
 BMWCCA 484984
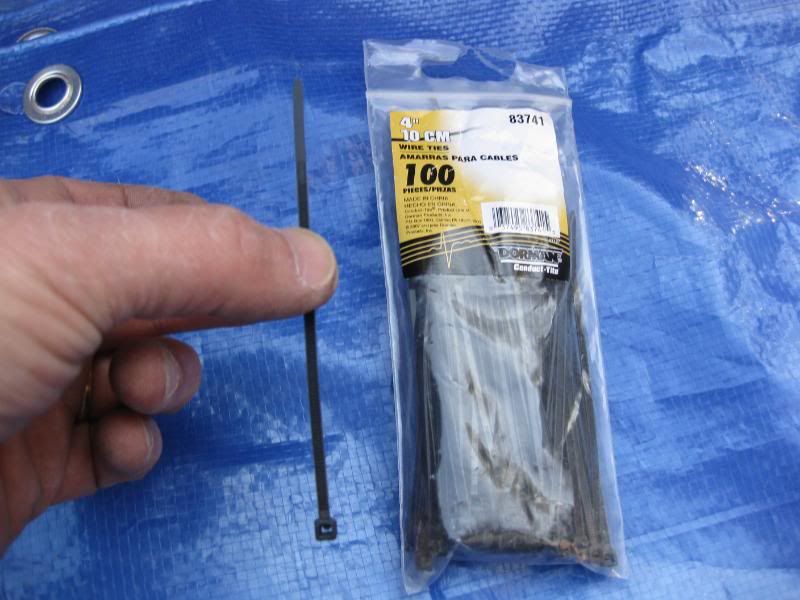
Tools Needed
Wire cutters
Black Vinyl Gutter Gaurd
Pack of 4" Zip (wire) Ties
Electric Drill
9/64 Drill Bit
Time to Complete
Approx. 20 minutes__________________________________________________ ________________(Original idea by 12CoolDude Racing mesh upgrade...Inexpensive!)
My brother suggested I do this mod a year or two ago and the piece never stayed in place because of issues I will bring up later in this DIY. I decided to document this for anyone who wants to freshen up the look of the old pre-facelift bumper's ugly lower grill.
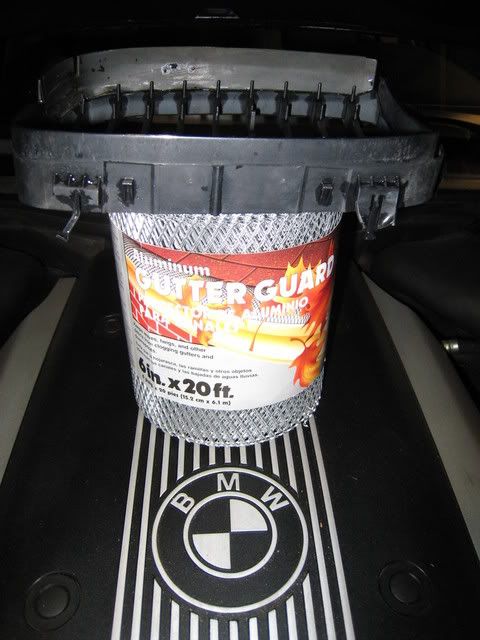
Get the black vinyl instead of the aluminum shown.
(Photo courtesy 12CoolDude)
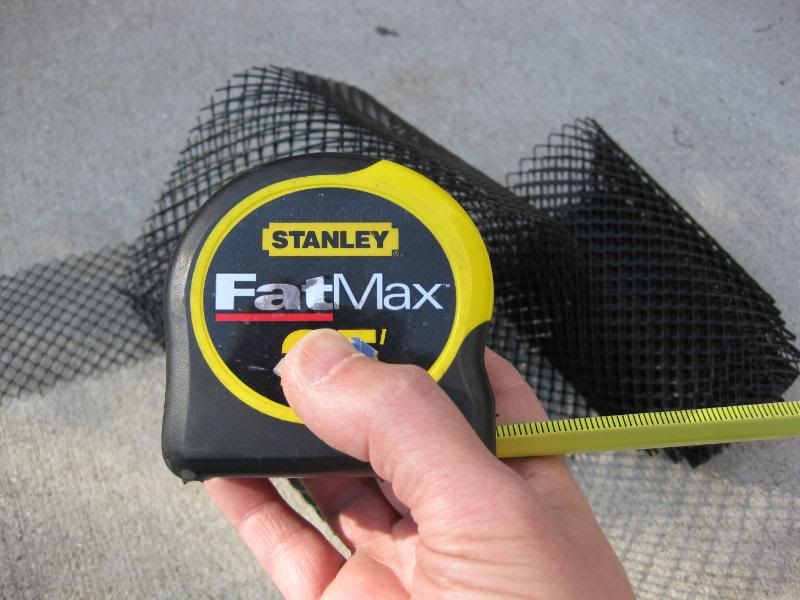
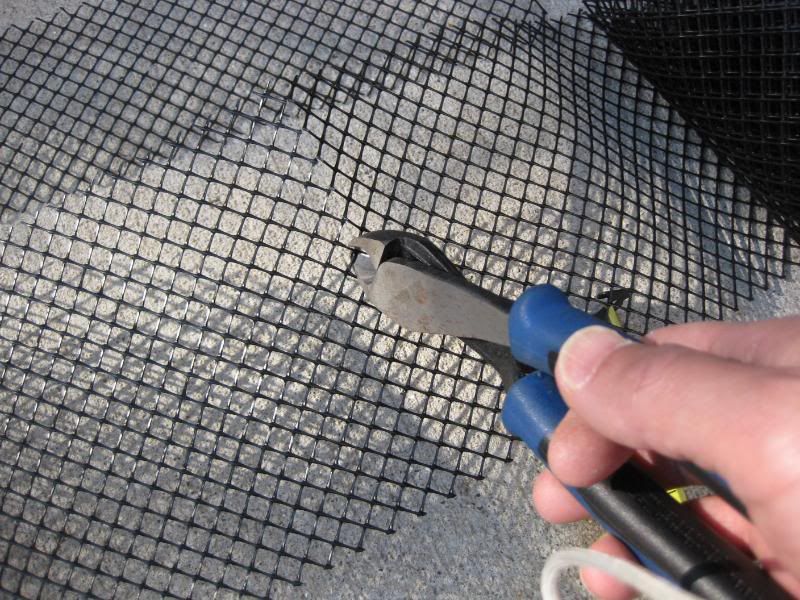
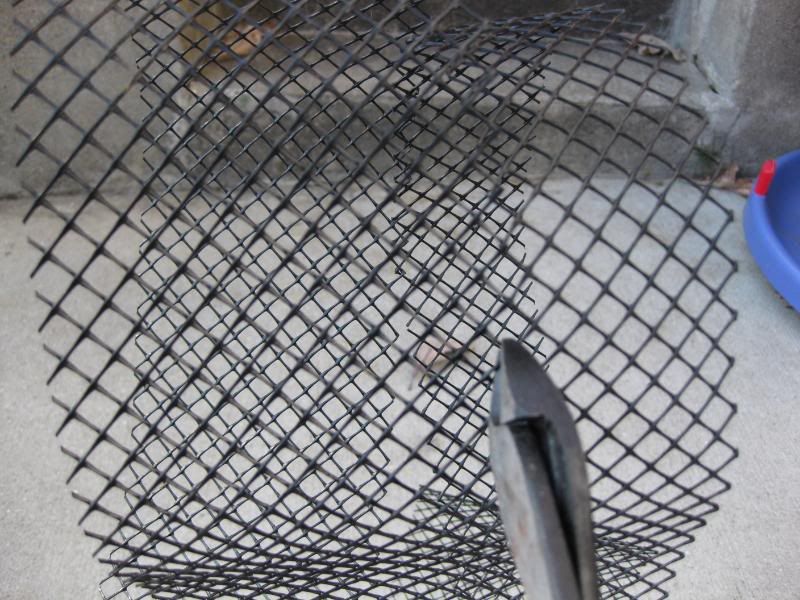
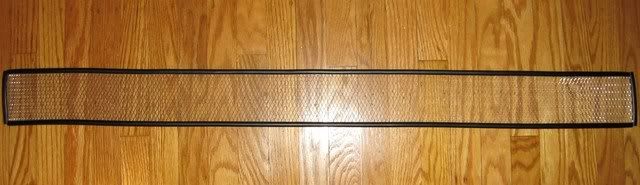
Use a tape measure to measure and cut using wire cutters or scissors:
Length = 44.5"
Width = 4"
Tip:
Originally Posted by jamesdc4

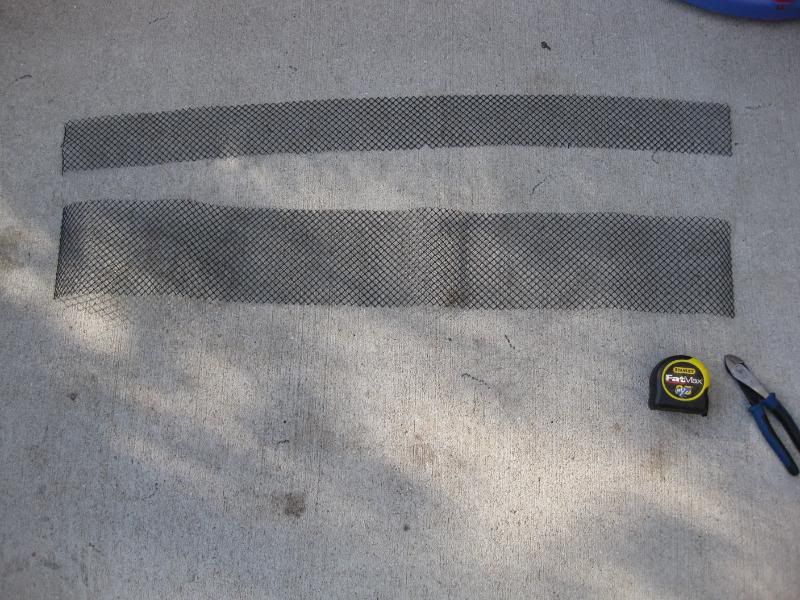
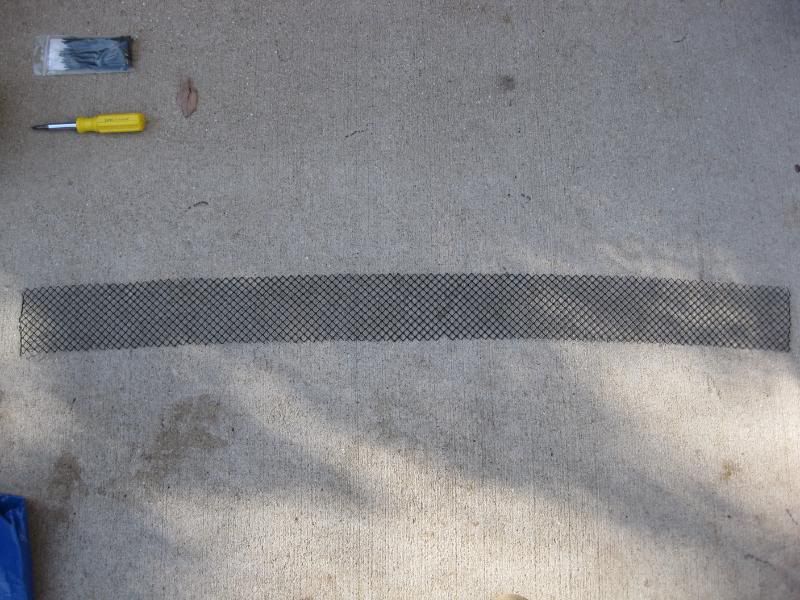
Here I have cut the piece to length only and am comparing it to the old piece.
Cut the piece to width.
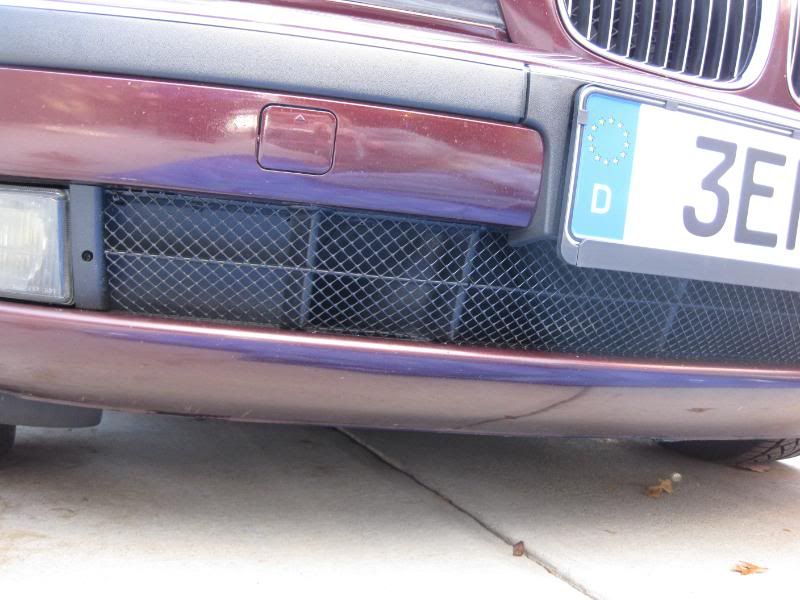
This is the old piece, but I use it here to show what the finished piece should look like.
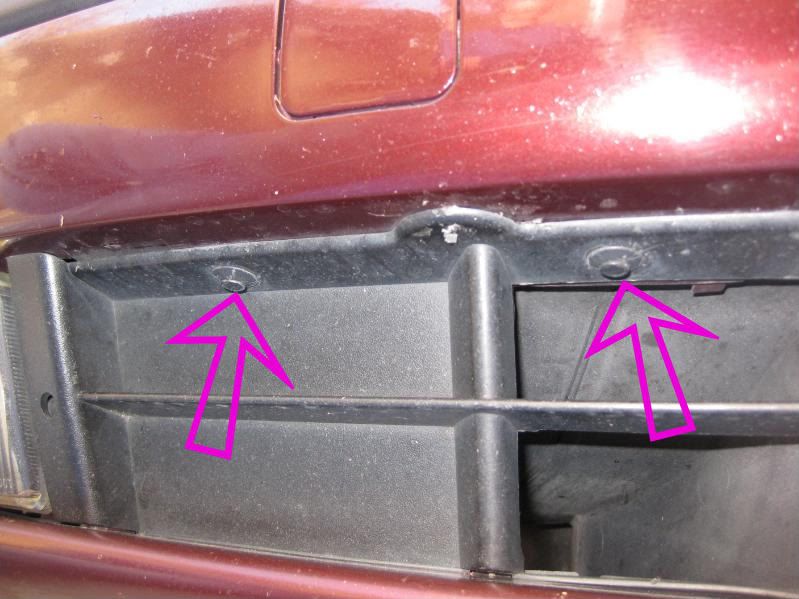
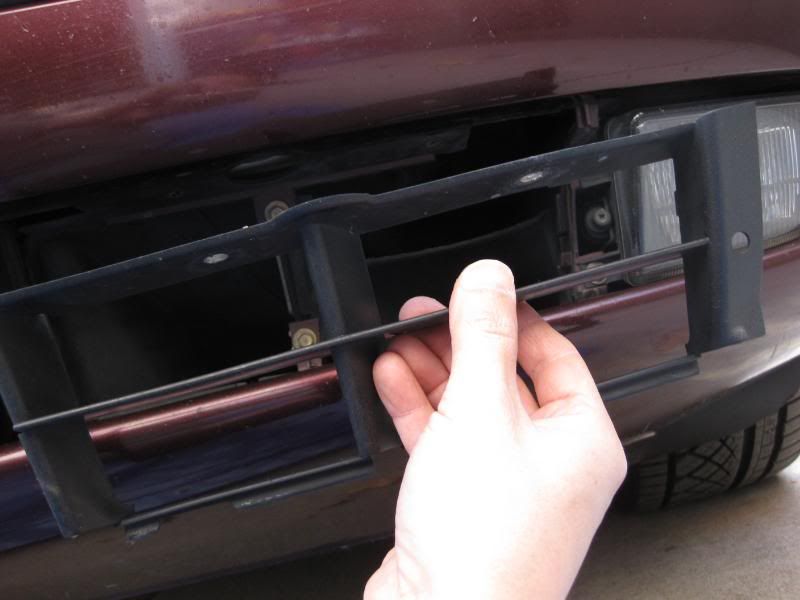
The problem with the old piece staying in place was caused by not having a place to anchor to the grill on the passenger side.
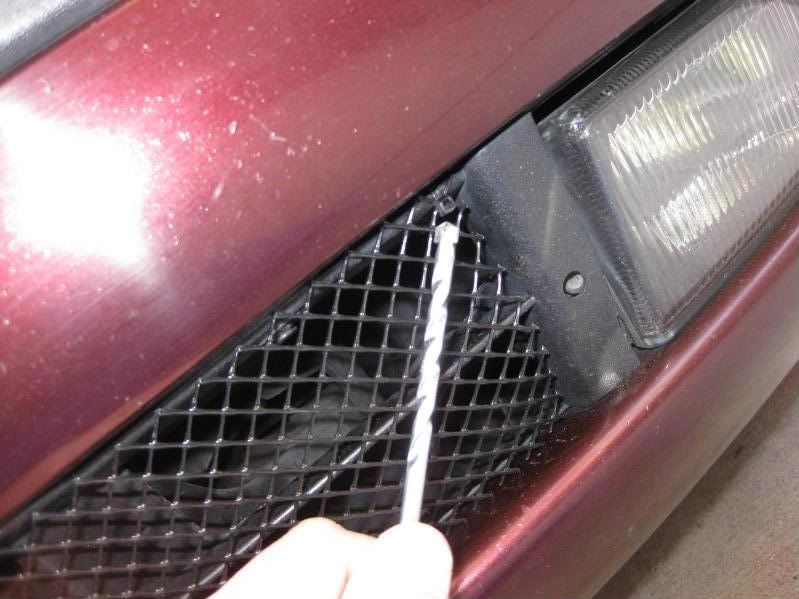
You do not have to remove the passenger side piece to drill, but I did to make things easier, and because I wanted to know for sure I wasn't drilling into some crucial component.
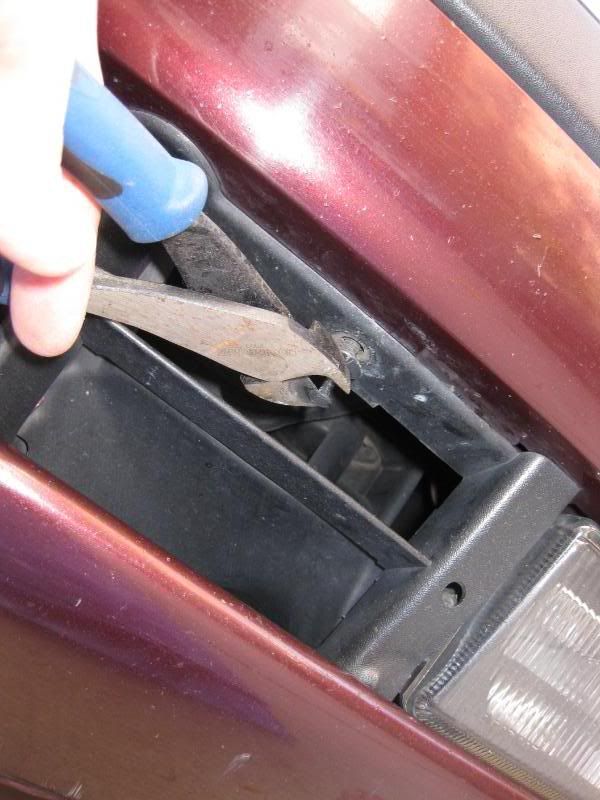
I used the wire cutters to gently pry the center pin of the expansion rivet out.
This is what the rivet looks like with the central pin pulled out (this is also on the driver side but I'm using it for reference).
Pull down and out to remove the grill piece (once again, this is on the driver side, but is identical on the passenger side).
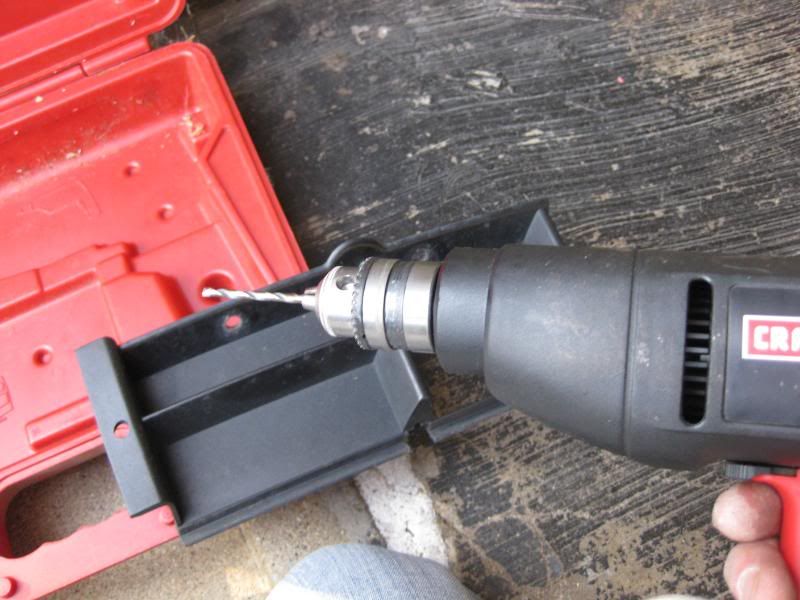
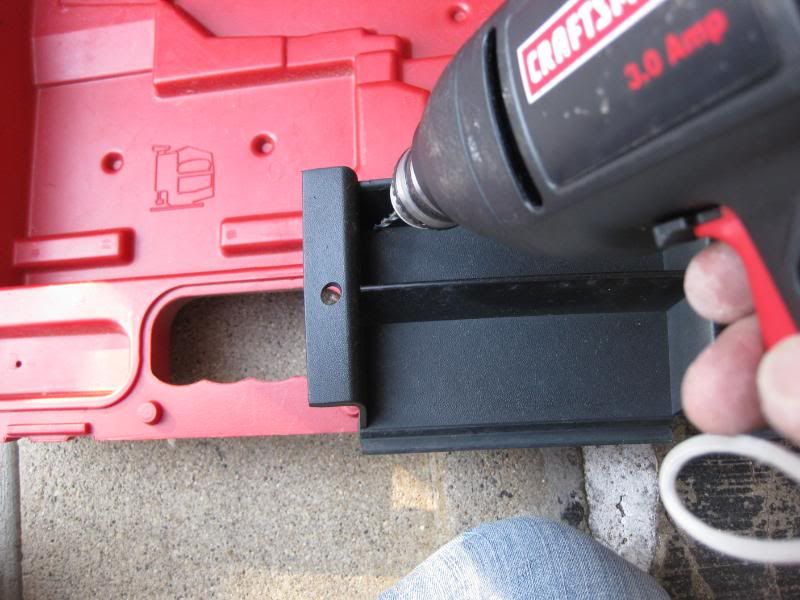
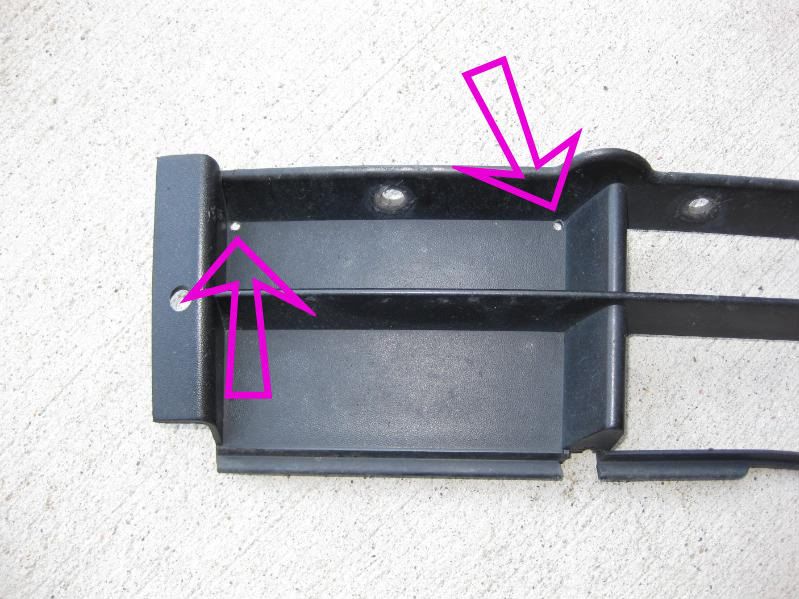
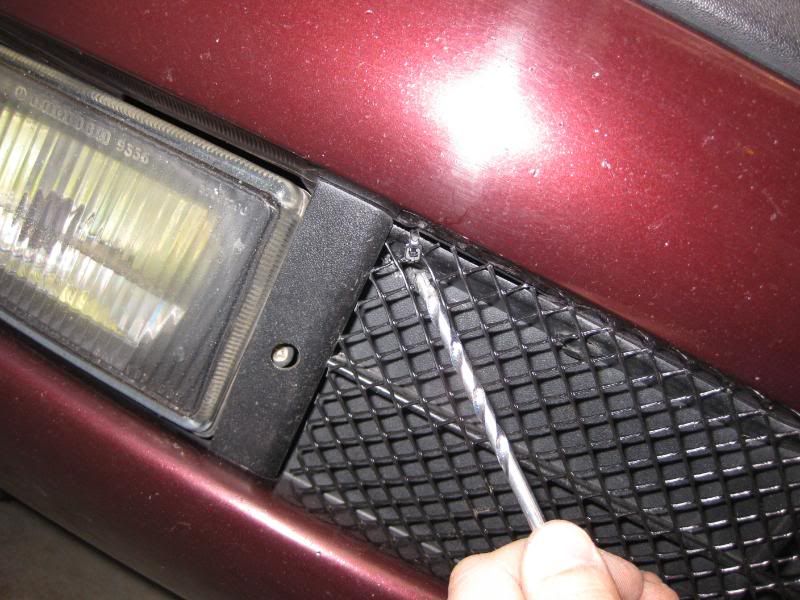
I used the drill to drill two small holes, but it turned out I only needed the hole on the left.
Note: This is on the passenger side grill piece only.
Here are the zip ties I used to secure the mesh piece in place. You'll need two for each side, four total. You'll have to connect two zip ties together for each side. Do not tighten the two zip ties together until you are securing the mesh in place.
Note: You will NOT need to drill a hole on the driver side because you can secure the zip tie around the top of the grill piece as shown below.
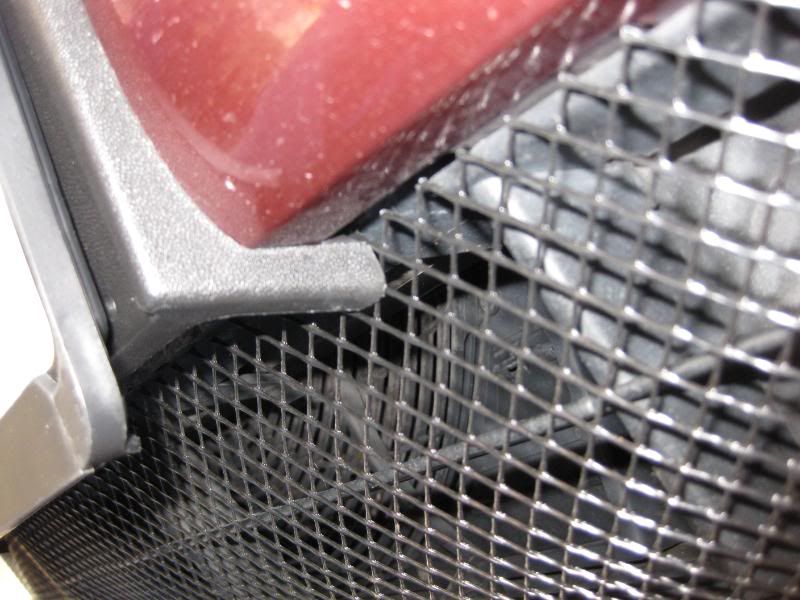
Here I have secured the passenger side throught the drilled hole.
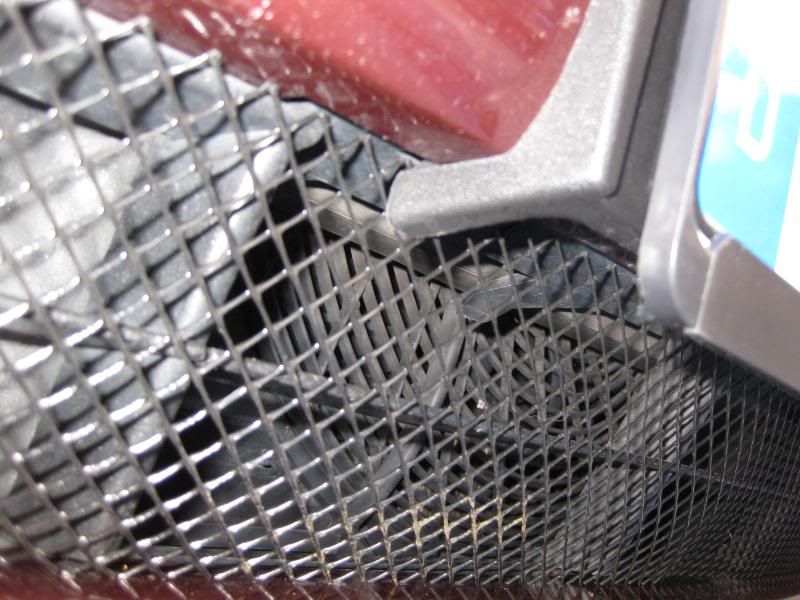
The middle and bottom of the mesh is held securely in place by the license plate clips and the lower bumper. You can use extra zip ties to secure the middle portions if you choose, but it is unecessary.
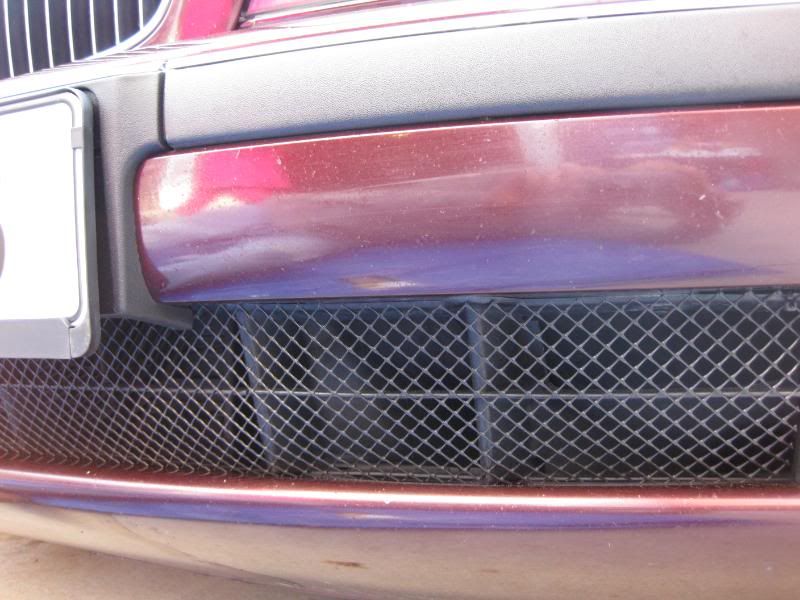
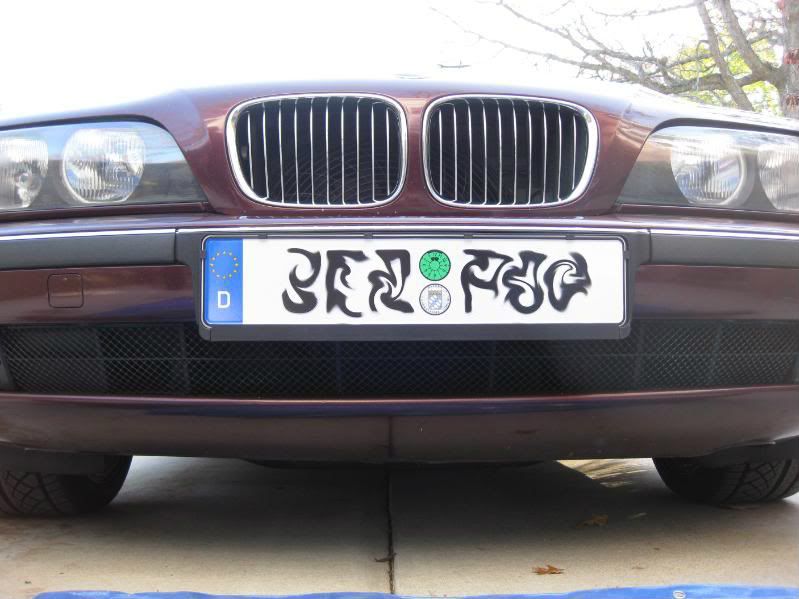
Here's what the finished product looks like.
Special thanks goes to 12CoolDude for coming up with an excellent idea, and ignoring the haters who lacked imagination and open mindedness.
Last edited by jamesdc4; 03-17-2011 at 07:20 AM.
Member
Looks good Jamie. I wanted to do this, but I switched to the M bumper...
Looking for a DIY? Parts? Check this out, it might be your ticket
Stable: e92is, e53 N62, e46M54B25, Tribby & e39 M54B30 R.I.P.
Member
Excellent! Well done!
The original bumpers are the best looking. The M-Technic bumpers look simply horrid.

Member
I HATE the pre-face lift bumper, it needs to curve out or straighten out not curve in.
Now its time to do a DIY for the good ol' bumper sag.
Last edited by 1st3series; 11-10-2010 at 04:51 PM. Reason: Automerged Doublepost
Member
I also like the grilles on your car, James. The original thin and cruel ones look much better than the somewhat feminine 'Mick Jagger' grilles they put on the later cars.

Last edited by Graham E39 528i; 11-10-2010 at 05:21 PM.
BMWCCA 484984
I'm not sure if you are being sacrcastic.
I like the mod and the bumper if it is done right.
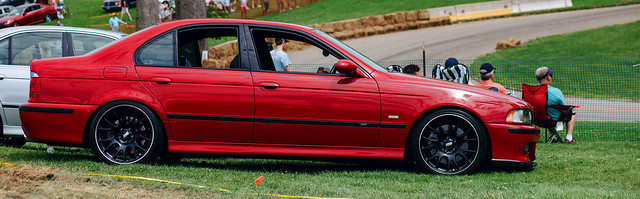
Here's a pic of Jordan's (jord1016) car. The lower bumper mesh is original race mesh.
(Source: http://forums.bimmerforums.com/forum...8&postcount=68)
I would also like to eventually do the bumper lower lip like this too (I just discovered Petes540i6's kick a** DIY today - Integrated Front Lip Spoiler).
I like the look of the border around the mesh. It gives it a finished look. I'll have to think about how to replicate it.
Last edited by jamesdc4; 11-10-2010 at 05:58 PM.
Member
I'm serious. Ask Jason5Driver, he wants to put the thin lips on his car.
I've heard of a number of guys who have put the M-Technic style bumpers on their cars, and a few years later they take them off (in disgust).
Anyway, what's the point of the pasta strainer on the front?
Last edited by Graham E39 528i; 11-10-2010 at 05:50 PM.
BMWCCA 484984
Lol!
Ah ah aaaah! If you want to know the point, read the DIY.
(Although from what I understand, the mesh smooths the air flow of the air entering and cooling the engine compartment. The smoothed out air flow cuts down on drag and therefore causes a miraculous increase of 20HP.)
Last edited by jamesdc4; 11-10-2010 at 05:56 PM.
Member
And for the love of God, what is your avatar? It looks like part of a woman's anatomy set alight with gasoline.
James, are you a misogynist?
Member
BMW CCA Member
it's the eye of sauron from the lord of the rings movies
Member
LOL!
Yes, I prefer the pre-facelift front grills.
I like the clean conservative lines of the older grills.
Call me crazy...
Oh wait...
LOL!
James-
Very nice DIY!
Awesome job!
Very well written!
Thanks!
Jason
Looking for an E39 belly pan , passenger front inner fender liner
BMWCCA 484984
Tanks, mang!
been there done that...
lookin good James (:
(oOO\(|||)(|||)/OOo) /00=[][]=00\
Member
Nice DIY, James! Nothing better than an inexpensive facelift to spruce up the look of the e39.
Sim Simma
Moderator
Clever. Really makes the non-M bumper stand out a lot more. Looks a lot better
Going into my TENTH YEAR of providing high quality reproduction BMW fabrics!
PRICE CUT on ALL FABRICS
Offering the best prices on the best quality reproduction fabrics!
Member
the real reason for the mesh is to keep track debris like rocks, tire goobers, etc from taking out your radiator or oil cooler. on the e90 328i that we run in Grand-Am, we have black mesh zip tied behind all openings in the front; including the grille, bumpers, brake ducts, etc
for the street? not really necessary but can help cut down on the cig butts and leaves i repeatedly dig out of those gaps
James
'88 M3 (track and weekends) | '01 540i/6 (daily) | '95 4Runner (lifted and armored)
BMWCCA 484984
Thanks guys (gals?).
The great thing about this mod is that I have enough material left over to do it again and again and again.
Total cost of the mesh = $4.00 USD.
I do want to do the border though. Not sure what material to use. Maybe 12CoolDude will think of something.
BMWCCA 484984
Well, I guess he already did...This is my next "to do"...
BimmerFan
horrid?
Member
Should you cut the mesh up into 3 separate pieces. That way you still have easy access to the fog lights bulbs?
BMWCCA 484984
Good idea, but no. When you need access to the fog lights, just snip the zip tie, pull the mesh aside and install new zip ties when finished.
Trying to line up the three seperate pieces to look like one piece would be a PITA and unecessary.
The best things about this mod besides how it freshens up the lower grill, is the low cost and ease of the install. Keeping it simple should be tantamount.
If the mesh gets damaged by road debris, it's so easy to cut a new piece and replace. This is the first time I've replaced it even though I did the mod exactly two years ago.
And I still have enough left over for several more replacements.
Last edited by jamesdc4; 12-21-2011 at 09:26 PM.
Member
I reckon if you hit tire goobers or rocks with that vinyl mesh, they'll go straight through.
We might need a materials technical update (MTU). Zip ties also do very poorly when exposed to the elements. HiRel Zip ties (with a steel tooth) would be preferable in this application.
BMWCCA 484984
That's why I mentioned it earlier.
For track applications, I would go with the aluminum mesh or something a little tougher. The black poly is really for aesthetics only. The zip ties however, seem indestructable.
Member
I also noticed the plastic stuff is a bit tricky to install. I was trying to put it on last night and it kept breaking when I tightened the wire ties. I guess the ~30° F temperature outside didn't help the plastic's flexibility too much.
I guess I'll have to track down some aluminum stuff; has anybody found any black aluminum mesh?
BMWCCA 484984
You could also heat the mesh up with a hair dryer or the like before installation.
 Posting Permissions


 Reply With Quote


 so put that in your pipe and smoke it!! Stay tuned for a final shot of the completed project...
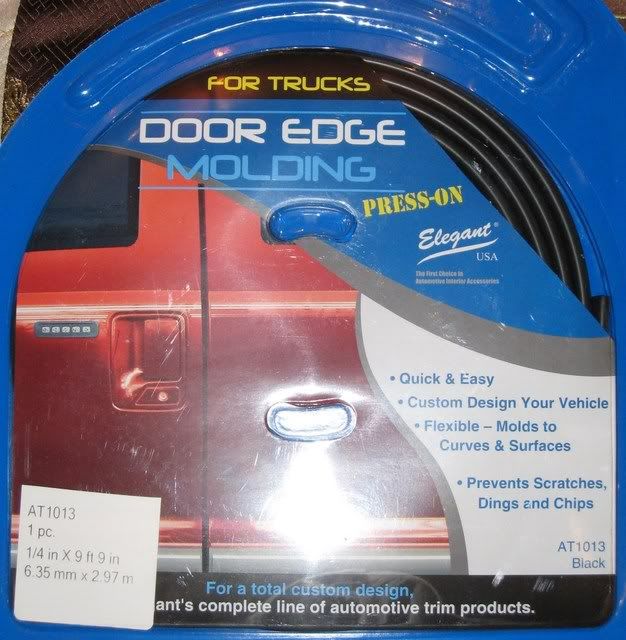
 LMFAO
LMFAO


Bookmarks