
 Sim Simma
Moderator
Sim Simma
Moderator
I bought new fog light bulbs then considered installing them but decided since I will probably need to take my front bumper off to wait until tomorrow so I can finally install my brake ducts too
Going into my TENTH YEAR of providing high quality reproduction BMW fabrics!
PRICE CUT on ALL FABRICS
Offering the best prices on the best quality reproduction fabrics!
Member
smogged
past couple weeks..
oil filter and air filter change, cabin filters,spark plugs, rear brakes, installed newer front seats, cleaned headlights, installed new visor anchor
to do:
thermostat and coolant, ATF and filter, gear fluid, new tires
Last edited by sfcabmw; 11-12-2009 at 09:01 PM.
Raw and Organic
Ordered brembo cross drilled fronts and rears, axxis deluxe plus pads and brakes sensors.
IndiansFan
At 193K miles, took the 528iT to Brett Anderson/Koala Motorsports
Inspection II
Balanced wheels to remove slight shimmy
Replaced plugs
Removed CDV
Installed UUC shortshifter
Replaced rotors
Replaced accessory belts
Replaced power steering feed and return lines
Replaced radiator and expansion tank
Repaired the PVC system
Tomorrow I pick up a set of 17" style 32's for the 530's winter shoes.
Member
Where do I freaking start?
I had a new clutch put in on Tuesday, where they found a valley pan leak. Fixed that by Thursday. Test drove it on Thursday and the radiator blew out on the right side...Replacing that today, then I am going to get drunk.
This has been a $2100 week with my 540.
Last edited by cardnal; 11-13-2009 at 10:59 AM.
2003 540i/6
Silver/Black
Dinan Software
Dinan Exaust
Dinan CAI
Member
540 are very expensive addiction a ?Originally Posted by cardnal


ASE Certified Master Tech
agreethats why i go with 528

2000 BMW 528i / Manual Tranny / Sport & Premium package / Xenon headlight / Sport seats / Premium sound / DSC /
2011 BMW X3
my name is andy.
i6 has just as many potential failures as v8's have.
On another note, got my Dinan adjustable rear sway in the mail today.
Member
I stared at my opened up engine in the garage. lol
BMWCCA 484984
Someone has replicated Mark's (e39dream) secret headlight adjuster replacement hack!
Procedure please!
Member
lol nice mod
Member
My Headlight Adjuster replacement Story
It was not difficult but it took alot of patience and finess. Having read all sorts of posts and seeing some pdf files, I tried the bake method. I beleive the sealant that was used is some sort of butyl that is used to seal windshields in and it did not take long for me to figure that I had to do something else. I saw one post on this forum where someone had cut the clear lenses off with what looked like a chainsaw. I knew that was not the way to do it.
I removed the headlamp assy's.
I removed all of the bulbs.
Then I removed the rubber boots (be careful because they tear easily, ask how I know this)
The projector lamp adjuster was fairly straight forward. I could see the adjuster. I removed the old peices ( that took the longest time) then took a T-8 torx bit and removed the socket that hold the ball. Then I installed the new adjuster. One key point here is not to snap the ball in the socket yet.
Here is where the patience part comes in. On the high beam adjuster, I marked out a 2" x 2" square on top of the housing, just inside of where the adjuster tracks are. I took my trusty dremel tool with a cut off wheel and cut a window in the housing. I caution you to take your time! Beneath this window is the fiber optics receiver and cabling. Only cut deep enough to get through the 1st layer of plastic. I was able to see everything and perform the repair on the high beam adjuster.
To close the window I had cut, I used a plug that is for 2" square tubing. I had to trim it so that it would sit flush on the housing. I used clear silicone to seal it, but I suppose you could use epoxy also.
I would post pictures but I do not have enough posts yet to do so. Maybe I can make a DIY when the time comes, if anyone is interested...
I have been an E39 owner for 4 months now and really enjoy this car. I thank everyone who contributes to these forums because it has helped me remedy the few problems I have had.
Thanks!
Last edited by Dude14; 11-14-2009 at 09:37 AM.
five a day
Member
Increased my ride height by 18"
Couldn't find a reasonably priced set of rims that suit the car, so sent the M Pars off to be refurbed

Member
Yesterday, looked at her while at the body shop to finally get her make over. I miss her already
Member
Member
Replaced oil pan gasket, installed new clutch, new fluid in tranny, rear end and engine and then took my 540i to a mountain race last night, had lots of fun
Member
oil chaaange.
Amateur Hobbyist
paint touch up: Titanium Silver
http://forums.bimmerforums.com/forum....php?t=1345441
Not a firearms expert
Member
i didnt use it for a week, so this morning took it for a quick blast on the freeway with my trusted Valentine One on the windshield....luv those early sunday drives with nobody on the road.(except for NY highway patrols)...
ASE Certified Master Tech
nice man and maybe i need to get one of those for myself.
2000 BMW 528i / Manual Tranny / Sport & Premium package / Xenon headlight / Sport seats / Premium sound / DSC /
2011 BMW X3
BMWCCA 484984
That would be great. Thanks for taking the time to do it, and I'm sure there are plenty of interested parties. I know you don't have PM privileges yet, but if you do by the time you get the DIY done, just PM me and I'll add it to the DIY subforum or I'll just keep an eye open for it.
Amateur Hobbyist
changed the Mobil 1 oil and applied 2nd coat of touch up paint to front bumper nicks
Not a firearms expert
Member
Member
Ordered a M-tech front bumper.
 Posting Permissions


 Reply With Quote
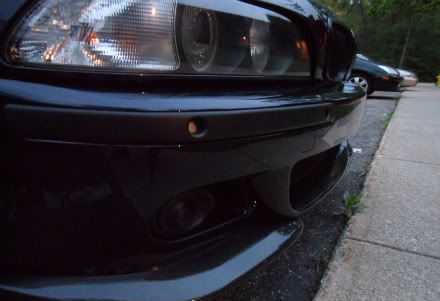

 Still Dude's way is certainly 1 way to do it with good results, and I'm impressed.


Bookmarks