
 BMWCCA 484984
Spark Plug Access (540i)
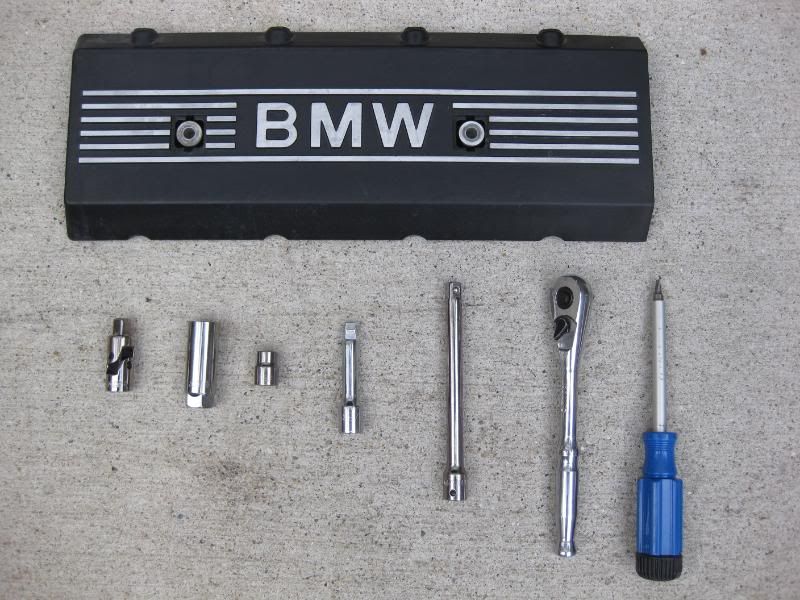
Tools needed (From left to right):
- Socket wrench universal articulated joint.
- 5/8 spark plug socket.
- 10mm socket.
- 3" socket extension.
- 6" socket extension.
- Socket wrench (Torque Wrench recommended).
- Common screw driver (not phillips head).
Time to completion: 30-45 minutes.
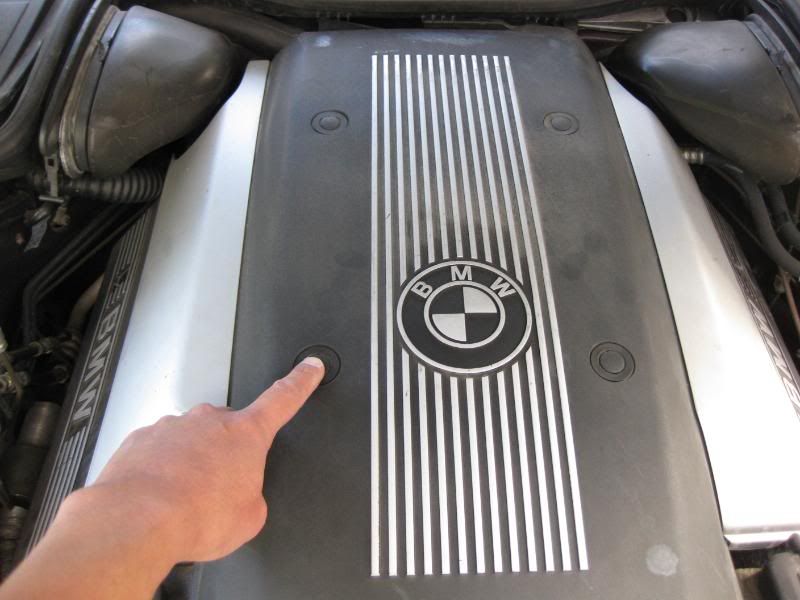
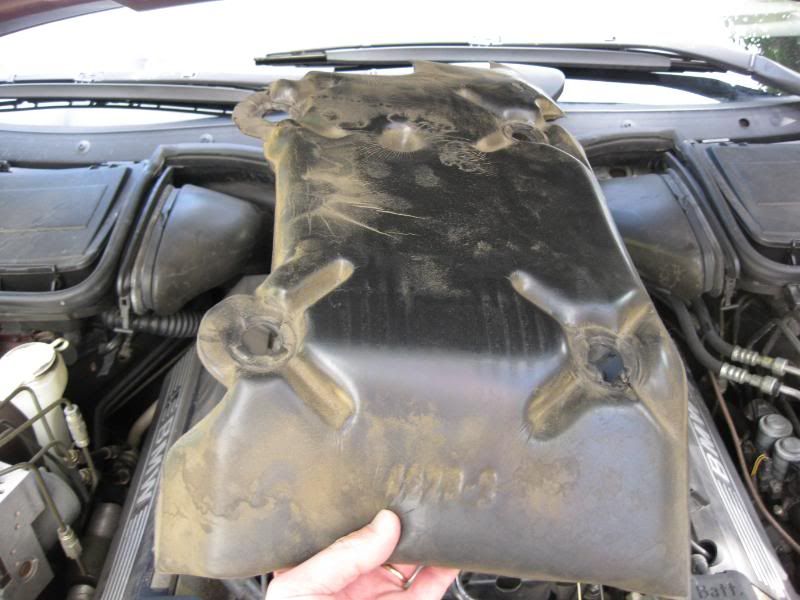
- Remove the center engine cover by depressing the four buttons (how you press the four buttons at the same time with only two hands is a puzzle for you to figure out).
- Remove the sound baffle if it doesn't come off with the cover.
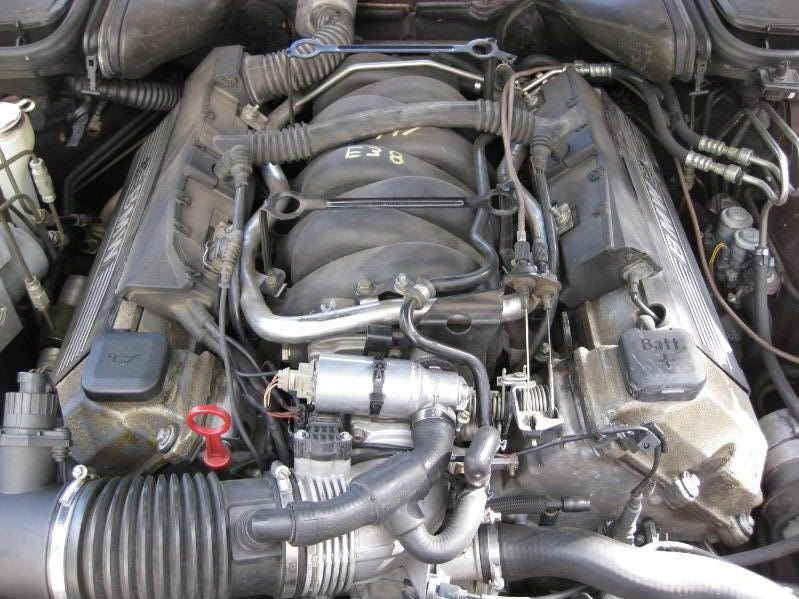
- This is what you should be seeing at at this point.
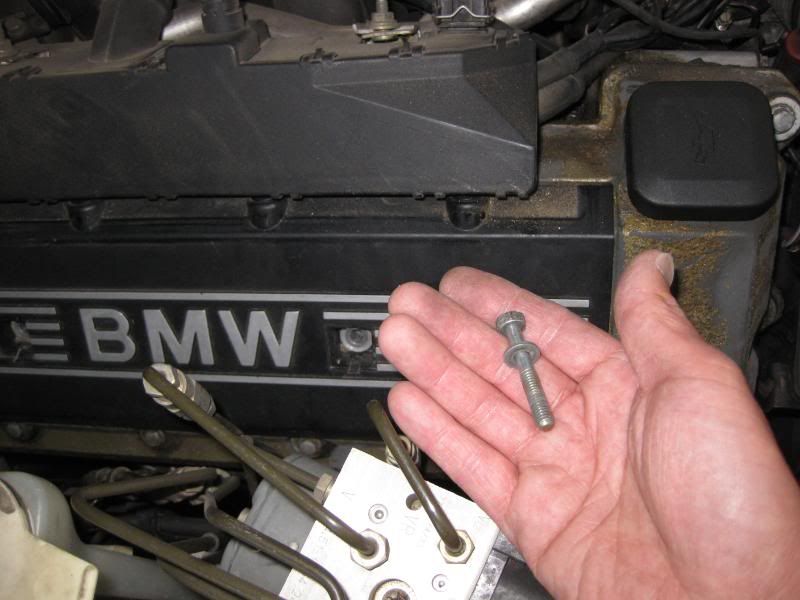
- Use the common screw driver to remove the 10mm bolt covers by inserting the common screw driver tip into the slot at the bottom.
- Use the socket wrench with the 10mm socket to loosen and remove the cover bolts.
- Be careful not to lose the washer on each bolt.
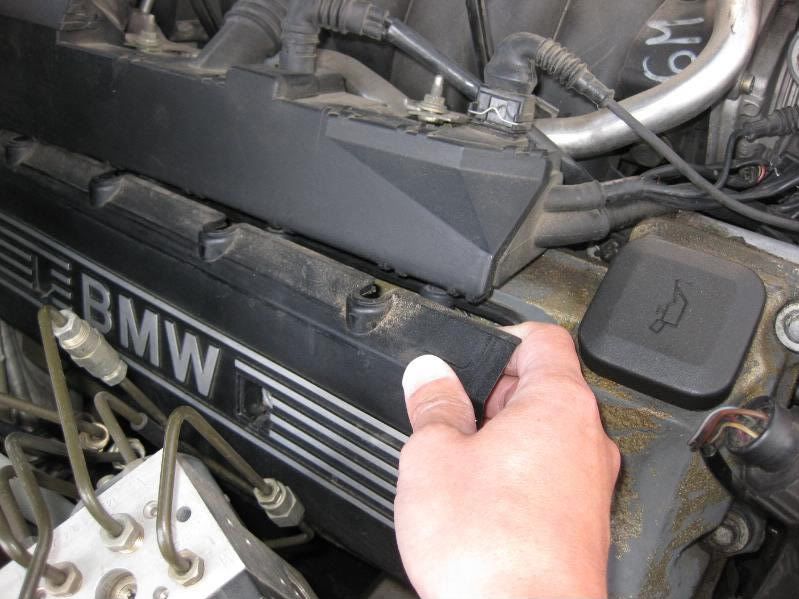
- Remove the engine side cover.
- Be careful not to let the engine cover bolt spacers come out and fall onto the lower engine screen.
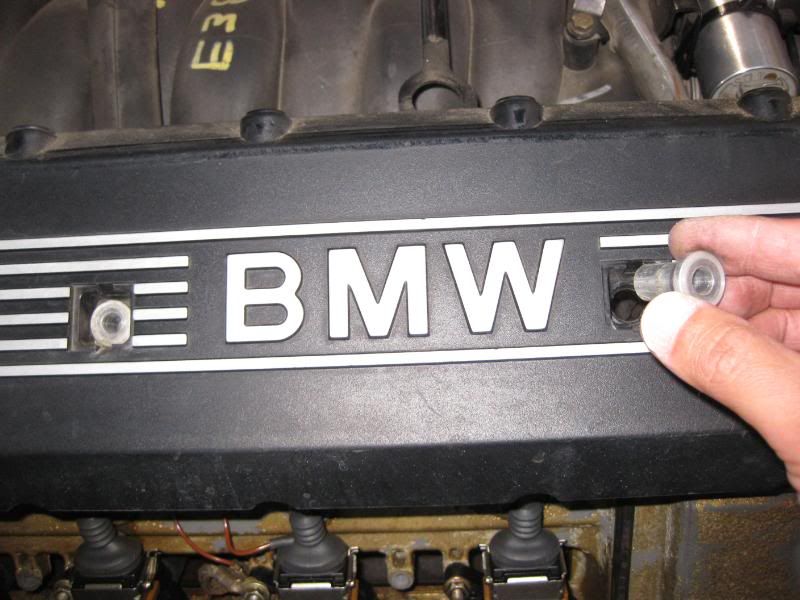
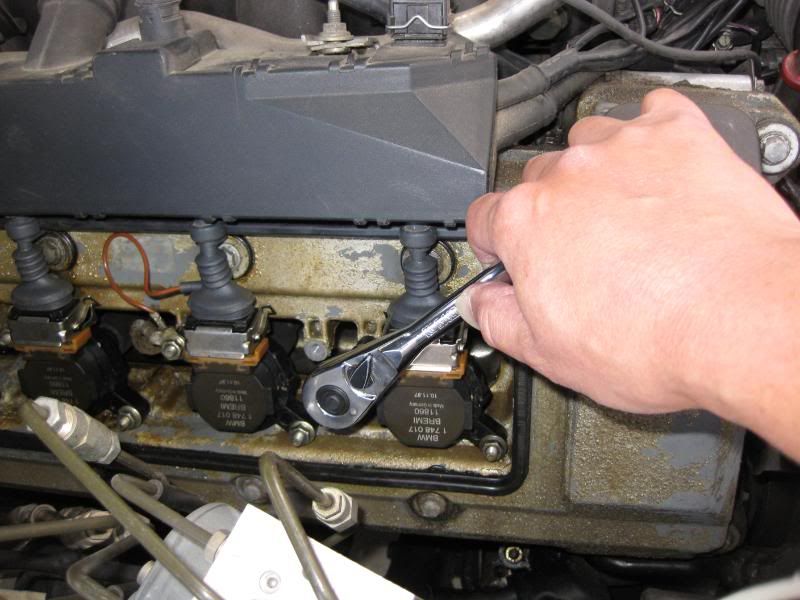
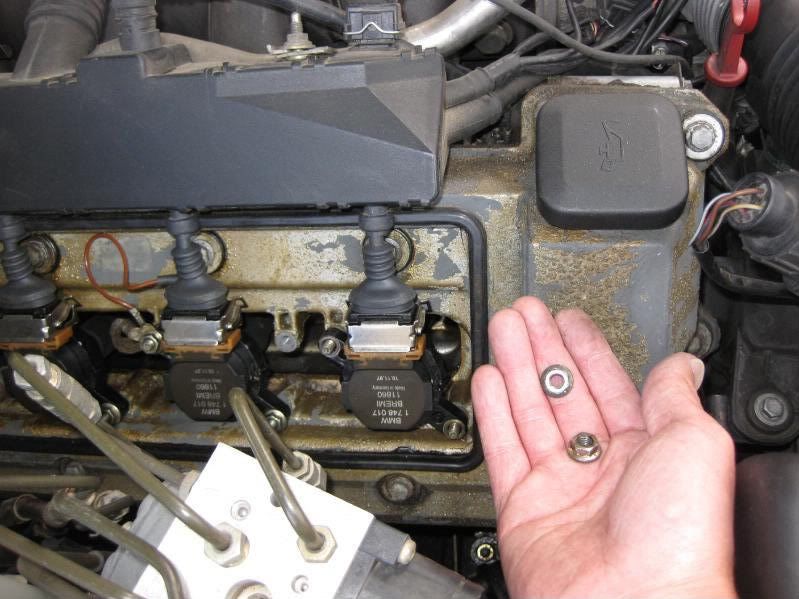
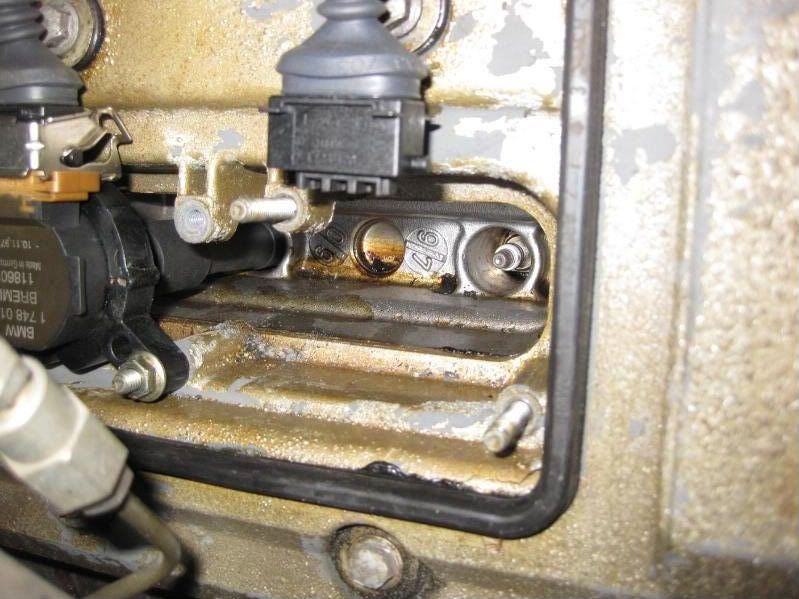
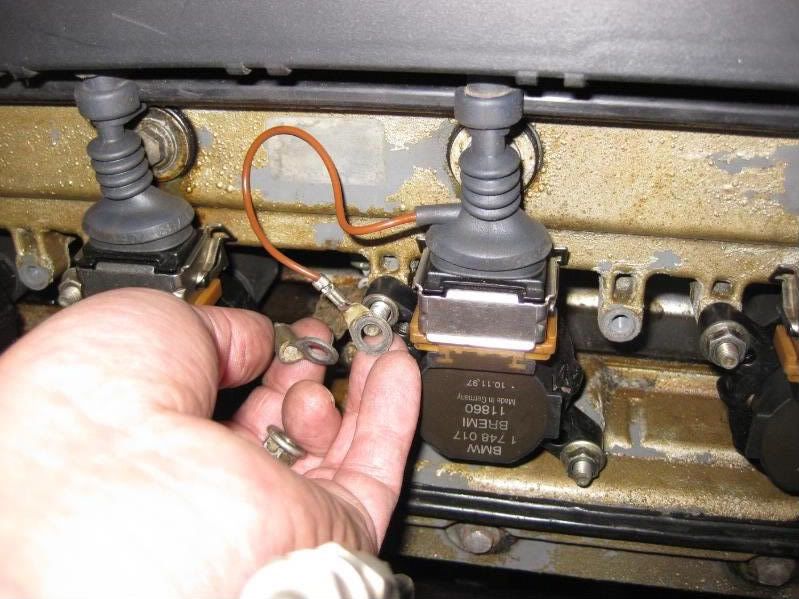
- Here are the two 10mm nuts you need to loosen and remove.
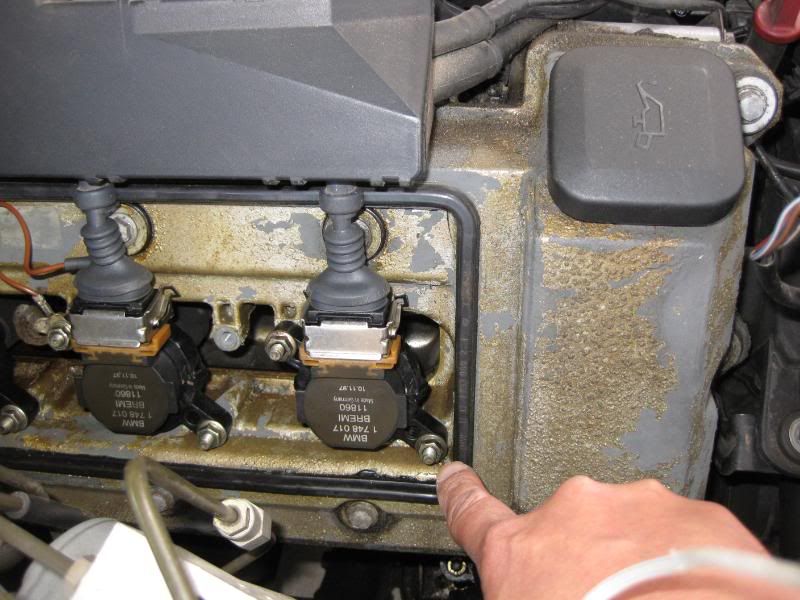
- Use the socket wrench with the 10mm socket to loosen the nuts.
- It helps to use the 10mm socket without the wrench to finish removing the nuts (be careful not to drop the socket or nuts).
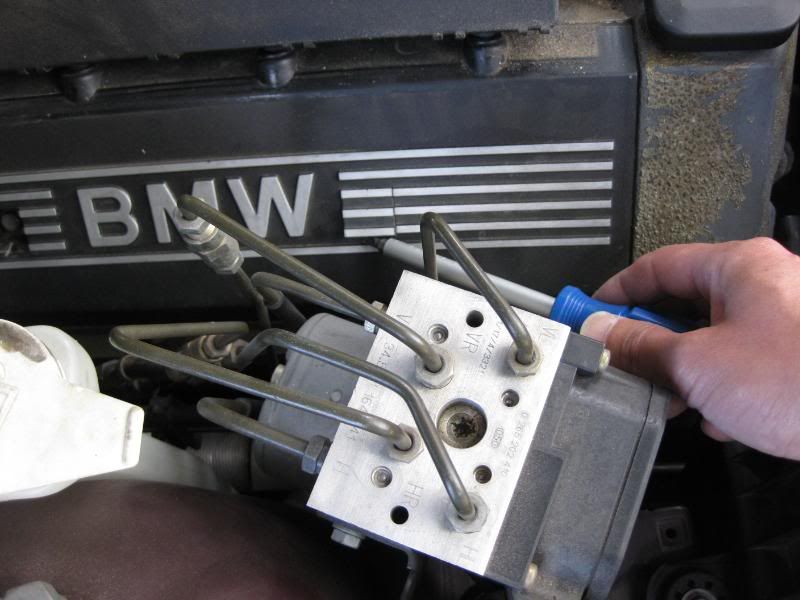
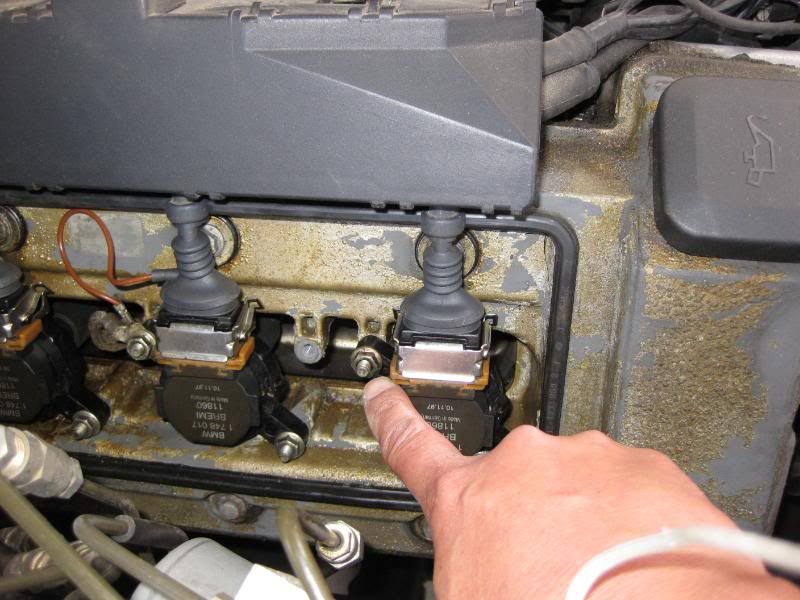
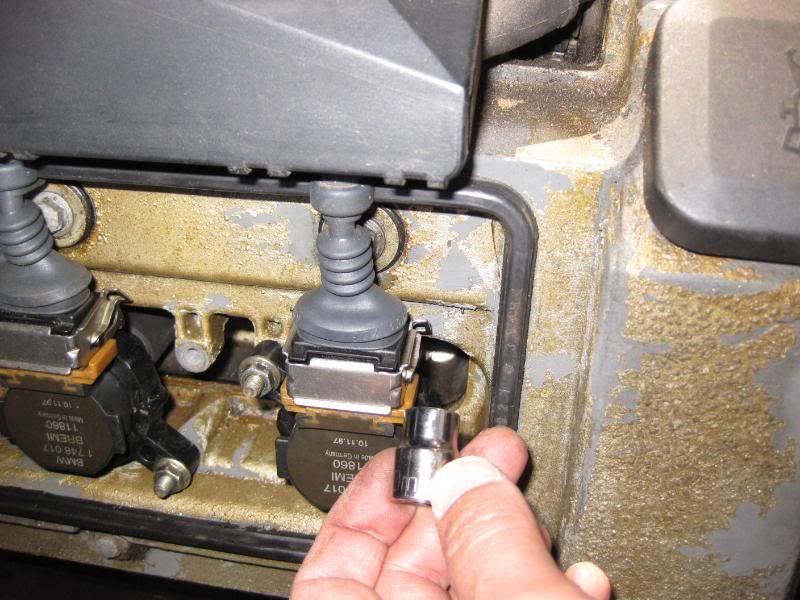
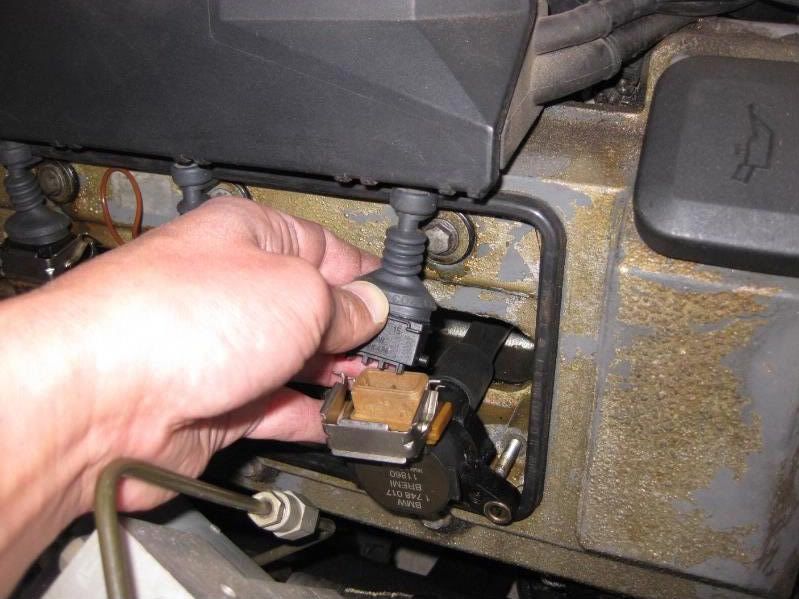
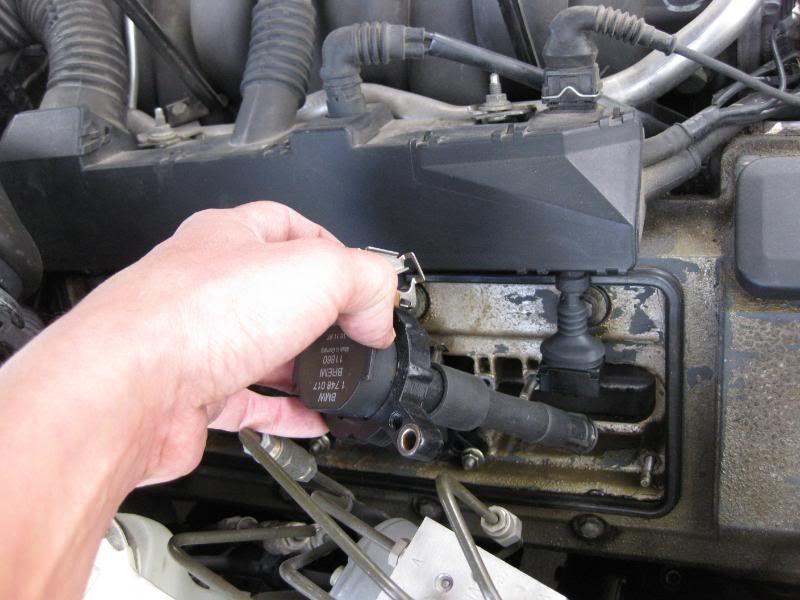
- Slide the metal clip out and away from the Bremi plug to disconnect the wiring harness (you can do this step before removing the two 10mm nuts, but I elected to do it after to allow for an easier disconnection). If the wiring harness is being stubborn and won't seperate from the Bremi plug, be patient. Gently wiggle the harness back and forth while sliding the Bremi plug in and out until the harness releases. DO NOT use too much force or you might damage the plug and/or harness.
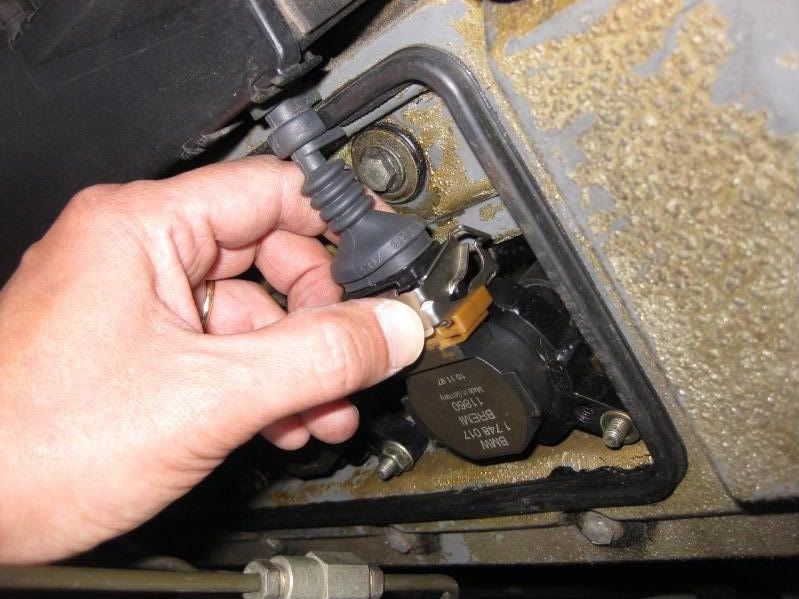
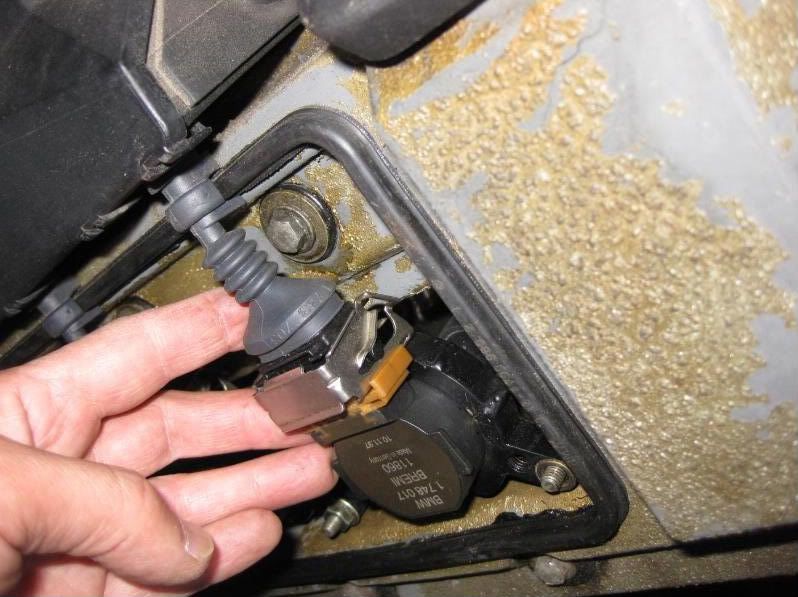
- Here are some pics of the metal clip from a different angle so you can see how it secures the harness to the Bremi plug.
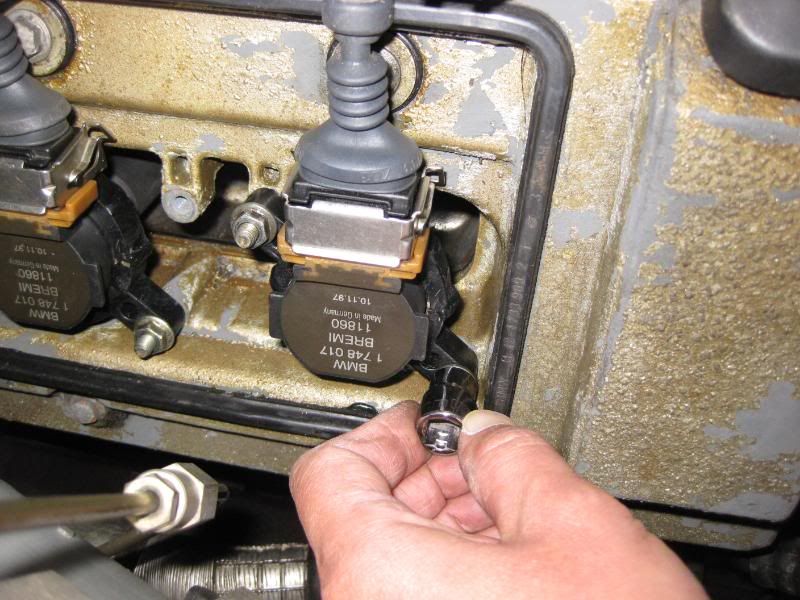
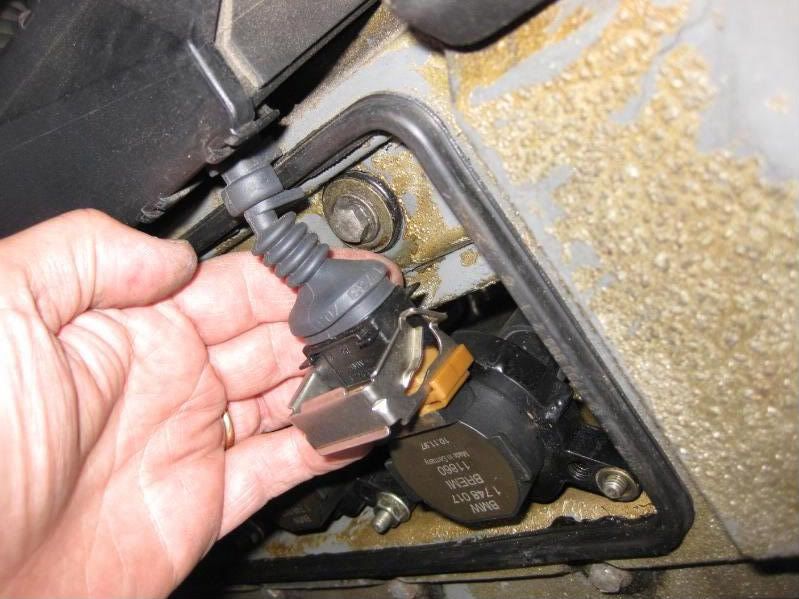
- Remove the Bremi plug.
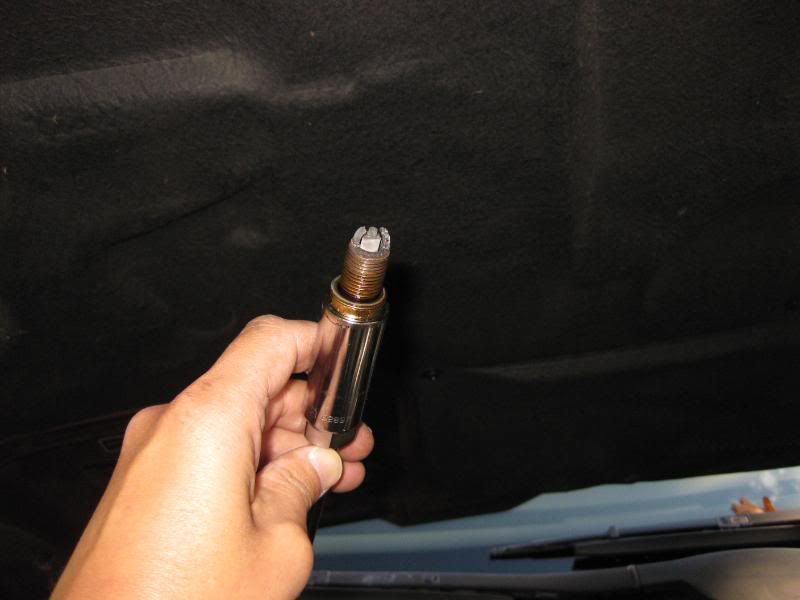
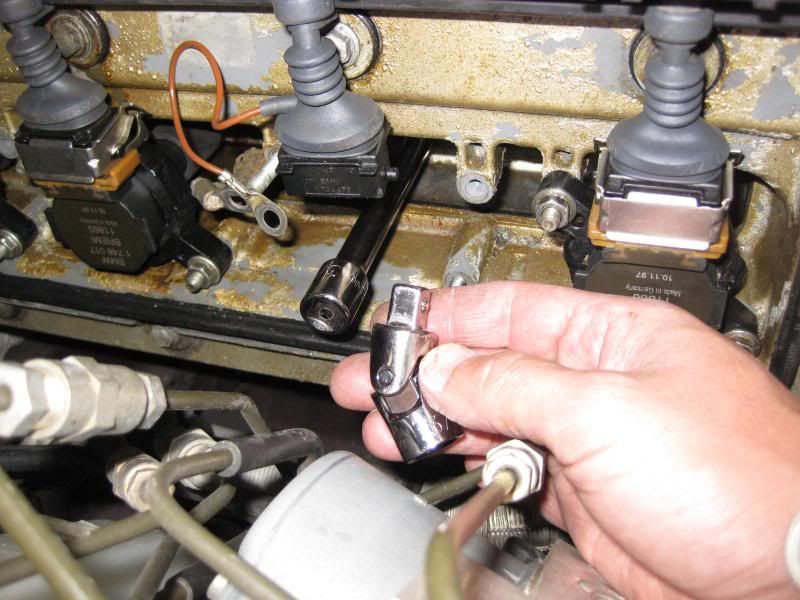
- Here's a shot of the spark plug in all its glory.
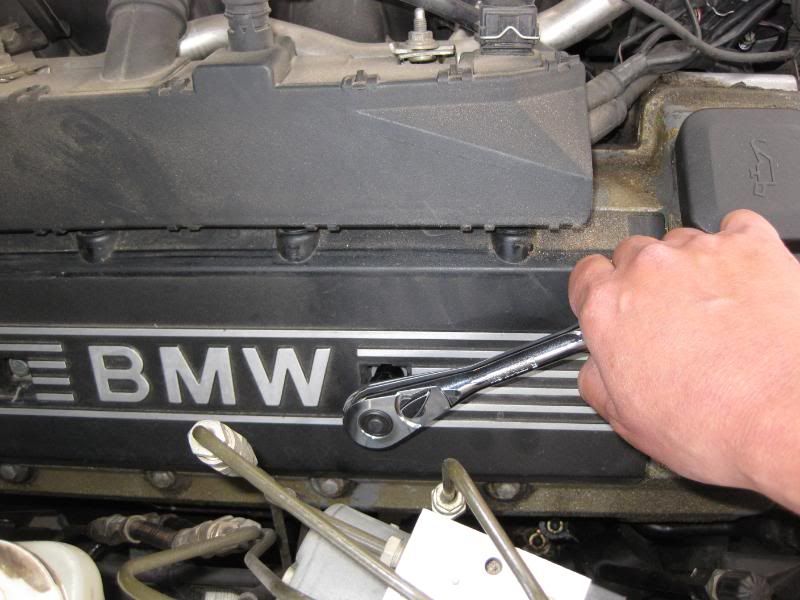
- Now use the 5/8 spark plug socket and 6" socket extension to loosen and remove the spark plug.
Last edited by jamesdc4; 07-17-2011 at 03:26 PM.
BMWCCA 484984
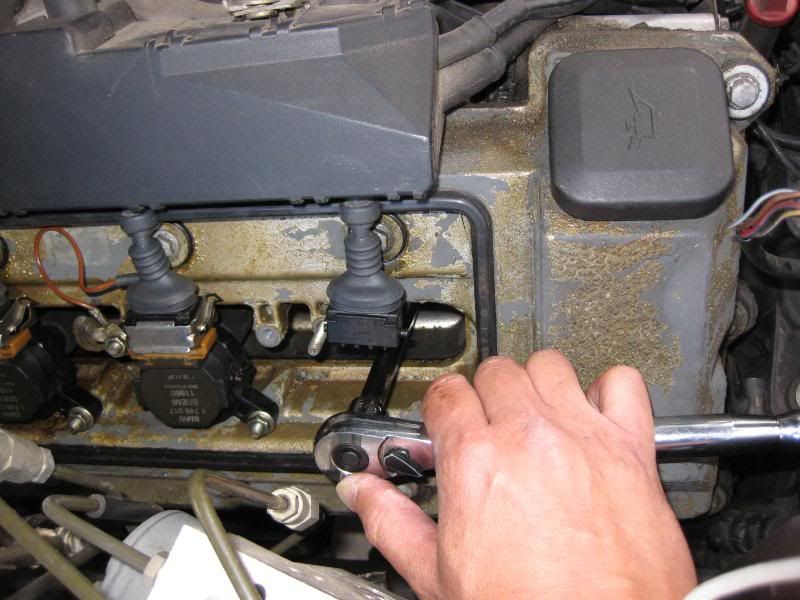
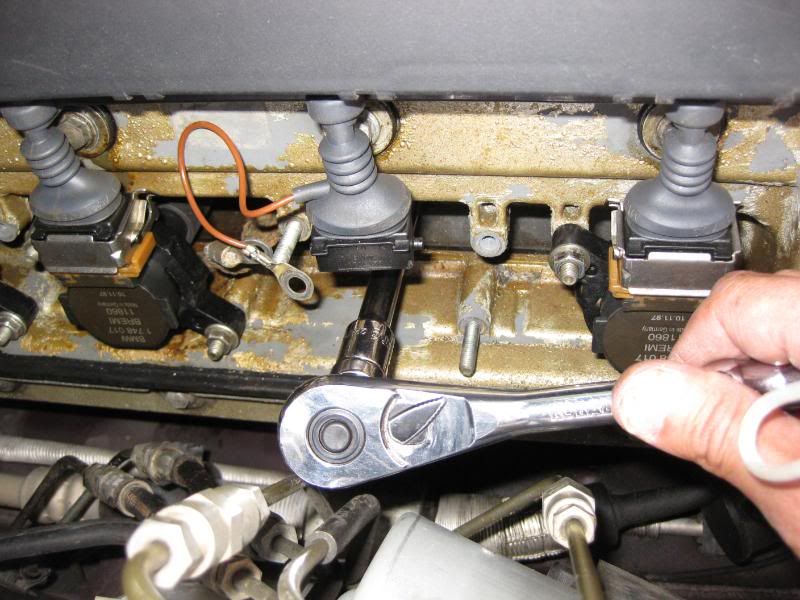
- The remaining spark plugs are removed in the same way. Be aware that one plug on each bank (side) has ground wires connected to one of the two 10mm nuts. BE SURE to reconnect these ground wires or you may be in for a nasty surprise when it comes time to start the engine.
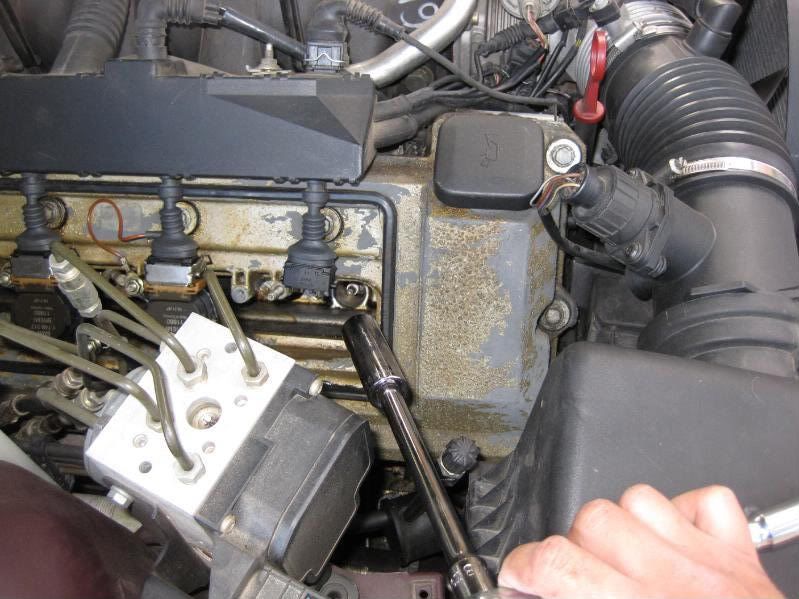
- The yellow arrows point to places where spark plug access is hampered by other components in close proximity. You may need to use the universal articulated joint to loosen and tighten the nuts or spark plugs. Try using the joint in different configurations with the socket extensions until you find one that works best.
- Installation of spark plugs, Bremi plugs, wiring harnesses, 10mm nuts and engine covers is the reverse of removal.
You can use the "hand tighten, then tighten 1/2-2/3 turn with wrench" method to install the new plugs or you can do it correctly by using a torque wrench.
When tightening with the torque wrench, tighten to 18 ft/lbs (25 Nm) as per the Bentley manual recommendation.
Last edited by jamesdc4; 10-08-2012 at 07:09 PM.
BMWCCA 484984
My apologies to Keith for deleting his post and relocating it as a quote (for continuity I couldn't have his post in between my two DIY posts).
Originally Posted by bimmerfiver
Last edited by jamesdc4; 09-14-2010 at 10:35 PM.
Resident PITA
I dont know james. It seems thorough enough but I think you might want to include a step by step of attaching the sockets to the ratchet, and i only see one plug cover bolt being held up there, arent there two of them, that could really mess someone up. Also what do they do after they remove those two coil packs and plugs?????? Definitly need some more info there.
Looks great, now if we could do a mandatory DIY on finding and using DIYs that would be the ticket.
>'97 528i, 200000 miles, Hella Xenons, 17" Stilauto wheels, Vogtland Drop Springs, Dynomax Race Muffler, Homelink, 540 brake upgrade, 15mm spacers >'65 & '74 MG Midgets BFC OT Lego Club #48 Manual conversion in process!!!
BMWCCA 484984

Jason,
It's the easy procedures that the noobs (of course, I am referring to myself) need help with. Then they feel more comfortable moving on to the intermediate and advanced repairs.
At least wait until the DIY is completed before judging its worth. Lol.
Last edited by jamesdc4; 09-14-2010 at 11:38 PM.
Member
LOL!
I am with NNY.
You forgot to pause for station identification = beer break.
Then continue with your scheduled program.
LOL!
Looking for an E39 belly pan , passenger front inner fender liner
BMWCCA 484984
I love beer, but I find that I tend to misplace important parts and tools if I drink while DIYing. I usually sip on one beer while working on the car and celebrate with several more after successfully completing the procedure.
Member
Don't forget torque spec - 18ft lbs or snug + 1/4 turn. Also, never torque spark plugs on a hot engine. Use of anti-seize and di-electric grease optional based on preference.
Richard
BMW Convert
Let us redefine "progress" to mean that just because we CAN mod a thing, it does not necessarily follow that we MUST mod that thing.
BMWCCA 484984
Thank you.
Member
Your valve cover gaskets are leaking
The two rearward sparks are easy to change if you remove the cases for the microfilters and their airducts which you marked with the yellow arrows.
BMWCCA 484984
I know. The spark plug well for the #6 cylinder had oil sitting in it. It's due for new VC gaskets and a maybe a powder coat although I find it hard to justify spending money on engine cosmetics.
Member
I still have figure out the puzzle of how to un-clip those four push buttons to get the engine cover off any help is greatly appreciated!
BMWCCA 484984
You have to have five hands.
Before all my clips broke, I would push two of the buttons next to each other down and lift slightly on the cover to hold them while pushing down the remaining two. It was always hit or miss.
Now I just pull the cover up and I'm done. Putting it back on is quite a bit easier too.
(Disclaimer: It's possible my method was flawed and that's why all my clips broke.)

Last edited by jamesdc4; 03-30-2011 at 11:43 PM.
spoolin'
Mine are all broken too. It's makes it very easy
1985 325 - 5 speed - LSD - M50NV - MS2/extra - AEM UEGO - TiAL MV-R - 750cc injectors - HX35 - Blunttech Manifold - 3" exhaust
1991 318i - 5 speed - M50NV - e36 rack - Smileys
wannabe modder
i think only one of mine still works,,,, maybe 2
M62L76
Member
On my car, I push each button down until it clicks. One at a time. Once it clicks, it's released. Once all four are clicked, the cover comes right off no problem. There is grime in the buttons, so I sometimes have to press them with a screwdriver or something other than my finger to get them to click.
BMWCCA Member
When reinstalling the engine cover, be sure to press gently and press the "buttons" in as you re-install the cover. If you simply push and let the buttons "snap" over the metal reciever holes, the tabs on the latches can snap off, rendering the button or lock no longer operable. As the plastic ages, it fractures quite easily. I have replaced three of the four "locks" or buttons now, because of this...they are not cheap, around $25 to $30 each, for a pretty simple device...
2001 540 M-Sport (cdn), ST X (KW) coilovers, H&R 15mm spacers, Eibach anti roll bars (28mm/18mm), Beastpower rear antiroll bar brackets, M5 rear chassis reinforcements (traction rods), Strong Strut front upper strut bar, Dinan Stage 1 software, factory M-Audio subs, Bavsound speaker upgrade, Bluebus bluetooth integration, Stop Tech SS brake lines, ATE coated brake rotors, ATE ceramic brake pads.
Seeking Hwy On Ramps
Thanks James,
Good write up with quality pics.
I searched high & low for this thread. Lots of info on a 6 block but next to nothing on the 8. Bimmerforums.com had a great write up on the 6 but as this will be my first attempt to change plugs I wanted to find a specific V8 procedure. Thanks again.
PB
Member
nice pic
Member
thanks for the write up, i was going to get it done but now I'm thinking I'll do it myself as it seems doable with instructions... and I feel a little more brave to try it now too..
Member
Quality instructions, James - thanks for making this! Just got a quote of $180 from my indie for this job, so will def. give it a shot myself... nice work!! Any thoughts on the NGK / Bosch debate, or is it more of a matter that with proper installation either is fine?
BMWCCA 484984
I had problems with the Bosch backing out, but it could very well have been improper installation. NNY528i feels strongly that there is no solid evidence to support the theory and he may very well be right. Regardless, I'm gun shy now. NGKs for me from now on.
Member
Even though this is an old post, thanks for putting it up here. It was here when I needed it :-)
Member
Bump for greatness
Member
Thought this would be the best place to post a rebate, hope OP doesn't mind....This will save you anywhere from $1 to $2 per plug, debending on flavor. Offer valid till 12/31/11.
Bosch Spark Plug Rebate
L
 Posting Permissions


 Reply With Quote
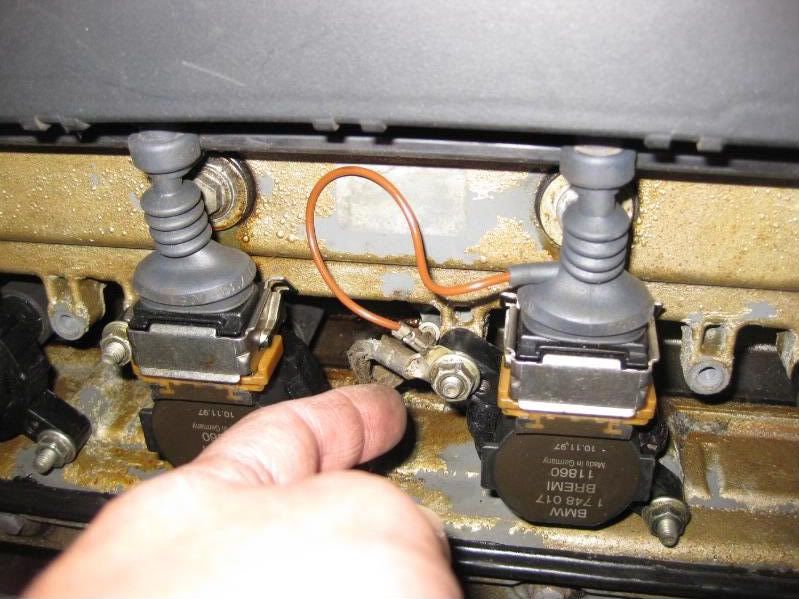


Bookmarks