
 Member
It was at the time a custom job for my S/C M62 E34 540i. Talk to Lou at ClutchmastersOriginally Posted by kernelmaker

Vortech V2Ti Rebello Racing M62 4.9L E34. Not a race car, but a fun car.
[IMG][/IMG]
Member
Will do. Thanks BigM62!
Member
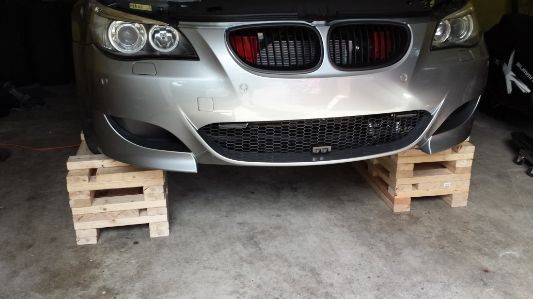
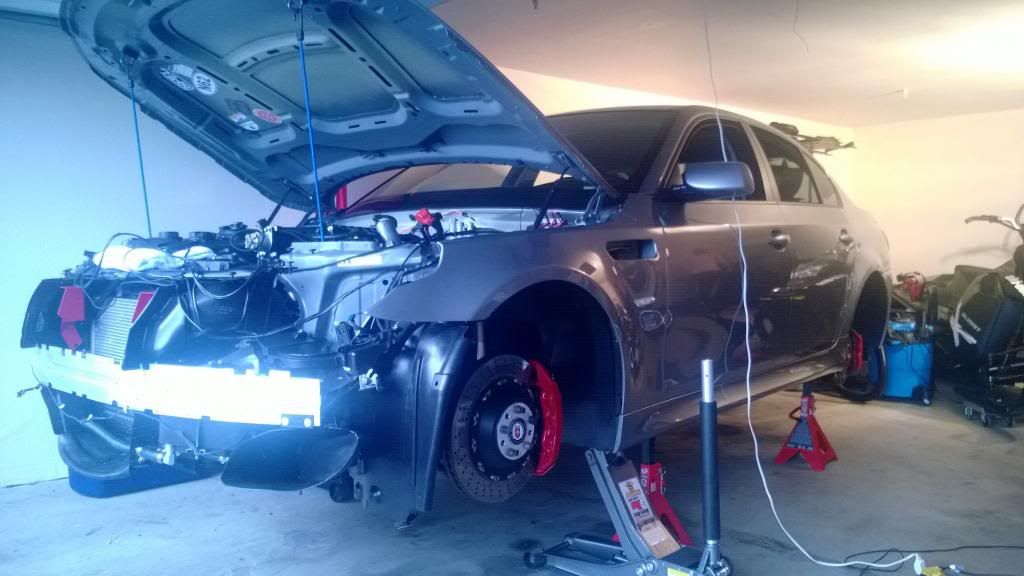
Welp, the car is up on cribbing blocks now. Ended up modifying the design found at this link: http://www.myturbodiesel.com/1000q/multi/wood-block.htm
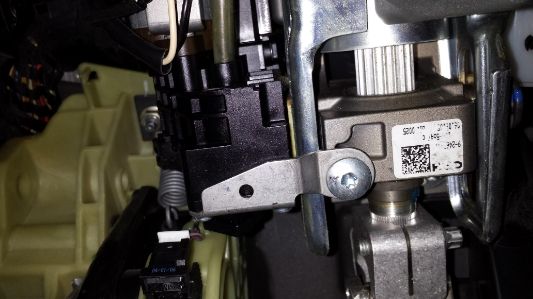
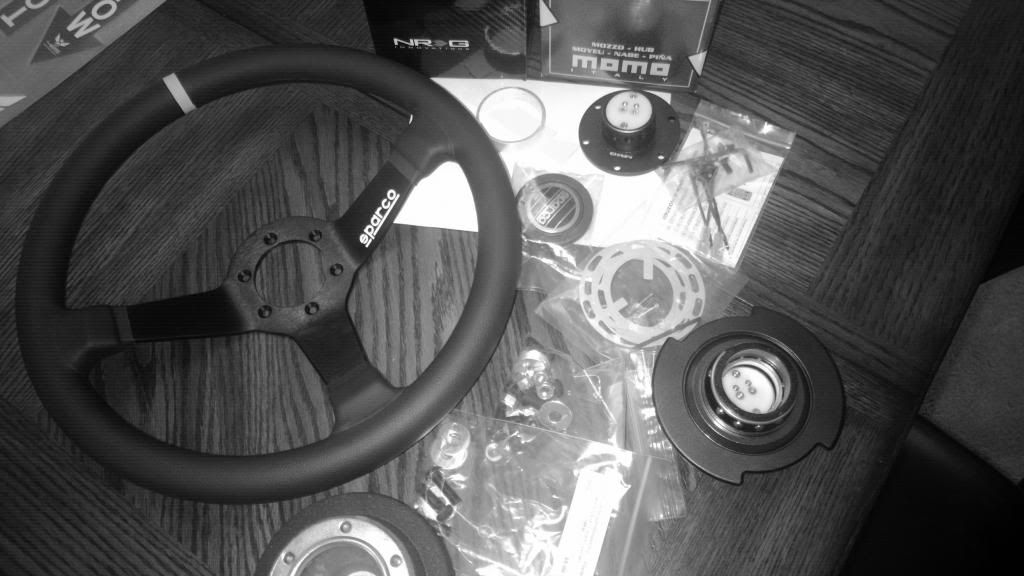
Pulling the pedals out went smoothly, but the telescoping steering wheel motor can make for a tight removal:
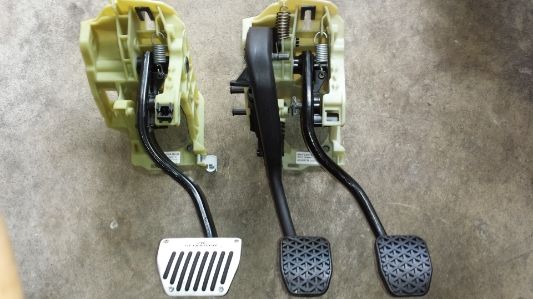
The pedal frame for the automatic looks similar to the pedal frame for the manual, so if you are attempting a pedal swap, might as well re-use the old pedal frame:
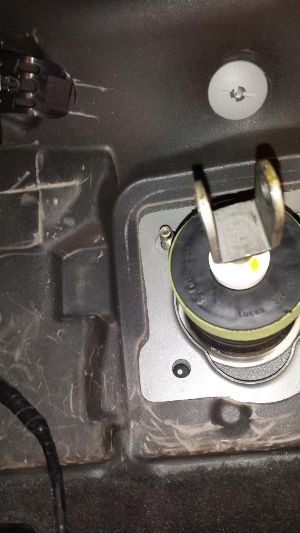
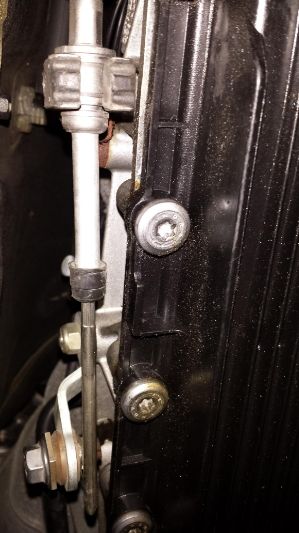
Ended up finding a rubber plug behind the cutout that provided access through the firewall. My guess is this is for the clutch hydraulics so I removed the plug and cleared some room around the sound deadening material. Here is a photo of the cross-hatch in the sound deadening material:
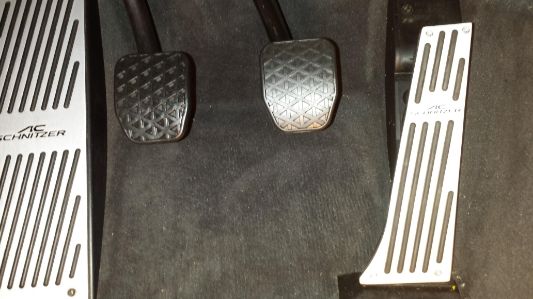
New pedals seem to fit okay. Dirty carpet but it was clean before I got in there and started taking stuff apart!
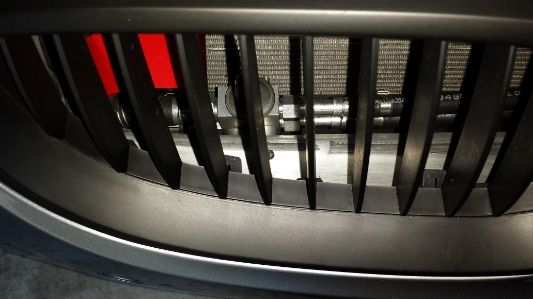
Grabbed a cell phone photo of the KIllerChiller A/C expansion block hidden behind the front bumper carrier.
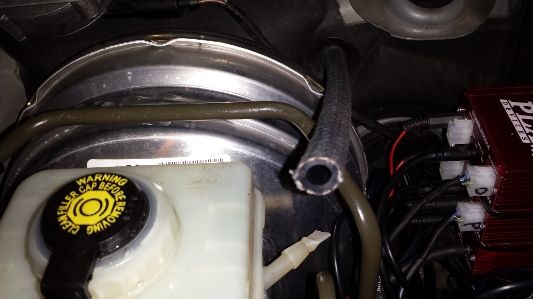
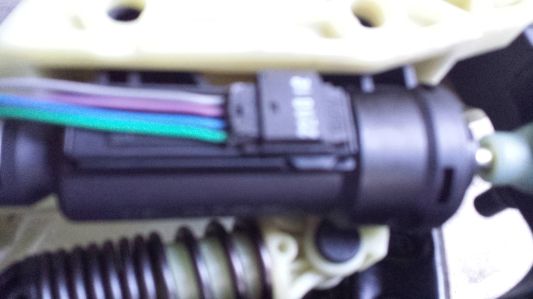
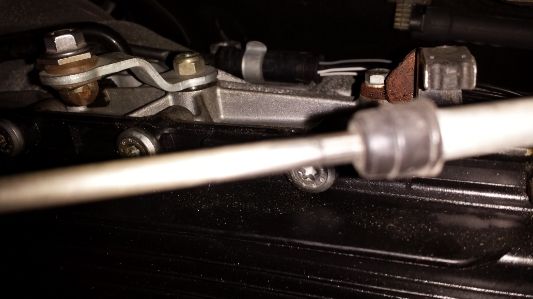
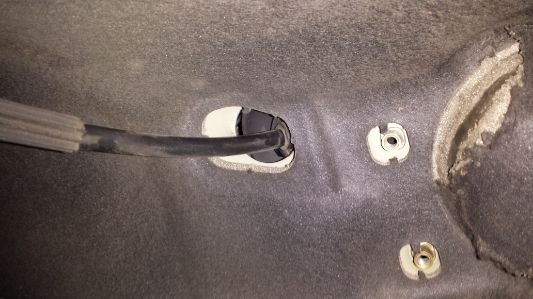
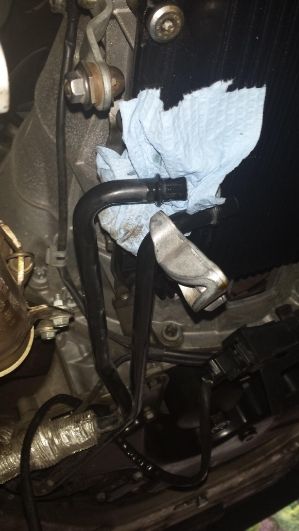
Fished the feed hose for the clutch master cylinder through the firewall using the correct BMW grommet. Went in easily but had to cut some of the sound deadening out of the way. The hose plugs in to the little nipple hanging off to the right of the reservoir once you cut the tip off.
Extracted the dual exhaust and began unbolting the drive shaft at the rear differential.
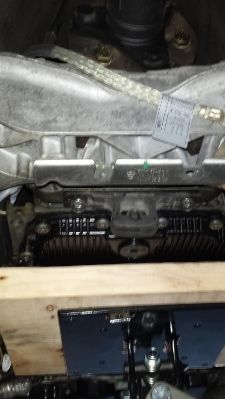
The bolts at the front end of the drive shaft at the guibo were difficult to get at with the transmission support beam hardware in place, so stuck the transmission lift underneath, removed the bracing, and was able to get at those bolts a bit easier.
Here's a shot with all the bracing removed
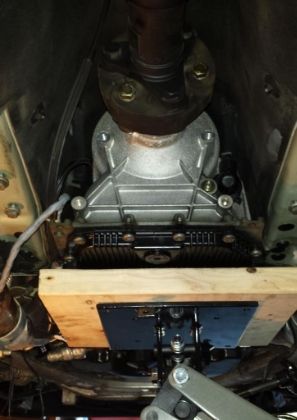
Put the transmission support bracing back in and left it looking like this for now.
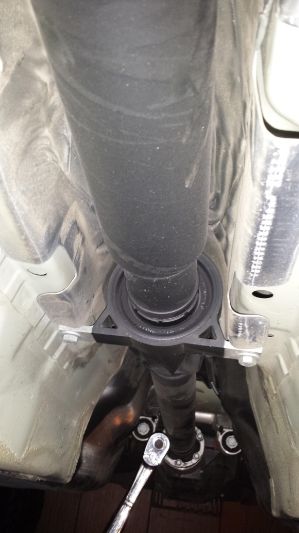
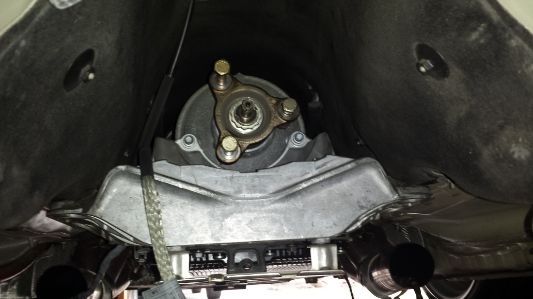
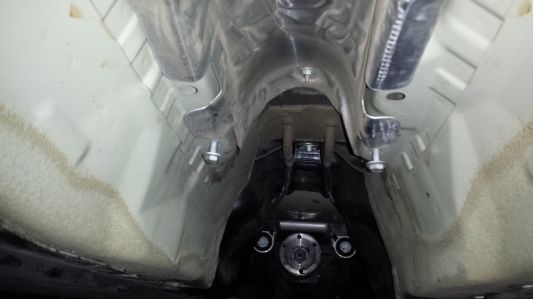
A view down the tunnel. No more drive shaft. The two bolts hanging from the top represent the location where the center bearing support was hung.
If you look up, you can see where the manual shifter will be routed through the tunnel.
Unplugged the transmission cable harness from the transmission and verified that the car would not start without the transmission cable harness connected. Going to leave it disconnected for now and try to get the car started without the harness.
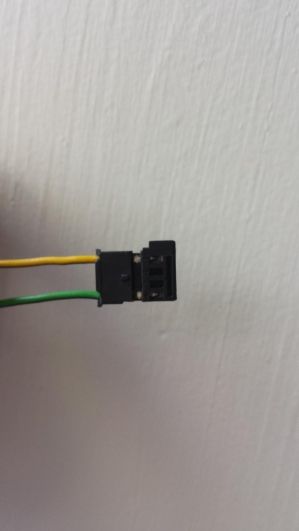
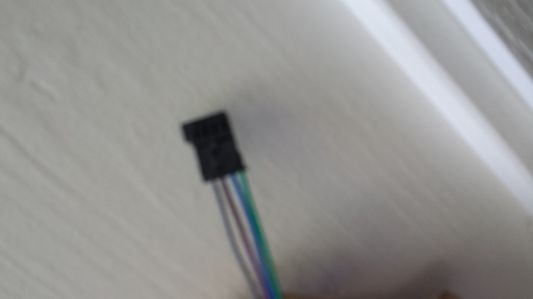
Picked up the clutch pedal switch. It's a hall effect sensor that mounts alongside the clutch master cylinder. It accepts a plug fitted with 4 wires and there was no plug of this sort on the factory (automatic) harness. Got lucky and Michael at BMW Seattle found one that appears to work. Problem is that it only had two wires sticking out of it.
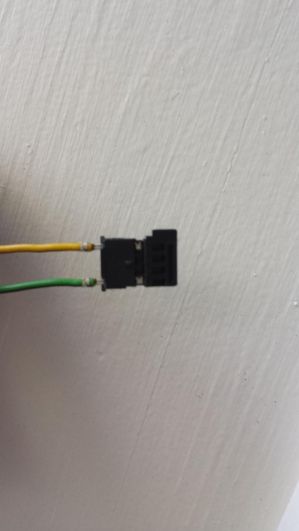
Popped a small screwdriver in the plug and released the two wires from their home.
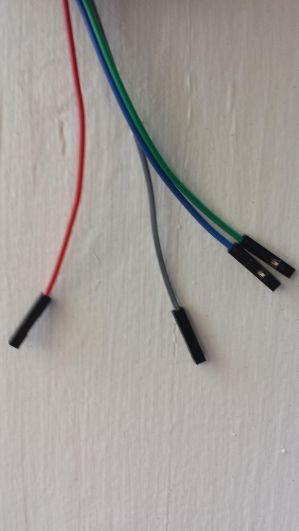
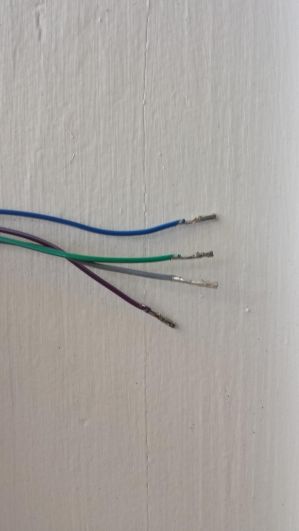
Found some of these breadboard prototyping jumper cables sitting around. They appeared to be the correct size for the clutch pedal switch plug, so removed the wires from their plugs and fitted them to the plug for the clutch pedal switch.
Appears to fit okay.
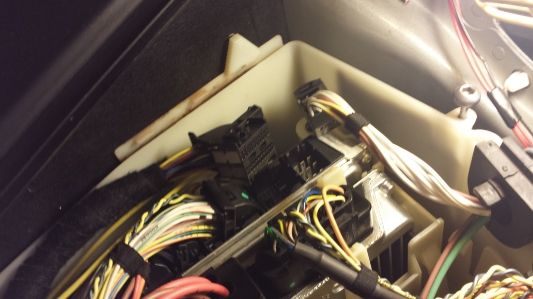
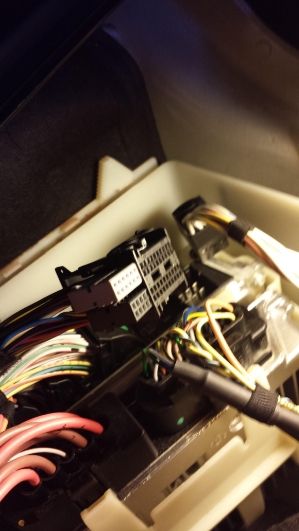
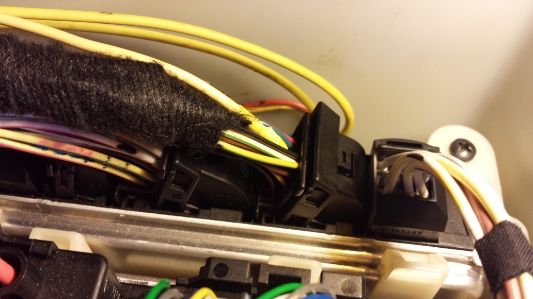
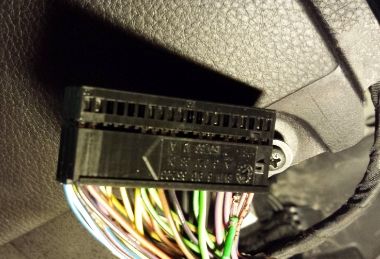
Cracked open the housing for the DME so a lead could be routed to the clutch pedal sensor. Here is where it gets a little interesting. The BMW service manual (I believe it's Bentley?) has the wiring schematic wrong here. They state that this car has the clutch pedal sensor run to pin 18 on the DME but wds online states that it should be pin 23. Verified the existence of other wires on the same connector and they were consistent with what wds online states so just went with that. Pulled the second connector from the right when looking at the DME from the front of the car.
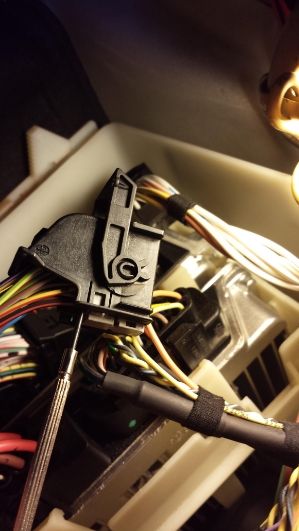
Using a screwdriver, you can release the sockets from the plug. Notice there is no wire connected on location 23.
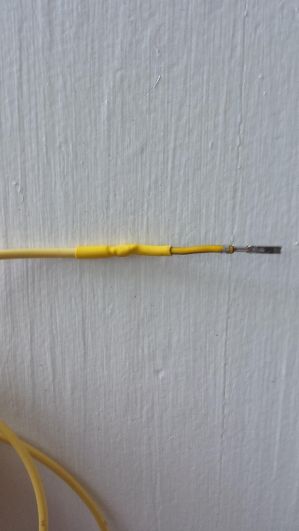
Ended up soldering up something to do the job and plugged that in to pin location 23. The wire clicked in perfectly.
Attached the connector back on the DME and routed the clutch pedal sensor wire with some other red wires that were run underneath the cabin filter area, then in to the firewall.
Still have to wire up power, ground, and CAS to the clutch pedal sensor but felt good to get this part out of the way. It was the longest run (from what I have been able to gather at this point). I figure the rest of the wiring should be pretty straightforward.
I believe the current wiring goal is this:
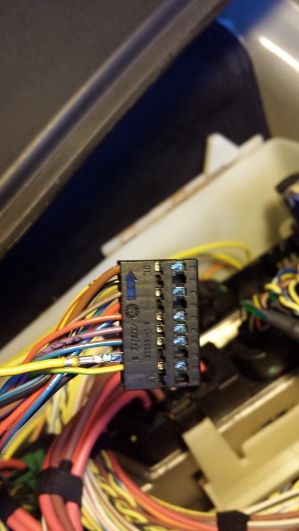
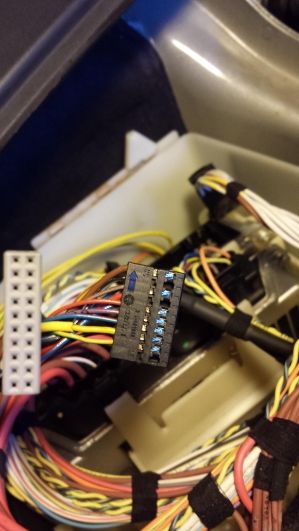
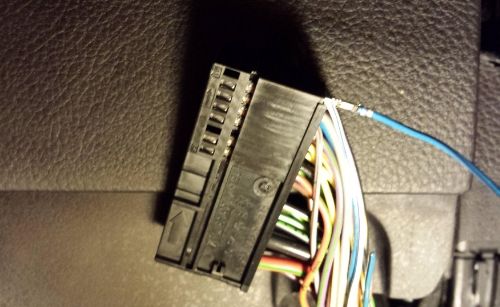
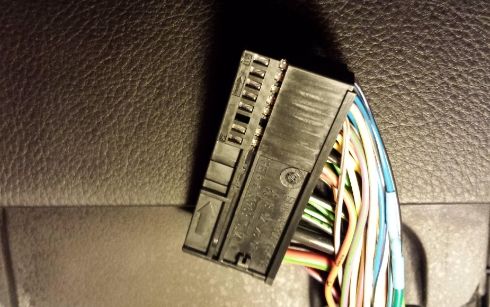
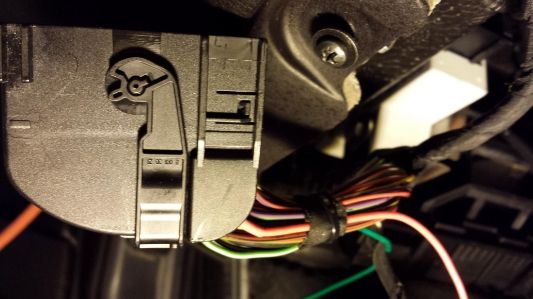
Added wires to pins 41 and 3 on the CAS connector as seen in the photos below. Pin location 41 was already occupied with a wire that connected to the automatic transmission. I simply clipped the wire and re-used the existing pin clip for it and wired it to the clutch switch module:
At this point the the wires were just hanging in the footwell space but I was so eager to discover if the wiring I installed would actually get the car running that I jumpered the wires over to the clutch switch module, grabbed my key and attempted to start the car. The car did not start. Didn't even turn over. My guess is that the CAS was interfering with the start-up sequence because the only thing I could see on the display was a key icon and then the car would power off after a second or two. Double-checked the wiring and noticed that the ground wire to the clutch switch module fell off the bolt that I had temporarily grounded it to (was using alligator clips). Tried to start the car again and then got a 'Engine Failure' message on the dash and the car electronics would stay on a few seconds longer and then power off. After going over everything in my head for a good 15 minutes I considered that this idea of retrofitting a manual transmission might not work afterall and that this was all one big bad idea. Then I figured it was worth double checking the pins in the DME housing to make sure none of them were bent. Opened up the DME housing and inspected each pin...all pins looked fine. Got under the car and looked for connectors that might need to be connected and found a large grounding strap by the transmission that was hanging. I strapped that back on to the chassis and left the automatic wiring harness laying against the tunnel still disconnected. Also forgot to plug the two upstream o2 sensors back in so made sure those were plugged in. Hopped back in the car and gave it another shot. This is what happened:
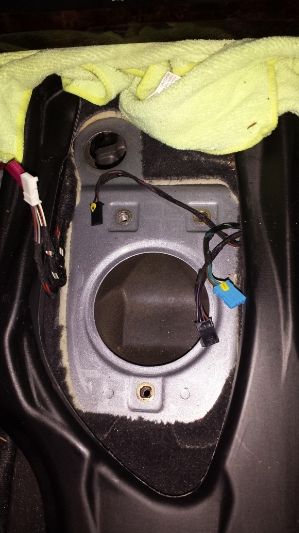
Pulled the center console out. Used a torx to release the manual shifter from it's home (3 screws). Disconnected the linkage from the side of the autobox and pulled everything out. Pretty straightforward.
Last edited by kernelmaker; 08-22-2013 at 01:01 PM.
Luchador
Very nice progress!
Great writeup for anyone else who wants to head down this path!
Member
Thanks wazzu70. Thanks for offering to answer questions in case I run in to issues with the retrofit. Hoping this writeup will help others.
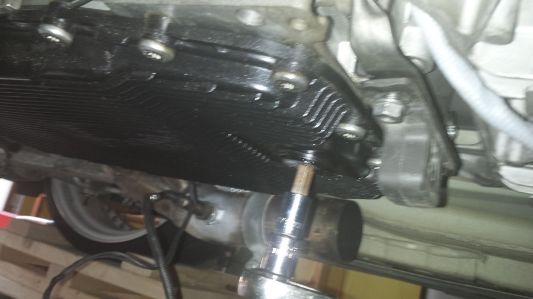
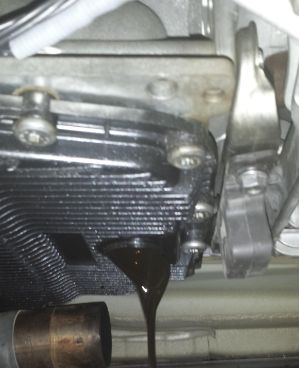
Removed the drain cap on the transmission. Drained as much fluid out as possible. Then removed the transmission fluid cooler lines and pushed those aside.
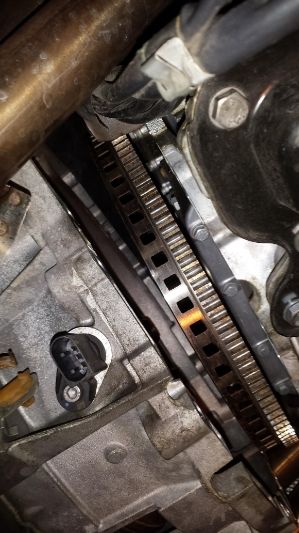
Removed the rubber cover to access the flywheel bolts. Rotated the crank to gain access to each of the four bolts and removed them one by one.
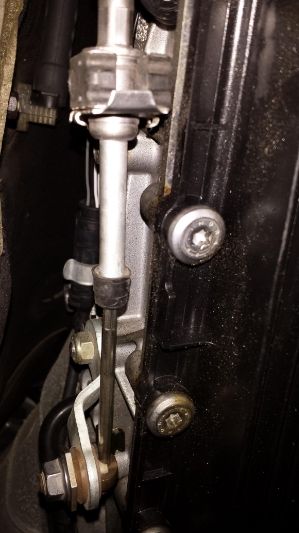
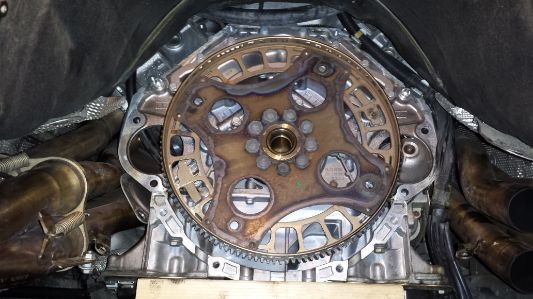
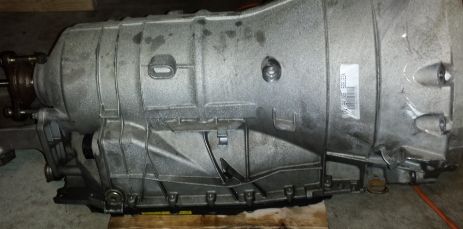
I didn't get many photos in this stage because some of the bolts were really hard to get at let alone get photos of. Removed each of the bolts around the bell housing and pulled the transmission out. There were a couple bolts on the drivers side that had nuts behind the bolts . These were a pain to remove. Ended up unbolting the steering knuckle and pushing the steering column up toward the cabin area to make barely enough room to insert a wrench on to the nuts. Also had to pull the passenger side collector off of the header to make it easier to pull the transmission out. Ended up rolling the transmission over roughly 30-35 degrees while still in the tunnel then dropped it out slowly. The thing is heavy.
Anyone looking to purchase a lightly used automatic transmission?
UPDATE:
---
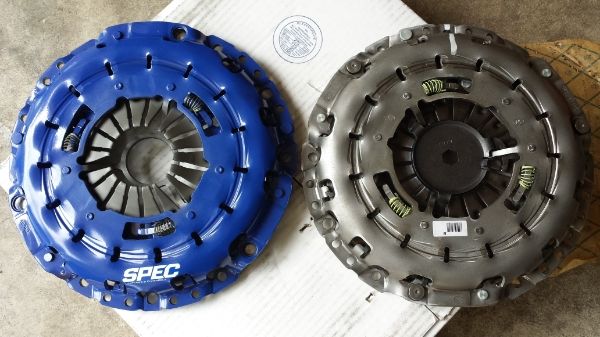
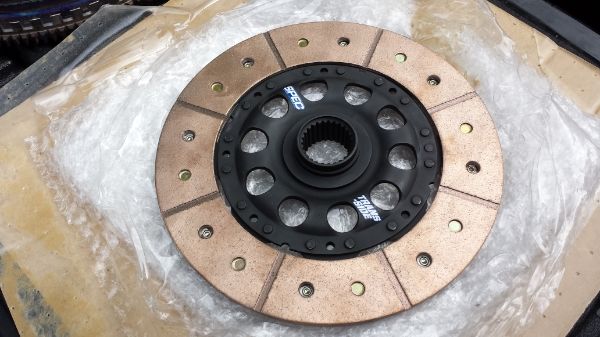
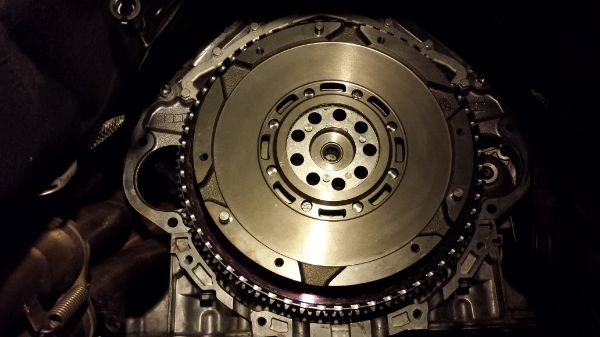
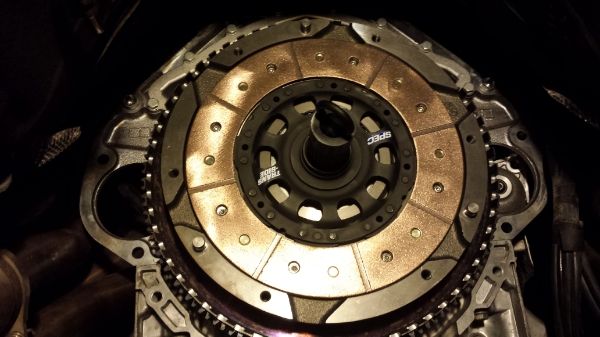
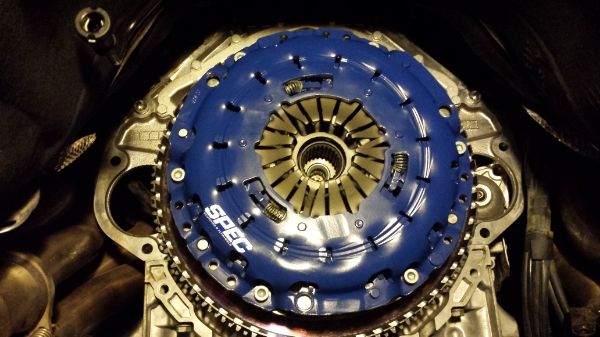
The clutch came in and it appears better suited for the job. Below are a few photos of the SPEC clutch next to a brand new Dinan (balanced OEM) one.
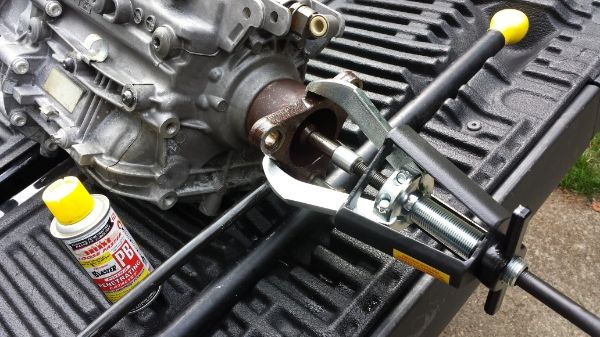
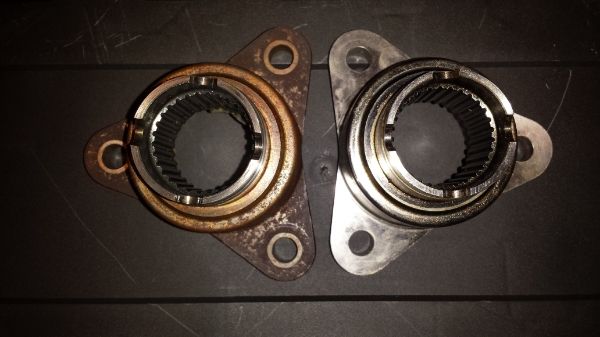
The new output flange arrived at BMW so decided to pull the old one off and check to see if the spline count was the same. Man was it a pain in the ass to take off. Had to hire some guy down the street with a air hammer and 40mm deep socket to pull it off. This is one day after he couldn't pull it off and I let it soak submerged in PB blaster. Once the nut was off his puller wasn't capable of pulling the flange off to a quick visit to Sears, some muscle and a few cusswords later the flange came off...and the spline count is the same as the new flange that BMW parts has waiting to pick up!
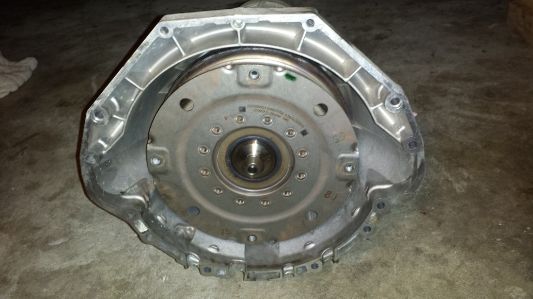
Ended up fitting the lightened flywheel and clutch on to the car as well.
New 105mm bcd flange next to the 110mm bcd flange.
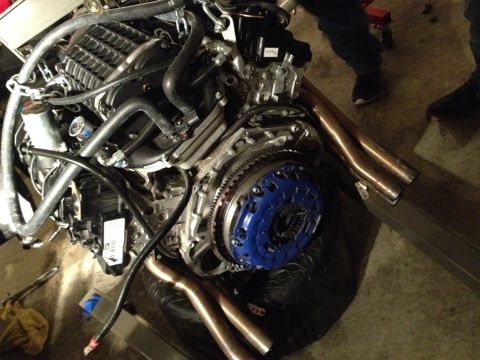
Throw out bearing and clutch fork installed. Next up was to put the transmission in the car.
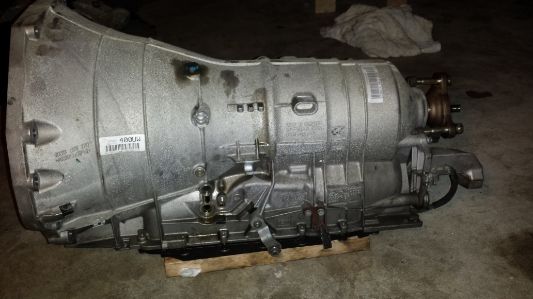
Putting the transmission in wasn't as bad as pulling the autobox out but it did require some patience. Torqued everything down to spec and then installed the UUC short shift kit.
Update:
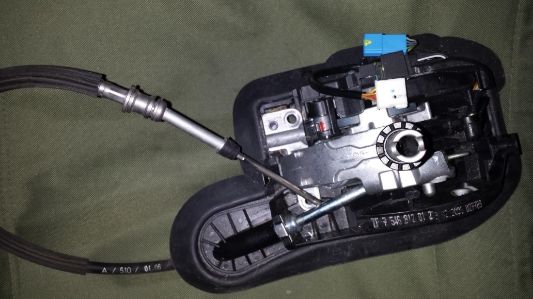
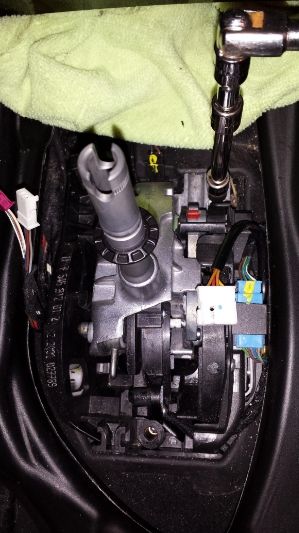
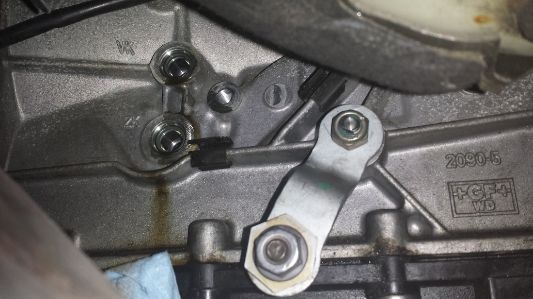
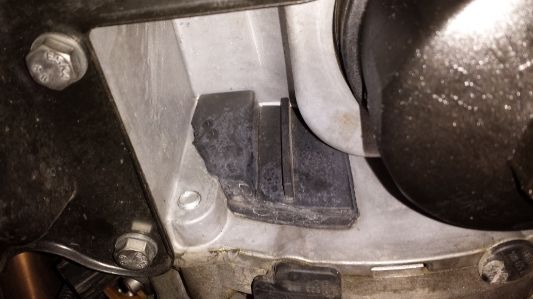
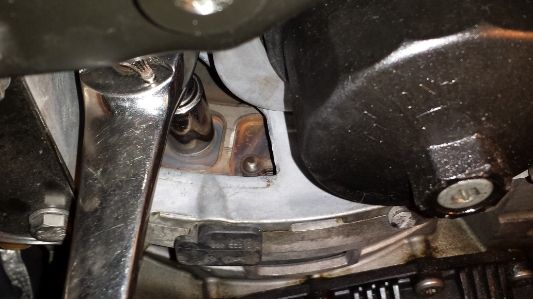
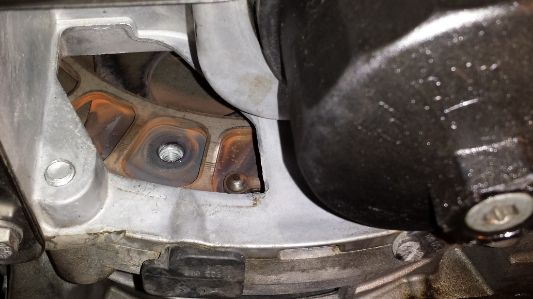
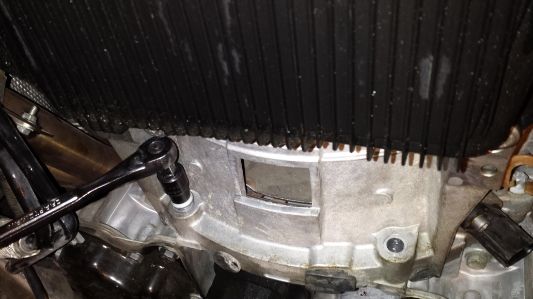
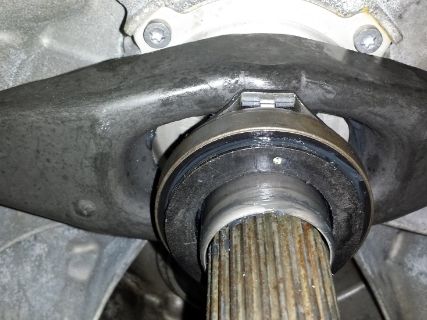
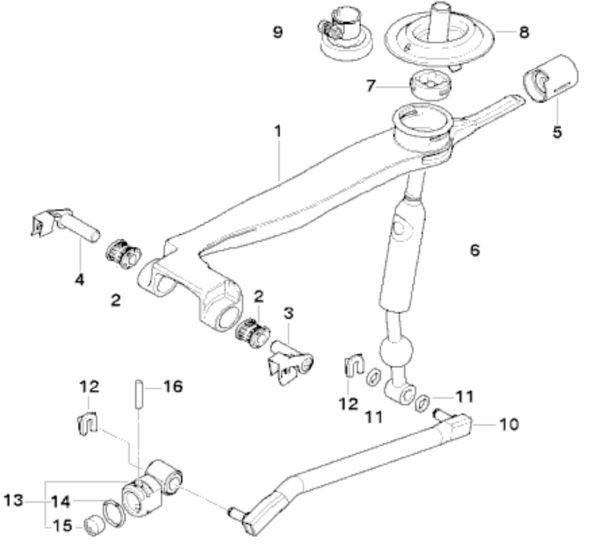
Put the manual transmission in, along with all the other parts. Sorry, no photos. Had a slave cylinder blow out because I bled the slave cylinder with the piston extended and not pushed in like it should have been. Fortunately had another slave cylinder kicking around and used that one instead. The new one is put back together now and is available if anyone feels like they want a deal on a slave cylinder. Must say that everything went back together pretty smoothly...except that that part number 5 (below image) is oriented backwards in the photo. The notch that looks like it should be facing forward actually needs to face towards the rear of the car:
Took the car off the cribbing blocks and took it for a test drive while running with reduced power (still need to do coding). The clutch feels and sounds great- very grabby and quiet. The car sounds different too when going through the gears. Sounds like a manual. The rear differential that comes with the automatic cars is geared lower (3.38:1) than the differential that comes with manual transmission cars (2.93:1) and the combination of the automatic rear differential with the manual transmission feels great!! Highly recommend fitting a 3.38 rear diff to your manual/smg car. The rear differentials are going for around $450 on ebay and the drive shafts between $150-$200. In fact, I'll sell my driveshaft for less.
Last edited by kernelmaker; 09-10-2013 at 02:41 PM.
Member
Been doing a fair amount of 'edit updates' to this thread to keep it from popping to the top where the new posts are, mostly because I'd figured people aren't as interested in working on v8's here as much as the i6's...but after recently learning that v8's are the best platform in the universe after reading this thread (http://forums.bimmerforums.com/forum...er-going-turbo), I began to feel more proud to have a v8 oriented project in the works, so am now making an official post to show what things are looking like as we come up on Spring 2014.
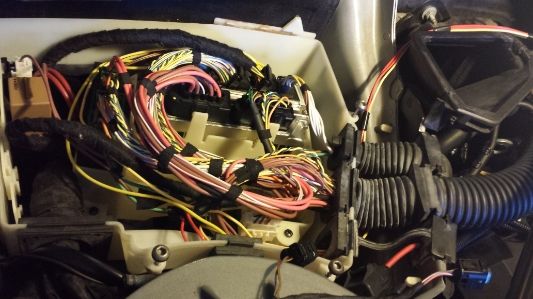
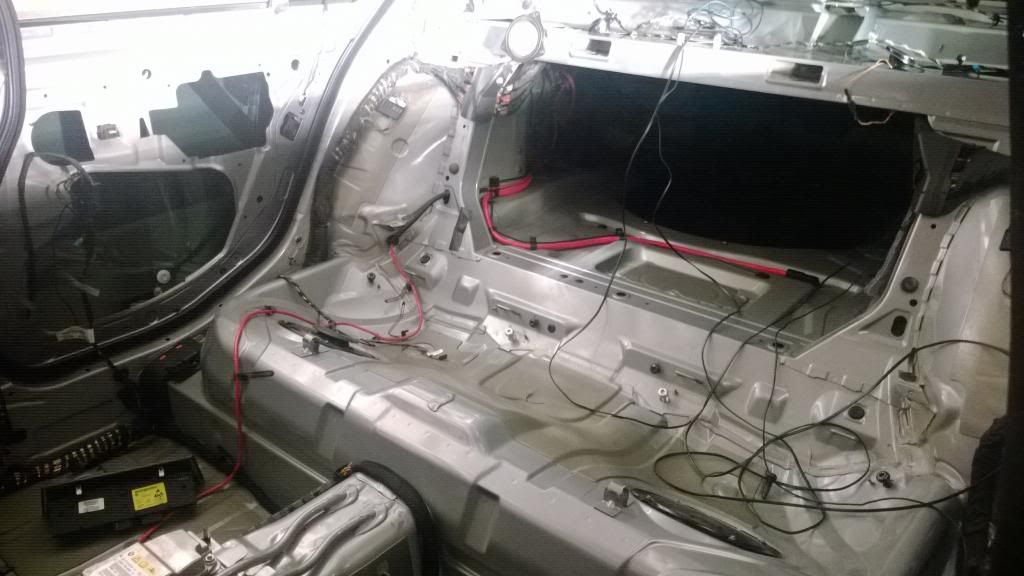
Re-routing some stuff. Tucking wires, re-doing some of the harness:
Other stuff:
Last edited by kernelmaker; 03-10-2014 at 05:27 PM.
fixitfaster
Love this thread! Please post more updates!! ..and I for one have love for any well built F/I setup.. whether it be a bmw engine or not, I6 or rotary.. Whatever floats your boat!
"There are bold drivers and there are old drivers, but there are no bold, old drivers."
Member
Freekin awesome thread.
Member
Wow
Luchador
Looks good man! Dont be ashamed of your project at all, this is a lot of DIY elbow grease! Very impressive!!!
Last edited by wazzu70; 03-11-2014 at 11:18 AM.
Member
Really really cool. Do you know the part number(or specific model number) of the supercharger used in the kit?
Member
Thanks for the support guys!!
After speaking with wazzu70 I'm beginning to think that going with a standalone would be beneficial and fun. What standalone do you guys feel is best suited for this configuration? The N62 comes from the factory with a valvetronic assembly on each bank..
Thanks e34m535t. It's an Eaton R1900. Says Magnuson on the blower housing.
Member
wow great project. Lock valvetronic to fully open, then anything that can support 8 cylinders will work. Personally i find the new AEM Infinity very interesting.
Luchador
The difficulty with valvetronic cars is the valvetronic is the idle control and throttle control. That requires a lot more maps/control algorithms than a traditional throttle body arrangement. The solution I have seen is to add a traditional throttle body and ICV to work with a standalone and lock the valvetronic solenoid in the maximum position.
This level of engine control is way over my head
You may be limited to adapting the factory ECU in this case if no standalones were capable of running all the controls
Member
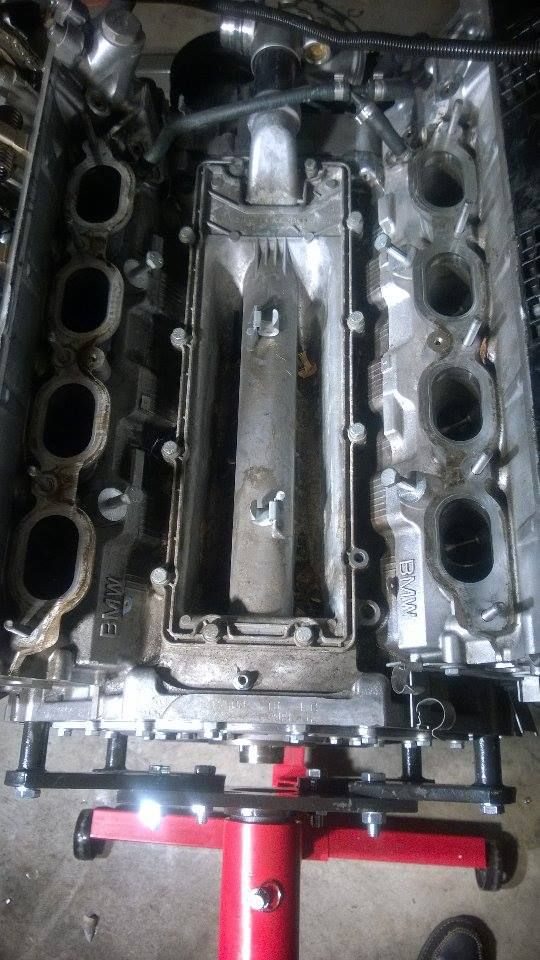
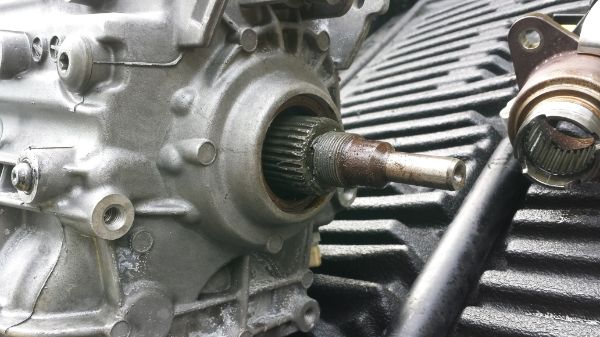
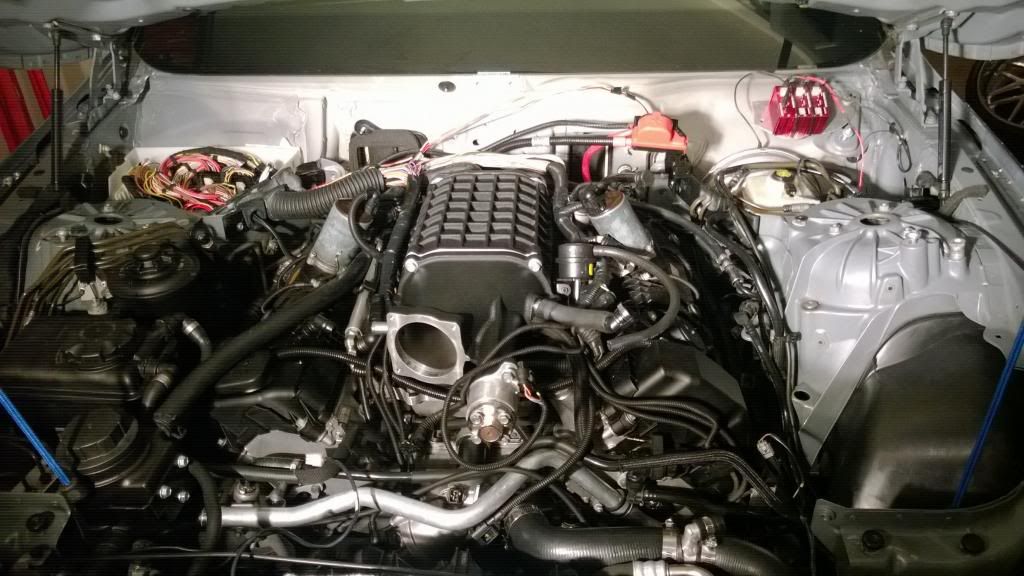
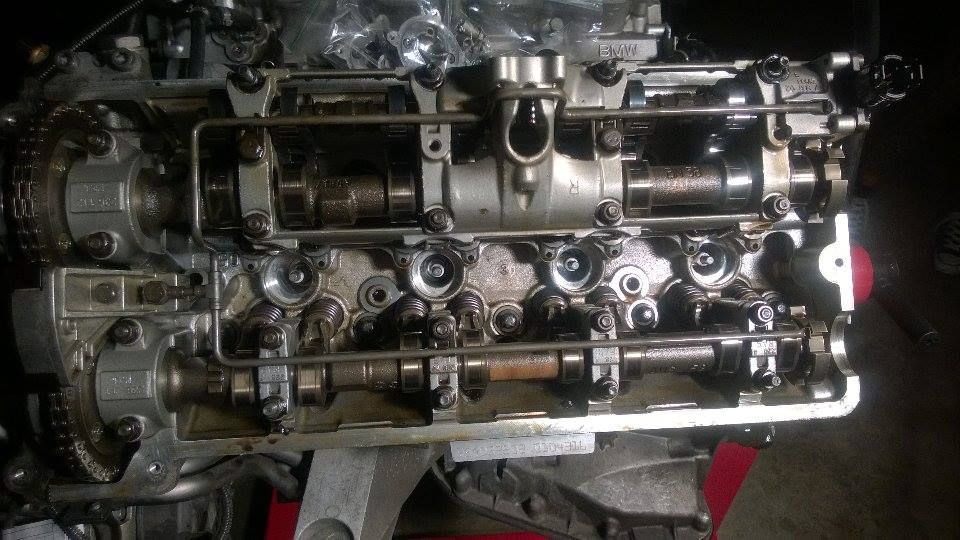
Picking this project back up again. Pulled the motor last night. Here is what the business end of a bolt on N62 looks like:
Member
So, what's up?
Why did you pull it?
This is my signature....
fixitfaster
inquiring minds want to know
"There are bold drivers and there are old drivers, but there are no bold, old drivers."
Luchador
Glad to see you are still plugging along on this. Work has been consuming all my time so I havent even touched my car in a year!!
Member
Hi guys. The goal is to install a forged bottom and lower the compression ratio.
That's a long time but I hear ya! Pretty much the same here.
Member
Nice, this thing is a monster! Can't wait to see the progress
1996 328i (m52B28US) OBD1 euro ZF 5spd. 3.23LSD conversion / Chem. PnP Head/ DINAN stg.2 CHIP/ VAC race valves/ S52 cams/ A/C delete/ fan delete/ Washer Fluid resv delete/ ARP head studs/ Cometic 140MLS / VAC Solid Engine/trans Mounts/ CAI / 2.5"Borla race exahaust/ NGK R spark plugs, M50 Mani, S50 Oil Res, Riot Racing HFTB, SAMCO Hoses, JBR FW, X-Brace, Mtech Front Bumper, RE RSMs, stoptech SS lines, Bilstein sports, H&R Race Springs, S52 Reinforcement plates, Kosei K1 w/ bridgestone RE960as, Brembo/stoptech slotted rotors, M3 Trailing arms, M3 Calipers, M3 Axles, ACS strut brace, weight reduction.
http://mbuild.blogspot.com/
Member
Me too. A slow project, but fun nonetheless. Here are a couple photos from today.
Member
What pistons? Isn't the block alusil? These are a bi*ch to find pistons for. Only Mahle makes them, and if you ask for custom configurations prepare for their big asking price. Of course since you've pulled the engine out you already know it.
Member
Mahle. They have a piston worksheet that you fill out and they build them to specifications.
Member
Yeah i know. I decided to sleeve up the block and use custom non-alusil pistons.
Member
hi i have a 2008 550i and I'm buying the same supercharger TVS2 , as you yours? had to change pistons ? RECOMMEND ? thx
 Posting Permissions


 Reply With Quote


Bookmarks