
 Member
Here is a part 1 of 2 on repair of the seatbelt that some people find quite daunting.
It is fairly straightforward and part 1 can be done by anyone with pretty basic tools.
What I am going to show here, is how to remove and install the seatbelt mechanism and belt assembly, and part 2 will show how to replace the webbing if yours is damaged, or you want a different colour, rather than replace the entire assembly, as most colours are no longer available and they are damn expensive anyway.
How about bright red in a red car, or blue in a car with blue piping on the leather? There are dozens of colours and shades available.
So how to remove the belt?
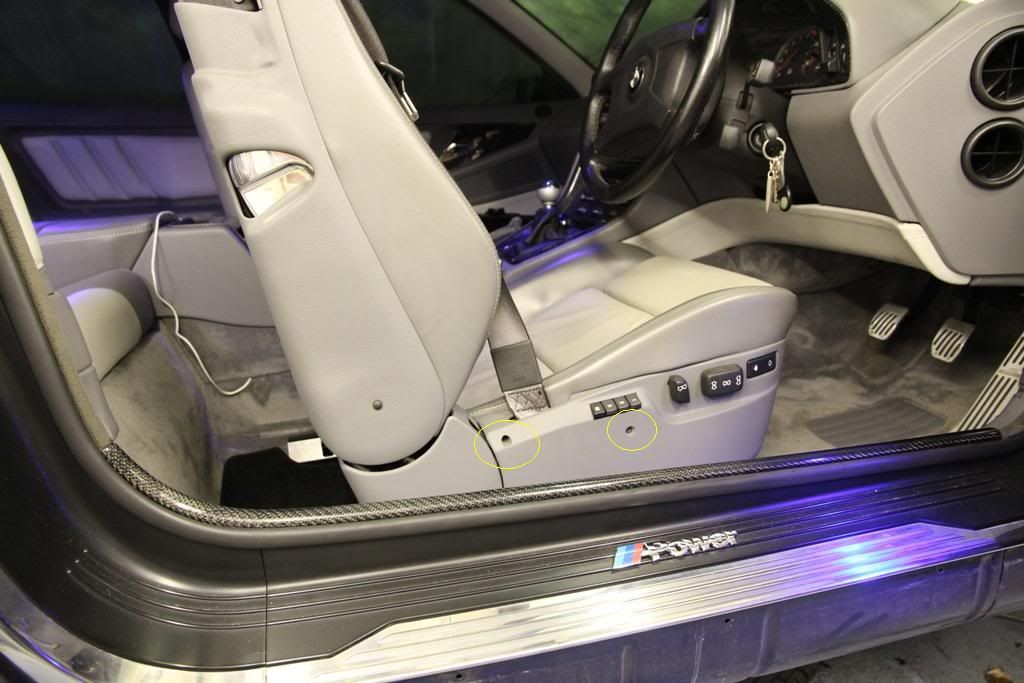
Firstly, move the seat fully forward and as high as possible.
There are 2 small torx bolts buried in the side cover where circled.
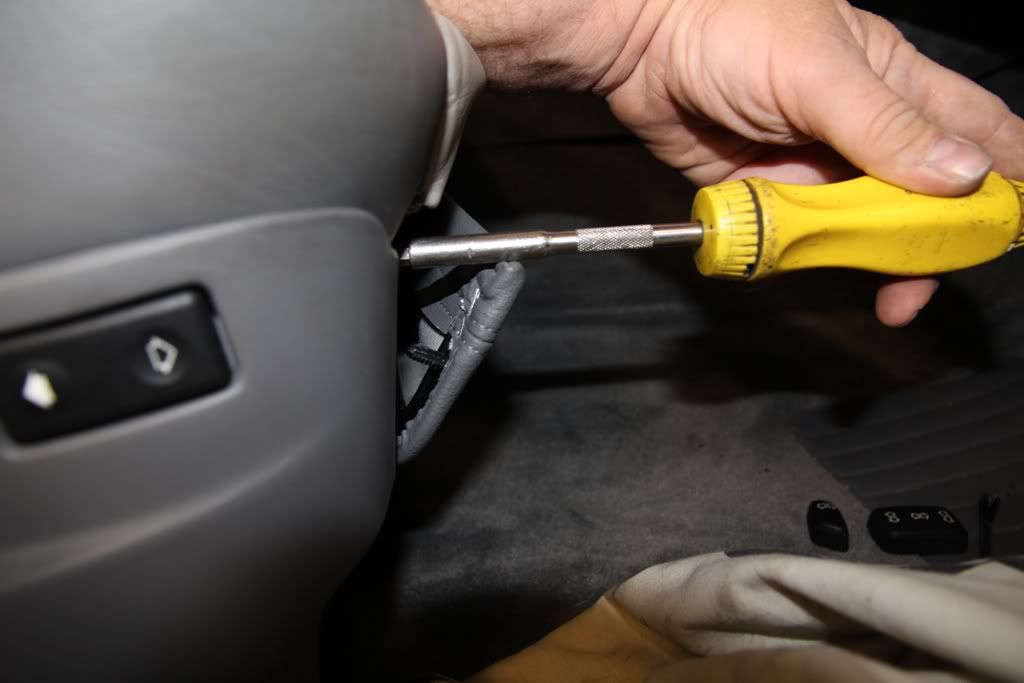
Next, undo the small crosshead screw at the front of the seat panel, behind the pocket (if fitted). Carefully pop off the side of the pocket to get access to the screw
and remove it.
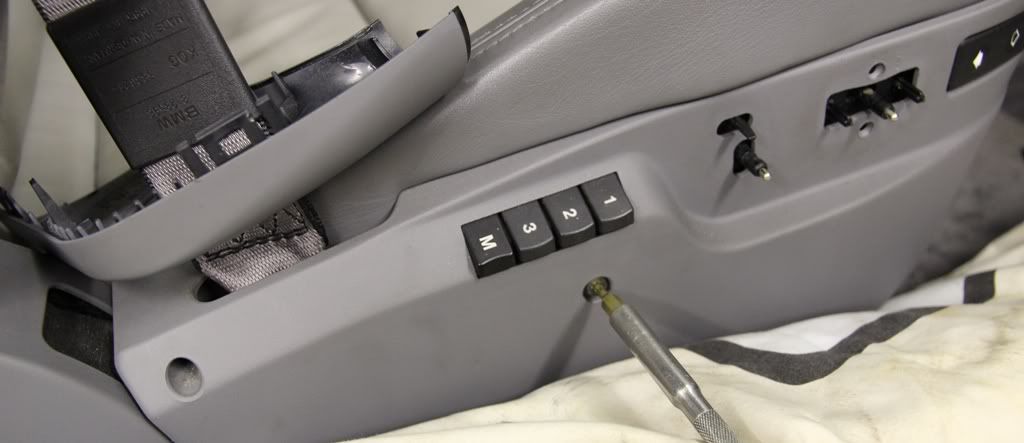
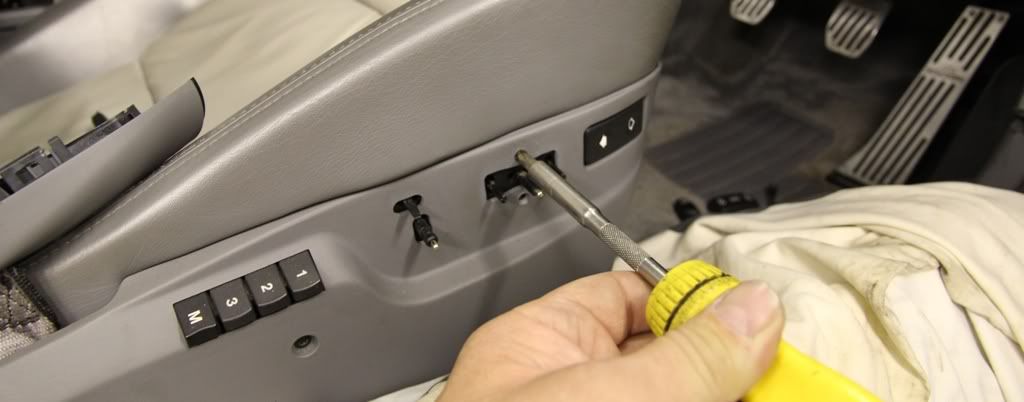
Now gently pull off the seat adjuster knobs and behind the front one, remove the 2 very small crosshead screws.
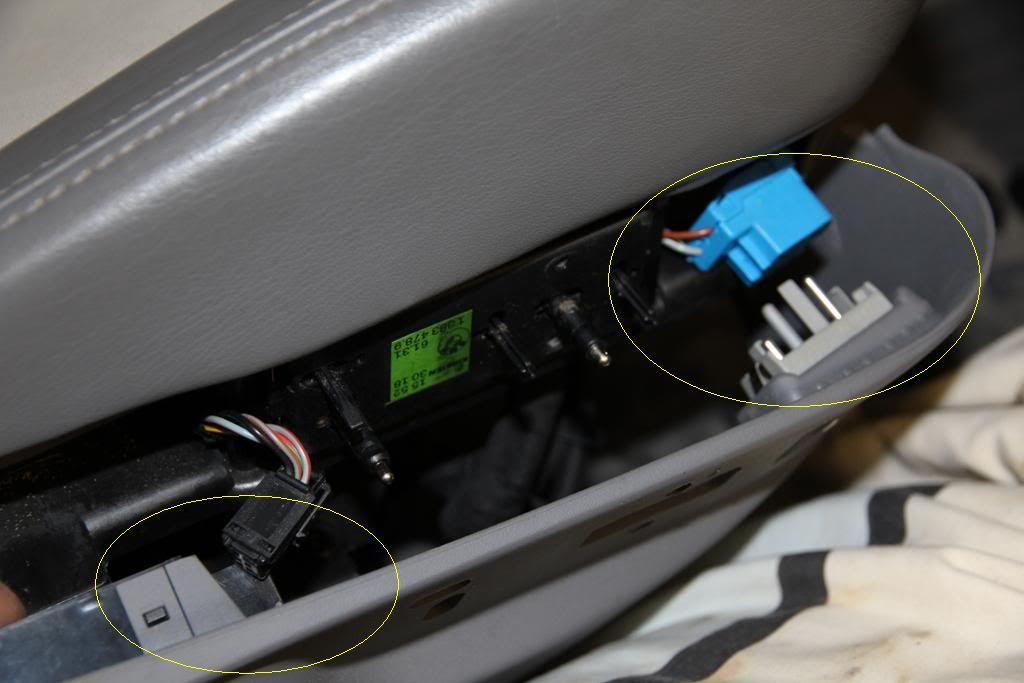
You should now be able to loosen the side cover, disconnect the switches wiring connectors and lift the panel away.
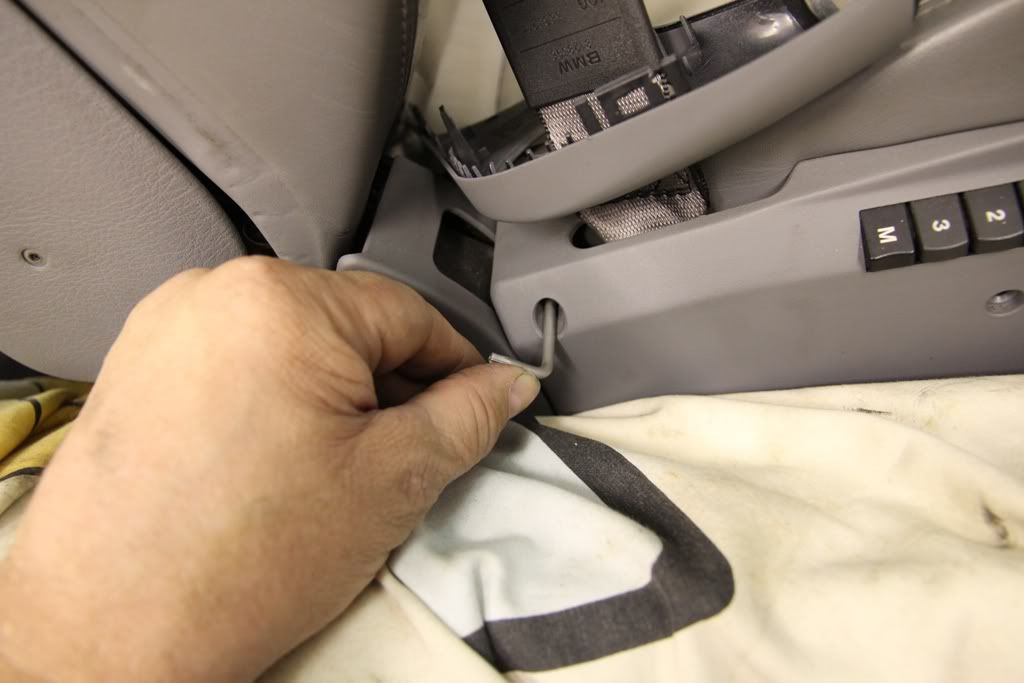
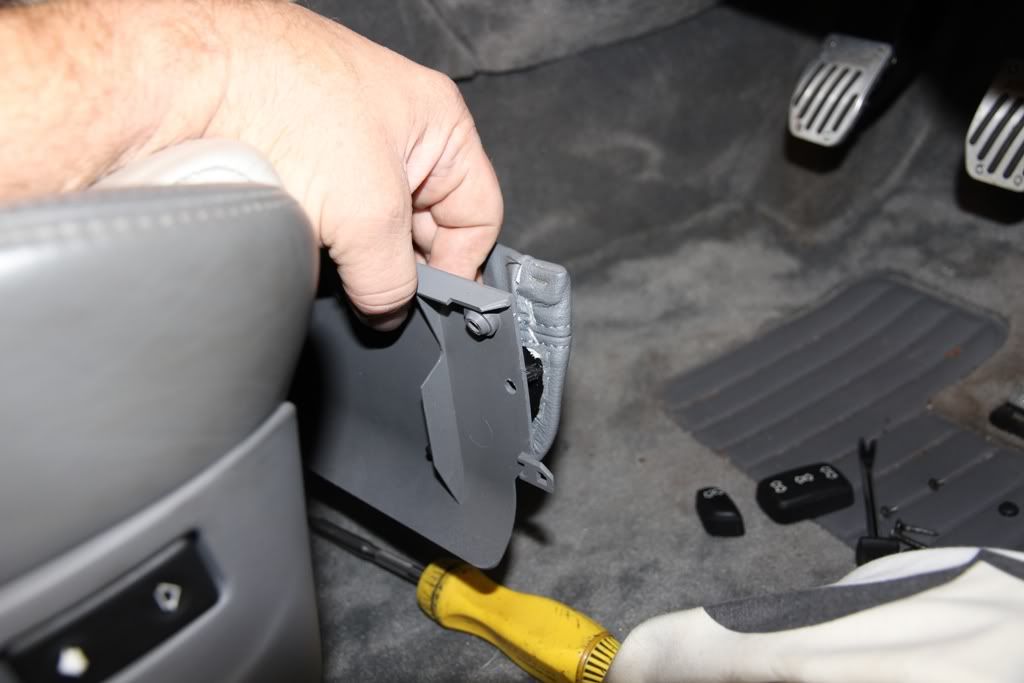
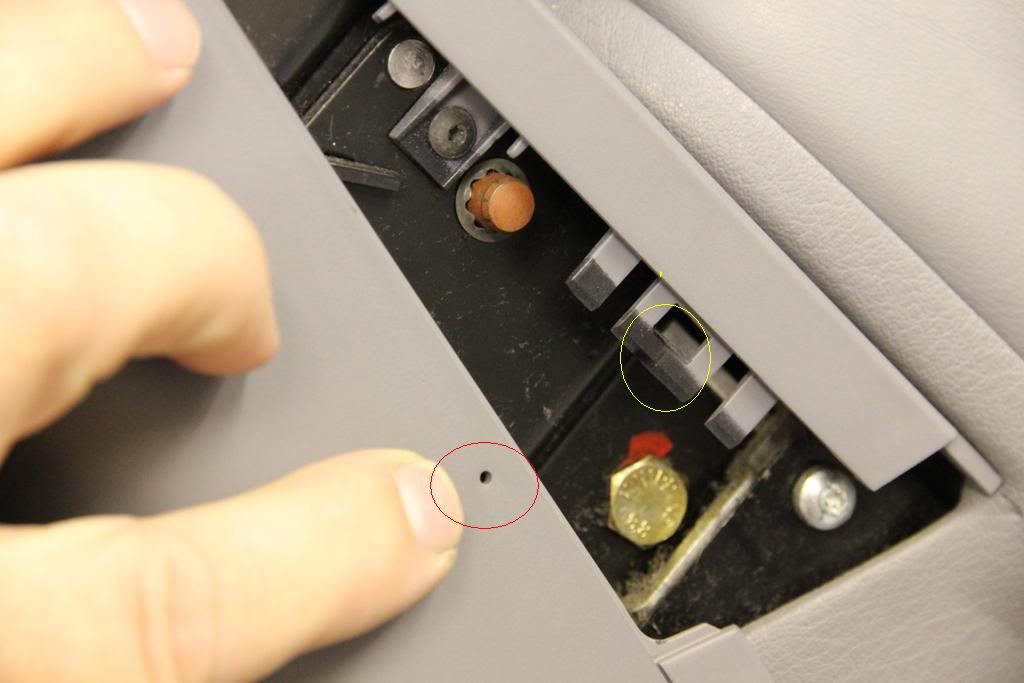
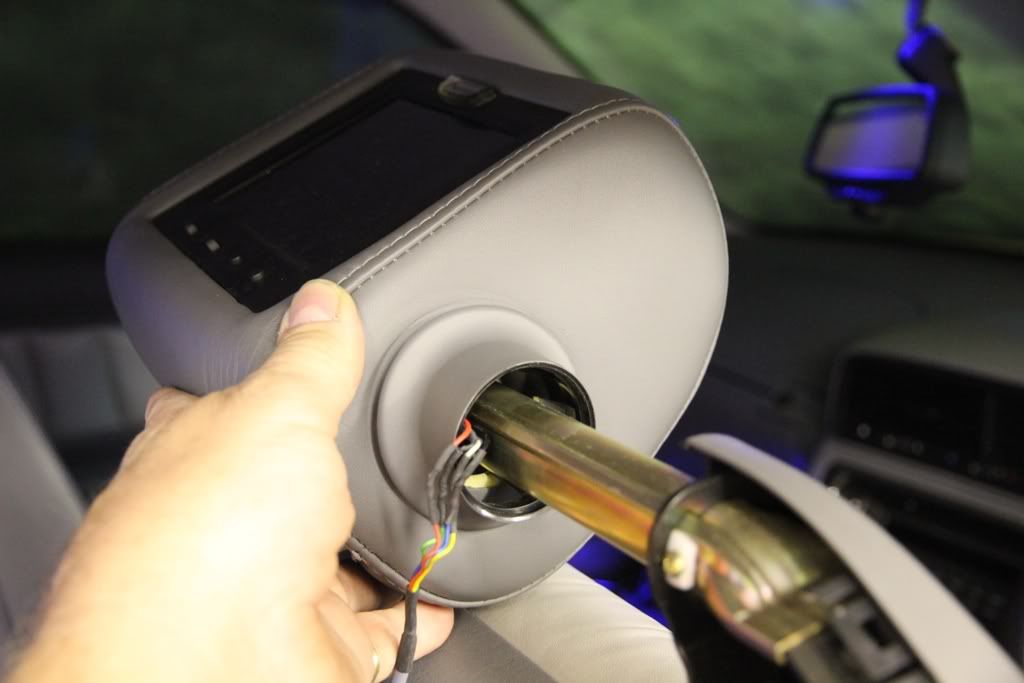
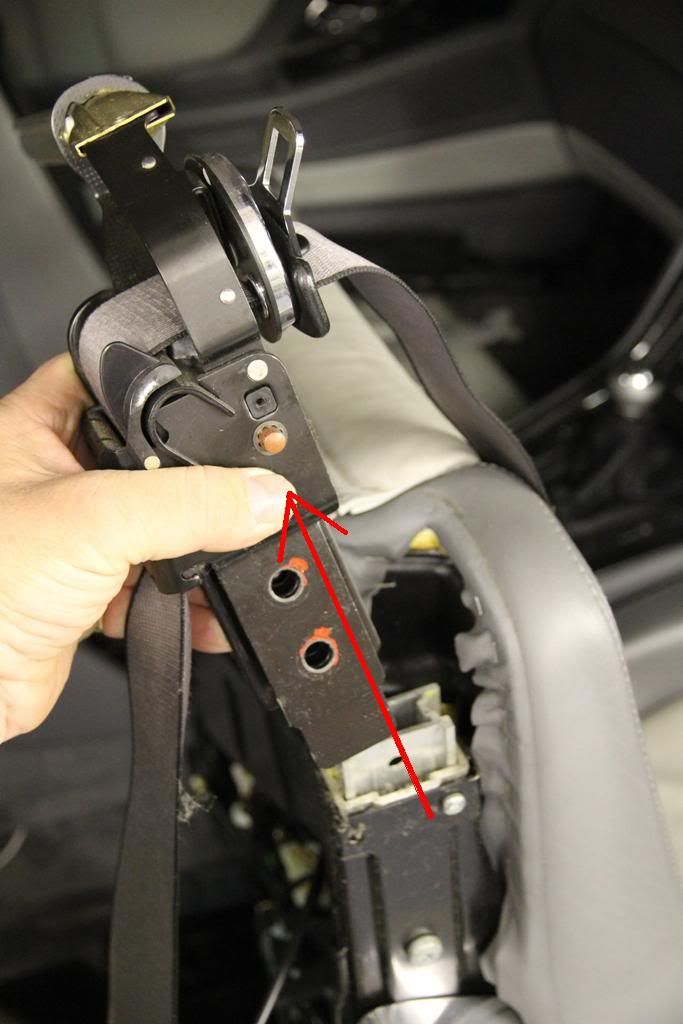
Next, using a small pin, push in where shown in red, to release the clip shown in yellow, and remove the rear shell.
Now remove the headrest by rolling it forward as shown, and use a twisting back and forth motion, whilst pushing away from you.
You can now remove the front shell by removing the two tiny torx screws. There is one on the outside where shown, but the inner one is only accessible once you have lowered the seat and the headrest post has risen to clear the seat backrest.
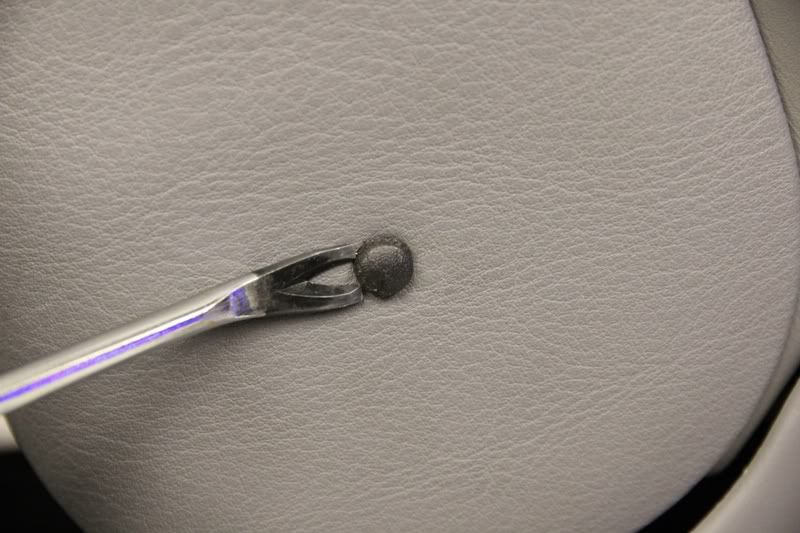
Now you can pop off the screw covers either side of the seat,
and remove the screws. (5 times longer than they need to be but fitted just to be a PITA as they are so difficult to get to. Surprised they didn't threadlock them!)
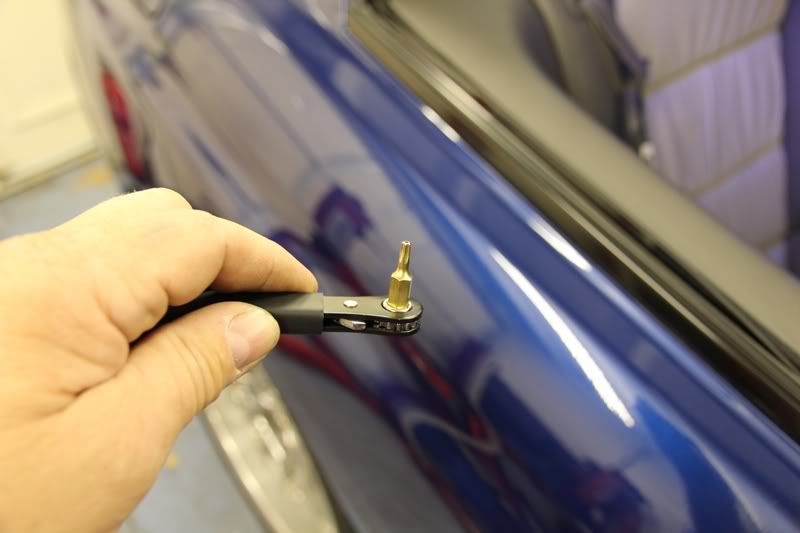
to access the inner one, you may need to remove the handbrake gaiter to get access to it. I used this....
like this....
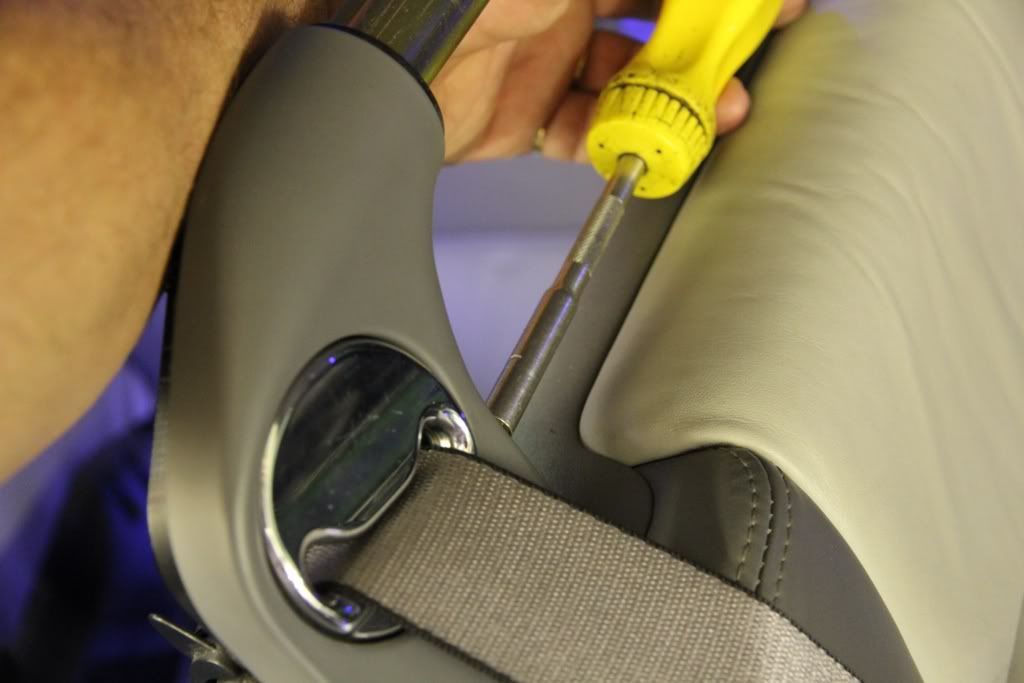
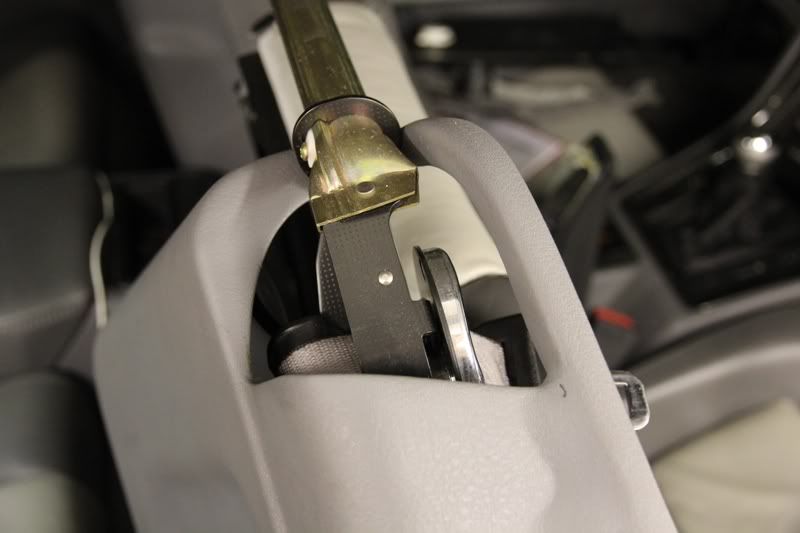
Using a hex key, disconnect the side anchor position of the belt...
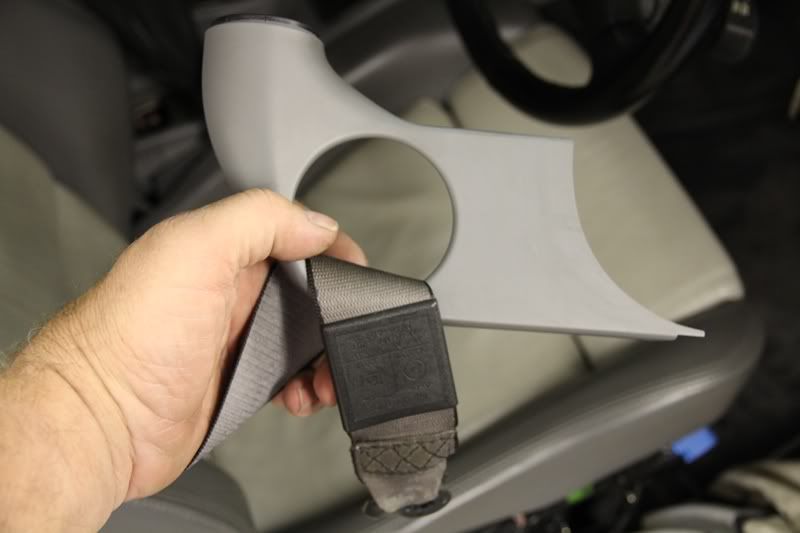
and remove the front shoulder shell previously disconnected.
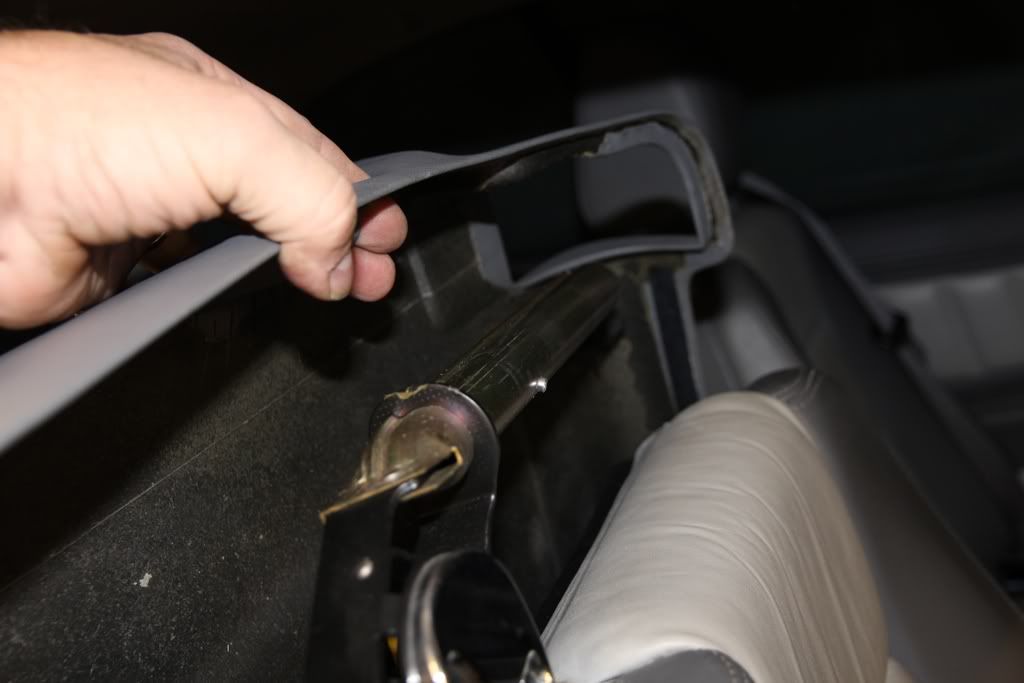
The seat back pulls back at the bottom and then lift off two hooks near the top of the seat.....
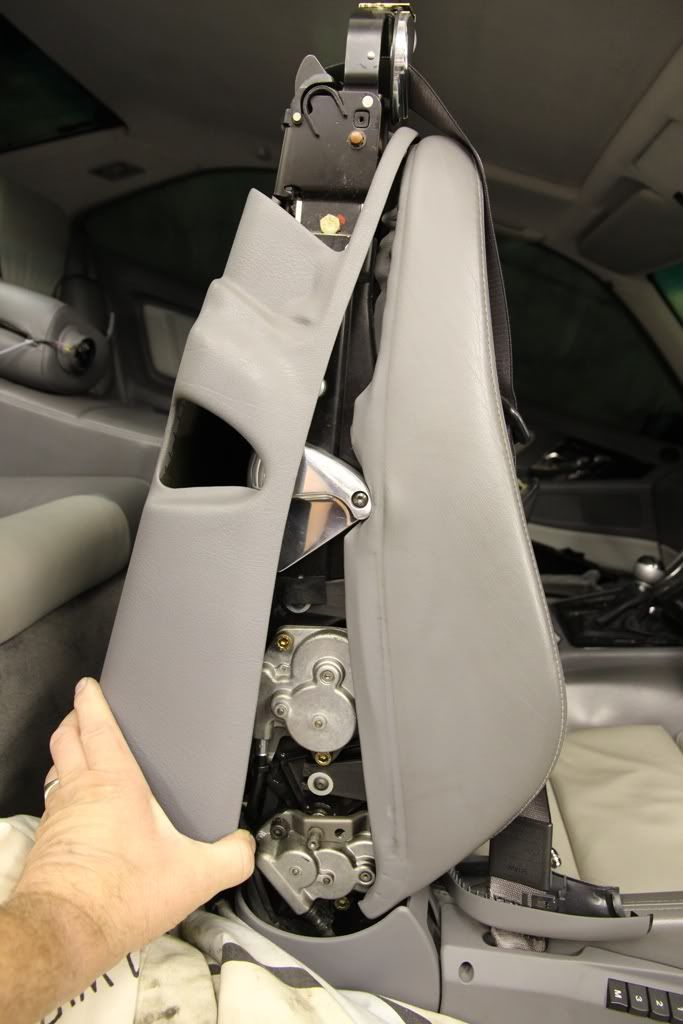
You now need to lift the outer edge of the back up, and thread the belt webbing through it....
and then slide the seat back along the headrest bar to remove it.
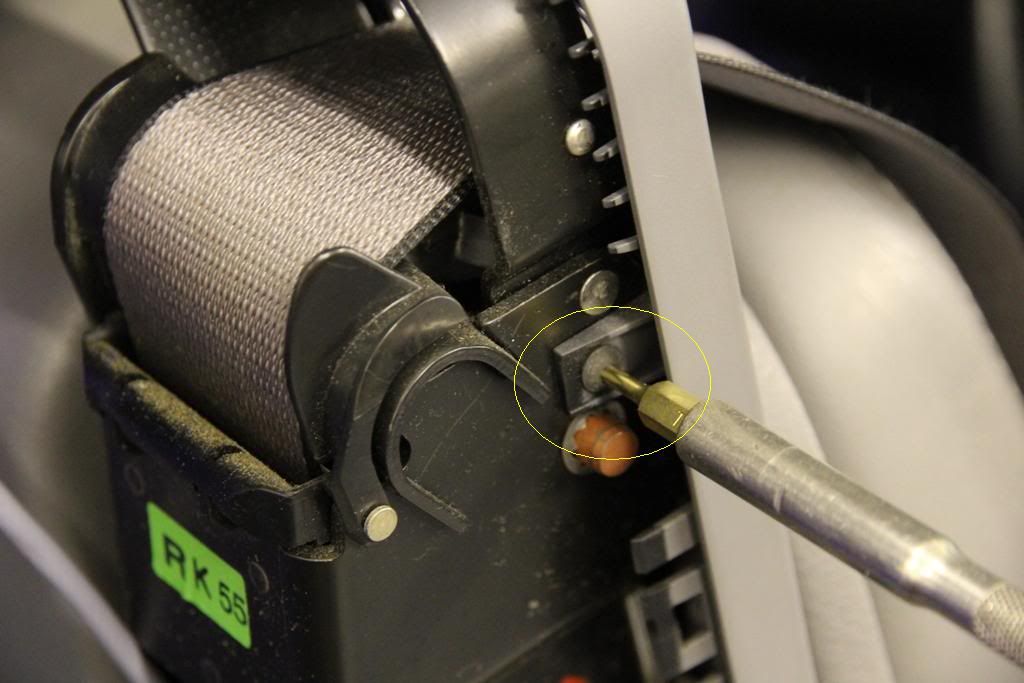
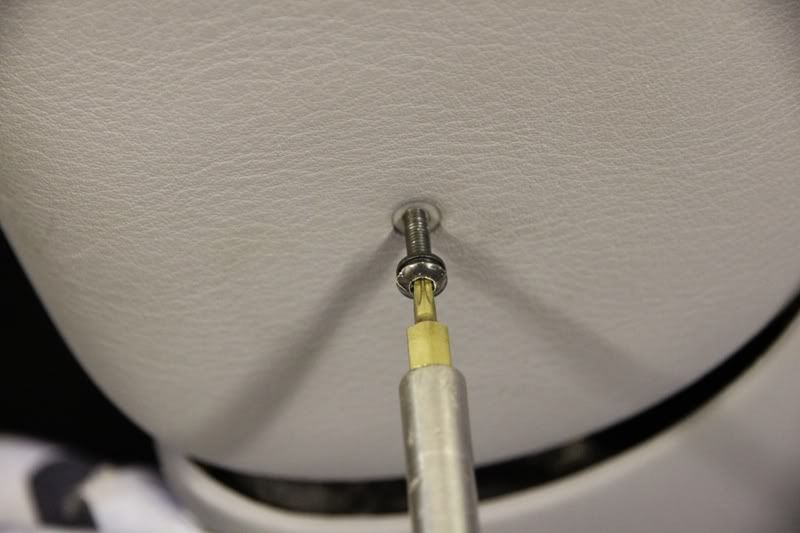
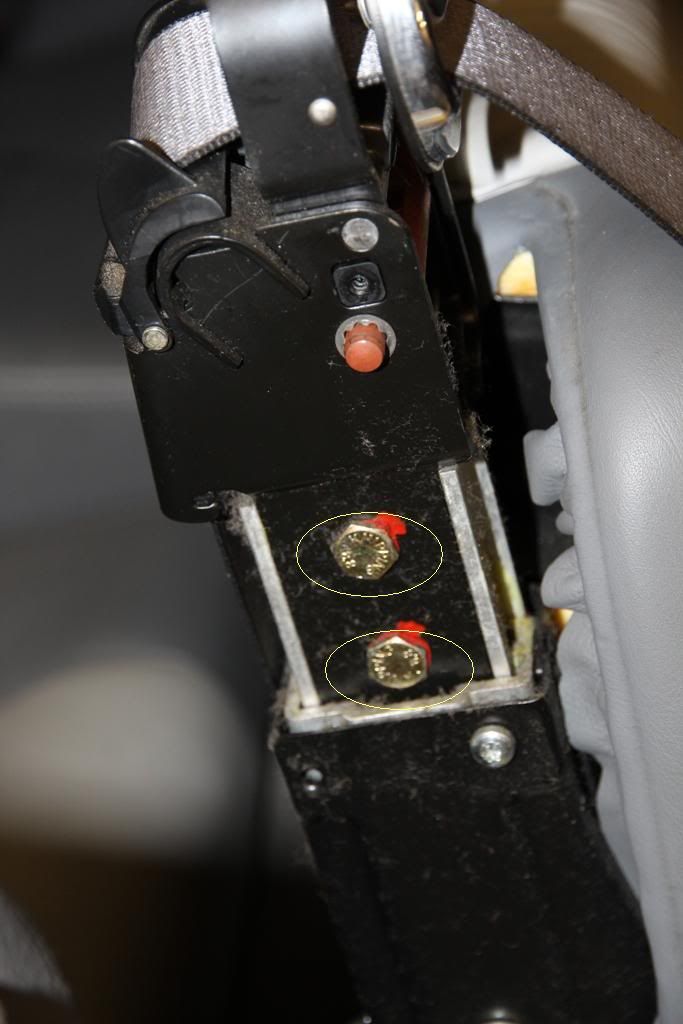
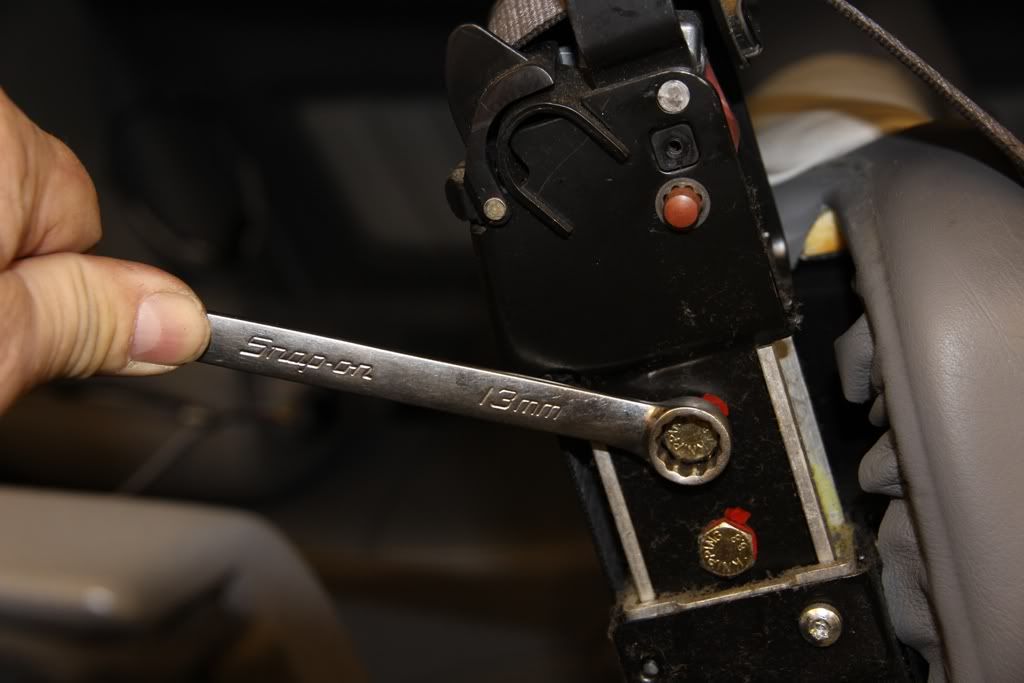
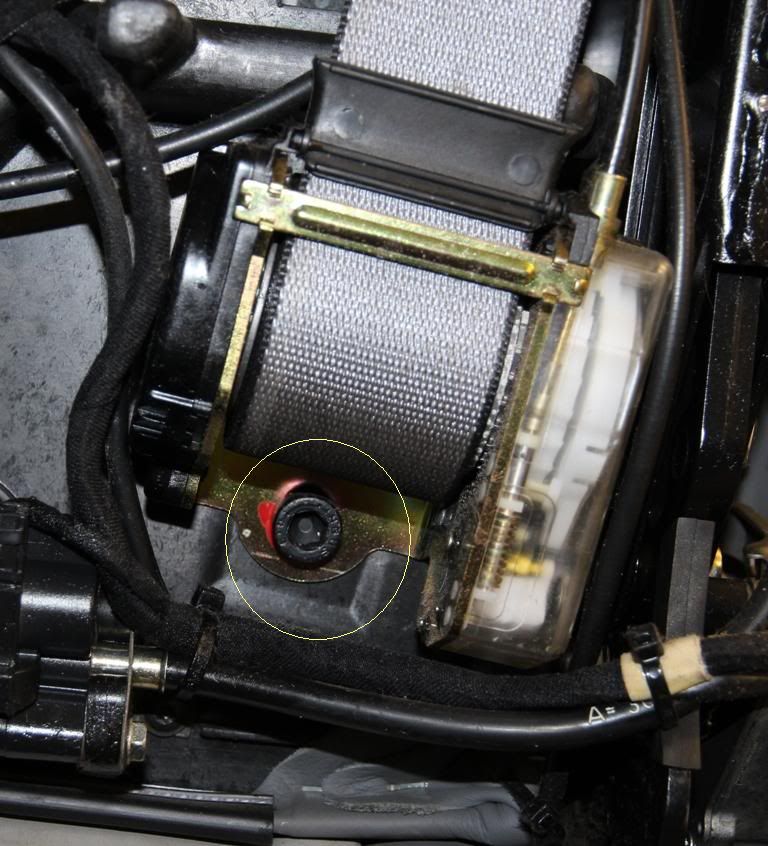
Now you need to lower the seat again so that you can access the two 13mm shallow head bolts....circled in red.....
I found they were so shallow, the lead on a normal socket slipped-off, so I used a Snap-On wrench....
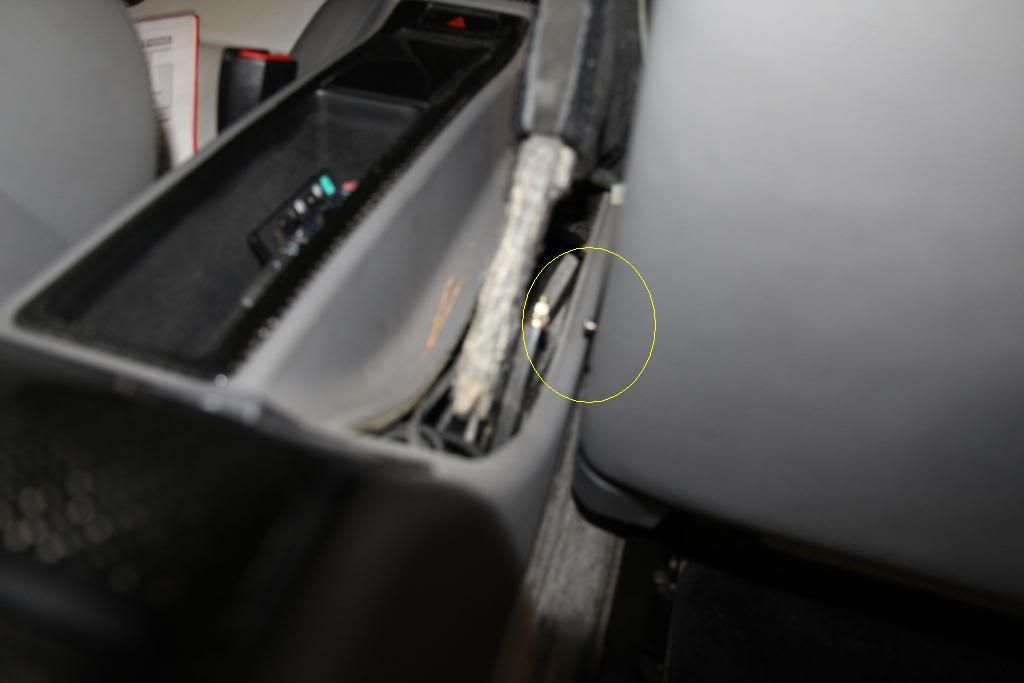
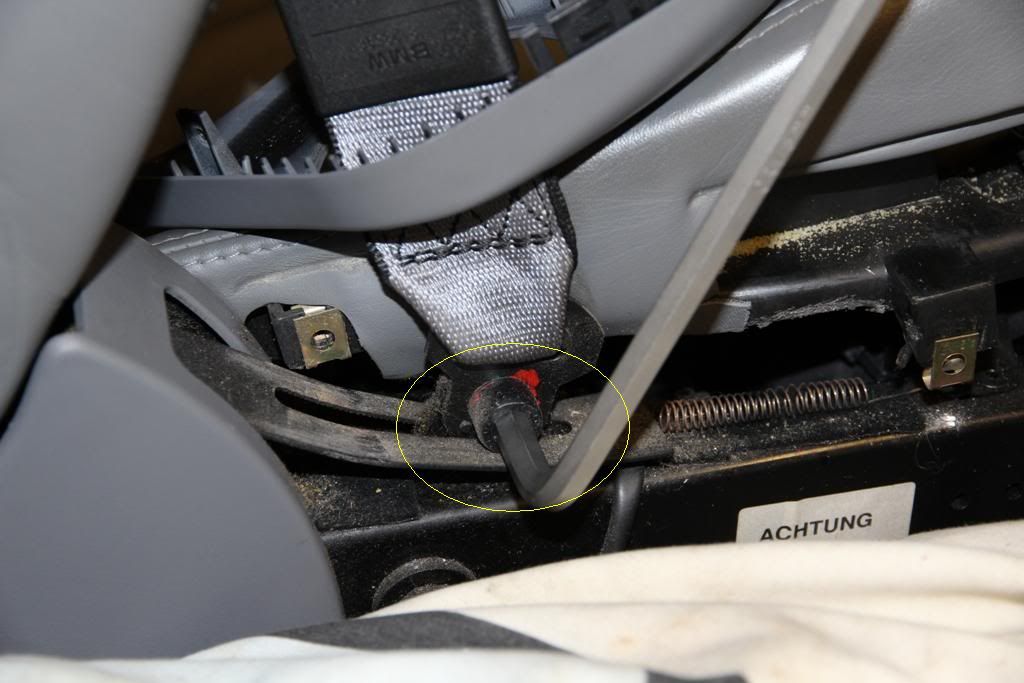
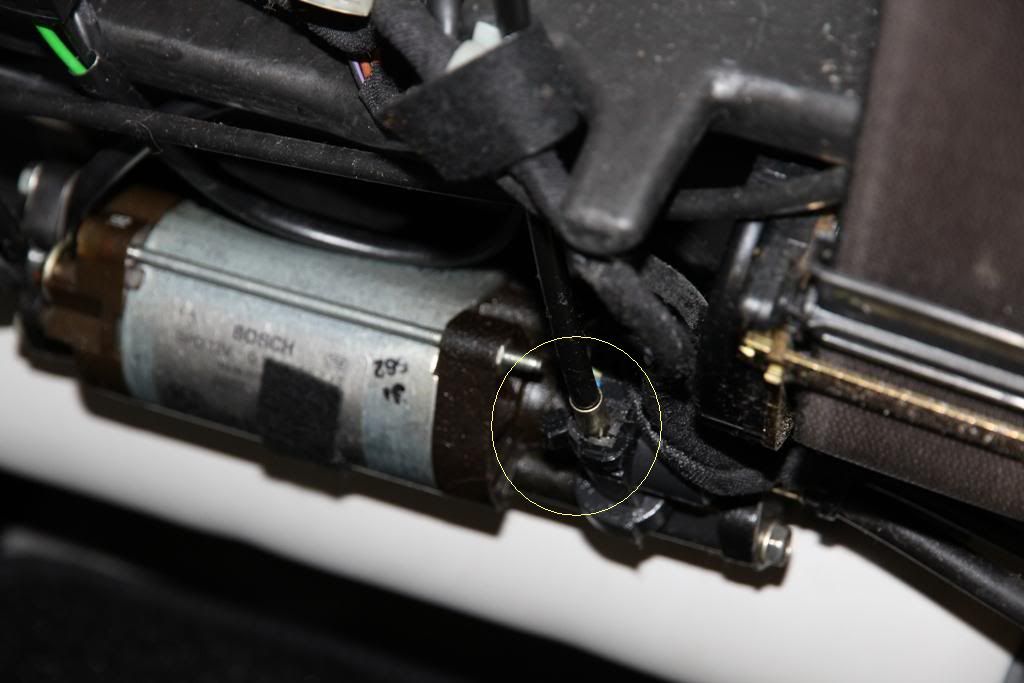
Now, in the position circled, you will find a zip-tie retaining the belt control cable. This needs to be cut....
so that the cable can be removed from the drive motor....
and the reel hex head bold accessed and removed.
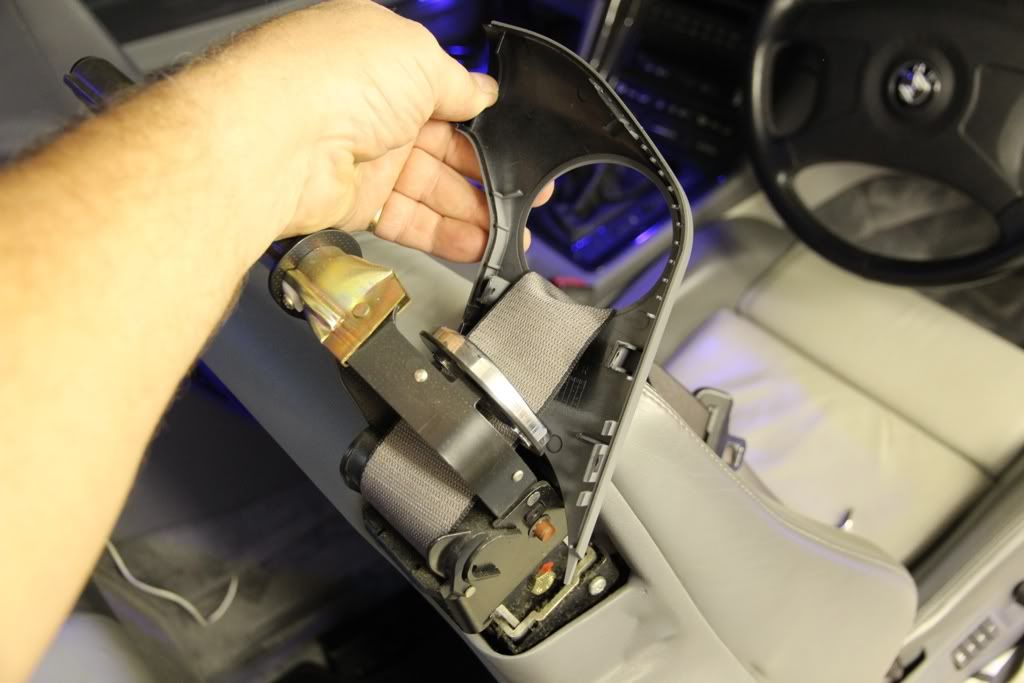
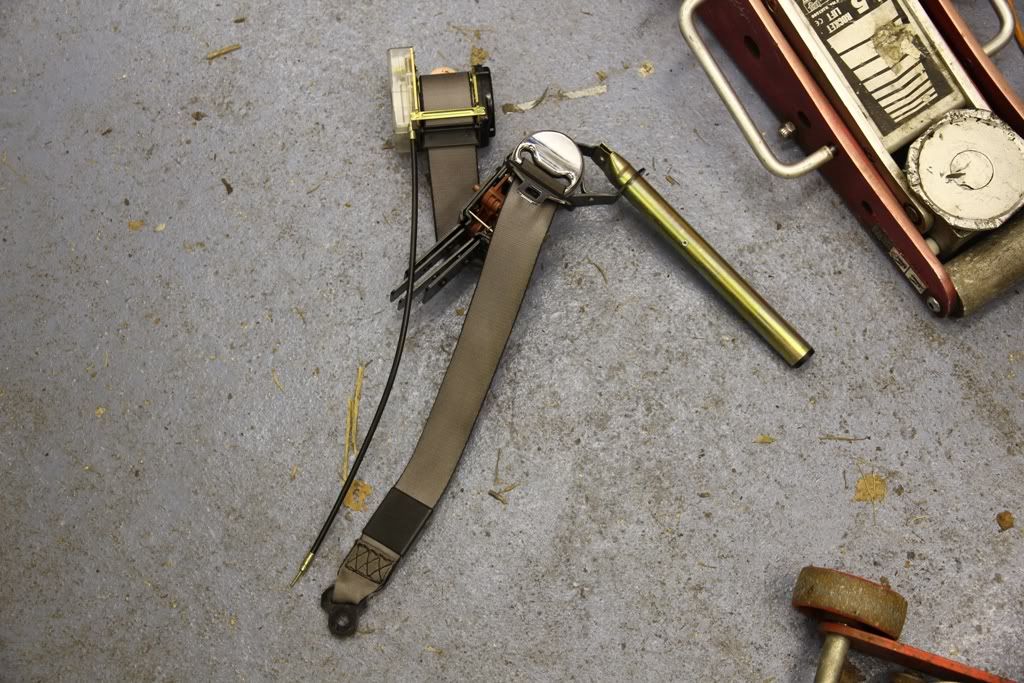
You can now slide the seatbelt complete up from the seat frame.....
and thats it! All done.
Easy eh?
Stay tuned for part 2 where it gets a bit tricky.
8Tech.
Member
Thanks for the great photos.
Matthew M.
North Carolina, USA
1997 840Ci | 2001 740iL | 1985 308GTSi Quattrovalvole
Member
Very useful!
Thank you 8Tech.
///Alex
Member
Excellent write up. Thanks.
Make BF Great Again
Was there ever a part 2 to this?
What "thumbs up" really means
Member
Very good photos, thanks.
Member
Excellent write up. How about creating one this easy for replacing the plastic handle on the tilt mechanism.
97 840ci-99 540i6-90 535i5 all black
Member
+ 1 Also this thread should be towed to the DIY fixes sectionOriginally Posted by Bluesman

Last edited by mjrgroup; 03-27-2014 at 07:56 PM.
1991 BMW 850i / V12 5.0L [M70] / ZF4HP24 E/H
Make BF Great Again
Agreed! Should be towed. Iceman?
What "thumbs up" really means
Member
Great write up,but who is the person with no legs in the back watching that TV ?...Ha,ha....or is it a midget (Child)..?
¿pǝpɹɐʇǝɹ noʎ ǝɹɐ
Looks there to me...
95 840Ci, Calypso Red/Silver, 83k - 99 740i, Black/Black, 185k, Alpina Mods - 01 740i, Titanium/Silver, 40k, Sport Pkg
Complete Turnkey Diagnostic/Programming systems available...PM for details.
http://www.8Coupe.com - Please register, spot, and help the project.
SoCalEights Member
BMW CCA Member
How about how to remove the other side of the seat belt where it snaps in across the lap, part # 72118134660?
Member
Great guide! This was a foolproof way for me to remove my seatbelts for rewebbing.
Thanks
Member
Great write-up. One question, on removing the torx screws on the seat (second picture), looks like you are using an allen torx wrench? If so, what size is the torx screw? I have a torx allen wrench and could not get it to loosen the screw. Any advice? Thanks!
Member
T20 torx for those side panel screws if I remember correctly.
Sent from my iPhone using Tapatalk
Member
Unless they have been replaced with something else by now.
Btw dgregp, torx and allen keys are two different things.
https://www.homestratosphere.com/all...torx-wrenches/
Last edited by TexaZ3; 01-25-2023 at 09:31 AM.
E36/8 2000 M Coupe Cosmos Black/Black
Shark, Conforti CAI, B&B Exhaust, H&R, Bilstein, AKG Subframe/Diff, UUC TME Red/Caps, Swapped Front Hats, Ice>Link.
================================================== =======================
 Posting Permissions


 Reply With Quote

Bookmarks