
 Member
I ran 3.91 on my LS1 swapped car when it was N/A and they were just about right. I would have been happy with a 3.73 over the 3.91. I agree with your choice 100%.Originally Posted by ckpitt55

Member
3.91 is gonna be way too short for road course I think
96 M3 | Forged LSx | Twin S366 | Injector Dynamics | E85 | AEM Infinity
90 Schwarz 325i
IG : sdobart
Member
Just playing with a gearing calculator. What's the consensus on a target RPM at 80mph in 6th gear, in a perfect world?
Tipsy
Member
It's dependent on your preferences and what your plans are for the motor. Cam, etc.
I'll be turning a little less than 2500 @ 80. Lots of guys prefer less rpm, but I bumped it up a tad to prevent cam surge issues at lower engine speeds, reduce my need to downshift when encountering slower traffic, and extend the utility of 6th at speeds lower than 80. The happy place for my cam starts somewhere around 2000rpm, but running more compression hopefully will help to combat it's sensitivity to this range.
Last edited by ckpitt55; 04-18-2014 at 10:32 AM.
Member
FWIW, you shouldn't have any surging issues with that cam with a solid tune. I have a 236/242 cam and can cruise all the way down to 1000-1100rpm in 6th without surging issues. I do agree about the reducing the need to downshift out of 6th when in traffic though. I can cruise at 45mph in 6th, but anything less (like 40mph) will cause me to have to downshift to 5th. This can be annoying sometimes given my rather....enthusiastic exhaust system.
96 M3 | Forged LSx | Twin S366 | Injector Dynamics | E85 | AEM Infinity
90 Schwarz 325i
IG : sdobart
Member
Worked on pressing some suspension parts together this weekend and spent some time on the differential as well.
Suspension stuff
Got the fcabs installed, not that it was much of a job. Went with the Treehouse parts to correct my caster for the pre-'96 front control arms I'm running and to hopefully provide me with a little more exhaust collector clearance when the time comes. I switched to the pre-96' arms because I've got TRM coilovers going on that require arm-mounted swaybar endlinks - which means I also need to swap over the sway bar from my old 325i.
On to the rtas...in general they went together with much less of a fight than I was expecting, though it did require some sorcery to get the rtabs in.
Cobbled together a tool to install the rta ball joints as there really wasn't a way to do this in the press. Just some 7/16" rod, 36mm socket, 46 mm socket, and a thrust bearing. Worked great.
Installed without boots because pinched / torn boots are a $60 mistake
I also tore apart the rear wheel bearings and reassembled with redline cv2 grease. Install was extremely easy - I used a 3" pvc coupler as a standoff to support the trailing arm and an old bearing race to drive the new bearing in. The arms are done aside from the hubs which is trivial - waiting to finish the rotor dust shields before I can install the rest.
---
Diff
Also did some work on the diff. I drilled and tapped the front mounting hole for M14x2.0 for use with the AKG front differential bushing that's drilled for M14. Should be stout.
Prepped the case, covers, and flanges for paint and just did them up in some flat black rustoleum.
Pre assembly diff group shot. 3.73 gears, 4-clutch, 1.65mm dogplates, M12 high offset carrier, machined carrier cap for clearance.
I got the carrier and bearing races all assembled and went to check my carrier bearing preload - then realized I had no means of accurately doing so. The most precise tool I had was a 1/4" Park flex beam wrench but it doesn't have nearly enough resolution for me to measure down at the levels I'm trying to measure. So I had to order a dial type torque wrench...no more assembly on this guy until that comes in.
Trying to get all this suspension / component level crap out of the way so I can start focusing on the chassis. Thanks for looking, more soon.
-Chuck
Last edited by ckpitt55; 04-21-2014 at 07:46 AM.
Member
Well progress is still being made, albeit slowly.
I got somewhat sidetracked by the search and purchase of a new (to me) DD. '11 WRX base model that I bought used - single owner and 29k miles, bone stock. I find myself needing to haul stuff from time to time and wanted something up to that task without being a complete bore to drive. This fits that bill pretty nicely, and the AWD will come in handy if this previous winter is any indication of winters to come.
Anyway back to the LS swap - got a dial type torque wrench so I could check my carrier preload. With the standard 1.58 and 1.70mm shims that the case was assembled with I was at ~5-6 in-lbs (without seals). Not enough, from what I've read I need to be around 14-16 in-lbs rolling resistance, which means I need thinner shims. Need to pick some of those up before I can continue.
Aside from that, just continuing to work through the powdercoating. Got the front spindle assembles put together
I also pulled out the carpet and started stripping the tar paper off the floor / away from the spot weld seams on the tunnel so I can stitch weld. In this picture there's still some remaining but I have since gotten it all off. Need to get it to bare metal before welding but other than that it's ready to go.
Also started looking at the slave cylinder fittings. I discovered this issue a while back but didn't move on it - I've tried several speedway motors -3AN adapters that did not fit a new F-body slave cylinder that came with my Monster clutch kit. Not sure of what brand but I assume it's AC Delco (or equivalent). It's got an SKF bearing on it. Anyway, I made some measurements and I think it's reasonable to assume that it will fit if I turn it on the lathe and match it to the stock fitting. I'd rather do this than gamble on something else that may or may not work. Judging from my measurements, there's enough variation to cause interference problems - not sure if this is a Q/C issue or a design flaw on their part, but for anyone in the market for these you may want to look elsewhere.

Last edited by ckpitt55; 05-13-2014 at 12:52 AM.
Member
FWIW, I don't think that will be a problem - I have used various manufacturers fittings for that and never had any problems with leaks. I would recommend looking at McLeod's clutch lines - they have ones in various lengths with the GM fitting which allows you to retain the quick release and no leak feature, which can come in handy.
Rob
Prior projects:
1998 540i with 6.6 LS2/T56 Chevy Power
- pictures and details
1992 325i with 6.6 LS2/T56 Chevy power - pictures and details
1995 M3 with 6.6 LS2/T56 Chevy power - pictures and details
Member
FYI, I use a speedway motors adapter and a Slave Cylinder that came from Monster and it fit just right.
БМВ Фанат!
BTW, that slave looks like SACHS
- 96 328is 6.0L. (LS1 to LS2 build thread: http://forums.bimmerforums.com/forum...ad.php?2098938)
- 96 328is 5.7L. (LS1 build thread: http://forums.bimmerforums.com/forum....php?t=1289987)
- 95 ///M3 6.0L. (LS2 build thread: http://forums.bimmerforums.com/forum....php?t=1619249)
- 97 ///M3. (e46 Fender Flares/track car build thread: http://forums.bimmerforums.com/forum....php?t=1727098)
- 96 328is (Dual Fuel Pump to Surge Tank thread: http://www.bimmerforums.com/forum/sh...ad.php?1964025)
Member
The fitting will go part way in but I'm unable to get it in far enough for the turned-down section to line up with the retaining pin. I had Speedway send me another one and it was the same story. Maybe a bad run of these parts or something?
БМВ Фанат!
I'll reuse your picture, but here are the measurements from the Russell fittings I got. Also for the OEM fitting that I removed, I had GTO style, not the F-Body quick connect.
Fittings2.jpg
- 96 328is 6.0L. (LS1 to LS2 build thread: http://forums.bimmerforums.com/forum...ad.php?2098938)
- 96 328is 5.7L. (LS1 build thread: http://forums.bimmerforums.com/forum....php?t=1289987)
- 95 ///M3 6.0L. (LS2 build thread: http://forums.bimmerforums.com/forum....php?t=1619249)
- 97 ///M3. (e46 Fender Flares/track car build thread: http://forums.bimmerforums.com/forum....php?t=1727098)
- 96 328is (Dual Fuel Pump to Surge Tank thread: http://www.bimmerforums.com/forum/sh...ad.php?1964025)
Member
Thanks for taking the time to measure for comparison. Seems awfully close to mine.
I think I'm getting interference on the very first (smallest) diameter. I'm going to turn it down to match the stock GM fitting size after work, hopefully this resolves the problem.
Member
I got the slave cylinder hydraulics sorted out, turning the fitting down a bit seemed to help.
Since then I rebuilt my half shafts and put together a DIY for the outer joints here: http://forums.bimmerforums.com/forum...-Joint-Rebuild. The clamps included with the boot kits didn't fit once everything was assembled so I had to go to NAPA and get ones I could work with.
Also continuing to work on the diff - I got a set of carrier and pinion shims in to set it up. I set my carrier preload up for 15 in-lbs which required about .125" of total shim. When trying to mockup backlash, however, there was no combination of shims that gave me sufficient backlash once I started snugging the caps down. In fact I was getting 0 backlash. I threw in the original pinion shim as a starting point but I think it might be too thick (setting the pinion too far inboard). In the process I found the TIS for diff rebuilding and also got a PDF from one of my local dealers that contains basically the same info - but has better pictures. Here's a link: https://drive.google.com/file/d/0B_a...it?usp=sharing. I hope to spend some more time on it this weekend.
I also finally got started on the seam welding. Engine bay / strut towers are pretty much complete and I started wire wheeling the rest of the seams along the transmissions tunnel and floor. Not going to be a very ideal thing rolling around on the ground, being showered in undercoating and welding sparks for hours on end but gotta get it done. Hoping to get most of the remaining welding on the chassis done this weekend.

Member
i will be watching this build as somebody knows what they are doing and pays attention to detail.
1995 E36 turbo v8
Member
Sub'd, great build.
Member
Thanks guys
Got a decent bit done this weekend -- the seam welding marathon continues. Got all of the seams on the passenger side knocked out, still a few seams left that I want to tie in from inside the car but it's getting there.
I also worked on the diff some. As I mentioned before, there was no backlash before with the original pinion shim once I tightened everything down. It was too thick and was positioning the pinion too far into the case. As a proof of concept I took the thinnest shim that came in the set and installed it to see if it fixed the problem. The original shim was .140" thick, the one I tried was .127". The thinner shim fixed my problem - I assembled everything and I still had backlash once the caps were snug.
To help with this process I needed to make a couple of special tools. The front pinion bearing needs to be pressed on each time you want to remove / install the pinion, which is a major PITA when you're going to be assembling / disassembling several times to get the setup right. So I took an old bearing and honed out the ID until it slid nicely over the pinion shoulder - no press tools required for install makes it great for mockup.
Then in order to remove the rear bearing race in the case to change out the shim, I needed to modify a driver to fit down in the bore. The flats give me enough clearance to fit down through the forward bearing and press it out without much effort.
I didn't haul out my indicator and magnetic base to measure backlash because I feel like I have more work to do yet - but I did mark several teeth with antiseize to get a quick and dirty of my wear pattern. The pattern appears to be centered and narrow near the tip of the tooth - which suggests that I need a little more pinion shim to increase the installed height and maybe a larger shim on the ring-gear side of the carrier to maintain backlash.

Last edited by ckpitt55; 06-02-2014 at 09:14 AM.
Member
Been playing with the diff more this week. Anti seize sucks so I bought some real gear marking compound. Night and day difference in pattern visibility.
Since the .127" pinion shim was too short I threw in a .133" and changed up the carrier shims slightly to bring down the backlash. This is the drive side wear pattern.
What you want it to look like
Checking backlash
Definitely on the tight side in terms of backlash (TIS is .0024 - .0055) but I'm in the ball park in terms of overall setup. I might take a little more time to try and fine tune it but I think I'm pretty much there. Wear pattern seems to be in the right spot - maybe a little out from center but increasing my backlash slightly would help to bring it in some. If I can get my backlash to .0035" I think I'll be golden.
Major Lazer
Pattern looks good. Agree with increasing backlash some. I usually shoot for 0.004" - 0.005" on BMW diffs.
2003 M5 LSx l 6 Spd Manual l 4.10 LSD
Build Thread
The chassis must always be regarded as a means to an end and never as an end itself
Member
Pardon my ignorance here, but what's all the seam welding accomplish?
Member
Good deal, thanks for the input
In theory it gets the sheet metal layers to act more like one piece of metal rather than individual pieces that are free to deflect / peel apart about the spot welds as loads are applied. Seam welding "pins" the edges down so they can't peel apart. As a result, stress is distributed more evenly which means less metal fatigue / less risk of failure long term.
Some will argue that it's not really worth the time and effort, but if done right I think it would provide for a reasonable increase in chassis stiffness without adding any weight.
Last edited by ckpitt55; 06-06-2014 at 04:55 PM.
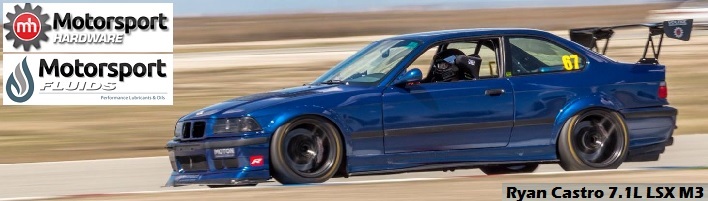
It's me Ryan Castro
great attention to detail
Member
Thanks man. You ever get that new powerplant up and running? That thing is ridiculous in the best way possible. I love it.
Last edited by ckpitt55; 06-09-2014 at 01:13 AM.
Member
didn't have a ton of time this weekend but I did dedicate the majority of the day today to finish diff layout and final assembly. went through a bunch of different iterations trying to optimize my contact pattern. Increasing the backlash alone made the pattern a little narrow, so I ended up changing the pinion height along with it to try to broaden it out.
drive:
coast:
measuring backlash again:
Backlash - .0045"
Pinion preload - 21 in-lbs
Carrier shims - .127" total for 15 in-lbs carrier preload (.066"/.061")
Pinion shim - .137"
All finished

Last edited by ckpitt55; 06-09-2014 at 03:28 PM.
Member
I don't suppose you have the dimensions (height, ID, OD) for the 12mm to 14mm ring gear spacers? Would like to make my own for an upcoming gear swap.
Your progress looks great, kudos to you for doing things that most people have a shop do.
 Posting Permissions


 Reply With Quote


Bookmarks