
 Boosted Member
Mario,Originally Posted by TIATO

Amazing build progress. The atttention to detail is very impressive.
I am wondering what is the benefit of the euro coolant pipe. Also, what fan are you using w/ your 57mm PWR?
Thanks.
Garrett
IP Contender
Would be nice but its just ambient cabin interior and exterior temps.
I could not get "just" a clock with the dispay size I wanted without some sort of "add on" or gimmicky chrome features. Ambient temp is acceptable to gauge how much I will sweat my ass of while sitting on grid.
Garrett, thank you.
The pipe is the essential component for the euro coolant overflow tank conversion. Best part of the tank is that its self bleeding and coolant level visibility is tremendously improved. As far as the fan is concerned, 16" Spal puller, wired to radiator temp switch backed up with a manual override switch in my center panel.
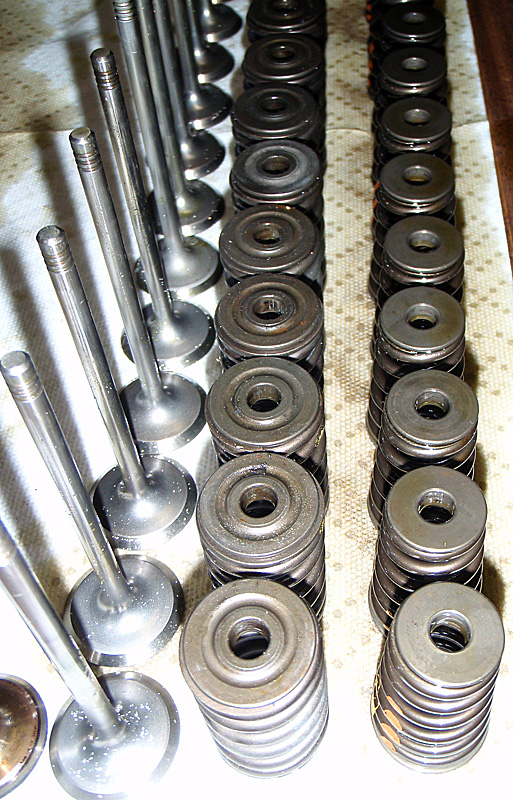
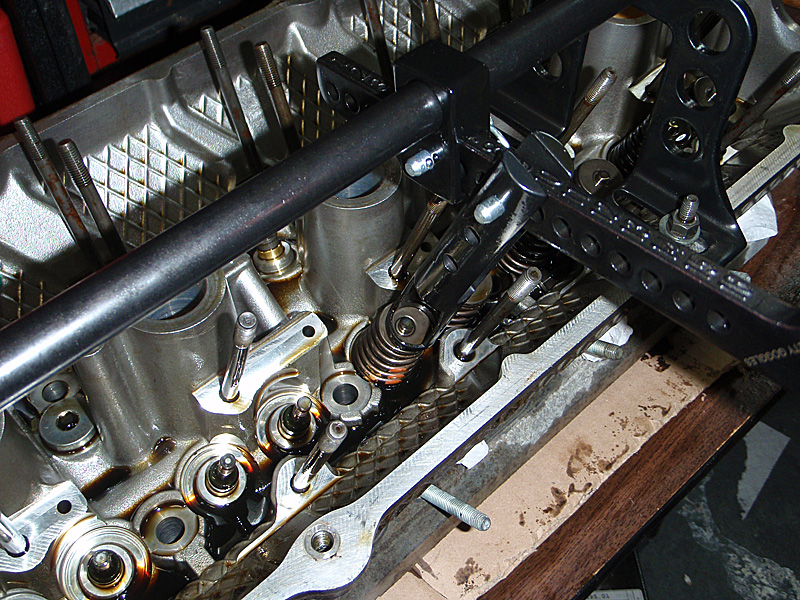
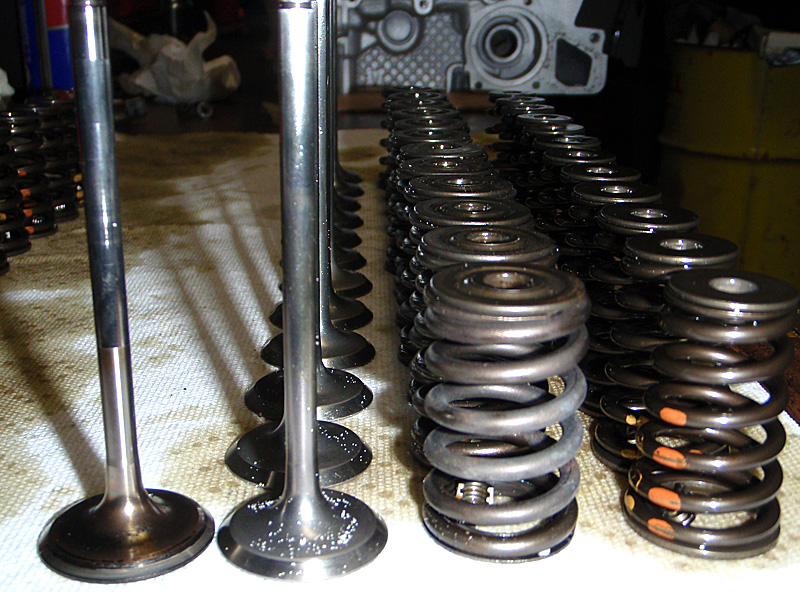
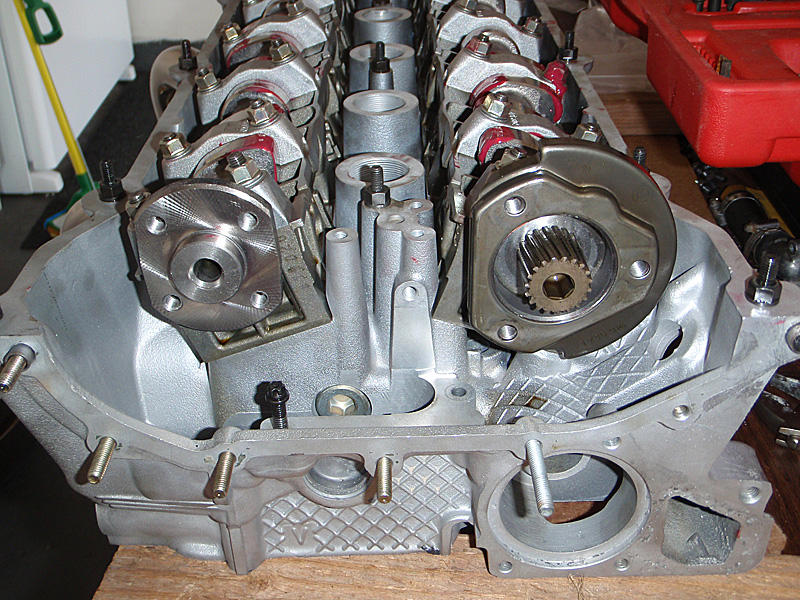
Spent a few hours last night disassembling the valve train on both heads. Easy stuff with the right tools. The nice thing about the SP tool was that I could install it in place and use it to remove 8-9 valve springs at a time without changing the over all position other than the compression handle.
Im swapping out the M50 valvetrain witht the stuff from my s52 head. Plug and play stuff. Same head casting, keepers and valves so its just the springs, seats and retainers being moved over. Subtle differences in hardware.
S52 retainers and seats are thicker and more robust. M5 spring has thicker coils and is a little bit taller than the s52 springs. Shape difference is a given.
Vales are identical save for some sublte differences above the keeper slots on the stem.
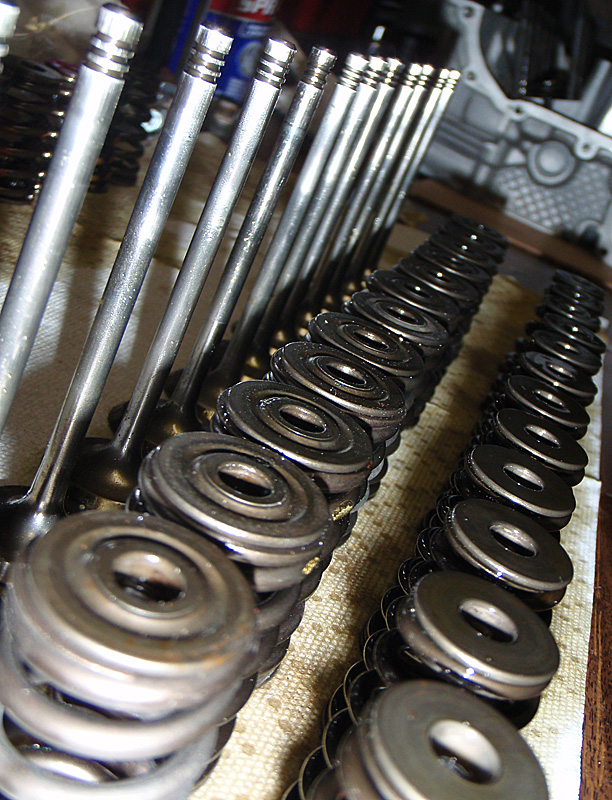
The lightly worked over (valve seats and valves re-freshed, fresh seals, and guides replaced only if they were out of spec) head was in excellent shape save for some grit contamination most likely there as a result of the machine work. If anyhting this would be the only complaint I would have about this $650 piece. Not a biggie as the whole thing and parts will be re-cleaned before re-assembly.
Last edited by TIATO; 03-11-2009 at 10:14 AM. Reason: Automerged Doublepost
Member
Looks good Mario. Man you are hard core. I brought that phase to the machine shop. I know I dont need to remind you, but don't forget to take the motor off TDC when installing the head with the cams installed. Looks good. Hope we cross paths at VIR. Dyno for me Mon....we'll see. Tyler
IP Contender
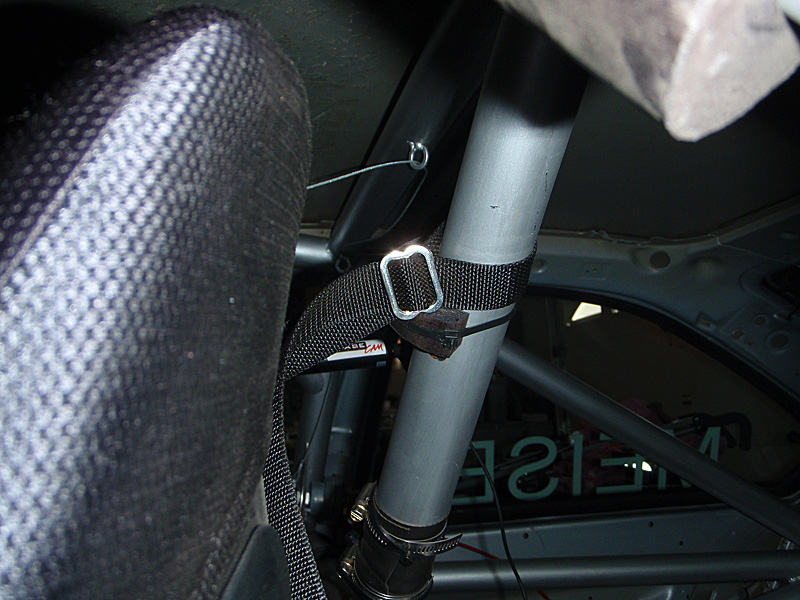
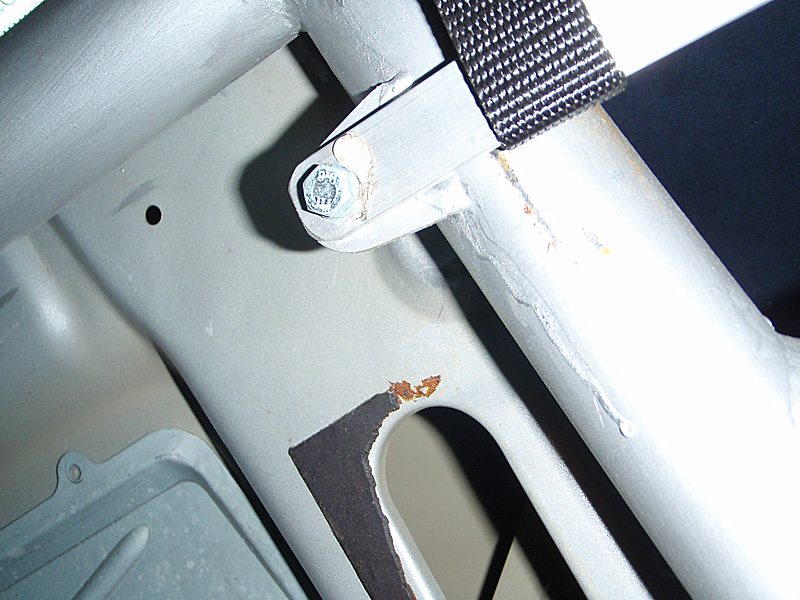
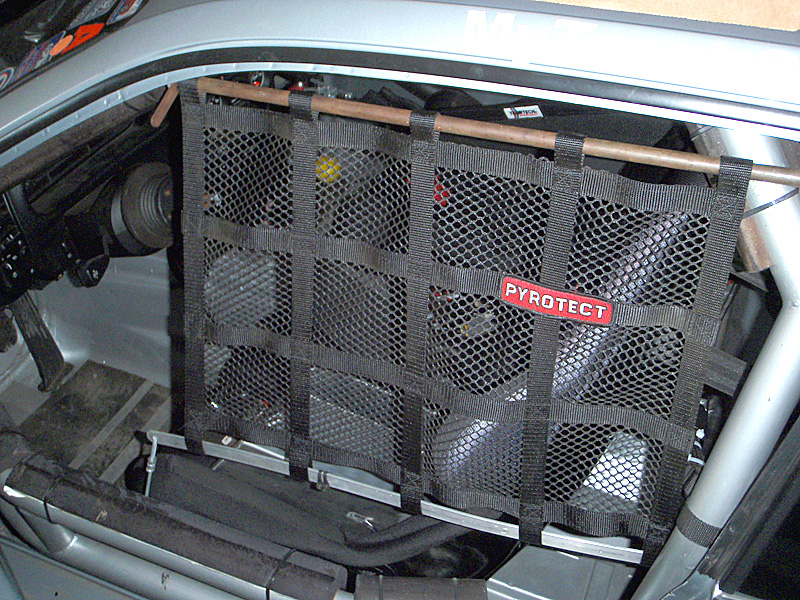
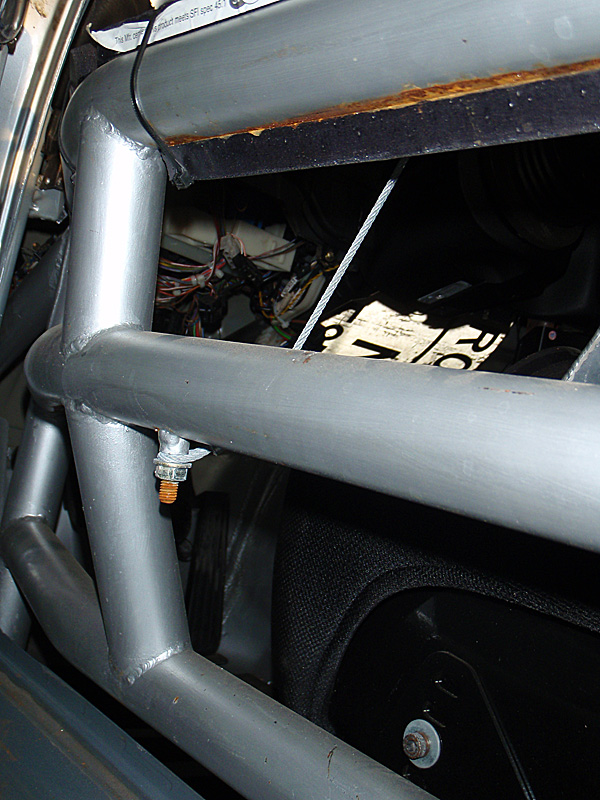
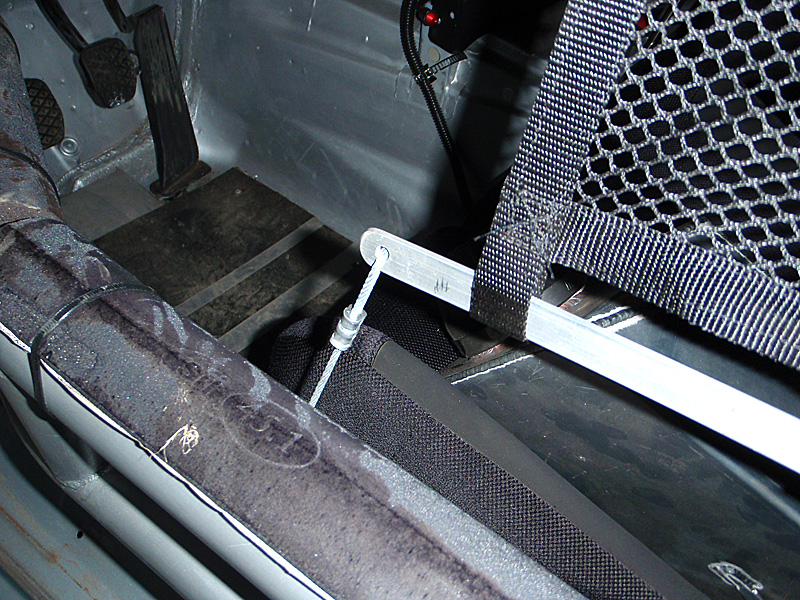
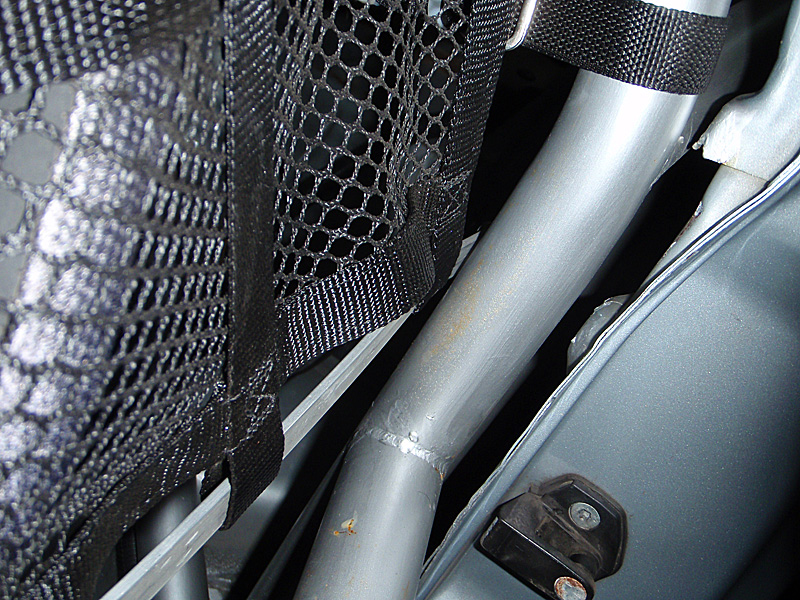
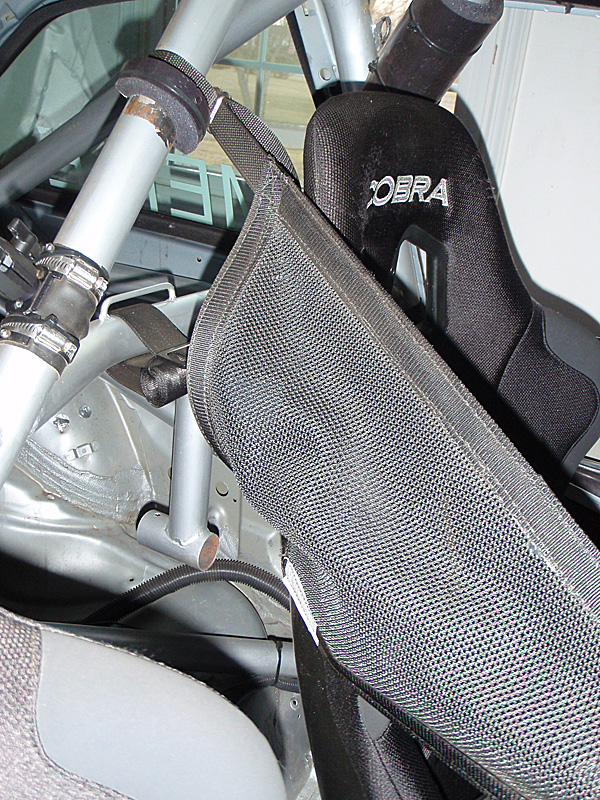
Nothing new to report. However I was asked about my window and center net mounting so here it goes...
Window Net
Center Net
Member
Right side net looks low.
Kyle Burkhardt
NASA Midwest Spec E30 Series Director
76 2002 "tii"
14 Mustang GT Track Pack
Member
Thanks Mario. Very helpful. Tyler
Member
Great pics.
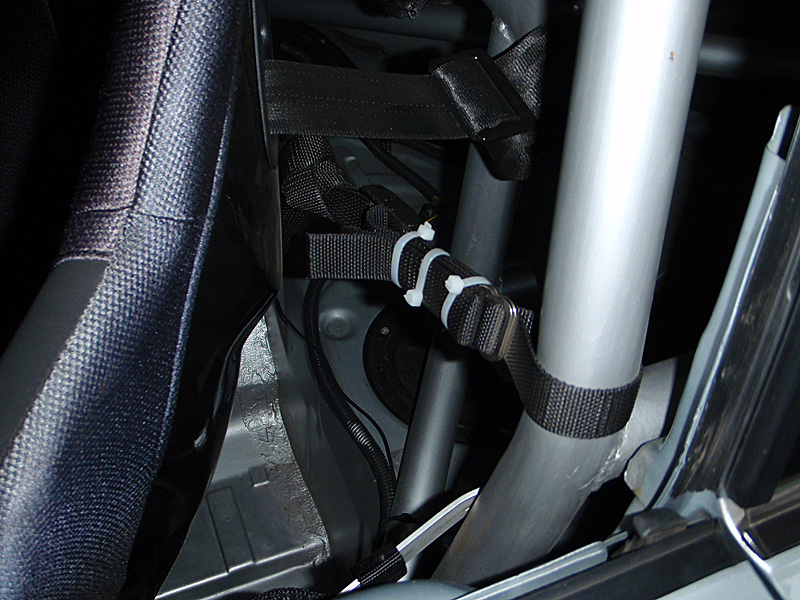
Here's a recommendation. Trim the sharp edges off the ends of those tie-wraps. Otherwise, they could slice your hand open if you ever reach back there to adjust something. I learned that the hard way last year. Those plastic tap ends get really sharp after you cut them with snips.
Take a fresh razor blade and trim off the tips flat with the locking tab.
IP Contender
Vince - oh I know very well how much they can hurt.
Must add that task to the to do list.
Member
Mario -
I've never seen that center net before. How do you tighten it up once you've made the connection to the front strap? Doesn't look like there's a ratchet type device.
Also, you should probably replace that piece of zip tied roll bar padding with a split collar or soemthing that won't allow the strap to slide down the tube in the case of a hit. Unless it's not possible for it to move in that direction.
In my case, Safety Solutions net has 3 straps. Top goes to the top of the main hoop where a split collar keeps the strap from moving toward the right side of the car. Center and bottom straps go around the back of the seat to one of the tubes at the outer side of the car. Either the main hoop or rear brace tube. They both keep the net from moving to the right and also add some stability to the seat.
Jay
From wannabe to has been in a few short years..... the older I get, the faster I was
IP Contender
Jay,
That is the Teamtech net from BW. While it works, I was never completely happy with the rear strap set up. 2 vs. 3 straps.
You are right about the split collar set up, much better solution and I will have to get some.
Mario
IP Contender
Quick update:
Saturday:
Re-cleaned block in prep for gasket.
Cleaned:
All valves
Springs
Retainers
Keepers
Seats
Cam Trays
Intake/Exhaust ports
Valve seats
Valve seals
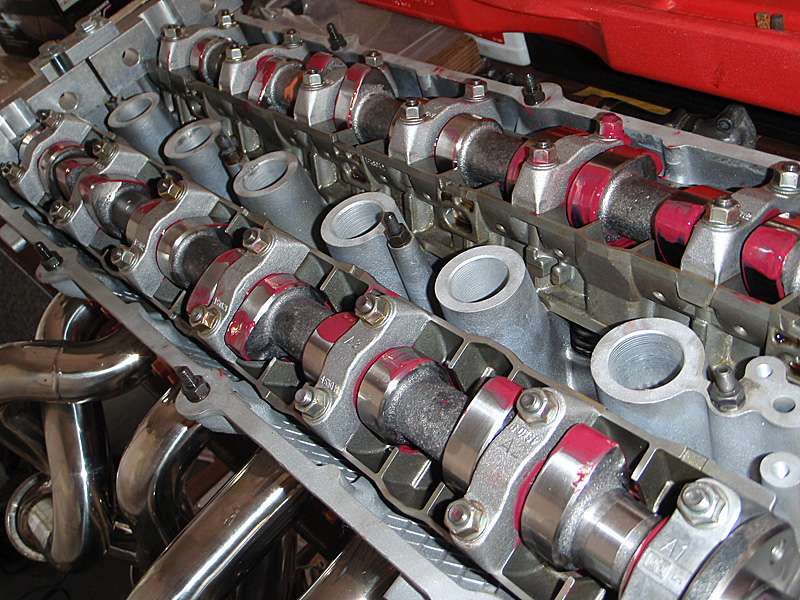
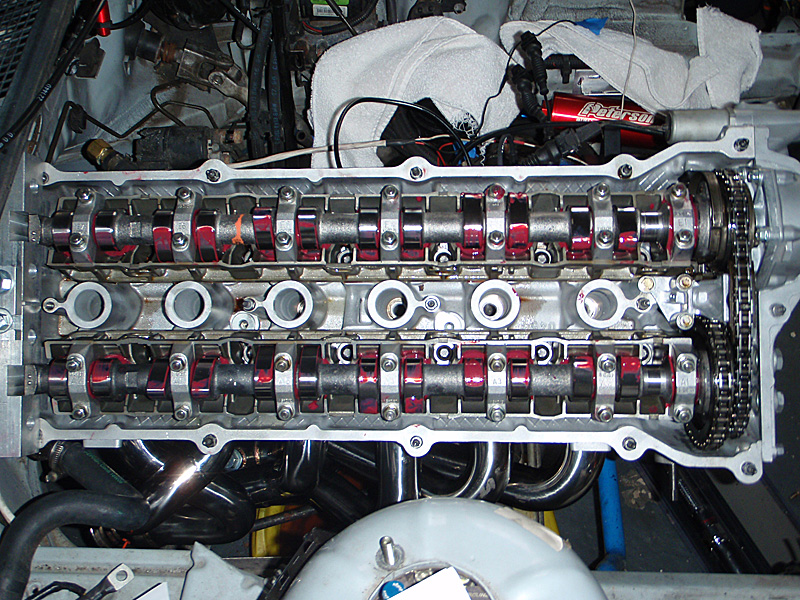
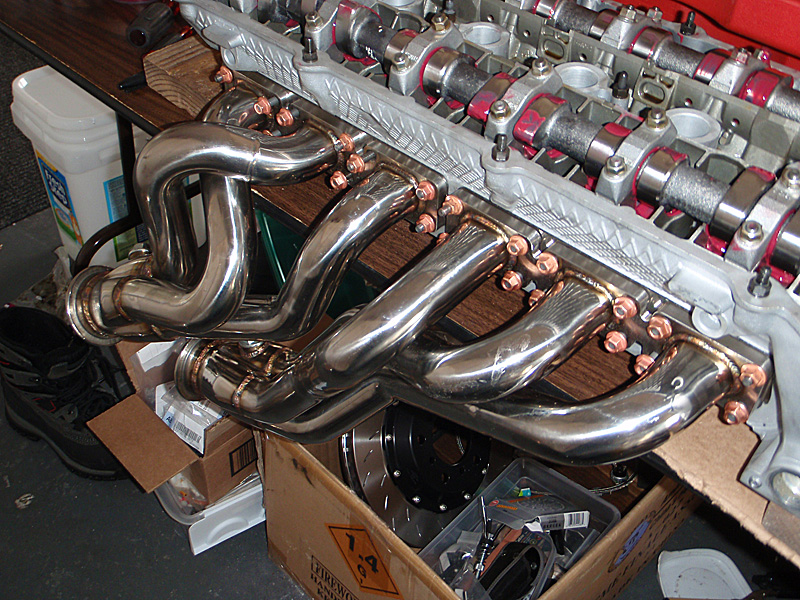
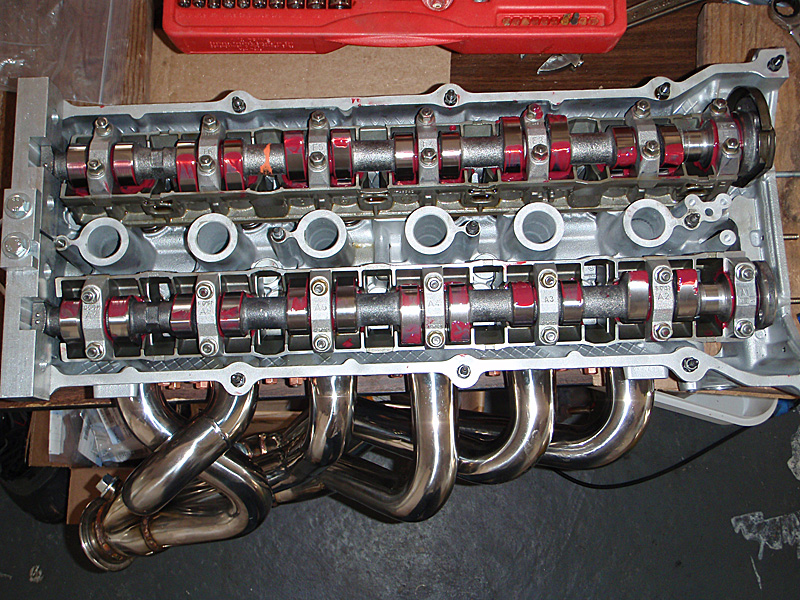
Sunday: Re-assembled the exhaust valvetrain and installed exhaust cam.
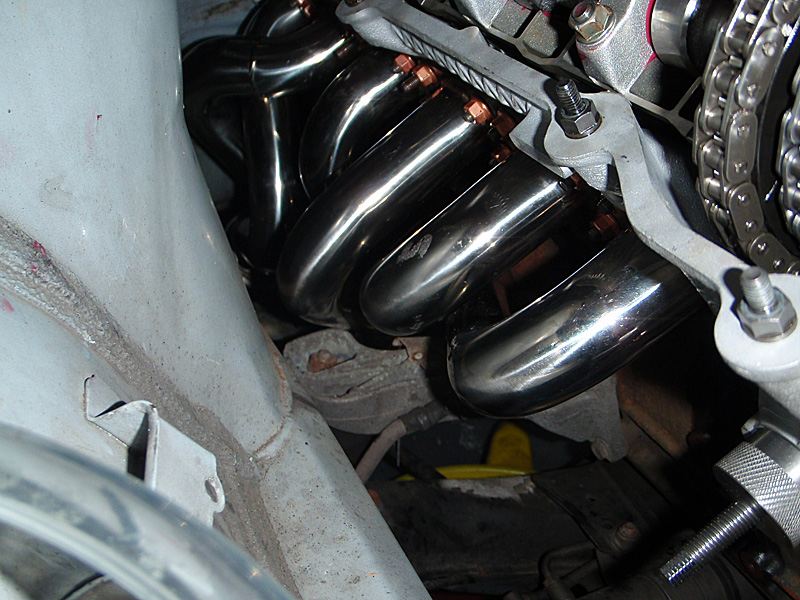
Monday: Re-assembled the intake side valvetrain and installed intake cam. Attached headers (loose). Transfered vanos helical bolt from S52 cam to new cam. Set cam timing and locked cams into place.
Tonight: Take a break. Do some home improvement stuff.
Tommorrow: Re-install head, rest of cam gears, timing chain, vanos, set timing. Complete header to exhaust install.
Thursday: replumb the fuel feed system (obdII to OBDI)
Fri to Sun: Install OBD-1 harness, connect engine, install intake manifold, cooling and oiling systems. Get the car running again.
Next week - drop front subframe, oil pan, replace motor/tranny mounts, control arms, check OPN, install baffeled oil pan, re-enforce front subframe, control arm bushings, finish front brake install, bleed brakes and start other maintenance.
Last edited by TIATO; 03-18-2009 at 12:05 PM.
Well Educated Idiot
You are SO DIGITAL MAN......everyone must love your thread with all the pics...fine job.
BUT......you HURT me deeply.......early on in the project...and I quote.
"In an instant I decided to sell the sedan and keep the sunroofless coupe."....
.....

..."keep a little love in your heart and a taste of jazz in your soul."
IP Contender
Thanks Bob. I figured images would be good for reference. Other peoples images have helped me out tremendously.
Yeah, the sedan....sigh...I did love that car...but the coupe had no sunroof.
Dont take it personal Bob. Its just business, LOL.
Head is now ready for re-install this evening...That Redline assembly lube looks like B-Horror movie blood...but I love it.
Member
nice work and pictures Mario.
question -- it's hard to tell, but are the wraps done correctly for the side net? I thought they ought to be wrapped like a harness, where you double-back around the buckle?
Ed Phillips // Spec E46 (build in progress)
Past: Spec E30 and GTS3
IP Contender
Thanks Ed. There were no instructions for the net install but your comment does make sense. Added to details list.
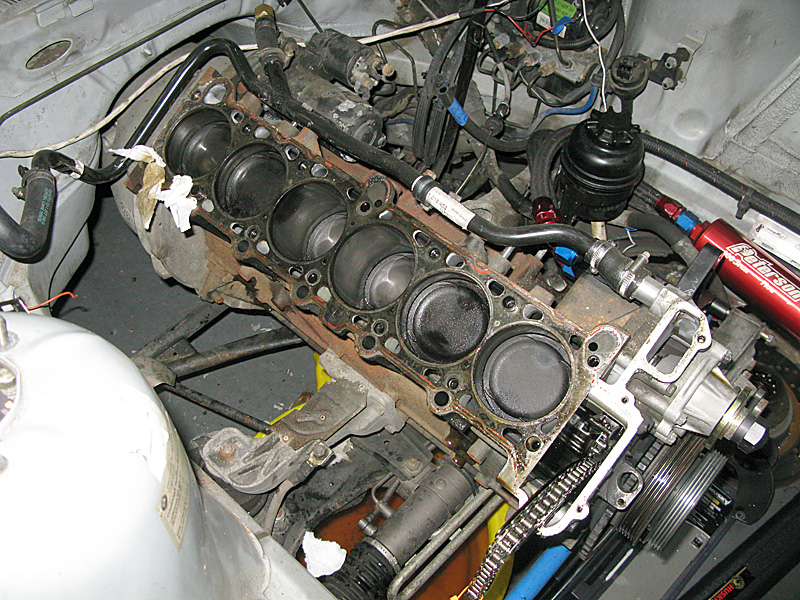
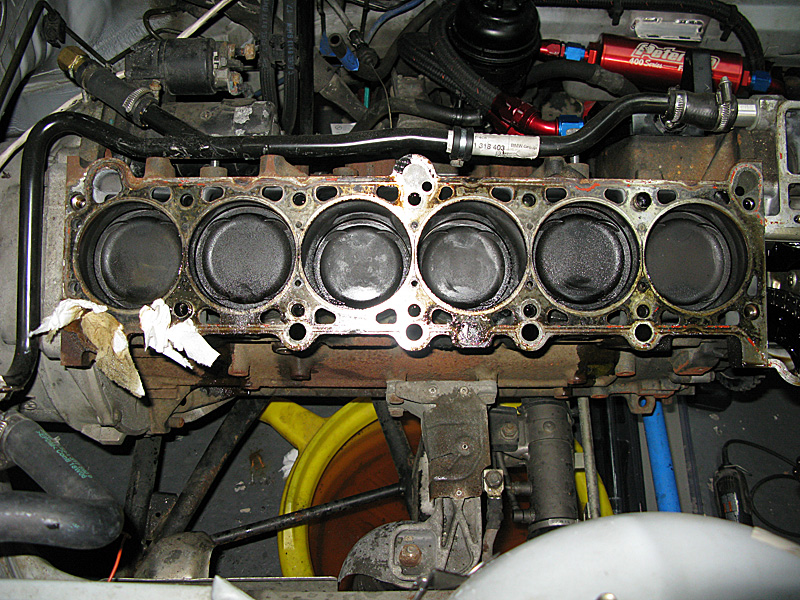
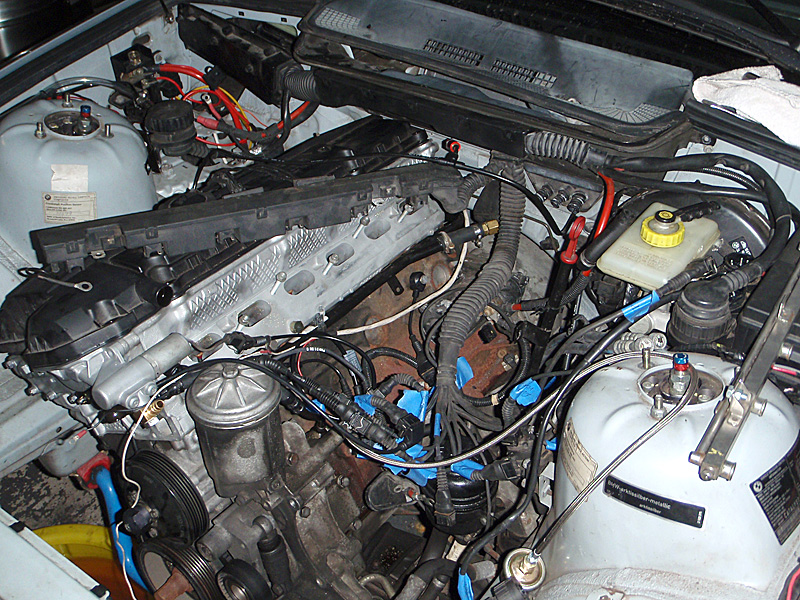
Good session last night. A friend came over to help me lift the head back on to the block. The whole assembly (head, cams, headers) easily weighs 75+ lbs.
We were concerned with damaging the bottom of the head while trying to align it on the dowels so we put 2 strips of cut folded over towels (one strip at the front by the cam chain and another toward the rear of the head) to gap and protect the bottom. One we got the head reasonbly aligned, I removed the front towel and placed the head on the locating dowel. Then repeated the process in the back. Perfect.
Torqued thew head to spec and completed stage one of the 90 degree torque process. Tonight stage 2 of torqueing.
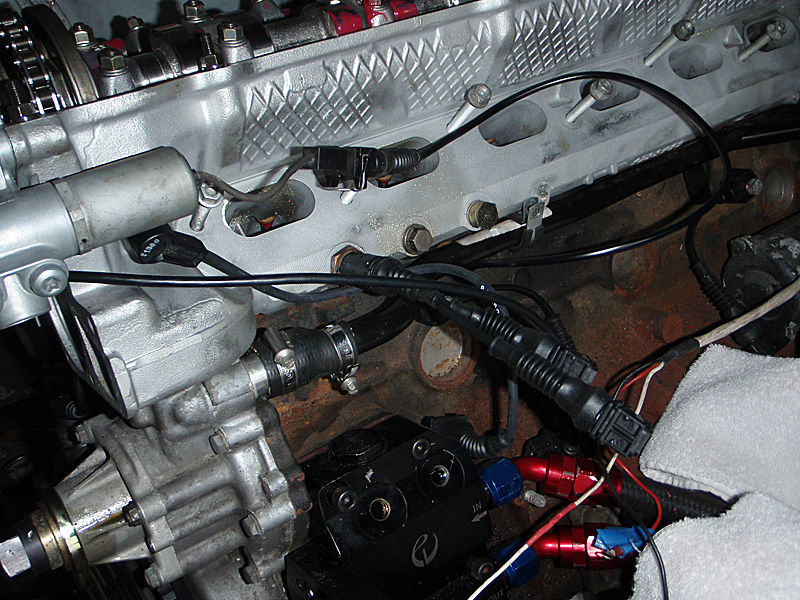
The proceeded with cam gear, chain, tensioner, guide and vanos and solenoid re-install. Added the S50 crank position and cam position sensors, plugged in the TMS 1 into 2 water temp adapter harness.
After a lengthy conversation with wannabearacer, I decided to keep my OBDII fuel rail and pressure regulator.
Tonight, install the header down pipe, torque down the header at the head and start installing the OBDI engine harness, prep valve cover with new gaskets.

Well Educated Idiot
I am very envious of your spare time and talent my Friend
It will be an honor when you pass me, know you did your own work !
..."keep a little love in your heart and a taste of jazz in your soul."
IP Contender
Bob, this image of my former sedan is for you. You can find some solace in the fact that my wifes e36 328 is a sedan.
LOL! Thanks Bob.
Spare time - no such thing. Im trading sleep, wife, child and household responsibility time for car work. Im very thankfull they are very understanding of my afliction. I guess thats why every Feb/March I spend an incredible amount of time in the garage on preventative maintenance and get as much done as I can so that the rest of the season I only have to spend 4-5 hours in advance of an event getting ready.
Damn Automerging!!
Good productive night and I had more work time than usual. My 5 year old stayed at her grandparents, my wife went to a neighbors house and the older two kids had to do lots of home work.
Got the header down pipe connected.
Valve cover was prepped with new seals and placed on head to cover the cam and valvetrain while I installed the OBD-1 wire harness.
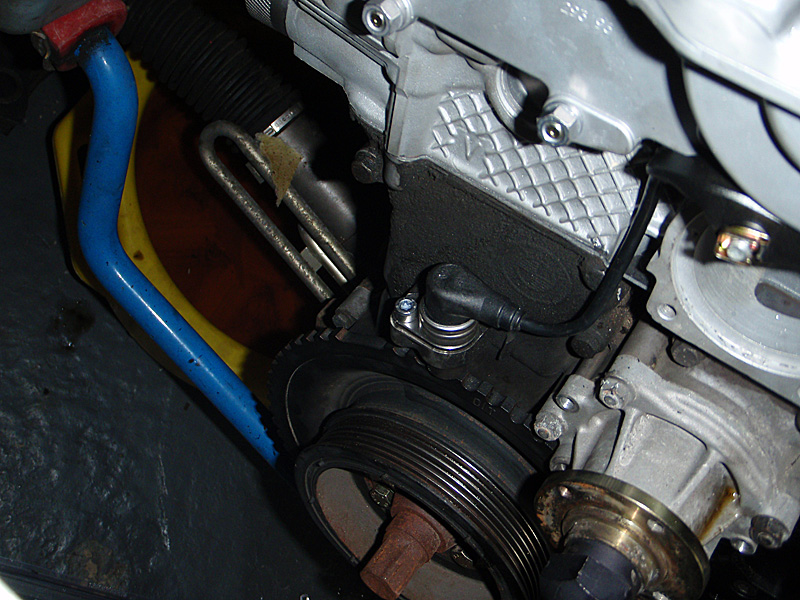
Water pump pulley is on.
Decided to skip istalling the VAC oil distribution block, inline filter and oil cooler for now and installed the OEM oil housing once more. With some many things changed on the engine I decided I need one less potential headache. Tensioner back on.
Could not install the thermostat housing as one of the mounting bolt holes was stripped - got to find some helicoil kit for that fix
Intalled the OBD-1 engine harness and had all but 3 connectors and 2 leads (TPS, Cam PS, Air Intake Sensor, Alternator connections) plugged in in less than 5 minutes. Have to revisit the CPS for the connecotor end of the sensor and the harness are the same
Now Ive got to source a larger air disconnect fitting so I can test the vanos and cam timing. Every quick disconnect I had was too small.
So good progress with some frustrations.
Last edited by TIATO; 03-20-2009 at 07:49 AM. Reason: Automerged Doublepost
L337HaX0r
this is incredible...
you have skills man. nice work.
Someday...
You do fine work Mario
Will you be at the Grand-Am races at NJMP in May? It would be great to catch up again.
-Ted
HandPlant Sensei
I want to hear, see, and experience this beast in person. Incredible build!
2001 540i 6-Speed / 1989 325i M20 / 1994 Suburban 2500
"You gotta fix the nut behind the wheel before you fix the bolts on the car"
LoveClub Member #23
IP Contender
Ted,
I will be at the event. Will definately catch up. Same paddock layout as last year?
Thank you all for the kind words. She has been a demanding princess these last few weeks.
IP Contender
Lots of progress since the last update. Frustrating progress though.
Issue of frustration #1:
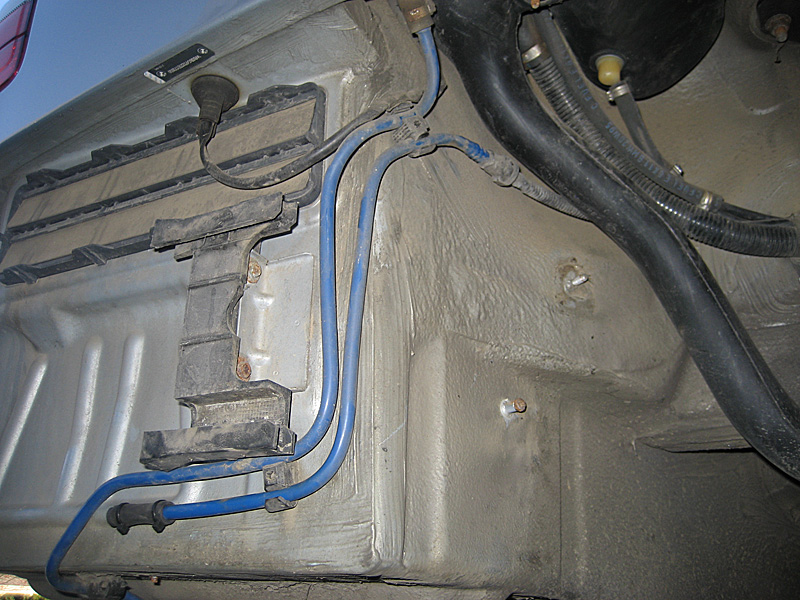
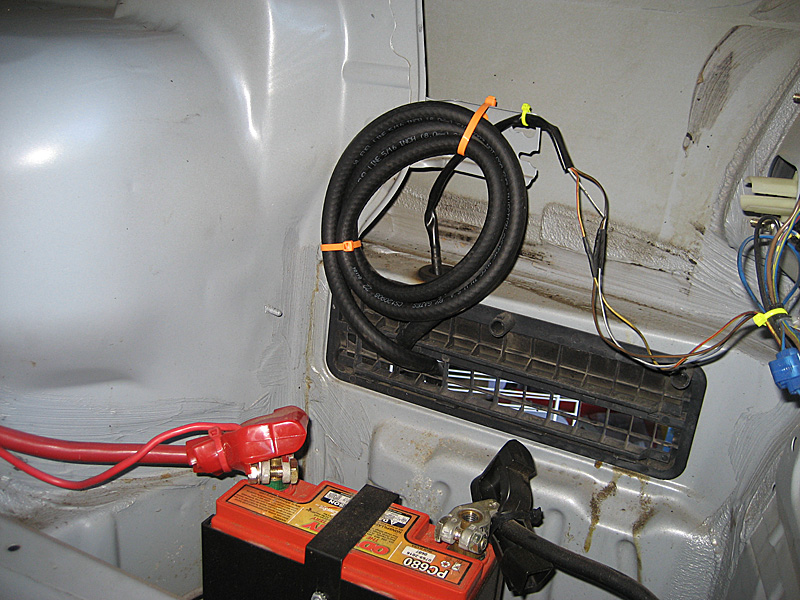
Charcoal cannister / purge system removal/disable: The modification process was very easy as shown below. The Frustrating part was the process if getting the rear bumper cover off. It started like this - to remove the bumper cover, you have to remove the tow hoop. Well, mine sheared off in the process. 2 years in the same spot will freeze it in place I guess. Bumper then came off easily.
Of course with a sheared off hook, I had to now get the rest of it out as a new bumper shock is in excess of $140. So I drilled it out and got it as clean as possible.
Issue of frustration #2:
DME chip. I made a bonehead move and sent a supplied decoder chip for custom BW software back to BW thinking it was just a chip carrier. Wrong! No decoder chip - ECU does not read the chip. Engine no start. Crank yes. Start no. Not knowing this I literally double checked the whole OBD-1 conversion, researched fuel deliery and spark isues. Of course with the decoder board in place, the car fired on the first crank.
Issue of frustration #3:
Front Control Arms. Conceptually a easy job. Execution ranges somewhere between baby easy to WTF kind of torture is this. Well, mine were torture. Thankfully I have to do this only every 2 years.
Issue of frustration #4:
Threaded holes on head for thermostat housing. Again, something that should be shit simple turned into another extended project. Screw the housing on and one bolt just spins and spins and spins. I did not notice that the threads wee stripped on my lightly reman'd head. Only solution - helicoil. NAPA to the rescue for having a 6 x 1mm kit in stock.
Issue of frustration #5:
Front lower control arm bushings. Swapping OEM with Delrin. What a PITA to press on. Whereas the OEM bushings have a metal sleeve that keeps the press centered, the delrin does not and it press wanders pushing the bushing off center.
Guess the notom line is Im getting tired of the all the work. Nearly every night since the end of February. I just want to get the car done and DRIVE IT!!
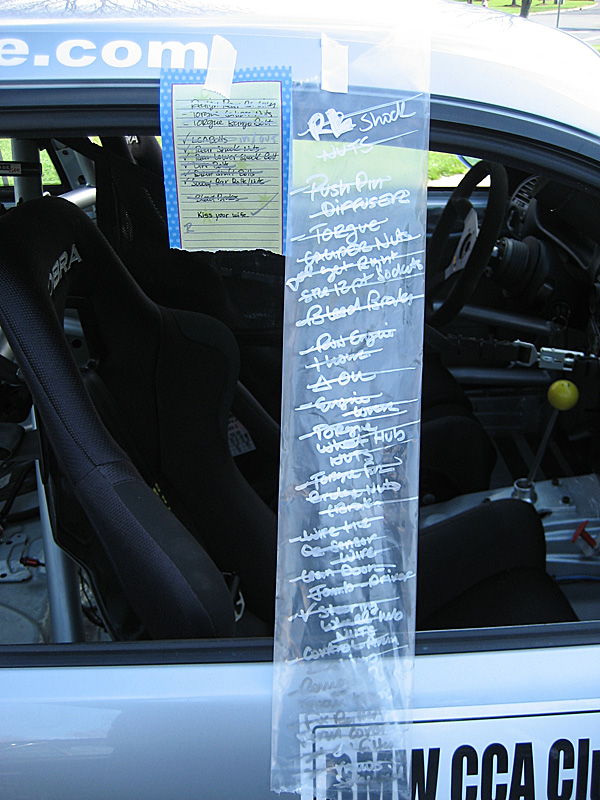
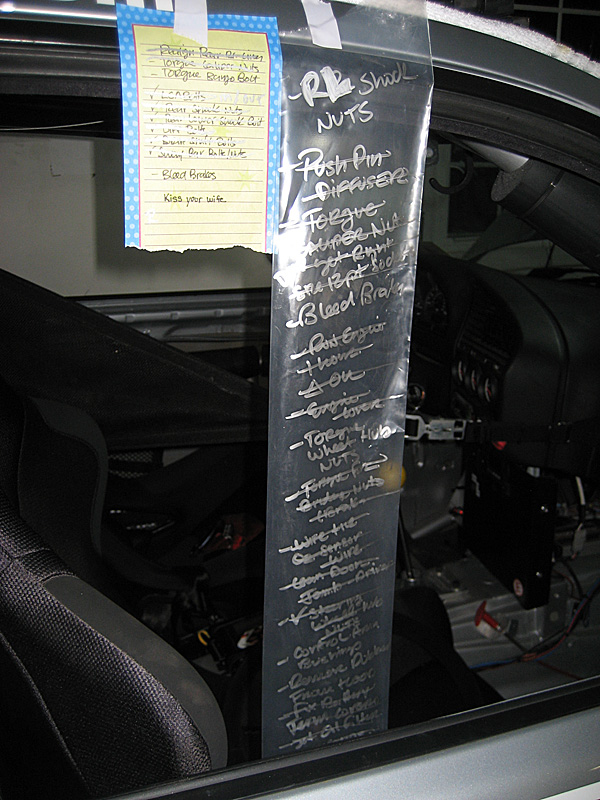
So today is April 5. Nearly all detail work has been completed. I just have the following to do to get the car race ready for VIR next week.
Bleed Brakes
Check rear shock nuts
Press on LCA bushings
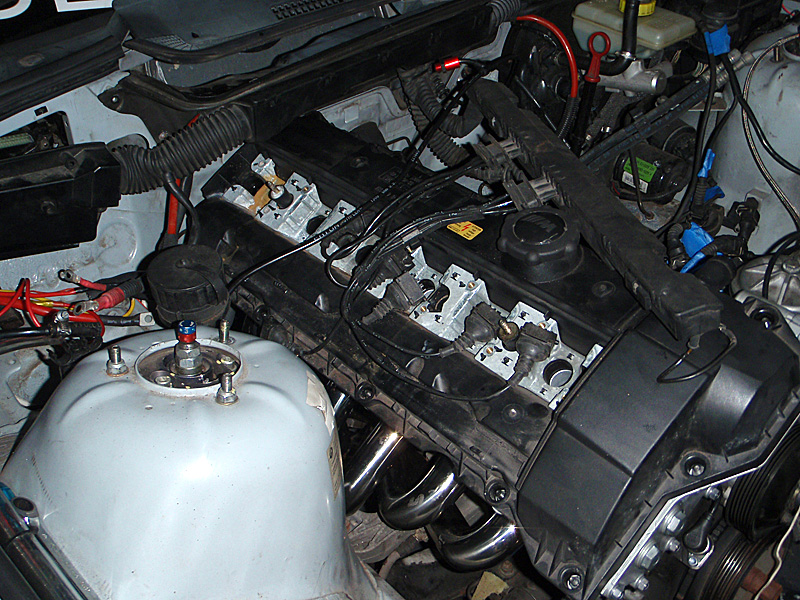
The car runs and I must say it sounds wicked. Yesterday I aet the car idle for an hour just to get all engine fluids up to temp and check for any fluid leaks. None. So other than the self made ECU issue the engine would have fired up from the get go. To date the whole OBD-1 conersion, hedgasket, head exchange, cam ans header istall, has been my most ambitious and technically involved project. Needless to say I am no longer intimidated by these engines.
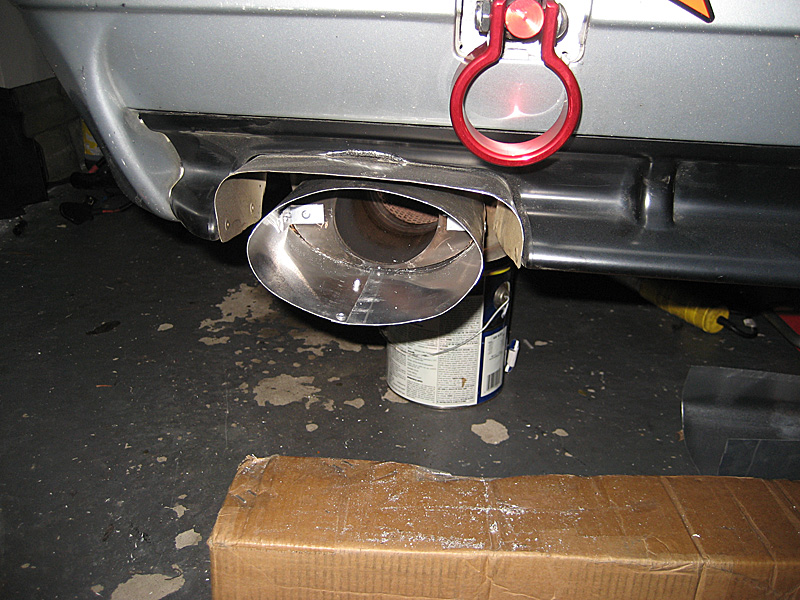
A fun project was fabbing up a new exhaust tip as the original AA one is now a resident of WGI. This little project heeded to be done while the bumper cover was off while I was working on the EVAP delete project. Some Home Depot sheet aluminum and an hour later. The AA exhaust had a new tip.
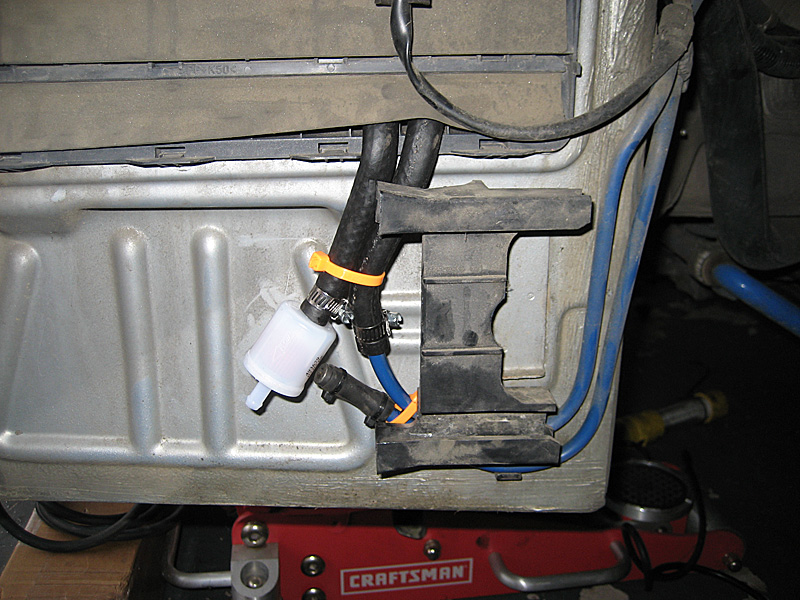
The EVAP work was interesting as well. Lots of research on that one only to realize that most folks make it more than it is. Cap the purge line to the engine. (In my case I capped both ends) Yank the big black hose and trim and loop the gas tank vent line and terminate with a small filter ( briggs and Stratton fuel filter witeh a few more holes frilled into the end cap).
OBD-I install. Again research is your friend. Many, many thanks to Vinnymac for his write up. I refered to it many times. I also bought the ZionvilleOBD-I conversion CD.
The KEY to the conversion is properly labeling the harness. Takes 1-2 hours but it makes the rest of the install a breeze. In my case I did not even remove all the labels in case I need to do future work under the manifold. The ideal solution would be to get an industrial label /tag printer and mark each harness lead. That’s for next time the manifold comes off.
It was suggested to me by Wannabearacer that I re-use the OBD-II fuel rail, fuel lines and furel pressure regulator. I did and the set up works perfectly with a lot less work. The only caveat is that small adapter plates need to be fabricated to adapt the OBD-II fuel rail to the M50 manifold. In my case I re-used the adapter tabs that came with my Europsort M50 manifold kit.
Did a Vinnymac type set up with the crank case valve. 1” rubber hose from the valve cover outlet to adapt the valve fasytened by hose clamps.. Then some 5/6” vaccum hose to plumb into the dipstick. A 3/16” vaccum hose to the manifold vaccum attachemt wherer I T’d in the connection to the OEM fuel pressure regulator vaccum line.
Of course I used OBD-I parts for the crank and cam position sensors, knock and O2 sensors, and the 2 into 1Turner adapter for the coolant sensor. The extra cable for the Cam position sensor that is recommended by many OBD-I converters was not necc. in my case.
Bimmerworld supplied harness extenders for the much shorter power lines on the OBD-I harness. The power cable extenders provide enough length to the cables that the installer can re-use the OBD-II power post located on the left side of the engine compartment.
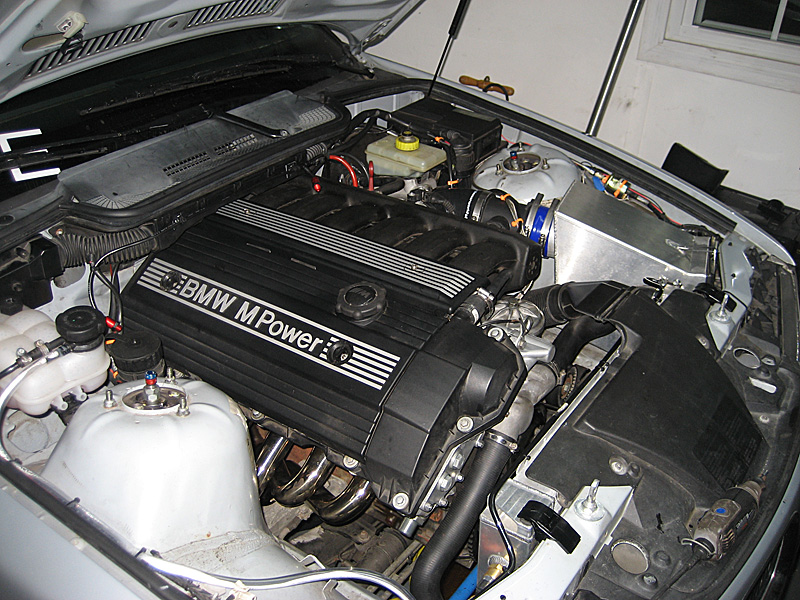
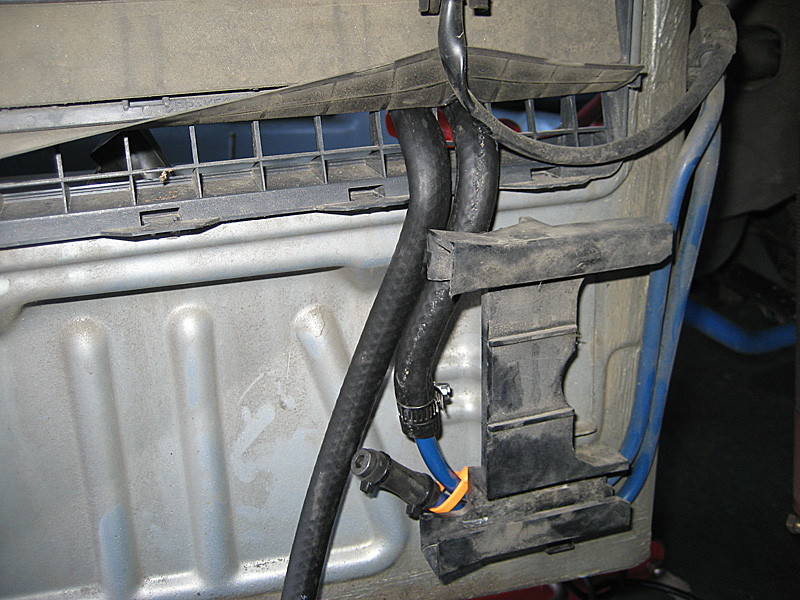
To hold in place and to organize all the wires offshoots of the OBD-I harness I also installed the OBD-1 harness bracket which fit to the block with some small modifications to fit around the euro coolant pipe.
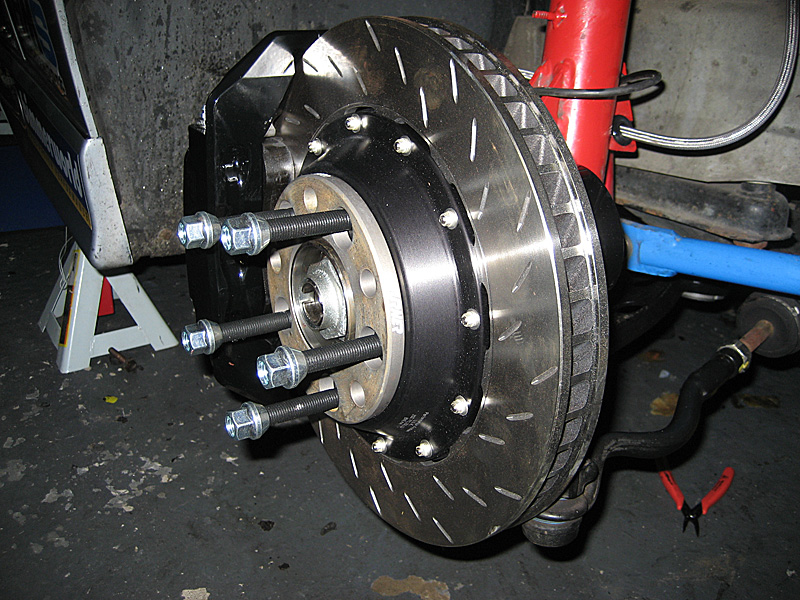
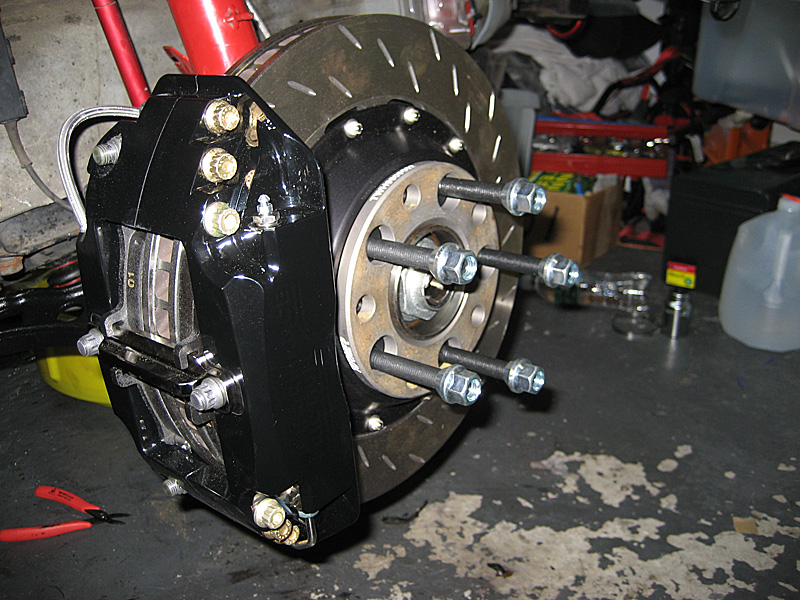
Performance Friction Brakes: Awesome quality. From the calipers to the provided hardware. First rate. Cant wait to see how they feel. Note for prospective buyers. Check your rotor to control arm clearance!! When I bolted my rotors to the hub, I only had a 1mm of clearance. Not enough for my taste. Some folks may have no clearance. 20 minutes and some grinding action later, I cleared that gap to 2-3 mm.
Note: The UUC Alcon brakes I had on the car prior were awesome units as well and served me very, very well for the season I ran them. The Alcons are a tremendous improvement in feel and modulative ability over the OEM brakes that manifested itself in much higher brake confidence.. The combination of OEM rotors, calipers and brackets make that set up a tremendous value.
There are 2 reasons why I went to the PF set up. The PF pads are MUCH thicker – 20/30%. The PF rotors are 4mm thicker than the OEM floating motorsport rotors. Keep in mind that the rotors with the PF kit are NOT the direct drive OEM replacements; The OEM replacements are of OEM diameter and width. The rotors supplied with the kit are designed to fit the kit and they are massive.
Here are the pix
Work list as of last night.
Evap delete:
New Exhaust Tip
Brakes
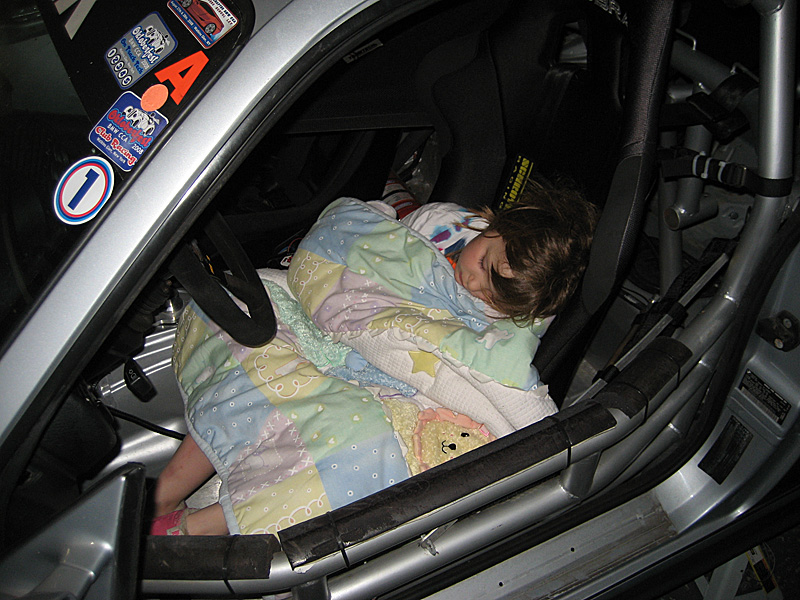
Little Helper - She's been hanging out with me in the garage, running tools chatting. One night last week she fel asleep at the wheel.
OBD-I S52
Last edited by TIATO; 04-05-2009 at 10:25 AM.
Member
Very nice progress! Its nice knowing you are not the only one giving up life to build a car one your own. I am presently waiting for a new harness to arrive to finish my OBD conversion...will definatley be doing the labels, its nice to get every last little bit of reasearch and opionion before i tackle it. Thanks for the insights and pics.
Lets just hope for more wheel time than wrench time soon :-)
IP Contender
Thanks. Ive learned so much from so any people here on BFC that my build is just one way to give back. My family has been VERY supportive and I owe them so much for putting up with this for the last 6 weeks.
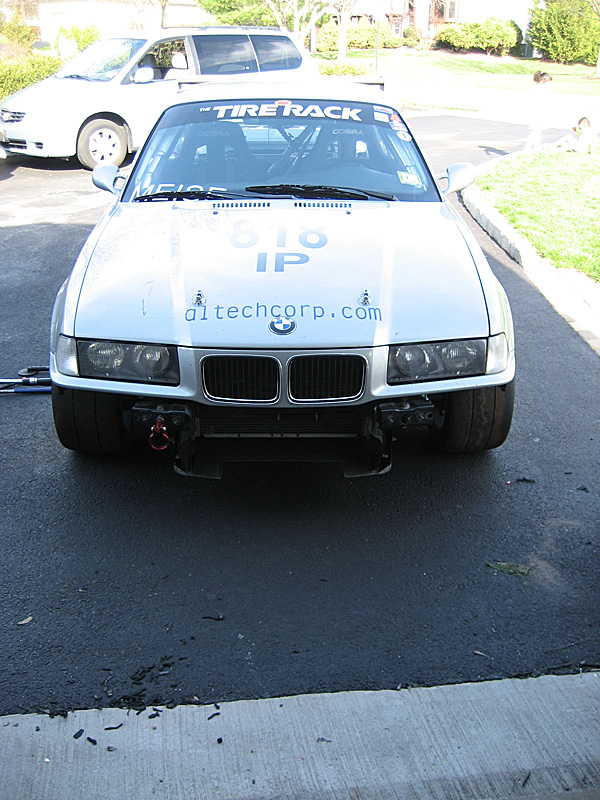
Alrighty folks, stick a fork in it - the car is DONE. At least until next month. Most of all worlk planned has been completed. Due to delays and running out of time, I had to push some projects out. That may be a blessing in disguise as the unclompleted projects (solid mounts, subframe re-enforcement and baffled oil pan) may be three less things to worrry about. However the car is ready for a VIR shakedown and club race this week.
Finished some details yesterday, bled the brakes, installed the control arm bishings (was going to go with Delrin, but I just too hard a time getting those ** on so I went back to stock units which went on like butter).
Took the car out for a slow spin around the neighborhood and heard very clearly hat I had to do some more grinding to the control arm. Folks, with the PF front brakes, grind that control arm around the radius of max to max steering input. I thought I ground enough - nope. I had the wheels, rotors and calipers off 3 times before I was pleased with the clearance of 2mm, max to max wheel lock.
That fixed, the car made no unusual noises other than the uncorked sound of a s52 and the tinging of stones being kicked up by the hankooks. With the cams and headers the engine sounds amazing.
My body is sore, hands hurt but I feel good that the car is done. To date this has been the most technically ambitious and complex work I have done to a car.
I was so happy to have the car off jackstands. For the first time in 6 weeks the bay is empty.
Another thing I could noy get to was washing the car and getting all the rubber marks off the hood. Obviously I had other priorities.
One item that will never do done is kissing my wife. She added that to the list when I made it a few weeks ago.
Last edited by jayhudson; 04-06-2009 at 10:12 AM. Reason: profanity
Experiment 626
I think I'm digging your space heater, patio-heater? very multi-functional... roll it onto the patio when your done in the garage. good idear
Build looks great. Just need to change that little avatar: Future IP front-runner
... or something to that effect. Good luck this wknd
 Posting Permissions


 Reply With Quote
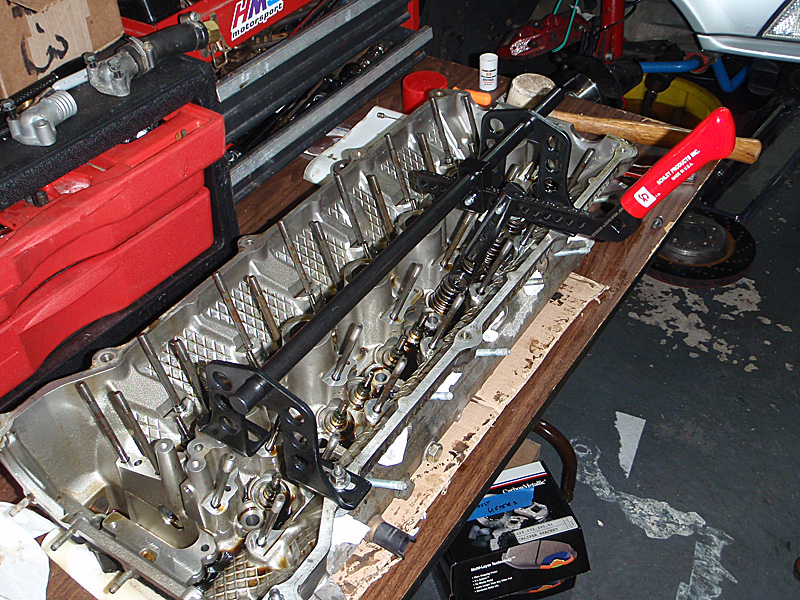


Bookmarks