
 Member
Originally Posted by Qsilver7

AWESOME THANK YA.....gonne take me awhile to get witch comes first >.< im about to run outside and do it now... but thanks (if it works
)
Member
I done both of mine with just a long and heavy screw driver. You should verify that the new strut matches the existing strut. I got a couple of struts that were a little bit too long. Had to return them.
Wheel whore & a BMW mech
Thanks, definately gonna try out the screwdriver-trick if i can't find an appropiate pipe!
And bump for a great informational thread!
??
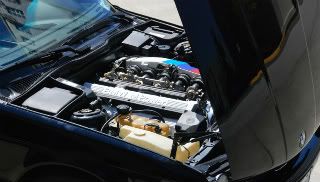
On my tourings the only wires that's been attached to the glass is for the 3rd brake light and for the defroster on the left side. Otherwise it's all free from wires following it up???
Also the cable guides that is screwed and has a bend in them attaches both to the hatch and not the glass.And the hinges goes inside the hatch hinges so it cannot really touch the wires attached to the hatch either.
So it can definately not be worse, in fact(?) the only wires that can break down is for the 3rd brake light and for the defroster and nothing else??
Last edited by M Quick; 05-10-2011 at 02:22 PM.
station wagon
Bump, Thanks Greg! How is this not a sticky yet? (not the first to suggest it)
station wagon
Looks like I'll be using my head to hold up the glass for a bit. Local dealer wants $30/ea for the moflickers!!
Member
Whooops. This was supposed to go in the e39 section.
Moved.
Last edited by kricker; 12-01-2011 at 12:08 PM.
Member
Pelicanparts sell them. Price is a little much for what it is though.
station wagon
mine just came in, got them at thebmwpartstore.com. Will be attempting this tomorrow or soon.
my version of a midlife crisis: 20 year old spray painted, lowered BMW station wagon.
station wagon
Well, 4 of the six shocks I ordered got lost in UPS somewhere, but doing the glass struts now. Small PITA with. All the plastic BS, and snapping them in blind, but could be much worse!
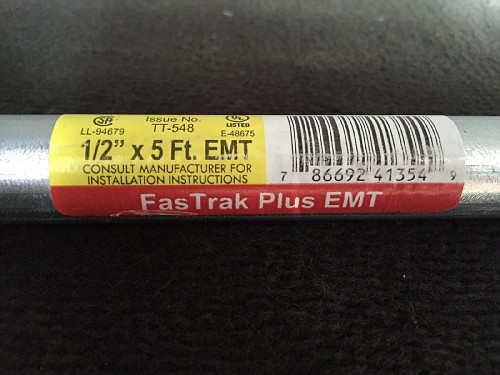
BTW 1/2" EMT (thin wall electrical conduit) makes a perfect 'special tool'.
Last edited by cddallara; 02-12-2012 at 03:16 PM.
my version of a midlife crisis: 20 year old spray painted, lowered BMW station wagon.
Member
Did you get it knocked out? I see this in the not too distant future for mine.
1989 635CSi Alpinewieß
1989 325iC Alpineweiß II
1985 745i Cosmosblau / Pacificblau cloth
1995 525iT S50 / 5 speed Alpineweiß III
1985 635i Cosmosblau
1998.5 M3 Technoviolent
1990 325iC
1999 528i
station wagon
Yup! Hardest part was trying not to break plastic tabs off upon disassembly. I found it a bit tricky to reseat the passenger side inner mount, the driver side popped right on. All in all about a half hour job for me.
my version of a midlife crisis: 20 year old spray painted, lowered BMW station wagon.
Member
Finally knocked this out today. Used the 1/2 thinwall conduit. Worked like a charm. Vote for sticky in the DIY section.
1989 635CSi Alpinewieß
1989 325iC Alpineweiß II
1985 745i Cosmosblau / Pacificblau cloth
1995 525iT S50 / 5 speed Alpineweiß III
1985 635i Cosmosblau
1998.5 M3 Technoviolent
1990 325iC
1999 528i
Member
there are like 20 threads that should be in the DIY and they arnt... MY vote for a better admin
Member
sweet diagrams these are useful for my touring!!!
Member
Find yourself a garage that knows something about the car. They'll remove the headliner and scratch their head trying to figure how to remove the old strut and install the new strut. A long screw driver or a long skinny pry bar is your friend.
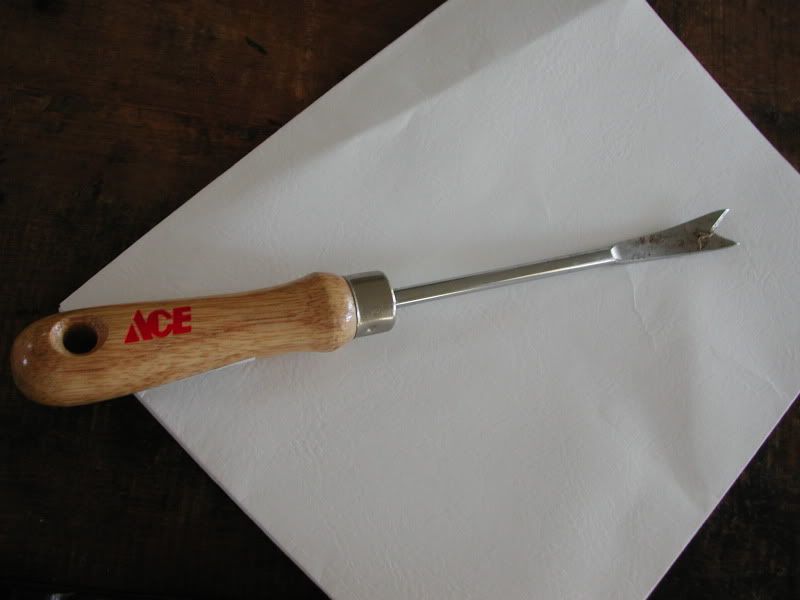
Silscreen BMW instead of ACE on that tool and you can ask for ten time the price at ACE.
Last edited by upallnight; 12-25-2012 at 03:38 PM. Reason: Automerged Doublepost
Member
This is an excellent thread. I just did mine yesterday, followed the instructions and i was done in an hour or so. The tool would definitely come in handy but it is not necessary. Also be cautious when removing the plastic bits as they are delicate from age.
Member
Sorry, double post.
Last edited by Chileburger; 11-05-2013 at 08:25 PM.
Member
After my regular mechanic could not replace both of the glass hatch struts I took the cat to BMW who told me the whole glass hatch needed replacing ex Germany as the pin for the right hand strut had broken off. A different BMW dealer is not sure which part to replace but thinks that it is part number 3 at http://bmwfans.info/parts/catalog/E3...for_trunk_lid/
Does anyone know if this right hand bar has a pin on it to accept the small glass hatch strut? I intend to replace the struts myself as no-one else seems able to. It also seems to me that the struts need circlips which could explain why the left strut had popped off.
Member
thank you to all who contributed to this thread.
I replaced the tailgate struts and wow, the tailgate flies up. Today with the help here I replaced the tailgate window struts. I used the long screw driver and a piece of plastic hose to hold the strut in place while I pressed it on with the screwdriver.
The problem I had was getting the rear connection made. The strut was just a tad too long-- I read about one being returned as too long. So I removed the new one and measured it against the old one - same size!? Reinstalled the strut and this time I closed the tailgate to fit the rear strut to the post; with the window open fully with a stick it was just right. With the tailgate fully open, it would not fit.
oh btw I bought the fittings to do redo these struts and have the posts that install inside the roof-- I decided mine did not need changing :>) Anyone need them?
aside-- I asked my son who also has a 95 525it about his tailgate window; he didn't know it opened. Ha.
Steve
Member
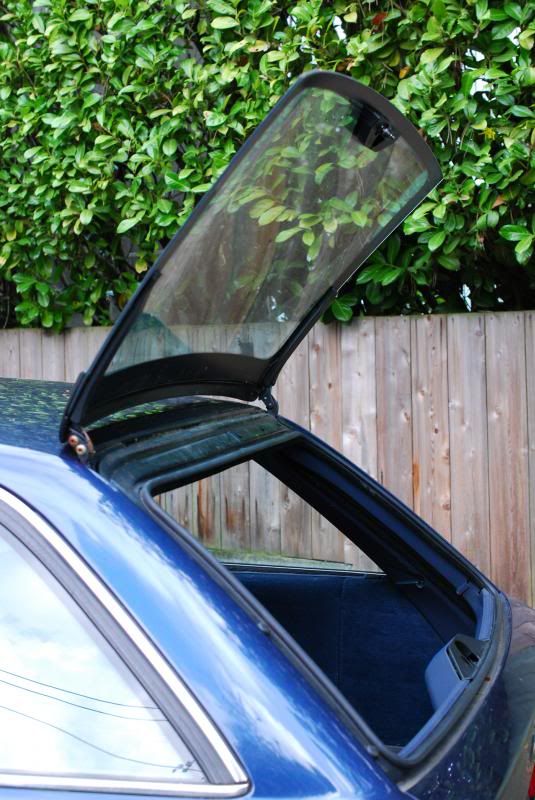
Just wanted to add some pictures to this thread as I just replaced my glass hatch dampers today.
Made myself my own tool to remove and install the glass hatch dampers.
Cut a ¾ PVC electrical conduit pipe to about 12 inches in length.
Increased the inside diameter of one end of the conduit using a 5/8 spade drill bit as I found this fit perfectly over the damper body when you remove or install it.
Heres what the tool is supposed to do when its being used to remove/install the damper.
When removing the old damper, slide the tool over the damper body and slowly push down on the tool and at the same time rotate the tool so as to pop the damper off its mount. Just pull the tool out and the damper and the boot should just come right out.
Remove the old rubber boot and place it on the new damper. Then slide the new damper into the homemade tool and line it up so that the ball end faces down an opposite line to the arrow. That way, you know that the arrow coincides with the top of the damper when your trying to pop the end of the damper onto the pivot inside the roof.
This is what youre aiming for:
Slide the new damper into the hole and try to feel the end of the damper so that you position it over the ball end. Itll take a few tries but you should be able to feel a click when youve successfully seated the damper onto the pivot end. When I replaced mine, one side made a click but the other side didnt so it may vary.
Youll know when its seated when you remove the tool from the damper body as itll stay put instead of pulling the entire damper out again.
You may need to slide the tool again so as to push the rubber boot back into place sealing the opening.
Slide the other end over the pivot that is attached to the glass hatch and button it up with the C-clip.
Put everything back together and enjoy the fact that your glass hatch will now stay open when you load items through this hatch. No more propping the glass hatch with an umbrella
Look ma, no hands .
__________________
91 M5
92 535iA
92 525iT
Member
Awesome DIY!
1987 325is
1988 M3
2007 335i
Member
Update: Used this thread to replace my struts this morning, took about 30min. I would highly recommend the pipe technique other members have noted above. I purchased a piece of 1/2" electrical conduit at Home Depot for $2.03. The fit was very tight (ie perfect) so I'd recommend taking your replacement parts with you as I found the struts didn't fit in the first piece I selected at the store. If anyone needs this "special tool" for your car happy to send it; just cover shipping.
Member
@Chunkster, thank you for posting those photos. Very helpful!
Member
Anyone know the best place to get replacement shocks these days??
EDIT: Did some research, Autohaus strikes again with the best price and free shipping!
Last edited by Fantom Infinity; 04-29-2016 at 08:16 PM.
Member
Thanks to everyone for all the tips/photos so far. A little update from my go at this:
My local Lowe's didn't have any conduit that fit snugly. 3/4" was too big and 1/2" was too small. Upon scouring the house for something that would work I found one of the sections of a Swiffer handle works perfectly.
I lost one of the rubber boots inside the hole, though so be careful and don't do that.
I think it's best to put the strut on, then slide the rubber boot on after you have the strut attached to the dowel. It's really hard to get the strut onto the dowel when you can't see because the boot is blocking your view.
 Posting Permissions


 Reply With Quote


Bookmarks