
 Member
This is a DIY for the E36 DEPO glass Ellipsoid headlights using TheRetrofitSource’s E36 ellipsoid FX-R “RetroQuik” kit. I found this kit works great with the headlights. Using the Depo headlights for this retroquik kit DOES require a bit of cutting of the TRS supplied brackets. I imagine TRS used either the OEM ellipsoid headlights or DJ Auto ellipsoid when designing this kit. Meaning, the DEPO internal dimensions are slightly different than the other two lights mentioned. I hope someone who has used the TRS kit on the E36 chimes in with their own experience. Splicing isn’t required of wires unless you want a clean factory install like I did. I chose the DEPOs because they were available at the right time and price, and I liked the bulb access covers better than the DJ Autos.
Shopping list
A. Depo Glass Lens Ellipsoid Headlight: $165 from Ebay
B. TheRetroFitSource.com FX-R “RetroQuik”: $160 http://www.theretrofitsource.com/com...ellipsoid.html
C. (included brackets and hardware in the “RetroQuik” Kit)
D. Morimoto XB35 4300K ($40 option with the TRS kit) (optional but recommended)
E. Morimoto Standalone Canbus harness $30 (Optional in kit but recommended)
F. High beam splitters (included in kit) (optional)
G. 36” AMP extensions (optional, recommended) $10 http://www.theretrofitsource.com/acc...l#.U0Lm8vldWSo
H. 9006 extensions (optional, not shown) $10 http://www.theretrofitsource.com/acc...rds-48751.html
I. AMP>D2S adapters angled (or straight depending on how to prefer to route your wires)(not shown, required) $15
http://www.theretrofitsource.com/acc...ree-48670.html
J. 35W or 55W quality HID ballast (FX-R 3.0 can use either)(not shown)
K. TWO M5 .80 x 25mm bolts (Lowes, 50 cents?)
L. 70mm diamond tipped glass hole cutter bit (amazon, $7)(optional)
Some parts listed above are “optional” because there are several ways to install these. I chose to hide my ballasts back toward the fire wall, so I used all the extensions mentioned above. I initially installed all this without a “HID relay harness”, but had annoying voltage spikes and was blowing the 7.5 amp headlight fuses. Interestingly enough, I still had the “LBF” obc error after using the Morimoto Canbus harnesses. After, installing the standalone HID relay harness, utilizing one of the Canbus harnesses, the “LBF” disappeared. If you have some knowledge as to why, please chime in.
Some of my own hardware from Lowes and also some TRS supplied hardware. (Not pictured is the M4 long bolts you will see later in this DIY, supplied from TRS) IIRC, the only hardware needed for the DEPO install is bolt “A “ in picture or “M5 .80x25mm. It’s found in the bolt and nut drawers in Lowes, you’ll need 1 per headlight.
B. Original Depo projector bolts
C. 1/4" nylon spacers (from TRS kit & lowes)
D. 1/2" nylon spacers fat (from lowes)
E. 1" nylon spacers
F. 3/4" nylon spacers (i think?) (from TRS kit)
G. 1/2" nylon spacers skinny (from TRS kit)
Begin by removing the out glass lens from the headlight. It’s held in by 4 metal retainers (two on top, two on bottom). Use a flathead head screw driver, insert it under the far side of the metal clip and twist the driver. The clip should pop right off. Protect your lights plastics by wrapping it in painters tape or something.
Then, carefully release the 4 plastic retaining tabs (two on inner side of light and two on outer side). These break very easily, no big deal if you break one. The lens is held shut by the four big metal clips. I inserted a metal clip behind the plastic clip to hold it open while I released the next clip beside it. Insert another metal clip once you pry it out far enough and work on the other side of the light. Once all four clips are released, separate the lens from the housing. It should take a bit a force even IF you have released all four plastic clips. Initially this is difficult, but after doing it once the lens gets easier to remove the next time.
This next part involves the inner glass lens covering the projector. Your options are to remove the inner lens completely and use one of many shrouds from TRS, or cut the inner circle out of the lens to allowing the FX-R to poke through and project its beam unobstructed by the flutted glass, or reuse the inner lens without cutting a hole in it but this will leave your new beam obstructed and greatly diffused. I chose to cut the lens using the bit mentioned above and a bench press drill, however, If I had to do this again I would simply find a auto glass shop or the like and have them cut the hole for me. I found it really difficult. Here’s how to remove the glass lens.
Remove the three retaining clips for the lens by loosening and removing the screws.
You’ll notice there is already a perfect template to cut along. Ask the glass shop to cut this out and clean up any burrs/edges for you.
Now, remove the stock DEPO projector from the housing. It’s held in by three Philips screws. Remove the rear low beam access covers and remove the posi and neg wires. The ground wire may need a pointy set of pliers to release it.
Just for fun I fired up the Depo projector with a fresh H1 halogen bulb and I was shocked how clear the lens were and how much blue flicker the cutoff had.
BUT the FX-R 3.0 is more what im looking for
I could not get the TRS brackets to fit where the FX-R was aligned with the high beam bowl. I used many different spacing options and screw sizes. Rather than waste any more time, I decided to remove a little bit of material on the inner portion of each brackets. A bench grinder or something similar is needed as the brackets are made of thick steel. In the picture below I have sharpied the area to be removed and you can see how it will allow the bracket to sit flush with the frame.
Now the material grinded away
Now, fix the brackets to the FX-R projectors using the supplied hardware. Sorry, I didn’t take pics of which hardware is what, but looking at the pics of the hardware installed on the projector you can guess which is which. I chose to thread the long M4 screws from back to front of the projector as below. By doing this, I could adjust the beam angle when the lights were installed on my car from the front . If you thread the screws from front to back, you’ll have to reach behind the projector through the low beam access cover with a 4mm socket to adjust the beam angle.
Top needs to look like this
Bottom needs to look like this
Front view with frame attached ( the left side of brakcet is the inner side for the driver headlight in this pic)
Side view
Before you install the projector+bracket into the headlight housing, decide how you are going to wire the headlights. There is probably several ways to do this. I wanted a clean install without drilling into the Depo headlights so I chose to rewire the harness inside the headlight and route all my wires through the hole left when removing the Depo “milspec to euro” harness plug.
I chose to cut the wires in this terminal, unscrew, and discard it. This leaves a precut hole to cleanly route your wires through.
My harness looks like this. If you chose to wire yours like this, you will have quad beam highs when you use your high beams. Meaning, when you tuen on your high beams, the Depo high beam stays on and also the FX-R drops its internal shield and produces its own xenon high beam (hence, "Bi"Xenon).
A. High beam positive
B. High beam neg
C. City light socket
D. Bixenon solenoid neg (previously low beam neg)
E. Bixenon solenoid positive (previously low beam posi)
F. Splice for positive wires
G. Splice for neg wires
H. To constant posi on turn singal (I think? May need to look this up on BF)
Cut a small incision in the black boot that the wires were ran through on the Depo headlights and run your amp wires through.
Push all the wires through the hole and route them to their bulb locations. The next step is to install the projector+bracket into the housing. Sorry, but I didn’t take pics of this step assembled to the frame, but the pic below may help. This worked for me, but there may be another combination of spacers that could work for you.
A. Use original Depo screw with no nylon spacer
B. Use original Depo screw with ¼” nylon spacer
C. Use M5 .80 x 25mm screw with ¾” spacer
Once your FX-R is in the headlight, carefully remove the D2S bulb from the packaging and without touching the bulb glass with your fingers, wipe down the bulb with provided alcohol pads. Install bulb into projector. Attach the angled D2S to Amp adapter. Connect amp extension that you threaded into the headlight to the D2S adapter. Use some adhesive backed cable tie mounts or another method of tucking the wires away from the projector and other components inside the headlight.
Do not reinstall the glass lens onto the headlight housing until you have fully mounted both headlights back in your car, preferable in a dark garage, and test your beam angles. Most likely, they will need some adjusting. Once you’re satisfied with the angle, hand snug the four M4 bolts that attach the projector to the bracket. It wouldn’t be a bad idea to use some invisible glass on the inside of the glass headlight lens before reinstalling with the 4 metal clips. Any dust or paper towel residue will show. Refer to theretrofitsource.com for proper projector aiming.
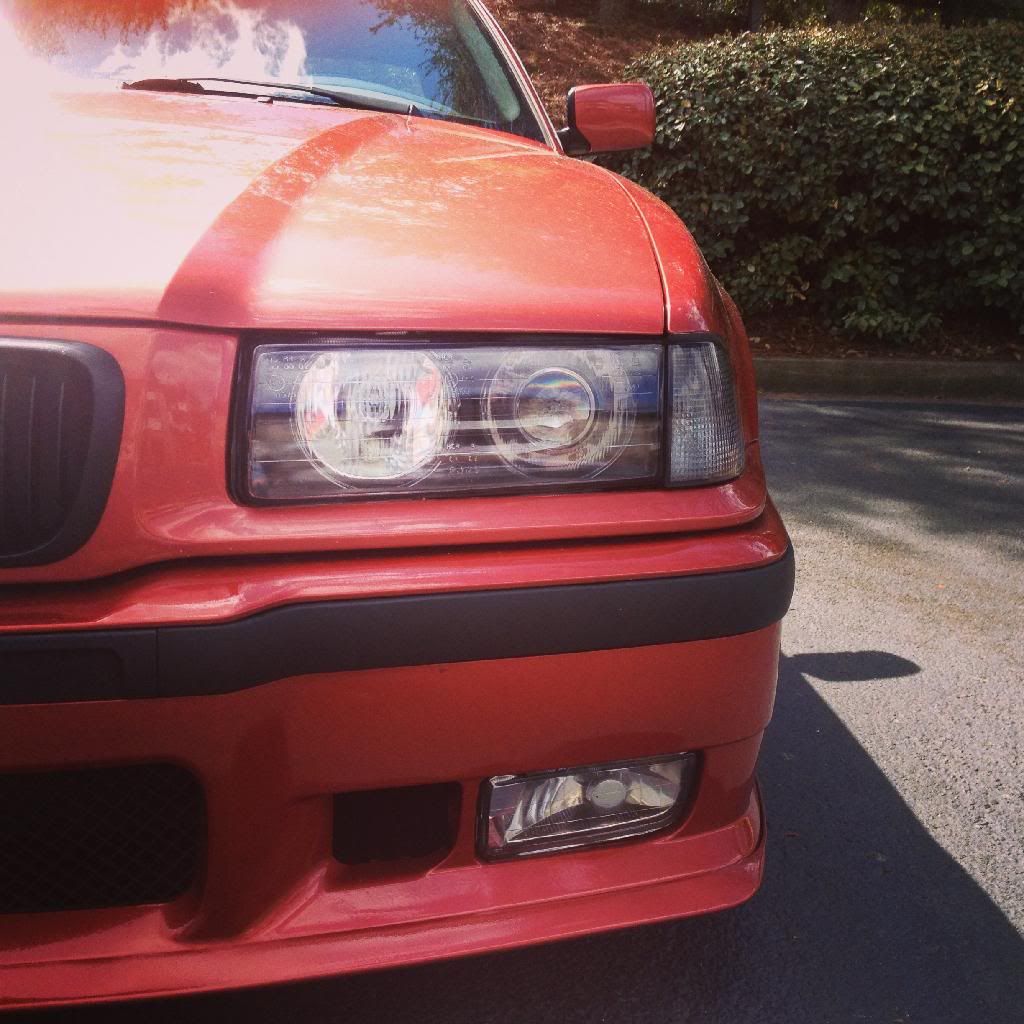
Enjoy your new light output and darn sexy headlights!
(output shots with Morimoto XB35 4300k and DDM 55W ballast)
Low beams only.
Below shows bixenon high beams plus Depo reflector high beams.
Last edited by DoriDori; 04-08-2014 at 11:49 AM. Reason: spell check?
Member
i had the same bracket issues on my djauto headlights, had to cut sections out
otherwise, pretty much the same install

Member
Interesting. Maybe TRS used the oem Bosch lights when making the templates. I like how you painted yours black. If I ever have mine removed again, I will try that.Originally Posted by hakhawk

Member
Subscribed
Current:
'97 E36 M3 Track/Street Silver Coupe
'03 325XI AW Sedan
Prev:
'02 E46 M3 Active Autowerke Stage 3.5 S/C'd IR/IR Coupe
Member
Awesome DIY. Saved it for later. Thank!
Member
Do you have any pictures of just the hid highs against a wall? or both of the highs against a wall?
Member
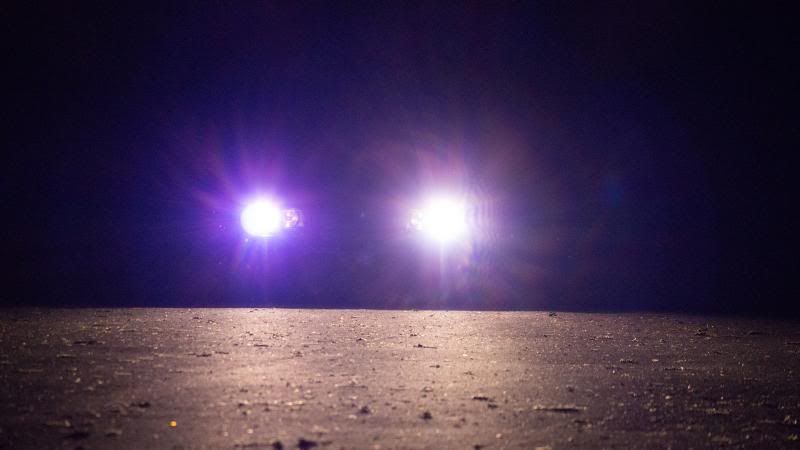
Took some night time pictures recently. I haven't had a good white wall to shoot some wall pictures yet, but I'll use my garage for some tonight.
This is the best example of the light output color. It's 4300k with 55w ballast. The below pictures make the output look bright white but it's more like a warm white.
Low beams
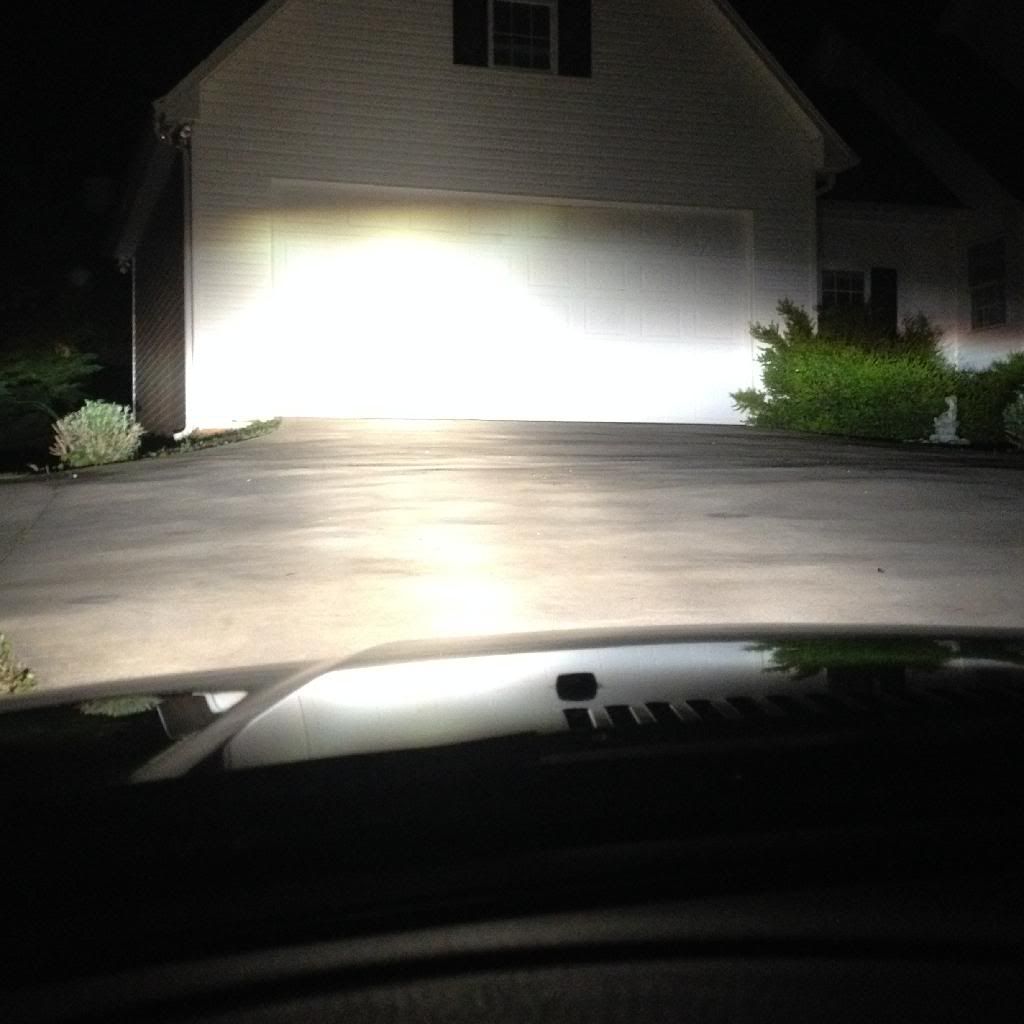
High beams
Low beams project 250+ feet away
Member
Member
Thats really nice. Im debating whether or not to do this. The stock depos are a great improvement but this looks soooo much better
Member
I didn't drive with stock depo projector, but I was impressed with it when I fired it up. It would be worth doing the cutoff shield mod if you plan on sticking to stock depos.
Member
Do you also have pictures of how you mounted the ballasts? My friend makes fun of me for leaving it loose, wedged in the engine bay, while his is all nicely mounted in the bumper.
Member
He would laugh at mine too. I used 9006 and amp extensions to allow them to reach as far back as the firewall. There's more options to mount ballasts. The driver side is mounting on top the fuse box via adhesive backed mounts and zip ties. Passenger is just zip tied against the firewall with some other wires.
 Member
Strong double sided tape does the trick for me. I mounted on on the side of the windshield washer bottle, the other one ended up on the side of the air filter box.
Member
Just ordered myself this kit. Super looking forward to installing it.
- - - Updated - - -
Do you have any completed and installed pictures you could post of your lights with the black brackets?
Some say...
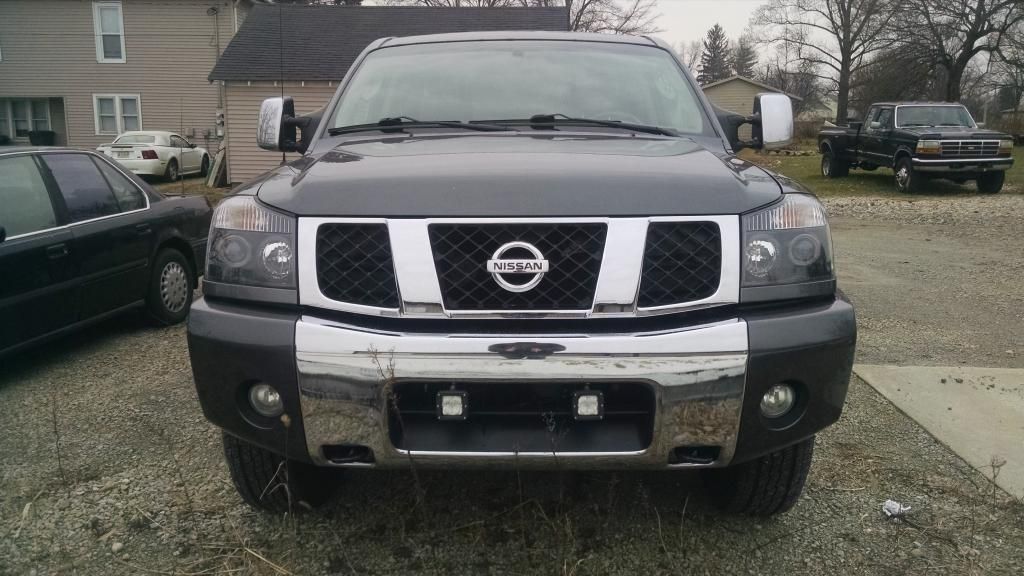
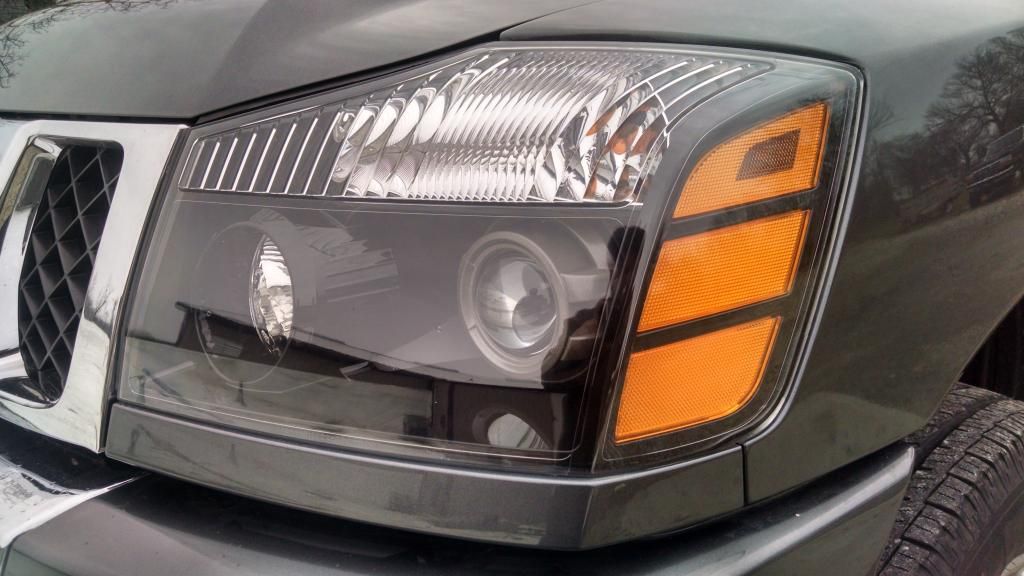
I'll be doing this to my DJ Auto's soon enough. I am very unhappy with the quality of the projectors that come in them haha. It's nice to see people on here doing this. The Nissan Titan forum is full of dumbasses putting in PNP kits..... I try to convince them with my trucks retro but they always say "It's too hard" or "I wouldn't know how to wire it" Like the wiring is any different from the PNP kit...
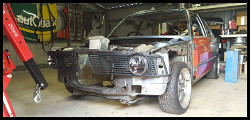
Shameless showing off my Titan's retrofit...
1997 328is - Megasquirt PNP, Holset HX35, Deka 80lb injectors, SPA T3, Precision PW39 WG, Synapse Synchronic BOV, DKM Organic Twin Disc Clutch, Innovate LC-2 W/B, Mishimoto Intercooler, Mishimoto Catch Can, Mishimoto Rad, Devils Own Meth, Porsche 911 calipers with E46 M3 rotors, Corsa Exhaust
Member
this is with one coat of niteshades tint on the highbeam reflector aswell


BMW NCCCCA Member #485873
That's a badass effect.
Member
You're going to love it. The FXRs are great projectors and the improvement in lighting is shocking.
Here's a writeup on my install from back in December.
http://www.hidplanet.com/forums/show...Sedan-retrofit
I personally thought painting the frames black wasn't going to be a good look, and not look as stock. I think having silver behind the inner lens is important to not make the projector look "squinty" with such a small lens being all that's visible. I was actually going to fabricate a sheet metal shroud for behind the inner glass lens to cover the retro-quik bracket, but I caught "get-it-done-itis" and skipped that step to get it completed. It looks ok, but if you know what to look for you can see the brackets. Most people will never notice though.
1998 Titanium/Dove M3/4/5
2020 Toyota 4Runner
Member
Did anyone find what headlamps the retrofit brackets were made for ?? I was hoping I could put them in some standard Bosch ellipsoid projectors or not ?
Sent from my HTC One_M8 using Tapatalk
Member
They are for the headlights with H1 bulbs (that's the projector-style headlight).
Member
Found that one out cheers. I heard that some projectors lamps needed more cutting inside than others.
Sent from my HTC One_M8 using Tapatalk
Member
Looks like the Retroquick kit is NLA? What other options are there nowadays?
Member
Look up Bluebimma on IG, he's using Morimoto Bi LED projectors in euro housing. Best i've seen thus far. IIRC euro lights are easier to disassemble than Depo.
 Posting Permissions


 Reply With Quote


Bookmarks