
 Member
Just did this the other day, thanks for the write up. My only problem was on the driver's side where the motor mount was pretty busted and the stud was frozen onto the motor mount arm. I removed the arm, and with some Dremel and drill action drilled out the stud. Thanks to the busted motor mount the engine had moved slightly. My passenger side mount wasn't bolted super tight, I loosened up the transmission cross brace to get a bit more movement and everything then lined up perfectly.
In the middle of all of that I made a meme of my old mount

Member
Just finished replacing my engine/transmission mounts a few hours ago. Thanks for the write up OP. I was somewhat worried about running into issues with the engine mount on the passengers side not raising high enough from reading experiences from other people; however, I found the passengers side to be far easier to install than the driverside.
I haven't seen this mentioned in this thread yet, so I'll share what I believe made the passenger side so easy for me. I removed the engine fan before I jacked up the engine, this gave me significantly more room to install the mount. So much room in fact, that I had about a half inch between the top stud and the engine mount bracket. I wouldn't have been able to get it up near high enough if the fan was still attached.
Member
If I remember well...I loosened the fan plastic shroud, think it was easier than removing the fan.
Member
i know this might sound like a rare thing to happen but my passenger side motor mount bracket cracked in two pieces i need some diy info on that it would be great. main thing that concerns me are the torque specs for the bolts that go into the block
thank you
86 325e Part out!!
http://forums.bimmerforums.com/forum....php?t=1641880
Member
What are symptoms of bad motor mounts? I have an automatic and don't really know how it feels with good ones.
1997 BMW E36 328i w/252k 9-29-13
Member
for me, it was losing TWO engine clutch fans (EXPLODING!).
Member
I replaced mine at 160k because I wasn't sure if theyd ever been done. With the new ones I had much better throttle response and the engine no longer shifted under hard braking, acel, cornering.
I used the bimmerworld group n knock offs. They're $60 and the same as the ones BMW sells for ten times that much.
Member
Im on pelican parts trying to order these mounts. The original part numbers had been discontinued. I'm driving a 320i touring. http://www.pelicanparts.com/cgi-bin/...6-779-970-M270
Will the mounts for the 318i and 318is work for me? I'm assuming yes.
http://realoem.com/bmw/showparts.do?...96&hg=11&fg=10
This is the diagram for the motor mounts. I typed in both part number searches and they brought me to the same part on pelican parts
Last edited by polarisboy385; 11-17-2012 at 06:09 AM.
Member
about to tackle this in the morning! I'm sat looking at my new mounts as I type. thanks fo the write up!
done it!! lol. so happy, the vibrations I had whilst at the lights has gone! very happy.
to add my 2 cents worth, I think there is a bit of confusion on the models including left and right hand drive. Mines a UK right hand drive auto. I had to fix the passenger side first lightly, they lift again to get the drivers side in. its a squeeze and fiddle but it did go. hope that helps some one! definately a job worth doing! thanks again for the "how to"
Last edited by newnut; 02-28-2013 at 05:49 AM.
Member
Wow, a blast from the past. IIRC I bought the nuts at the dealer. I'm pretty sure they do not come with the mounts.Originally Posted by mjbennett9

[
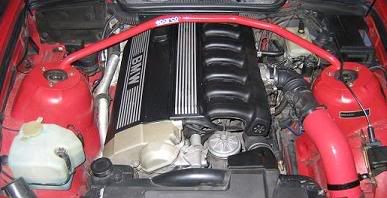
Turner Perf Chip/Fan Delete/Sparco Strut Tower Brace/X-Brace/JTD Underpanel
Zimmerman X-D Rotors/Axxis Ultimate Pads/Solid Caliper Guide Bolt Bushings
UUC EVO3/DSSR SSK/3.15 LSD/Cosmos Racing CAI V2/ASC Delete
96+ M3 LCA/LCAB M3 RTAB and GC Shims
BMW OEM Alarm/Woodgrain Delete/Blizzaks baby!/16x7 BMW Style 30 Sport wheels
License Revoked
Thanks,
I'll try another dealer as my local one Voss BMW in Dayton (Centerville technically), says he cannot get them.
UPDATE: I got a different parts person this time. They don't carry in stock, but did order them for me. The bottom nuts are $5+ each and $3.50 each for top ones. $17 for 4 nuts. rediculous. I could reuse them old ones, but won't. I may reinstall old ones temporarily and then replace with new ones once they come in. I want to get this done. Only a few minutes to put on the new nuts.
- - - Updated - - -
You didn't have any issues with fan hitting the fan shroud (as you lifted the engine)?
- - - Updated - - -
That's what happened to me! And I put the new one on already, but waiting on mounts to install this weekend. I know, reverse, but just did major front end overhaul and was tired and not thinking clearly. BUT, after front end work, I took to get aligned and had them check the mounts. they said nothing wrong with them. it would NOT be first time a mechanic was wrong. There's few things I can think of that will explode a fan when you floor the engine. What I can think of is a bad motor mount. I even told mechanic this--I'm changing regardless and HOPE they are physically noticably damaged so I can bring back to him and show. :-)
Last edited by mjbennett9; 04-18-2013 at 04:20 PM.
Member
Wait, how did that happen?
You're jacking the oil pan, and one of the motor mounts is off, so the entire weight of the car was being supported by the other motor mount?
Motor mounts really sound like a job for a professional. I heard one of the sides is a nightmare.
E39 DIYs done: Wipers, O2 sensors , MAF , Upper/Lower Intake Boots , FSU , ABS module fix , Power Steering Reservoir , Changed Rear Differential Oil , DISA , SAP, Vacuum lines , Radar Detector Hardwire , Fuel Filter , LED Angel Eyes , Headlight Adjusters--> [1],[2], [3] , Headlight Polishing, Punted: Fan Clutch/Tensioner/Pulleys , Oil cap O-rings , Window regulator ,Crumbling Cowl
Member
Motor mounts are one of the easiest jobs you can do on an e36. Ive done them 3 times. Its a no brainer operation.
Bleed your cooling system http://forums.bimmerforums.com/forum....php?t=1709482The ULTIMATE OEM Alarm/Keyless thread http://forums.bimmerforums.com/forum....php?t=1792200
Member
Just wanted to add my thoughts to this for anyone who searches it in the future.
-My motor mounts looked like 150,000 mile originals from 1999, so the nuts were slightly corroded. It takes some muscle to break them free
-The drivers side is easier because jacking by the oil pan naturally lifts that side higher. That one slid right in
-To get the passenger mount in/out I had to remove the engine fan (5 minutes). That let me jack up the engine high enough that the blades wouldn't crack on the radiator shroud. The whole car actually came off the jackstands about half an inch (bad!), but it was necessary for me to get the mount in. Only was like for about 45 seconds so I think things should be fine.
I'm giong to put some locktite blue on the nuts and torque things down this week. All in all it's a greasy/dirty/sweat job on your back, but between getting the car up on jackstands and handling the mounts it probably took me 2 hours.
Can't wait to get it on the ground and feel the difference!
Member
Please read (potential finger saving information).
Some personal experience with this tonight.
Removed nuts. Neither mount's nuts were too difficult to get to, although the bottom ones were obstructed enough to where the deep socket wouldn't fit into the space, and the last 5 turns or so had to be done with a wrench at an angle because the shallow socket got stuck in the space between the CA. Removed CAI tube and the top driver nut was easy with swivel/extensions. (Note: While the bolt/thread size is the same on the top and bottom of the mount, the top nuts took a 16mm and the bottom a 17mm.)
Jacked with 2x4 on oil pan.
Driver side mount cleared and removed no problem.
Continued jacking up to remove passenger side mount, but was unable to get clearance before the whole car started getting picked up by the back/top of the motor.
IMPORTANT! Loud popping sound, and broke the bottom passenger side plastic mounting point for the fan shroud. Looks like the fan pressed hard enough on the top of the shroud to break it. Oops. Probably fixable with plastic-weld/epoxy. Lesson learned: could have been avoided by temporarily removing the 4 plastic rivets from the shroud, which should allow the shroud to move 1/2"-1" vertically, enough to possibly make a difference with the fan clearance issue.
Lowered car.
Removed remaining plastic rivets on shroud so it was loose, allowing it to move up to 3/4".
Re-installed old mount on the driver side with the nuts mostly turned on so as to hold that side down and get maximum lift/clearance on the passenger side.
IMPORTANT! Jacked motor up again to the point that i could just see daylight over the top of the passenger side mount bolt and was 1-2 jack pumps from getting ready to reach in and grab the mount, when the old driver-side mount that I temporarily installed BROKE in half and the motor QUICKLY shifted/rotated appx. 1"-2" to the passenger side. Something tells me that they weren't designed to be pulled on...
Going to finish it tomorrow. Plan to remove the old split/broken mount from the driver side, temporarily reinstall the bottom half of the broken mount on the driver side with a good 3" bolt ran through the middle to hold the driver side down while jacking. Not a big job really, but way more PITA than I expected, including maybe a new fan shroud.
Last edited by clunkyM; 12-04-2013 at 10:32 PM.
Member
Sorry to hear you had these issues....there was mentioning of the fan shroud to be let loose before raising the engine but I guess you missed that important info.
It all depends from what exact point you are raising the engine from the oil pan and this could have caused the mount to break, it is always better to use the engine lifting tool, it's not too expensive.
Member
Or just remove the fan altogether like I did. Takes 5 mins and then the limit to how high you can Jack becomes the wiring harness on the firewall.
Member
Yes, bumping an old thread... But I just wanted to say thanks to the OP for composing this DIY, and to others for sharing their knowledge as well. I used this DIY a few weeks ago to install E46 M3 engine mounts in my E36 328is. As expected, I had to use a hacksaw to remove about 1/4" from the lower stud of the passenger side mount. It was definitely longer than the stud on the non-M mount I removed from the car. Otherwise, it was an extremely easy job.
1998 BMW 328is 5spd
1966 Pontiac GTO
2007 Subaru Impreza 2.5i 5-door
Member
wanted to add my two cents to the thread as I just completed the job on my E36 using stock lemforder mounts
procedure is very straightforward, few things I noted that arent necessarily mentioned.
-I used an engine hoist w/ chain on the eye hook, relieved any stress I had about jacking it from the oil pan underneath
-remove the airbox, maf, intake elbow and you can get a deep 16 mm socket (2"-2 1/2") w/ 6" extension on the top side driver nut w/o a wobble extension, passenger side needed wobble extension w a combined 18" of extensions w/ the wrench, bottom nuts nothing elaborate needed. All 3/8" wrench
-I loosened the fan shroud to allow some extra movement and should of removed the top fuel/engine covers for clearance but got away with not needing to.
-did not need to cut off the studs on the mounts to allow removal, lifted the engine high enough and the old mounts slid off and news one fit right back in, screwed the nuts on top a couple turns so they would not move, then lowered down into place slowly making sure the tabs line up.
-torque wrench on all of them, only needed wobble extension on passenger side top mount
'99 M3
'82 320i
Member
Awesome DIY, planning on doing this project this weekend. I got some motor mounts from AKG. I am planning on getting this engine support bar from Northern Tools http://www.northerntool.com/shop/too...9403_200309403 and the one question which I was not able to get a straight answer from them was if it does lift the engine up. I know it is meant to support the engine but I wanted to be sure it also would lift the engine enough to change the motor mounts. I'll be using it in the future to drop the subframe and do work to the oil pump/pan.
Current Stable:
2016 Cayman GT4
1995 E36 M3 Dakar Yellow (NASA GTS2)
1994 E36 325i (AER)
1988 E30 M3 (Alpine White)
Member
My mounts are getting a bit soft but I'm kind of afraid of doing this. If you screw up, won't the engine fall on you?
EDIT: Just saw the post about jamming a piece of wood in between the engine and a cross member. Good stuff. I might consider doing this myself after all. Depends on whether or not my short 32 mm wrench can actually get the fan off. Just worried about getting the passenger side out.
Last edited by DYL; 02-14-2015 at 12:07 AM.
Member
Wanted to say thanks for this guide! helping people out all the way to 2015.
After having a hell of a time sourcing an engine hoist (tates rents didn't have any of the hardware, just the hoist) I finally did the job via the oil pan + wood method.
-ramps work fine for this job, probably better than jack stands, I imagine the car would get lifted off the jackstands. ramps or wheels were not really in the way , I had to awkwardly crawl in under the driver side door because the jack was in the way but not really a big deal.
-I did have to replace driver side first, install new mount, lower engine, loosely install the bolts on driver side and jack up the motor again.
-the second time I jacket it up with the 2x6 block (free scrap wood at home depot) I had it running parallel front back of car as close to the passenger side of the oil pan as i could and I absolutely had to remove fan and loosen the fan shroud.
For M3 mounts you need to jack that motor SKY high to complete the passenger side I probably should shaved off 1/4 " like others but I managed to get them in.. My oil cap (M50 e325is was smooshed into the top)
If I did this job again, I would start with the passenger side, leave the old driver side motor mount in with nuts loose.. I was afraid of damaging the studs on my new motor mount while jacking the hell out of it.
This allowed me to not be a fan delete guy anymore, and confidently install a brand new clutch fan.. FEELS GOOD
Last edited by drpatso; 03-15-2015 at 01:00 AM.
Member
To lift the engine.
#buttstuff2k14
BMW CCA Member
I jacked from the oil pan with a big block of wood to disperse the weight. I followed the thread here for help and got away with using wobble extensions instead of the universal joint. A 6-pt socket is necessary to not strip the nuts; my nuts were really tough to knock loose even with an 18" breaker bar.
Last edited by shogun; 12-23-2016 at 04:04 AM.
Member
ALTERNATE METHOD FOR E36 M3
This is probably the best thread for E36 motor mount replacement, no doubt you have arrived here by web search. Note M3s are a bit different since they have dual exhaust, and this is a contributing factor for the right engine mount being more difficult (i.e., engine not lifting high enough to sneak out the mount). I have a 95 M3 and these are the procedures I went through (however, I never could have done it without Hellrot's initial post!). Other E36 variants may benefit from the instructions below too.
- raise car and support both front wheels on ramps
- for safety, disconnect: rubber intake hose to manifold, plastic air duct for alternator
- remove strut brace if necessary
- note distance between fan shroud and fan blades
- loosen and remove all 16mm bolts from L and R motor mounts (top and bottom)
- lift engine with hoist or from below with floor jack with wood block (remove x-brace if required), watch fan blade clearance, remove shroud or fan if required (I didn't have to do this)
- left side mount comes out easily as people mention, replace old with new, hand fit new lower 16mm nut
- confirm weight of engine is off the right side, it should slide around a bit with some play, however the engine will not be high enough to remove it
- "magic step": loosen and remove the right side motor mount brace that is attached to the block (four easy 13mm bolts), the right engine mount will now be very easy to remove and you don't need to lift the engine so high
- note position of heat shield and mount in the assembly and install with new mount
- with righthand mount in position (thread on the lower nut) reattach right side motor mount brace and bolts, check torque specs
- make sure both mounts are in their correct position, lower engine onto mounts
- thread on and tighten all 16mm mount nuts, torque to spec
- reattach intake hose and alternator air guide (also x-brace, strut bar, fan shroud, etc. if required)
- double check your work
- lower car
- test drive
This is the procedure that worked for me. Perform at your own risk, more important .... have fun wrenching :-)
1995 M3 - Conforti HFM Kit, Euro springs, Koni yellows, float'g rotors, LTW splitter/wing
2002 A4 1.8T Avant w/ too many mods
2004 Honda Insight
 Posting Permissions


 Reply With Quote


Bookmarks