
 Member
I have a M style 2003 rear (and front) bumper on my 2003 540i/6 car with three small 2-3" cracks in it. After seeing the cost of the great deal on a replacement bumper in another thread (over $1100) I made up my mind to try a repair first. After watching the different repair methods on youtube videos I decided I didn't want one of the ones that melts a piece of metal that resembles part of a Ruffles Potato CHip into the bumper. Instead this one looked like it did a solid repair and checking around comes recommended. $235 seems steep compared to the other kits. This one that included 30 feet of the same welding rod and reinforced mesh seems a lot more reasonable. I have a rheostat that can vary the heat as needed.. Anyone use anything like this before?
Is anyone 100% sure if these bumpers are ABS? If so, you can get the same companies ABS welding rods, the mesh, and a 200 watt iron that would be even cheaper.
The company has about 20-25 different material type welding rods..
Last edited by SW530; 01-27-2023 at 01:33 PM.
A great ending is all you'll see..
__________________________________________________ _____________
Member
I didn't look at the product you are considering but do have a little experience with plastic welding.
The tool I had(past tense)was a cheapie from Horror Freight that used heated air. Using the correct plastic type is important, there are usually areas you can trim a bit from the original part if in doubt.
Practice, practice, practice. At least with the modest set up(& skills) I had results the were acceptable after a more than a few tries.
I wouldn't discount some corrugated reinforcement melted in as long as it isn't something that will rust later. I've "stitched" together broken bumpers this way and it is a good reinforcement to the weld.
Bodywork hides all your sins.
If you can leave two black stripes from the exit of one corner to the braking zone of the next, you have enough horsepower. - Mark Donohue
Member
Do you want me to check markings on my mine? I think it will say ABS if it's one.Originally Posted by SW530

Almost There
Moderator
The BMW bumpers are a special plastic blend. Not ABS or Polypro. I forget the blend at the moment, but look at your new bumper Z, it will have the plastic type stamped on it.
98 540i 6, 525 whp, 120 mph 1/4, V3 Si S/C'er @16 psi, W/A I/C, Water/Meth, Supersprint Headers, HJS Cats, 3" Custom Exhaust, UUC Twin Disc, Wavetrac LSD, GC Coil Overs, Monoball TA, AEM FP, Aeromotive FPR, AEM Failsafe AFR/Boost, Style 65's w/275's, M5 Steering Box, Eibach Sways, M3 Shifter, Evans Coolant, 85 Deg Stat, PWM Fan, 10" Subs, B.A. speakers, Grom Aux/BT, Still Rolling as my DD!
Member
Just checked my new bumper and it has > PC / PBT < markings.
I'm assuming it's this:
https://prlresins.com/products/pcpolyester-resin/
Obviously, it'd be better if you could check yours because it's possible that yours could be ABS and BMW later switched to what mine has, I don't know...
Mine has 12.10.18 sticker which means it was made on October 12 2018 (Europeans put day first, month second).
- - - Updated - - -
Yup, just did and posted it.
Member
3M 04240 in a dual cartridge.
Followed by good polyester glaze.
Fit everything up with tape on the back, bevel it out and glue away.
I used a spreader to keep it level.
I have more pictures, and can give you more info.
At least it's an m bumper. It takes adhesives well.
The regular bumpers are PP and a whole different can of worms.
20190720_113946.jpg
20190727_113154.jpg
20190727_140917.jpg
20200429_171804.jpg
20190727_113144.jpg
Not enough room for past/present garage
Member
Good info. Thank you.
- - - Updated - - -
Yes please and the date code as well? I The right information would save me a 24 mile drive through snow.. its a insulated climate controlled outbuilding on a farm that I rent.. in the country. Its where I winter the cars I care about because of the dreaded rust belt salt roads.
- - - Updated - - -
Thank you!
A great ending is all you'll see..
__________________________________________________ _____________
Member
Nice repair! Has it lasted a while? And did you drill holes at the ends of the cracks so it wouldn't split further? I can paint the rear bumper when I paint the hood.. Thank you.
A great ending is all you'll see..
__________________________________________________ _____________
Member
I've put 35k on my salvage title M5.
Did the front bumper also. It now has rock chips, but no cracking.
It had actual holes , from hitting stuff. I bridged across them with that product.
The pink was 2 part epoxy finishing (norton epoxy repair filler 06412). Figured that my repair was extensive enough to warrant the money. Then putty coat after the epoxy primer, but before primer.
I didn't end drill all the cracks, but i V'd them out so far it acted like an end drill.
20190727_113123.jpg
20190727_113127.jpg
20190727_140845.jpg
20200429_171818.jpg
Not enough room for past/present garage
Member
I would go more with wagons ho's method. SEM and 3M both make great products to repair holes and cracks in these bumpers.
3M also has a patch for backing the crack/hole as opposed to the tape thats out there.
Would be a good topic for Snotty to chime in on.
Member
JP, so are we comparing experts now?
Not enough room for past/present garage
Dismembered
I’m no expert, but WagonHo’s way is how I’ve done it. I actually have a front OEM M bumper that I need to fix in the spring. It’s even missing whole chunks out of the corner spoiler lip. I’ll form the missing section with aluminum screen, form it to the missing sections shape, epoxy it into place on the inside of the bumper, spread the 3M epoxy over it on the front surface, then body work it. I have also used MarineTex in the past, same good results. Once formed, I also used 2oz fiberglass cloth as backing over the inside section of the repair.
Set the controls for the heart of the sun
Member
Its lloking goof Theres
Last edited by kallekula; 01-29-2023 at 01:29 AM. Reason: Cyfffjfjj
Member
Its looking good, sucker for Dark metallic.
Member
Yeah I got a nice crack on the bottom of my bumper thanks to some d-bag in a Subaru. Contemplated repairing it. But the cost to get it right would probably be as much as buying and painting a new one.
Will keep it and attempt to fix it whenever I feel like it hahaha.img_1_1674979449199.jpg
Member
It's fortunate you found all the pieces. That's a much more extensive repair than I need to make. I see no reason your method wouldn't work for me. My front M bumper has paint chips but my hood has more. Other than the bumpers and hood my paint is great.. so I'll probably remove them all and repair and paint them off the car and then blend them in on the car. Thanks!
A great ending is all you'll see..
__________________________________________________ _____________
Member
When I recently wanted to respray my front bumper I was quoted $500 by two independent shops. Bought matching color on rattle can and was gonna build a simple temporary paintbox but the project ran aground.
 Posting Permissions


 Reply With Quote
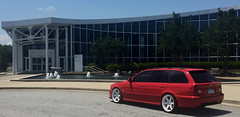


Bookmarks