
 Member
Currently working on an exterior restoration and I thought I'd post some progress pics here. The thread is kind of long and covers a lot of stuff, so here's an index that will take you directly to interesting parts of the various projects:
- Headlight Restoration Work
- Restoring my Style 42 wheels begins on this post
- Repairing the right front rocker panel
- Final Bodywork
- Final Paintwork
- All work complete: final shots
- Fixing the faulty drainback valve on my OFH
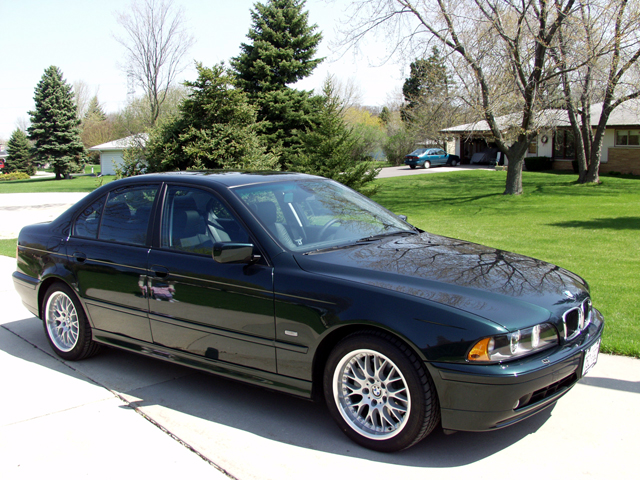
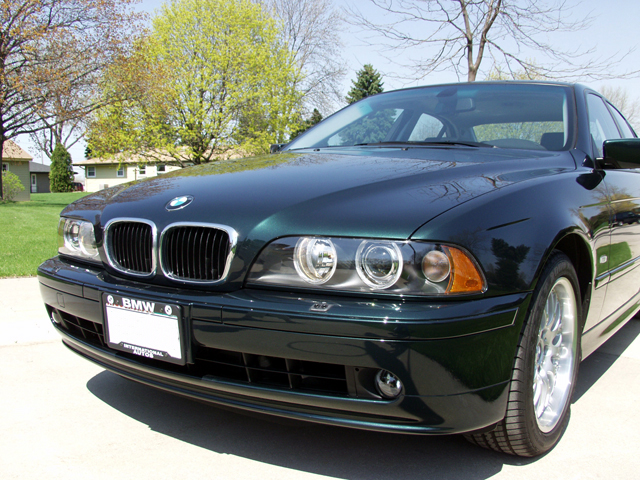
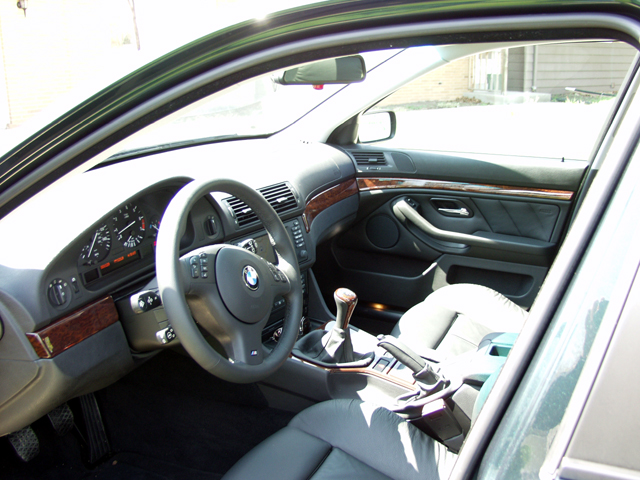
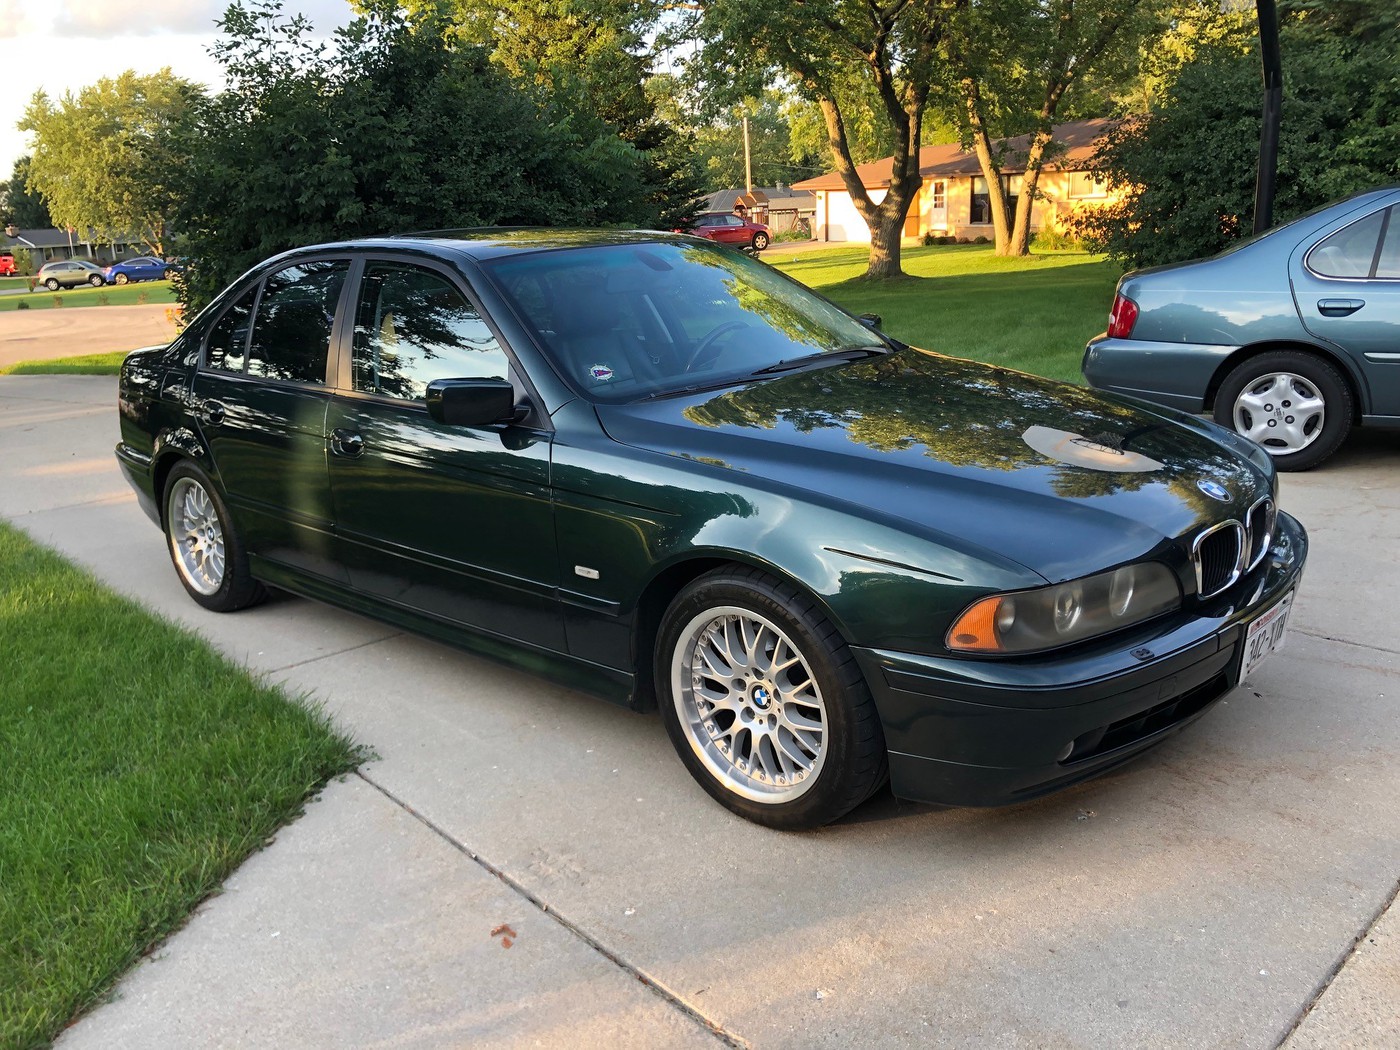
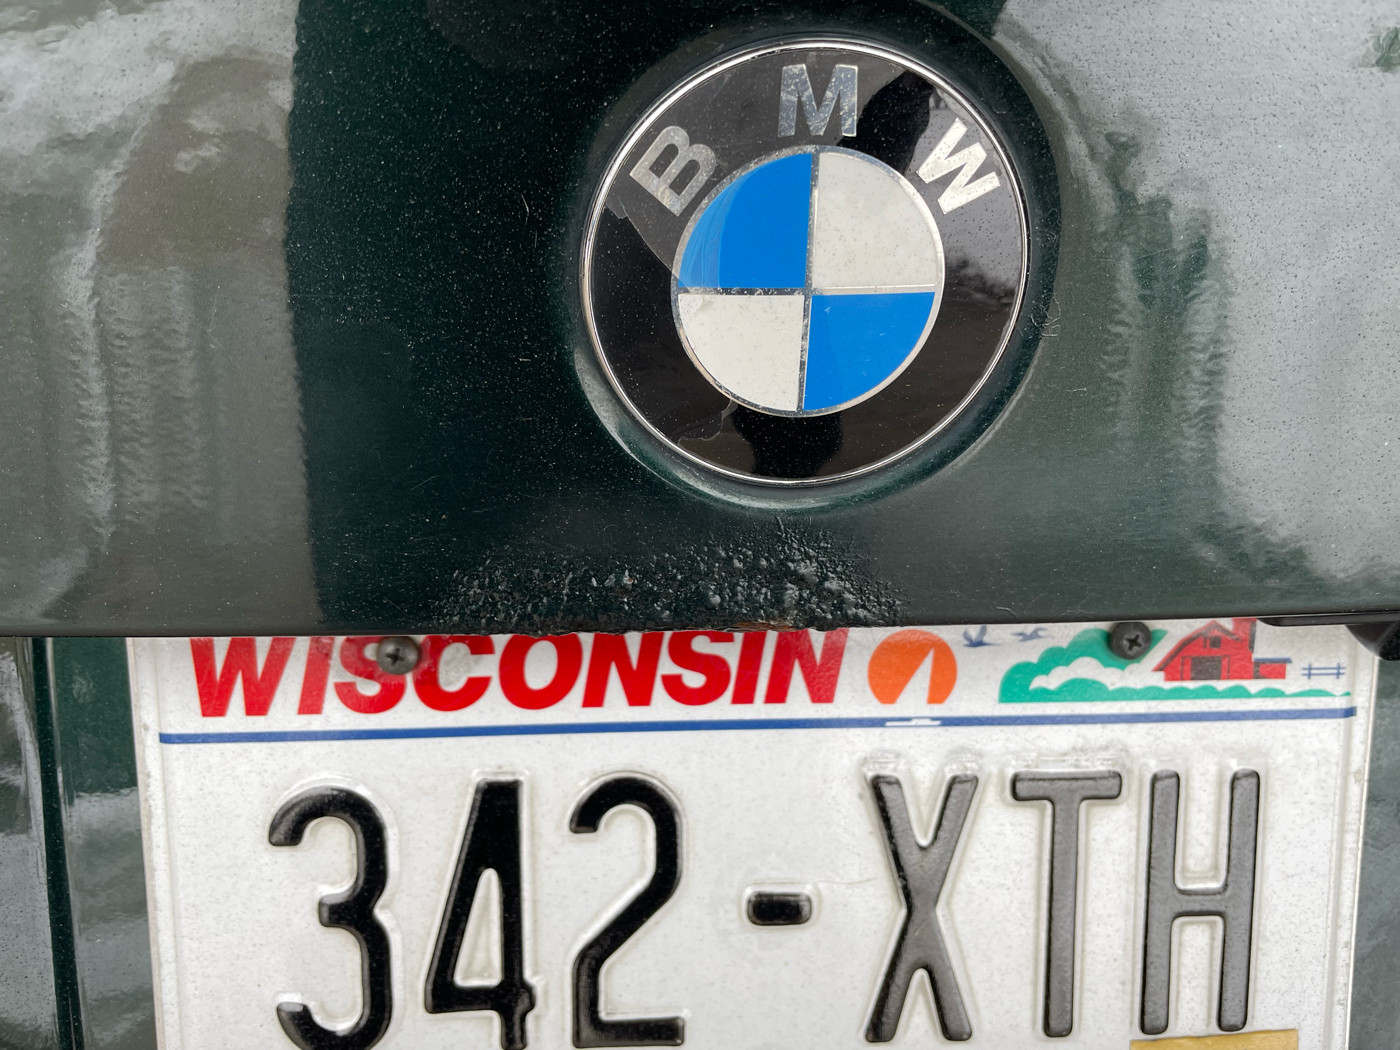
My BMW is a 2003 530i 5 speed, with Sport, Premium and Cold Weather packages. I also added factory Navigation and fold down rear seats. With a March 2003 production date, it was one of the last E39s to roll off the line. Here she is pretty much brand new:
and here she is in 2019:
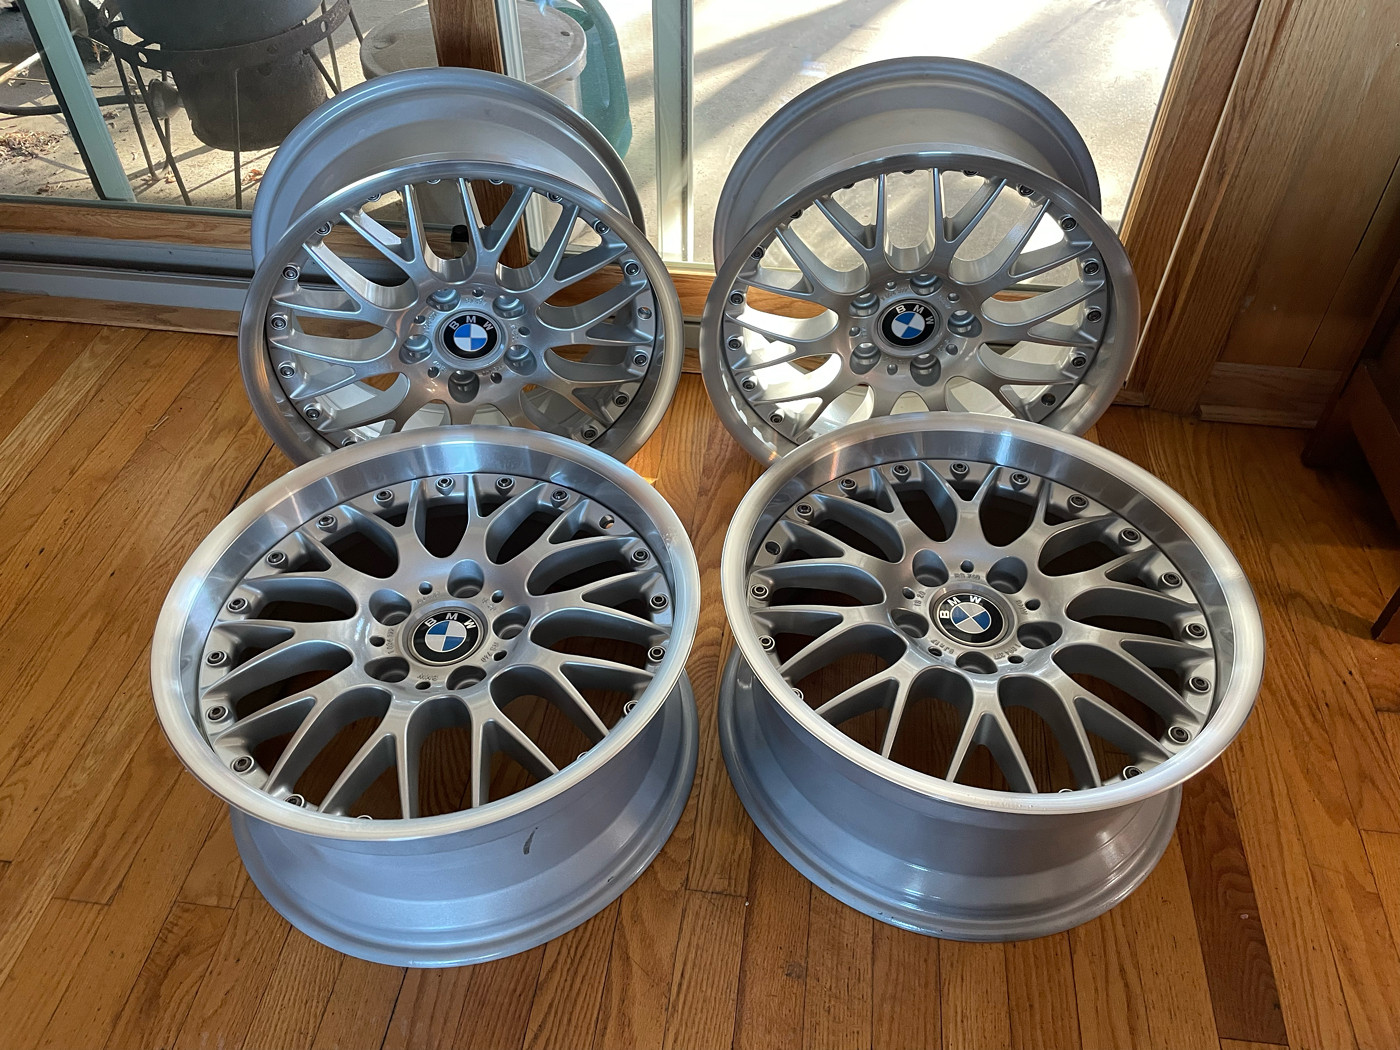
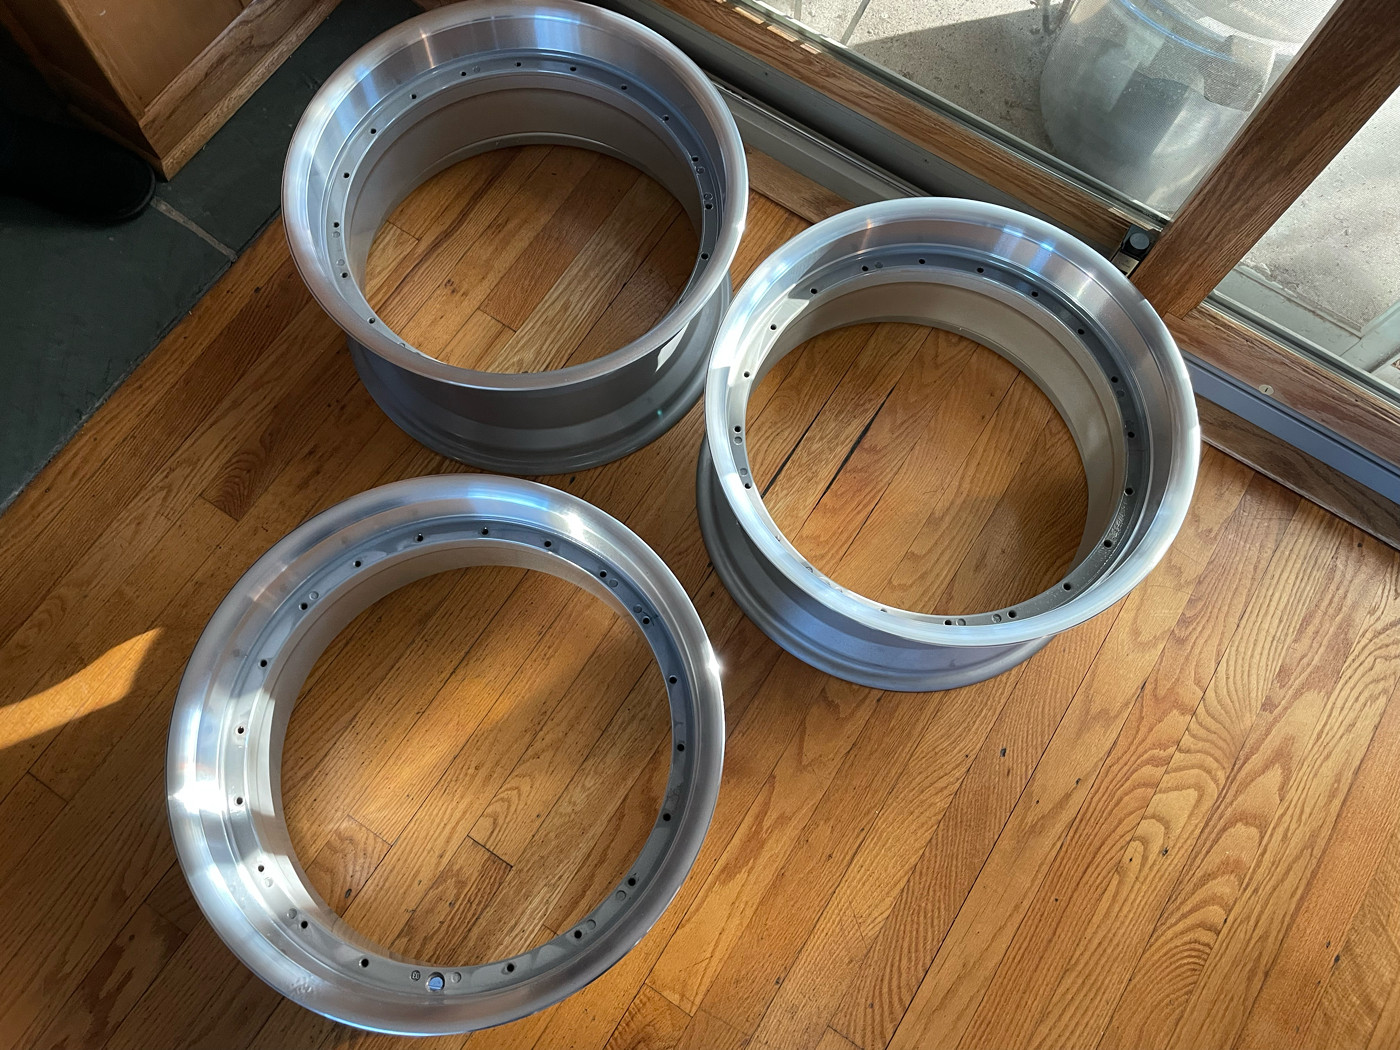
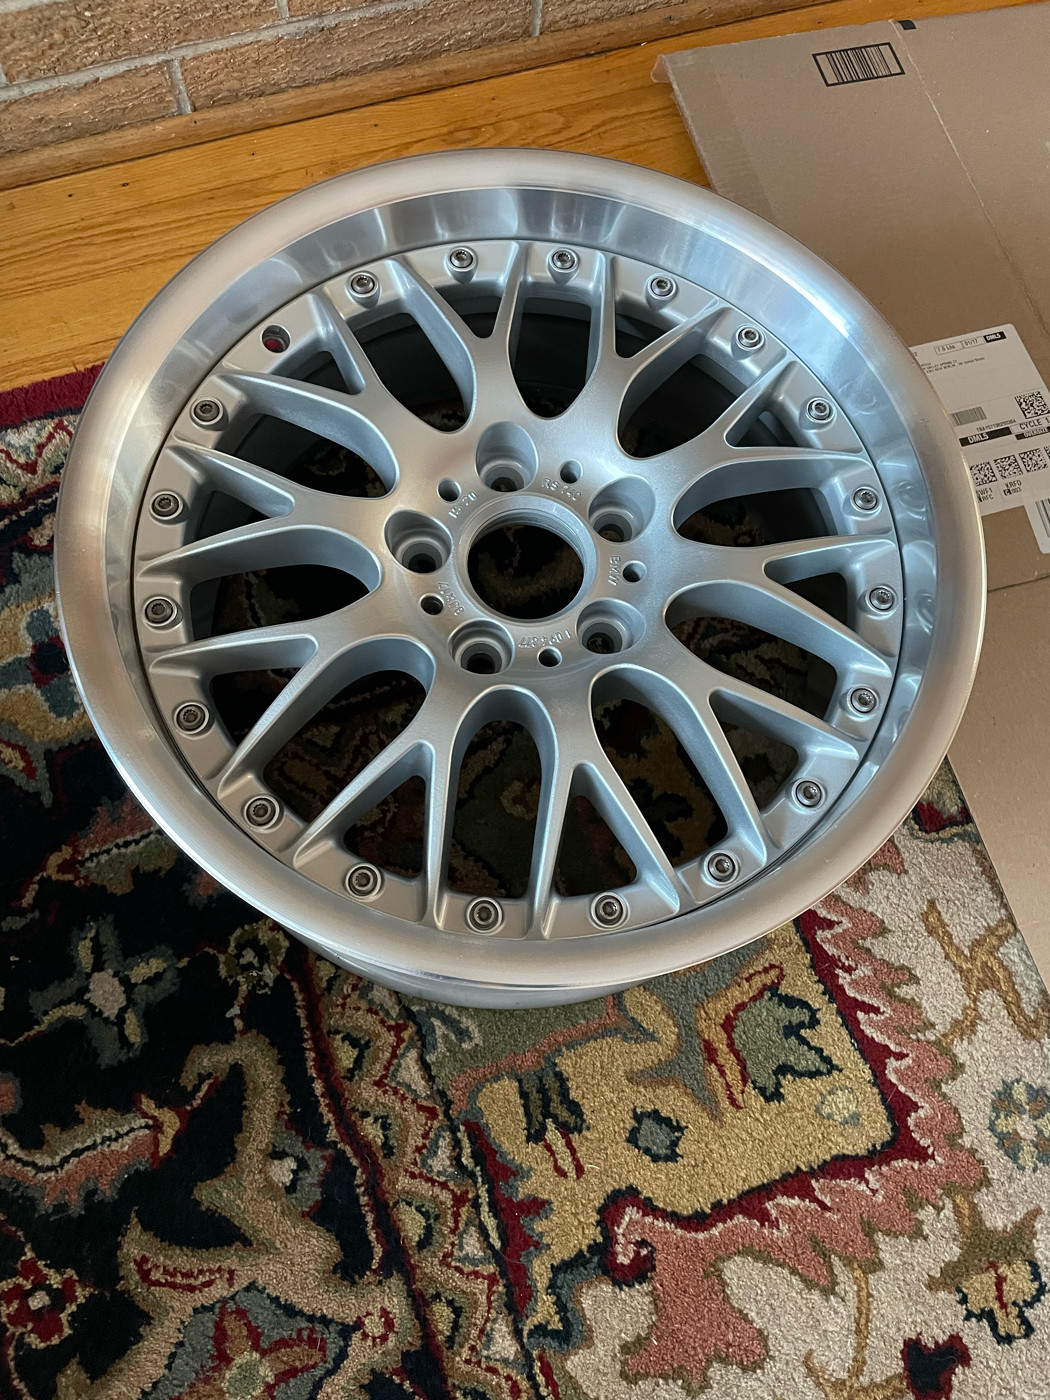
Not too bad yet, but in need of some restoration. She's in the body shop now and I'll be posting more pics here when I stop by next week to check on the progress. In the meantime, I started work on some of the other parts... Like those awesome 17" style 42 wheels. After 19 years of spirited summer driving, they were starting to show some wear and tear.. They had some curb rash in places and a few chips out of the inserts. So I decided to engage a local shop to help me get them back to factory condition. Essentially, I'd be the grunt: disassembling and re-assembling, and they would acid dip/re-coat the inserts using BMW sliver powder coat then polish out the rims and re-apply the clear coat.
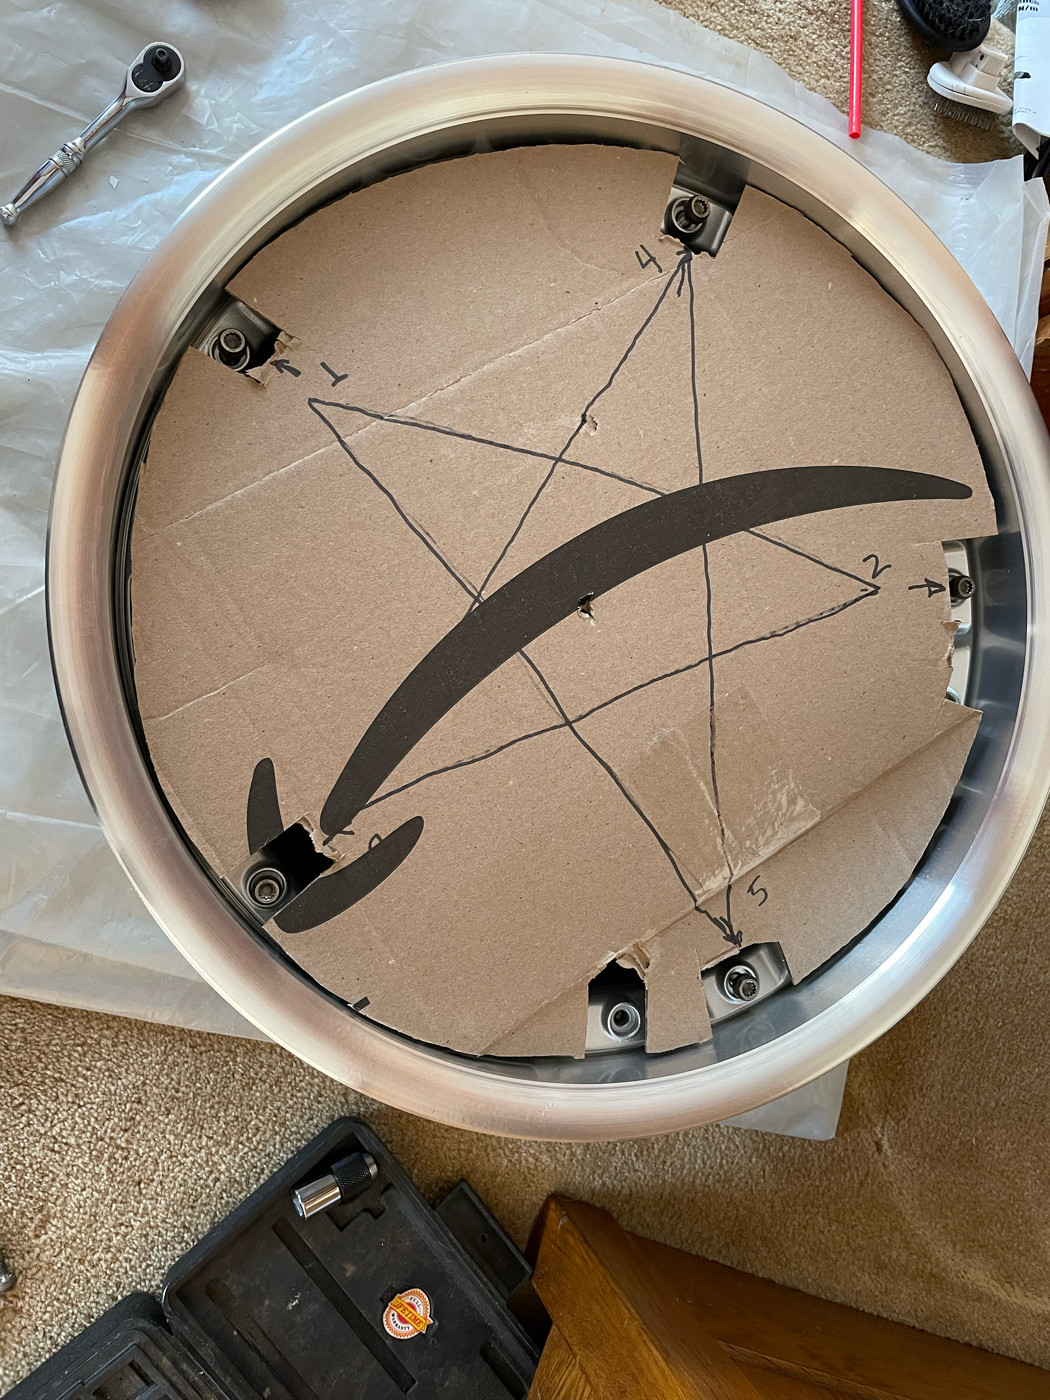
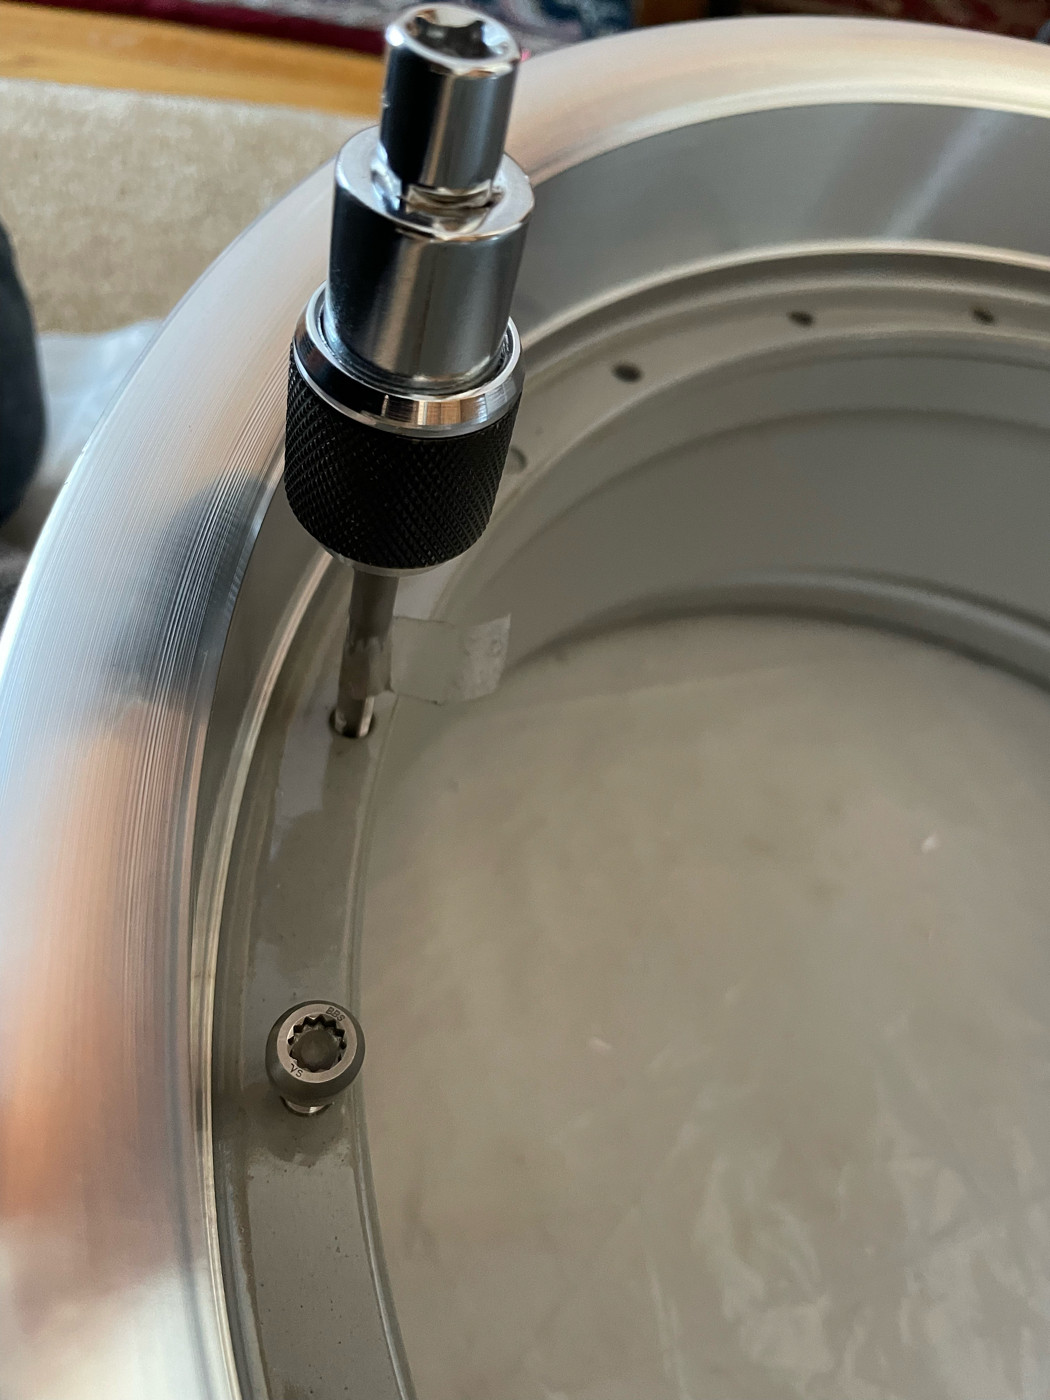
Now there's lots of stuff out there on how to disassemble these: essentially get a torch and heat up the outside of the rim behind the screw to break the thread lock bond. Use a finger on the inside to measure how much heat to apply. When it starts getting uncomfortable, its hot enough. Then take the titanium screw out (of course its titanium lol) using an 8mm XZN (triple square) socket and some patience. Titanium is brittle, so I cranked 'em out nice and slowly. Mine came out easily since I only use these wheels when there's no salt on the roads. Rinse/repeat 18 more times. Then, turn the wheel upside down, put a 2x4 on the insert and tap it out with a mallet. Easy peasy.
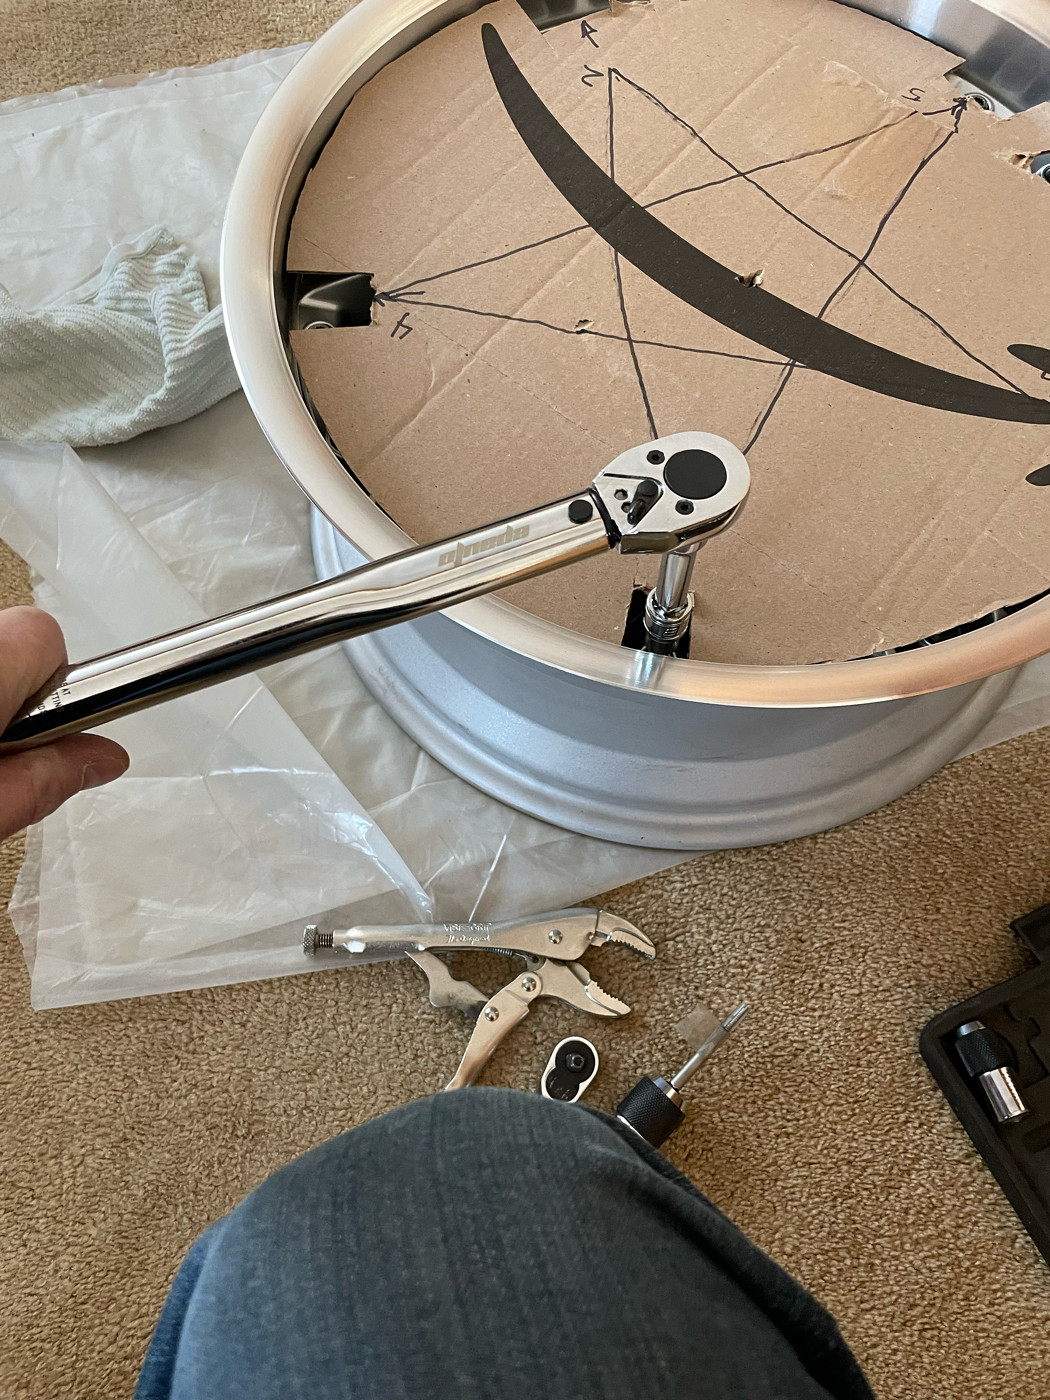
However, there isn't much on how to put them back together again. Essentially its a 5 bolt star shaped torque pattern repeated 4 times. Each titanium screw gets blue Loctite first. Do this process 3 times: first to 10ft lbs, then to 15ft lbs and finally 21ft lbs which is the factory torque spec. There's a real key to the process too which is this: before doing anything, clean up all of the threads! I used a 7mm 1.0 pitch tap for this. It will clean out any thread lock and also any overspray from the polishing work. I also used a 7mm 1.0 pitch die to clean up the screws. All 19 should easily go in and out before beginning the torque process. Then I made a form to help with the torque sequence itself. Details are below.
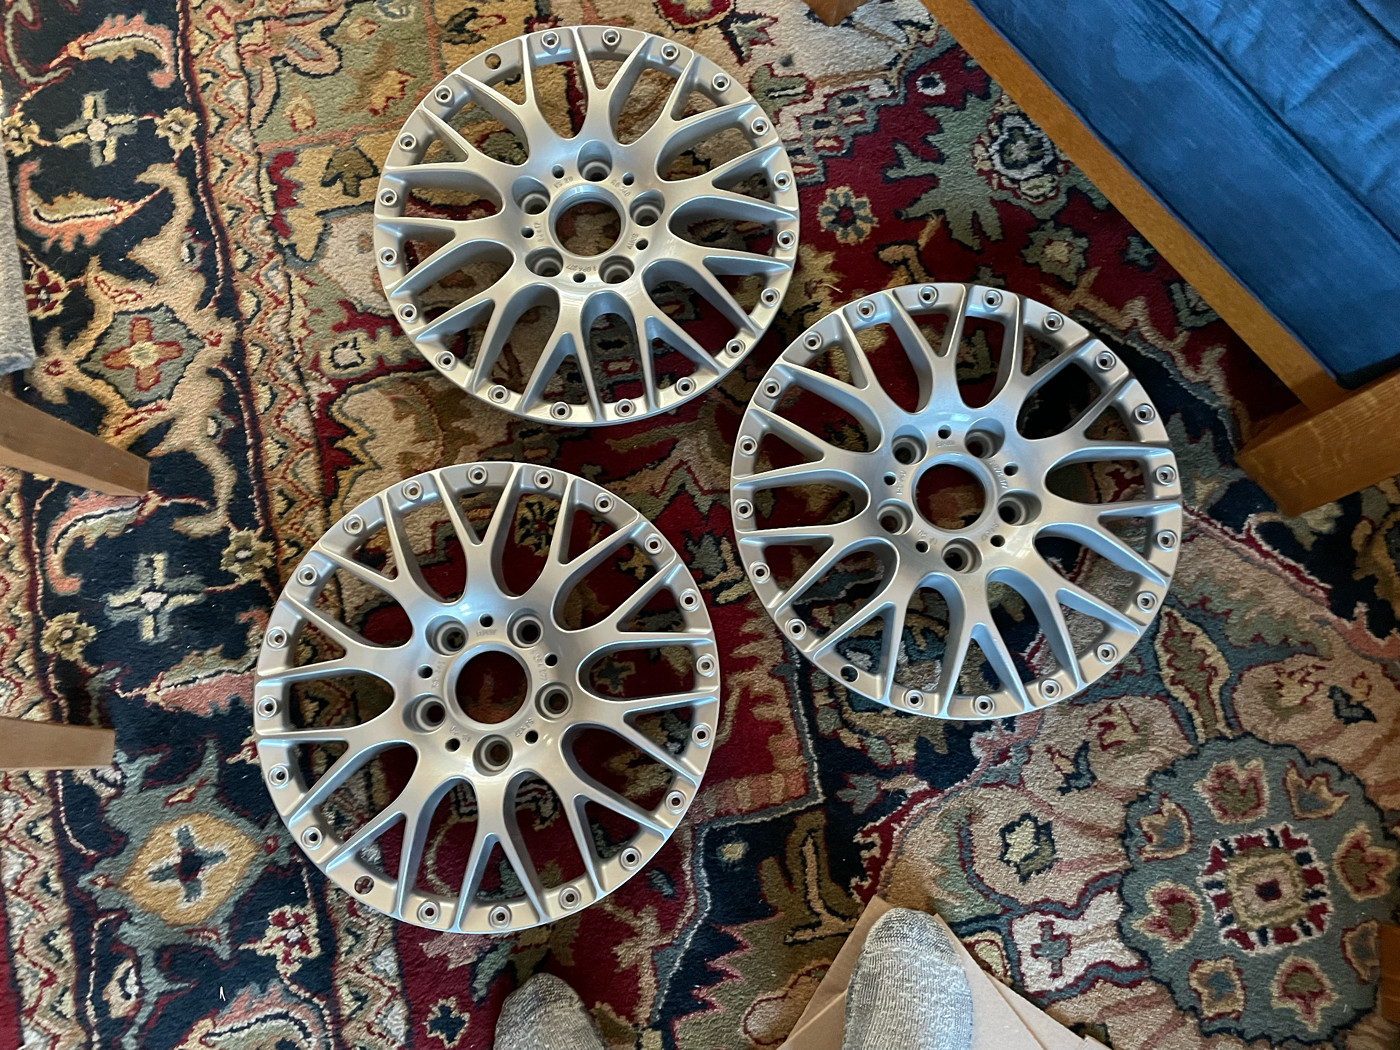
Some of finished rims/inserts
The form that I built:
Assembly:
First, I positioned the insert then hand tightened 5 screws in the star pattern to seat it correctly. Then I removed the 5 screws and assembled all 19 screws with blue Loctite clockwise around the rim to hand tightness again. At this point, all bolts were inserted. Then I began the torque sequence: Essentially, position #1 on the form to the screw at the left of the valve stem hole. Torque according to the guide pattern. Shift #1 left one hole, repeat. When you see the valve stem hole in one of the positions (on the 4th left shift) torque the final 4 bolts and the sequence is done. Crank the torque wrench up 5ft/lbs, reset number 1 and repeat. Easy peasy.
Finished product. 4x fully restored classic style 42 wheels, all ready for new Michelin Pilot Sport 4S's!
Last edited by sleuth255; 08-12-2022 at 02:55 PM.
Member
Looks good! Where is wheel #5?
And your wife let you bring them into the house?
I hope the jack pads are still solid.
Last edited by edjack; 01-23-2022 at 05:41 PM.
Ed in San Jose '97 540i 6 speed aspensilber over aubergine leather. Build date 3/97. Golden Gate Chapter BMW CCA Nr 62319.
Member
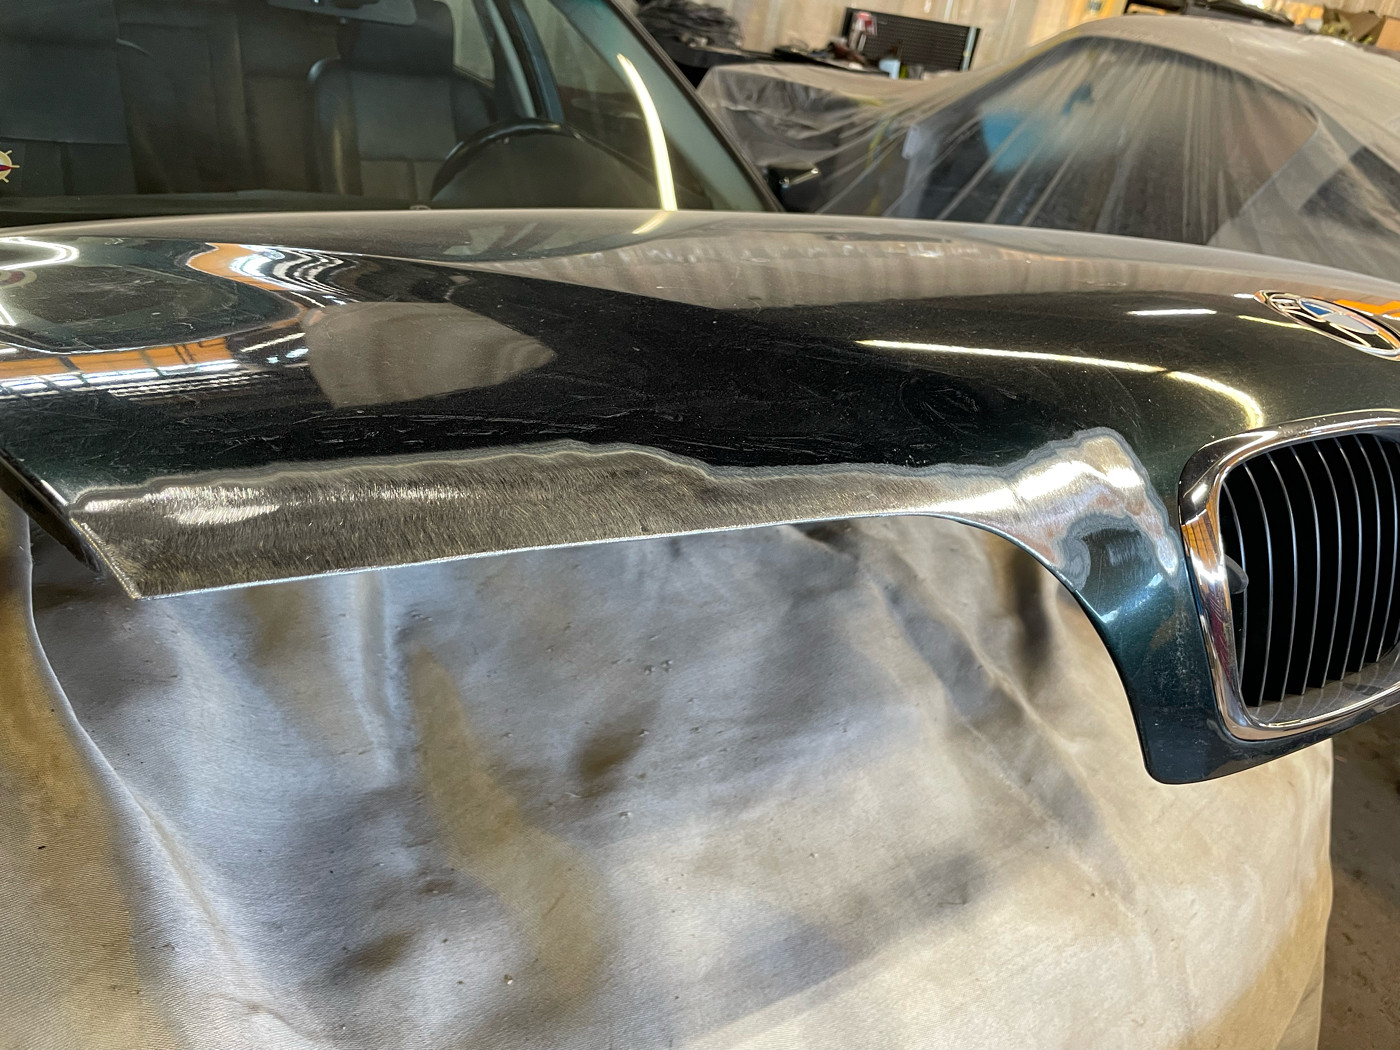
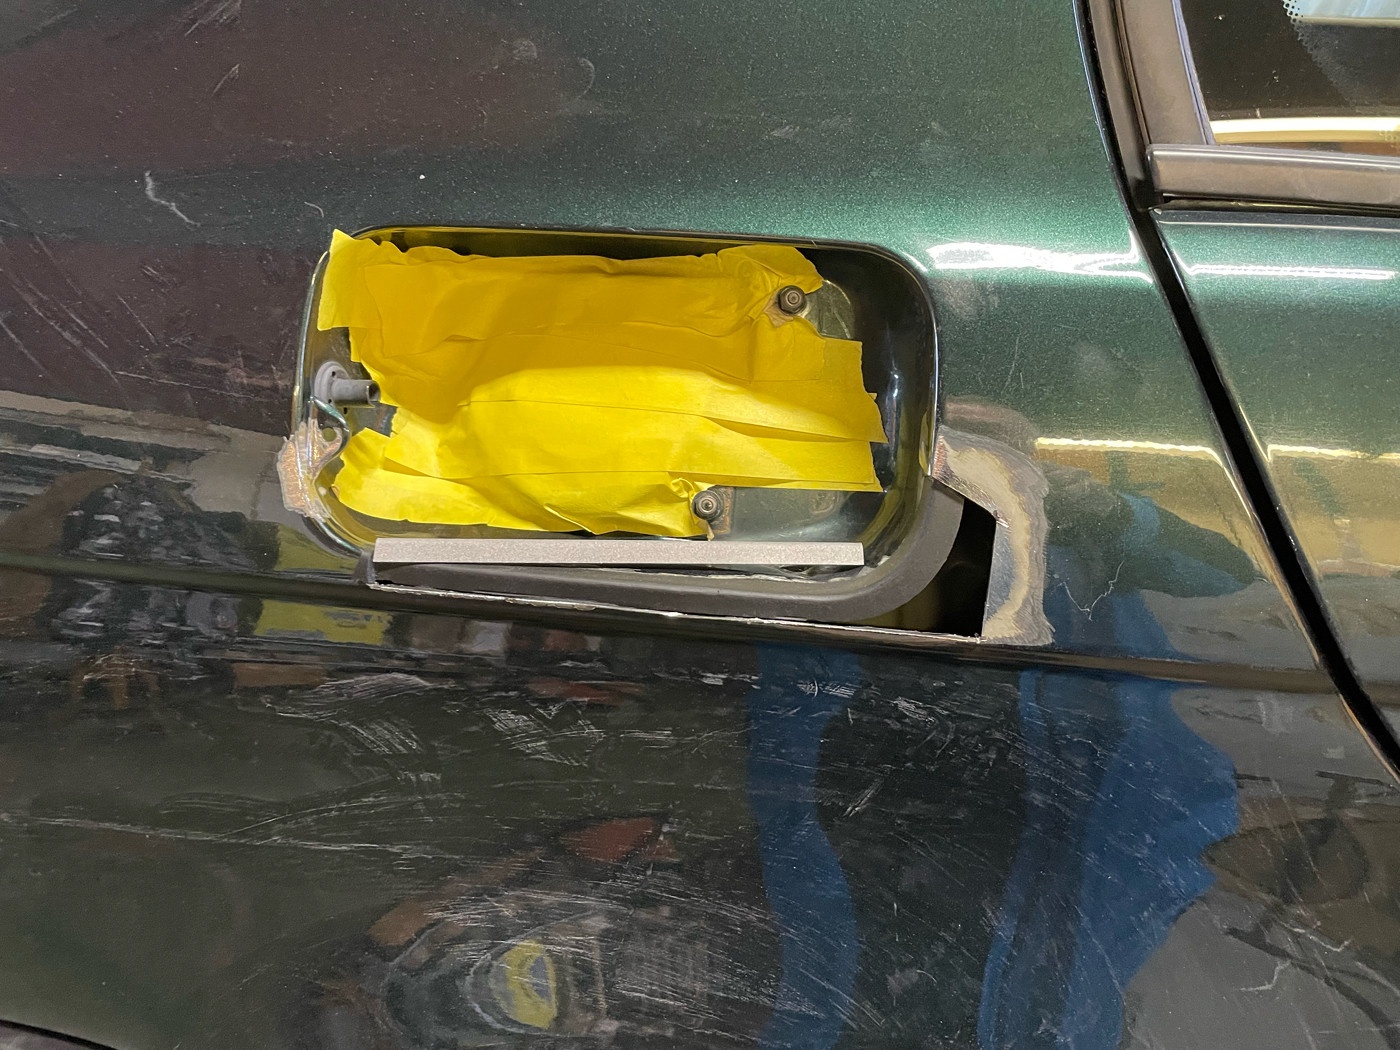
The spare wheel is still in the boot... I'll get it done when the car comes back. Jack pads are all solid. They did a closeup inspection there. I'm really looking forward to seeing the work in progress (although the pics may be scary). Line items from the current statement: "Cut out both layers of the right front edge of the hood, made replacement pieces, and started welding them in". Then a week later "Welded in both layers of the right front corner of the hood and the flange then ground the welds flush. Cleaned out the paint around the gas cap door and began repairing the rust damage". Yikes!
Member
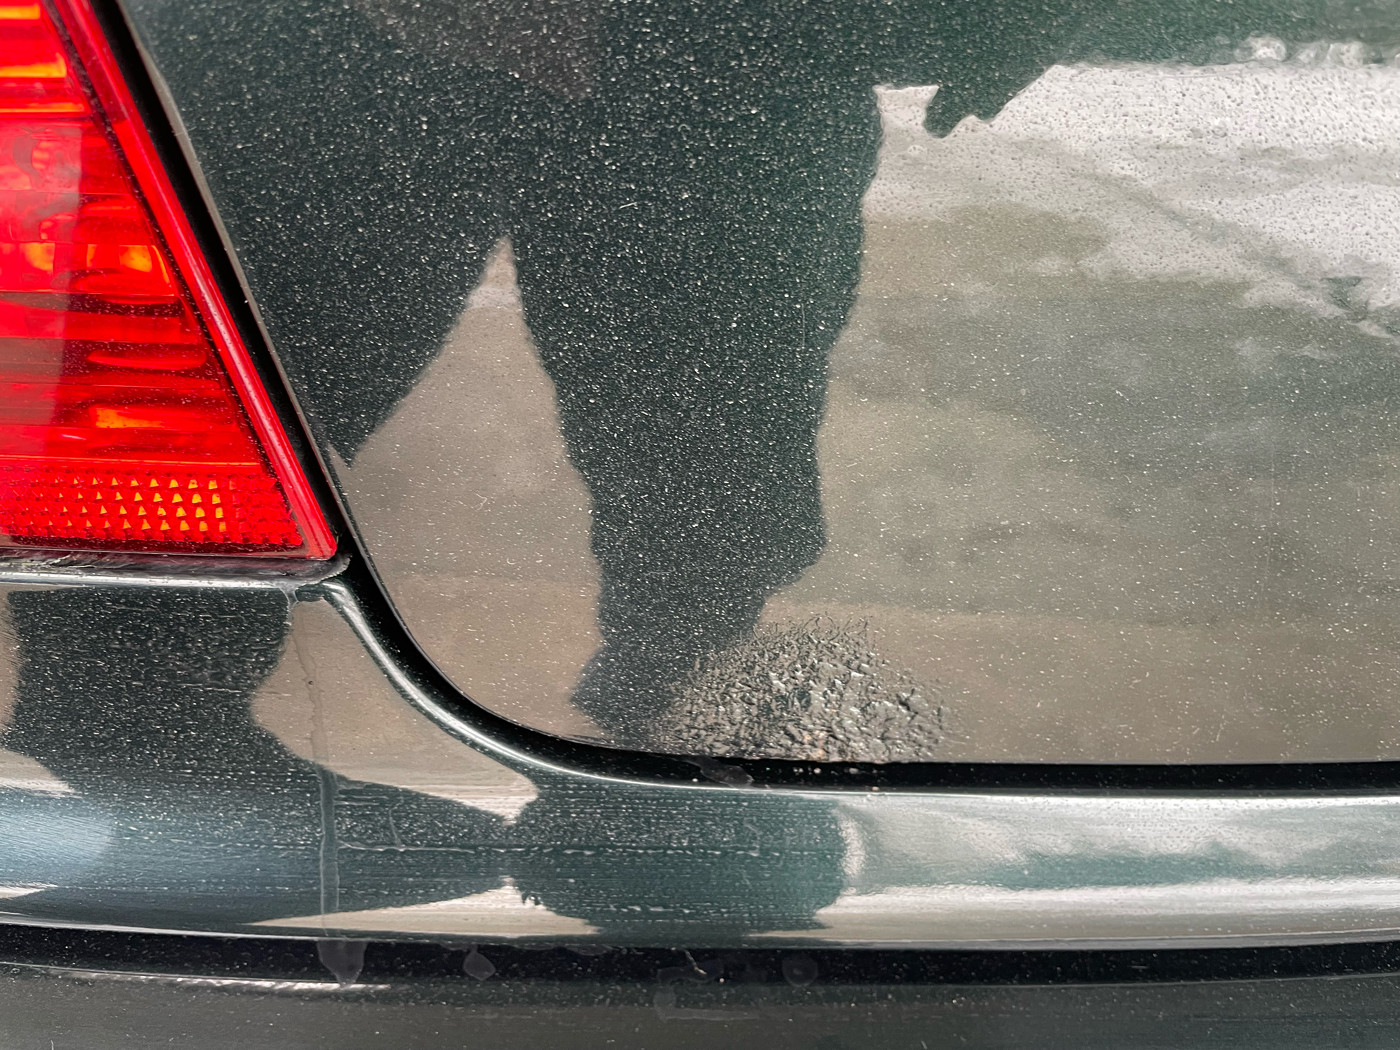
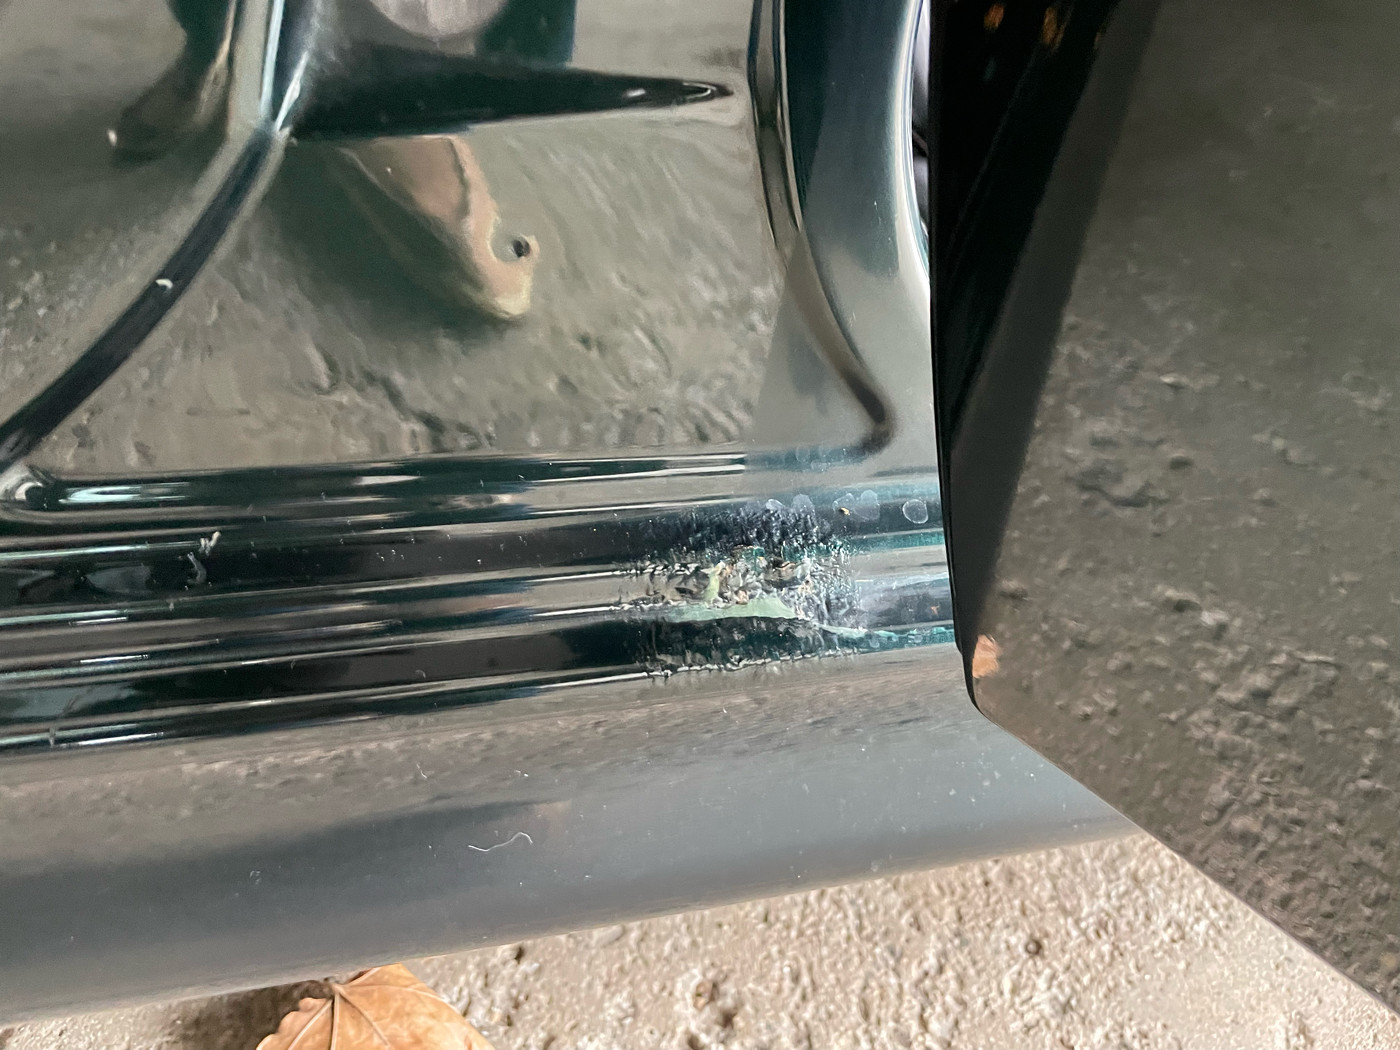
Body project. here's what we're up against:
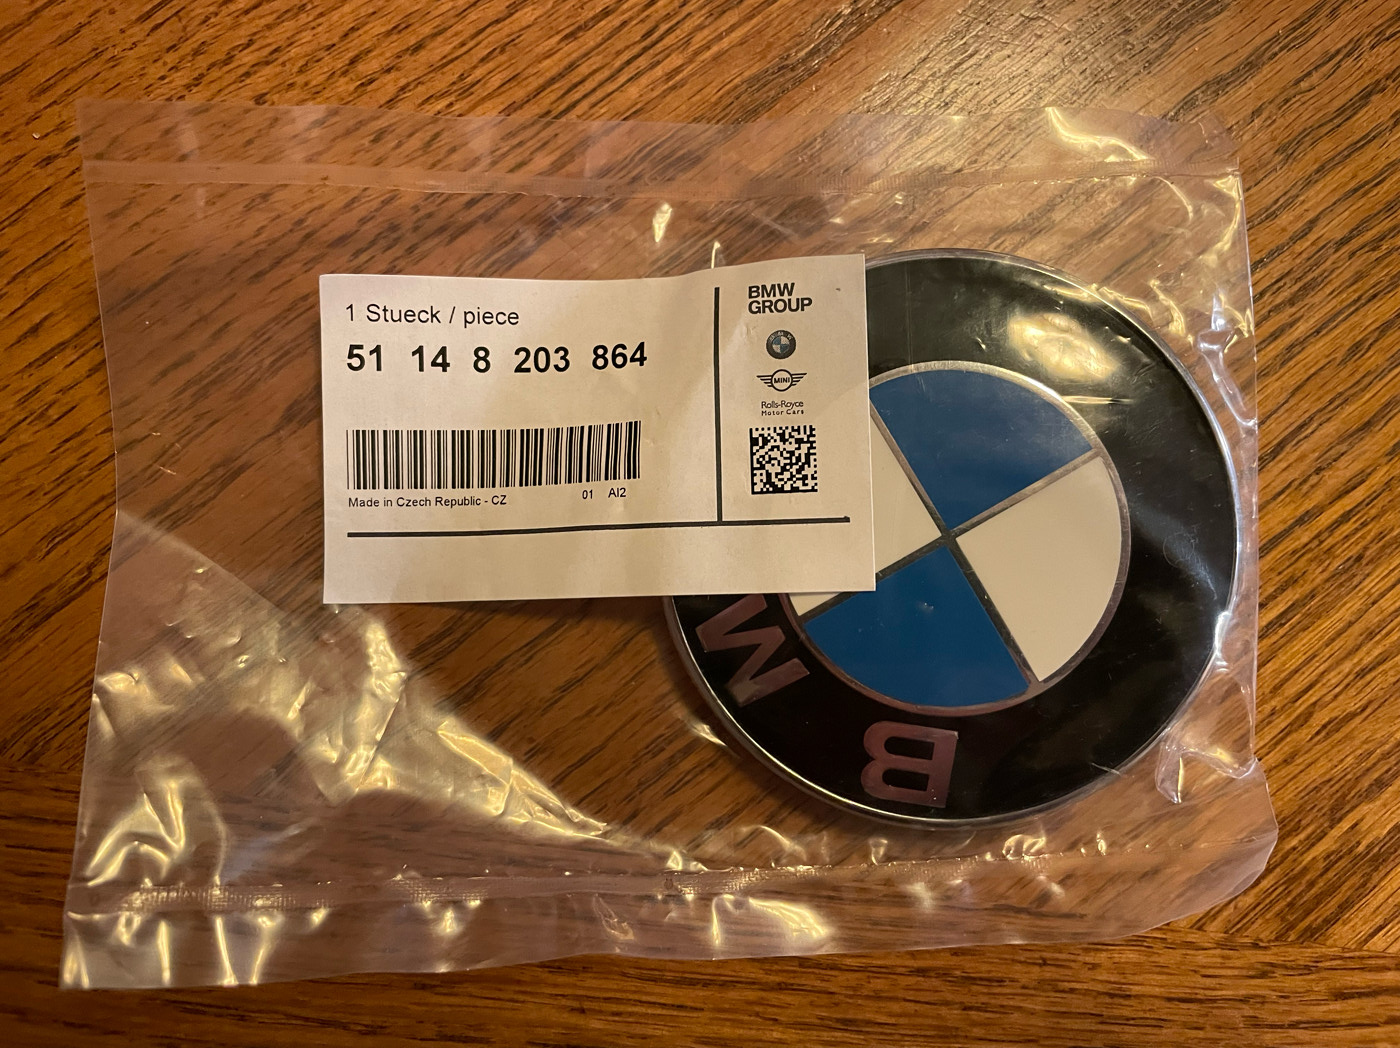
Damage to the trunk lid (needs a new trunk emblem also):
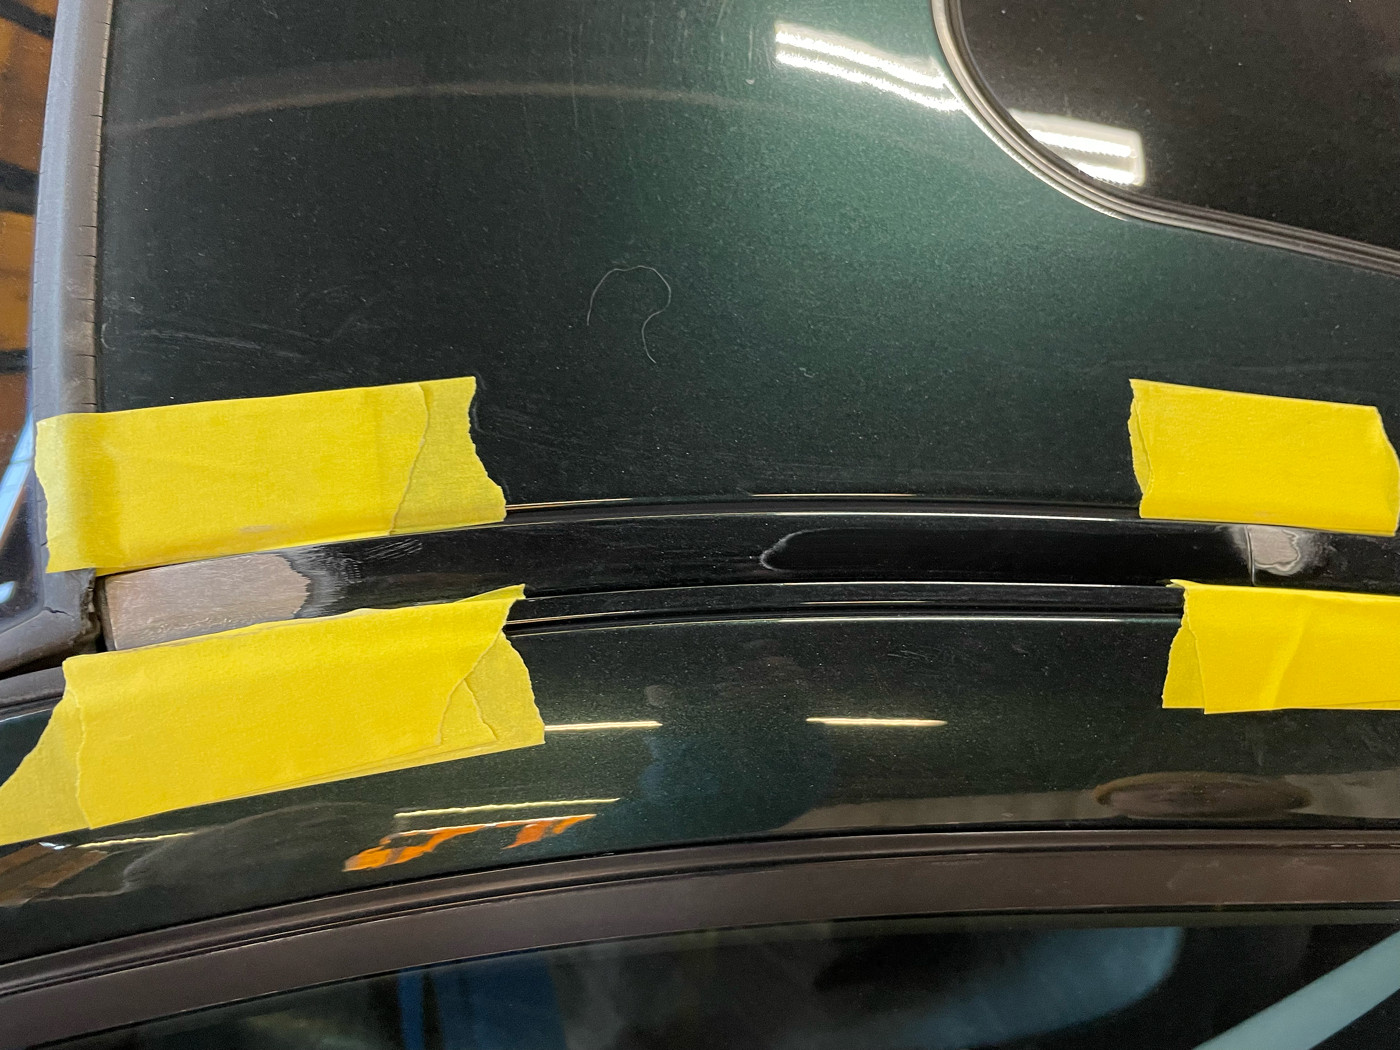
Damage between drivers side front and rear door:
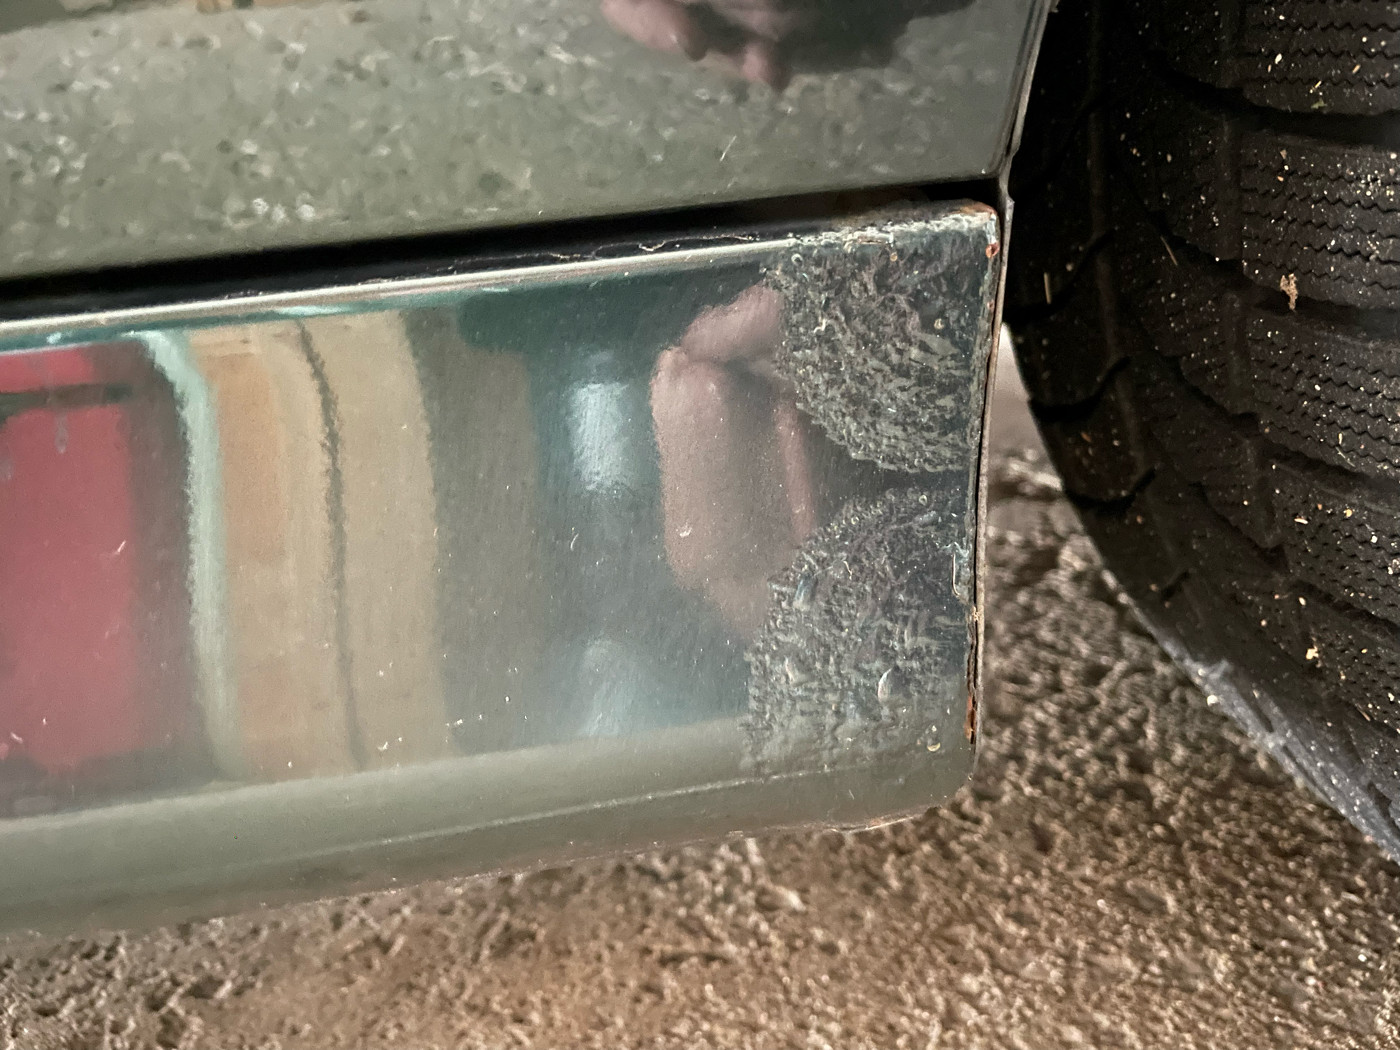
Damage at the front side of the passenger rocker panel:
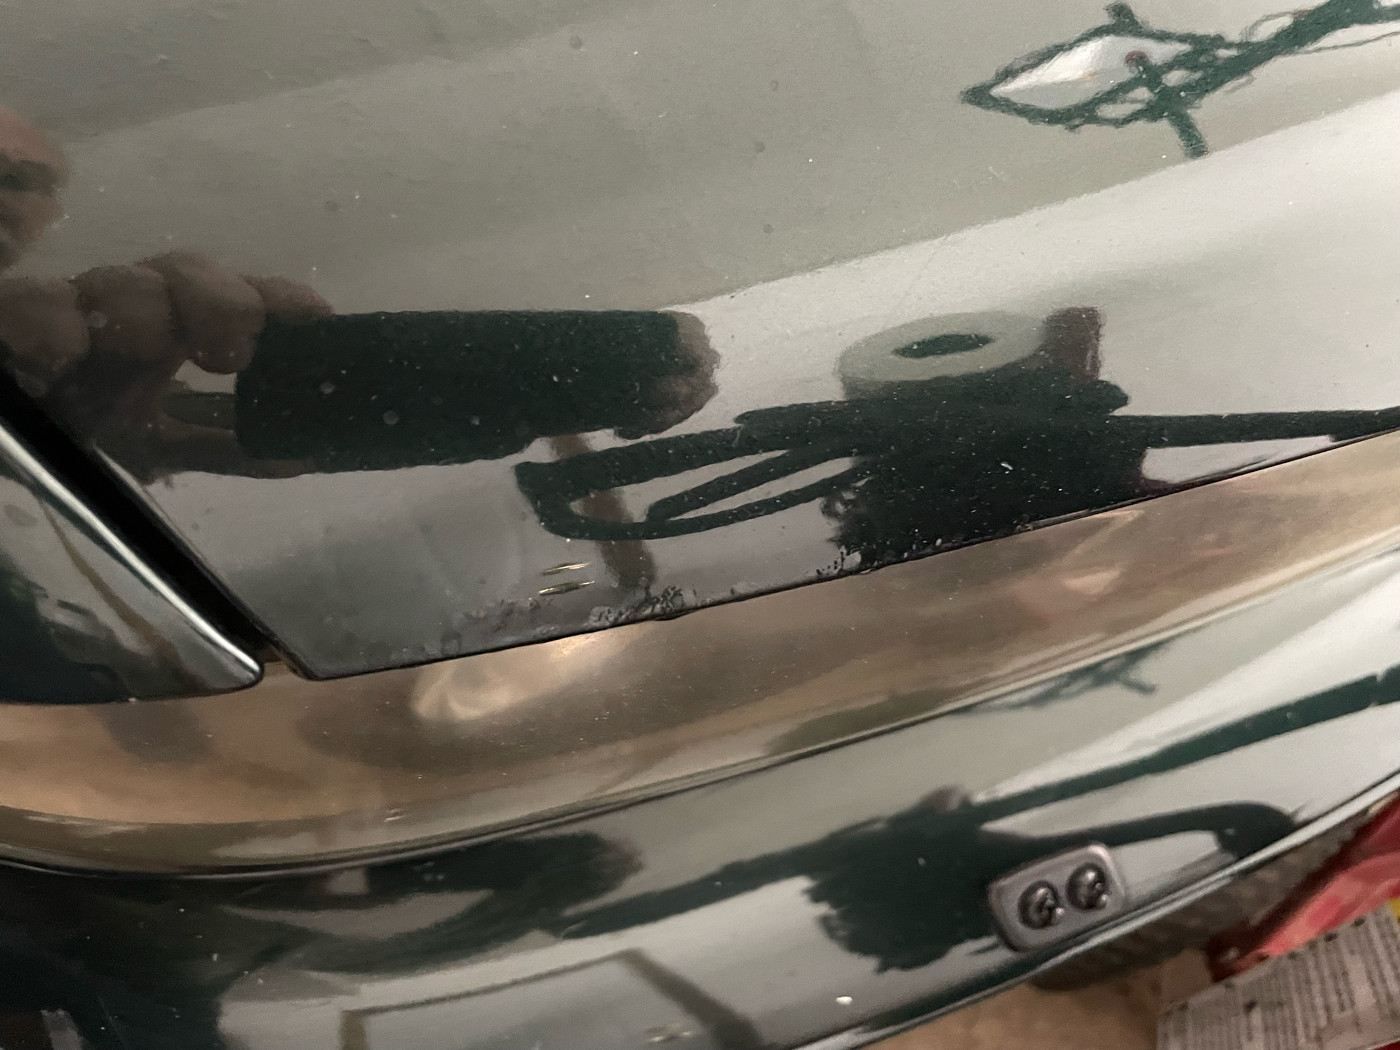
Damage at the hood:
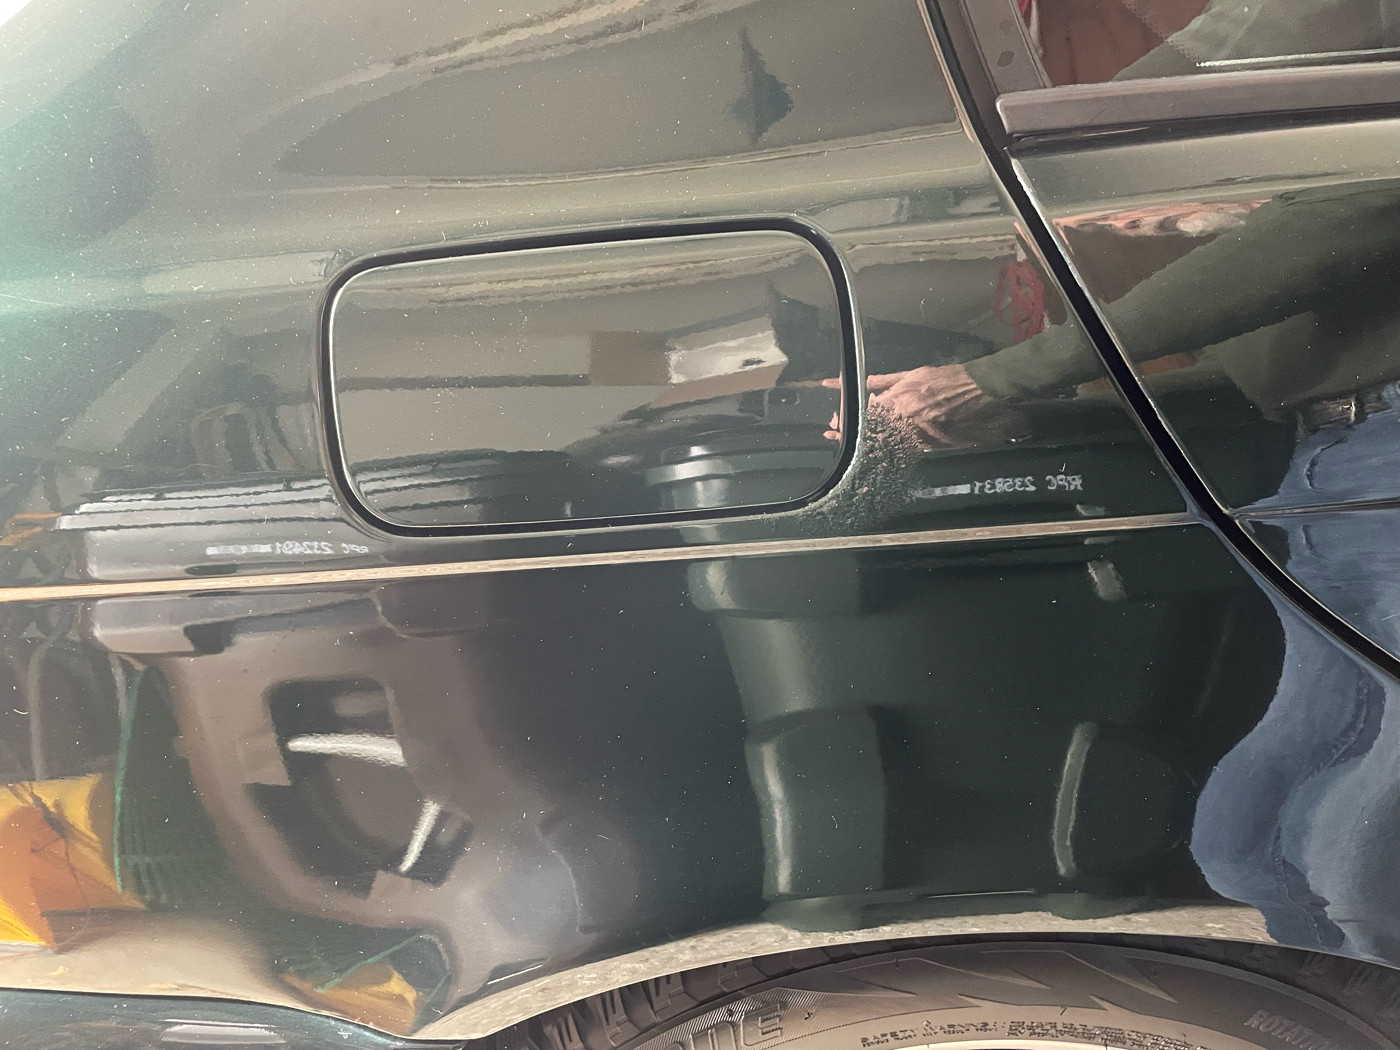
Damage by the fuel door:
The car also needs new front headlight assemblies. The existing lights are starting to fog up on the inside and can no longer be restored. Sadly, these can't be baked open either. Not looking forward to purchasing replacements where the adjusters will break again. Maybe Hella has beefed them up. I may go with Euro replacements but am also interested in maintaining the factory appearance. For some reason, the left side exact Hella replacements are in short supply. Everybody must get hit on the drivers side in the US lol...
Last edited by sleuth255; 01-23-2022 at 06:14 PM.
Member
Excellent work. 530i manual is almost a unicorn nowadays. Rust is not that bad for your location. Usually Wisconsin cars are rusted away by this age. Looking forward to the updates.
Member
Those came out amazing man! That is definitely motivating for me since my E39s style 42s also have seen better days. How long did it take the shop to restore them?
Member
I dropped them off on Monday and had them back by Friday.
Member
Is it just me or all the pictures gone?
Member
So glad to see another E39 getting some love, especially manual.
Mine is about to be officially 25 years old in few months (04/97) and not a spec of rust (not even at fuel filler cap area).
So lucky to live down south.
Awesome wheels pictures!
2010 BMW M6 SMG Coupe * Black Saphire Metallic * Full Leather Merino Black
2019 BMW X3 M40i * Alpine White * Mocha Leather
Former:
1997 BMW 532M (528i with 3.2 S52 engine from E36 M3 / 5 speed manual)
1998 BMW 540i 6 Speed
2003 BMW M5
Member
Wow, great to see the "new" and "used" photos! I am very interested in how you plan to treat the rocker panel rust. Our E39 has a similar issue, except that it is a bit more aggressive.
L
Member
This showed up today so I'm off to the shop to drop it off and check things out!
Member
Pics from the fabrication shop. They've just started in on it. Jim who is the fabricator for the project says that the next few weeks should get more intensive.
Hood rough-in is complete:
Work on the filler door in progress. They will be replacing some corroded internal parts as well:
Jim also ground out some small parts by the drivers side roofrack mount:
- - - Updated - - -
The overall plan is to remove all corrosion and apply color to the refinished areas. Then the entire car will be clear-coated to remove any evidence of blending. More to come.
Last edited by sleuth255; 01-25-2022 at 05:32 PM.
Member
I am interested to see what they do with the rocker panels ....
Looking for an E39 belly pan , passenger front inner fender liner
Member
Hey, if they can't be baked open and the lenses are bad just cut the old clear lens off, pick out all of the pieces, and replace the lens and adjusters at the same time. Maybe even the projector bowls while your in there (Evo xr 2.0 for the win)
Sent from my SM-G973U using Tapatalk
Member
2002-2003 (facelift) model years cannot be baked open. 2001 and before can from my understanding since the plastic component is different. I might be wrong though.Originally Posted by seagreen323i

 Dismembered
All BMW changed in June, or September of 2002 was the use of butyl rubber to seal the lenses on to the housing, to using urethane instead, to make it harder for us to open up the housings to repair the broken adjusters, forced many to buy new headlights.
Set the controls for the heart of the sun
Member
Well I get that, but my logic is if the lenses are trash just smash the lenses out and replace them. If you break the headlights oh well you were planning to buy new ones anyways.
Sent from my SM-G973U using Tapatalk
Member
That is a good point. Why not try to cut out the lenses and install new? Worse thing that can happen is that I have to spend the (considerable) $$$ anyway. Cost of the attempt is the price of the lenses. I'm thinking this might be difficult however since the curved lenses themselves would have to be precisely removed to insure that the replacements mate to the headlight assemblies well and can be properly sealed. I'll have to take a look at it...
Last edited by sleuth255; 01-28-2022 at 12:06 PM.
Dismembered
I’ve done it a few times with the newer headlights. All that’s important, be careful not to mess up the housing. No matter what you think, just because you know that your car is newer than that June, or September 2002 change date, you do not know the full history of the car you have, unless, of course, if you have owned the car all it’s life.
Check the manufacture dates on each housing! They might have been replaced by a previous owner with the older ones in the past! So you never know, unless you check. It’s been a while since I have performed open heart surgery on these newer lights, if you wish for a process, drawn out of my whacky mind, say so, and I will list it on here, everyone else can correct me if I say something wrong, call me a moron, it’s cool, I’m not perfect, I am equal opportunity, names don’t break my bones. But for now, I need to go take care of something. Replacement lenses, adjusters, projectors, anything E39 headlight related parts, I have a great guy out in Arizona that can supply us everything to our E39 heart’s content. All the lenses I have gotten from him do not have DJ Auto embossed on the lenses!
Set the controls for the heart of the sun
Member
Good news is that I am the only owner of this car which I ordered from the dealer, leased when it arrived, then purchased when the lease was over (all BMW had to offer was the Chris Bangle E60 disaster). I have not replaced the headlights. All I've ever done to them is the "ship in the bottle" adjuster replacement a while back. Good to hear about your guy in AZ; I was trying to hunt down the lenses myself and was striking out. It looks like the amber side for the marker light is part of the lens assembly itself? Anything you might be able to list in terms of a step by step would be helpful!
Last edited by sleuth255; 01-28-2022 at 04:08 PM.
Dismembered
Ok, I’ll get on it when I have more time, I will be doing two sets of facelift lights sometime kinda soon anyway, have two sets to do, so we will start another headlight how to. I will reach out to my guy in Arizona and see what he’s got in stock, I think I need to order another set of adjusters anyway. I do have a brand new set of projector guns that need to go into one of the sets too. Something you want to think about, as at this age, the original projector reflector bowls have already corroded and the bowls just don’t have the ability to throw the beam down the road like it used to. These new guns are modern reflector bowls, they should be much better than the old designs that came on our cars. I’ll check to see if he has those too, the current set I have came from Blacknight530, but not sure if he’s still bringing those in from Dinkyland. The lenses I have, did come with the orange reflectors, but those are easy to yank off, glue in the chromed ones, if that’s your thing. I have a chrome Euro set which I purposely hit with a cleaner which easily wiped off the chrome finish on the Euro lenses, I figure, why be like everyone else, as an experiment, I spray painted one gun metal grey on the inside, just like the chrome was, ended up actually looking good, think I am gonna go that way, only, I will get that Rustolium shadow chrome kit, so it will be the reverse of doing the shadow chrome on wheels, where you base it with the flat black, then the translucent silver chrome, it will be the other way around, on the inside of the clear side lenses. Confused? We’ll see how it turns out when I do a practice run on some clear plastic . Stay tuned!
Set the controls for the heart of the sun
Member
Hey throw me in the loop for a set of clear corners too.
Sent from my SM-G973U using Tapatalk
Dismembered
Huh? I only have so many Euro corner pieces, we’ll see, maybe JG in Arizona has a collection he’d let go of. I usually snag spare headlights from the junkyards whenever I find them while out junking. Think I only have two sets with the Euro lenses. Heck, I am a jack of all trades, bet I could do up some awesome looking orange corner bits to look like custom Euro bits, I have a bunch of those!
Set the controls for the heart of the sun
Member
Oh I thought you were implying you had a source for new clear corners. Sorry for the misunderstanding
Sent from my SM-G973U using Tapatalk
Dismembered
Nah man, it’s cool, if I find more Euro corners, I’ll let you know. I surprise myself all the time with the surplus bits I have ratholed all over the place. But right now, the ones that I know I have, I need.
Set the controls for the heart of the sun
 Posting Permissions


 Reply With Quote
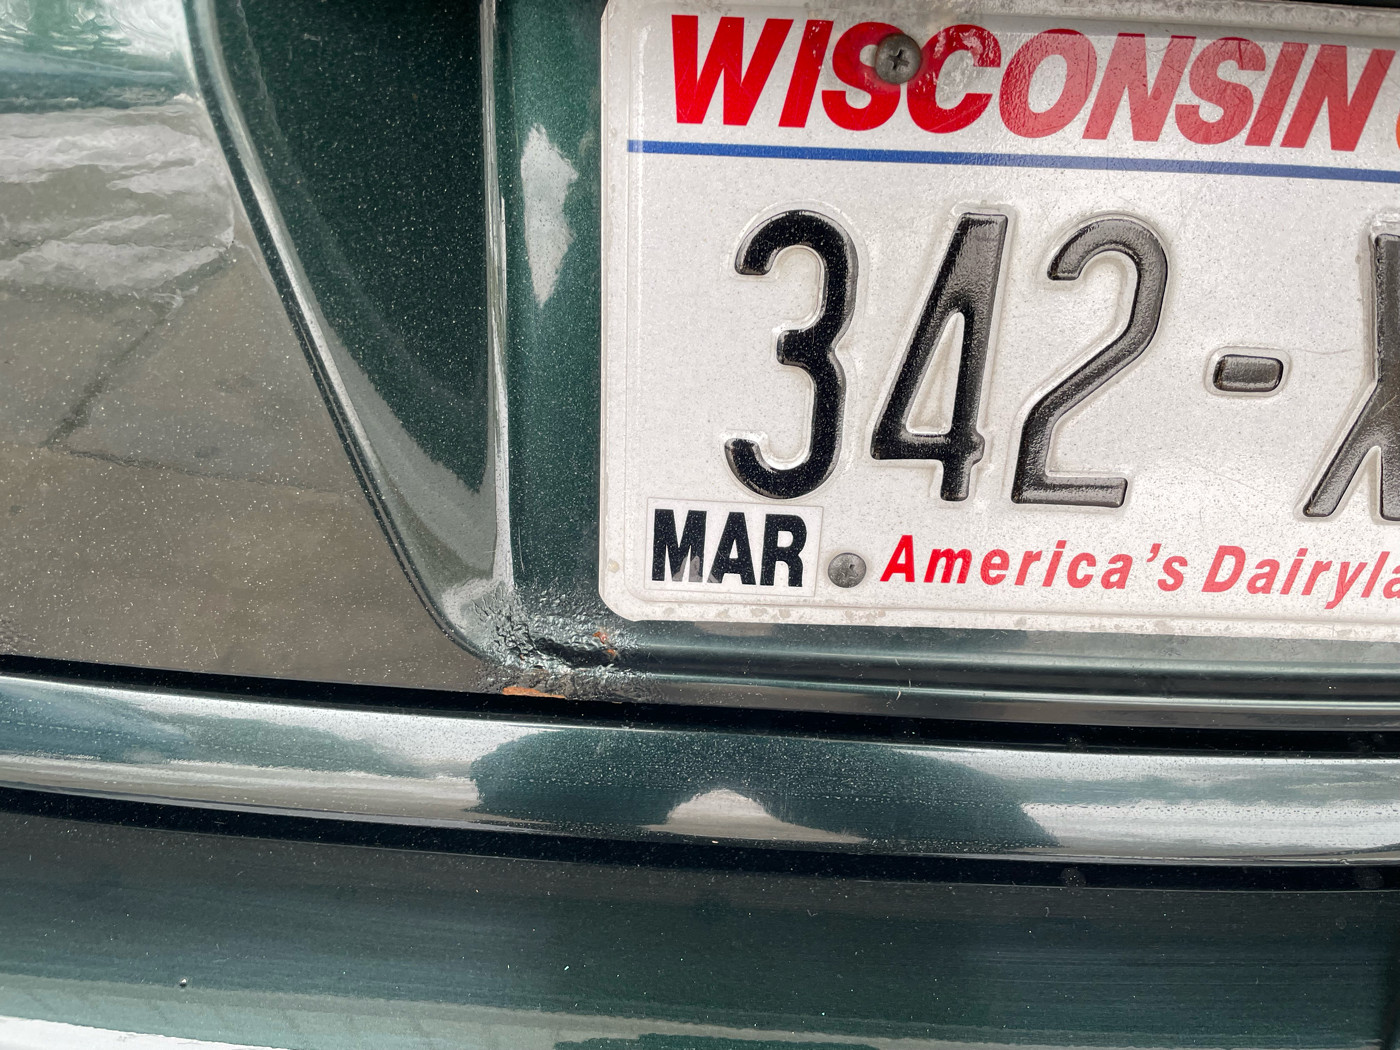


Bookmarks