
 Member
Thanks for posting the strut insert install, I've heard it talked about but I finally understand it. It looks like the linked Dinan product photo is not correct then? It appears to show a full yellow strut, but obviously that is not what you have installed.
I found a very succinct Koni install video for anyone else who is behind the curve like me on suspension issues:
https://www.youtube.com/watch?v=PXSnNZt3NiI
Member
I believe the photo on the page is the kit for the standard E36 where you do not need to undertake this level of craziness. So I was a tad surprised to learn that I needed to get OE shocks just for the darn housings (the Bilsteins the car came with were beyond gross and I don't think they would have worked anyway).Originally Posted by Charlemango

Member
Delivery from overseas today, sneak peek.

Member
ok that's pretty cool
Member
BMW CCA Member
Wow, thats going to bump up the value of your car!
Member
Even your workspace is clean......
Member
BMW E36 M3 Expert
Very very cool!! I'm jealous I can't use it.
Member
There are currently a few Alpina diff covers to be found (with some intense googling). I ordered from what appeared to be the *least likely to get ripped off* source that I could find, and fortunately, it all worked out!
ThanksIt has taken me a LONG time to get this organized, and I think I still have a good ways to go. It certainly is nice when you have no time constraints to deal with and can take things slowly/methodically. I have some more garage renovation planned once I can get this car rolling again (I need it out of the garage to do so). Oh, and a shed would be nice too so that I can stop bumping into all of the family bikes!
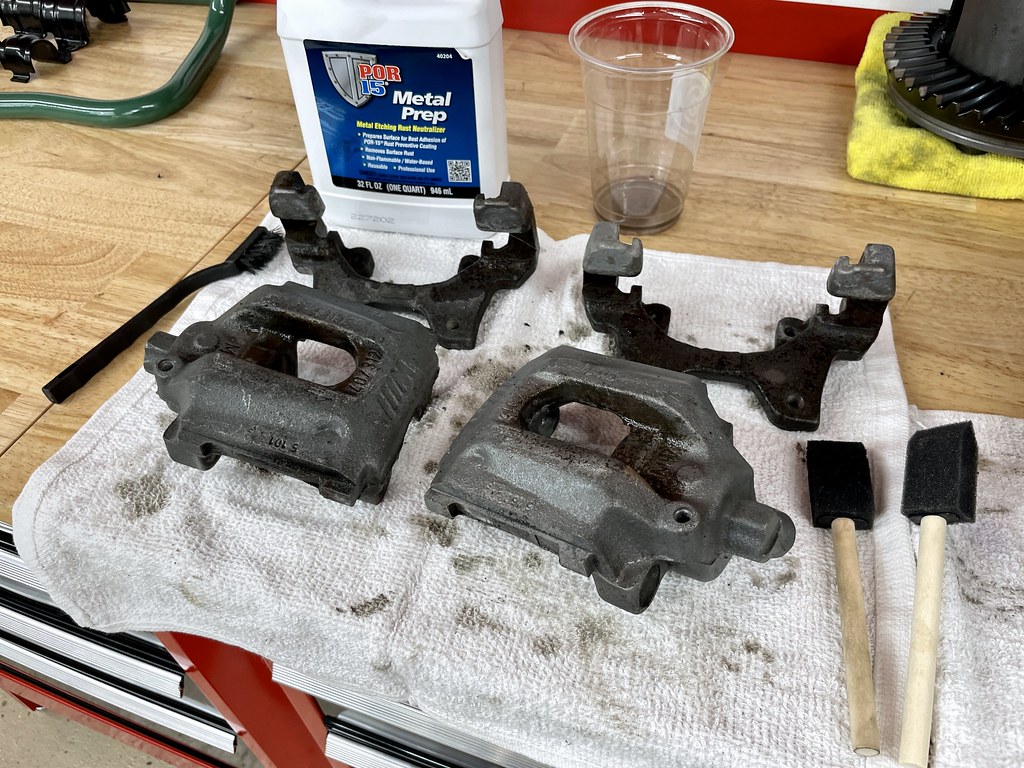
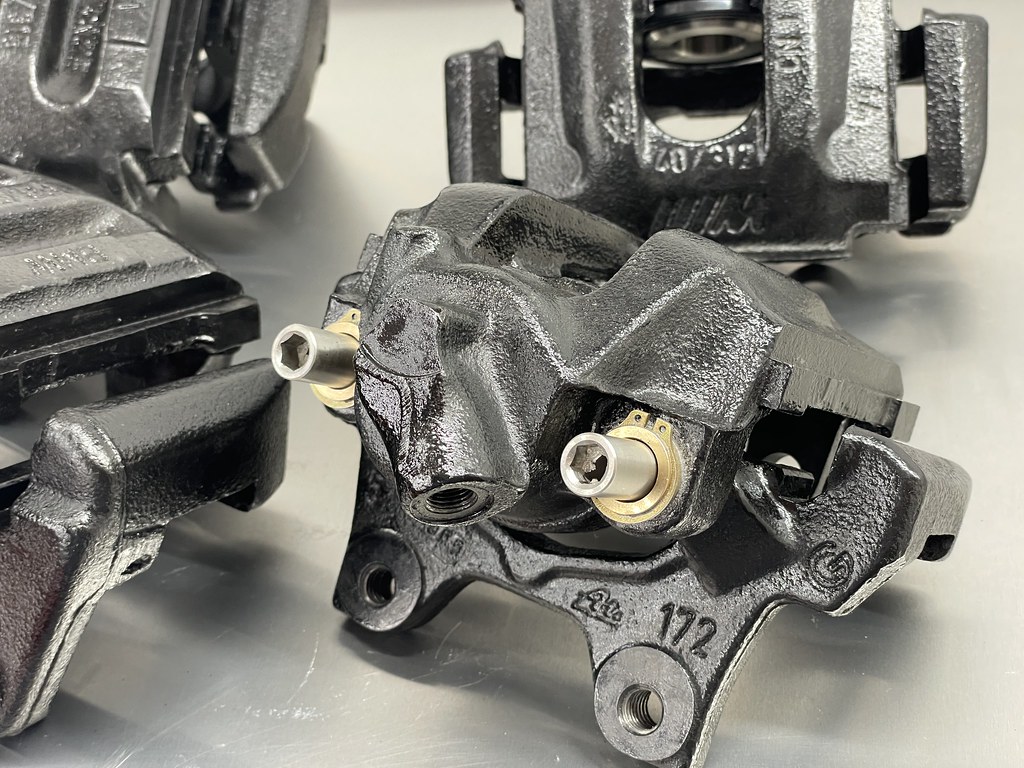
More restoration porn, rear calipers.

Member
Looking good! I should do the same with my calipers before I install the SS brake lines.
Member
It def cleans them up nicely. Now that I have the experience I strongly recommend having the components sandblasted - it def takes a good amount of work to do it the way I did (and messy with all the degreasing, wire wheeling, etc).
Member
Probably a good idea with regards to the sandblasting. I'll take the parts to my friends shop to do the sandblasting.
Member
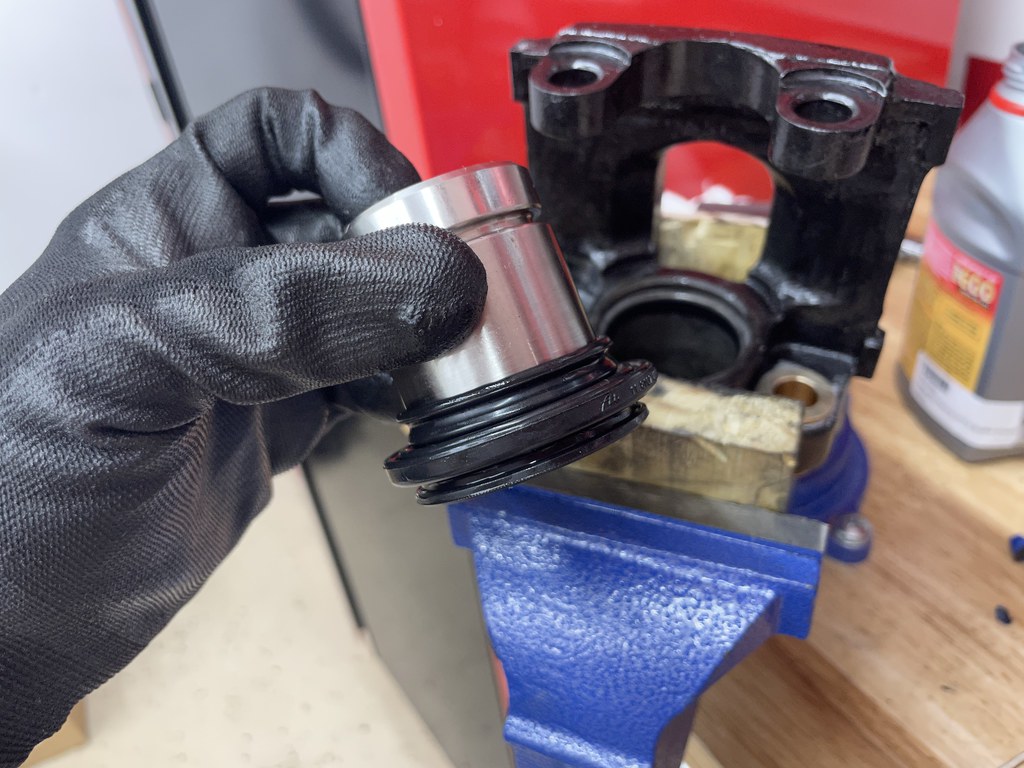
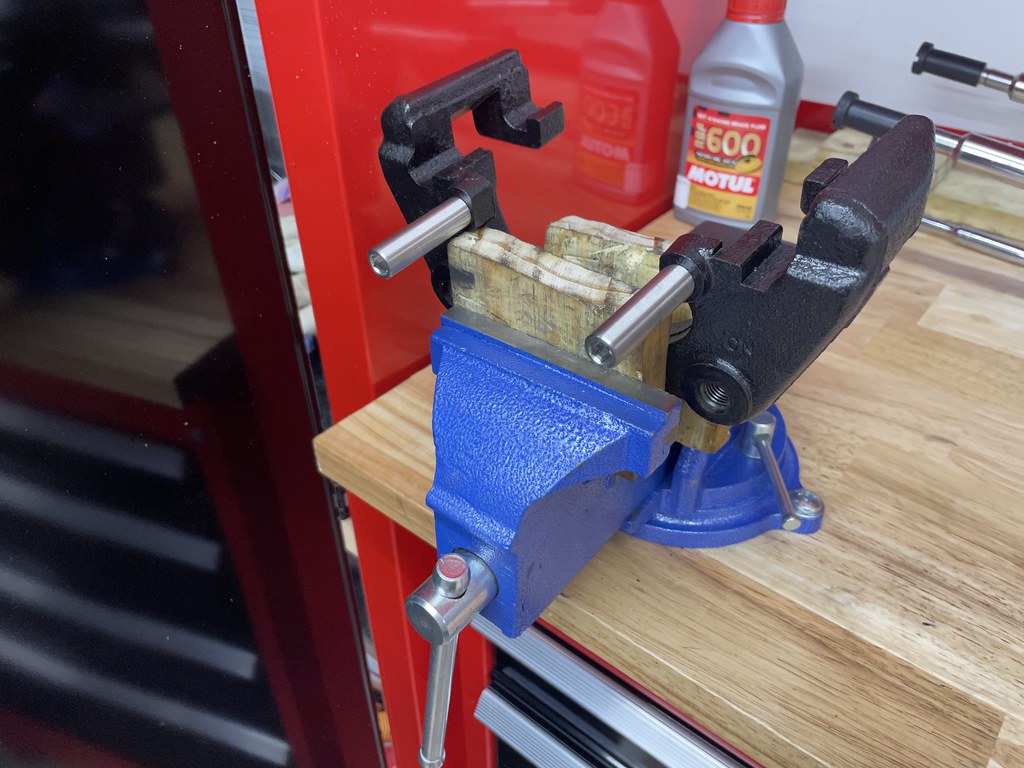
Just a bit of info on brake caliper piston reassembly since I found a lot of conflicting information out there.
(after using brake fluid to lube / install the rubber ring gasket inside the caliper)
Position the dust boot at the bottom of the caliper piston, and position the piece that needs to seal so that it is hanging below the piston. This allows you to easily insert the piston gasket into the caliper flange which holds it. You should not need to use any tools other than a simple plastic trim tool to ensure the gasket is seated (do not use a screwdriver, pick, or anything that could tear the boot). Once inserted, simply push the caliper piston down, ensuring it is straight so that you do not bind up on the inner rubber ring/gasket. For me, the fronts went in by hand, but the rears needed some gentle help from a c-clamp. Once complete, use air to push the piston partly out to ensure the dust boot is properly secured on the piston. Fin.
Chasing threads is my new favorite hobby
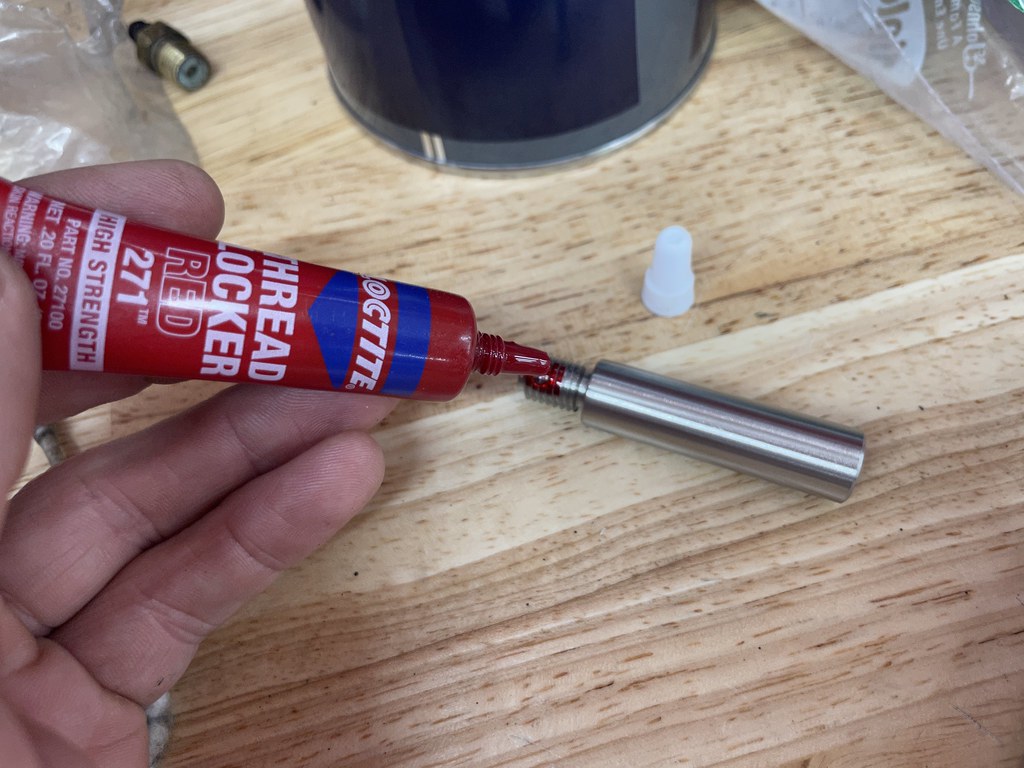
Threadlocker (for solid brake guides, do not use on OE) then torque to spec
All done. Will lube everything upon install.

Last edited by jaysonx; 09-29-2022 at 05:13 PM.
Member
Ok, I am convinced. I will be rebuilding the entire caliper and doing the paint work. I also have the same brass brake caliper guide set.
Member
I would not recommend red loctite on the brake caliper guides. They have to be removed to put new pads on and to grease the brass bushings.
Member
BMW E36 M3 Expert
I wrote the same thing too as OE pins have no loctite at all. Then I looked up these parts on BW and their nylon reinforced version comes with preapplied loctite on the included pins.
Member
Grab the Por15 caliper paint kit and a small pack of artist paintbrushes on amazon, it worked well. Also, note my hack of drilling a hole on the bottom of the can and sealing it with a screw - it is a much easier way to use without constantly opening the lid.
The install procedure for the solid caliper guides calls for chasing the threads and then applying threadlocker. I'm using red for its claimed 500-degree heat tolerance before weakening, which is rather optimistic in my experience, but I'm not worried about these things going anywhere.
I just updated my post disclaiming that to not create confusion.
Last edited by jaysonx; 09-29-2022 at 05:23 PM.
Member
Weird. I guess you will have to remove the caliper bracket from the spindle every time you have to replace pads/grease the pins. Seems like a pain. I've been running the brass guides for over 5 years, no loctite on the pins. Just torque to spec.
Member
Same ^ ...I don't recall the instructions requiring loctite but so maybe it was updated. I check the pins every oil change.
Member
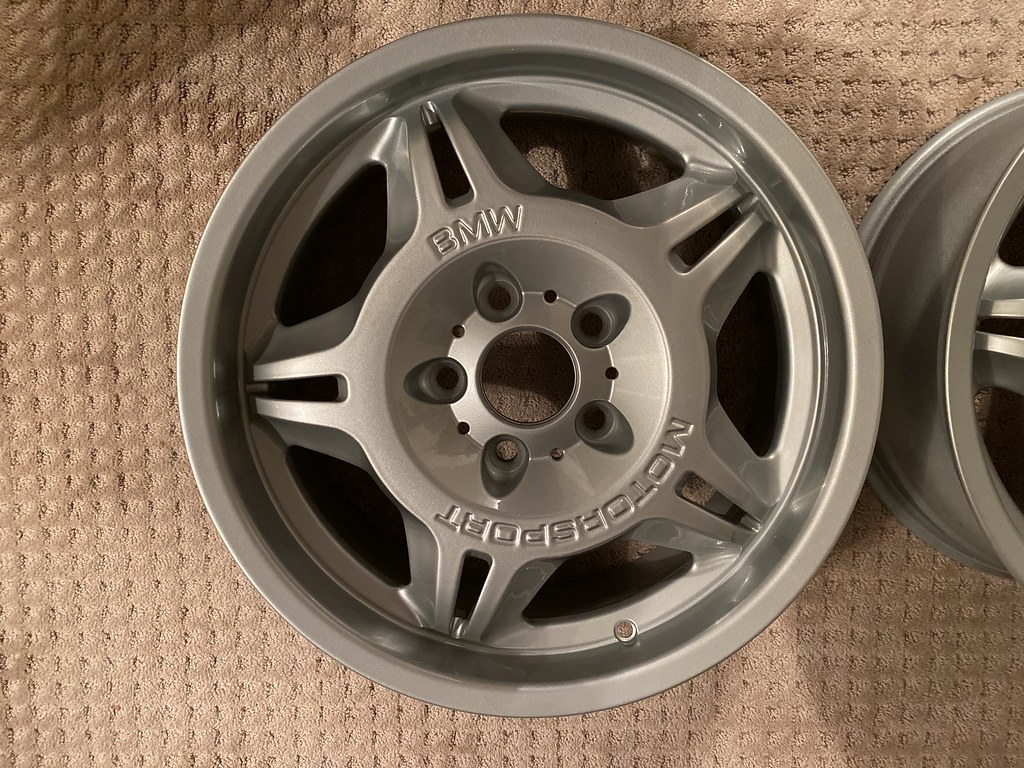
So I am becoming a bit of a DS1 hoarder, and I have one more on the way. I am in the midst of selecting the cleanest candidates for refinishing (or perhaps just all of them). I've spoken with two shops and they have two different approaches. One recommends sandblasting and powder coat+clear (prismatic), and the other wants to acid dip and paint - claiming to follow the process that BMW used at the factory. In the past when I have had wheels done they have been powder and I have had no issues, but I'm wondering if it will play well with the engraved BMW MOTORSPORTS lettering. Does anyone have experience with this one?

Last edited by jaysonx; 09-30-2022 at 05:58 PM.
Member
BMW E36 M3 Expert
You're going to get less definition in the stamping with powdercoat as it fills in the recessed area more. Additionally, powdercoat clear does not last. It doesn't matter what sales spiel the shop tells you, powder clear will crack over time. When that happens is determined by the application quality. There is no proper silver powder either and the final color brightness is extremely dependent on the blasting media used. Dull blast = gray silver. If the shop tries to tell you the powder hides any base color it is applied to and will not show through, you do not want to use them.
Paint is always going to be the most accurate to original. Powder is a good option if you know what to expect and have true professionals doing the work. Both types of refinishing can be fouled by careless work though.
Best of luck.
Member
Go with the acid dip and paint.
It would have cost around $600 for having a wheel repair/refinish shop to refinish a set used DS1s I already had $500 in. I ended up painting them myself. The shop that powered coats probably glass beads not sandblast but uses words sand blast. I glass beaded sections on 3 of my wheels since they had been repaired & painted before and the original material is flipping on there good. I should have at least paid to have them dipped. I thought I had better pictures but this is right after I got tires mounted for the first time.
Screen Shot 2022-09-30 at 7.58.45 PM.jpg
After a few months of use.
Screen Shot 2022-09-30 at 8.30.42 PM.jpg
Last edited by AJLM34A; 09-30-2022 at 08:34 PM.
[IMG][/IMG]
 Member
bigger question is which would be more reliable to hold up abuse? Powder coating vs paint (obviously if you go powdercoat, don't do a clear finish)
Member
I had purchased 4 front stamped Style 24s a while back and had 2 refinished by a professional wheel shop. These were painted and the paint was much too thick around the lettering, and I ended up selling these keeping the other 2 with the original finish. It looked ok on its own, but not if you know what it's supposed to look like. Point is make sure whoever is painting it knows what they are doing.
Member
I apply Mothers or Turtle wax spray bottle ceramic coating on my wheels after I clean them really good and only use car wash and really soft brushes and car wash type mitts. So far that is holding up.
[IMG]
Member
WOW!! Where did you find the Alpina differential cover?
 Posting Permissions


 Reply With Quote


Bookmarks