
 Member
Yes, purchased new OE INA lifters from FCPEuro. How high are you revving your S52? I didn't go too crazy on the head because I like to enjoy the S52 and the car for what it is...anything fancier to me it just makes sense to S54 swap or buy an s54 powered car, because that's really what you're simulating. And this is still a car that, to this point, is 100% street driven.Originally Posted by AJLM34A

Thanks! Most of all it is helping me stay organized and on track. Considered doing a jet hot coating on the headers but I have to draw the line somewhere and start putting stuff back together.
Member
BMW E36 M3 Expert
Good and tight with the return valve is enough. The oring is the same as the S54 CPV.
Member
Thank you. Good to know about that o ring
Member
I am only revving to 7100 rpm, it could go more but it is more than adequate for my current needs. Even though I went with 280/280 cams, there is a noticeable difference in how it revs having solid lifters.
Current S54 pricing makes them unrealistic after factoring just a basic non head removing reseal and VANOS rebuild.
If the head gasket were to go out on my DD automatic M3, I would change the lifters to solid.
[IMG][/IMG]
Member
Ditch the low temp thermostat and get an 88C one.
Member
BMW E36 M3 Expert
This. No need for this. Running your engine cooler will only cause issues on a street car. You’ll run too rich and have poor fuel economy.
Low temp fan switch is fine. Just not the thermostat.
Member
So logic on the low temp thermostat was with the AC delete+Euro radiator I don't think my thermostat was ever fully opening, which I suspect may have been the cause of the issues I was having bleeding the cooling system. And the car will be getting a custom tune anyways, so should be able to circumvent the issue of it running rich.
Member
BMW E36 M3 Expert
Run the 88c.
Member
Haha ok, will reuse my 88C
Last edited by sirhodjibob; 02-06-2023 at 09:52 PM.
Member
Getting the block cleaned and prepped. Used mix of a razor blade, WD40, and then my Rupes Nano polisher with foam pads to clean up.
Installed:
IWIS Racing lower timing chain
IWIS Racing oil pump chain
11311722841 - new crankshaft chain sprocket
11311703717 - chain guide rail
11311726480 - chain guide rail
Also painted the exhaust side of the block with POR15 Engine Enamel- came out pretty nice. Did not attempt the other side as it would be hard to do with the engine in the car, but it matches quite well.
Not quite Braymond141 clean but the key thing is all the old gasket material is off:
New Achilles Racing oil pump installed. Has a few upgrades over OE, including use of a hex bolt w/ safety wire instead of the nut that is prone to falling off. When I removed the oil pan the nut literally just fell off, yikes!
Also installed:
07119912970 x3 - oil pump bolts
11411703930 - Z3 reinforced pickup tube
11411703947 - pickup tube gasket
07119904527 x2 - pickup tube bolts
07119904517 x2 - pickup tube bolts

Last edited by sirhodjibob; 02-23-2023 at 08:43 AM.
Member
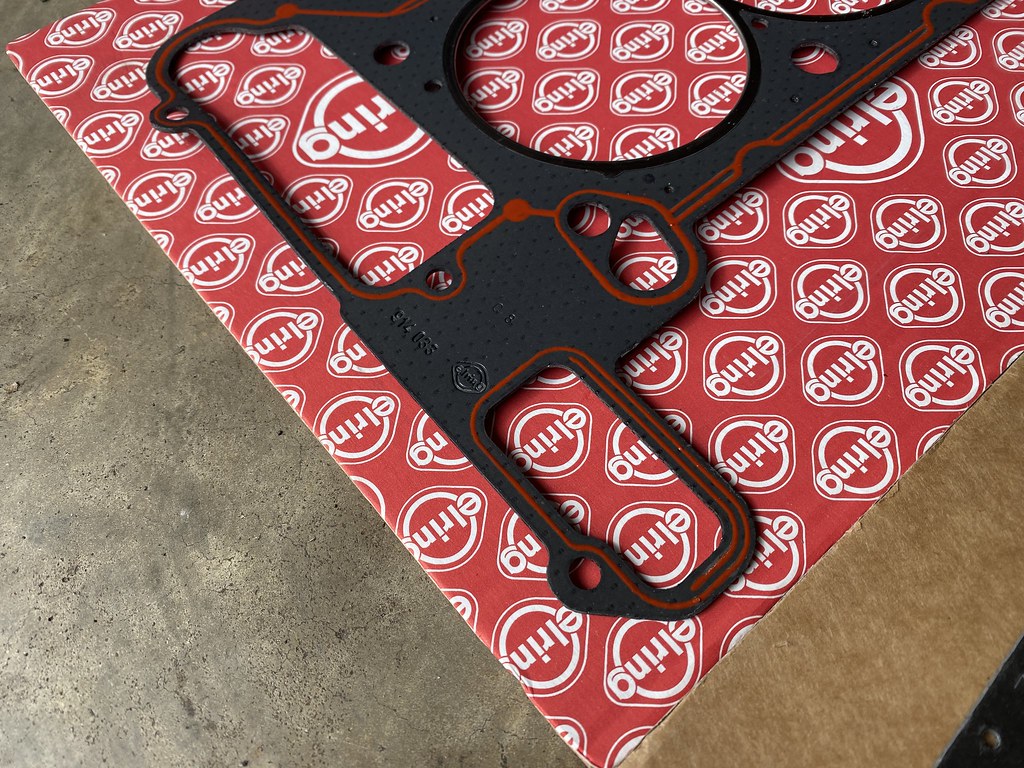
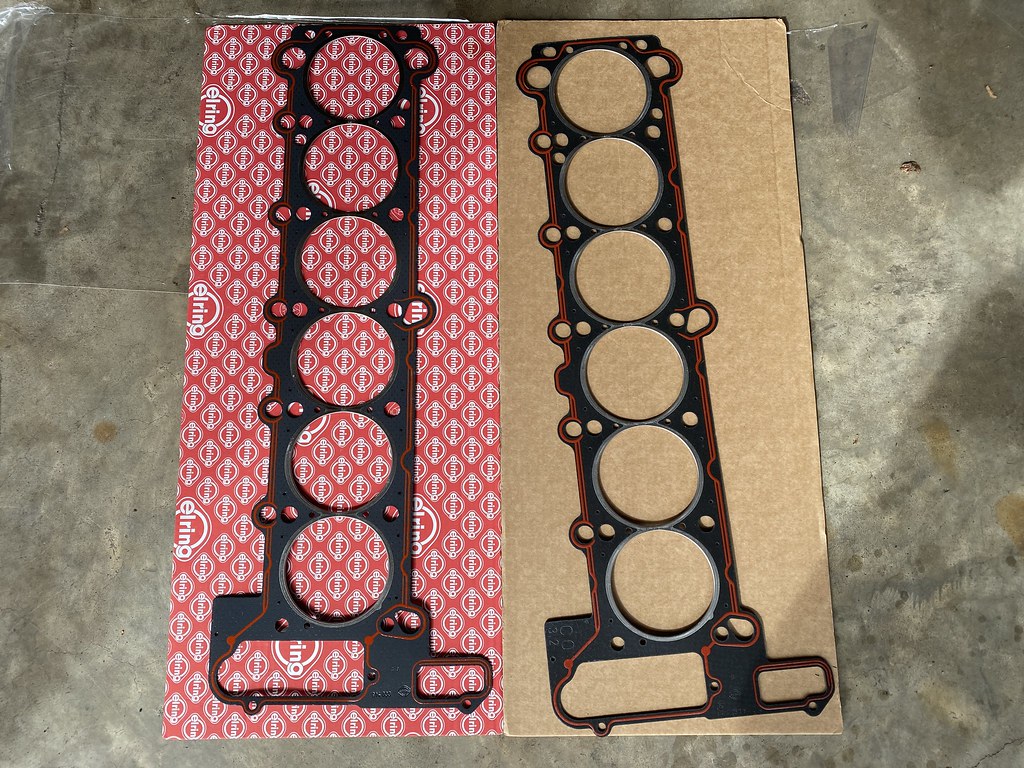
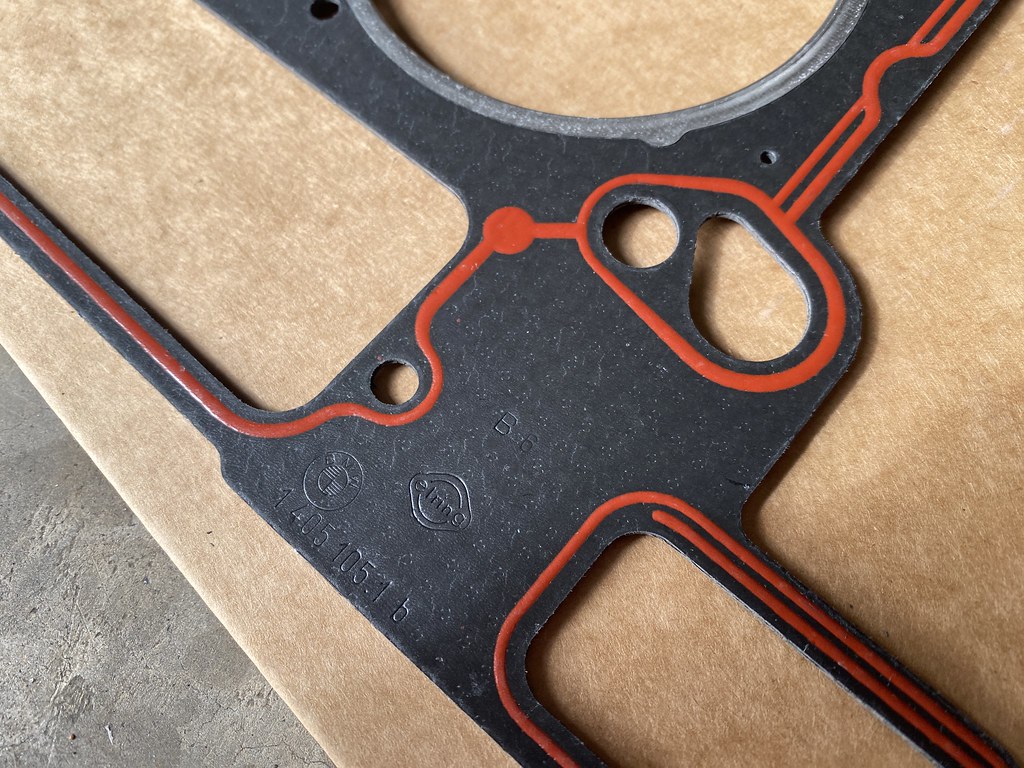
Elring headgasket from RockAuto on the left, OEM BMW headgasket from the dealer on the right:
The Elring has a rubbery texture to it, while the BMW feels smooth. No discernible difference in quality that I can make out in my amateur eyes. Interestingly, the BMW one has an Elring stamp on it, but then again did Elring buy Victor Reinz? Unfortunately I don't have a VR to compare.
Last edited by sirhodjibob; 02-23-2023 at 11:41 AM.
Member
VR bought Elring
Member
I love seeing this stuff!. Looking awesome as usual.
Member
Getting there:
Note- couldn't install the washers for the ARP headstands with the cam ledgers in place, so had to take those back out. Maybe there was a way, but not worth the hassle.
Member
BMW E36 M3 Expert
Sell me the Elring gasket you're not using please
Excellent work as always. You're almost back up and running!
Member
Failed to mention in the post I used the Elring! BMW one is yours if you want it.
Member
Forgot to post picture of baffled oil pan install...
Installed
11131740000 x 21 (I think...)
11131435807 x 2
11131435806 x 2
23001222887 x 3 (bolts that go through the bell housing)
Elring oil pan gasket
Not pictured but I did install a Turner magnetic oil drain plug for good measure.
These studs made installing the oil pan much easier. Part number 07129904544.

Member
Great thread! Love the work that you have done so far. Reviving this post because I'm wondering where you go the KBA decal from. I received my OEM mounting hardware for my GT wing, but I'm having trouble locating that decal. It's the final piece I need.
Member
BMW E36 M3 Expert
You can get the sticker from Pukar, but his work is quite pathetic overall, so be warned. The white on clear stuff is passable simply because it isn't too easily discernible but it's not on the level of OEM. Everything else he sells is trash.
I'm working on getting them done in vector format. I just need to find the right company to print them.
Member
Thanks for the info, I'll just wait until you release your product since I'm in no rush.
Member
Ran out of blinker fluid
Member
Alright, let's see where I left off.
This is from months ago, but I digress:
Schrick 264/256 cams installed and timed (correctly, hopefully). They are timed just like factory cams, so that part was easy. I opted NOT to replace the cam ledges, they had some wear but nothing significant. I used Redline Assembly lube liberally.
I did replace the hex nuts for the cam caps
07129905541 x 28
And replaced the splined gear shaft that screws in the intake cam where the Vanos attaches: 11361738468
For full list of parts go back to page 14 but all chains, sprockets, chain guides, and tensioners were replaced
There are countless videos documenting how to do this, but I found this one from Gareth at FCPEuro very useful:
I also opted for the ATI Crank Damper kit from VAC Motorsports. I had originally tried using a kit adapting an LS1 harmonic balancer, but the hub adapter was junk and it was too much work when an off the shelf solution existed. For those keeping score at home I did remove the sticker after the picture
Also installed:
11211726449 - crank hub
11211720633 - crank hub bolt
11231288660 - crank hub bolt washer
I borrowed a 3/4" drive torque wrench from Autozone to torque the crank pulley to 300ft-lbs, which I did with my pinky.
Behind it is a new OEM Corteco front crank seal. I used the tool from TCEuro to install which worked like a charm.
Last edited by sirhodjibob; 09-20-2023 at 01:09 PM.
Member
After installing Dr. Vanos "Stage II" (REM Polished gears) kit, I installed a new valve cover. Did you ever look at your engine with the beautiful M Power cover, then at the unsightly splotchiness at the front of the valve cover? Does that bother you? Well guess what, spending $330 on a brand new one will not fix that but hey at least it came with new gaskets.
Installed:
11121703341 - valve cover
11121738608 x 3 - "cap nuts" that go in the center line of valve cover
11121738607 x 11 - "cap nuts" for outside of valve cover

Last edited by sirhodjibob; 09-22-2023 at 10:19 AM. Reason: Added part numbers
Member
Next issue to address were the rubber fuel lines which were badly deteriorated. I replaced all of them along with new clamps, and threw in a new fuel filter for good measure as well as replaced the fuel pressure regulator.
I forget which line I disconnected that caused this, but hilariously all the fuel from the tank proceeded to empty itself while doing this job. Fortunately I had some empty gas containers handy to catch it, and given how long this project has been it was probably good to dump the old gas anyways.
Installed:
13311403416 - fuel hose "kit"- come with a short rubber hose that attaches the hard line to the fuel filter and new clamps
13321740985 - Mahle fuel filter
07119905544 - nut for fuel filter bracket
07129952104 x 8 - hose clamps
13311744068 - fuel hose (curvy one after the filter)
13537563456 - CRP fuel hose (you'll need to cut to length
13531729319 - Pierburg fuel pressure regulator
13531433176 - vacuum line from regulator to intake manifold
13311427637 - return hose that connects to the rail
13311427638 - inlet hose that connect to the rail (this was identical to above)
While under there also replaced the differential fluid:
And transmission fluid:

Last edited by sirhodjibob; 09-19-2023 at 08:58 PM.
VSCERL
Coming along nicely. Looking forward to hearing your thoughts on the new cam setup.
Past: '99 Hellrot/Dove M3 | '97 S14 1JZ | '06 Triumph Daytona 675 | '01 330I M-Tech I | '99 Silvia S15 | Current: '96 Estoril/Black M3
 Posting Permissions


 Reply With Quote


Bookmarks