
 Member
Bought this car June 2019. It sat in storage for 3yrs never really doing anything to it. Bought it with TCK DAs already installed with 400/500lbs springs. 165k on the motor and chassis.
Immediately sold the DS1s and put on 17x9 et42mm ARC-8s with 245/40 RE71Rs. I paid to have the cooling system updated with aluminum rad, aluminum tsta housing, some hoses, spark plugs, valve retainers/ keepers, motor mounts, oil change, brake fluid flush, stainless brake lines, MOMO hub & steering wheel, and then I went straight to the track.
I also figured out that if I want to keep running HPDEs, I would have to learn to work on this car myself.
Took it to 8 track events this summer, burned through 2 sets of tires and found a blown head gasket after the final event. In between events I replaced/installed the shifter bushings with OEM, guibo, heater control valve, Rogue trans mounts, front calipers, brass guide bushings, clutch pedal & bushings, diff fluid, MTL fluid, Motion Motorsports underpanel, AC delete, and a couple more things I cant remember.
522F11F2-6009-4387-A0DB-40F0884E9CA2 by D S, on Flickr
Last edited by bimmerboy318; 12-15-2019 at 07:49 PM.
Member
With winter here, kicked things off by getting the RTAB pockets reinforced at MWorks Garage in Cincinnati.
4B4FB93A-8B4A-41B8-A546-D687BBD65239 by D S, on Flickr
715E4D20-ED8A-4F6F-9048-7C5CBE37714D by D S, on Flickr
Last edited by bimmerboy318; 12-26-2019 at 10:03 PM.
Member
Love white. Love an S50 singing at 7000rpm.
Member
Disassembled the front end in preparation for my Black Friday purchases.
Front subframe down awaiting Condor reinforcement plates.
Head removed to replace gasket, Vanos seals, and being sent off to Autohead Performance for a freshening. Piston bores still show hatch marks.
B02AD219-CB87-4390-AB0C-794DF927BC76 by D S, on Flickr
Just got it back! 3-angle valve job cut on a Serdi, pretty cool!
5DB4856C-2D47-4BD5-88D8-E619B6163EEC by D S, on Flickr
Cams back in and ready to put back in! Most DIYs say 11ft-lbs on the cam cap nuts... but Autohead Performance was adamant they should only be 6ft-lbs. So thats what they got.
341185E0-95CE-4CF2-A6C6-CDB413B3D2AC by D S, on Flickr
Last edited by bimmerboy318; 12-11-2019 at 10:03 PM.
Member
The Elring head gasket set I bought contained a Victor Reinz... wtf? And yes, it was completely sealed.
1AAF1896-8A76-4C63-893F-ED3DAF33C025 by D S, on Flickr
Other items purchased include:
Z3 oil sump pick-up
Oil pan gasket
Oil pan dipstick o-ring
Condor front subframe weld-in reinforcements
Beisan Vanos seal kit
Upper timing belt tensioner
Timing belt belt tensioner guide
Valve cover gasket
Valve cover gasket grommets
Intake manifold gaskets
Exhaust manifold gaskets, studs, and nuts
NGK V-Power spark plugs
Meyle tie rod ends
Condor FCAB, Diff, and rear subframe bushings
Redline power steering fluid
Redline 75w90 Diff fluid
Redline MTL transmission fluid
Meyle CSB
A2AB4BDF-55DE-45D3-B814-FAB77AA00BDF by D S, on Flickr
Last edited by bimmerboy318; 12-26-2019 at 10:11 PM.
Member
Got the valve cover back from powder coat. He did it in regular black first and then covered again in wrinkle finish black to try to hide all the imperfections. Still not perfect but much better than what it was. Now trying to decide if Im still going to put the engine plastic cover back on or not.
8F79AB49-61D2-4D5F-9672-8F715D62949E by D S, on Flickr
Covers
440F856E-06B6-4DD7-8267-2C32149447D2 by D S, on Flickr
Sans covers
D7923D2E-9476-4A4D-A1FF-774E1027F0AE by D S, on Flickr
Last edited by bimmerboy318; 12-15-2019 at 07:45 PM.
Member
Did a few things while the front subframe was out. Safety wired & red Loctite oil pump nut, Z3 sump pick-up, and a fresh oil pan gasket.
5954FF9E-F589-492A-9832-62051679F9AD by D S, on Flickr
Member
Dropped the rear subframe as a whole. Was easier than I thought.
AFF88FBB-3C1A-412E-99BE-5466CC7EEB5E by D S, on Flickr
The key to getting the subframe bushings out is to heat them up on the outside just until the rubber starts to sizzle. About 2min with a MAP gas torch. Youll know youve heated too far because they will catch fire. Then just give them a bump with a hammer.
C8B3D0B1-B096-47E6-B1FC-40F17F7D69C2 by D S, on Flickr
F3120F15-DA44-419C-9B91-5CDC4BF5B77C by D S, on Flickr
All cleaned up with Condor bushings.
F9975475-9077-4D14-821E-D7A8164DE559 by D S, on Flickr
Driveshaft freshened with a new centering bushing, CSB, and coat of paint.
BB3F544C-2D7A-4D7D-9433-D8BE528E7207 by D S, on Flickr
Last edited by bimmerboy318; 12-26-2019 at 11:41 PM.
Member
A lot of goodness down here... a bunch from the junkyard. From the junkyard: Z3 031 steering rack, Z3 X-brace, and 325is sway bar. New: Condor front subframe reinforcements, Condor FCAB bushings, and new oil pan gasket. That oil pan used to be as dirty as the transmission.
1CD90091-F094-41D0-ADD6-8A6082798CC9 by D S, on Flickr
Member
Looks good. Should be a big difference come spring when the tracks open up again.
Member
Baffle the oil pan while it was out? Any oil cooling installed? Consider adding an oil cooler and accusump setup and that engine should stay happy for a LONG time. Also consider hood vents if this is a track car.
Once I had a happy cooling system/engine, the s50 was dead nutz reliable for me on track. Love the color combo.
Member
All things I will consider. But this winter was to just get reliability up and anything while in there taken care of. Except the oil pan baffles. Some mods I can do in between events and when the car fund replenishes itself a bit.Originally Posted by olemiss540

Last edited by bimmerboy318; 12-19-2019 at 08:17 AM.
Member
FYI, both Bently and BMW TIS (Technical Information System) say 11 ft-lb for the M7 cam bearing caps
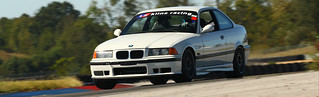
📷: @nholmes74
Legitness!
Love that the cylinder walls still have cross hatches at 165k. Amazing.
Member
Have to admit that Im a little sad the interior is gone.
91062B8E-7A50-41AF-979A-848668556BF2 by D S, on Flickr
Member
Ben Sipson bar fitted today. There is a compound angle where the floor mounts go so I put the bar ahead of that angle. When I did, all 4 mount locations touched with a little body weight on the bar. I drilled one hole in each plate and tightened it down before drilling all the rest.
75D5C1D8-3CD2-4A87-AAC1-776492ED990E by D S, on Flickr
C022ECC5-8BD0-4B38-AEFE-44780F2FC418 by D S, on Flickr
Last edited by bimmerboy318; 12-23-2019 at 04:13 PM.
Member
Would love to see more pics on the bar install. Just ordered mine today from Ben. Doing the X brace and harness bar set back.
Member
Yes, will do, only fitted the bar and drilled the holes. I drop it off for powder tomorrow. To install, the foot needs to pass in front of the shifter, between the shifter and center dash. The other foot will kinda go under the door until its right up to the rocker panel. Ill get picks when I do the final install.
- - - Updated - - -
Wire is cleaned up as far as I will go. Just waiting on the split wire loom I ordered. I cant take the fumes from Xylene and Goof Off so the only sound deadening I removed are the pieces that somehow interfere with the roll bar installation.
3CCDE68F-68A4-40D8-BBDF-22992E82AD19 by D S, on Flickr
FF40CAD5-0F77-4980-9F67-FBB1EECA80C8 by D S, on Flickr
- - - Updated - - -
Took out the steering column safety bolts in anticipation of lowering the wheel 1/2 to 1. Silly me thought it was a nut so I figured Id drill half out. Only to discover it was actually a bolt head. Thankfully the chisel technique still worked despite destroying most of the bolt head. Waiting for my seat and side mounts to arrive before finalizing the spacer.
2C027760-46D3-4476-89F7-893247581E15 by D S, on Flickr
While I had the drill out, figured might as well drill out the steering wheel lock out.
226256C6-FD88-4EBE-BE36-EA1F008EDB98 by D S, on Flickr
Last edited by bimmerboy318; 12-26-2019 at 09:51 PM.
Member
I just gutted my interior and just put the dash on the garage floor as i type this. My wiring looks like a rats nest. I so dont know what to do. Most people are saying to gut it and start from scratch. But i plan to keep this drivetrain for now and do a swap this time next year. I cNt see messing with the engine harness but i want all the body harness (except the lights) gone...... what to do.
Member
The only wires I completely removed were for the radio/amplifier. The rest I cut, taped, and removed the fuse where possible. I kept everything to keep it street legal. I kept the HVAC black box too. Heres what my fuse box looks like now. This is an HPDE car that is trailered to the track but driven to the mechanic for alignments, tires, etc. If it was a race car, I would look into completely thinning out the wiring including the HVAC, window switches, hazards, etc.
B72F3489-664B-4CD8-8095-23B2A3EFA746 by D S, on Flickr
Last edited by bimmerboy318; 12-26-2019 at 09:57 PM.
Member
Got my Bayside Fabrication (Ben Sipson) bar back from powder. Don’t know if it’s good or bad but paid $85 cash for gloss white.
What I’m trying to show in some of these photos is how it fit before bolting it down. Less than a 5mm gap shown with 5mm Allen wrench at the passenger front mount, which was the worse one.
42A41DAF-813F-4F81-A147-46ED80726C63 by D S, on Flickr
BA11E533-4A40-4655-84D0-8EA25C1FD0A8 by D S, on Flickr
F5A264F9-B40C-4867-AA3C-4AF4B9F83696 by D S, on Flickr
9B0C7E2C-B8FD-42B4-B385-262EF9161F7B by D S, on Flickr
E36 M3 journal https://www.bimmerforums.com/forum/s...-Build-Journal
F80 M3 journal https://f80.bimmerpost.com/forums/sh....php?t=1734421
Miata K24 build https://www.miataturbo.net/build-thr...ine-up-105885/
Member
Here it is all tightened down. Trying to show the gaps on the sides and the top with no sunroof cassette. Make sure you tell Ben you deleted the sunroof.
F0A45ABC-9467-4B8E-B8C1-D77B15BCDD42 by D S, on Flickr
18696925-C064-42C8-AA83-E653770AD702 by D S, on Flickr
B93802F3-B5FB-47B2-AA9B-034ABF033A73 by D S, on Flickr
538CE07E-2457-46D9-90C4-A013294E7084 by D S, on Flickr
5880AD57-DFB8-4036-8E4D-DF6E9CAFF656 by D S, on Flickr
Lastly, you may have noticed that I tried to cheat the whole bar toward the driver. It’s slightly offset by 3-4mm. But that’s not the bar or Ben’s fault. I work in the automotive body-in-white welding and assembly business... the tolerance stack up on cars from the floor pan to the roof is typically up to 10mm. So not bad for a “production” piece. Overall extremely happy. Any better would need the bar at the shop for custom fit up and measurement.
575E22E4-5B28-4F53-BEDF-058581D789FE by D S, on Flickr
6A6F8E17-32A8-4A59-A56D-F19DECEA3E0D by D S, on Flickr
Last edited by bimmerboy318; 01-02-2020 at 02:51 PM.
E36 M3 journal https://www.bimmerforums.com/forum/s...-Build-Journal
F80 M3 journal https://f80.bimmerpost.com/forums/sh....php?t=1734421
Miata K24 build https://www.miataturbo.net/build-thr...ine-up-105885/
senior LOUNGE creator
Love this thread .
Hopefully you didnt use the VR head gasket
Sent from my iPhone using Tapatalk
If liberty means anything at all, it means the right to tell people what they do not want to hear.
― George Orwell
📷: @nholmes74
I had similar fitment issues with my bar. I also removed the sunroof, so there is that same gap between the bar and roof.

Member
Man this looks good. I have been wanting to a cage in mine but when I moved up here to Louisville I didn't see much SCCA racing going on. What track are you running on up here?
 Posting Permissions


 Reply With Quote
Bookmarks