
 Member
BMW CCA Member
Member
BMW CCA Member
I realized that over the last year working with this car I ended up with several different threads covering the rebuild of the car. At this point I am going to just consolidate it here, which will also help me keep a history of the car in one place. I’ll post links to the other threads here as well so you may have seen a bunch of this already. It picks up with brand new stuff with the donor car in the next post.
(How I got into all this in the first place: A look back )
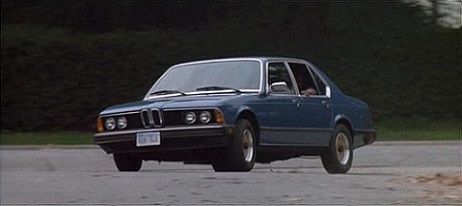
It started 2 years ago when I bought my 85 745i from a a board member who is also a BMW mechanic. In the couple years he owned it, and in the time he worked on it for me after i bought it, the car got new:
Water pump
Thermostat
M5 fan
Water hoses
b35 Starter
Spark plug wires
Spark Plugs
Cap, Rotor
Brake calipers, and rotors front and rear
Brake hoses
Fuel lines
Single Tre Fuel pump upgrade
Valve body rebuild
Differential Upgrade to 3:73
CSB
Rear springs
Front Struts and Strut Mounts
Transmission hoses
Valves adjusted
Oil spray bar and lock banjo bolts
Jarmo chip
Team 745 wastegate
Stainless exhaust
All Vacuum pods for a/c changed
New a/c and heater fan
Heater box insulation and flaps repaired
New dash
Euro gauge cluster
Sport steering wheel
16” wheels
Headliner
Battery
When I picked up the car from the PO, Tim, I drove it from Philadelphia to New Olreans and except for breaking the key off in the lock in rural Virginia and luckily finding a locksmith that fixed me up with the one spare key in Virginia, the car ran like a top and continued that way until last July.
That’s when i started chasing down an odor, that was bugging me since I got it. I started heavy duty cleaning the leather, decided it would be easier to take the seats out and so might as well do the carpets too. That’s when I found the leak had been there a while and stripped the interior to clean, sanitize and get rid of the odor. Of course since everything was out may as well paint it. And that my friends is the classic rabbit hole and I went straight down it. So off the car went for paint.
When I got it.
Radio upgrade
Fuel pump
Interior out
Valve body work
Interior stripping
Out for paint
Back from paint
Links Related to this Thread
Buffalo Leather Questions
What do you guys think is the best color?
1985 7451 Interior Overhaul
Looking for padding replacement.
New to me 745i bought from a great Board Member
Last edited by espoe; 06-02-2019 at 11:22 AM. Reason: Adding Links
Member
BMW CCA Member
Now on to the new stuff. While it was out for paint there was a donor giving up its parts for the cause. A 1984 executive model that on the surface looked like the one I should have restored, but rust in the wrong places along with a bad transmission, paint, and lots of other things sealed it’s fate.
Original Link for Donor Car 2012 :
745i Restoration thread
+ftHDKeLSo6XvtjaZoGalw.jpg
Sent from my iPad using Tapatalk Pro
Last edited by espoe; 06-02-2019 at 11:31 AM. Reason: Added Link
Member
BMW CCA Member
First things first clean and organize the space, get the car at a level that makes it easier to work on. Particularly for this old guy.
Extra 106 Engine ready for whatever is needed.
Space is clean, now time to give the car a good wipe down inside and under the hood to start working in there. Going to take tasks and attack them in a way that dodges the heat. All of the interior seat cleaning and oiling, gauge cluster repairs, light assemblies rebuilt, light sanding of parts and spray painting, and anything else that will fit on the workbench is going to get done inside in the a/c. Early morning and late afternoons will get the outdoor work. I hate it that I missed several months of great weather. Oh well, onwards i go.
Also going to install some portable lighting and some bad ass fans outside. If I dont I wont get started till November
Task list coming up
Sent from my iPad using Tapatalk Pro
Last edited by espoe; 06-06-2019 at 10:45 PM.
Long Member
Show us that new headliner please.
Member
BMW CCA Member
Just realized that is not an easy photo to get.
s042T1o1TJCM5KfLD10QMg.jpg
t4PisjfgTo6dbimfZX0MhQ.jpg
For those curious about the headliners in these cars:
I had it installed while I was waiting to pick up the car from Tim in Philadelphia so I wasn't there when they did it. On the parts car I had I did rip into it to see how it's put up there. The reason these cars are a PITA and expensive when it comes to headliners is that they are not installed on a single foam pad. They are tucked under the windshield and door gaskets, sewn on to a tube midway between the sunroof and rear windshield, and glued to some foam pads that are there for shaping as well. The guy that installed this one was able to not tuck the new one under the windshield gaskets somehow but I didn't get to see how he did it. He's a very experienced classic car person so he knew what he was doing. Cost was $1,100.00
If I were to do it over again I would have installed some heat insulation in the roof like the thin reflective mats, or painted on Lizardskin, or something. We need all the help we can get. Another thing to note is there is foam up there to help with the shaping, and that 30 year old stuff is drying out and starting to decay. If you tap on your roof and you see stuff coming down it may not be the healuner but the old foam under it coming out.
I have heard the non-sunroof cars are installed on a pad, but I don't know that for certain. I think Jay was looking into it a while back but I have not seen anything further about it. Finally if you were looking for the sunroof drain you will see it in the picture below if you look closely. (the tube is the same color as the background) It drains out the front a pillar on the passenger side. Didn't look to see if there was a rear one. You can also see where the old headliner was tucked into the gaskets
N4lDNG0tTkq4SsTWZpeYtA.jpg
Member
Wow, two clear sunroofs. Impressive.
Member
BMW CCA Member
As the tow truck was coming to get the donor car it occurred to me to get the sunroof out. I could not get it out for the life of me and ran out of time. The was the only part that got away from me and the rear little green glass panes. Noticed those as the truck was driving off.
Sent from my iPad using Tapatalk Pro
Long Member
At one point I had thee or four spare OE BMW glass roofs.
I make E23 parts.
09/1983 745i (stolen spring '13 around Houston, TX Achatgruen on nutria buffalo. 8481080)
10/1984 745i
11/1984 745i
11/1984 735i (10:1-265/6)
Ford, MB, and GM round out the pack.
Member
BMW CCA Member
Shouldve called you to get it out!Originally Posted by Hit Man X

Sent from my iPad using Tapatalk Pro
Long Member
It is easy when you remember how! Like those power rear seats.
I seem to recall you put it in vent mode, remove a few screws. Lower it, slide it back and remove more toward the front. I just do not recall now.
I make E23 parts.
09/1983 745i (stolen spring '13 around Houston, TX Achatgruen on nutria buffalo. 8481080)
10/1984 745i
11/1984 745i
11/1984 735i (10:1-265/6)
Ford, MB, and GM round out the pack.
Member
BMW CCA Member
Wifes away so got the interior in and started cleaning and arranging all the parts with screws, clips etc.
Apparently Ive been collecting parts for several years. I got 3 of everything.
Sent from my iPad using Tapatalk Pro
Member
BMW CCA Member
Stared with the oil and these seats are coming along nicely. Started with Lexol just to get some oil into them as it has been probably 10 years since they've had anything. All of the interior was inside except the rear seats, though the car was covered for a good bit of that time. Besides the tops of the rear seats, they really didn't feel all that dry but were nearly silver as the pictures show. After starting with a couple coats of the Lexol I Switched over to the Color Plus and that seemed to make a big leap in the color. I would have gone just with color plus but I only had 1/2 can. Lexol had started to bring it about but the Color Plus really kicked it up. The only. thing I will have to address will be some split of the seam at the corners of each rear seat.
%AZxlPaVR5SkjTkuqITT5w.jpg
First Applications. One on the right has 2 coats, and the left one has 1.
31lJ8BoOTVqyt6+WyTEVPg.jpg
After the Color Plus. Hard to tell but it's coming along each time.
7LL9A9xDS7+uRseoNk5H6w.jpg
Split at the top
Bp8zAclXTQqxzE6nE+EgMQ.jpg
Member
BMW CCA Member
So now I have 2 spoilers that I can put on. The smaller one was on the car but I have this other one from the donor car. What do you think?
qcBfpIhrQmqr6NbcHoA6pg.jpg
Smaller One-covers over the Roundel
sES2xdDKQUaq6EHelH4ztA.jpg
7adc40eb90c31bf908a2bff828aceeb0.jpg
Larger One- You can see the Roundel and the Number, plus it goes past the end of the trunk lid.
DSC_7662.jpg
I like both really
Member
I'd leave them both off. Then again I deleted the factory spoiler from my E39 M5 when I had it. I like the smooth look.
Steve H.
Member
The one that holds the beer can on the roundel is the hartge spoiler as you can tell by the stripes on that car.
If you have a roundel that has been moved to the right side of the license plate, the spoiler with the beer koozie in it is not recommended, would look weird.
Member
BMW CCA Member
I left the holes in the lid for the mounts so one of them is going on. Besides, makes it that quirky 80s Euro look.
Sent from my iPad using Tapatalk Pro
Member
The one with the beer can hole on my car did not have any studs for mounting. It was taped in place. That is the way it will go back on, too.
Member
I would have had to reschedule the pickup. Good condition moonroofs are very rare now and bringing in $500+. Is it too late to go get it?
Member
^ I didn't want to be the bearer of bad news but he's right.
Steve H.
Member
BMW CCA Member
Maybe not. It was going to the body shop where my car was painted, then a scrap guy was going to come get it. I'll check it out as it's not too far from me.
I stripped most everything out of the car and the roof never even crossed my mind until the last day at the last minute . I was taking some photos of the rear seat area to see the executive seat brackets, and to photo the location of the sunroof drain since I ripped up the headliner to look at was underneath. That's when it hit me. Before that never thought about it. The driver was already on his way and it was part of a 2 car deal. Pick up the donor to clear the space and swap it out at the body shop for my car to come home. I got the roof to budge a little but could not get the forward screws out by the time the driver got there. It was late in the day and there wasn't any time to play with so I let it go. I had no idea they were worth that much though.]
Anyway I managed to salvage every window regulator, hood release bar, Steering Column, window guide..... You know, the stuff nobody wants
- - - Updated - - -
No Roundel by the plate, it's still in the middle.
Member
BMW CCA Member
The donor car with the larger one was also taped on except it had a stud at each end. It also looks like there were studs for the rest of it but the screws were broken off. I have to investigate that further but the tape seemed to have worked really well so why not? Any idea which tape it is.
Also it seems that spoiler is a Foha made in Austria.

Last edited by espoe; 06-13-2019 at 06:54 PM.
Member
3M should make a permanent attachment tape for car exterior parts.
If you go with the beer can holder, put paint protection tape on the areas of the rear quarter that are under the spoiler. The spoiler will rub on that area. I've got a chunk of griots tape for this when the spoiler gets reinstalled for the full Miami Vice look.
Member
BMW CCA Member
A little more leather work. Im getting really happy about this interior.
Eats up oil thats for sure.
Sent from my iPad using Tapatalk Pro
Member
BMW CCA Member
Progress for today
And thats all that is going to happen outside today. Man its hot and sticky. So today I am going to sort through the stash of part, clean and choose the best, test any electrical that I am able. Find all the screws, nuts and bolts and get them together with the parts, get one decent set of headlights from the set that I have, label the bejillion relays I have, and anything that will make the assembly smoother
Sent from my iPad using Tapatalk Pro
Last edited by espoe; 06-15-2019 at 12:33 PM.
Long Member
What are you using to condition the leather? Color Plus, Leatherique, or Colourlock?
I make E23 parts.
09/1983 745i (stolen spring '13 around Houston, TX Achatgruen on nutria buffalo. 8481080)
10/1984 745i
11/1984 745i
11/1984 735i (10:1-265/6)
Ford, MB, and GM round out the pack.
 Posting Permissions


 Reply With Quote


Bookmarks