
 VSCERL
I haven't tried streaming music via the cord, but if I recall correctly the manual said it was for charging only. I'll report back.Originally Posted by bmwstephen

The radio skip track buttons still operate, but I haven't tried anything else. The kit also retains the ability to control everything through the factory steering wheel also, however I have a Momo in my car.
Past: '99 Hellrot/Dove M3 | '97 S14 1JZ | '06 Triumph Daytona 675 | '01 330I M-Tech I | '99 Silvia S15 | Current: '96 Estoril/Black M3
VSCERL
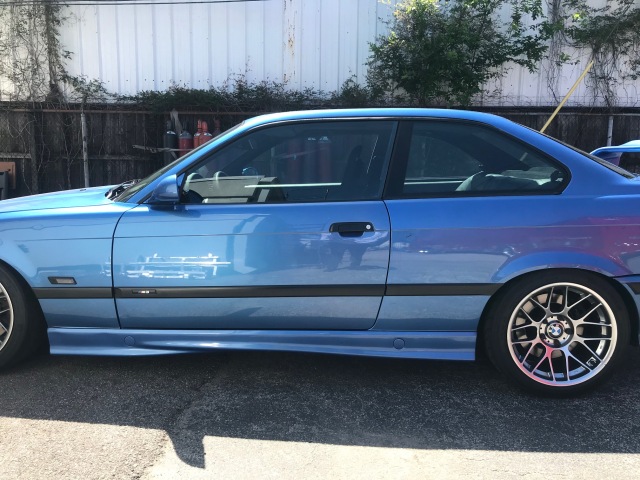
Took the car out late the other night, took advantage of the deserted streets.
IMG_2824 copy2 by Mike Ellington, on Flickr
IMG_2812 by Mike Ellington, on Flickr
IMG_2815 by Mike Ellington, on Flickr
IMG_2833 by Mike Ellington, on Flickr
Past: '99 Hellrot/Dove M3 | '97 S14 1JZ | '06 Triumph Daytona 675 | '01 330I M-Tech I | '99 Silvia S15 | Current: '96 Estoril/Black M3
Member
This is a great read. My Estoril M3 @ 140,000 miles needs a bit of attention, too. It's nice to see someone really give their car the proper care it needs.
This might be a dumb question, but after you fitted your unpainted bumper did you remove it to paint or paint in place? I missed a step somewhere..
VSCERL
Thank you. The bumper and nose panel were pulled off to be painted and have PPF installed, I just didn't grab any photos of that process.
Past: '99 Hellrot/Dove M3 | '97 S14 1JZ | '06 Triumph Daytona 675 | '01 330I M-Tech I | '99 Silvia S15 | Current: '96 Estoril/Black M3
Member
Car looks great man, I love what you've put into it.
Question - who makes the temp display you adapted into the cluster and how does it communicate with the temp sensor?
VSCERL
Thank you. It's a small "company" in Florida but I think it's just one guy who builds them in his free time. I always forget the company name so I'll dig it up and PM it to you.
The readout takes power/ground/signal from the sensor/dimmer/and can be wired up to a momentary switch to set warnings. The sensor itself is in the cylinder head and only has the signal wire and ground. Very simple.
Past: '99 Hellrot/Dove M3 | '97 S14 1JZ | '06 Triumph Daytona 675 | '01 330I M-Tech I | '99 Silvia S15 | Current: '96 Estoril/Black M3
Member
I've enjoyed this thread and love your car! I just got my first BMW - a 98 Alpenweiss/black M3/2/5. But I've had quite a few Nissan S-chassis cars as well as a G35/2/6MT, several Mustangs, Corvettes, Camaros, Trans Ams, etc.. My son is currently working on a black S14 as I work on this M3. Small world!
Last edited by vinco; 04-22-2020 at 10:38 AM.
VSCERL
Thank you. An AW E36 M3 is a good one. I'm still a die-hard Nissan guy and have a real soft spot for black S14's. I'd love to own one again someday but like most cars of that era clean and unmolested examples are hard to come by nowadays. I'd probably get into an S30 before buying another, however.
Circa 2006, my beloved bone-stock 5-speed '95 SE.
And 2015, not long before loading her up to deliver to the new owner.

Past: '99 Hellrot/Dove M3 | '97 S14 1JZ | '06 Triumph Daytona 675 | '01 330I M-Tech I | '99 Silvia S15 | Current: '96 Estoril/Black M3
Member
Okay thanks man.
VSCERL
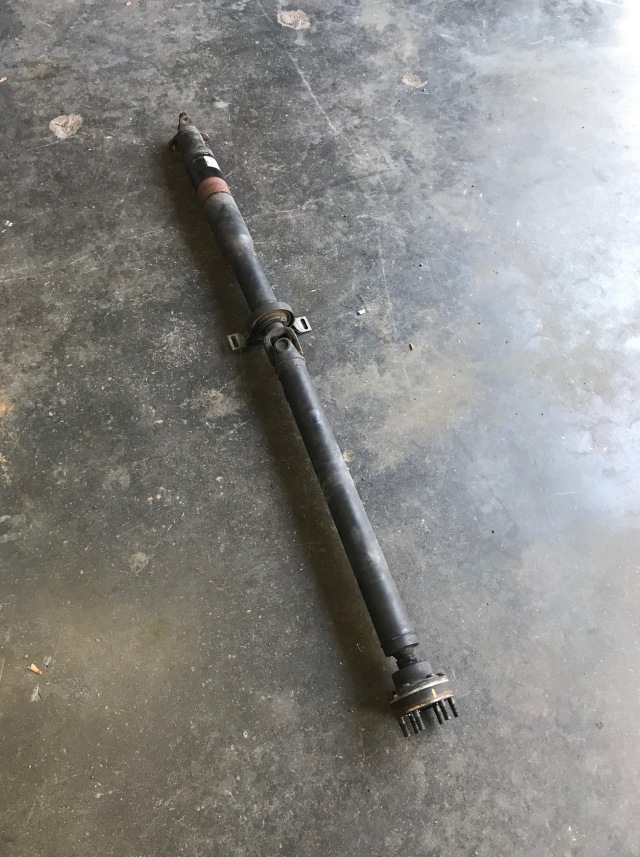
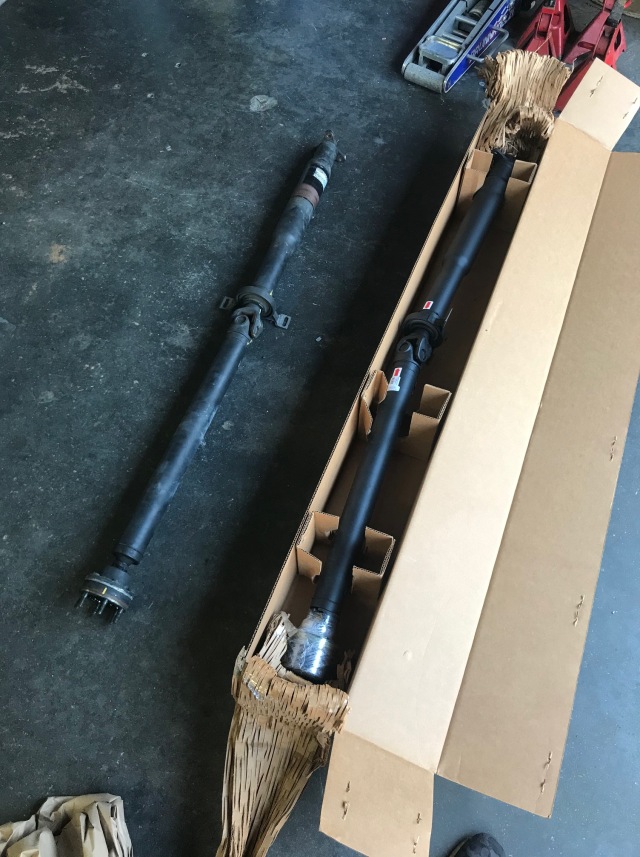
For a while now Ive had a metal on metal clinking sound coming from under the car as I pull away from a stop. It started out very faint, but eventually became louder and more prevalent. At the same time, over the last few months I started to notice a slight vibration and humming, increasing with ferocity as speed rises. Originally I thought something was wrong with the differential, maybe the bearings were about to disintegrate. Take a listen below.
The metallic noise was very loud when youd rock the wheels back and forth and you could hear it grumbling a little bit as it would rotate in one direction. The sound was hard to isolate with the exhaust and heat shielding still mounted, as the driveshaft itself acts as a megaphone, transmitting the sound throughout the entire thing. Once those were removed the failure was obvious, you could even see the play in the center joint when moving it by hand. The center bearing was a bit crunchy as well, but not awful.
Getting the driveshaft out was pretty easy, its just a lot of work dropping the entire exhaust just to get at it. Im unsure if this is the original 163,xxx mile drive shaft, as it had alignment marks on it.
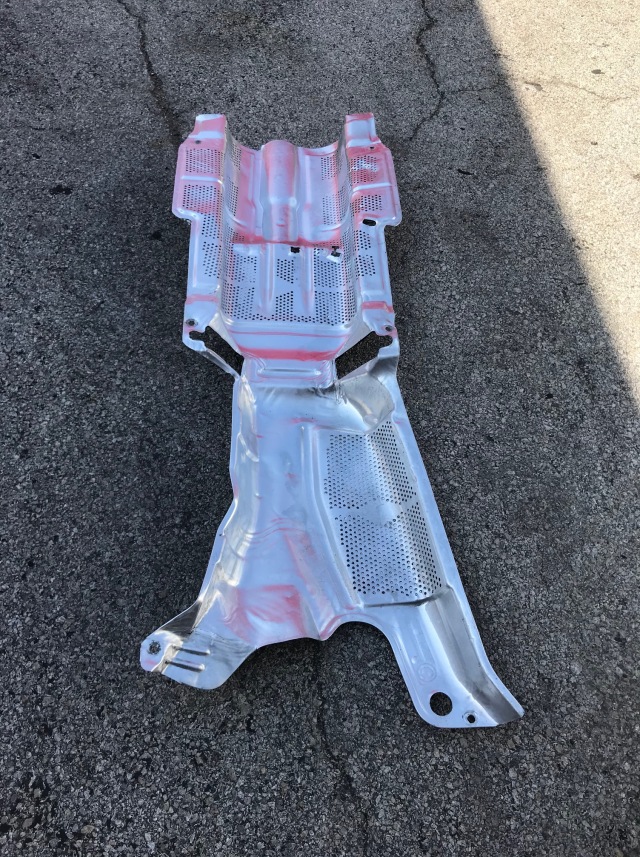
I went ahead and ordered a re-manufactured unit from Driveshaft Specialist in San Antonio. They seem to be pretty sharp with BMWs and have a good reputation. Luckily it only took two days to show up. While I was waiting I cleaned up that grimy heat shield. If only I had the time and patience to do the rest of the underside.
Re-installation was seamless and the guibo in the car looks perfect. I need to order some transmission tunnel insulation braces as its still sagging in areas onto my shifter and ever so slightly on the drive shaft. Luckily those can be installed pretty easily.
It might be a placebo effect, but the car feels a bit more athletic now without the slight slop in the drive shaft. Thankfully the metallic noise is gone, however the humming vibration is still evident, so I think differential rebuild with new bearings is in store in the not-so-distant future. However, for now, the car is mobile again.
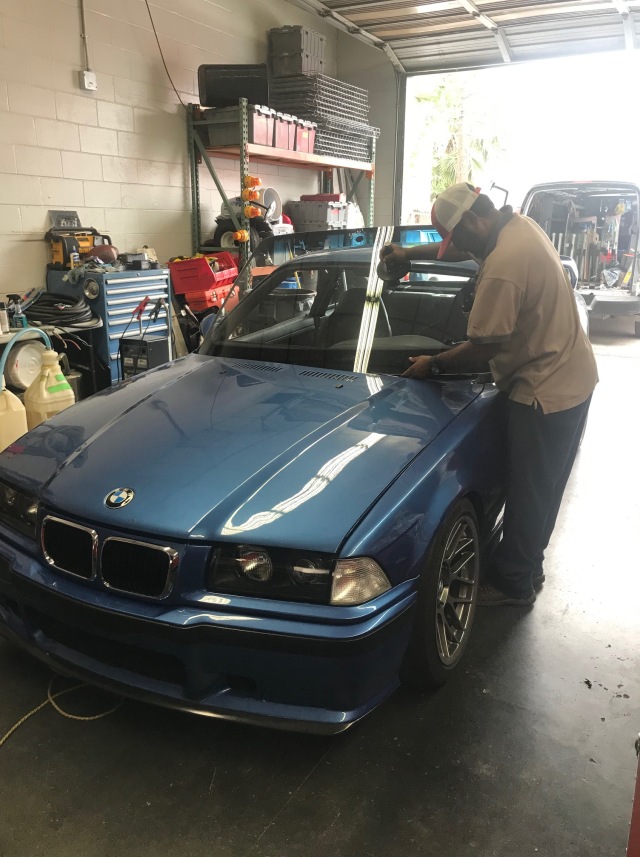
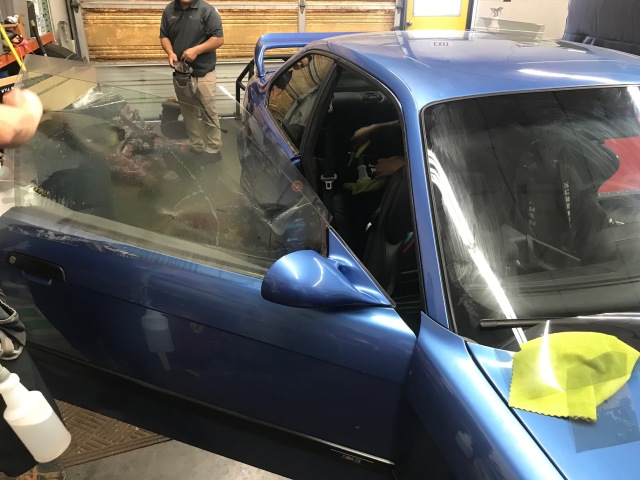
While I had the car at work I also knocked out something Ive for some reason neglected for a while, the windshield. There was a crack halfway up the passenger side that has been there since I bought the car.
Old one out, new one in.
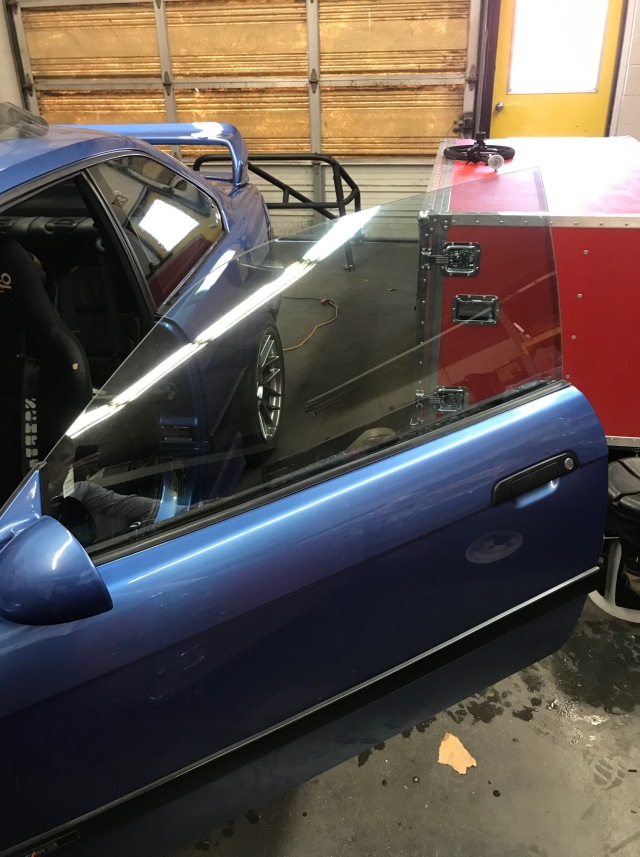
Having removed the 20% tint and loving the way the fishbowl looks, along with the new windshield in the car, it was time to throw some 70% Ceramic on all the windows, including the full windshield. Hopefully this will help keep some of the heat out during the Texas summers.
Its got an ever so slight smoked tint to it, very very faint. Im happy with it.
Now to put some more miles on it!
Past: '99 Hellrot/Dove M3 | '97 S14 1JZ | '06 Triumph Daytona 675 | '01 330I M-Tech I | '99 Silvia S15 | Current: '96 Estoril/Black M3
Member
I'd think about wheel bearings before the diff unless they've already been done.
VSCERL
I originally checked those, but they seem to roll free without any play or noise. I have no idea how old they are so they should be done sooner rather than later.
With the car on jack stands and spinning the wheels or lightly running the car through the gears, the humming is very evidently coming from the diff. It doesn't help that I have Revshift diff bushings, but the vibration has slowly increased over the last 12 months or so, now to an obvious level.
Past: '99 Hellrot/Dove M3 | '97 S14 1JZ | '06 Triumph Daytona 675 | '01 330I M-Tech I | '99 Silvia S15 | Current: '96 Estoril/Black M3
Member
I went through this exact same process you are going through when I moved down here from Dallas. I put a lot of miles on the car for about 6 months while I commuted back and forth.
I had a wonky vibration I could feel, and I could see the vibration in my rear-view mirror at speed on the highway (like I had the stereo cranked up with the bass maxed out. I mean, if I HAD any bass...). It finally got bad enough that I decided to replace my wheel bearings even though there was no play and no obvious noise coming from them. And this fixed the vibration in the mirror, but there was a still a wonky vibration evident over about 40 mph, and within a week of replacing the wheel bearings turned into a clank. Driveshaft specialist in San Antonio got a new driveshaft to me like the next day (yes, being close helped a lot), and when I removed it I could see the rear u-joint had died.
The major difference here is that I had blown the LSD cover bolts about 2 years prior and had already replaced my diff. I always wondered how long it would have lasted if I hadn't lost the LSD cover.
If it helps, I do have my original 3.23 diff with new 12.9 grade Bel-Metric LSD cover bolts, new bearings, and an extra clutch plate to upgrade to a 3 disk. I didn't remove the pinion, but both output shafts had to come out to get the LSD out. I've been meaning to put it back together for years - I can get off my ass if you decide you need it (it IS a 4-bolt u-joint, so you'd have to make the pinion swap. So probably better it's disassembled).
-Josh: 1998 S54 E36 M3/4/6 with most of the easy stuff and most of the hard stuff. At least twice. 271k miles. 1994 E32 740il with nothing but some MPars. 93k miles.
VSCERL
Thanks Josh. I was actually planning to do the same and try and upgrade anything I could to my diff while it's apart. Did you use the Porsche clutch plates?
Past: '99 Hellrot/Dove M3 | '97 S14 1JZ | '06 Triumph Daytona 675 | '01 330I M-Tech I | '99 Silvia S15 | Current: '96 Estoril/Black M3
Member
No, I have a friend who rebuilt his and ordered the Porsche plates (edit: now that I think about it, I think he ordered the whole kit from Thayer). When he got them he realized his original plates were still in good shape, so he gave me one of the plates (and I think a dog plate too - I'll have to go look at what all is in the bag) to do mine. He also sent me a copy of the Thayer instructions if you need those.
Also, if you replace bearings, when you order make sure your output shaft bearings include the inner race. Mine did, but apparently they don't all include the inner race.
Last edited by blckstrm; 04-28-2020 at 05:53 PM.
-Josh: 1998 S54 E36 M3/4/6 with most of the easy stuff and most of the hard stuff. At least twice. 271k miles. 1994 E32 740il with nothing but some MPars. 93k miles.
VSCERL
One of the upper idler pulleys had developed a bit of a rattle, so rather than just replace the noisy one I replaced everything; both belts, both tensioners and all three pulleys.
Unfortunately the longer bolt on the upper tensioner was right in front of my offset SPAL puller fan, so as usual, a quick and easy job turned into something more real quick.
Once that was out of the way everything else was cake! The belts that came off were still in great shape, no signs of wear or any cracking.
Picked up a set of rear upper strut mounts from Garagistic along with new gaskets.
Lastly, the headlight mounting screws were old and cracked, so they had to be replaced.
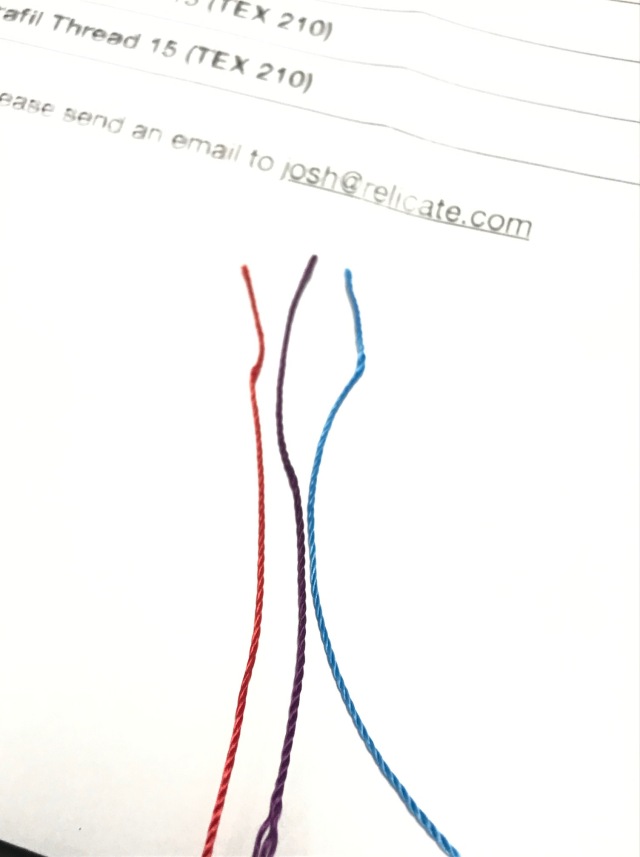
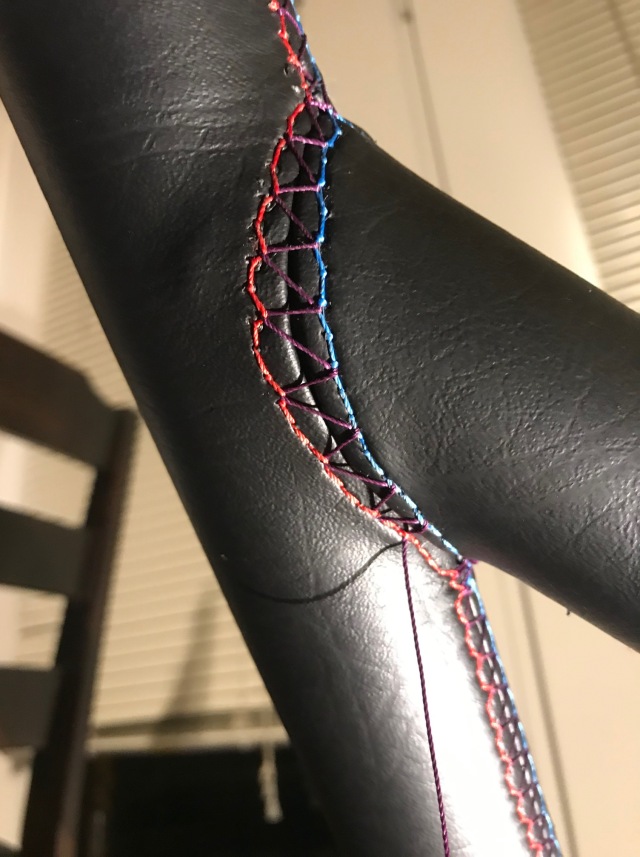
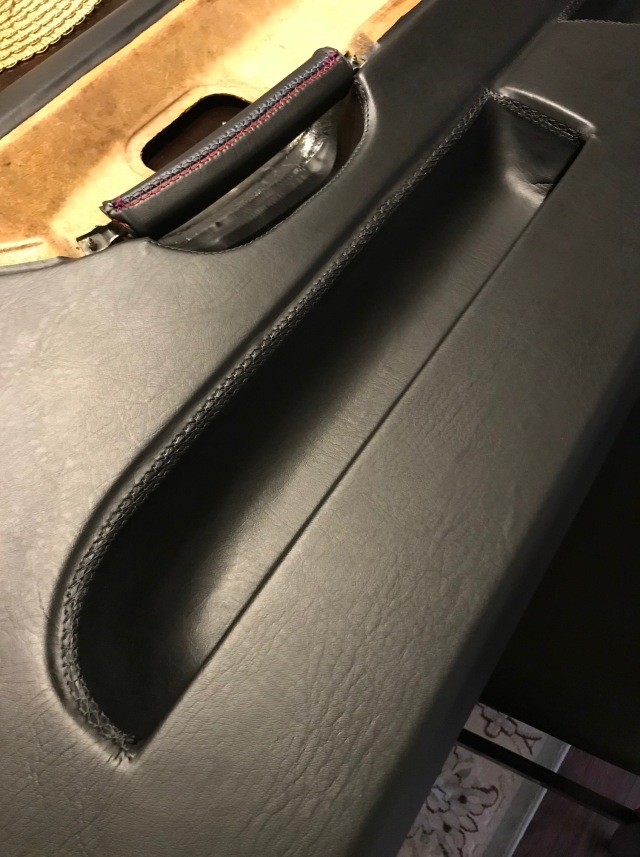
Im still working on the next version of the door panel repair, but in the meantime I whipped up some door handles using BMW Serafil thread, with the proper violet stitching tying the blue and red together. I need to work on the ends of my stitchings, but otherwise some of the upholstery Ive done has been surprisingly enjoyable. More to come with this later!

Past: '99 Hellrot/Dove M3 | '97 S14 1JZ | '06 Triumph Daytona 675 | '01 330I M-Tech I | '99 Silvia S15 | Current: '96 Estoril/Black M3
VSCERL
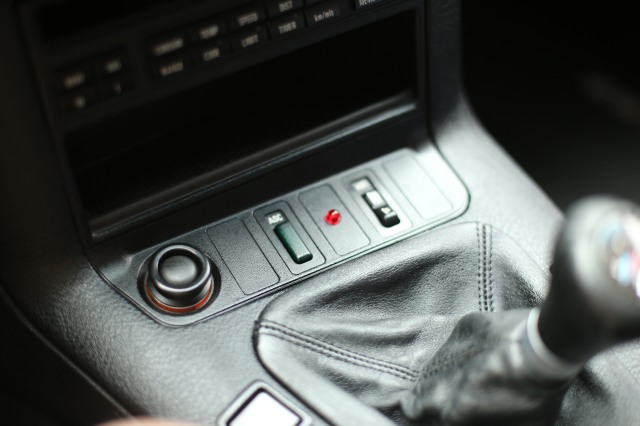
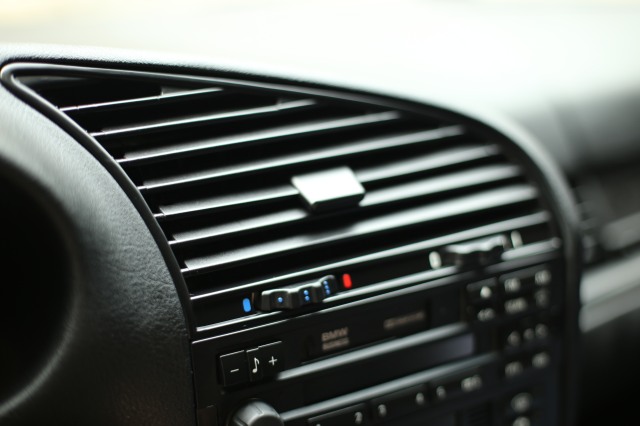
Also spent an afternoon cleaning up the interior a little so I took a few photos.

Past: '99 Hellrot/Dove M3 | '97 S14 1JZ | '06 Triumph Daytona 675 | '01 330I M-Tech I | '99 Silvia S15 | Current: '96 Estoril/Black M3
VSCERL
When I first bought this car it was gutted from the front seats back and had two fixed back bucket seats. My goal was to turn it back into a more street friendly car, something I could take on road trips and around town with the fiancé. Over the following year or so I sourced a full black interior to swap out the tired Dove Grey bits and returned the car to full interior and with manual Vaders. Here I am, some three plus years later, finding myself leaning back towards a bit more aggressive track prep while still maintaining the street car essence. The car, in it's current format, is very capable on our local small track and twisty back roads, but with my apparent inability to hold still and leave things alone, I've found myself asking for more ways to shave time and be more athletic with the much faster cars at the track. I've had a full "track spec car" before; fully gutted, seam welded chassis, buckets, full cage, harnesses, sound deadening removed, and stupidly enough, A/C delete. It was a cool car, but approaching thirty years old, driving around for an hour and losing 2 pounds of water weight from sweating, a headache from straight pipe exhaust, and smelling of fuel and exhaust for the rest of the day isn't so appealing to me anymore.
So how do you make an old BMW able to hang with a brand new Porsche GT4 at the track but still maintain it's composure of a classy, near vintage German street car? I looked to some of the Porsches of Singer Vehicle Design as they seamlessly blend form and function. Unfortunately I don't have thousands and thousands of disposable income to put into the M3 but I did pick up on one thing that they do that I love. Roll cages. But not just any regular ones, they'd wrap it in the same leather used to reupholster the seats, dashboard, door cards, etc. They effortlessly took something that is so obviously utilitarian and made it look civilized.
This made the gears in my head start turning. I appreciate the M3 for being somewhat subdued, almost unexpected for a mostly stock looking car being able to produce serious lap times. So when I came up with the idea to attempt my own Singer style cage I realized I wanted it to be subtle while paying homage to the ///M heritage of the car.
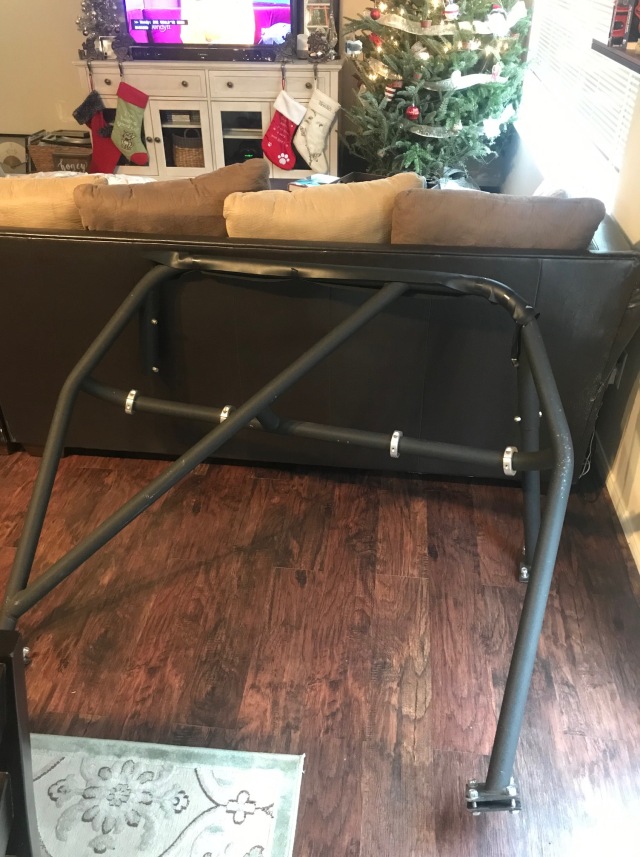
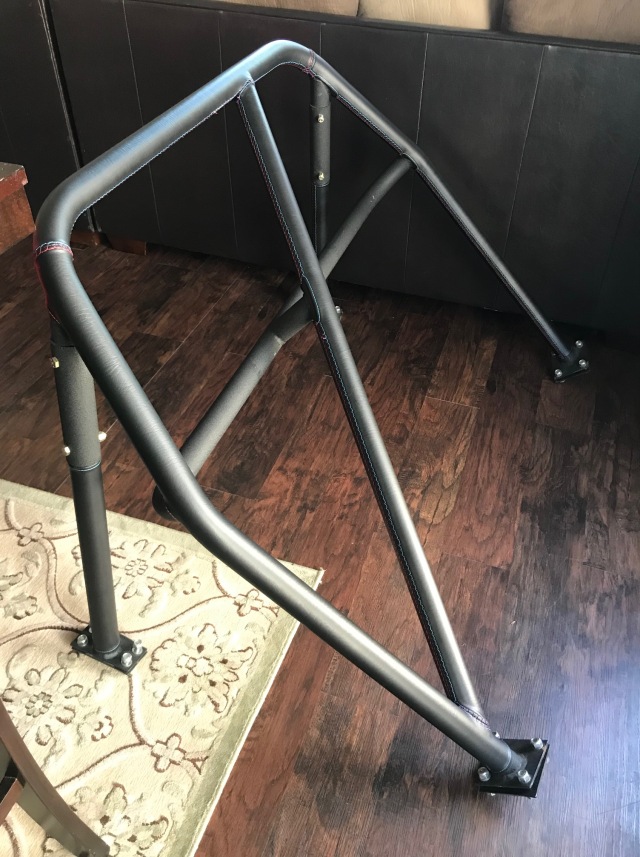
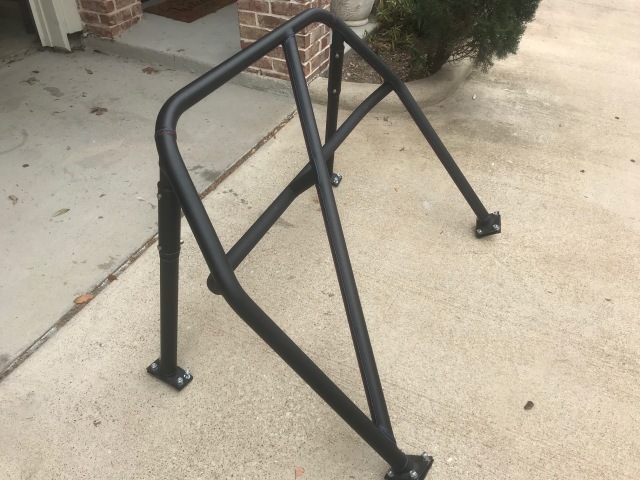
Not wanting to do a full roll cage again, as driving to dinner with a helmet on doesn't sound ideal, I started looking for an easy bolt in roll bar that retains the ability to keep the rear interior mostly intact. Luckily not long after I came up with the idea a Kirk 4-Point came up for sale locally for a good deal. I can't say for certain that the fiancé was too stoked on having this in our living room for a while.
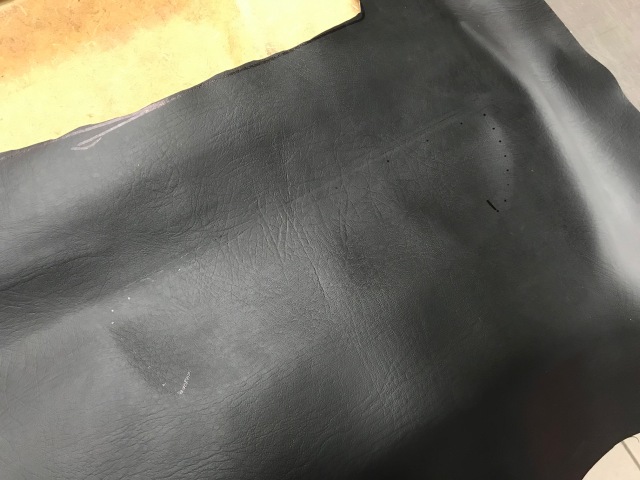
Luckily I had already sourced a leather like vinyl for the door panel reupholstery project I had been working on. I went back to the store and picked up a couple more yards as I love the grain and texture it has.
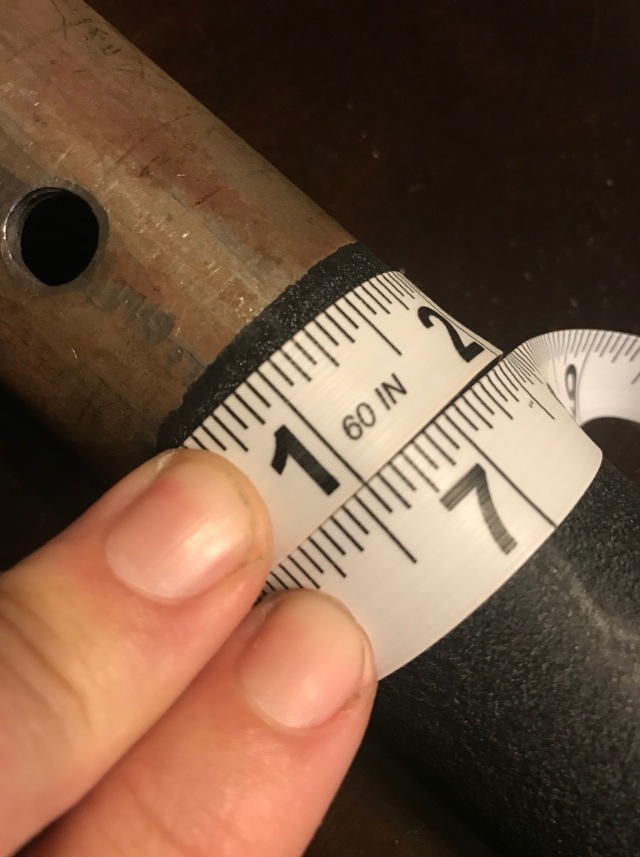
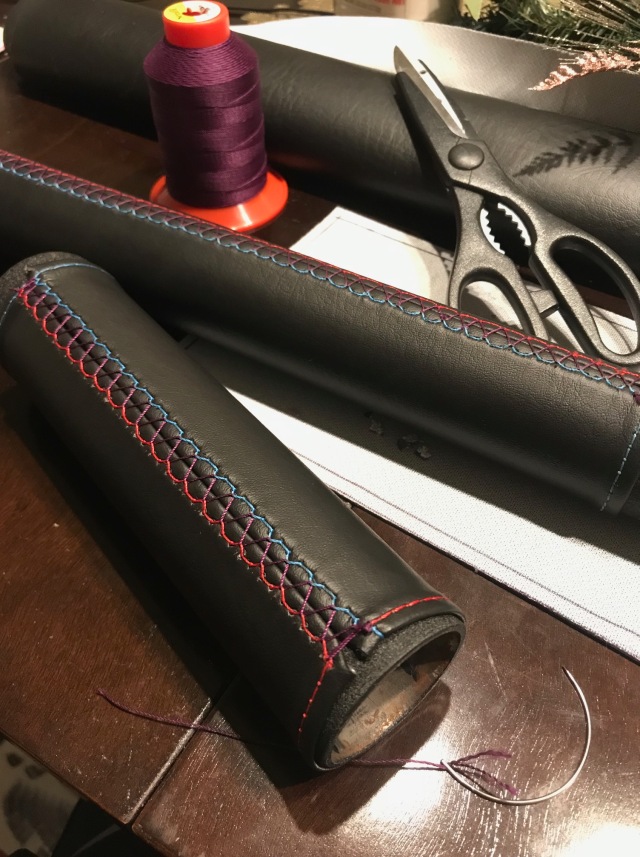
I took measurements of the overall diameter of the bar and started drafting up whether I was going to do a butt-seam or if I was going to roll them over for an embossed stitch. I landed on this style, I'm not sure if there's a formal name for this type. There's about 1/8" of fabric rolled underneath to raise the stitching and make for a smooth seam. The strips then have to be cut about 1/4" shorter than the overall diameter as you want it to stretch a bit when you pull the stitching together. If it were loose the material would be free to twist and make the stitching line wavy.
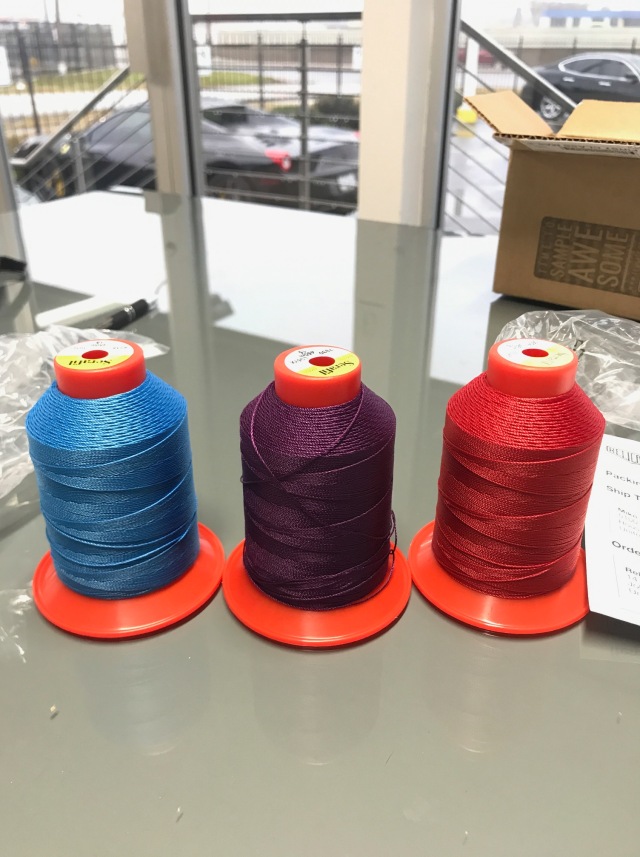
Next up was to decide the colors and thread size. After digging around for a while I found a vendor for Serafil thread, supposedly the brand that BMW uses for their steering wheels and the like. The modern day colors are light blue, dark blue, and red. However if you look at the badging on the trunk, door jams, or really anything pre-E46 it was mostly light blue, violet, red. Continuing to try and stay "period correct" I opted for the violet center thread.
With all the materials gathered came the hard part. The main hoop had to be done in three separate pieces, one piece for the harness bar, and separate pieces for the rear supports that tie in to the rear wheel wells. Many hours of measuring, tracing, cutting, and planning how the pieces would tie together, I had all of the pieces cut and mocked up accordingly.
I briefly looked at purchasing a sewing machine but having literally zero experience with one and surprising expense for a newer one, I decided to sublet it out to someone who knew what they were doing. With all of the pieces cut and labeled I made directions for a local seamstress to run them through a sewing machine with the respective colors in place.
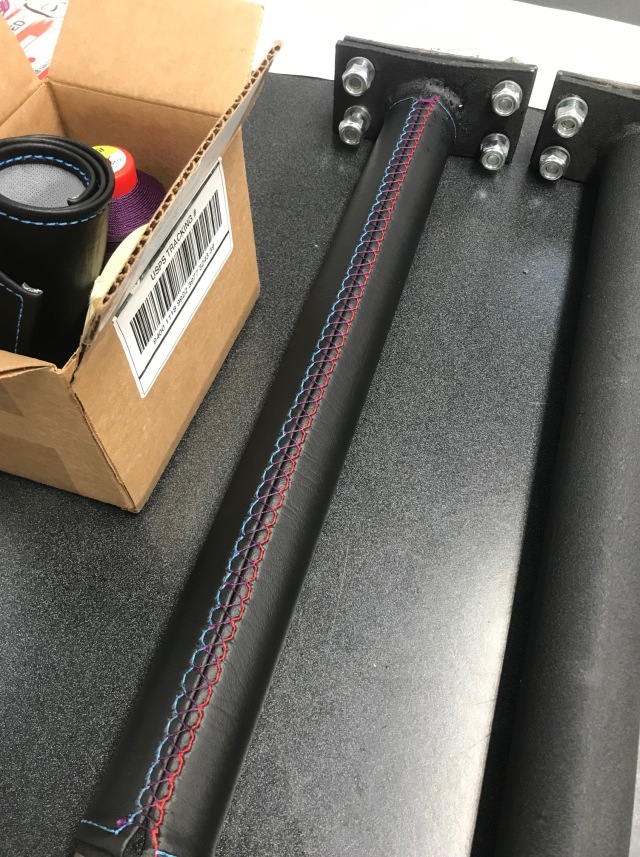
Once they were back from the seamstress it was time for the most time consuming part of the entire project: hand stitching the pieces onto the bars. I broke it up into sections, working about 3-4 hours a night on the weeknights. I started with the rear bars since they were smaller and removable so I could work at the table instead of hunched over on my living room floor. Turns out the two short bars that tie the rear supports to the main assembly came up about a half inch short overall, so these will need to be redone to be perfect.
It's an extremely time consuming process to get right. Again, I have no experience with anything like this, so I wouldn't be surprised if there are shortcuts that I don't know about. Once I got in the rhythm it was easy and straight forward, just time consuming. I was keeping track of the time invested but I lost count when it got over 20 hours.
Seaming the pieces together is a tricky part. I knew when developing the templates that I couldn't accurately guess exactly how the material was going to lay down once it was pulled tight and stretched, so I tried my best to guess. Most of it turned out pretty good, some other areas could use some improvement.
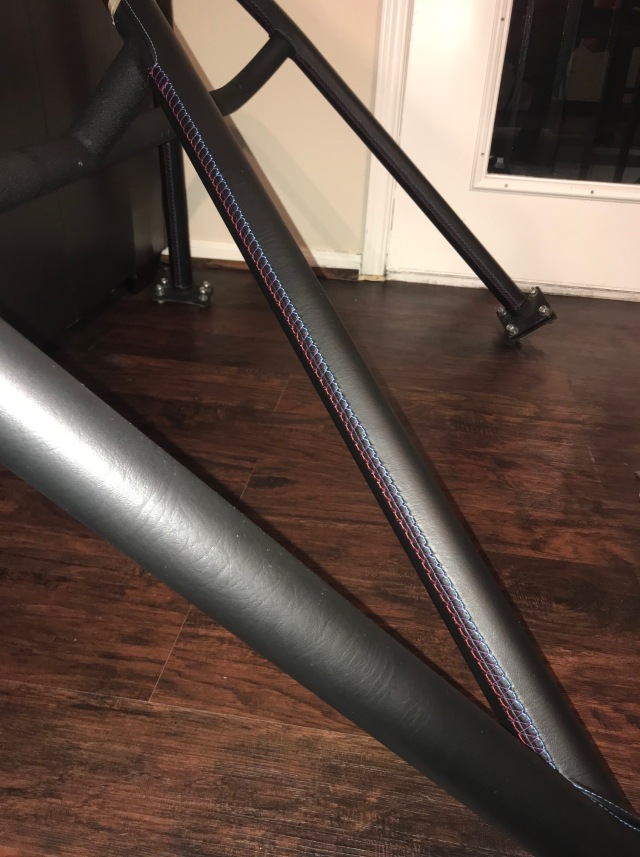
I think all said and done from start to finish I probably have 50+ hours in the project, but I'm very happy with how it turned out for being my first time ever doing anything like this.
It came out exactly how I wanted it to, subtle and unassuming, but classy and tasteful. From ten feet away from the car it looks like just another bolt in roll bar, but when you start looking at it closely you notice the details. It's not 100% done yet as I need to re-do the two rear supports where the nuts and bolts go through as they ended up short, develop the pieces that tie the main hoop into those supports, and then weld some harness slide supports onto the bar rather than using collars. Once that's done it'll be quick to wrap that final piece and ready to go into the car. Before I can put it into the car I have to finish my OEM styled rear seat delete that I decided to make to help offset some of the added weight from this roll bar. Overall I'm real stoked on how it turned out and cannot wait to get it into the car and move on to the next stage of my interior overhaul.

Past: '99 Hellrot/Dove M3 | '97 S14 1JZ | '06 Triumph Daytona 675 | '01 330I M-Tech I | '99 Silvia S15 | Current: '96 Estoril/Black M3
Member
absolutely stunning car and thread.
Glad you are enjoying the headlightsI am actually looking to remove the complexity of the install and 3D print some ABS mounts but need to scan or model the current projector mount. They mod is literally a night and day difference.
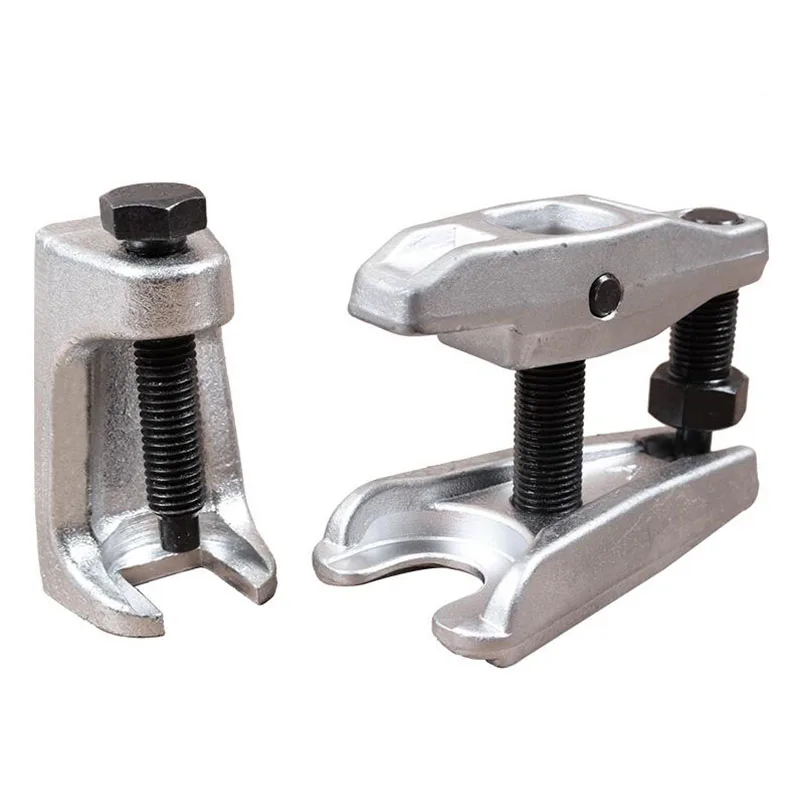
A quick question, I am going through a revive of a 95 M3 with only 80k miles, how did you finally remove the windshield wiper arm? My seems frozen.
VSCERL
Thanks! I struggled with the driver side windshield wiper arm for about an hour. I was replacing the lower windshield trim underneath it so I wasn't too worried about marring it up. I used a ball joint pulling tool similar to this one.
Past: '99 Hellrot/Dove M3 | '97 S14 1JZ | '06 Triumph Daytona 675 | '01 330I M-Tech I | '99 Silvia S15 | Current: '96 Estoril/Black M3
Godbless our soldiers!
Saw your post on facebook....I can't imagine the time and concentration but love the outcome and attention to detail!
1997 Arctic Silver/Black M3
CES Stage IV (651rwhp/615rwtq @ 24 psi)
1999 Techno Violet/Dove M3
Auto/Convertible and staying stock!
Member
Love it Ronald. <3
Member
Just following up on this one here thanks to your inspiration. After installing it and testing out its full functionality, I wouldn't recommend you waste any additional effort running it back to the centerconsole. There's litterally no room back there to squeeze this unit in. Also, for some odd reason if I charge it off the unit, there is a noise interference
VSCERL
Ive found myself about 75% finished with about half a dozen projects lately, one of which being that I rebuilt the rear calipers months ago and chose to do the fronts at a later date. The parts have just been sitting in a box with the To-Do list in my phone growing and growing. I decided this weekend would be a good one to get back to business and finish the other half of that project.
Although I have no issues with my calipers sticking, I have even pad wear, and no other general issues, I primarily wanted to get rid of the red paint and also ensure that everything in the car is new and fresh. Id rather have peace of mind knowing its new and good to go than wondering how long itll be before a problem arises. As they say, preventative maintenance is cheaper than repairing something that is broken.
Heres what the calipers started as. A couple years of aggressive and dusty track pads coupled with some lackluster red paint.
After a quick sandblast. Im not against leaving them in this original color but the black paint will hide the ever building brake dust a bit better, not that itll make much difference.
Bores cleaned, pistons cleaned, new seals, new bleeders, and new guide housings. It would be cool to paint the ///M in the tri-color but for now Id just rather wrap this project up.
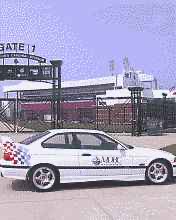
Cruising the forums I came across a set of TC Kline Double Adjustable coilovers that I immediately hopped on. Supposedly they come from a genuine LTW car that was trailered to and from events, never seeing any actual road miles. I believe it, they showed up looking nearly brand new. I reached out to True Choice for a quote on a full rebuild as these are Koni based and decided since they look so good and no visible issues, Ill save that for a later date assuming I dont find any issues after driving on them.
Heres an apparently ancient photo of the car that they came off of.
500 pound springs for the front, 550 for the rear. Should be good for a car that still sees plenty of street time and 200TW tires.
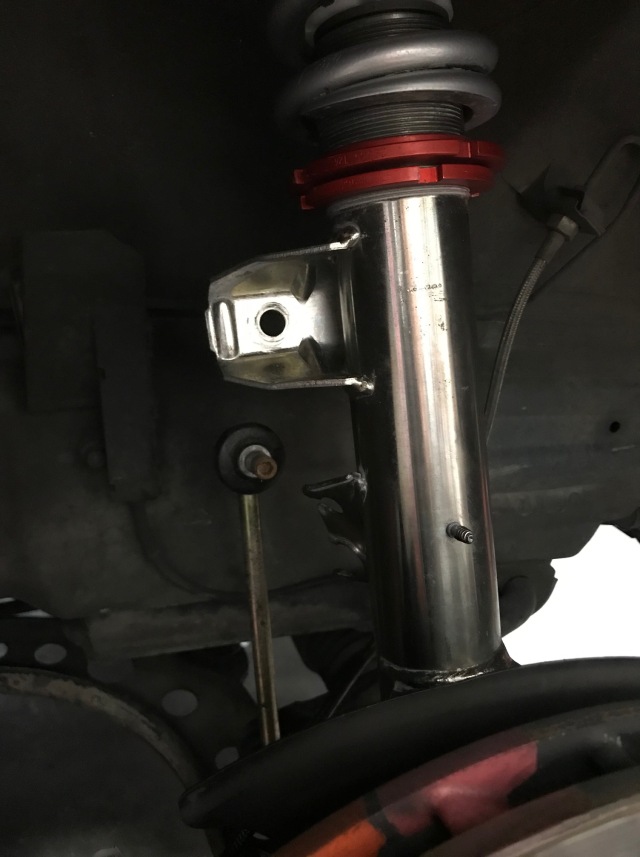
TC Klines rear spring perches are interesting. They imply that you can run them on either the top of the bottom, however I chose to run them on the top so they can be adjusted easier when I get to corner balancing the car. However the threaded portion that seats on the rear knub doesnt fully seat flush with the chassis, as you see here:
I reached out to them and they said that this is fine and that I shouldnt worry. Still, it seems a bit odd, so I looked into getting some alignment cones or articulating spring perches. However the coil springs tighten toward the bottom meaning I couldnt put anything in there to help locate the spring. Although this photo below is at full decompression and thats unlikely to happen while driving, it just seems like that spring perch isnt far off from unseating completely. The springs and perches that were coupled with the BC coilovers sat flush against the top.
All bolted in with the freshly rebuilt calipers, ready to go.
I will apparently need new sway bar end links for the front, however. The ones that were bolted to my BCs were far shorter.
TCKs camber plates are pretty slick in that you can adjust both camber and caster. Im looking forward to getting this thing on the alignment rack and to start playing with the settings.

Past: '99 Hellrot/Dove M3 | '97 S14 1JZ | '06 Triumph Daytona 675 | '01 330I M-Tech I | '99 Silvia S15 | Current: '96 Estoril/Black M3
VSCERL
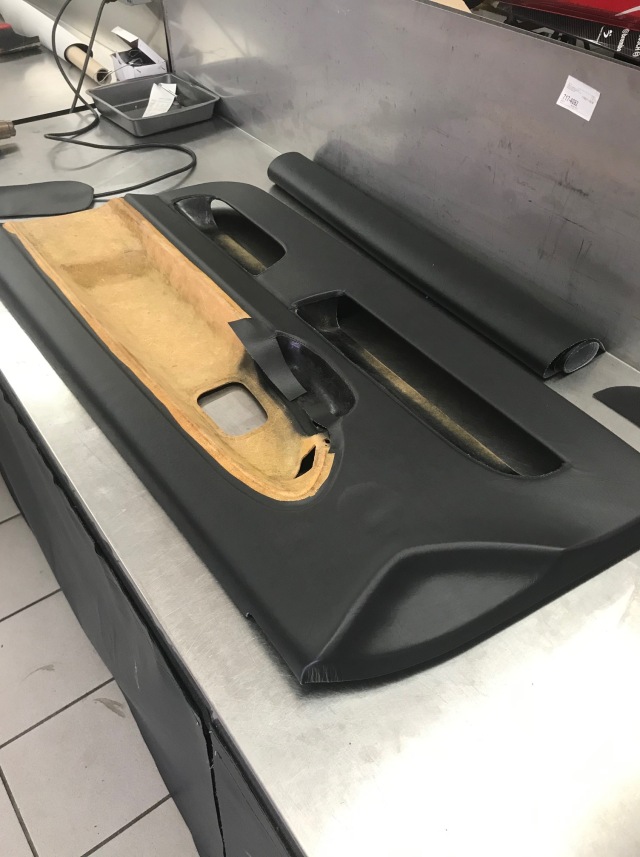
I started wrapping up another project that I've been working on forever; the front door panels. I had completely stripped them of their material and re-glued a similar vinyl on them. The first attempt of doing it with one piece and some strong glue and heat didn't work so this forced me to do something less than ideal. Here you can see the failed one piece attempt, it created a lot of wrinkles in the material.
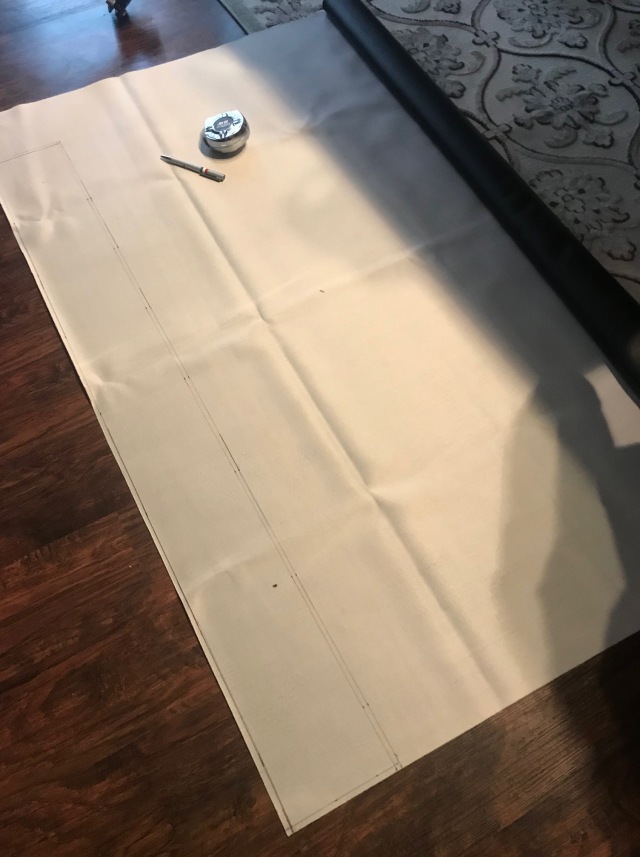
I really wanted this to be done in one piece but I just couldn't figure out a way to do it with something that would look right and, most importantly, hold up long term. The only way to resist the fabric stretching and pulling against the fiberboard was to cut out a separate piece with lots of slack so that it wasn't fighting the adhesive. I laid out a big piece and started marking the pockets.
Cut pocket pieces with slack to wrap underneath and adhere to the backs.
It ended up looking like this, except the pocket for the door handle area was also cut out as well.
This picture below shows how short the fabric falls when cut out of a flat piece, that's a lot of stretch to do in one piece, just too much.
Once I had my big piece laid out and the templates for the pockets done I handed them over to my local seamstress to run though his machine in a subtle black thread.
And so begins the long process of hand brushing on the contact adhesive in small portions and adhering the fabric to the fiberboard. I think the first door took me 3-4 hours just in doing the big piece. It takes patience to make sure everything lays as it should, the adhesive is very strong and you don't get a second chance to reposition the material once it's down.
All done. There was some small wrinkling in some of the corners, the material isn't as forgiving to work with like a vinyl wrap. Luckily the wrinkling is hidden in the corners that won't be visible once installed in the car.
The next stop was to glue in the pockets. Again, this is tricky to align because the adhesive will not let go once it touches each other. I delicately glued both pockets and the door handle pocket in.
The final stage was to stitch the pieces together onto the big main piece, again a slow and diligent process. Overall I'm happy in knowing that my map pockets will never fail again. I'm not super thrilled on the fact that I now have stitching on my door panels but this is the only option I can think of aside from ordering the expensive replacements that will inevitably fail again, probably sooner than later in the hot Texas summers. The light in these photos accent the stitching to show the detail and the process, however in person they're more subdued. We'll see how they look once they're mounted in the car, hopefully a bit less obvious.
I just need to glue the plastic pocket pieces and clip mounting brackets back onto the rear and finish the arm rest portions, then I can finally put them in the car and see how they look.
I think my next focus, after the door panels, needs to be to finish my rear seat delete so I can get the roll bar in the car so it quits collecting dust in the back of the shop.
Past: '99 Hellrot/Dove M3 | '97 S14 1JZ | '06 Triumph Daytona 675 | '01 330I M-Tech I | '99 Silvia S15 | Current: '96 Estoril/Black M3
 Posting Permissions


 Reply With Quote
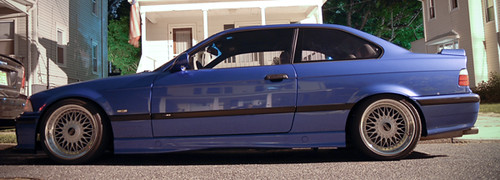


Bookmarks