
 Member
Ok the diff work is pretty cool and all BUT IS THAT AN F50
Also love the S15. I had an imported Z32 TT before my recent BMWs.
Last edited by sirhodjibob; 12-27-2020 at 08:40 AM.
VSCERL
Originally Posted by frbz
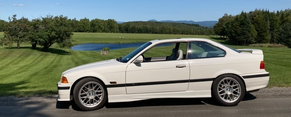
 That's my weekend beater, an Argento Nurburgring F50.
In all honesty, the M3 gets to share garage space with cool stuff every now and then thanks to my job.
I've always wanted a MNP slicktop Z32, but don't think I could handle the intricacies of the VG30. They're really such beautiful cars.
Past: '99 Hellrot/Dove M3 | '97 S14 1JZ | '06 Triumph Daytona 675 | '01 330I M-Tech I | '99 Silvia S15 | Current: '96 Estoril/Black M3
Member
your patience is admirable!
[ US spec 10/1995 e36 m3 ]
VSCERL
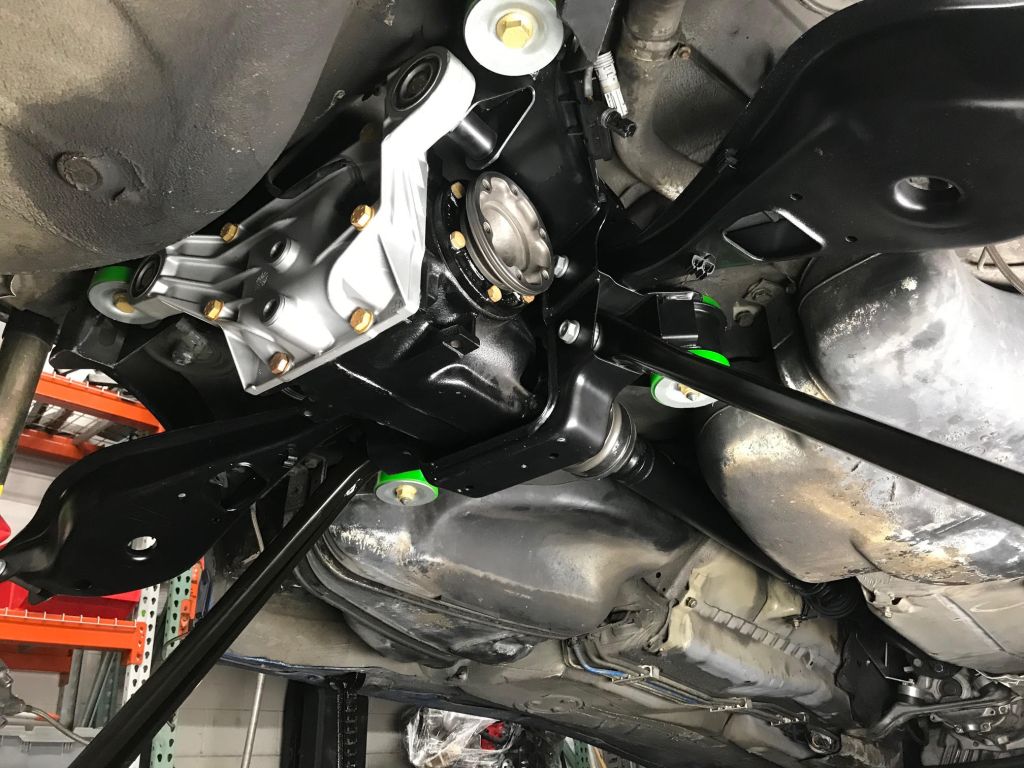
Part two of the big project.
With the differential rebuild finished up and the subframe mounting bolts already broken loose, it was time to tackle the rest of the "while I'm in there" list. This included dropping the entire rear subframe, control arms, carriers and axles to overhaul everything.
Yeah, this is heavy. Wiggling everything out as one piece was fairly simple once it was free of the subframe studs.
The entire back half of the car is filthy, cleaning everything has been on my list for a long time so now will be a good time to finally get some of that taken care of.
I started to separate the entire rear end into three separate pieces to tackle the cleaning, degreasing, and overhaul in sections.
Once everything was separated, I started with the subframe. Straight into the sandblaster!
The subframe took almost two hours to get every nook and cranny, but the end result was super gratifying.
No proper refinish job is complete without the accompany hardware and brackets.
While the subframe was still raw I got a set of AKG rear sway bar reinforcements zapped in.
Moving along to control arms, I purchased new Lemforder bushings for where they attach to the rear carriers. First up was a deep clean.
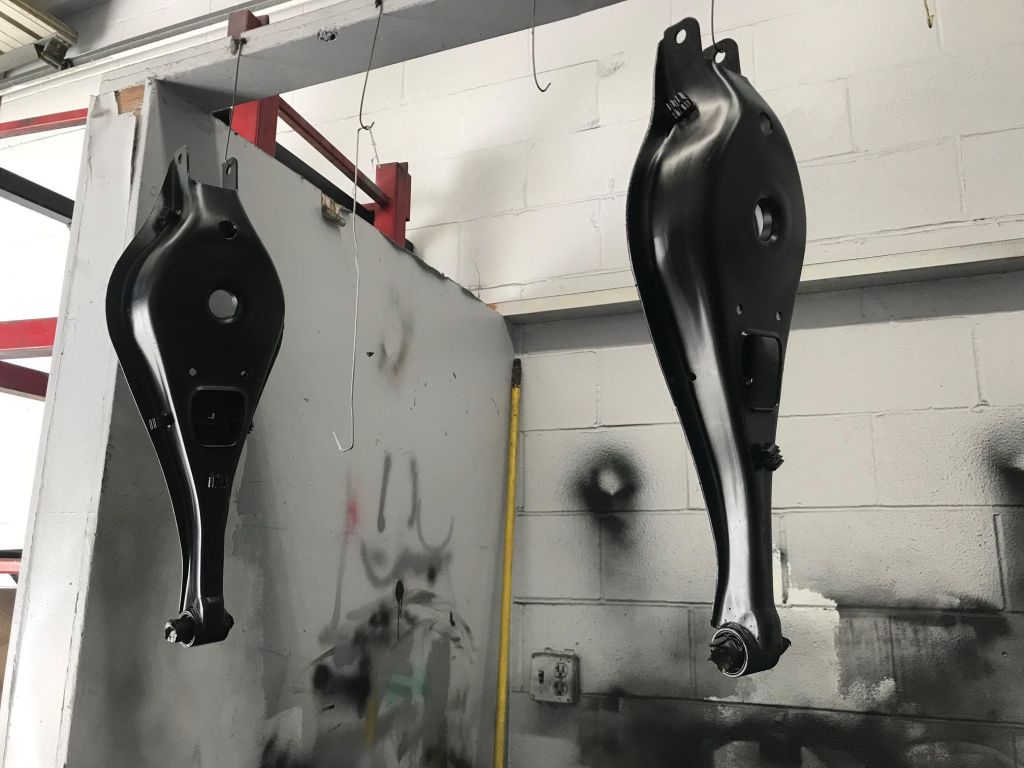
The upper control arms, the ones that house the coil springs, were pretty straight forward when it came to pushing the original bushings out. Once the new bushings were in and the arm was thoroughly stripped of any contaminates, it was off to the paint booth to get coated in a thick, durable, satin black epoxy paint.
The lower camber arms were a different story. Since this piece is effectively two pieces with a small tack weld holding the together, pushing the original bushing out and not getting caught on the second "lip" proved to be incredibly difficult and ended up ruining the arm entirely.
Hindsight being 20/20, I should have just ordered the replacement camber bars with the new bushings already pre-pressed, as they are only $30 a side. Bonus 488 GT3 content in the background.
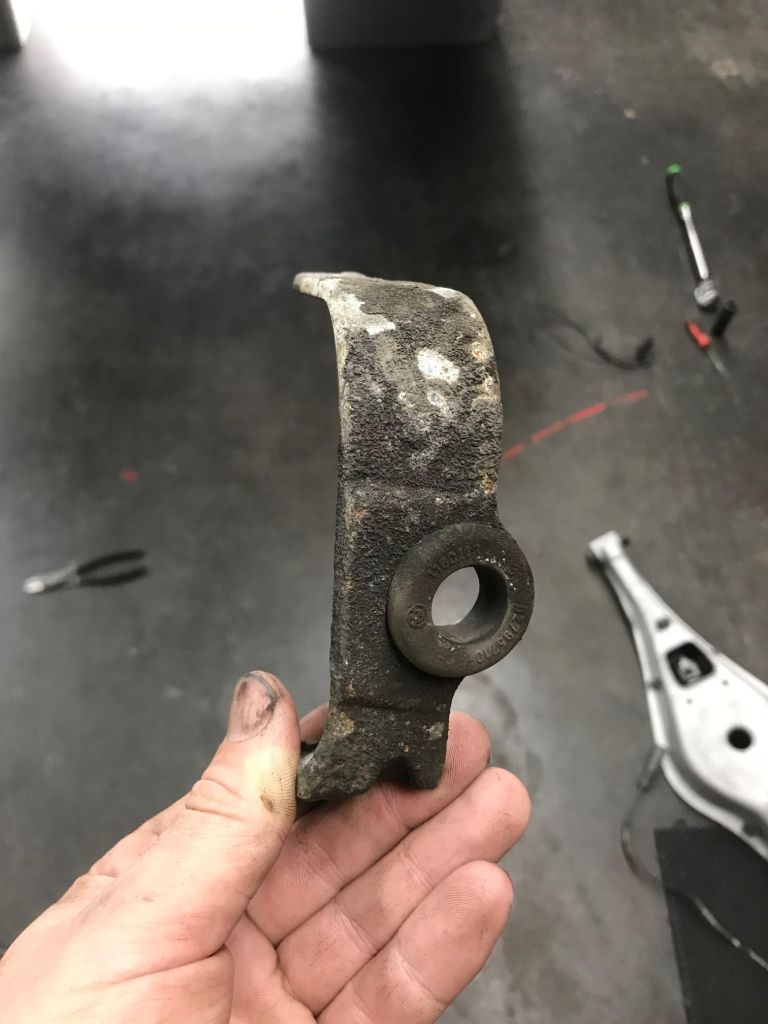
With the four arms out of the way, I moved back to the rear carriers and pushed out the ball joints. It's totally possible that these are the original ball joints, they were pretty loose and I'm glad to have fresh ones in the car now.
Originally I had ordered Lemforder RTAB's with limiters as that seems to be the general consensus for dual duty cars, but once I had it all apart I found that the car already had Powerflex Blacks in it. Showing no signs of wear, and me having no previous issues with them, I decided not to create more work for myself and will continue to run them. If for some reason I need more compliance down the road, they're not too bad to replace with everything still in the car.
With the ball joints replaced, it was back to the table with the carriers to drive the axles out, and let me tell you, it was not a good time.
The first one, the driver side, did not want to leave it's home at all. Soaked in PB Blaster, heated up with a torch, and eventually giving it a few loving taps with a brass punch and a hammer, it finally broke free.
The second one was the exact opposite. I soaked it in PB Blaster for a minute and came back to it having fallen out pretty much on it's own.
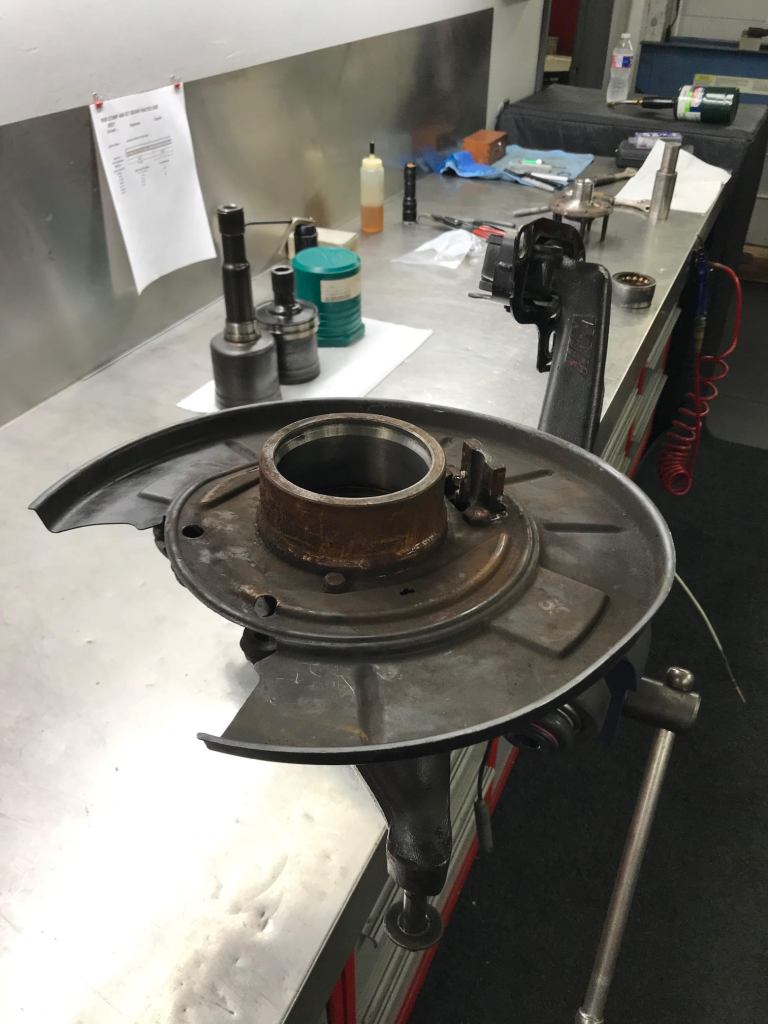
With both axles out, I did another deep clean and inspection. Everything checked out and looked to be in pretty good shape, so I left them alone.
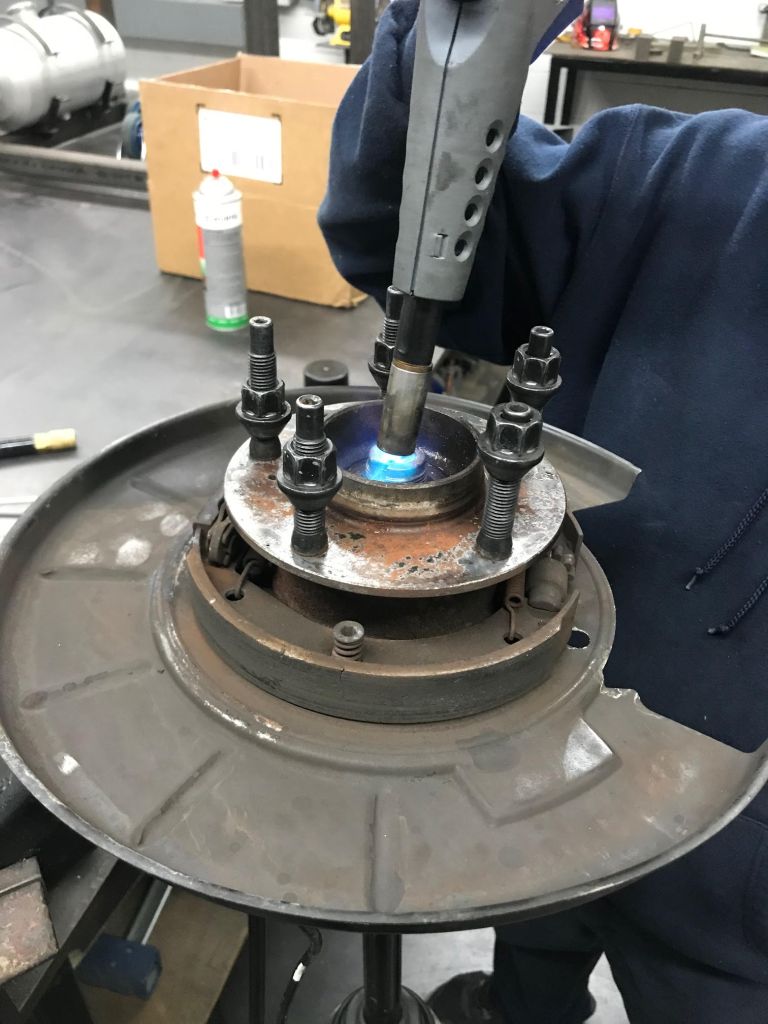
I didn't have much reason to believe the wheel bearings were bad, or failing, but when you've got everything this far apart and you don't know the age of them, why wouldn't you replace them?
The old ones didn't want to come out all too easily either, but a strategically placed 55 ton press said otherwise.
A little while later the epoxy paint had dried and was in the clear to start handling and reassembling.
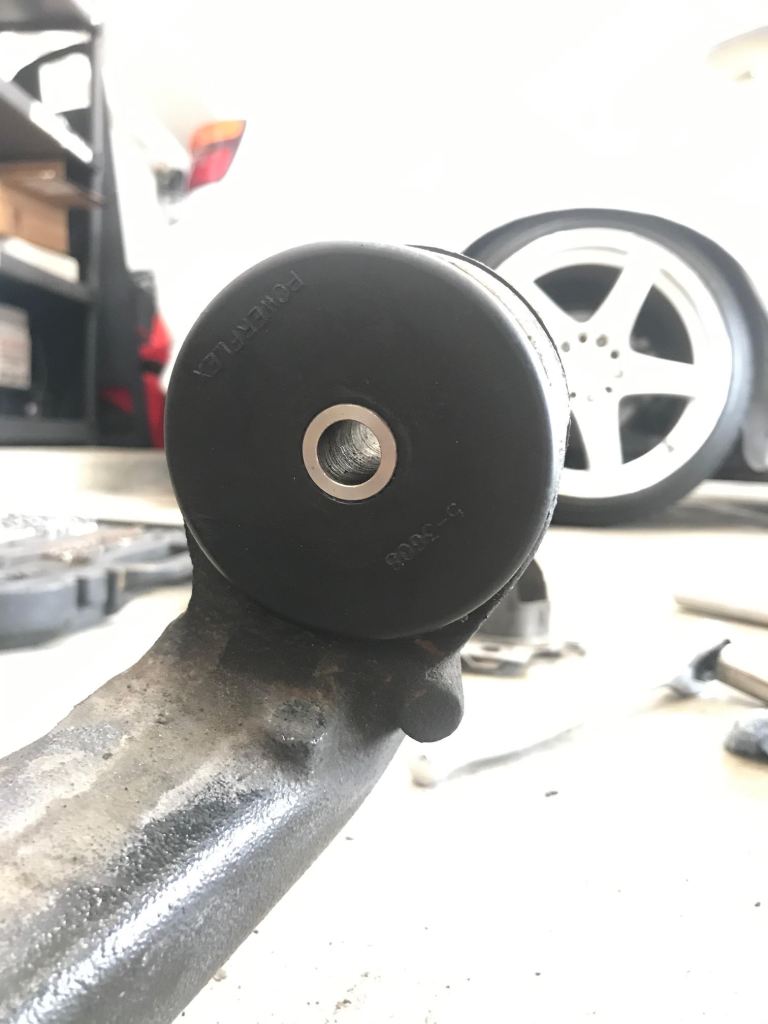
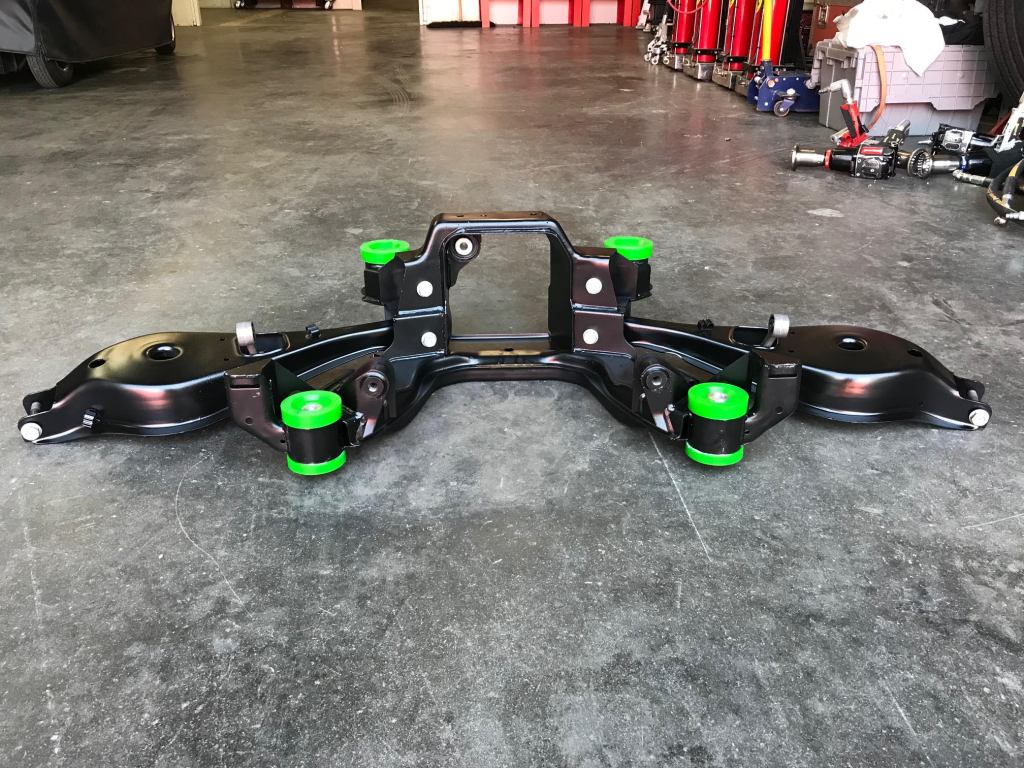
Mentioned in the last post, I had removed the polyurethane differential mounts in favor for OEM rubber. The reason for this is twofold; I planned to do 95A poly in the subframe to try and isolate the subframe and suspension arms as much as possible in an effort to hold alignment specs best, but reading through other's threads I found that when you do poly in BOTH the subframe and diff, that's when you get diff whine. Staying true to the street car theme and not wanting any highway whining, this is what I landed on.
I can safely say that I'm not a huge fan of the highligher green (or Revshift's customer service), but the Powerflex Blacks were double the price for the same product. If FCPEuro is confident enough in these, then so am I. On a different note, it was nice to see everything coming together freshened up, clean, and recoated. I also temporarily installed the new Lemforder sway bar end links just so I didn't misplace them.
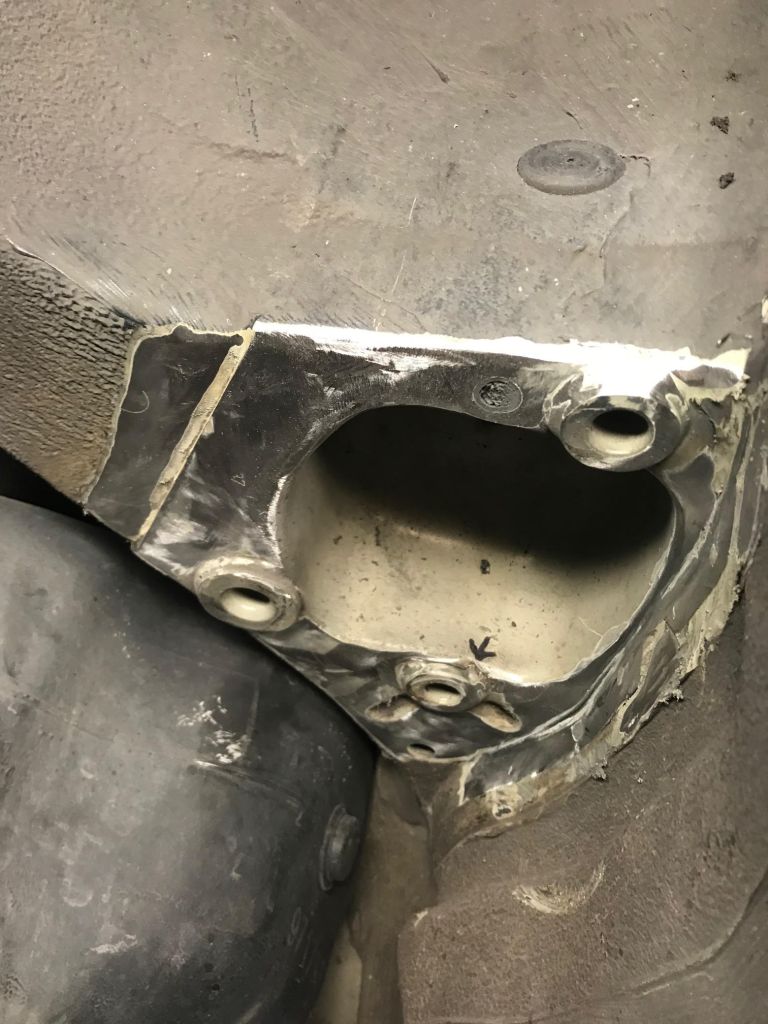
Another thing to do while everything was apart was the RTAB pocket reinforcements. Grinding everything down revealed everything to be in decent shape, with only one small area of concern that looked like it was beginning to crack.
One eternity later and a face full of undercoating fragments, I coated the bare metal in weld-thru primer.
Here's one angry race mechanic sharing a few curse words about how much he loves working on street cars and welding upside down.
With the whole rear crossmember reassembled with the differential and looking pretty, I became too excited to reassemble the car and run it through the gears to make sure everything still worked.
Lining everything up and reinstalling this as one piece on your own isn't a great time, but with a little patience and some good music it ended up going back together eventually. Now I REALLY need to degrease and steam clean the gas tanks and rest of the underside.
Final stretch of the reassembly, double checking torque on axles, driveshaft, subframe, then reinstalling the rear brakes and plugging in the required sensors, and finally snugging up the exhaust system with new gaskets and hardware.
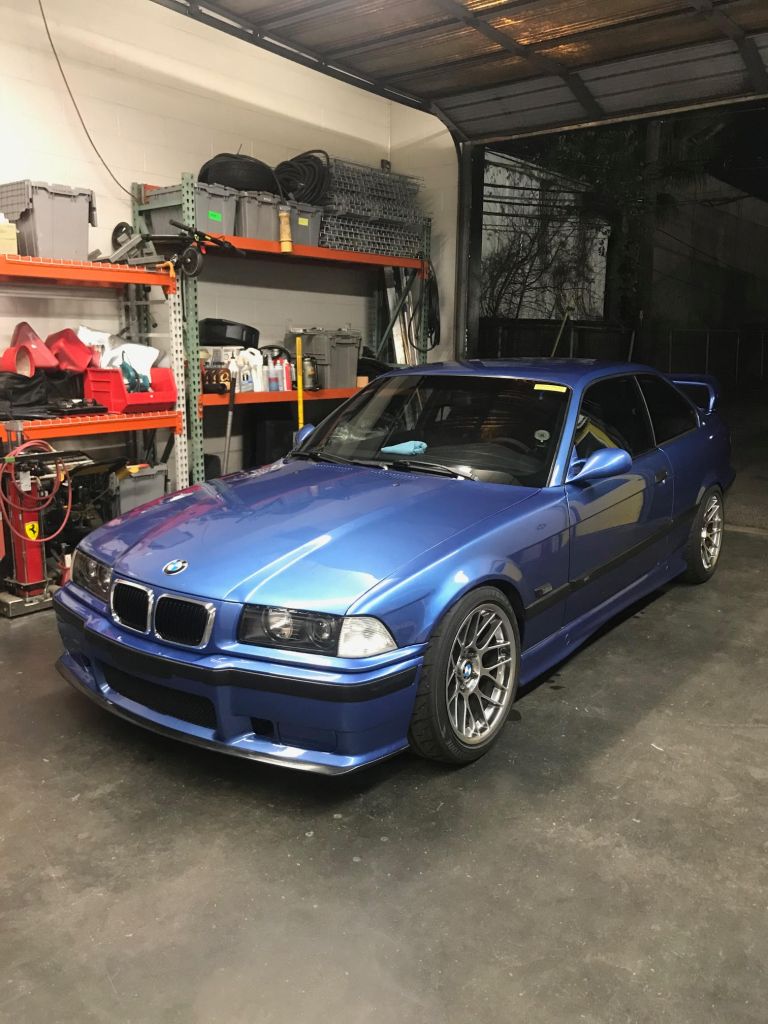
After feeling confident about the reassembly, and for the first time in roughly three months, the car was back on the ground on all four wheels. First order of business?
A fresh bath. Months of sitting outside and having the local stray cats use it as a bed was giving me anxiety. I did a quick 45-minute wash to knock all of the surface dirt off but it'll be due for another full day with the buffer soon.
No abnormal sounds, knocks, or drivetrain explosions on the 50 foot drive to the wash bay, so that's a great start! Next step is going to be putting it on the alignment rack and torquing all of the suspension bushing bolts at ride height, double checking everything for the thousandth time, and then re-aligning the entire rear end. After the long journey of refreshing nearly everything from the driveshaft back, I'm excited for the maiden voyage home to feel out the 3.46 ratio and the silence of fresh bearings!
Past: '99 Hellrot/Dove M3 | '97 S14 1JZ | '06 Triumph Daytona 675 | '01 330I M-Tech I | '99 Silvia S15 | Current: '96 Estoril/Black M3
Godbless our soldiers!
Doing my rear subframe, axles, trailing arms, painting, and reinstalling was very rewarding for me! Looks great!
Member
Nice job, Mike!
Tom
Currently 1995 M3 manual coupe, 1993 325is
Past cars
2003 530i
1998 528i
1995 530i
1988 528e
1988 535i
1987 2.7i
1972 2002
Member
Thats some awesome progess! Refreshing the rear was one of the most satisfying jobs I did on my E36, once it was over. Nothing like a tight rear end
VSCERL
Thanks dudes! Just successfully drove the car home for the first time in three months! Going to watch some of the Rolex 24 of Daytona and then go out later tonight or tomorrow morning to feel out the 3.46.
Past: '99 Hellrot/Dove M3 | '97 S14 1JZ | '06 Triumph Daytona 675 | '01 330I M-Tech I | '99 Silvia S15 | Current: '96 Estoril/Black M3
Member
Man that is some impressive work! I'm about to do the same to mine so thank you for the inspiration!
Member
I remember doing this a few years ago. Looks very familiar even down to the green RevShift rear subframe bushings. It is a lot of work but very satisfying.
Very complete. Looks great!
Your mom goes to college
this is the kinda stuff that give Braymond a huge boner
98 Estoril ///M3 4/6
S54 swapCSL
Member
Nice work. Thanks for bringing us along for the ride.
Member
looks great. Have enjoyed reading through this thread.
VSCERL
Thanks guys, I really enjoy sharing and conversing with like minded enthusiasts on here.
I put about 100 miles on the car over the weekend, and the silence and absence of pinion bearing noise is super refreshing. The car feels great and athletic, although I haven't gotten to really test out the 3.46 yet.
After about three months without the car, entering an offramp at about 85 mph and feeling the car turn in, squat down, and take the corner smooth and flat and planted, it was a stark reminder of one of the many reasons I love this M3.
Past: '99 Hellrot/Dove M3 | '97 S14 1JZ | '06 Triumph Daytona 675 | '01 330I M-Tech I | '99 Silvia S15 | Current: '96 Estoril/Black M3
Member
BMW E36 M3 Expert
awesome documentation and work. At some point in the future I'll be doing rear end, I'd love to get it half as good as you've done.
How do you find the NVH of the rev-shift bushings?
TRM Coilovers 670F/895R | BBS LM | Corsa RSC36
VSCERL
Thanks!
I'll have to report back as I've only put about 150 miles on it around town so far. The car certainly feels more planted in the rear, but that could be a combination of all the new bushings. I don't notice any new whine or vibrations at speed/RPM, but that's likely because the diff bushings are OEM Rubber.
I will say that the little expansion joints in the road do create more of a "thunk" as I go over them.
Past: '99 Hellrot/Dove M3 | '97 S14 1JZ | '06 Triumph Daytona 675 | '01 330I M-Tech I | '99 Silvia S15 | Current: '96 Estoril/Black M3
Member
I've got it about half as good as Mike!
In the last ... 7 or so years I've done everything he's detailed here. Some of it I've done more than once.
Most of us have done our RTABs, but those rear ball joints are important for maintaining geometry and are usually pretty neglected.
I got some aftermarket rear camber arms. There's some risk here, but I wanted the better adjustability. They came with ball joints both inside and outside (I hadn't anticipated that), but I don't feel any additional NVH from that. I'll replace the last rubber bushing with a ball joint next time since there's no downside.
I'm pretty jealous of the detail demonstrated here. When I say I did about half as good as Mike, I mean it. I replaced all the wear stuff, but I didn't (nor do I have the time nor the facilities to) scrub, dip, clean, paint, and powder coat everything. It is just beautiful to see the attention to detail and the effort there.
Well done! And Mike - let me know next time you come visit Austin! (I'd get in touch when I visit Houston, but... I don't really ever go to Houston).
-Josh: 1998 S54 E36 M3/4/6 with most of the easy stuff and most of the hard stuff. At least twice. 271k miles. 1994 E32 740il with nothing but some MPars. 93k miles.
VSCERL
It's been nearly two months since the last update, not for a lack of interest or changes with the car, but because of the heartstrings that are tugged in writing the latest update. Before we get there, let's back up to the end of February.
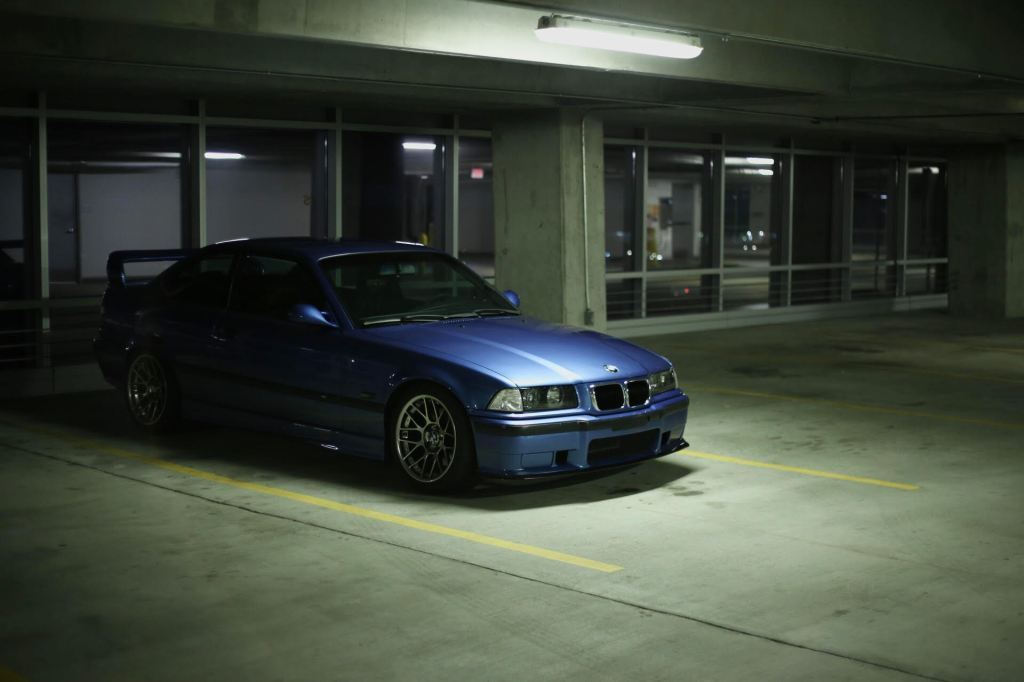
With my fiancé out of town I took the car to one of my favorite burger spots for dinner and decided to bring the camera along with me. This time of year in southern Texas is near perfect weather in my opinion. The nights are cool and the humidity is gone, it's the perfect time to get the car out more than normal.
With the entire rear end of the car rebuilt and an appointment set with an independent to get the intermittent ABS light sorted out, I was feeling good about the car being back near 100%. My 30th birthday was coming up that weekend, so I tucked the car back in the garage and boarded a plane back to my hometown to celebrate with my family.
The long weekend went great, I finally got to spend time with family and take a break from work and the daily grind. As the universe would have it, the day I was set to fly home from a few days of tranquility, the relaxation would grind to a halt.
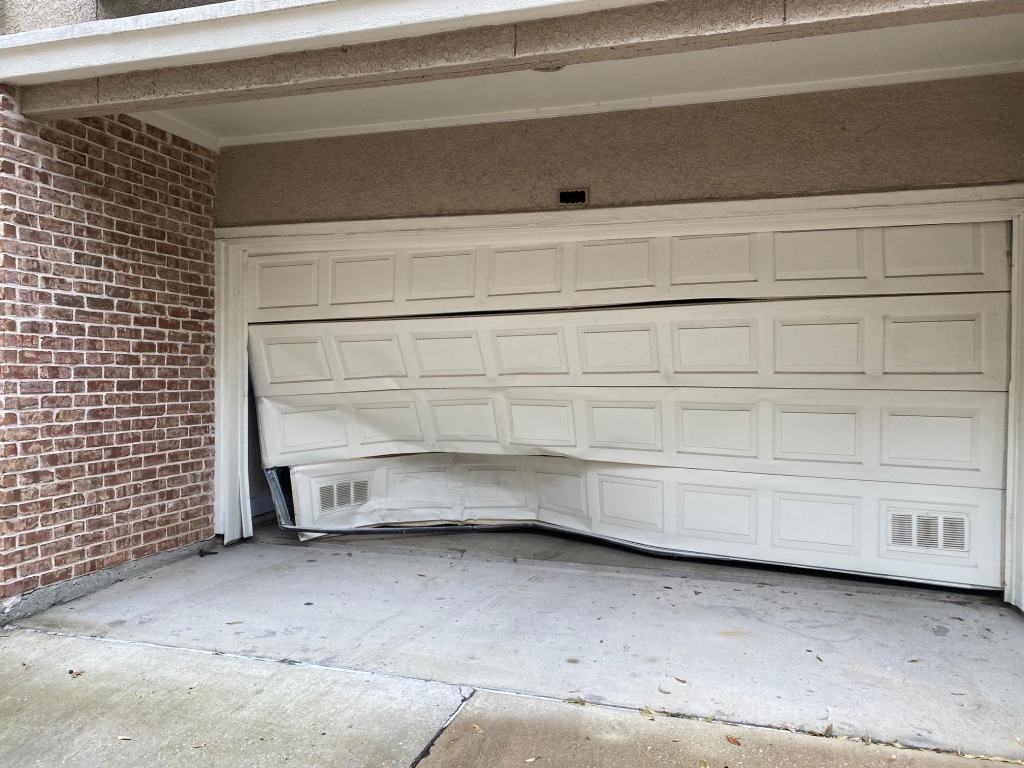
I had given my garage door opener to my neighbor to check up on our cat's food & water while we were gone for a few days. They've done it for us many times before, usually checking in with a quick photo here and there of our furry pal. So when my phone rang at 9:30 in the morning, rather than a text, I instantly started to feel my breakfast begin it's u-turn in my stomach. My first thoughts were that the cat had gotten out of the house or that something had happened and he had fallen ill.
"My wife accidentally ran into your garage door with our Tesla," he said, and I sighed with a huge breath of relief. After losing my other cat to cancer just two months prior, that scab was far from healed and I wasn't ready for another.
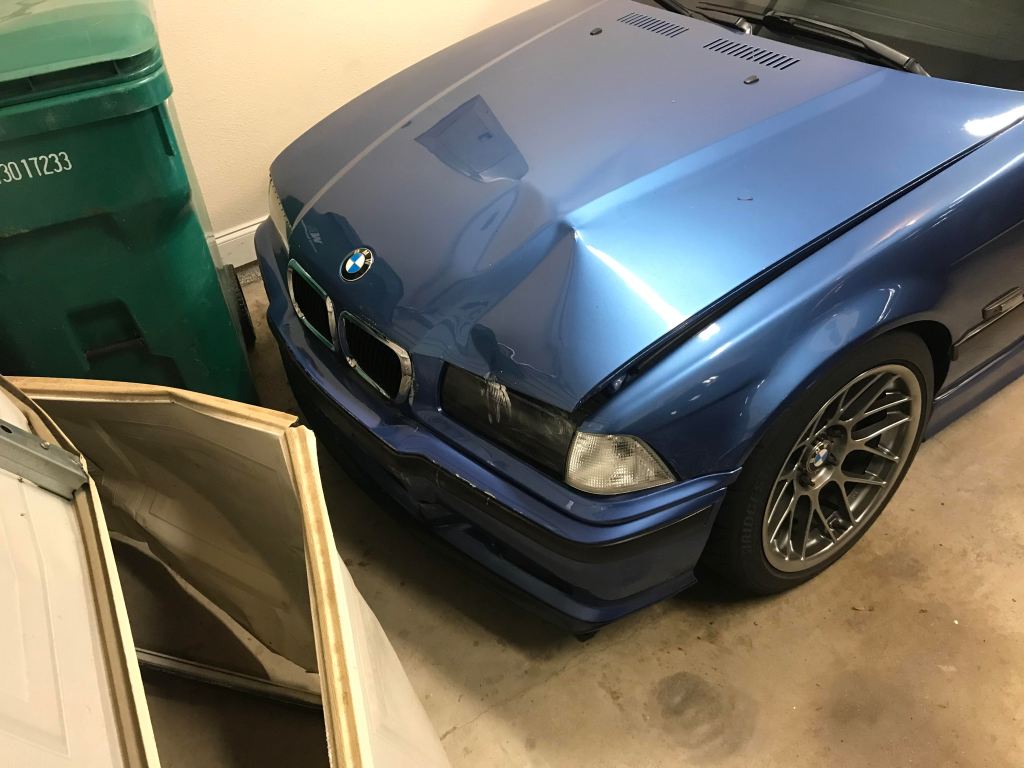
"The door is too messed up for me to open it and see what all is damaged, but your M3 got scratched up a bit."
I felt the bacon and eggs start to plan their great escape again. I could tell by his tone that he was upset, definitely not the way he wanted to start out his Sunday morning. His wife was okay, aside from being shaken up, and other than the garage door itself the rest of the house was okay. "Scratched up" I thought, "no big deal. I'll have to replace some clear bra and maybe some trim pieces." I told him that I would be home tonight and we can survey the damages and go from there. In the meantime, send me some photos of the extent of the damage. He obliged and told me to call him right back after getting the photos.
Warning: The following content may be unsuitable for E36 or otherwise BMW enthusiasts. Viewer discretion is advised.
Any second now and this kitchen countertop is going to be reacquainted with my breakfast in a different format. Although this was beyond "scratched up" I managed to keep my cool, largely in part of the fact that I was surrounded by my in-laws. Although I was dying inside, I called my neighbor back, told him my thoughts and tried my best to stay level headed. Nothing was going to get solved now, right this moment, while I'm 1000 miles away. I'd be home late this evening to see it myself. I hung up the phone, walked over to the couch that looks out over the woods, and didn't move from there for a good hour. I rotated from staring out the window like a psychiatric patient and staring at this photo, zoomed all the way in on my tiny little iPhone screen. I was trying to make a mental list of what was wrong and what needed to be fixed.
Those remaining 12 hours before I got home were the absolute worst. With nothing but the single photo and my mechanically inclined mind trying to decipher the extent of the damage, the parts diagrams exploded in my brain as I linked each part to the other. "If the bumper is cracked just below the bumper shock, that means a lot of the force was pushed into the front frame rail, which means it might be bent/collapsed, which means....." and "If the nose panel and the hood are pushed back an apparent 4-6 inches, that means that the AC condenser and the radiator are pushed up against the front of the engine, which means....."
Sitting there and thinking of every piece of plastic and glass and metal and how they all intersected, how they would spread the damage from one to the next, not being able to know for certain on whether my car was totaled or not, that's some of the worst anxiety I wouldn't wish on anyone.
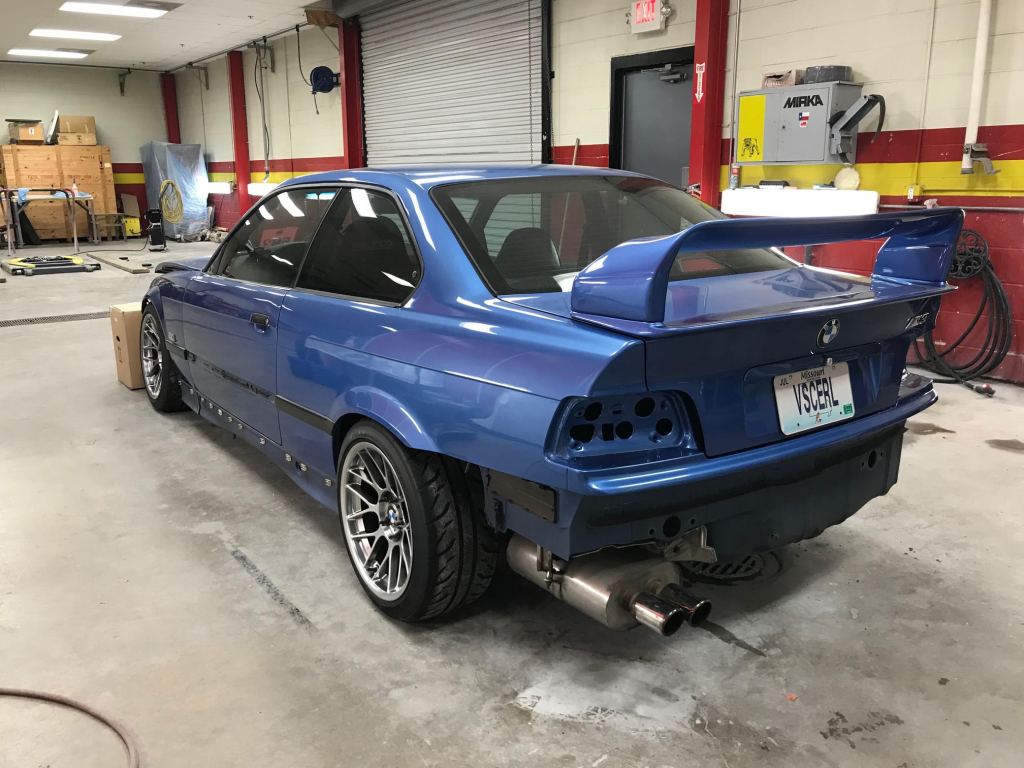
Getting home that night and assessing the damage first hand was a strange mix of emotions. It started with anger; having all of my hard work and delicate care over the years being taken away at the hands of someone else and no fault of my own. Then came some more anxiety whenever I walked around to the back to find the car had been pushed back far enough that it broke the glass table behind the car and pushed it through the drywall of the back of the garage. But then came a sense of relief as I started to follow the carnage and survey what all was damaged.
"Front nubs, look okay but will know for certain when I pull it apart. No cracks or obvious issues on the strut tower, nothing came close to it."
"Rear frame rails in the trunk are straight. Luckily the table behind the car was made of glass and not a steel toolbox that wouldn't have folded. If that were the case it would have beer-can crumbled the car between the two, at which point all hope would be lost."
"No fluids leaking under the car. The SPAL fan motor is very slightly pushed up against the water pump pulley, but nothing else is touching the front of the motor. No cracks that I can see. Once I pull the fan out I can start the car to see if anything sounds off."
Some 45 minutes later of me circling the car with a flashlight I could start to cross things off my mental list I had been making the last 12 hours. All of the damage looked to be purely cosmetic and entirely repairable. Although there was a long way to go, the photo made it look worse than it actually was. The next hurdle: who/how the bill is going to be paid. I know what an insurance company would say, they'd take a look at a piece of paper that says "25-YEAR OLD HIGH MILEAGE 3-SERIES...COST TO REPAIR EXCEEDS MARKET VALUE" or something of that sort and would want to total out the car and leave me high and dry with a measly check that wouldn't cover a fraction of what I had built.
Adding salt to the wound, just before I left town a few days prior I had reached out to my insurance agent to set an appointment for an agreed value term at a handsome but realistic figure on what it would actually cost to replace this car in the event of a total loss. Welp, I'm gonna have to reschedule that, sir.
The next day I met with my neighbors to discuss the next steps. Now's a good time to explain a bit more about them. Honestly, calling them my neighbors is a disservice as they're far more than that. They're some of my best friends, people I talk to daily and have dinner with almost weekly. And they know me well, and they know my M3 well. They watch me wipe it down clean after every drive before I put it back into the garage. They know how I'm constantly working on and tinkering with the car, trying to perfect every detail. They have a full understanding of just how much I'm invested in the car not only financially, but emotionally. So naturally they were just as gutted as I was, honestly probably even more than me after I had a day to process it all. If I had to choose someone in my zip code to hit my car, it would be them. Without hesitation they promised to fix the car by any means necessary. It's a shitty situation, but I can't ask for more than that.
About a week later I had our flatbed truck pick up the car and bring it to my workplace, luckily we have a full body shop on site.
A couple more days sitting around outside while I waited for some space in the shop to open up.
Finally, by the third week of March, I got my open spot towards the back of the shop. I quickly started pulling the car apart and chasing down replacement parts. Surprisingly enough an OEM M3 bumper was at the dealership in Dallas, so it showed up quick.
Over the following week the parts pile grew bigger and bigger while waiting for some body shop time. Although there wasn't anything wrong with the A/C condenser, now seemed to be a prudent time to go ahead and replace that old thing. And even though I didn't show any signs of damage to the S54 Z3M Behr radiator, it is about three years old now and they're cheap enough to replace now rather than a hairline crack I can't immediately see becomes a geiser under pressure on my maiden voyage home.
Sharp eyes will notice some new brackets in there as well. More on that later.
One of the silver linings of this: I got to switch the car back to it's proper pre-facelift nose panel with the '96 specific kidney grilles!
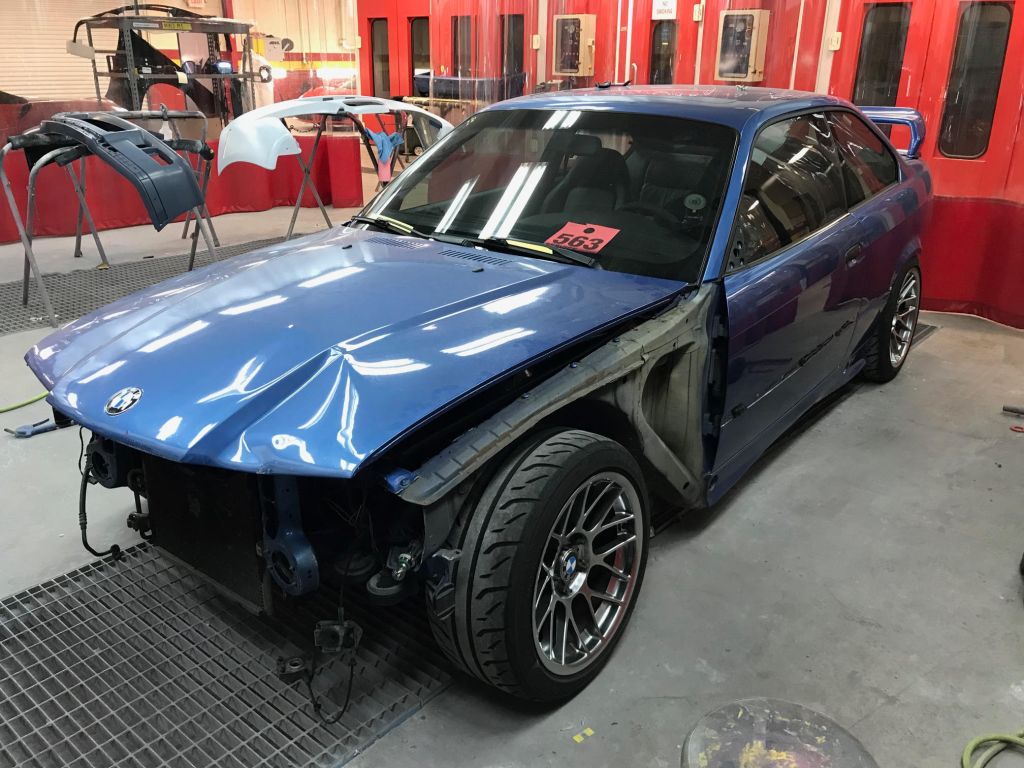
A couple days later I came back to find my car had moved over to the prep area. This means the guys were finally ready to start getting down to business.
Originally I just planned on fixing the front end damages and rear bumper. When painting the front drivers fender we would have to blend the new paint into the old paint somewhere in the drivers door. With the rear bumper getting painted there would be some blending going on in the back as well. By this point a good portion of the car would have fresh paint while the other half didn't.
After some deliberation I decided to bite the bullet and take advantage of the opportunity to get high quality paintwork done by some very talented individuals at my work and committed to respraying the entire car. There isn't anything wrong with the passenger side aside from a few nagging chips here and there, but when you've come this far along and you don't care about Bring-A-Trailer nerds with paint depth gauges on a car that'll likely never be for sale, why not? So I stayed after work and stripped all of the side moldings and clips as well as the rear wing.
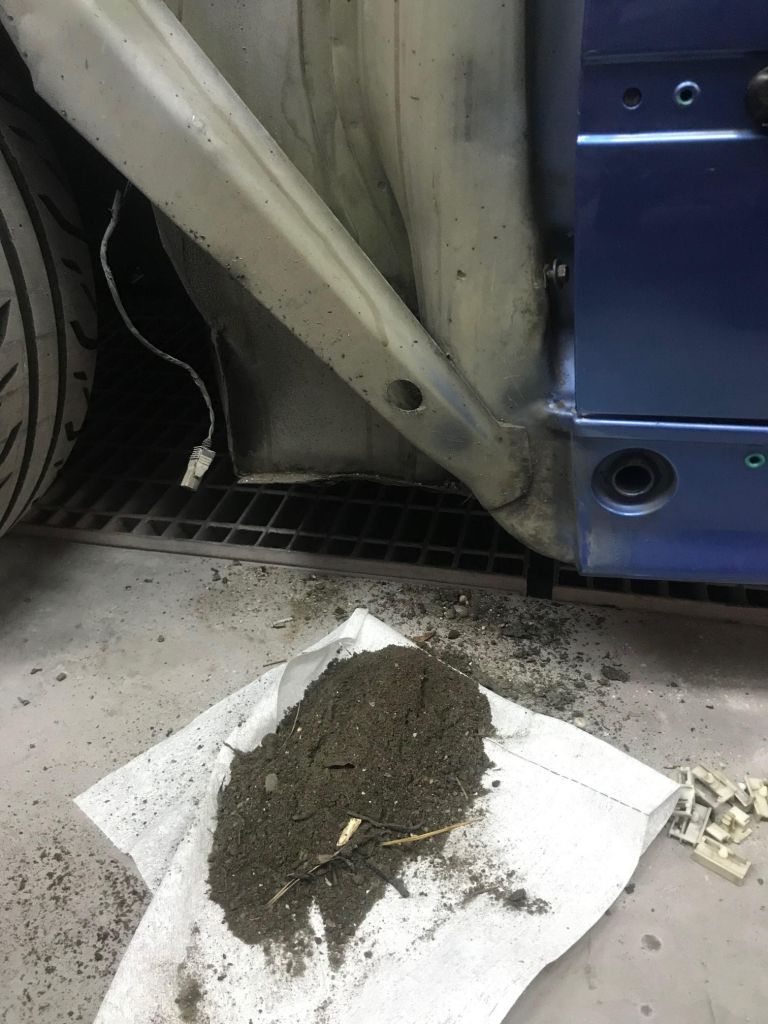
Upon removing the driver side fender I found a small garden.
That's uh.......nice. I weighed it by the way, two pounds! This is sure to help my lap times moving forward.
This is where I start to become hands-off and leave it to the professionals.
I don't know what's kind of science project is going on here, but whatever.
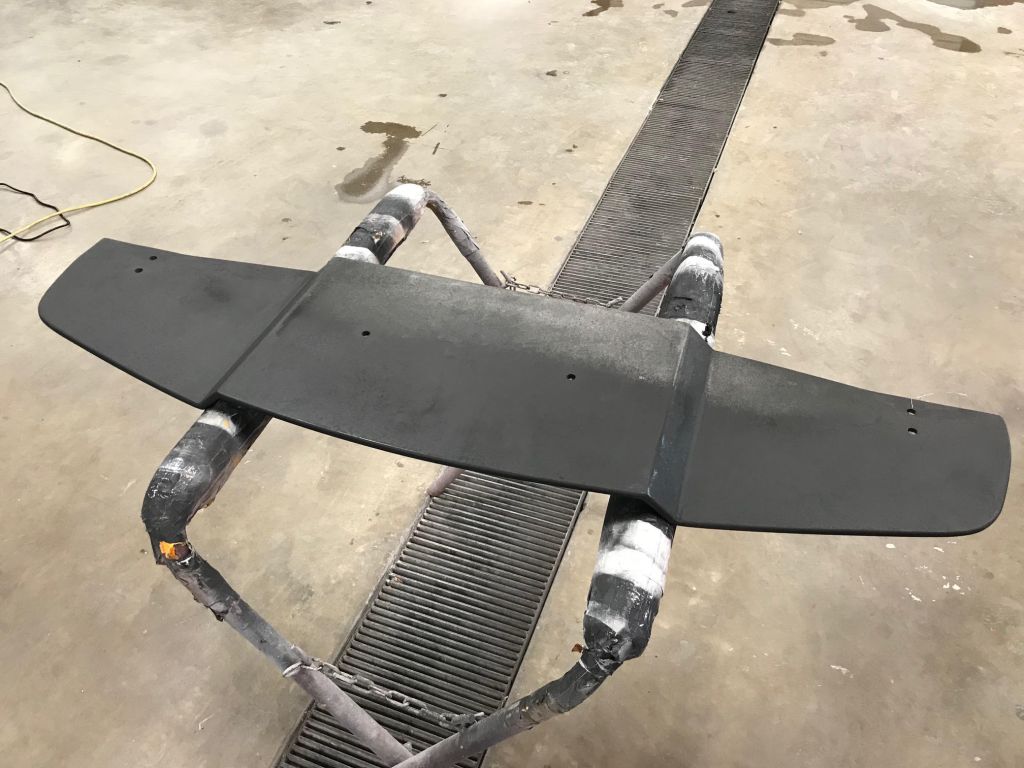
If you were paying attention earlier, you'll likely know what you're looking at here. Something I've been wanting for the car for a long time but for some reason kept putting it off...
The LTW front splitter! The car has been needing this to balance out the GT wing in back and I'm stoked to have finally gotten this for the car with OEM hardware and brackets.
They definitely don't look pretty right out of the box. Although most of this is hidden under the car, I'll have to clean this up before installing it.
Still, I'm very excited about this overpriced front lip.
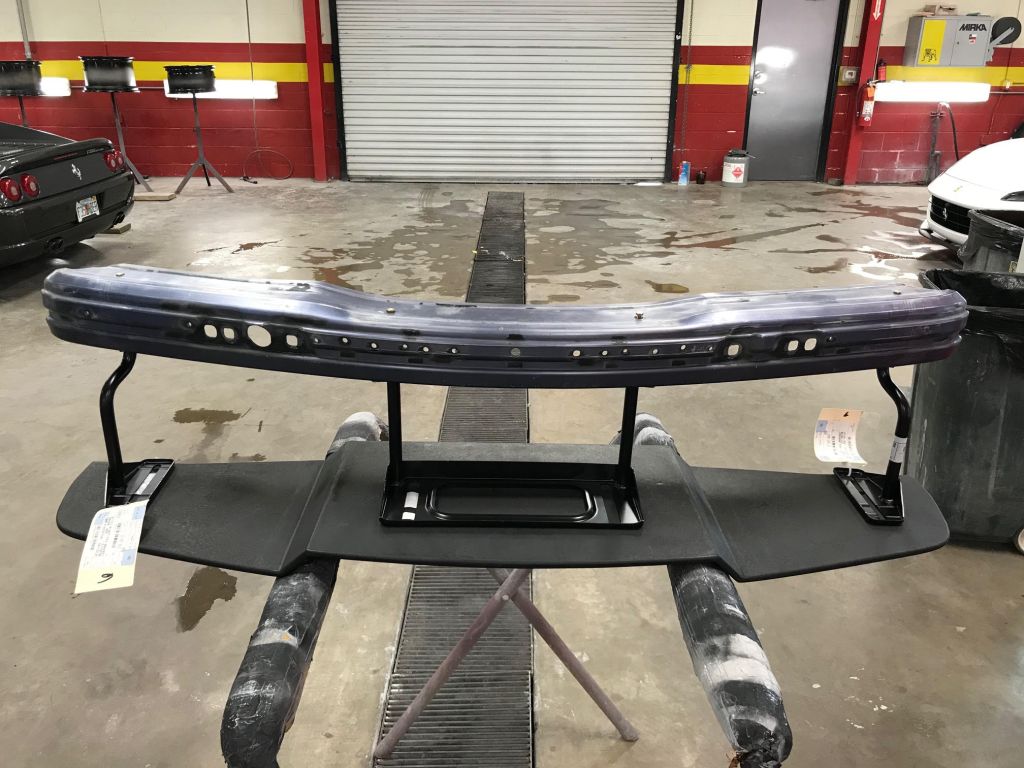
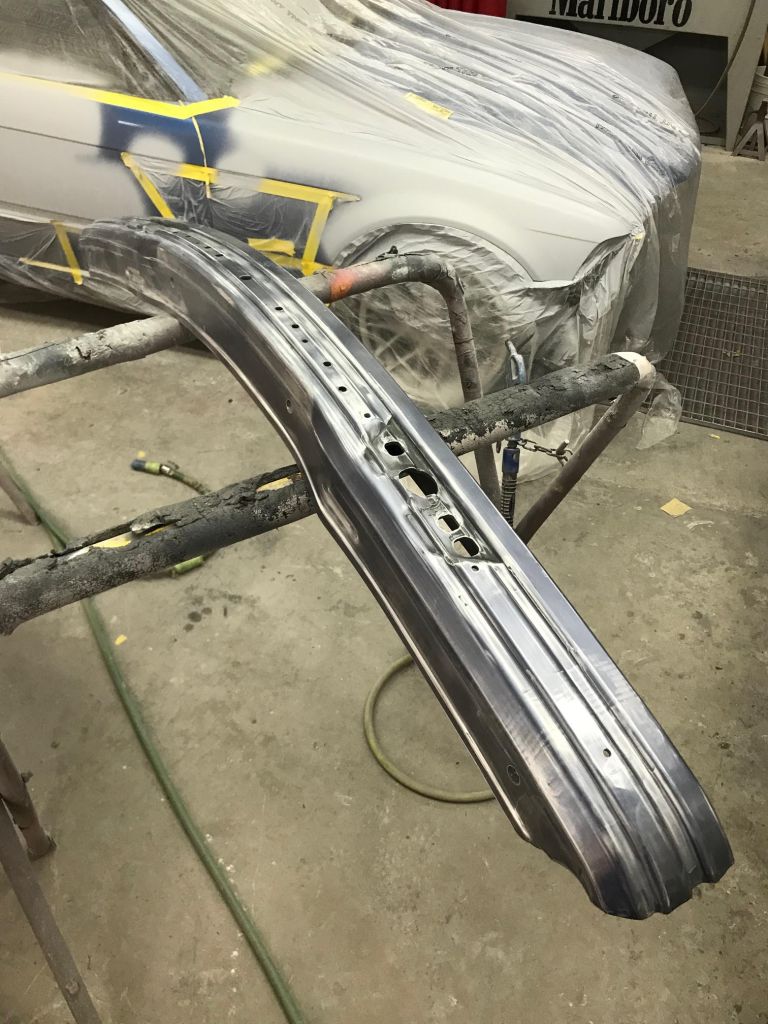
The front bumper carrier, again although it's predominantly hidden, needed to be sanded free of it's surface blemishes. I just can't install parts that don't look like they're refreshed.
An hour or so later of sanding down the splitter tray, this should be ready for primer and paint now.
The last piece of the puzzle to show up all the way from Germany, the OEM hood! It took about two weeks to get here and it showed up in great shape, thankfully.
All the new OEM parts waiting to get sprayed and reinstalled, soon!
Meanwhile my body guy has been cranking out work and fixing imperfections before priming the whole car.
And with that, we're up to date. It's been a long month and a half of street and waiting patiently, but with the end goal becoming clearer by the day I'm optimistically looking forward to the end result. Although I could have done without the car being crashed into and the headaches that have come with it, I think at the end of this I'll be glad I got to address some little nitpicks I had with the car and have the exterior entirely refinished and done so properly. It's definitely bittersweet, but it could have been worse and it's all going to work out in the long run.
Past: '99 Hellrot/Dove M3 | '97 S14 1JZ | '06 Triumph Daytona 675 | '01 330I M-Tech I | '99 Silvia S15 | Current: '96 Estoril/Black M3
Member
BMW CCA Member
What a tragic update. After all the time and money youve invested, its really disappointing. But it looks like youre well on your way to make it even better.
-rb
 Member
How come they are just masking the trim around the windows instead of removing them?
VSCERL
Right now is just finding high/low spots and correcting them. When the car gets into the primer stage most of the trim will come out.
Past: '99 Hellrot/Dove M3 | '97 S14 1JZ | '06 Triumph Daytona 675 | '01 330I M-Tech I | '99 Silvia S15 | Current: '96 Estoril/Black M3
Member
ahh got it. with the amount of attention to detail you put into your work, I would be shocked if that was missed. In any event, let us know the removal and install process for the window and windshield trims. I can't seem to find much info on the process for e36.
I dealt with these trims when I had an e30 and they were not fun because you could easily Knick the paint; especially in an area where rain water channels through or can sit.
VSCERL
Those long metal side window moldings that run along the top of the windows suck majorly to get out and in. I kinked one a few years ago and had to get a replacement that will be going in during this. Once the rear quarter window is out I can pull the metal trim out, pull up the rubber window trim that I just replaced not long ago, and I'll have to figure out how the door rubber trim comes out.
The windshield was replaced a little under a year ago so I'm probably going to leave it in for this. I'll see what my body guy says about moving/removing the trim when spraying around that.
Past: '99 Hellrot/Dove M3 | '97 S14 1JZ | '06 Triumph Daytona 675 | '01 330I M-Tech I | '99 Silvia S15 | Current: '96 Estoril/Black M3
Member
Awesome work, and way to turn lemons into lemonade. You know you're a car guy if when something breaks you use it as an excuse to upgrade
I'm slightly behind you. Doing the rear end rebuild now and my GT splitter is arriving next week. I only hope mine comes out half as nice as yours!
Member
Awhhh... gutted. I can relate more than you know. Fortunately it looks like your car may end up even better!
I'm an original M3/4/5 owner. Mine now has 131k miles.. but to this day I have basically never parked it next to anyone... but it has been damaged several times while parked... at my house and in my garage! It is unbelievably frustrating when you spent $$$$ and time keeping it perfect and things out of your control keep happening. To this day my wife still keeps trying to get me to sell it - and this just pisses me off - why? I am not responsible for any of the crap that has happened.
- 2008 - I retired the car from daily driving in 2008 when I finally bought a house. We were remodeling the house when we moved in and the garage wasn't available so I had to park next to my garage on the street. Within the first month of moving in someone crashed into the drivers side of the car - front door crushed and other stuff. Unbelievable.
- 2011 I'm at a stop light and someone crashed into me from the rear... bang. wtf. The person was not a citizen and had no id whatsoever - when this happens in los angeles you are sol they just let them go - they don't do anything (it's nuts out here seen this dozens of times since moved here for college). I had to go through my own insurance.
- 2011 so I decided it was finally time to have the car painted. Living in southern california the UV and wear and tear makes it impossible to keep the paint like new forever... so I paid $7k for paint job from this place specialty car craft. It was recommended by many and they do all kinds of exotic and expensive cars. The paint job was generally good but their specialty was f'ing up my car. They didn't prep properly and oversprayed onto the M3 seats!! then they tried to scrub is out and ruined the top inside corners of the seats (the seats were like new). They oversprayed all over the place.. rear door panels must have been sitting by when they painted.. the B pillars had some overspray. They epoxied in one of the corner lights because they broke mating bracket on the headlight. The left masking tape all over inside the sun roof opening when putting back together. The hood/bumper/quarter panel lines were all wrong. I could go on.
- 2011 ok so aside from the crap they messed up we now have a nice looking newly painted car... FOR 2 MONTHS. two months later... brand new paint....someone tried to turn around in the street and managed to back up all the way into my garage and crashed into the side of the car!!! are you kidding me? my car is not safe inside my garage? Door and quarter panel crushed. Person tried to drive away and my neighbor chased them on a bike and got them to stop! In 2011 you could not get an OEM sedan drivers side door (they eventually made more).. so I have a freaking used door now that pisses me off.
- 2018 My wife cracks the passenger side front door right on the fold line.. at some point soon I will be replacing the whole door. I have a 23' wide garage plenty for two cars with open doors - but wife doesn't park at the designated spot with the foam ball marker I put in :|
Can't wait to see how yours turns out. Loving the LTW front spoiler. I've always wanted it but I can't get myself to install a rear wing on mine so it would look unbalanced w/ front lip but no wing (esp LTW). I'll live it out through you
Last edited by brianc; 04-14-2021 at 05:59 PM.
 Posting Permissions


 Reply With Quote


Bookmarks