
 Member
I took one of my new (the alternative Bosch number) valves out again for testing. Resistance is different from the original valve (25 instead of 44 ohm).Originally Posted by sreten

Without 12V, it is closed on two directions; with 12V on it, it is open on two directions. So I see your point but don't think it matters.
Member
Yes, resistance is different like I mentioned in the other thread. I would imagine the direction matters otherwise they wouldn't have marked the airflow.
Sent from my SM-G965F using Tapatalk
Member
Can you clarify? Which fuel pump?
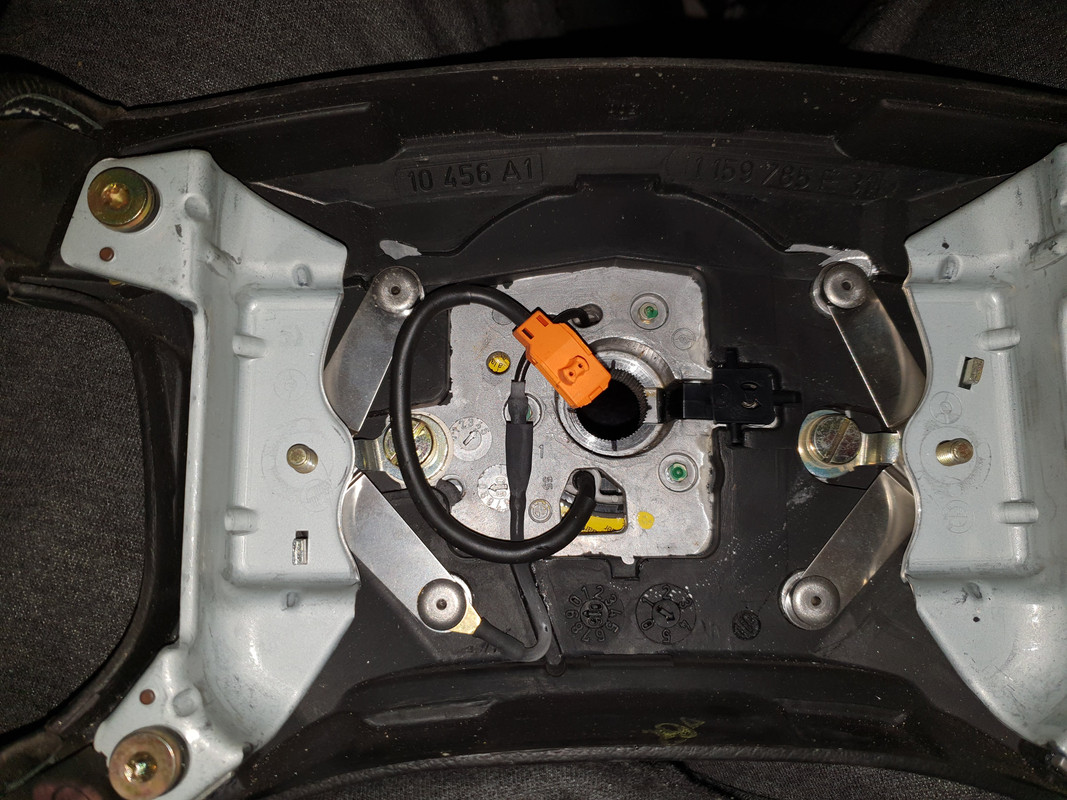
Since getting the car, there was a pronounced clicking sound coming from the steering wheel when maneuvering it. I poked around to see what was the cause of the noise and perhaps find out why was the airbag light on.
Got answers to both of the questions.
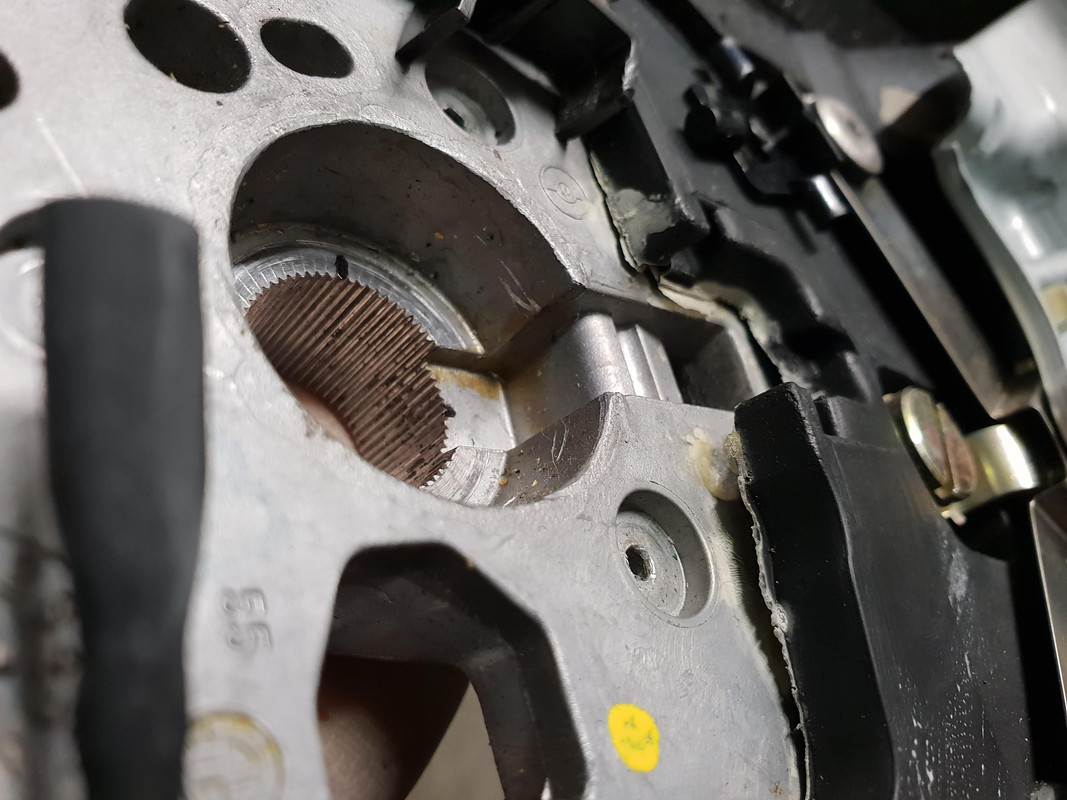
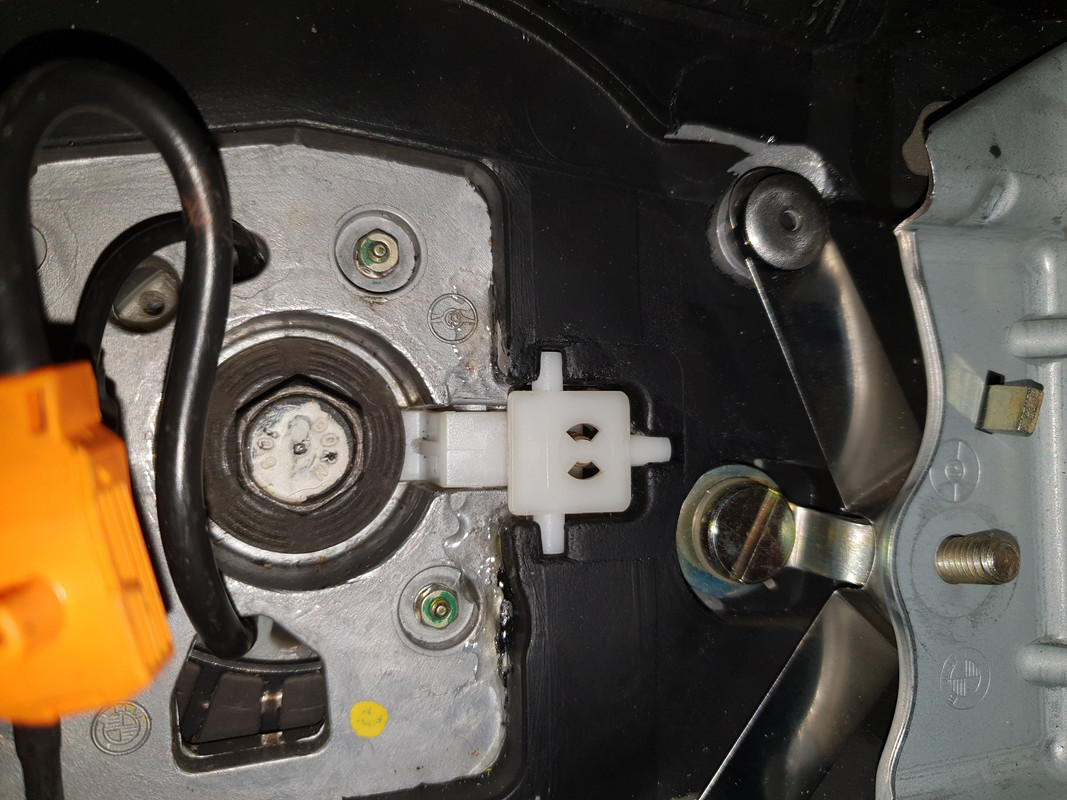
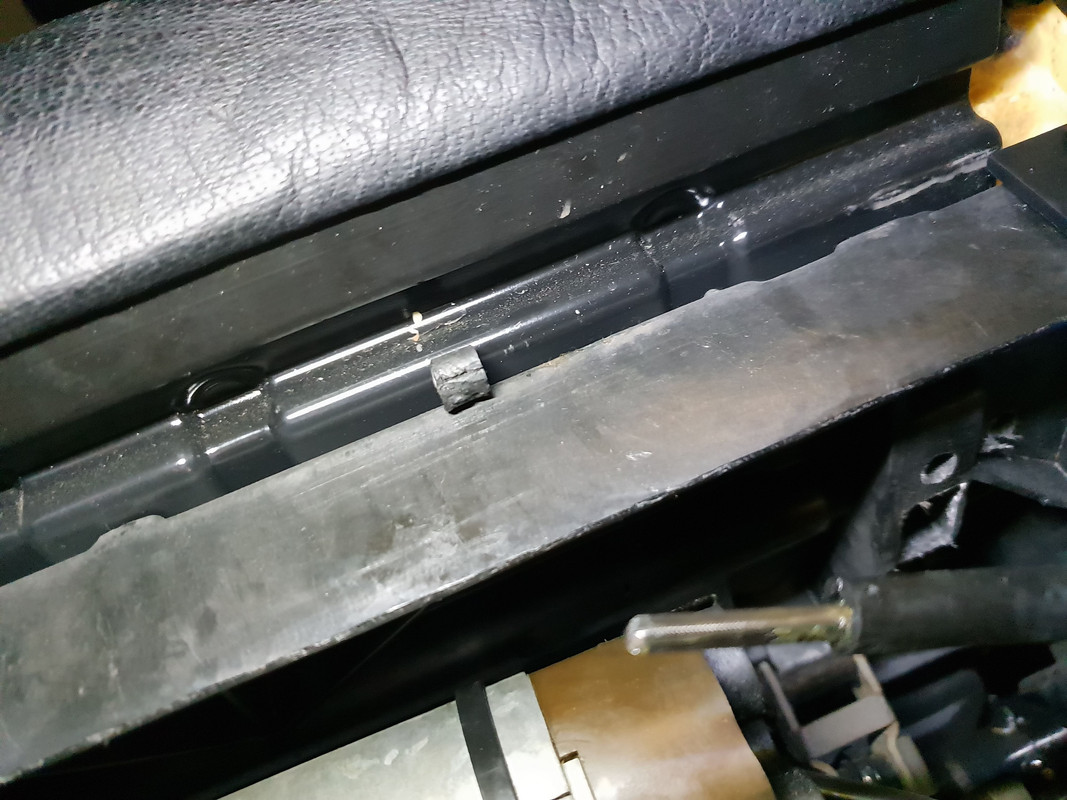
This plastic piece broke off inside the steering wheel and was catching when the steering wheel was turned.
Steering wheel material also separated from the metal surface so I'll need to use some heavy duty stuff to glue it together. This probably contributed to breaking the plastic piece in the first place.
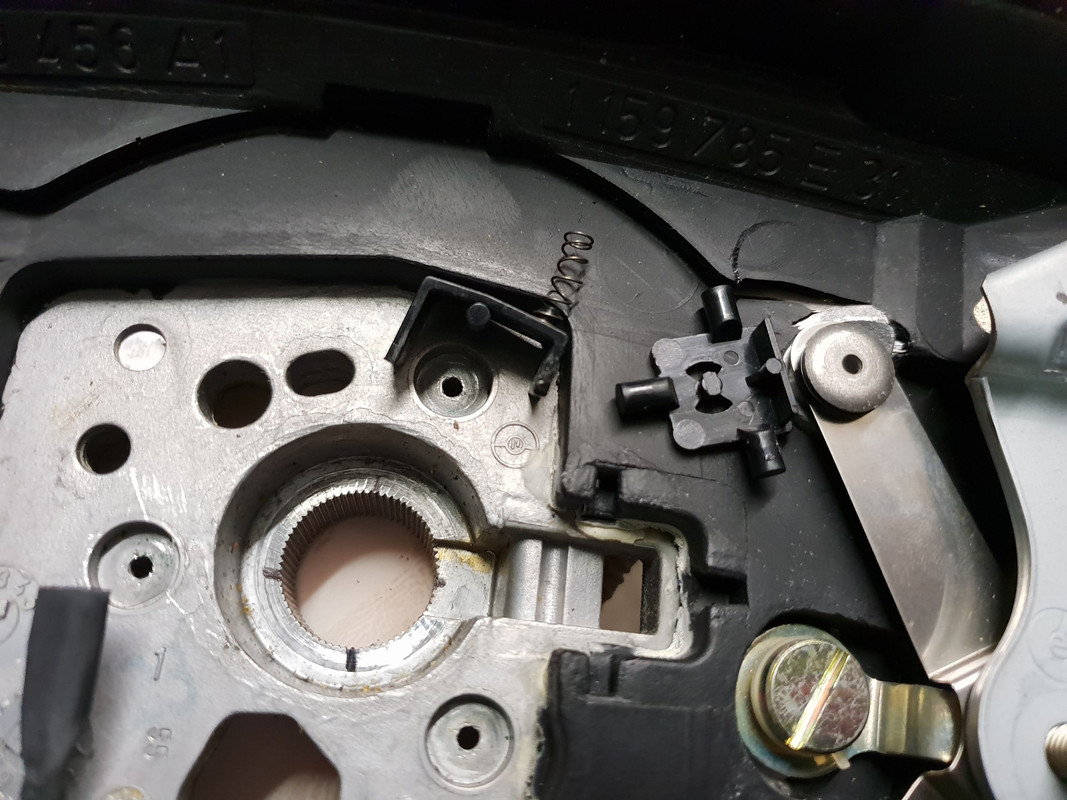
Once I took everything off, I learned that broken plastic piece slots into the clock spring on the rear side and limits the movement.
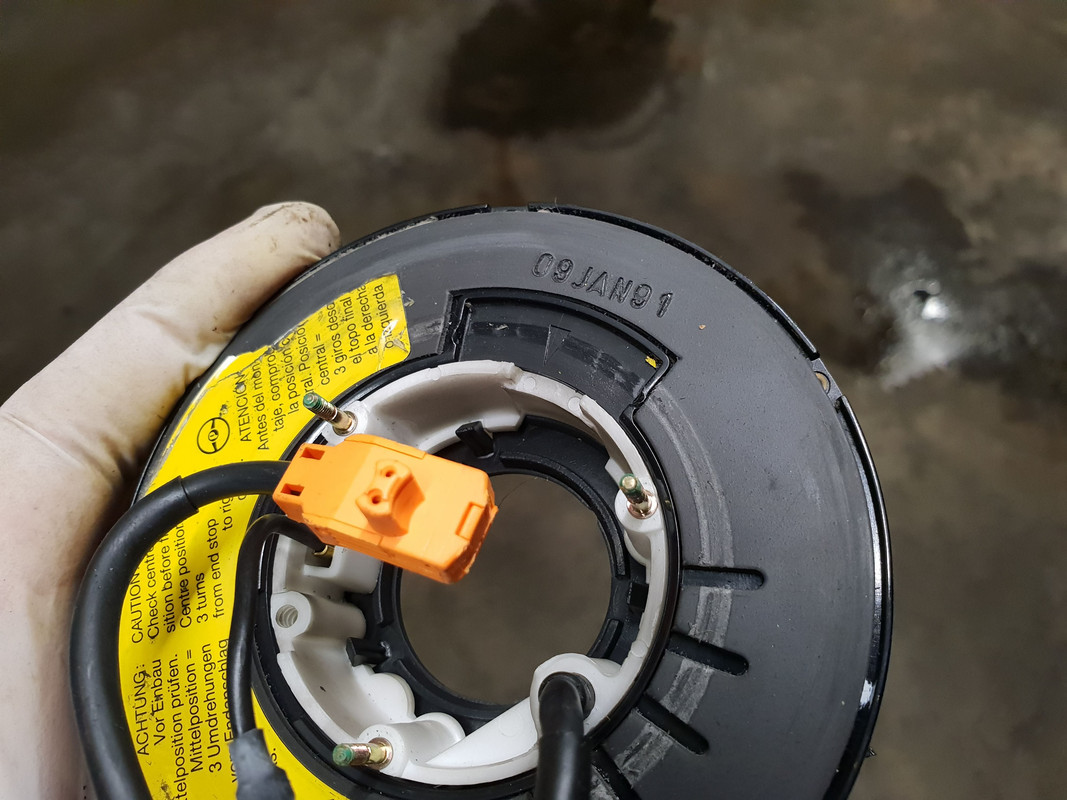
Which brings us to the reason for the airbag light. Wires ripped off.
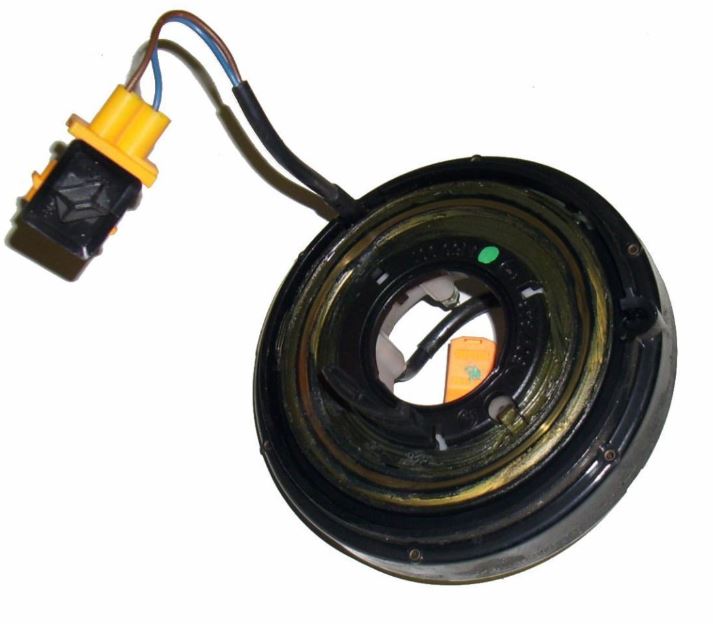
Wires I could reconnect but seems that the slip ring is broken as it spins indefinitely. I'll crack it open to see what's going on but I'll probably source a replacement one.
Did anyone deal with this broken plastic piece? It's too small to try and glue it together so I guess I'll try to get a donor steering wheel which has that part intact and replace it.
Last edited by sreten; 12-24-2018 at 12:21 PM.
Member
Merry Christmas, folks!
I sourced locally a cheap and complete E36 steering wheel that has plastic locking pin intact and it also came with a slip ring. I'll be able to make it work, just waiting tomorrow for the stores to open to pick up epoxy and glue back the part on the steering wheel where locking pin sits that separated.
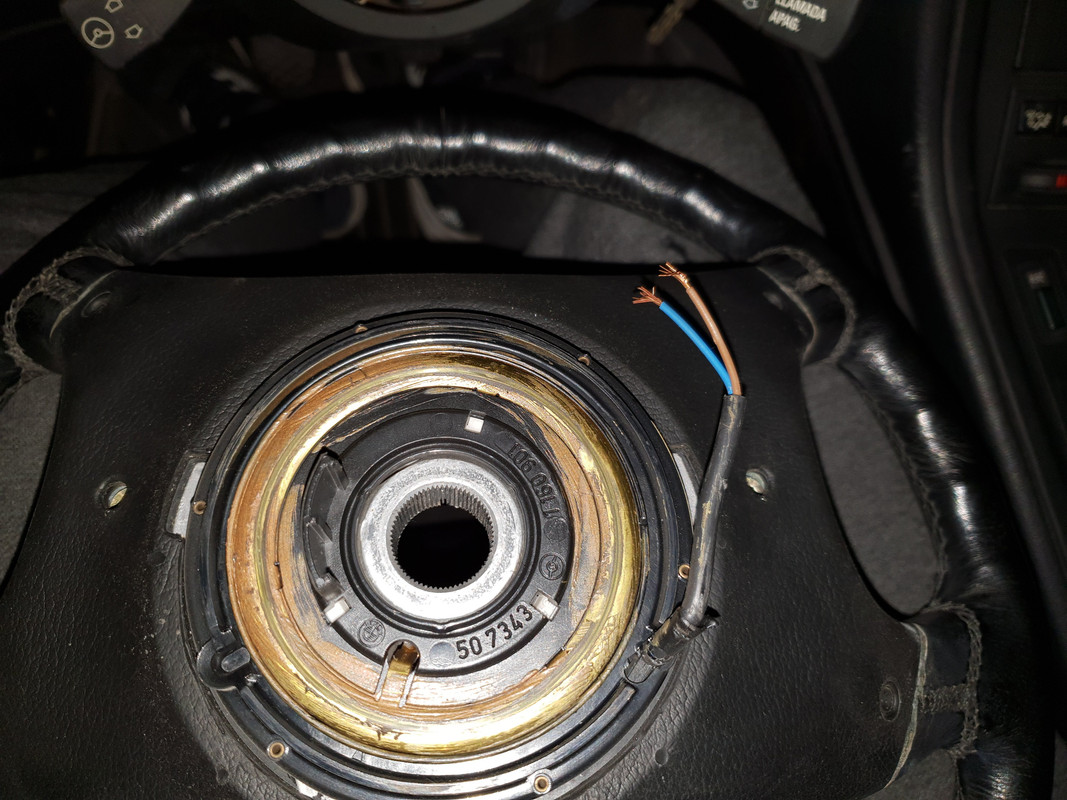
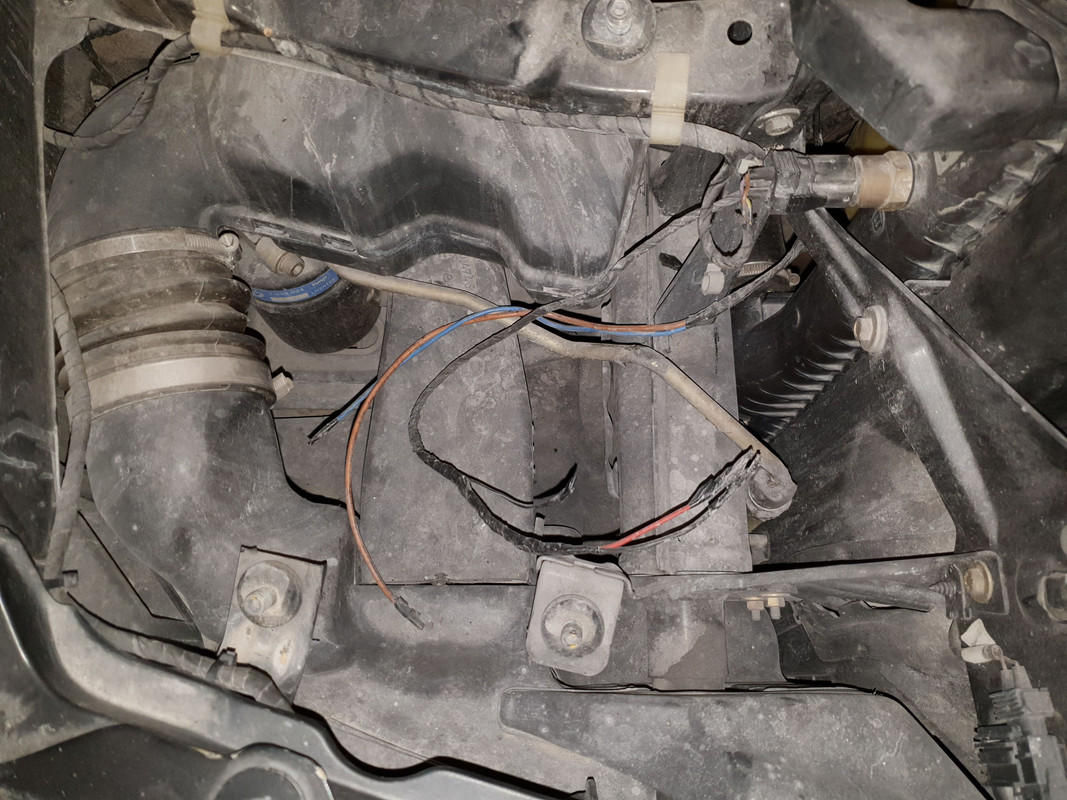
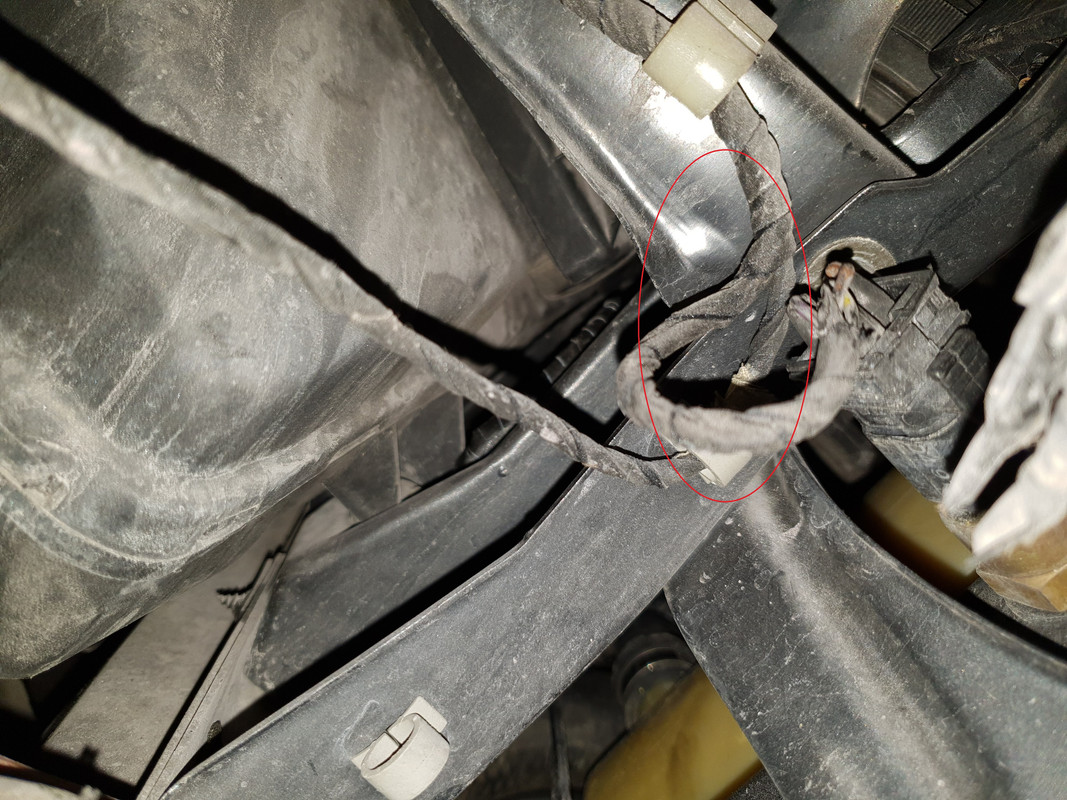
In the meantime, I removed the right headlight since I noticed another open wire running underneath it. That headlight is also not popping up so I thought it might be connected.
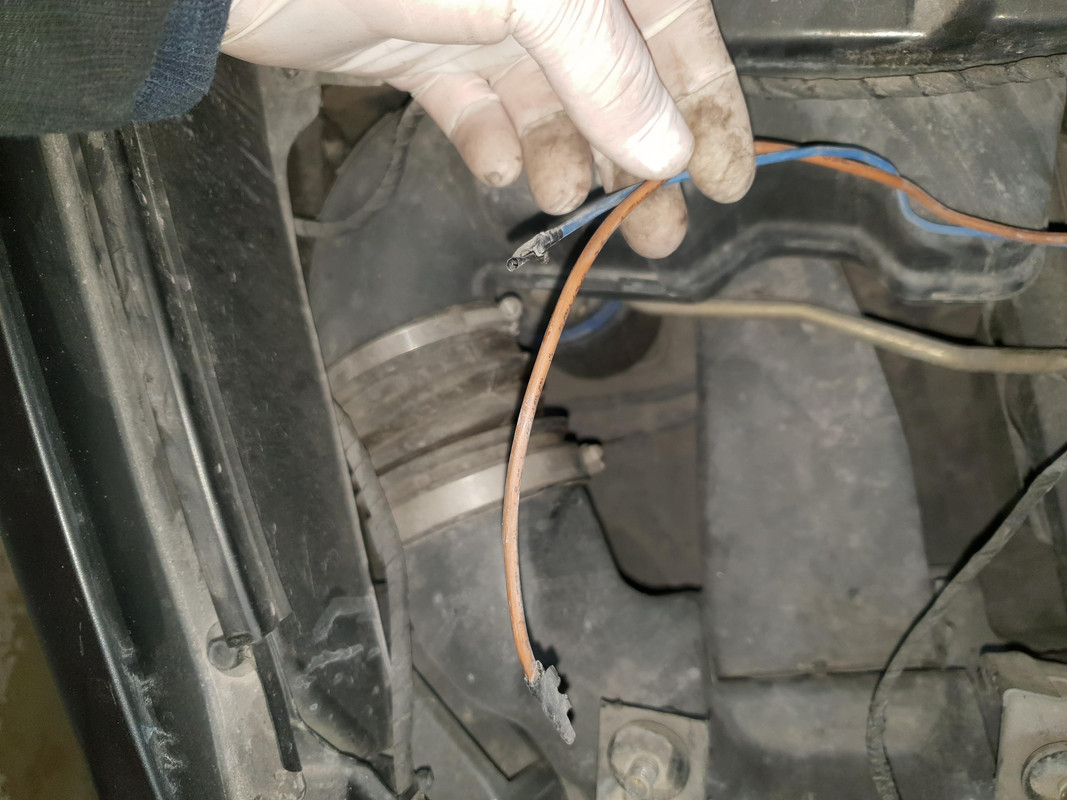
Yay, more hacked up wires...
The brown & blue wires were chopped off under the bank 1 distributor cap and they go across the front of the engine back to the alternator.
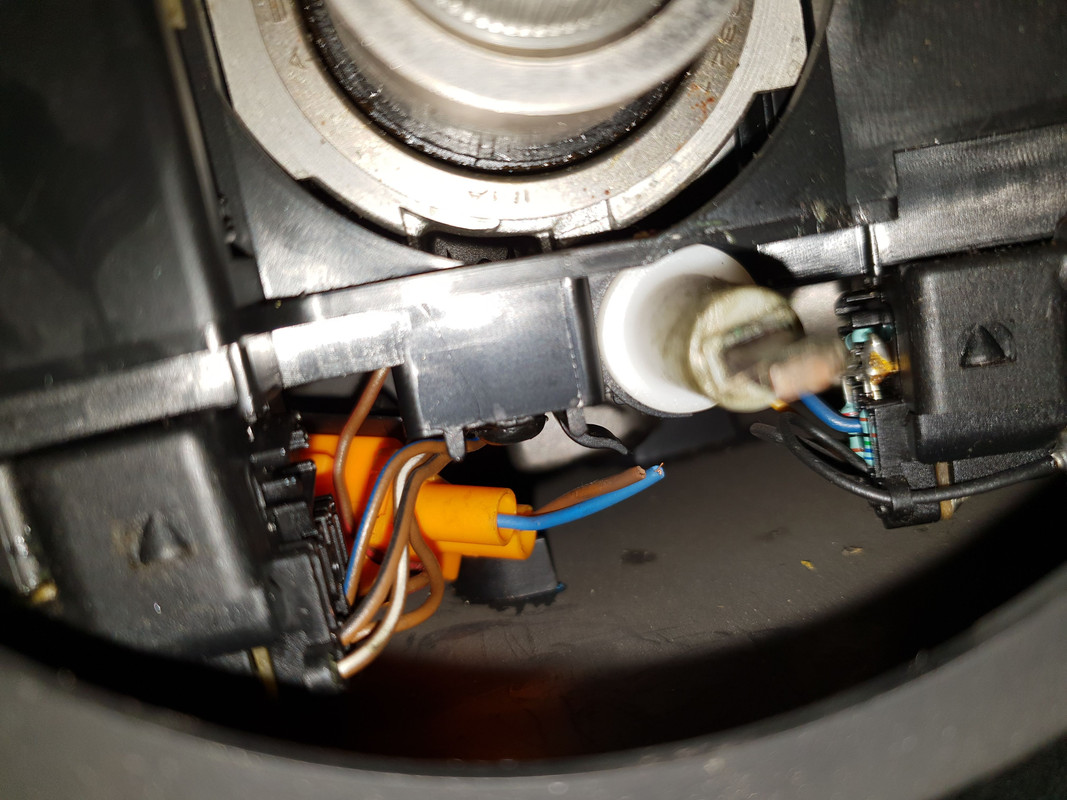
The other 3 wires are coming out of the same wiring loom as the wires for the radiator coolant temp sensor. No idea where they are supposed to go but doesn't seem it has to do anything with the headlight wiring.
Can anyone chime in and identify these wires?
Member
AFAIK , a car with the Webasto heater has the second alternator.... ( under the AC compressor ) . This i connected with a loom in front of the engine going to the main alternator , as was in my car . But that is only a "big" red wire ( + ) and a small blue one for the alternator 's "field induction" ( don't know the exact name ) ……... i removed all that .
More strange , i have read somewhere , is that the second alternator was for a extra batterie in the trunk for some consumers…. ???? perhaps a misunderstand , because in my car both batteries are in parallel as were the alternators.
Member
It could be something in relation to that but the car doesn't have a second alternator, at least not anymore. I did however find more wires around the AC compressor so it's possible someone removed it at some point.
Sent from my SM-G965F using Tapatalk
Member
You were spot on Barry. Found pics from Roger's Alpina that has a 2nd alternator.
https://www.bimmerforums.com/forum/s...php?p=26575407
That wire is definitely for the 2nd alternator which someone removed so that solves that mystery.
Still need to figure out what other 3 wires are for.
Sent from my SM-G965F using Tapatalk
Member
on my car the 2 wires from the coolant level switch come together with the 3 wires from the connection plug above the AC compressor. Than they go to the coolant temp sensor on the radiator . Further i cannot see … but i assume to the "main" loom of course.
Member
Hi, did you get my PM ? i lost internet connection at that time.... and i cannot see "sent items" .... ? perhaps one needs 100 posts to be able ??
Yes , i have wire loom going under the right headlight but can't see were it go's.
From the temp sensor on radiator the loom go's further to the water level sensor ( 2 wires) and the connection plug above the AC compressor ( 3 wires) .
Member
Thanks, Barry, I got your message.
If I understood you correctly, the wires for the coolant level sensor are coming from the same direction as the wires for the radiator temp sensor. So it's possible that these wires were for the coolant level sensor at some point, just someone cut them off. I don't have wires or a plug above the A/C compressor.
Otherwise, I have no clue what those wires could be for, if someone can shed more light, please do.
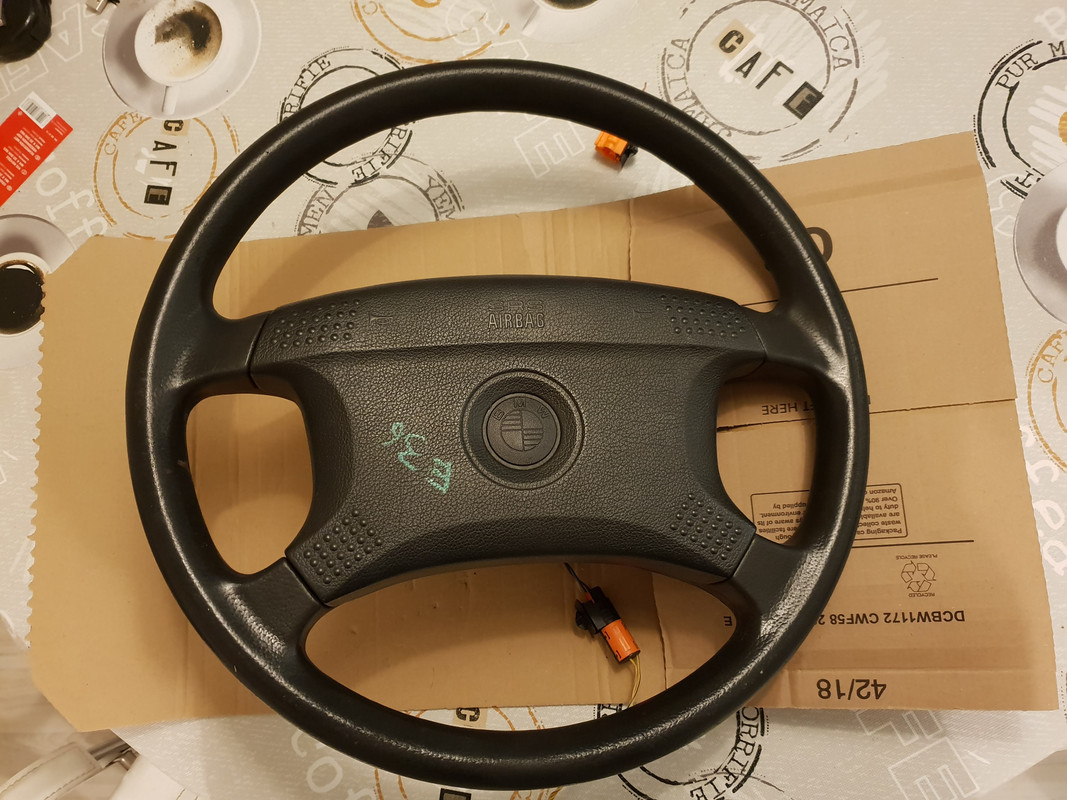
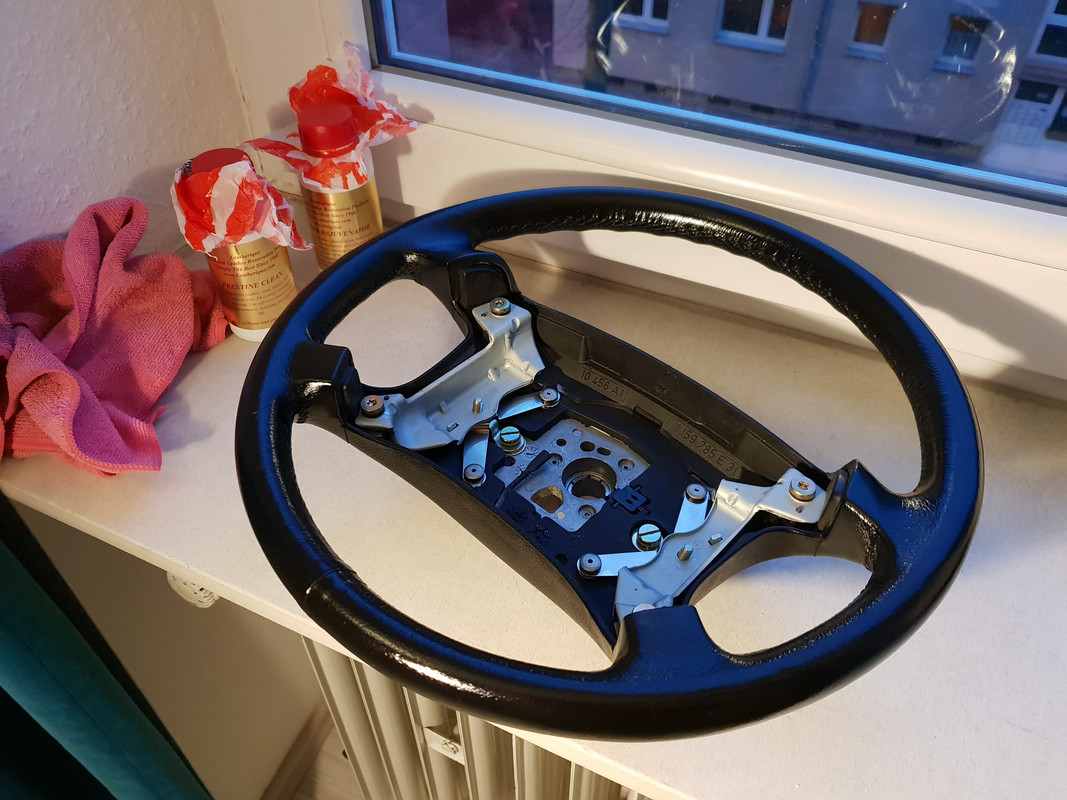
I picked up a cheap E36 steering wheel that came with a slip ring and locking pin.
My slip ring had ripped cables inside and was kaput so I reused the one that came on the E36 wheel, just swapped the plugs. Tested the continuity with a multimeter from one side to the other and this slip ring is good.
Used epoxy to glue back part of the steering wheel that unglued and installed replacement locking pin.
Used the opportunity while I had the steering wheel out and treated it with leatherique.
Reinstalled the steering wheel back in the car and now I have a new obstacle of resetting the airbag light.
I tried this trick this morning more than a few times and didn't work - https://www.bimmerforums.com/forum/s...-Special-Tools!!!
Zymexx SIR3 or BOA airbag reset tools that Shogun used to sell, I can't find anywhere online to buy.
Anyone in Germany/Europe has this tool and is willing to rent it with compensation? Short of that, I don't know what else to try to reset the light so I'm open to suggestions.
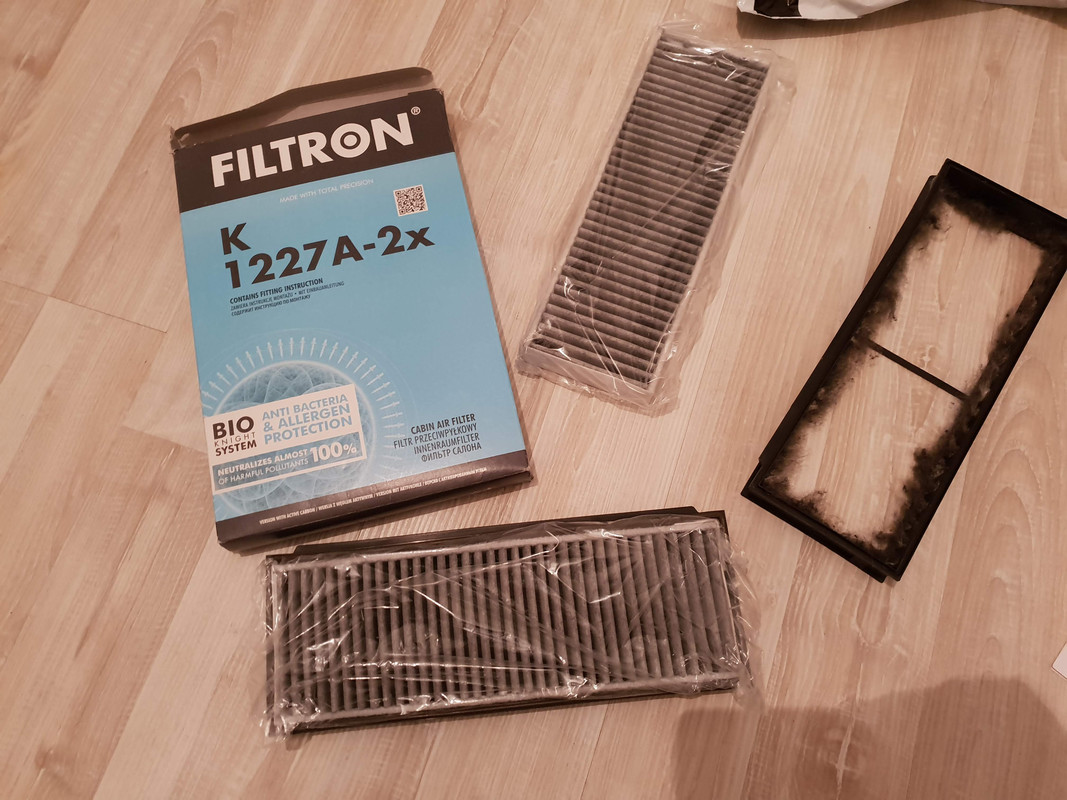
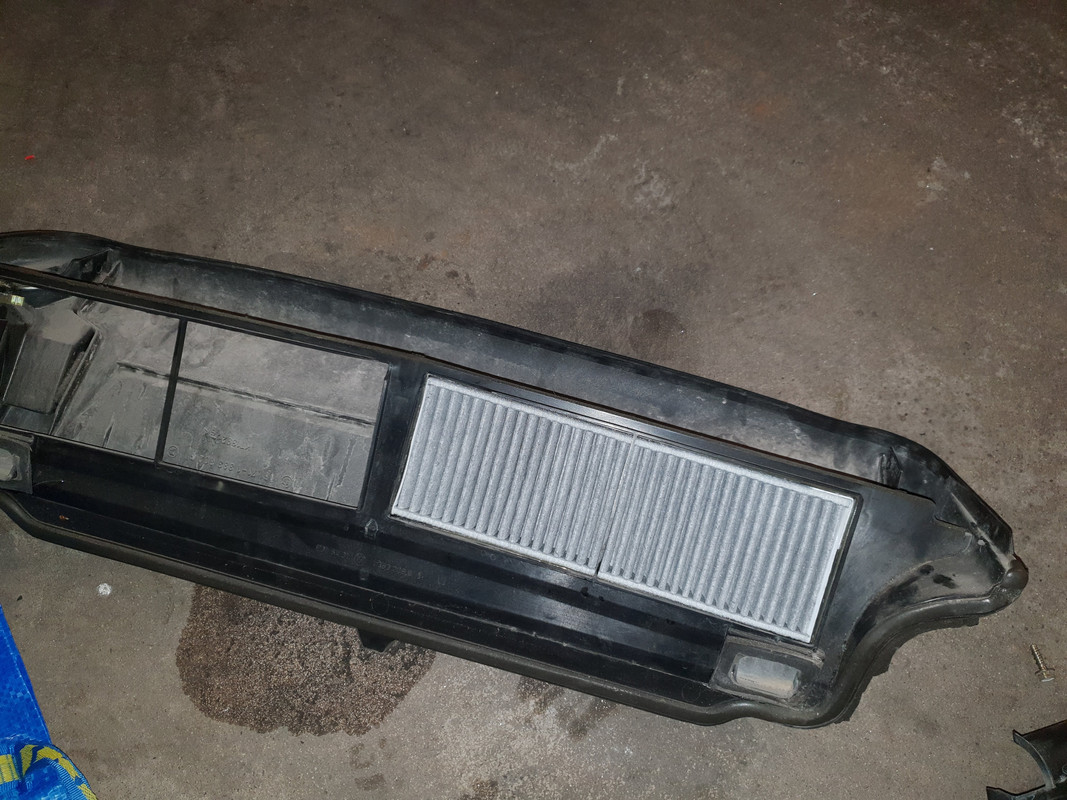
I was looking into new cabin air filters and in Europe, you can only get them from the dealer at a ridiculously high price.
I did some research and found that the cabin filters for Peugeot/Citroen part # 1609998980 are correct dimensions: 290 mm x 96 mm x 30 mm, which should fit in the plastic housing of the original E31 cabin filters.
Filtron part # K1227A-2x. These are only 10 / $12 for the pair so I ordered them.
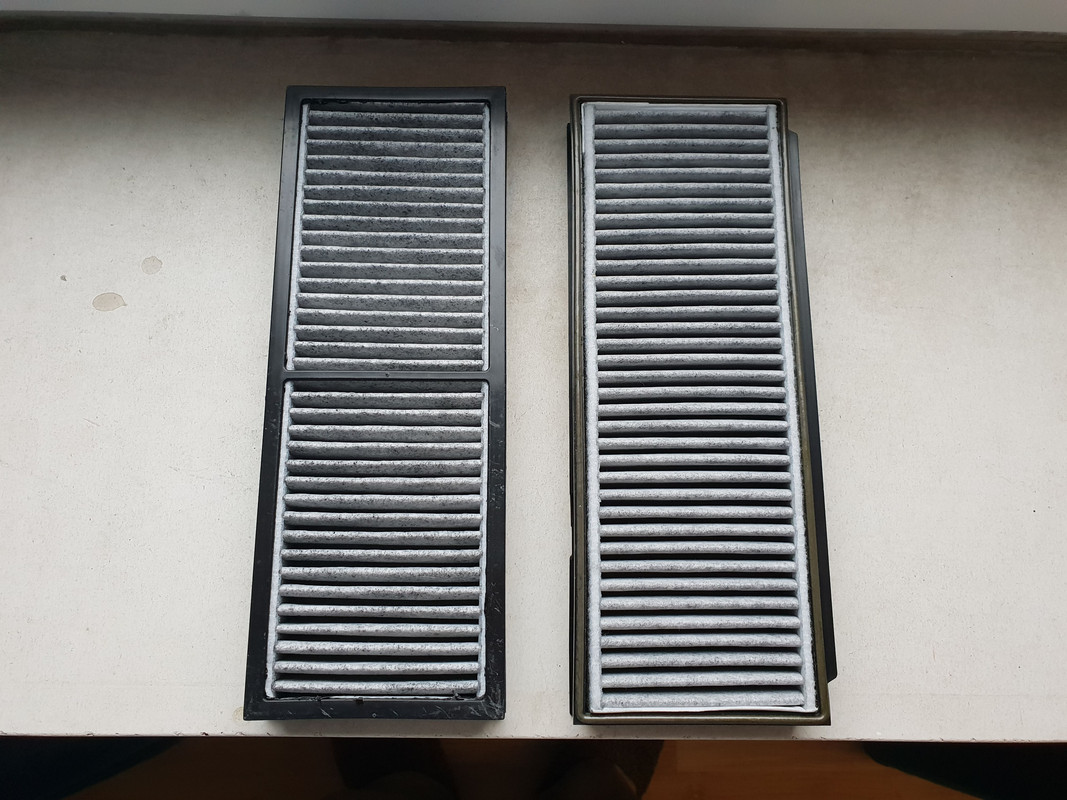
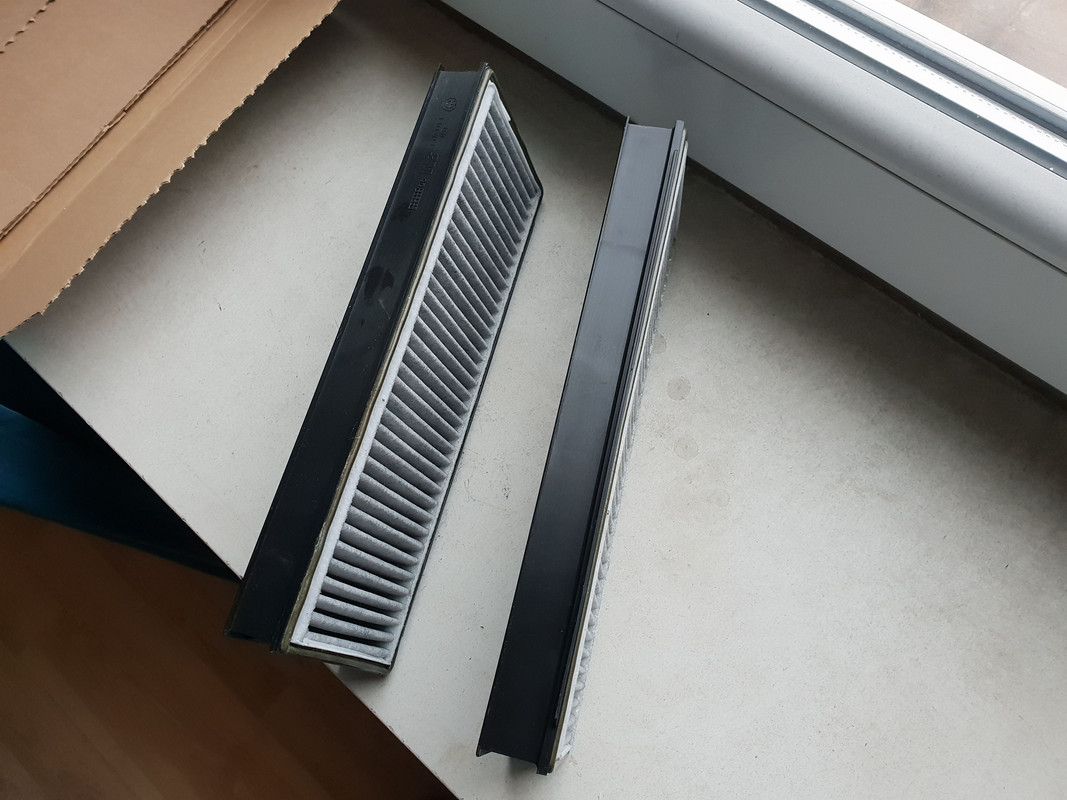
Test fit was good so I cleaned up the old filter housings, smoothed out the edges and put a small bead of sealant on the inner lip and put new filters in. You can also install them without the sealant and they'll be fine but I did this to have a better seal.
These worked out perfectly!
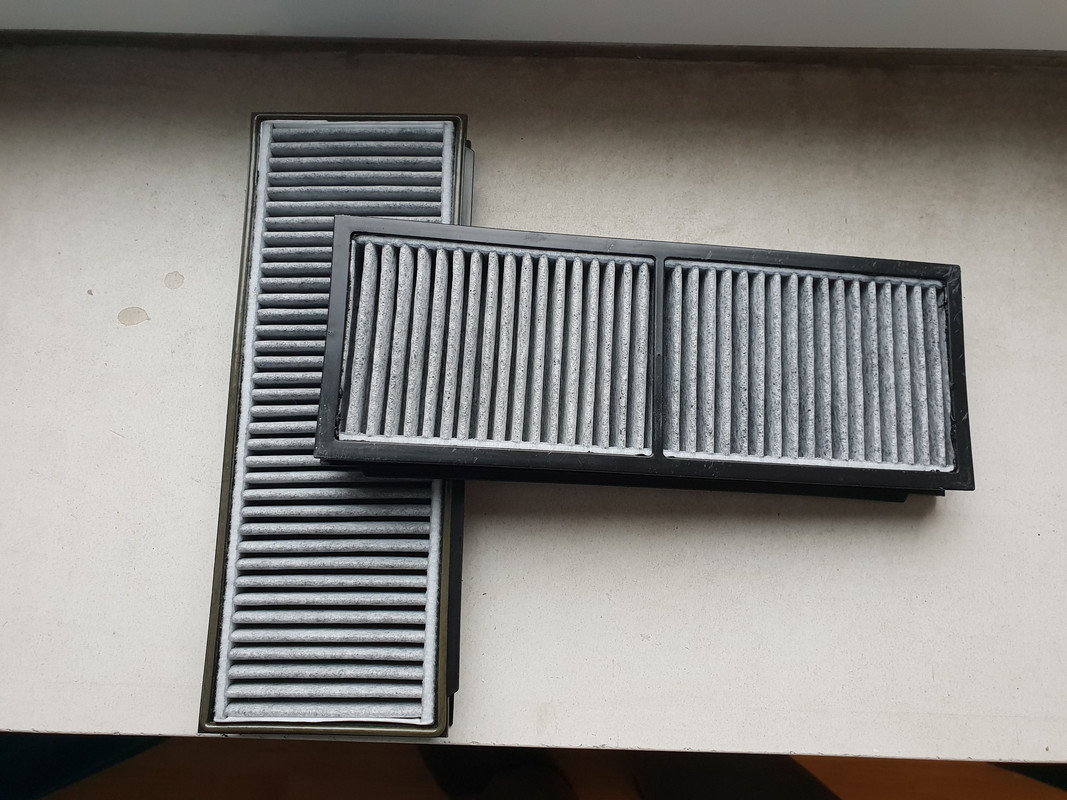
This is a good way to save some money and keep stock appearance if you still have old, original filter housing to reuse.
Member
nice tip for the filters ! yes , at BMW they are expensive.... i soaked mine a day in soap water , stirred them a bit around in the water , a few times in clean water and dryed them with compressed air... they were as "new" . The soap water was black....
Those wires with plug above the AC compressor are for the activation of the electric clutch in the AC pulley i think… cannot imagine what else ? but strange that there are 3 wires…. some sensor feed back ??
It's that plug that is all under oil /dirt from leaking chain tensioner in most cars….
edit : just read that there is a seize sensor , in that case of troubles the clutch is deactivated to ensure a working water pump/fan.
Last edited by Belgiumbarry; 12-29-2018 at 04:05 PM.
Member
hi, great write up!
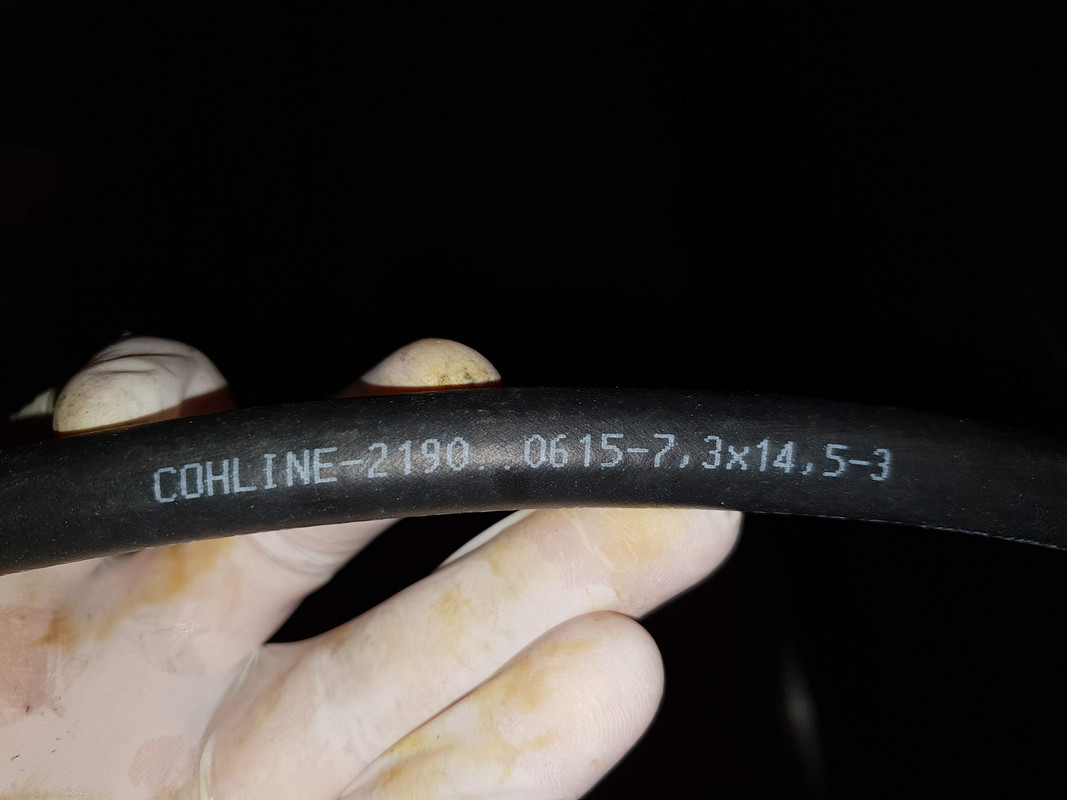
did you use J30 R10 fuel hose in your fuel pump assembly? normal fuel hose will deteriorate when submerged in fuel.
Member
Next time just get these filters
Not sure about the wires, I'll remove the headlight again and unwrap the wires to see what's going on there.
Thanks for pointing that out. I used high-quality fuel lines but I think I made an oversight there. I emailed the seller but I suspect I made a rookie mistake there.
Didn't even cross my mind. I can't find hoses labeled as J30R10 for sale in Europe but I did find ones specifically to be used inside the fuel tank so I'll order them and I'll have to redo this.
Lovely. At least I didn't reinstall the rear seat...
Member
The airbag in my '91 850i (and '87 325i) also doesn't respond to DIS or INPA.
What works for me is to generate flash codes using a small test light, directly connected to the orange Siemens computer plug. I can send you the instructions I wrote (not to forget the procedure) if you want.
If need be I can reset the SRS lamp using my good old Carsoft 6.5 adapter, works fine.
Member
Thanks, Albert! Please send me instructions.
I read somewhere that someone managed to reset the airbag light with Carsoft 6.5 on the same year e32 and e34 and now you confirmed it as well so I'll order Carsoft and try it out.
Sent from my SM-G965F using Tapatalk
Member
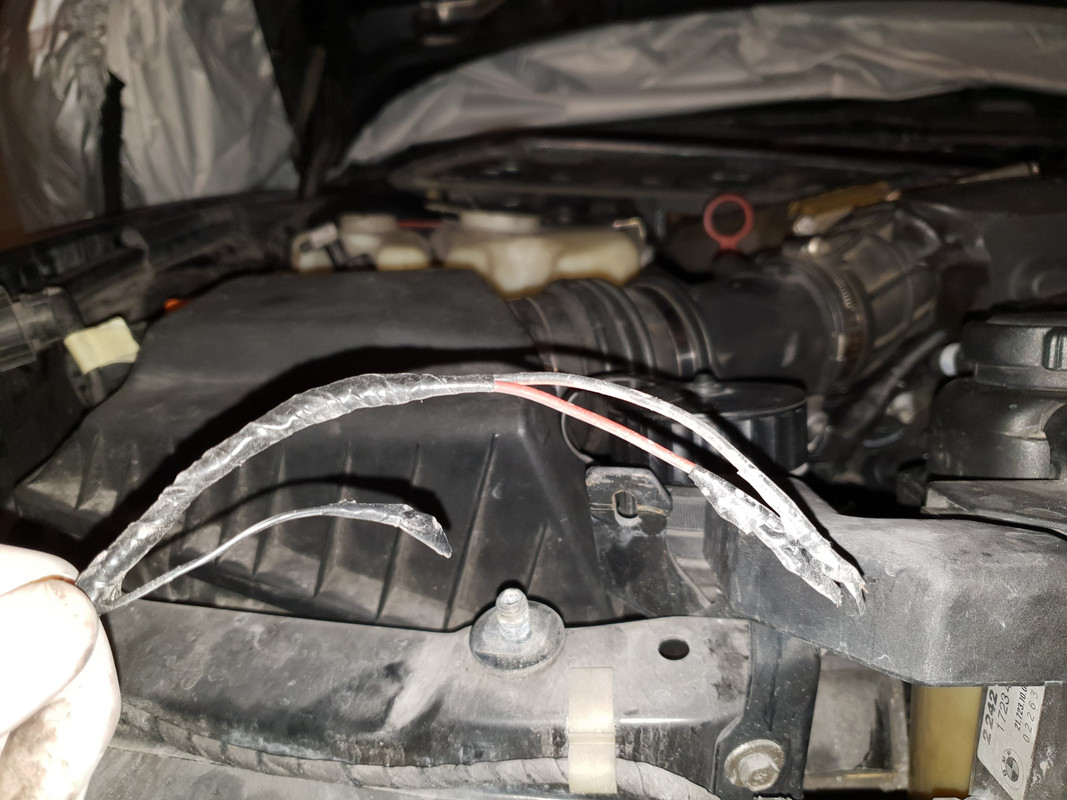
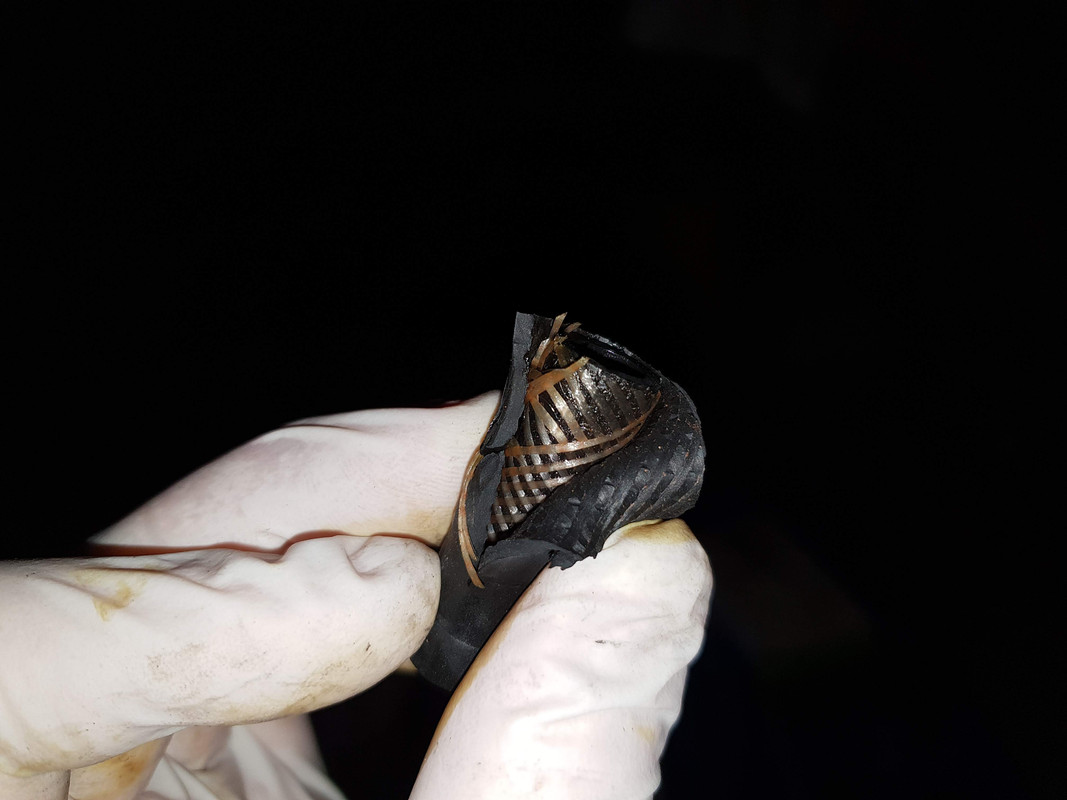
Thanks again for asking the right question!
Lack of experience in this area made make a pretty stupid mistake. Luckily, there weren't consequences, the hose started to get small cracks but it didn't melt and the tank was crap free.
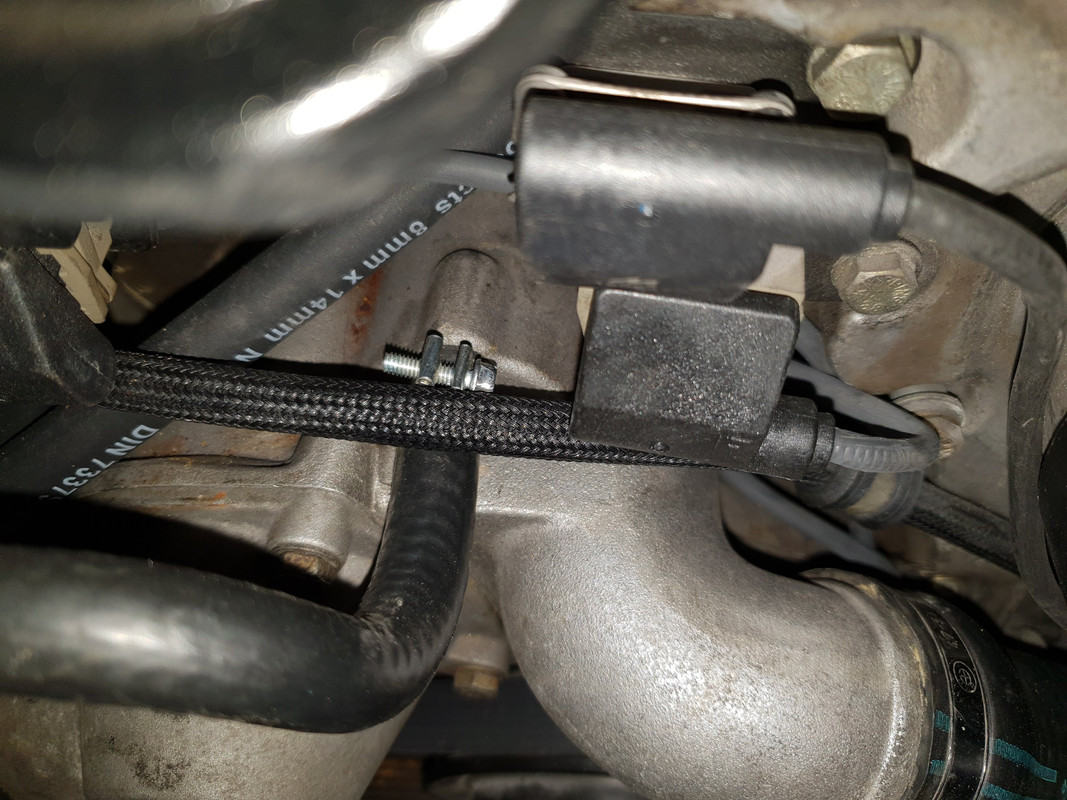
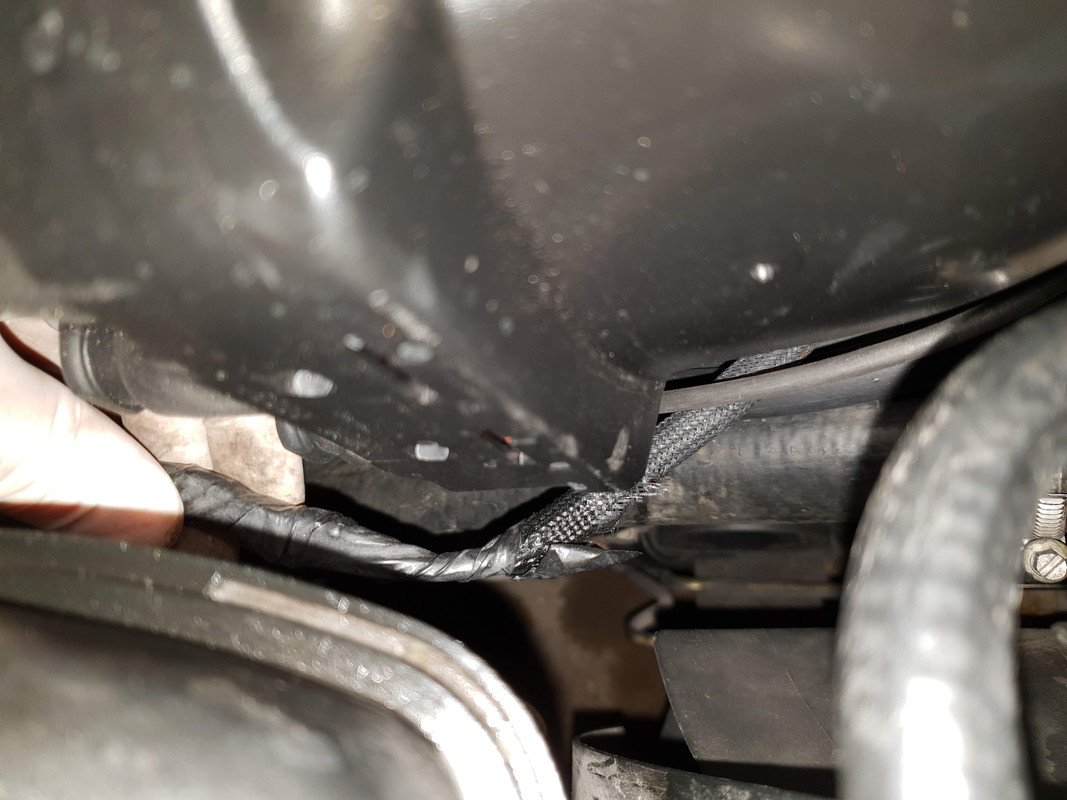
I cut open one of the hoses and this is what eventually would've happened, the outer part of hoes would separate and dissolve.
Correct submersible fuel hose used this time.
Good lesson learned here.
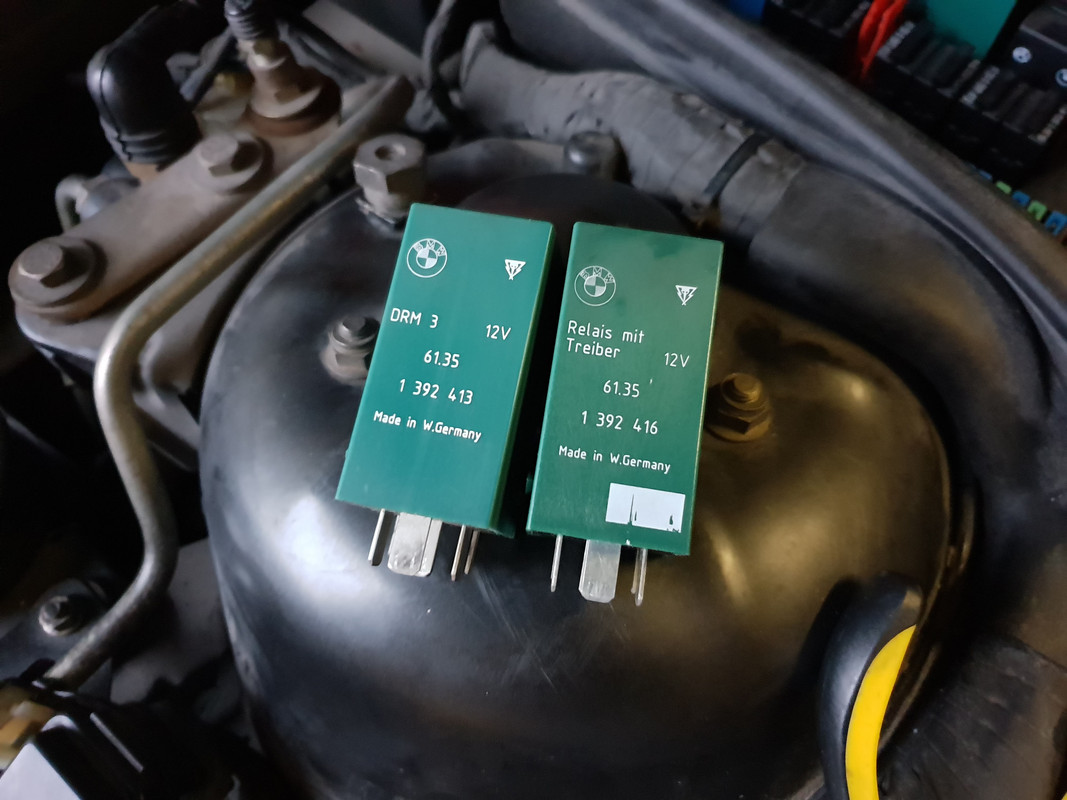
I also resolved the issue with the right headlight not popping up and the answer was right in front of me all this time. I was going through the pictures I took and noticed that the part number on K39 relay is wrong. It was ending with 416 instead of 413. So obvious I just didn't expect someone would put a wrong part but nothing is surprising me on this car anymore. The car had 3 416 relays. Whoever worked on this car before just sucks.
Installed the correct one and both headlights are working properly.
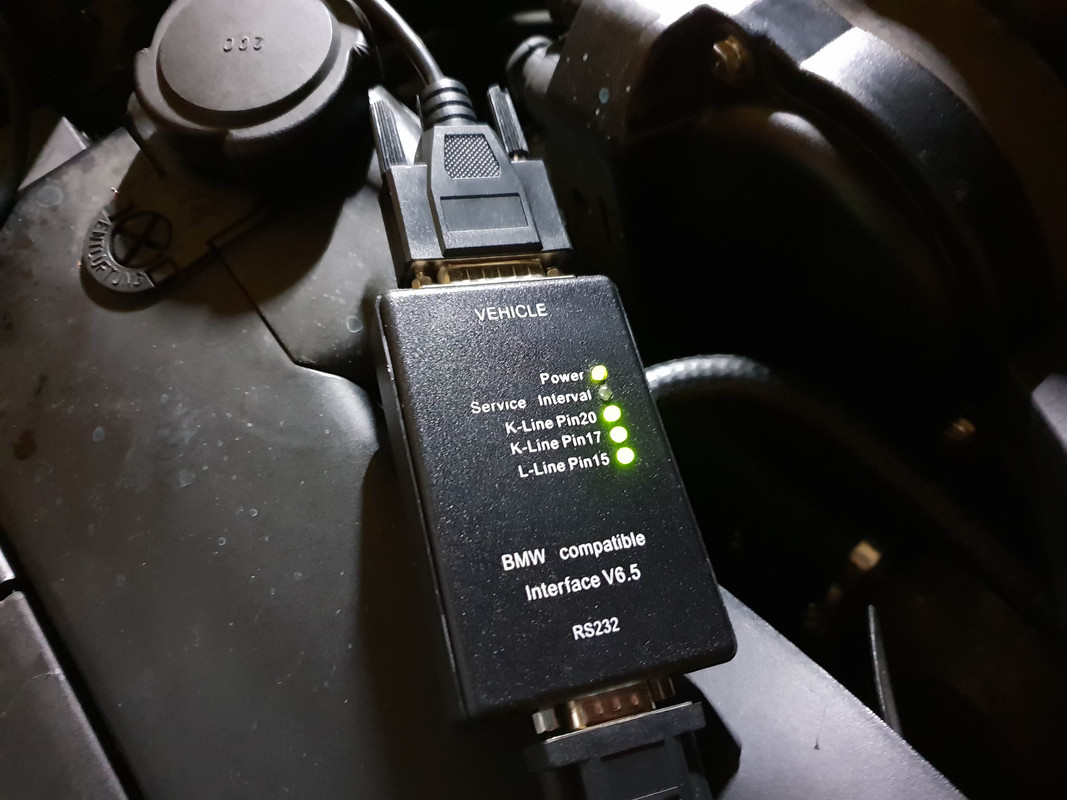
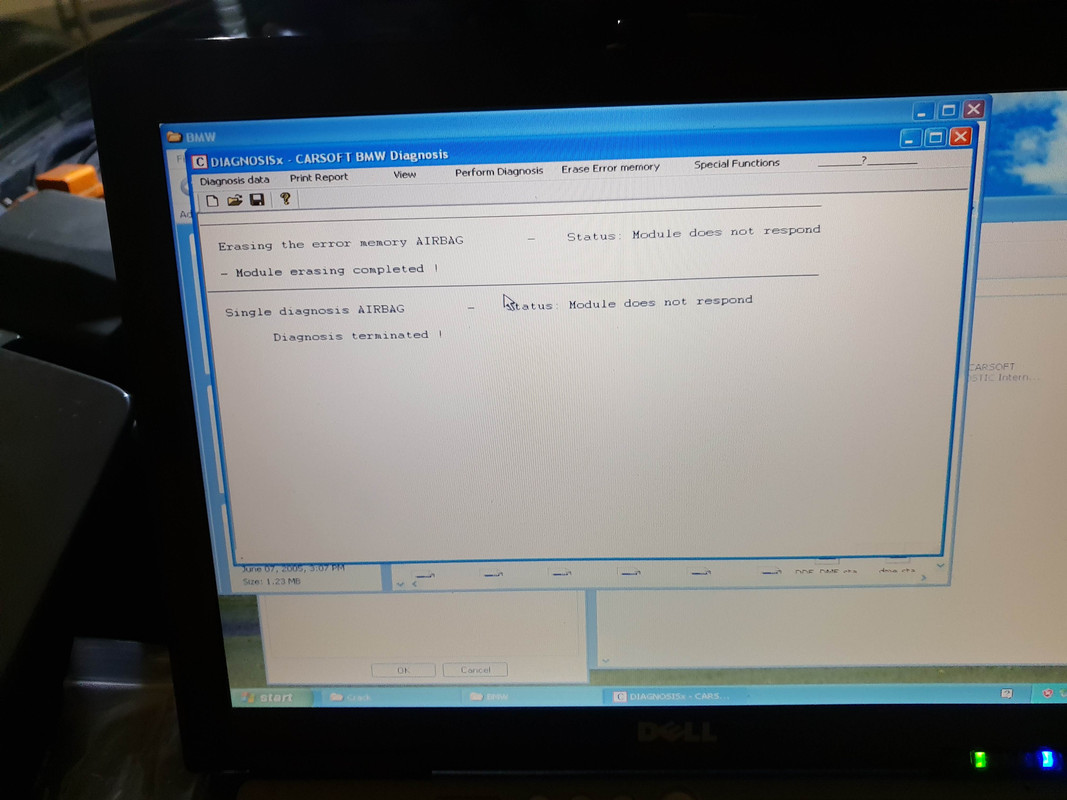
Next, I was set on resetting the airbag light. I bought and installed Carsoft 6.5+SP1.
All lights on the interface were green but it couldn't reach the module.
The only thing Carsoft could connect to is DME 1-6, nothing else.
Then I connected Carsoft directly to the airbag module and X74 connector.
Connection as follows:
- pin 14 on diagnostic connector to pin 1 on X74 for 12V
- pin 19 on diagnostic connector to cars ground, at this point all the light on Carsoft interface are green
- pin 15 on diagnostic connector to the pin 6 RXD on X74
- pin 20 on diagnostic connector to the pin 7 TXD on X74
As soon I as connect pin 7, the pin 20 light on Carsoft interface goes red and it still can't reach the module.
Then I learned Alexander Maier and his brother from 8erfaszination are just 30 minutes away from me and kindly agreed to borrow me the correct tool for resetting the airbag light. Zymexx BOA SIR3 that Shogun used to sell back in the day.
They are great guys who parted over 90 cars over the years and have a massive choice of parts. I highly recommend them.
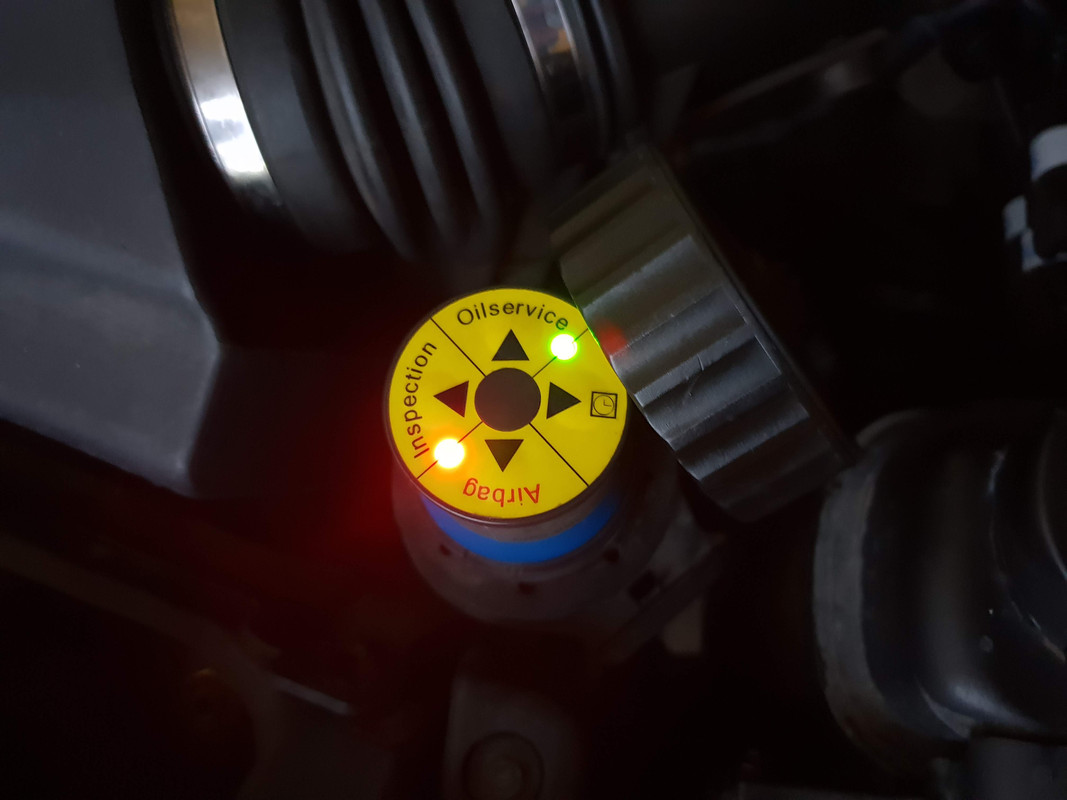
I connected the BOA tool, goes through self-test and the light becomes solid green. I hold the airbag button until it goes solid red and after a minute or so, it starts flashing red and is unable to reset the light. According to instructions, this indicates a communication problem with the car.
I then connected the tool directly to the airbag module and after going through the self-test, the airbag light would immediately start flashing red which indicates another communication problem. Instructions don't say how does the tool behave when there is still a fault within the system though.
I went back to 8erfaszination and borrowed 2 airbag modules 5WK4 027 (same as the one on the car), 2 front impact sensors and another slip ring.
Connected the first module and it was the same, rapid flashing light after attempting to reset it. Connected the tool directly to the airbag module and this time, it wouldn't immediately start flashing red, but it would after attempt to reset the light.
Then I tried a different slip ring and different airbag - same results.
Then I tried putting 3.3 ohm resistor instead of the slip ring - same results.
Then I replaced both front impact sensors, one by one - same results.
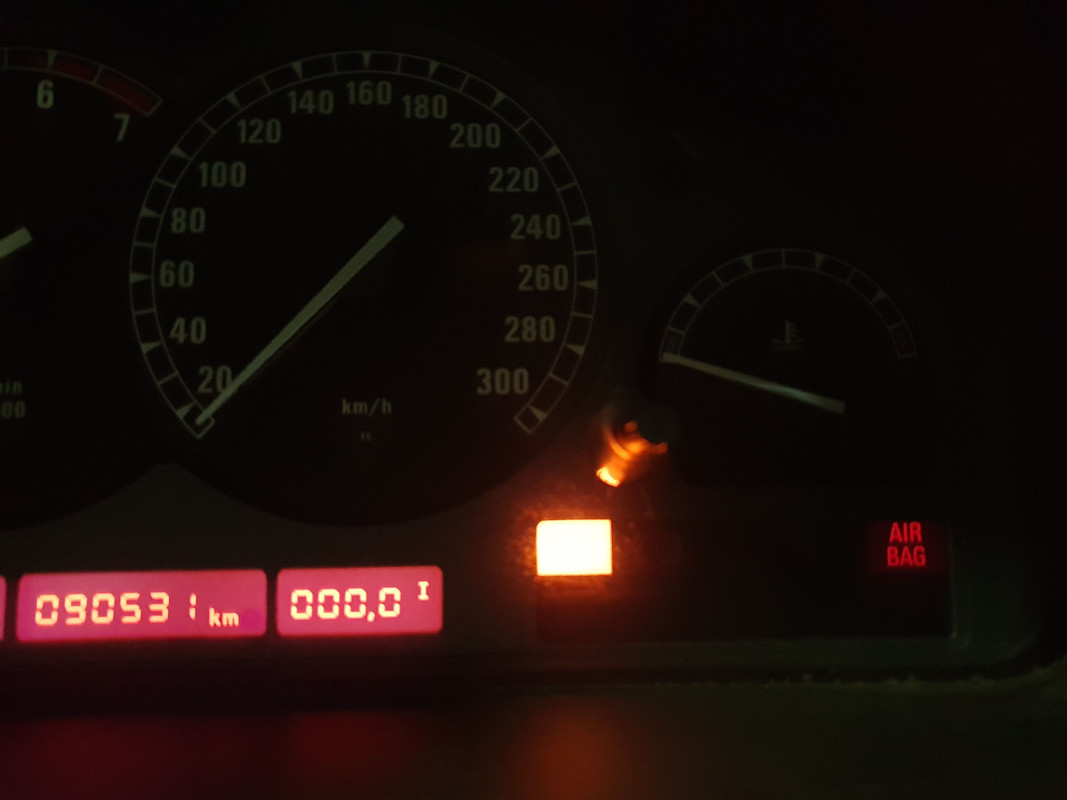
Then I put the 2nd airbag module I borrowed and it was acting a bit different. The airbag light would come on the dash with half a force and then slightly dimes out to the point where it's barely visible, but the light would still be on just dimmed.
Video here:
This is new and got no clue what it means. Trying to reset the light with BOA tool, would give the same results - flashing red light.
At this point, I tried everything I could think of and I'm beyond frustrated. I made 3 round trips to 8erfaszination and I wasted 2 fucking days making a 30-year-old explosive device to work properly which ultimately I don't even want to have.
I'm throwing in the towel and disconnecting this crap entirely. Life's too short to waste it on this nonsense. I have more important things to do on the car anyway.
Last edited by sreten; 01-14-2019 at 05:34 AM.
Member
It looks like there is something wrong in your airbag system (not the computer), like a bad connector somewhere or so. Therefore you need to find out what, either by a diagnostic device (did not work for me) or a small test lamp like I suggested.
Member
Yes, clearly there is something wrong with the airbag system but I'm also pretty sure Carsoft 6.5 I bought doesn't work. It can't connect to any of the modules on E31 and I also tried it on my e39 M5 and got the same results. Not sure if it's the interface box or the software, the thing is full of bugs.
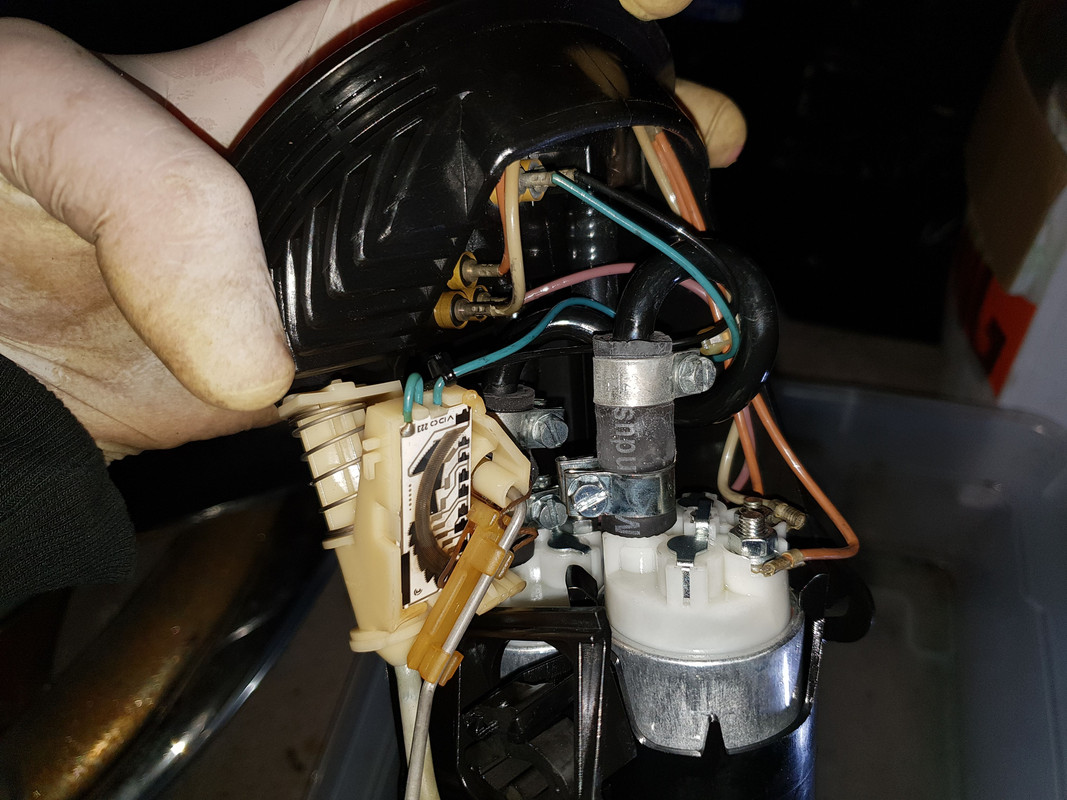
For now, I'm admitting defeat and moving on to other stuff. However, I did notice one something peculiar when I was putting the airbag back together.
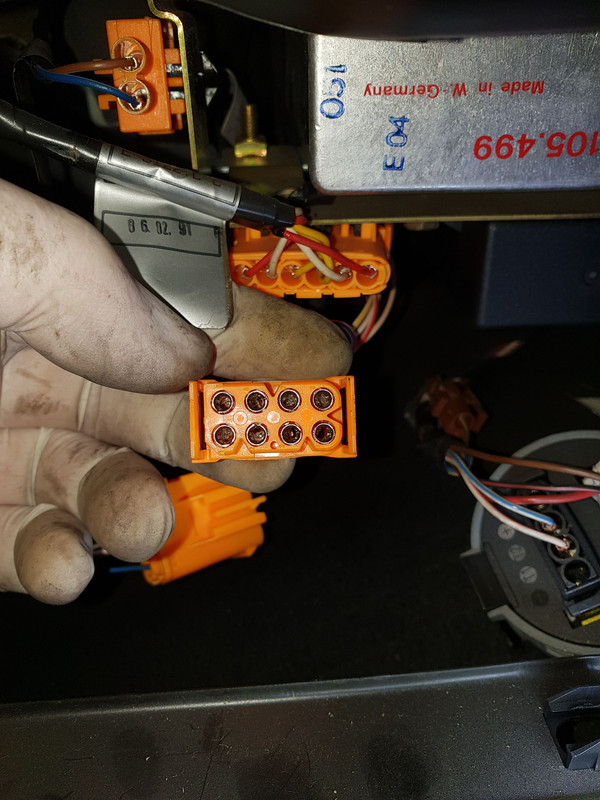
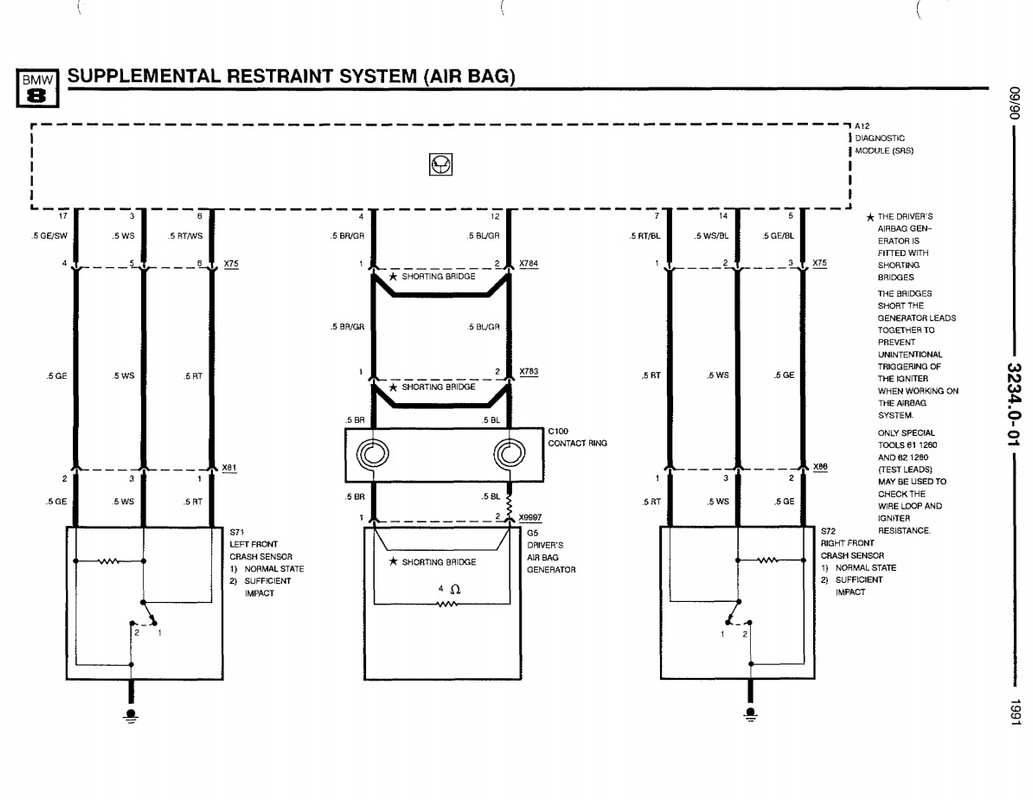
If we look at the wiring diagram for the airbag system from '91 E31 Electrical Troubleshooting Manual, we can see that the airbag connects to the slip ring which then connects to the plug x783 located under the steering column and goes all the way to the airbag module.
Slip ring connects like this: blue wire to blue/gray wire, brown wire to brown/gray wire.
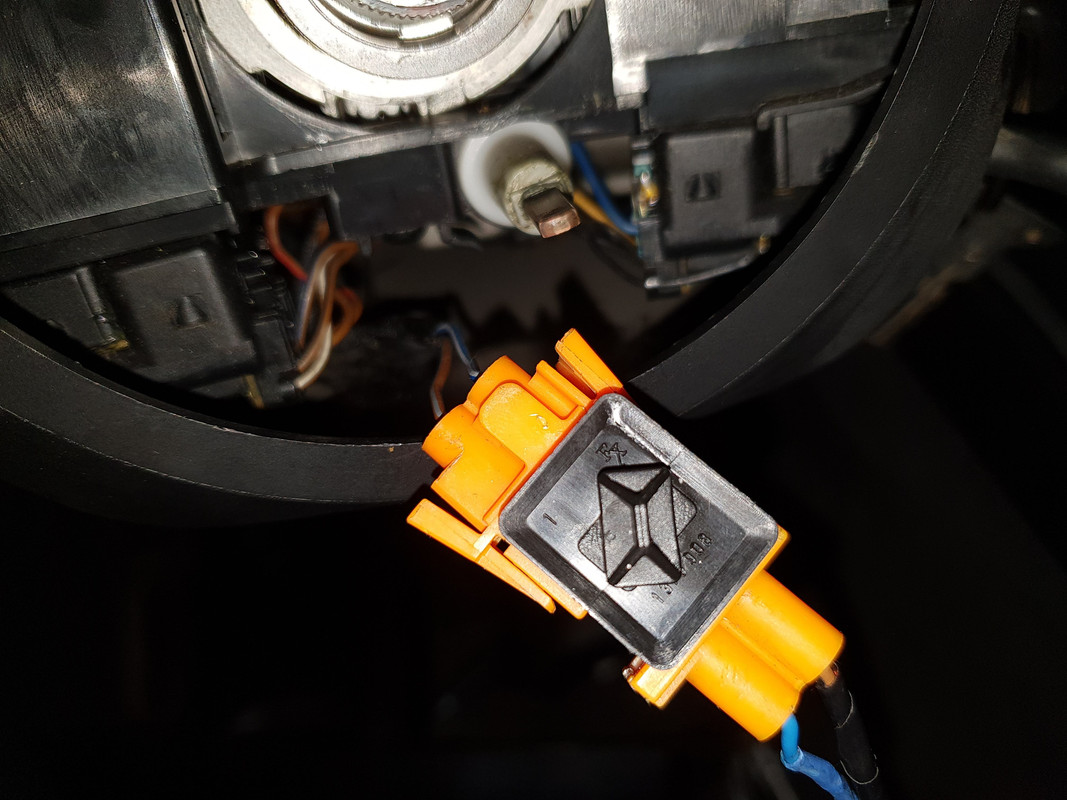
In my case, it's not according to schematics and the wires are cross-connected as shown in this picture.
Brown wire from the slip ring connects to the blue/gray wire and blue wire connects to the brown/gray wire.
You can't connect this plug more than one way so it's impossible to mix it up. Also, this is not the case just with my slip ring, if I look up pictures for the slip ring 32 34 1 160 901, all of them have the same wiring pattern.
Can anyone with more experience shed some light on this?
I also checked continuity with a multimeter from the airbag connector to the airbag module and the wiring and slip ring are good. I also get 3.3 Ohm read out at the airbag module plug with the airbag connected so the airbag is okay.
I checked the wiring for impact sensors and there is continuity from the wires in the engine bay to the airbag module.
Member
Despite being pretty cold outside, I got some more work done.
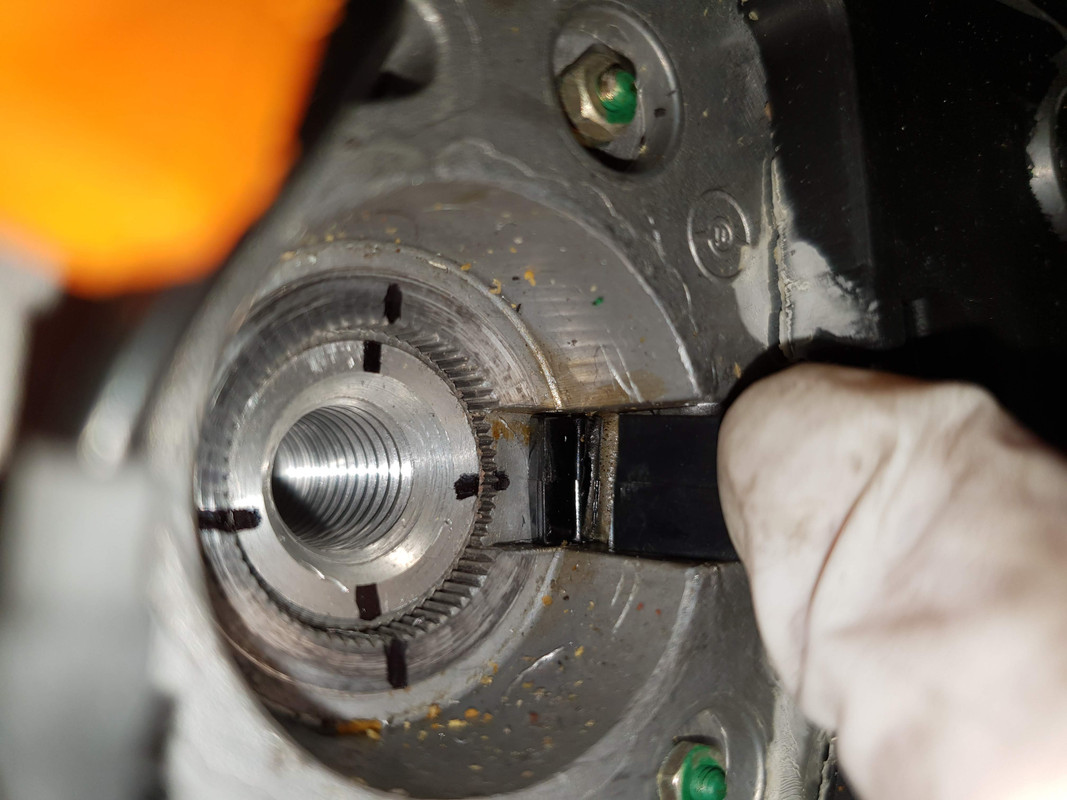
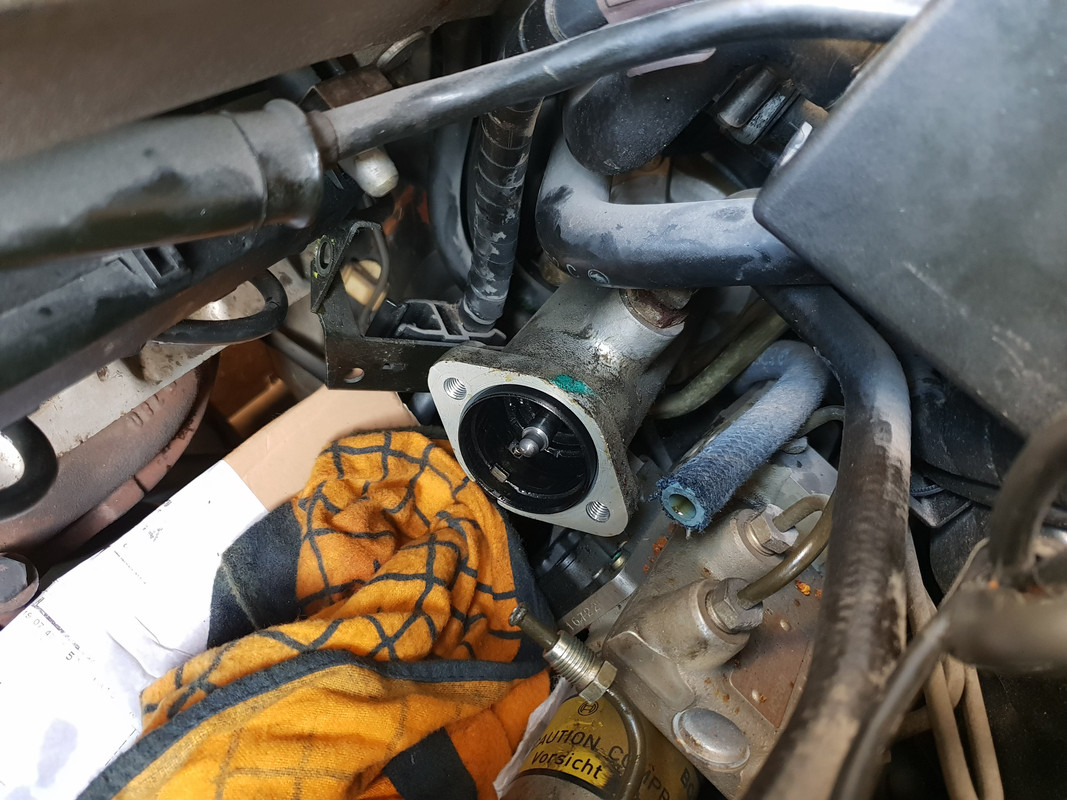
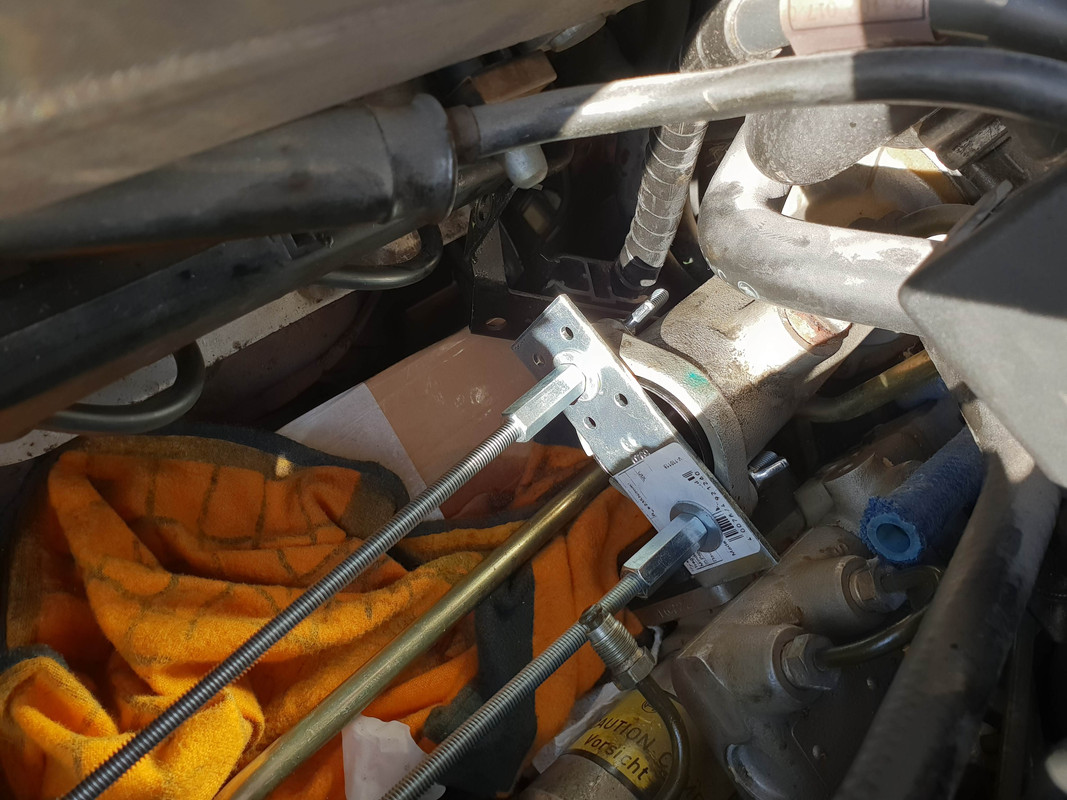
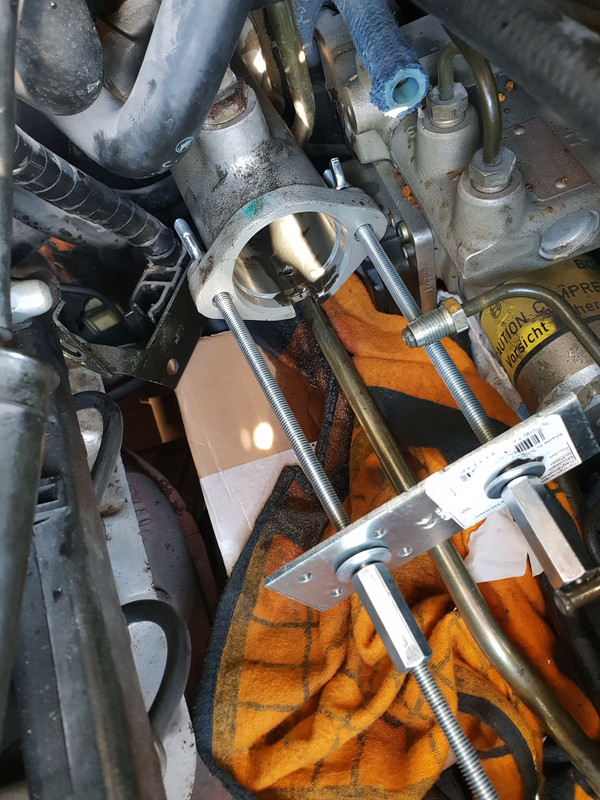
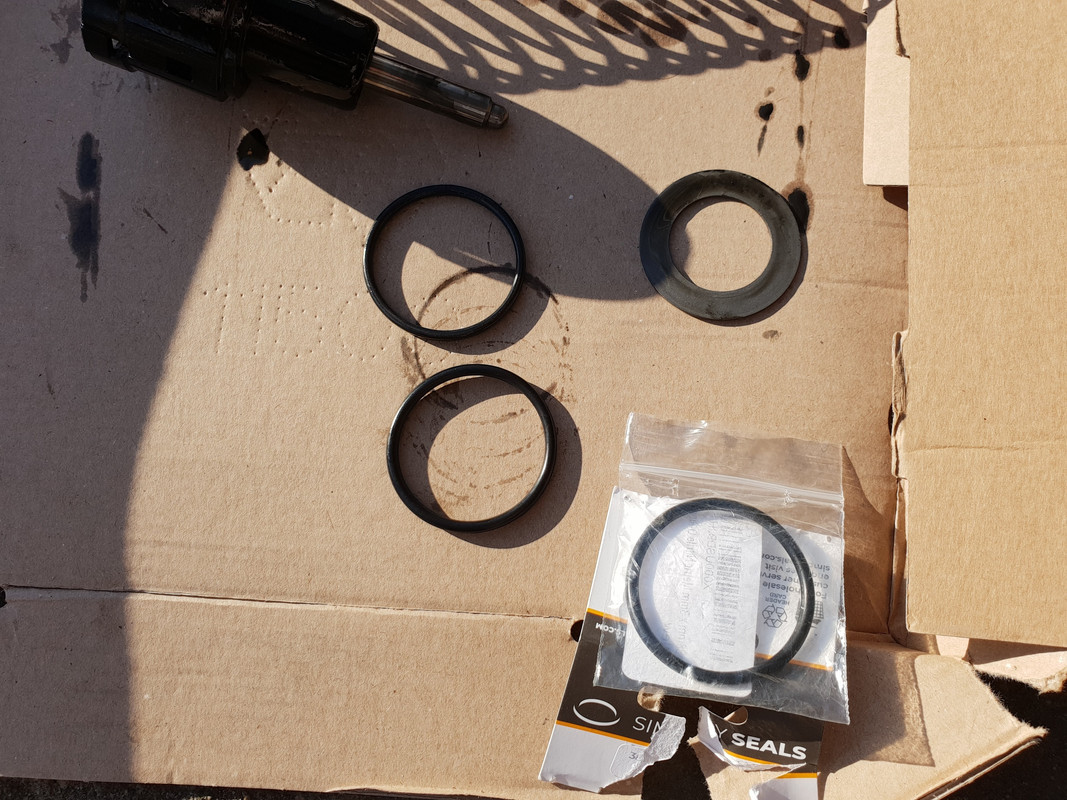
Mainly I wanted to address the leaking brake booster, a full rebuild would've been nice but I opted to try the simple & cheap fix and replace the culprit - the O-ring.
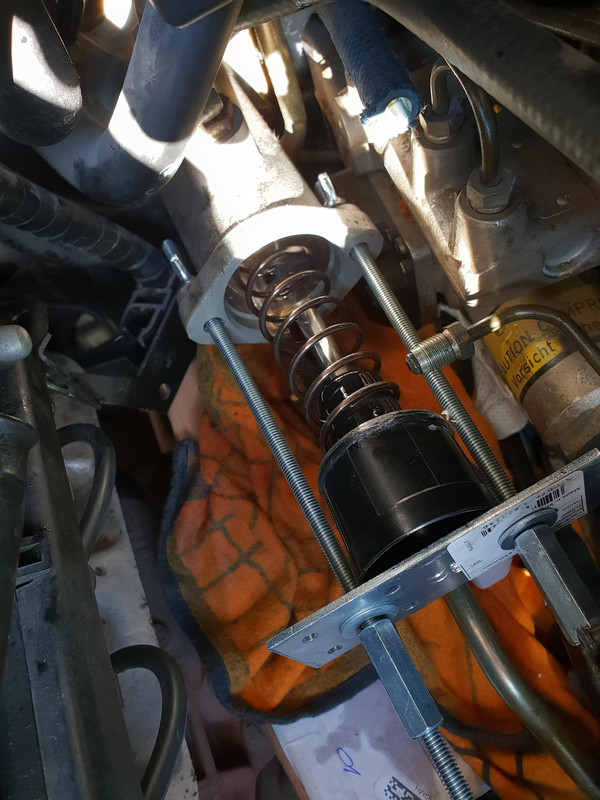
In order not to die from the vicious spring, I mocked-up a simple tool for safe removal of the spring.
Credits for the inspiration go to Jay (master6).
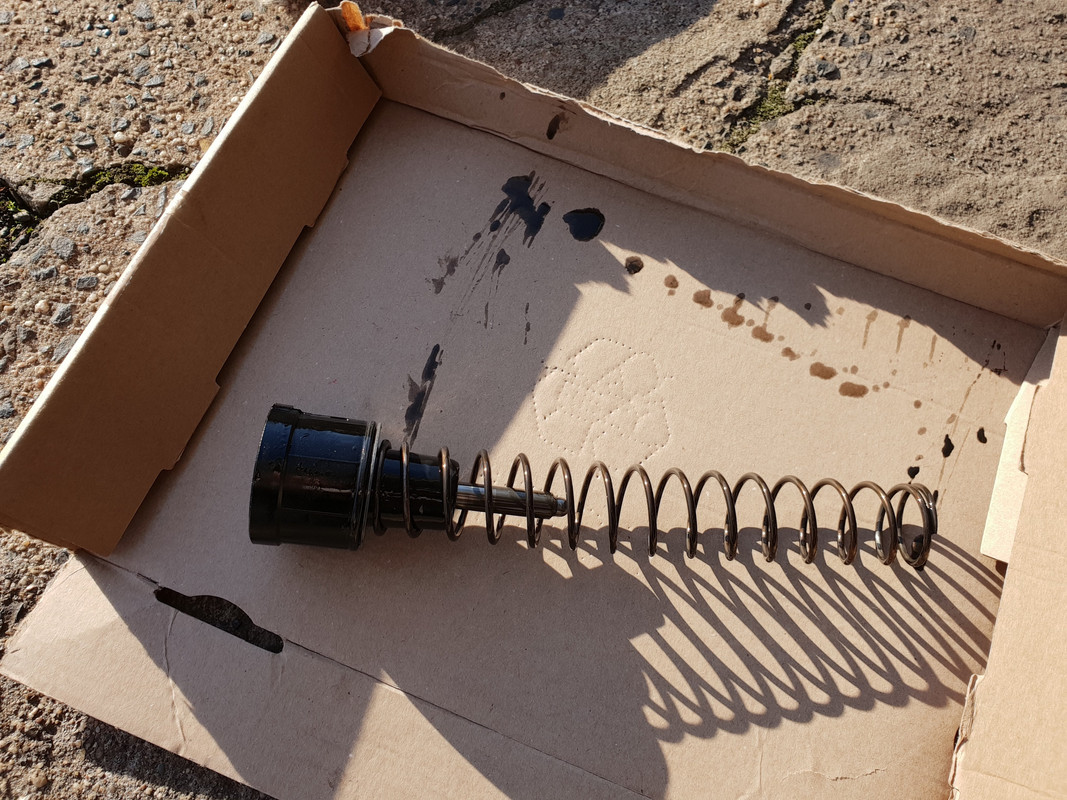
The O-ring was flat and not as elastic which caused fluid to leak out.
With a healthy dose of technische vaseline the new O-ring went it.
Got the new grommets for the master cylinder and new pressure switch as it too was leaking. I thought I released pressure from the system when replacing this stupid switch but apparently I didn't and fluid sprayed every-fucking-where. That was fun to clean up.
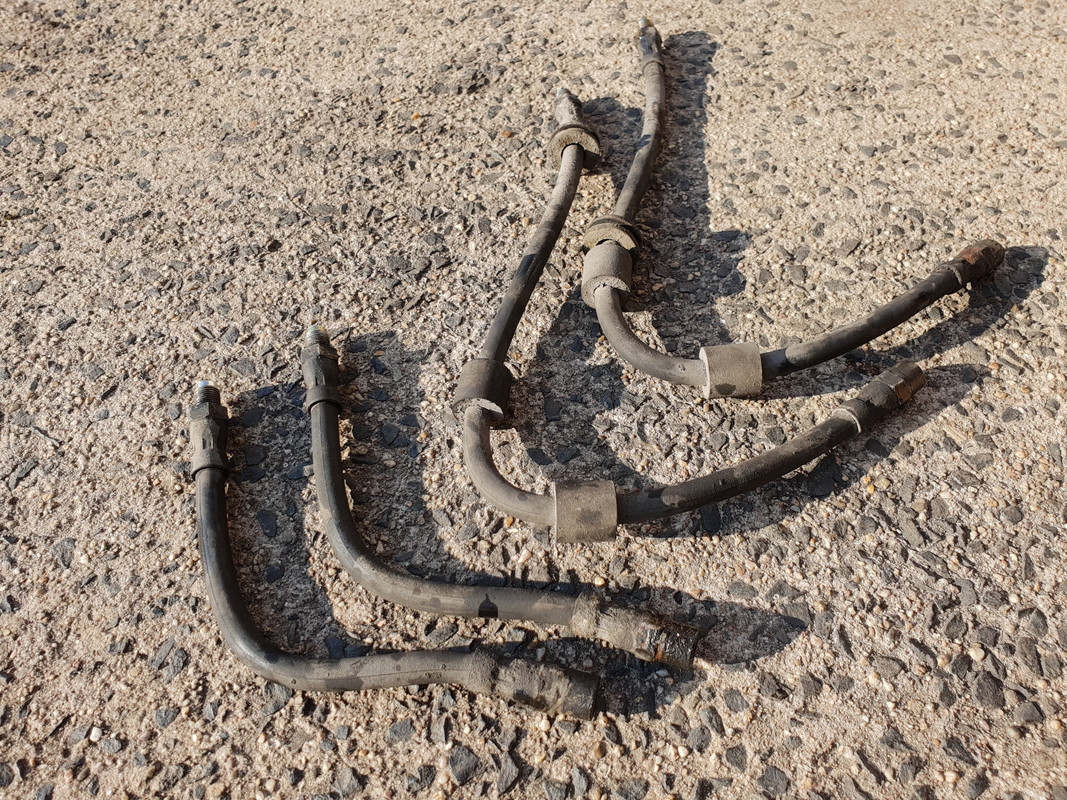
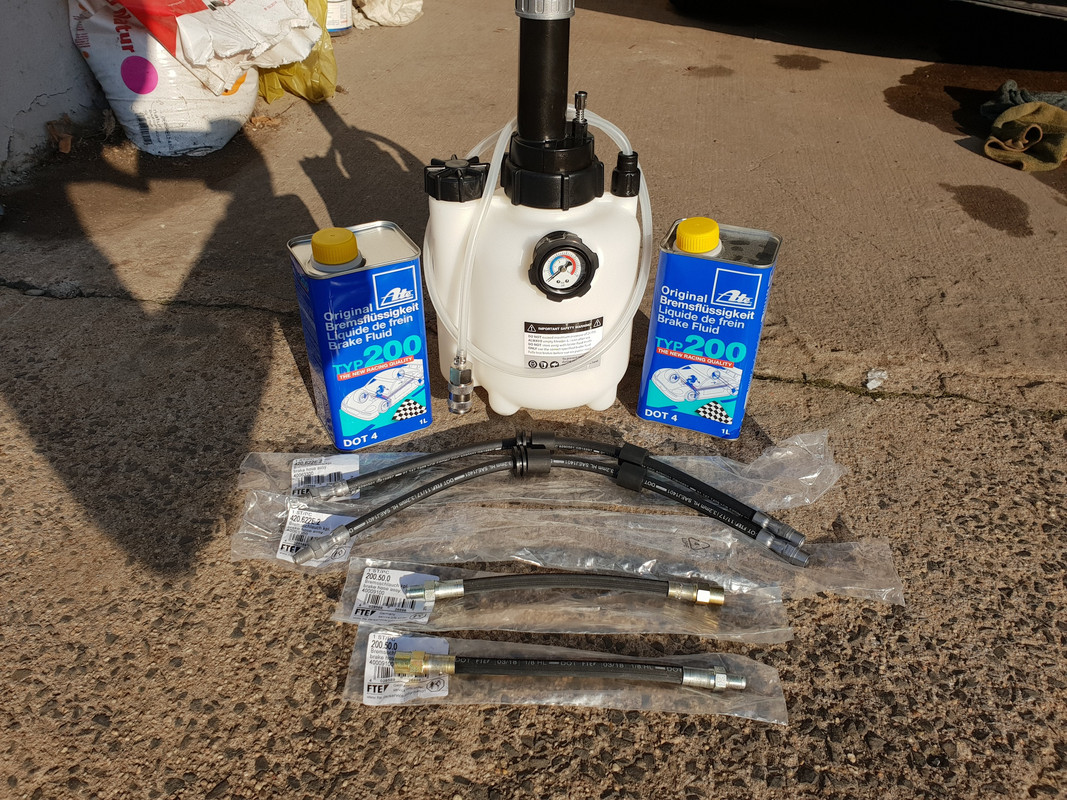
Replaced brake lines. They weren't as bad as I thought they'd be, just hardened.
Went with OEM FTE lines. Flushed nasty old brake fluid using a power bleeder plus fully depressing the pedal 12 times as per the manual. Flushed around 1.5 L of fluid.
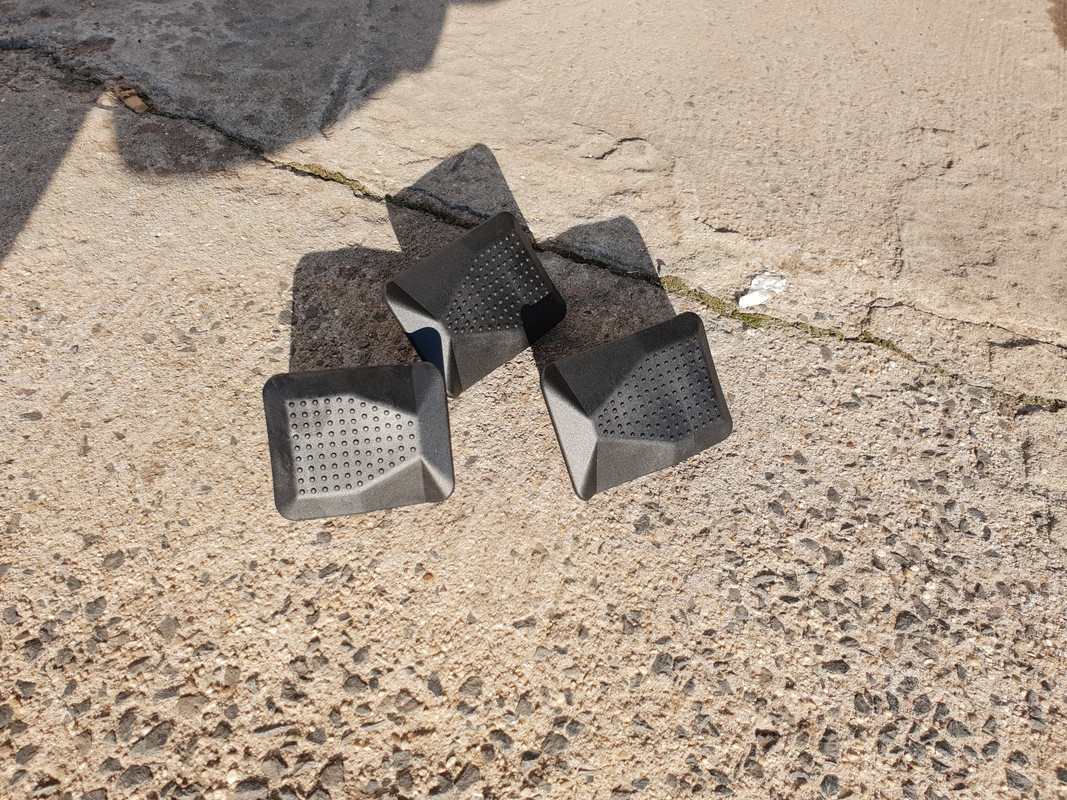
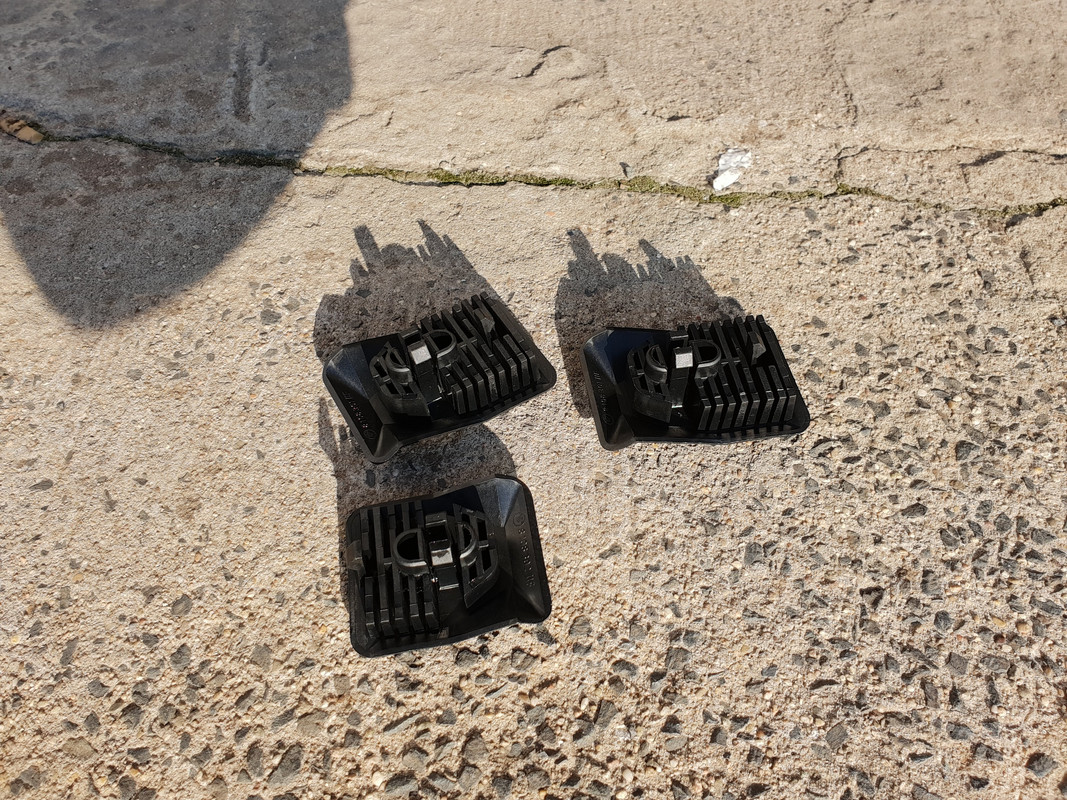
Also got 3 new jack pads since old ones decided they'd rather stay in Spain.
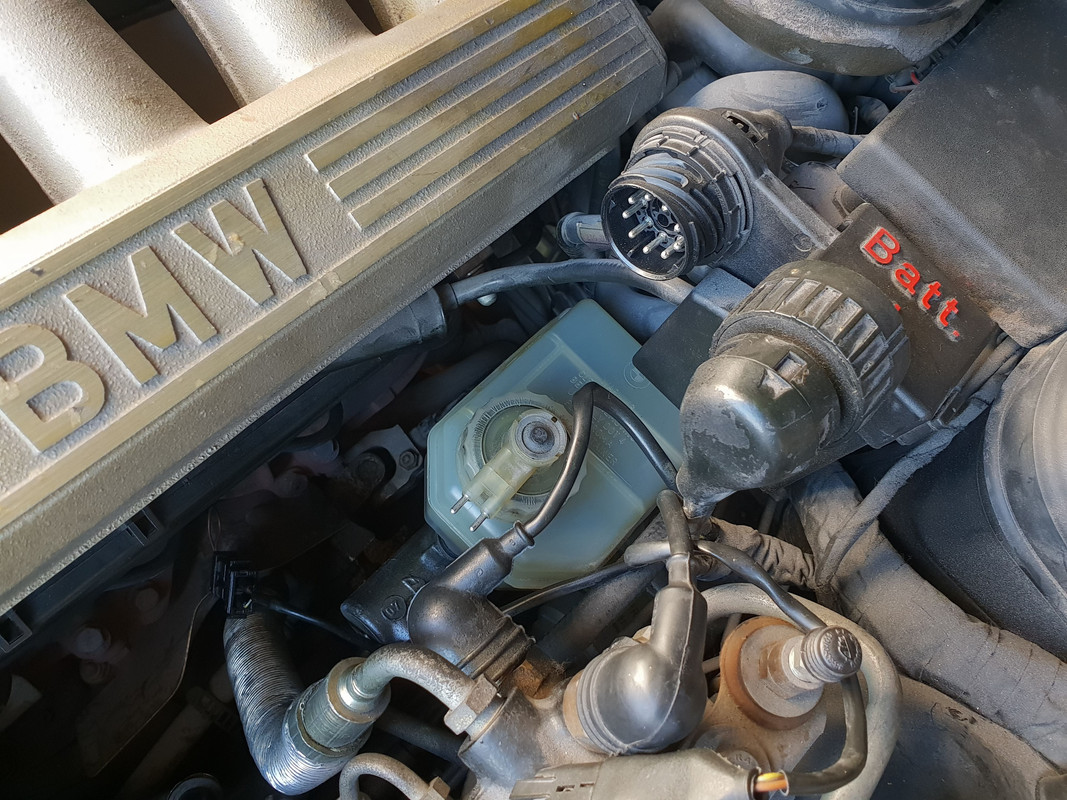
New washer fluid cap. The cap is NLA from BMW so I searched and someone posted that the one from Mercedes with a part number # 163 869 0508 fits.
It does but not perfect, it's a bit bigger in diameter but it's staying in place so it'll do.
The brake booster repair went well in the sense that it is no longer leaking but another problem presented when I started the car. The hydraulics/power steering is totally dead, the power steering pump is whining and screaming for its dear life.
Fluid level is good and I tried purging the air, tons of bubbles are coming out but the pump seems to be kaput. This damn pump has been a problem since the day I started the car. I ordered a seal kit from the dealer and going to crack it open and see what's going on and if it can be repaired, if not I'll get a replacement unit and hopefully that solves the issue. Also going to inspect all hoses for possible air leaks.
Two steps forward, one step back with this car.
Last edited by sreten; 01-23-2019 at 12:04 PM.
Member
One thing to check on the power steering pump BEFORE you go to all the trouble to rebuild is to check the rubber hose feeding the pump from the reservoir. Sometimes over age that hose gets soft and collapses on itself not allowing fluid to flow as it should. This has been known to cause those groaning noises you describe.
Good Luck!
CSi #18 - Car & Driver Magazine 1994 actual test car
-- Hellrot/Black-Gray (1 of 1 NA CSi color combination)
BMWCCA E31 Chapter International Clubs Liaison
North America Representative, 8er.or Board of Directors
Member
Thanks, Roger. I'll give it a good check over.
Sent from my SM-G965F using Tapatalk
Member
Update.
Checked all of the hoses and they are fine. The one feeding the pump is def not soft but not rock hard either, I'd say normal.
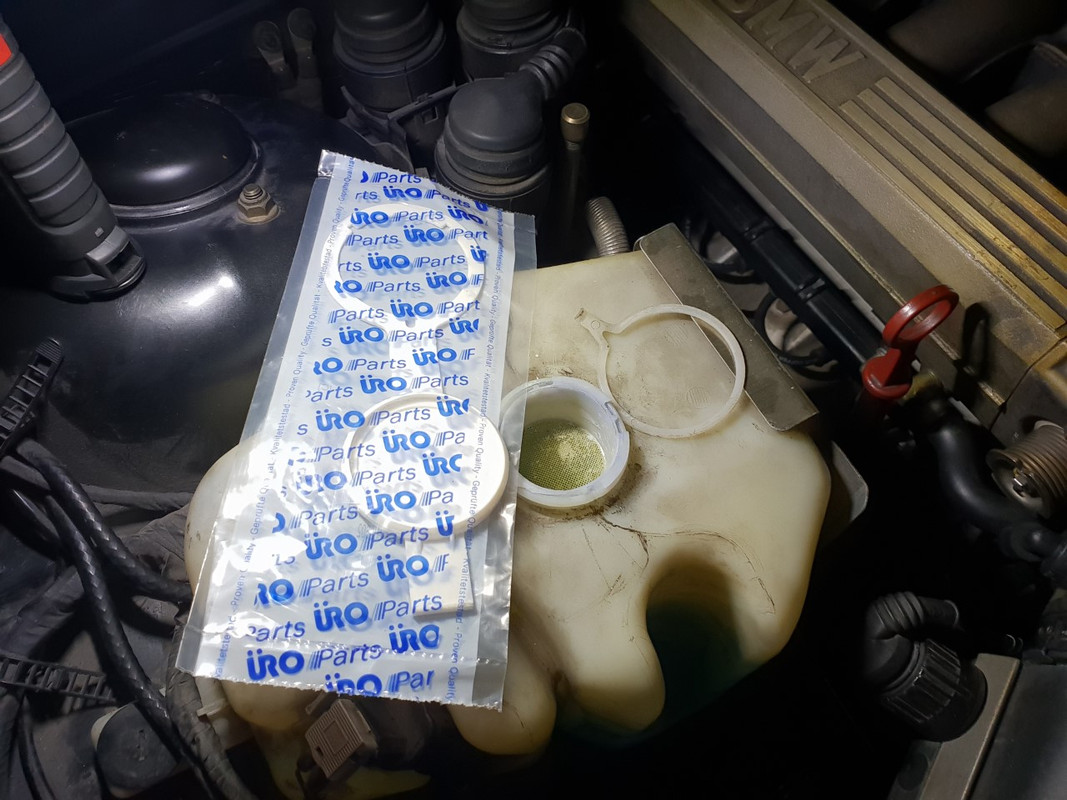
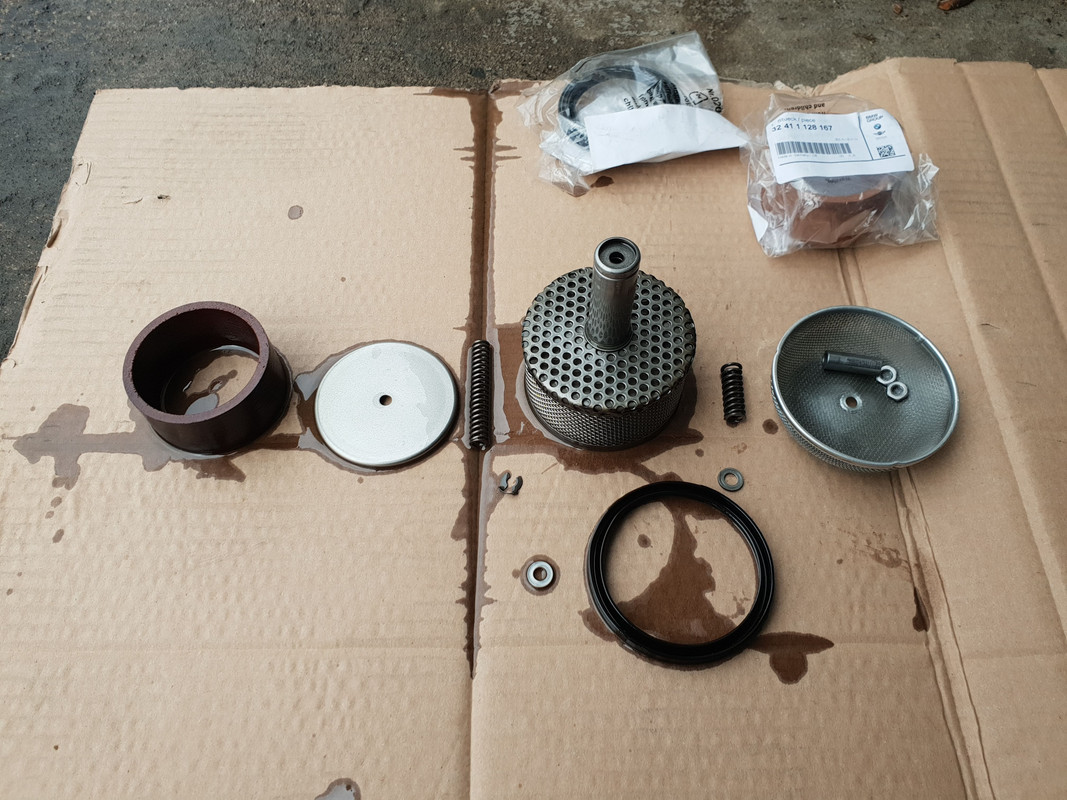
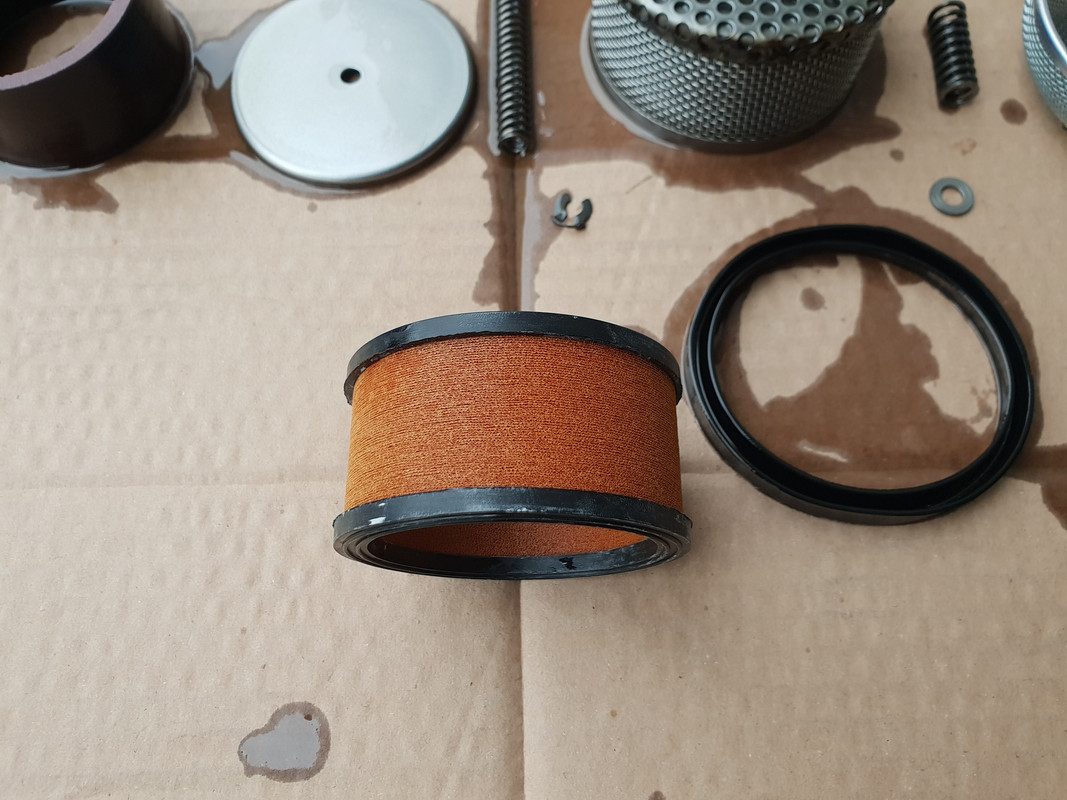
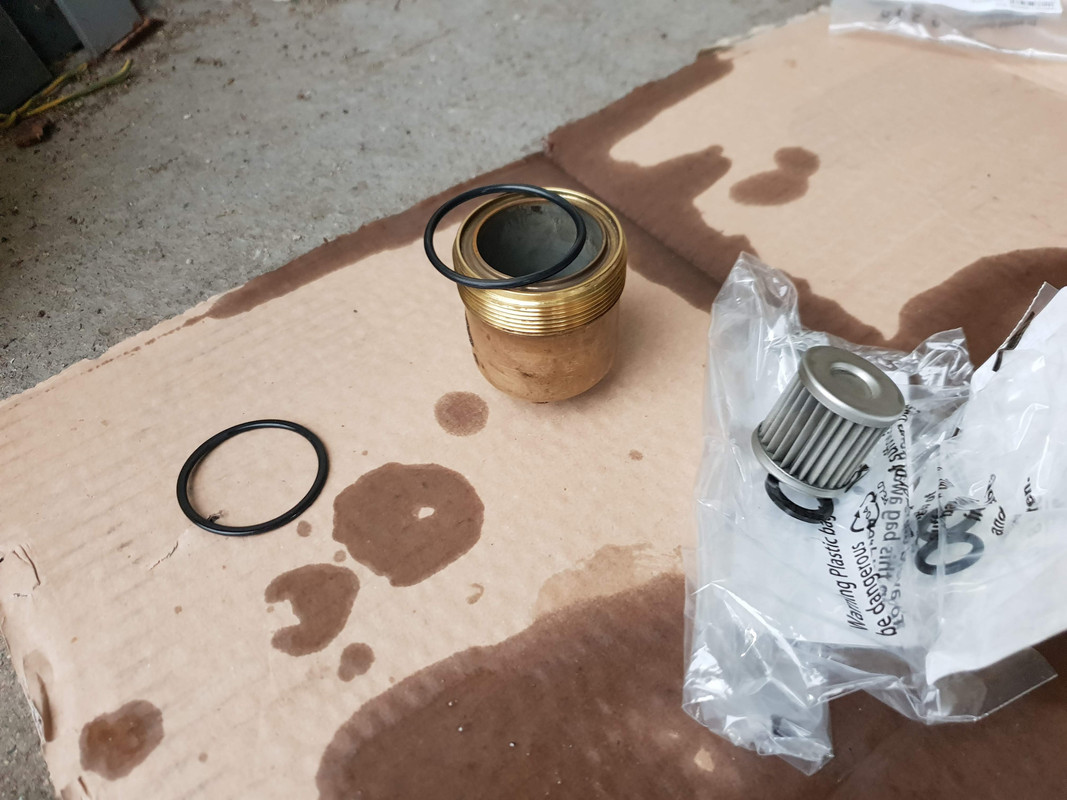
Replaced the filter in the reservoir.
Cleaned the bottom one and replaced the O-ring.
Added more Pentosin, purged the air by turning the steering wheel from lock to lock twice and stepping on the brake 5 times twice in a 30 seconds interval as per the manual.
The pump is quiet as a mouse now and power steering/hydraulics are working properly! So I'm not going to rebuild the pump even though I got the seal kit as it seems it's not needed.
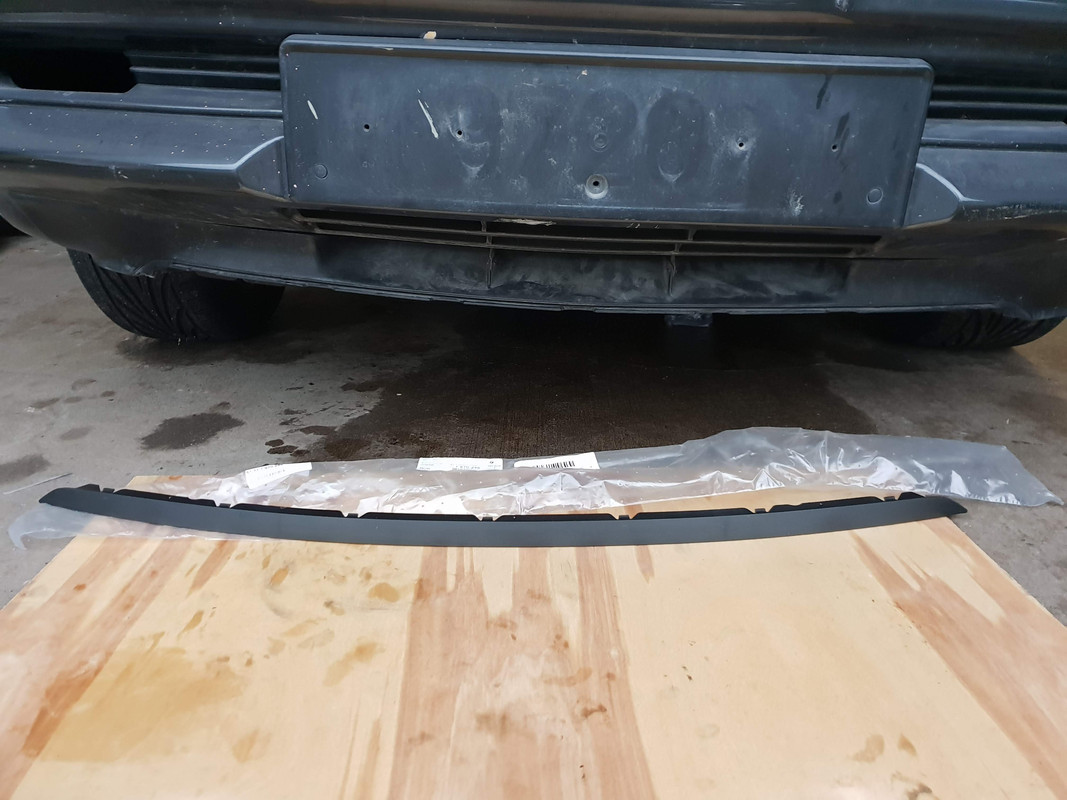
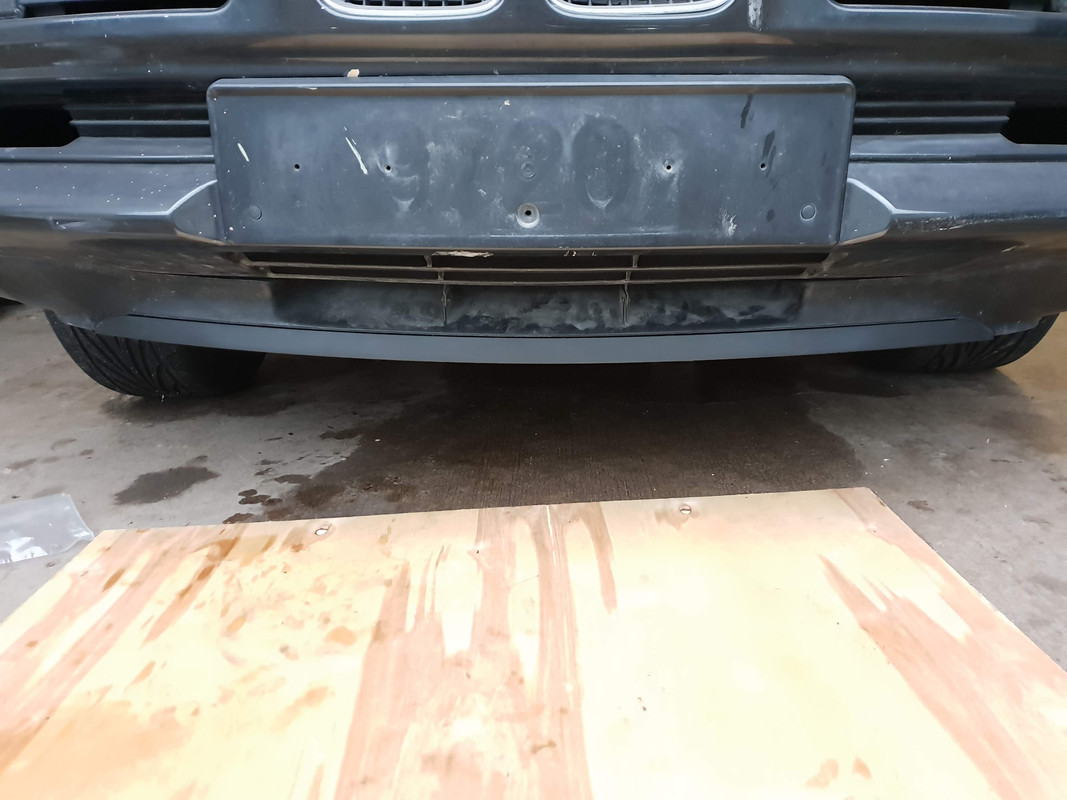
The front lip was missing, got the replacement from the dealer. Pretty pricey piece of plastic, almost 100 euros.
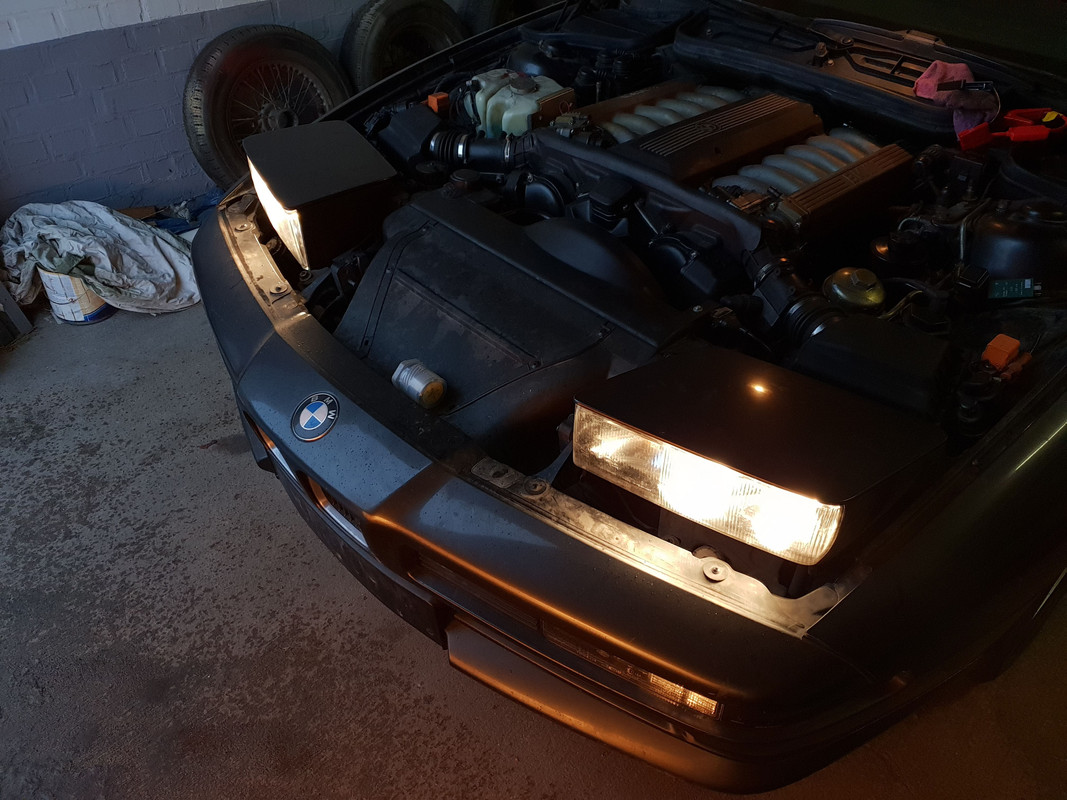
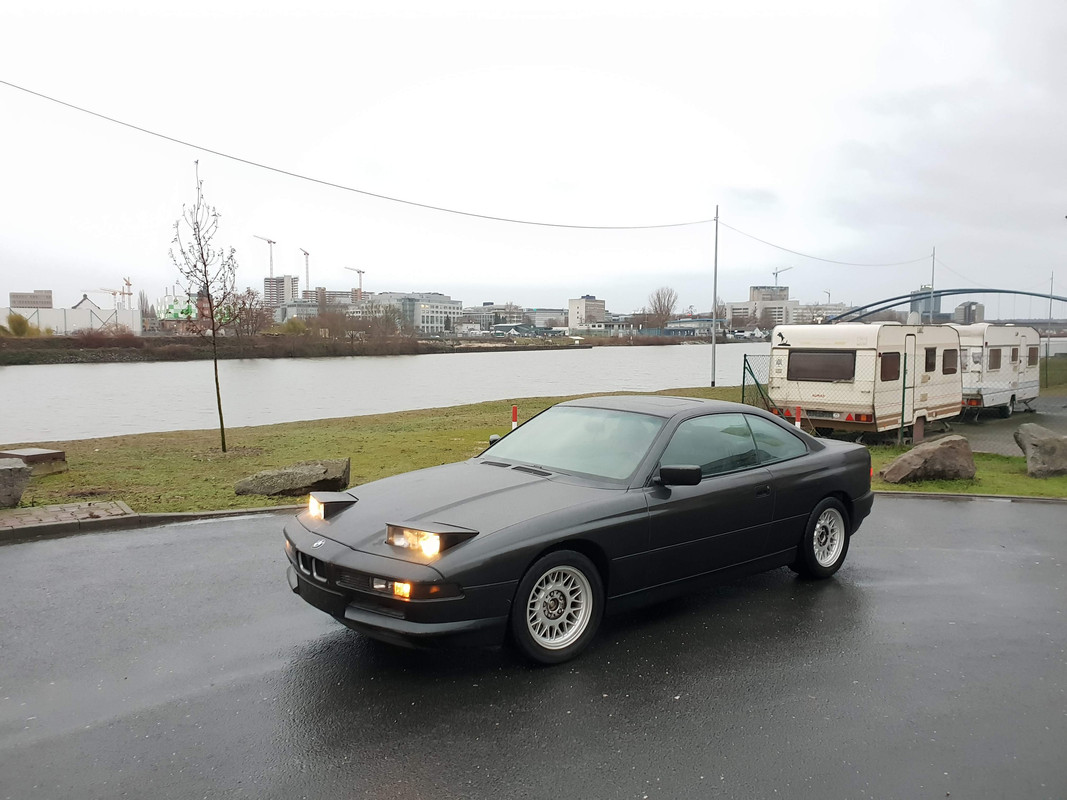
After 10 years or so the old girl is back on the road!
Pretty proud moment. I rented a new garage in a sorta industrial area where I can work on the car without anyone bugging me. There's a closed stretch of road right in front of it so I was able to stretch its legs and damn it feels good!
The engine is very healthy and revs happily. I think I'll bleed the brake once again for good measure, suspension needs to be checked over but mostly I'm waiting for at least a bit better weather so I can detail the interior and do paint correction. It needs it badly.
Last edited by sreten; 01-28-2019 at 10:46 AM.
Member
Congrats! It always brings a big smile on your face during the first drive after doing all that work.
CSi #18 - Car & Driver Magazine 1994 actual test car
-- Hellrot/Black-Gray (1 of 1 NA CSi color combination)
BMWCCA E31 Chapter International Clubs Liaison
North America Representative, 8er.or Board of Directors
Member
BMW CCA Member
Thumbs Up!
Mark in mid-MO
1993 BMW 850Ci 6-speed
2011 Cadi CTS coupe 6-speed
Member
Thanks! Indeed it does!
Thanks!
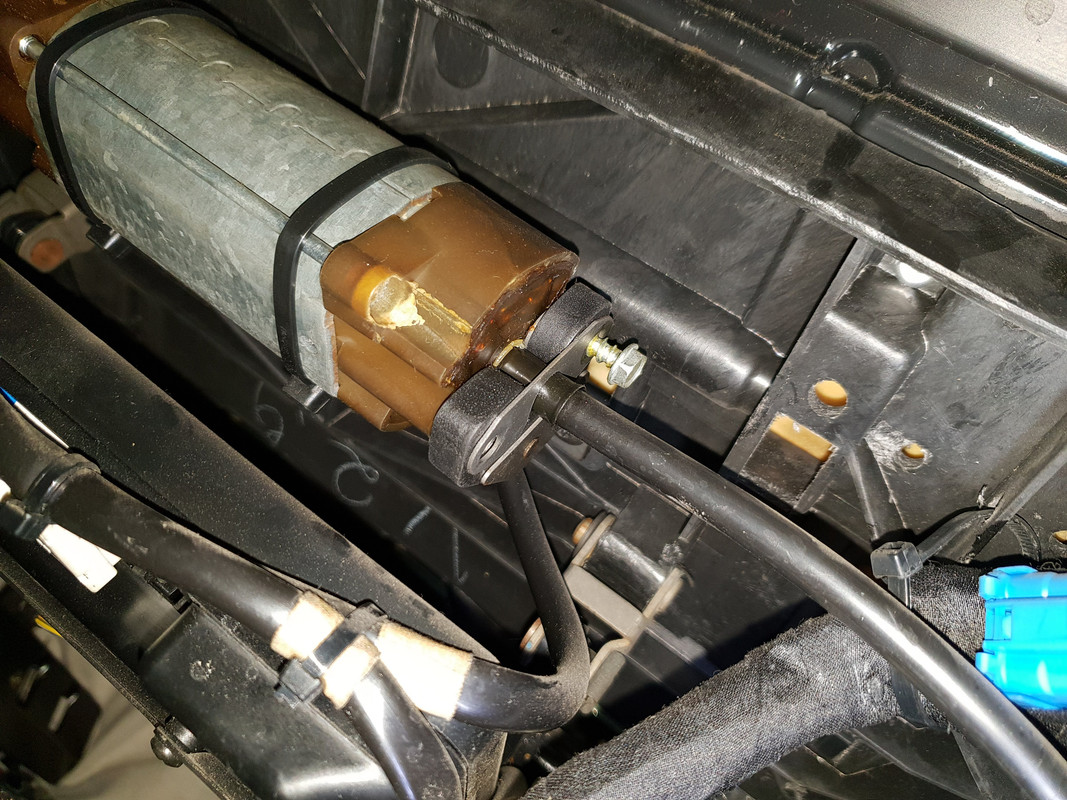
Fixed twisting bottom part of the drivers seat. Easy DIY but man this bastard is heavy.
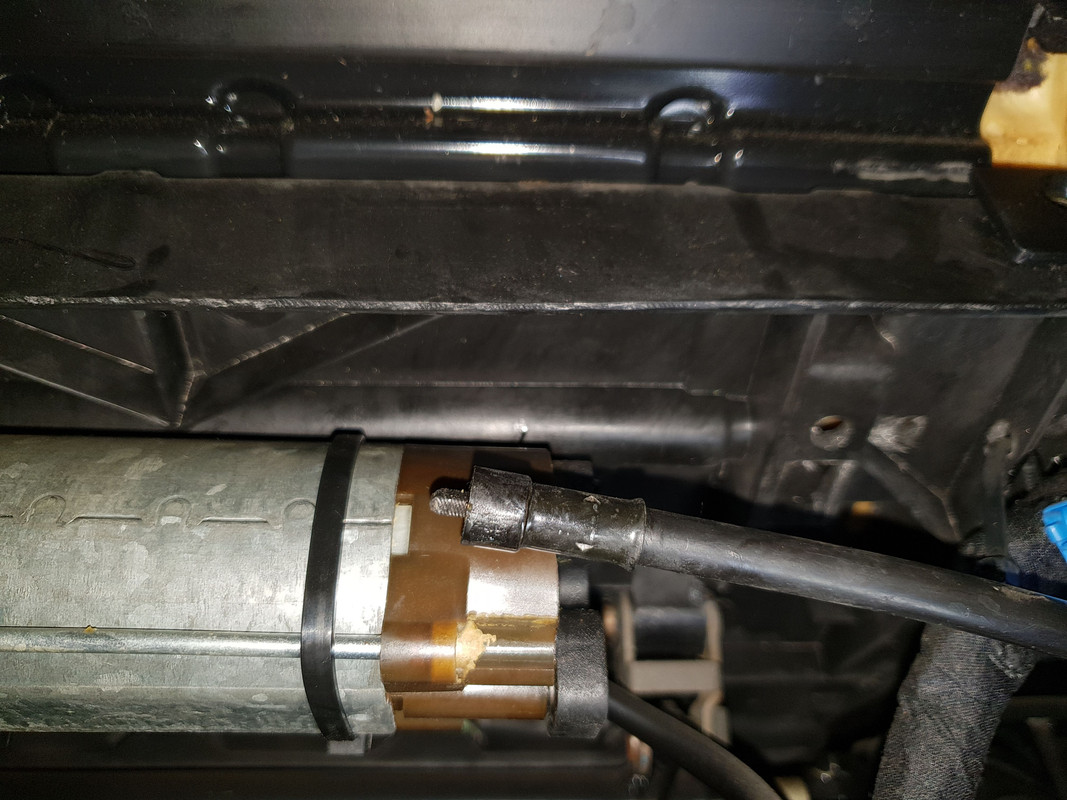
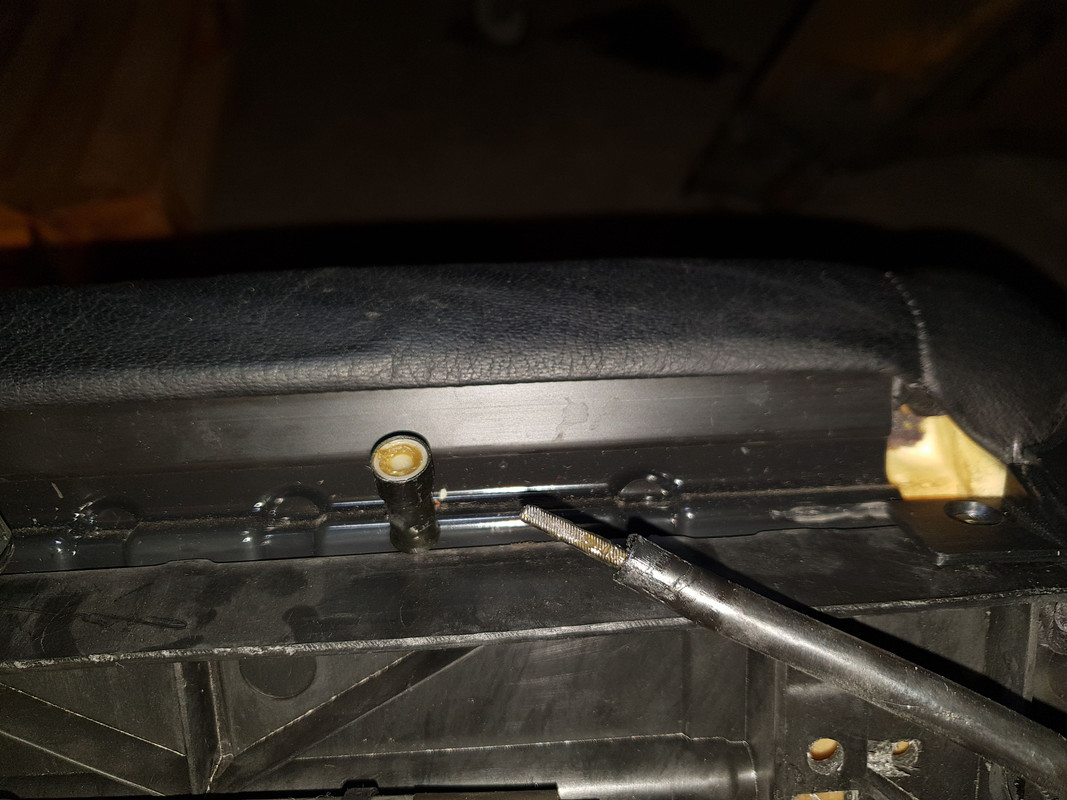
Cable fully pressed into the cable sheath. Pretty short.
I cut off around 6 mm and the seat is moving in all directions flawlessly.
I also wanted to ask for feedback on fluid for the 6-speed tranny. Which fluid is preferred amongst members? I haven't checked the label on the gearbox yet.
I did a search for it and Redline MTL and RP Synchromax are coming up the most but those are not easily available in Europe, at least not at a reasonable price.
 Posting Permissions


 Reply With Quote


Bookmarks