
 Member
Ok, so a few weeks ago I stripped down my 14 year old charcoal canister filter so see what was in it. I pretty much expected it to be destruction testing but it was actually pretty straightforward.
With my car having just 40k miles and having been garaged all it's life, I was surprised to see surface rust along the lowest edge of the canister and with it being full of petrol fumes, about 6" away from the exhaust manifold, I would recommend anyone to check the structural integrity of theirs at periodic intervals. (Maybe Bi-Annually?)
So, with mine being pretty sound, I investigated the possibility of rebuilding it.
Now as you all know, I am not a purist when it comes to my carand my personal philosophy is, that if I can make something better than it was, then the cost is secondary, if I can make something of equal or better quality for the same price, then fine, but I will not entertain saving money on an inferior product. In this case, I believe we can rebuild the canister for about 10% of its replacement cost, plus an hours labour, at the same quality.
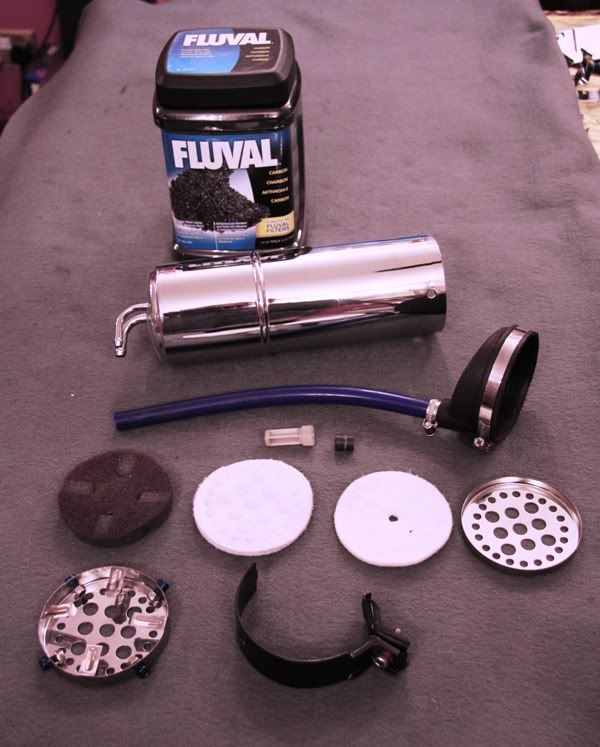
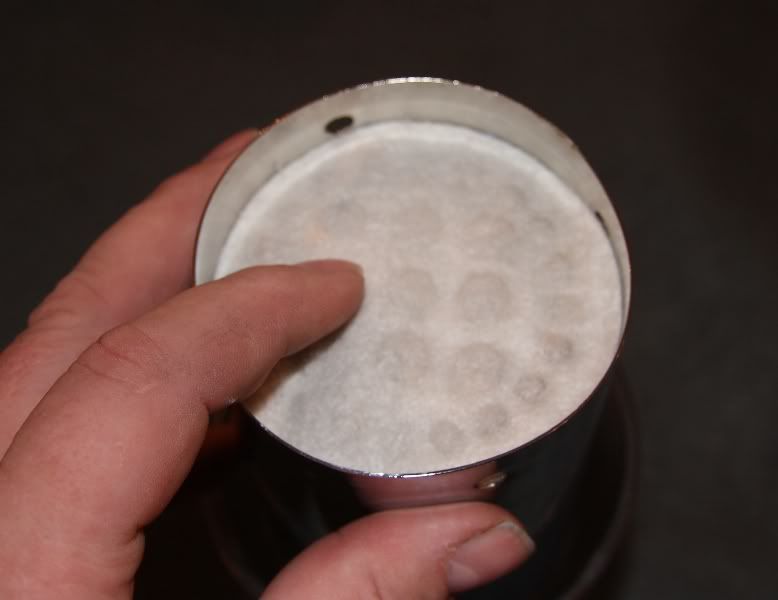
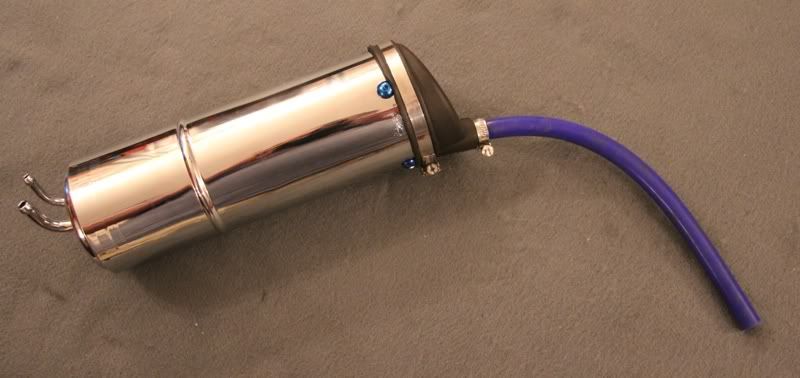
So this is what we start with........
Now if your canister has more than surface rust then forget the whole thing and buy a new one. If corrosion is just surface, then the enpty canister can be blasted and powder coated. I have polished and chromed mine to reflect the radiant heat from the exhaust manifold.
I found that a 60 deg short wash with a 1200 spin speed nicely cleaned the 2 fibre and single foam filters.
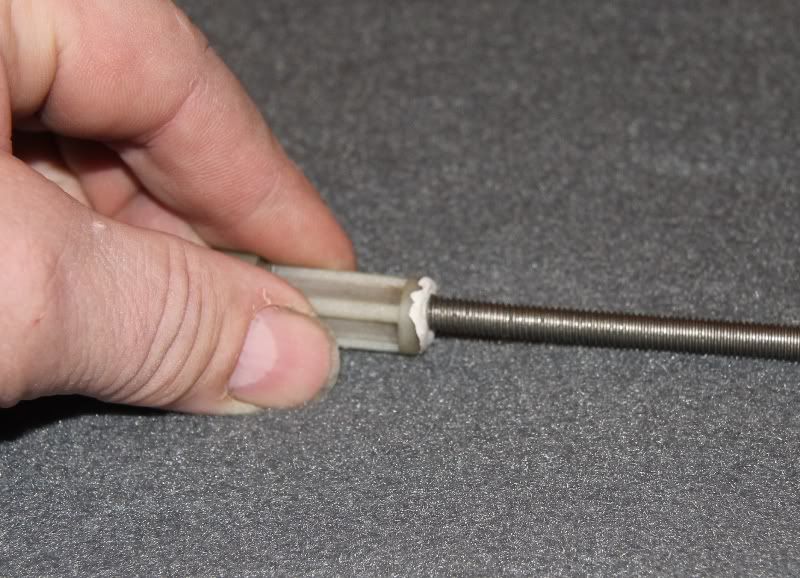
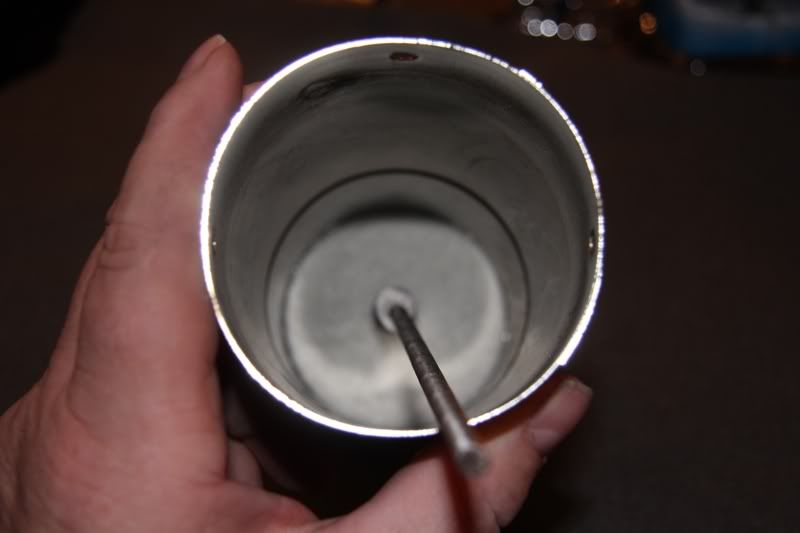
To reassemble, I used a length of 6mm rod to guide the parts onto the inner spout. Starting with the first steel mesh...........
Followed by the slightly smaller fibre filter.........
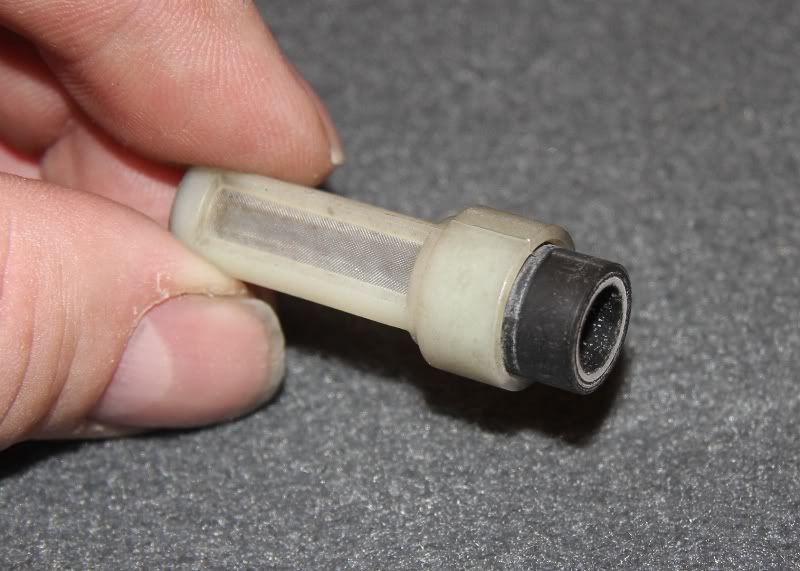
and then seperating the short rubber tube from the nylon filter............
Fitted the rubber by sliding it down the stud. Then, using a putty adhesive (Blu-Tac) on the end of the stud..........
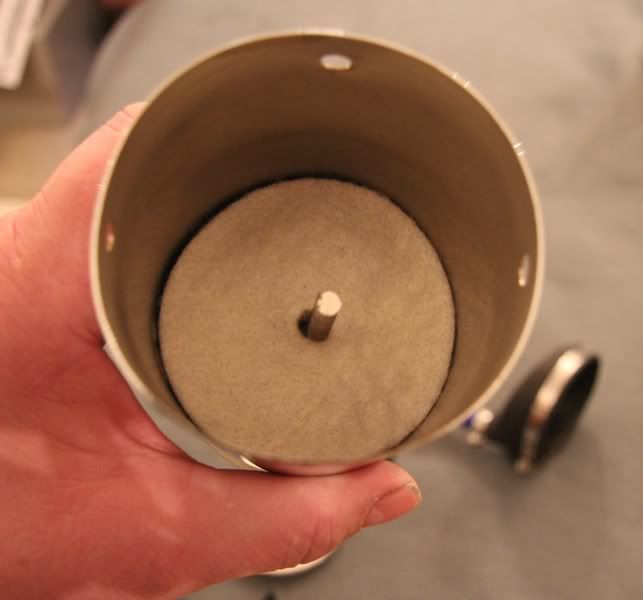
Fitted the filter back onto the seal inside the canister.
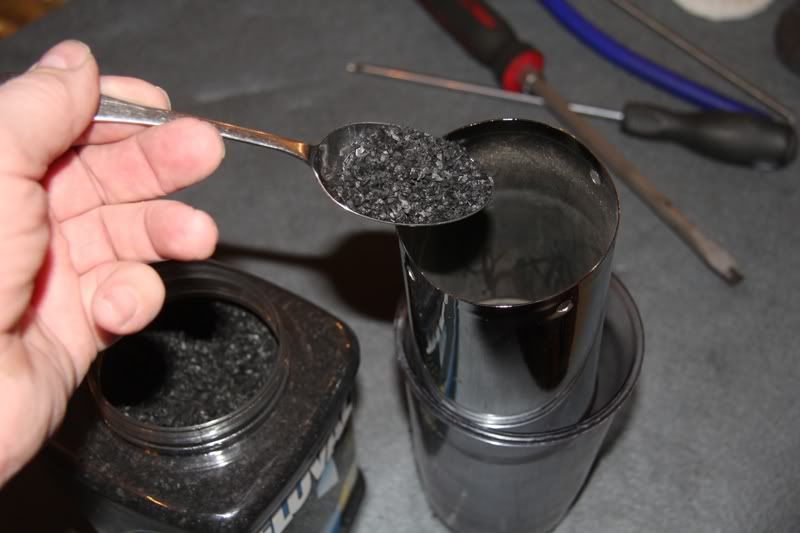
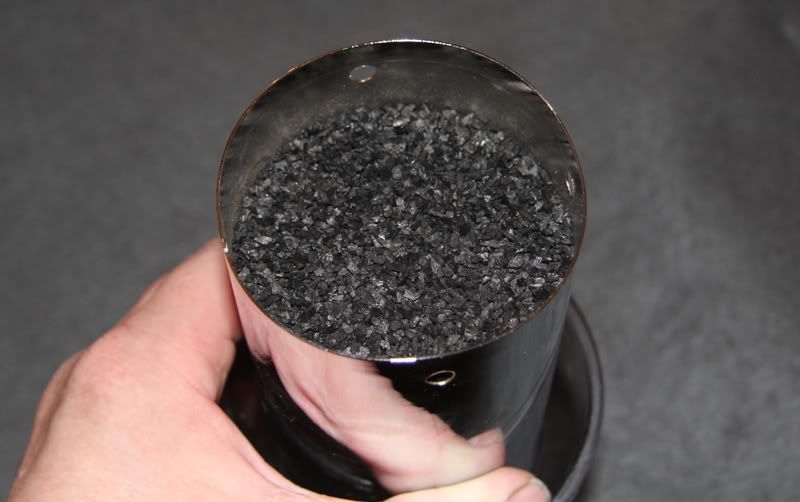
Next, using half a jar of aquarium activated carbon filter media, or abour £6.00 worth, refill the canister.
Shaking the canister gently as you go to settle the carbon. Continue this until the canister is very slightly fuller than before.
Then refit the second fibre filter pad.
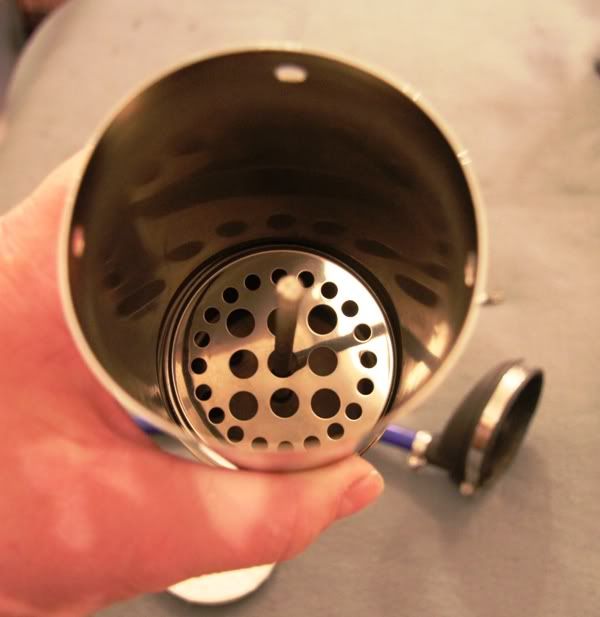
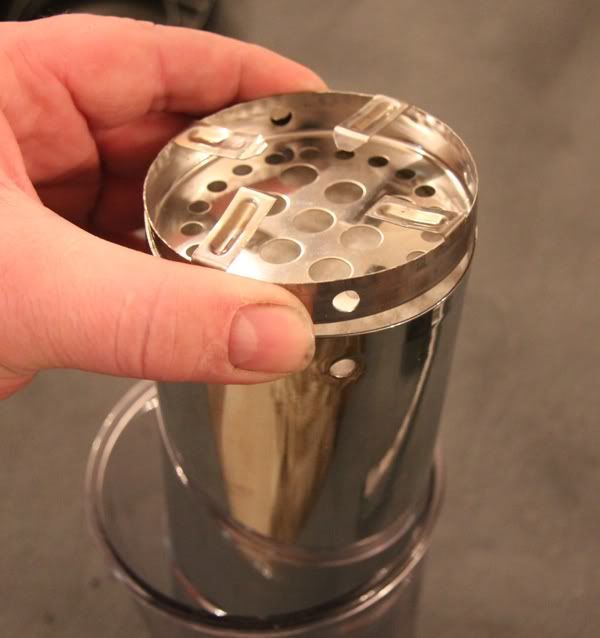
Now offer up the outer metal mesh and gently tap/vibrate the canister to aid in the re-alignment of the fixing holes. The vibration further settles the carbon, compacting it to allow this.
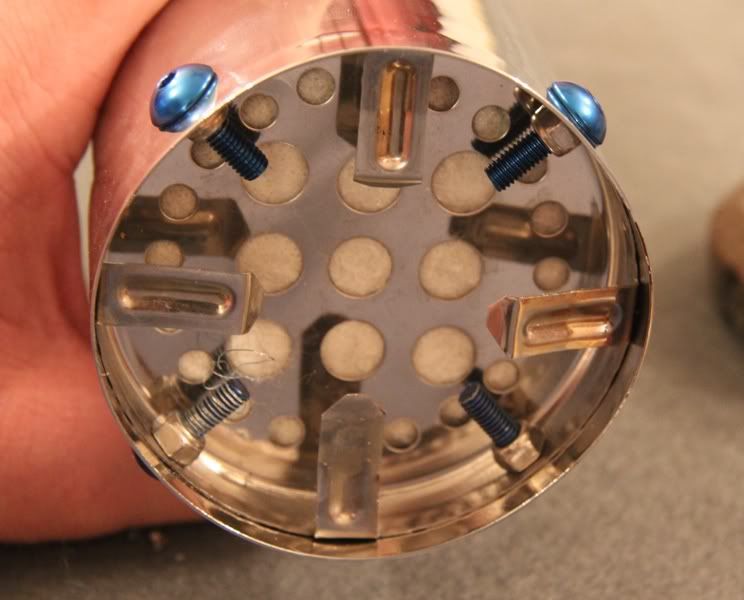
Using bolts and stainless locknuts, secure the end mesh filter.......(I used M5 mushroom headed socket bolts)
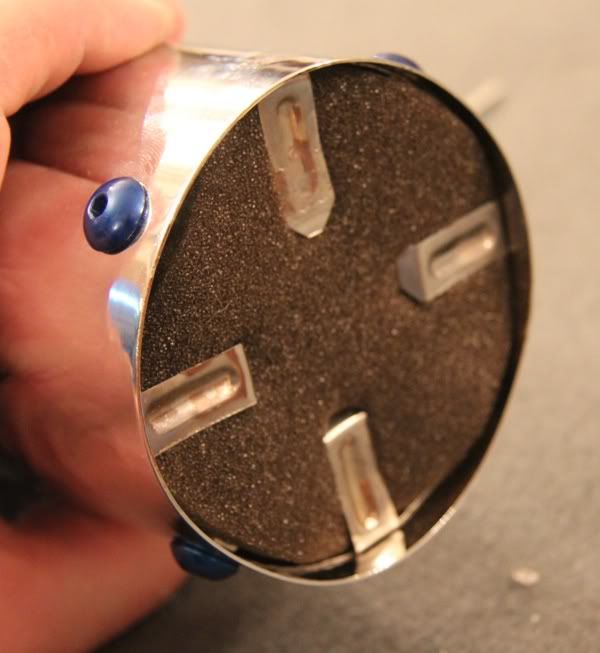
and then refit the foam filter element.
Finally, refit the end rubber boot and breather hose and the rebuild is complete.
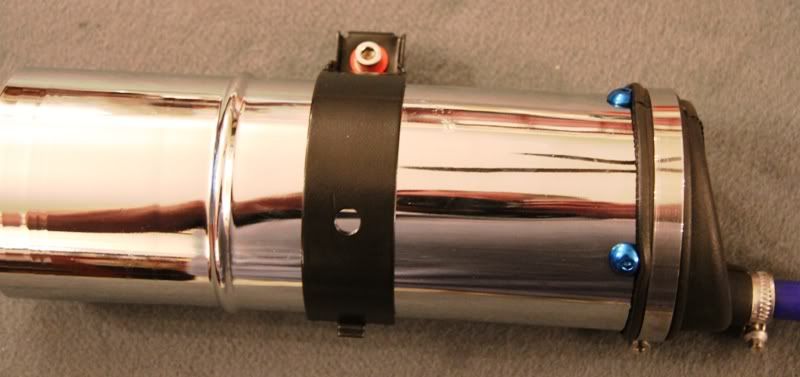
It's then just a matter of refitting the canister to the car, here seen with newly powder coated bracket and stainless cap head bolt.
And so, for less than £15.00 for all the parts and services, you have an as new carbon filter.
8Tech.
Last edited by shogun; 01-16-2019 at 10:31 PM.
 Member
is this canister on all e31? What does it do?
Member
Yes, it is but this one shown is for all V12 850's.
The fuel tank vents into one end and the fumes are absorbed by the carbon. The canister is also connected through 2 non return vaves with electrical solenoids that connect it to the inlet manifold via the DK motors.
To vent the tank, the solenoids open under certain running conditions to create a vacuum in the canister so that the fumes are burnt off by the engine rather than vented to atmosphere.
The other end of the canister IS however vented to atmosphere and this is where I believe the fuel smell comes from when the carbon inside the canister is saturated.
HTH,
8Tech.
Member
So the fuel smell inside the cabin could be because of this? Where is it located?
Only pre-bungle bimmers
It's all here I think -->> http://forums.bimmerforums.com/forum...php?p=19255520Originally Posted by Fatandre

CB42613, CB42577, DH29770 and counting...
Member
just rerplaced mine...fuel smell gone..except it cost me about 200$$$!!!!
worth it in terms of my health and breathing
Hamann's baby!
very nice write up...so that activated carbon is like the one used for aquariums right?
CB42366 - 1991 850i 6-speed. Brilliantrot & Black Nappa Leather
CD00144 - 1994 850CSi. Hellrot & Black Nappa Leather
My other projects:
Supercharged Tbirds, V8 Tbirds, V8 Mustang Convertible, Audi V8 Quattro & Audi S8
Member
Where is this canister exactly?
Member
In the linked write up he says he removes the washer bottle and then the clamp to remove that canister. So I think it's somewhere under the washer bottle. I'll go have a look.
LouM...
edit: Yep, Right under the washer bottle. You will need to remove the heat shield too. Unless it comes out with the washer. You can see the hoses on either end when you look on either side of the washer.
I also have some surface rust on top of the canister from the washer fluid I think. Looks like he did too based on his cleaning of the canister in that post.
L...
Kind of fuzzy but this is looking down the rear of the washer.
This is looking down the front of the washer right behind the air cleaner box.

Only pre-bungle bimmers
Did you read the label on the jar in first picture?
CB42613, CB42577, DH29770 and counting...
Hamann's baby!
do questions help answer questions?
I think this is called Socratic method or something.
I did briefly glance ad the pic when I first read the post but did not pay attention. I guess it's some sort of carbon brand...i wouldnt know since I buy my filters prefilled for my 35 gallon tank.
CB42366 - 1991 850i 6-speed. Brilliantrot & Black Nappa Leather
CD00144 - 1994 850CSi. Hellrot & Black Nappa Leather
My other projects:
Supercharged Tbirds, V8 Tbirds, V8 Mustang Convertible, Audi V8 Quattro & Audi S8
Only pre-bungle bimmers
Try paying attention next time and reading the whole thread carefully. Fwiw now, I posted a link early on in this thread where you'll find http://forums.bimmerforums.com/forum...16&postcount=5
CB42613, CB42577, DH29770 and counting...
Member
Reviving this thread to say thank you! I rebuilt my E30 canister today using this same technique.
shade tree mechanic
Moderator
Another forum member has on his own website also a good info on this + much more DIY http://www.km5tz.com/BMW%20850i.htm
page 1 : 1.Introduction, 2.Battery acid corrosion, 3. Hydraulic reservoir and fluid lines, 4. Engine mounts, 5. Aux pump and heater control valve, 6.DK throttle body rebuild and test
page 2: 1.Top end dismantle, 2.Banjo bolts, 3.Intake manifold refurb, 4.Fuel injector refurb, 5.Valley pan cover, 6.Engine wiring
page 3: 1.Charcoal canister refurb, 2.Acoustic cover refurb, 3.Valve stem seals, 4.Cam timing, 5.Oil pan gasket, 6.Intake gaskets
page 4: 1.Gas pedal bushings, 2.Dash removal and restoration, 3.Heater core replace, 4.GM module capacitor replacement, 5.Hydraulic brake booster rebuild
page 5: 1. Steering box replacement, 2. Fuel tank breather, 3. Sway bar bushings, 4. Transmission oil pan filter and gasket, 5. Transmission shifter shaft seal, 6. Fuel pump check (fuel pressure),7. Top end rebuild, 8. Fuel filters + hoses replacement,9. ADS interface, 10. FTP reflector
page 6: 1.Flashlight repair, 2.Its all back together and running! 3.New tires and wheel touchup, 4.Brake lines and caliper rebuild, 5.Front sway bar end links, 6.Spare Engine, Transmission and more!, 7.Front seat cable repair
page 7: 1.Strong Strut, 2.New seats, 3.Rear drive train/suspension rebuild, 4.New steering wheel
page 8: 1.Transmission valve body rebuild, 2.A lucky find on Craigslist (lots of 850i parts), 3.Power steering pump rebuild
page 9: 1.MAF testing , 2.SMOG results
page 10: 1.HomeLink garage door opener, 2.CarPC
page 11: 1.CarPC (cont)
page 12: 1.Ignition Waveform analysis, 2.QuickJack B5000SLX, 3.Engine hoist, 4.HiFi system,5.Exhaust back pressure test
page 13: 1.Spare engine refurbish
E32 has the same charcoal canister system and therefore I will move a copy of this very good, informative DIY into the E32 forum
Shogun tricks and tips for the E32 series are HERE!
 Posting Permissions


Bookmarks