
 Member
I may have missed it, but who made your headers/mounts?
Very quick progression! Love the color.
Member
Originally Posted by Tim Mc

Than you for the compliments, the headers and engine mount are the cxracing kit... To be honest im not to happy with them. I am not sure how in the hell the spark plug wires are supposed to fit without touching the headers, going to mess around with it more tomorrow but the tubes are in hte way and some of the wires rest on them.
Does anyone out there run cxracing headers and stock coil/wire setup? I think i might have to do the coil relocation mod.
Derp
Remote mount the two coils nearest the fire wall on the driver's side. No need for a grounding strap back to the head as they're grounded via the harness already.
Member
Awesome, i'll mock that up tonight. Hopefully i can re-use the stock wires and not have to buy a whole new longer wire set.... although a coil relocation mod would look cool I don't want to deal with it right now... I just want to get this damn thing started
Member
Worked on the car a bit last night, Was incredibly frustrating... I realized the machine shop put my valve covers on backwards......... I am even more frustrated that I didn't notice this until today, The last remaining bolt to remove it from the driver side is hard to get to, the brake booster is in the way.... So my options are
--Order a new valve cover for the driver side and place it on the passenger side so i can have that nipple to run the vacuum line to
--Remove brake booster and install the new smaller mercedes unit i have that I read about in another thread(I haven't done much research on getting this to work)
--Leave it as is and just run the vacuum from the throttle body to the driver side vacuum nipple
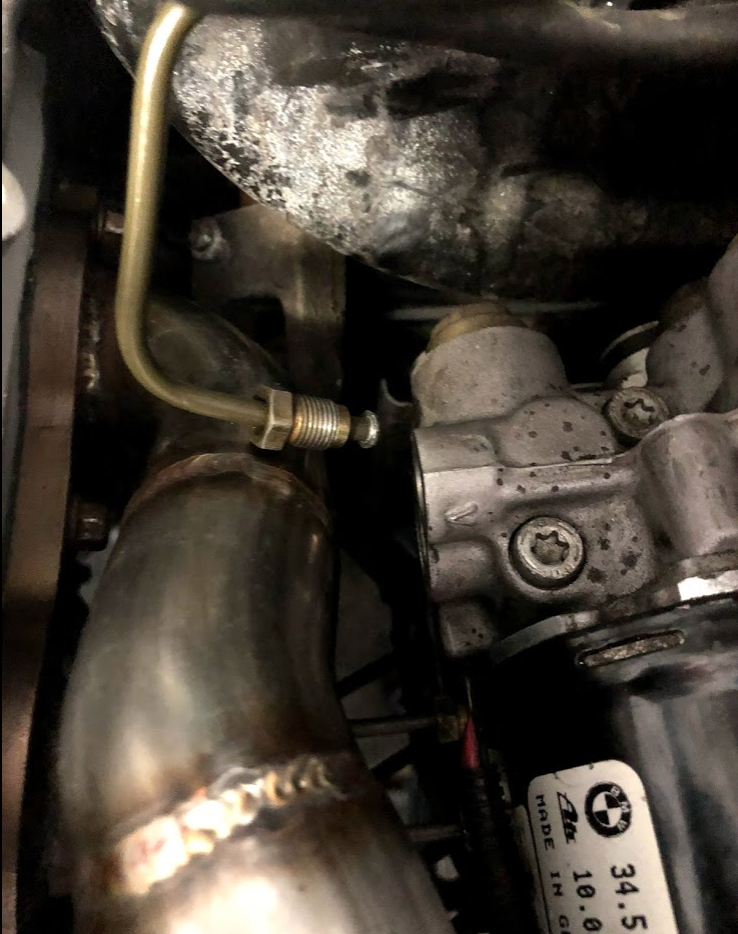
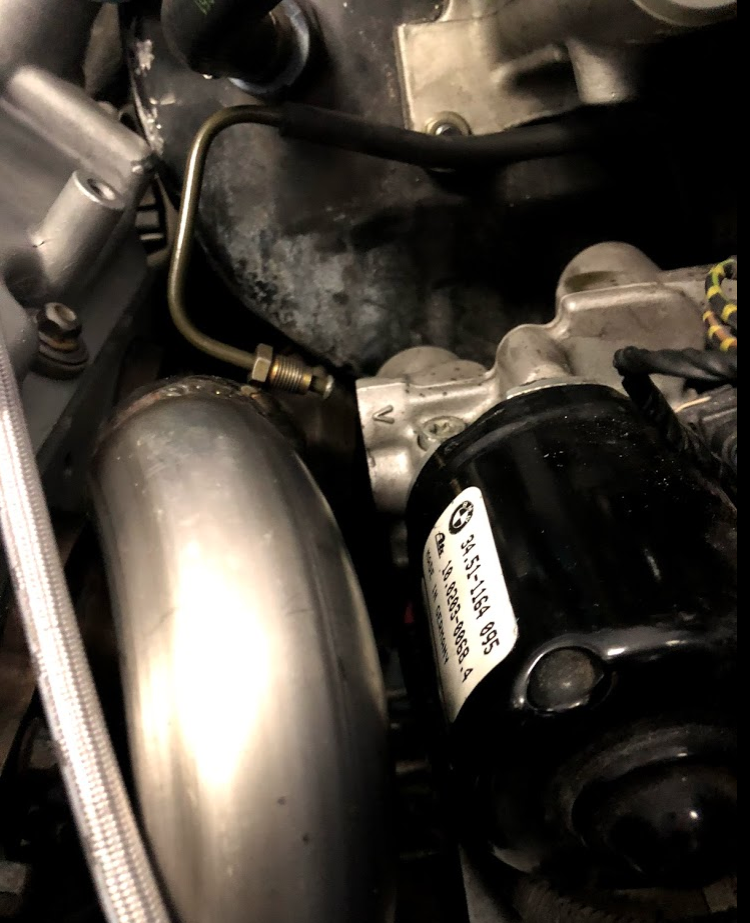
Lastly another blunder, I had forgotten that I disconnected one of the abs brake lines when i was installing the headers, well now this one seems to not go in as it would hit the header, I need to figure out how to replace this line with a new one or delete it or relocate the abs.....
Last night was a frustrating night, BUT what sense is a project without a few WTF moments along the way....
Any thoughts/ideas especially on the break line is appreciated
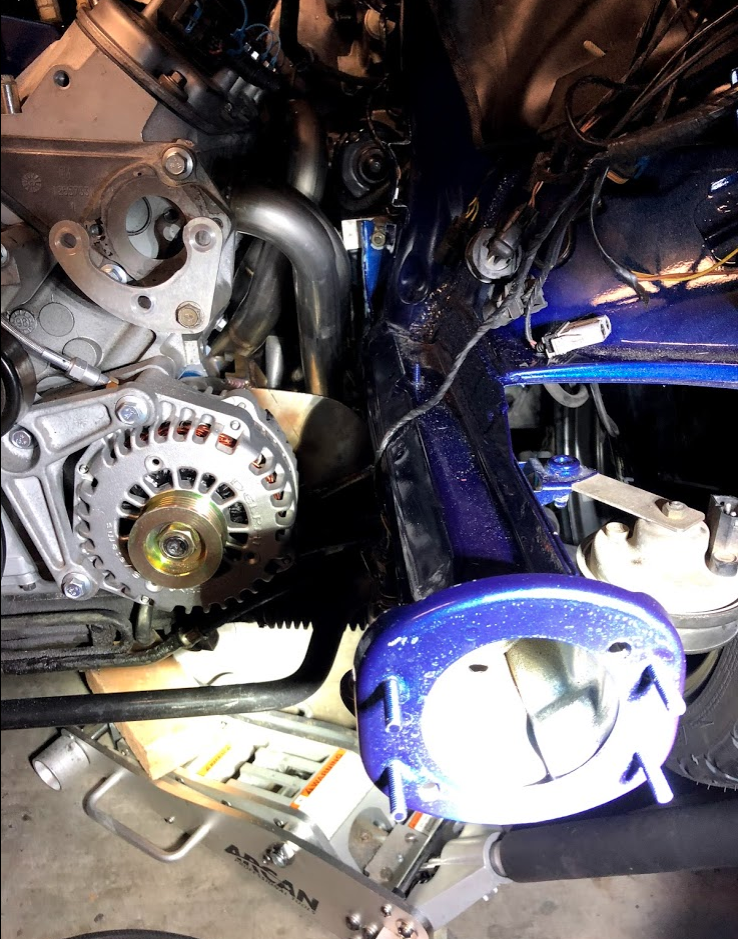
Here are some more pics showing the clearances
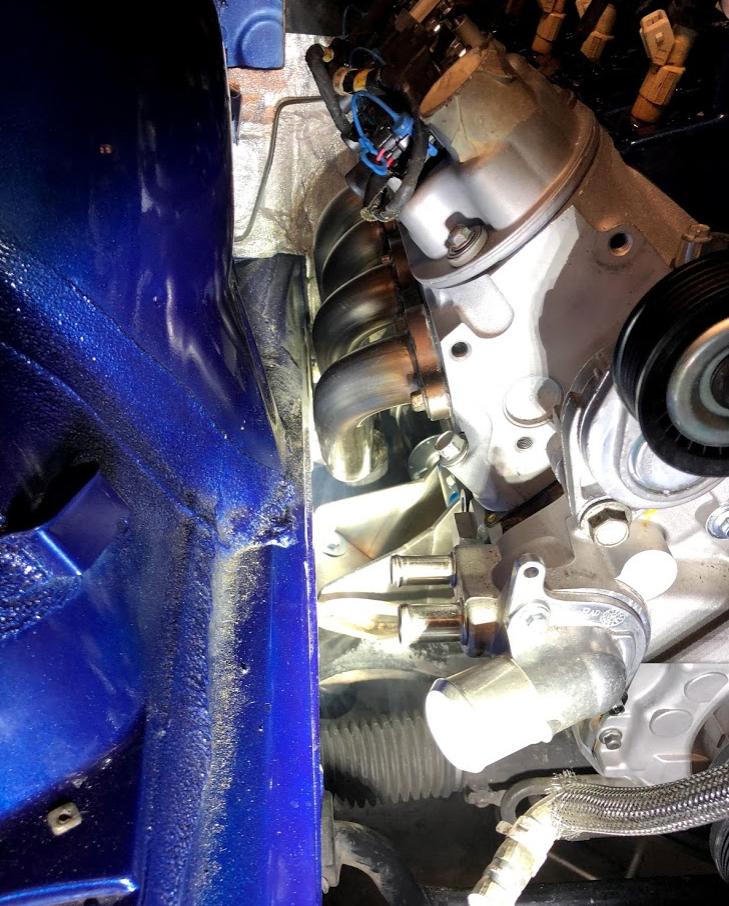
Passenger side header clearance
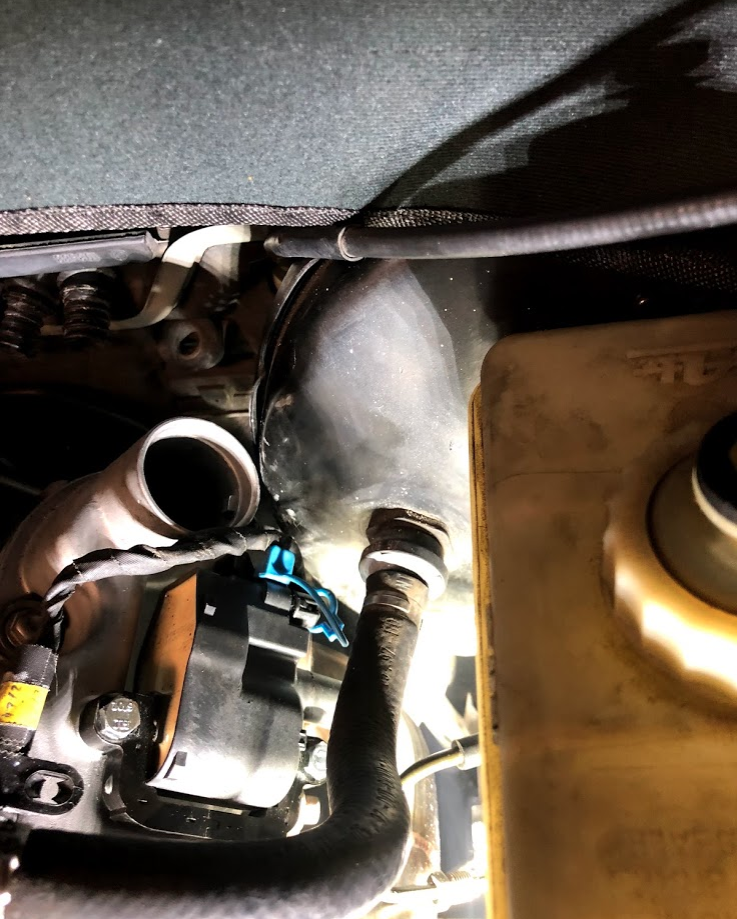
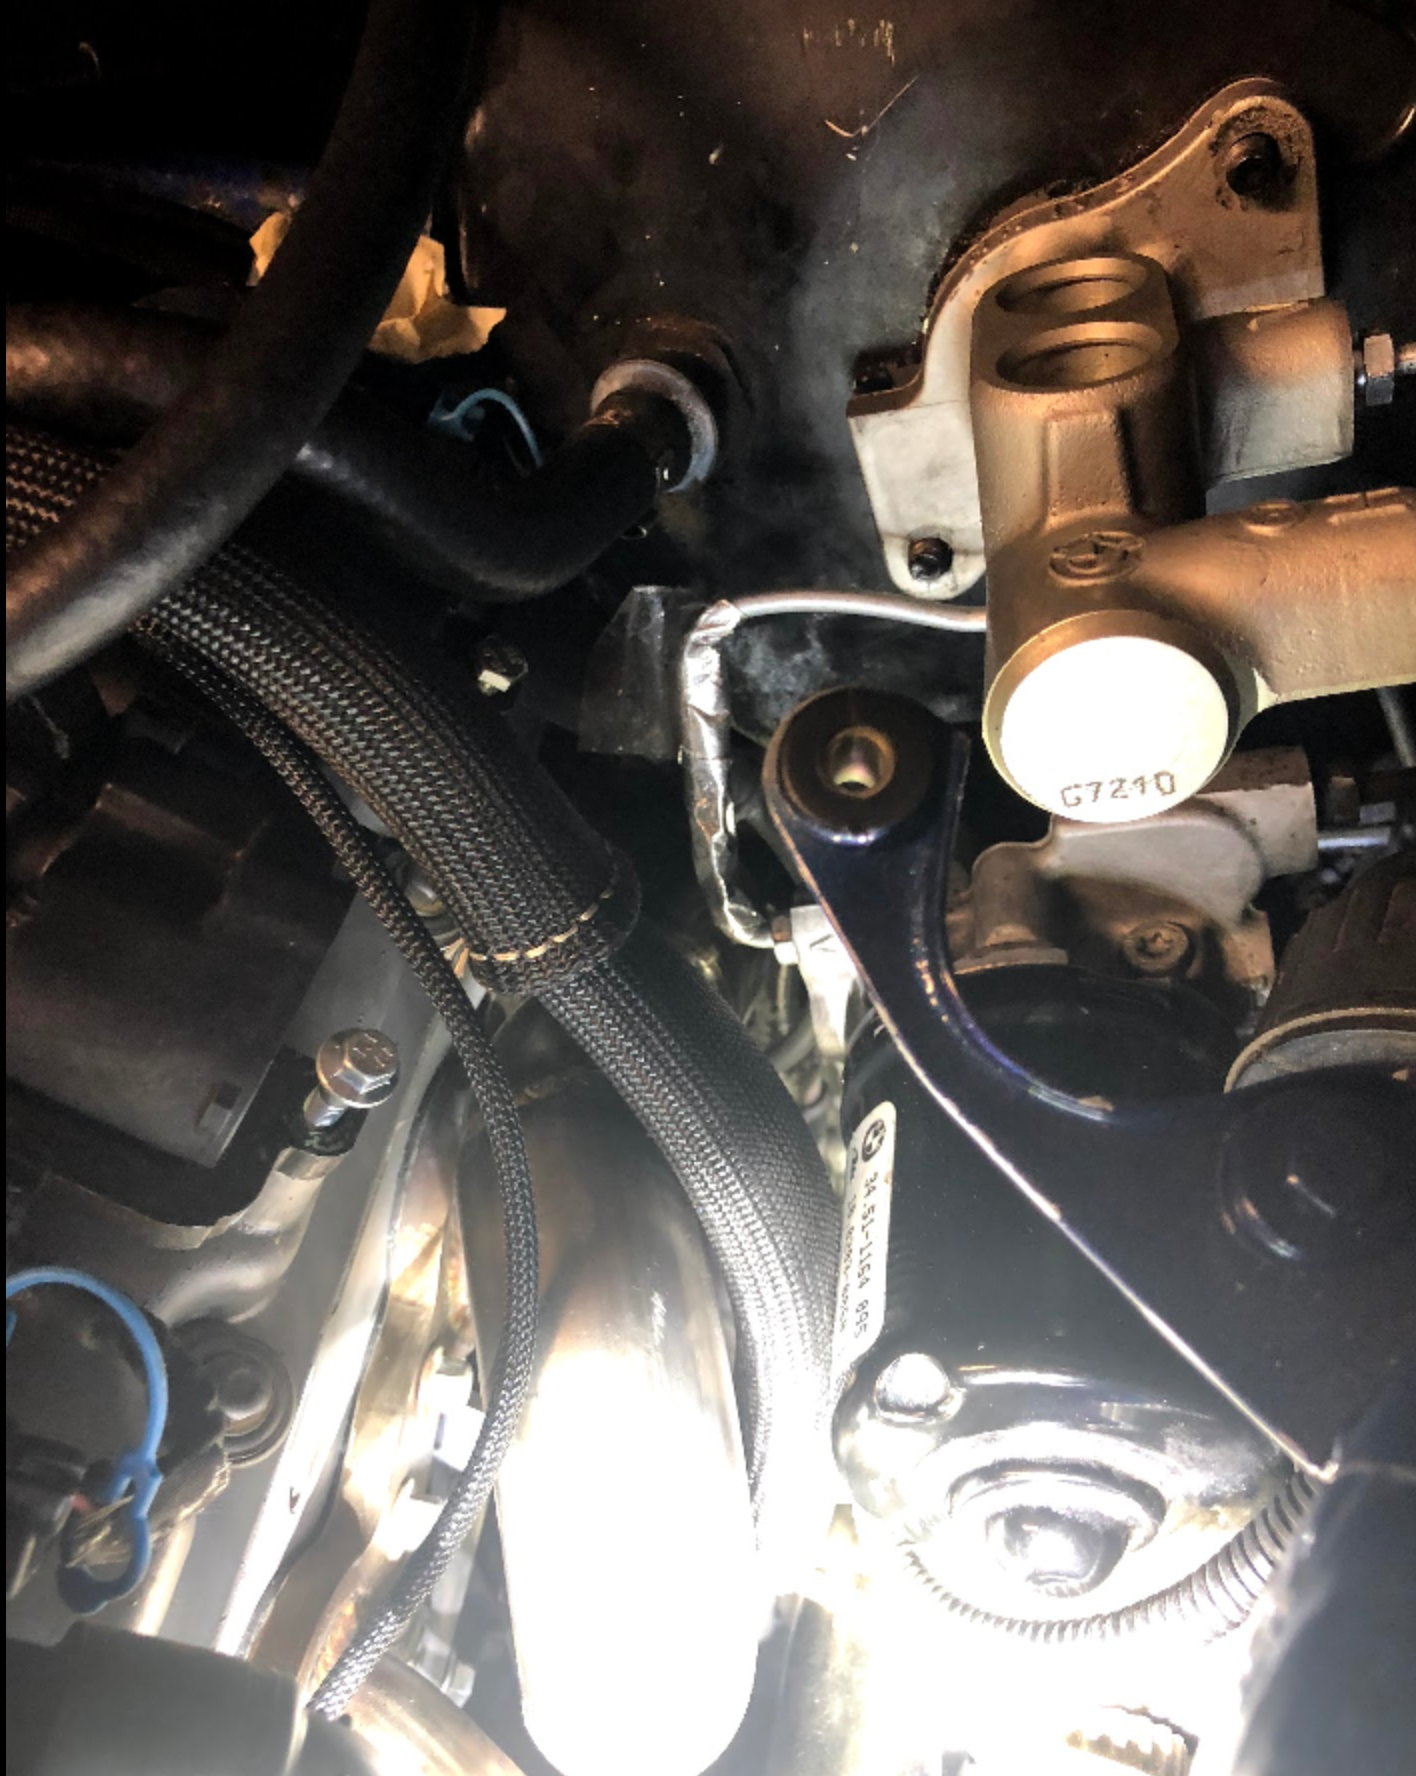
Driver side to brake booster
Driver side header clearance
that darn line that needs to be connected
another angle of the line
Derp
1) I did not have to move the ABS pump to fit these headers, simply massage the lines a bit in order to fit everything with significant clearance. I also wrapped all my brake lines with heat tape and ceramic coated the headers.
2) Aren't you running an LS6 valley cover? You can cap all the vac lines in the heads then.
Member
awesome ok thank you
Member
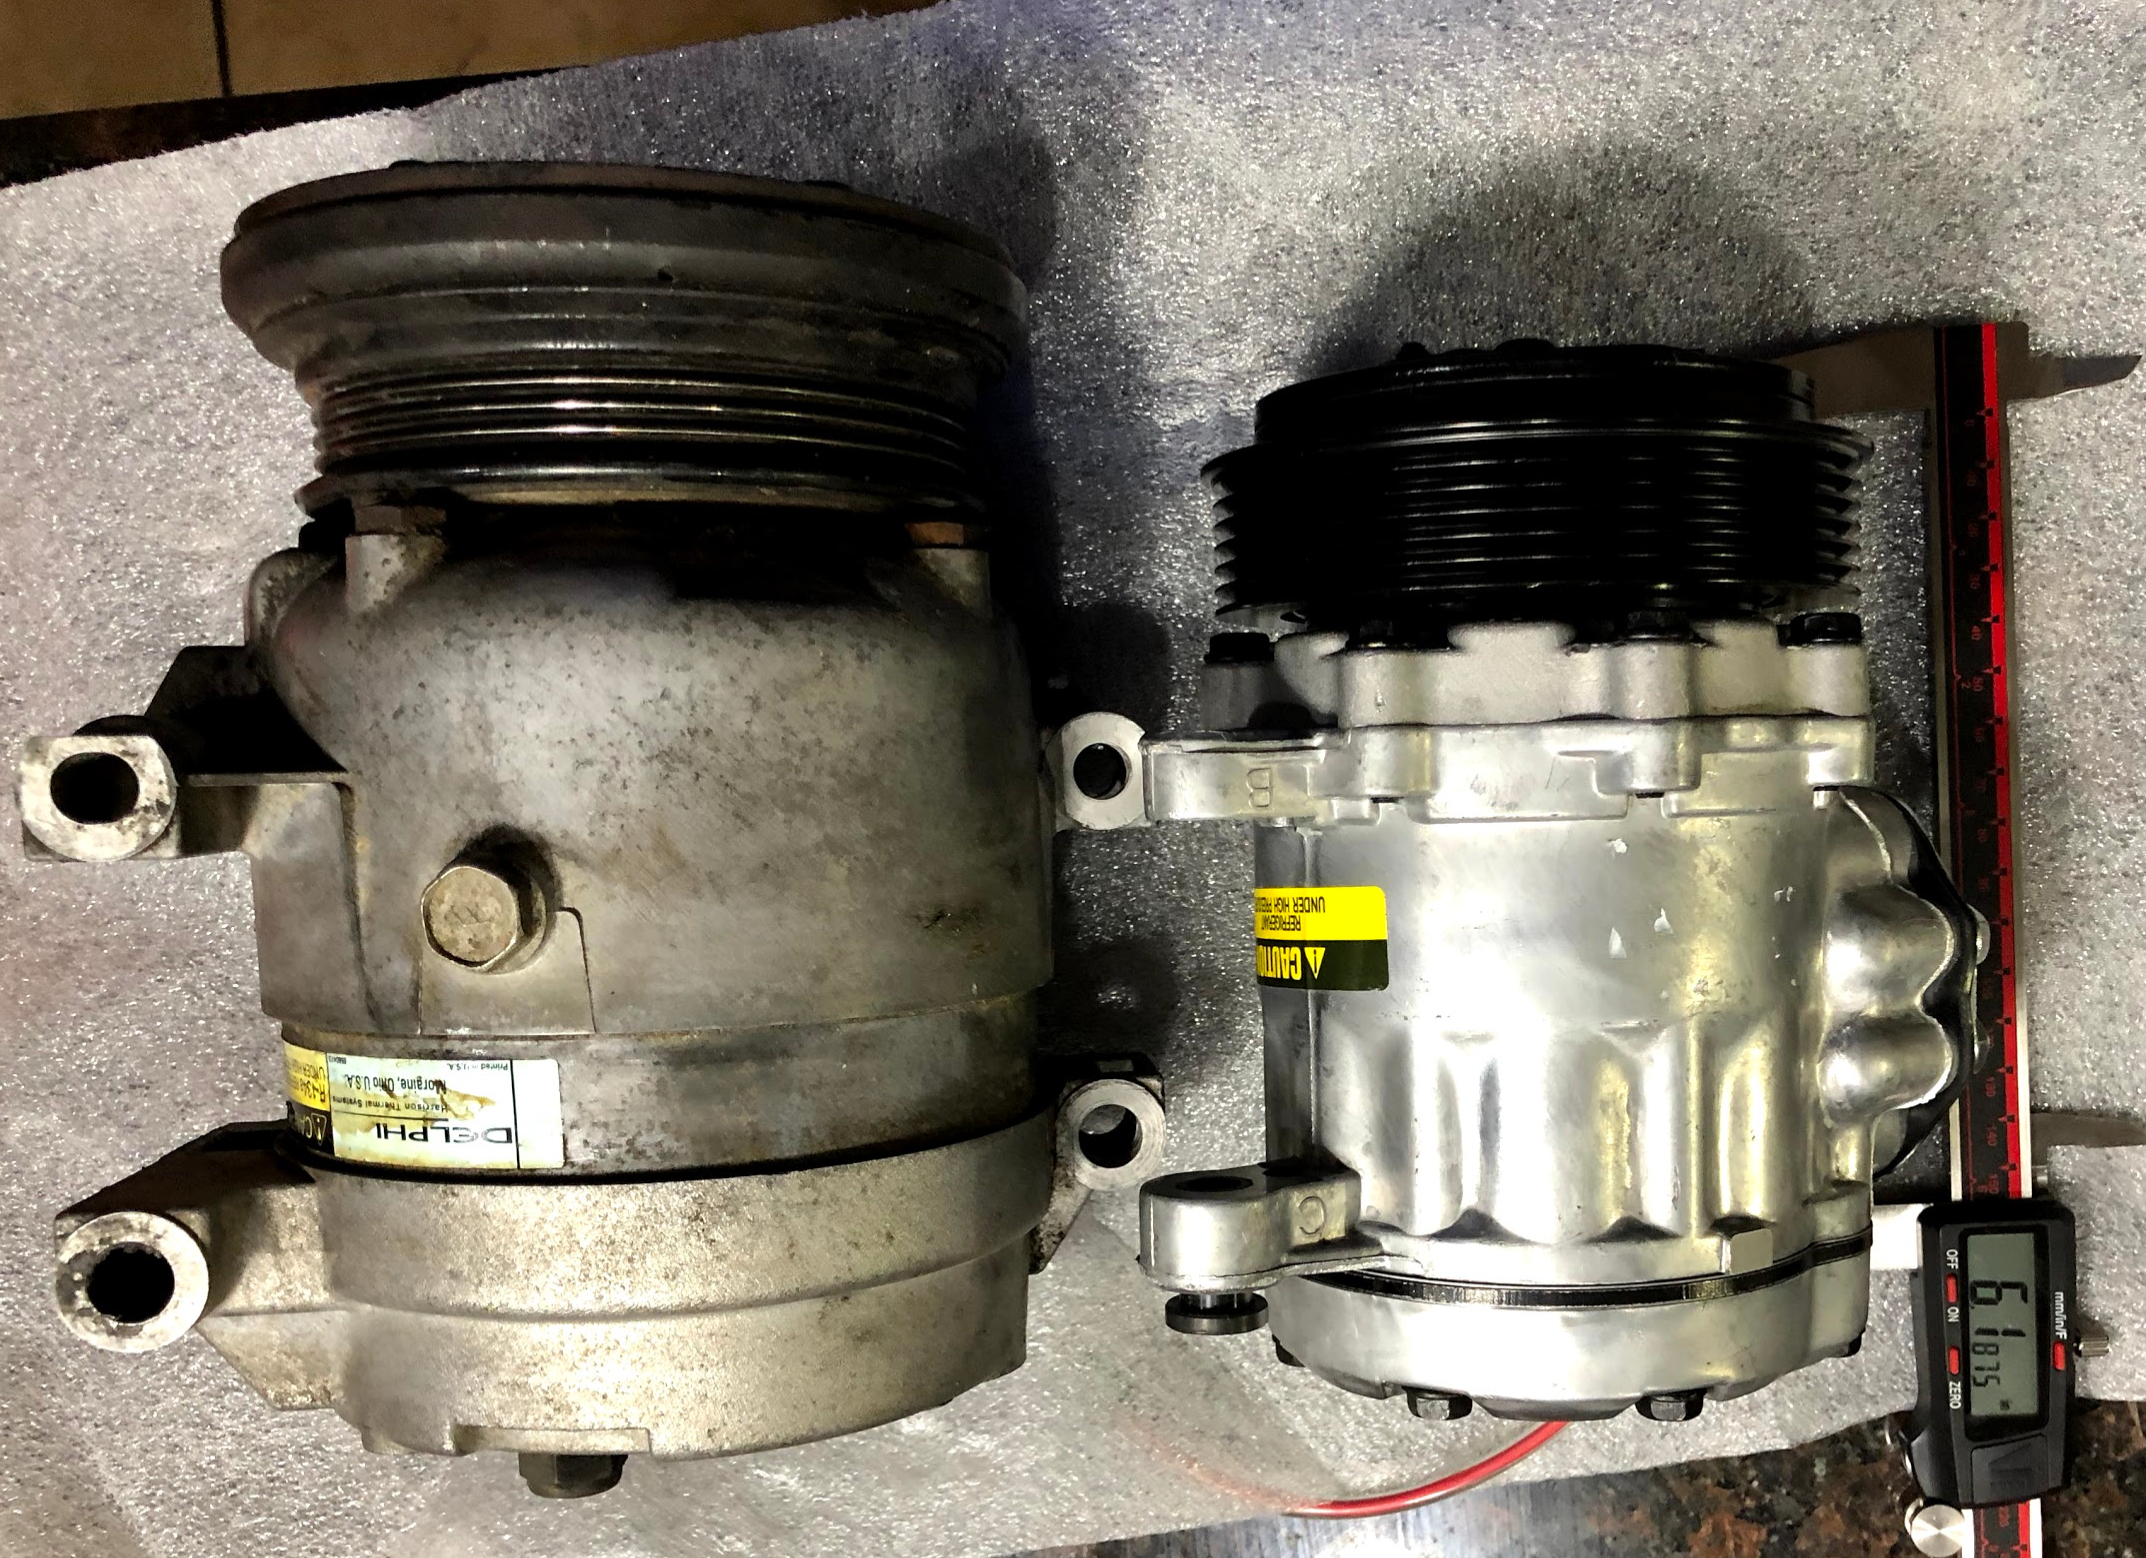
Got my new ac compressor and bracket, the kit is the Dirty Dingo Sanden SD7B10 LS Low Mount AC Kit, here are some side by side pics of the new compressor vs the old
Need to do some research on how to connect this to my harness, it only has a single wire coming off of it instead of the connector that the stock compressor has
Last edited by RulyLSX; 05-31-2018 at 12:18 AM.
Member
I have the CX stuff too- I cut apart the coil bracket on the driver's side to rotate one of the coils 90* so that the plug wire was clear. Also ran a pair of Nascar wires for the rear two cylinders on the drivers side. I have some pictures in my thread. Thought it looked a little cleaner than remote mounting some of the coils.
Instergrams: @davemakepictar
Member
awesome i'll check yours out, i ordered some msd wires that you can cut to length, i'll try your method instead of trying to remote mount all the coils.
Member
IT"S ALIVE!!!!!!
After struggling all weekend with two random issues I finally got the car running on it's own.. Here's the issues i experienced
-No power to ecu/fuel pump/IGN ------ I got my wiring harness from wiringspecialties.com and followed their very well laid out instructions, when i went to start the car for the first time it cranked but i got no spark/fuel. The harness I have has a separate fuseblock for IGN/FUEL/AC/FAN1/FAN2 well when i would turn my key to on and crank that fuse block would not get any power, I quadruple checked grounds, ran through all wiring etc and coudn't figure it out. I got the car to start by wiring that fuseblock directly to the battery post and finally got power. SOLUTION: After going through the instructions again and emailing support for wiringspecialities they told me that fuse block gets power from a wire that goes to the starter.... one that i had put off from setting because it was tough craming my fingers to get it on the starter, once I wired it up and tried again I finally got power to fuel/ign/ecu DOH!!! I was able to start it once by spraying a bit of brake cleaner in the throttle body... I have spark and power to fuel pump but no fuel.....
-no fuel ------- Once I figured out my power issues I could not get any fuel pressure, i disconnected the lines to the fuel filter to make sure it was actually pumping something and to attempt to confirm the line i thought was the feed was the right one, for some reason it wasn't going past the fuel filter. Solution: I had connected the wrong lines to the corvette fuel filter for feed/return.. I had the feed going into the return of the filter and vice versa UGH!!!!
Once I figured out both issues above and confirmed fuel was making it all the way to the fuel rail the car started right up, holy crap I had forgotten how loud open headers were, wife and kids came scrambling out from the house thinking an earthquake was going on cause the car noise to them "shook the whole house" <3
In my blunder and frustration of messing with the fuel lines I forgot to clamp down the hardline going after the fuel filter and into a quick disconnect, once i shut the car off it popped off and spilled gas around ... Didn't feel comfortable turning on again after fixing this so that's all she wrote for this weekend.. Very happy to at least have it turning on and running... Just need to figure out a permanent solution to the fuel .
My current setup on fuel after the filter is a 12" hardline with quick disconnects on both end, one goes to the fuel filter and one is connected to a flex fuel line that is about 36" long all the way to the fuel rail. I am going to try to find a 24" hard line then that way i can use a smaller soft fuel line. I also need to see if they make those dorman quick disconnects in a 90 degree, right now i have to bend the fuel line at an angle so it connects to the side fuel rail and it's a bit forced
Last edited by RulyLSX; 06-08-2018 at 03:24 PM.
Member
VIDEO of it starting
https://www.youtube.com/watch?v=w0Ik...ature=youtu.be
Last edited by RulyLSX; 06-06-2018 at 12:44 AM.
Member
Just another note for documentation purposes, My wiring harness has two plugs, one was labeled "ECT" for engine coolant temp and other one was labeled "coolant". In my quest to get the car started I only plugged in the "coolant" one and left the "ect" one unplugged, I ran into an issue where the car was not starting anymore randomly, i got it to start 2-3 times then all of a sudden it woudn't start anymore.... it was getting fuel but no spark. Turns out the "ECT" plug which goes to the ls1 pcm was preventing the car from starting due to not detecting engine temp. What's weird is that it did start before(WTF). I confirmed this was the cause for it not starting because I unplugged the "ECT" plug and it went back to not starting
On my wiring specialties harness "Coolant" is for the bmw gauge and "Ect" goes to the PCM, this needs to be plugged in in order for the car to start lol
Last edited by RulyLSX; 06-06-2018 at 07:03 PM.
Derp
The GM PCM uses coolant temp in the tables to determine fueling for the car. Without that signal, it will never run correctly as the PCM thinks the engine is... -270* or something completely off like that.
Member
That was a lightning fast build!
Congratulations!
First start will be like the first drive...worth the efforts...can't wait for the burnouts!
Member
Thanks Tim!
After looking at how I'm going to route the coolant plumbing I have decided to bypass the heater core and eliminate the heater function from my car. If I ever need it in the future I don't think it will be too hard to add. I am in Arizona, Having a working heater is just a nice thing to have some days but not needed. AC is a must
Anyone delete the heater core valves from the swap and are there any issues doing this ?
Last edited by RulyLSX; 06-07-2018 at 04:20 PM.
Member
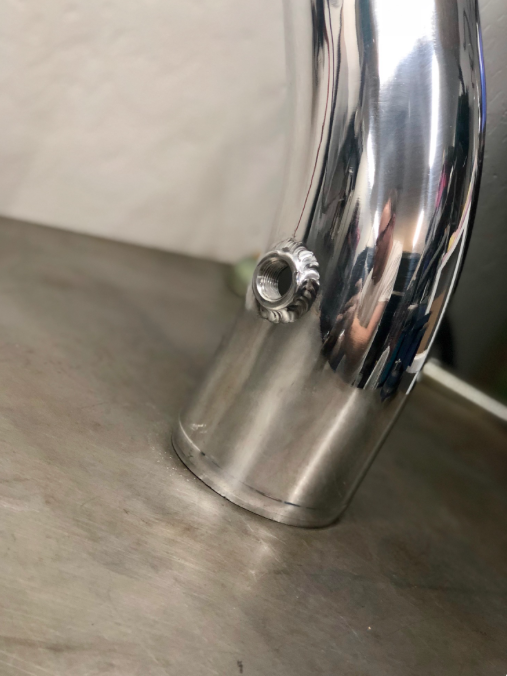
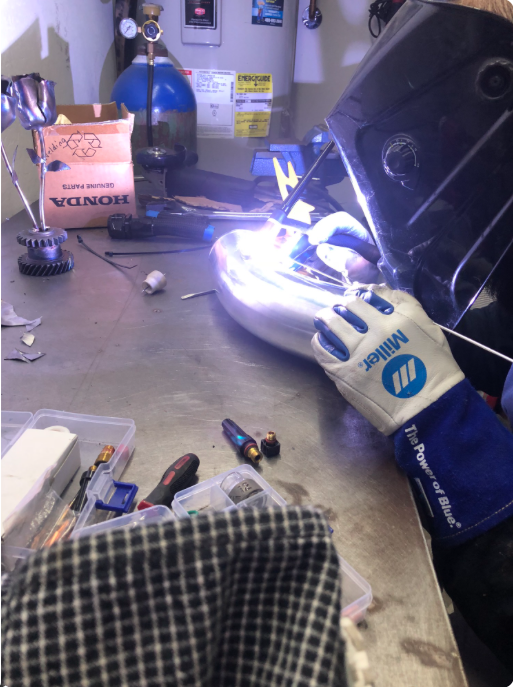
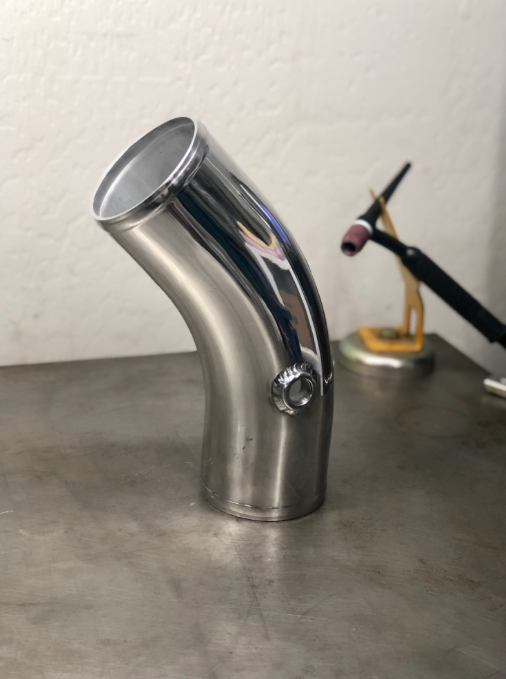
For the air intake I decided to go with a GM screw in IAT sensor, my buddy welded on a 3/8 npt bung to my intake pipe . His shop https://www.facebook.com/EFfectiveAutoandFab/
Parts list
Air intake kit: https://www.cxracing.com/AI-LS-UNI
Air intake sensor: https://www.amazon.com/gp/product/B0...?ie=UTF8&psc=1
bung: https://www.amazon.com/gp/product/B0...?ie=UTF8&psc=1
Last edited by RulyLSX; 06-08-2018 at 04:53 PM.
Member
Love the build bro! Holy shit you got it done fast as hell.
Member
Spent yesterday and today working on the car and got the following done
--Brake lines put back together, I went to a local shop and had them redo the line that was having issues clearing with my headers, I asked if they could make the turn that's hitting the header as tight as possible, They made it tighter and now the line clears albeit it's a very tight fit. I wrapped the line in heatwrap and will be ceramic coating the headers similar to pmak26's setup
-Cleaned up the wiring and put it in a more permanent position, transmission is all wired up now too(reverse light, reverse lockout)
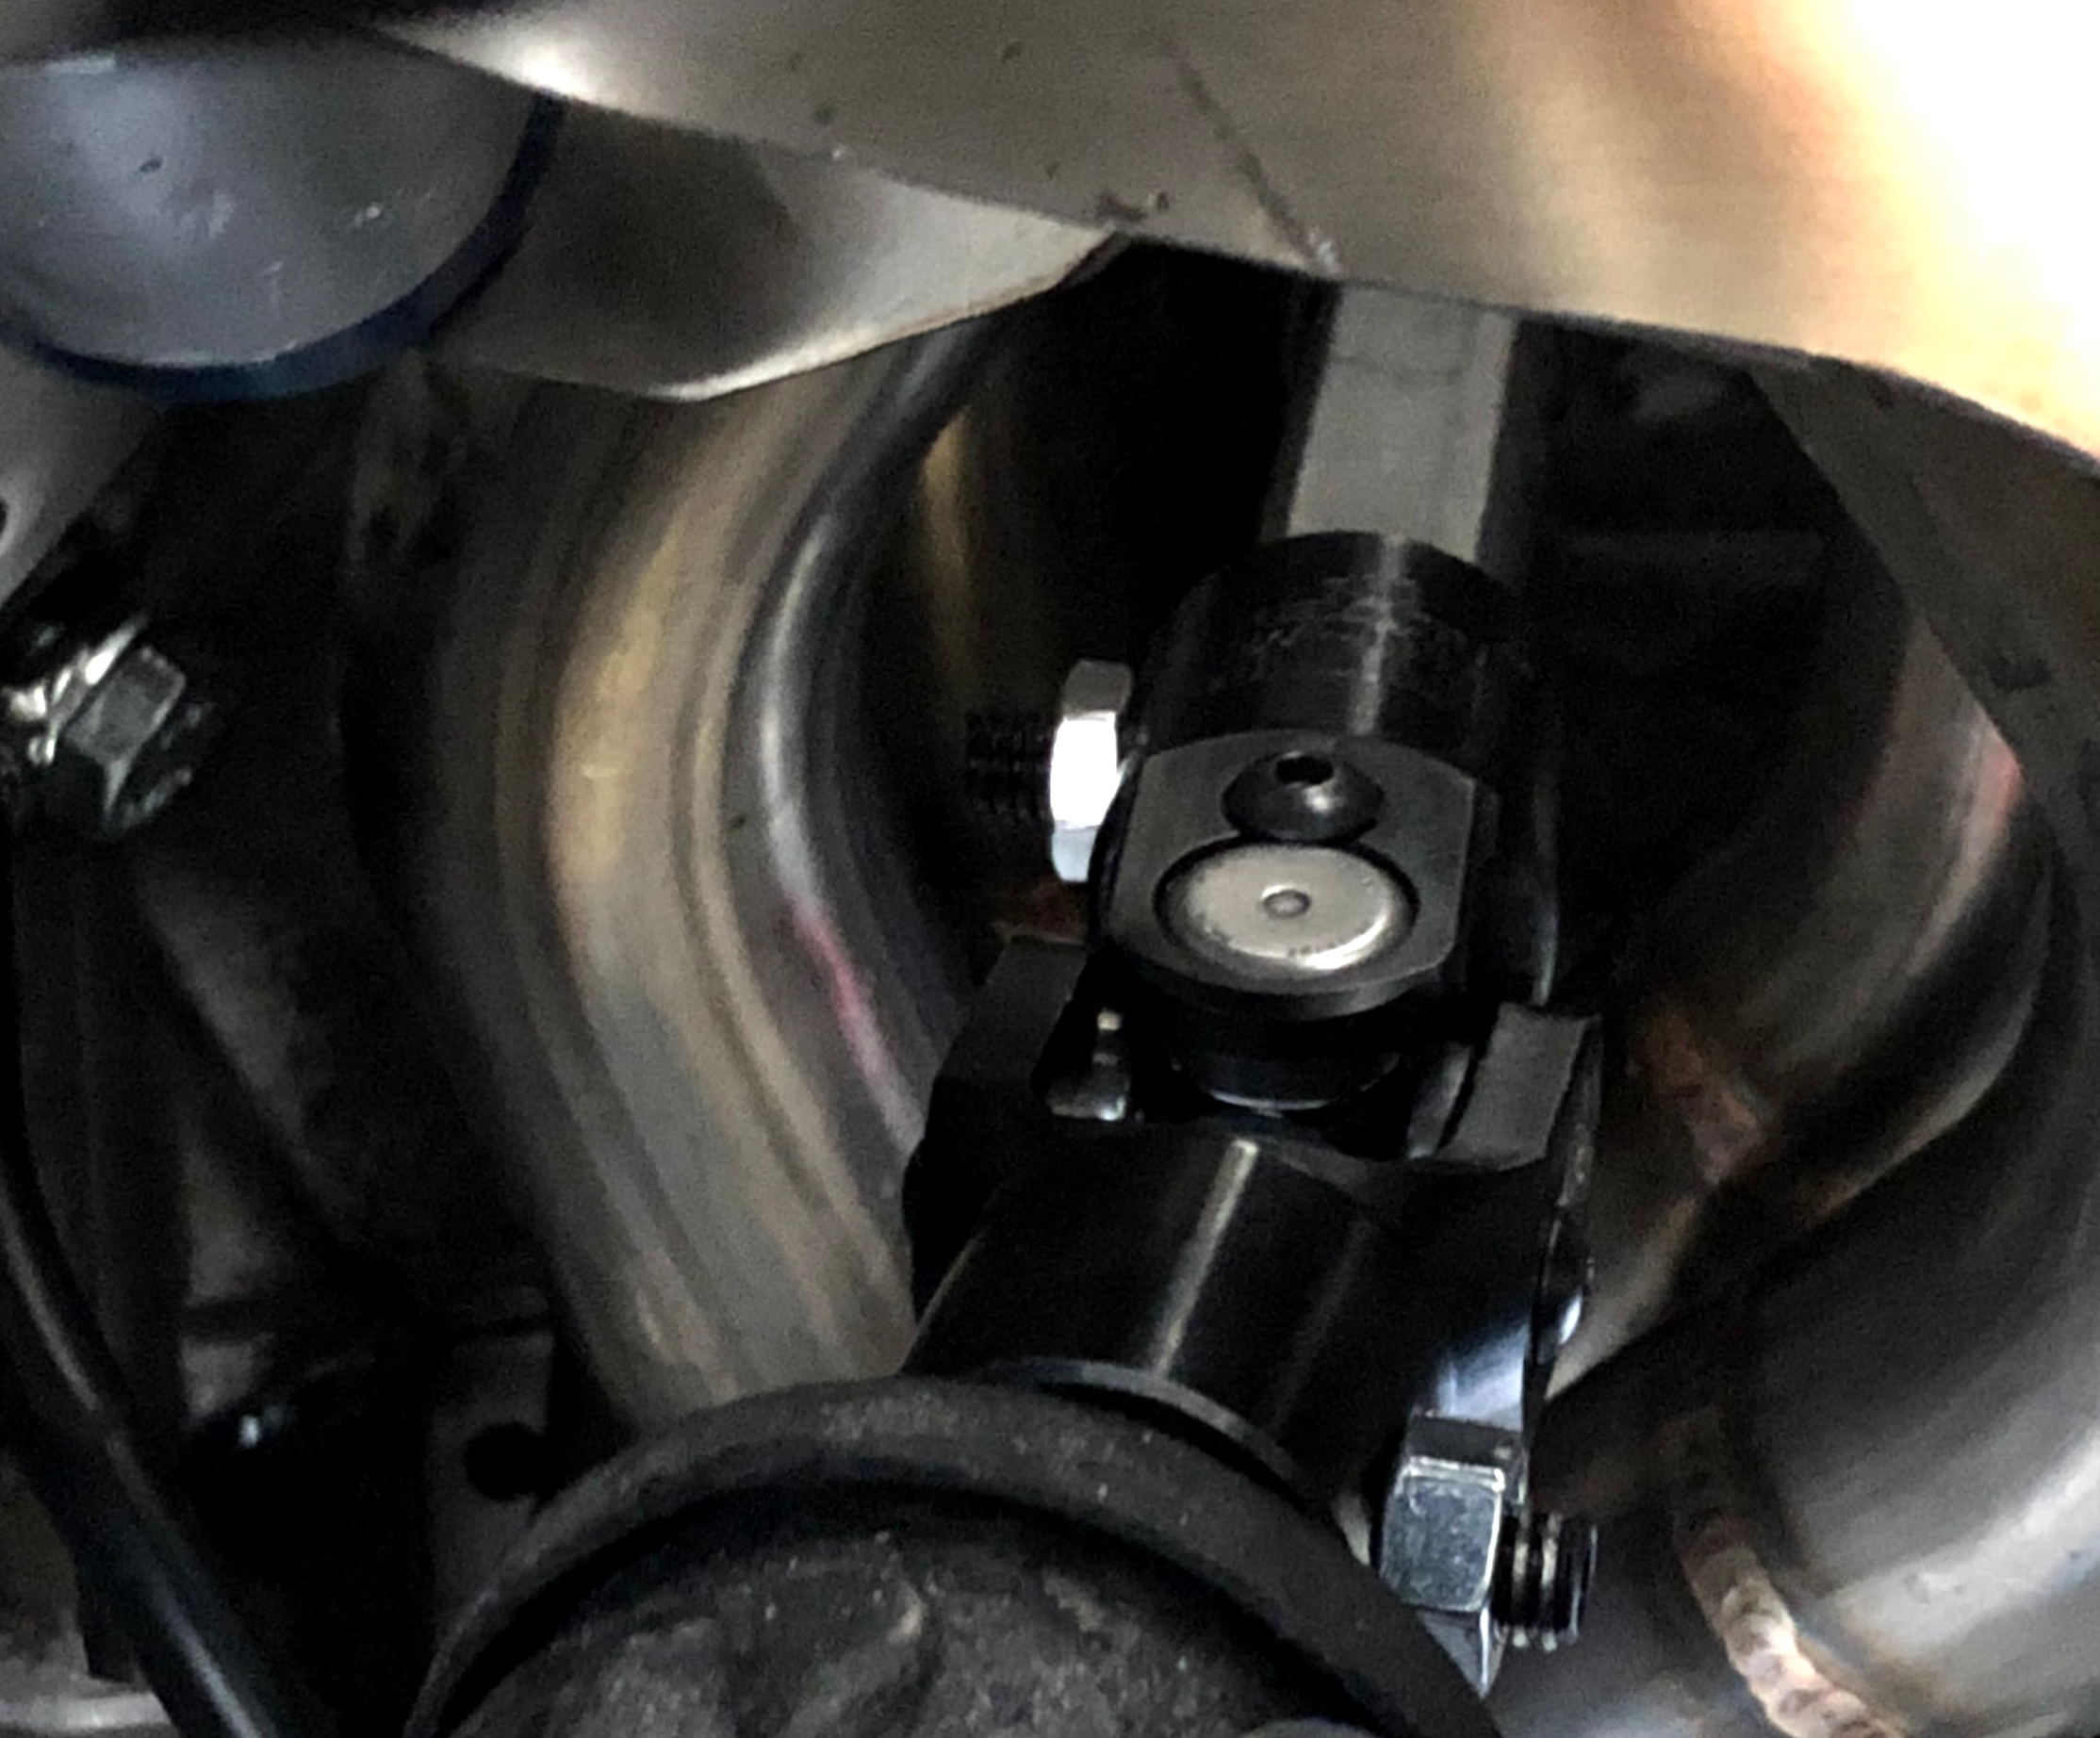
-hooked up the steering shaft..... I started the morning attempting to put on the e34 joint that was recommended, after struggling with it and smashing my hands 193849839849389 times i said screw it and whipped out my fleming river and borgeson kit i had ordered just in case the e34 joint gave me issues...GOOD news is that it's on, bad news is that while removing the stock joint close to the firewall my steering column collapsed LOL . what fun is a project without some bumps in the road eh? FML
Picture of the new brake line clearing, also put a heat sleeve on the plug wire
update on the cleaned up wiring
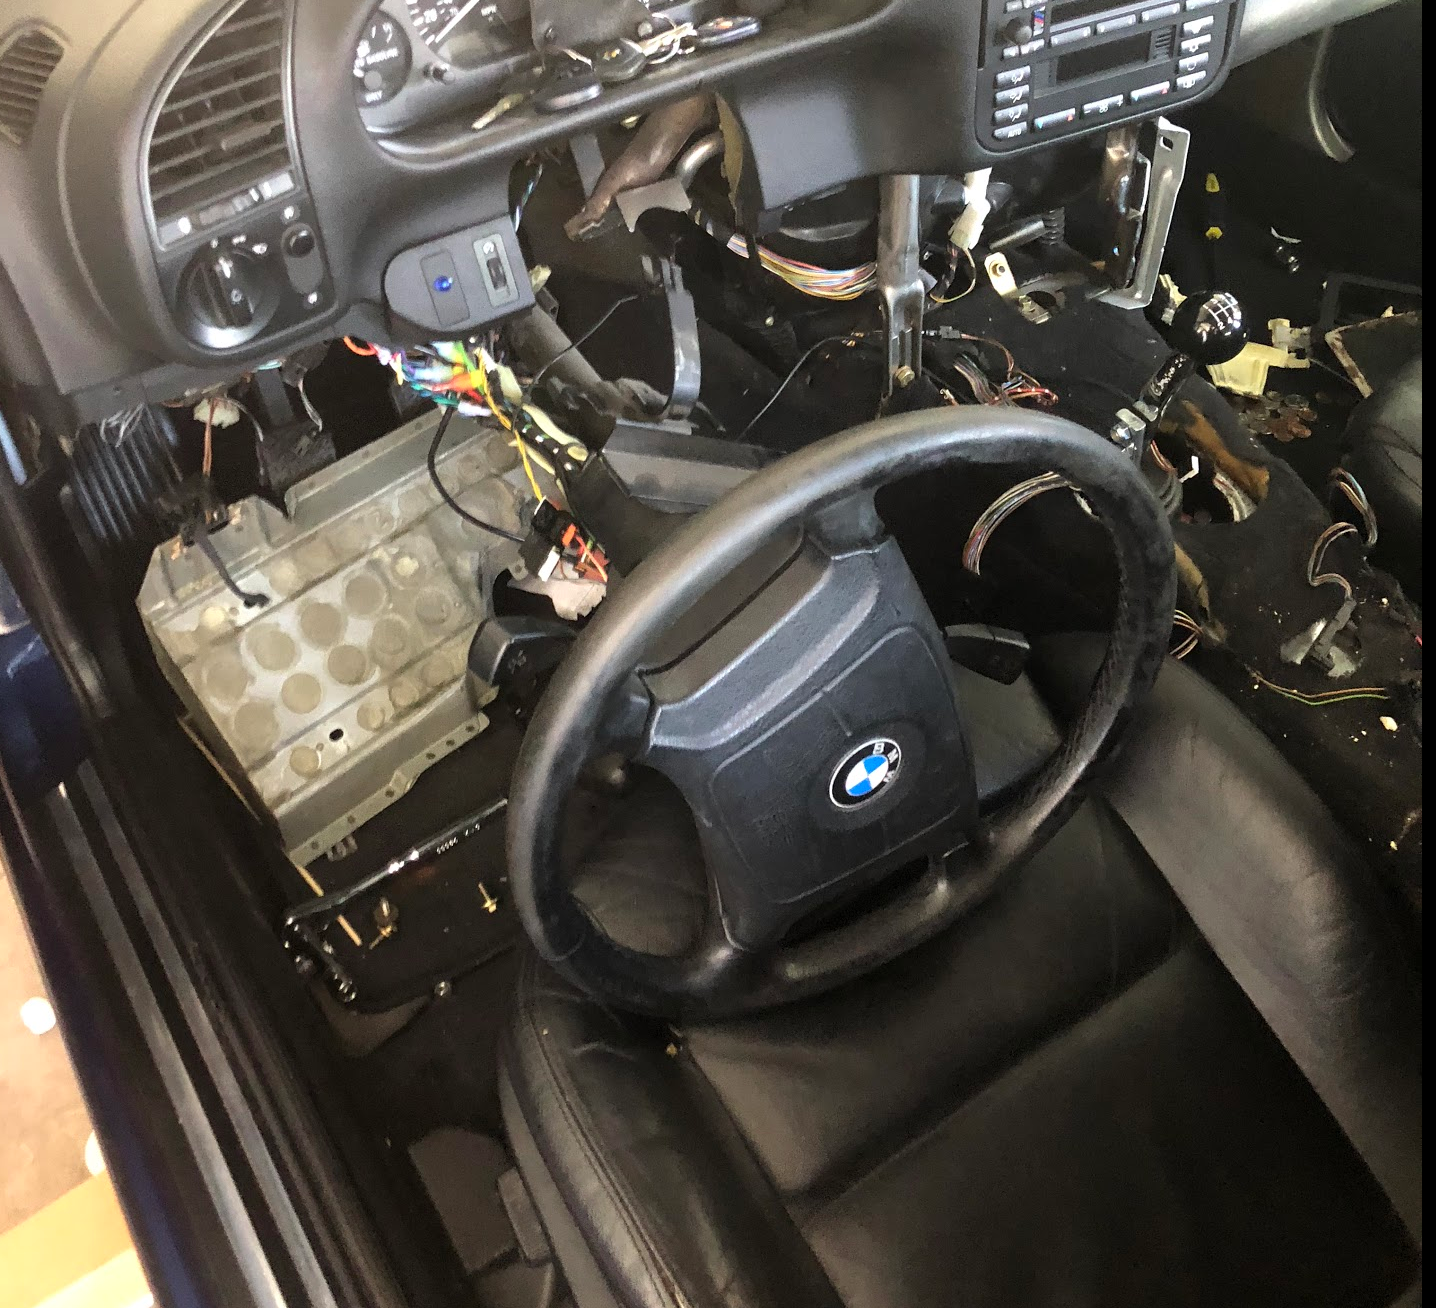
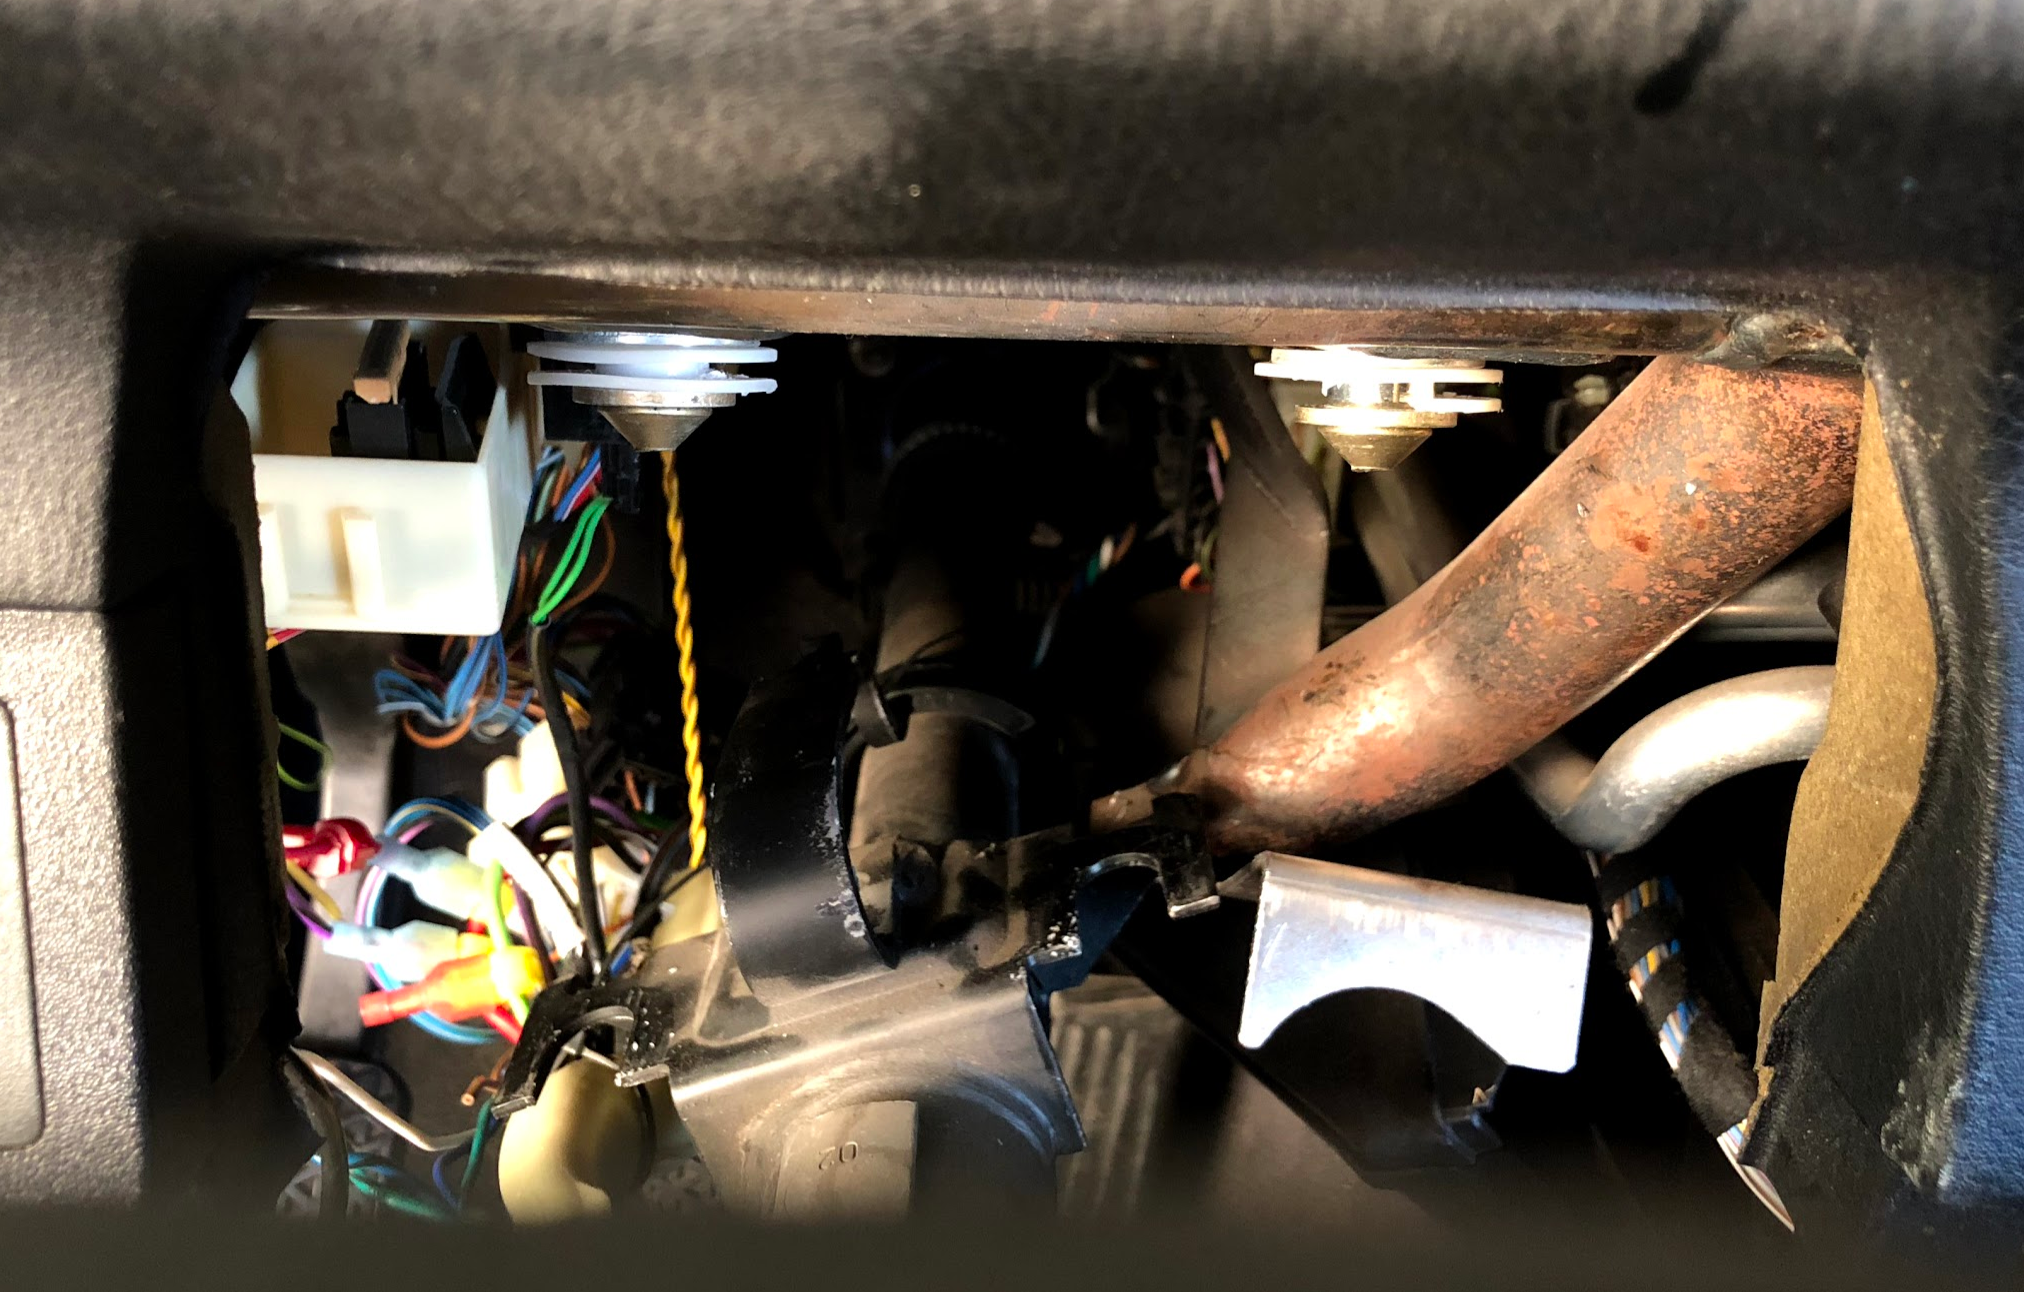
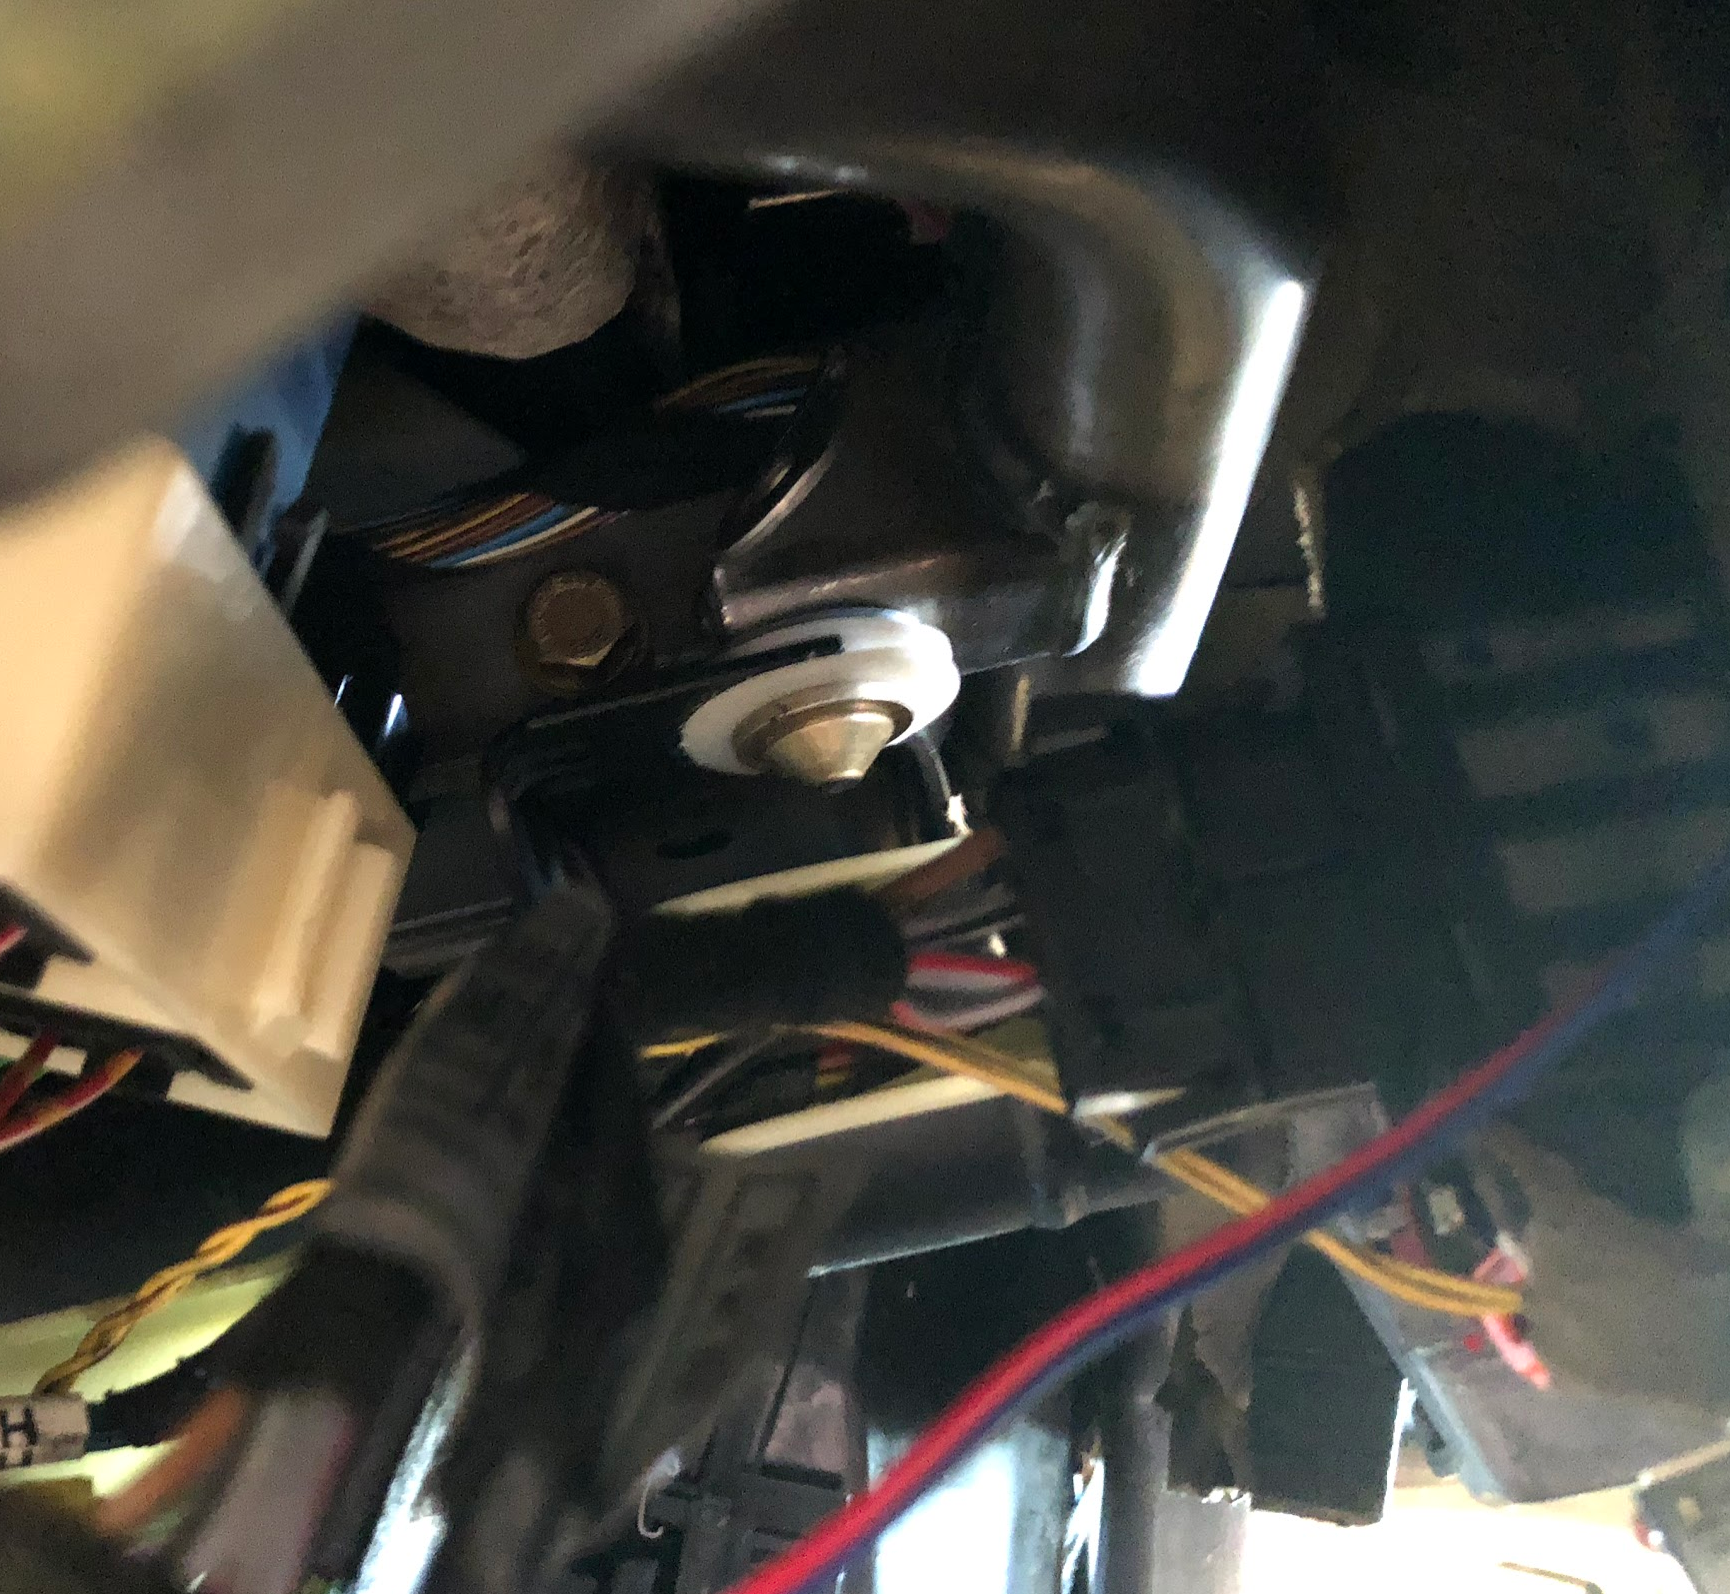
collapsed steering column
the bolts supposed to hold the column, they are supposed to slide into the plastic ends right?
I got the columnn placed back into the plastic holders i'm assuming it goes into but any slight bump forward sends the column crashing down again
Tomorrow I will try to remove those fracture bolts that hold the column and replace with regular bolts, also some bearing on the column towards the firewall i'm not sure if that's broke but i need to figure out how to place that or if i even need to....
Was hoping to be working on other stuff but oh well
Last edited by RulyLSX; 06-09-2018 at 11:45 PM.
Member
Today I got the following done
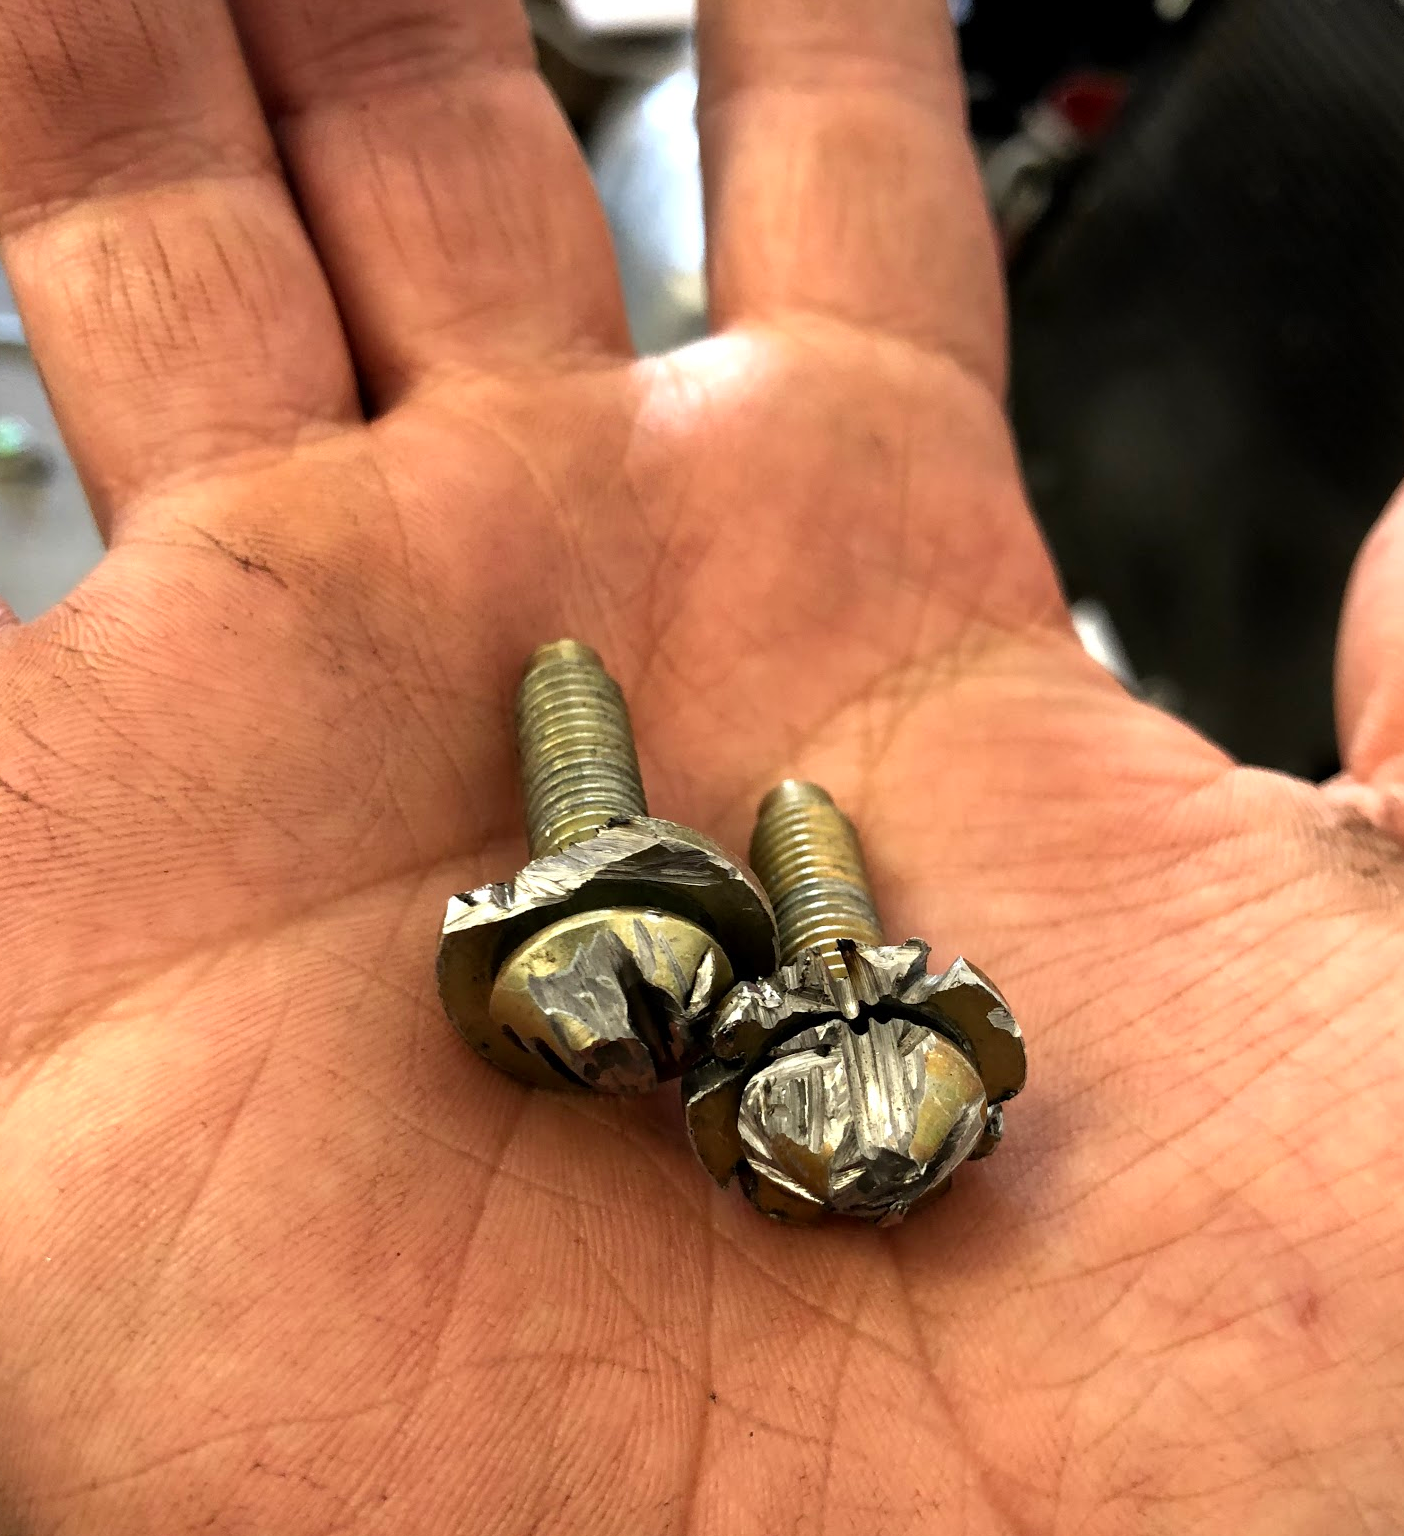
-removed the steering column fracture bolts, added regular hex bolts and washers...Steering Column nice and sturdy now!
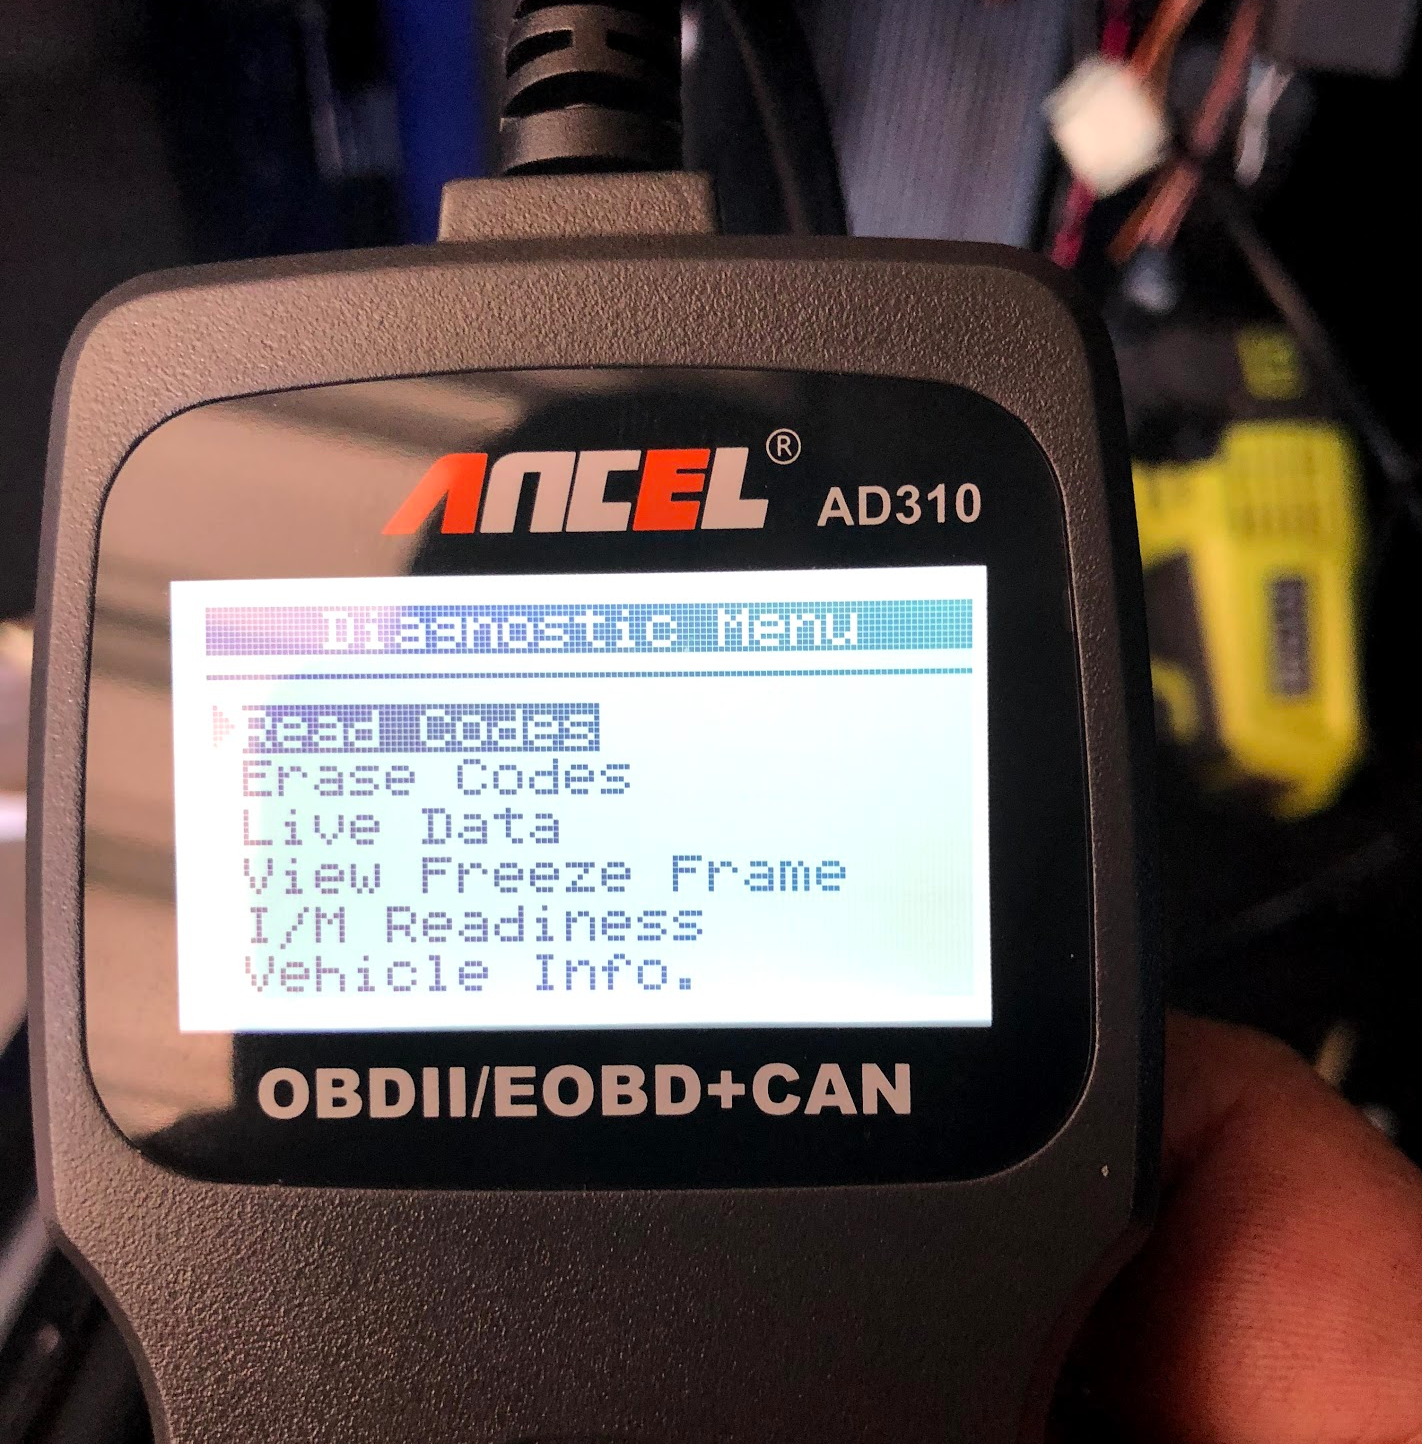
-moved obd2 connector to stock bmw location - The wiringspecialties harness has a plug already so I just extended the lines to inside the car via the driver side firewall hole
-installed fuel and oil pressure senders and ran wiring inside the car for my aftermarket gauges
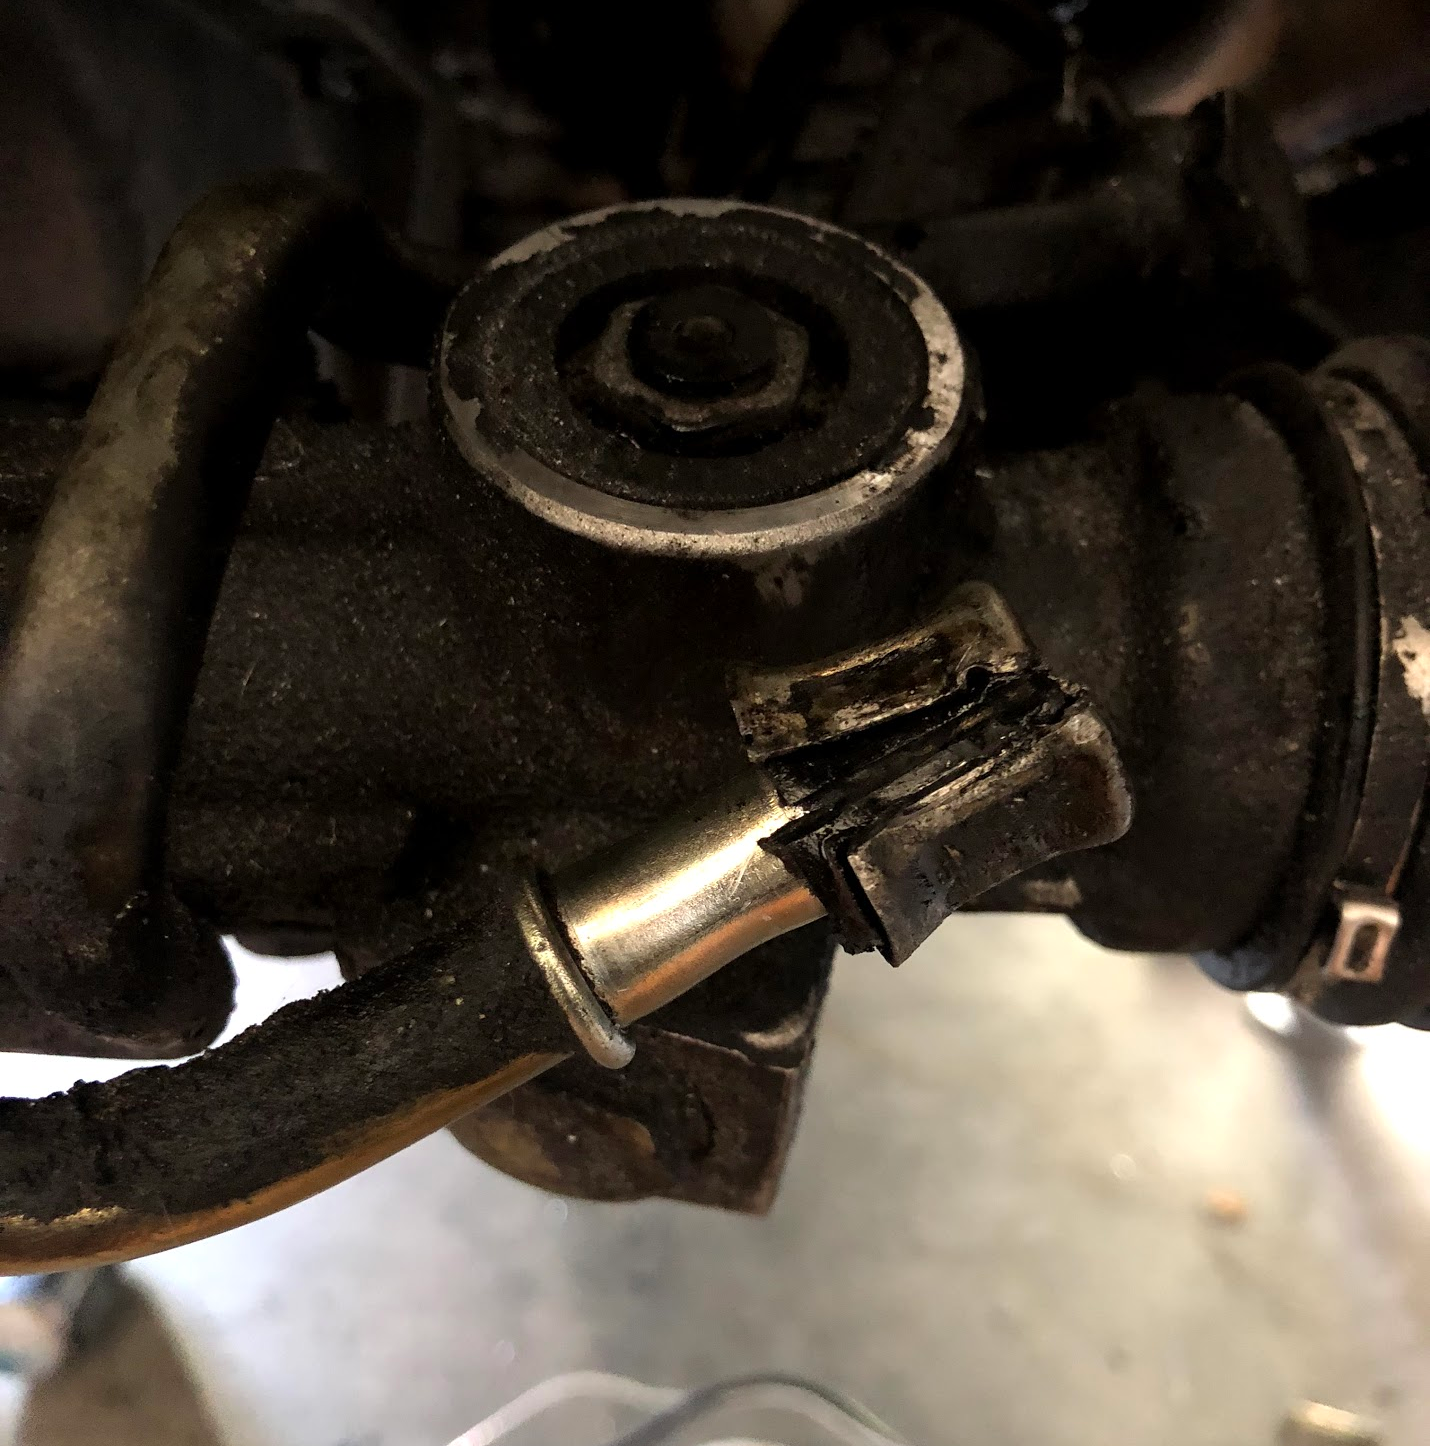
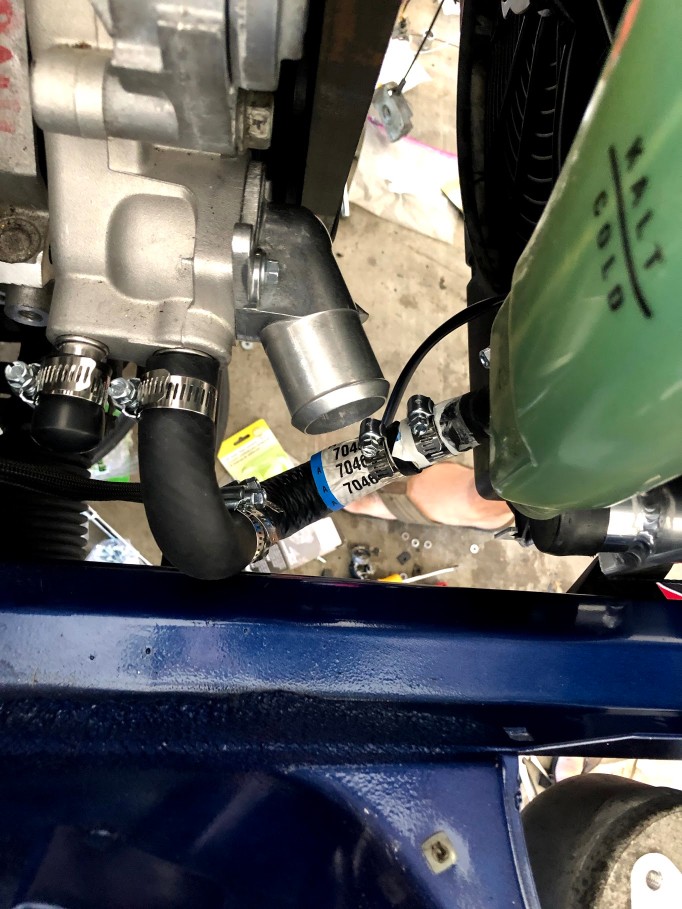
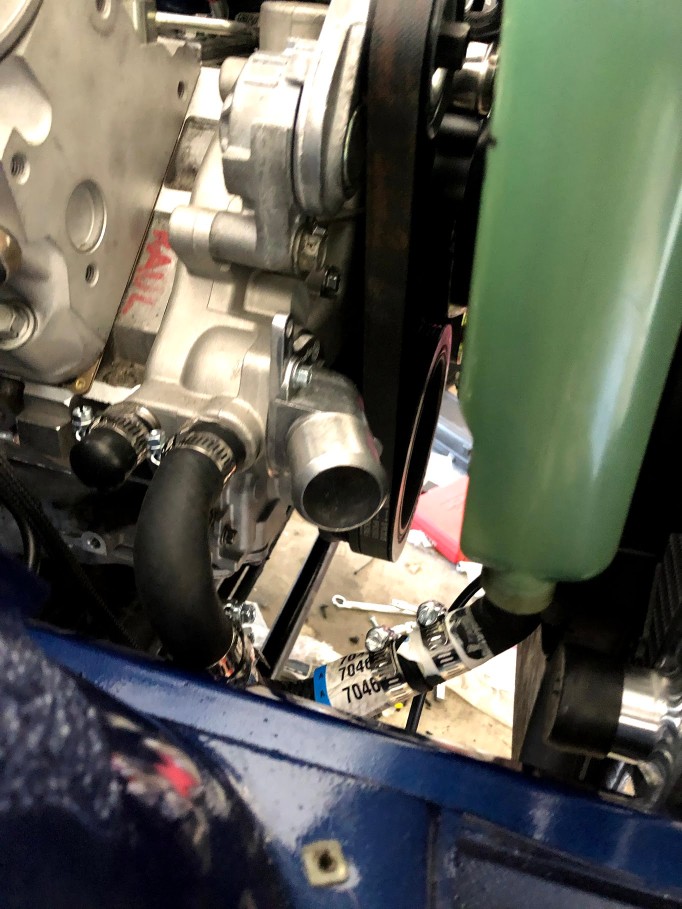
-removed the powersteering return line and installed a new one with clamps on both ends
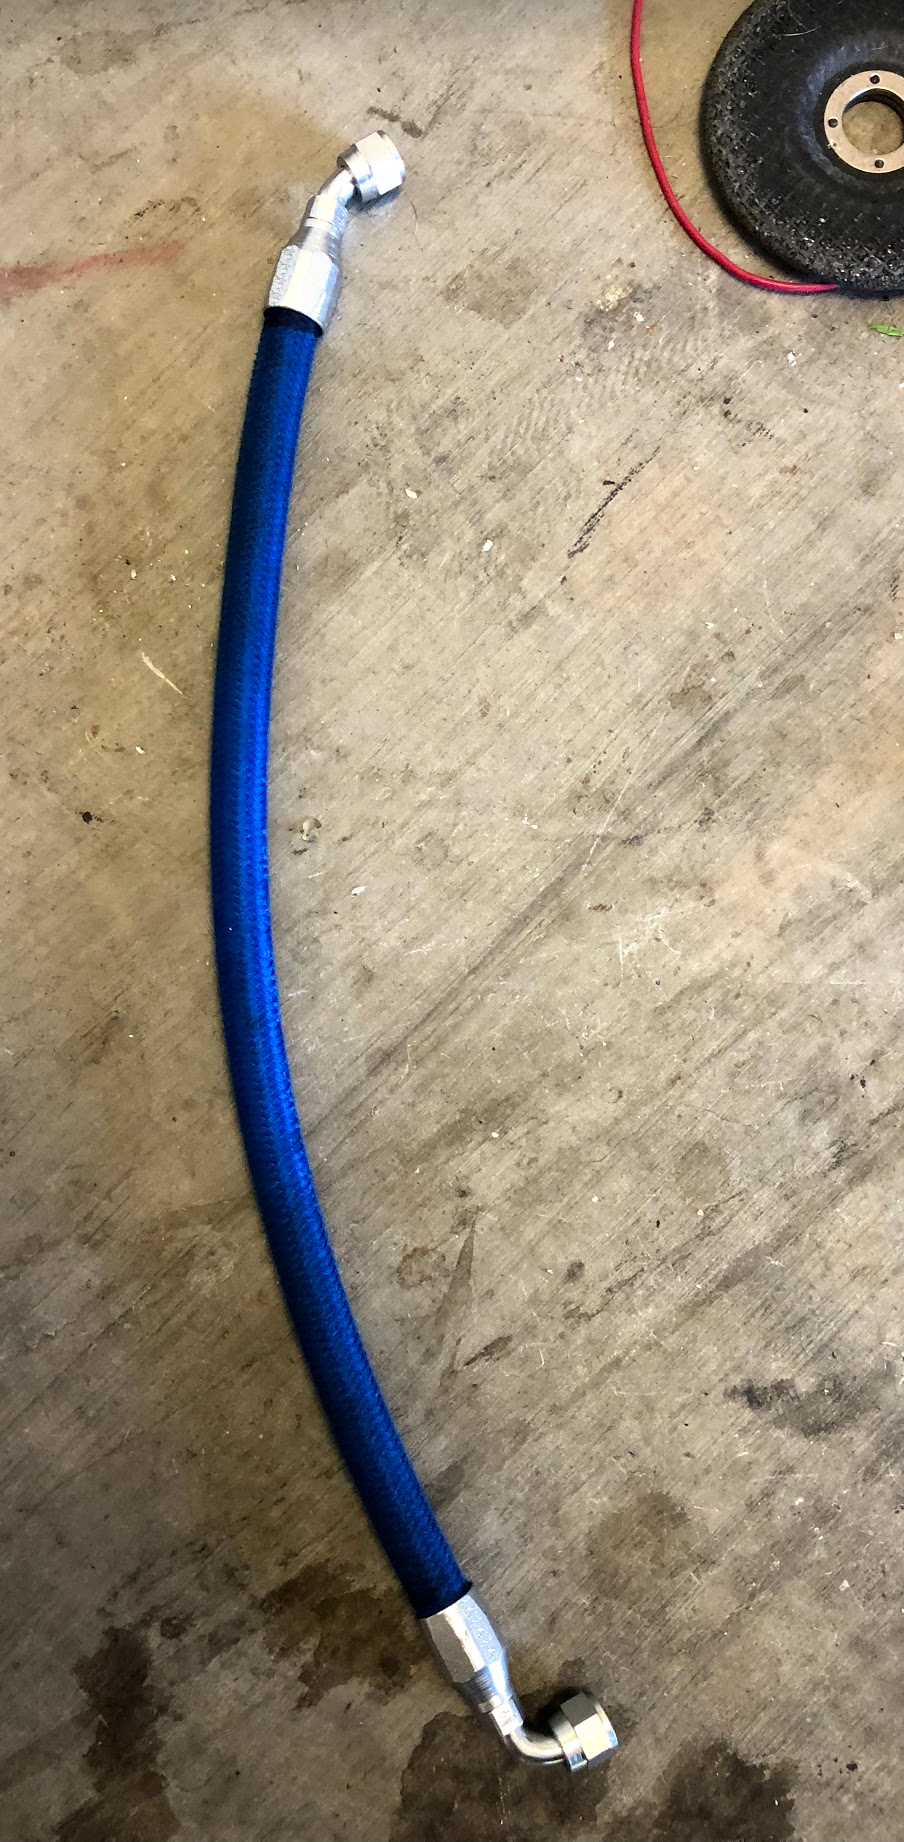
-made the high pressure power steering line per Bimeroks thread, installed line...it's a lil long, i'll shorten it later
those damn fracture bolts, I had to make a slit on them and went hammer happy
removing the return from power steering
new high pressure line
testing obd2 connector
pic of steering shaft
Member
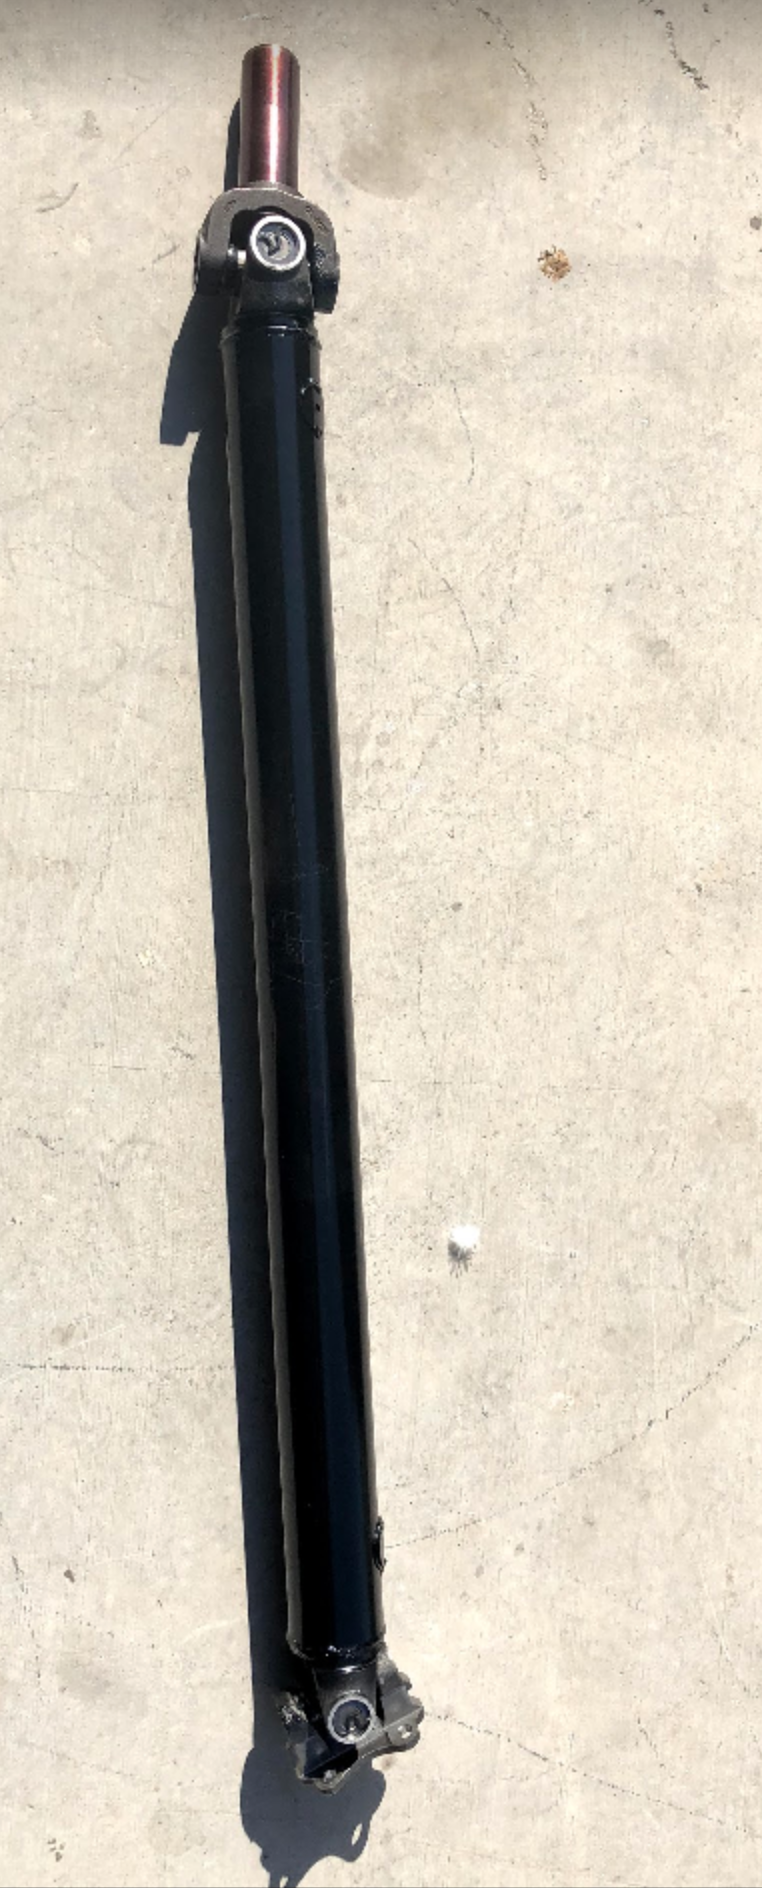
dropped off the jtr flange and my yoke to a local driveshaft shop, they asked me to measure from end of tranny seal to the flat surface of the flange. Measured out to 45" exactly. SHould be ready tomorrow
Member
Man you built this thing up quick!! Looks damn great, and sounds amazing. Can't wait till I can start mine up!
Member
Thanks alwaysbored!
Update for today
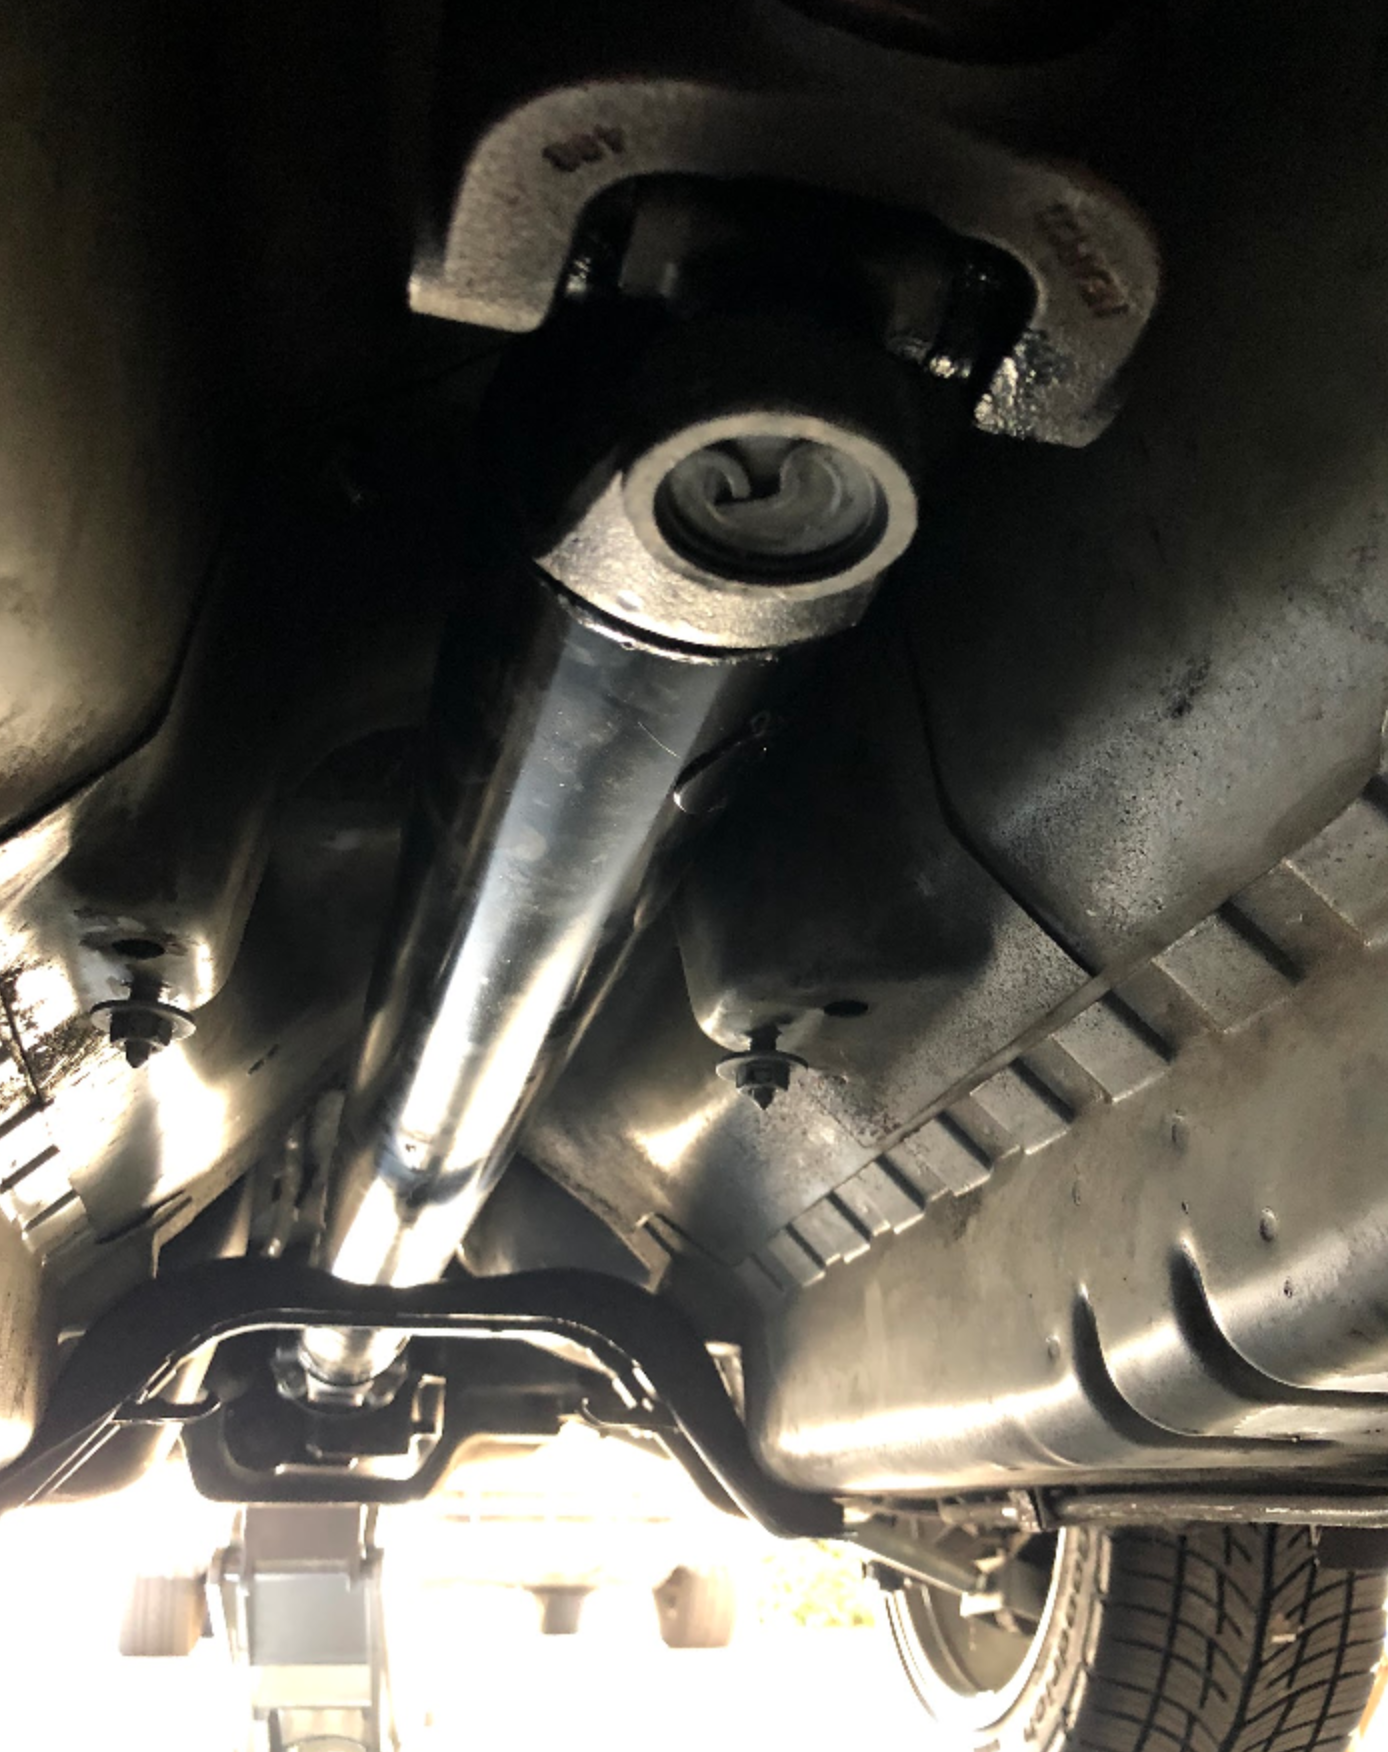
-Got the driveshaft from the shop and installed it
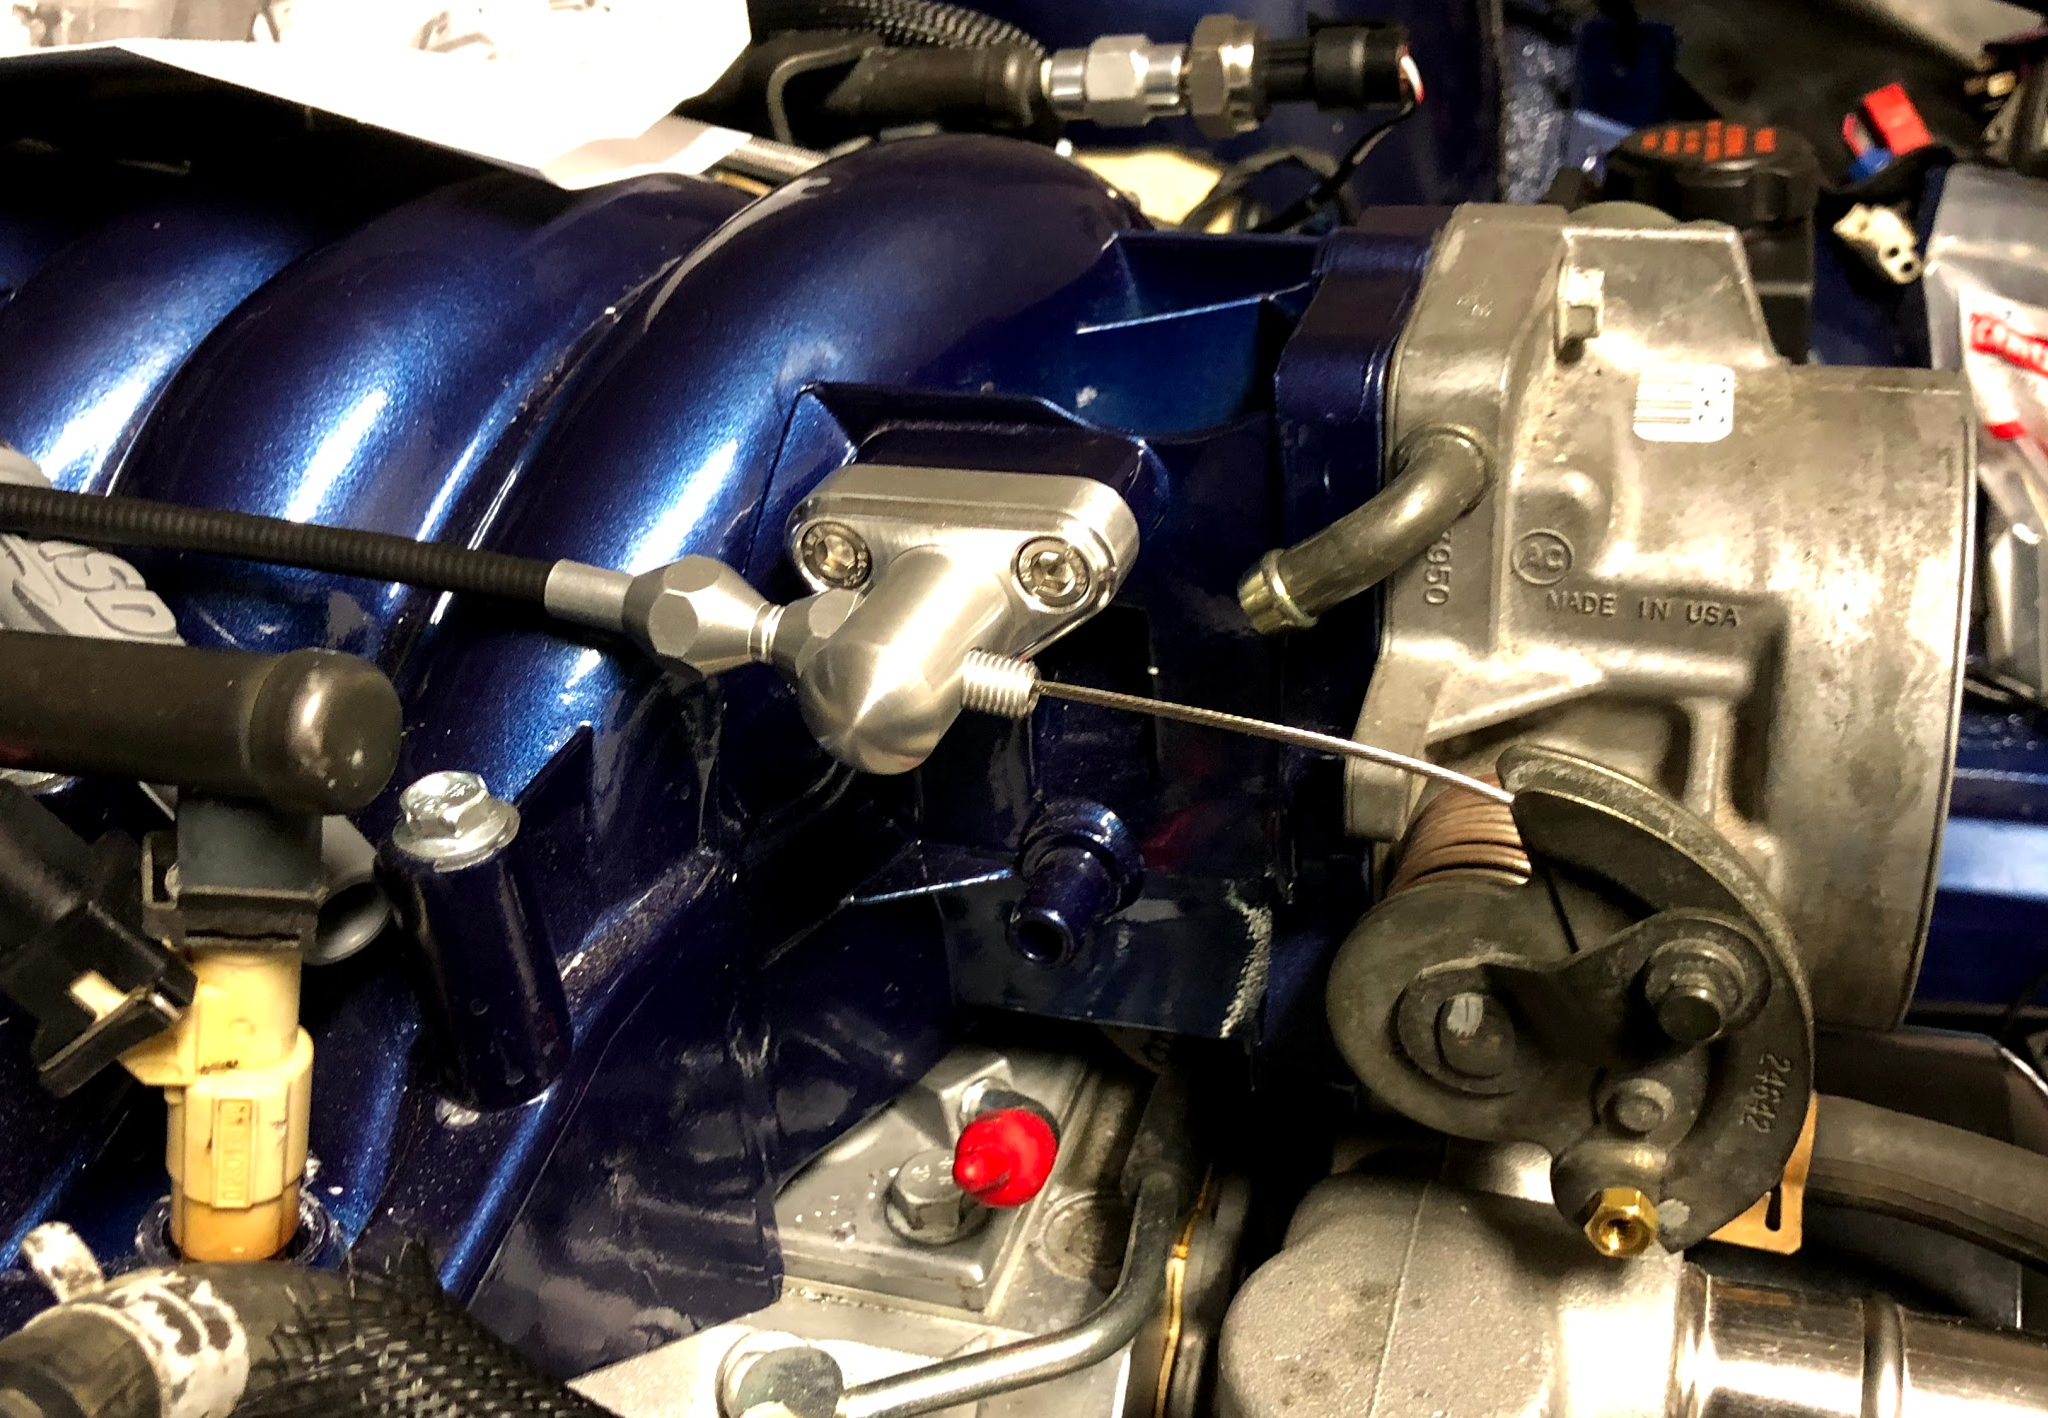
-Finished the throttle cable install
Member
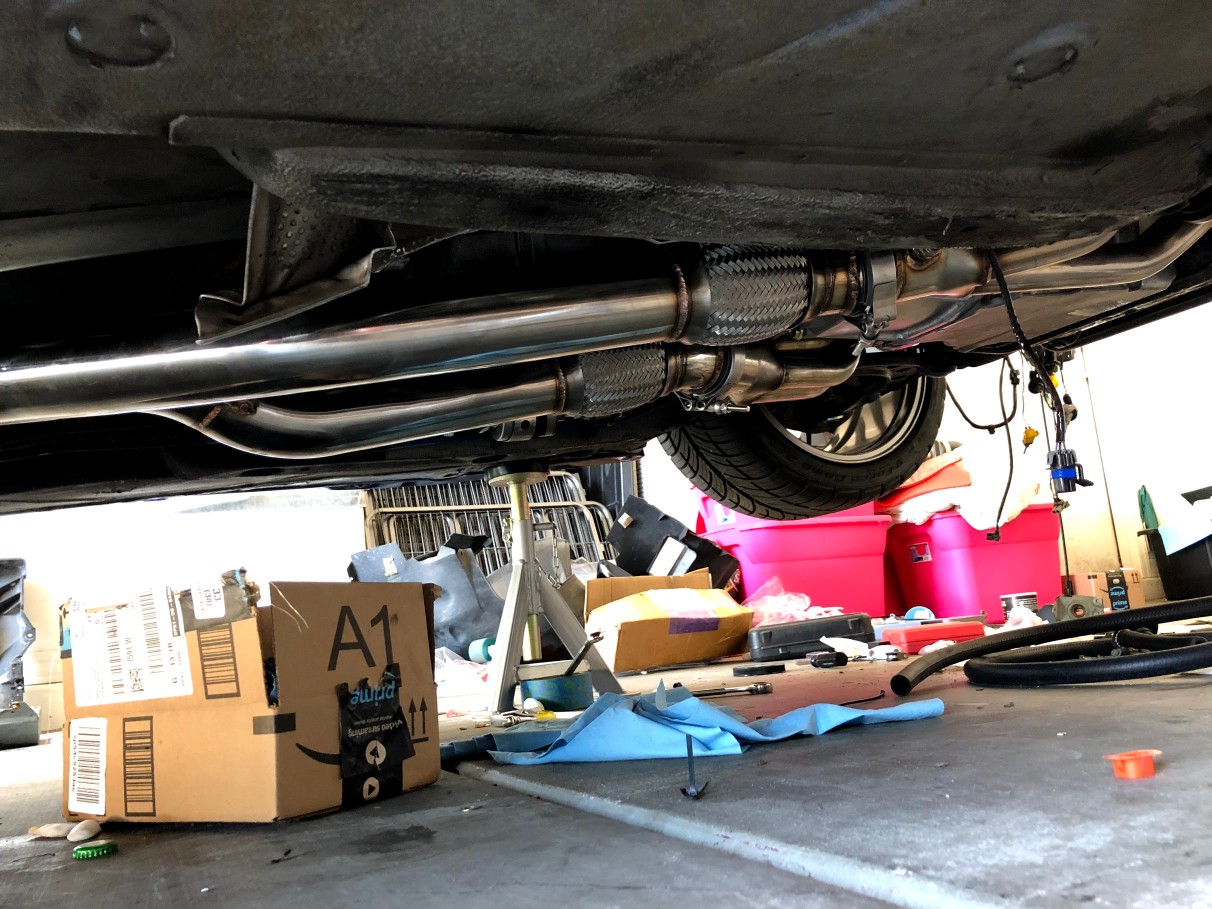
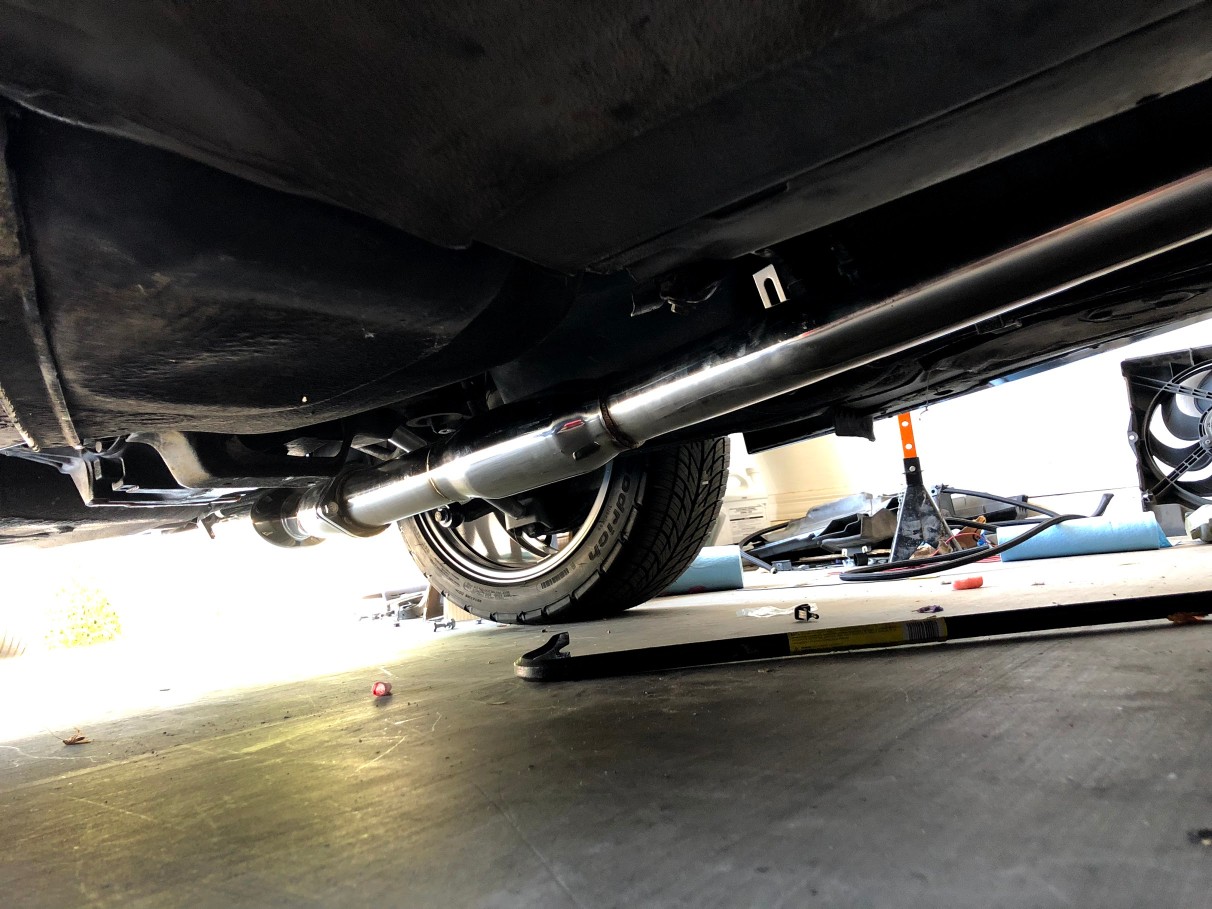
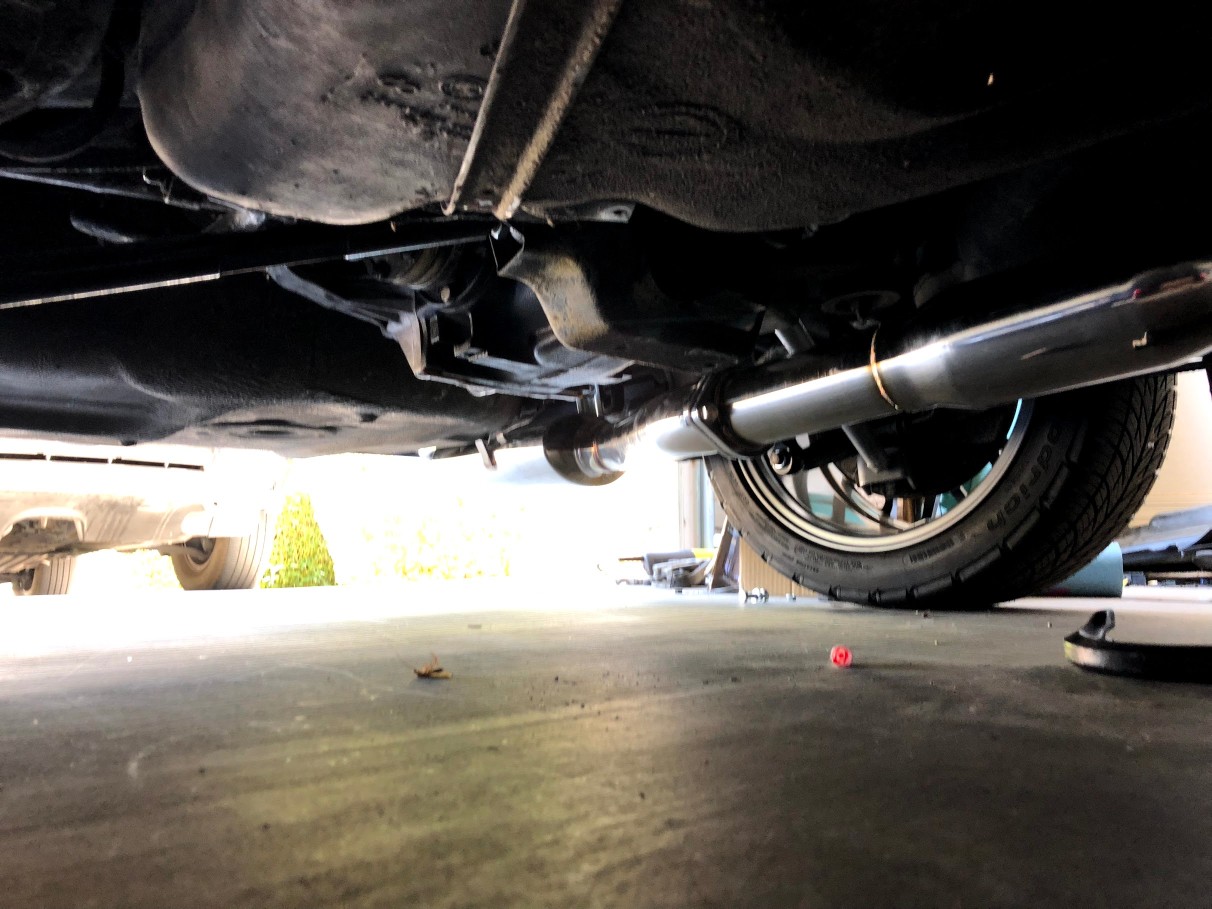
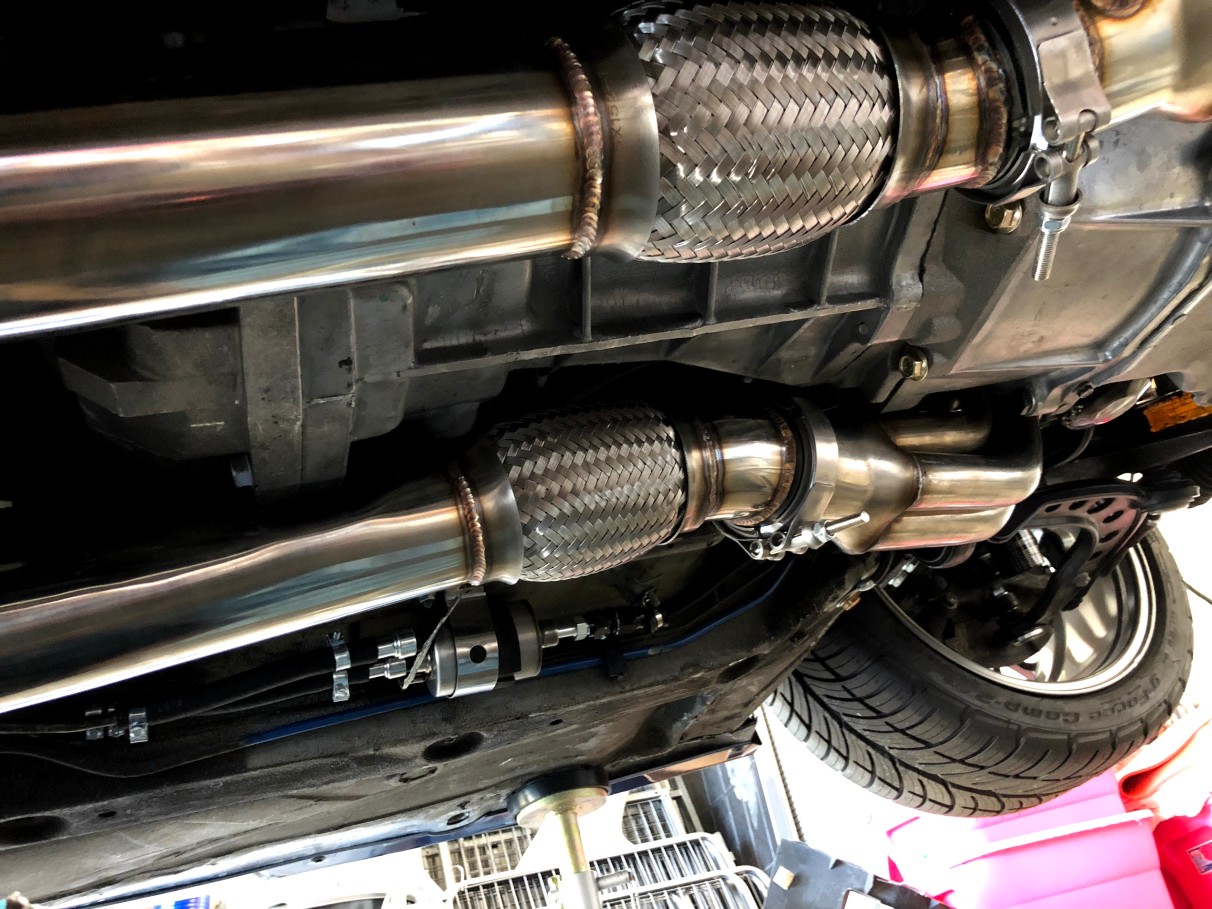
Got the following done today
-Installed the exhaust: Not sure what to think about the sound yet, will wait to pass judgement once everything is connected(iat/maf/o2 sensors) . Even with the full exhaust on it sounds LOUD lol. I did have to hammer in a part of the exhaust as it was hitting the tranny, The CX racing full cat back is designed for a t56 not a magnum so i'm guessing that's where the fitment issues came into play
-Installed o2 sensors: one of my sensor wires is not long enough so i put in an order for a plug extender for the passenger side
-Replaced stock fuel rails with holley fuel rails: Did this so I could connect the fuel rail from the back instead of the side stock location. Nothing wrong with the side but I think it's cleaner with the port on the back, also put my fuel pressure sender in line.
-Replaced the fuel line from filter to fuel rail with an fittings and teflon braided -6an line
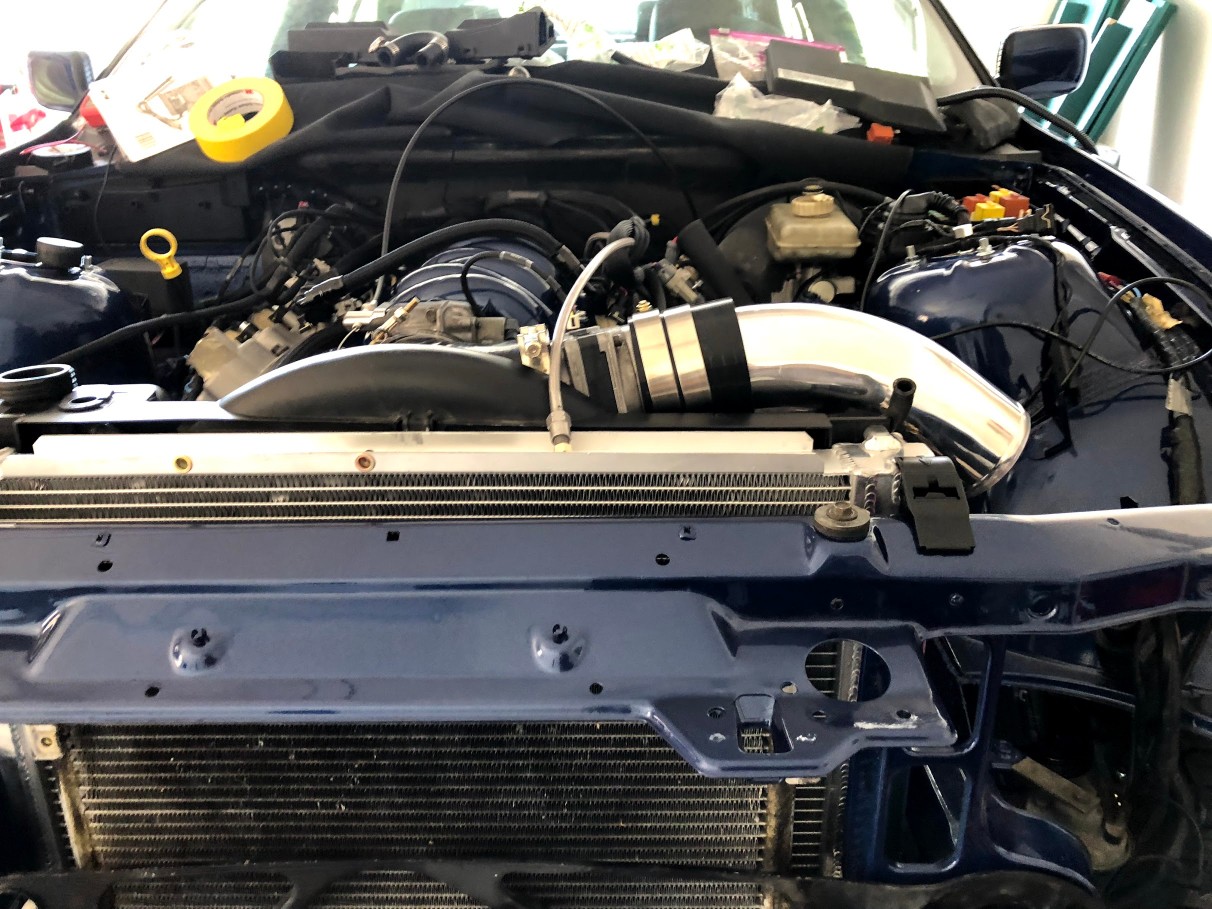
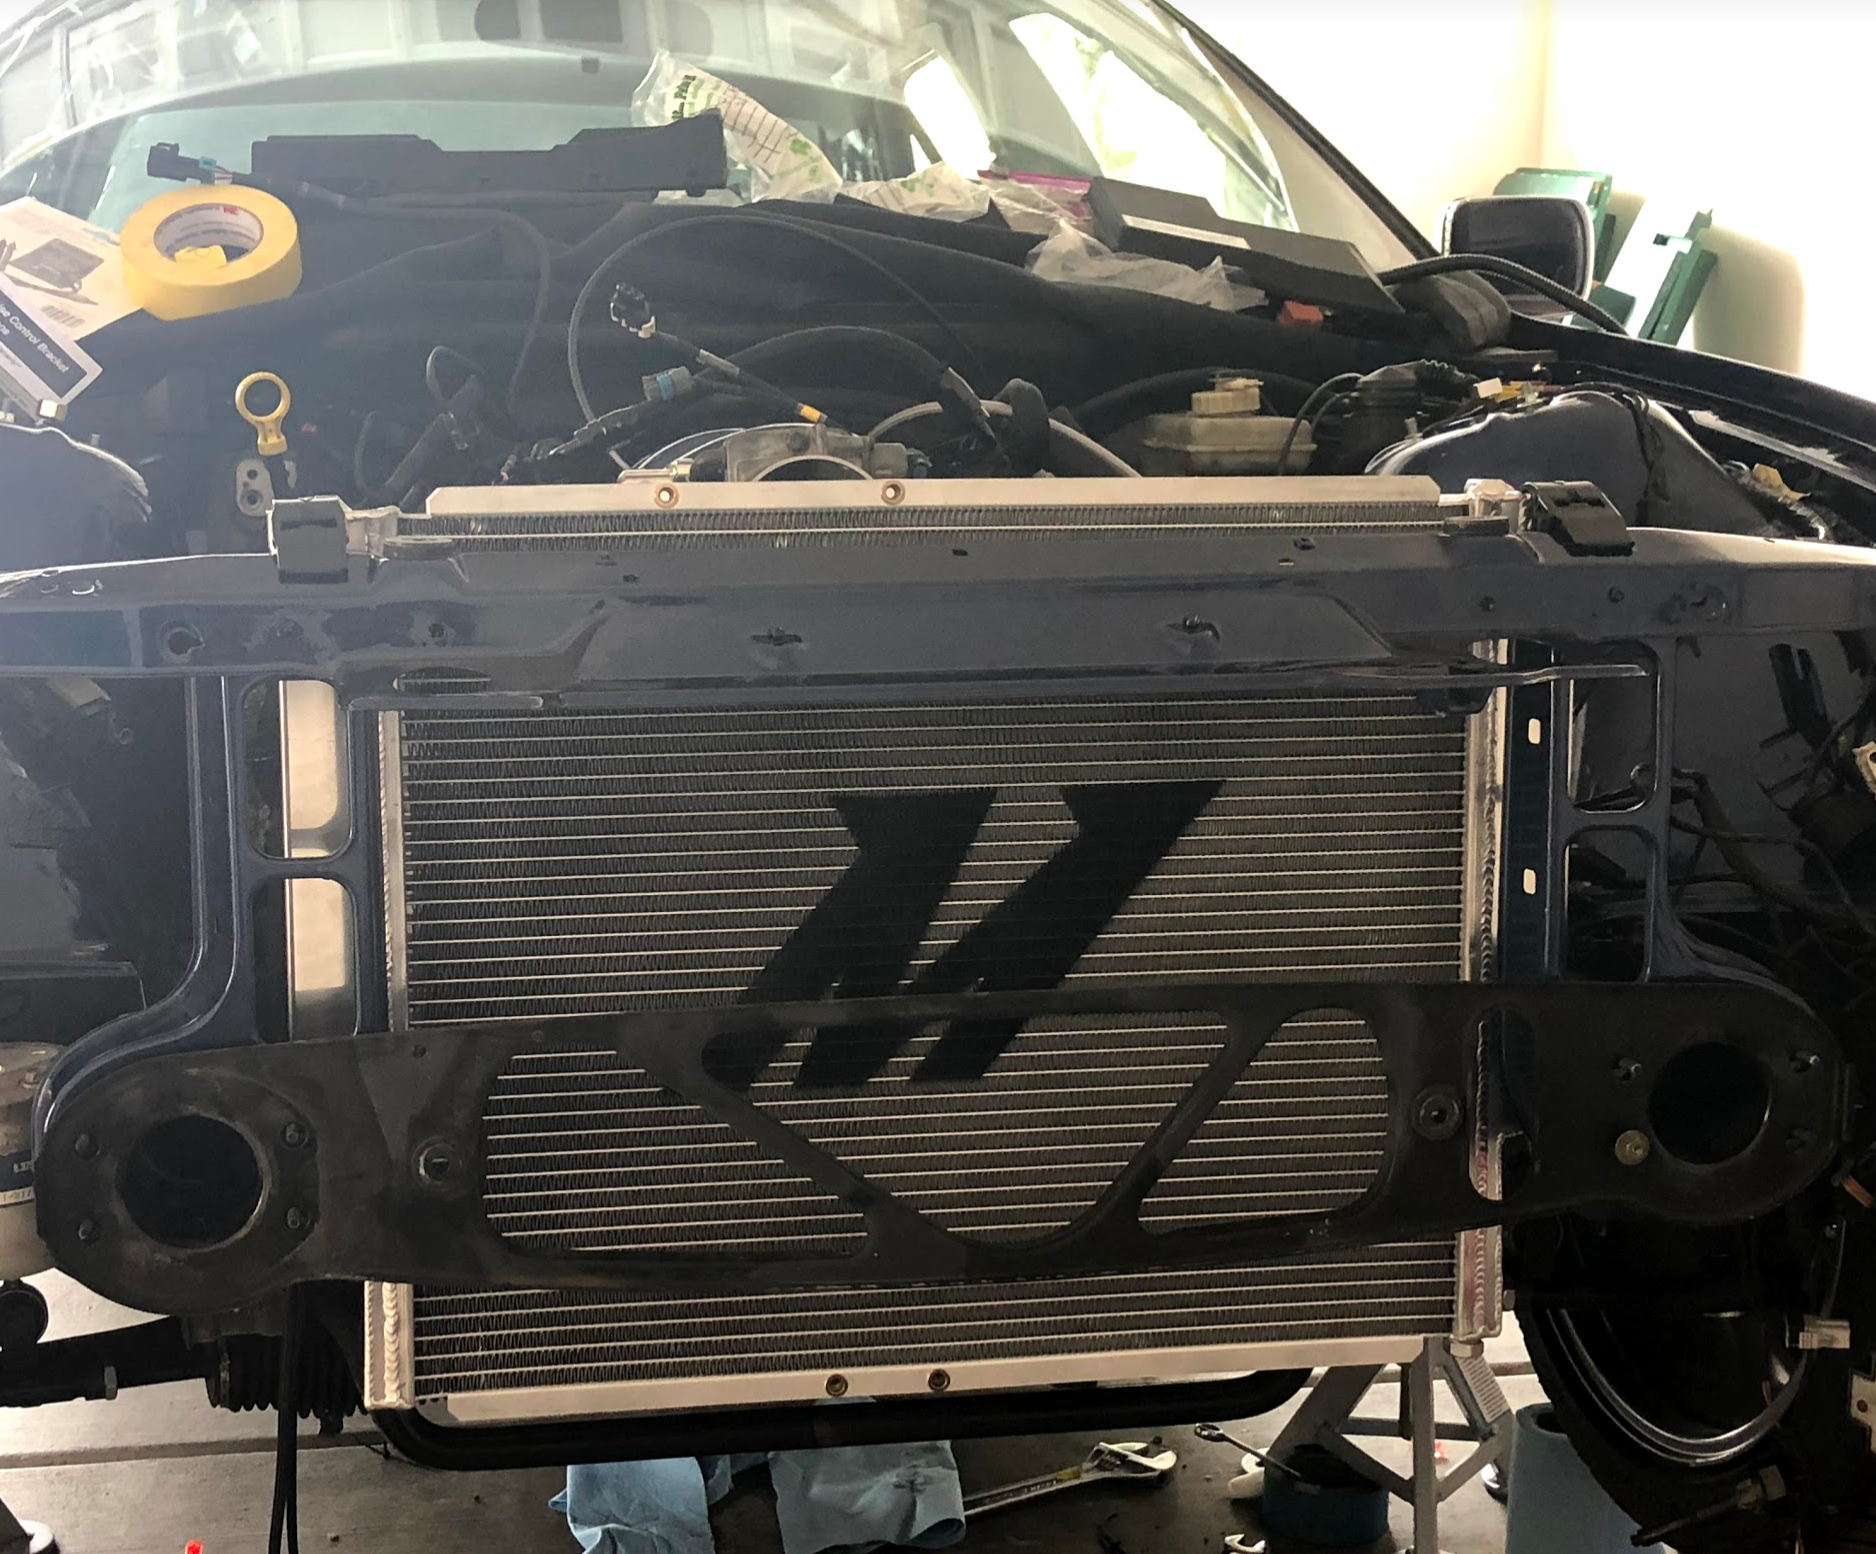
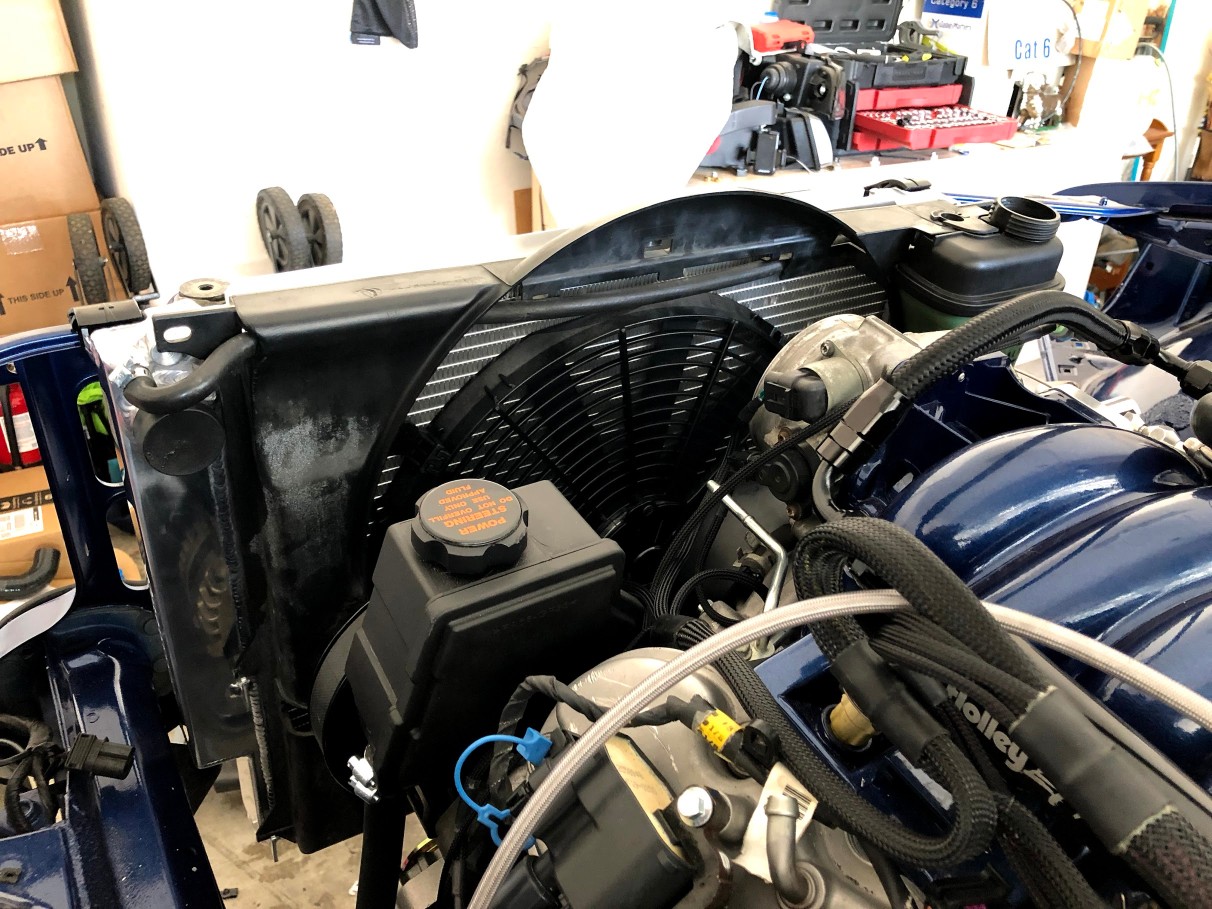
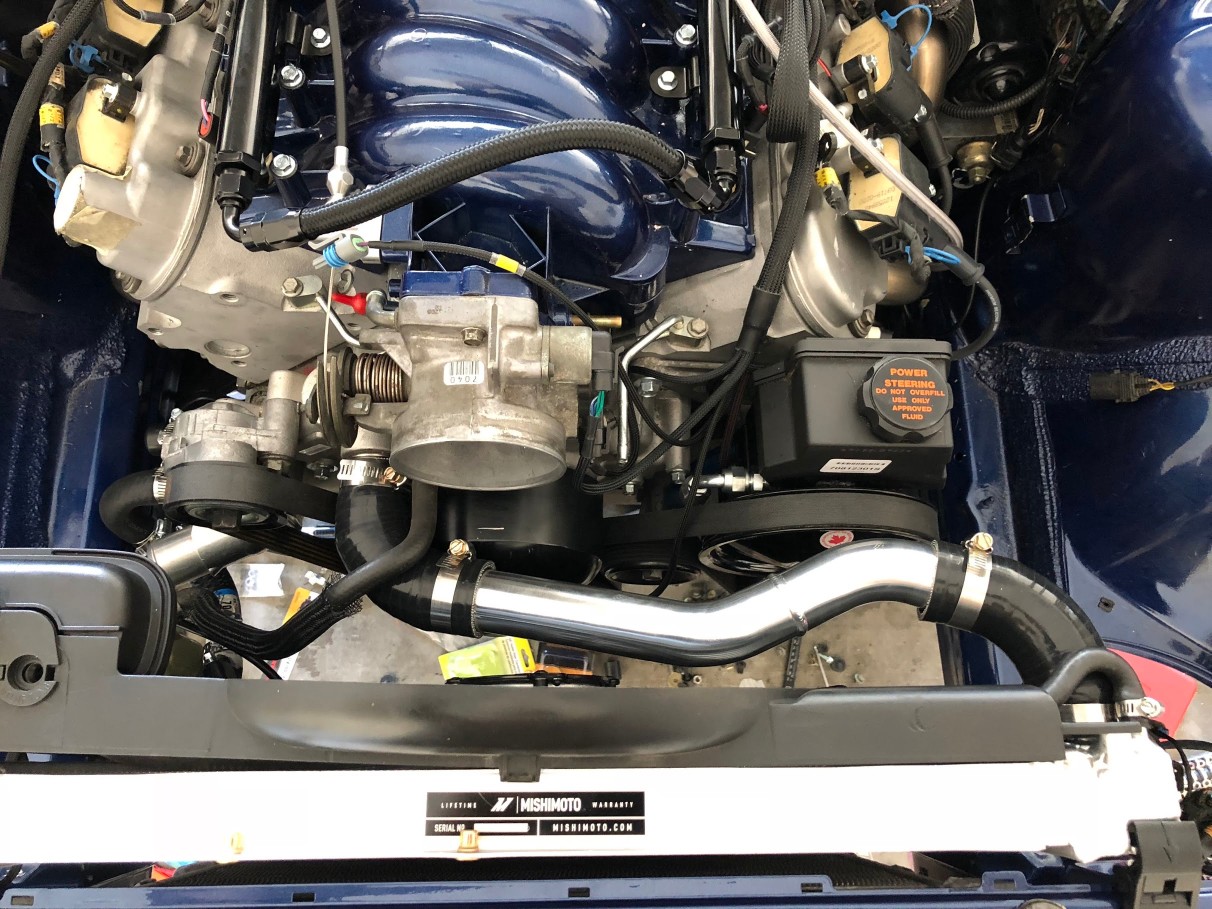
-Started test fitting the mishimoto radiator: I am going to use the stock shroud and made several trips to auto parts shops trying to find a hose that I could route Expansion tank>heater inlet on ls1 water pump. Since I am deleting the heater from the car I assume i can just go straight to the heater inlet and cap the heater outlet .... Hope it works :/
Right now I am in the process of trying to remember how the front end went on, i spend a ton of time scouring and searching for front end pics to get an idea of what goes where, what bolts to what etc... I am a bit dumfounded at the moment. Should of done a better job documenting it when i ripped it all apart lol
- - - Updated - - -
Video of the car starting up with the exhaust installed
https://www.youtube.com/watch?v=fw8k...ature=youtu.be
Last edited by RulyLSX; 06-17-2018 at 02:02 AM.
Member
More pics/vids!
-Got the upper and lower radiator hoses installed and setup: I purchased the cx racing universal ls1 radiator kit and it fit perfectly
-My o2 sensor extension arrived today via next day amazon prime: Got this installed and had to zip tie the excess wiring to avoid hitting the headers
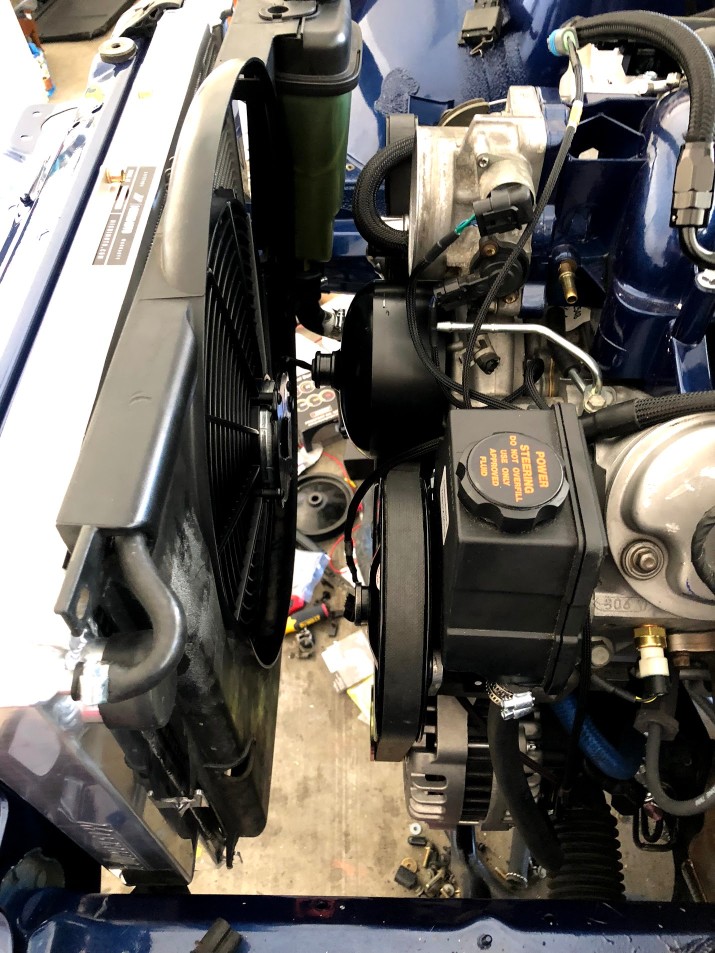
-mounted the spal 16" puller fan in side the stock shroud. Used a universal mounting kit that I bought at pep boys - I might have to cut the stock shroud as it blocks the intake slightly
-I also have to figure out how to install the intake to the driver side... The upper radiator hose is in the way, I am going to see if i can install the intake first without the upper radiator hose installed and see if there is enough room under.... If that doesn't work I am going to have to send the intake via the passenger sid
-Filled her up with coolant today and found several leaks from not tightening stuff good enough... that was fun
-Also stupidly forgot that the coolant crossover to the heads needs to be routed to the throttle body.... I capped it for now after it just squirted out water, I already placed an order for a throttle body bypass line via amazon
-All fluids are filled excluding brakes
anyways, here's some pics and video of it running with coolant flowing!
 Posting Permissions


 Reply With Quote


Bookmarks