
 Member
Just FYI. The older Ford Rangers that have a manual trans have a nice clutch resesvior. I used them on a couple projects. Like $5 at the local salvage.
БМВ Фанат!
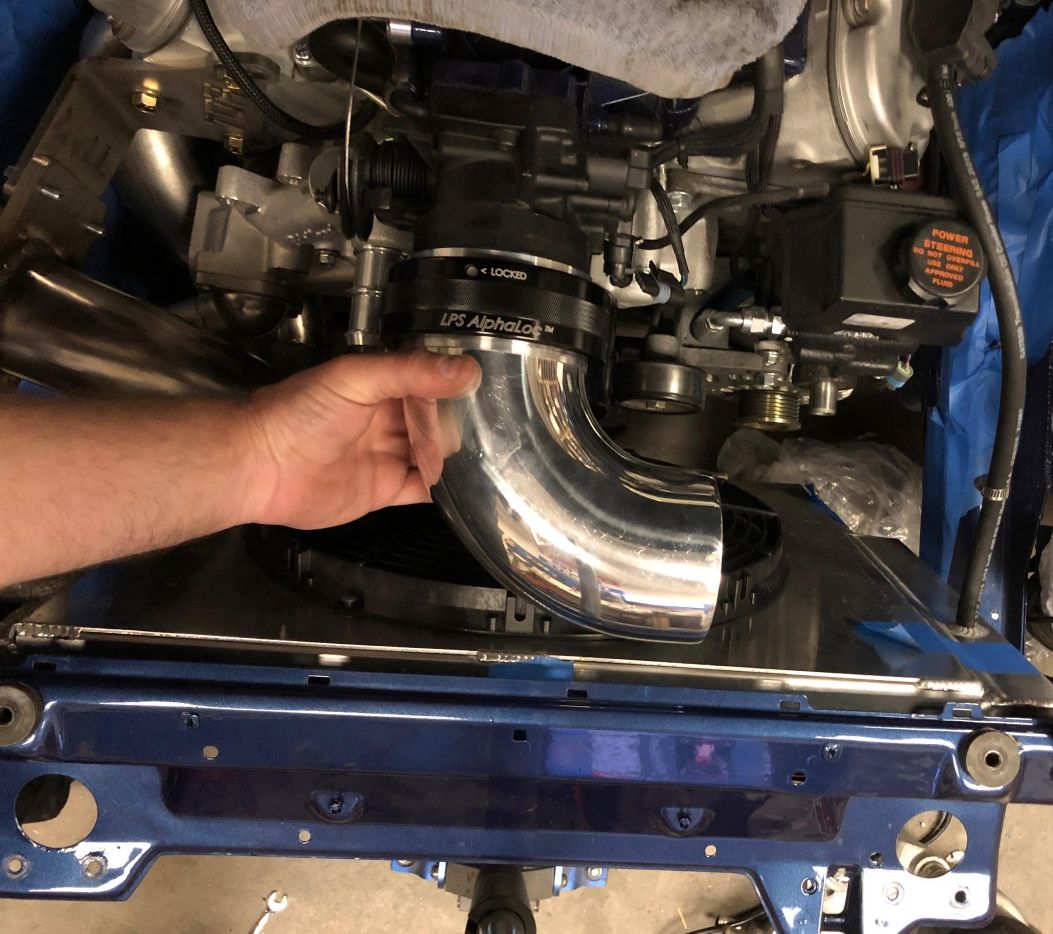
From doing some research the spring that you removed is both assistant and resistance spring. It provides a bit of resistance at the initial pedal travel and then past about half way it turns into assistance spring. It is best seen when the clutch pedal has no hydrolics connected.
But if it made your pedal feel good, then its a win.
- 96 328is 6.0L. (LS1 to LS2 build thread: http://forums.bimmerforums.com/forum...ad.php?2098938)
- 96 328is 5.7L. (LS1 build thread: http://forums.bimmerforums.com/forum....php?t=1289987)
- 95 ///M3 6.0L. (LS2 build thread: http://forums.bimmerforums.com/forum....php?t=1619249)
- 97 ///M3. (e46 Fender Flares/track car build thread: http://forums.bimmerforums.com/forum....php?t=1727098)
- 96 328is (Dual Fuel Pump to Surge Tank thread: http://www.bimmerforums.com/forum/sh...ad.php?1964025)
Member
Ok that makes sense due to that pivot thing it's on, I'm gonna run without it a for a while, so far i'm loving the consistent feeling it has through the whole pedal travel, it's just a tad bit firmer too which I likeOriginally Posted by bimerok

Member
Today I installed a new clutch pedal, this was in part due to my frustration with my clutch issues lol. It's a mason engineering metal clutch pedal to replace the plastic one. It's touted as a "short throw" clutch pedal and it was expensive but reviews I had read were all saying it was totally worth it, best mod ever etc etc ... The feel of the clutch is the same as the plastic one to be honest, it does feel a bit shorter and the alignment is now just level with the brake pedal
Here is a pic of side by side of the two, link to the details of the pedal here> https://www.masonengineering.net/pro...php?bmw_id=e36
The cool thing about this all is that I am now a pro at removing/installing the clutch pedal assembly lol, i have done it 4 times now and to install this new metal pedal it took me about 15-20 mins from start to finish
- - - Updated - - -
haha glad I am not alone!!! Have you been running without it?
Last edited by RulyLSX; 11-03-2018 at 10:43 PM.
Member
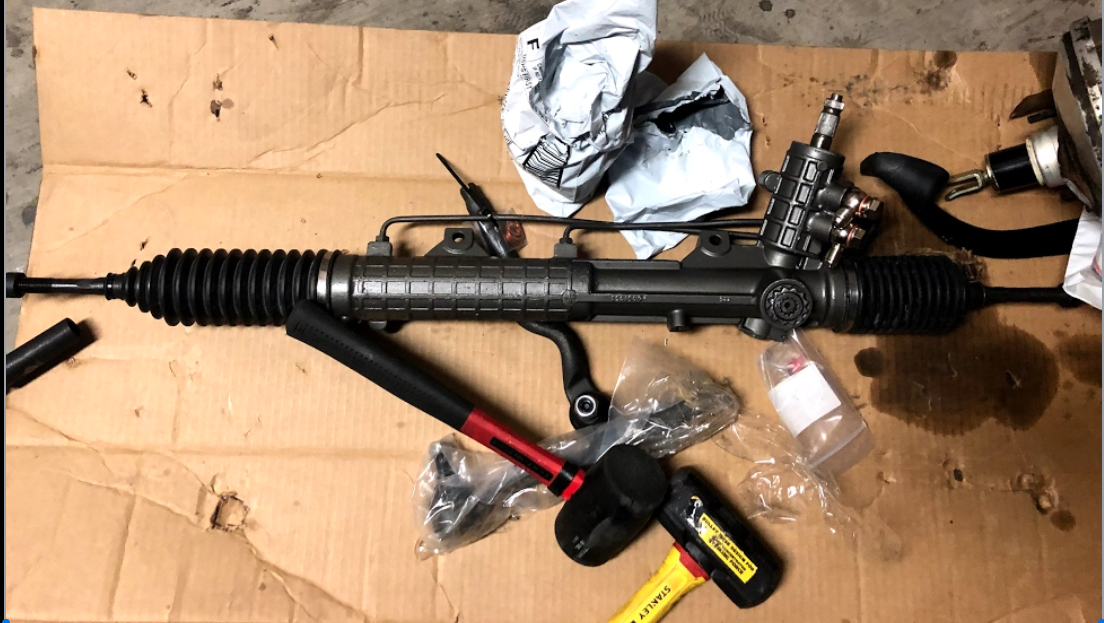
Not much to update, right now the thing that is bothering me as I'm driving the car more is the amount of "slop" in the steering, I did find another thread on bimmerforums that some have had slop using the flaming river setup as I have so i'm going to try to figure that out.
I had my wife move the steering wheel back and forth in the "slop" area looks like everything moves as it should but the slop is in the steering wheel rack?
Here is the video of the actual wheel slop
Additionally here is what it looks like at the rack side
Not sure if I should replace the steering shaft, adjust it or the rack/tie rods. I'm thinking since it's moving all the way to the rack that it's an issue with the rack though, any advice is appreciated.
Member
I've noticed a bit of slop using Flaming River setup on ours...still unsure if it is much to worry about or what it is caused by. Our slop is nothing like what you are showing in your video though. I almost wonder if the -3 degree camber is causal for our M3...
Although you could take the opportunity to install a quicker Z3 rack like we did...
Last edited by Tim Mc; 11-08-2018 at 11:56 PM.
Member
Yeah looks like im gonna get a new rack and replace everything with itwill look into the z3 one thanks!
Member
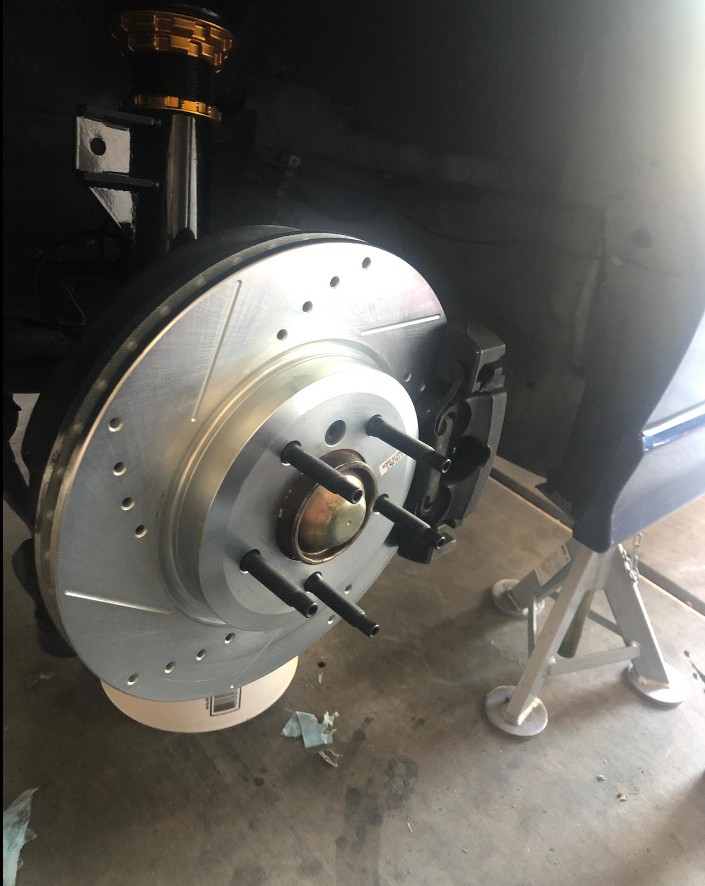
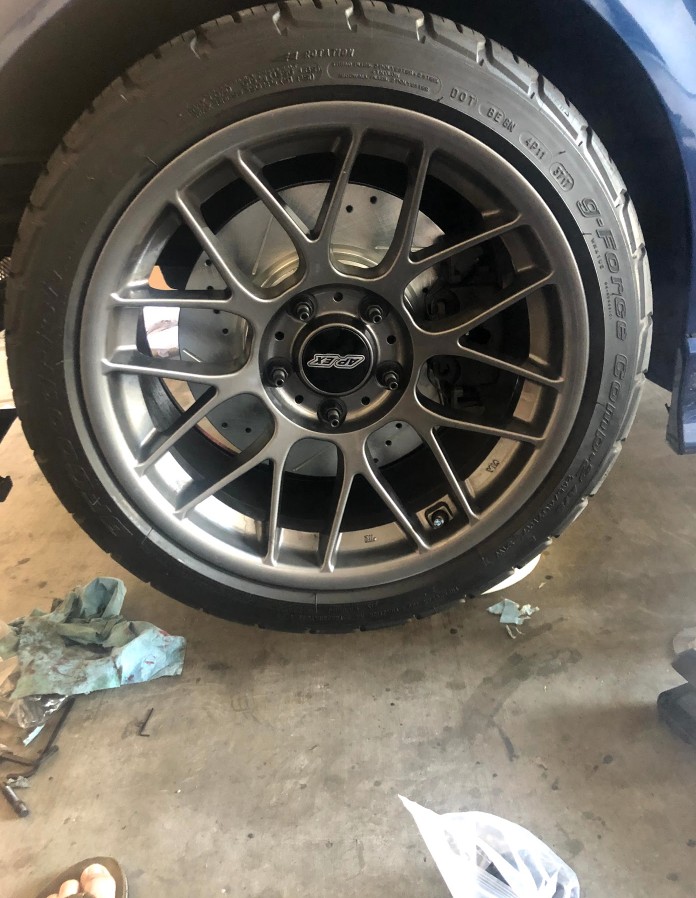
Updates for this week
Installed e46 330i front calipers/rotors along with my apex stud conversion kit that has been sitting on my shelve for a while. Took the car out for a spin and noticed the same as others have noticed when doing the upgrade, it has increased the pedal travel for the brakes, feels a bit weird.
I do have an m3 brake master that i was going to swap in, after removing the NON m brake master i realized that the new one isn't going to fit with my lines..... My lines to brake master are M10 and M12... The m3 one are both m10, DOH!
I found a thread were a guy recommended some pipe that has m12 on one end and m10 on the other, placed an order for that.... for now the car will be "down" until this line comes in and i can get my brakes working again lol.
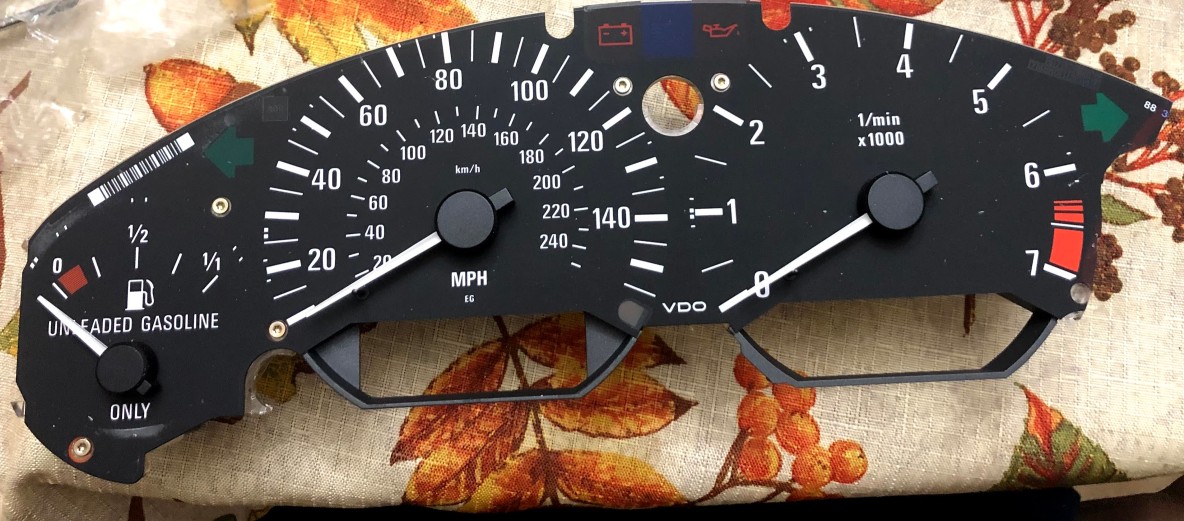
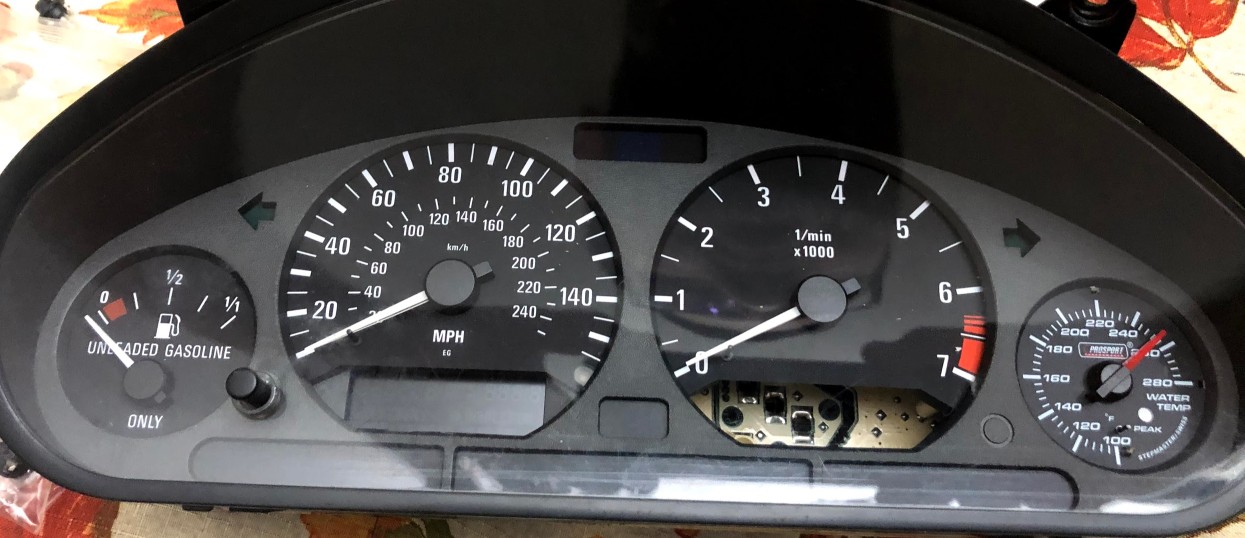
The other thing I have been trying out is to install a water temp gauge onto my stock cluster, I used my prosport water temp gauge that i bought a while back and my old NON m gauge cluster to cut up lol. So far it fits well!!!
Last edited by RulyLSX; 11-11-2018 at 10:30 AM.
Member
The gauge installation looks great.
Sent from my iPhone using Tapatalk Pro
Member
Thank you! it's coming out better than expected, i did test it out already and everything works!!! Since I confirmed it works the next step is cutting up my m3 gauge cluster and leaving it on permanetly. IT's going to be nice knowing the actual temps
Member
This weekend I took the car out to the track again after the 210mm diff swap, made a total of 4 passes, first two passes my clutch was sticking to the floor on shifts, I found out that with my violent clutch stomps the mickey mouse clutch stop i had made from home depot elevator bolt and the metal clutch was causing the "stuck" i would push the clutch in so hard that it would rub up against the metal clutch stop and cause it not to come up.
After removing the clutch stop the pedal would come back to normal.
The last two runs were nearly identical, 12.8 time, 2.0 60ft and 110mph trap speed, I am still spinning a lil off the line. I am clutch dumping at 4,000 with the launch control and tires were at 18psi. Time between runs was taking too long so I called it at night and went home. I'll be back out next week and will try launching a lil lower in the rpm range to see if i can improve my 60ft.
Looks like going from 3.91 ratio to 3.23 on the diff caused me about 6mph at the drag strip
anywho, here's a vid of the run.
Member
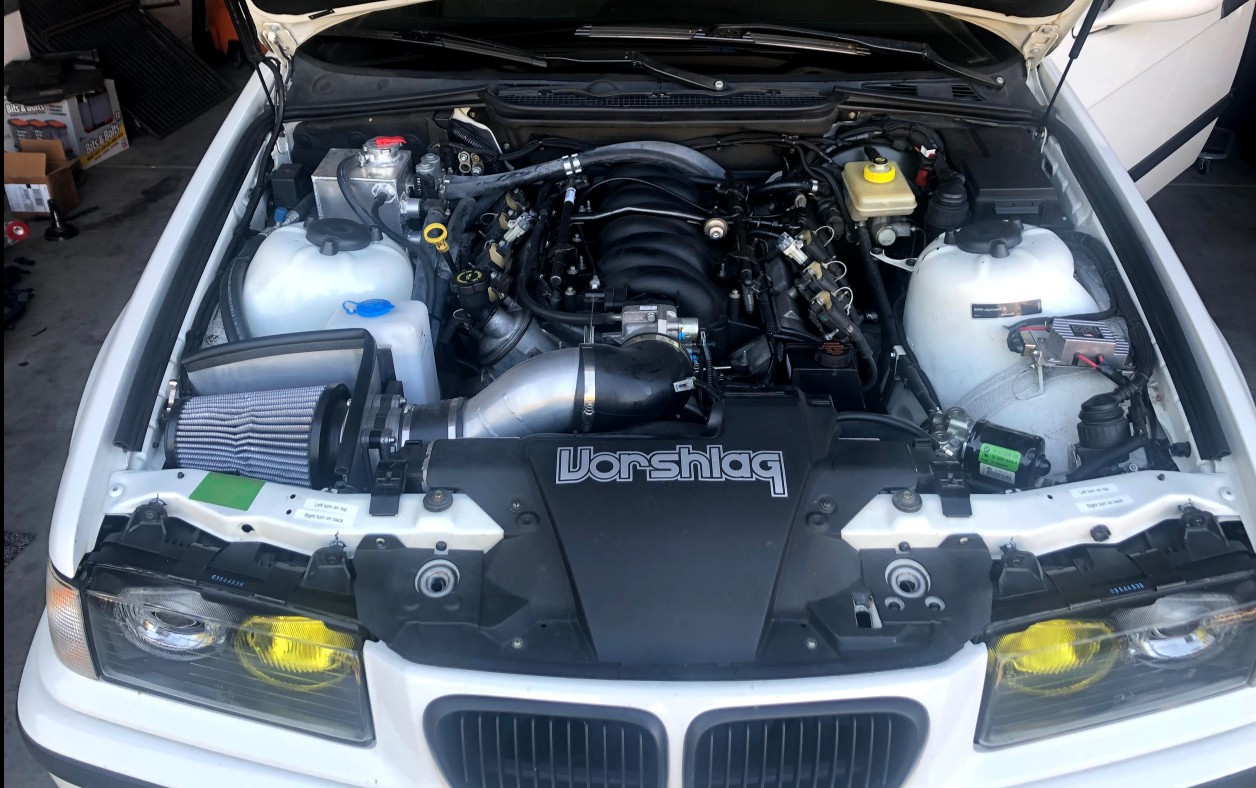
Not an update to my car but I did have the pleasure of meeting another local guy that has an LS e36!!! Met him through these forums and helped him install my old 3.91 LSD diff into his ride! Let alone the fact that I finally got to see another LS E36 in person other than my own but this one was actually the first e36 built by vorshlag with AC!!! I had seen their build thread of this car a few times so it was really cool to see it in person.
I loved how quiet it was compared to mine at idle, such a sweet deep rumble, if i wasn't going turbo i would go with his same setup!
More than anything it was fun wrenching with someone else, made stuff a hell of a lot easier and look forward to meeting up with Brian again!
Member
Update:
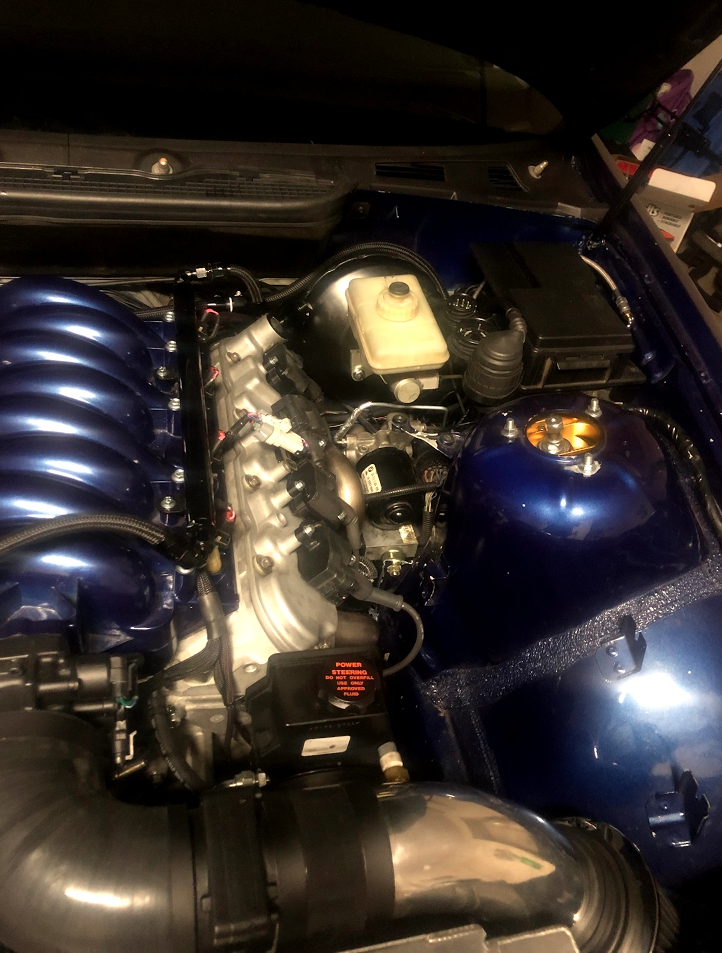
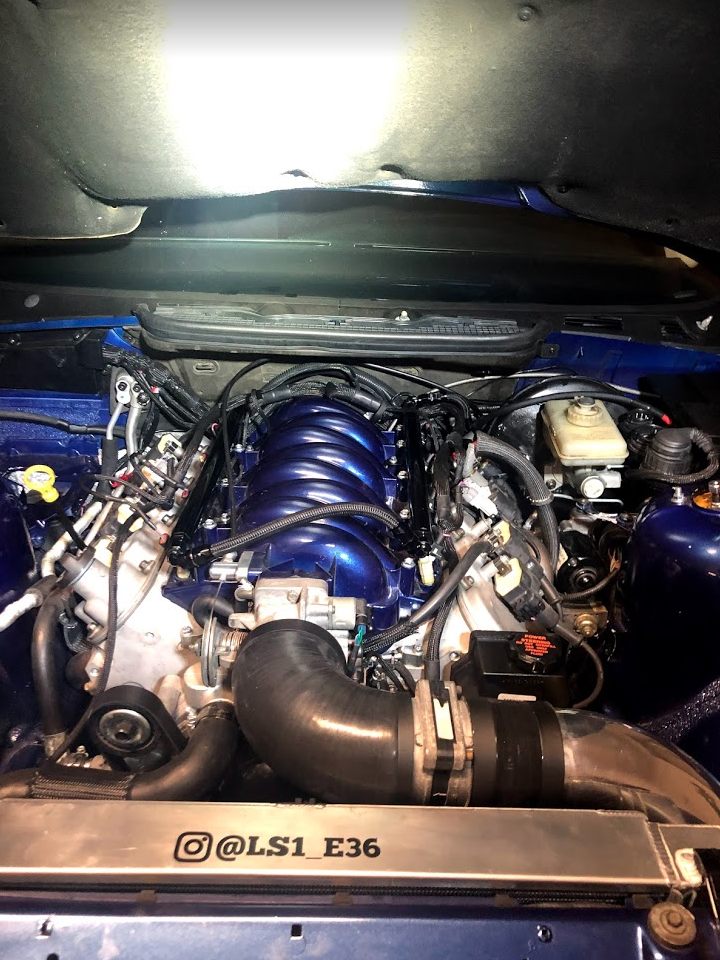
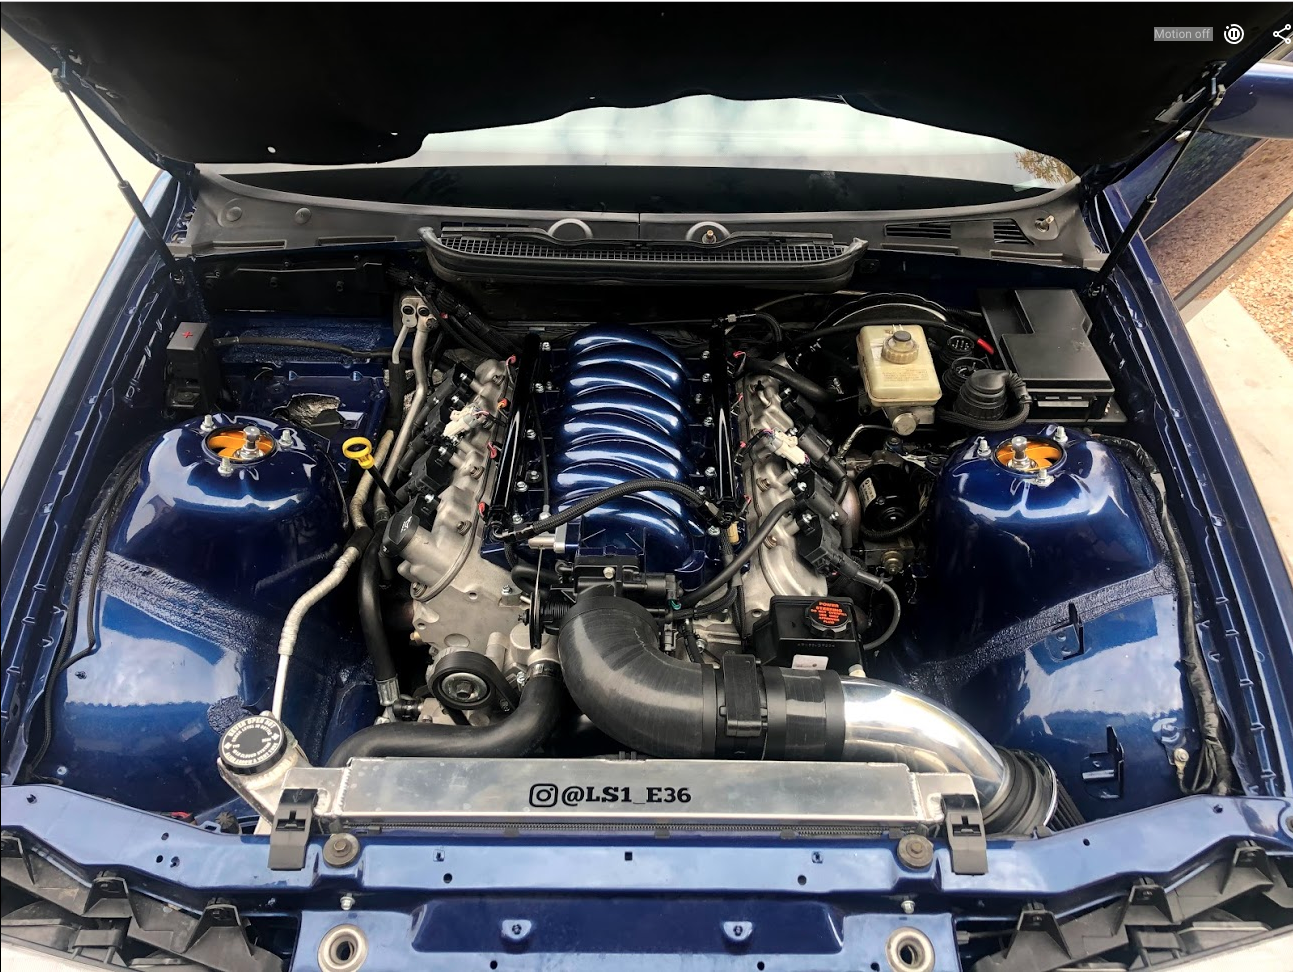
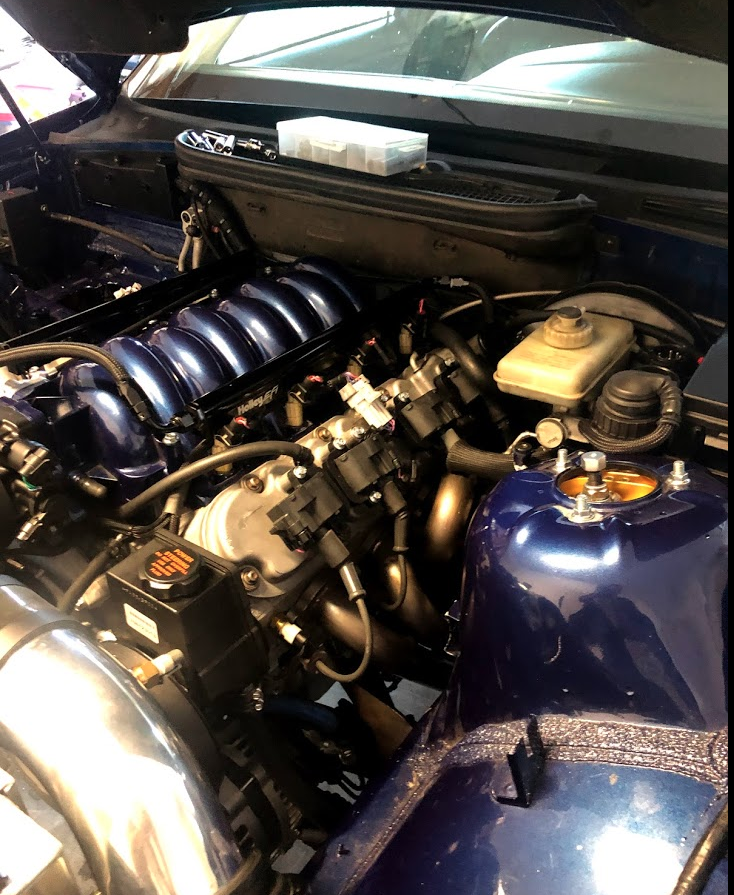
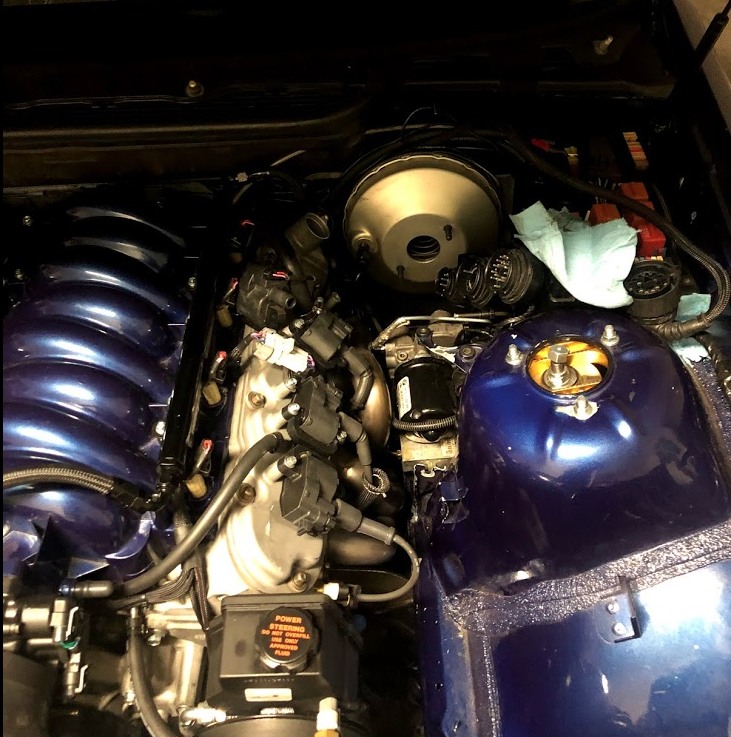
Been working on cleaning up the engine bay wiring, tucked the harness and reworked the coil/injector wiring, also painted some items black... Intake clamps, maf and throttle body.. also working a different brake booster.
Before
After
New steering rack and cooler, also converted all the lines to AN
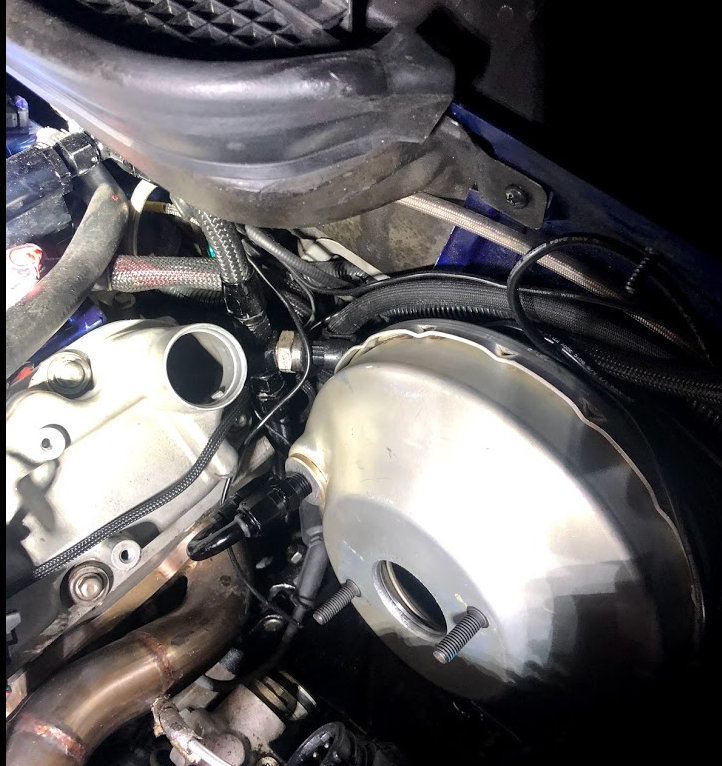
Removed OEM brake booster and started test fitting the smaller diameter booster from a 190e
--Power steering cooler I used a Derale 13223 Frame Rail Fluid Cooler, it uses -6 an for both in and out ports, the cooler actually lined up perfectly where the existing power steering bolts go... Link to cooler https://www.amazon.com/gp/product/B0...?ie=UTF8&psc=1
--For the brake booster, it's from a 1987 Mercedes 190e, I took it to a machine shop and they put it on a lathe to slightly enlarge the diameter of the hole were the master cylinder goes, also tapped the vacuum line in it for pipe thread(1/4npt) and have a fitting that goes 1/4npt to -6an... Going to see how that works, could also use -8 i guess if needed, plan is to put a check valve in place then run it to the back of the ls6 intake manifold and hide the hose as nice as possible, right now my hose went over the valve cover and it looks like crap IMO... I don't think i have seen someone use an line for booster vacuum line, hope it works.... worst case scenario is that I scratch the booster plan completely and use the hydroboost. Love how much clearance there is with the smaller booster, makes such a difference!
Last edited by RulyLSX; 12-17-2018 at 10:40 AM.
Member
New booster is in! was a PITA but it's finally in, flipped the booster around as well so the vacuum line is on the opposite side... hope that isn't an issue.
Did an initial bleed and the breaks feel great, still have air in the lines but the pedal effort required isn't that bad at all, maybe slightly harder than stock.....
Member
Slick! Certainly looks factory.
Noticed your valve covers both have oil fills? Intentional? We only have one on the passengerside - unsure if that would help with clearance/clean up.
Member
When I first put the car together I realized after I had everything in place that my valve covers were on the opposite ends, that meant I could only filll it from the rear driver side lol, I didn't have enough clearance to reach the rear driver side bolt to remove that side valve cover so that's how I ended up with what I have now lol.
Now with the new booster I have plenty of room to correct that which I already have and will be added a smaller cover back there
Member
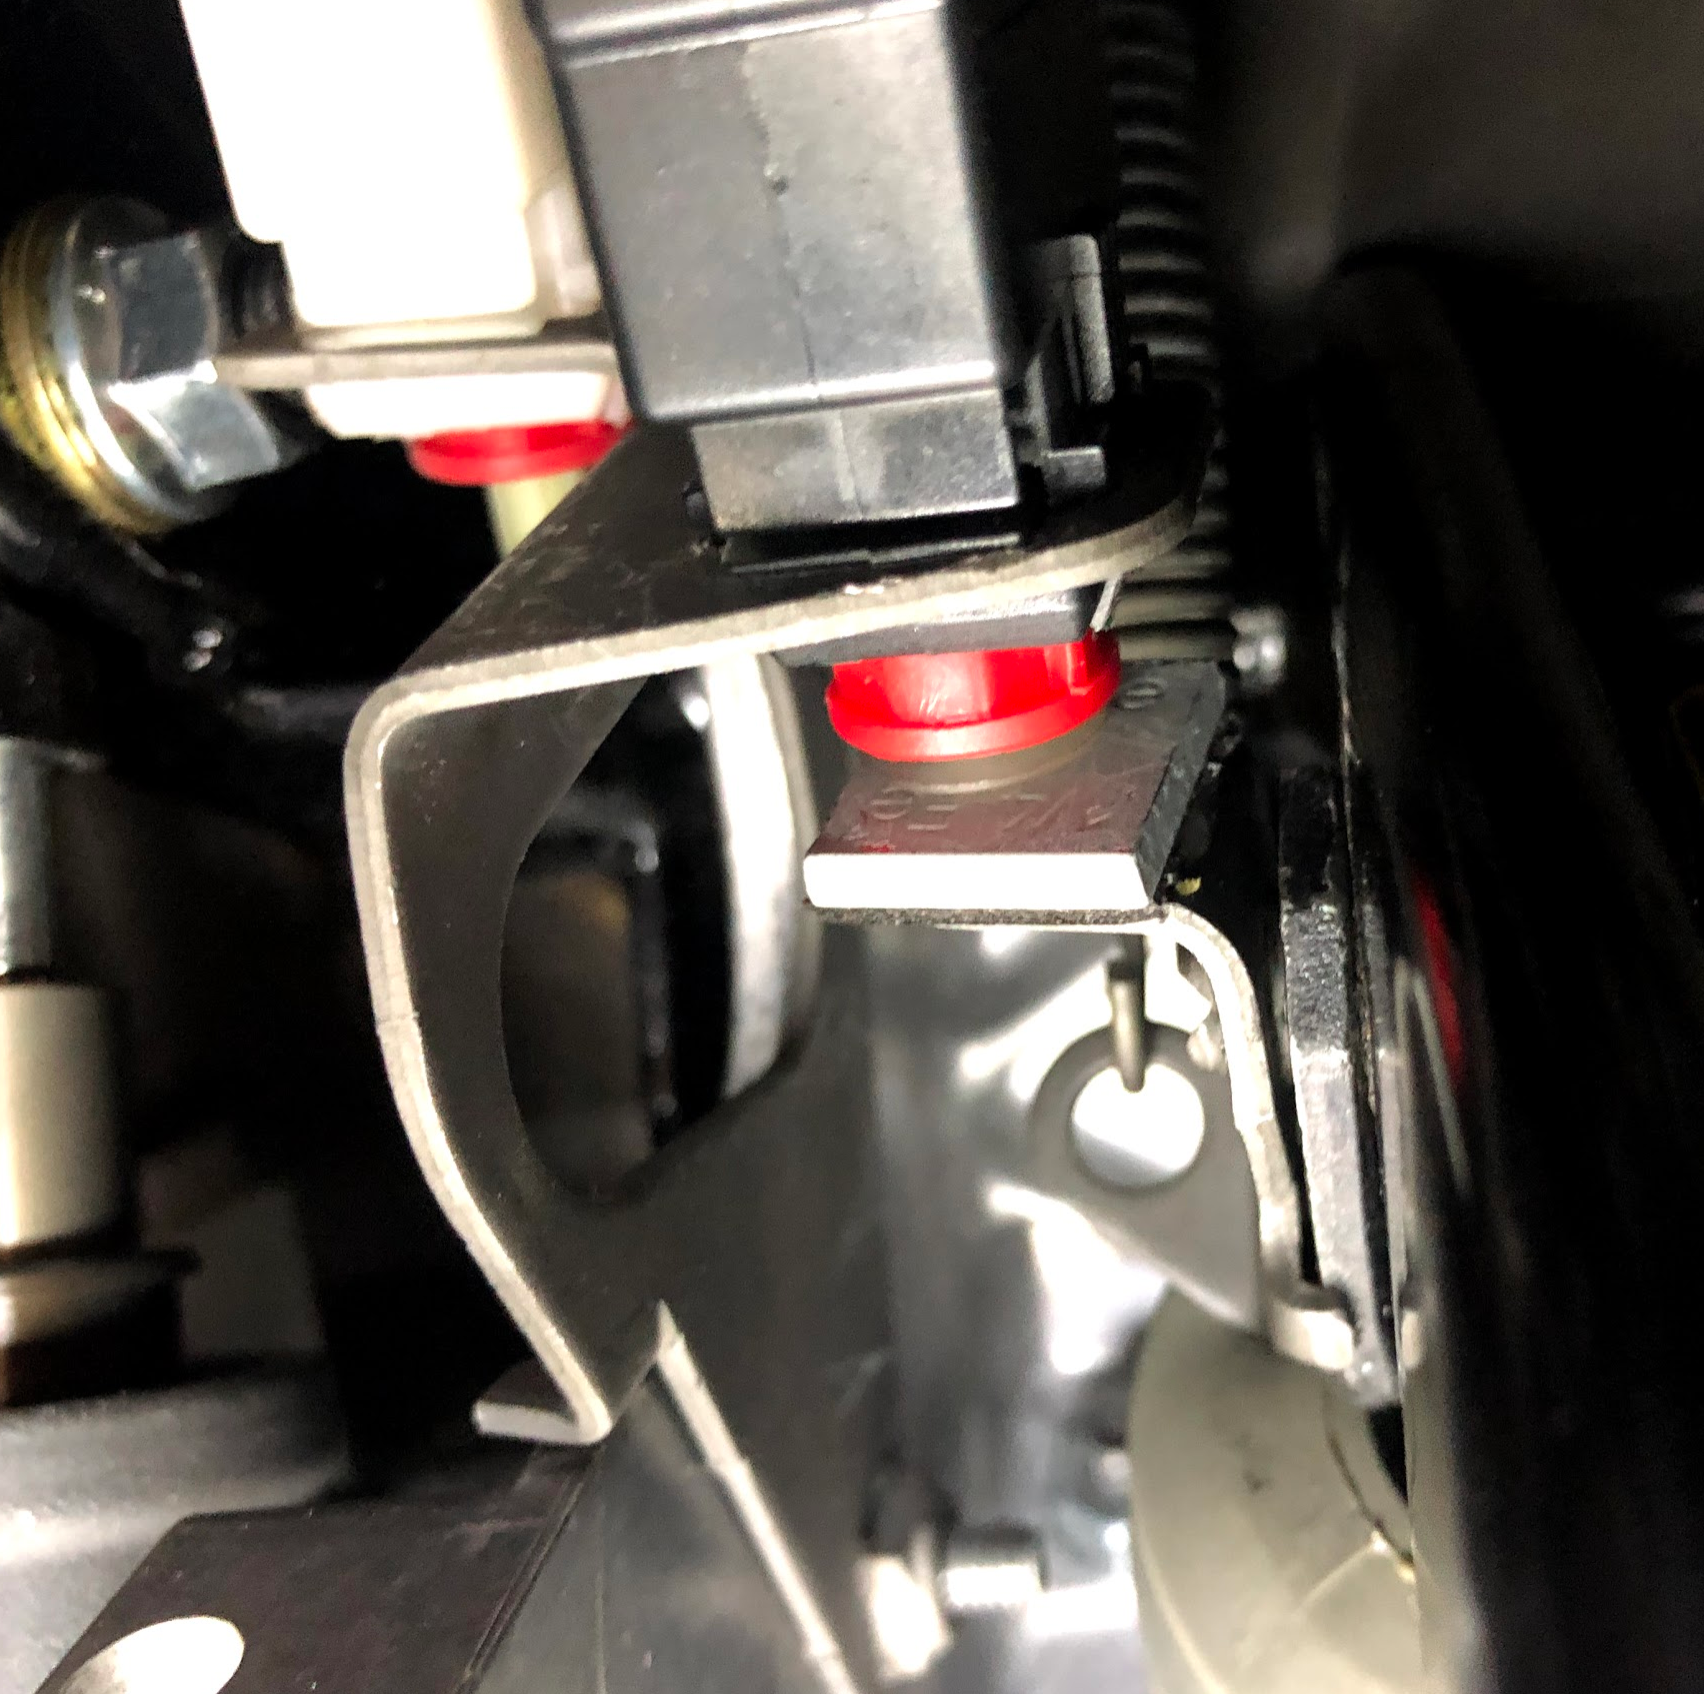
One thing I found out after installing the new booster was that my brake lights weren't working at all. While inspecting the brake light switch it appears that the tab that activates the switch isn't reaching anymore.
My only guess is that the new brake booster bracket that attaches to the pedal isn't as long as the stock one.... I dind't think to compare the two boosters while they were both out since I didn't see anyone mentioning that when doing this swap.
I was able to fix the issue for now, I found a wheel weight that you normally put on wheels when balancing and stuck that to the brake switch tab on the pedal... I used a dab of super glue and the brake lights are working again.... Temp fix until i figure something else out
Member
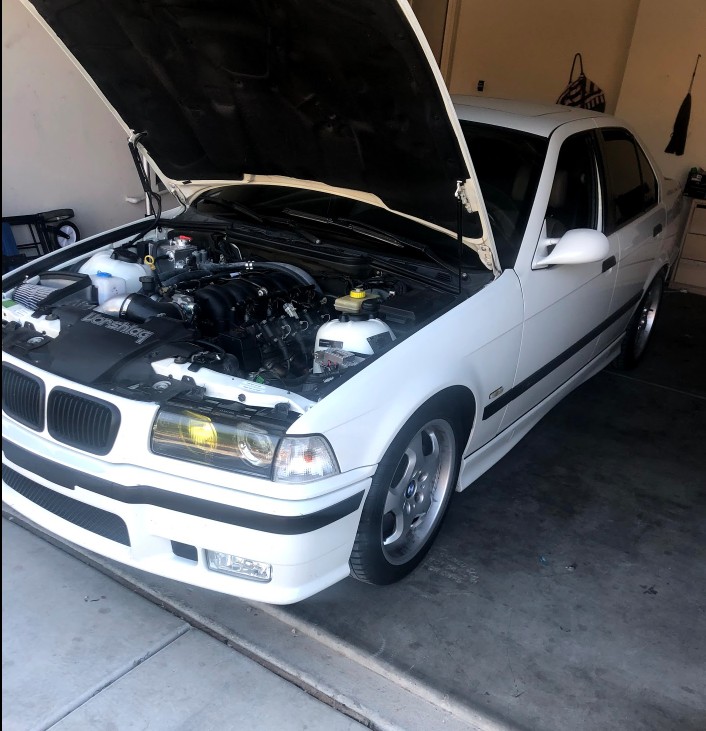
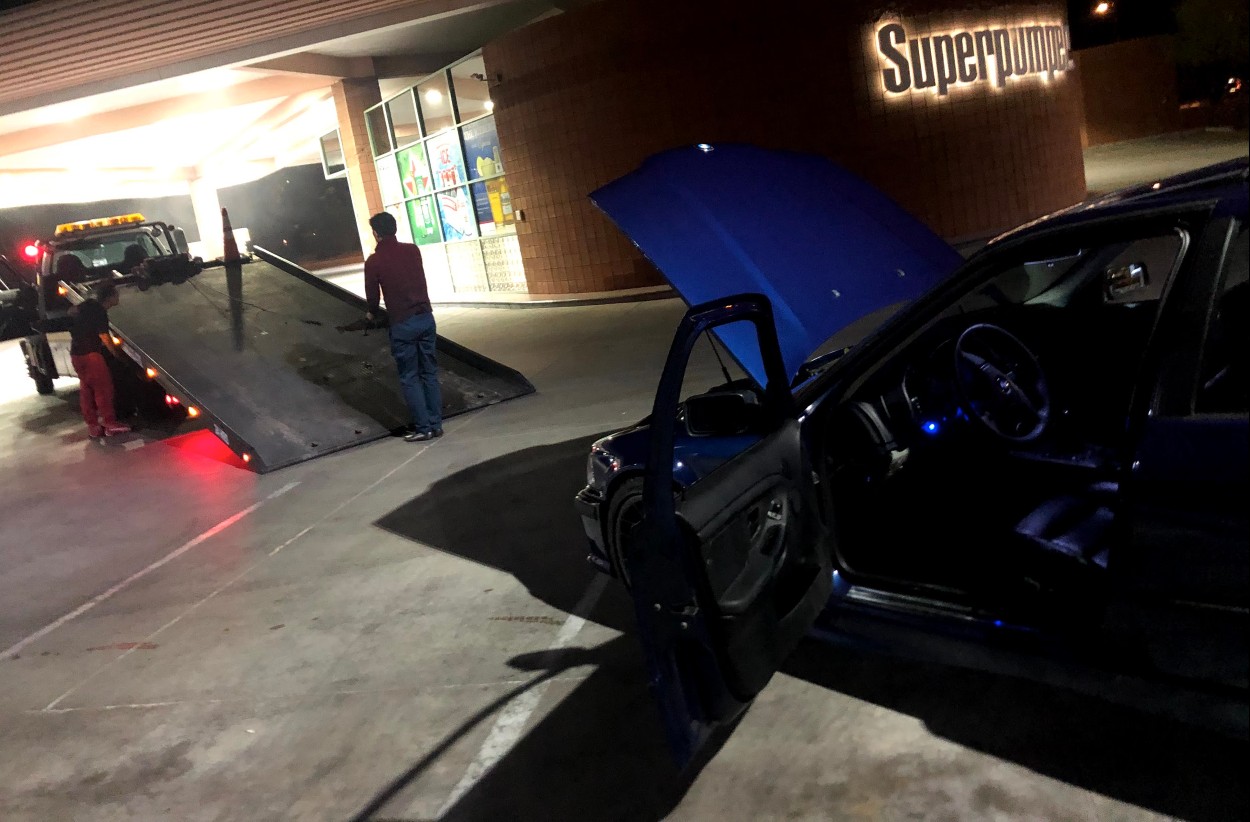
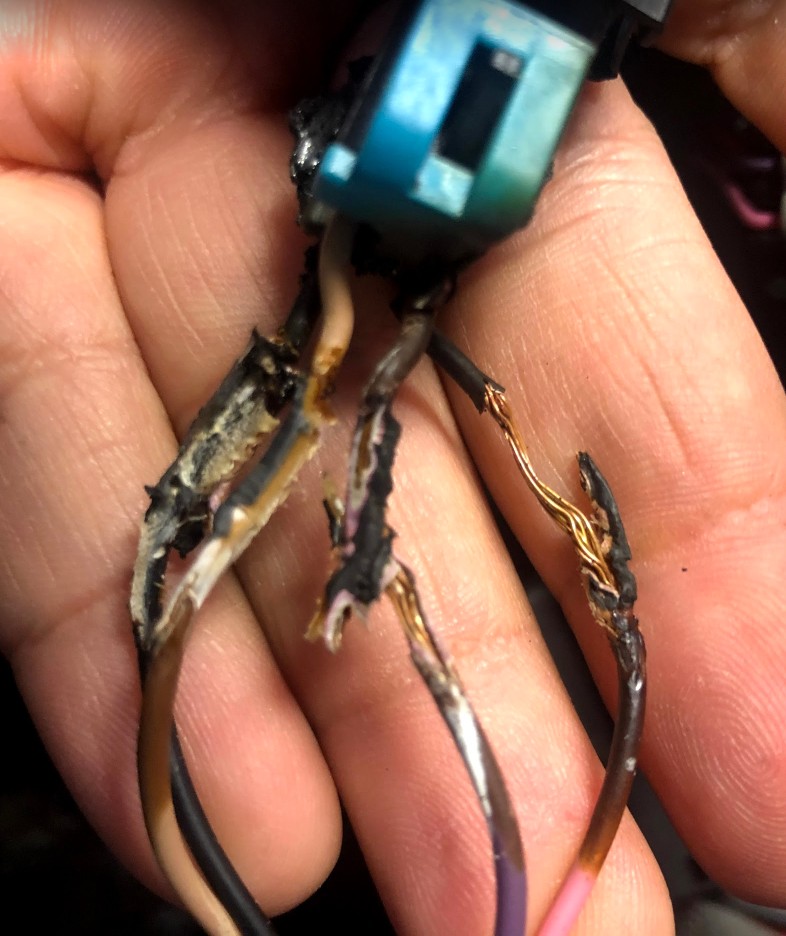
Haven't updated in a while, car's been running great. I drive it to work roughly once a week 40 miles each way..... Runs like a friggin champ!!! I did have an issue with it back in January though, when i did some wiring clean up i ended up moving the o2 sensor a lil too close to the header and it shorted..... left me dead in the water and I Had to tow the car home lol, when using hte wiring specialties harness I found out that the o2 sensor is branches off the fuel pump wiring, so when that shorted my fuel pump fuse blew!!! Tried replacing it a few times but couldn't get further than a mile before it blew again :/
I had to order a new o2 plug and fixed the wiring, after that was fixed i was able to correct the issue with the wires resting on the header and the car has been fine ever since!
Also waiting on the fabricator I will be using to start building my custom turbo kit, looks like we are a few weeks out before that happens though. In the meanwhile I did get new parts that I am excited about
It's the rally road lid/dual fuel pump hangar kit but I will only be using a single fuel pump for my turbo build... this is the walboro 525, should be enough for my power needs , I am going to put this in place and convert my fuel lines to all AN instead of the clamp setup i have now
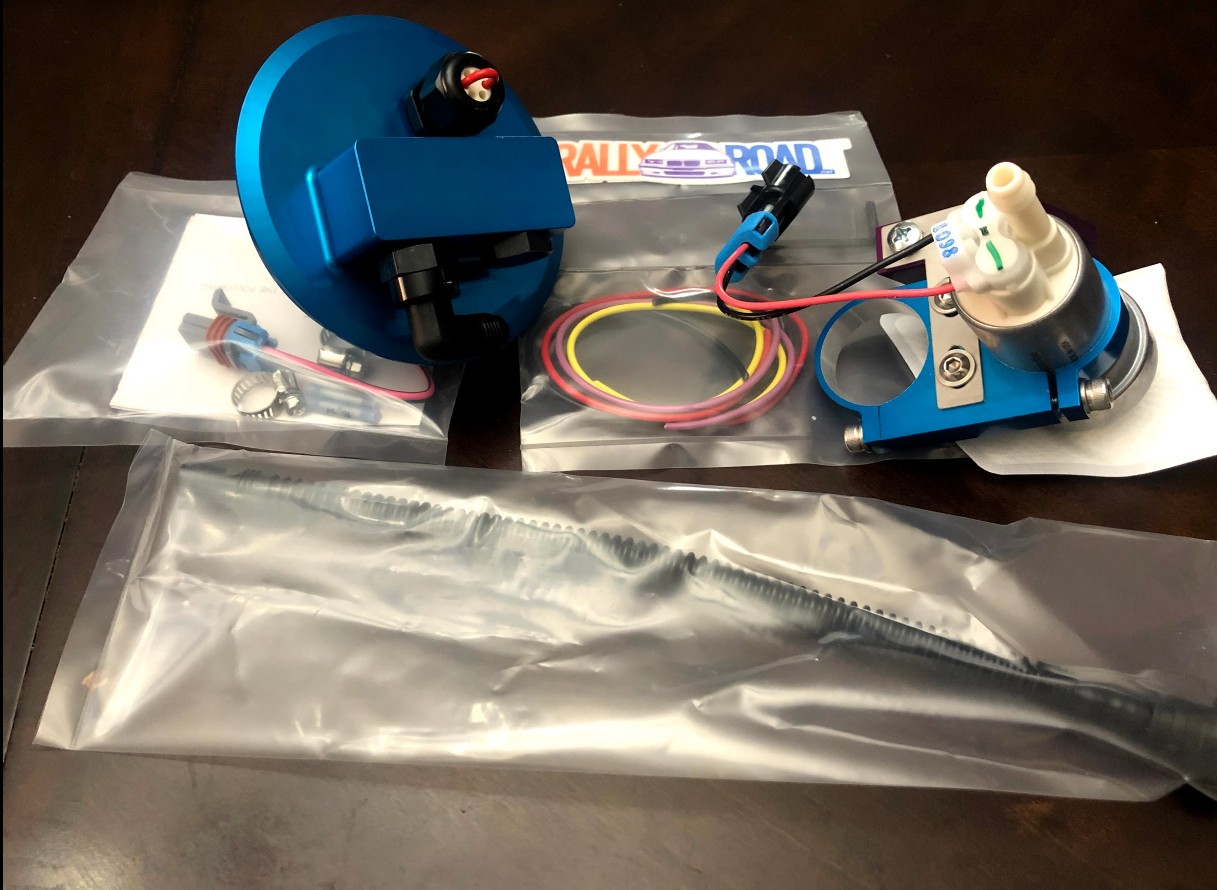
Last edited by RulyLSX; 03-06-2019 at 10:39 PM.
Member
Nice work on the swap
Food for thought with your fuel system,if youre considering adding a second pump or surge tank for track work. Consider adapting a fuel pump assembly from a modern car with a fuel bucket and Venturi pump.
Ive been thinking about this for my swap but Im only just getting started.
Member
Awesome, i'll keep that in mind once I attempt the fuel lines, can't wait to be booooosted
Member
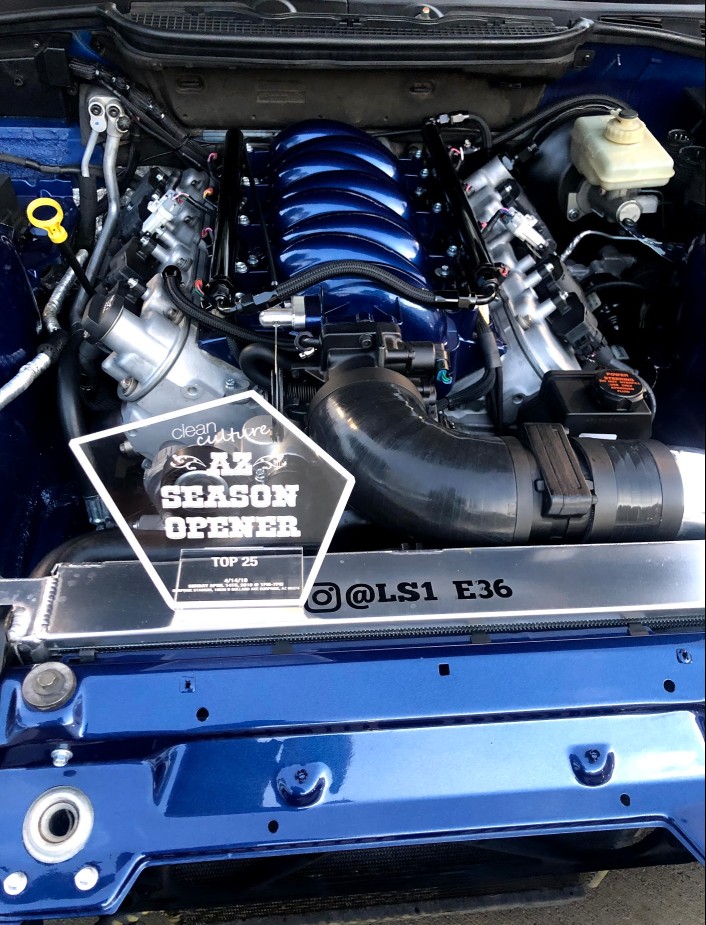
Updates on the car, it won a trophy! lol, won top 25 at a car show I went to, Top 25 out of ~400 cars in attendance
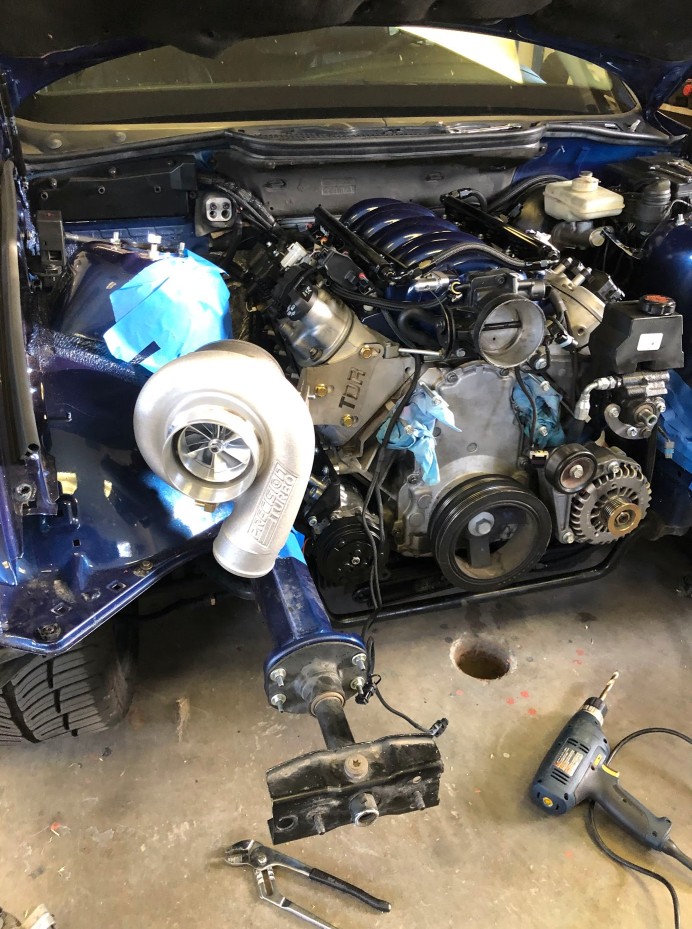
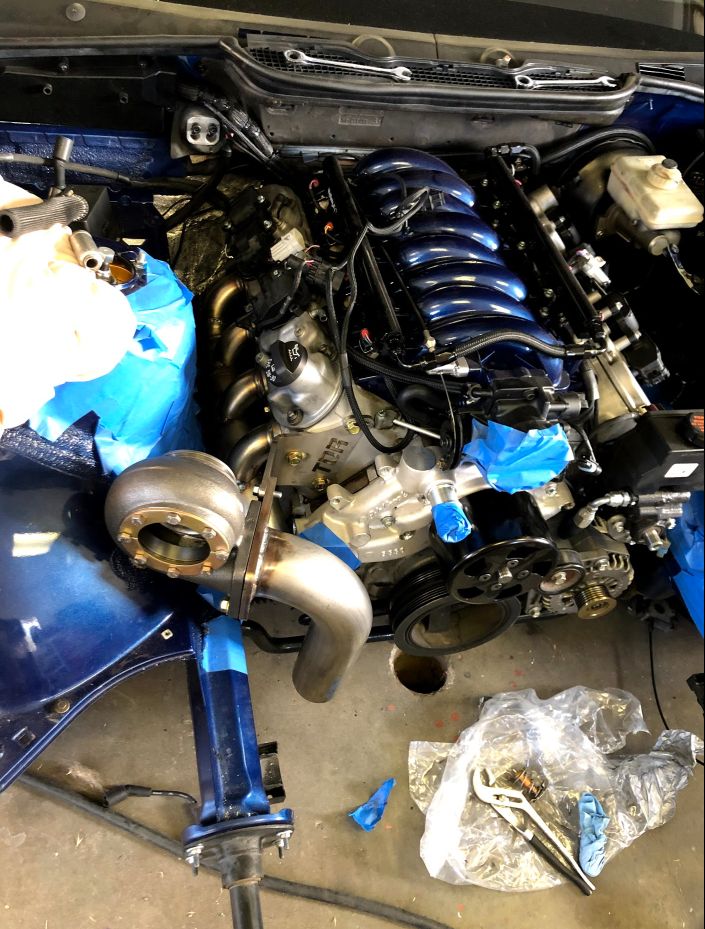
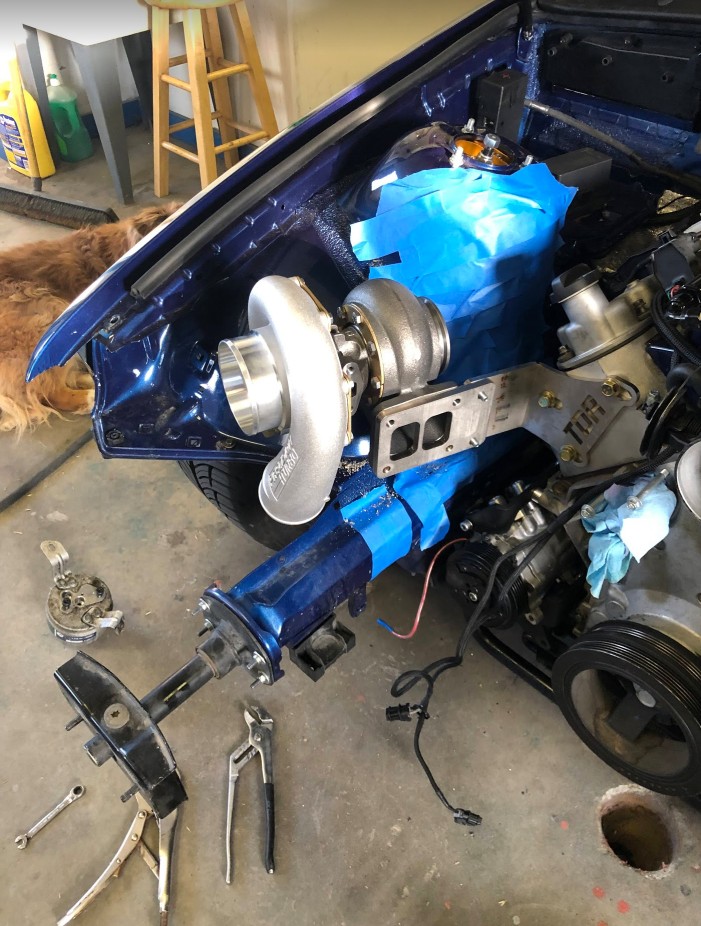
Finally found a fabricator and started discussing plans on phase 2 of my car, BOOST
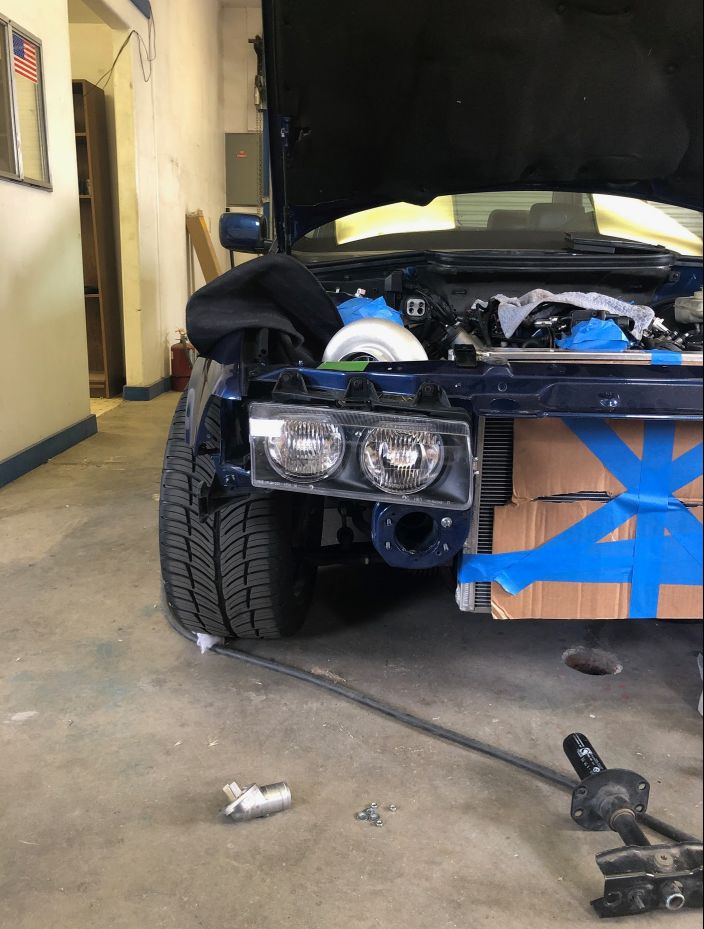
bought all the material for the turbo kit and the car is dissasembled and turbo kit is getting fabbed up, looking to place the turbo in an area visible from the engine bay
before the car is put back together I need to figure out what to do with ABS, either move it somewhere out of sight or delete it and get a proportioning valve, either that or get an MK60 setup from an e46... haven't looked into if these are smaller and less of an eye sore than the one currently in the car
Member
Nice job on collecting the trophy!
Now, imagine what hardware you will be collecting with the turbo...
Diving in at the shallow end!
Member
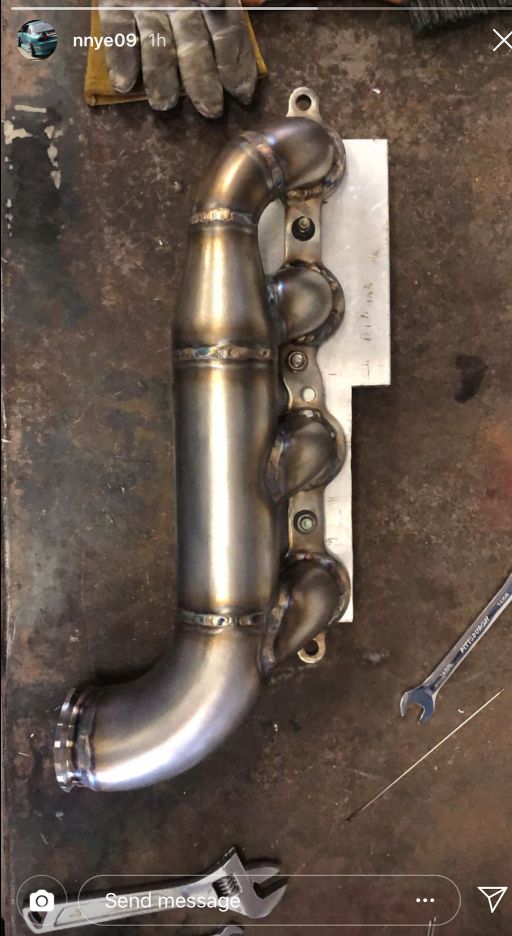
Ordered a ton of stainless steel and we are making good progress, still not everything is set in stone and have to figure out a few things but very happy so far
-Log manifold is almost done for the pass side
-turbo placement appears to be done as far as were we want it
-radiator had to be tilted forward and a lil down, at least thtat's the plan now and the tank/fill neck will be moved
-Still need to figure out best routing of coolant
-Depending on where the down pipe goes possibly relocating coils
random pics
Member
Looking good!!! Looking forward to seeing the finished project.
Member
Thx buddy, we are gonna have to meet up at the pavs soon!
 Posting Permissions


 Reply With Quote


Bookmarks