
 Member
When I bought my 68 Camaro in pieces I told my wife I'd have it on the road in 2 weeks, when I sold it 22 years later there were still things I wanted to do. I just didn't have the time or ambition to do them. The first plate to go on it was a personalized one that read 2 weeks and she loved to explain it. I moved into my 328coupe after it was gone and that's becoming a project to keep on the road, almost as much work as her e46 lol.I'm not there yet (Not really sure if you are ever "there" once you get started... don't tell my wife).
Gave away my BMWs, driving a VW and an Audi now.
Project Wannabe M3
looking good!Originally Posted by Deus Ex Machina

Member
Dang deus nice work, sucks you bought that fan clutch and then i tantalized you into an elec.
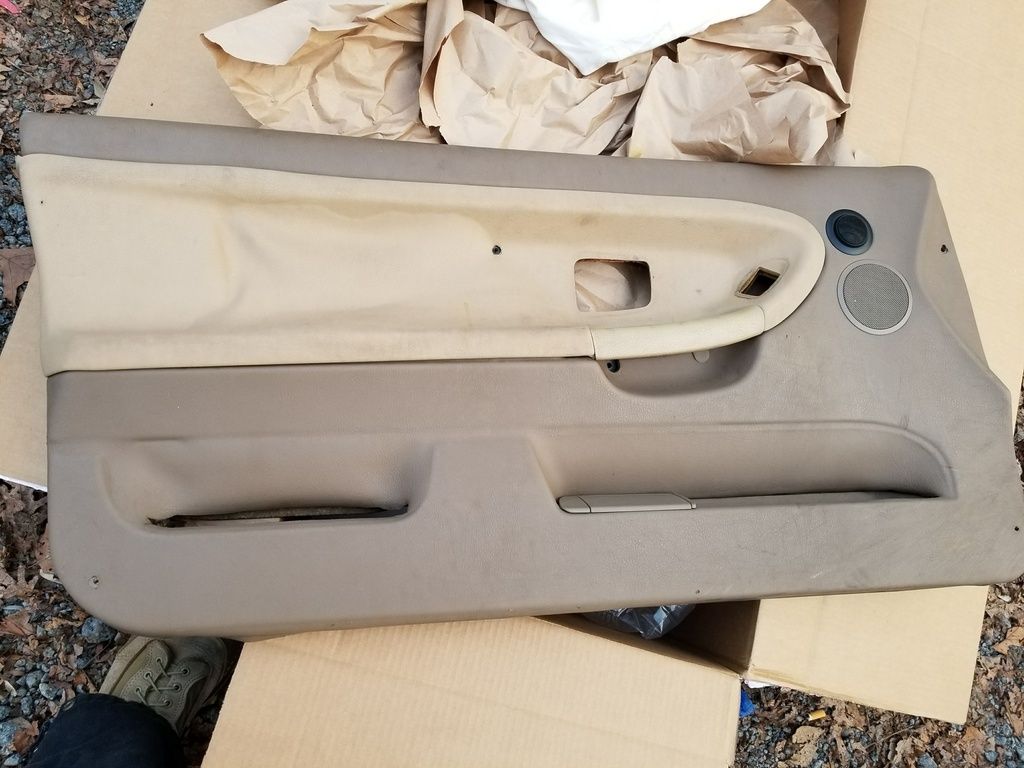
Was that picture of the hard door panels on your car? Have you seen the MKAH motorsport ones? They have a sedan option that i am having a tough time NOT buying.
Also, i have the Bavarian motorsport rear emd master tool for the bushings / ball joints. I could rent it to you should you want it.
Member
I can probably return the fan clutch, or just keep the old setup as a backup.
That's a photo I pulled from the net, I don't have the door panels yet. I got a UPS notification a few minutes ago for a delivery today, it may be them coming in.
I actually was looking at the MKAH panels before these, but there are reported gap issues and some other problems if you are maintaining window regulators etc. as they are track based parts.
The Hard Motorsports panels are supposed to be lighter than the aluminum and provide more space for the speakers and components as they are ABS molded in a shape very similar to the OEM panels.
I will have to buy a Nutsert tool to install them which I don't have yet.
That fan clutch cost more than I paid for the entire Mishi Fan/shroud unit.
I may take you up on the tool. Is it the one for RTAB's?
Last edited by Deus Ex Machina; 12-19-2017 at 04:07 PM.
Member
Damn yeah i have read the fitment issues for the MKAH variants, but Hard doesnt offer a sedan option
And yeah, it is for all bushings and Ball joints in the rear, Just let me know
https://www.bavauto.com/catalog/prod...xoC-X4QAvD_BwE
Member
Will do, I will need to have the new parts in hand before I tie up your tool.
Member
The Hard Motorsport door panels came in today. I ordered the proper Metric Nutsert tool, it will be in on Friday (Just in time for the Christmas vacation E36 wrenching party).
I also got in the Mishi fan controller kit and the NPT sensor adapter.
Sent from my SM-G955U using Tapatalk
Last edited by Deus Ex Machina; 12-19-2017 at 06:33 PM.
Member
Very nice. I have a 93 325is. Lots of work at first. One of the biggest noticeable changes we when I refreshed the suspension.
New bushings everywhere. Shocks etc. I have a street I drive down and prior to refresh would shake my teeth out. After, felt like it was fresh out of the factory
Member
A full bushing set is next up. Mine rides smooth but there is a rattling from the rear at low speed, I gather it is the RTABS.
Member
I got this in time for my vacation. Now I can put the door panels on if I get to it.
If it would stop raining.
Sent from my SM-G955U using Tapatalk
Member
I bought a couple of nutsert tools in SAE, my kid broke the first one and took the other one apart for some reason and I spend more time trying to figure out which mandrals go were than I do using it. When I pulled the deck lid carpeting down I put it back up with nutserts and SS flat head/socket head screws with ferules. I hate single use plastic anchors.
Gave away my BMWs, driving a VW and an Audi now.
Project Wannabe M3
do you have a link for this rivnut gun?
Member
It's a good option for solidly mounting certain things, like the Pandem Body kits. The Hard Motorsport door panels came with 5mm nutsert sleeves and standoffs but not the tool. The panels don't have the holes drilled but have molded depressions where they go for the mounting screws and door locks. You have to cut a slot for the pull strap, door speakers (if you have the speaker setup) and the mirror switch.
https://www.amazon.com/gp/product/B0...?ie=UTF8&psc=1
Member
I use a bit of Loctite to help hold the sleeve in the hole.
Gave away my BMWs, driving a VW and an Audi now.
Member
I'm about halfway through my time off work, I got some reasonably good weather yesterday and today, I hope it holds.
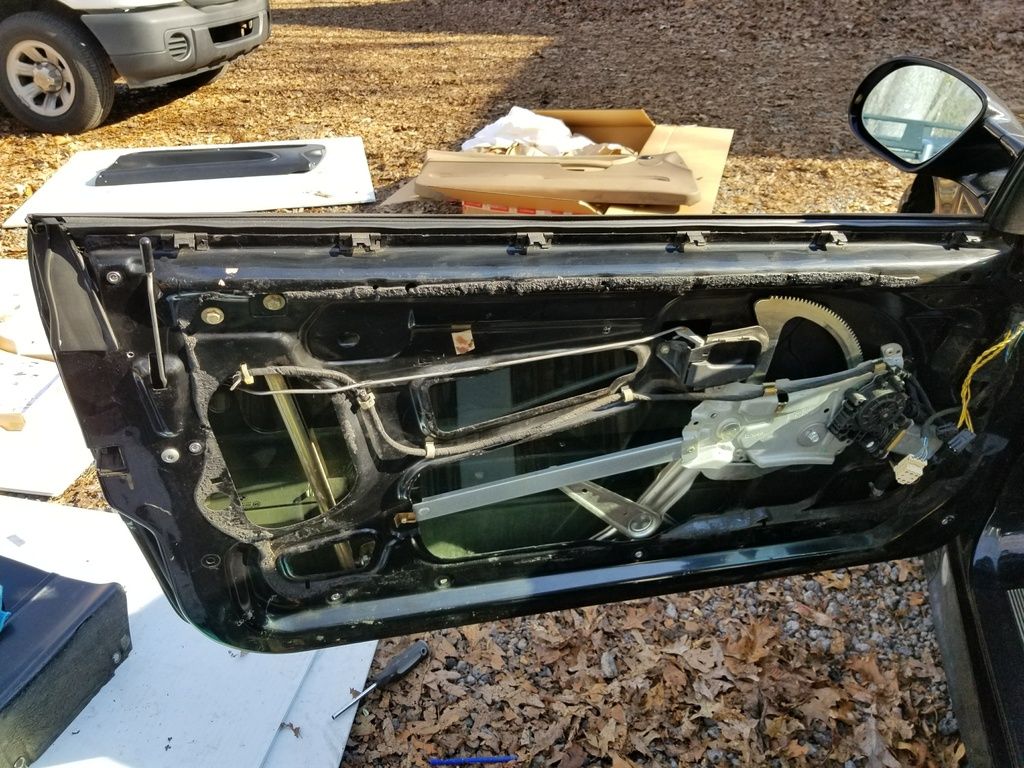
I got a buddy to help me, I disassembled it and put the parts on that are going to stay. Now I can do the door panels.
After changing the door I noticed that the window no longer lowers and raises itself slightly on opening and closing the door, so I have to manually crack the window when I open the passengers side. Annoying, I hope I can sort that out.
I put my new fogs and side marker lights in. The drivers side marker isn't working, I am going to have to get the toner module out and track the wiring.
Sent from my SM-G955U using Tapatalk
Member
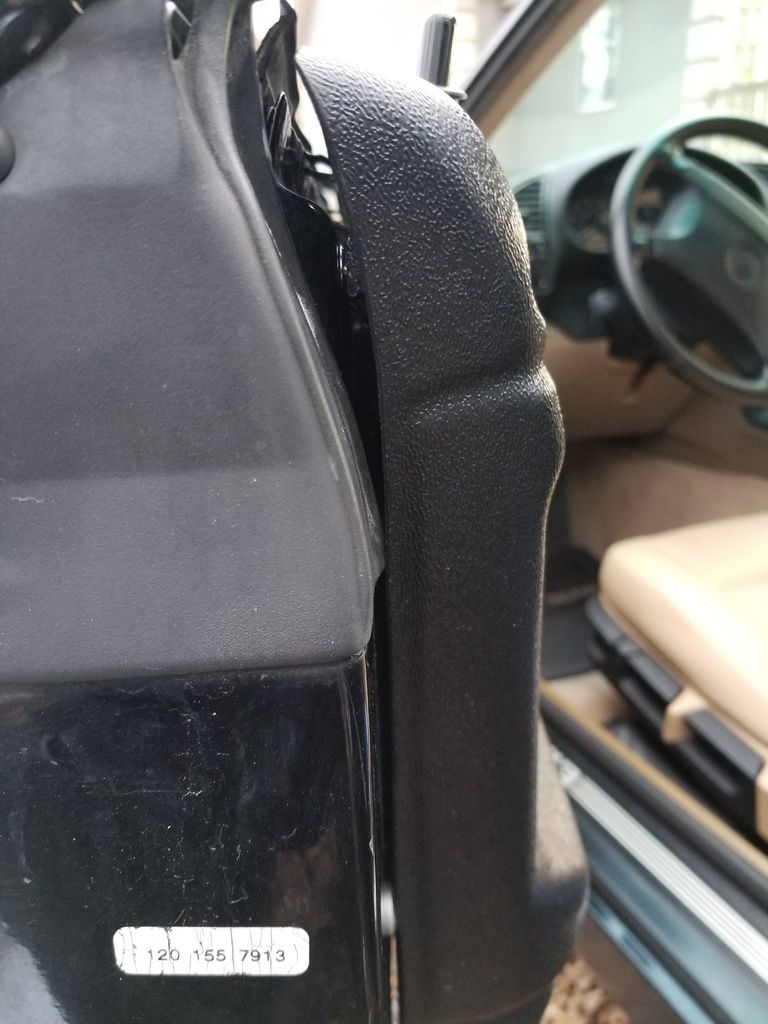
I worked on the Hard Motorsports door panels today.
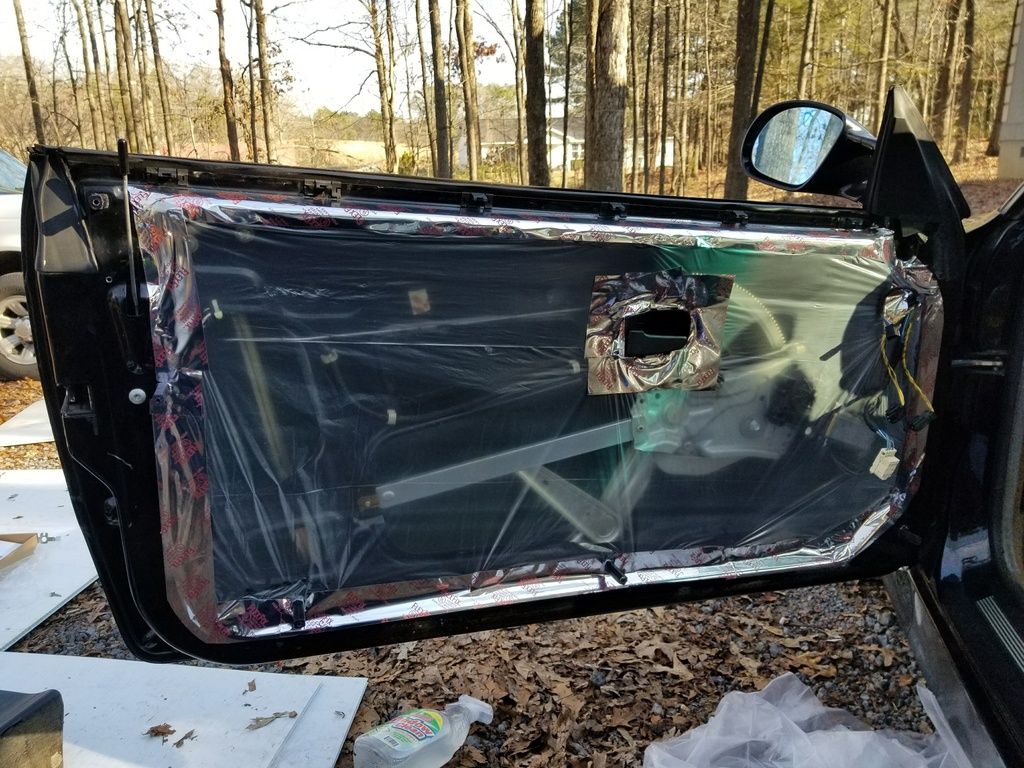
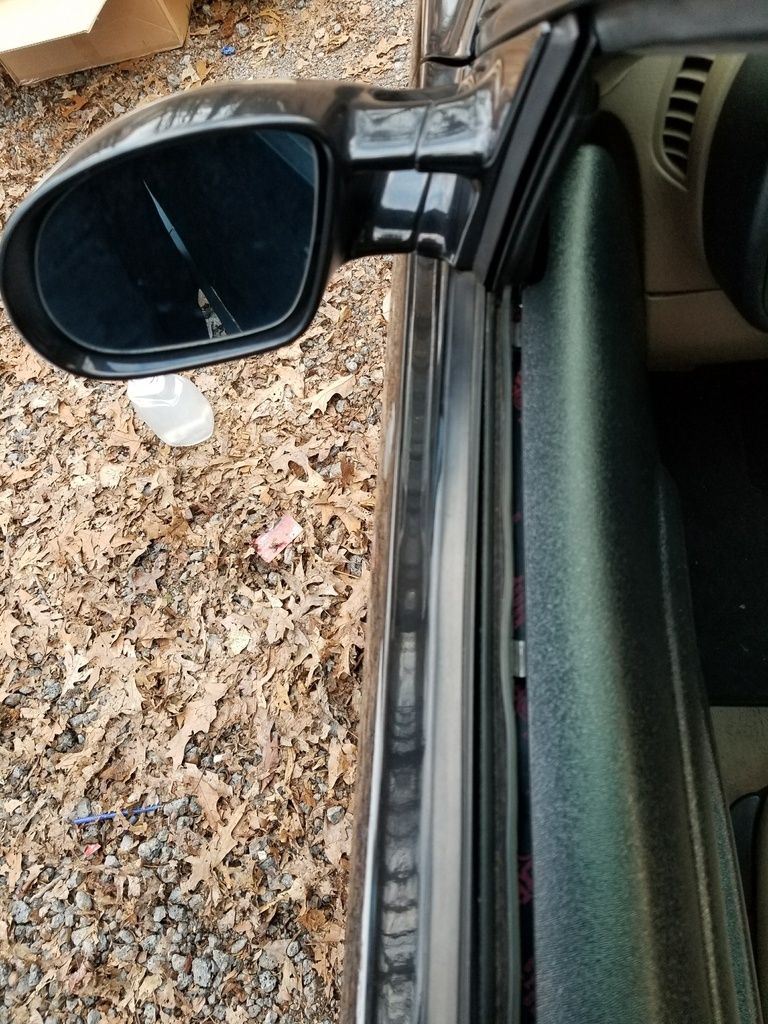
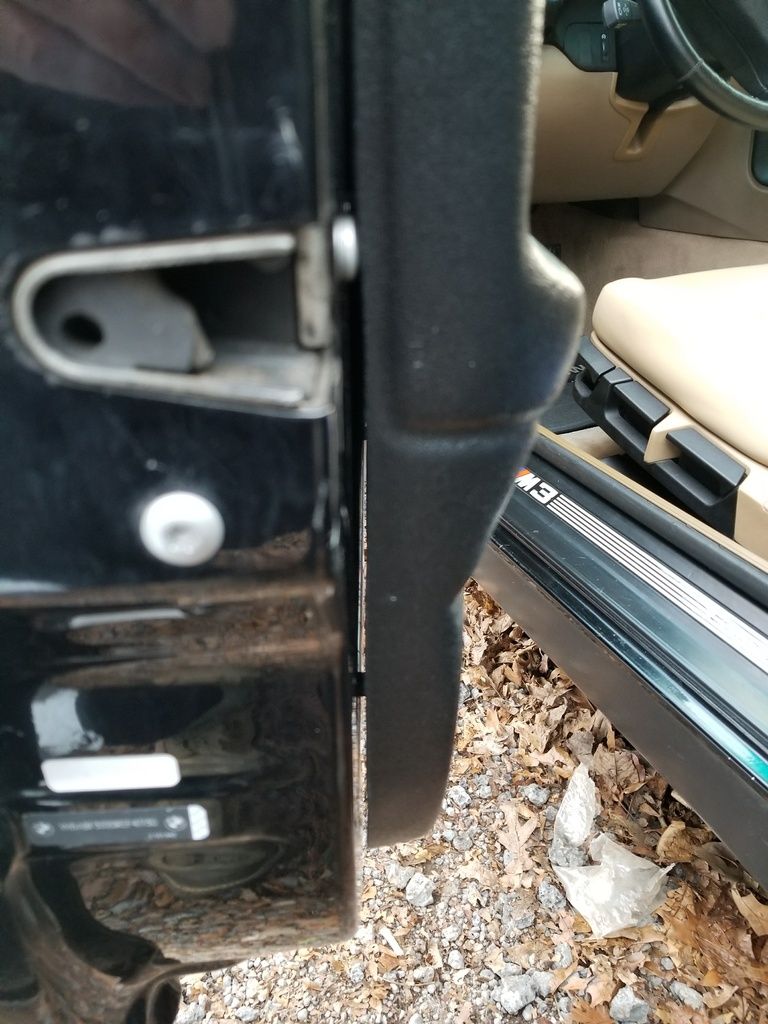
Here's what the old drivers side door panel looked like (The passenger side was a lot better).
I stripped off the door panel, and installed the nutsert sleeves. Those things are nice.
A closeup of the nutsert sleeves installed, they utilize stock holes, so you don't have to drill.
After installing the sleeves, I cleaned up the door panel surfaces, and scraped off the bulk of the tar. Not all of it came off, but that is a good thing. Since someone removed the moisture barrier, I needed to put something back, so the fresh tar surface that I uncovered gave me something to hold and stretch the plastic.
I used what I had, which is pretty thin, and aluminum airtight water heater insulation tape. I will go back later and do another layer of 4 mil, the tapework being there will make it a lot easier the second time around.
I installed the standoffs right after the plastic, here is a closer photo of some of those.
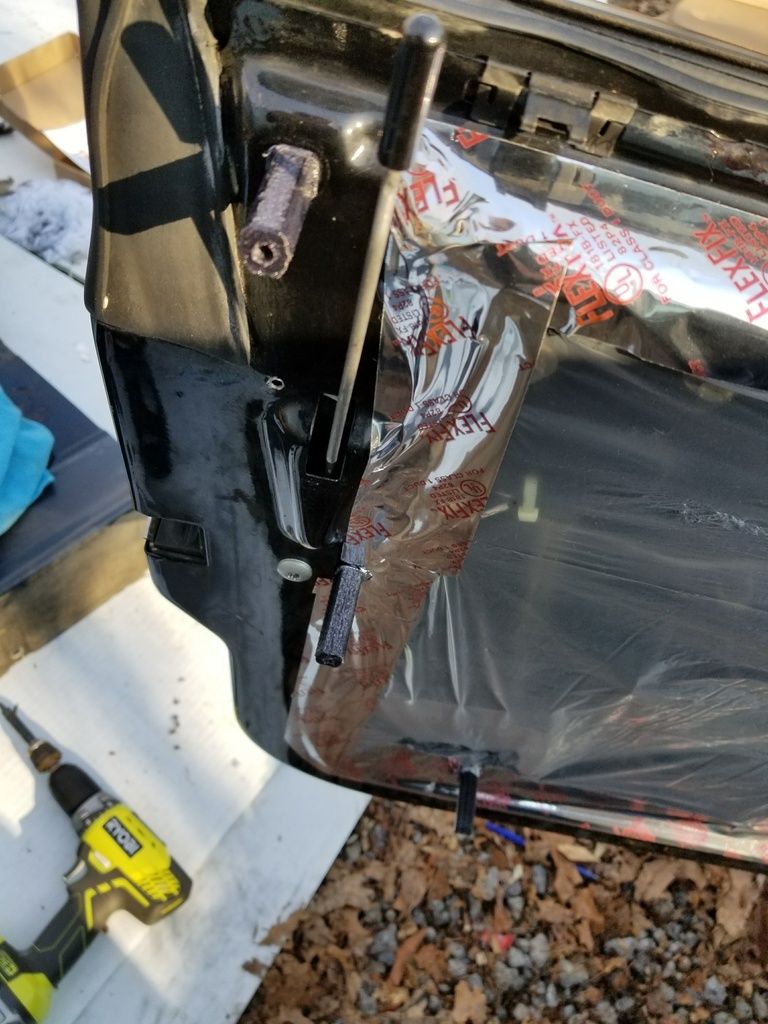
I drilled the hole for the lock pull, I went a little too small at first, I opened it up with the drill bit, actually went a little large that time, but the lock surround from the stock panel will cover it. I am going to put some liquid nails on it and re-install it when I do the final work.
I drilled the mounting screw holes exactly the size of the 10mm bolts, I got one bolt in and then manipulated the panel to get them in one at a time. I used the drill bit to open the holes up one at a time and push them in the direction of the standoff mount. You have to be careful with that and do a little at a time, you don't want to make a hole you can't cover with the bolt head. The standoffs are plastic, and some weren't exactly straight. The last one didn't line up exactly, I will make it work when I disassemble and reassemble.
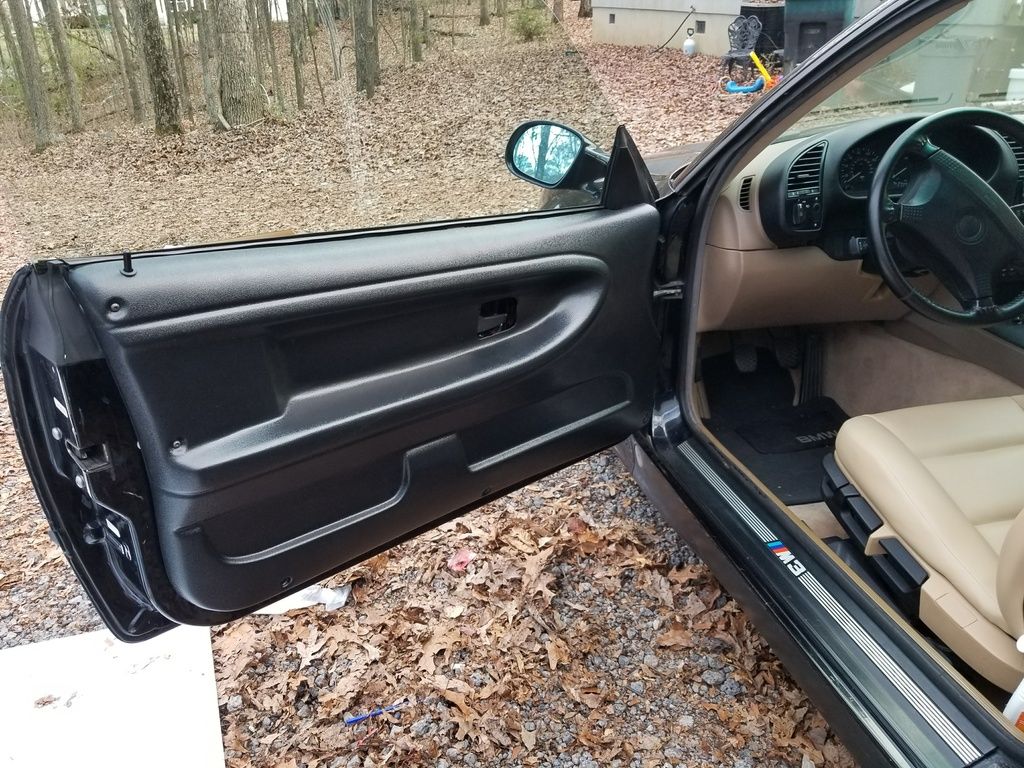
They look great compared to the shot out stock panels. There are some issues, such as the door handle is quite inset (About an Inch or a little more). You can't lock the stock door latch surrounds in, so I broke off the tabs, cleaned them, and put 3M high strength body tape around the edge and stuck it to the door panel itself.
Overall I am very happy with the look, I will have to disassemble again to carefully cut the holes for the door pulls, mirror switch, and door speakers. I'll clean the old door panel in the spring and take it to a body shop supply and have them read the colors so I can paint them to match the stock ones.
There are gaps between the panels and the door. If desired, you can measure and grind down the standoffs to make them tighter to the door. Rather than do that, I may get rubber edging.
There is one area that rubber edging cannot eliminate. I can live with it. These are made for race cars but are the best option I could find to clean up the sad mess of the old panels. (I do feel that Hard Motorsport should have done a better job in shaping that area to close the gap. If they did that, these would be a near perfect solution.)
Here is the worst area as far as gap goes. It looks pretty shitty close up.
Last edited by Deus Ex Machina; 12-29-2017 at 10:45 AM.
Member
Good feedback, I have wondered about those panels. What do they feel like? Are they hard plastic or something with a little give? I'm concerned about breaking in freezing temperatures.
'94 325i Sedan, Arctic Gray: UUC LTW FW, EVO 3 and DSSR, +.020 Maxsil pistons, ASC delete, Eibach shocks/springs, 16" contour reps 238k
'93 325is Coupe, Schwarz, work beater 299k
'89 325i Vert, Alpine White: 5spd swapped. Sold
'04 Toyota Sienna XLE Limited AWD, In progress swapping to M50/G250, http://www.wibimmers.com/board/index...nna-25i-build/
'05 Volvo V70 R, 6mt, mostly stock, kid hauler 200k Sold
'85 Toyota LandCruiser: Lifted, gas hog. 205k
Member
They're flexible, once installed they are under tension. The front bolt was a pain in the ass, I had to press the panel down so it flexed forward enough to get the bolt in.
And I have to take them back off to cut holes for the switch and speakers.
I think I am going to try partially screwing the bolts into the standoffs on the next install with the panels off, and using my ratchet to get each standoff barely threaded in. I think that will be easier than completely tightening each standoff down and pushing the panel to line up the holes.
Member
Here's what I did to the door latch surrounds to make them work.
Sent from my SM-G955U using Tapatalk
Member
Thank you for detailing you panel project so well, this is already a great resource for anyone considering the product. I think your rubber trim plan sounds great.
Member
Thanks gdavid, I have found suitable edging, I am going to measure the thickness of the panel edge, I am thinking 1/16" but it may be 1/8". Amazon has 25' for about $23.
Member
I stripped off the old clips from the side skirts and test fitted one. They fit perfect as expected. I made measurements from the M3 these came from for the grommet holes (to drill them). I am going to mark all of the holes with a silver sharpie, drill them and paint the old grey areas black..
Sent from my SM-G955U using Tapatalk
Member
I finally got the Style 42 wheels painted about midnight last night.
They turned out pretty good
They were painted with the tires mounted, the way I do it you won't be able to tell. A side bonus is that the rubber is perfectly clean and black when done.
Sent from my SM-G955U using Tapatalk
Last edited by Deus Ex Machina; 01-13-2018 at 10:17 AM.
Member
Looks like you used tire shine first. When I did mine I used a deck of cards and slid them under the rim.
Sent from my SM-G950U using Tapatalk
Gave away my BMWs, driving a VW and an Audi now.
Member
Tire Shine Gel, regular tire shine is thinner and prone to spatter. Brass toothbrush to remove the overspray.
 Posting Permissions


 Reply With Quote


Bookmarks