
 Member
HI all,
Hi Guys,
As I attempt to remove the remaining 5 bolts from the rear coolant accumulator on my 1999 750il...(1 of the 6 snapped at the bolt head as I tried to loosen it)...I am wondering the best way to ensure that I do not break the heads on them as well. I have been spraying pb blaster and a mixture of ATF and acetone for the past few days. I was thinking if getting some heat on the 10mm bolt heads may help break up the corrosion and reduce my chances of snapping another bolt. I know there is VERY little space to work between the accumulator and the firewall....but I figured if i clean off the lubrication residue I may be able to apply heat using one of those mini butane torches. Its seems small enough to get in there and aim at the bolt head. Given the thickness of the coolant accumulator and the intensity of the mini torch flame...I dont think it will generate enough heat to damage either the accumulator or the engine block...any thoughts or suggestions?? I dont intend on getting the bolt red hot...just to heat enough in order to get create some expansion and then spray some water right away and have it contract quickly and break up some of that corrosion.
Thanks again for the great advice.
Member
I think the heat is going to help a lot. Given the proximity to the firewall, consider a plumbers soldering cloth to insulate the paint work against the firewall.
The second thing that will be helpful would be some "impact". Try whacking the wrench handle with a deadblow or the palm of your hand. That will help bust it loose from the corrosion. After it breaks loose, try steady pressure. It may take several cycles of penetrating oil, heat, wrench, til it feels like it will turn "easy" enough.
Id also suggest using a box end wrench as opposed to a socket + wrench. A box end will keep the torque directly in the same plane as the fastner. A socket wrench can add some extra off axis twist making it easier to snap a bolt head.
Member
Hi Bill
That sounds like great advice. I will certainly try fitting a 6 sided 10 mm ratcheting flex head wrench but not certain if the thickness of the wrench wall will allow it to fit in the tight area of the accumulator body. For the past week..I have been putting pb blaster and atf/acetone but have not attempted to loosen the bolts yet. I am waiting for the mini torch to arrive as well as the 6 sided wrench to apply heat and continue with the lubricant bathing before applying any force to the bolt.
Thanks again for the great advice
Member
A non-ratcheting offset box end wrench might be your best bet. A flex-head ratcheting wrench will make it difficult to control and apply a lot of force to. Is there room for a long handle 1/4 drive ratchet with a shallow socket? That would also be better than a flex-head.
Member
Good point....the offset wrench does make sense. The 1/4 drive long handle ratchet should also work. I guess regardless of which tool...the lesson here is patience, alot of oiling and careful loosening of the bolt.
I'm keeping my fingers crossed that constant oiling, heating and six sided wrenches/sockets will work,
Thanks again for all the help i've received from this forum.
Member
Take your time, use the advice other have offered. Once you have the fasteners removed, clean the gasket areas thoroughly, blow out the threaded holes, then use a M6 thread restorer and chase the threads (do not use a tap, they're for cutting threads). Instead of using bolts, convert to studs (pt. # 07129908104) and washer faced nuts (pt. # 07129904553) this allows using the full depth of the threaded hole and holds the gasket while installing. Use anti-seize on the threaded fasteners. I prefer using Permatex #3 on my water side gaskets. As always do as you feel is best.
Member
If you can get even the slightest movement on a bolt, stop and re-tighten, then loosen again and repeat this cycle. This can often remove a bolt that would shear if just carry on trying to undo in one go.
Member
Hey Chris
Thats great advice....After a week of constant oiling..I intend to use a 6 sided short socket on a long handled 1/4 ratchet or an offset wrench and SLOWLY coax the bolt to turn and continue oiling it as I get movement. I may also use a mini butane torch to het some heat on the bolt and spray a mixture of ATF and acetone right after removing the flame from the bolt head. I believe the heated bolt will help draw in the atf/acetone lubricant.
Thanks again for all the great advice
Member
Besides PB Blaster there's other good penetrants Liquid Wrench, Kroil, Loctite Freeze and Release. You may want to remove the A/C and pump belt (mark rotation) and run the engine and heat the components (don't get carried away). Possible tap on the accumulator itself. Be reminded that as stated before you're fighting about 25mm (1") of corrosion times six. I hope you have better luck on the remaining fasteners, worst case is that all the heads twist off, at that point you can pry the accumulator off and start the process over, on the remaining piece. It's good practice that when working on water side parts i.e. pump, valley pan accumulator, etc. is to always purchase new OEM fasteners. When applying anti-seize coat the entire bolt.
Member
Hi Motion....awesome points. I have been using the atf/acetone mixture along with the pb blaster...I managed to remove 2 of the 5 remaining bolts and the corrosion build up seems to be on the part of the bolt that is not threaded into the heads...the bulk of the rust occurring in the section of the bolt that goes through the accumulator flange...so tapping the bolt and the area of the accumulator may help unfreeze it. I will also give the freeze and release trick.
Thanks for the great points
Member
The corrosion is caused from the gasket weeping pass the threaded portion of the bolt and into the drilled portion of the accumulator, where galvanic corrosion takes over between the bolt and aluminum casting. That's why I slather anti-seize on the entire fastener. The next time you pull a water pump bolt with a long shoulder you'll see the same but the shoulder of the bolt doesn't have the surface area of threads. Again spend the extra money on water side OEM fasteners, they're the correct size and strength, you don't have to clean and chase the old ones, you'll have them in hand prior to starting the project, you won't be forced to make the decision to put some cheap hardware store cadmium bolt that's either too long or short and you won't know if the old ones were ready to break. I'd suggest that once the accumulator is removed take a break because that was the easy part don't rush trying to remove the remaining portion of the fastener. I assume you've got the hood in the service to give you as much room as possible. I'm also not sure if this work is part of a valley pan change out, if so and you have access to a Tig welder, consider welding the two rear coolant pipes and install as an assembly. Loosely assemble the pipes and accumulator minus the "O" rings and tack, then remove and weld fully. You'll never have to worry about leaks when changing the water pump.
Member
Hi Motion..excellent advice...I did replace the water pump,valley pan seal as well as the vcg and intake gaskets. I also ordered all original fasteners for the valley pan and the accumulator...the 4 water pumps bolts looked clean since they dont go through a water pocket so I reused those..but changed the 2 10 mm bolts on the driver side of the water pump with oem ones.
I will reseal the coolant pipes with the new orings...the tig weld sounds great...but i dont have one and not willing to have it done by a shop. If I have an issue with a leak in the future will certainly try that route.
I already have the new OEM bolts and they seem to be typical bolts that have a zinc coating but im sure with time...corrosion will take over. Not sure why the factory doesnt use a stainless or some other material that will not rust...especially given the PITA location of these bolts. As always..im sure it comes down to lowering costs.
Thanks again for your words of advice..I appreciate your help
Member
Stainless is great for being corrosion resistant but too soft and will gall if the threads are stretched when installed. Make you're decision on weather to use bolts or studs on the accumulator after removing the existing threaded portions. Take a OEM bolt and put it through the accumulator and measure how much thread will go into the head, I prefer studs.
WDS junkie
One other suggestion...use only BMW o-rings for the coolant pipes! I used CRP or whatever FCP sold and they would leak after like a year or whenever I did any work to the cooling system. It must be a slightly different size or material, but the BMW ones don't leak. And that's not something you want to tear apart for a freaking o-ring.
'98 740il | 9/97 build | schwarz 2 | sandbeige | 5AT | 270k
'04 330i ZHP sedan | Mystic blue | Alcantara | 6MT | 120k
'00 540i sport | Titanium silver | Black | 5AT | 152k
'85 Mustang GT convertible | Medium charcoal metallic | Gray | 5MT | 216k | one owner, all original
mods: m-pars | Bilsteins & B&G springs | ValentineOne | StealthOne
retrofits: full nav | MKIV | bluetooth TCU | BM53 w/ AUX input | video module w/ AV input & backup cam | oem sirius xm | xenon | shades | PDC | rain sensor | BMW DWS TPMS | lighted door handles | front seat heaters | heated steering wheel | euro rear fog lights | ski pass | folding mirrors
Member
Hi motion and racer...I purchased BMW orings and oem bolts washers...and will be coating the entire length of the bolts. I was able to remove another bolt this morning...so I now have 2 more remaining and intend to continue this slow process of oiling and slowly coaxing the bolt with a 1/4 ratchet with a 6 sided 10mm socket. too afraid to use a longer handled ratchet since I may increase the risk of snapping the head off again. I figured the closer the torque placed is to the bolt head..the safer albeit more time consuming.
Since I am unable to start the engine..(still have not replaced the intake runners and new injectors due to space for doing accumulator)...I may still use a mini butane torch the lightly heat the heads of the remaining 2 bolts..as well as the rust and crud that I am certain is hiding inside the accumulator flange where the bolt head snapped off. I figured heating and oiling it should help dislodge the rust so the broken stud will released from the accumulator.
Thanks all for the continued support...you've made this ordeal much less scary.
Member
I was finally able to remove the rear accumulator after snapping the heads off of 2 of the 6 bolts. I now need to remove the 2 threaded studs from the broken bolts. I cant believe how much corrosion was inside the flange area of the accumulator where the bolt goes through...This area of the bolt is the reason why the bolts refuse to turn and you end up shearing off the heads. It took me over 10 minutes to wiggle off the accumulator even with no clamping force on it...other than the rusted surrounding the 2 bolt studs.
Now that the rust is no longer an issue...I believe removing the remaining broken studs should go alot easier. I am waiting to receive some kroil oil to use on the threads entering the heads bofore I attempt to remove them with vise grips.
From the 4 bolts I was able to remove with breaking...it seems that the end threads that go into the heads remain in good shape with no rust or deformation...I'm hoping this works in my favor when I attempt to remove them.
I wanted to say thanks again to all that offered their advice and suggestions.
Member
Don't get over confident, be like a chicken cackle after you lay the egg. Don't forget to chase the threads with a thread restorer and clean thoroughly.
Nothing like a course in character building and patience 101.
Member
Hi motion
i know I still have some work ahead of me
need to get those 2 broken bolts out and intend to use a lot of thread lubricants like kroil and atf acetone mix well as brake cleaner. Once I oiled the threads for a few days I will attempt to use the smallest possible vice gripe pliers and place a cloth by the pliers teeth since I am worried that the vise grips may destroy the stud if it doesn’t loosen with my first attempt
I already a thread chaser ready to clean out all 6 holes and the new Bmw bolts are on their way
i will be using anti seize on the entire length of the bolts and new Bmw o rings on the coolant pipes
thanks again for the great advice
Member
Glad to hear all but 2 of the bolts came out intact! If you haven't used a thread chaser before make sure you practice on a correct size nut to get a feel for how the chase starts in the threads. Even though it is not a tap, the chaser can still damage good threads if you start it slightly crooked/crossthreaded. Especially when its alum threads vs a hardened steel thread restorer.
1998 BMW E38 740il - Vermont Grün Metallic, 150k miles, all stock. 11/98 build.
2011 Range Rover Supercharged - Rimini Red, Jet/Jet Interior.
2018 Mercedes GLE 350 - Diamond White, Soccer Mom kid-hauler.
1970 Chevy Chevelle - Pro-touring, 496ci BBC, custom everything.
Member
Hi bill..good advice on the chaser. I will also use some motor oil on the chaser threads to be a little safer.
Thanks for the help
Member
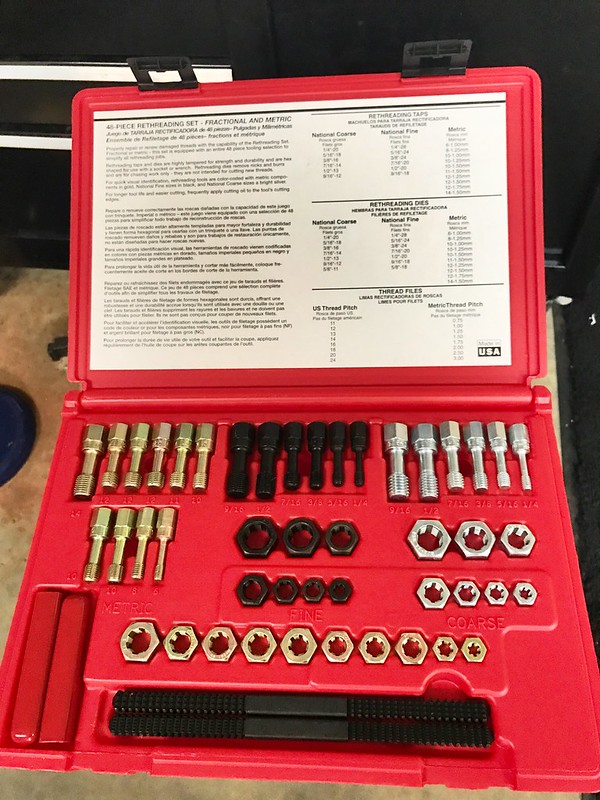
One thing you may want to consider for your toolbox, if you don't already have something similar - A complete thread restoration set. Several years ago I picked up a Craftsman/Kastar 48pc set which is excellent American made quality and VERY reasonably priced ($50). Having the set on-hand has been invaluable when working on my cars... especially late at night when running to the store for a new bolt/nut/stud is impossible. I use mine to restore all sorts boogered up threads on my cars. Wheel studs/bolts often get deformed a bit when installing and removing wheels, same with manifold/head/valve over bolts and studs.Originally Posted by 1999750il

Looks like the Craftsman re-branded set is discontinues and now commands almost $100 on eBay, but the Kastar (original manufacturer) version is still available:
http://www.tooldiscounter.com/ItemDi...?lookup=KAS971
1998 BMW E38 740il - Vermont Grün Metallic, 150k miles, all stock. 11/98 build.
2011 Range Rover Supercharged - Rimini Red, Jet/Jet Interior.
2018 Mercedes GLE 350 - Diamond White, Soccer Mom kid-hauler.
1970 Chevy Chevelle - Pro-touring, 496ci BBC, custom everything.
Member
Hi Bill
That looks like a nice set. Has more pieces than the one I ordered and seems more robust. I will be placing an order today. Like you said..its cheap insurance...thanks for another great idea
Member
Hi all,
the saga continues. I was able to remove one of the two broken studs from the rear of my engine. I have been oiling and heating the studs with a plumbers torch with map gas. Still not able to get the stud to budge. Has anyone used a different method to heat the stud? I was researching the heat induction tool that sells for $400
as you know there is very little room to work with by the firewall and I believe the heat inductor tool should be able to fit
i was hoping to use this tool to get the stud red hot and allow it to cool down before using vice grips to loosen it
if anyone has a better idea please advise ....this last broken stud is proving to be impossible
thanks to all for their help
Member
If you haven't chewed up the remaining threads too much, is there enough left to put 2 nuts on? Tighten them together then use the inner one to try to undo - with all the heat you've given it, this might just work
Member
Hi Chris....I actually tried using three brand new nuts and this method worked removing the first broken stud. The second one is proving more difficult and stripped the threads. I also tried using vise grips with the heat and constant oiling. Im worried about using too much force or torque trying to grip and remove the remaining stud. I ordered the bolt buster from amazon $376 to help heat up the stud without damaging the surrounding aluminum head. I know its a alot of money for the tool but I dont want to risk snapping the stud and making matters even worse.
 Posting Permissions


 Reply With Quote

Bookmarks