
 Member
Got my care package from Condor Speed Shop last night, everything looks really good. Sticker didnt fair too well in the package tho lol. Shipping was really fast tho which I was happy about...not that I was in a rush or anything.
condor 11 by minthinrich, on Flickr
This also came along with it, which honestly really makes me happy as a customer. I deal in sales daily so this little extra will keep me buying more of their products I feel.
condor note by minthinrich, on Flickr
Went ahead and installed the lollipops first which was a slight challenge to get the oem off. Used a 3 jaw puller which was perfect. Hit the ends with a wire wheel since they were a little dirty. Need to mess with the driver side however since it was fighting me to go on.
condor 3 by minthinrich, on Flickr
Next was the Engine and Trans mounts which was sooo easy to do. I went with the "short" engine mounts and solid trans. I will report back once I actually get to drive the car on how loud they made the car. However having no carpet/heater/insulation material....its not like a normal test. I do plan to order a new solid mounted shifter as well which is why I went solid mounts.
condor 2 by minthinrich, on Flickr
condor 1 by minthinrich, on Flickr
Member
Finally got it out of the garage over the weekend after installing my floor pans. Still need to fiddle with the drivers side more and figure out the dead pedal. I will take pics of that this week.
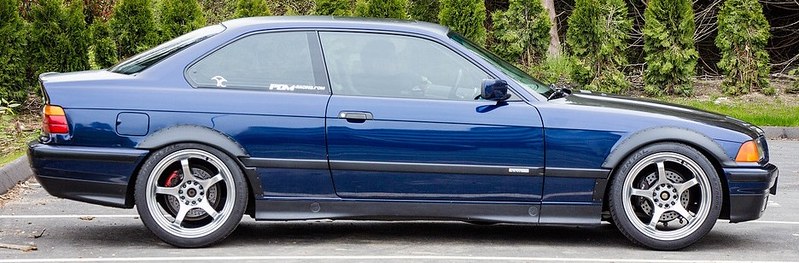
FIRST DRIVE MARCH by minthinrich, on Flickr
Member
Had to stop at the UPS store today at lunch to pick up a box since I am never home when they come to deliver. Of course was home most of the day yesterday and saw 3 trucks go past my house....none of which stopped due to the weather I guess.
5 lbs and long....hmm
SAMSONAS BOX by minthinrich, on Flickr
Opened it up, 2 things inside. I can make my own selector rod, but not sure if I will need to.
SAMSONAS 2 by minthinrich, on Flickr
SAMSONAS 1 by minthinrich, on Flickr
Thought long and hard about RTD or CAE....but both had a 6-8 week lead time. I honestly could have waited, but I dont want to be tearing into the car again once it warms up if I dont have to. Didnt find many reviews, but ended up deciding on the Samsonas shifter setup, which most guys says is very very similar to those 2. Stock at VAC in philly....had to order one. Priced right around what the RTD goes for.
SAMSONAS 3 by minthinrich, on Flickr
Last edited by Hinrichs; 03-08-2018 at 01:44 PM.
Member
Took a little while, but got the shifter installed. I ran into a few snags, and I am going to redo the mounting plate I made but the shifter is installed and I am very pleased with it so far.
Last edited by Hinrichs; 04-03-2018 at 08:04 AM.
Member
Nice! I just ordered the IRP V3 shifter and have been checking the tracking info every few hours ever sincecant wait to install.
Let us know what you think of the Samsonas at the track.
Sent from my iPhone using Tapatalk
Member
[QUOTE=KlausH79;29995148]Nice! I just ordered the IRP V3 shifter and have been checking the tracking info every few hours ever since
Let us know what you think of the Samsonas at the track.
Still need to mess with the shifter since I cant get into 5th yet....never adjust the stops but I am very happy with it so far. Everyone who has driven my car is in love with it.
Lets see where I left off.
Replaced the steering rack, and went back to power steering. I think in the end it was the rack but glad that I rebuilt the pump before. I need to recenter it but its in and working well. Old on top, new bottom. Ordered it from rackdoctor
steering rack 1 by minthinrich, on Flickr
steering rack 2 by minthinrich, on Flickr
Then after a still having a CEL for the vanos, I ordered up a replacement from DrVanos and installed that after I bought the tools and a few needed items from ECS. I was going to rent them, but I am kinda glad I have my own set just incase. Who knows maybe someday ill throw cams at the car or can rent them out myself to some people in need. I thought it was going to be a nightmare, but it really was easy taking my time. If I would have pulled my rad due to how I mounted my fan, it would have been much easier with more room...but I didnt want to go through that again for this. Everything looked great under the valve cover however and I was finally able to replace all the gaskets. Thew in new plugs as well since I was fighting a missfire.
VANOS by minthinrich, on Flickr
Slowly started to drive the car as well. I added taller wing stands, and added cross bracing with cables so that it stopped moving. Added the bimmerworld lip as well to drop my splitter lower as well.
outside 1 by minthinrich, on Flickr
first drive april by minthinrich, on Flickr
outside 2 by minthinrich, on Flickr
Member
Should have just done this sooner, but oh well live and learn. Went with cheap arms just to see if that was the issue, and well here is the video. My ball joints on both sides were completely shot. Should have just figured they were prolly stock. After replacing them the steering feels great, but the alignment must be really screwed up and I hope I dont need offset control arm mounts just incase these are for a 95 not 96+
IMG_2175 (1) by minthinrich, on Flickr
Other than that, I ended up finally getting all my saftey gear over the past few days so I should be ready to race august 18-19.
saftey gear by minthinrich, on Flickr
suit 2 by minthinrich, on Flickr
Member
Added a front cage section per my class rules since I finally figured which I should run in. I have some tough competition in GT2 but its kinda funny since its all mustangs so far.
cage wrapped by minthinrich, on Flickr
Got rid of my jeep and got a truck and trailer.
trailer queen 3 by minthinrich, on Flickr
Finally last weekend I was able to race. First event was the Weatherly Hillclimb. It was a ton of fun and I really learned a lot. I will end up getting a new tires or a new wheel and tire combo in the spring. Almost everyone was running slicks and I was basically on street tires. I did fine with them but didnt really try pushing as hard as I would have liked to. I did shave off 12 seconds from my first run to last so I was more than happy. I was about 10 seconds slower however than the other guys in my class. Some pics from the hill.
2 by minthinrich, on Flickr
1 by minthinrich, on Flickr
3 by minthinrich, on Flickr
4 by minthinrich, on Flickr
Member
Love this thing. Been watching on IG. Hoping you got some video of your runs!
IG: dimitriantoniou
Member
I didn't run my GoPro this time as I didn't like my helmet mount in the car, but I got a new mount for the roll bar so next race I will have it on. here is a video that someone made for each car. Its a mix of runs but I am glad that he made it.
Member
Got my condor front windows last week but didnt have time to install over the weekend. Last night decided to pull the front windows, regulator, and everything I could in the doors. I left the wiring for now cuz I still might use the power locks....which my driver door cylinder isnt really cooperating with me anymore so I tend to not lock the door. The windows fit super tight and should seal well. They say you cant leave them in without adding extra support but I dont believe that yet. They are mainly for keeping pests and rain out when the car is sitting. At least now my car is fully GT2 legal. Just need to start taking more out of it. Next will be the sunroof which is going to be interesting as the cage is in the way completely.
CONDOR WINDOWS 1 by minthinrich, on Flickr
CONDOR WINDOWS 2 by minthinrich, on Flickr
Member
Cool build thus far man! Those front windows are a great idea; I'll def be picking up a pair for my car!
Member
At first I hated them and the way they fit...even tho they are just for storage mainly, but after messing with them again the other day, they fit perfectly.Originally Posted by BlackHawkRacing

Ended up finally weighing the car, with prolly 3/4 tank of gas just to see where I am at after the cage and stuff. Have some ideas on where I can pull weight after talking to some guys, and there is a lot of extra wiring yet to pull but not too shabby on weight. I will also be pulling the rear 1/4 and rear glass soon. 2840 which I am not too sure how accurate the truck scale is.
SCALE by minthinrich, on Flickr
So the other day I was able to get my sunroof removed. Lets just say, I really should have pulled it before I welded in the front cage section. Its not impossible but wow what a royal pain it was to pull. I ended up having to cut the cassette 3 times to get it out of the car. Dropped prolly 40 lb which makes me happy.
SUNFROOF DELETE by minthinrich, on Flickr
Glad I pulled it however since I missed a weld in one spot, and over winter ill get the cage paint stripped and done better. I couldnt really paint a lot of it anyway so from above it kinda looks like crap.
Got my CF delete panel in. Was going to order from S2R tuning again, but I was so annoyed dealing with them for my headlight deletes I didnt want to do business with them again for a long time. I mean come on, how hard is it to give a customer tracking information. End rant....I ended up going to bimmerworld this time, could even be the same panel, but they had it in stock so thats where I went. Had it in 2 days like usual and got it installed asap. The last race of the year however was canceled so I rushed to get it in and I didnt really need it. Oh well its super shiny and looks kinda cool.....Also I made a rookie mistake while screwing in the back of the panel with a self tapper. Used one a little too long and made a pimple looking thing with a tiny hole in my roof. Hammered it down and threw on a big dogfish sticker I made for the upcoming autocross that I should be attending. Depending if I can make the drive to pittsburg area this weekend...I might have a big update to share.
CF PANEL by minthinrich, on Flickr
CF PANEL 2 by minthinrich, on Flickr
Member
Hey, I think I know this guy...
Member
thanks to this guy I can update this thread again.
Met my friend saturday to get the wheels and flares. I ended up getting 4 enkei NT03+m wheels wrapped in 285/30/18 Hoosier A7, 4 extra tires with about 50% life, and the hard motorsport flares.
picking up the tires by minthinrich, on Flickr
After grabbing some dinner with him and his wife, headed back home and unloaded everything and started to get working on the fenders. Had to see how wide these tires were next to my extra wheels. This is with a 225/45/17
size comparison by minthinrich, on Flickr
hands by minthinrich, on Flickr
Taped the drivers side, marked my lines and then started to cut.
cutting 3 by minthinrich, on Flickr
cutting 1 by minthinrich, on Flickr
Grabbed the drivers flare and riveted it on. Fits really well after some minor trimming around the side trim which I need to go back and mess with more. Learned a lot from this side for the passenger.
mounted 1 by minthinrich, on Flickr
mounted 2 by minthinrich, on Flickr
Cut the passenger side which went much faster, but I need to order a replacement flare. The one I got which was in a crash, is a little beat up and twisted. Its also cracked worse than I originally thought. Not a big deal however. Hard to see, but its crazy how wide the wheels are and how silly it looks with out the front bumper on. Cant wait to see the rears. Bumper isnt adjusted properly on this side and it also doesnt have a side mount to hold it up.
cutting 2 by minthinrich, on Flickr
no bumper by minthinrich, on Flickr
Driver side looks good, but I need to loose my 12.5mm spacer. Might need some shorter springs or something and pull the lower shims out.
mounted 3 by minthinrich, on Flickr
Should be working on the rears tonight hopefully which I am really going to take my time with. Kinda nervous about cutting it.
Member
I used 5" springs in the front to clear 18 x 10.5 with 285/30-18. But I didn't have enough thread on my ASTs to get the ride height up high enough. I had custom perches made to allow me to get the 5" springs to work. And I hope you're ready to do a bunch of cutting/welding in the back of the car.
If the flares aren't wide enough to clear, you can make spacers to push the flare out from the body.

Member
When you cut for flares, what do you do with the plastic fender liners?
Member
I was running 4* of negative camber and it tucked in pretty good. Even if you have to run a small spacer I think it should still sit inside the flare. Like Jaker I was able to make them work with no spacer, but like I told you literally a credit card between tire and perch.
Jaker what did you use to make those spacers for the flares? Widest I can find (cheaply) is 4.3" and with 18x12s it looks like I will need around 5" or so. Will have a better idea when tires get here in a couple days.
Member
I used the wide black Gorilla tape to join the "modified" fender liner to the body/flare.
That's just ABS plastic. I originally made the spacers using 1/8" thick and made a pattern for my waterjet guy to cut the stuff. He made me the 3 thin layers you see in the photo. That was to clear 275/35-17 on 17x10.5. Then I stepped up to the 285 and they still fit pretty good. Now that I'm going to 295s, I needed the extra space. Hence the extra 1/4" layer. And I am in the process of switching to 5mm nutserts and aluminum button head screws. I got sick of drilling rivets out repeatedly and re-riveting. Especially since I usually end up scratching my flares while doing the riveting.
I am anxious to see how you get 335s and/or 345s under the fenders. I've got 315s on the radar for once I get the rest of the car sorted.
Last edited by jakermac; 11-05-2018 at 07:01 PM.
Member
Thank you for the info.
Ill keep you posted. Tires are coming this week, hopefully Ill know how much flare I need this weekend. Its a four door and it looks like Ill have to go onto the door with the flares.
Member
From my last alignment I was at 4* but I am running the largest shim on the strut which could be part of why I have a little less clearance. I do need to get some pics of where the wheel sits when I can try my 5mm spacers. I do have a lot of adjustment at the top plates however to gain more camber so maybe I am not really running 4*.
I will play around and see what I can make happen. I think short springs will be in order but im not sure. I also need to lower the front down a good bit to get back to the height I was at on 17s. Main thing right now is waiting to hear on pricing for the replacement passenger flare. I will be taking my time with the rear which is why I havent touched them yet. Also need to clear out some more space in the garage so I get a good position to weld in.
Member
I too am running 4 degrees. I have no shims on one side, but shims on the other side because for some reason early on I had an imbalance on what the GC camber plates were showing from one side to the other. The OCD in me wanted the needle to point to the same place on both. Then when I went to a new alignment shop I discovered that the previous shop's rack was to blame. I think I was able to get away with a 10mm spacer on one side, but had to run 12-15mm on the other side because of the shims so obviously ran the thicker spacer on both sides. So now I'm pretty sure I'll be able to run 10mm spacer on both sides which will keep the frontal width down, something that's important for autocross.
Member
Stayed kind of busy over the weekend test fitting, installing, and cutting up the car more. Only really worked on it a little Friday night and Saturday morning due to having other plans, but feel like I got a lot done.
Friday night I decided to tackle the rear 1/4 windows. I went with the hard motorsport cup style with vents. They fit great but I think I need to find someone locally who can copy the 3-d printed mounts so I can add some more. They are kind of flimsy on the corner. I kind of wish I just called them and ordered the windows without hardware and just the vents since I will probably end up having to rivet them on or something. I do have to say tho, its nice being able to kind of quickly get into the back seat area with them pulled out rather than crawling through the trunk for certain things I drop.
hard window 1 by minthinrich, on Flickr
hard window 2 by minthinrich, on Flickr
Next up was the dive planes. They are probably pointless but I think they look cool and they were on sale. To me it finishes off the front bumper compared to the rear with the diffuser. Very easy to install and fit well.
hard bumper aero by minthinrich, on Flickr
Saturday morning I was feeling really ambitious and decided to tackle the driver side rear fender and flare. Super fun knowing if you mess up, the shell is basically destroyed. I forgot to take pics after it was cut and then the steps to get it welded. I will get some on the passenger side once I work on that which should be tonight. I also plan to space the sides of the rear bumper to meet up with the flares.
rear driver fender 1 by minthinrich, on Flickr
rear driver fender 2 by minthinrich, on Flickr
rear driver fender 3 by minthinrich, on Flickr
rear driver fender 4 by minthinrich, on Flickr
Member
Nice work on the flares! Detailed pics of the other rear would be appreciated. I hope to do the same this winter.
Member
Looks good!
 Posting Permissions


 Reply With Quote

Bookmarks