
 Member
Welcome to what I hope will be my often updated build thread.
I purchased this car from another Bimmerforums member who has the original build thread somewhere and I will track that link down and post it for historical purposes. His thread ends with the crashing of this chassis into a tirewall backwards at VIR (around 50mph if I recall). The car had a great cage in it and deserved a new lease on life so I bought the shell from Eric for a great price and set about bringing the car back to life.
This will be my second race car rescue. My first dedicated race car build was an E30 that I bought after it had been used as LeMons car and then all but abandon in a side lot in a DC suburb. Sadly, that car was totaled in it's first outing and it was beyond saving for a host of reasons. I spent a season developing and racing a friend's E90 ex-Koni Challenge car before buying the chassis that will be the basis of this build thread.
Here's how the chassis sat when I bought it. Doesn't look bad from the front other than the crusty roller suspension and wheel parts.
The back was a different story. The driver's side was pretty crunched and the frame rail took a pretty good beating.

However, the cage had a logbook that went with it and was nicely done and the car was very much worth saving.


So I drove down to Richmond, VA to Eric's house, had some BBQ and a beer w/ he and his dad (who originally built and drove this car) and brought it home so the planning could begin.
I went back and forth on engine options; originally it was going to be an S52, then an S54, then an S52, then an M52 with M3 cams, then an N52, before I finally bought what I thought was a great deal S50. The S54 was too expensive to race (higher class, more power, more tires, etc) and the N52 would have been great (GTS2 and BMWCCA Dmod limit displacement) but the standalone options were more than I wanted to spend. So enter: this S50 I bought off of Facebook.
The engine supposedly "ran when pulled" but after seeing the state of it I find that unlikely. The #6 piston had the impression of a valve retainer in the top of it and was pockmarked. And the head needed 13 new valves and all new valve guides. Not to mention bad leakdown numbers prompted new piston rings also.

I decided to try out Total Seal's gapless rings. The OEM rings were more expensive and Total Seal was great to deal with. It was my first time ever doing rings and they were happy to answer questions and when I got a little too aggressive with some ring pliers and snapped a ring they replaced it at no cost.

With the #6 piston replaced and the new valve rings done I did a DIY deck job on the block using large sharpening stones and WD40 and I am pretty happy with the results. The machine shop wouldn't touch the block with the crank in it and I didn't want to go down the rabbit hole on that.


With the new pistons in I of course did new rod bearings.
I went back and forth on oiling whether to do a baffled S50 oil pan or just do the S54 pan. I ended up deciding on the S54 setup after finding a good deal on eBay. Otherwise I'd have been perfectly happy with the baffle kit. I used Bimmerworld's drilled oil pump nut to secure that known weak spot in the oiling setup.


Installation of the S54 setup was very straight forward. A few bolts had to be sourced from Home Depot (the race car superstore) due to the pans being different thicknesses but otherwise it was nice and easy.


While the chassis was at the body shop and the head was at the machine shop I started putting on the various pieces that I could onto the engine. I am not running an oil cooler so I'm using a regular M50 oil tower and the Bimmerworld oil distribution block so I could install AiM temperature and pressure sensors.


Then I got creative trying to hold everything still while torquing the crank bolt. This didn't work but ultimately I found a combination of stuff in the garage to make it happen and had to put an out-rigger on the engine stand so it didn't try to fall over while torquing to 300ft-lb.
After all that was done the head was ready to go on. The block was already prepared so I installed the APR head studs.

The head was rebuilt using OEM valves and valve guides but I added Supertech springs and titanium retainers to give a little over-rev insurance.


And then the head goes on and the ARP bolts get torqued per the proper sequence in 3 stages.


Then the cams get installed and timed. I am using a Tilton flywheel which doesn't have a hole for the flywheel lock pin so a little extra care is required.
I did have a setback installing the nuts onto the intake cam studs. Somehow even tho I was well below the spec torque value all 3 nuts stripped at once. I can only assume it was related to interactions with the spring diaphragm. But I was able to get that all apart without causing any damage.

If you've scrolled this far you deserve to see some of the masterwork the body shop is doing. The pictures are pretty clear but they are pulling to relieve stress in the shell and then cutting and replacing the rear left quarter. I am also having them use E46 330 sedan fender flares to add room to the wheel arches so I can run bigger rubber.


Now stuff starts going back onto the chassis...


That catches everything up. There is still obviously so much more to be done, and I will try to keep this thread updated.
Member
I applaud your efforts here!!!
Can you share how many hours the body shop has on the left rear quarter and trunk floor?
Sent from my iPhone using Tapatalk
Last edited by bluptgm3; 09-02-2017 at 02:29 PM.
Member
Thanks. Once the body shop is done I'll share the hours and cost.Originally Posted by bluptgm3

Member
Looks familiar
Here's the link to my thread. Unfortunately most of the pictures are broken links thanks to Photobucket's recently move to kill links unless you pay hundreds of dollars.
https://www.bimmerforums.com/forum/s...6-M3-track-car
Last edited by hoki06; 09-02-2017 at 11:12 AM.
Member
Great thread! Hats off to you for saving this car from certain junk yard doom
Member
Thanks! Eric (previous owner) and his dad put a lot into this car. They were sad to see it go I think so I'm really committed to saving it. And I have a 3.5 year old and this will be a father son project a second time.
Member
Fixed for Chrome users! #$%^ Photobucket!
https://chrome.google.com/webstore/d...flicjjgj?hl=en
Last edited by MauiM3Mania; 09-05-2017 at 01:59 PM. Reason: profanity
Member
Good find!
2003 E46 330i ZHP - Daily Driver | Bike Hauler
1995 E36 M3 - Autocross | Fun
Member
Thanks. Got a bit carried away!!
Member
Just a small update.
The back quarter has been tack welded in place and the trunk has been test fit. Looks really good, save for the non-standard trunk roundel...that will be addressed.

I also have this little side project. I had pondered what to do about intakes. The eBay metal tube and cone filter didn't do it for me. But the carbon fiber headlight ducts seemed like a lot of money for no real upside. So I bought new headlights on Rock Auto then gutted the left side, drilled holes, put wire mesh in from the back side then put it back together. I'm pleased with the results.


Hopefully the next update will be final shots of the completed chassis. Someone had asked about cost to do the repairs. With the body work and doing some paint work on the rockers and bumper to add color sounds like it'll be around $3200. I'll ask about the hours and share that as well.
Have you checked RealOEM?
BMW CCA Member
Nice job with the headlights, that'll look good. I had a similar idea, but I used a sink drain from Home Depot
1993 E36 325is
2003 E46 325iT
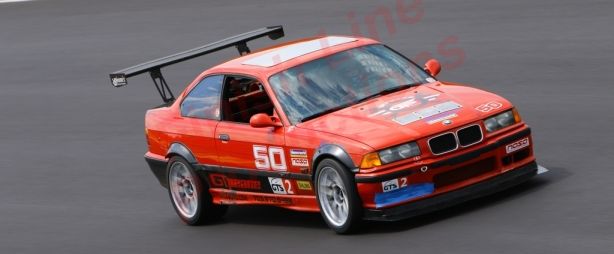
SpeedHunters feature: http://www.speedhunters.com/2018/04/...t-dtm-tribute/
APEX feature: https://www.apexraceparts.com/blog/m...-arc-8-wheels/
Member
Thanks. I like that sink drain idea. My setup is just going to dump air under the hood. THen there's a bimmerworld intake behind it.
Member
It sounds like I'll have the chassis back from the body shop this coming Thursday so then it'll be time to really dig in. Until then just a small update.
The major body repair is complete and they have moved onto adding the E46 330i sedan flares and making them part of the car.
Here's the front.


And the back...you can see where the donor rear quarter was grafted in and TiG welded into place.


We are trying to make room for 275's and I think these will do the trick.
Some small wiring work started for the AiM MXL sub-harness. The harness from AiM is way overpriced and kinda sloppy, so I'm building my own. Also built my own USB cable for it since I didn't want to pay $80 for the headphone-to-USB plug.


And I started laying out the breakers, plugs, switches and warning lights on the nice Bimmerworld carbon center dash. And I've been amassing DT connectors to build the chassis harness.


Member
Between 20 and 25 hours into the rear quarter repair.
Member
Flares are looking great, glad to see you saving this car. Crazy how much it takes to fix the rear.
Member
Thanks! Yeah, it's a lot of work to do a repair like this. The body guy makes it look easy but I'm sure it's not.
One more small update. This will be the last until I get the chassis back at the end of the week. The guy doing the work cut me off so I'm surprised by the final result.
Just a few shots of the flares getting primer.


And then the final teaser of color. The chassis will remain mostly silver but with some accent color around the bottom and top. I couldn't afford a full wrap so figured a little color would stave off my want of more.


Member
Glad to see this thing getting saved; awesome progress thus far! What size tire are you looking to fit with the flairs? They look great.
Member
Thanks! 275/35/17 Hoosier R7's is the plan. GTS2 has become a tire size arms race recently.
Makes Cars Dance
BMW E36 M3 Expert
Yeah, sorry about that. That's my bad.
Member
I've really been slacking on updates as I've been busy with my side business, real job, family, etc. But there will be an update. And as a teaser, the S50 is out and the S54 is coming.
 Posting Permissions


 Reply With Quote
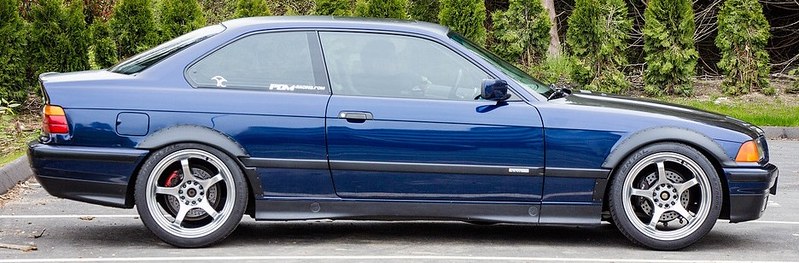


Bookmarks