
 Member
Right. I've been holding on to upgrade my sordid looking lights with broken adjusters and dull, faded looking light output for a really, really long time. Alas! I have finally started working on it about two days ago. For those that are wondering about the non-bakeable headlights in the title, yes, you can still upgrade your late 2002-03 E39's by cutting the lens out. As unfortunate it may sound at first, but I assure you it is the only way to do it. There are few owners who have already done it. Also, installing a new lens wouldn't be a bad idea along with other goodies.
Here's my list of upgrades:
- G4 Bi-Xenon Projectors (thanks to Paul (blackknight530i) for the group buy)
- Morimoto low beam D2S 5500k bulbs (got everything from TheRetroFitSource.com)
- Morimoto high beam H7 5500k bulbs (looks like I'm probably going to need an amp igniter, an XBS ballast, and another wiring harness kit)
- Morimoto H7 bulb cover adapters
- New high quality plastic and metal made adjusters kit
- ECS Tuning Euro clear lens
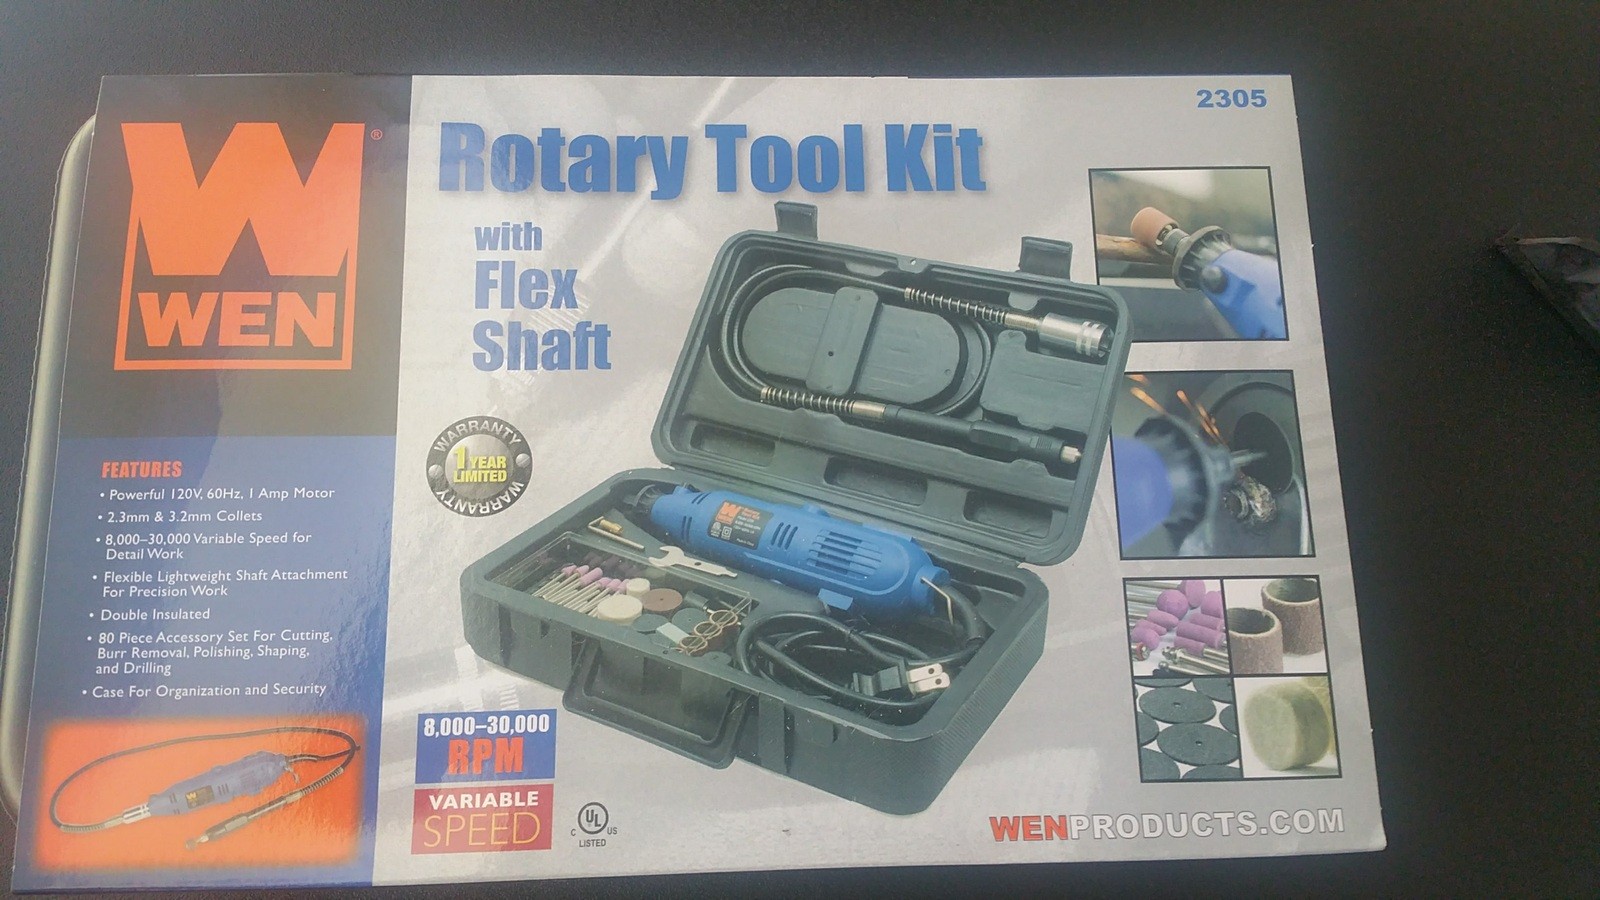
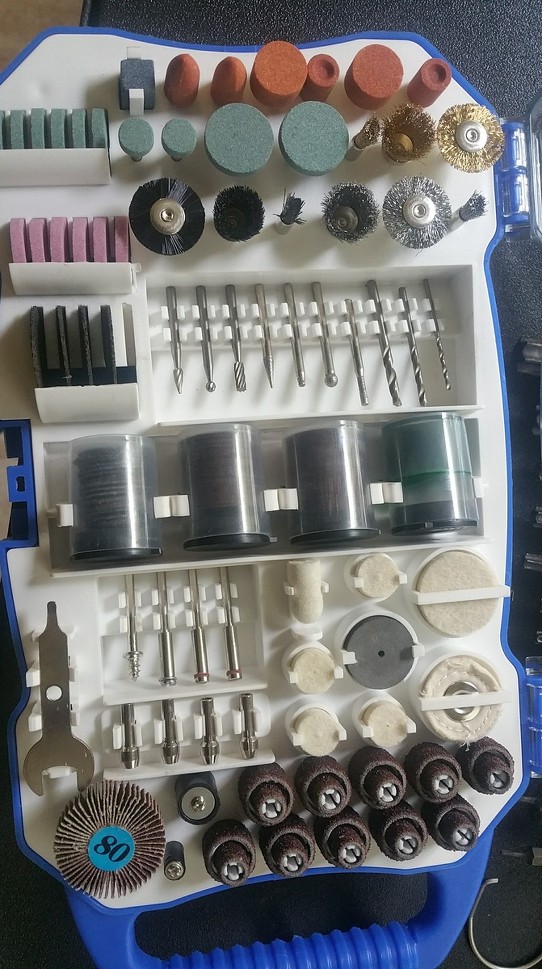
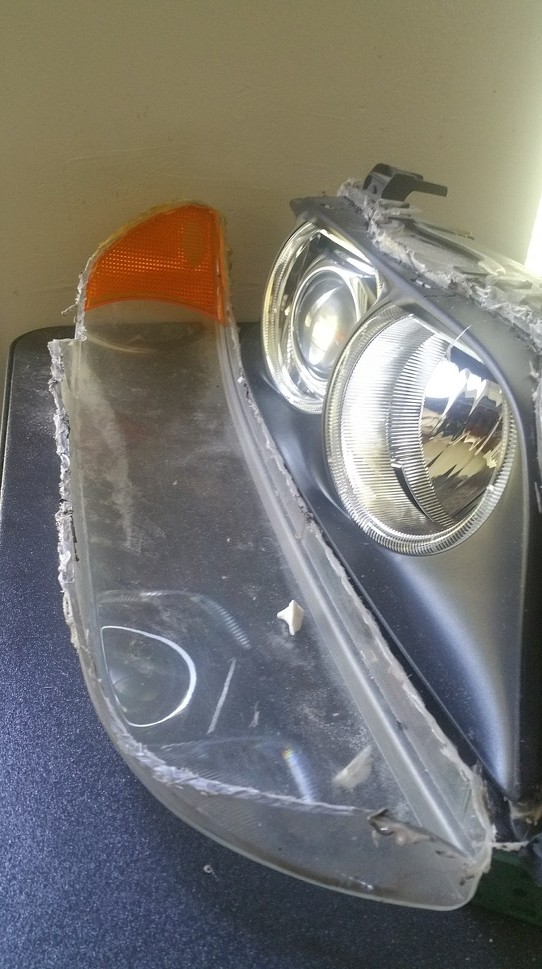
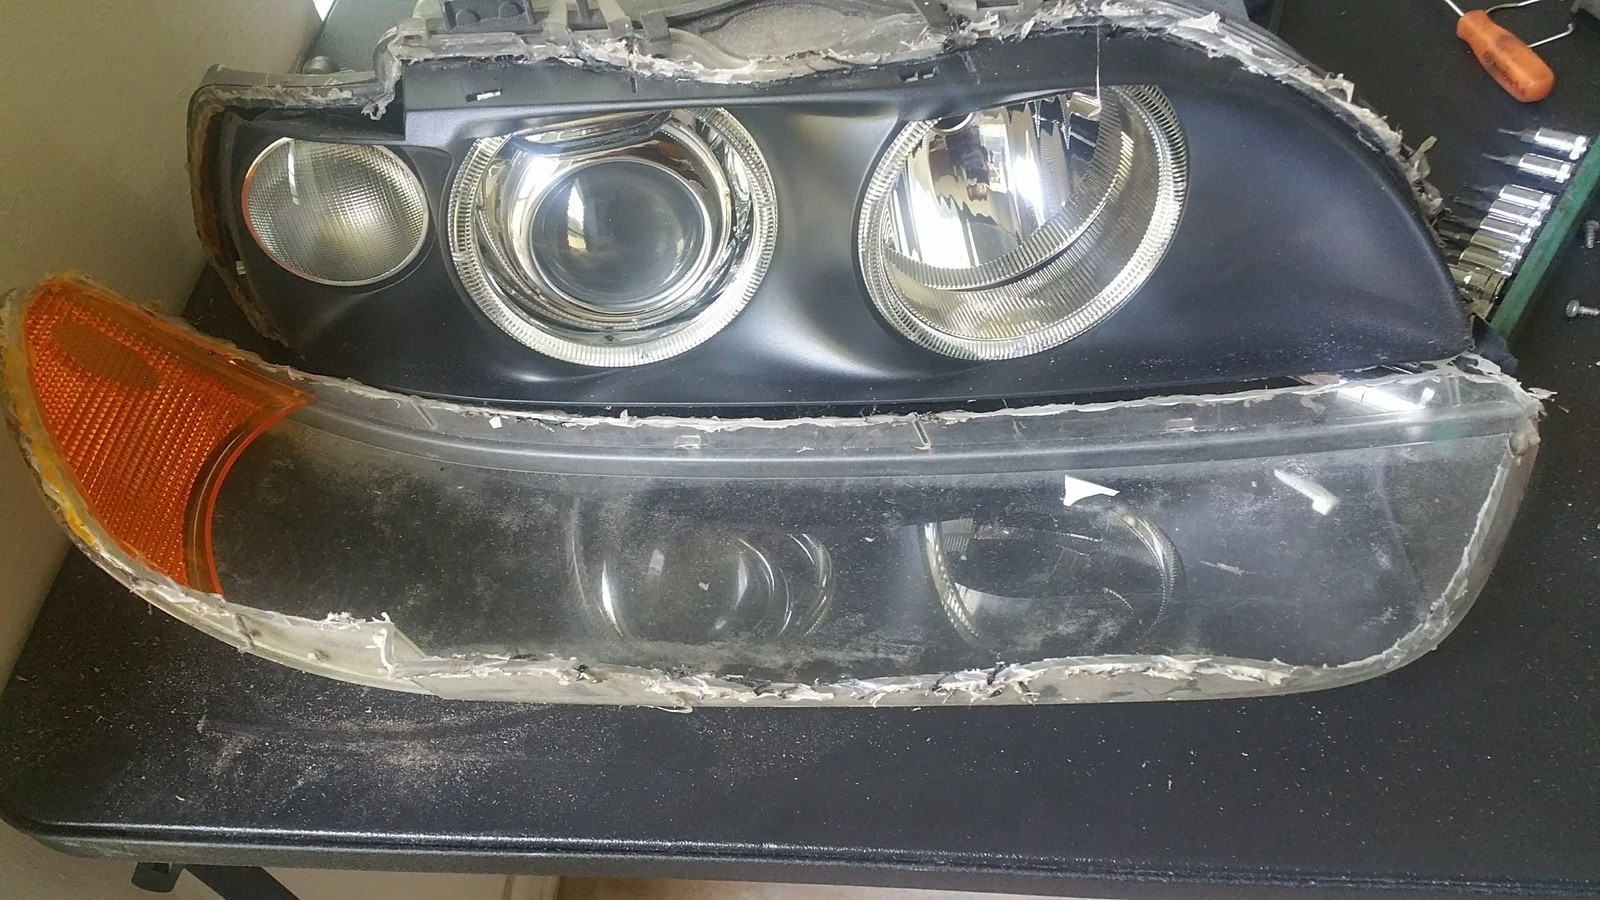
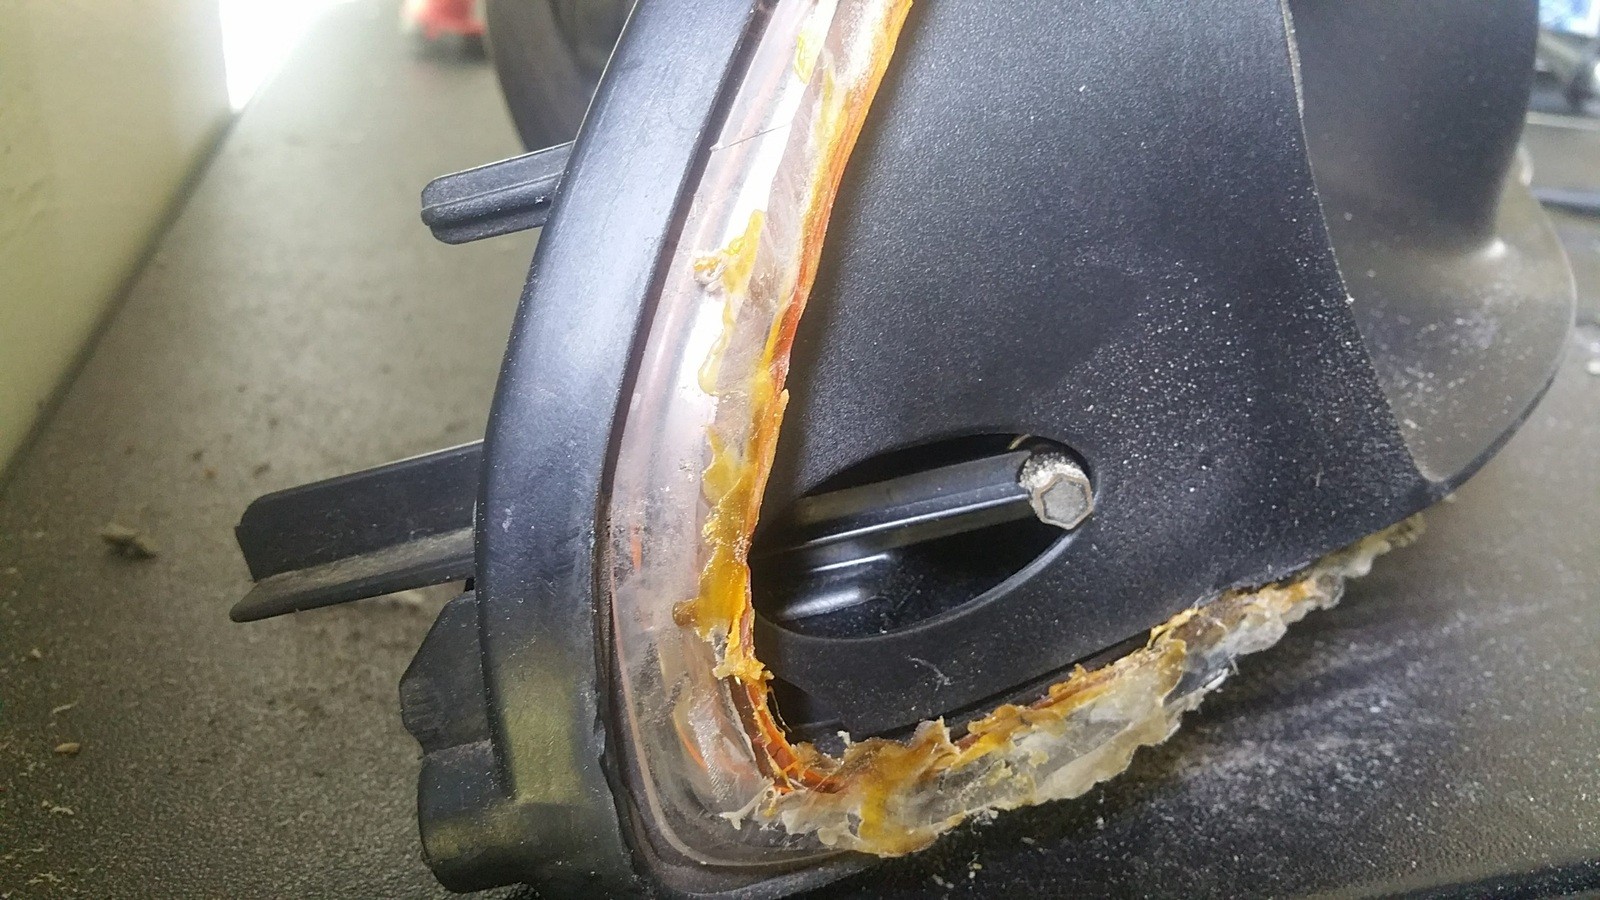
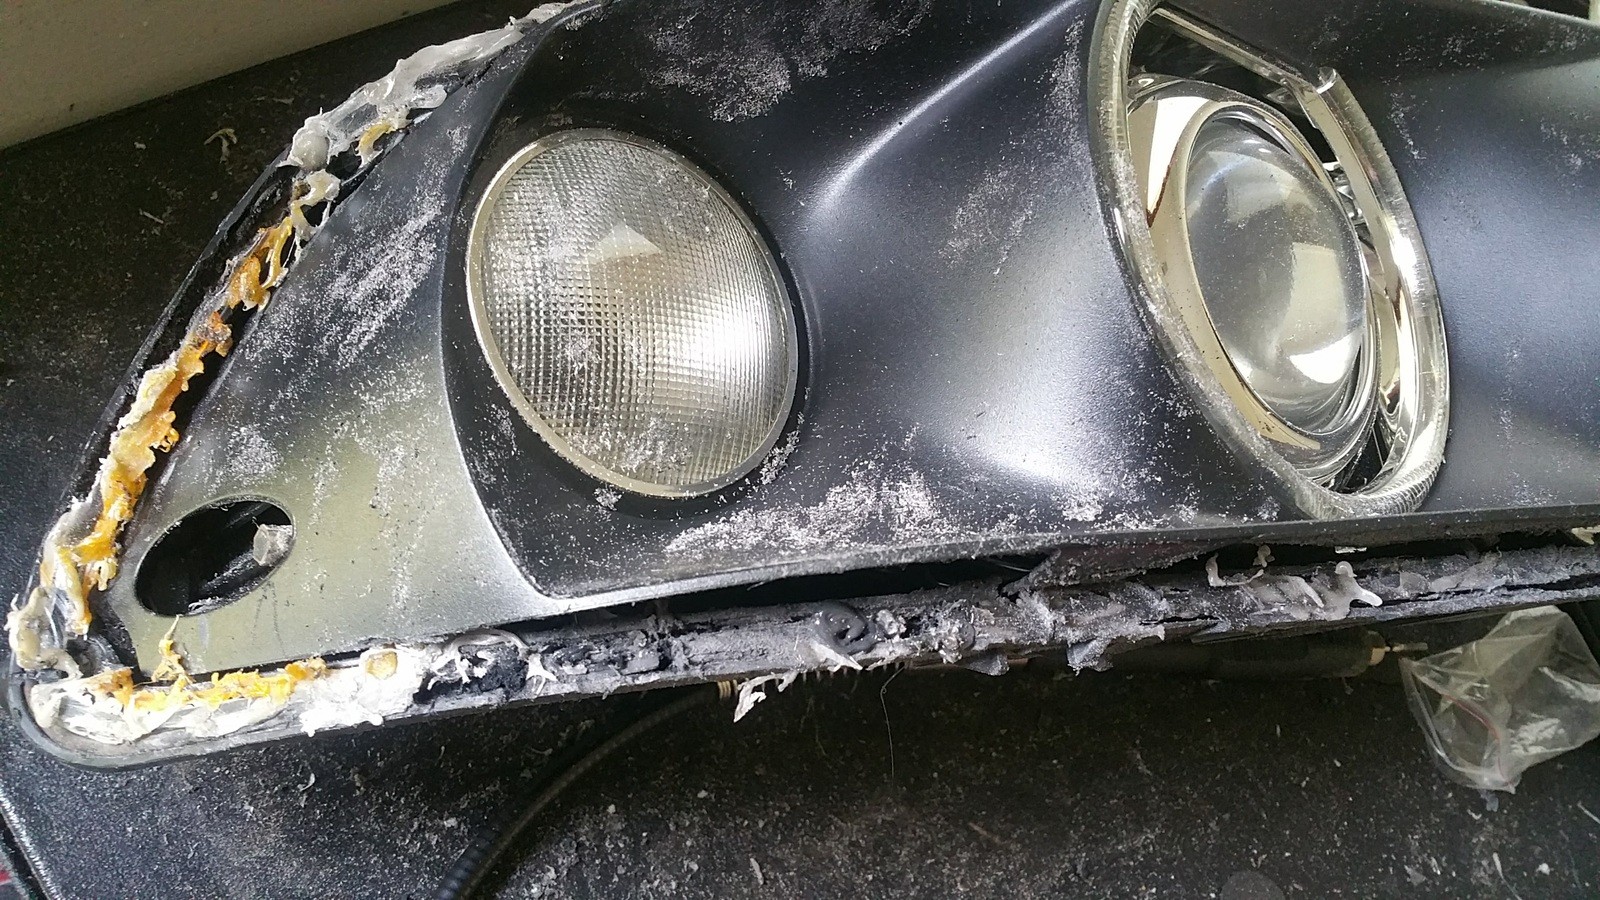
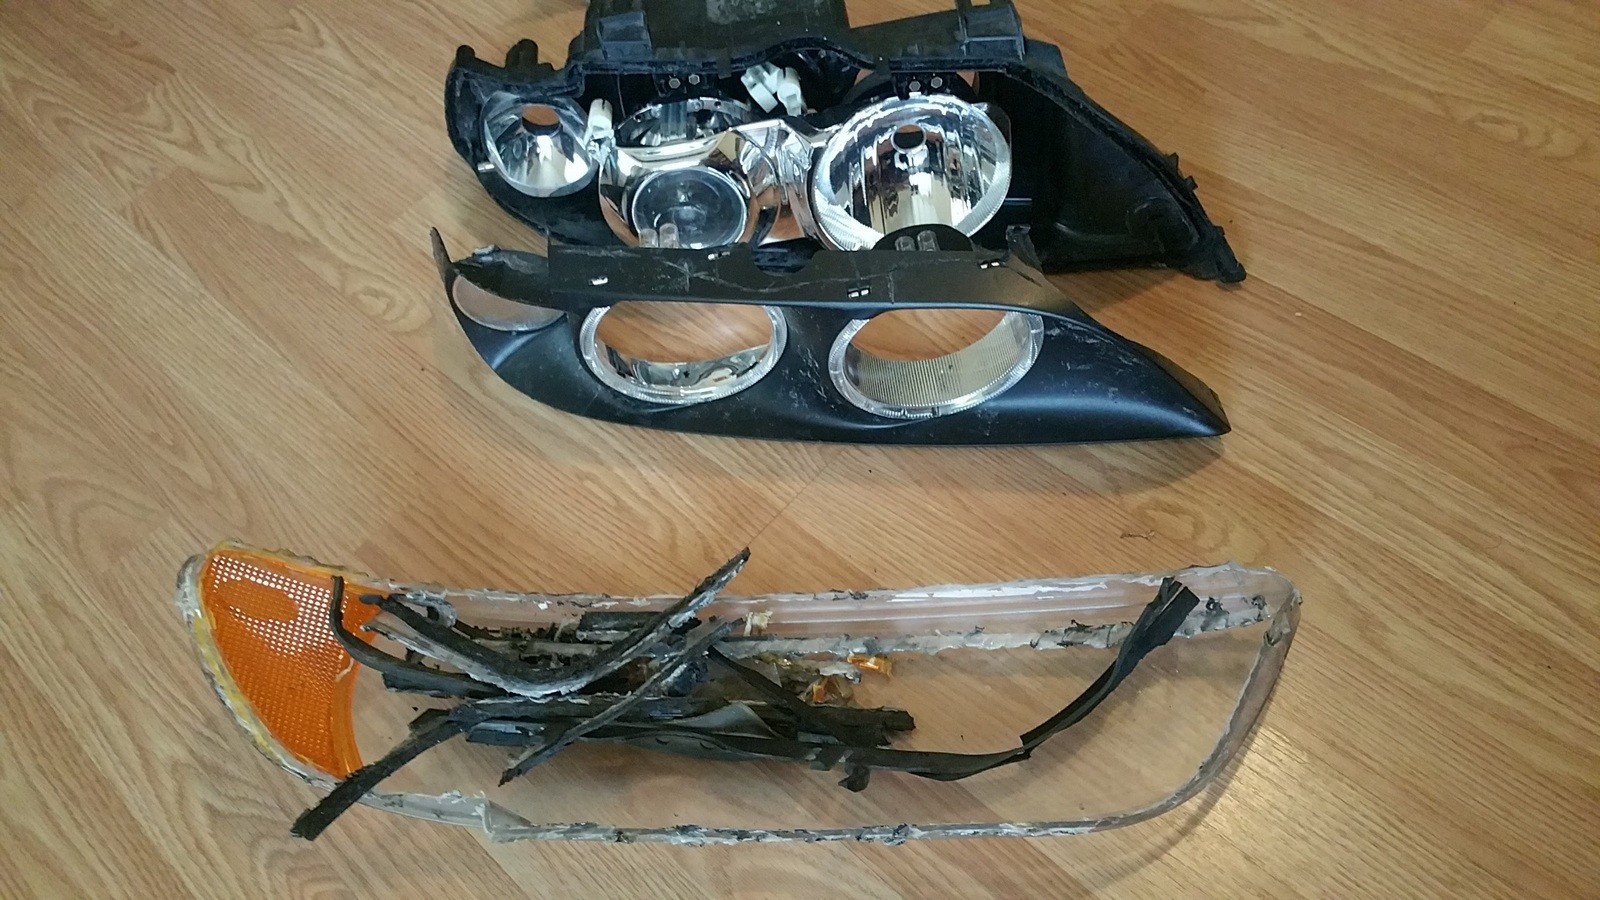
Currently I'm working on the passenger side headlight only before I proceed dismantling the driver side. My brand new dremel tool came with a small pack of assorted tools like sanding discs, cutting discs, drills, etc. but their little cutting discs don't last long when you are cutting the headlight lens. They easily break if you put too much pressure on it or cutting it at an angle. My advise is to use a steel cutting disc as it hardly wears down and won't break at all on plastics. Because my lens were so dirty and hazy it was hard to judge how deep I was cutting into it before I hit the main frame. There are already few cut marks around, so be careful if you are about to do yours. Just go slow, have a good steady grip on your tool, and apply light-firm pressure. Also, be aware as to not cut too close to the outer housing like I have done it here. Otherwise, it will be too difficult to grab and pull the remaining part of the lens still glued into the housing. This was my first time doing and although I've managed to pull it out I'll be careful the next time I do the driver side.
Went and bought an assortment of dremel tool kit.
My second cut was too deep and that was my mistake. Thankfully, I have only cut the lens and not the frame or the back housing.
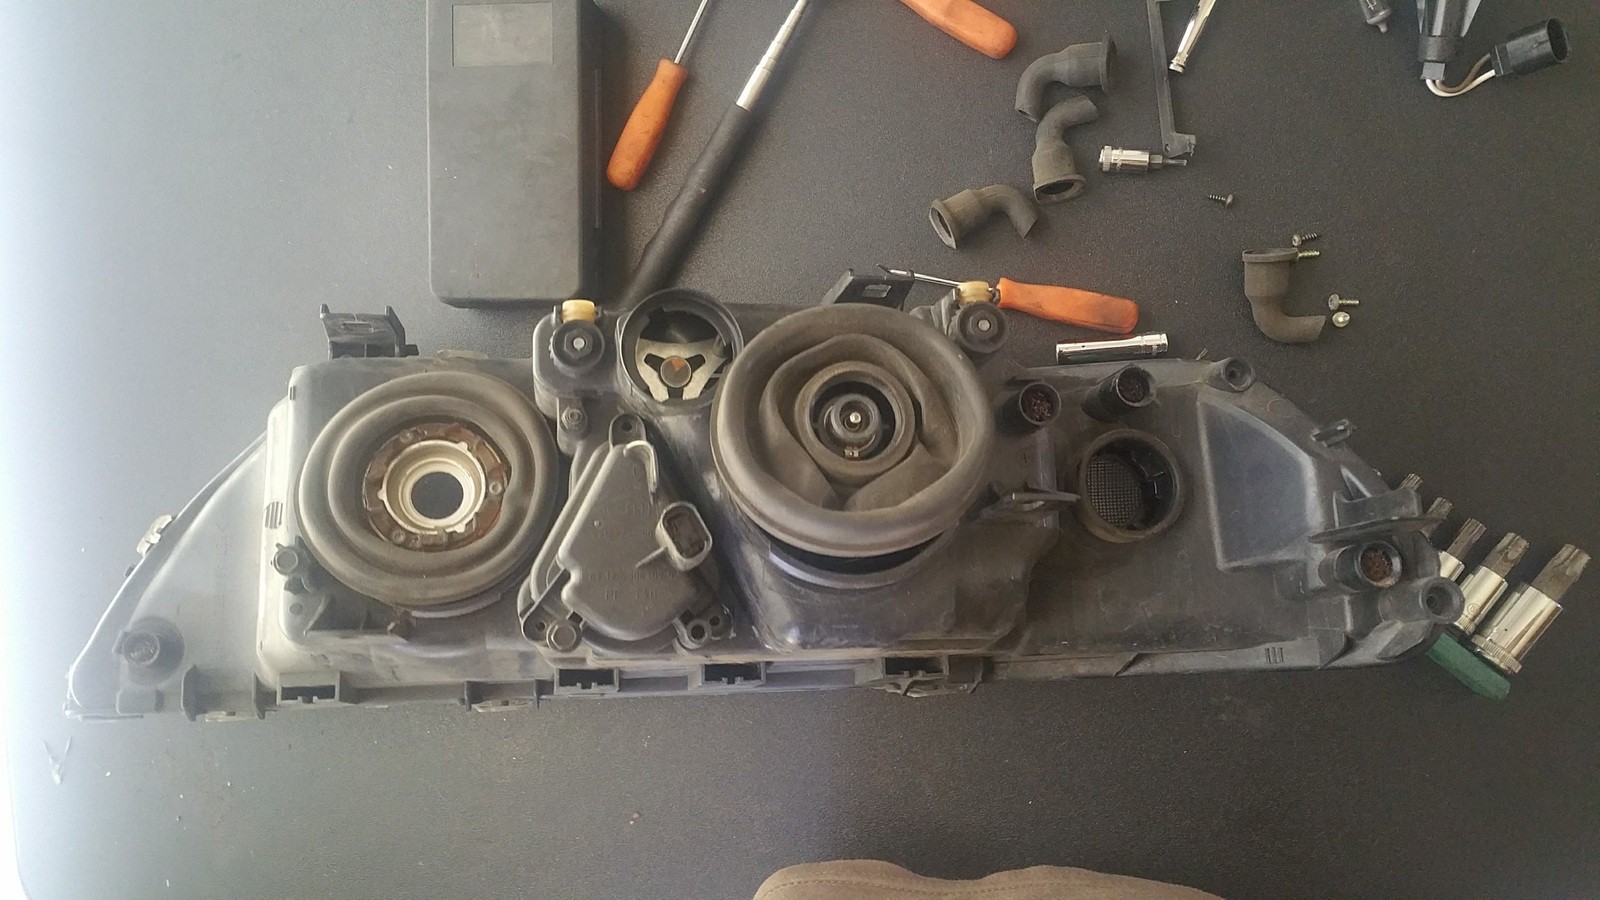
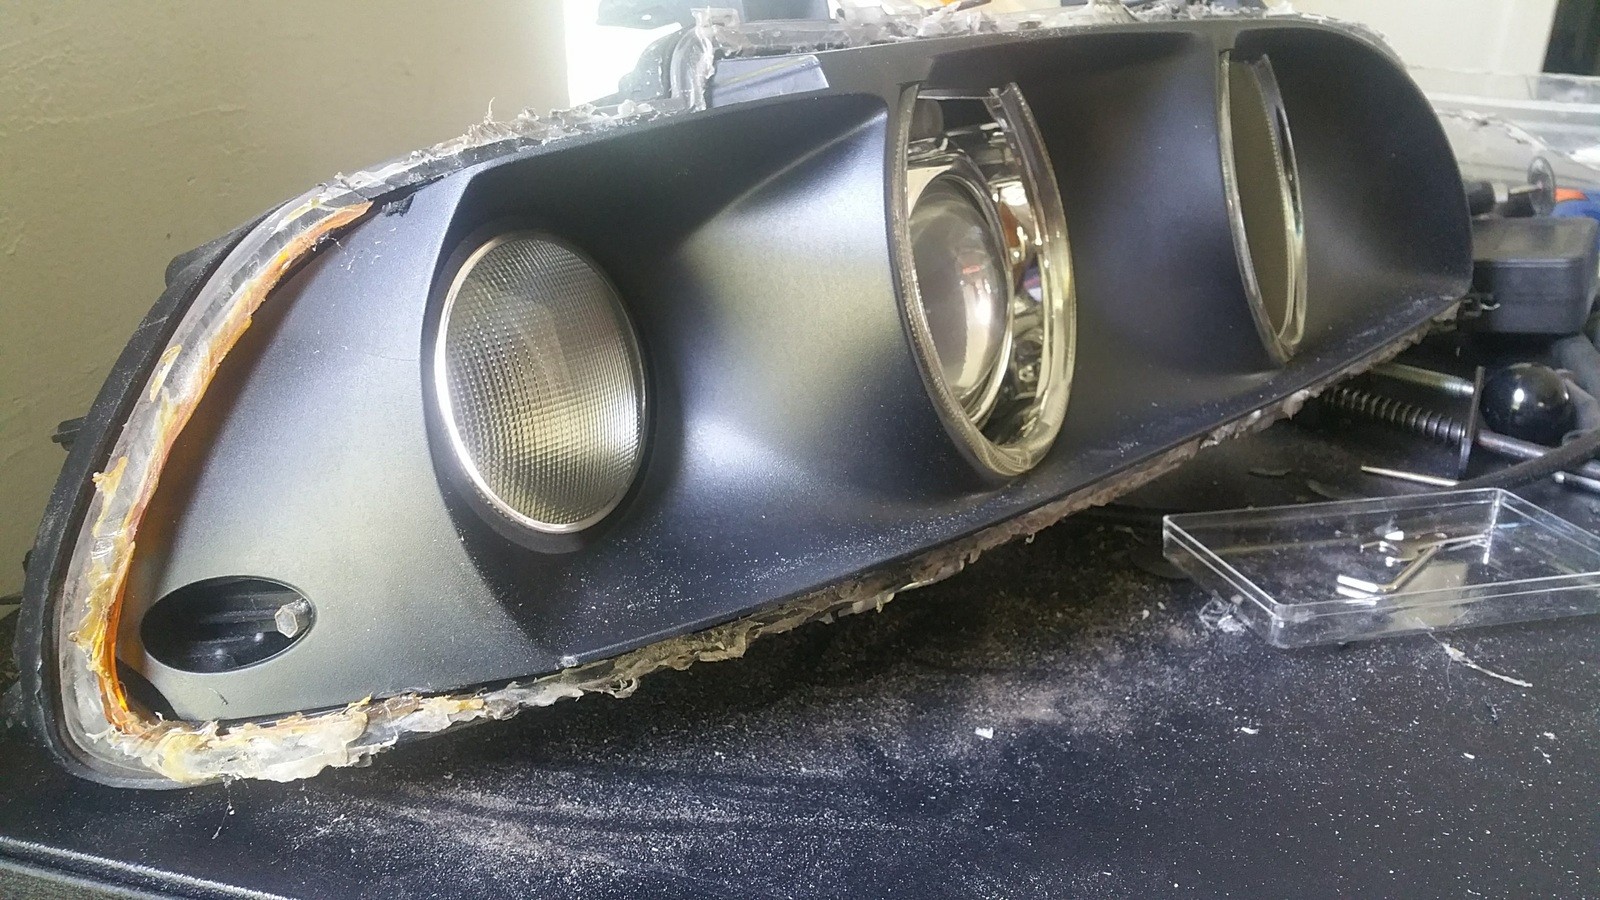
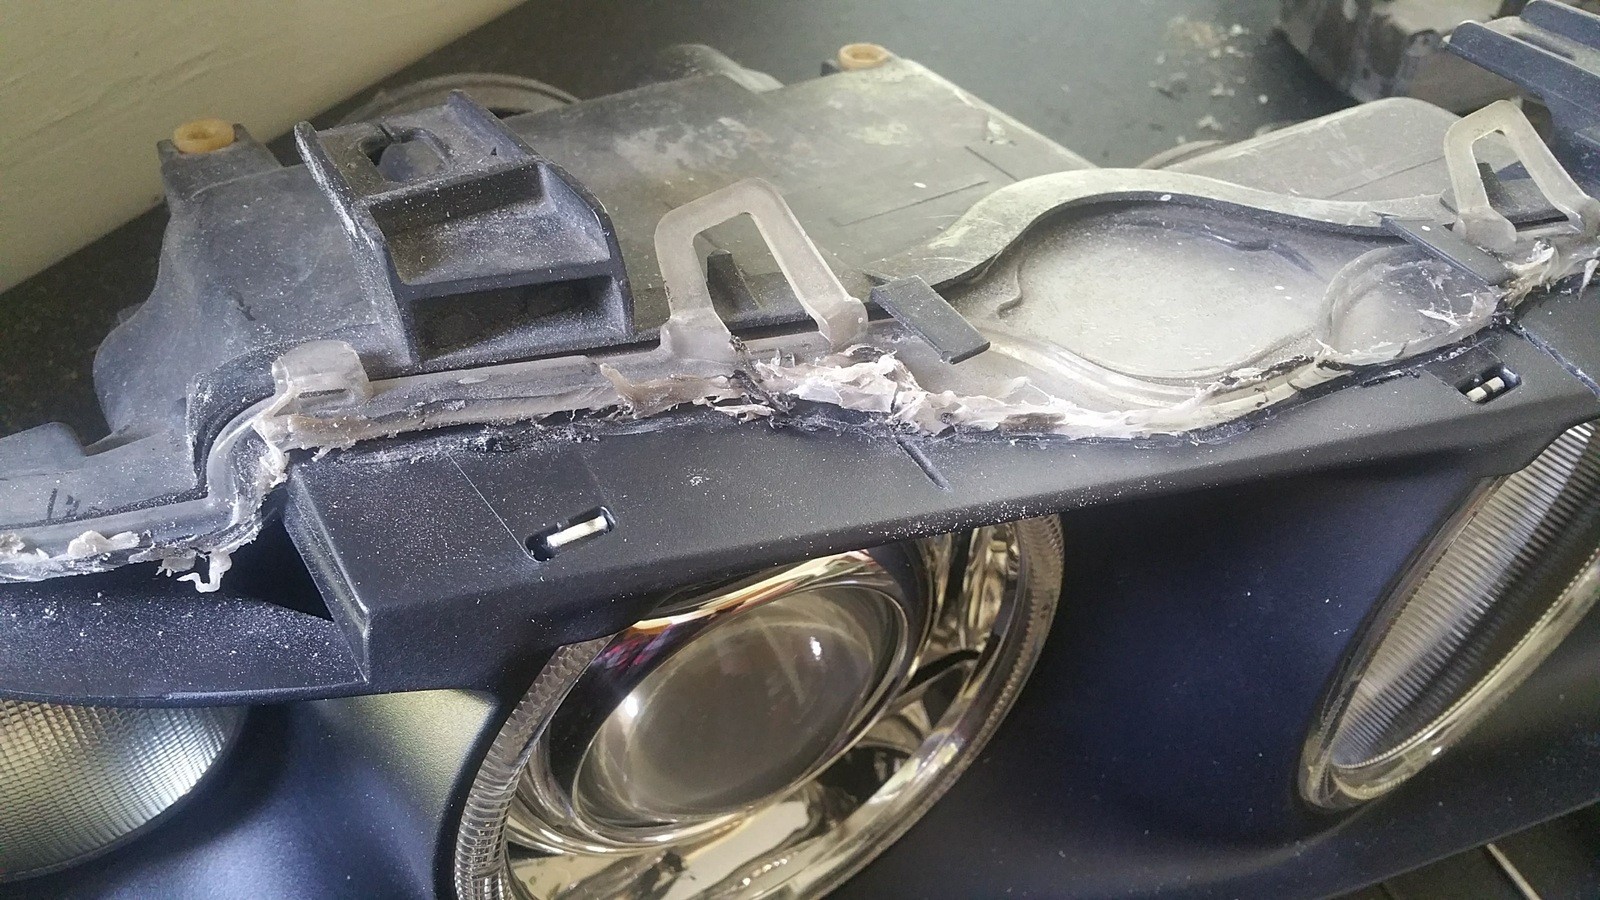
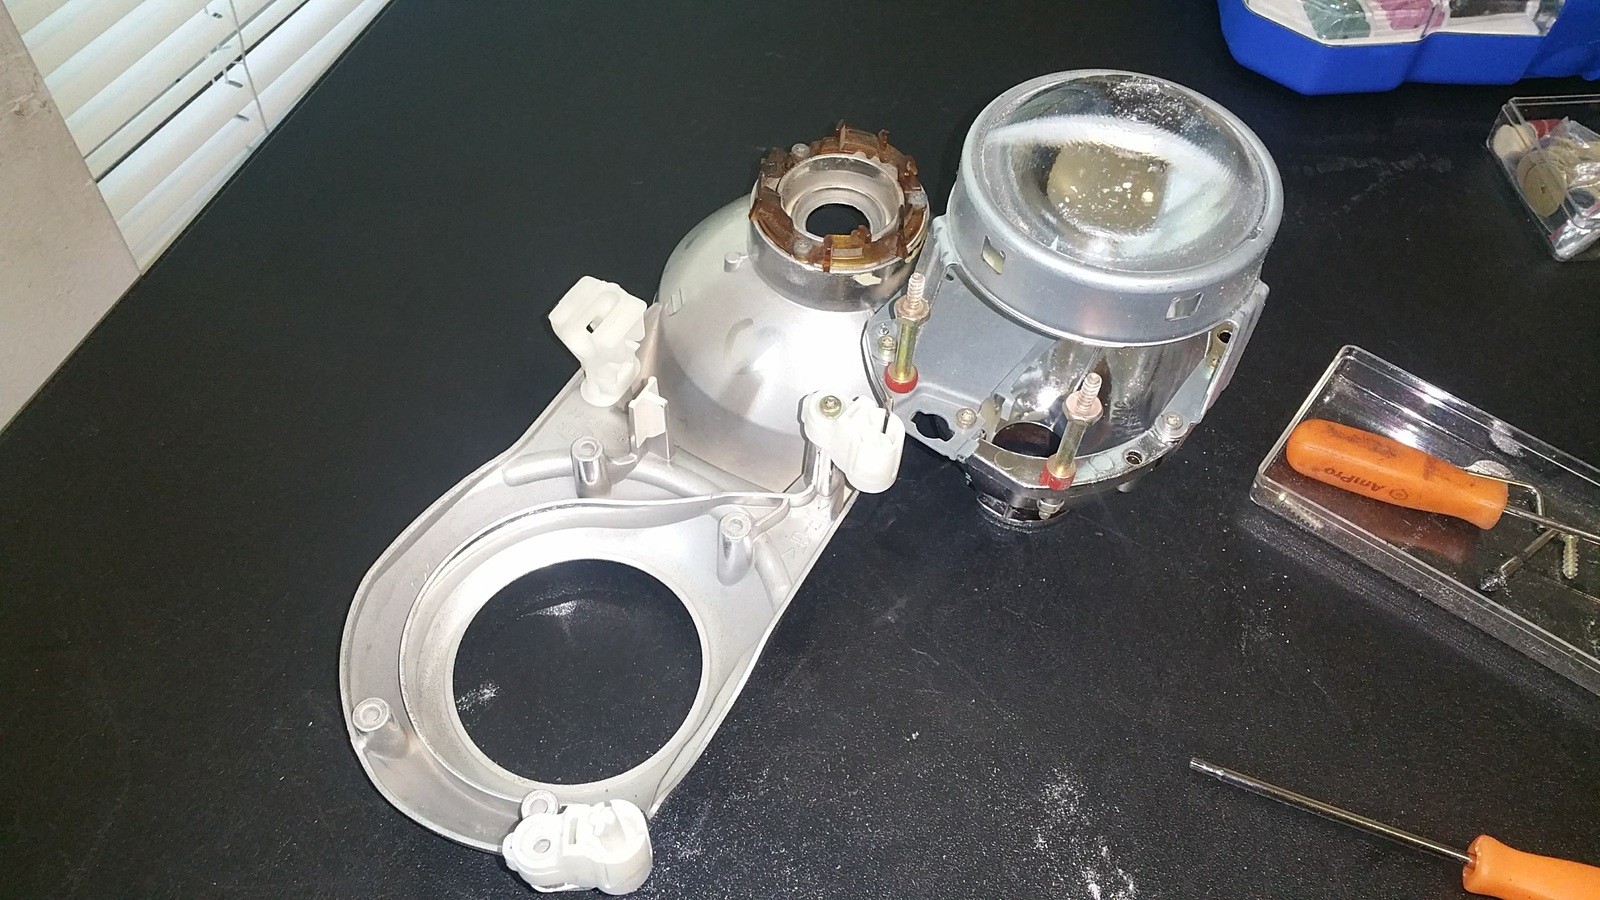
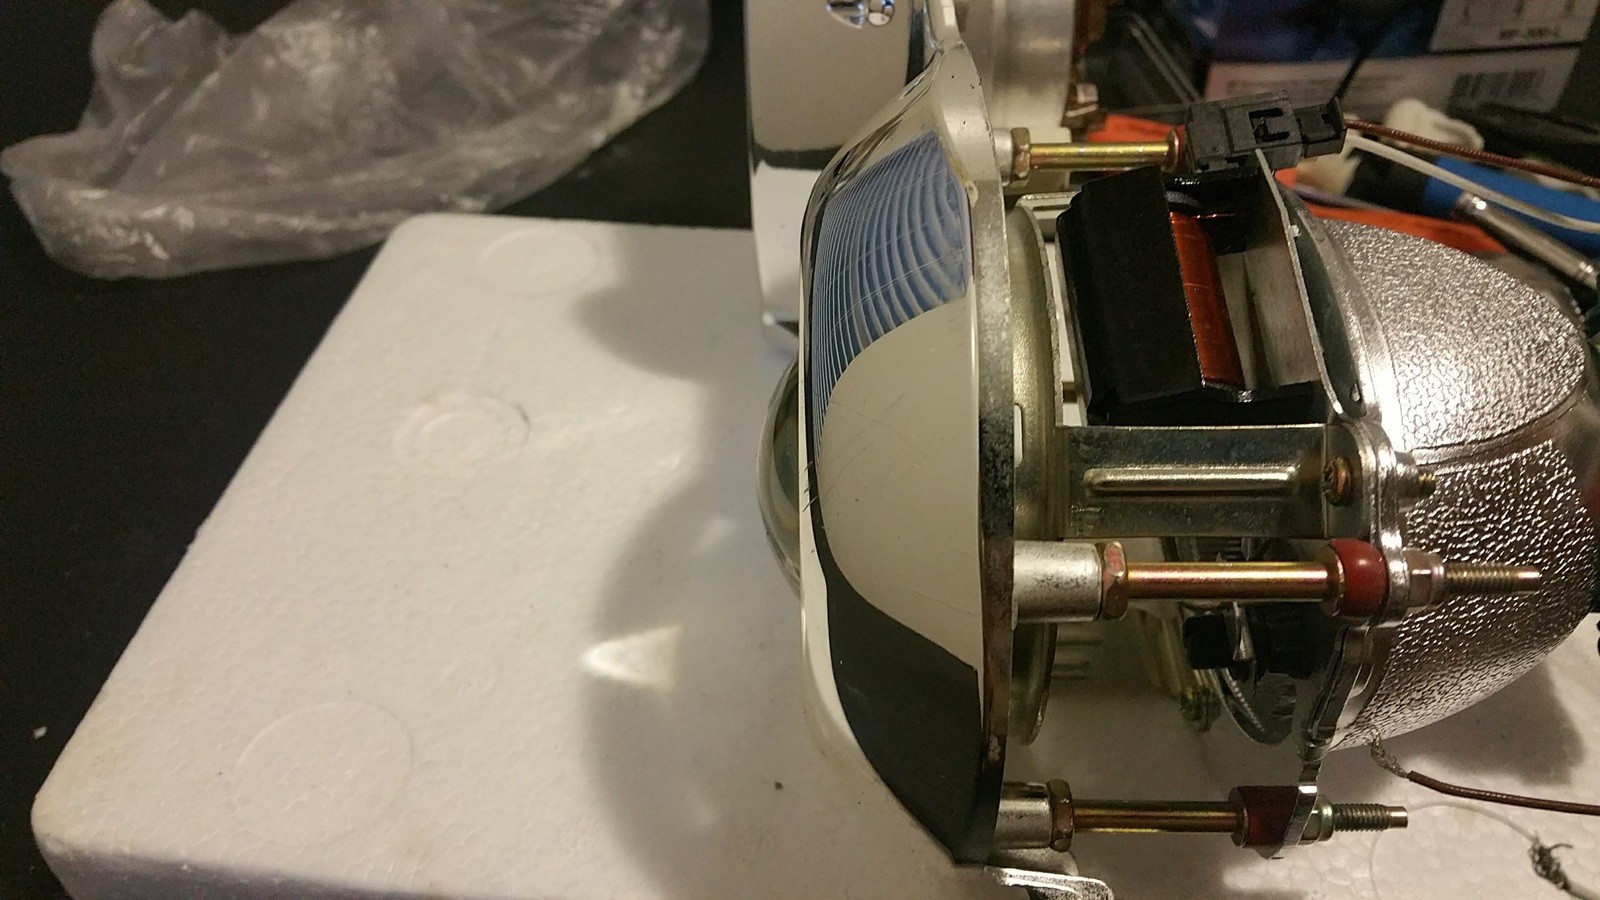
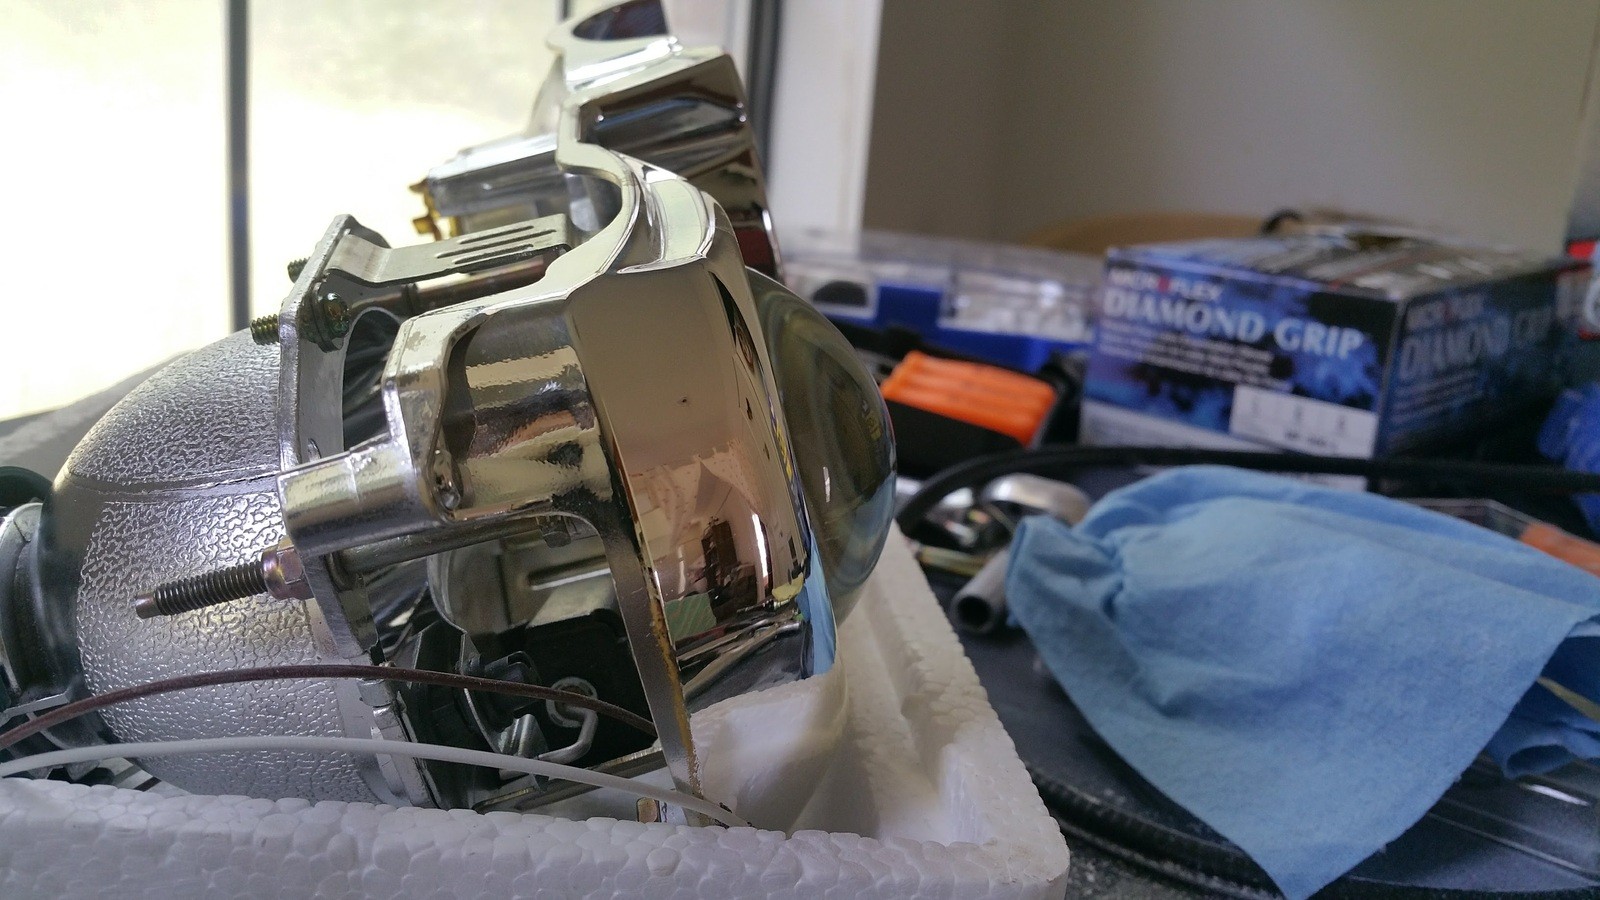
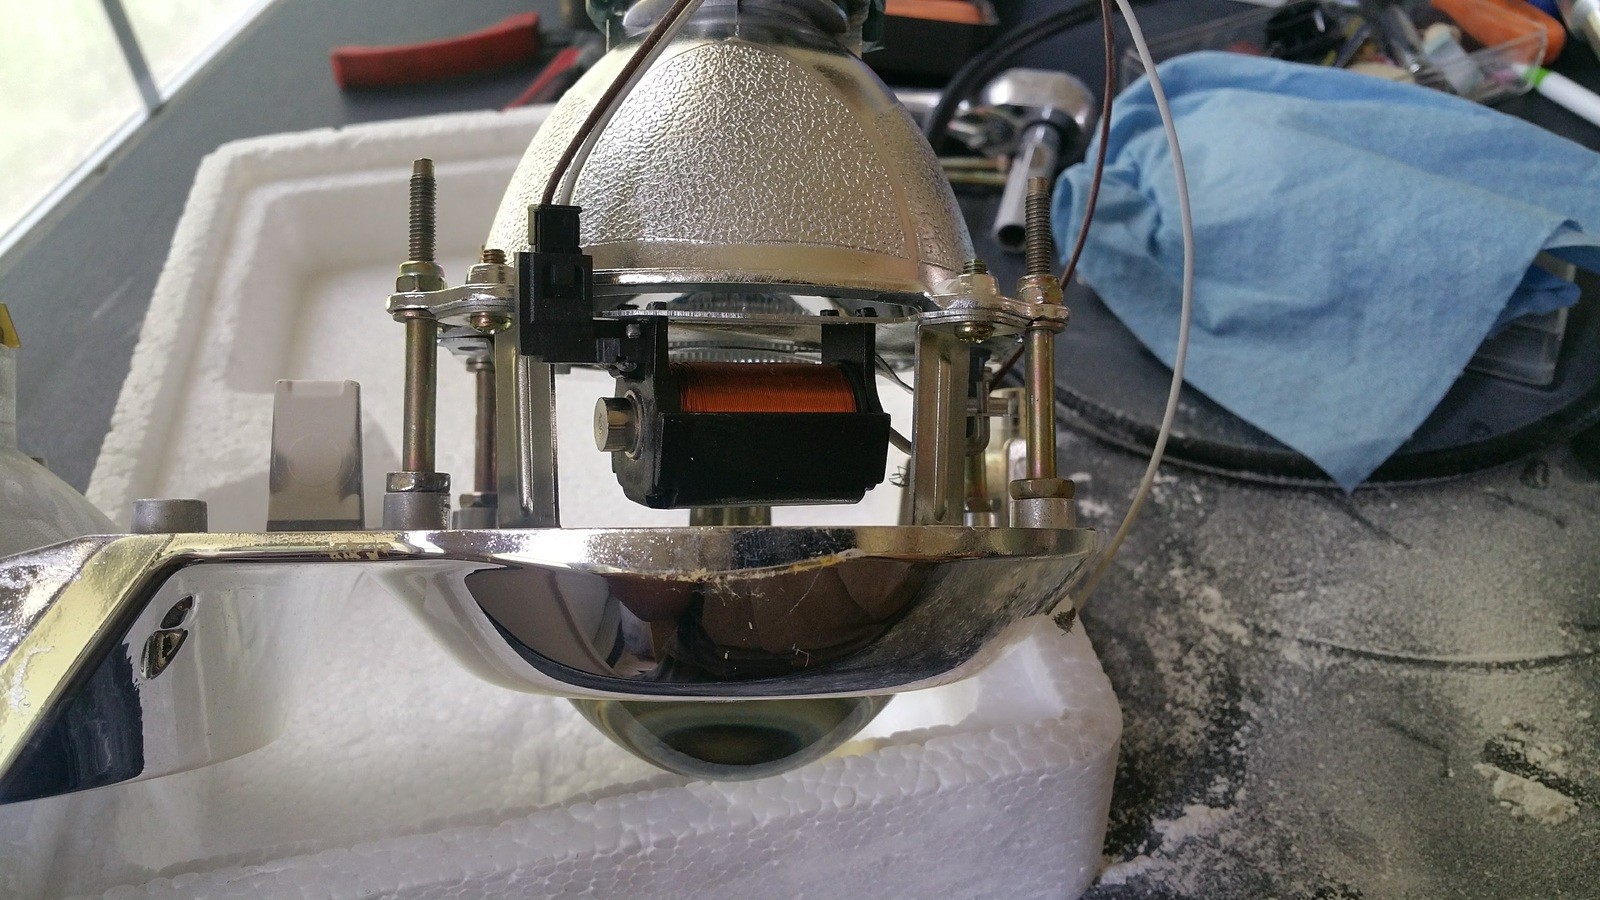
The chrome plated housing is held on by the manually operated adjusters and also by the auto aim leveling motor. By constantly unscrewing the gears will release it and separate it from the back housing.
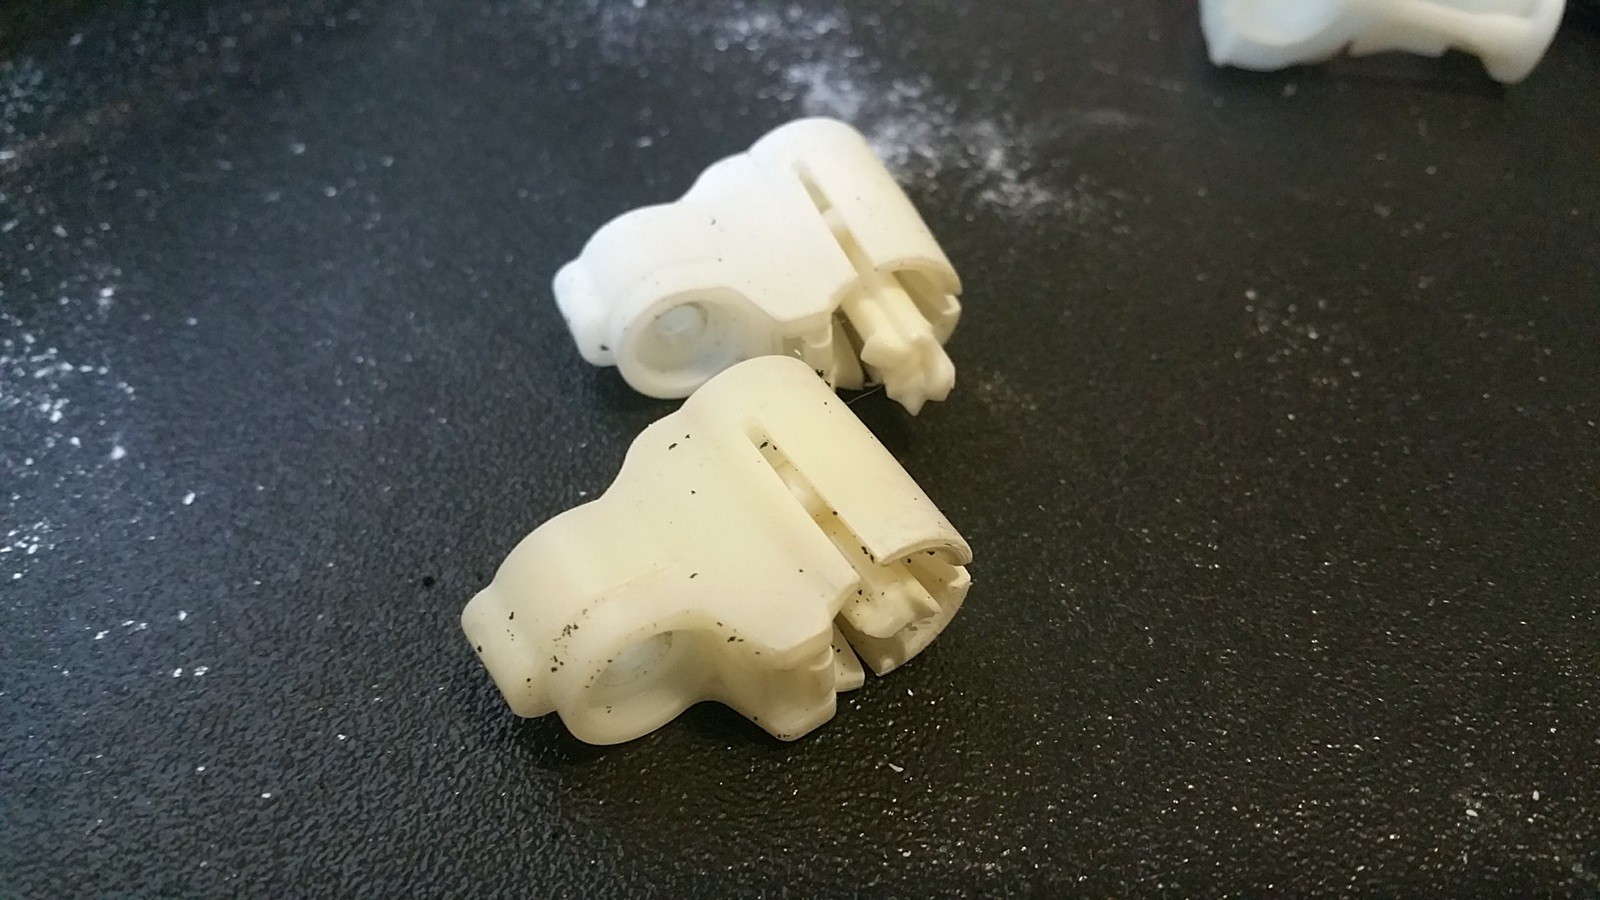
Few of the broken adjusters.
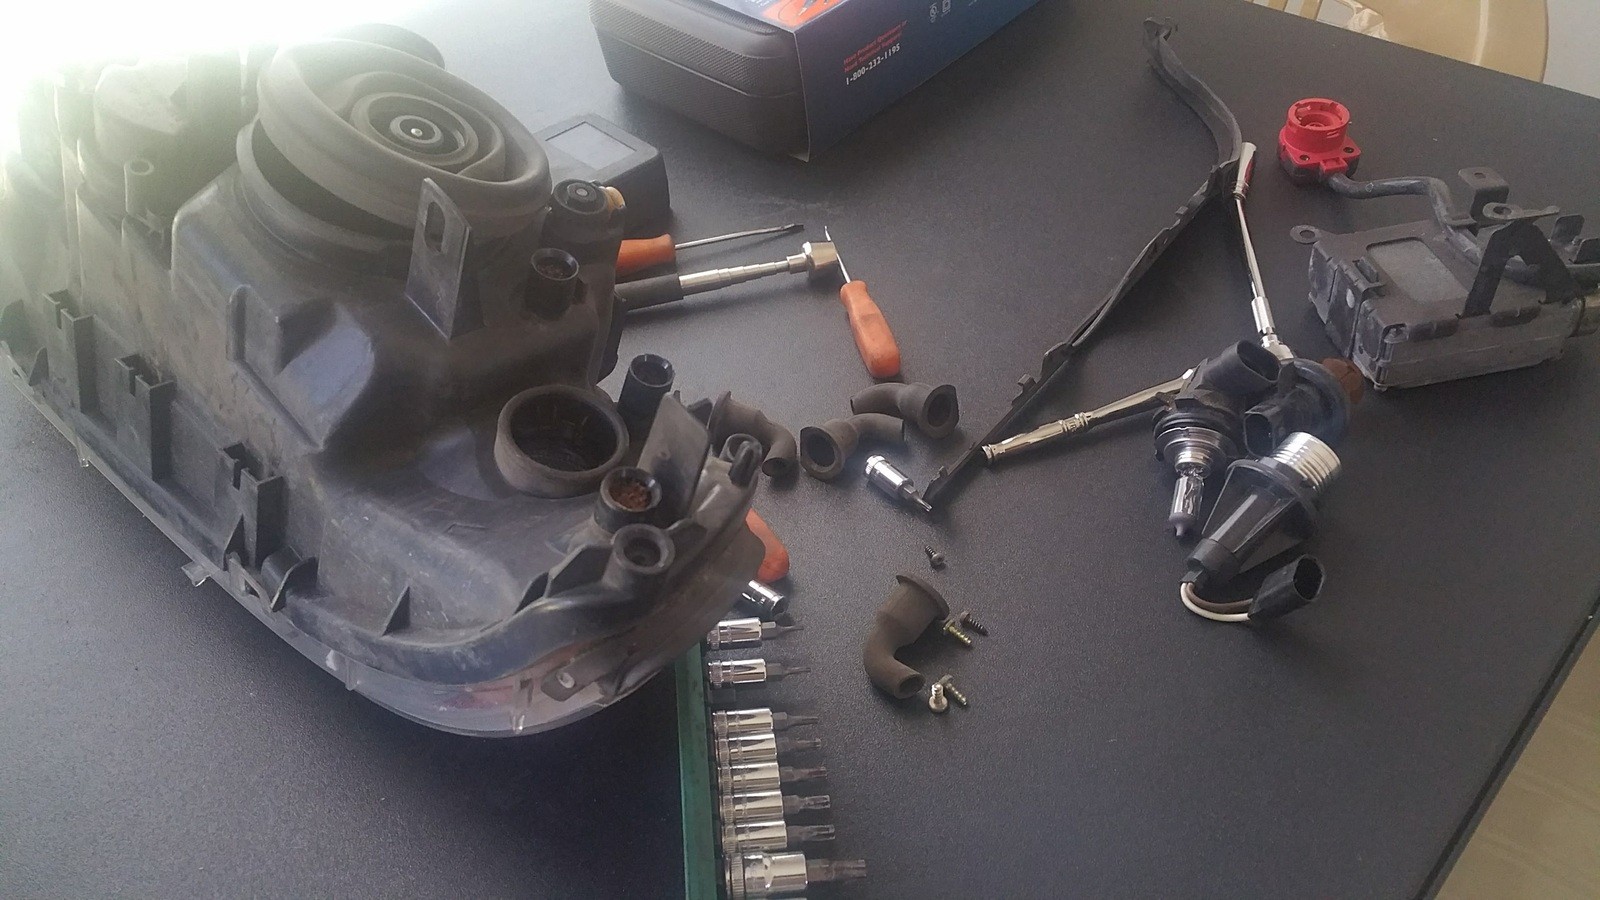
Old and original projector already loosened.
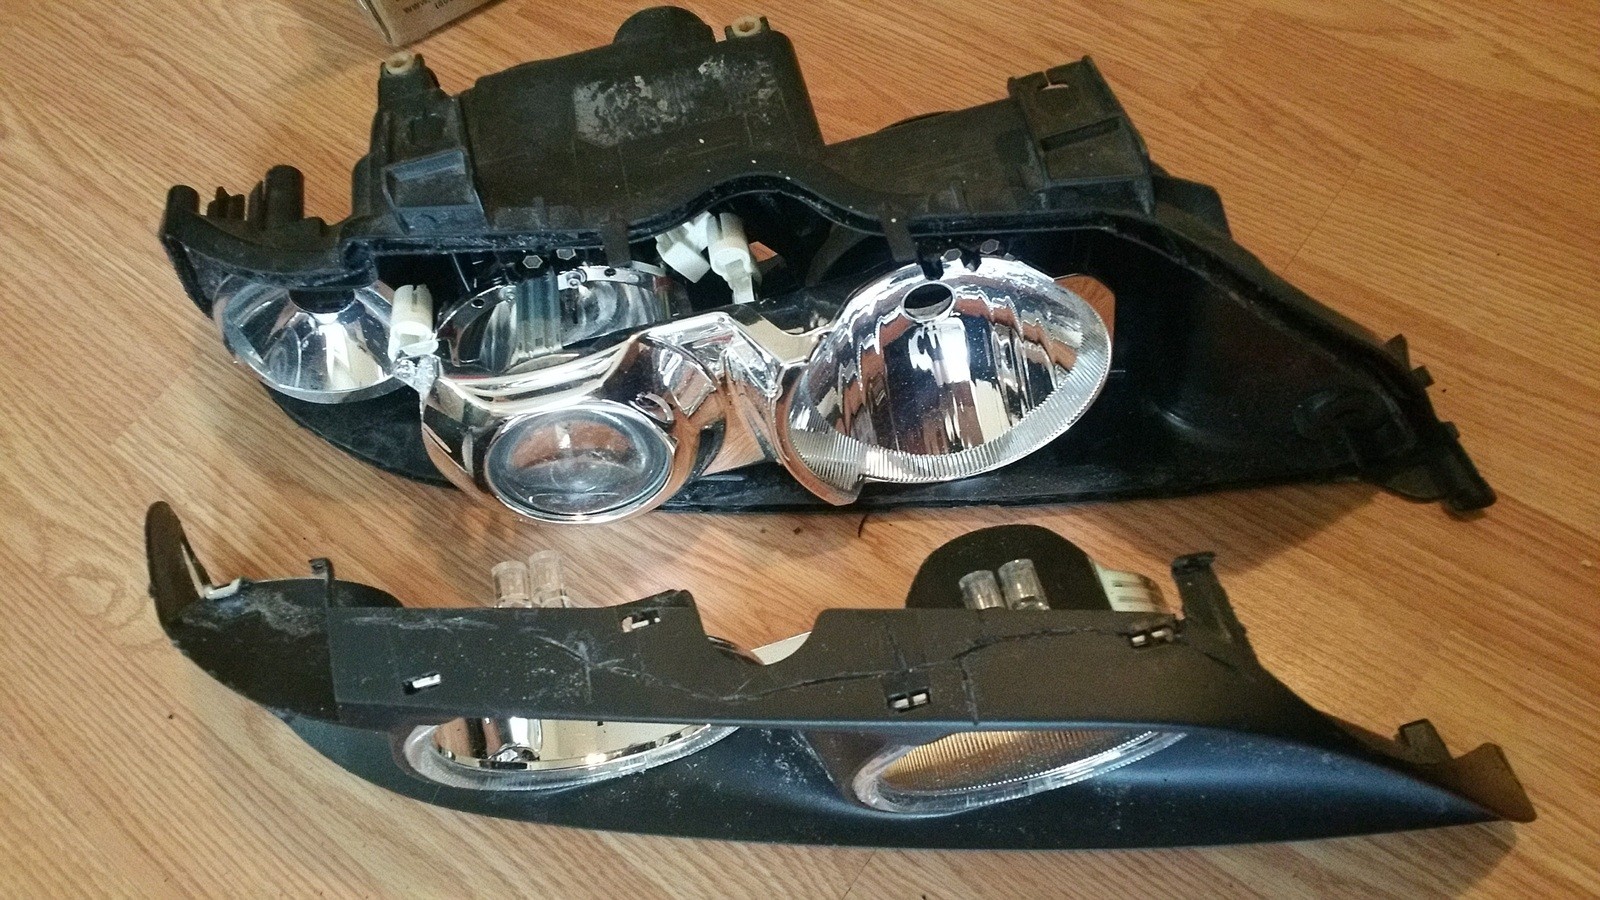
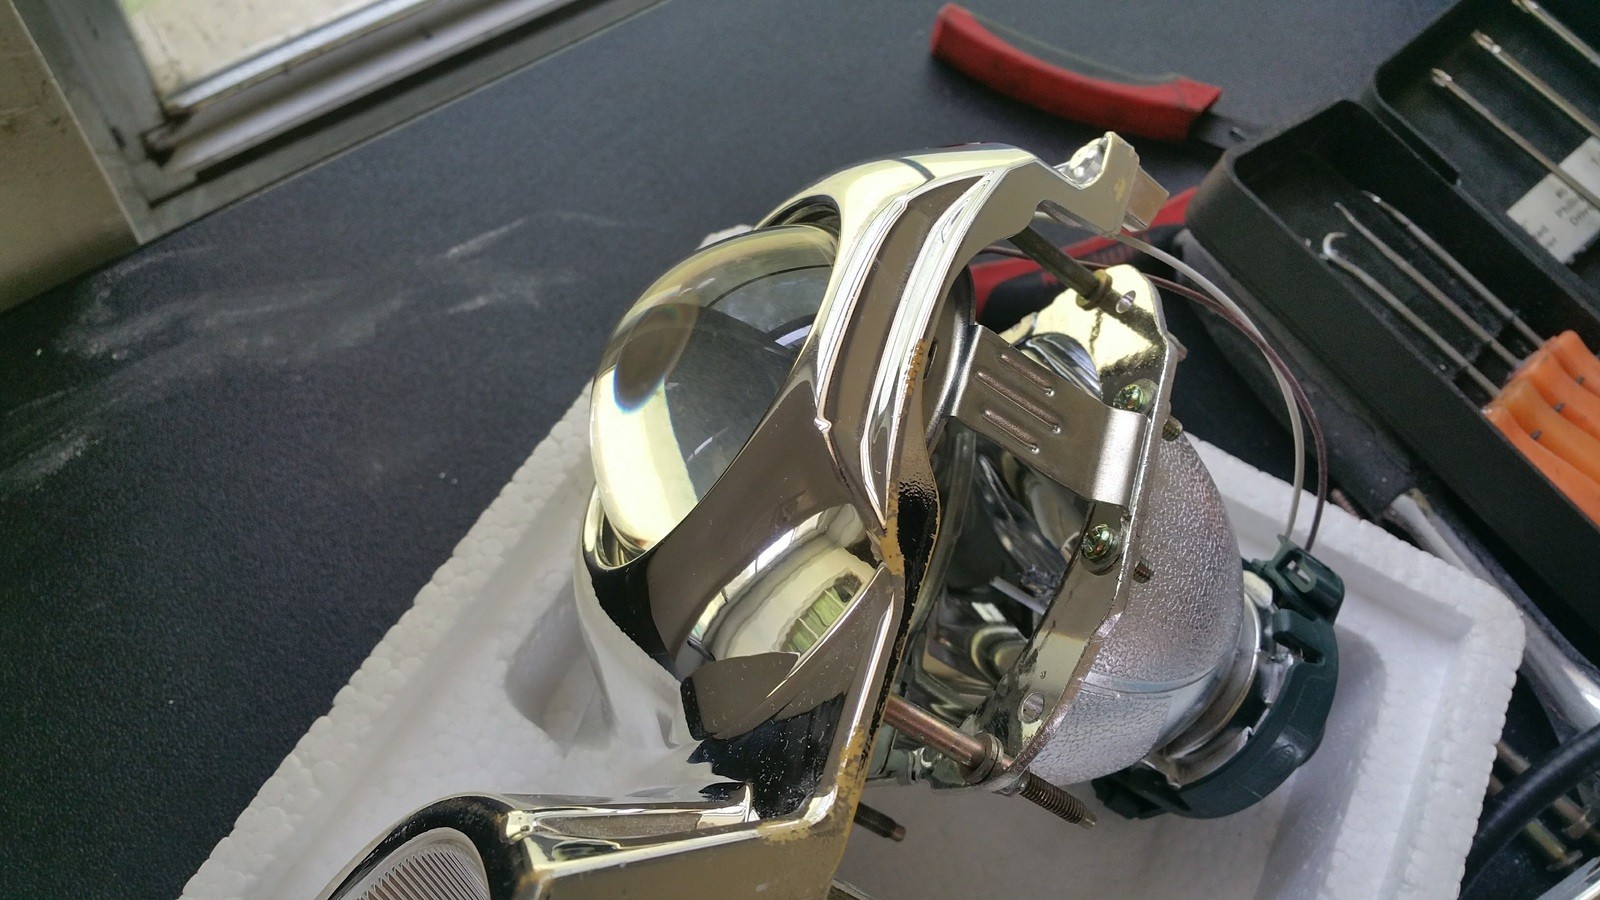
A quick comparison shot between the new G4's and the old one side by side.
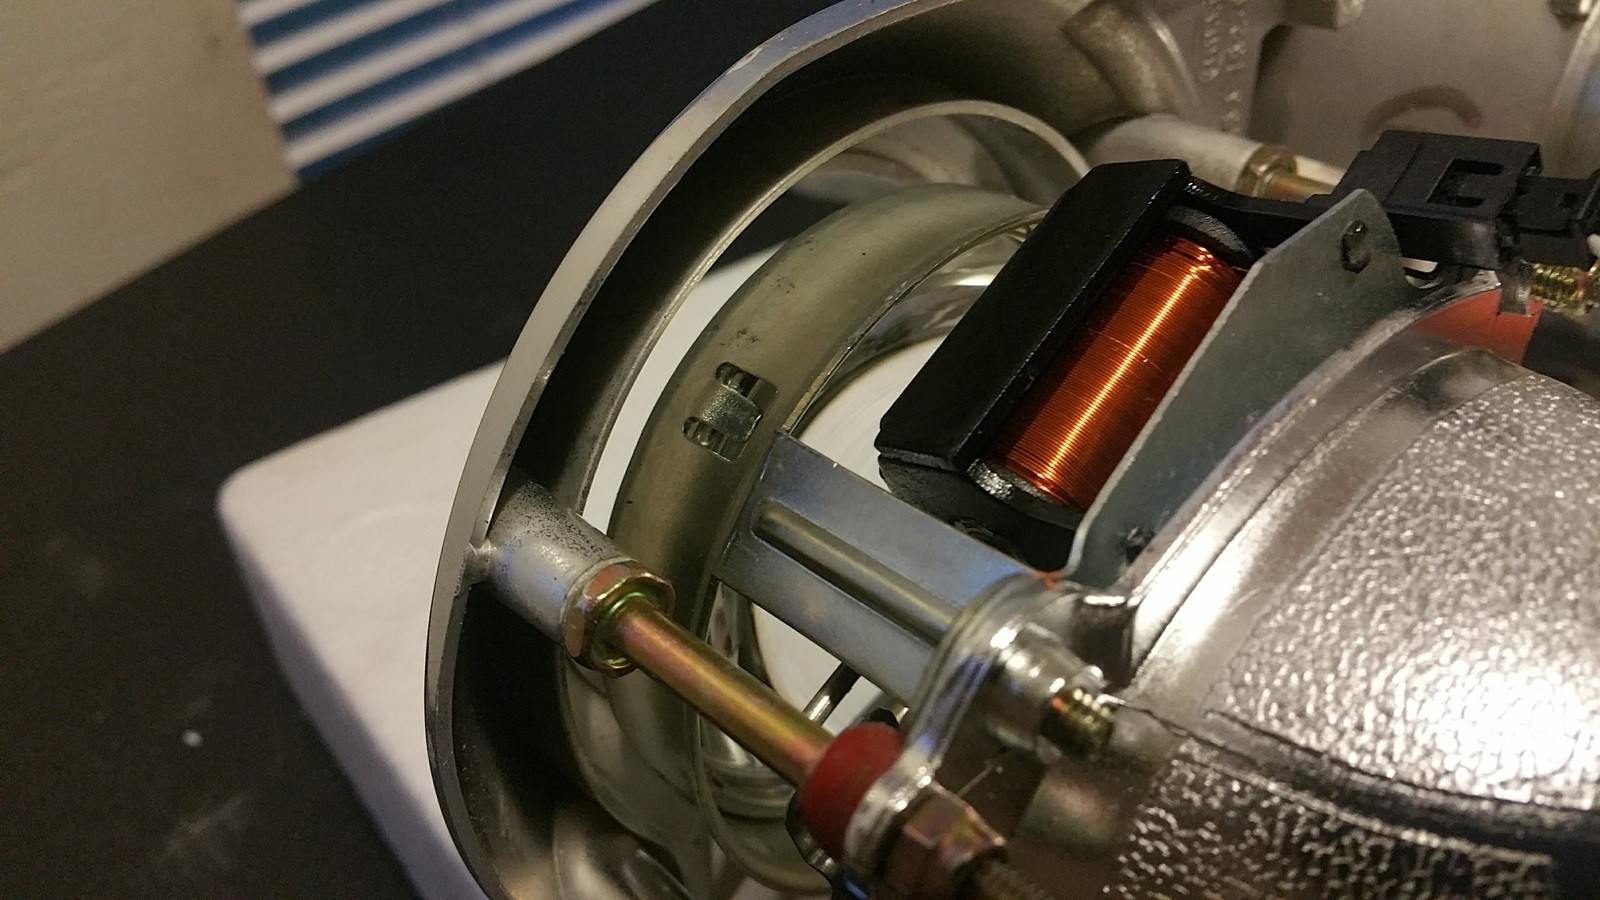
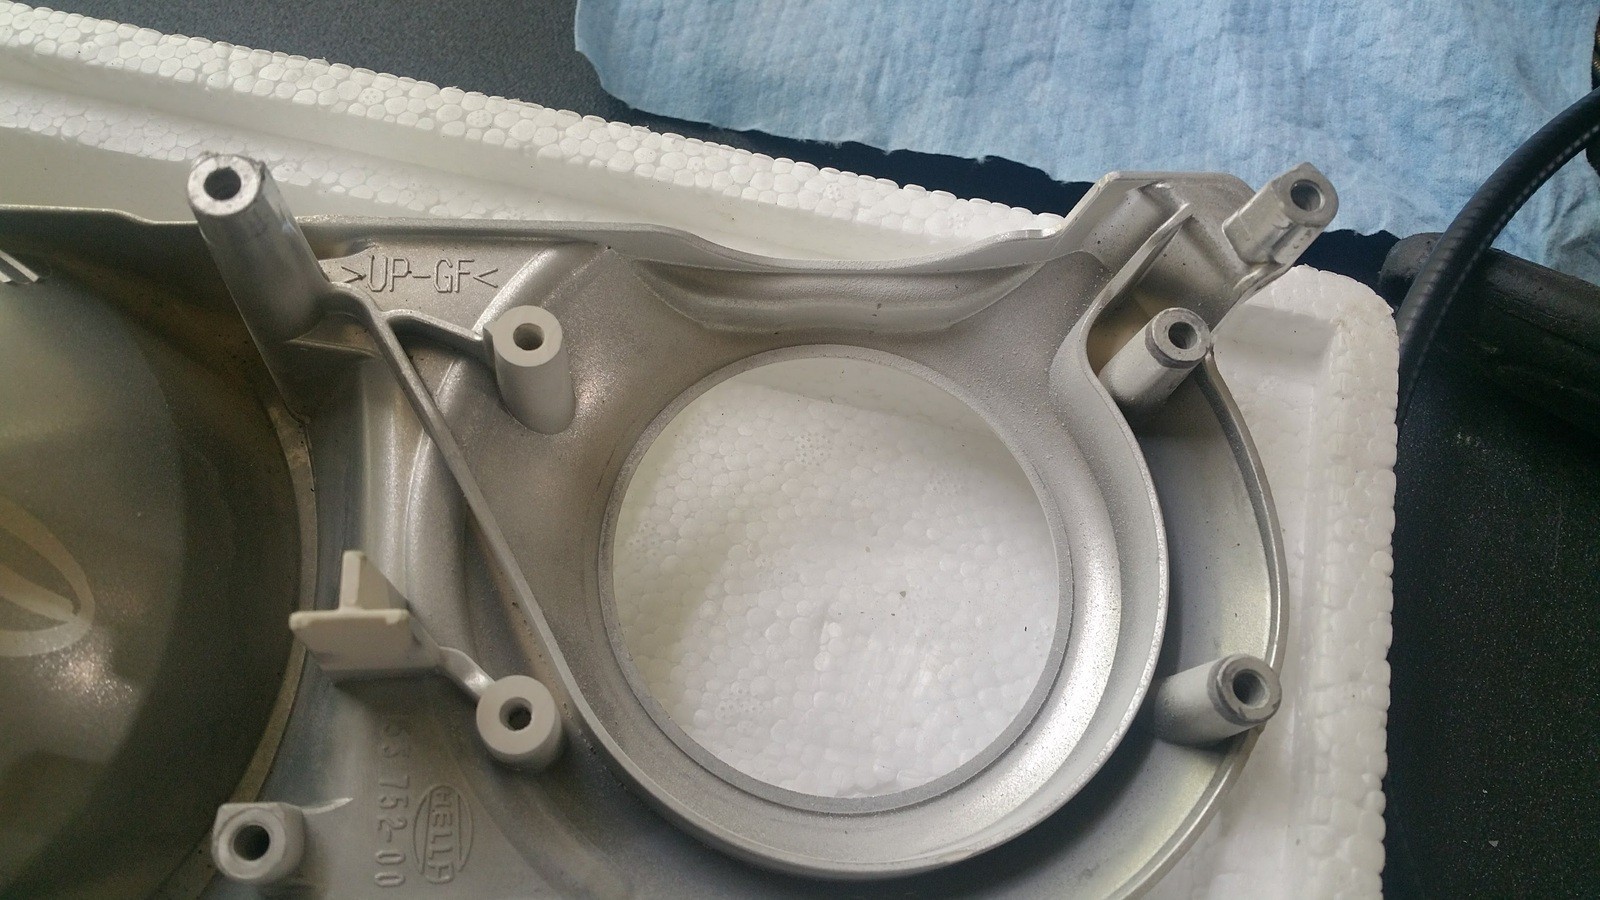
A quick test fit of the new one back on to see the gap present as others have mentioned it before.
It was then suggested to remove those little rubber spacers to reduce the gap but then I found another slight issue.
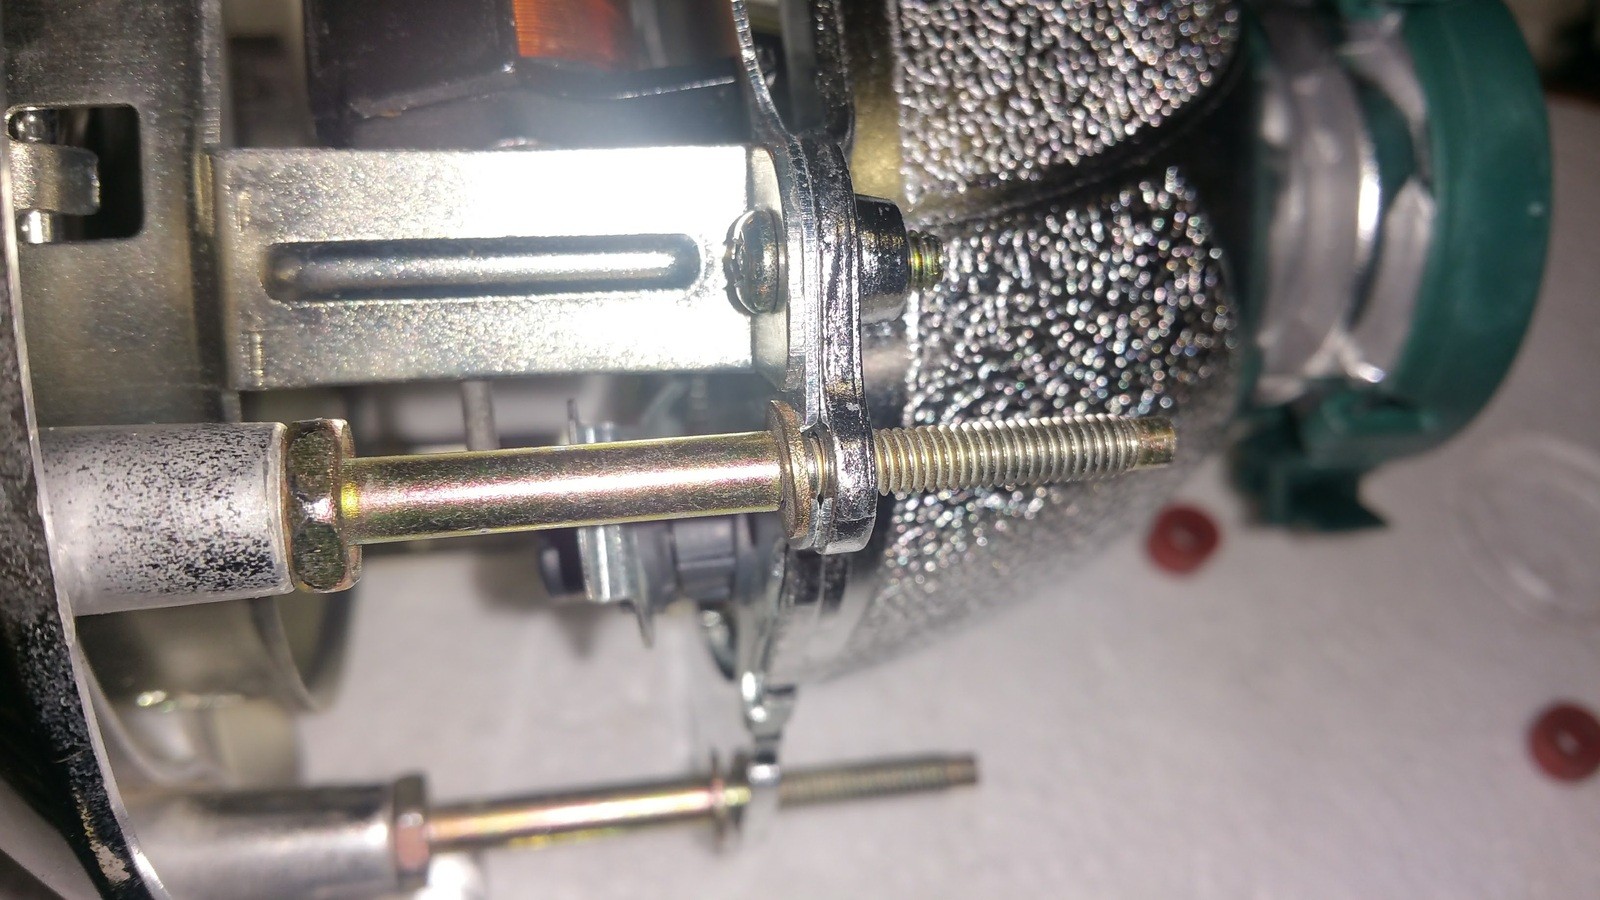
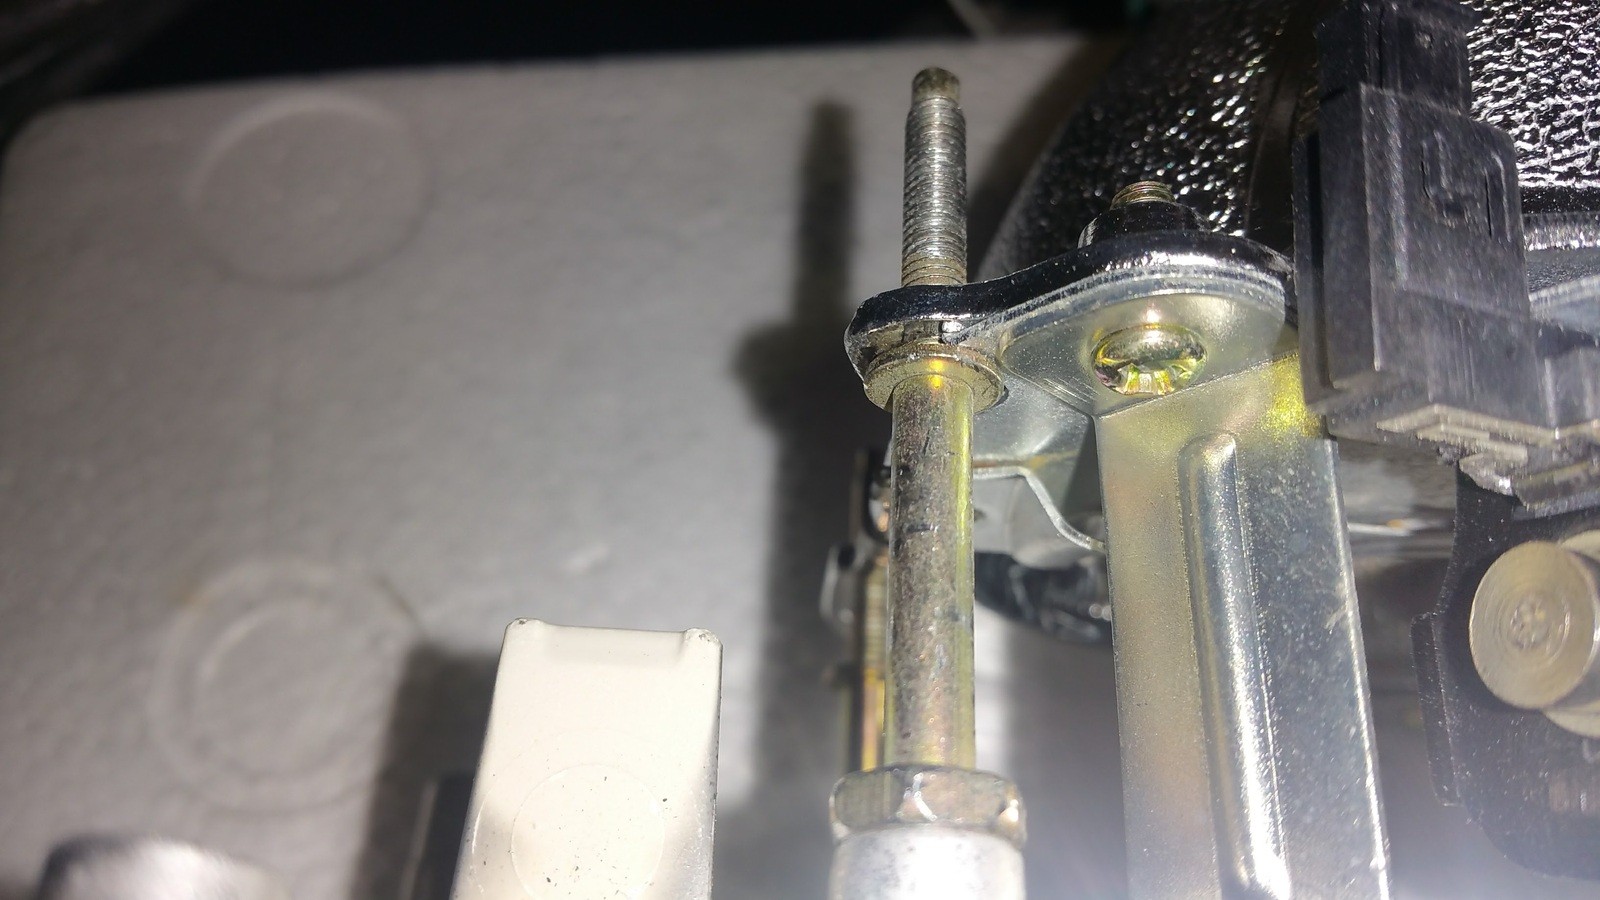
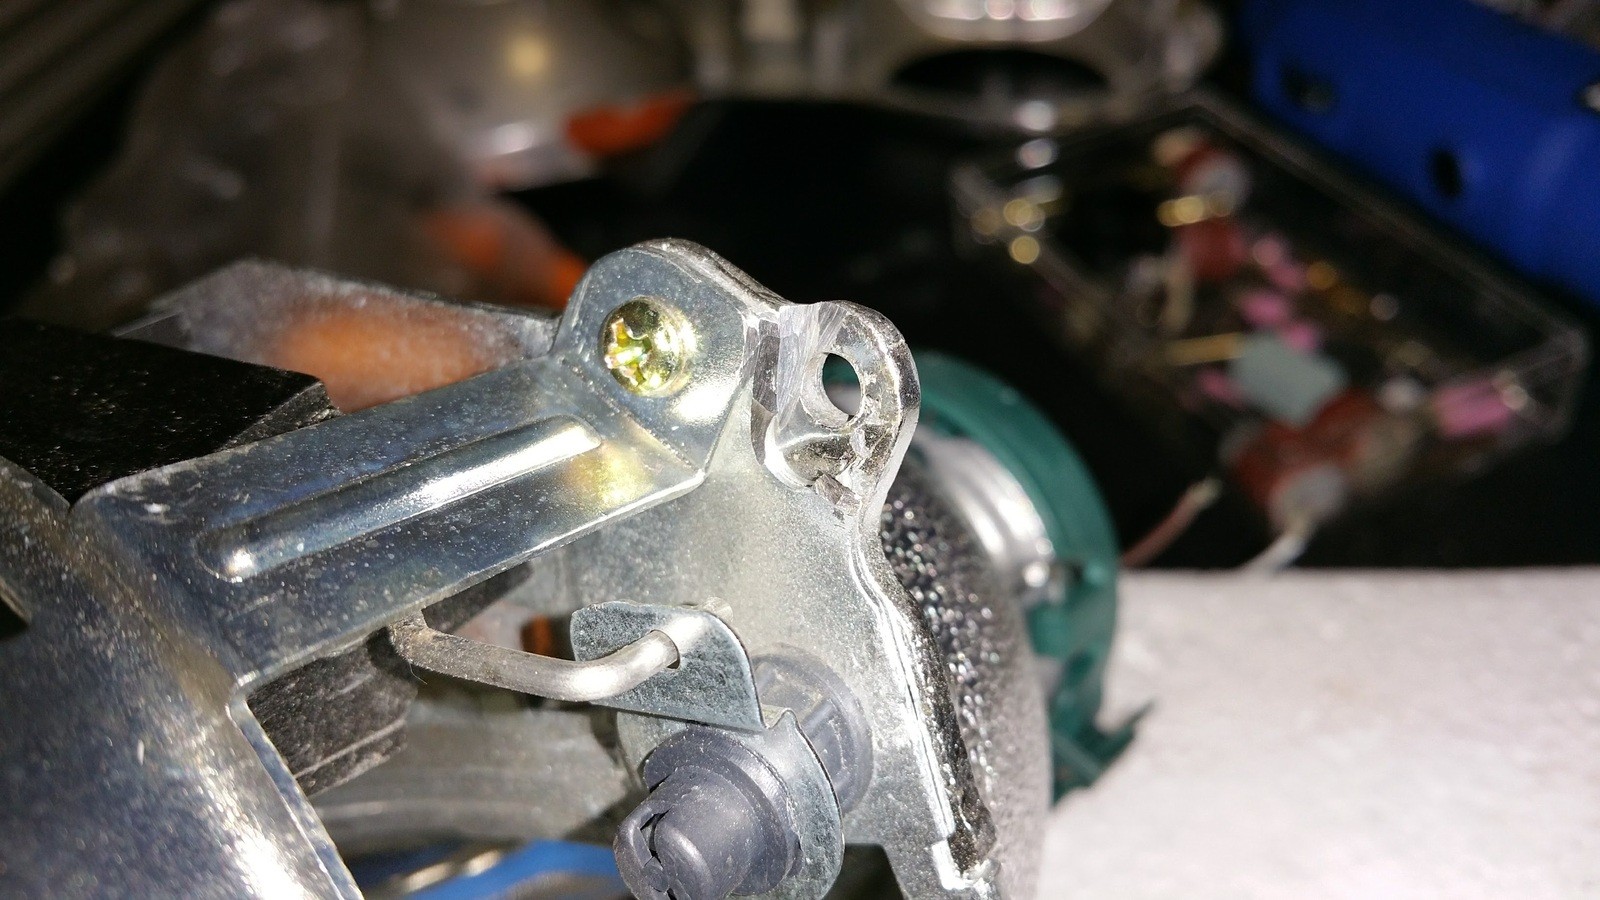
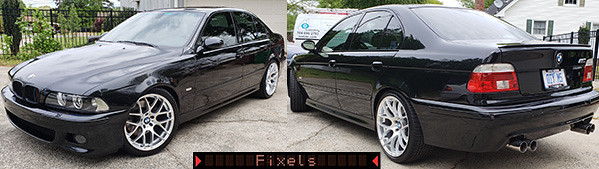
The washers don't sit flush against the surface. I'm having to lift up and cut a bit of the new projector's frame in order for the mounting stud's washers to seat flat. There are only two sides out of four that has this problem causing the projector to seat at a slight crooked angle. I decided to grind the metal down enough so that the washers and the stud will flush against the surface evenly and mount the projector straight and true.
The other two sides are fine.
After a bit of grinding I managed this.
Same issue here as well.
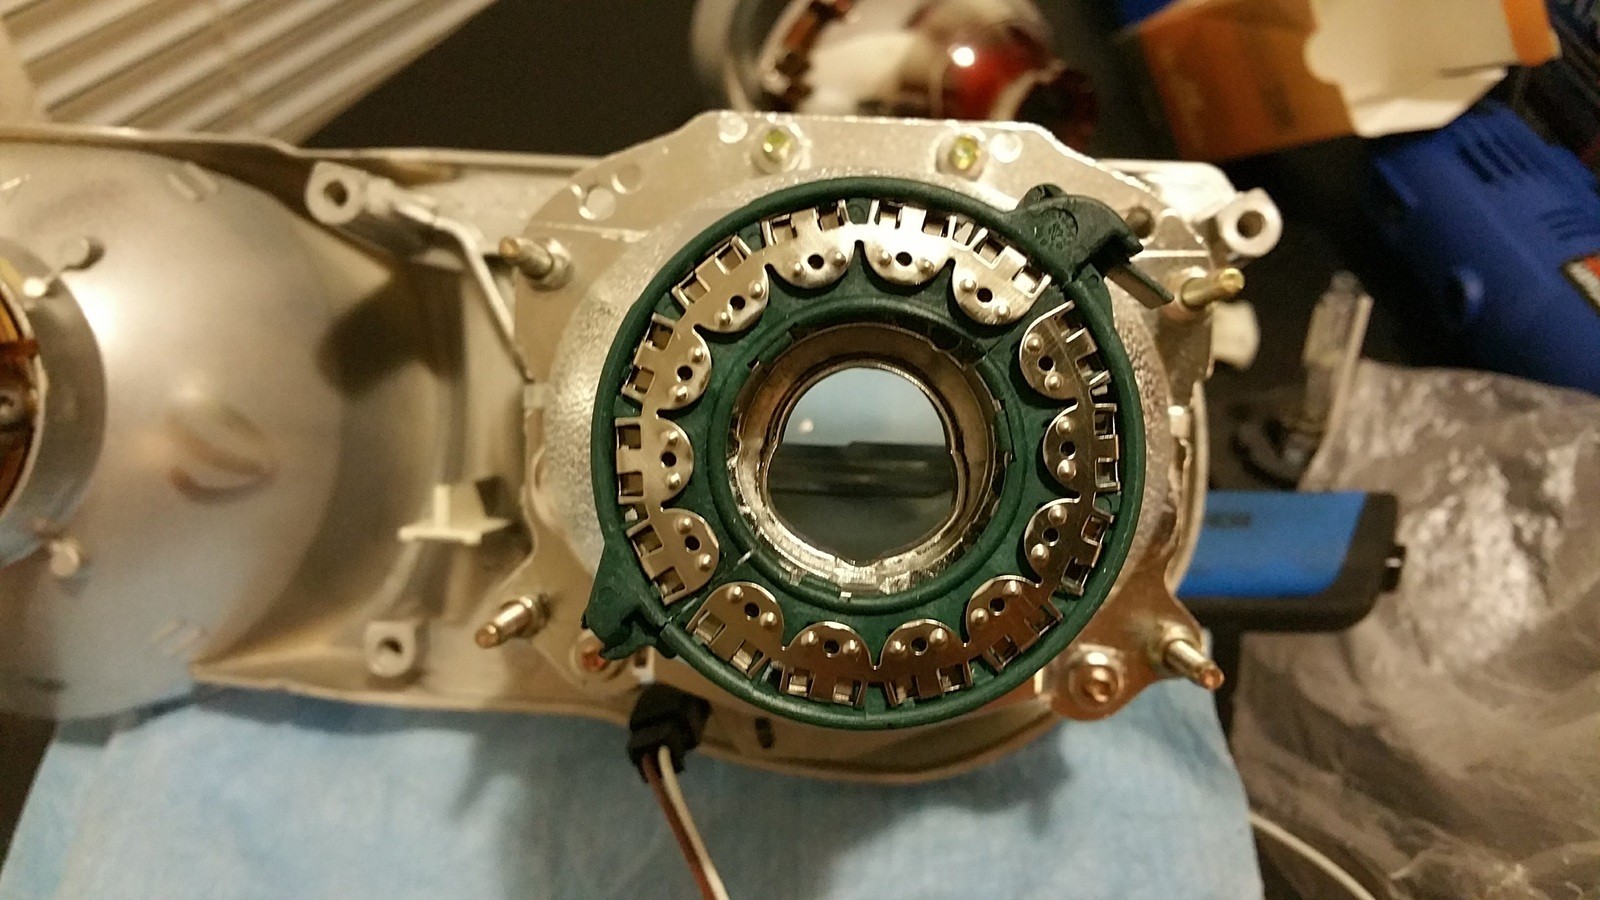
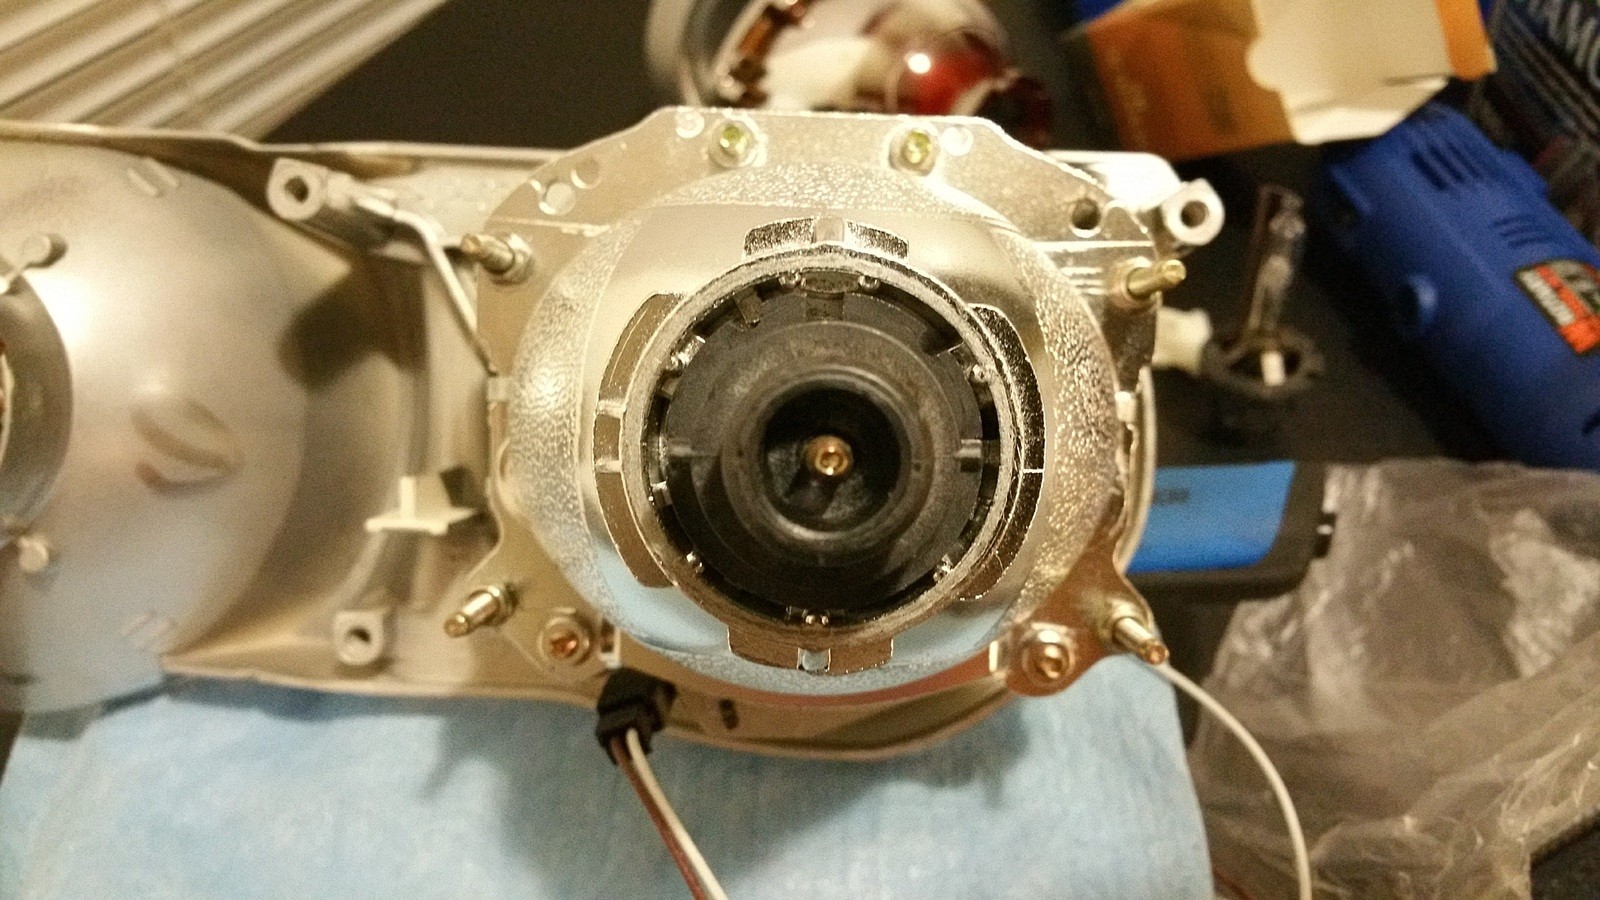
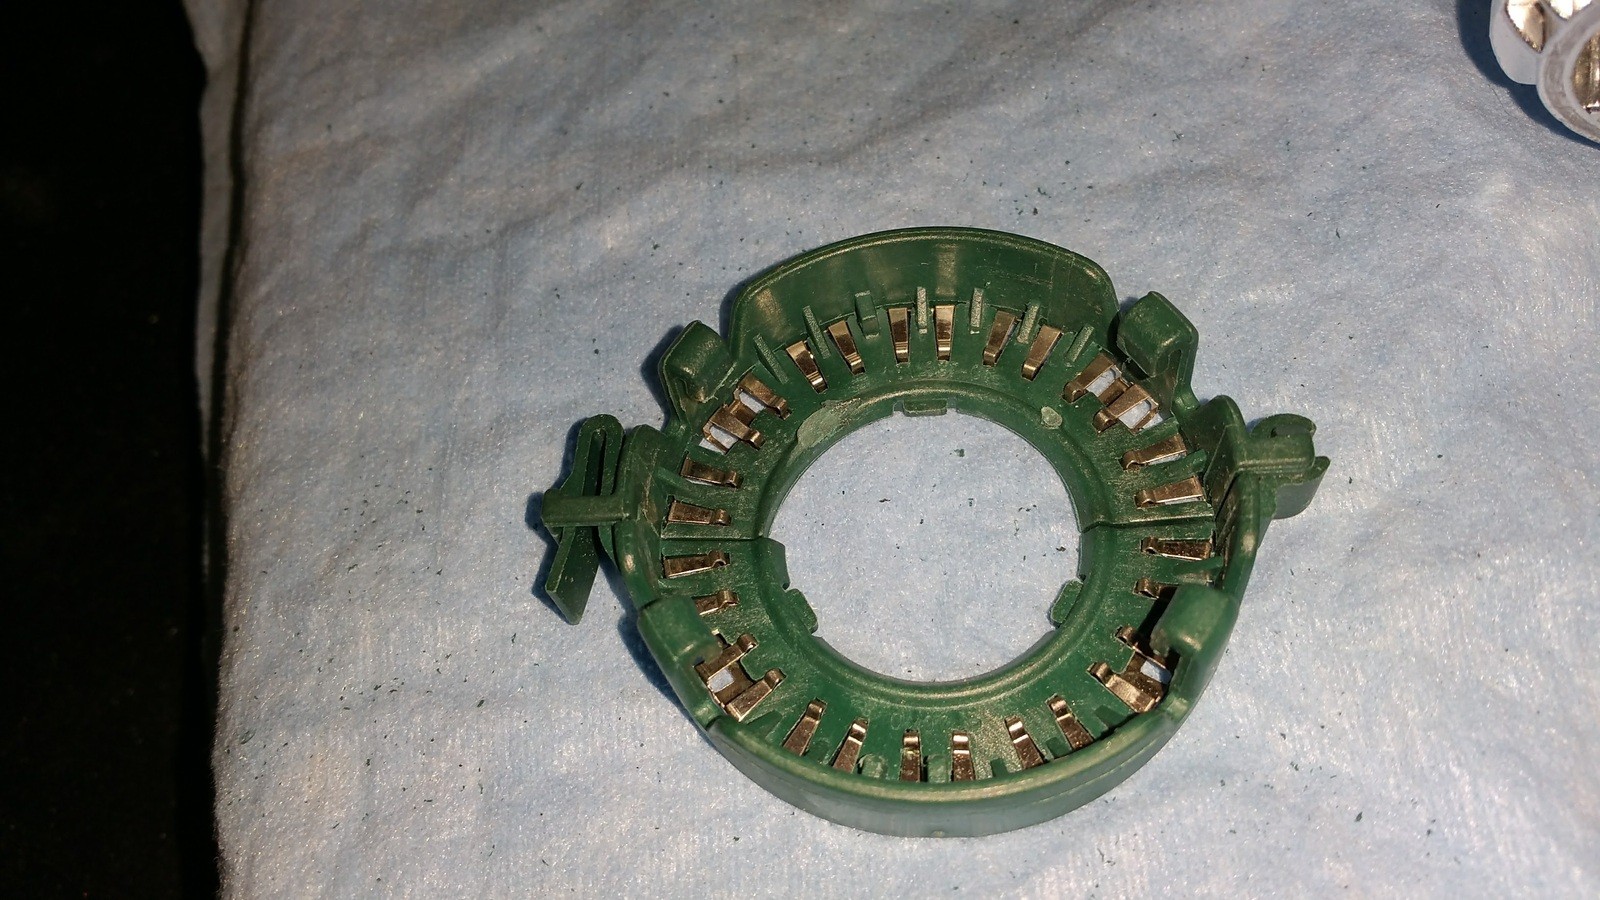
I had to position the low beam D2S bulb in its correct orientation since there are no matching nibs or notches between the new projector and the new bulb, so I had to make sure to get it right. Also, had to make sure the locking ring can easily slide on, twist and lock the bulb in place.
In locked position.
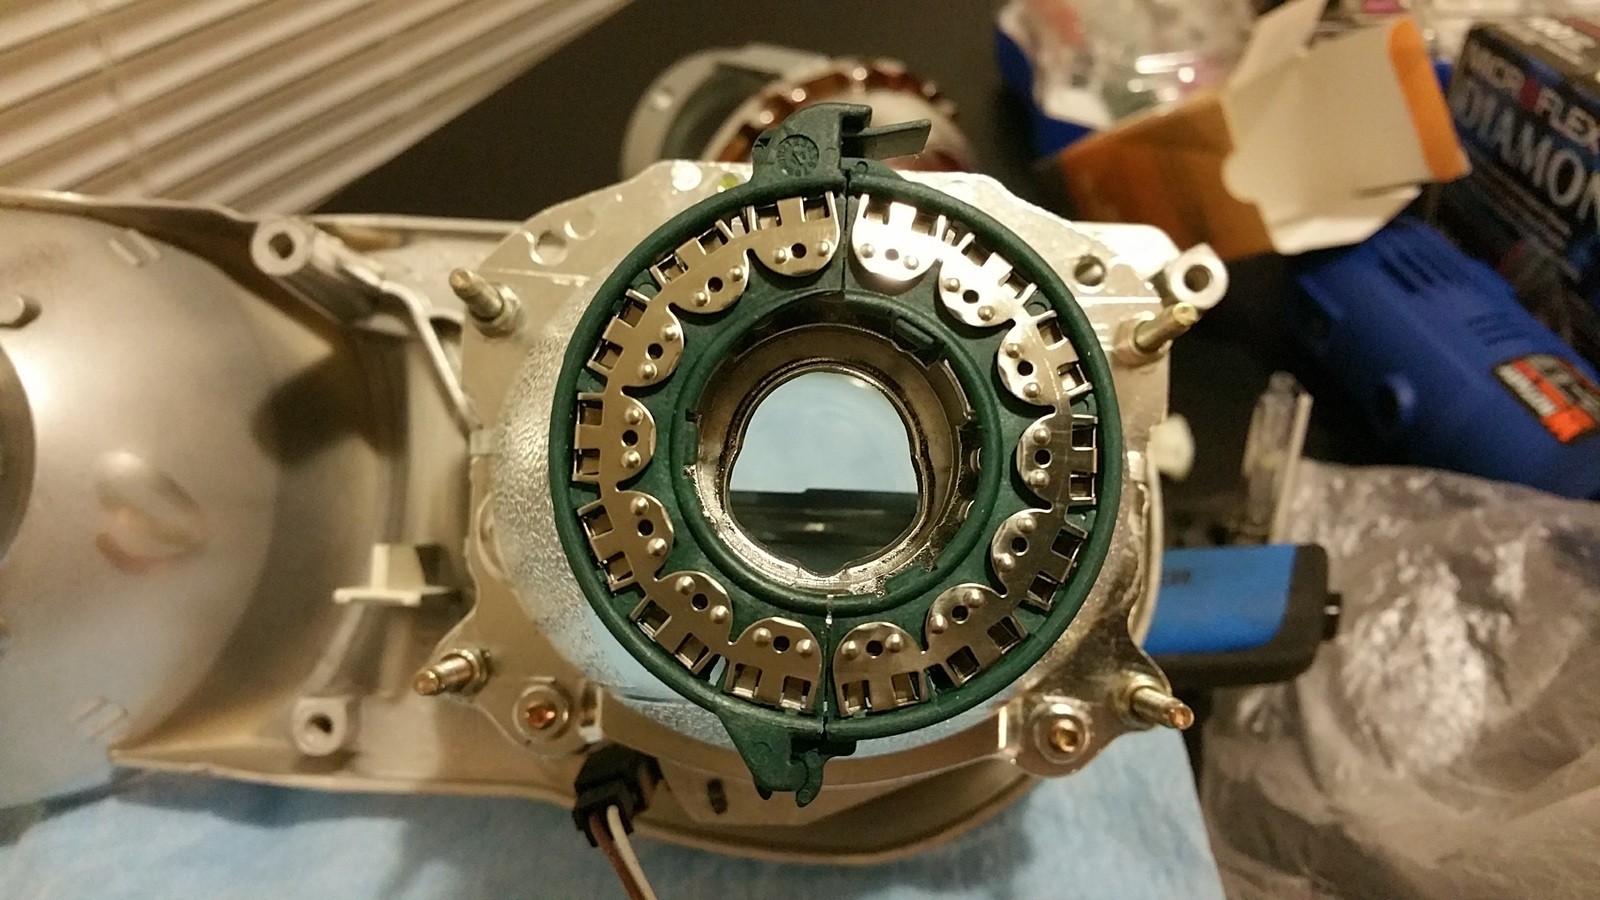
Unlocked position.
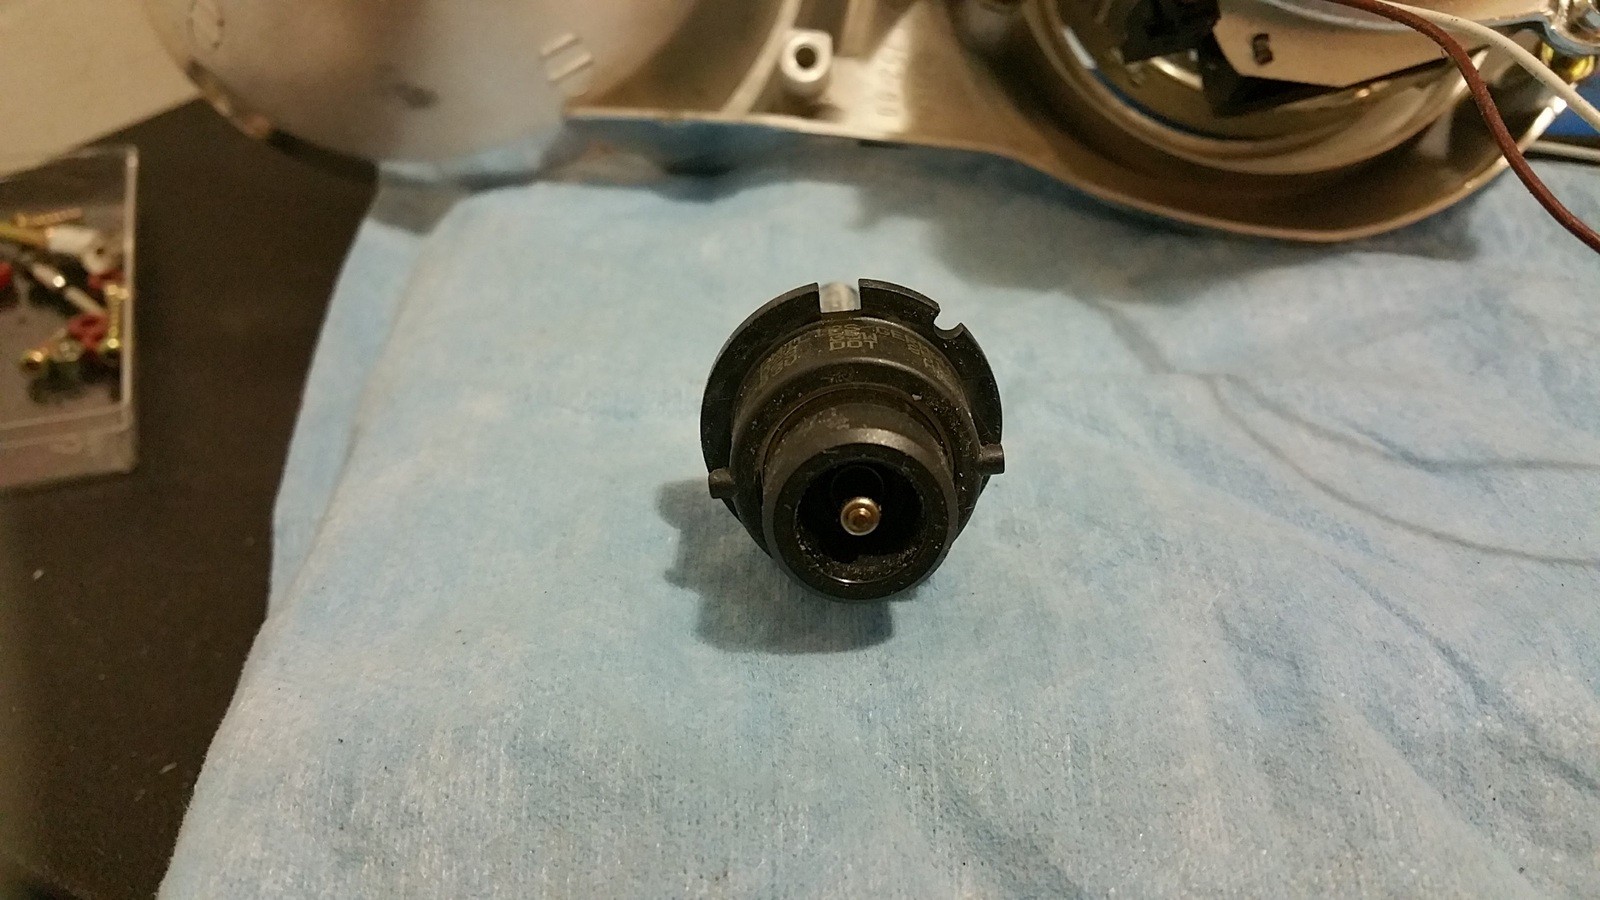
Took note of the stock D2S bulb with its notches cut out and the two left and right tabs, and the orientation of it. The new Morimoto bulb has few more notches cut out but sits exactly in the same position as the original one.
The brown part of the bulb faces downwards when installed in the car.
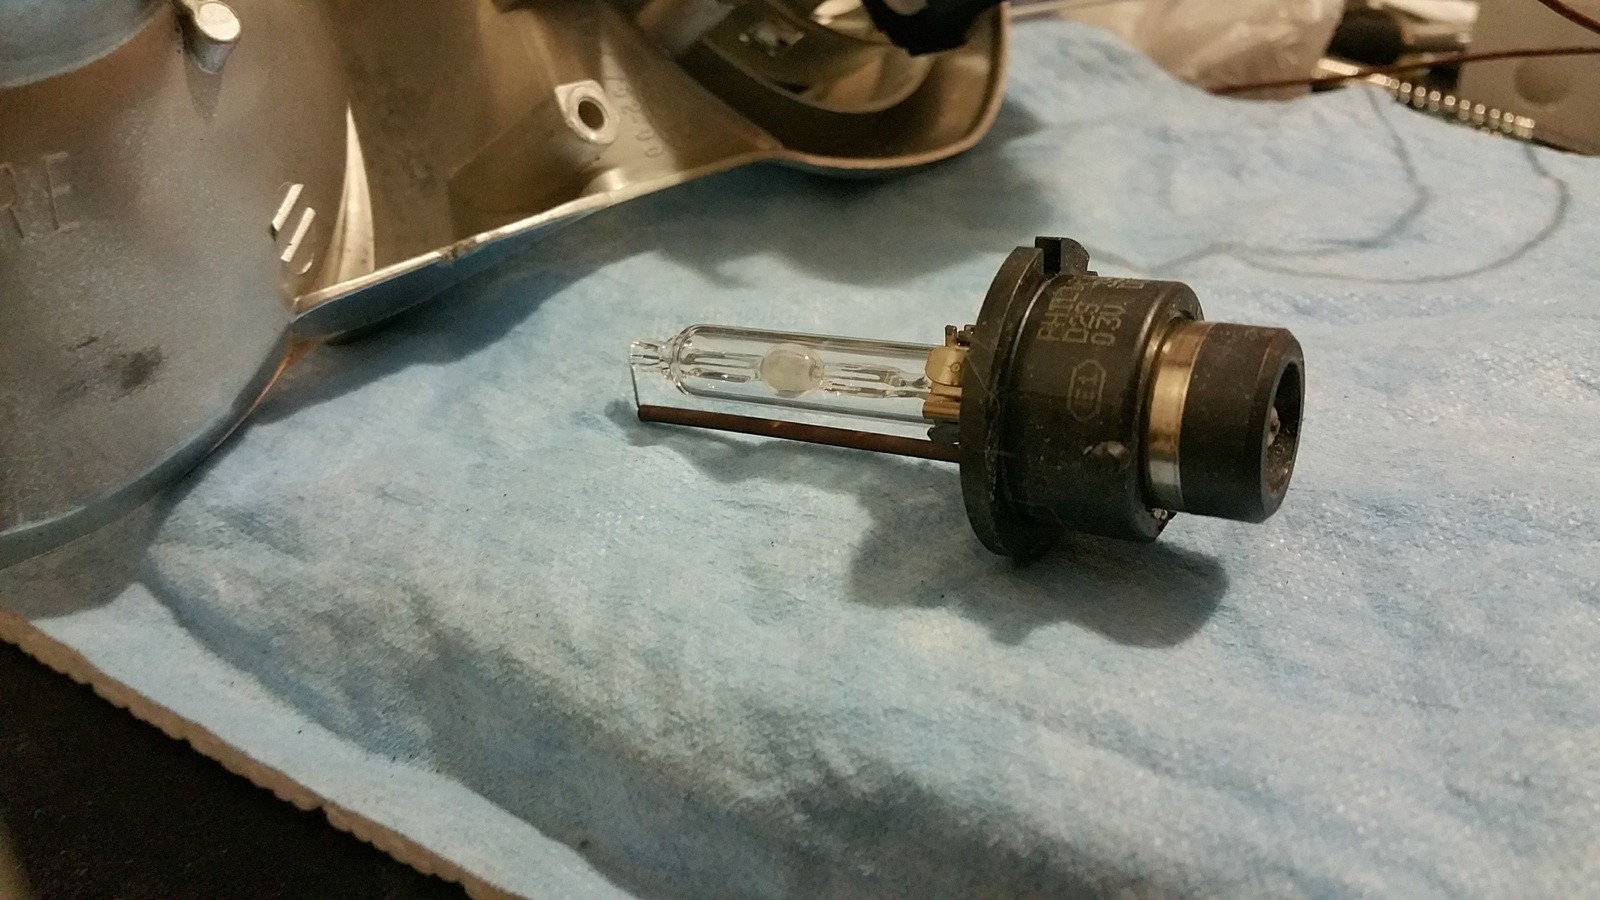
Here's the new one.
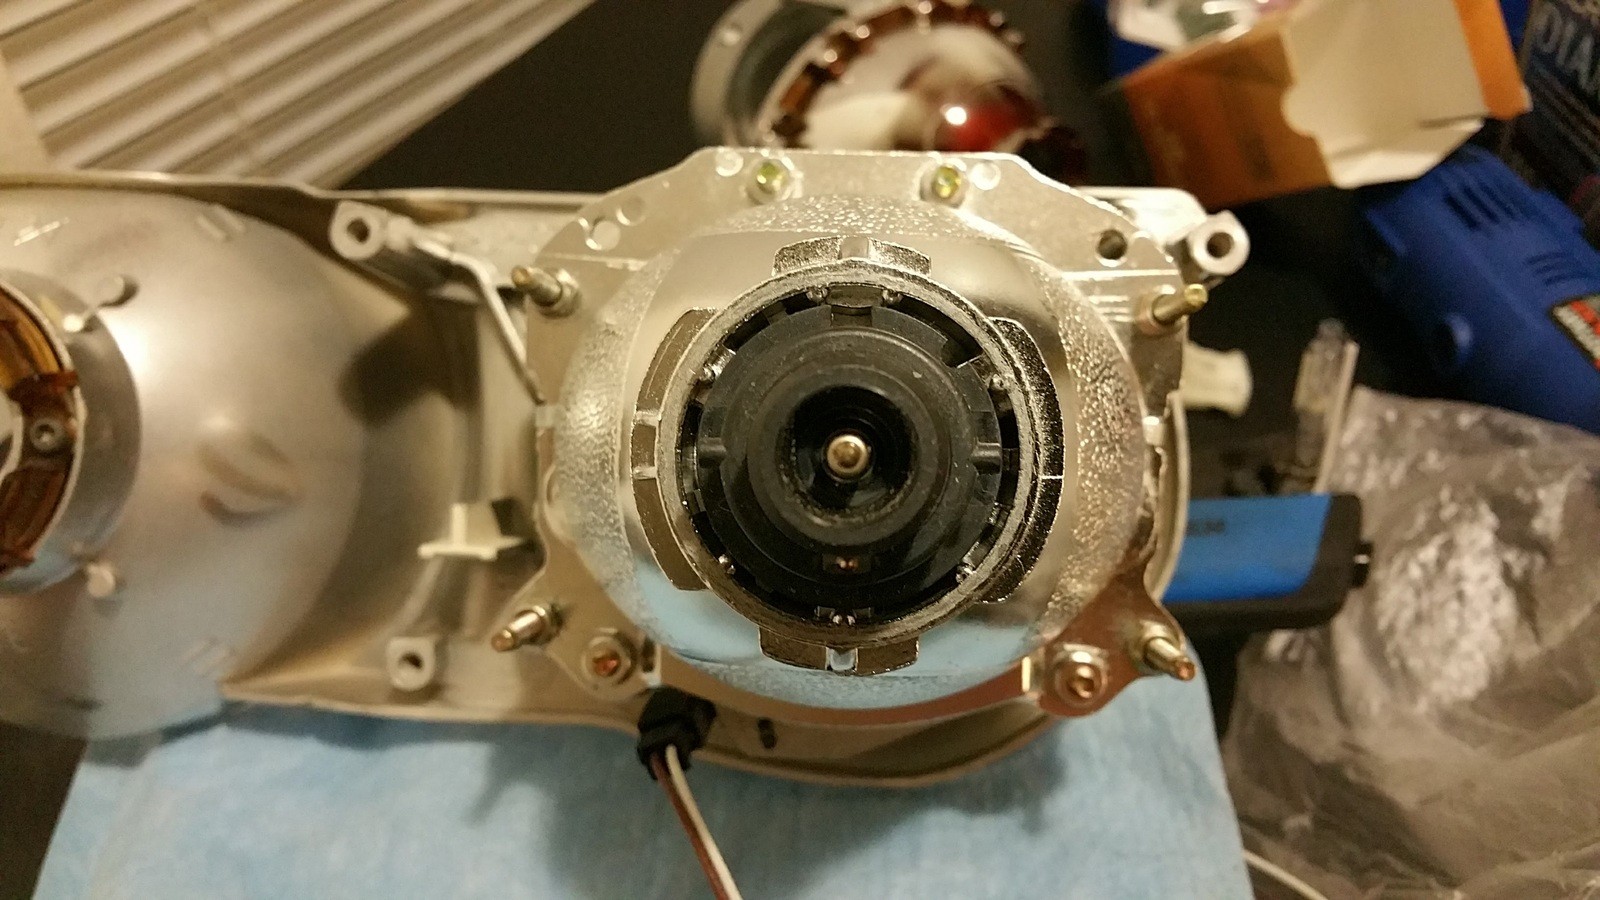
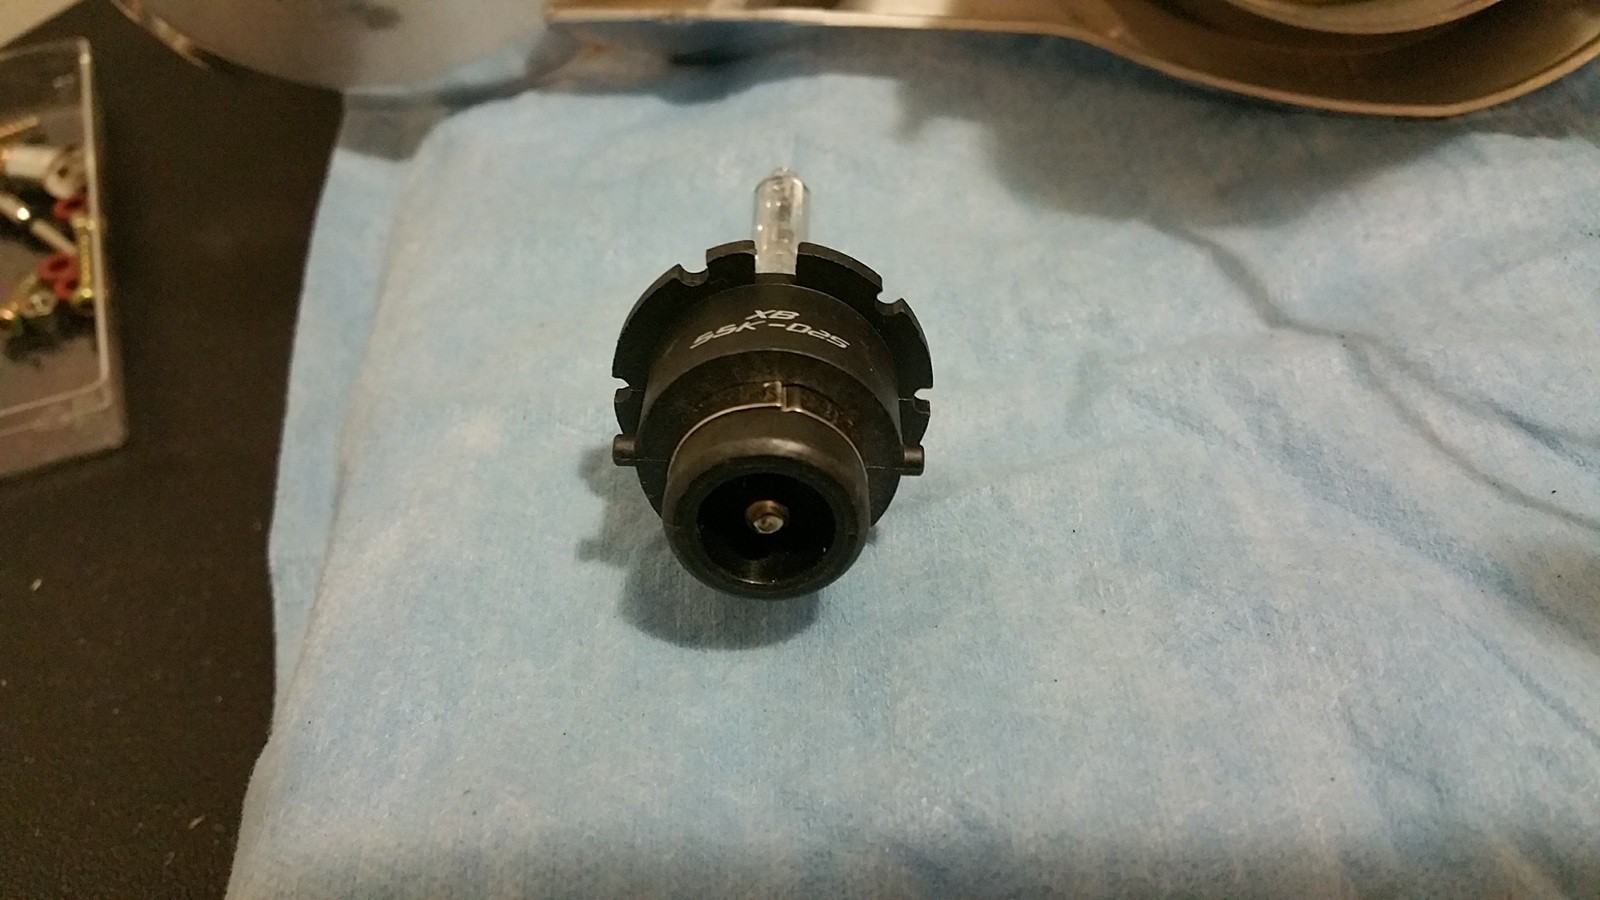
As mentioned by others, there was a little nib at the 11 o'clock position that had to be ground off. Otherwise, I was unable to install the ring over the bulb.
This is as far as I have gotten as of right now. I am stuck installing the H7 high beam bulb because it appears that I need few more parts to arrive to complete its installation. I have already placed an order for H7 bulb cover adapters since I can't use the original one. The original one is plug while the new one is not and wire goes straight to it. Also, the wiring kit is different from the stock configuration. I've sent an email to theretrofitsource.com as I'm trying to find out if I need a new ballast or not. I would like to stick with the stock one, so that I can just carry on with what I currently have but due to the different connector styles and different way of functioning, I may have to get an amp igniter, most likely get a new Morimoto XBS 35W (or even a 55W) ballast, and another wiring harness to complete this H7 installation kit. I didn't realized this in the first place when I initially purchased the bulbs. I thought it was a simple plug-n-play thing. Will have to wait for a response.
NOTE: Do not attempt to clean or wipe the chrome plated housing with an alcohol wipe, as it will peel off the shiny chrome plating. You can clean the G4's lens inside and out though. Other parts were also taken care of.
That's it for now. I will update this thread once I get more parts.
Member
Forgot to mention that I'm going to try and rework on the reducing the gap of the projector by shortening those mounting studs. I have got a spare set of those and by cutting it to appropriate length might get me close enough that it won't look bizarre in the end.
Member
I would reconsider using HIDs for the H7 high beam unless you do a lot of night driving with your high beams on. Flashing your lights will be really bad for the ballasts.
Sent from my iPhone using Tapatalk
Chris
-------------------------------------
04 Mercedes S55 AMG
97 BMW 540i6
Member
Curious to see how you do that. I haven't taken mine apart yet but was wondering the same thing. How big does that gap look without modifying it?Originally Posted by auaq

I also thought about taking those rubber washers off then using them between the projector bowl and the projector lens. I'm not sure how that would change the light output though since I would be changing the focal point.
Sent from my iPhone using Tapatalk
Chris
-------------------------------------
04 Mercedes S55 AMG
97 BMW 540i6
Almost There
Moderator
Quad HID Auaq? That will be nuts. Off/on operation will take a toll on them i think. The lens removal sure looks like a pia. I can hear the cursing from here as the dremel discs were breaking. In for updates! Maybe some ideas we can share.
Maybe do a pre power up and alignment on the low beam to verify high beam alignment since you have to adjust the standoffs. The G4 fits perfect on the Reps I'm working on.
98 540i 6, 525 whp, 120 mph 1/4, V3 Si S/C'er @16 psi, W/A I/C, Water/Meth, Supersprint Headers, HJS Cats, 3" Custom Exhaust, UUC Twin Disc, Wavetrac LSD, GC Coil Overs, Monoball TA, AEM FP, Aeromotive FPR, AEM Failsafe AFR/Boost, Style 65's w/275's, M5 Steering Box, Eibach Sways, M3 Shifter, Evans Coolant, 85 Deg Stat, PWM Fan, 10" Subs, B.A. speakers, Grom Aux/BT, Still Rolling as my DD!
Member
Yeah, I may not install these H7 and just carry on with the stock ones.
cnsorial - I'm going to try and cut the threads that screw into the housing but still have enough left to hold the projector together and further reduce the gap. Those rubber washers won't be needed.
Phillysteaksammich - Interesting those reps has no gap and the whole thing fits like a glove.
Dismembered
Think about an H7 PIAA LED?
Set the controls for the heart of the sun
Member
Sticking with stock H7 bulb.
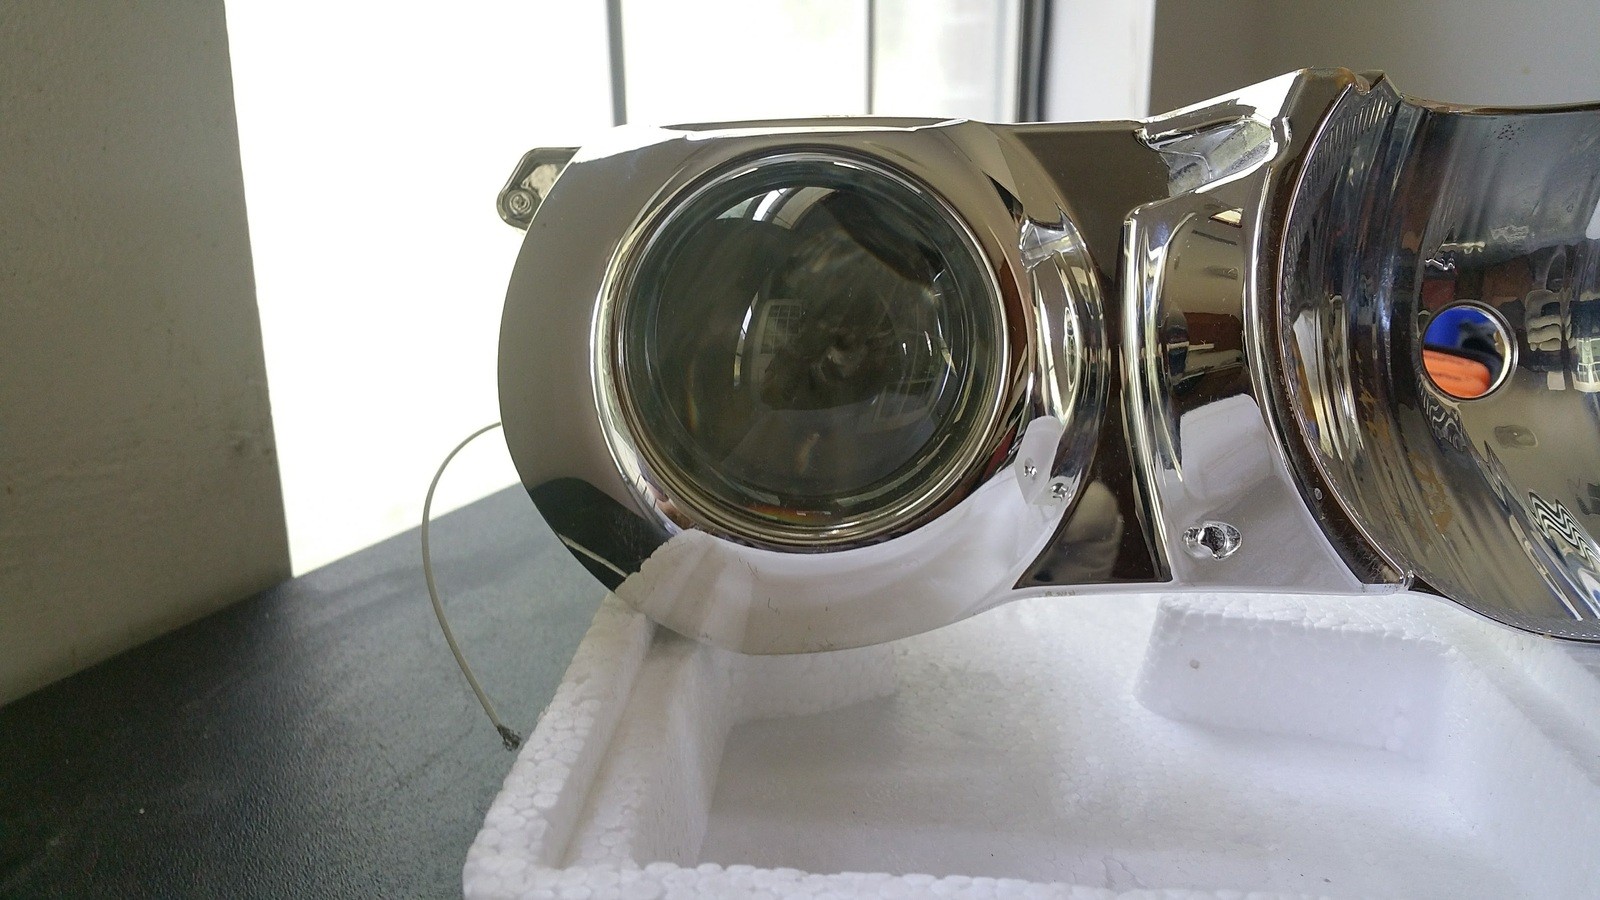
I've finally got the gap reduced down to almost 2-3mm between the projector's bowl to the chrome frame, so much that it almost flushes in and you can hardly tell a difference at all. It fits like the original one. Will post pics later.
FASTEN SEAT BELTS
LED H7 replacements longer than the average penis?
Almost There
Moderator
My reps originally had a gap and the new projectors match. Maybe I should shorten the standoffs a bit? Any downside to the gap? If not, I may just leave it.
98 540i 6, 525 whp, 120 mph 1/4, V3 Si S/C'er @16 psi, W/A I/C, Water/Meth, Supersprint Headers, HJS Cats, 3" Custom Exhaust, UUC Twin Disc, Wavetrac LSD, GC Coil Overs, Monoball TA, AEM FP, Aeromotive FPR, AEM Failsafe AFR/Boost, Style 65's w/275's, M5 Steering Box, Eibach Sways, M3 Shifter, Evans Coolant, 85 Deg Stat, PWM Fan, 10" Subs, B.A. speakers, Grom Aux/BT, Still Rolling as my DD!
Swap Addict
BMW CCA Member
Asim, a couple of things to note in your first post. The notches for the bulb orientation are in the green retainer, not the projector. You cut both nubs off, not just the little one as I instructed in the other thread, but I guess I can't blame you as the other thread is inaccessible at the moment (working on that mods?). Another thing is that the gap is almost completely unnoticeable when you're not looking for it. I have the gap on both my cars and don't mind it one bit. The only thing I could think of to eliminate it would be to thread the standoffs a bit further down the shafts. I don't see why that wouldn't be fairly easy to do. Just mark how much closer you want it on the shafts, then run a tap down to your mark, then reassemble. You could even keep the rubber spacers if you want, though I put mine on the opposite side of the projector frames before putting the nuts on. Also, there's an easier way to deal with those screw holes not sitting flush or whatever. Some of them the screw holes on the lens frame and the bowl frame didn't line up perfectly, so just take a drill bit the same size as the bowl frame holes and drill it from the back side. This will pull the lens frame metal as it makes it bigger, making it flat. It worked fine for me.
-Paul
2003 "M5" - Full M5 conversion, AMG C63S 6 piston front calipers, Porsche Panamera 4 piston rear calipers, GC Coilovers, Eibach ARBs, UUC Evo3/DSSR, Borla Exhaust w/Muffler Delete, BMW NBT with Carplay/Android Auto, Bi-Xenons, e38 Style 37 M-Pars, e60 Hubs 530i 6-speed swap build thread2005 Range Rover 4.6is (M62TU Powered) - 4.6is Engine Swap from X5, BMW NBT with Carplay/Android Auto
2006 Porsche Cayman S - Soul Performance Competition Headers and Exhaust, H&R Coilovers, 718 Boxster Spyder wheels, Rennline 35mm rear spacers
Artifically Aspirated
Moderator
Paul, of course we are......Philly hop to it, lol.
Almost There
Moderator
Message sent to overlords, patiently waiting.........
98 540i 6, 525 whp, 120 mph 1/4, V3 Si S/C'er @16 psi, W/A I/C, Water/Meth, Supersprint Headers, HJS Cats, 3" Custom Exhaust, UUC Twin Disc, Wavetrac LSD, GC Coil Overs, Monoball TA, AEM FP, Aeromotive FPR, AEM Failsafe AFR/Boost, Style 65's w/275's, M5 Steering Box, Eibach Sways, M3 Shifter, Evans Coolant, 85 Deg Stat, PWM Fan, 10" Subs, B.A. speakers, Grom Aux/BT, Still Rolling as my DD!
Swap Addict
BMW CCA Member
I figured you guys were, just making it known to others so people know that the info thread will hopefully be back soon. Thank you guys for working on it!
Sent from my SM-N910V using Tapatalk
-Paul
2003 "M5" - Full M5 conversion, AMG C63S 6 piston front calipers, Porsche Panamera 4 piston rear calipers, GC Coilovers, Eibach ARBs, UUC Evo3/DSSR, Borla Exhaust w/Muffler Delete, BMW NBT with Carplay/Android Auto, Bi-Xenons, e38 Style 37 M-Pars, e60 Hubs 530i 6-speed swap build thread2005 Range Rover 4.6is (M62TU Powered) - 4.6is Engine Swap from X5, BMW NBT with Carplay/Android Auto
2006 Porsche Cayman S - Soul Performance Competition Headers and Exhaust, H&R Coilovers, 718 Boxster Spyder wheels, Rennline 35mm rear spacers
Member
Thanks for the tip and quick info on that retainer thing, Paul. I've figured it out a bit. Yeah, I was trying to see if your thread was back up or not, but it's still not accessible yet.
I actually had the coarse side threads cut to about half length since one of the holes in standoffs are't as deep as the rest of them, and then I also had to shave off the standoffs quite a bit to get the projector lens as close to touching the ID of the frame once all installed back together. I'm happy where it sits now although it does appear to sit slightly crooked horizontally speaking. It's hardly noticeable though and don't think it will affect too much with the aim.
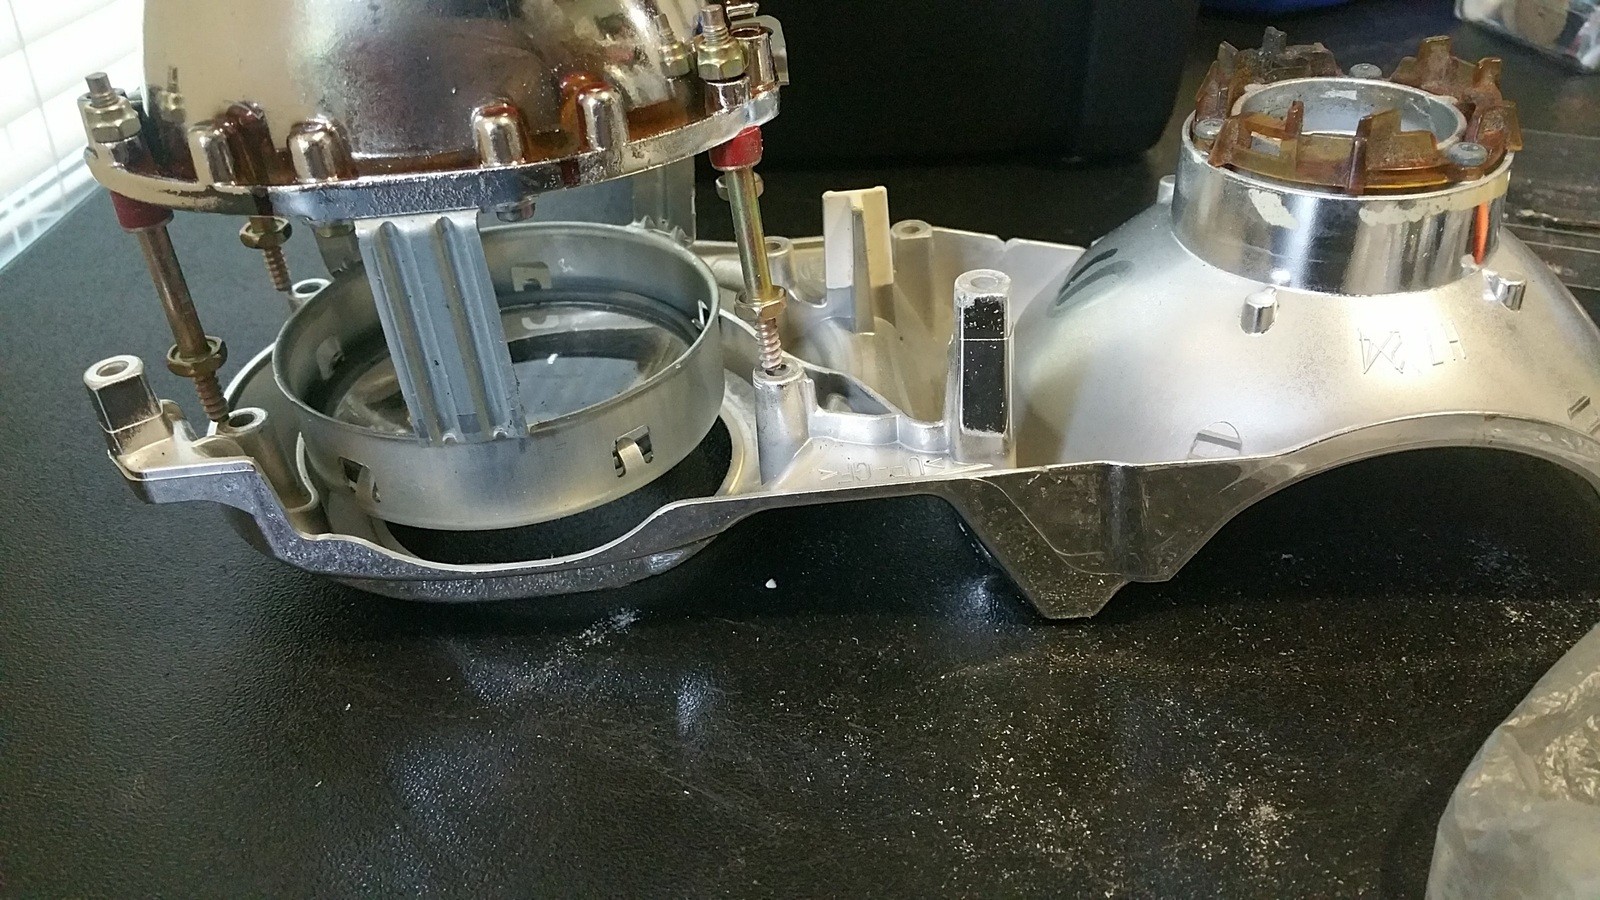
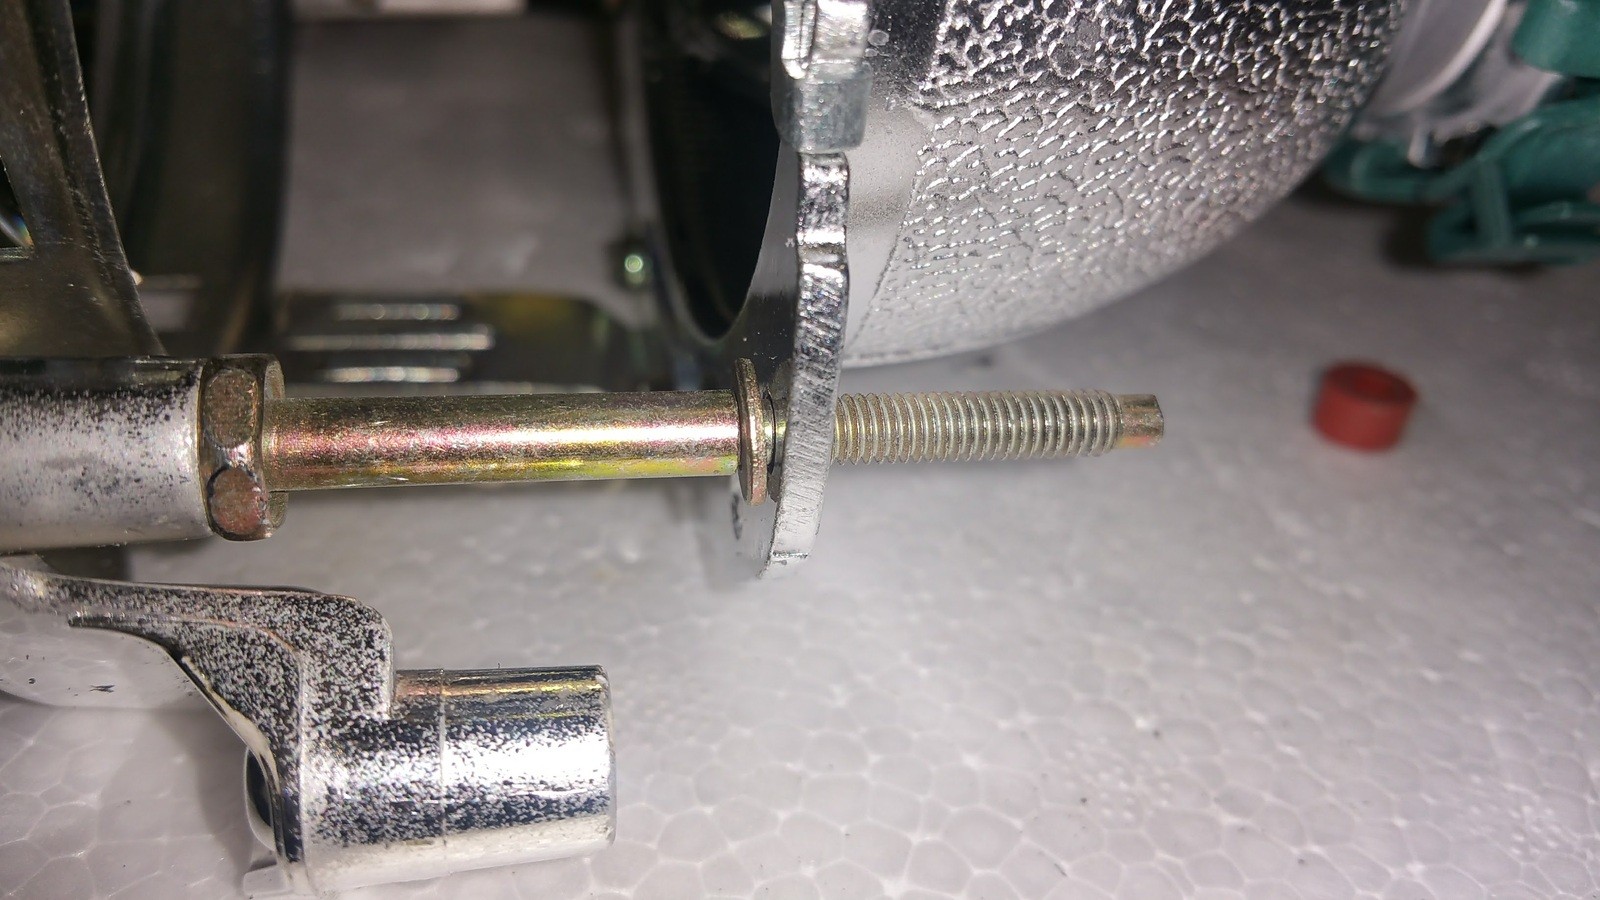
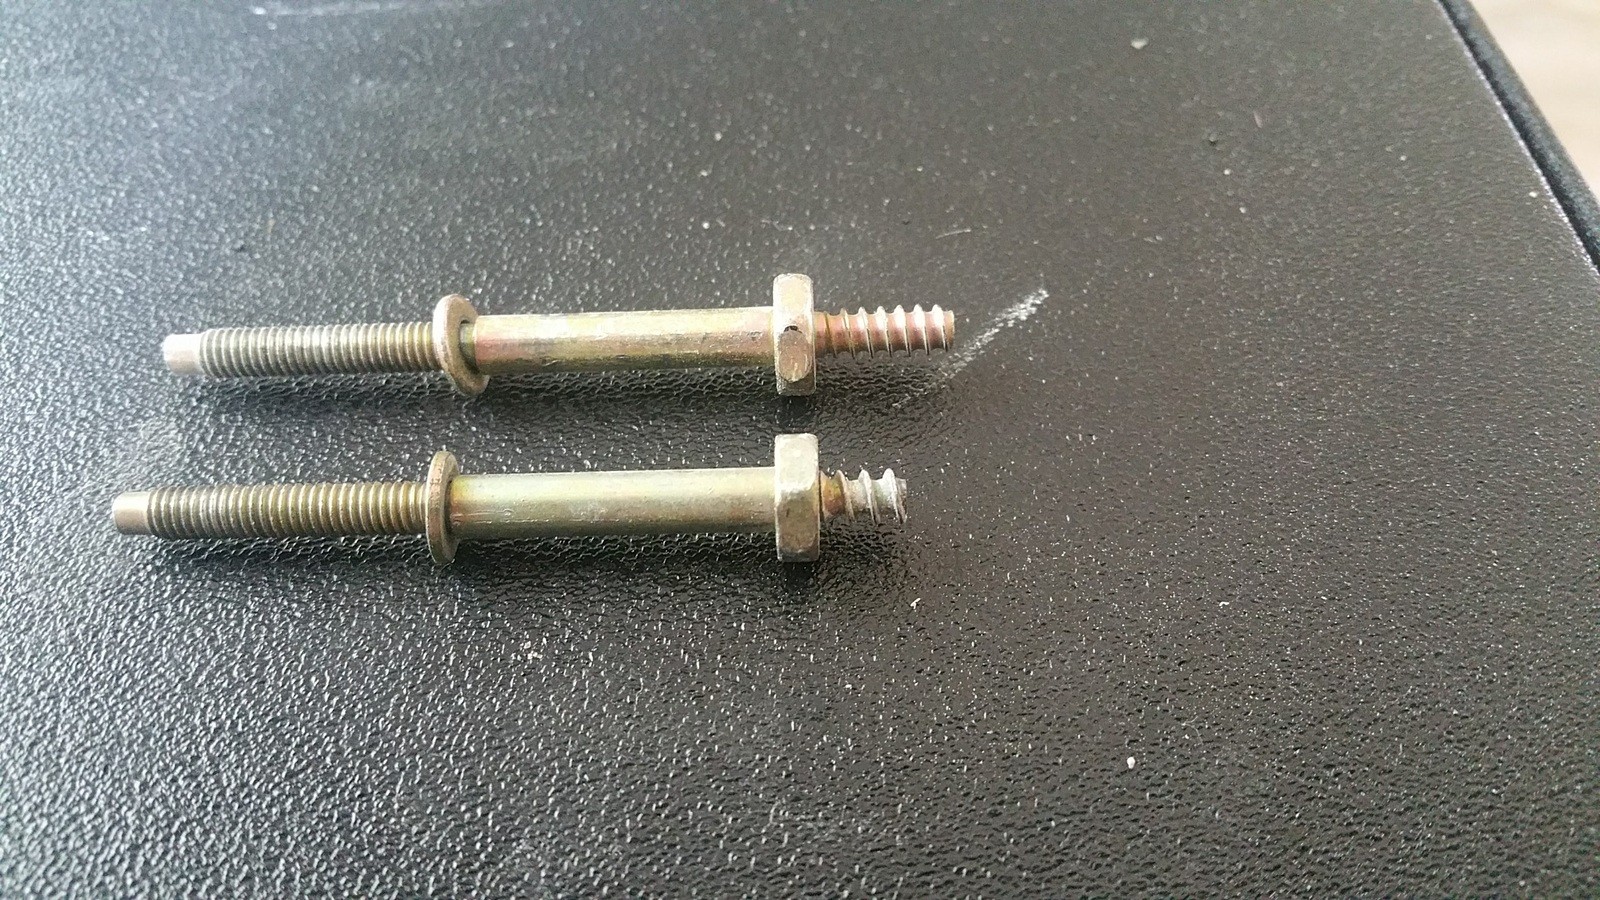
So here's what I did. Just for comparison the right ones with a little bit of black markings around it is at original height and untouched. The left side was initially shaved off by ~ 3mm, but then I continued shaving it more little by little till I got it at the right height at all four corners.
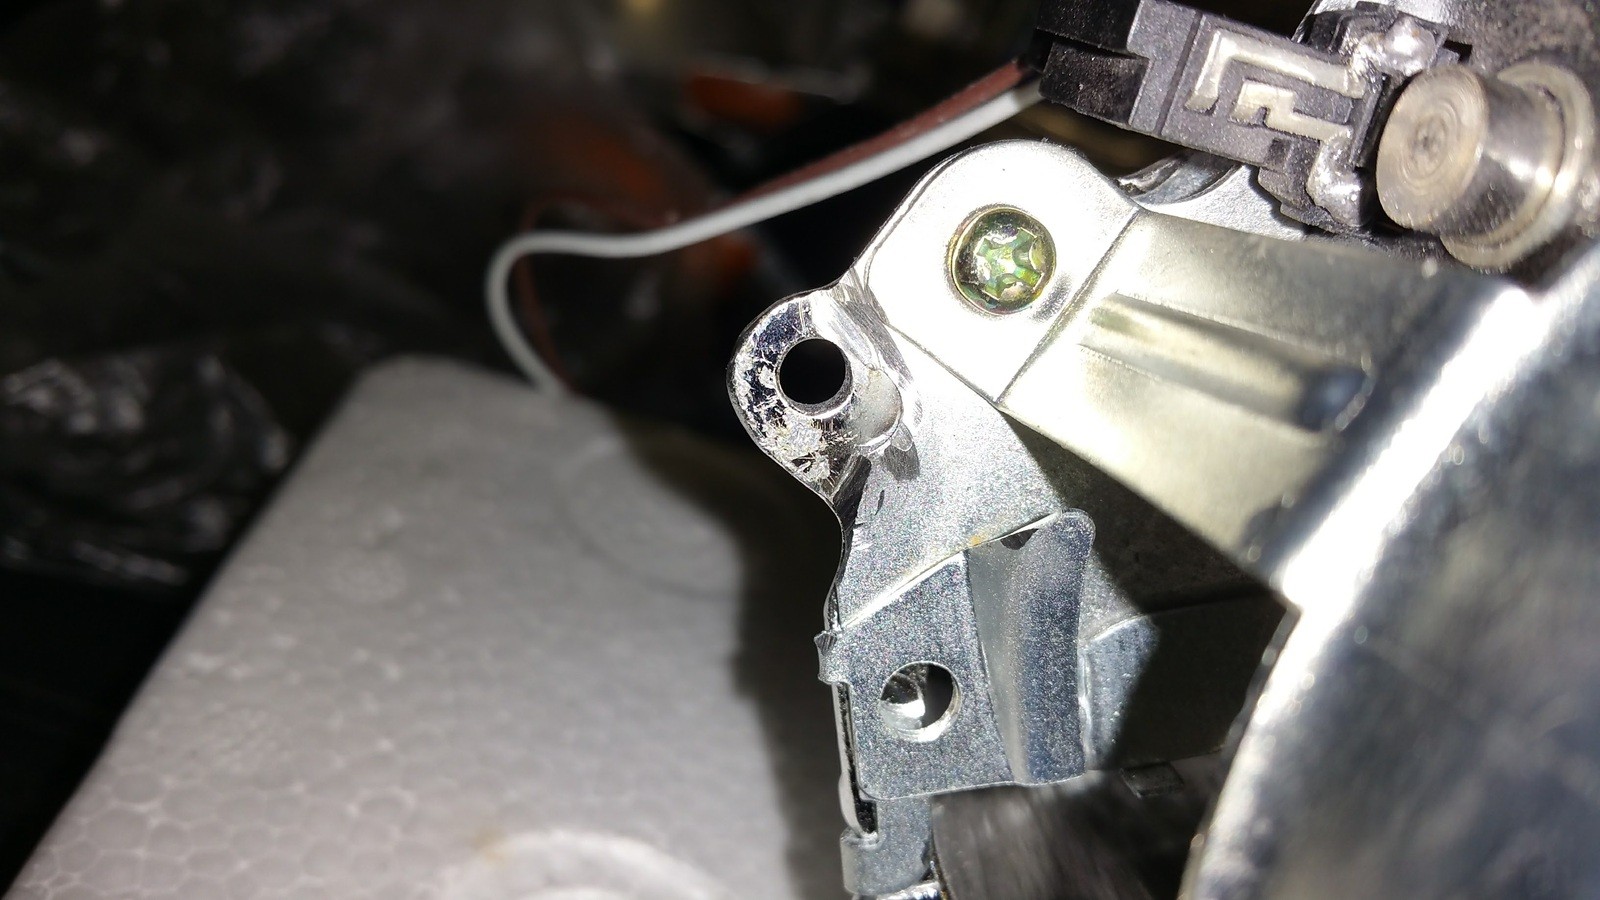
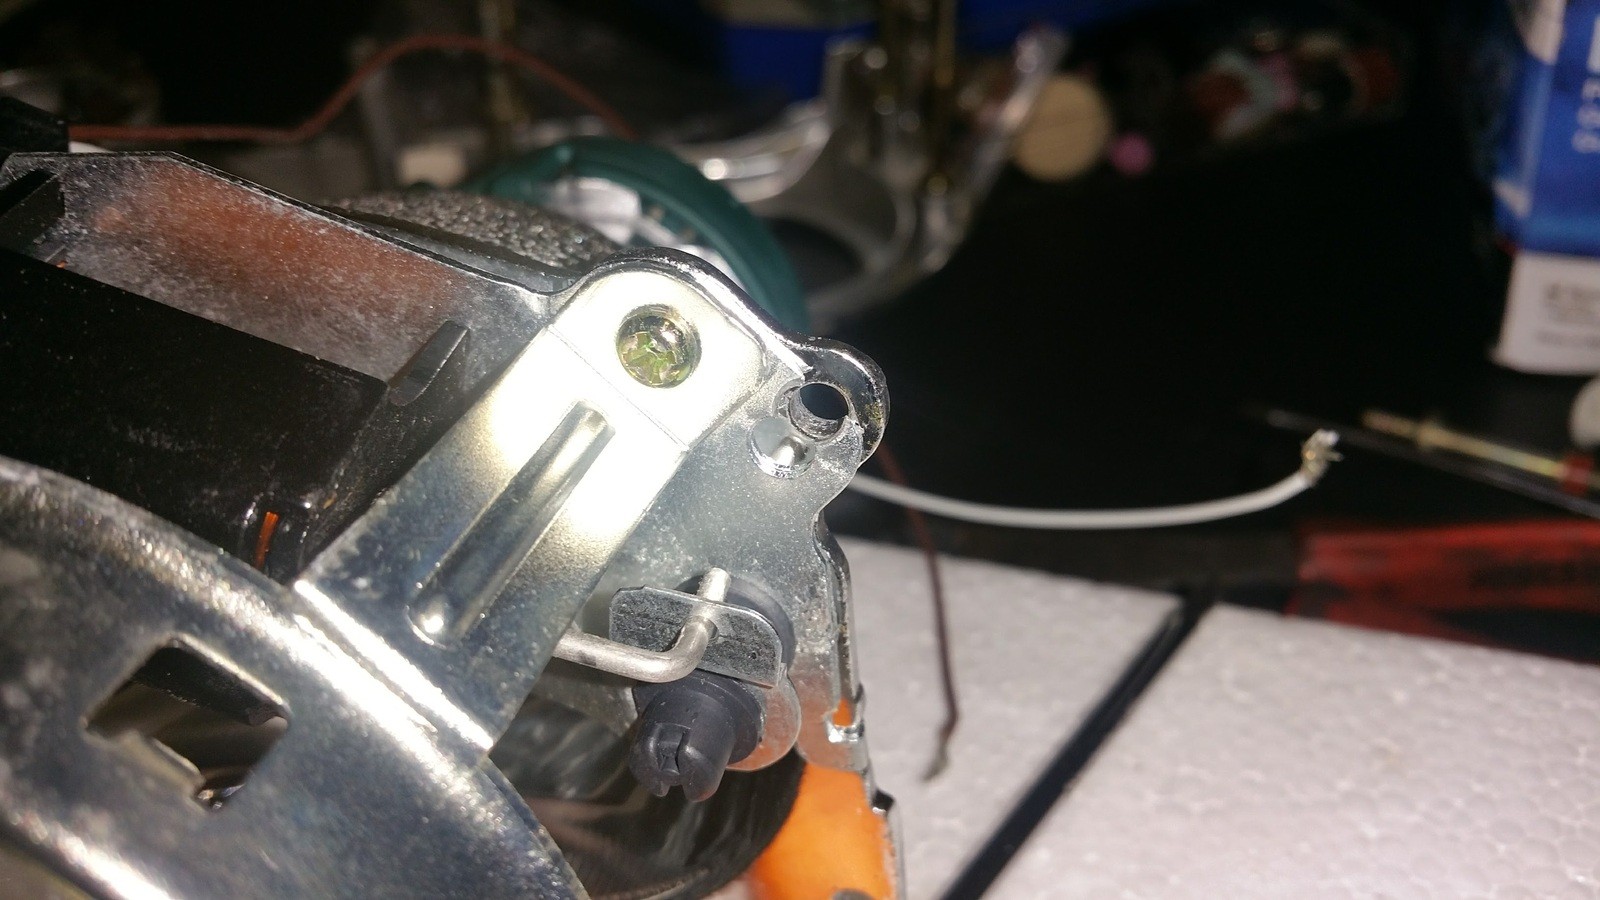
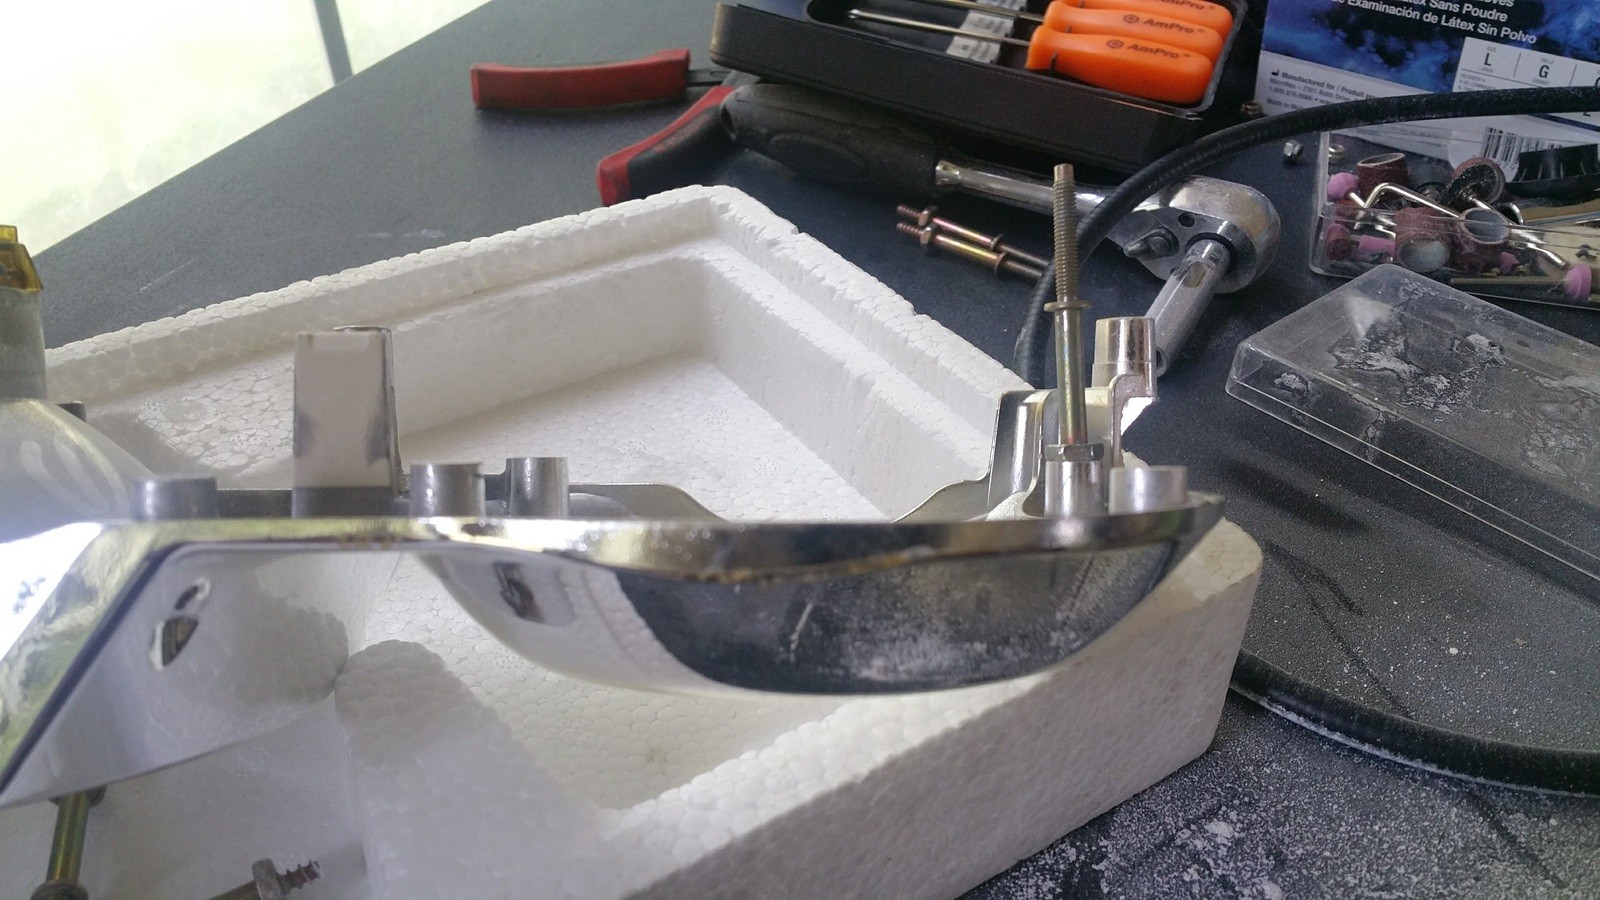
I then test fitted everything to make sure it the surfaces were flat and even around once bolted back together.
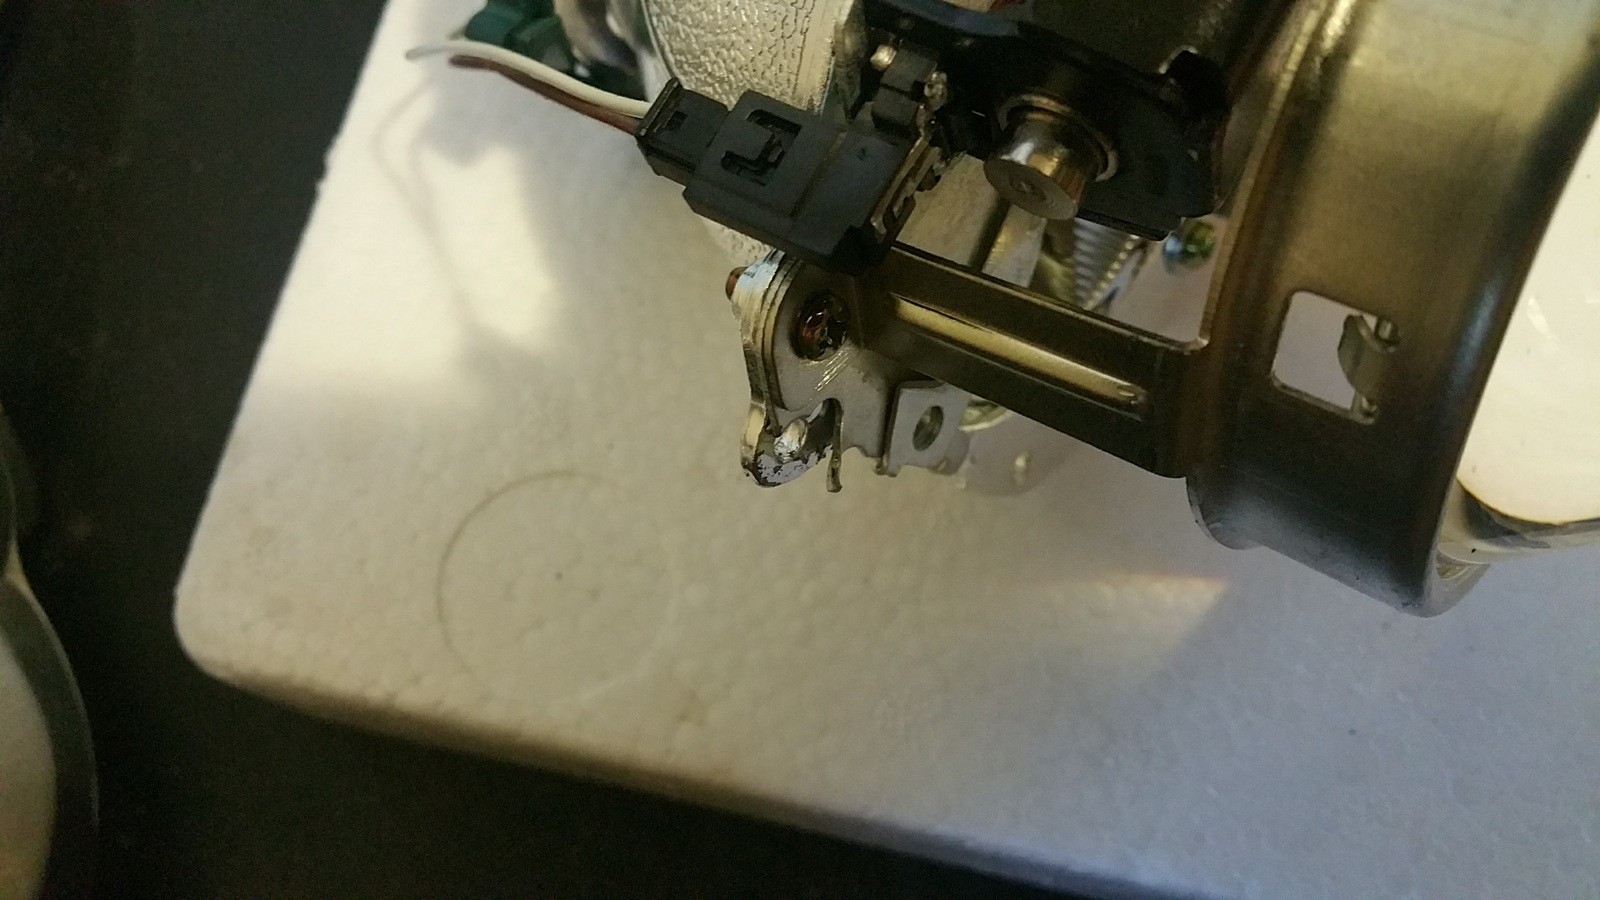
Quick question. I haven't figured out where those wires go to. Anybody knows?
After sorting out this little issue out I was ready to put the three part of the adjusters back on the frame only to find out I mistakenly and dumbly threw them away because I thought my new high quality adjusters came with the complete kit. Ugh ....Welp, the nearest LKQ recently got a 2001 530i in their yard, so I'm hoping that nobody has stolen the headlights yet cause I'm going to buy 'em for spare parts. So, I'm stuck once again with no more progress from today.
Artifically Aspirated
Moderator
I looked into moving it back but there is no drop down menu like the other forums have that we are mods for.
Member
By the way phillysteaksammich, I thought my AE rings have the diameter as the stock ones but it seems like they are not. I, too, will have to cut the flat top and squeeze it in place. How did you go about affixing the rings to how the originals sit in?
Almost There
Moderator
I may just leave the minor gap as it's hardly noticeable and its how the Reps came anyway. I'll look at it one more time.
My AE rings did not come in yet but my plan is to cut the flat top plastic spacer and squeeze them in. Are yours 127mm OD too?
I tried to tow back Pauls thread too. I got no mod powers over there.
98 540i 6, 525 whp, 120 mph 1/4, V3 Si S/C'er @16 psi, W/A I/C, Water/Meth, Supersprint Headers, HJS Cats, 3" Custom Exhaust, UUC Twin Disc, Wavetrac LSD, GC Coil Overs, Monoball TA, AEM FP, Aeromotive FPR, AEM Failsafe AFR/Boost, Style 65's w/275's, M5 Steering Box, Eibach Sways, M3 Shifter, Evans Coolant, 85 Deg Stat, PWM Fan, 10" Subs, B.A. speakers, Grom Aux/BT, Still Rolling as my DD!
Swap Addict
BMW CCA Member
Weird that my threads keep getting towed to where e39 mods can't do anything about it, isn't it? What's up with that? Shouldn't you guys have that kind of power?
Sent from my SM-N910V using Tapatalk
-Paul
2003 "M5" - Full M5 conversion, AMG C63S 6 piston front calipers, Porsche Panamera 4 piston rear calipers, GC Coilovers, Eibach ARBs, UUC Evo3/DSSR, Borla Exhaust w/Muffler Delete, BMW NBT with Carplay/Android Auto, Bi-Xenons, e38 Style 37 M-Pars, e60 Hubs 530i 6-speed swap build thread2005 Range Rover 4.6is (M62TU Powered) - 4.6is Engine Swap from X5, BMW NBT with Carplay/Android Auto
2006 Porsche Cayman S - Soul Performance Competition Headers and Exhaust, H&R Coilovers, 718 Boxster Spyder wheels, Rennline 35mm rear spacers
Member
No, mine are slightly larger than 131mm OD at the top flat side as someone mentioned it in your thread.
Almost There
Moderator
I am only a mod here. They only give mod functions on forums your a mod on. I wrote Kevlar, but nothing back yet. It may be the GB and not sponsor thing, and someone complained, I can only guess who, then it got towed. I'm speculating.
98 540i 6, 525 whp, 120 mph 1/4, V3 Si S/C'er @16 psi, W/A I/C, Water/Meth, Supersprint Headers, HJS Cats, 3" Custom Exhaust, UUC Twin Disc, Wavetrac LSD, GC Coil Overs, Monoball TA, AEM FP, Aeromotive FPR, AEM Failsafe AFR/Boost, Style 65's w/275's, M5 Steering Box, Eibach Sways, M3 Shifter, Evans Coolant, 85 Deg Stat, PWM Fan, 10" Subs, B.A. speakers, Grom Aux/BT, Still Rolling as my DD!
Dismembered
You guys remember cal45fan? He got the boot because Umnazi complained.... Dat's whuts going on....
Set the controls for the heart of the sun
Lights on, nobody home
No group buys for you!!!
Untitled.png
Dismembered
Too late, already got a set from Paul.
- - - Updated - - -
One more thing, if anybody needs anything about E39 headlights, adjusters, lenses, reflectors, ballasts, pm me for cal45fan's number....
Set the controls for the heart of the sun
Member
That is too bad...
He was a huge asset IMO.
Auaq,
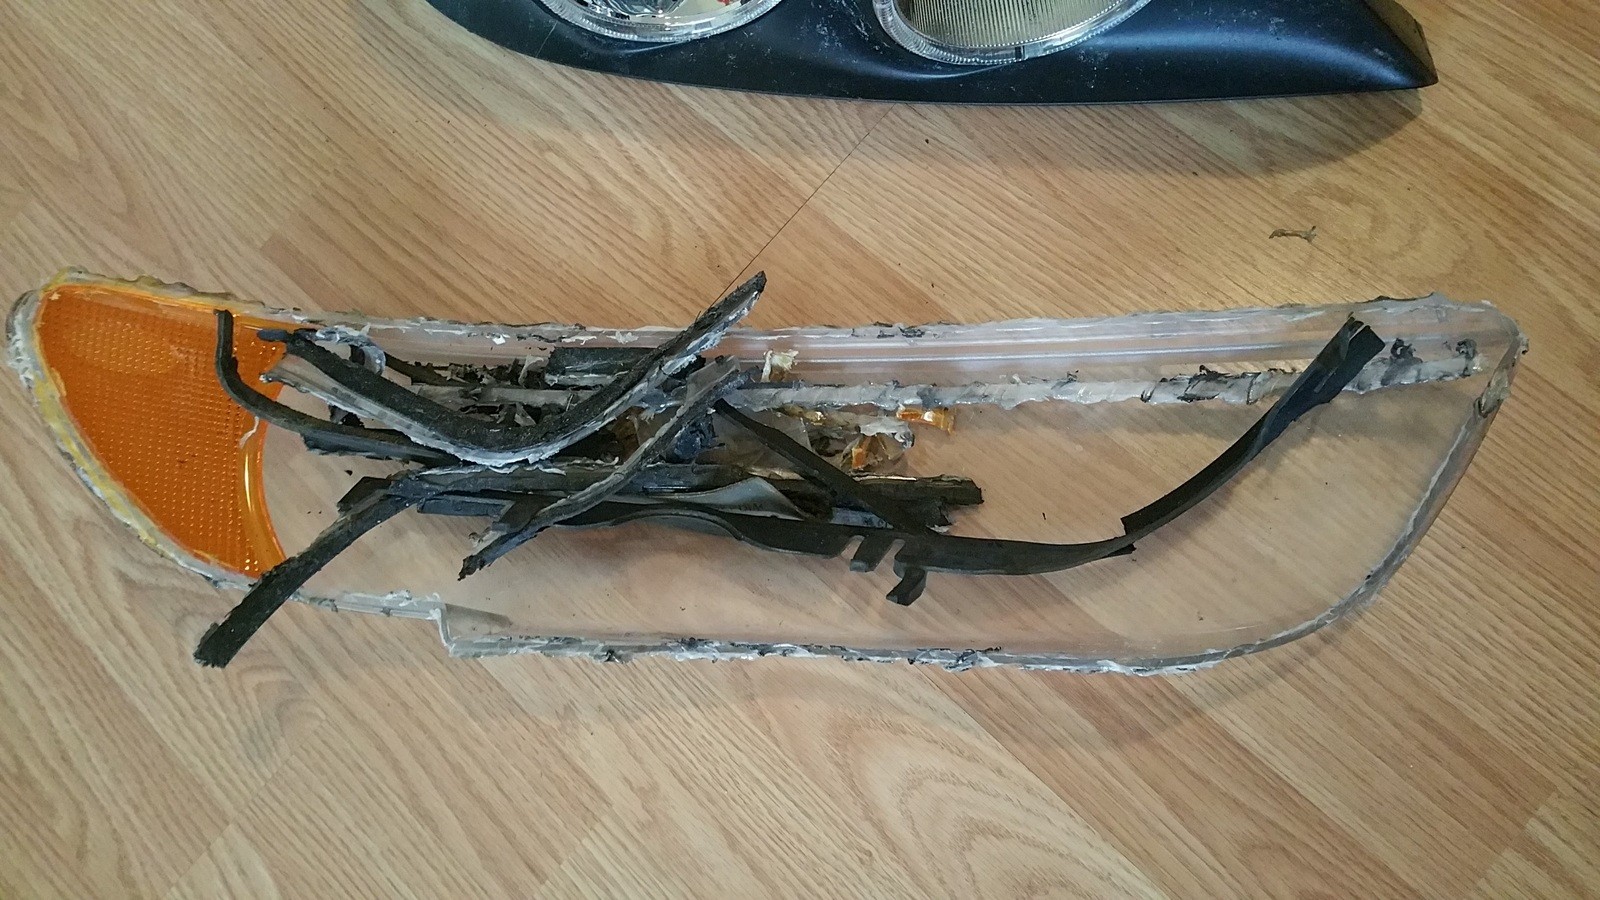
Those cut up lenses look scary...
Looking for an E39 belly pan , passenger front inner fender liner
 Posting Permissions


 Reply With Quote


Bookmarks