
 Cars in Perpetual Repair
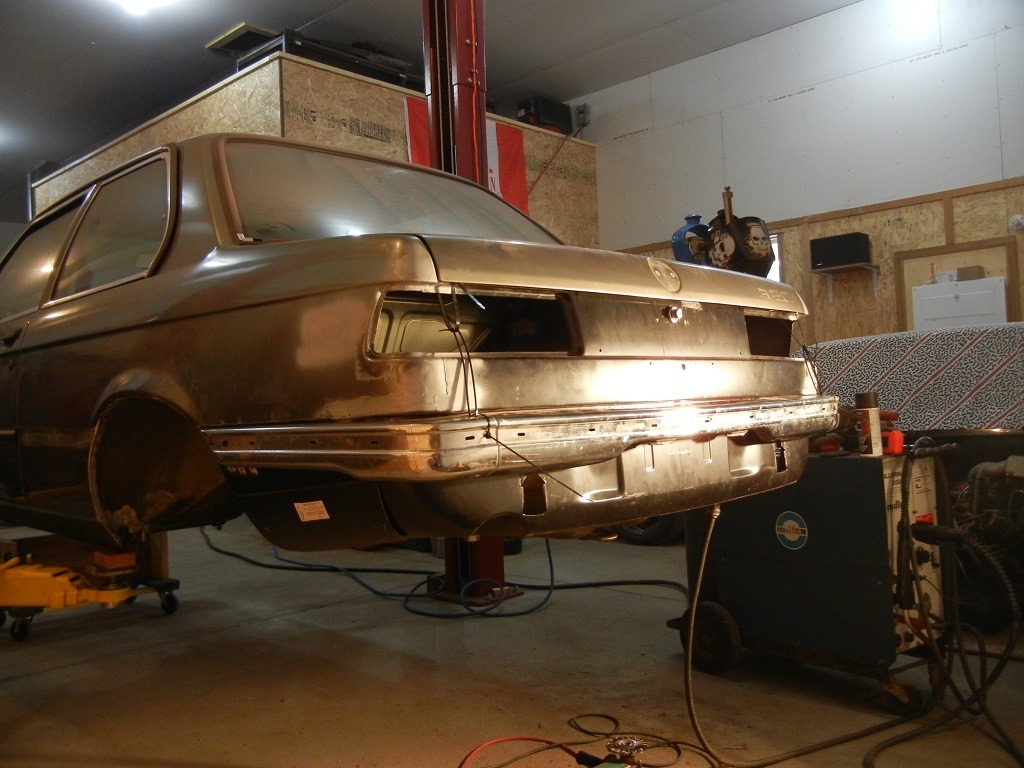
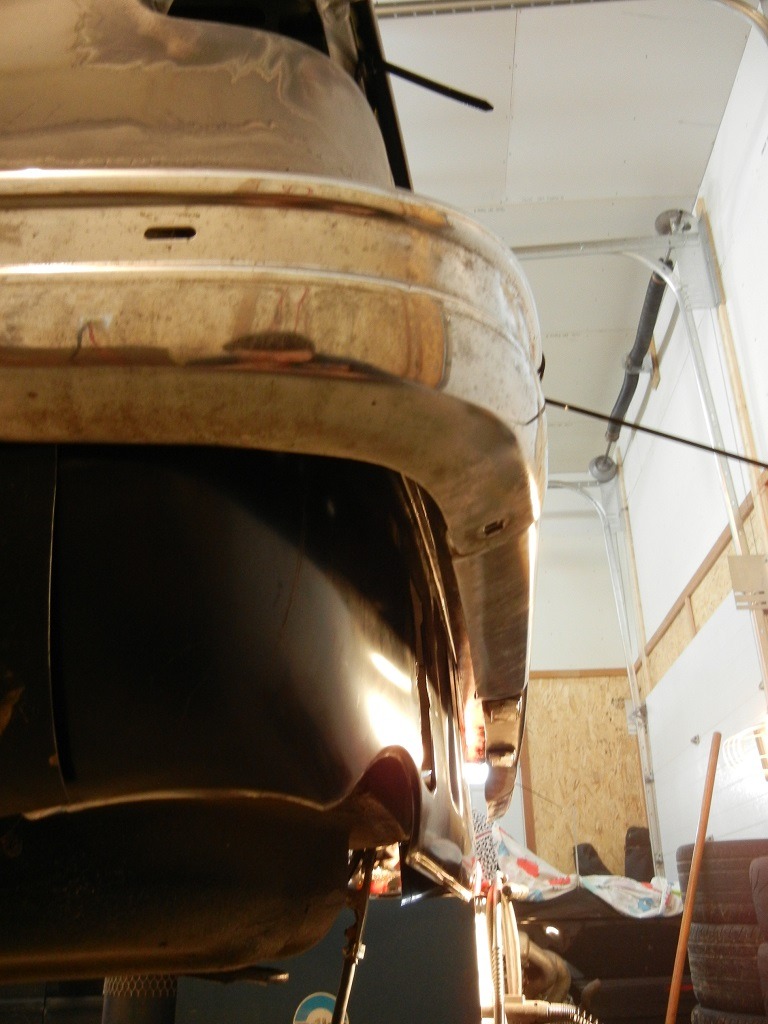
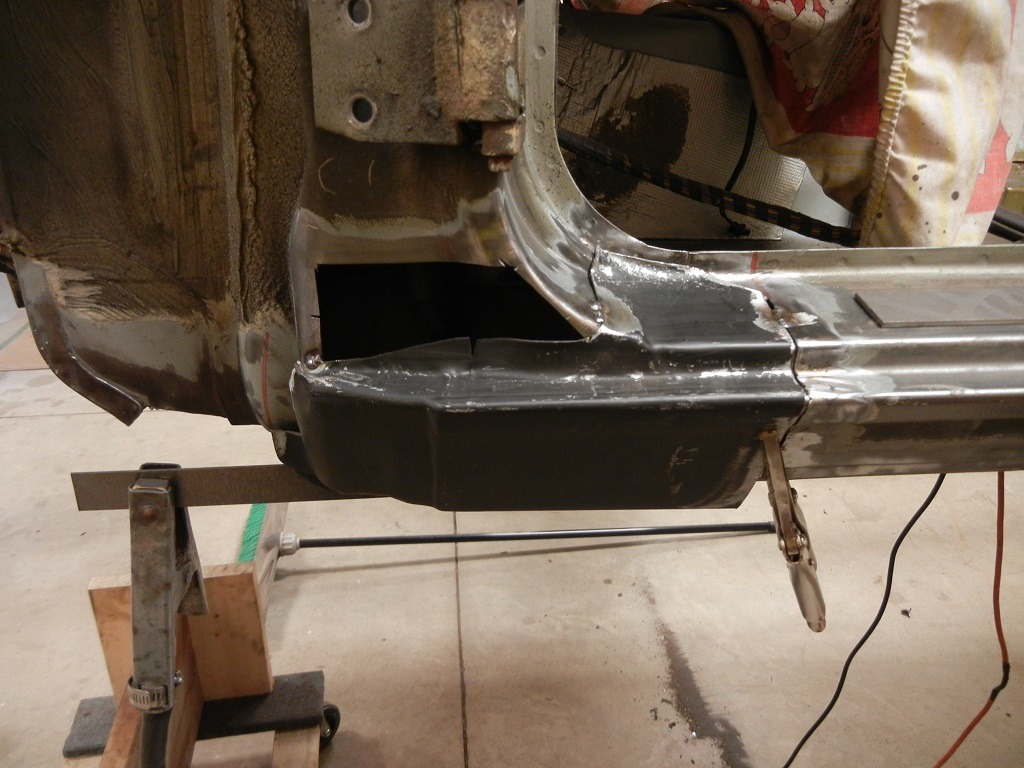
So... unfortunately when it came to the rear valance I didn't take many pics of the process...
Since the side patch panels have a lip that overlaps with the lip on the fender they are pretty straight forward to install, you just need to drill some holes for spot welds.
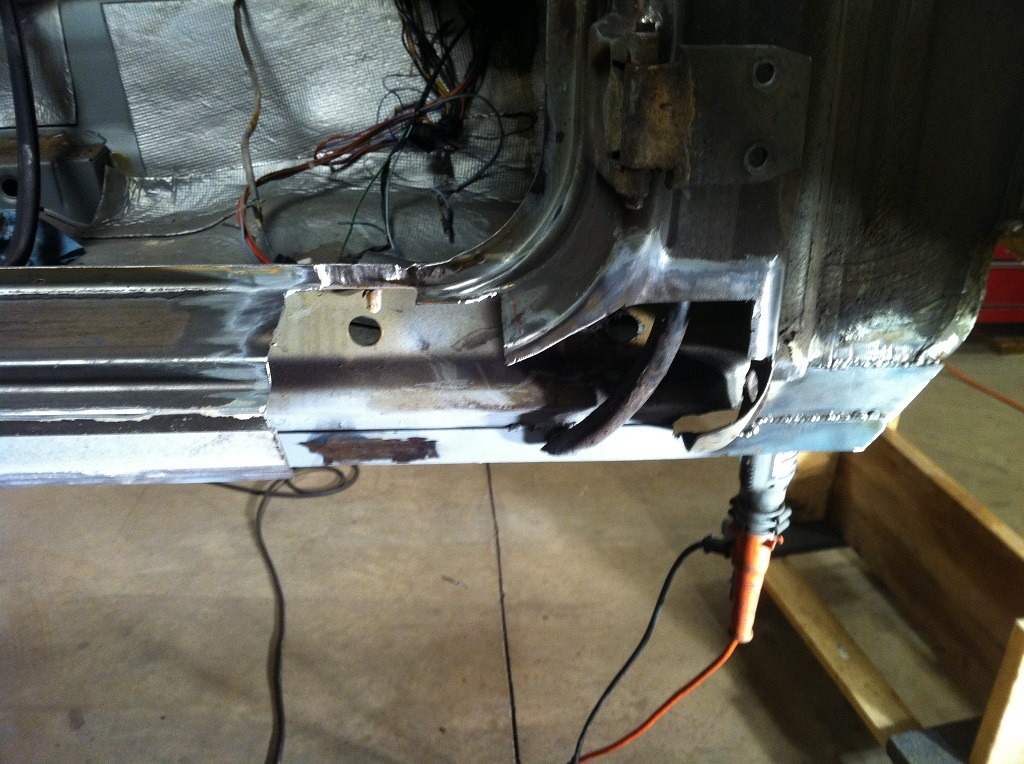
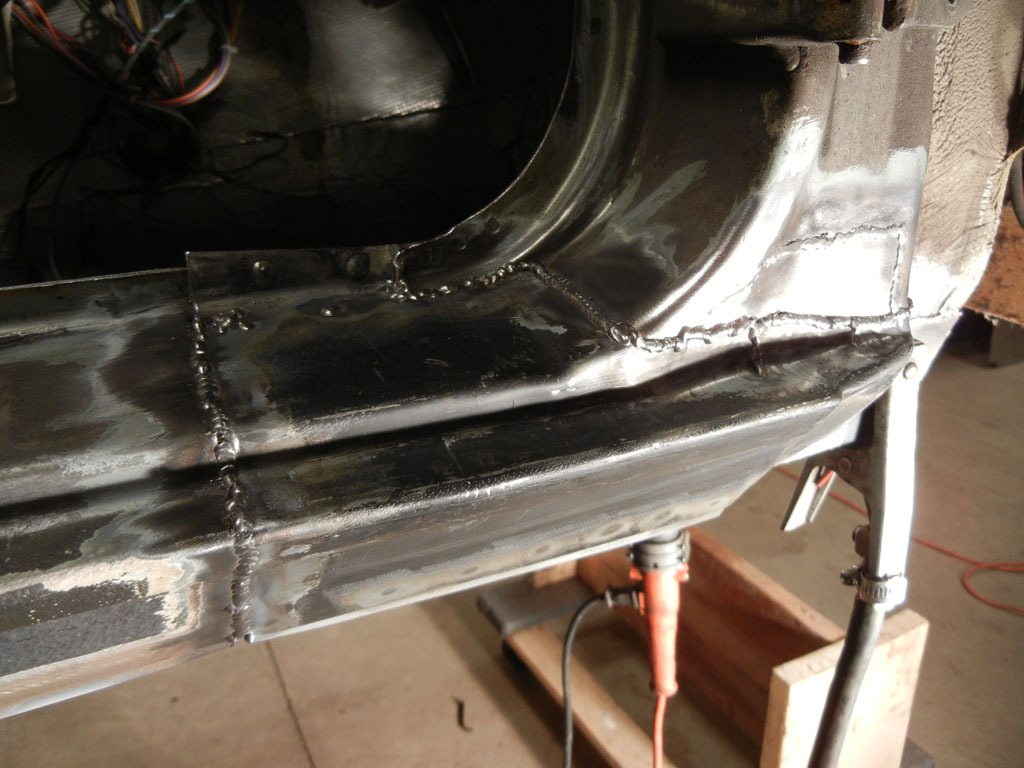
Once I had the side patches tacked in place on both sides, I tacked the valance in place to figure out where to trim the patch panels and blend them into the valance. There is a stamped profile in each part so they need to be cut in the right spot to get things to match up.
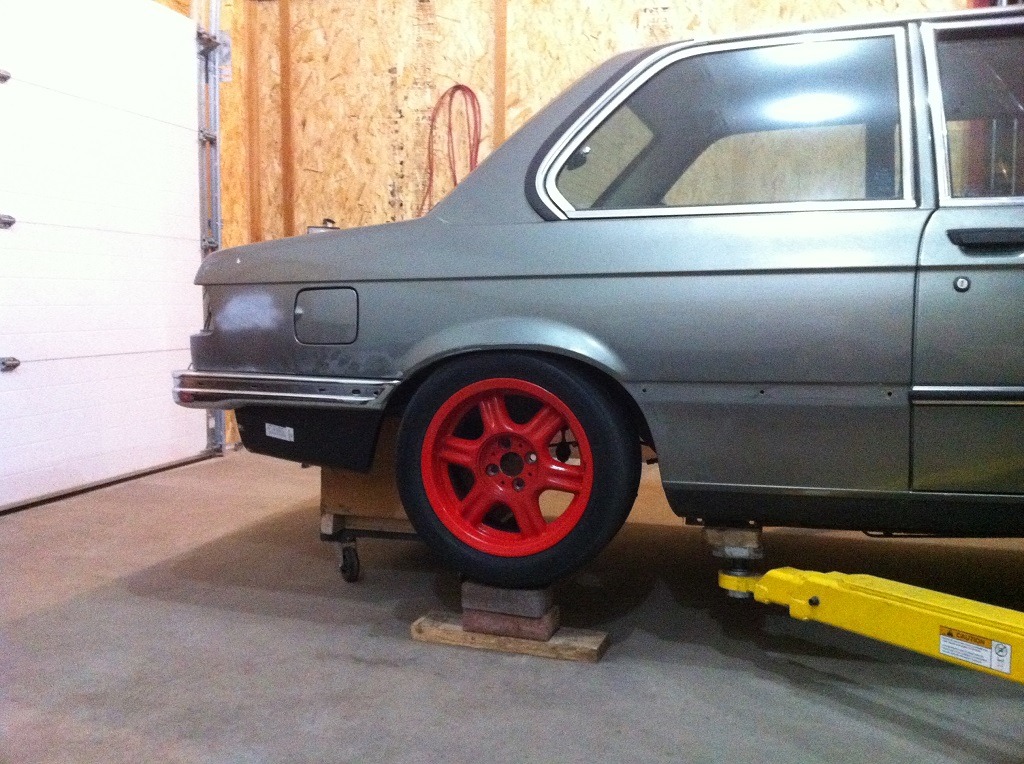
To double check valance placement I zip-tied the bumper back in place to do a rough check...
Everything looked reasonable, so pulled off the valance to prep it.
Getting bored of body work once again I started wondering what wheels I'd want to run... E90 fitment?
Kidding... too big and heavy for an E21
E30 style 10's in Chevy Orange?...
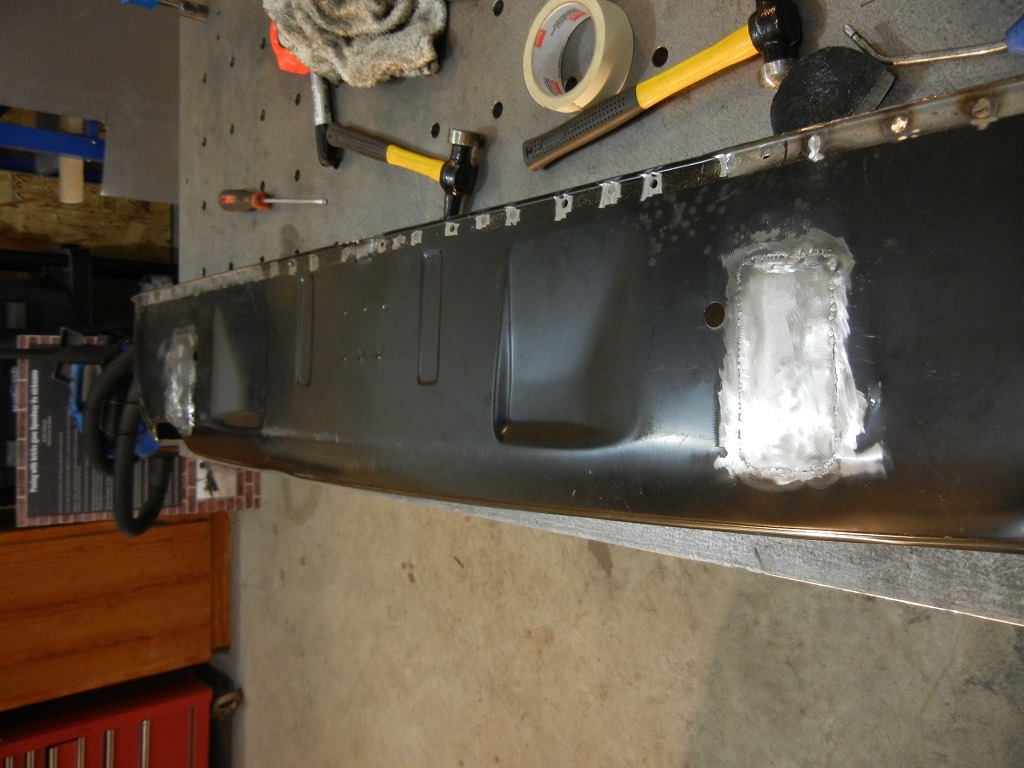
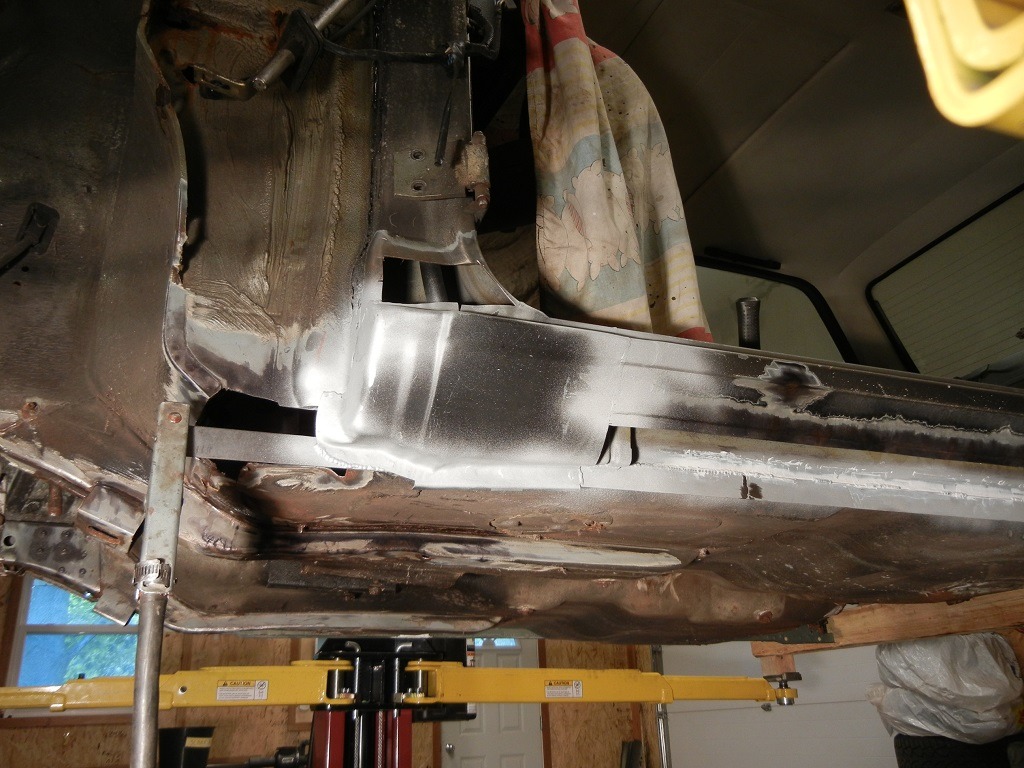
After a beer I got back to work... and patched the bumper shock holes in the US spec valance...
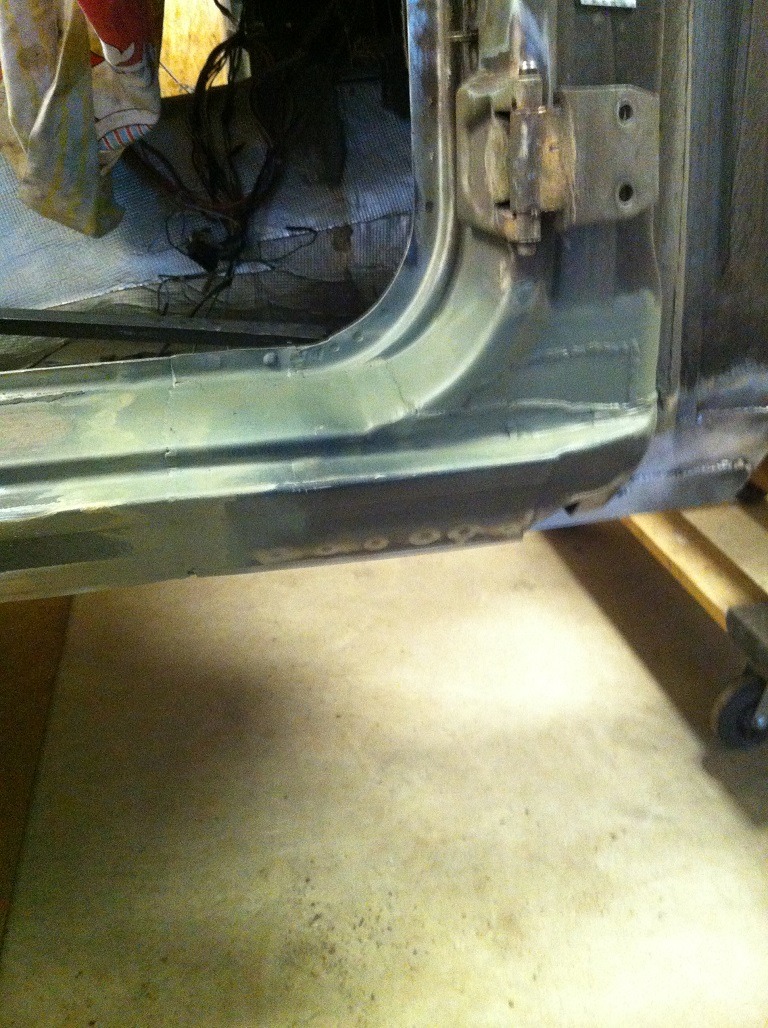
And by the light of the moon I got the rear valance done-ishhhh
It's about 90% complete at the moment. I still need to do a little bit of welding and grinding on it, finalize the bumper fitment and figure out licence plate mounting.
Last edited by Bullet Ride; 08-07-2017 at 08:41 PM.
Member
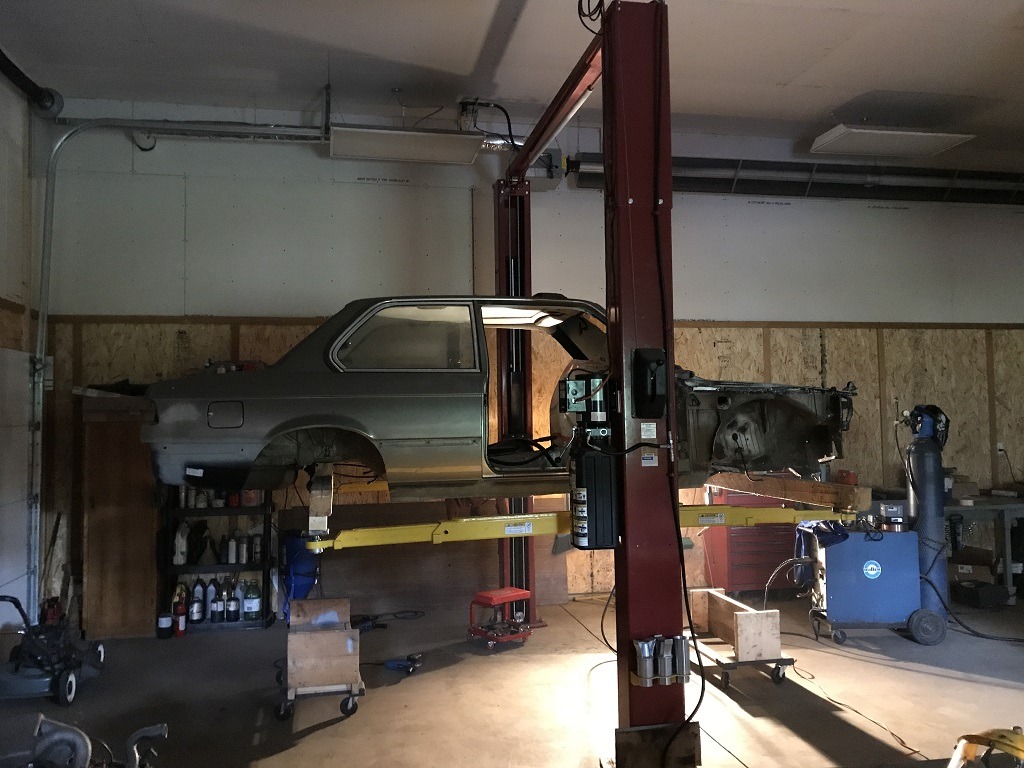
I envy the lift in your garage ... *sigh*
Cars in Perpetual Repair
If anyone ever has the height for it, I highly recommend putting like $20 a week away for one (if not more), after a couple years you'll be able to buy a brand new low end one or a used better quality unit.Originally Posted by bassboy3313

It's sooo worth it. And if you have friends that trust you enough to let you do work on their cars, you can do some side work to pay it off.
I've paid off about half the cost of the hoist just helping friends with brake jobs, muffler repairs, changing wheels, etc.
This resto definitely wouldn't be possible without the hoist... ok it'd still be possible but I'd be a lot less willing to do it without the hoist.
...I'd have scrapped the car by now if I didn't have a hoist")
Last edited by Bullet Ride; 03-24-2017 at 04:58 PM.
Member
Oh definitely! The height is the main issue for a lot of home garages, including mine.
Cars in Perpetual Repair
So I've been a pretty busy lately...unfortunately not with working on the car... life gets in the way sometimes
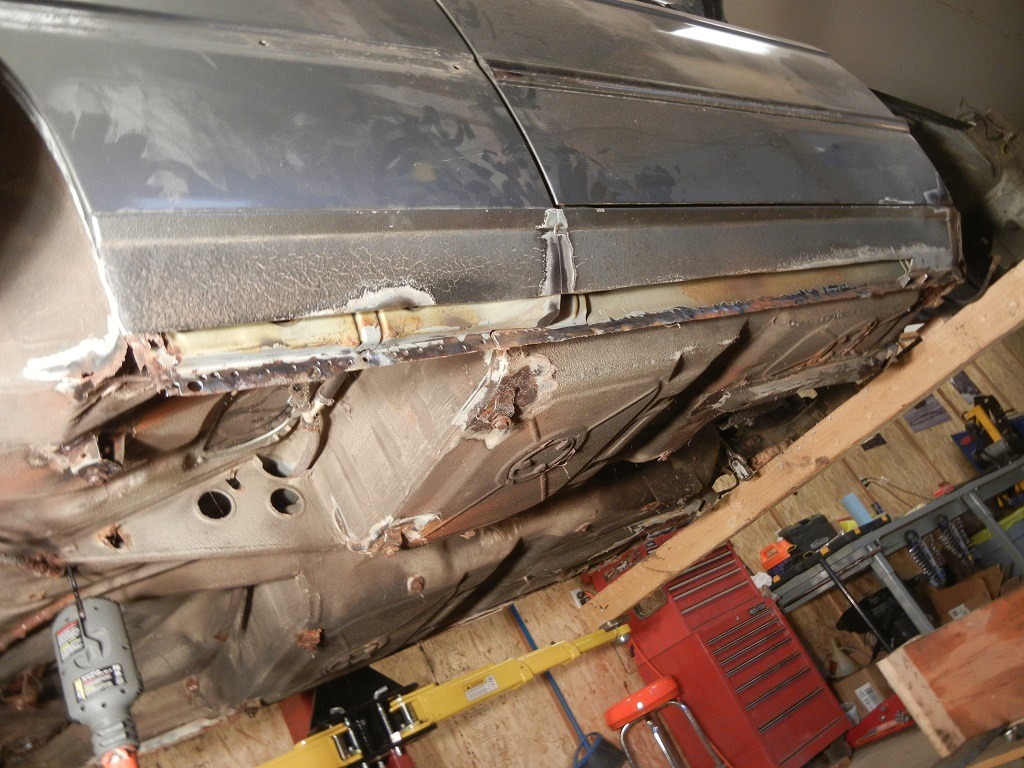
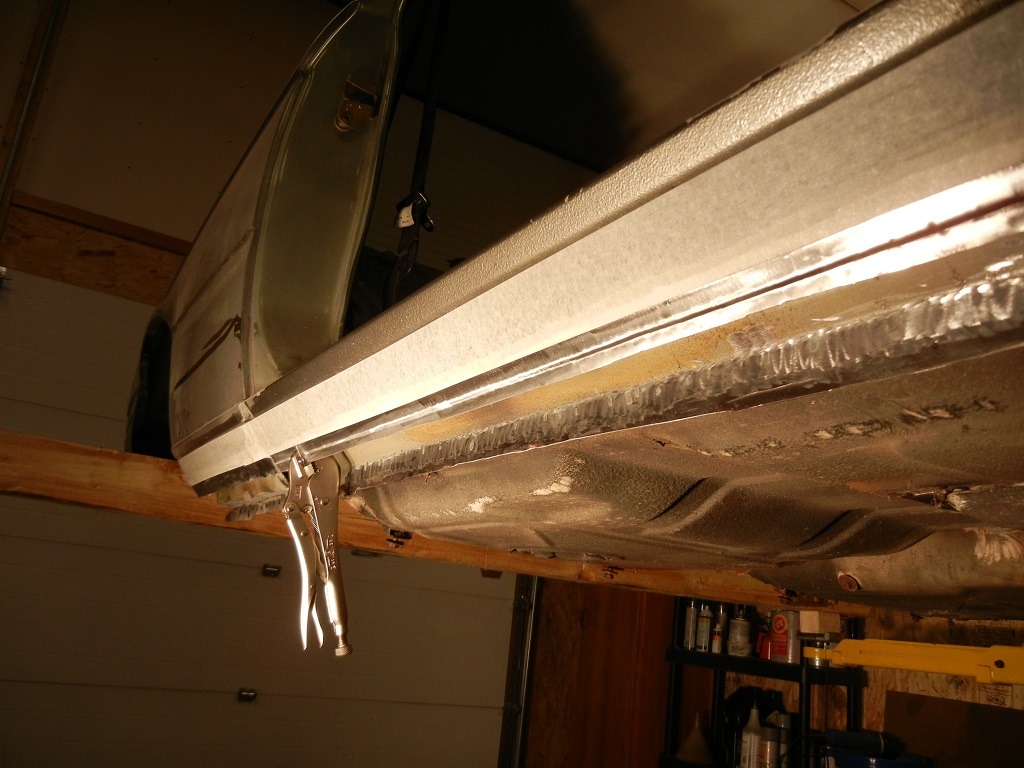
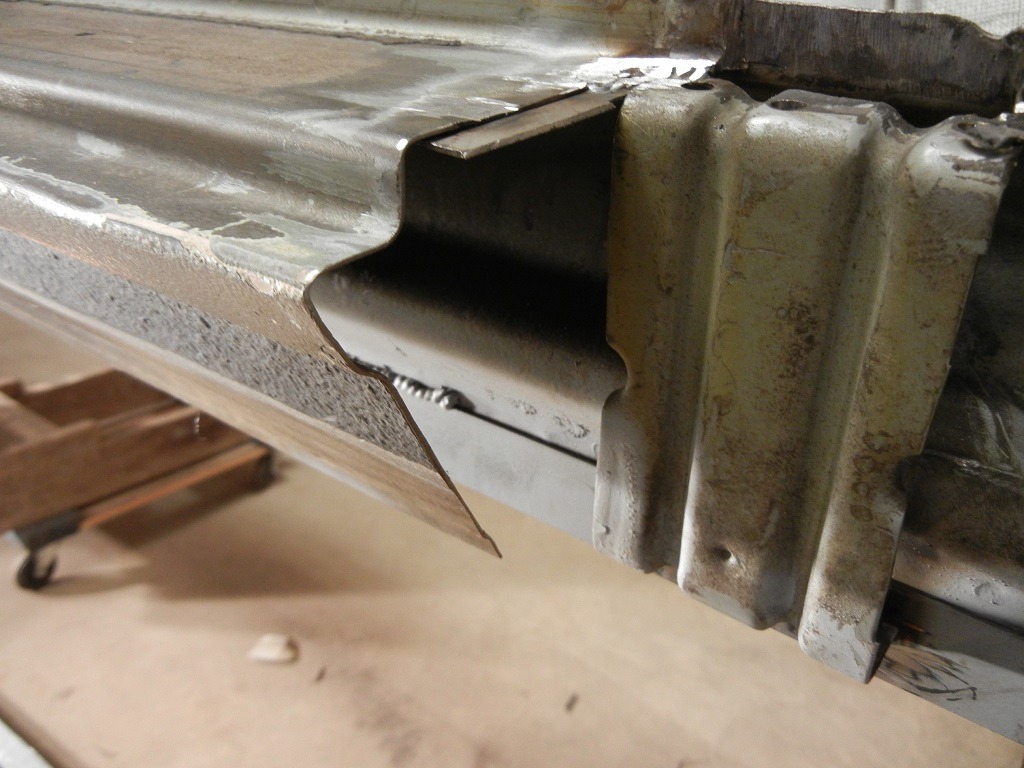
Anywho... so since the rear end was mostly complete I started picking away at the rusty rockers. Due to closeness to the beer fridge the passenger side is the side I chose to work on first. The pinch seam appeared to be the worst part of the rocker, so I started off with some exploratory cuts along the bottom so that I could visually inspect inside of the rocker. I found that a lot of the spot welds were pretty high up the pinch seam which made them harder to drill out. I ended up just cutting along the pinch seam as closely as I could manage and then just ground down whatever was left until it was cleaned up...
A rare picture of the animal in his habitat...
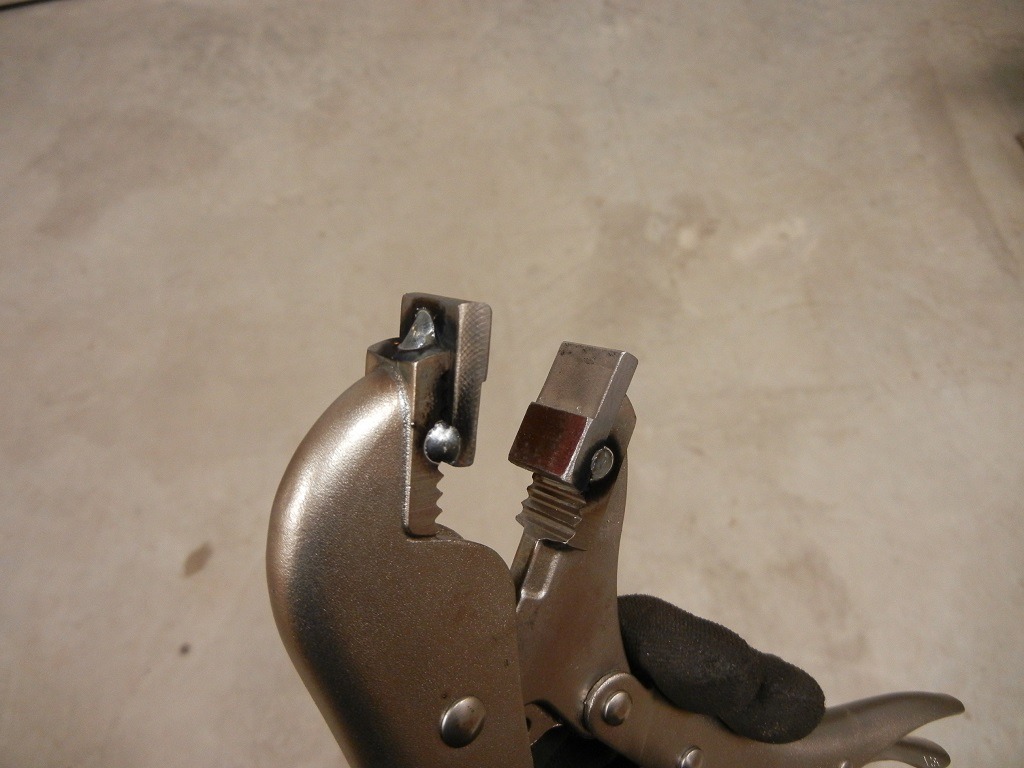
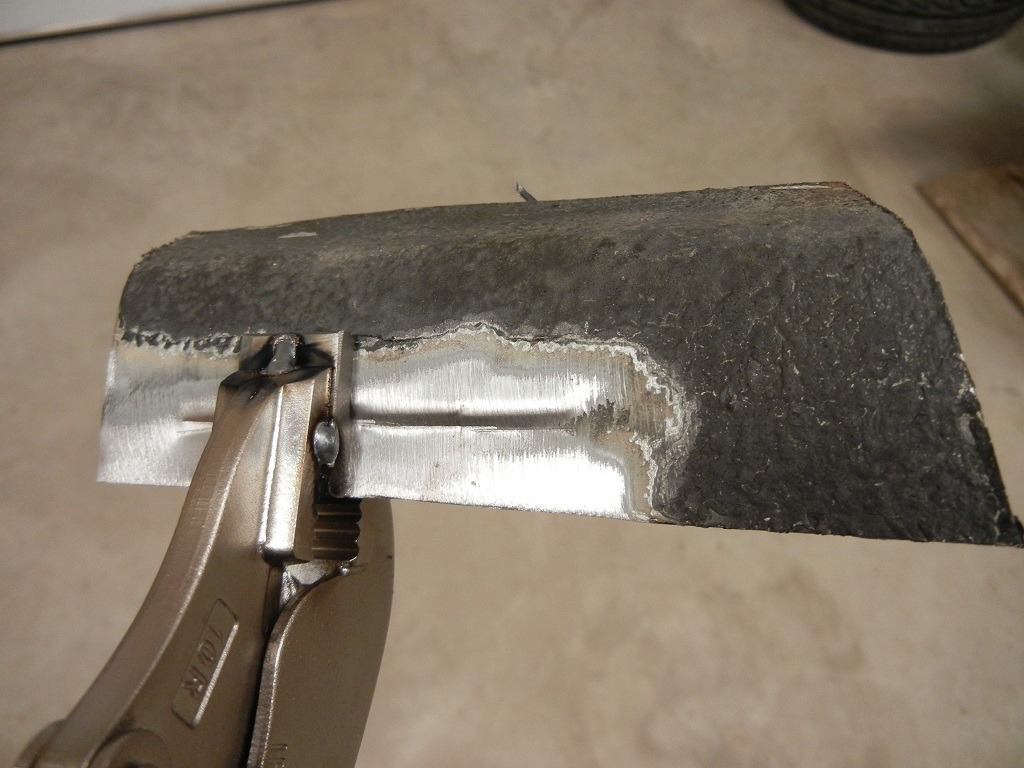
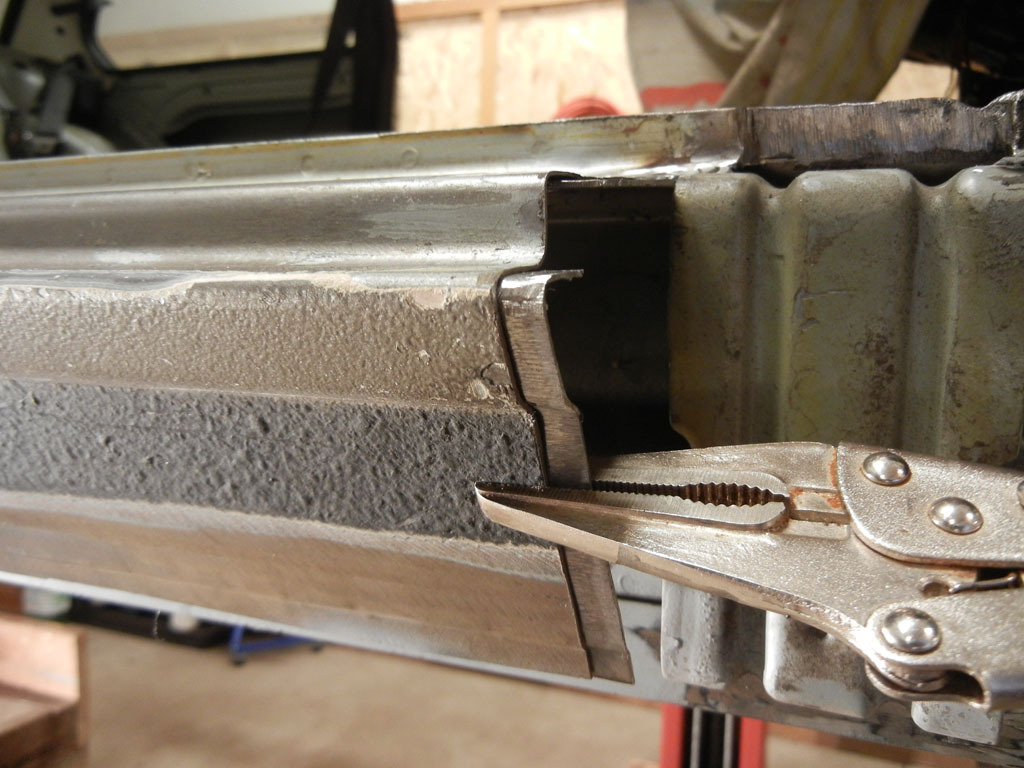
Since the rockers looked clean on the inside above the pinch seam I decided that rather than cut out the whole rocker to put the patch panel in, I'd just cut what I need out of the patch panel. In order to apply this patch I'd either need to weld on a backing strip or do an overlap joint. A backing strip would involve drilling a bunch of spot welds in both the rocker and the patch. An overlap joint would be easier, but I'd have to come up with a way to form a step in the rocker for the patch to sit in so that it'll sit flush. I could buy some fancy autobody crimping tools... or I could just do this...
What will that do you ask? Well... it'll do this!...
With some patience and a straight line to follow, the tool was able to crimp a nice straight step...
After that I cut all the crap out of the pinch seam and welded in a new strip of thicker steel. This should add some more rigidity to the new pinch seam as these seem to get pretty flimsy over time.
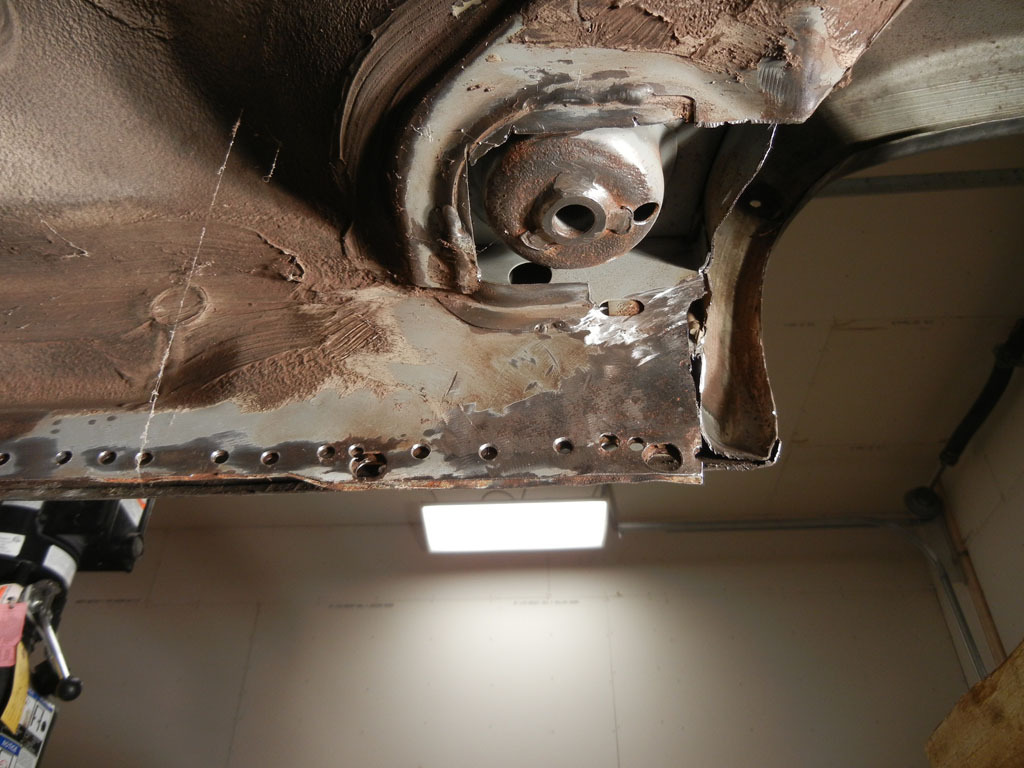
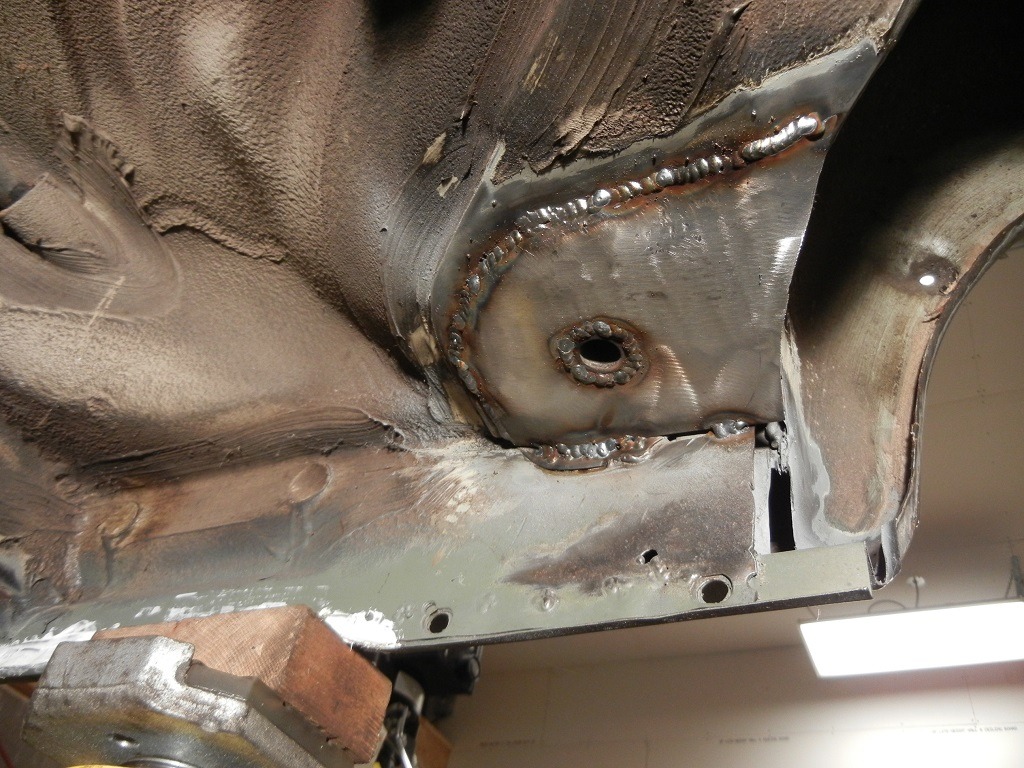
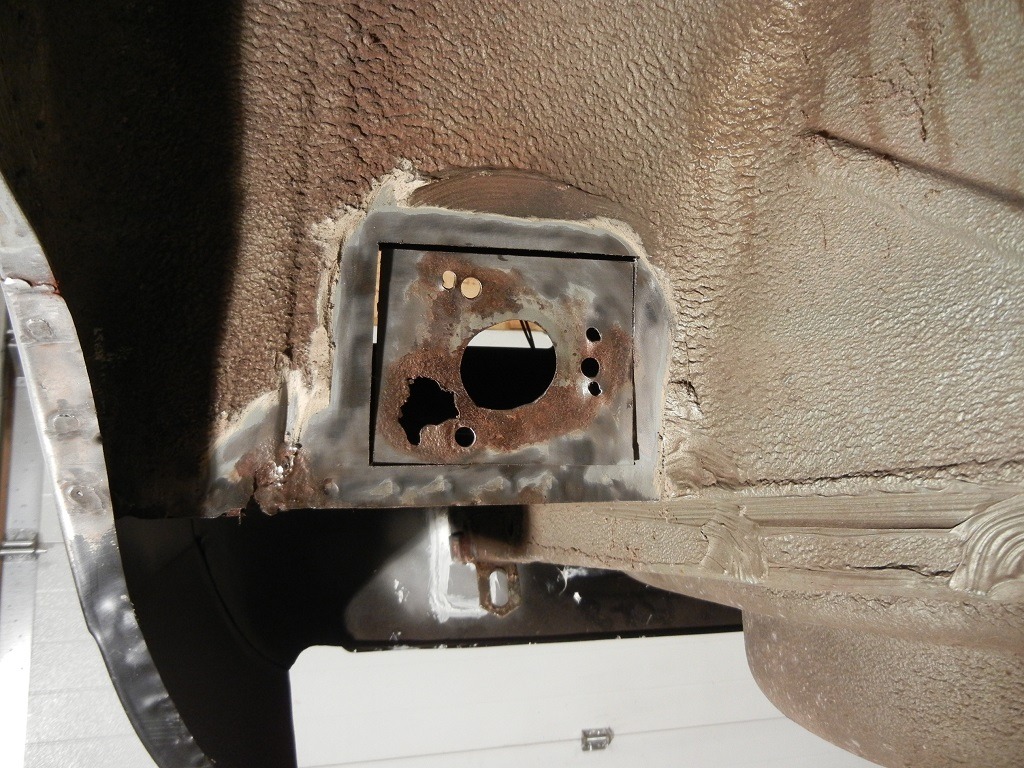
I also started cleaning up the rear subframe mount while I was at it... it ended up being pretty crusty too...
Shouldn't be too difficult to patch though.
That's all for now folks.
Last edited by Bullet Ride; 08-07-2017 at 09:07 PM.
Cars in Perpetual Repair
It's been a while...
Cars in Perpetual Repair
So where was I.... ah yes... I hate body work.
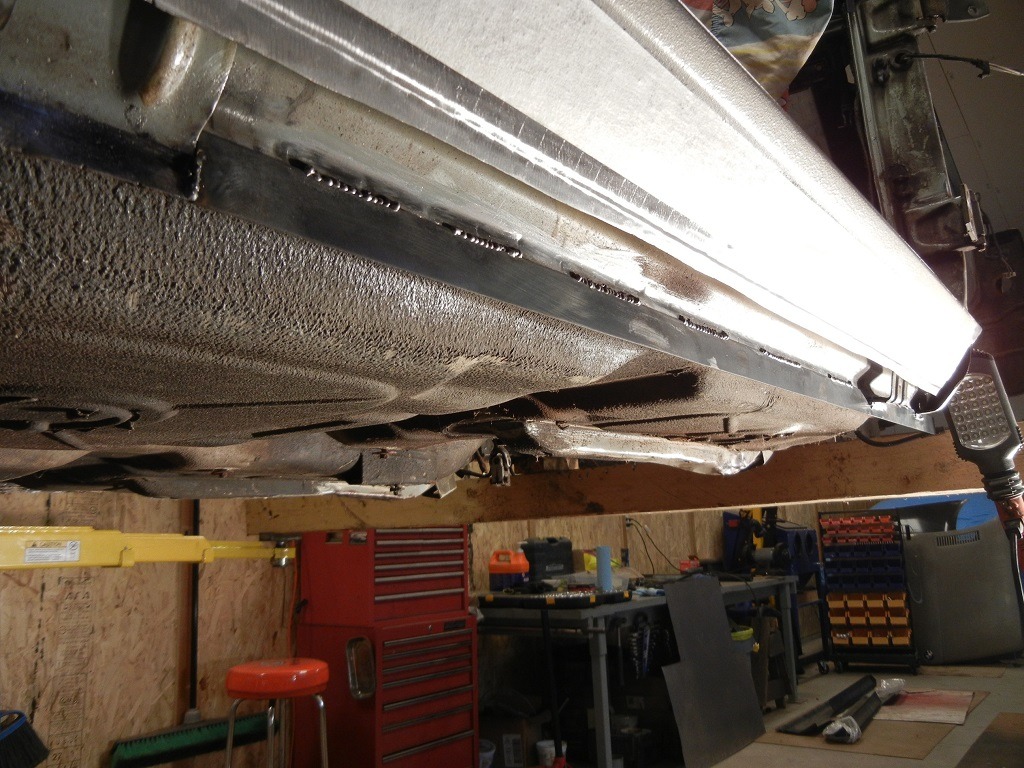
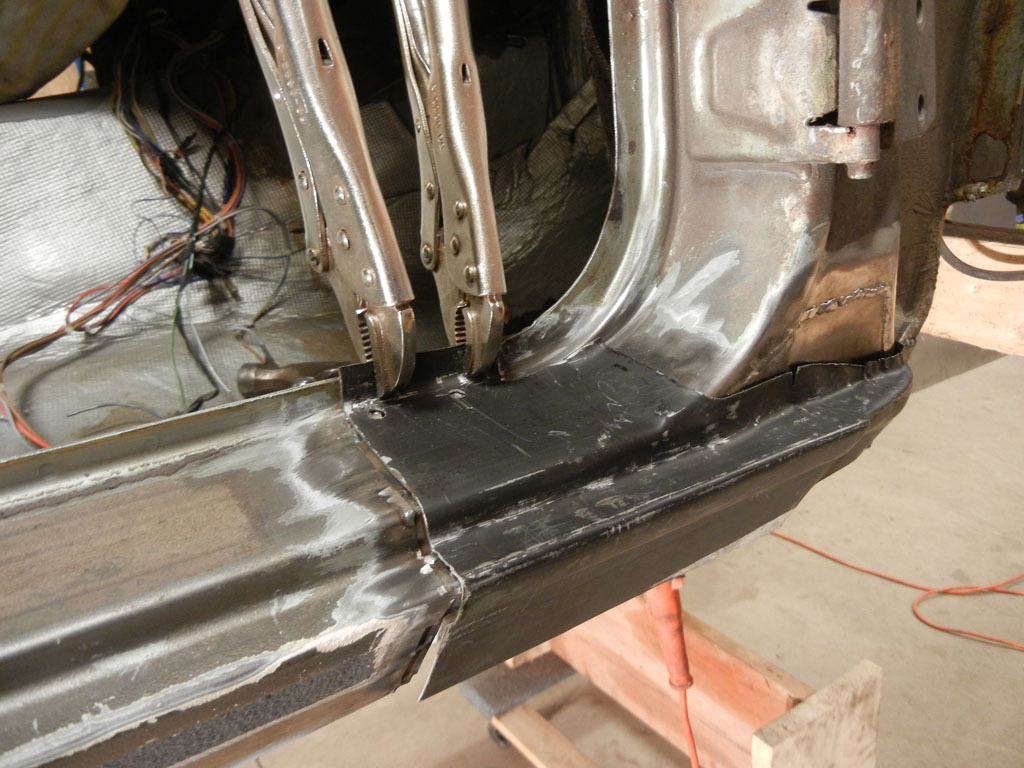
So this is what the front end of the passenger rocker looked like with all the crap cut out and prepped for the patch...
Actually not quite... I ended up having to cut back past the jack point reinforcement...
And then weld in a couple small patches that the patch panel wouldn't cover...
Ok, so I wanted to have a backing for the welded joint on the rocker to make sure that the rocker patch was robust, the problem is that the rocker is this funky profile...
At first I started trying to hand bend a backing strip and that was proving to be annoying because there are some close, tight radii in that profile.
Then realized that part of the section that I cut out was still in ok shape, so I cut a strip out of it...
Much better...
After that it was just a matter of cutting a section out of the patch panel and trimming it to fit. Since the patch panel was formed to be an over skin it took a bit of fettling and hammering to get it to fit ok...
Some shitty welding....
A little bit of grinding and some primer and she'll be good to go for a bit of filler and sanding when that time comes...
After that I cut the remaining strip out of the patch panel and drilled a bunch of holes in the pinch seam to plug weld...
Some more welding, grinding and primer and the passenger side rocker is done!
I'll be working on the driver side rocker tomorrow
Last edited by Bullet Ride; 08-07-2017 at 09:15 PM.
Member
Bullet Ride - Looking really good, some really great work here. I am enjoying following your progress.
MJ
Member
Looks like a lot of fun, great job mate.
Cars in Perpetual Repair
Well, it looks like I'm going to have to re-host my pictures somewhere else and update all of the links due to this photobucket debacle going on...
Sorry folks.
Cars in Perpetual Repair
Working on updating links with newly hosted pics now. Got the first several posts done, let me know if you have any issues seeing the pics.
Thanks.
Cars in Perpetual Repair
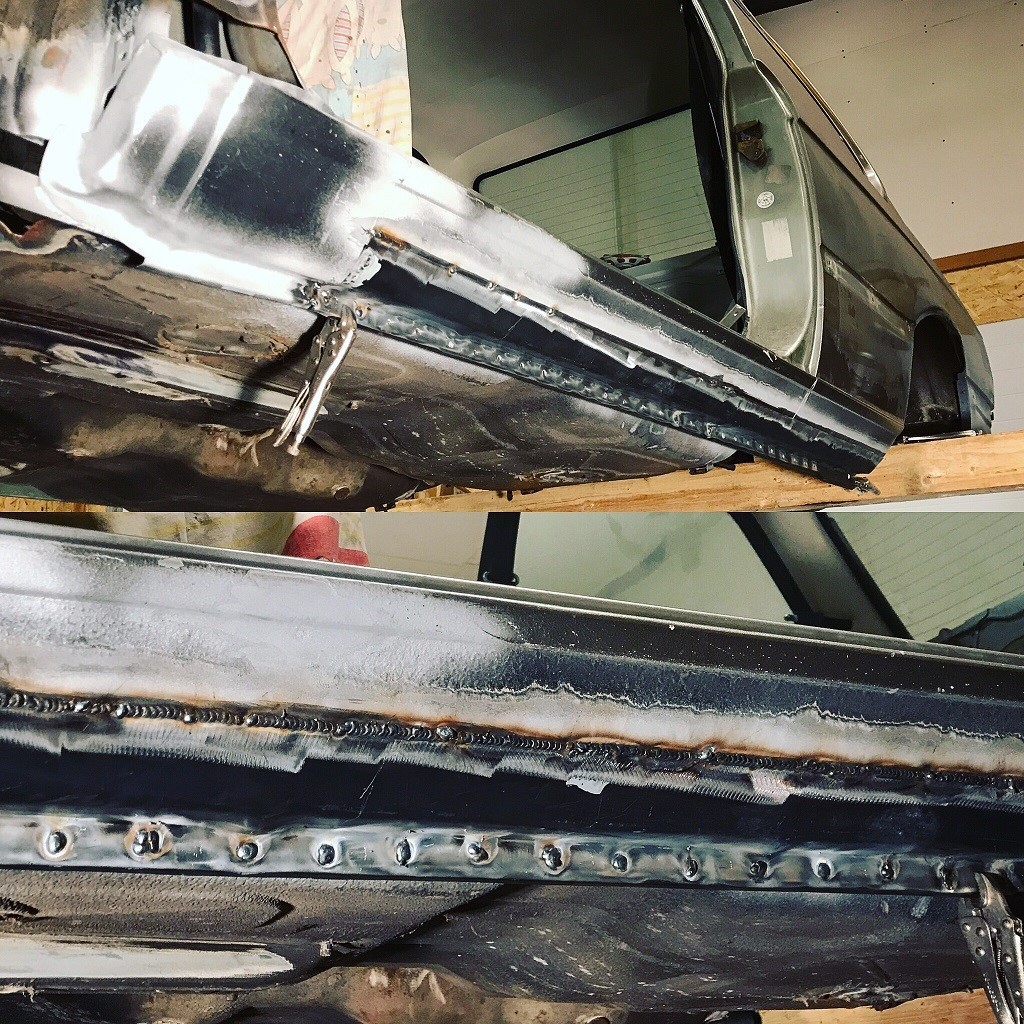
Same procedure on the driver's side rocker, cut out all of the rusty looking sh!t and clean up the edges...
Then weld in new strip for pinch seam...
Again, fitting up this section of the patch required equal measures of cutting, hammering and patience....
Then fit up the rest of the patch and drill a bunch more holes for plug welds...
Plenty of lonely nights in the shop, but I'm slowly starting to see a light at the end of the tunnel...
Member
This is one of my favorite threads. You are making serious progress and it is great that you are sharing pics of the work.
Hopefully you have a decent stereo in the garage for some background noise. I re-purposed a used home receiver and speakers in my shop. With the right cables I can hook up my laptop to listen to IndyCar live-stream or phone/ipod for tunes. That and the sink are the two things I could not live without.
Is that a Challenger/Quality lift? Looks like an E10 model.
MJ
Member
Great to see you back at it Bullet, you are making some GREAT progress with the body. I have to say that body work is not my favorite thing to do either, it is always such a dirty job/work.

Always FUN TO DRIVE - Build Thread & Tech info - 79 320/6 track car build thread -- Videos of track car -Adam in car Auto-x video - Start-up video - 4/2011 Adam's TOP BMW time San Diego BMWCCA - 4-5-15 Dyno break-in run new M20B25 - Exhaust Thread - Link
Member
Man scrolling through these pics is so gratifying. You're doing a really nice job with the body work.
What service at you using to host pics? I expect the photo bucket fix will only work for so long.
Sent from my SM-G920V using Tapatalk
Last edited by jrcook320; 09-19-2017 at 01:25 PM.
Cars in Perpetual Repair
Music is a must out in the shop. I've also got a home theater receiver as well with some older, but pretty legit Bose speakers set-up with an old Creative Zen 20gb mp3 player lol.
Good eye, it is a Challenger E10.
This might seem like a bit of a hack... but I'm actually using tumblr lol.
It doesn't advertise itself as a photo hosting website, it's more for angsty, confused teens and weirdos to reblog memes and bullshit.
But I just uploaded my pics and then just right click and copy image address and insert it here.
Seems to be working so far, and I can't picture tumblr asking their users for money anytime soon lol.
Cars in Perpetual Repair
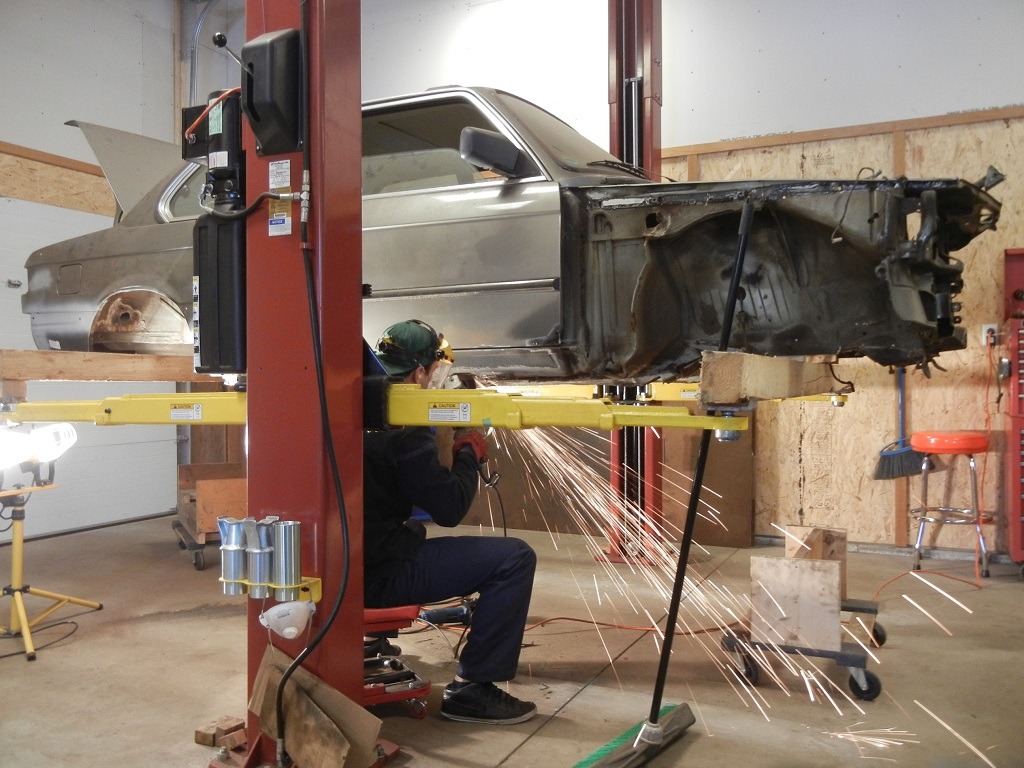
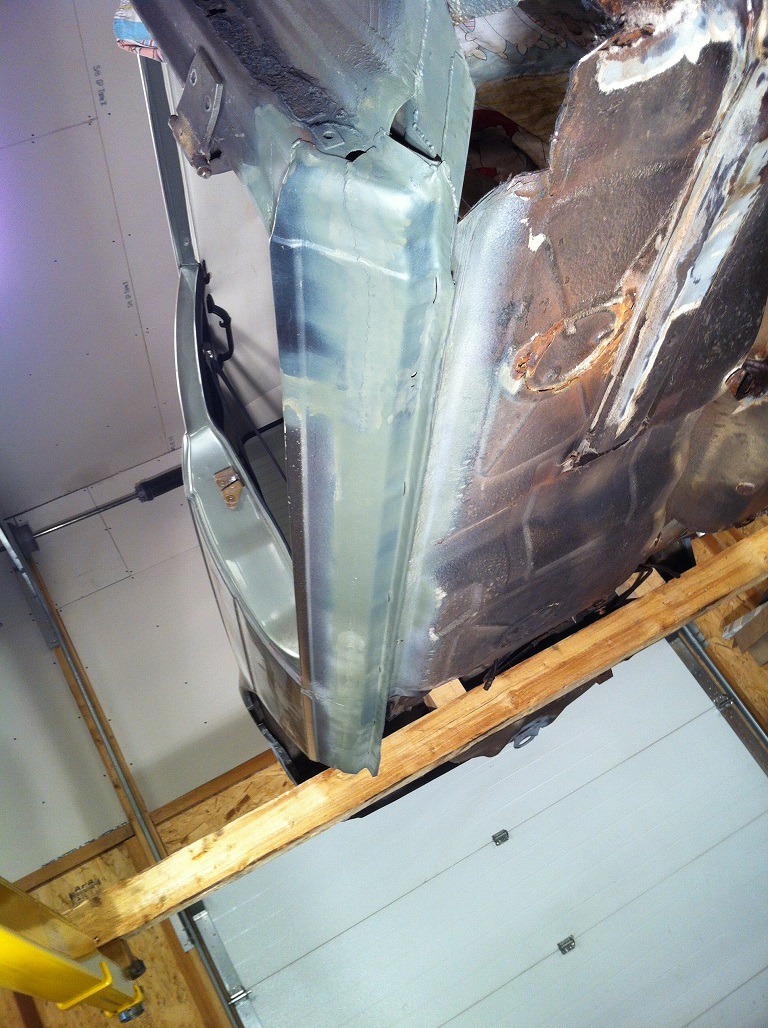
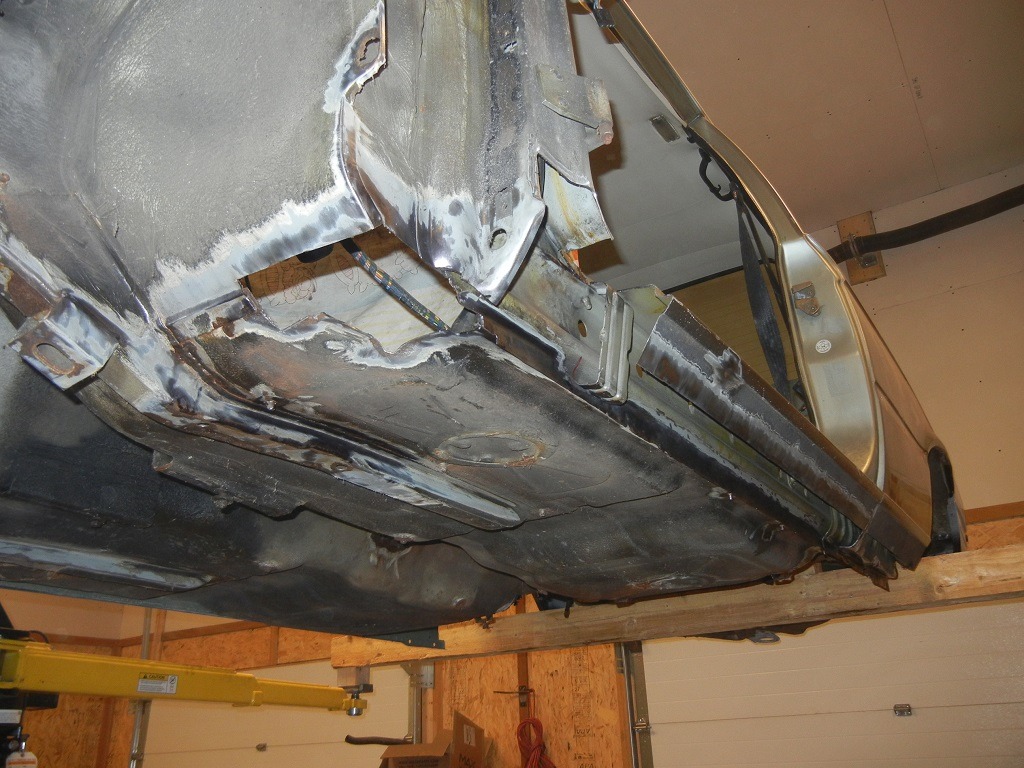
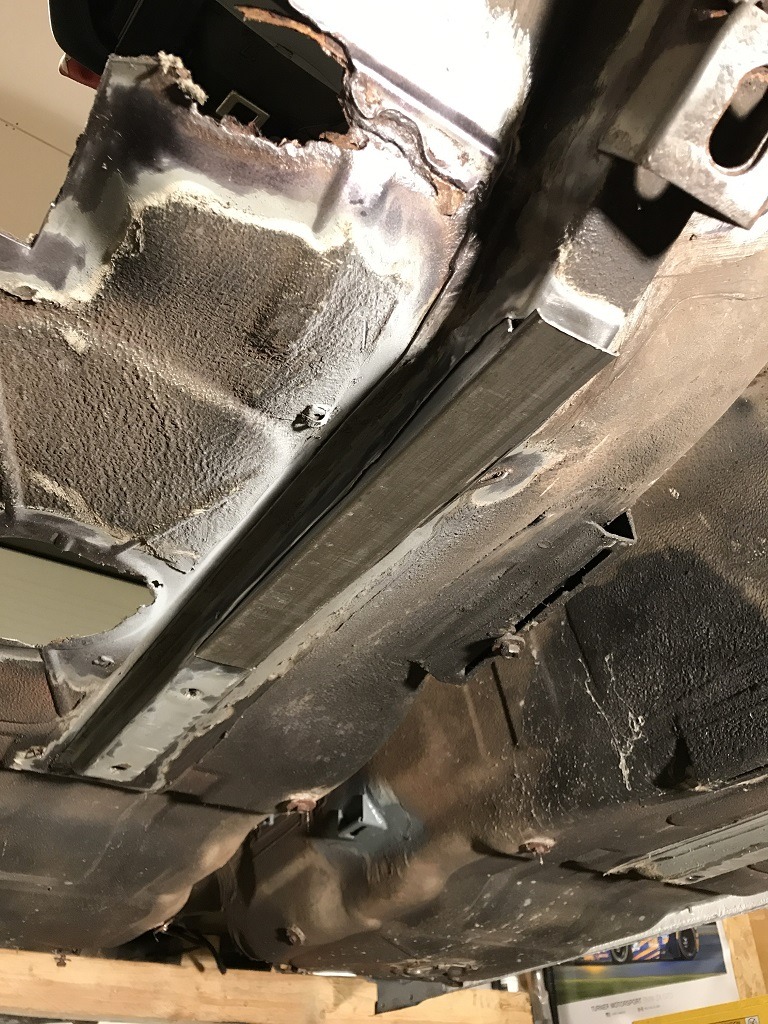
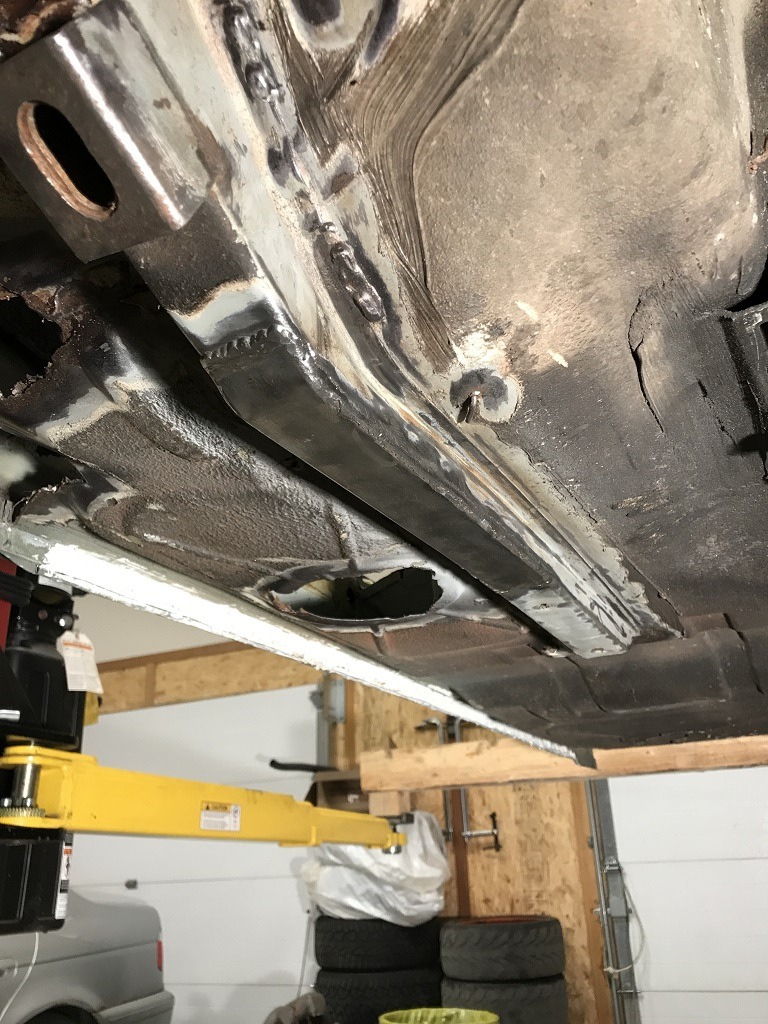
Next up I tackled the soft frame rails. I started off with wirewheeling the undercoat off and cutting the bottoms out to look inside...
Things looked pretty good inside. After some measurements I went and bought some 1.75" x 0.125" wall square tubing and trimmed it down to the proper height.
It fits inside the frame rail nice and snug...
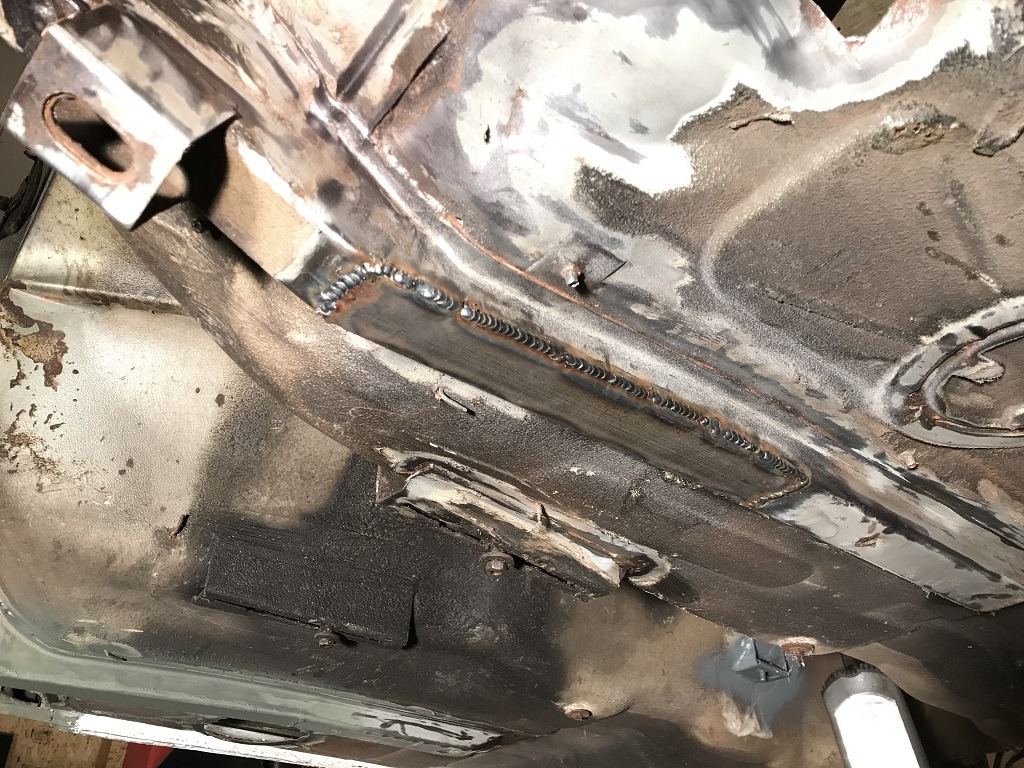
Glue it down...
Repeat for other side...
A little prime for a good time...
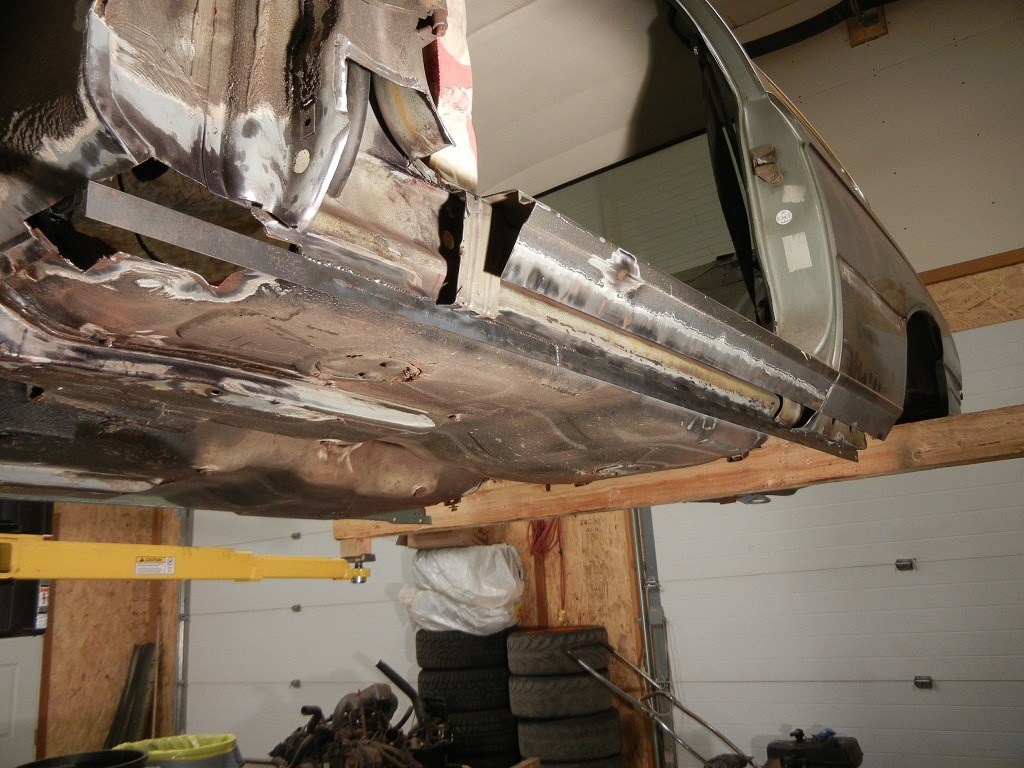
Up next... floor patches. This stuff is easy
Last edited by Bullet Ride; 09-19-2017 at 07:10 PM.
Member
Hmmm. I now have a reason to use my tumblr account.
Cars in Perpetual Repair
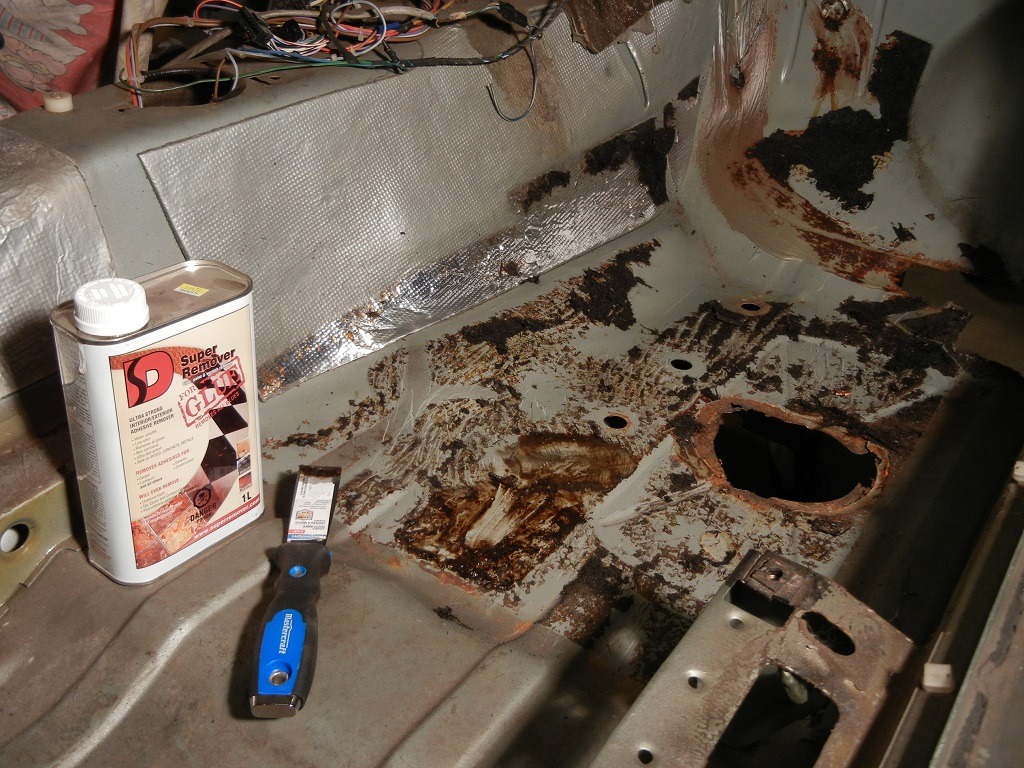
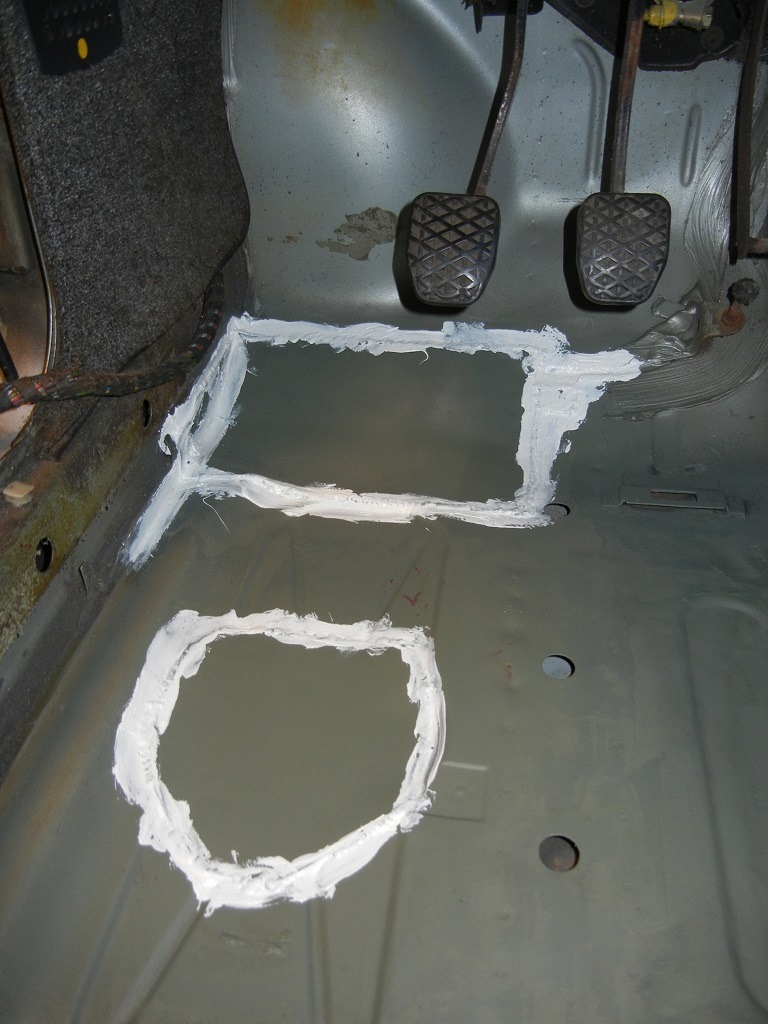
Ok so floor patches... you've all seen this sh!t before... pretty standard fare on these old salty whips.
After ripping up the ... probably asbestos... insulation/sound deadening off the passenger side floor there was fair amount of glue and west German horse pubes still stuck to the floor, and trying to wire wheel it just smeared it all around so I went and picked up this stuff called "super remover" meant for glue from the hardware store.
It's like a gel, and after letting it sit for a couple minutes the glue came off pretty easily with a scraper and some rags. All cleaned up...
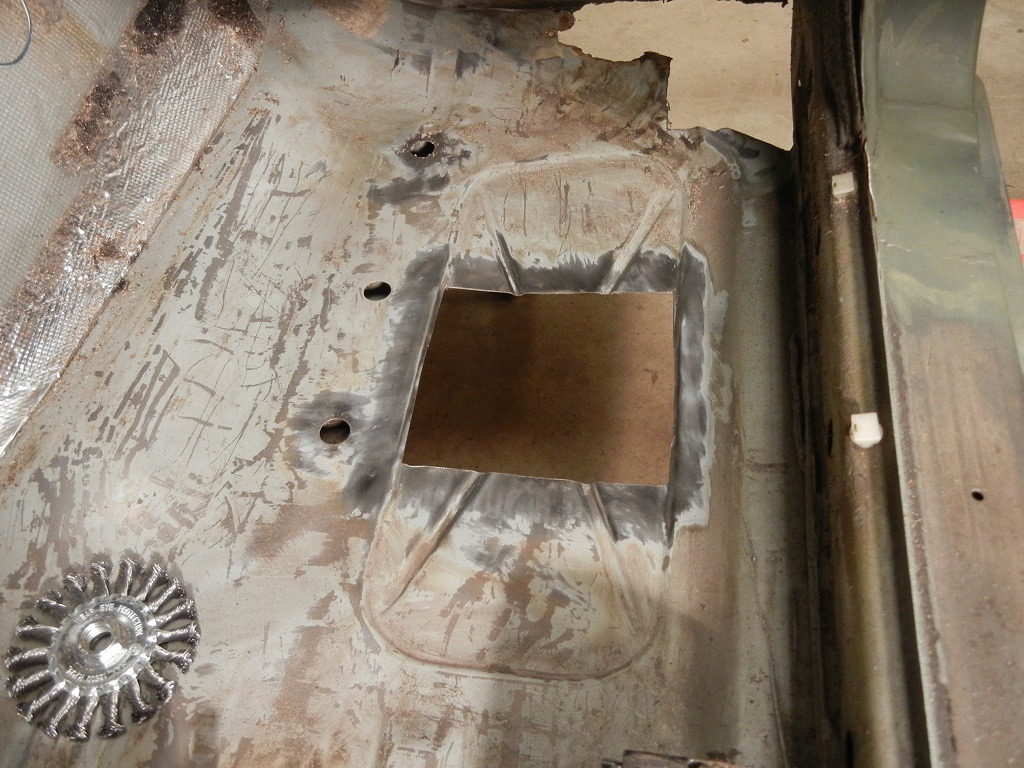
After that, just the regular proceedure... cut back to clean steel... clean the edges...
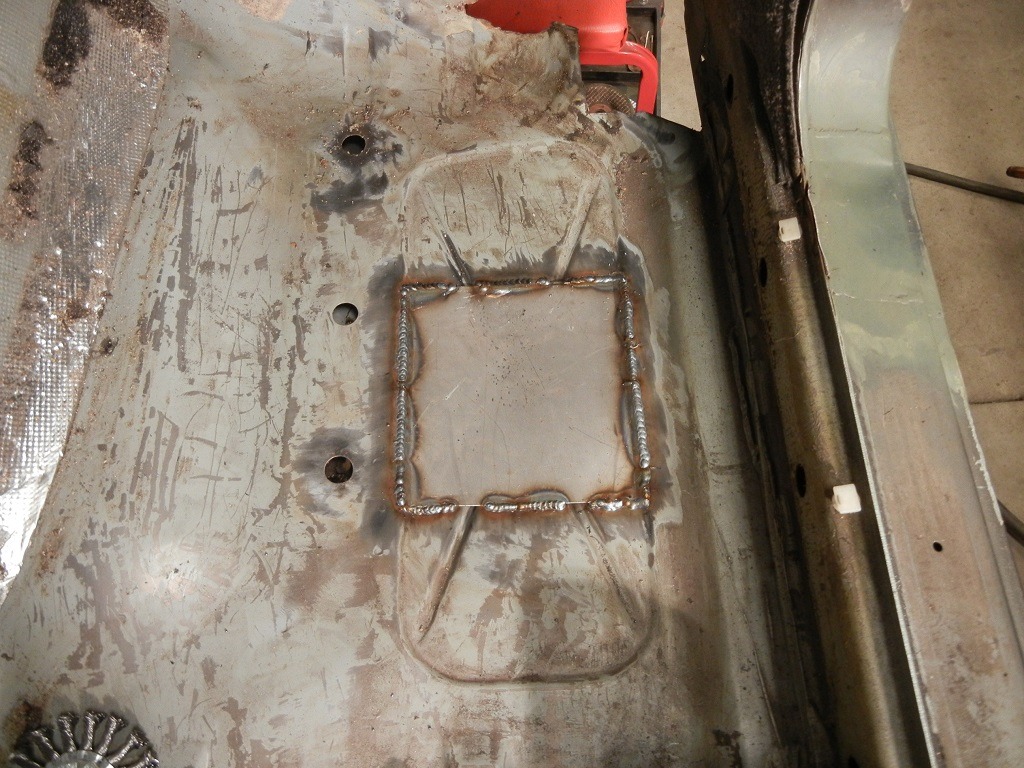
Cut a patch and glue it down...
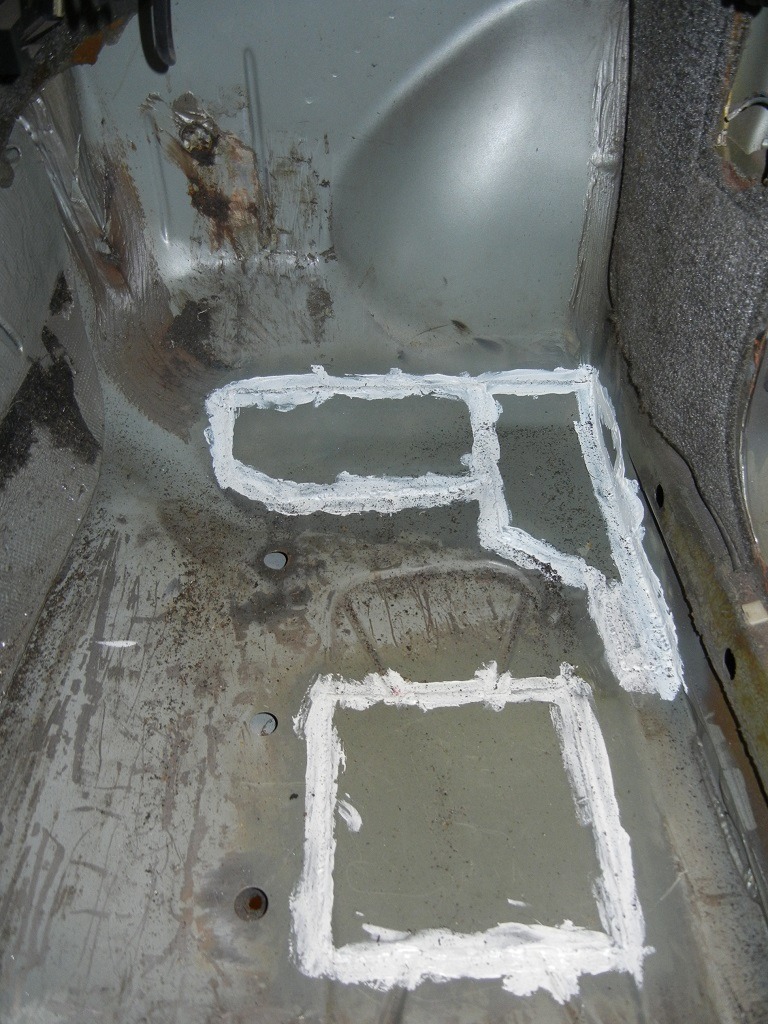
Prime it and seam seal it and then repeat for the other hole(s)...
And then repeat for the driver's side...
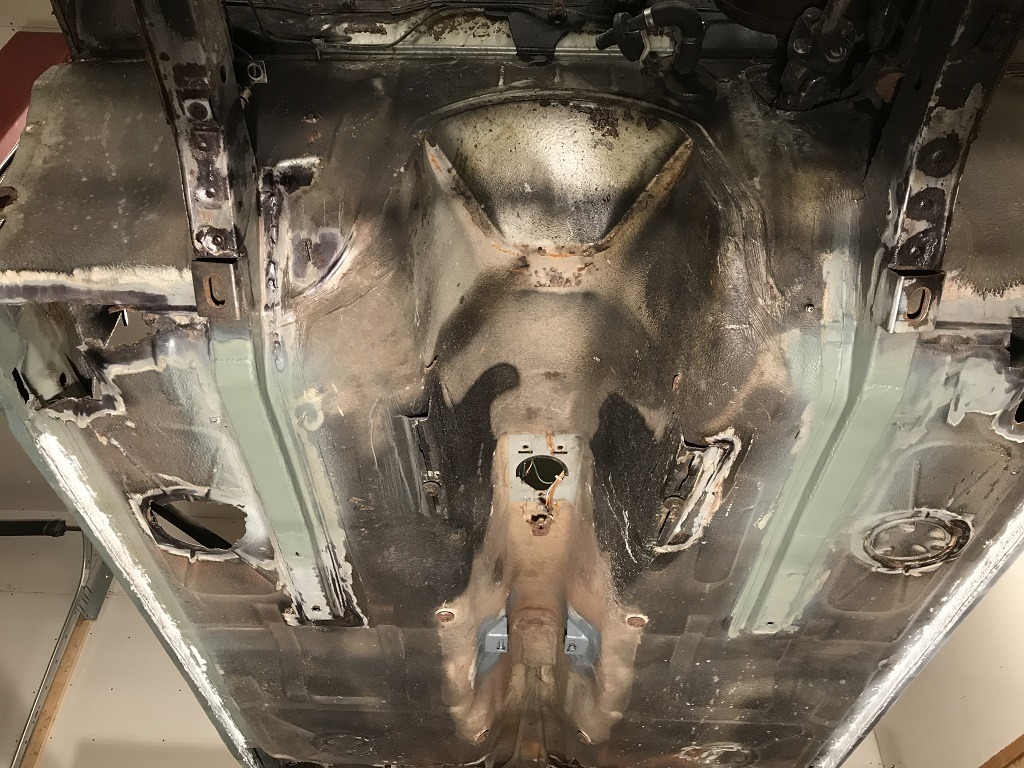
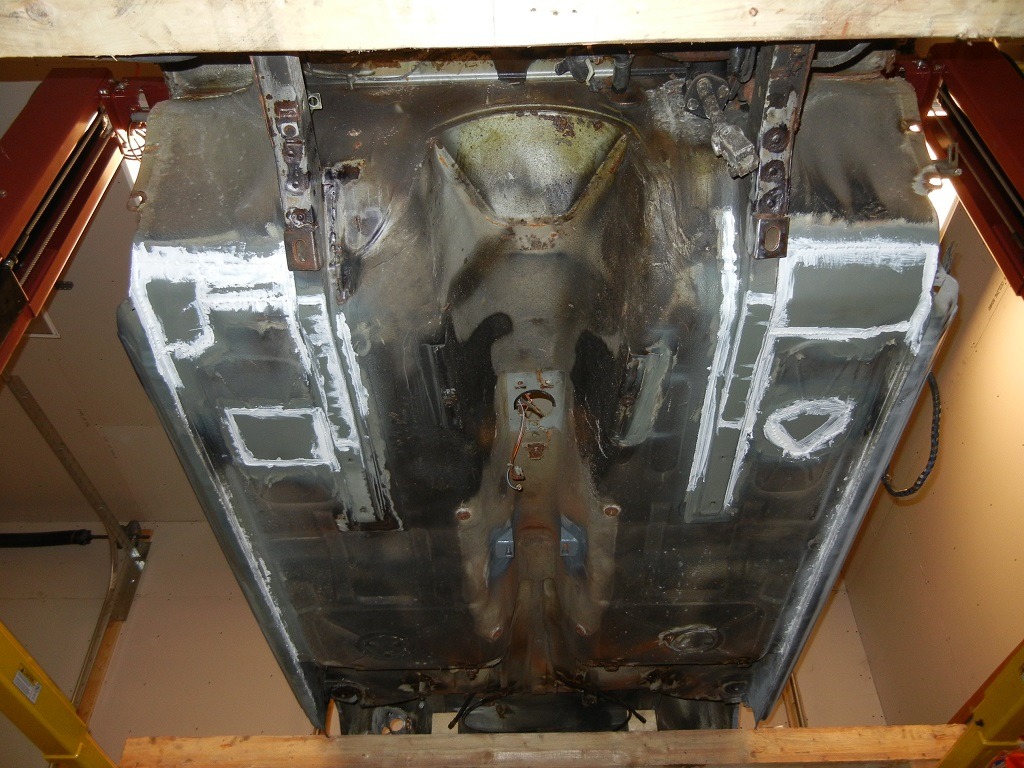
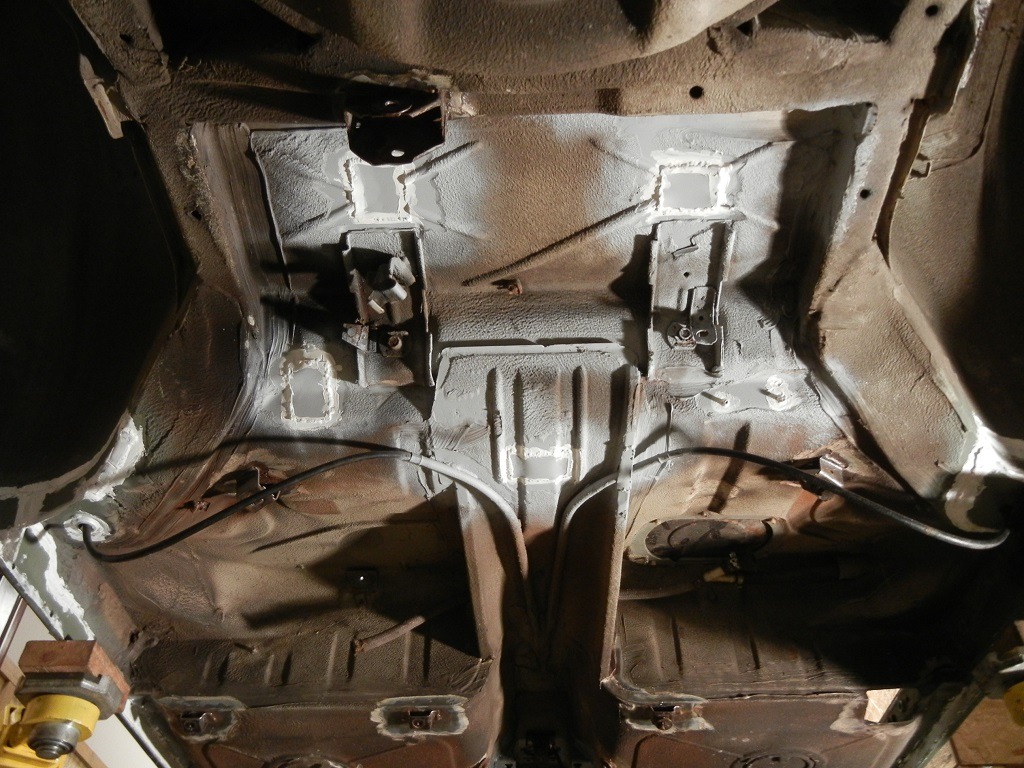
And then seam seal the pi$$ out of the underside...
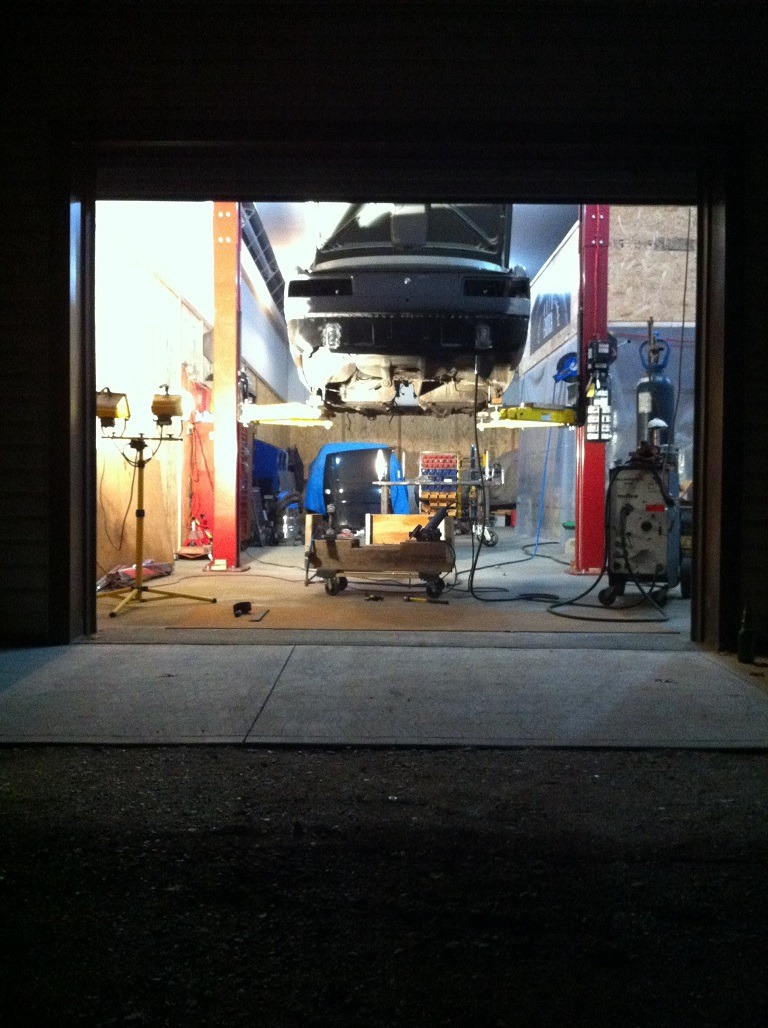
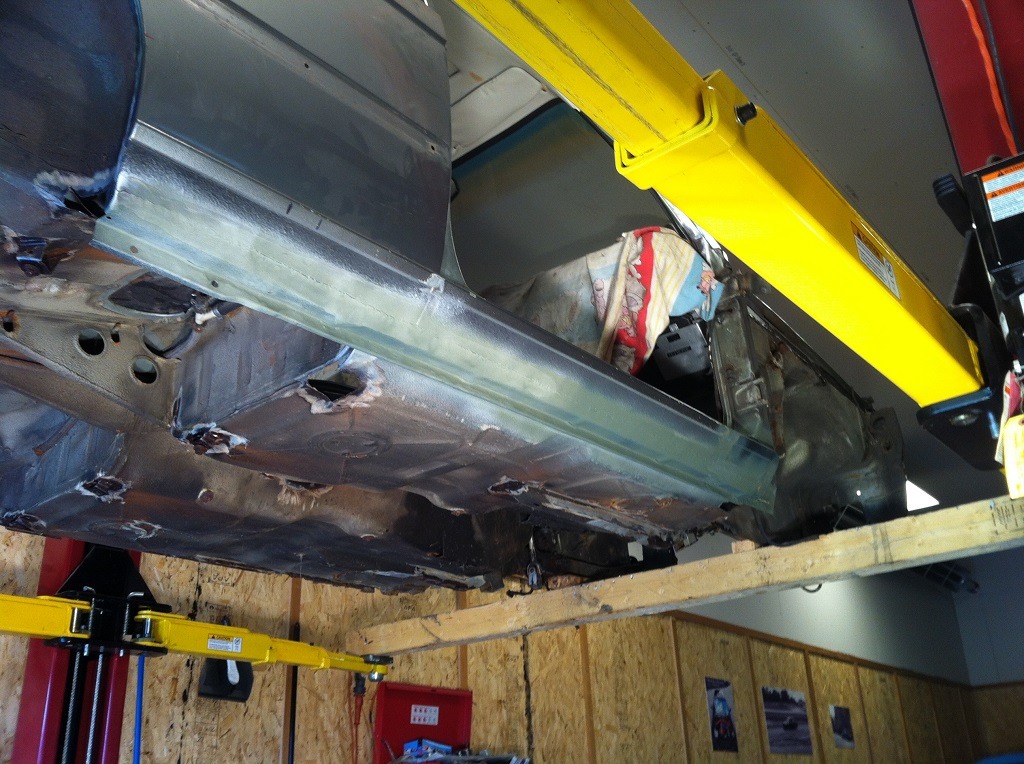
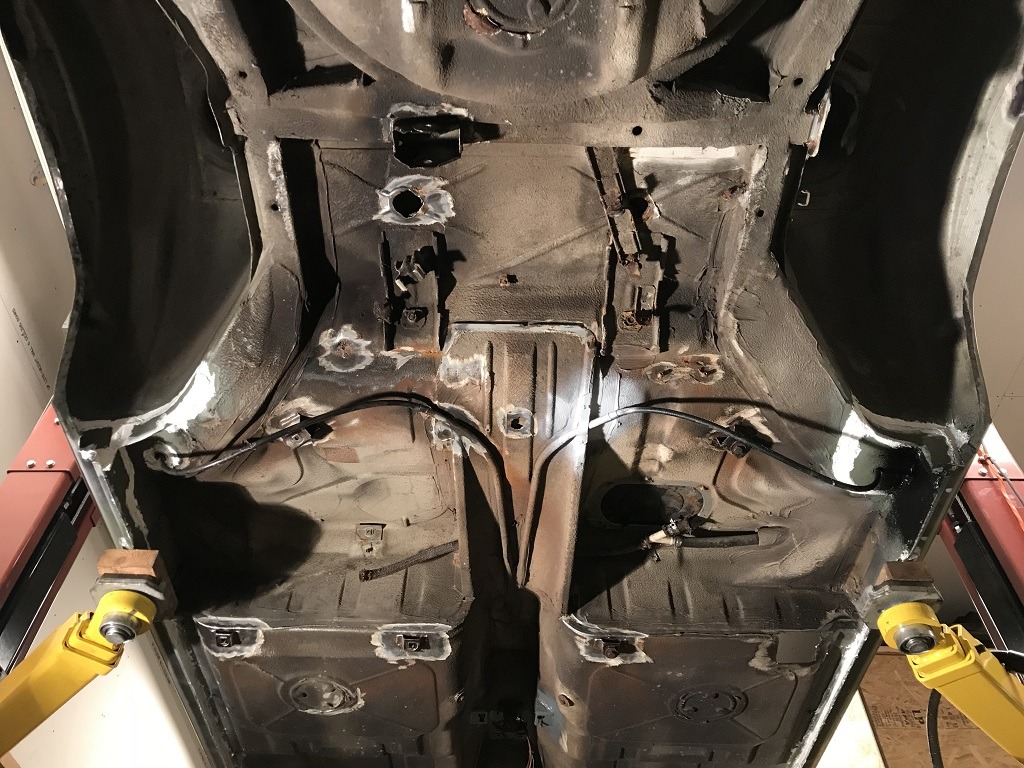
Now I can pick the body back up from the factory jack points, get the wood beams out of the way and start working on the engine bay
Cars in Perpetual Repair
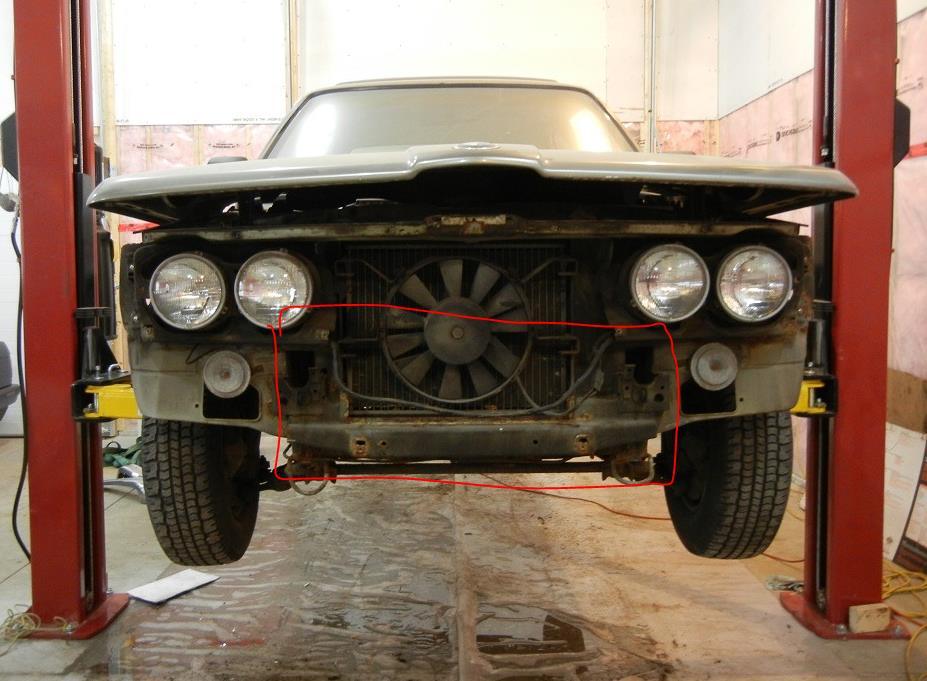
Anyone have a parts car with a clean front rad support they can cut out and ship me?
This area basically... it's in pretty rough shape on my car.
I know W&N sells a patch pannel, just figured I might be able to get one from a parts car that would otherwise be going to get shredded.
Member
"Horse pubes." That's the funniest shit, right there!
Sent from my iPad using Tapatalk
Eric P.
Member
Hey Steve, yeah, I've got that. Email me at allanhesch@gmail.com instead of through the bimmerforums system and we'll get the details taken care of. Allan.
Sent from my Moto G (4) using Tapatalk
Cars in Perpetual Repair
Some progress to update...
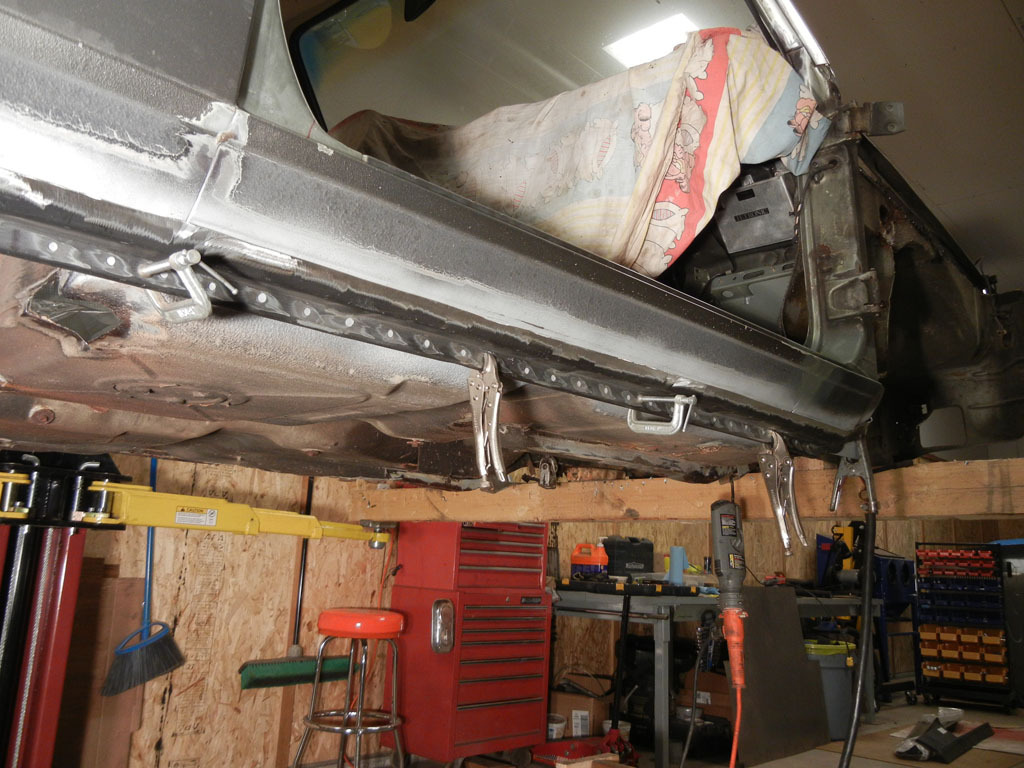
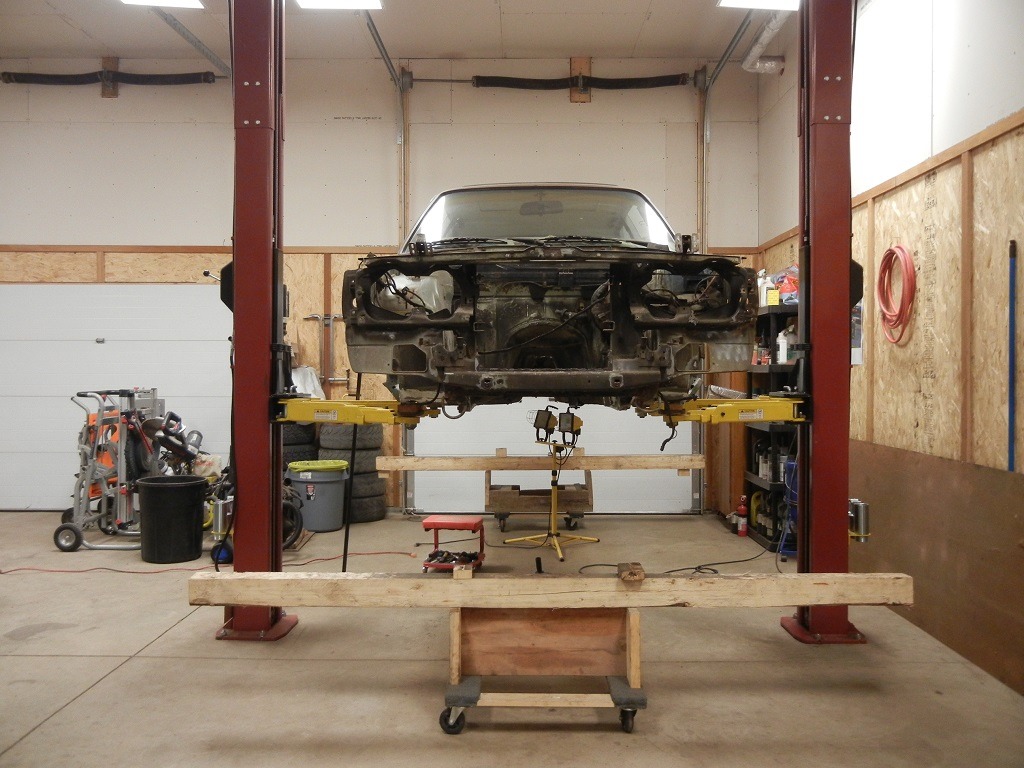
I crossed my fingers and picked the car back up by the factory jack points...
I wanted to get the beams out of the way so that I could start on the engine bay, and because there were a few more things left to patch out back.
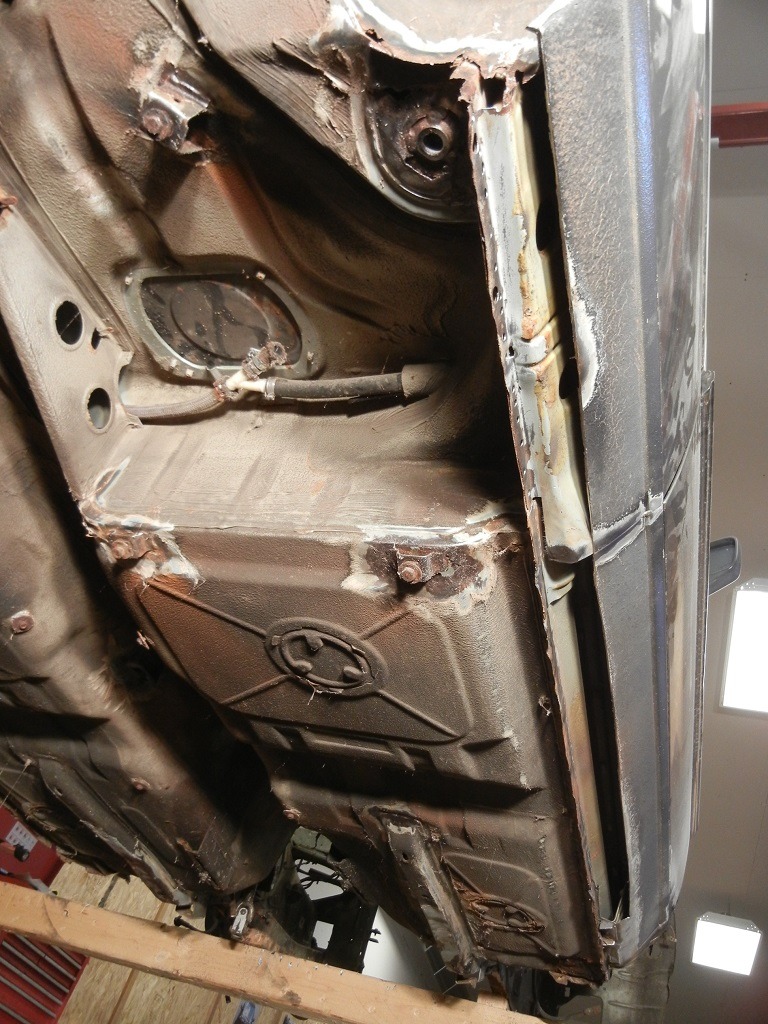
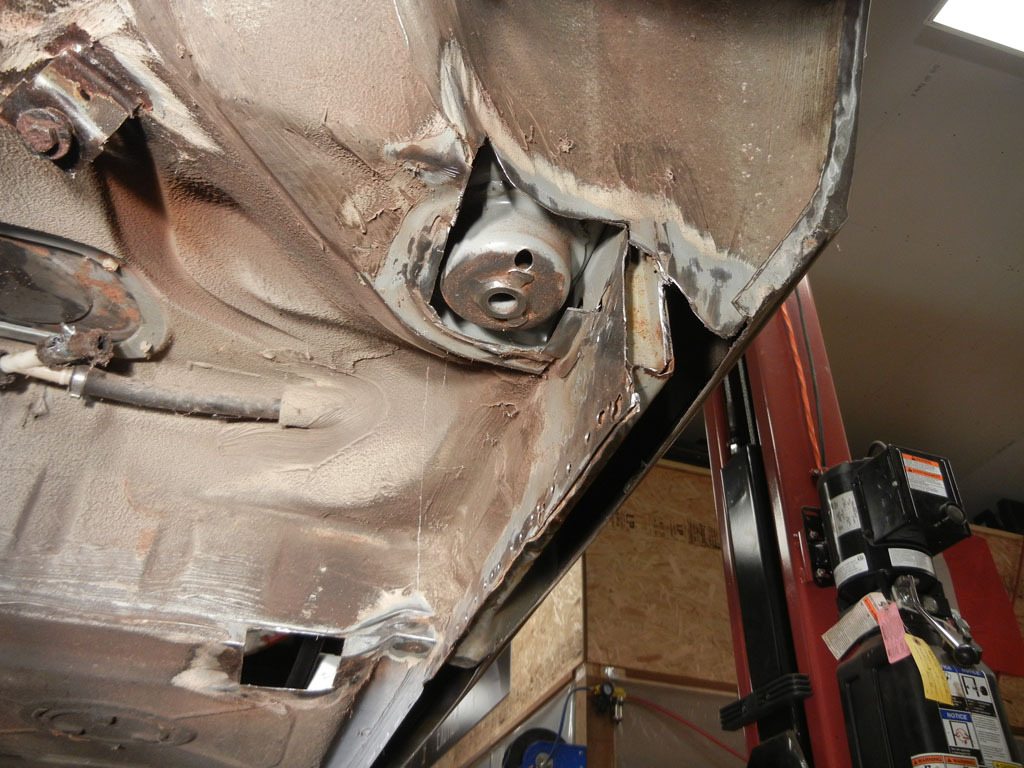
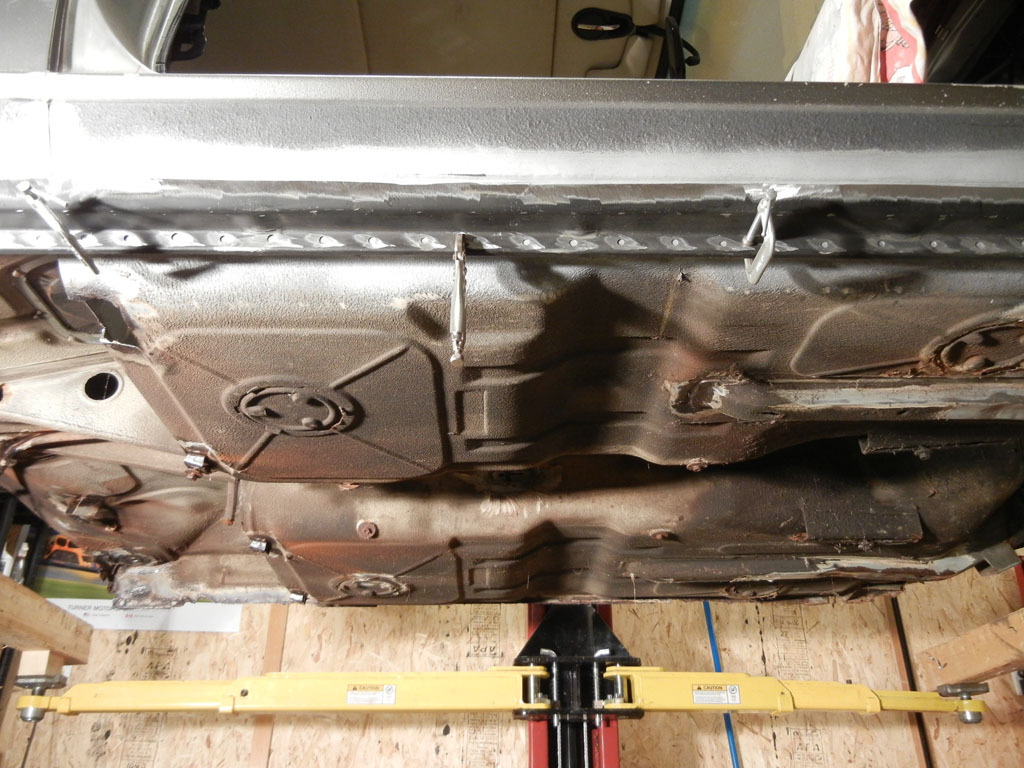
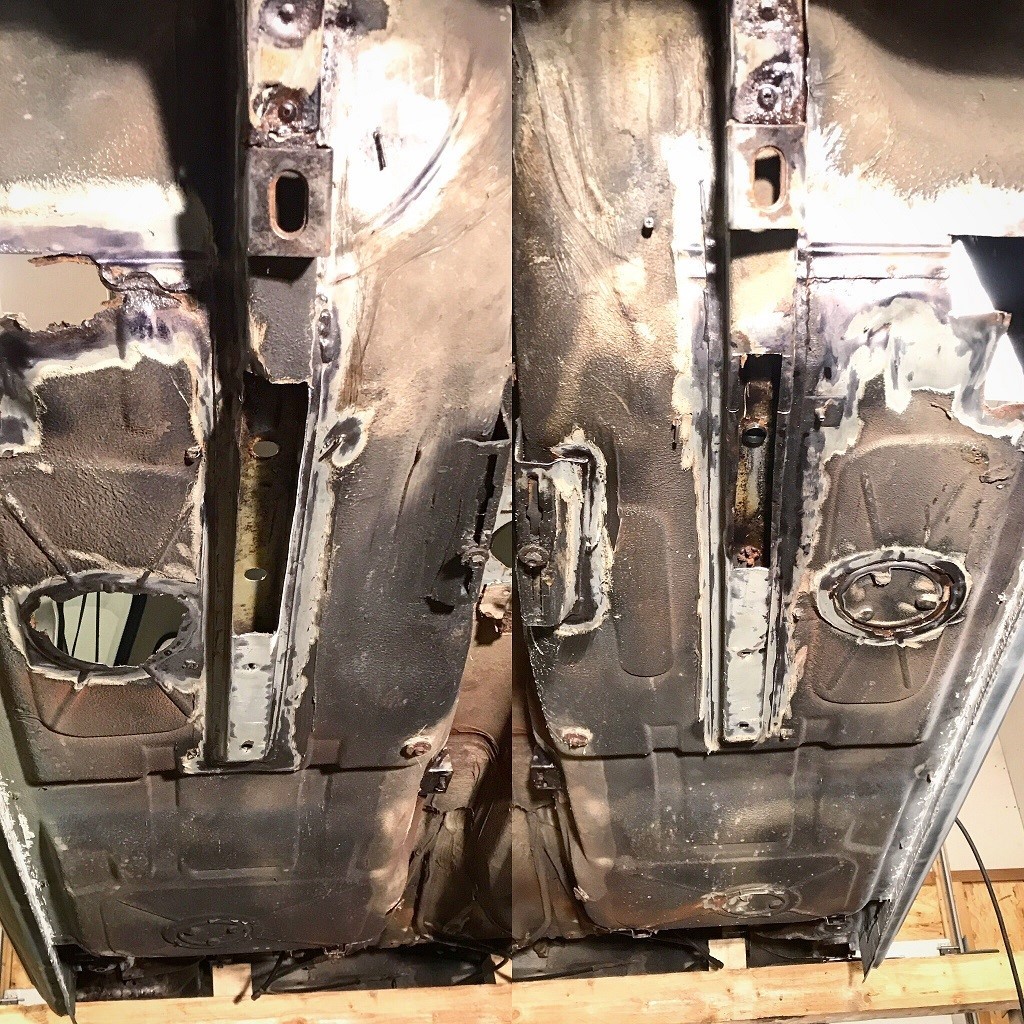
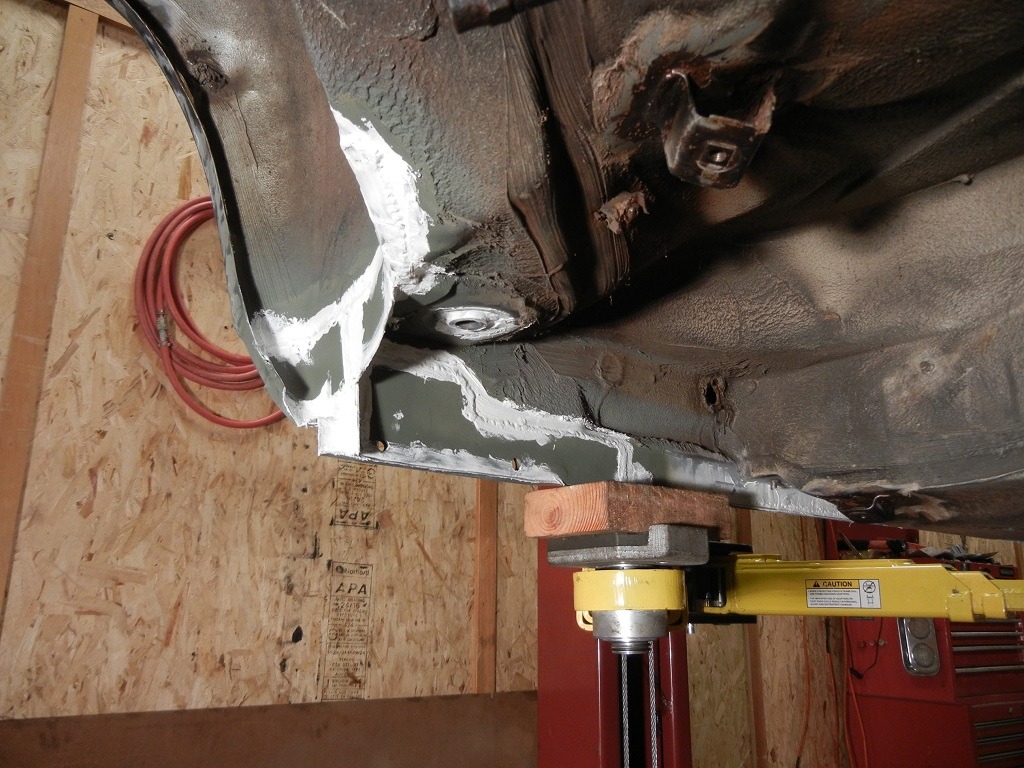
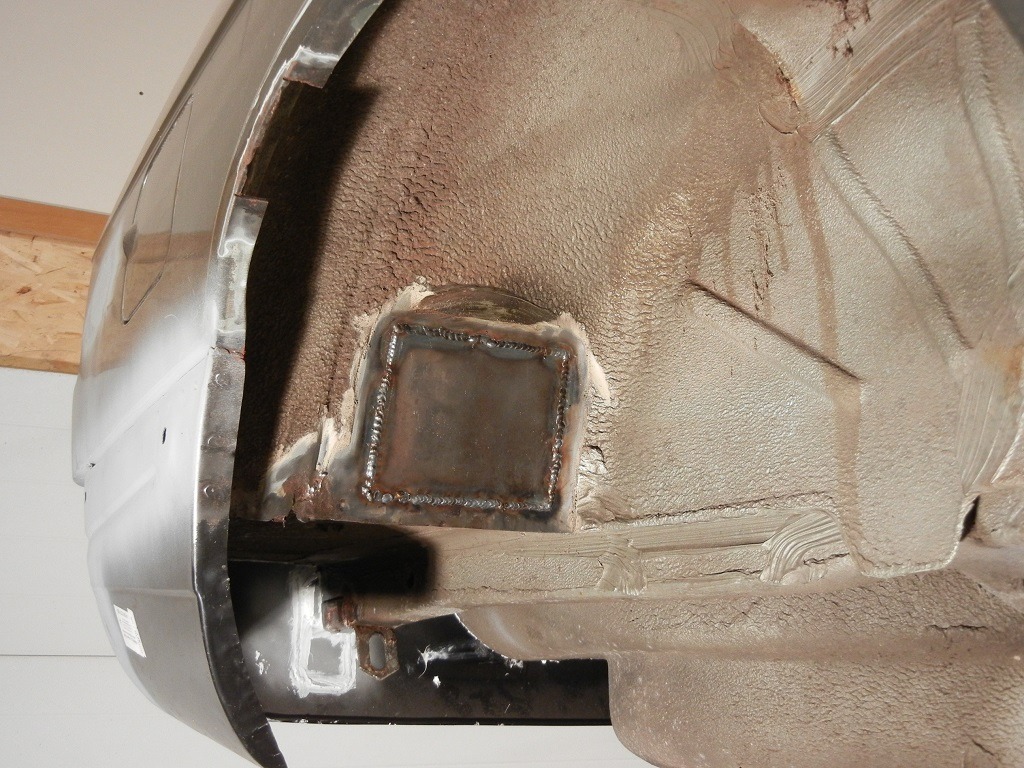
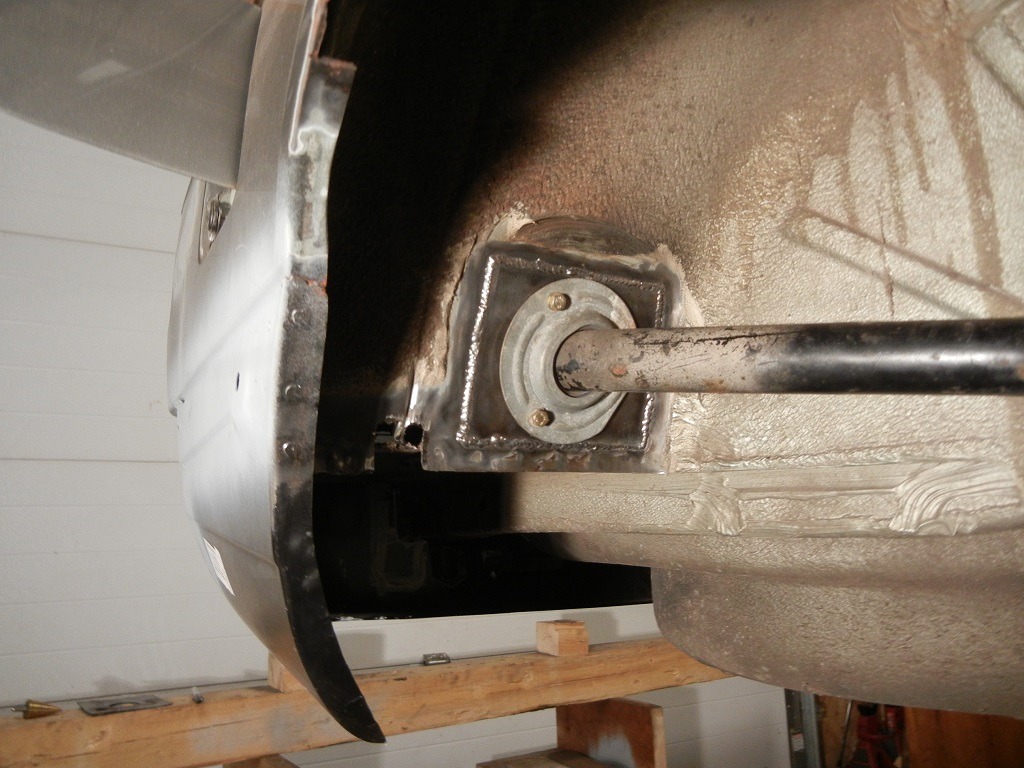
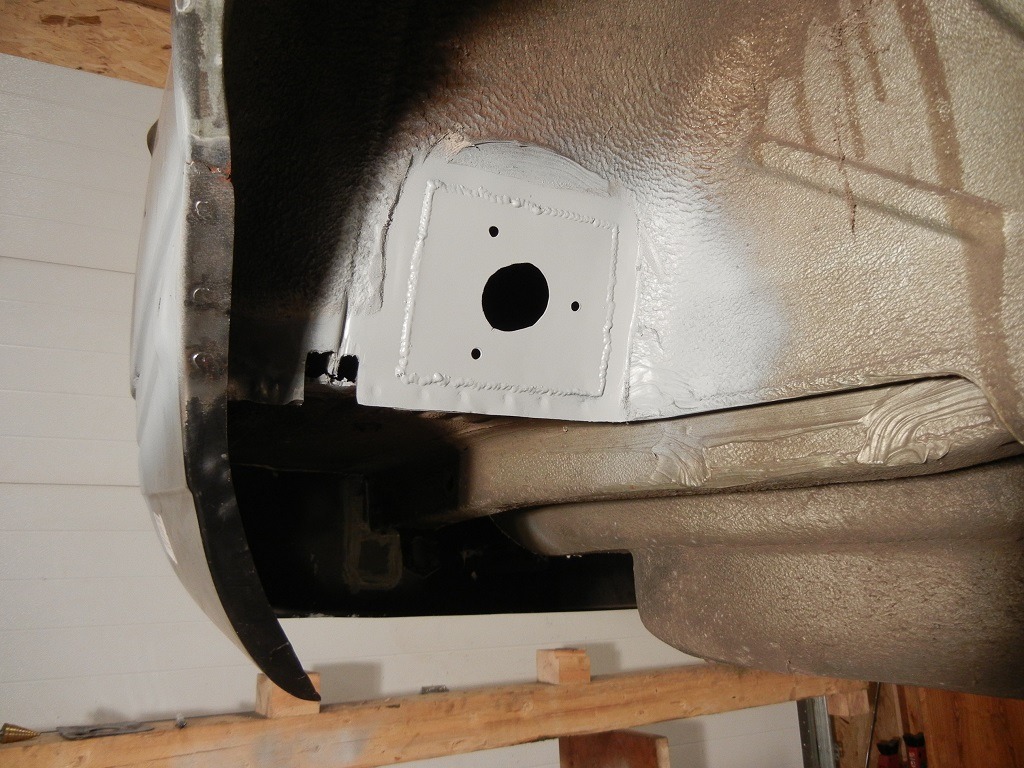
Subframe mount patches along with some minor wheel well patches...
Some more wire wheeling and searching for holes...
Holes patched, and fuel pump brackets cut off because I'm going to install an E30 in tank fuel pump and an in-line E30 fuel filter...
Then attention was turned to the fuel filler neck...
Abra-kadabra....
Used the section cut out to transfer hole pattern and used a stepped drill and die grinder to open up the hole. Quick test fit...
PrimeTFO of it...
Stay tuned. Progress is slow but steady.
Member
This is interesting. I look forward to see how this swap works out, should work based on the dimensions but I never made it past that stage. Was not sure how I wanted to modify the supply hose from the pump to the hard supply line and decided to stay stock.
MJ
Cars in Perpetual Repair
Didn't have any luck finding a clean used one, ended up ordering the piece of W&N. Will have to wait a couple weeks for it to arrive now.
 Posting Permissions


 Reply With Quote


Bookmarks