
 Member
I used the engine mounts from E36V8 in my swap and have had issues with them from day 1. They never really fit the chassis that well. I had to cut and reweld the driver's side mount because the angle was wrong and it wouldn't sit flat on the poly mount. I also had to buzz a little material off the sides because they were rubbing the frame rail.The car has maybe 5000 miles on the swap and the mounts are bent. Specifically, the piece of channel used to bolt to the engine has started to bend. One day I noticed that the oil pan was touching the rack - whoops.
I am building new mounts now and thought I would post this for anyone who's interested.
CJ's Pony Parts sells adjustable engine mounts designed for a 302. I am using these as the basis of the project. http://www.cjponyparts.com/total-con...1970/p/MMFD04/
The passenger side was pretty simple. I have a plate cut out that I will weld the "ears" of the CJPP kit to. I may box the top in. You can see in the picture that this puts the engine mount more directly in line with the frame mounting point.
I am using the E30 poly mounts now. It should be mentioned that my car has the E36 front subframe reinforcement kit installed, as well as an additional piece of metal welded to the top of the subframe. i don't remember if the additional metal was part of the kit or something I came up with, I doubt it was part of the kit since it would raise the installed engine height slightly. The hood looks like it will clear with a little sledge massaging.
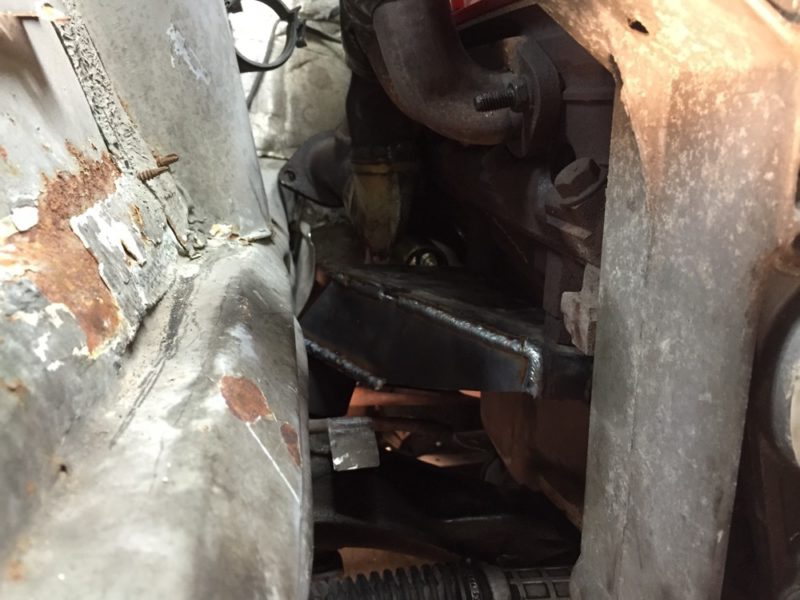
The driver's side is going to be a little more interesting since the steering shaft is in the way.
I'm not a pro and I've never built engine mounts before so if anybody has any (useful) feedback I'd be interested to hear it
How have you guys with a bunch of street miles on your swaps dealt with this?
IMG_4135.JPG
IMG_4141.JPG
Member
My dad fabricated my mounts since I saw that people were having issues with the e36v8 mounts. I couldn't justify spending the money on something that I would have to modify, when I can just ask to get them made.
Had I known about the cjpp kit, I probably would've looked into it too see if I could use it.
At first they were designed to work with the e30 mounts, but the engine weight would sink them. So now I'm running stock e36 rubber.
Gussets were added to the bottom for more reinforcement.
I'll try to get better pictures later on today.
Edit: I have the stock 94/95 gt intake so it sits a little lower. I actually have about 1" to 1.5" clearance between the intake and hood
Last edited by ponchiz318; 02-28-2017 at 01:50 PM.
Member
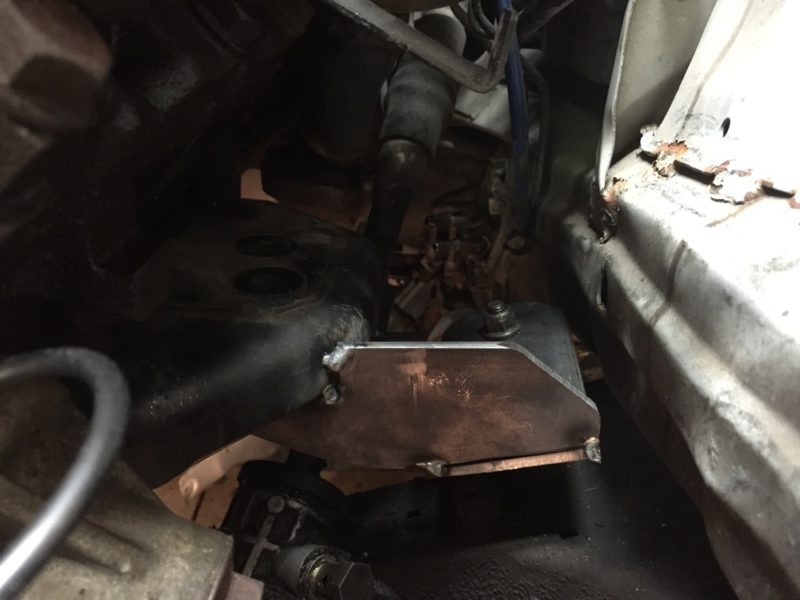
here's what I did.
1.5" DOM tube.
M.O.R.E. Bomb Proof engine mounts (off-road parts) # CB700
https://www.mountainoffroad.com/cata.../?q=cb700&cat=
I added an "extension" on the subframe, so have two bolts holding my mount to the subframe.
obviously very solid, and not much isolation............
ps - this is on an LS3 into a Z4
Member
interesting.. how are you going to fit a steering shaft in there? add some additional u joints?
Member
ah....
you are perceptive.
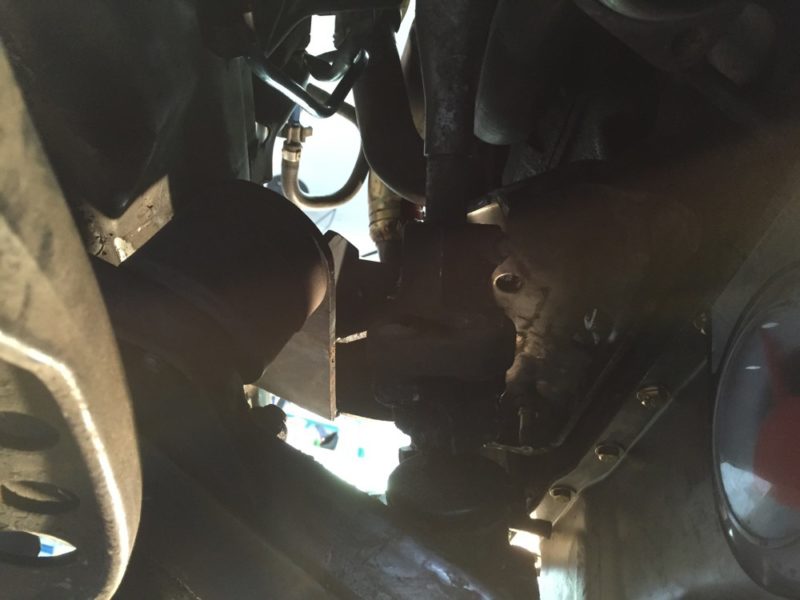
here is what I did:
it drives fine - I do not notice any additional play.
Member
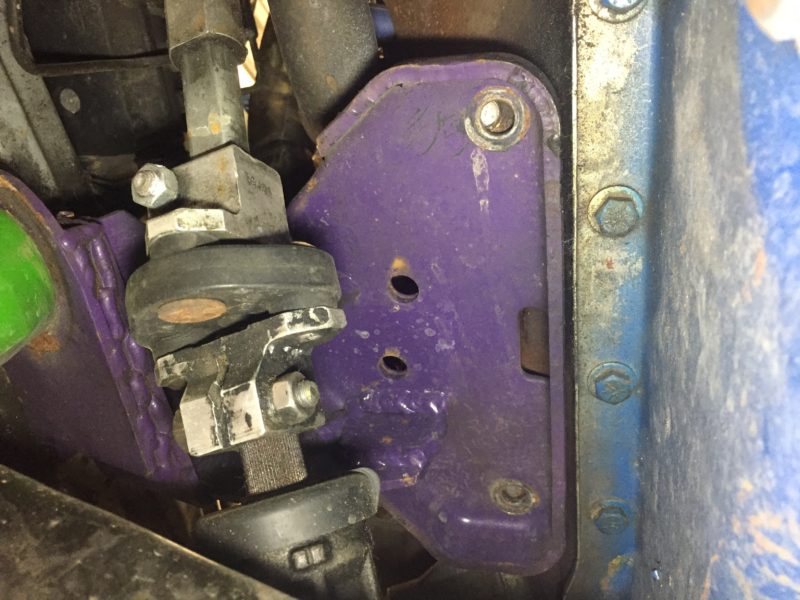
nicely done. where did you put your abs pump?
Member
I made a bracket and moved it outboard about 3 inches, then added some DEI heat mat (that stuff works great!).
(you can see the offset by where the new bolt head compares to the original)
the front brake hard lines could be kept and rebent to reach.
the rears I had to totally redo to route around the LS3 CATs (as well as fuel line and battery cable)
(and yes, they are slightly exposed at the back of the wheel well, but they are behind the plastic fender line and well clear of any tire radius.
I will eventually put a sheet metal cover over then as well.)
Member
Getting there...My first design sucked, this one is turning out better.
IMG_4212.JPGIMG_4213.JPGIMG_4214.JPGIMG_4215.JPG
Member
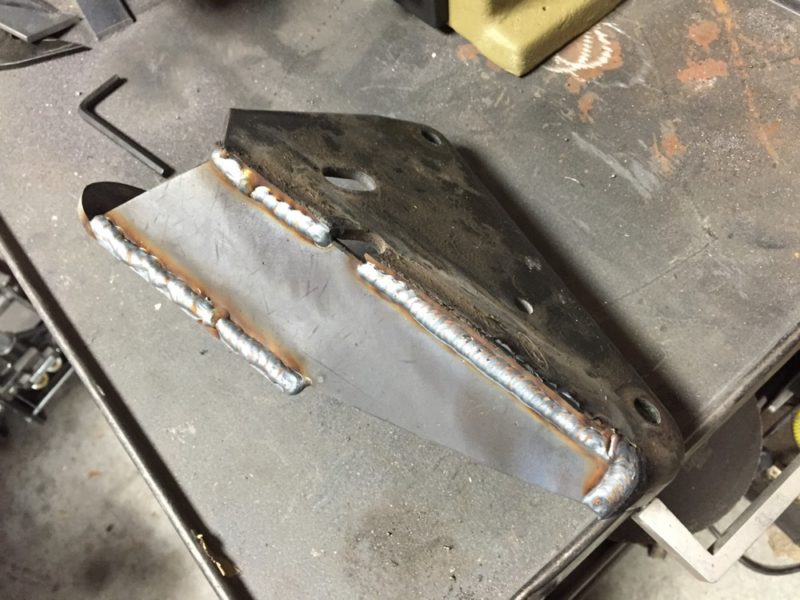
This is what my buddy made for engine side mounts for his 351 that he was planning to run in a 49 Ford F1 (he has since ditched this idea to run a Coyote 5.0 instead). Obviously, the end application is very different, but the mount style is what I would go with if I was going to fab them myself. These use a poly bushing mounted horizontally, putting the bolt through them in double shear. You then would need to make the matching "fork" to hit the crossmember. Making mounts to work with stock style BMW mounts really doesn't make much sense to me, since they're single shear. Do you have any reinforcement on the inside of the box that you made?
Here's his engine side mounts:
He'd be willing to sell, by the way.
Instergrams: @davemakepictar
Member
My word, have people been shearing off the bolts in the single-shear orientation? That would be a very, very bad day.
Member
I chose not to reinforce the inside of the box. It's made out of 1/4" plate and welded all the way around, it should be plenty strong. I am going to add some pieces of angle iron in a couple of spots to keep the bottom plate from deflecting, between the distance from the bolt holes in the subframe and the location where the engine mount sits.
I do like those mounts above but I'm limited to simple shapes since my metal cutting tools are a bandsaw and a grinder, and I really hate grinding.
I am also thinking I will slide the engine forward maybe 0.5", this should give me plenty of clearance around the steering rack. Things are a little tight as they sit now.
Member
A lot of ideas out there. Some good, some not. Go simple and use the standard
M60 rubber isolators with something like this -- just an idea for you guys -- these
will not fit an E36 chassis.
E30-LS1 Swap Guide and Kits, email us at e30ls1@gmail.com !!! or check our website e30ls1.wordpress.com
Member
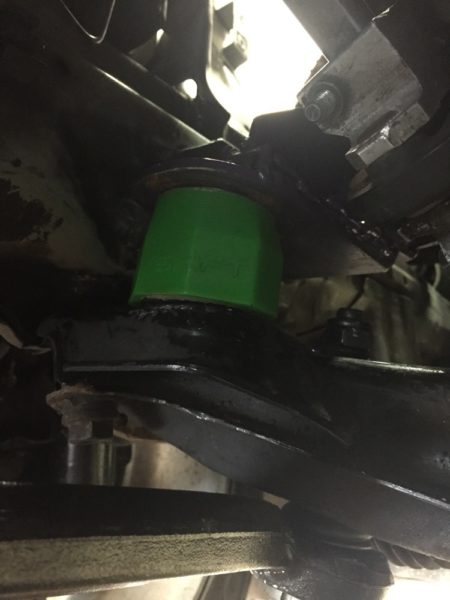
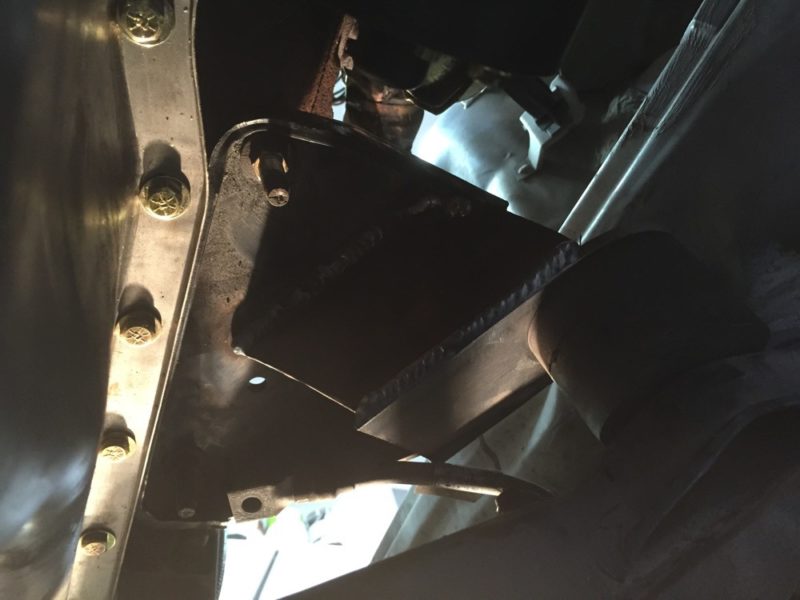
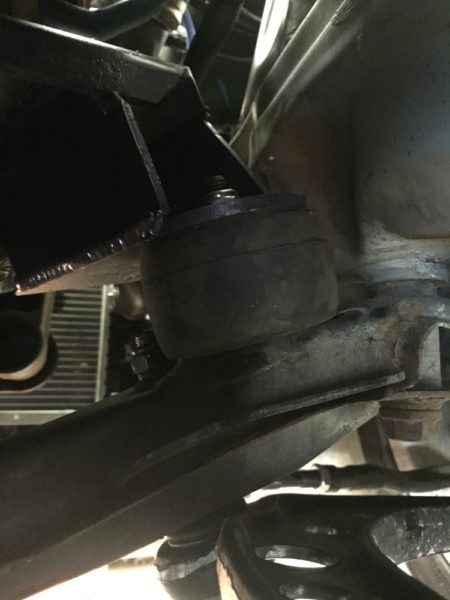
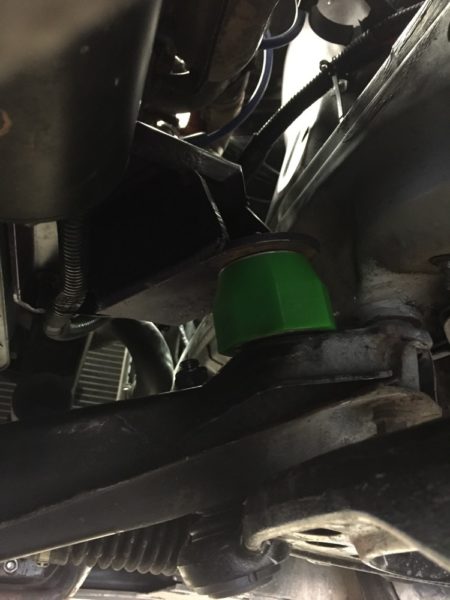
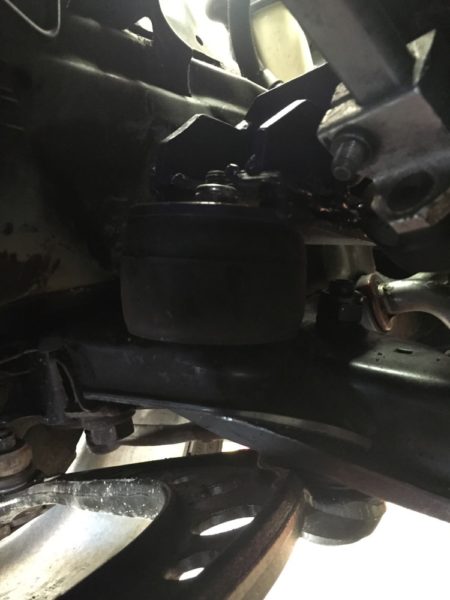
I started with the stock Explorer mounts and connected them to E30 engine mounts. Like ponchiz, I found the rubber E30 mounts sunk bad, so I got some poly E30 mounts from RevShift.
Driver's side:
From underneath, you can see how it goes over the steering shaft:
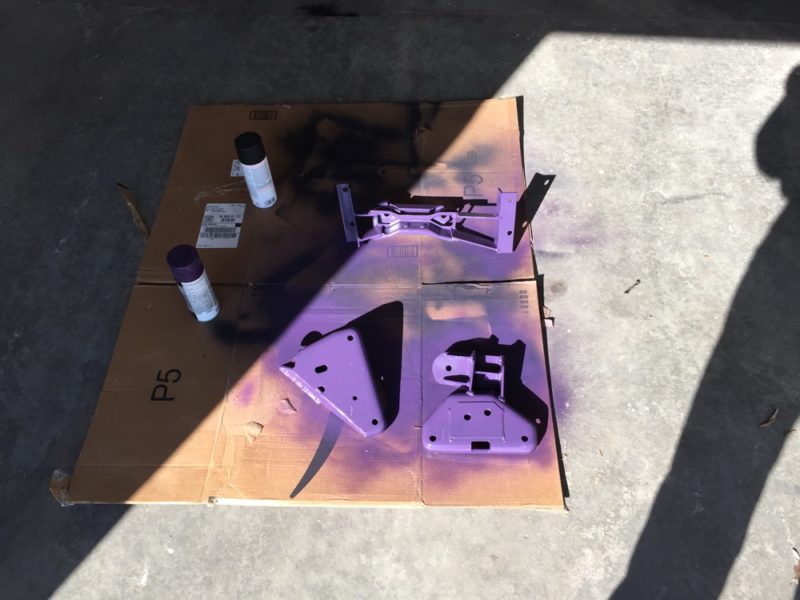
Passenger side:
Front underneath, looking toward the front of the car:
Painted:
Before and after the poly mounts, passenger side:
Driver's side:
Last edited by Laminar; 03-29-2017 at 10:56 PM.
Member
good stuff fellas, thanks!
Pushrods? What?
What I just did this last weekend was pull both engine mounts out and modified them by adding 1/8" mild steel flat bar at the ends where the bolts go through
to the block. I hacksawed some triangular pieces for the sides and rectangular plates to close the wider "bottom" sides. I beveled the edges and welded them to recreate
the rectangular shape of the tube used in the original mount. I made some crush tubes out of 3/4" x 0.120 wall 1020 DOM tubing I had left over from another
project and tack welded them in where the engine mount bolts go through. Lastly, I reused the 1/8" mild steel shims (4 per side) I made the last go-round
trying to raise the oilpan off the steering rack. The little bit I've been driving after the mods is encouraging, the engine isn't twisting over and interfering
with the steering shaft or pressing down on the steering rack. Time will tell if my changes are good enough or not.
PS: I had to repair fatigue cracking on the passenger side mount and extract one broken bolt from the block on the drivers' side. Lotsa fun.
1993 BMW e36 318is with a (mostly) completed SBF 5.0/T5 swap
TFS Street Heat heads (TFS 170 tw) with upgraded dual valve spring kit
TFS Street Heat Intake w/70mm TB and EGR delete spacer (fits under hood)
TFS Stage 1 camshaft
MS2-Extra controlling fuel and spark
It goes...ok. :-)
Member
I've broken several engine mount bolts on the driver's side. Inspecting engine mount bolts is now part of my pre-autocross inspection and happens monthly. The last two bolts that snapped were grade 8 bolts. I don't use Loctite when installing the bolts (to make them easier to extract when they break...), but perhaps they're backing out and then snapping when they get loose and the mount can lever against them?Originally Posted by MvnTgt

Fortunately I was able to weld a nut to the end of each bolt and back them out without any trouble.
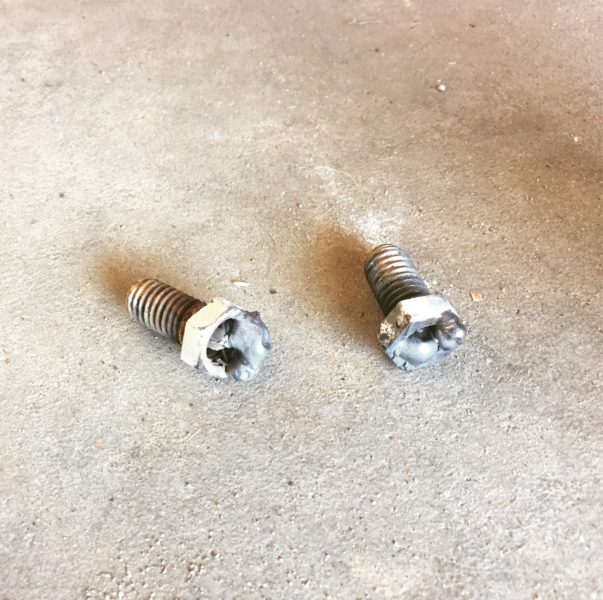
Pushrods? What?
Yep, the bolt that broke was a Grade 8 as well. I found the broken off head laying on top of the steering rack when I was fumbling around trying to extract the rest of it. How very considerate of the bolt. Single shear loading makes bolts unhappy.
A visual of what I was midway in the process of doing to the drivers' side mount.
Last edited by MvnTgt; 08-23-2017 at 05:52 PM.
1993 BMW e36 318is with a (mostly) completed SBF 5.0/T5 swap
TFS Street Heat heads (TFS 170 tw) with upgraded dual valve spring kit
TFS Street Heat Intake w/70mm TB and EGR delete spacer (fits under hood)
TFS Stage 1 camshaft
MS2-Extra controlling fuel and spark
It goes...ok. :-)
Member
I broke the exact same bolts last winter on the drivers side. it was the biggest pain to weld a nut on to get them out with the engine in the car. I have broken the bolt that goes thru my poly mount on the drivers side 3 times and lost 2 poly mountsI now run a rear sub frame bushing that I cut down to the right height. Hard launches or burnouts is when I have had them fail. I am going to get an ARP bolt or I need to figure out how to add a second mounting point on the sub frame when I add my supercharger.
Pushrods? What?
It's sounding like a mount redesign may be necessary. Something that puts the loads more in tension/compression. The arms are too long and mounting tabs too far away
Last edited by MvnTgt; 08-24-2017 at 04:22 PM.
1993 BMW e36 318is with a (mostly) completed SBF 5.0/T5 swap
TFS Street Heat heads (TFS 170 tw) with upgraded dual valve spring kit
TFS Street Heat Intake w/70mm TB and EGR delete spacer (fits under hood)
TFS Stage 1 camshaft
MS2-Extra controlling fuel and spark
It goes...ok. :-)
 Posting Permissions


 Reply With Quote


Bookmarks