
 Member
Today's job was to refit the rear door cards and the rear seats as part of a winter project I am doing
I seem to have a problem with the fold down seat backs though.
Try as I might I can't get them to click into the pin that holds them tight against the rear firewall.
They just won't line up ???
They are nicely slotted in to the hinges but seem to be a bit out at the locking pin area ?
Any ideas??
meeknet.co.uk
Try harder - they are very difficult to re-engage, but they will go back in if you really give it a bit of effort!
Timm..2007 E64 650i Individual Sport..1999 E31 840ci Individual Sport..ex owner of 2000 E38 740..1999 E38 740i V8 M62..1998 E38 735i V8..1993 E32 730i V8..1988 E28 518i
My BMW Repair YouTube Channel
My Current 840ci Sport Individual
My Current 650ci Sport Individual
My E31 Repair and Information Website
My E38 Repair and Information Website
My E63/E64 Repair and Information Website
Chase - Heroes to a generation
Member
BMW CCA Member
Like the two tone leather, by the way!
Mark in mid-MO
1993 BMW 850Ci 6-speed
2011 Cadi CTS coupe 6-speed
Member
Try pushing the release handles back in as far as they go before slamming them back.
Member
Thanks for the replies guys.
Im pretty certain the seat backs are fully engaged. Push down with the seat in a 45 degree angle then twist to engage under the little sort of tab.
I think as Timm says, maybe i need to give, it a bit more of a whack.
Every time I give something a thwack it usually involves something plastic breaking or disintegrating and a $$$$$ bill for some little peice of plastic.
Member
Those are very tricky to get back into position. They do require a lot of force.
Member
Thanks.Originally Posted by ByMW

The UK/EU Csi seemed to get the nice deal on the interior spec.
This is what I've been working on,refreshing the interior. Over the last six months the car has been slowly transformed.
Drivers seat was in need of some TLC
BEFORE
AFTER
IF ONLY THE FRONT SEATS WERE AS WELL PRESERVED AS THESE

Driver
Nice progress
INSTAGRAM: jellismotorwerks
Member
Your title of this thread -- "Today's Problem" - totally cracks me up. It's so spot-on with these cars :-)
Member
I breathed on the the wing mirror and this is the result.
%5BURL=http://s1201.photobucket.com/user/hedley2/media/IMG_0021.jpg.html%5D%5BIMG%5Dhttp://i1201.photobucket.com/albums/bb359/hedley2/IMG_0021.jpg%5B/IMG%5D%5B/URL%5D
I can take the door cards off and take a look behind ,but how does the mirror bit attach to the mounting bracket?
Is it fixable without taking the bracket off?
it looks like the mirror sort of plugs into the bracket,but I don't want to apply too much force in case I break sime peice of unobtainium peice of BMW quality plastic.
Any pointers chaps. ?
Last edited by hmg66; 03-12-2017 at 05:26 PM.
Member
It should just push back in. The mirror is connected to the base using ball type plugs which you can see in the pic. Push it back in and you should feel it clipping on to the base
Sent from my SM-G928F using Tapatalk
Member
Ultimate Machine Driver
Give it a hit with the palm of your hand, Just over the pin in the picture, It will pop in place, Trust me, It's a good reason they come off when they do!
Member
Thanks,I'll give it a go tomorrow.
I was really surprised how easily it popped off. I just tapped it ever so lightly as I was pulling out of the garage.
Member
very nice
1991 BMW 850i
1984 Porsche 928S
Member
A bit of Vaseline did the trick. Just git to be careful lining up the three sockets and it pops back in with some firm pressure. All is well again
Member
The weather has warmed up in the UK and spring has sprung this week.
Some more progress on the car
Surprisingly no problems to report.
All that cosmoline does eventually come off. :thumbsup
Before
y
During
a
After
a
Plenty of time,elbow grease, some nylon and brass wire brushes and engine cleaner to remove years of grime.
Last edited by hmg66; 03-15-2017 at 06:28 PM.
Member
Very nice, hmg66. I wish mine could get the same shine, especially the studs, how did you do that? And the plastic parts, the black is very nice.
Member
The metal work goes crusty and tarnished. It was cleaned up using a collection of wire and brass detailing brushes to remove any oxidation,coupled with some metal polish,time and elbow grease.
The plastics and rubber hoses were treated to some liquid silicon. Try and leave it to penetrate for a few days then wipe off the excess. I find it gives a nice semi gloss finish. Wipe it over once a month as it can attract dust and it comes up nice again.
Member
So the little washer bottle lid on the rear boot valance has no lid.
Ive got a replacement but it looks like the only way to remove and replace it is to take the rear valance/bumper off??
I can unscrew it a turn or two but it is attached to the tube that feeds the resevoir below so I can't get it out
On the plus side the car is cosmetically almost there now.
A bit more progress over the last couple of weekends
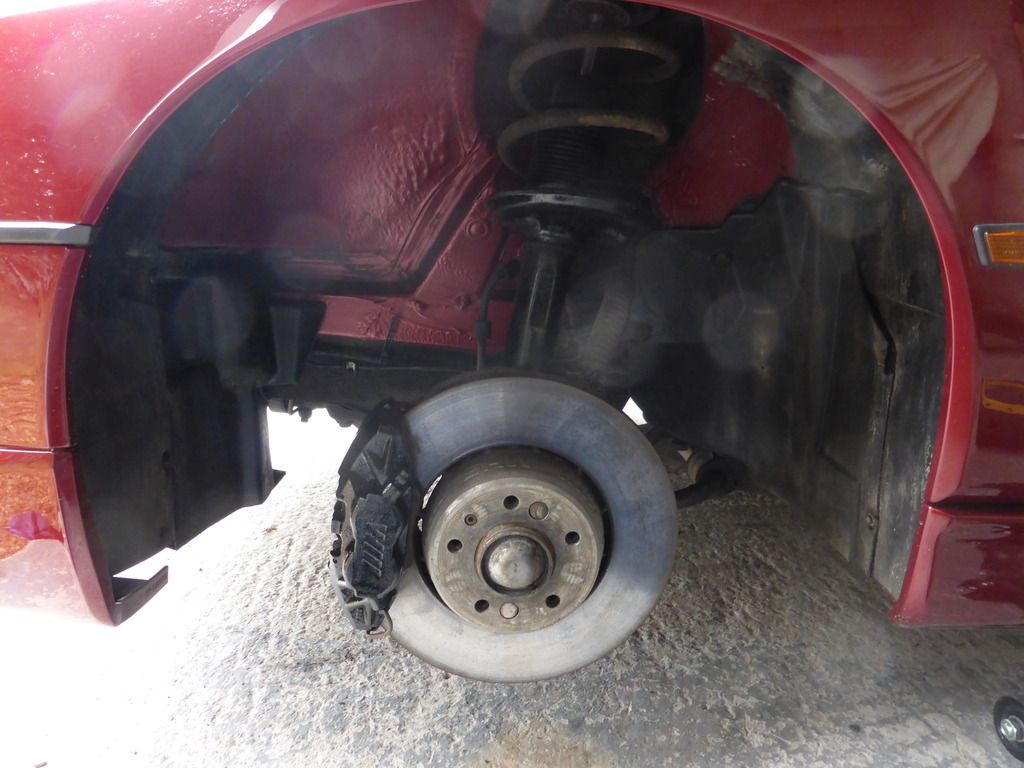
Cleaning up under the arches and tidying up the brake calipers a bit.
Before
After
]
Before
After
Last edited by hmg66; 04-17-2017 at 04:37 AM.
Member
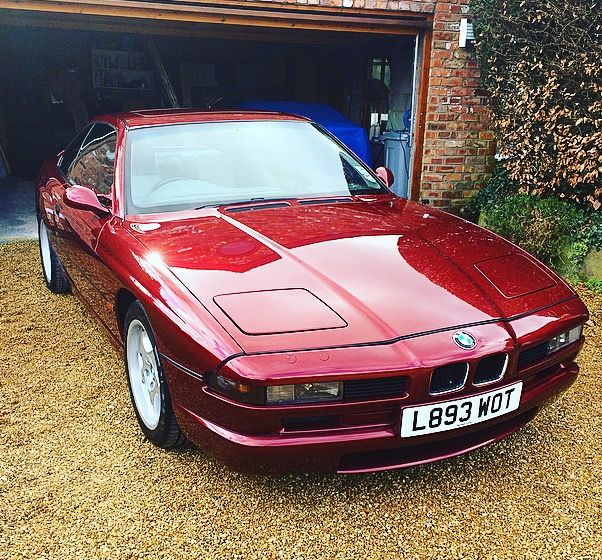
Fiited the newly refurbed TS to replace the nasty aftermarket 19" Alloys that she sat on before.
I can totally understand those that like to personalise their 8 but I like to get it as original as possible.
Before
After
I was pleased with the way they sat in the arch.
Last edited by hmg66; 04-17-2017 at 04:54 AM.
 Posting Permissions


 Reply With Quote


Bookmarks