
 Member
First off allow me to apologize for calling my headers longtubes because they are midlengths. Hope that does not confuse anyone who may happen on this thread and say "hey where'd you find longtubes?" Anyway...
It has rained its ass off here lately so my outdoor chores have been impossible. I also went ahead and hired people to do stuff that I normally do (power washing, gutter cleaning, etc). That has left some time to work on the car...
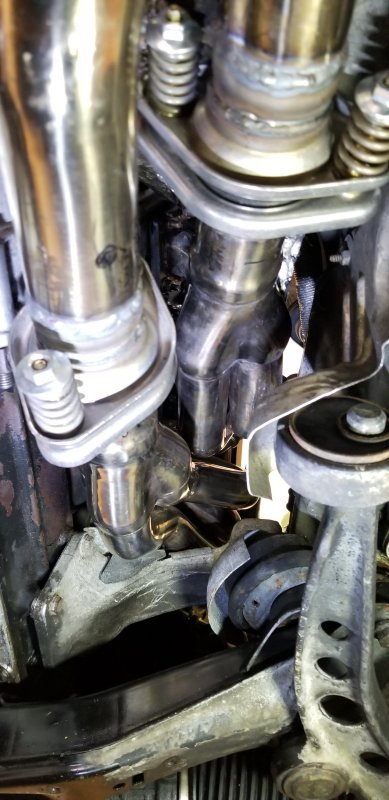
... Which means FINALLY finishing the damn headers. I had serious inertia on this project. In order to make the ball joints "fit" (the quotation marks will make sense later) I had to place them where I had the most room. Under the car there simply wasn't enough room so they had to be placed sort of up between the lower part of the engine block and the back of the front suspension. Even there it was tight but I made it work.
I cut the first header in a bandsaw, rotating it back and forth to make a nice straight cut, about an inch downstream from the collector. The second header I gave about 6 inches further before the cut in order to stagger the ball joints so they were not next to each other.
After I welded the ball joints onto the headers they got reinstalled, this time for good. This is the third time these headers have been on and off the car!
Test fits. Still tight in there. Have to use a box end wrench to tighten one screw, which is okay I think
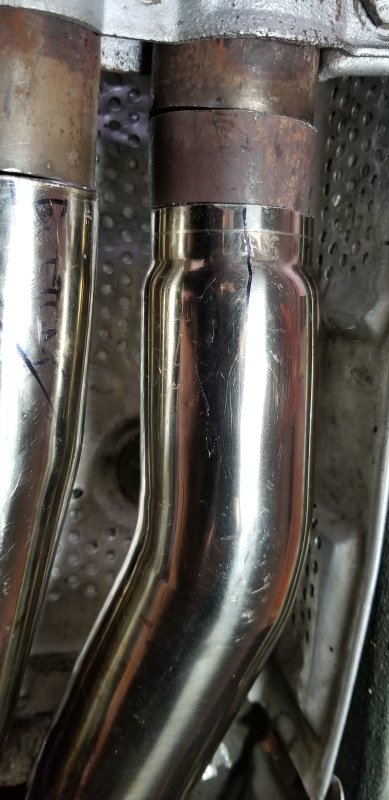
I saved the part I cut off after each collector and reused it to swoop down to the original exhaust section. I measured the "finished" length of the ball joints and removed that from the pipes that went down under the car. So far so good, everybody was nice and inline.
What made it interesting was I guess a miscalculation or bad cut or something that made the smaller of the two pipes way out of line with the rest of the exhaust. What a disaster. This literally took weeks of thinking, not sure why but it did. I was originally going to try to cut a crescent piece of pipe to perfectly splice in but if you have ever tried to cut pipe even a simple straight cut can be tough. After about the fourth bad "wedge" filler piece I just gave up and wondered what to do next, up to and including putting the stock exhaust back on! Very frustrated at that point.
Here you can see the alignment issue with one of the pieces I tried to make fit (it was way off on top; can't fill in that much with weld)
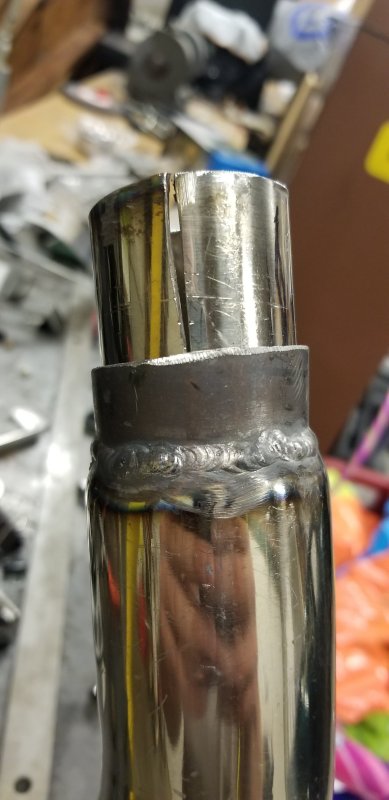
One night, struggling to figure out a way out of this jam, I was playing with a piece of scrap and realized all I had to do was make a slip fit insert that would compensate between the two out of alignment pipes. I slit a piece of pipe then pulled it in on itself with a chain clamp. It was the perfect diameter to slip into both exhaust pipes and act as an adapter. Because it slipped inside both pipes, the angle difference at the top (nearest to the underbody) wouldn't matter.
Slit but not yet welded
Boom. Done. No leaks and I have headers with OEM style serviceability. Nice. One person can easily install or remove it. Very nice. The ball joints will not clear the bolt in subframe brace. Not nice! Literally the last thing I thought about on this project because I didn't have it installed. Stupid. I think I can mod it to make it work but it seems silly to mod the subframe weldment just to make my dumb ass ball joints work. That's what it will have to be at this point.
I put the stock exhaust back on for now. Haven't taken the time to finish repairing the RSC36 stuff and make noise.
Other stuff:
I absolutely do not like the OEM style pads I got. Lost a lot of braking performance. Not as dusty but one of the fun things about this car was scrubbing off speed with just a tap of the pedal. Now I have to plan further ahead. Makes the car feel less zippy. I also want to replace the rear calipers as they acted pretty clunky when I installed the new pads.
In the winter I think I will take down the front end of the car and take care of some nagging problems:
1. The steering rack doesn't return FULLY to center and so far nobody has a good idea why. All I can think of would be blown seals inside the rack itself that make the transition between turns lazy. So that may need to be replaced
2. Oil pan gasket, as mentioned before
Member
Very nice build. I recently also had steering issues and thought it was the rack. Make sure to check tie rods, control arm bushings, shocks, steering guibo, wheel bearings, and wheels for imbalance. My problem was the wheels. The shop I took them to the first time around did not balance them correctly. I'd hate to see you spend $200-$300 on a rack and it doesn't fix the issue.
Member
you had imbalanced wheels and it biased your steering rack? wildOriginally Posted by bmw328m52

Yeah there is a ton of stuff to check still. My chassis had 165k, probably lots of that rubber stuff is worn. I also have coilovers which I'm sure can influence the designers' intended geometry.
 Posting Permissions


 Reply With Quote
Bookmarks