
 Throttle Buddies
I'd love to. It's 78 deg and sunny today. Feels quite hot already. You should moveOriginally Posted by tptrsn

I need to sort out a mounting point for the griffin radiator, intercooler, and ideally have two hard pipes for the intercooler (pie cuts please)
Might be going back to a fabricator sigh
Ordering a wideband, BOV and IAT sensor now.
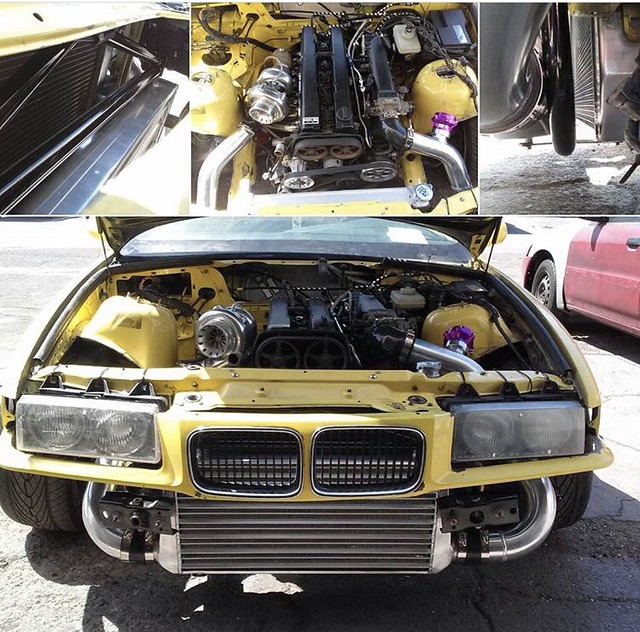
My setup is extremely similar to Sal's 1JZ car.
1k5yMdPl.jpg
If I can get my radiator/IC/Oil cooler to fit that nicely I'll be happy.
Last edited by Press22; 03-12-2017 at 03:18 PM.
instagram @andyitslit
Member
Damn, those JZs just look so sweet sitting in there like that... I have a difficult time figuring out if I would do that or a super low-buck LS swap... Tough call.
Throttle Buddies
Go LS. I only did JZ for cool points. hahahahaha
instagram @andyitslit
Stiff Member
Don't be fooled. the JZ in an E30 is pretty painful as far as swaps go. The LS is actually an easier swap in that chassis.

Status: Someone put glitter in my oil. Wait. Why's all my oil outside the engine? What's that knocking?
Member
This thread has gotten extremely NSFW, for more than one reason.
All this talk of 1jz's has my pants fitting very tightly
Throttle Buddies
Not much of an update but I've added almost all vacuum lines except for the brake booster and BOV.
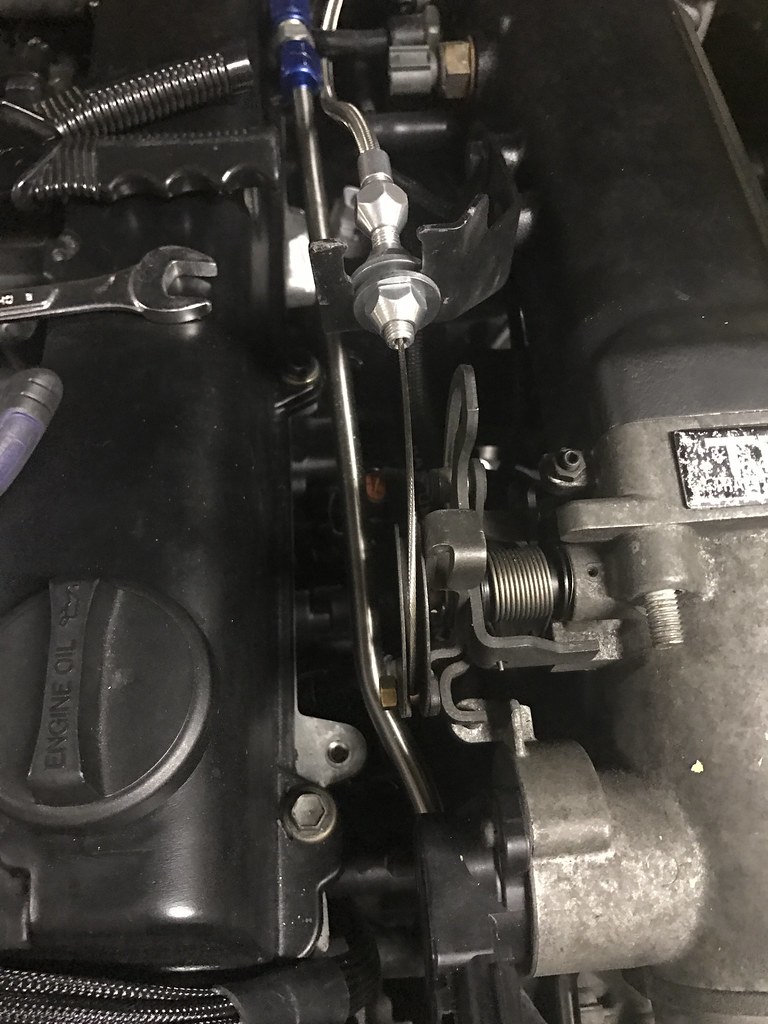
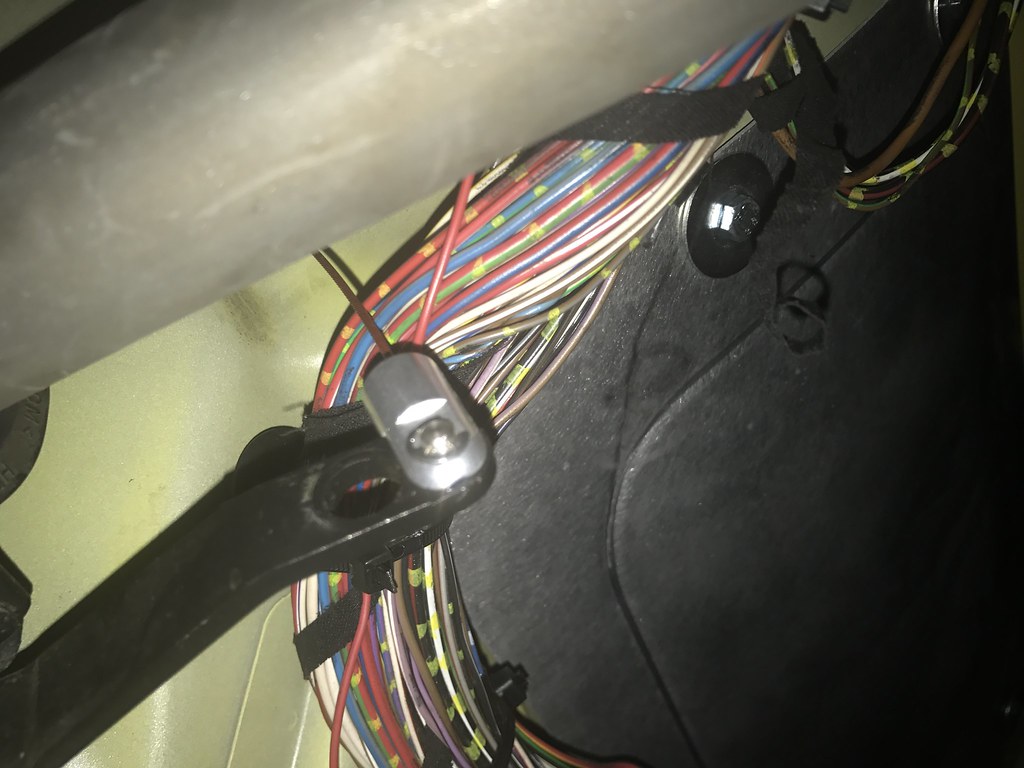
Then installed a Lokar 36" LS1 Throttle Cable which I cut to fit. These work great on E36 pedals by the way!
Shot of how I attached it to the pedal.
Shot of it attached to the throttle bracket.
I used two washers here since the stock throttle bracket uses a wide bushing, I'll make or buy a bracket that fits better later.
Last edited by Press22; 03-20-2017 at 09:33 PM.
instagram @andyitslit
Stiff Member
So curious. How do you go about making your own throttle cable? Lots of people tell me to just go to a bike shop. One day I'd like to do DBC back on my LS. Although the ECU is a pile of poo... Here, have a sexy gif.

Status: Someone put glitter in my oil. Wait. Why's all my oil outside the engine? What's that knocking?
Throttle Buddies
Pretty simple with the Lokar cables. You end up just cutting one end. If you follow their instructions to a tee it works out well enough. I pulled out a ferrule cause I didn't read and it became a little bit of a pain but was able to get it back on.
The throttle body end comes off completely, you pull the wire out and cut the cable housing, then run the wire through from the cabin and cut that to something like 1/4" more than WOT. From there use the adjusters to remove excess slack. (Leave a little bit of it though, 0 slack is not recommended)
Stiff Member
Makes sense. Seems simple enough. TY!
Status: Someone put glitter in my oil. Wait. Why's all my oil outside the engine? What's that knocking?
Throttle Buddies
More parts BOV went with the Tial Q 10psi spring, wanted a Nuke Performance one but couldn't wait months for their backorder.
Some more silicone couplers for the intercooler. Drift event on Sunday is the last practice before Rd.1 of Southwest. Obviously I'm not near ready haha.
I've been debating upgrading from AEM v2 to Infinity 6... anybody know any reasons I really should make the upgrade?
instagram @andyitslit
Member
Because you haven't spent enough money yet?

Throttle Buddies
Well my AEM V2 is from the E28. I'm borrowing it and loading up the tune every time I switch cars. I was eventually going to just buy another V2 but driftmotion released a infinity plug and play which is only ~$400 more than the V2. I'm wondering if there's any features in there that could justify the upgrade haha
though ever since I saw a Alec Hohnadell and Forrest Wang's car I got a big crush on proefi
Last edited by Press22; 03-24-2017 at 04:17 PM.
instagram @andyitslit
Track Rat
This thread is baller.
Sent from my QMV7A using Tapatalk
1995/98 BMW S52 Powered 325is. --DriftSlut--
Drift Build Thread:
http:// www.bimmerforums.com/forum/s...52-Drift-Build
Throttle Buddies
Thanks! ^^
I haven't had much update since I still need fab work and every single place in town is too busy. Been getting more parts though! also I'm sick again so nothing gets done.
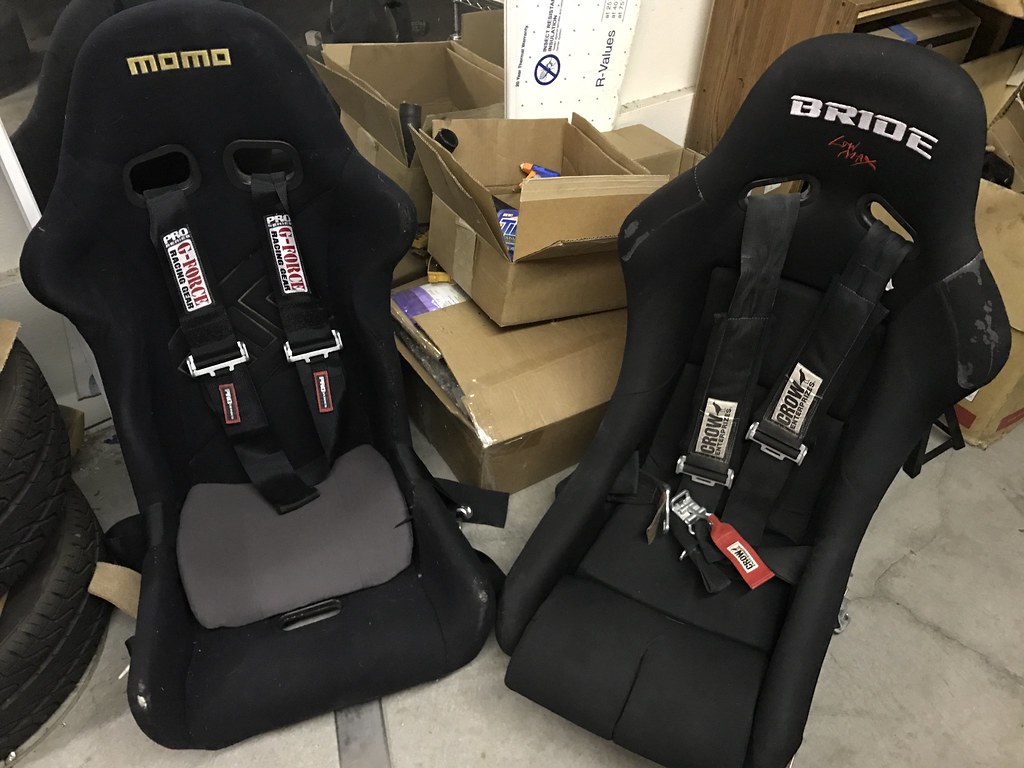
Picked up some used seats, expired but both real. Momo passenger will fit the larger gentlemen and now I won't have a ugly red seat.
Also got a fancy AEM Serial datastream gauge. It can display practically anything from my AEM and stores 19 different configs.
Guess I'll only have two gauges (wideband and this, assuming this can read accurate water temps)
aem_data_gauge_hero.jpg
Got some new secret paint for the valve covers.
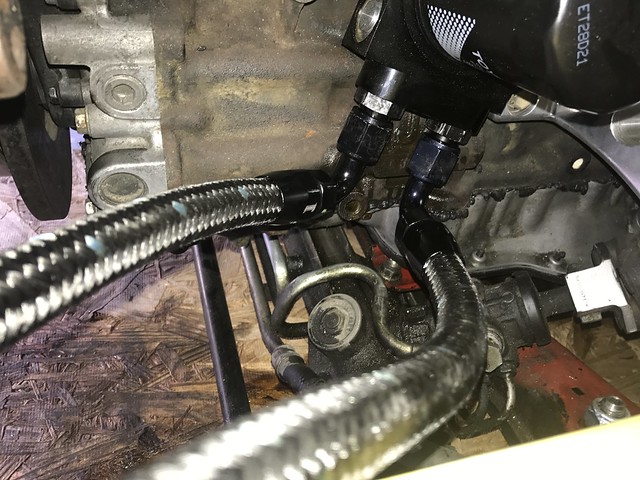
Chasebays is making me a power steering kit with a koyo oil cooler.
and I'm still here wishing I could weld.
instagram @andyitslit
Throttle Buddies
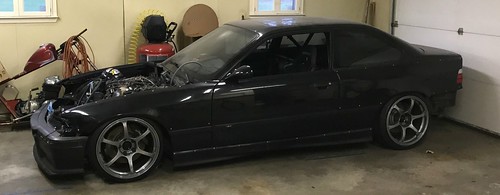
Latest update. I'll add more photos later
instagram @andyitslit
Member
Member
valve covers lookin flossy...
always trying to make it lighter and faster
^^former build: http://www.bimmerforums.com/forum/sh...-neglected-M3/
current build: http://forums.pelicanparts.com/porsc...car-build.html
instant grams: doktor_b
Throttle Buddies
haven't painted them yet, got to get AN bungs welded on for catch can first
More photos as promised.
Now that all the vac system is plumbed I (struggled) to connect to my AEM and tune it so I could get a proper idle and startup.
Still sounding rough.
To do:
Get more fresh gas in the tank
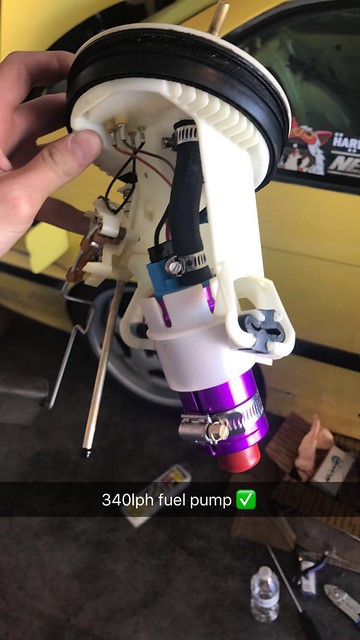
Install 340lph fuel pump
Rush Order Driveshaft
Install braided brake & clutch lines & bleed
Route coolant lines from back of head back to WP or Rad
Dyno & Tune
Install new seats
Install Oil Cooler and PS Cooler
Install A/F Gauge & Serial Datastream Gauge
Get some grippy front tires
If I do all this in 8 days I can make the next practice event.")
instagram @andyitslit
Throttle Buddies
Little update time... here we goooooo
New Conquer helmet, they run smallish so order a size up if you get one. The M fits my small head tight
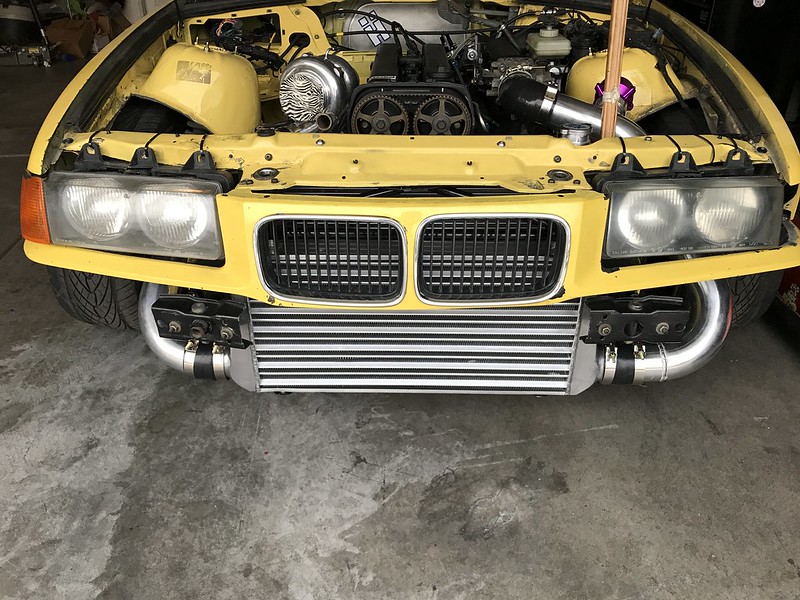
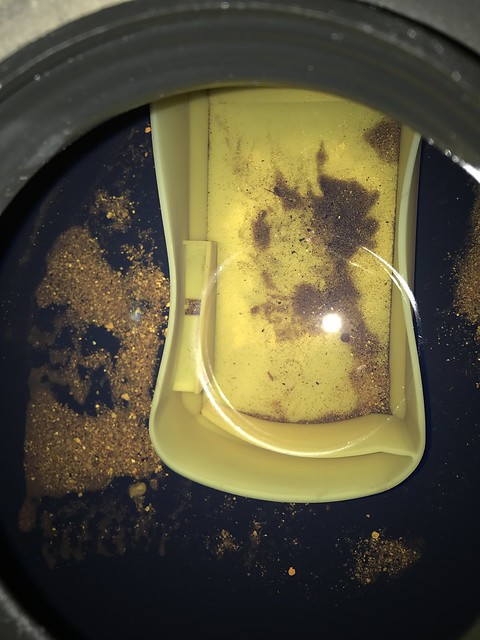
Then went to install the new fuel pump and found a beach in the gas tank. Had to get all that cleaned out.
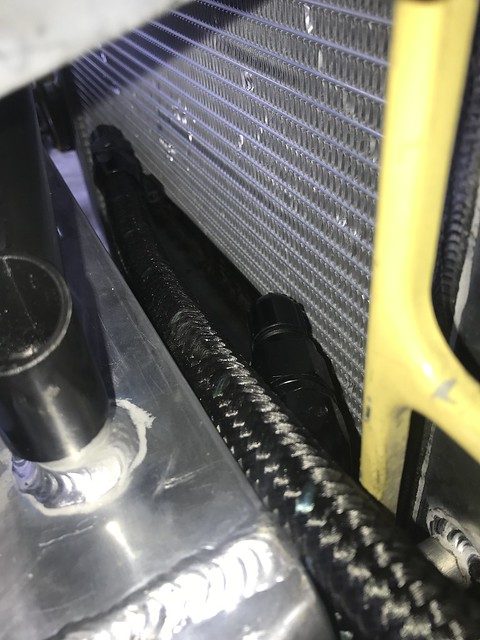
Remove radiator to install oil cooler it's already 100 degrees out here. FeelsBadMan
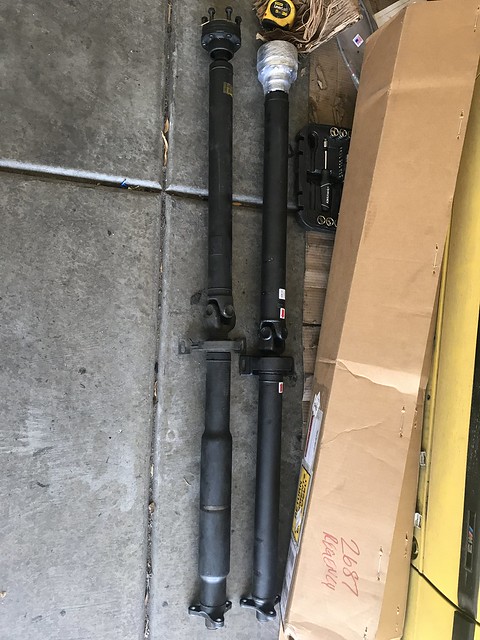
And finally new driveshaft arrived. Only 2" difference. Longer one is the stock 95' M3.
Not pictured but I also started to remove sound deadening, some areas are a pain like the trunk, rear shelf and under the seats.
If anyone's got any advice let me know. I'm trying to do it gently since I don't want to be painting the interior until I get a cage.
instagram @andyitslit
Member
crushed up dry ice mixed with rubbing alcohol...
Member
I tried dry ice (not mixed) and did not have good luck. It would leave behind a nasty residue and would only work on flat surfaces it could sit on top of. I ended up using a MAPP torch and heating it up, and then it wold basically just wipe off with a putty knife. I've read other people have had similar success using a heat gun.
Member
The rubbing alcohol is important because it actually spreads out the cold and crushing it up makes it cover a lot better.
Member
the problem for me when I tried that was that it left all the adhesive still there. Like the chunks of material came off but left behind all this black nasty shit that had to be wire wheeled off. Using heat just let me wipe it all off and it was ready for paint after a quick goo gone wipedown
Throttle Buddies
I'm using a heatgun right now, some areas like the footwells it went well and left little to no residue but under the seats and all the problem areas I mentioned before it's leaving a ton of that "black nasty shit" residue.
I guess I'll go get some ice soon
instagram @andyitslit
Member
So what's the deal with that driveshaft? Stock rear half and a custom length front half? That's the route I'm going to end up going, making a 1 piece one kinda seems like a pain in the dick
 Posting Permissions


 Reply With Quote


Bookmarks