
 Member
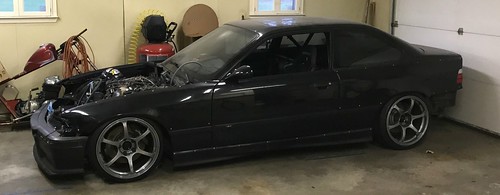
Running a time trial in June in the pouring rain at Palmer in MA I learned the hard way about the lack of proper safety equipment at this track when I went off in turn 4. A proper tire wall is bolted together vertically and horizontally to prevent contact with whatever is behind it; usually concrete or steel. At Palmer the tires were stacked loosely so when I when in at a 45 degree angle my car continually climbed up over the various layers of tires before coming to a stop. At this point my car was at a about a 60 or 70 degree angle on it's side. The remaining tires then released their energy expanding back to their static shape and pushed my car over onto it's roof. A slow motion roll over. The damage was extensive and for about a month I debated parting out the car before deciding to go ahead and turn it into a full track car with a full cage. RF had already reinforced the rear and the rear shock towers. I already had Ohlins and AP brakes in the car and all this was fine and no structural damage was done. So here goes my rebuild thread starting with how the car looked after the crash.
I started by gutting the car completely removing everything and anything that added weight. I then brought the rolling chassis down to my friend Mike at Autoworks Unlimited. Mike checked the frame to make sure it was OK, cut the roof off, fixed the pillars and pass rear quarter panel. The sunroof is gone and the replacement no-sunroof panel will remain off until after the cage is installed.
Next week the suspension will be dropped and the entire chassis inside and out will be water jet blasted using the same equipment used to clean the hulls of a ship at 50K PSI. This will remove every ounce of seam sealer and body filler and bring the chassis to bare metal so it can be seam welded and the cage welded in. While the work on the chassis was being done I took the stock wiring harness and stripped it down to bare bones and re-wired the ECU, the Motec display modifying the dash to mount them along with circuit breakers, switches, secondary gauges for Oil Press and water Temp and a circuit and switch to control the wiper motor. All the wiring has been bench tested and all required connections to the engine compartment terminate with connectors which I will be easily able to pass through the firewall with a grommet to seal and protect.
All for now it my be a few days before I update
Last edited by CMM3; 09-30-2016 at 05:34 PM.
Member
Sorry to hear you dinged up the coupe, but will love watching the rebuild here.
Your engine and drivetrain rain come through okay?
2001 Steel Gray MCoupe - 147,000 miles and owned since new. MCS 2WNR suspension, Hotchkiss swaybar, poly bushings all around, cat delete headers with custom tune, 3.73 LSD, and Clownshoe Motorsports rear subframe reinforcement.
2014 Porsche Cayman S / 2022 BMW X3M Competition / 2020 Ram Rebel
Member
Thanks, all the important AKA expensive stuff is fine, Just sheet metal which is surprisingly all bolt on and the front bumper got trashed. But I found a guy parting out a Z in NJ and bought all the replacement sheet metal I needed for short money. I had a spare front bumper, so the only things I had to replace with new OEM parts I needed where the roof panel and the drivers rear quarter.
Member
Sweet! You considered taking the opportunity for some widebody fenders? For a rebuilt track toy, that'd kick some serious butt in the corners.Originally Posted by CMM3

2001 Steel Gray MCoupe - 147,000 miles and owned since new. MCS 2WNR suspension, Hotchkiss swaybar, poly bushings all around, cat delete headers with custom tune, 3.73 LSD, and Clownshoe Motorsports rear subframe reinforcement.
2014 Porsche Cayman S / 2022 BMW X3M Competition / 2020 Ram Rebel
Member
If you know were to find any let me know?
Member
Sorry to see the carnage but this looks like it will be a phenomenal build when it's complete.
Member
The chassis was on the rotisserie today get water jet blasted to remove all the old paint, sound deadening, seam sealer and crud. No residue like media blasting when done. sorry for the poor picture quality it was sent to me in a hurry.
Member
Dan doing it right, as always!
Member
Making some progress:
Picked the car up after being water jet blasted and the chassis looks like it just came off the assembly line with the sheet metal just having been spot welded together. Funny BMW chose to galvanize all the metal except for the floor pans and shock towers which show a little flash rust before being coated to halt the flashing while the rest is silver with no flashing going on. The piece of wood and the blue tape are there because I'm playing around with ideas for the cage and how to brace the strut towers. I've got the roof panel, dash, one seat, booster-less brake master, and pedals fitted in place so the cage guy will know where they sit. They all will come back out in a few minutes when the cage gets welded in. I fitted the lexan side windows and installed nut inserts for them along with the rear hatch window so they are in place before the chassis and cage get painted. I also cut my hood and fitted the hood vents I'm installing so the hood can now be painted along with the rest of the sheet metal. The front suspension came home as well while the rear stayed being to have the trailing arm bushing converted to solid/spherical, DTM e30m3 style and solid sub frame and diff bushings installed.

Last edited by CMM3; 10-11-2016 at 11:29 AM.
Member
work on the cage is underway. The front cowl sheet metal in the engine compartment no longer needed has been removed, some seem welding done and the main hoops have been started,

Member
pretty sweet build thread!
Member
Thanks, some more pictures of the cage work...

Last edited by CMM3; 10-28-2016 at 10:16 PM.
Member
front shock bracing to firewall / dash bar and firewall almost done

Member
plates on top and straps on the sides of the shock towers added, coolant reservoir, battery and driver side only wiper motor/linkage in place.

Member
I'm curious, why relocate the battery to the front? Maybe a big fuel cell in the rear?
Member
tiny battery is a big weight reduction.
losing 17' of heavy gauge wire is a big weight reduction.
and it simplifies the whole battery system by shrinking it.
my $.02
always trying to make it lighter and faster
^^former build: http://www.bimmerforums.com/forum/sh...-neglected-M3/
current build: http://forums.pelicanparts.com/porsc...car-build.html
instant grams: doktor_b
Member
Bingo, Short leads from battery to ECU, Injectors and coils also a big plus in minimizing voltage drops and ground loops. I also relocated my oil cooler to the hatch to get it out of harms way. It sat too low and actually hit in the past. I mounted two fans in the bottom of the battery box with an oil cooler on top and a duct fitted over it. The fans will draw air in through 3 inch hoses that will run to the rear quarter windows with scoops mounted on them. Holes cut in the bottom of the box for the fans exhaust and it's all sealed up. I also will mount an oil accumulator in the hatch area, all very tidy, out of the way and easy to service if needed.
Last edited by CMM3; 11-04-2016 at 01:56 PM.
Member
What an awesome build! I assume this is an S54-engined car? I cannot wait to see more pics of your progress!
Tis by the grace of God that my cars run!
Member
I'm glad you're putting everything back together! The craftsmanship looks awesome.
I was at the event and the track went silent during the TT, and everyone who looked over to T4 was mortified to see an ambulance and an upside down car. I'm glad you're OK and wanting to get back in the saddle.
-Fred, SB #242 Red E30
Member
Thanks, it is an s54 with a CSL intake, custom exhaust and tune
- - - Updated - - -
I appreciate the kind words, it's never good to see a fellow driver in a bad way. I came through fine with just a bruise on my elbow. My cage builder Chris Howard said the car is built like a tank compared to others he's worked on
Member
Awesome man.
Member
It's been a while since I've updated and it doesn't look like a whole lot has been accomplished during this time but everything takes forever. Measuring and ordering parts and sorting everything out. I removed all the annoying screw mounting points that are welded on the chassis by BMW to attach various things like wires, heat shielding and so forth and replaced every one with a nut insert. I also used nut inserts to attach clips for the lexan windshield, quarter and rear windows and all the brake lines and oil lines. I think I've installed almost a hundred nut inserts but in the end it should be worth it as all the fasteners will be the same stainless steel M5, M6 or M8 round hex head. I ran the brake lines, mounted a remote oil filter in the hatch area along with an accusump and an oil cooler. The cooler sits over the stock battery box which I mounted two 7" fans in the bottom off. The cooler then has a duct that fits over it to intake air from dual 3" hoses which I'll run to ducts/scoops in the rear quarter windows. I also got the pedals squared away. Even though I'm using the stock pedals I got rid of the brake booster and had to adapt the new master to the stock pedal. I added a brake proportioning valve and a second switch panel which also serves as the support for the dash. Not shown is the wiring that is also done for the rear brake lights, oil cooler and fuel pump.
2nd switch panel and -12an bulkhead fittings for oil lines
Brake head fitting and pressure switch for lights
Brake proportioning valve, brake lines and other side of oil line bulkhead fittings
Brake line routing front and rear
Handle to open/close oil accumulator
Oil lines routed under pass floor pan (fabricated) to rear
Drivers side floor fabricated floor pan (brackets and supports also made), painted both with non-skid paint
Oil accumulator, cooler, check valve, filter with lines mounted in hatch
Now I get to remove everything I've fitted. So I can send the chassis out to get the entire underside seam welded, have it all bead blasted to profile and clean everything up before I have it all powder coated.
Last edited by CMM3; 12-12-2016 at 11:21 AM.
Member
Looks professional. Very nice work!
Member
Thanks for the encouragement. It's a fun project but at the same time frustrating because it's taking so long. I'm sure a real pro would have done the same work in half the time it's taken me.
very much so...
On the contrary, I'd commend you on the speed of your effort.
A lot of these build threads are months or even years between updates. You're moving at enough of a clip to actually follow the thread in "real time".
Looks like it's going to be an awesome car!
 Posting Permissions


 Reply With Quote


Bookmarks