
 Member
E85 Track turbo build**
Last edited by crapet01; 11-12-2016 at 07:10 PM.
Member
just a bit of background info:
Im a student in Australia so don't have heaps of disposable income. this build thread is pretty much purely to make a mild budget e36 turbo build but to make it look good cosmetically also. the car is being built mainly by myself besides some of the fabrication work which will be done down at a local shop down here. Anyway the car is primarily being built as a motorsport platform.
for you guys ill be posting up exactly what I have bought my parts for and if I get any labour or tuning how much that is as well. for costing sake I will separate the costs of the turbo build and other parts so you can see just how cheap it is to do a budget turbo build yourselves. Note all prices are in AUD
Turbo parts
Manual E36 325i 300***kms (185*** miles) $2000
Garrett GT3582r $800
Nissan R32 GTR intercooler $50
740i V8 MAF $60 (No longer required with the Link ECU)
Bosch 040 fuel pump + 10L surge tank and speedflow e85 lines $200
Bosch 650cc (65lb) injectors $280 (no longer required)
Xspurt 1000cc injectors $660
Tial 38mm V band wastegate $220
Link G4+ Pnp ECU $1200
Mercury standalone remote coil packs $755
AKG Poly 75D motor mounts $300
AKG Poly 75D rear subframe bushings $250
AKG Rear trailing arm bushing movement limiters $80
AKG Rear trailing arm reinforcement plates $50
AKG Rear sway bar reinforcement plates $50
Ces e36 Cutring Headgasket, Copper Spacer, Arp 2000 Head stud kit $1100
Achilles sump baffle $230
$7,795
Other parts:
Brakes
E36 M3 front calipers, spindles and rotors $200
E36 M3 rear calipers $200
DBA T3 4000 series new front rotors $300
Front and rear used slotted brake rotors and 80% ferodo 2500 brake pads all round $300
E36 M3 front bar $200
e32 3.64 Large case LSD $400
Penrite 10w40 oil 10L $105
NZKW drivers seat bracket $50
Driftworks Hydro E-Brake $75
Speedflow hydro fittings + braided line $215
20% Window tint all round $220
Clear Acrylic for front door cards $80
Sony head unit $40
Rear guards rolled $100
Solid steering bush $80
Hardrace rear camber arms $240
Penrite 80-140 synthetic diff oil $45
Rear trailing arm & Diff Powerflex black series race bushings $300
diff output studs to replace broken ones $100
Replacement rear maxspeed shock postage only (warranty replacement) $30
Wheel stud to lug conversion $160
CCFL angel eyes $40
HKS 4" mushroom superflow filter $40
Aeroflow 4" silicone joiner $15
Wilwood brake proportioning valve $135
Bilstein B14 Coilovers $750
ZF 320Z 5 Speed M3 gearbox $1000
5 Puk NPC Clutch, Lightweight HD Singlemass flywheel, HD Pressure Plate $300
M3 Tailshaft with modified 4 bolt rear flange & new Guibo $200
Rally Road Productions oil cooler cap plus 10 row cooler and braided 10AN lines $300
Postage for gearbox, clutch, flywheel, cooler etc $100
M20 auto flywheel bolts $80
Brown & Geeson steering wheel quick release $200
Wheels & Tyres:
E90 194M Msport staggered 17” wheels $400
2x 255 Nankang NS-2R $150
2x 215 Nitto NT01 $430
$6280
items sold from car
Lowering springs that came on the car $250
Cold air intake that came on the car $75
profit when selling 2871 turbo $50
JunBL Muffler sold for $110 profit
Getrag Gearbox, stock clutch, stock dual mass flywheel $400
$885
Total $13,020
so first of all when i got my calipers they looked like this
which was fine there was no damage or rust but whilst i was saving for more parts i thought i would freshen these up before i put them on the car. i first started by wax and grease removering them but this just didnt seem to get all the grit and brake dust of them so i could get good adhesion with spray paint. so i decided to give them a light sand with 140 grit which brought them out to look like this.
after this i did some research and found a bloke on youtube who uses a die grinder and grinds the textured surface off the calipers to make it perfectly smooth to get a powdercoat style finish. i dont have a die grinder or a air compressor so i used a dremel and a large stone bit to get them looking like this.
i was pretty happy with how smooth they felt and after many many hours of grinding i was keen to get some paint on. i started off by using VHF flameproof primer which looked like this.
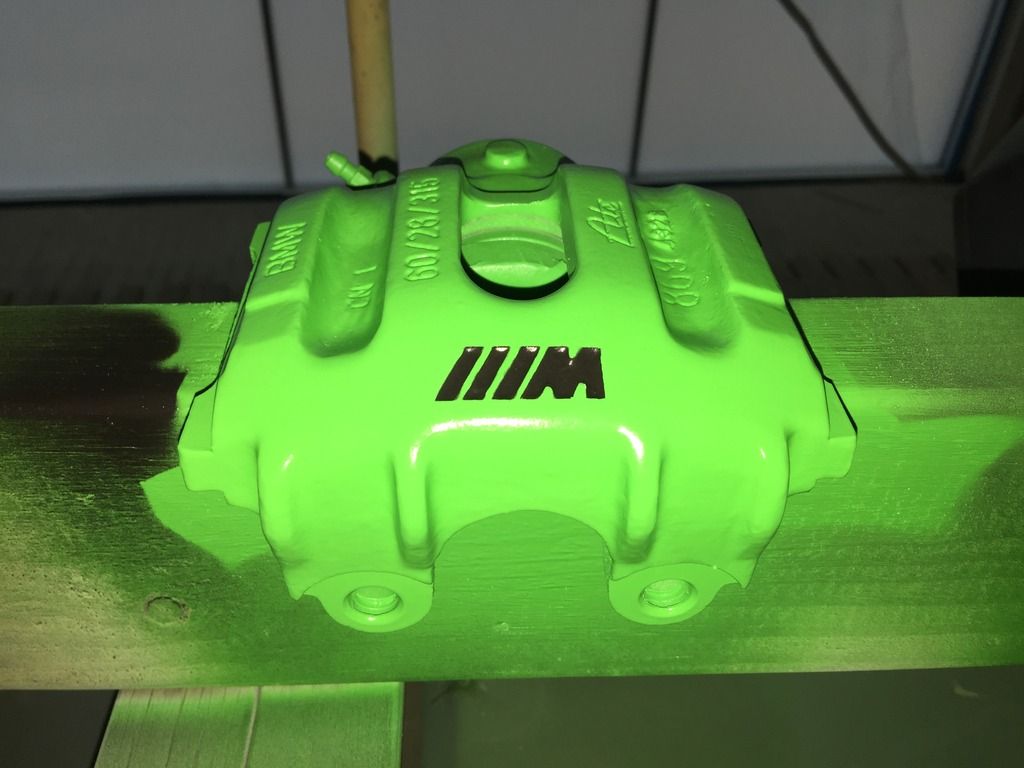
then after 3 coats of the primer i put on three coats of VHF Engine enamel in "grabber green" i love this colour and only reason i used engine enamel not caliper paint is i wanted this colour and couldnt get it in caliper paint.
i then carefully taped around the ///M logo and painted that logo black to really try and set it off.
after i put the VHF flameproof satin clear on this is how they came out. im super happy with the results and for about $50 in spray paint and about a days work on the grinder id recommend it to anyone
Last edited by crapet01; 05-25-2017 at 05:44 AM.
Member
not heaps of progress this week. im waiting on rear m3 calipers. someone told me i will also need m3 rear trailing arms? anyway we'll see how we go.
I almost having everything I need to get the turbo in. I'm going to see a few fabricators next week to try and get a custom manifold made. at this stage I'm still going to try and do the cooler and exhaust myself but we will see how it goes. I don't want to mess around with the manifold as its a tight fit for a professional let alone me trying to botch it myself.
Anyway this week I managed to do some repairs on my Nissan R32 GTR intercooler beforeIi put it in the car. I just used a small flat head screwdriver to pick the fins back up as some of them were folded over on the surface hence picking it up for $50! anyway i found it to be a relatively easy process. probably took 2 hours but well worth it. i also hit it with some paint after to finish it off.
and after i repaired it and painted it.
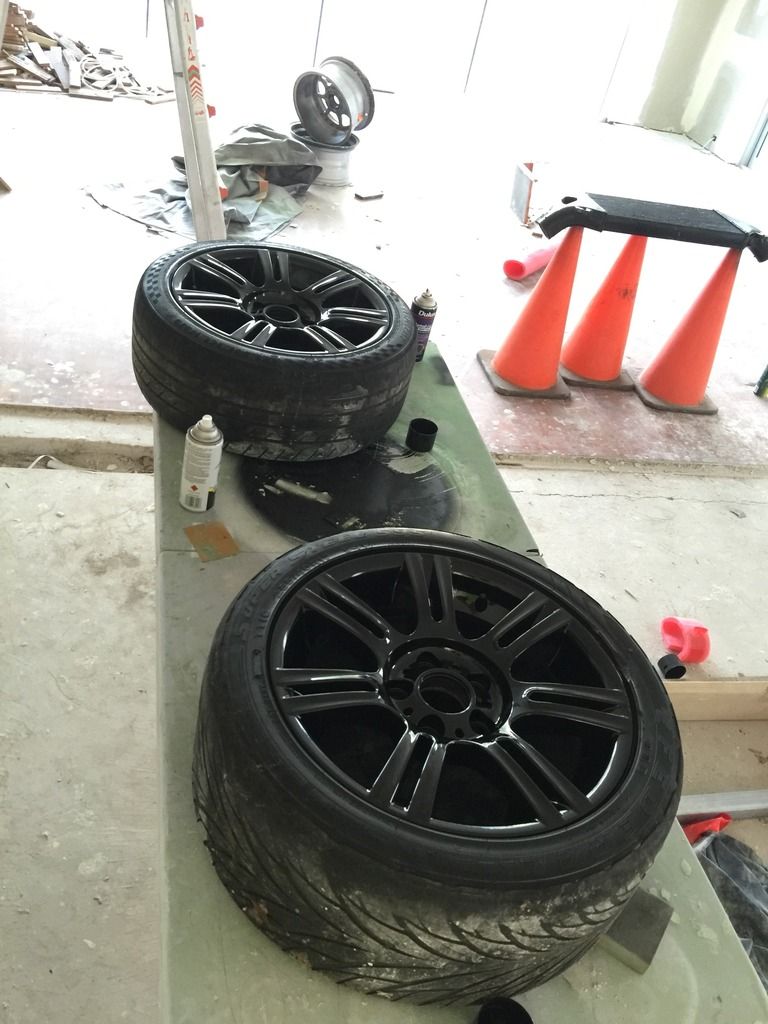
i also test fitted my 194m wheels. this gave me the motivation to finish the repairs on these and hit them with some paint as well. when i test fitted the rears since they are 255's i had some scrubbing issues on the guards so ill have to get the guards rolled at some point in the future.
so this was my first attempt with repairing wheels and by the end of the experience i was a lot better. i think it took me an hour to sand all the bog back on this one. way wayy too much
this is one of my better ones all sanded back almost ready for paint
i managed to hit them with 2 coats of paint about half an hour ago but will probably need at least one more coat. for those of you thinking they wont look mint. you are right. the repair job isnt perfect and i used relatively cheap spray paint. just keep in mind these will be the wheels i use on the track for now.
Last edited by crapet01; 09-22-2016 at 06:09 AM.
Member
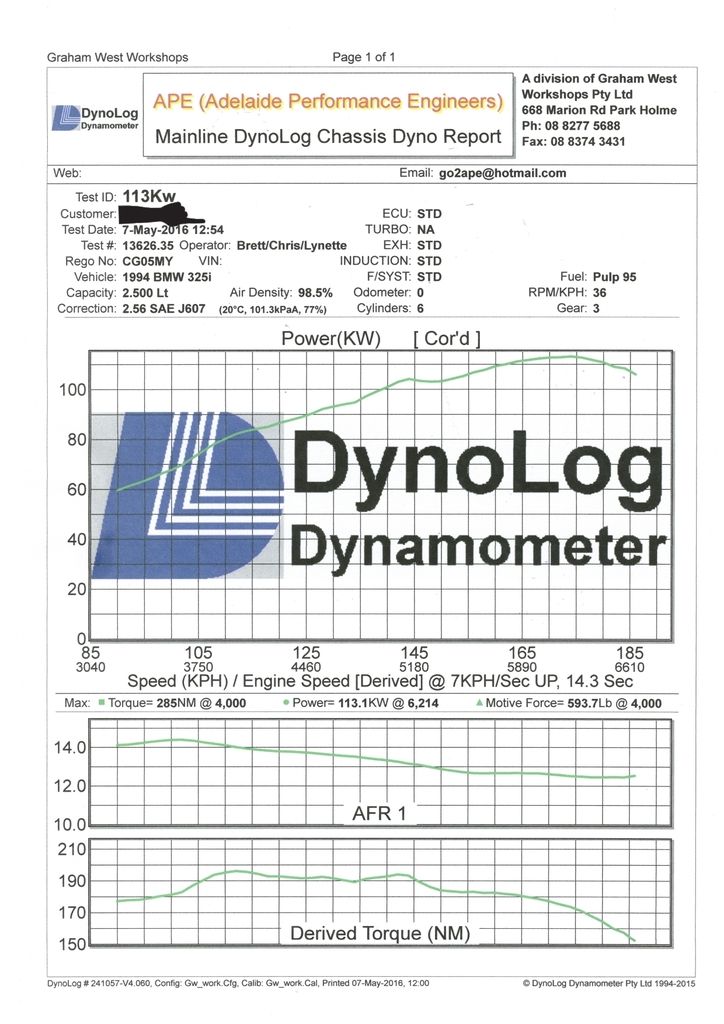
went to graham west dyno on the weekend to test what power the 2.5L makes before it gets the turbo installed hopefully in the coming weeks. so it made 113kw which i was pretty happy with as they claim to make 141kw at the fly from the factory. i also got told by the guys down there that the engine seems healthy which coming from those guys is reassuring.
Member
i went and spoke to a fabricator today who did a full tig stainless exhaust on my e30 to talk about a custom turbo manifold + dump. its an absolute nightmare trying to find information online for what people do about it for the RHD models as the steering rack is in the worst position. anyway i got quoted $2000 for a full custom setup which is more than i was hoping on spending but at this stage i don't see many other options. ill speak to a few more fabricators and see what they think. i have heard of people mounting the turbo on the intake side of the engine bay but i don't really want to do this for various reasons.
u owe my mule an apology
here is another option, but you would loose AC
http://www.elite-d.co.uk/bmw-e36-rig...urbo-manifold/
86 325es, 2.8L m50, S476sxe, ProEFI 128 ecu, e85, solid rear axle, TH400 trans, 28x10.5w slicks, zip ties, popsicle sticks, tape
best time 9.06 @ 151.8 mph, best 60 foot 1.30
Member
thanks for the input! i just had a look on their website and it would cost $1600 AUD after postage. so i would probably be better going custom since i would have to get a custom dump pipe made for the elite developments manifold anyway which is roughly $300.
Member
Those calipers turned out fantastic man.
Member
thanks Rajicase! a lot of time and effort but all worth it in the end i think!
also is anyone able to shed some light on Differentials. so a month or so ago i did some research on swapping diff centres from a large case to a medium case to fit into my e36. from what i found the diff centres were more or less the same it was just the housing and the hub setup which was different so my intention was to remove my factory open medium case diff from the car, take the diff centre out and put the diff centre from the e32 large case LSD in. and that would be that but now i cant find the original page which i got my information from and am skeptical i now have a large case LSD for nothing...
any help at all would be awesome
Member
Ask waganstyle. He knows the answers to these sorts of questions, like whether the guts of a 210 diff fit into a 188 case.Originally Posted by crapet01

LICENSE SUSPENDED
Stubs would still be the same that's for sure.
1996 332IS
Built 3.2
CES/Steed TS Precision 6466, spraying a "$π!℅" load of meth.
Technique Tuning 80# tune.
1/4 mile 10.84 @ 136.72
Your 1 and only stop for all your BMW performance needs
WWW.CESMOTORSPORT.COM
Member
More common to break 188mm output stubs in drag racing on drag radials than the diff internals. Using bias ply instead of radials would help, but people report bias ply are challenging to drive. I have never tried them.
Member
im not really phased about breaking components to be honest, just need to know if my intended setup will even work with swapping the internals. i doubt i will be pushing enough power in the near future to be breaking stuff like that! im assuming thats like a 800Hp sort of scenario?
Member
so i haven't posted in a few weeks but i haven't been slacking off. this has been because my iPhone has been playing up when i try and take photos so i haven't been able to document my processes as much as i would have liked but i am taking photos with my iPad now so should be all sweet. over the past few weeks i have mounted the intercooler, stenciled the intercooler, got my car tinted, swapped diffs and stripped the interior. ill start with the diff first because i got that done with a mate today. i managed to pull the diff last night by myself in about an hour and a half which i was pretty happy with. no real issues just make sure you have a E12 inverted torx bit and be careful not to strip the half shaft bolts but anyway. if you want to know how to drop your diff use this page. its a awesome write up with some good images chucked in there to help you along the way. http://www.bimmerdiy.com/diy/e36diffswap/
so i started my diff swap by cleaning my work bench in the shed to make room for a 3.15 e36 medium case open diff and a 3.64 e32 medium case LSD. my intention was to swap the complete centres. i haven't seen any write ups on this anywhere so i was skeptical as to wether it would actually work! here are both of the diffs side by side. you can visibly see they are slightly different shapes and contours but all in all the main body is similar.
i started by dismantling the LSD. i was hoping i could leave the pinion gears in each of the housings but turned out that didnt work so we had to set to work at getting those out which was probably the hardest part.
http://s1077.photobucket.com/user/cr...ml?sort=2&o=46
sorry guys i didnt get heaps of photos because i was pretty much balls deep in trans fluid but to get the pinion gear out you first have to remove the driveshaft output flange then remove the nut holding it in place. then place the diff with the back casing facing down so you can hit the end of the pinion gear with a sledge hammer and put a piece of timber in between. don't be shy this b**tard is hard to get out! anyway once it comes out you're all sweet. all of the parts turned out to be the same lengths and everything. the below picture shows how it looks when the LSD centre and matching pinion gear are in the e36 housing.
after the centre swap was all finished i make sure you can rotate the input flange especially. it may be difficult at first as there is no lubrication in the housing but none the less should still spin. after that i got some brake cleaner and just gave it all a once over and then rinsed the housing with some cheap motor oil i had to get all the residual brake cleaner out. i havent got any LSD oil at the moment but ill get some tomorrow hopefully. after this i just used some silicone gasket goo to seal the rear casing. im hoping to get the diff back in the car soon and see how it goes.
Member
i have been working on the hydro and some other things this week but i just got around to getting some photos of what the interior looks like now. excuse the low res images. (stupid ipad) theres also more to come. im hoping to have some bucket seats in the near future so can say goodbye to the weight and comfort of the factory leather seats.
i managed to retain the factory sun shade by just cutting the rear parcel shelf in half pretty much and just using the factory child restraint point and bending a piece of metal to pin it down. worked heaps better than i thought it would.
just as a interested little side thing i decided to weigh everything i took out of the car. since racecar and all... i just thought some people might be interested on what specific things weigh. ill update this list as i pull things out, but heres what i have done so far.
Headlining 2kg
A pillar and C pillar trims 2kg
Back seat. seat back 7kg
Back seat. seat bottom 6kg
All foam insulation from parcel shelf and under seats 10kg
Centre consol 2kg
Drivers door card and insulation 3kg
Passenger door card and insulation 3kg
Current Total: 35 kg
Last edited by crapet01; 06-29-2016 at 09:57 PM.
Member
Lookin' good man, just one thing though.....that GT2871 will probs bring some sadness when you want 'a little more'. I ran a 2871 (largest version) on an M20B27 and struggled big time to get much out of it before the motor complained. Ignition timing was in the single digits and little more than 12psi could be run before detonation. The turbine is small and back pressured the motor like crazy. I know the M50 is worlds apart from an M20B27 with a 731 head (the worst) and is a lot more detonation resistant, but back pressure is nasty, and with 10.5:1 stock compression...it won't help. If it were me, I sell off that 2871 and look elsewhere. Do it right, from the start, save the headache.
Are you planning on running E85?
1989 E30 - M50B28 Turbo - ZF 8 Speed
Member
Cheers Nutzy, this was something in the back of my mind. however it will be a dedicated e85 car so it should be safer to run on the 10.5:1 stock compression without drastic detonation issues. Im not really planning on running more than 1 bar of boost because from what i have read thats when the stock motors like to say good night. but obviously there will come a time where i push its limits and you're right i should account for this situation. did you have a specific turbo in mind which you think would be better?
Member
E85 will help massively, but your VE will still drop like a stone up high.
Stock M50B25 is tougher than you think. E36Hater here on this forum got over 700WHP from a stock bottom end!
GT3076 would be better, but still not great. GTX3576, S256 (317222), HX35 - those three have enough compressor to put a smile on your dial and enough turbine size to keep the motor happy. The GTX will obviously kill the budget, but I got my S256 for about 1400.
1989 E30 - M50B28 Turbo - ZF 8 Speed
u owe my mule an apology
My experience was much the same running a small turbo on on an M20. The high drive pressure just makes the motor detonation prone. It wont detonate on E85, but another thing to consider is that it will make at least 50+ whp more at 15 psi with something like a gt35 or a s256 than it will on a GT28 just because of the back pressure difference.
86 325es, 2.8L m50, S476sxe, ProEFI 128 ecu, e85, solid rear axle, TH400 trans, 28x10.5w slicks, zip ties, popsicle sticks, tape
best time 9.06 @ 151.8 mph, best 60 foot 1.30
Member
following nutzy and someguy2800's advice i have found a near new garrett T04z for sale which is good for 600hp on E85 so i think ill try and grab that. its also externally gated so will look a bit cleaner in the bay.
Member
To4 is a great turbo. If you go the route of a cheap manifold that has the wastegate port located parallel to the firewall you might want to consider internally gated or a 5 bolt ford housing. The cheap manifold is very difficult to plumb the wastegate to. I would go SPA but its your money.
Member
im still working on selling my 2871 to try and get the T04 but theres also a few GT3576r's for sale which are internally gated which would be cheaper. i have decided to not get a cheap manifold because i dont really have that option after exploring almost all my options. RHD is a really difficult setup to get the dump past the steering column so im getting a full custom manifold and dump which i got a quote for roughly $1200 which is pretty good.
i also had some spare cash this week so i got some DBA T3 4000 series vented and slotted front rotors. these are awesome rotors and will look sweet big thanks to Brad for hooking them up!
i still need rear rotors and pads all round. so if anyone has any recommendations that would be sweet. i don't want to spend heaps but i also want pretty decent stuff.
Member
I Managed to put some time into making some custom door cards this week. spent a good few hours on them and im relatively happy with the results but i think next time i could do a bit better. i purchased 2 sheets of 1.2m x .6m acrylic which was $40 per sheet. this was more than i wanted to spend but i was super keen to see if i could make it work and i thought clear acrylic would be interested as it would look as if the door was exposed.
starting off, once the original door card and the sound deadening is removed there is a line of silicone which remains on the door no matter how careful you are removing the sound deadening.
this is a real pain to remove and you pretty much have to scratch a majority of it off with your nails or similar.then you can move onto using acetone and a rag but this removes the paint if you arent careful.
once i finished this i started mocking up where the acrylic would go. i actually started with a piece of cardboard for the preliminary outline. but heres a nearly finished flat piece of the passenger side. measuring where the cut the slit for the door handle (tow strap) was nervous because you only get one shot at this and its quite hard to get reference points on where to measure from but luckily i nailed it first go.
the last part of the process was heating and bending the top section of the acrylic to cover the clips the original door card attaches to. i was devastated on the passenger side where i snapped two small pieces off and had a sizeable crack due to being a bit impatient. (this is why i did passenger side first) you can see the missing sections in the top corners of the acrylic in the below photo.
now for the drivers side. a few more complications on this side whilst trying very hard not to crack or chip the material.
i also should note how i made door handles out of tow straps. i got a piece of wire and threaded it through the reinforced stitching so it had decent strength and folded the wire back on itself for double strengh when wrapping around the corner.
the wire on the right is the original wire that the door handle is connected too which i have bent back on itself to attach my wire to. and i used the factory door handle mounting hole to run my feed wire through. logistically there arent many options when running a flat door card as it significantly decreases the space inside the door cavity.
i went about the drivers side in a completely different fashion and it was a much better way of doing it. heres where it all began. more cardboard testers and fiddling later this is how i sized it up. the only real differences are was the way it was measured and the sizing of the piece.
i successfully managed to bend this one without and chips or cracks which was awesome although i cut it slightly too short at the top so it doesn't sit perfectly flush with the weather strip which is annoying but its a track car. whatever. one of the added complications was the fact i wanted to keep my power mirrors which meant i had to retain the mirror controller. however this wasnt a major issue. i just found the deepest point of the door cavity and cut the hole accordingly.
this is the final product all rivited on. yes... I used rivets. not great for removal but they look good and at the end of the day if i have to break the panel its not some hectic carbon fibre one you pay drug money for online its a $40 piece of plastic.
I'm thinking I might add another colour tow strap to use for closing the door (probably black) because at the moment its a bit difficult but we'll see!
Last edited by crapet01; 07-01-2016 at 09:43 AM.
Member
There Hasnt been heaps of progress the last few weeks but lots of maintenance. I also seem to be forever collecting parts! I have a power steering leak issue. And I had a nasty clunking when disengaging the clutch, particularly at lower speeds causing erratic driveability. The clunk turned out to be loose diff bolts which I was an easy fix. Power steering is slowly dripping away as I'm unsure of how to fix it and flush it. Also getting a lot of rain this winter has made evident 2 separate leaks in the sunroof assembly which drip nicely on the drivers and passengers lap. This was fixed with some silicone for now. I think.
HYDRO!!
I have been super excited to get this project underway and me, and a mate (shoutout to Digby) got it installed last weekend. Its a relatively simple process but just a few things that took a bit of time. Ill point out I doesn't have ASC, so there is just a single hard brake line running to the rear axles. I ordered a brake flaring kit with a tube cutter a few weeks ago in preemption of this project taking place.
I started by cutting the hard brake line pretty much where the exhaust heat shield finishes. I first made one cut, and then a second about 10cm apart from the first cut removing a small piece of hard line. This just freed up some space. The lines were then flared and the fittings under the car installed.
I then drilled two small holes at the curved bottom edge of the trans tunnel to run the lines up into the cabin.
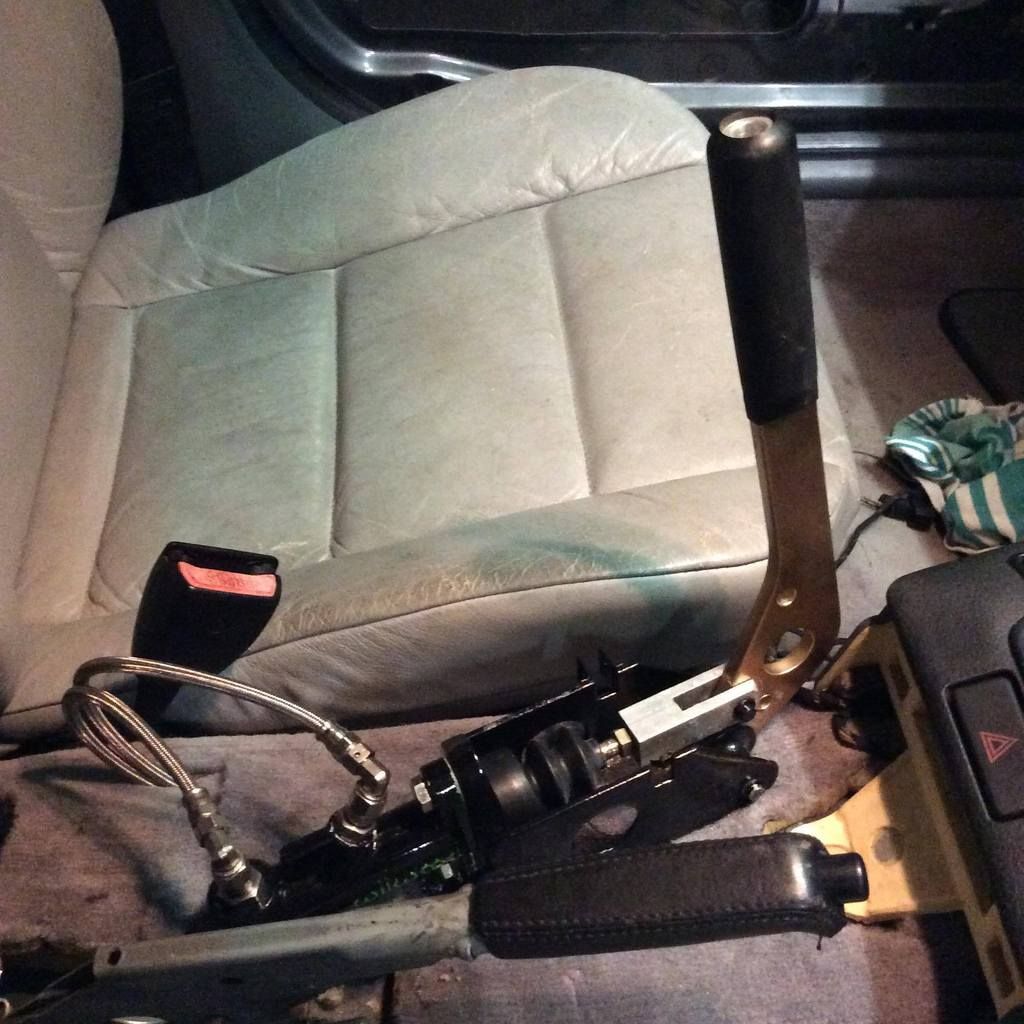
Running the braided line was the most challenging requiring the passenger seat to be removed in my application so I could run the lines under the carpet to keep it pretty stealthy. I didn't bother completely removing the seat as the bottom of the seat belt is attached to it so as you can see I just moved it half in half out of the car.
All that remained was attaching the hose to the fittings and bleeding the systems as obviously; the brake system was pretty much completely dry. No harm as I wanted to change the fluid anyway! Im super happy with how it came out and if you have the right tools its really easy to do. Im looking into getting a stainless lobsterback 1" handle made up because I think that would look pretty good but we will see. This will be fine for the moment. And yes, it works!
Member
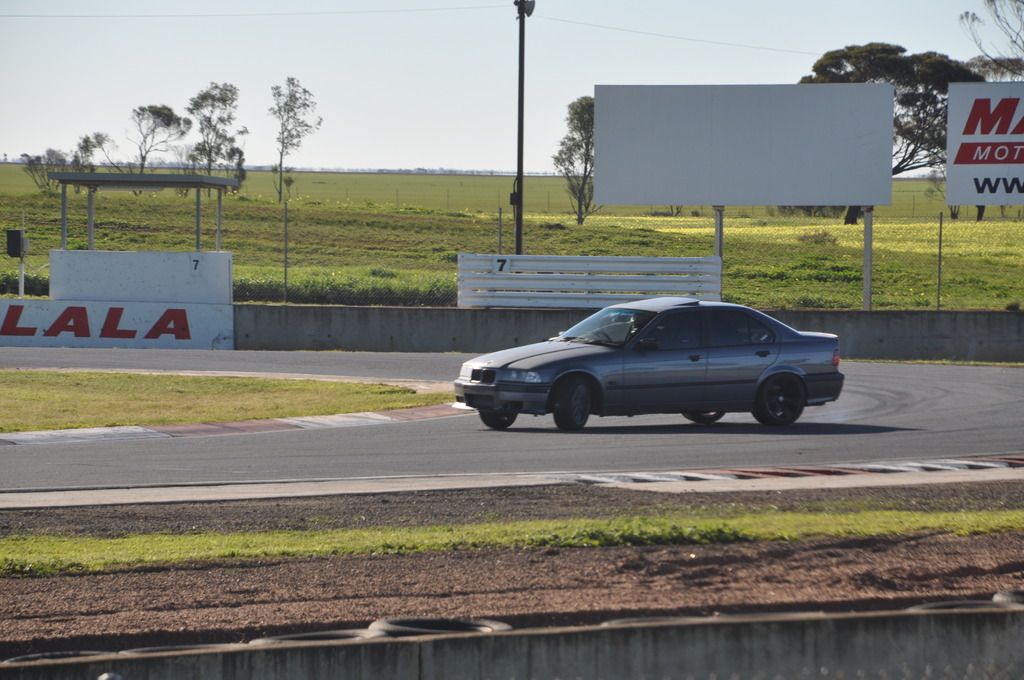
First track day:
on the weekend I had a chance to get out to Mallala my local track. I knew my suspension was going to be limiting when i was pushing the car to its limits but I didn't anticipate it to be as bad as it actually was. at times I would lift inside rear wheel around sweepers. I hadn't had a chance to get my fixed back Recaro installed so I got bashed around a bit in the factory leather seat. i managed to pull a high 1:31 which I was pretty happy with considering completely clapped out suspension. i also didn't experience any mechanical faults which was impressive.
the reason i went to the track completely stock is so i had a time to base my modifications from.
heres a couple of photos from the weekend.
 Posting Permissions


 Reply With Quote


Bookmarks