
 Member
Looks good!
always trying to make it lighter and faster
^^former build: http://www.bimmerforums.com/forum/sh...-neglected-M3/
current build: http://forums.pelicanparts.com/porsc...car-build.html
instant grams: doktor_b
Member
Had the day off today, I REALLY wanted to check out the inside of the local courthouse. Luckily I beat the ticket I was there for, and before 10 AM, so I had a lot of time with the car today.
Made a point to take a lot more pictures, since I've been slacking lately. First up was securing the heat wrap on my fuel line, and then securing the line out of the way of the headers. Line was also tightened up on both ends in preparation for starting.
Secured near where the ABS pump used to live.
Underneath. Stock fuel filter cover should be able to be reinstalled back over this.
Up next was mounting the light bar. Had to take the bumper down to the crash bar, which I wasn't really anticipating.
Mounted. Added in some hardware where it was missing between the bumper and crash bar.
Thinking I want to get some sort of tint for the bar so it's a little less noticeable.
Bumper reinstalled.
Pulled the passenger inner fender while the bumper was off, found about 10 pounds of dirt sitting on the bottom of the fender. Also found out that someone probably used the fender as a jack point at some point before I owned the car.
Cleaned, rusty underneath all that dirt. I spraybombed this quick to hopefully slow down future rust.
Pulled the passenger skirt as well. Pretty shocked I still had a rocker panel left. I wasn't anticipating finding one after seeing all the dirt.
New fender liner installed with new hardware.
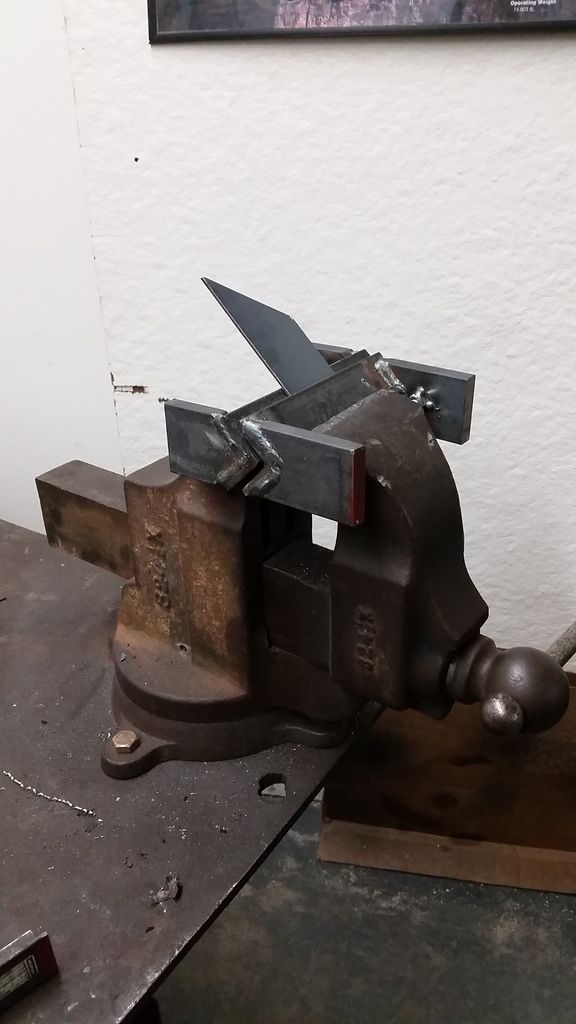
My shopmate and I built a small brake for the vise as well, should help with a lot of small brackets. Bent 1/8" without an issue. My booger welds featured on these edges.
Instergrams: @davemakepictar
Derp
Uhh, why the light bar? It's blocking an awful large amount of an important cooling passage.
Member
Because E36 lights bring the suck. Easily removable if temps suffer, and I have a larger than stock radiator, and will be going with an aftermarket fan for it. I also don't have the AC condenser in place currently, which should help cooling.Originally Posted by pMak26

EDIT: I'm guessing (hoping) I won't actually be losing that much airflow, as the bar is not flush with the grill, so theoretically it'll work less like a blockoff and will just create a lesser obstruction instead, with air still able to move around it. I'm sure someone smarter than me can tell me if that idea is correct.
Last edited by squashman702; 01-26-2017 at 09:16 AM.
Instergrams: @davemakepictar
Member
I ran a 4.5" thick heat exchanger in front of my a/c condenser on my E36 and was able to get it to cool with a good radiator and fan setup. You will be fine.
Member
Good to hear.
Changed the oil in the daily, then cleaned up the shop some. Had a little bit to work on the purple turd.
Power steering cooler "mounted" with foam protecting it from the cross piece. We'll see how it works in this spot.
OBD2 plug and related harness made, and ready to be connected to the engine harness. Thinking I may add a connector somewhere in the bay so I don't have to chop up wires if the harness ever has to come out of the car. My buddy put a 3/4" hole in the firewall to run wiring for this, the oil pressure gauge, and the light bar through.
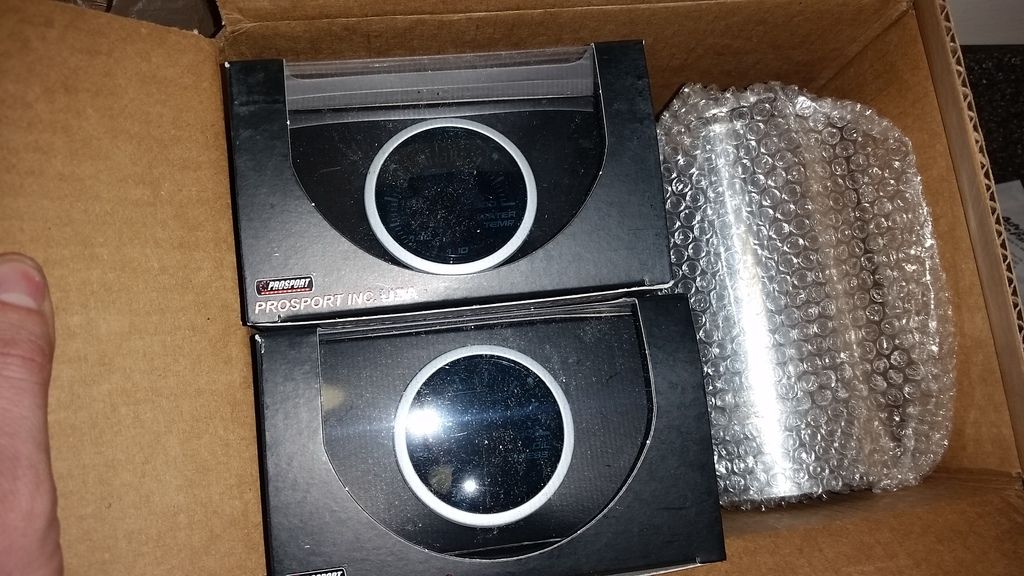
And a shitty picture of gauges, with part of the intake next to them.
Instergrams: @davemakepictar
Member
Started doing oil pressure things today. The C5 has a temp sender above the oil filter, so I kept it when I swapped the pans, thinking I'd use it in the future since the F body housing wasn't threaded. Since I don't have an oil temp gauge currently, I stole the location for the oil pressure gauge. Needed an M12x1.5 to 1/8" NPT fitting, and a 45* NPT fitting to locate the sending unit. Wrapped the sending unit in some reflective tape to hopefully allow it to live a little longer.
What it looked like before it went in, wire coming off is the ground. Pipe plug is from the motor's previous owner, not something I added.
Installed. LKQ did some artwork on the block.
Got the OBD2 port mounted in the glovebox. Put a 3/4" hole in the top of the glovebox, and ran the wires through that.
Back in the car. Plenty of room left for tickets.
Wiring is going through the firewall behind and to the outside of where the clutch pedal hits the floor.
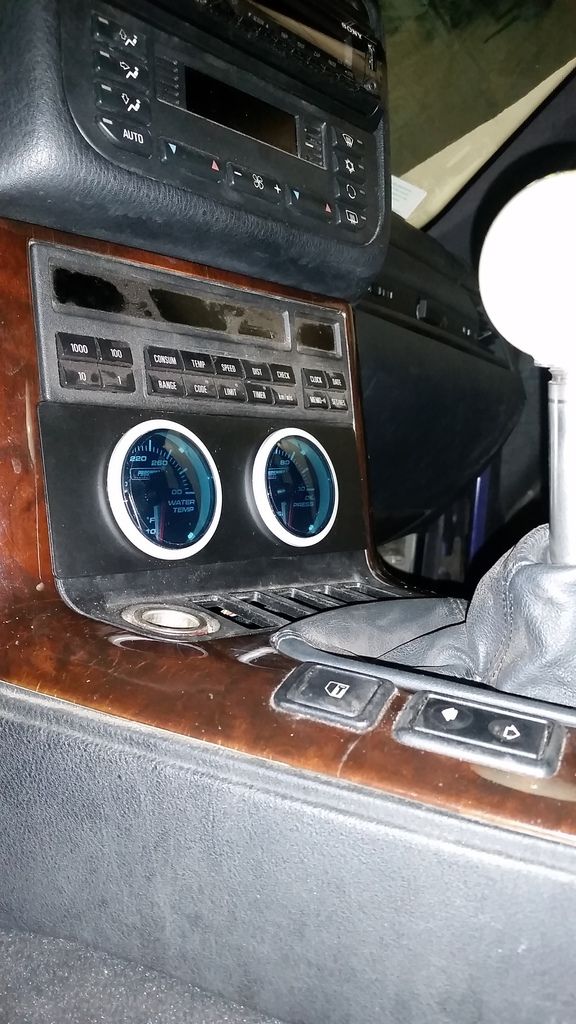
My buddy started to set up the gauge panel. The back of the storage pocket is gone, and part had to be filed down to allow the gauges to sit in it. Going to glue the metal panel to the pocket.
Mocked up.
Instergrams: @davemakepictar
Member
I used the old oil level sensor spot on the passenger side of the pan for temp sender. And kept the oil pressure sender above the oil filter.
Sent from my LG-H918 using Tapatalk
Ls2 e36 sedan
Member
Does the temp sender thread right in there or does it need some sort of adapter?
Instergrams: @davemakepictar
Member
Adapter. I believe I got it from speedway motors. Most people ditch the level sensor for the adapter and temp sensor.
Sent from my LG-H918 using Tapatalk
Ls2 e36 sedan
БМВ Фанат!
http://www.bimmerforums.com/forum/sh...0#post23526880
- 96 328is 6.0L. (LS1 to LS2 build thread: http://forums.bimmerforums.com/forum...ad.php?2098938)
- 96 328is 5.7L. (LS1 build thread: http://forums.bimmerforums.com/forum....php?t=1289987)
- 95 ///M3 6.0L. (LS2 build thread: http://forums.bimmerforums.com/forum....php?t=1619249)
- 97 ///M3. (e46 Fender Flares/track car build thread: http://forums.bimmerforums.com/forum....php?t=1727098)
- 96 328is (Dual Fuel Pump to Surge Tank thread: http://www.bimmerforums.com/forum/sh...ad.php?1964025)
Member
always trying to make it lighter and faster
^^former build: http://www.bimmerforums.com/forum/sh...-neglected-M3/
current build: http://forums.pelicanparts.com/porsc...car-build.html
instant grams: doktor_b
Member
Well, it ran. And it had 58 psi of oil pressure when cold according to the gauge. Found out that I never had a MAP sensor, so I had to buy that, and a new battery. Video is up on my insta-scrambies @davemakepictar.
Instergrams: @davemakepictar
Senior Member
Supporting Vendor
Please secure that fuel line and oil cooler with real fasteners rather than just zip-ties.
Jason McDaniel at Vorshlag
Member
Fuel line is secured in the bay as pictured above with a rubber coated hose clamp, the zip ties shown just change the position slightly.
Cooler is for the power steering fluid, and came with zip ties designed to go through it to attach to a radiator. I may end up changing how this is mounted, but there are no brackets to use for mounting on it.
Instergrams: @davemakepictar
Senior Member
Supporting Vendor
Good. I hate to see fire. And even though that PS cooler came with zip ties, I'd do something better. Power steering fluid burns too. That in the pic is PS fluid burning.
firefirefire.jpg
Jason McDaniel at Vorshlag
Member
More progress tonight, had some help from my shop mate to get a decent amount done actually. Too busy working to take pictures, I'll grab some either tomorrow or Thursday. Here's all that we got done:
Had to correct the wiring for the fuel pump. Since I added the relay for the fuel pump, I had to power it through the X20 plug. We jumped the relay on Sunday to get the pump to run, but actually spliced in the wire today through the connector.
Also added a large 4 gauge ground from the back of the passenger head to the chassis. Cranking time was greatly improved.
Shortened and loomed the wire between the junction block and the fuse box. This was more of the same 4 gauge wire.
Shortened and loomed the wire from the junction block and the starter, again 4 gauge.
Shortened and loomed the wire from the relay box to the junction block.
Filled the transmission with Dex III.
Ran 5/8" silicone hose from where the evap line was cut near the fuel filter to the evap purge on the motor. Need to finish up the wiring on this.
Instergrams: @davemakepictar
Member
Some of yesterday's work:
And how today went:
(none of these came close to working)
Instergrams: @davemakepictar
Member
Did some stuff the past couple of days.
Wiring for gauges, OBD2, and light bar tucked away behind the carpet/dash. Finally put the clutch pedal back together as well.
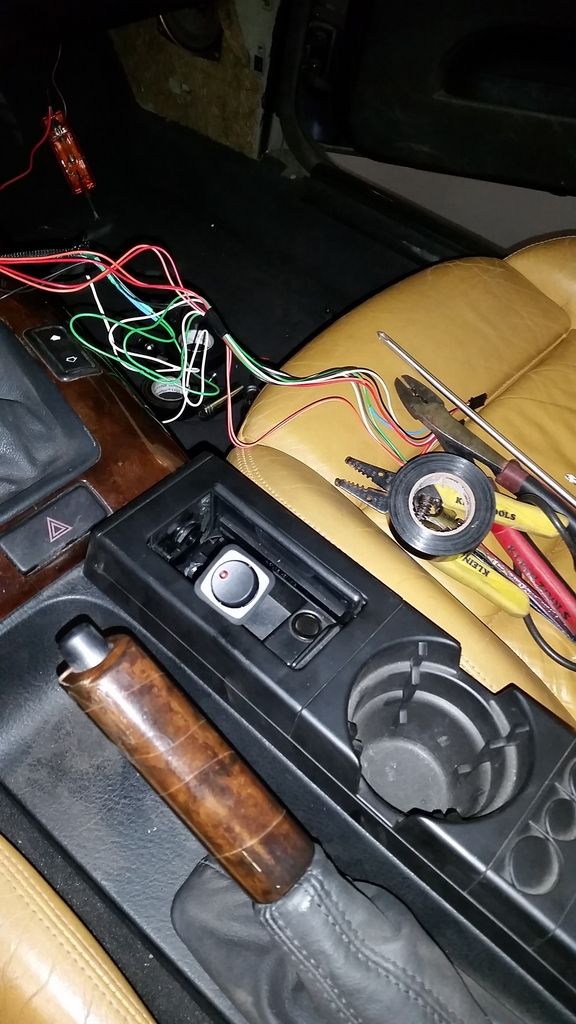
Light bar switch location, this took some figuring out to tuck all the wiring and set up. Reused the stock ashtray and glued in a piece of aluminum for the switch panel. Had to make a lot of holes in a lot of panels to pull all the wiring through.
Finished. Just need to find a good place underhood to mount the relay.
Instergrams: @davemakepictar
Member
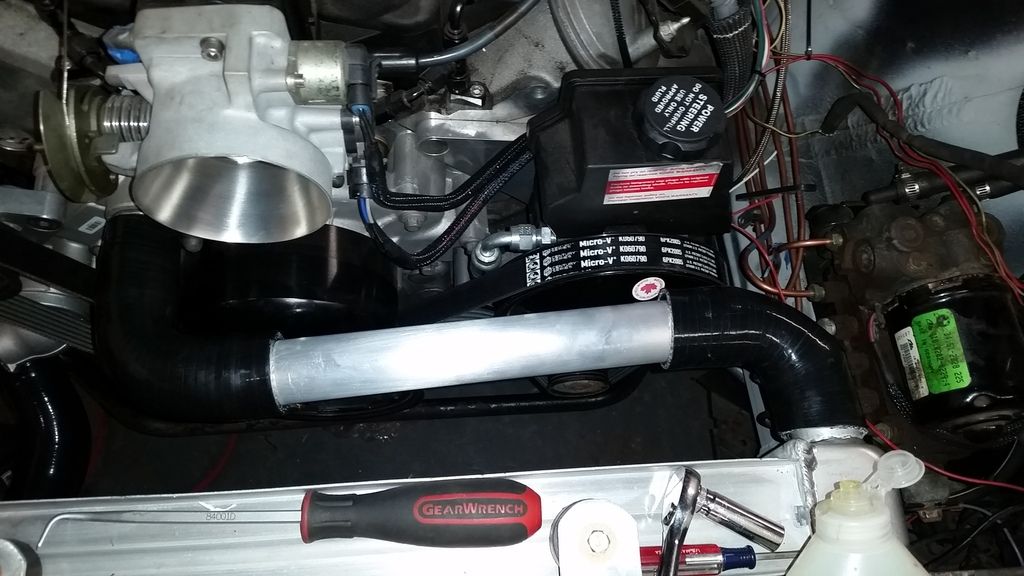
Messed with the radiator hoses today, got at least the top hose complete, and have one version of a lower hose. May revise it still.
Bought some 1.5" aluminum tubing, and an assortment of silicone couplers off ebay.
Modified some crimpers to use to create beads at the end of the aluminum tubing. Stole the idea from somewhere online. Worked pretty decent.
Rough idea for the upper. 1.5" 90 degree on the radiator, to the 1.5" tubing, to a 1.5" to 1.25" 90 degree reducer at the water pump.
Part of the lower hose. Mandrel bent 1.5" aluminum. Stole Jon Volk's idea for this, but tweaked it a bit. Not sure if I'm going to keep it. Ends are beaded as well.
Lower hose. 1.5" 90 degree elbow off the thermostat, to the 180 degree 1.5" tubing, to a 45 degree 1.5" to 1.75" reducer at the radiator. Had to shorten the heater hoses slightly. I have a 135 degree 1.5" elbow on the way. May also order a swivel water outlet and see if I can't use that to hit the 45 degree outlet, but it looks like it probably won't after mocking it up with the water neck removed. Definitely open to ideas on this.
And the upper hose complete- still needs slight tweaking. Probably going to shorten the upper outlet on the radiator to correct the hose angle slightly. Going to grab the heat shrink hose clamps, and use those all around except for the lower hose at the radiator side, since there's no petcock on the radiator.
Instergrams: @davemakepictar
БМВ Фанат!
Gees that lower contraption is scarry looking trombone...
Get a bend for reference that is close to what you need, even if you make it out of paper towel tubes and head to PepBoys, Advaned, Autozone. They let you go in the back most of the time to pick the right hose. Get the correct S bend and get rid of that detour of a contraption. These bends are out there, just have to look.
- 96 328is 6.0L. (LS1 to LS2 build thread: http://forums.bimmerforums.com/forum...ad.php?2098938)
- 96 328is 5.7L. (LS1 build thread: http://forums.bimmerforums.com/forum....php?t=1289987)
- 95 ///M3 6.0L. (LS2 build thread: http://forums.bimmerforums.com/forum....php?t=1619249)
- 97 ///M3. (e46 Fender Flares/track car build thread: http://forums.bimmerforums.com/forum....php?t=1727098)
- 96 328is (Dual Fuel Pump to Surge Tank thread: http://www.bimmerforums.com/forum/sh...ad.php?1964025)
Member
I'm not pumped on how it looks at this point, but there's no reason it shouldn't function.
I tried the replacement hose route last week- with the Chevy radiator and the OEM LS1 water neck, the bend needed is far from ideal.
Instergrams: @davemakepictar
Member
Looking good Dave.
i haven't been out to the garage since Saturday. You're doing better than I am for sure!
always trying to make it lighter and faster
^^former build: http://www.bimmerforums.com/forum/sh...-neglected-M3/
current build: http://forums.pelicanparts.com/porsc...car-build.html
instant grams: doktor_b
БМВ Фанат!
It will function even if you loop it twice around the engine.
Don't look for just GM replacement hoses. Look for ANY hose with the right diameter and a bend, even if you have to use the bend from the middle of a hose.
- 96 328is 6.0L. (LS1 to LS2 build thread: http://forums.bimmerforums.com/forum...ad.php?2098938)
- 96 328is 5.7L. (LS1 build thread: http://forums.bimmerforums.com/forum....php?t=1289987)
- 95 ///M3 6.0L. (LS2 build thread: http://forums.bimmerforums.com/forum....php?t=1619249)
- 97 ///M3. (e46 Fender Flares/track car build thread: http://forums.bimmerforums.com/forum....php?t=1727098)
- 96 328is (Dual Fuel Pump to Surge Tank thread: http://www.bimmerforums.com/forum/sh...ad.php?1964025)
Member
Exactly what I did with no luck.
Instergrams: @davemakepictar
 Posting Permissions


 Reply With Quote


Bookmarks