
 Member
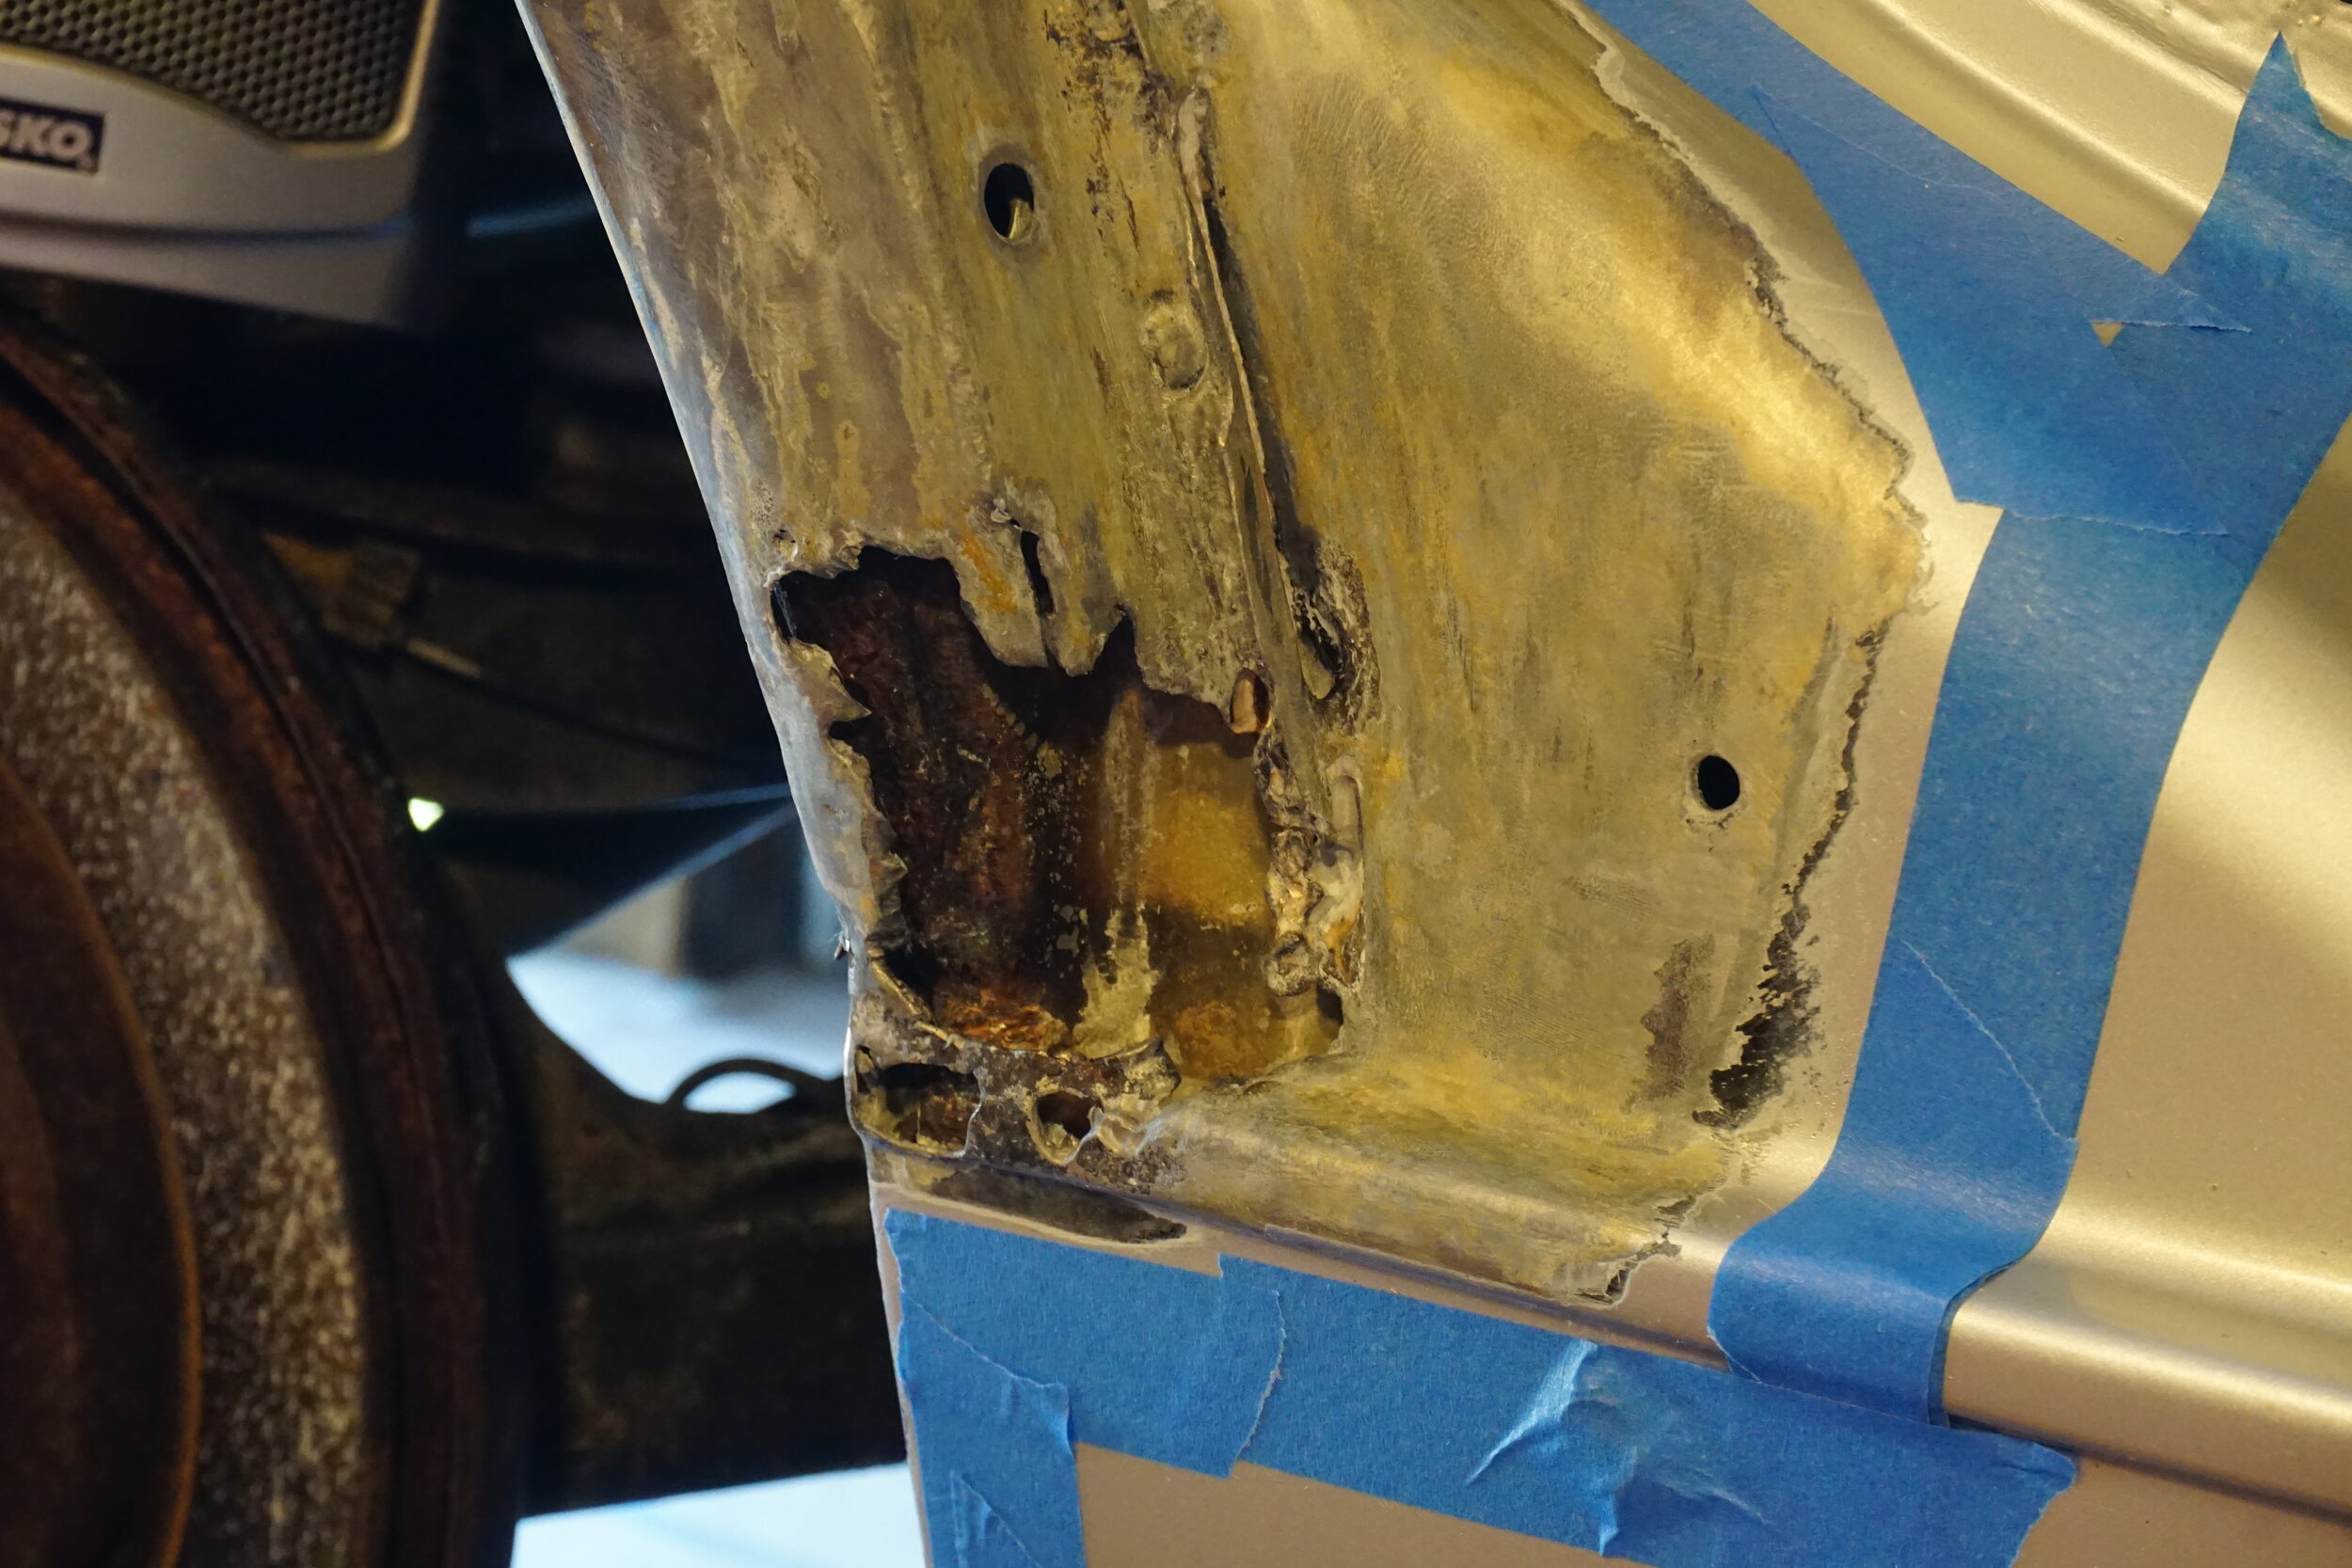
So, back to that rust repair project. I knew that welding on a replacement was the "right" thing to do, but I can't weld yet, and I wasn't about to ask someone to do it for me, so I did the best I could with what I had. Knowing what I know now, even if I had a new section welded in, it probably still would have required a ton of Bondo, as that's just how this car was repaired it seems. I knew that if I wanted to keep the rust from coming back I would have to get as much of it out as I could, so I went to town with every attachment I had for my angle grinder and Dremel. Wire wheels, grinding bits, flap wheels, etc. I must have spent at least two days doing this, I was relentless. Once I couldn't physically remove any more rust, I attacked it chemically. I used a combination of "Krud Kutter The Must for Rust" and the line of POR15 prep products, specifically the Metal Prep solution. Here's how it went.
I stuffed paper towels in all of the gaping holes so they would absorb the chemicals and hopefully clean out the insides of the fender a bit where my tools couldn't reach. Yes, I have that long flexible attachment for my Dremel that allowed me to get tools way up inside the holes and in tight areas.
I then kept the whole area wet for about an hour with each product, reapplying frequently so they wouldn't dry out. After wiping the area down with water and a paper towel to clean up, a lot of rust came up, and the metal looked very clean. All of the dark areas that didn't even look like rust cleared right up. These products work, but you have to give them time. The POR15 Metal Prep leaves behind a zinc coating that supposedly helps the POR15 paint adhere, which you can see in these pictures.
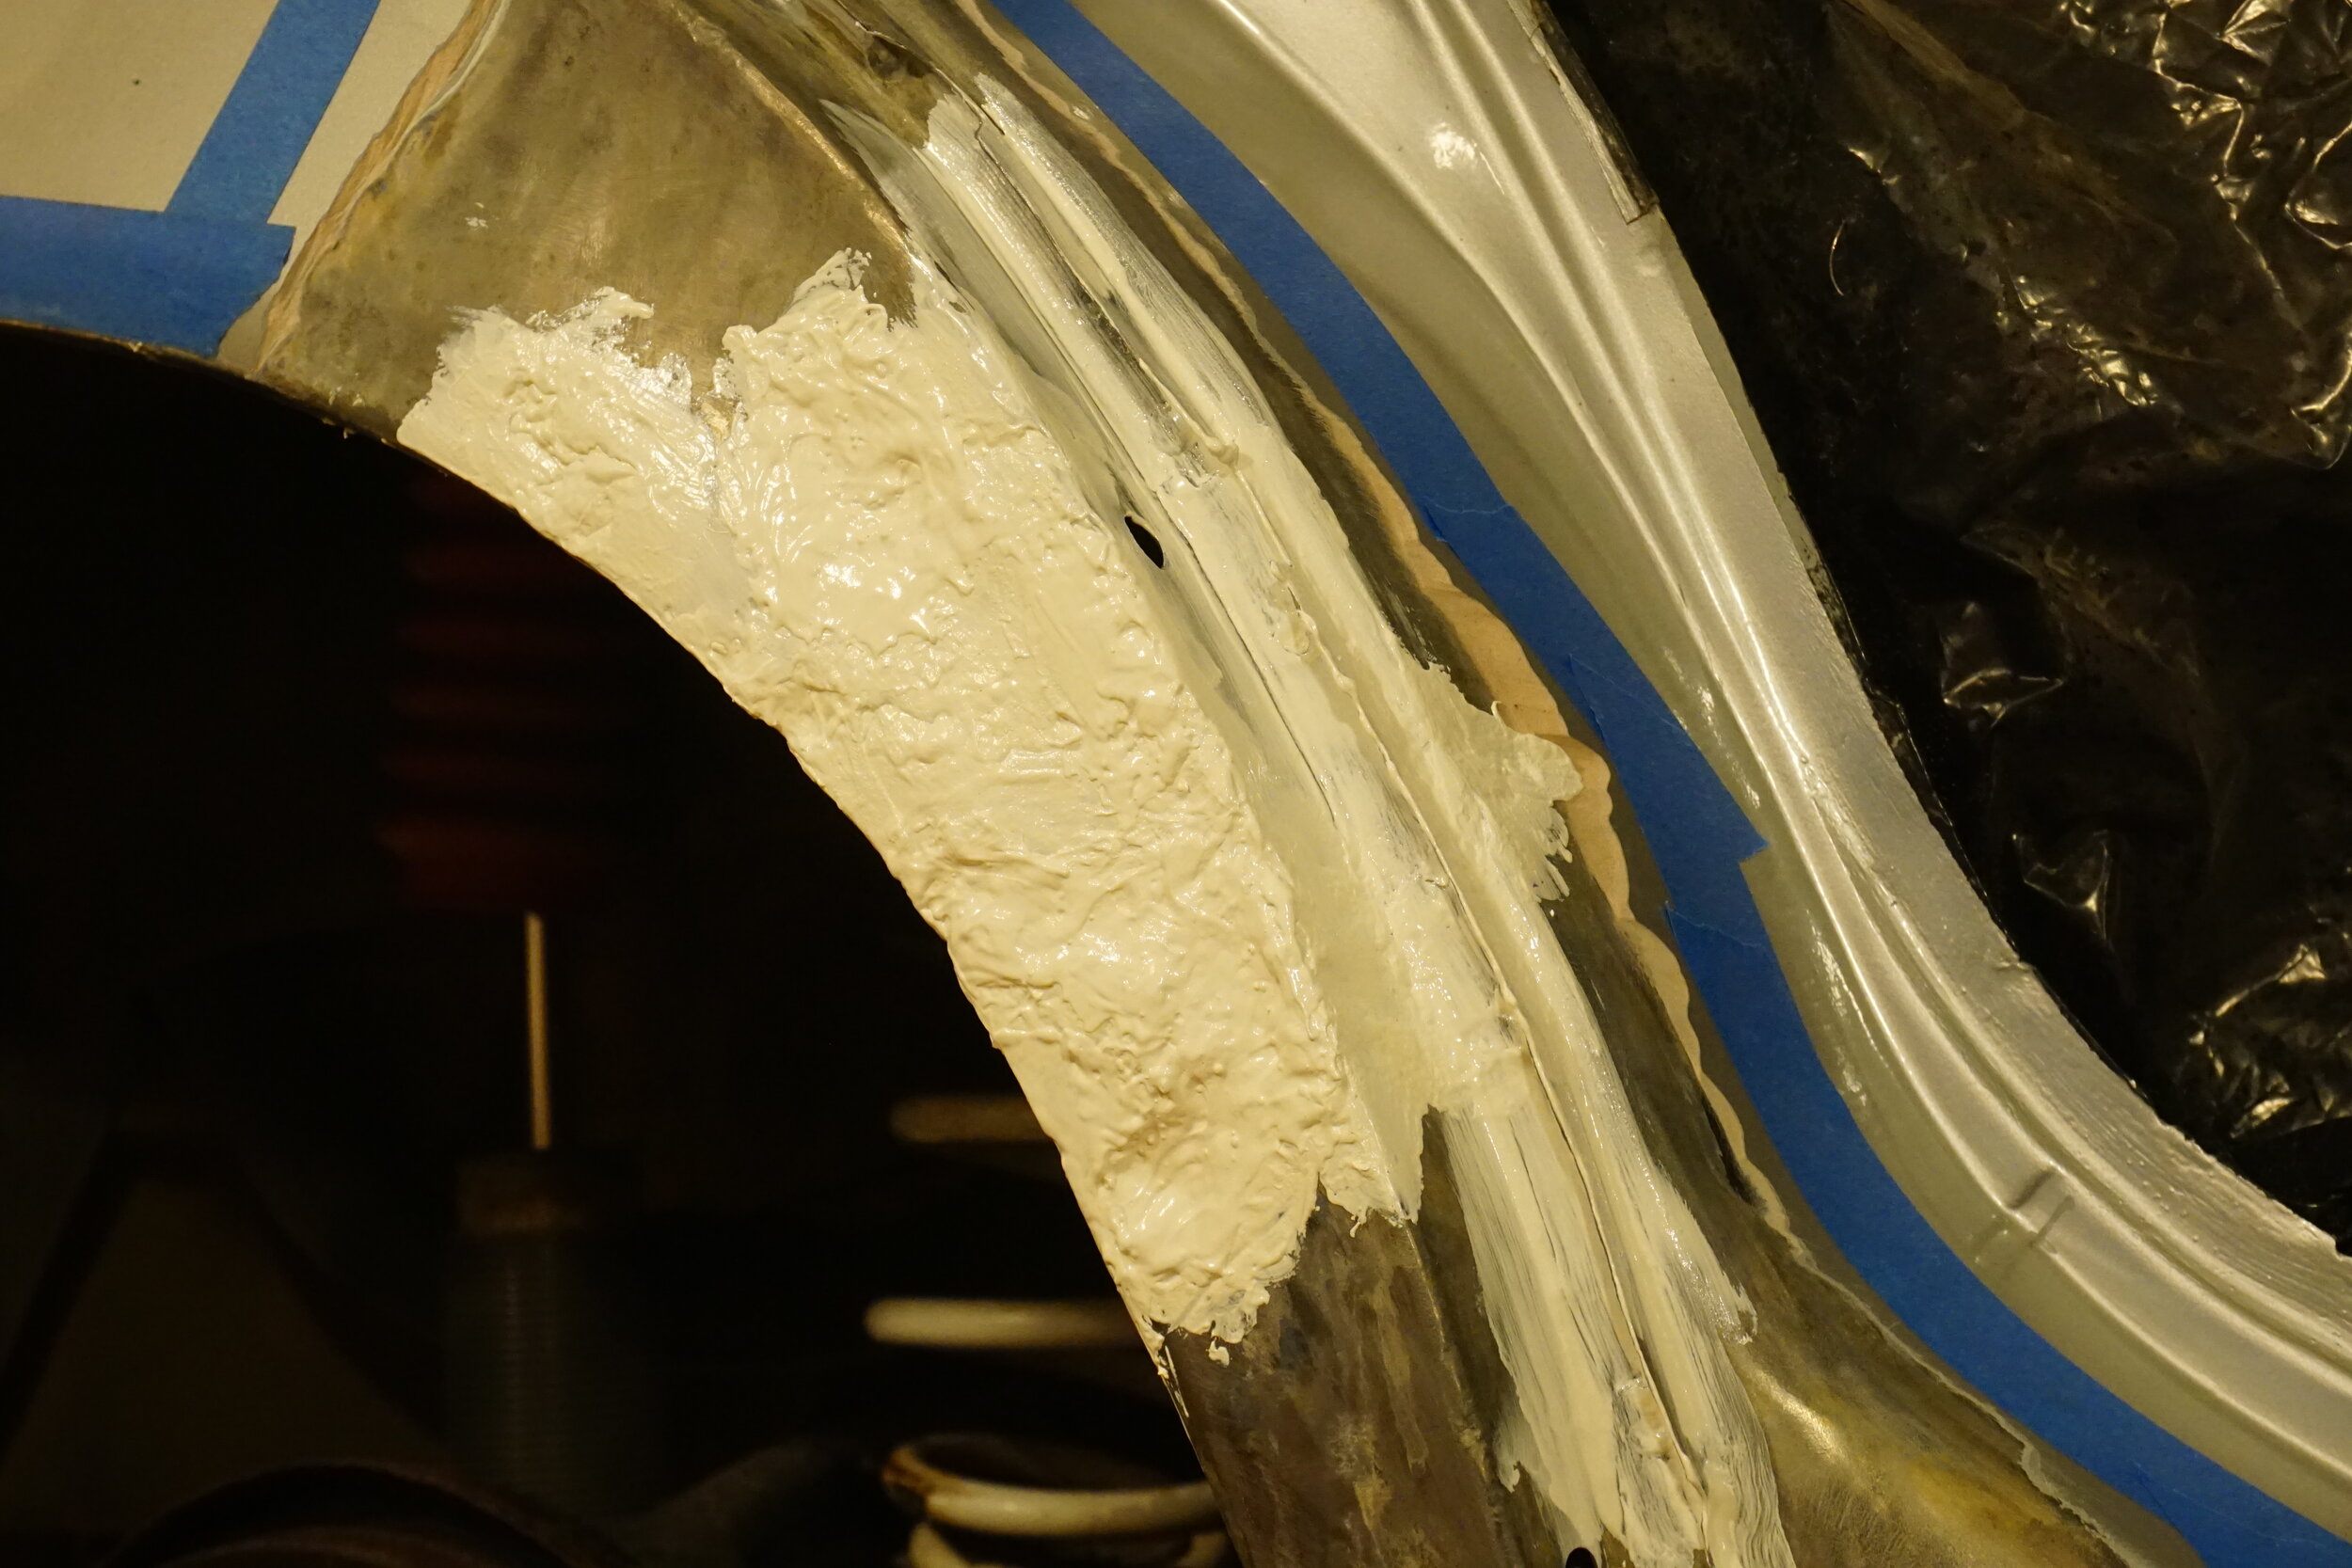
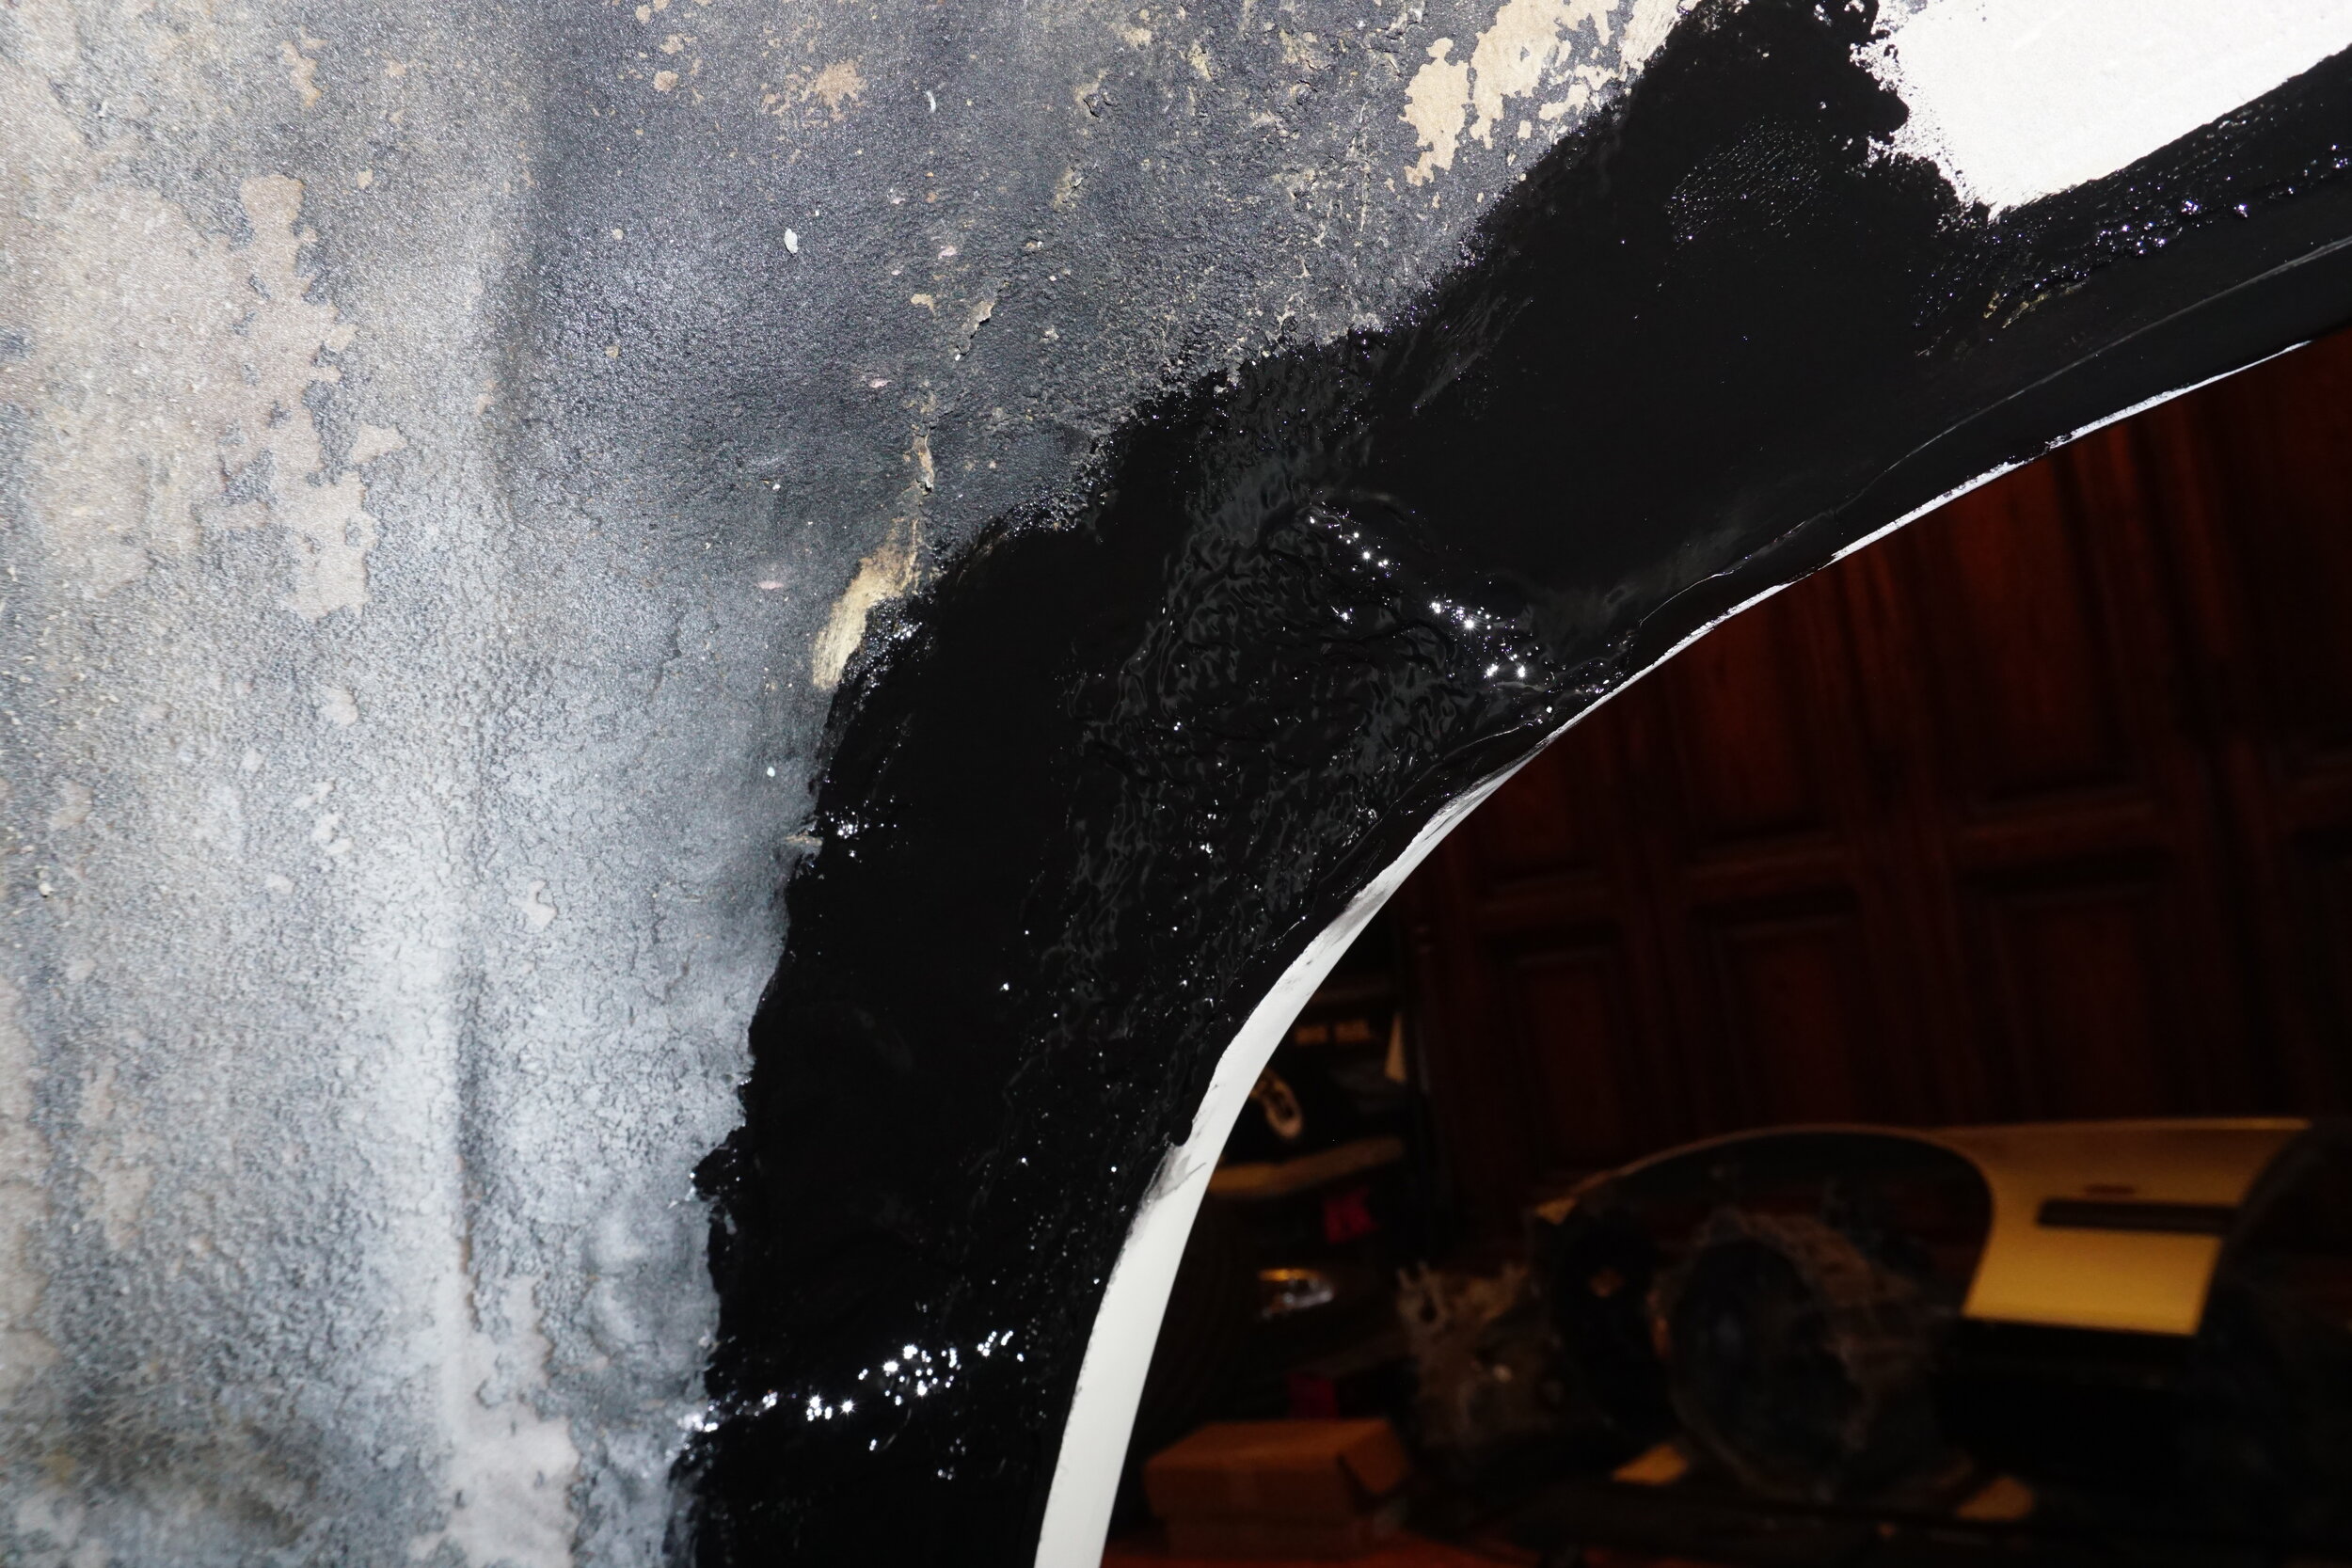
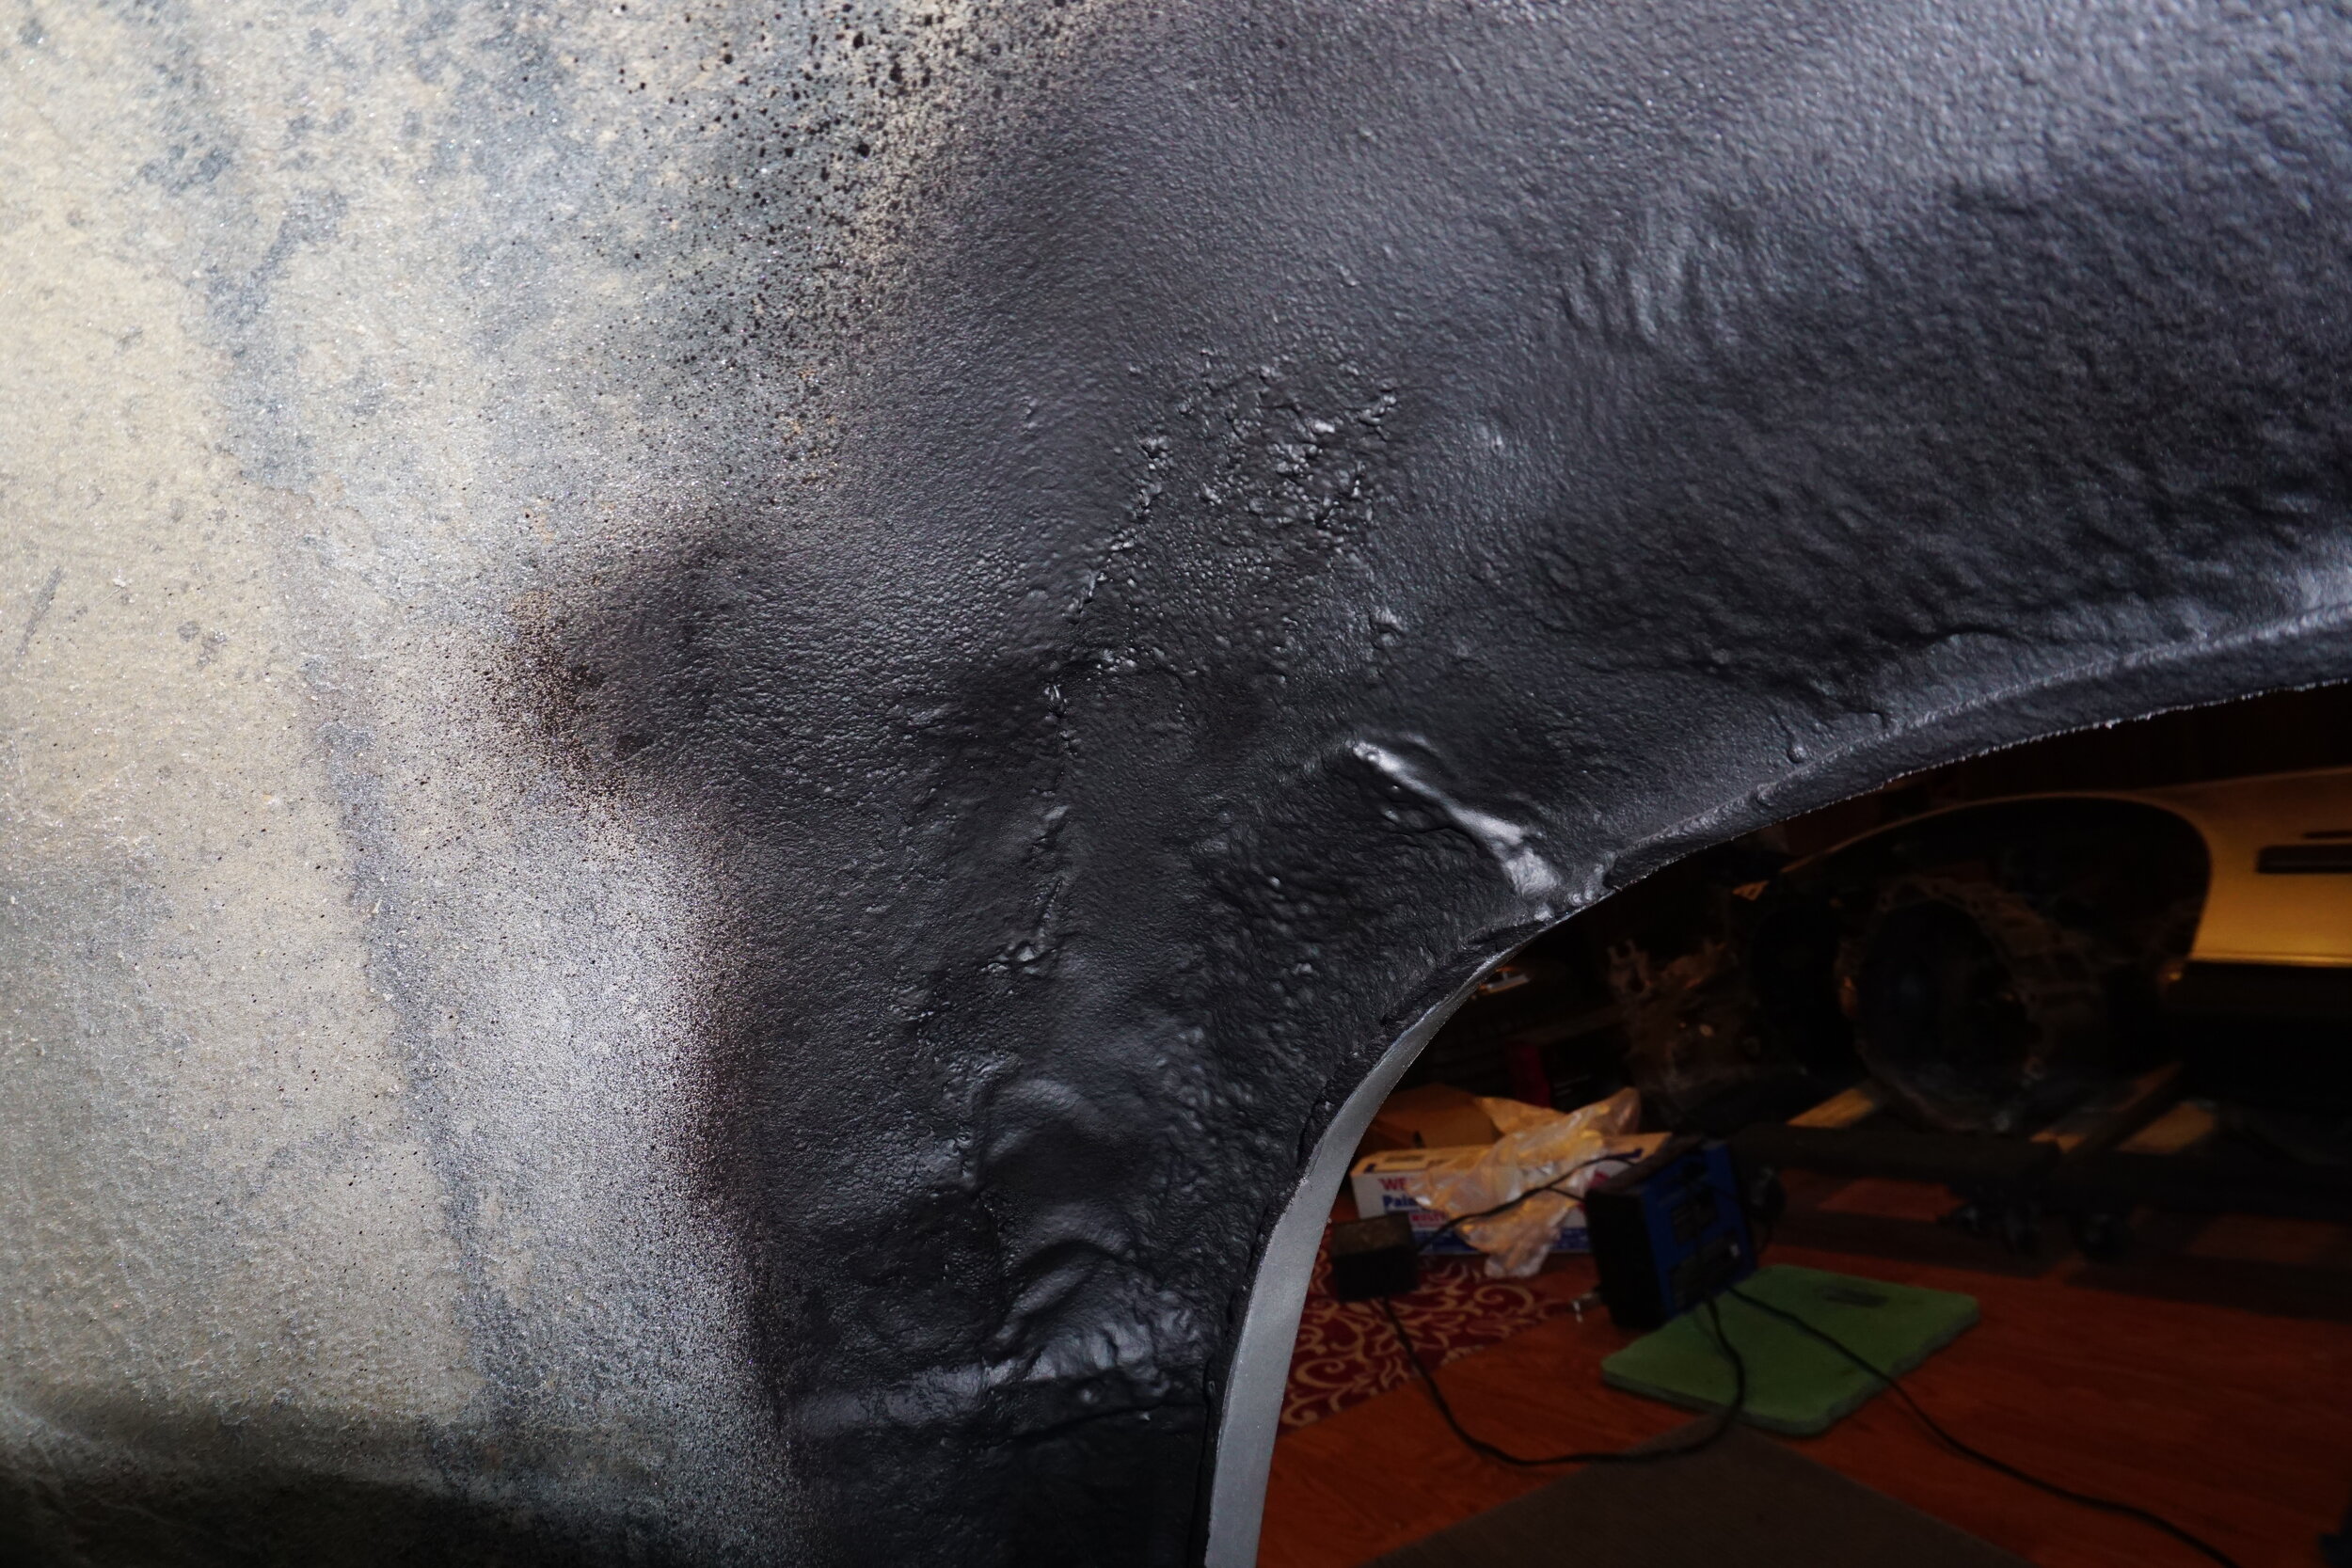
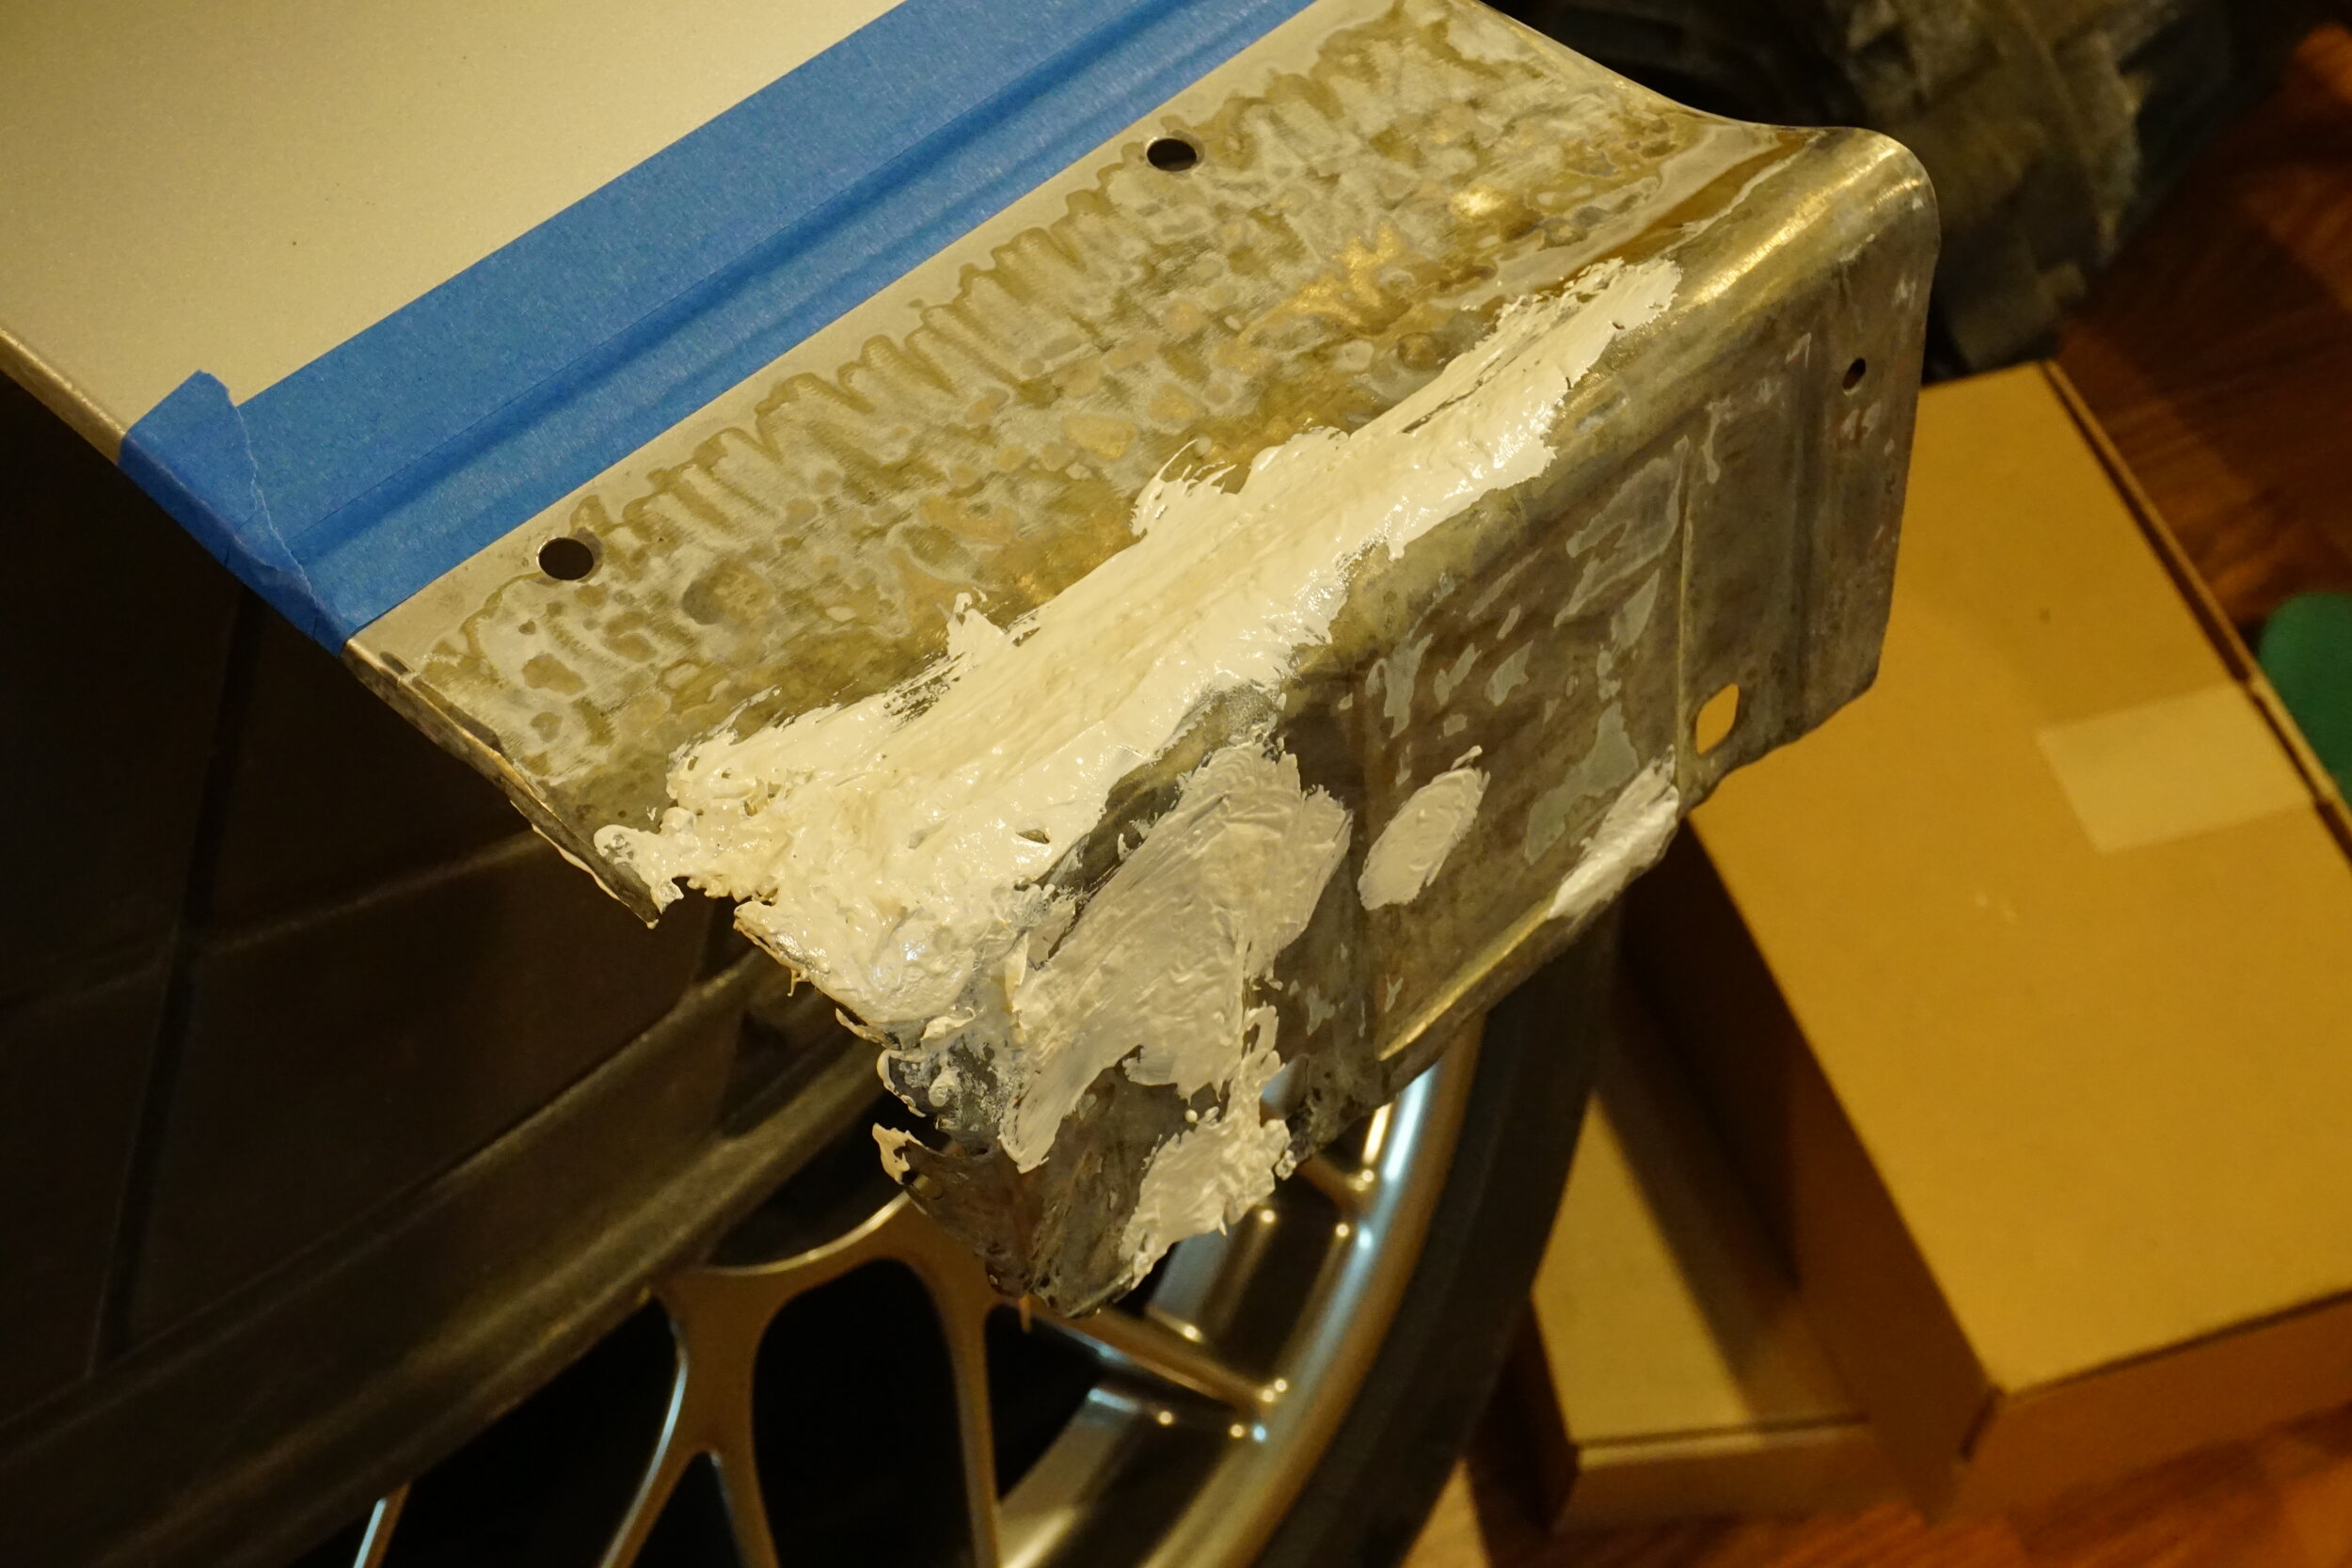
Then it was time for the POR15 Patch Filler and Seam Sealer. It supposedly has the rust-prevention properties of POR15 paint, but it's thicker and can be used to fill patches and cracks. I decided to coat the insides of the holes/fender in an effort to keep them from rusting further. I don't have pics of everything, but I smeared this stuff everywhere I could fit my fingers.
Once the insides were coated, it was time to rebuild the structure of the fender. I wanted to use as much of the POR15 seam sealer as possible, so that's what I used instead of Bondo. It took a LOT longer to dry, and it didn't sand nearly as easily, but I feel good knowing the fender is stuffed full of this POR15 stuff. I used Bondo wire mesh sheets to fill in the gaps, then smeared POR15 all over it.
Then more POR15 until all the gaps were closed and the fender was water tight.
The POR15 does turn rock hard after a few days and the repaired areas felt very solid. Is this how a body shop would do this? No way. But is it a better long-term solution than a bunch of Bondo? I sure hope so. After it had all dried (I had heaters blasting the areas to speed it up), it was finally time to bring the Bondo into the equation. I'm not a body man, and I've only really used Bondo once before, so I was very cautious and probably wasted a ton of time. I probably had to do 10+ applications of it, as the area had to be built up so much for it to be flush with the door. It didn't help that I probably applied it too thin, and didn't start shaping it properly until late in the process. The most difficult part was getting the compound curves correct, where it not only comes out to meet the lip of the fender (another headache in itself) but also slopes down towards the bottom of the car. I also had to make sure the gap with the door was even when it was closed, and that the height of the Bondo matched the door when it was closed. I'm guessing I spent about two whole days just building it back up into roughly the right shape. It's also extremely difficult to gauge the shape and curvature of Bondo next to a painted surface since there's no gloss. Turns out I didn't get it quite right. I think this was the hardest part of the project. But, it was also incredibly rewarding to see the shape come back after what it looked like when it was all stripped down to the bare metal. Enough talk, let's see some pics.
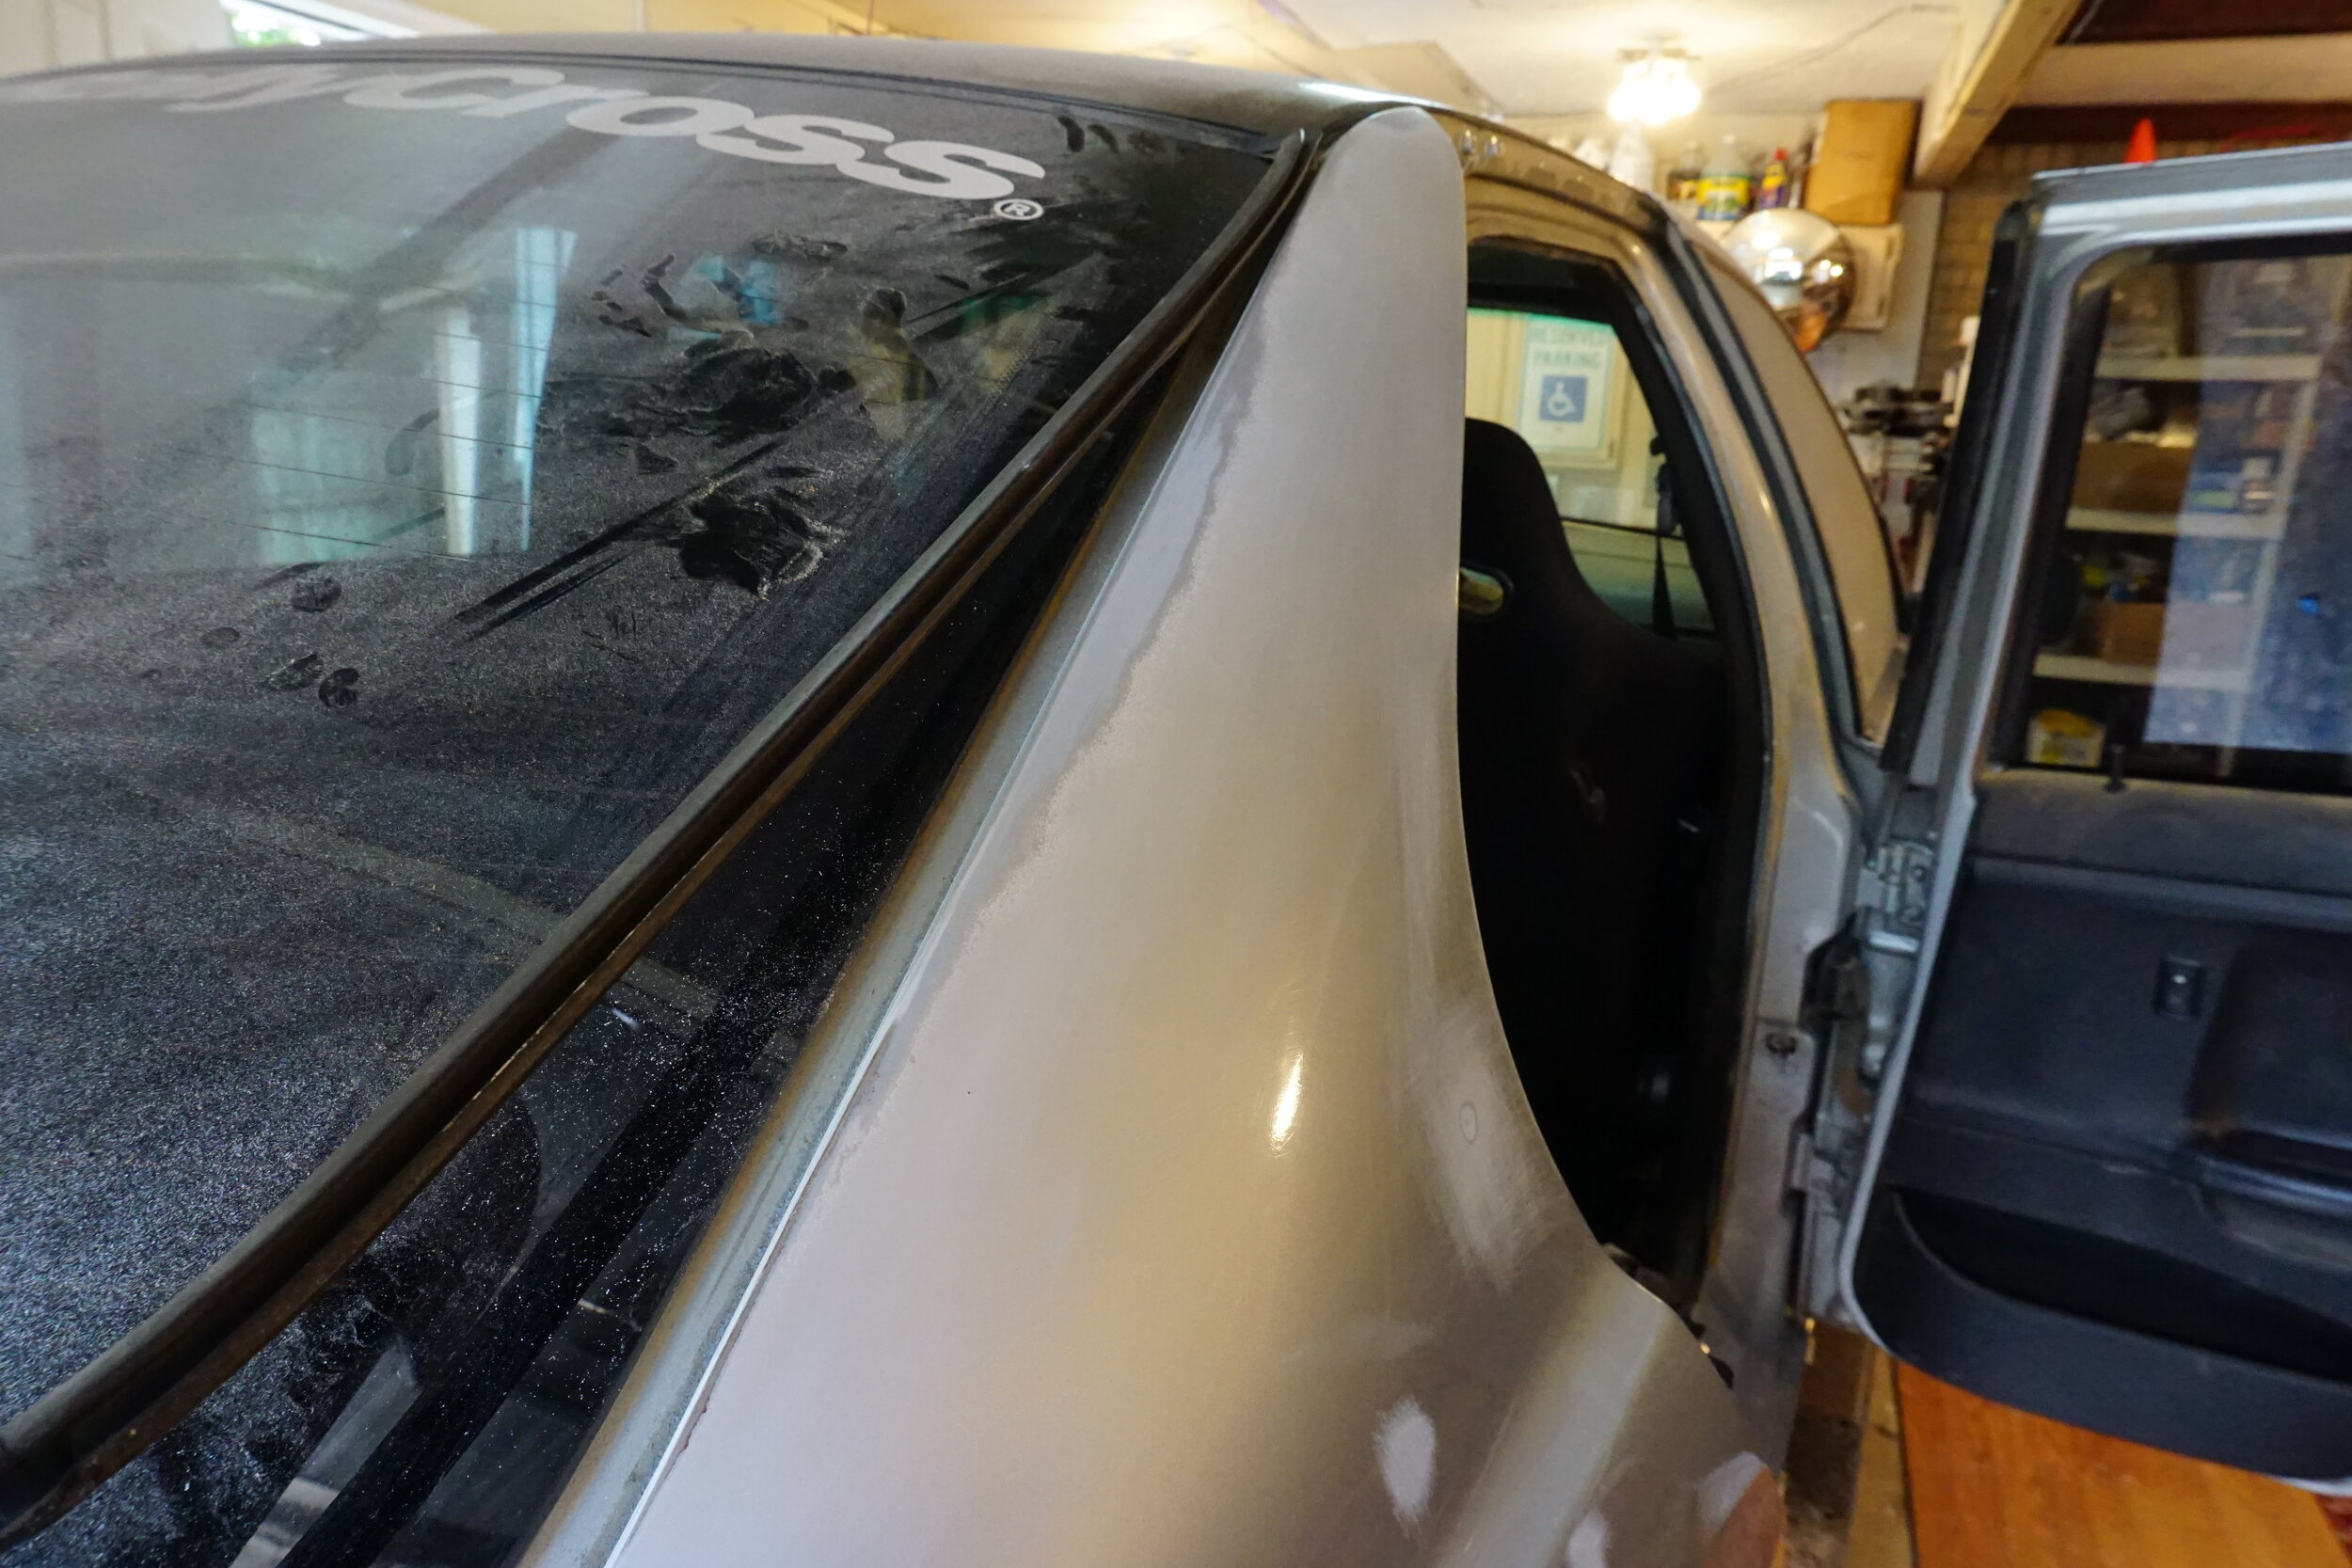
I then decided to make the project even more difficult. You see, the paint at the top of the panel where it meets the roof was all sorts of crappy, and the clear coat had basically dissolved. There were some tiny spots of rust along the side of the rear glass, and I was tired of looking at it. I knew blending in my repair would be a job in and of itself, so I decided to just paint the whole damn panel to at least make blending not as much of an issue. Except the paint on the whole fender was crap, and there were tons of little spots where the paint had started to come up and I think I could see the original paint under it. I wasn't about to paint over all these little divots, so I got to sanding.
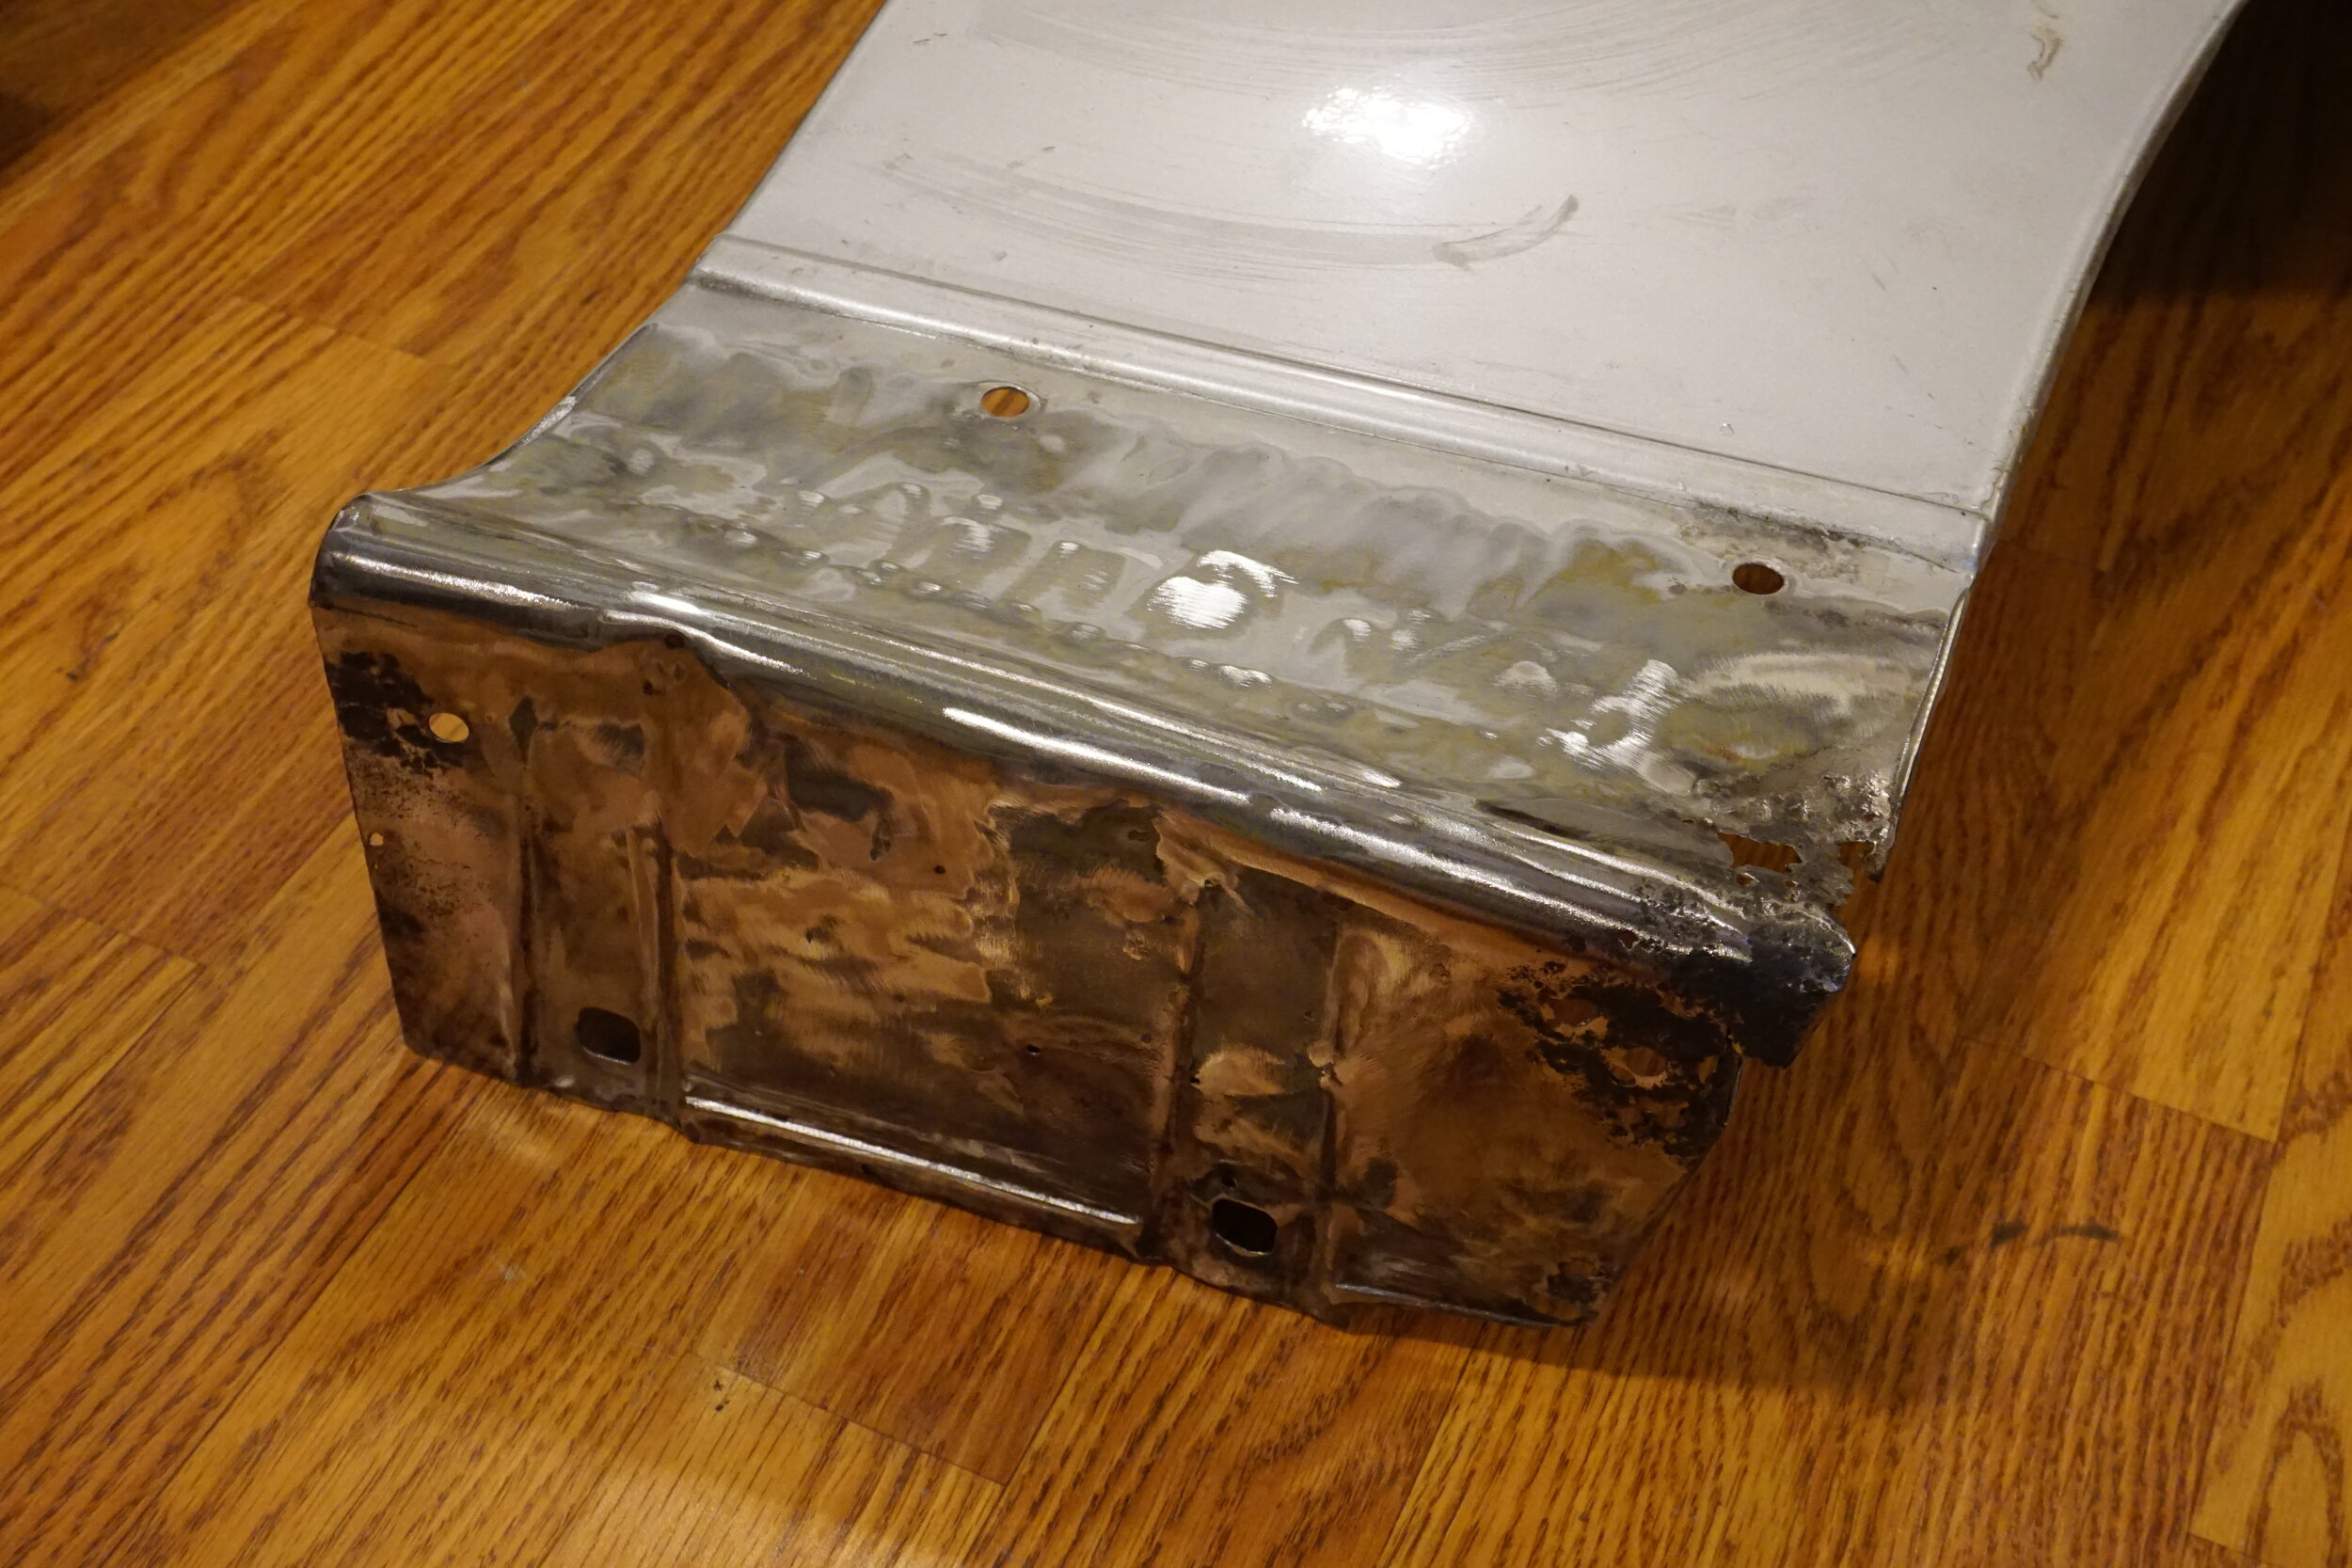
Yeah, there were a lot of divots in there. Here's what the upper part of the panel looked like:
I then went to town with some "3M Scuff-It Paint Prep Gel" on a Scotch Brite pad to scuff up the existing "good" paint so the primer would have something to grab onto.
That's all for tonight folks. Come back next time for more "A stupid man tries to do bodywork"!
Member
Tonight, on "This idiot really did all this?" we get to the main event, painting!
But first, priming. Specifically, with some nice 2 part epoxy primer from the local autobody paint shop. I used the Spray Max 2K Epoxy Primer in beige, since it's apparently the nicest stuff you can get in a spray can. I cleaned the area with PrepAll, then tacked it, and then it was time to spray.
I think I ended up doing three coats. Unfortunately, I think I should have used my high build primer first, as I was left with a ton of low spots from the sanding to build up.
I used a trick I learned from watching some videos on YouTube (Refinish Network) where I sprayed the high build primer through a hole in a piece of cardboard to reduce overspray and keep things neat. I think it worked as intended:
There was some spraying
And then sanding. And then more of each, until I thought all the low spots were built up and level. This took a while. I used 400 and 600 grit paper to get it ready for paint.
Finally, FINALLY, it was ready for paint. When I went to the autobody paint store, they used this fancy scanning machine to determine the closest match to my existing paint color. First, I gave them my paint code, then he scanned the car in a few locations to get readings. A match score of 1 is absolutely perfect. I think the scale goes as high as 50. The factory code was a match of 15, while an Isuzu silver was a match of 5, so that's what I went with. Unfortunately, I had all sorts of problems with the nice wide-angle nozzle on the can. At first it was just dripping paint out onto my floor, then it worked for a while, but by the second or third coat it just started splattering paint out, so I took it off and had to use a generic narrow-angle nozzle, which made application even more difficult. There were a few spots where it just didn't seem to go down right, and I wasn't able to fix them with more layers. In the end I used the whole can, which gave me 5 coats, which is more than what's recommended. Applying them heavier might have helped, but that was made difficult by the narrow-angle tip. At least there were no runs.
Here you can see the transition from the old bondo to my repair bondo:
But there was nothing I could do at this point except put the clear on and say fuck it. I tacked the surface again before putting the clear down. I tried to apply the clear a little heavier than the base, and put down four good coats. Again, no runs. I again used Spray Max 2K Clear.
Here's an area where the base didn't go down right:
It still needs to be wet sanded and polished, but I'll do that once the season is over. I'm also going to polish the door a bit to smooth the transition from shiny clear to worn clear. Maybe it will work.
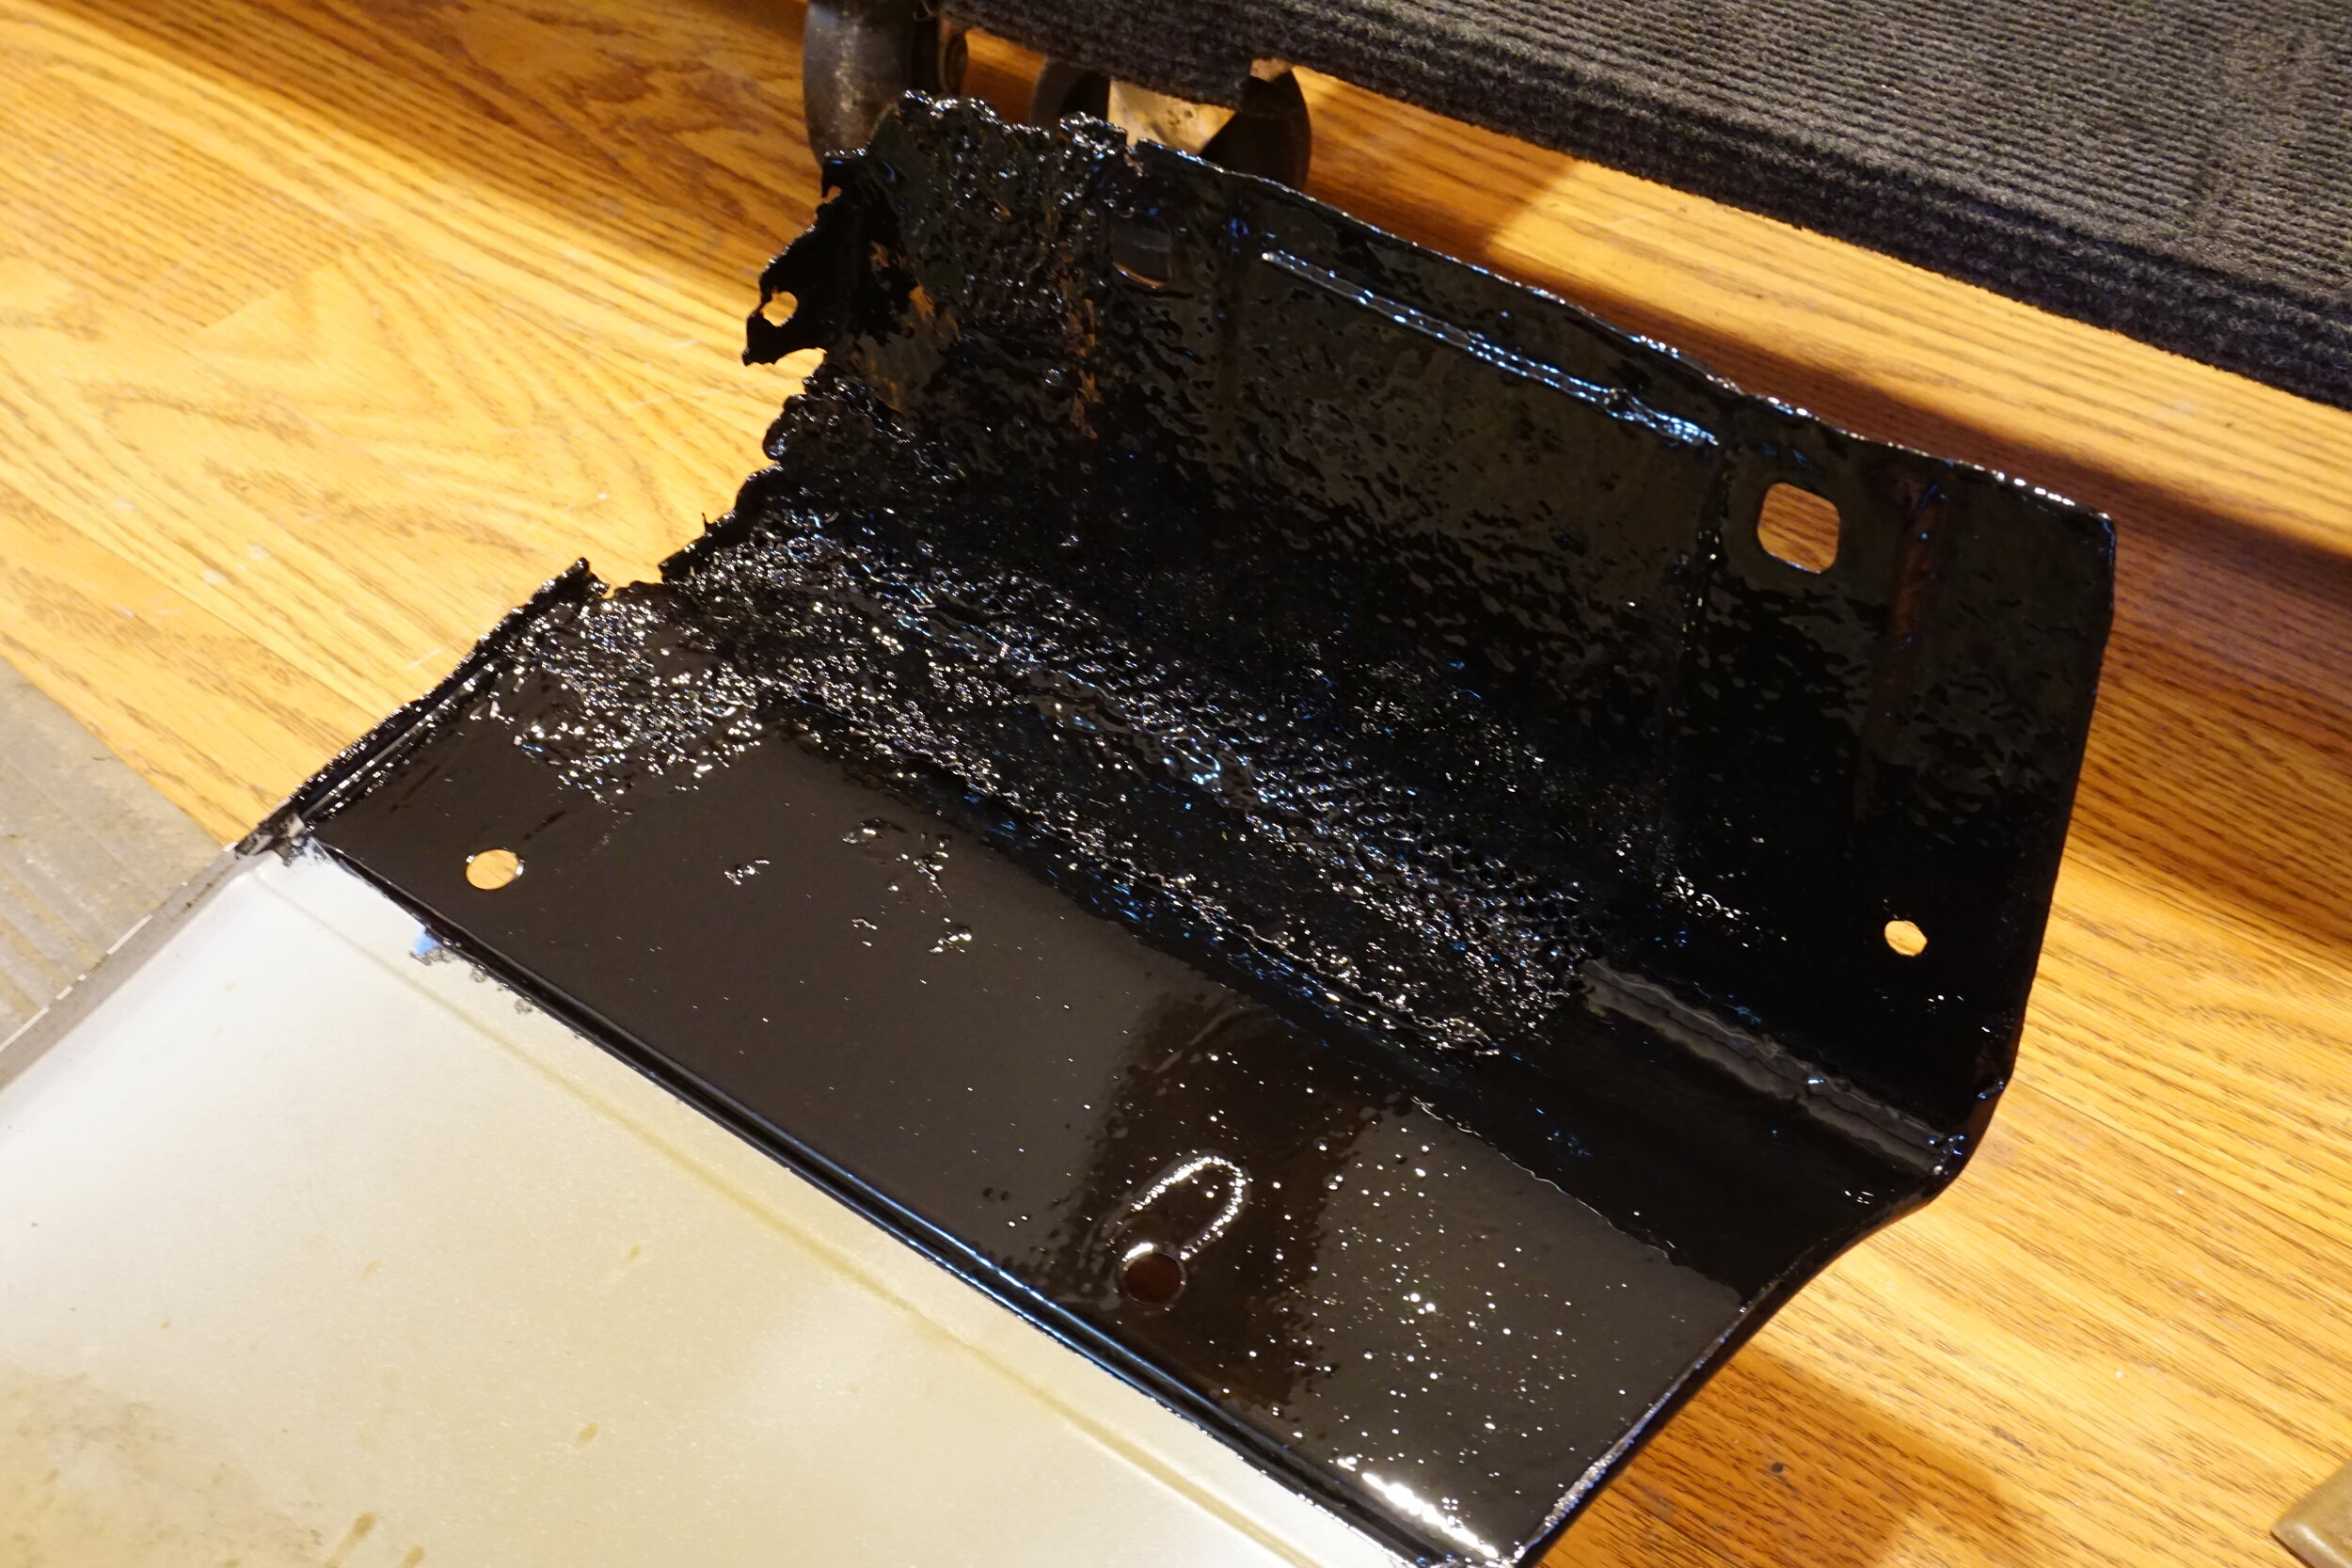
So, all done, right? Well, no, not even close. Once the clear was on I had to finish up inside the fender. First the regular POR15 went on everything.
Then the 3M Rubberized Undercoating went on top of that after I sanded it down with 320 grit so it could adhere.
I'm pretty pleased with how that turned out. I think the inside should be well protected and will keep any water from getting back inside the fender. I made sure to spray a lot down in the valley of the lip so anything that gets trapped in there can't do any damage.
Then there were all the other parts of the car I had to repair.....
Last edited by 95maxrider; 11-02-2020 at 08:19 PM.
Member
That looks great! That's a much better job than what I did. Hoping it lasts for you.
Member
Nice work!
I've seen some pretty amazing results from those 2-part spray cans. Mostly on smaller items like motorcycle tanks and fenders.
Member
Before I get back to paint adventures, I'm going to review the last two rallycross events of the year. We had another double header weekend, like we've been doing all year due to covid, and we were back at Summit Point. Conditions were absolutely perfect, with temps in the 70s and low humidity, and good sun. Considering this is the DC region in November, we were very lucky. I came into the weekend in third place, a few points behind Josh, and many points behind Stephen. I've only ever won one event at SP before on the Tree Course, and I generally don't do very well on the Barn Course for some reason. Which is strange, since the Barn Course is hard packed, has a few straight sections where I can use my power, and generally has pretty simple courses. Historically, the Tree Course is tighter and isn't as hard packed. It can get very loose and dusty. So I wasn't feeling very good about my chances of doing well.
We tried something new in an effort to get more runs, where one run group ran all morning, and the other run group ran all afternoon. This would eliminate the switchover between groups halfway through the AM/PM sessions and get us more time to run, since it's getting dark so early now. I think it worked out pretty well and I didn't hear any complaints. So on Saturday we were on the Barn Course, and we ran in the PM session. Josh jumped out to a little lead on the first run, but I was right behind him, with Stephen a little back. But on the second run Josh hit a cone, and I ran very fast, and I jumped out to a decent lead. I continued to lay down the fastest times of the group for the next three runs and built a little lead. As the afternoon wore on the wind died down and the dust started hovering on the course, and with the sun at a low angle it was getting difficult to see where you were going in some spots. We were supposed to get 8 runs, but by the time our 7th rolled around they called it as our last run. I didn't need to risk pushing it so I took it a little easy, and finished about 3 seconds ahead of Stephen, who was about 1 second ahead of Josh. Neither Stephen nor I hit any cones. Of our 7 runs, I was fastest on four of them. Josh was complaining that he couldn't put down power as well as he usually did and thought his diff was worn out, but I didn't put much stock in it. But with his second place finish, Stephen locked up the championship for the season, securing his first in the MR class. Stephen has been a consistent and tenacious competitor for a long time, but has missed out on the championship the last few years due to missed events. So this year he finally attended all the events, and lo and behold, he won it all. Of all the drivers in the class, I would say Stephen does the most with the least (car). It's got a tired M20 and a full interior, so it's probably got the worst power to weight ratio of all the competitive cars in the class, and yet he is always near the top of the pile. My hat goes off to him, he really earned this one.
So then it was down to Josh and I, fighting for second place. We get to drop two of our eight events for the season, and I had two stinkers early in the season, while Josh had been consistently on the podium. I think Josh came into Sunday with a one point lead over me, so I was going to have to beat him if I wanted second. Josh hasn't finished lower than second for something like the last 7 years, and I'm sure he wasn't eager to start now. We were on the Tree Course Sunday, and were greeted by the unexpected surprise of the course having been graded and slightly widened in certain areas. This got rid of all the loose slit on top and got down to a nice hard packed layer, which really helped me put my power down. There was one tight kink on the course right next to a cone wall, threatening to ruin someone's day. But otherwise, the course was very friendly to my car. With the championship locked up, Stephen was free to not really GAF and promptly hit four cones on his first run, likely equaling his total for the season. I laid down the fastest first run and never looked back. Josh laid down a scorcher on his second run but caught a cone, and I pulled away from there. Of our 8 runs, I was fastest on four of them. Eric and Stephen both had some fast runs as well. After Josh hit another cone on his third run, he pretty much gave up and started to horse around. In runs 5-8, people who were out of contention started swapping cars and having fun, but Eric wasn't too far behind me, so I had to stay in serious mode and make sure I held onto first. In the end, Eric hit his only two cones on his last run, and finished about 10 seconds behind me. Everyone else's runs were sort of jumbled since they were car swapping so it's impossible to know what the rest of the results were. So with two first place finishes for the weekend, I edged out Josh by a few points and got into second place for the season, only one point behind Stephen. Considering I was in fifth place after our first two races, this feels pretty awesome. By the time the season was half way over, it had been over a year since I won a race, and I was starting to wonder if I had what it takes to ever win one again. But by winning three of the last four, I guess I answered that question. The competitiveness of our MR class is second to none, and I know I wouldn't be able to drive this well without all the other awesome drivers around me, forcing me to get better and push harder.
I ran my Maxxis gravel tires on both days and it was absolutely the correct decision. I just don't see a use for my grass Maxsports aside from deep silt or mud conditions. Maybe if I had gotten a wider size (they're a 185/65/15 vs the 205/65/15 Maxxis) they would be more useful, but for my car they're just too narrow and squishy if the course has any grip on it. After everything was over Josh went home and measured the break away torque of his diff, and damn if it wasn't about half of what it should be. I'd be surprised if that loss happened all of a sudden this weekend, but I guess his hunch was right. So he'll be back even stronger next season, as will most of the other cars. As for me? I might actually get around to installing those seat heaters in my Recaros and detailing my car
Member
Alright, let's try to finish up this rust repair nonsense. Yes, there is more to this.
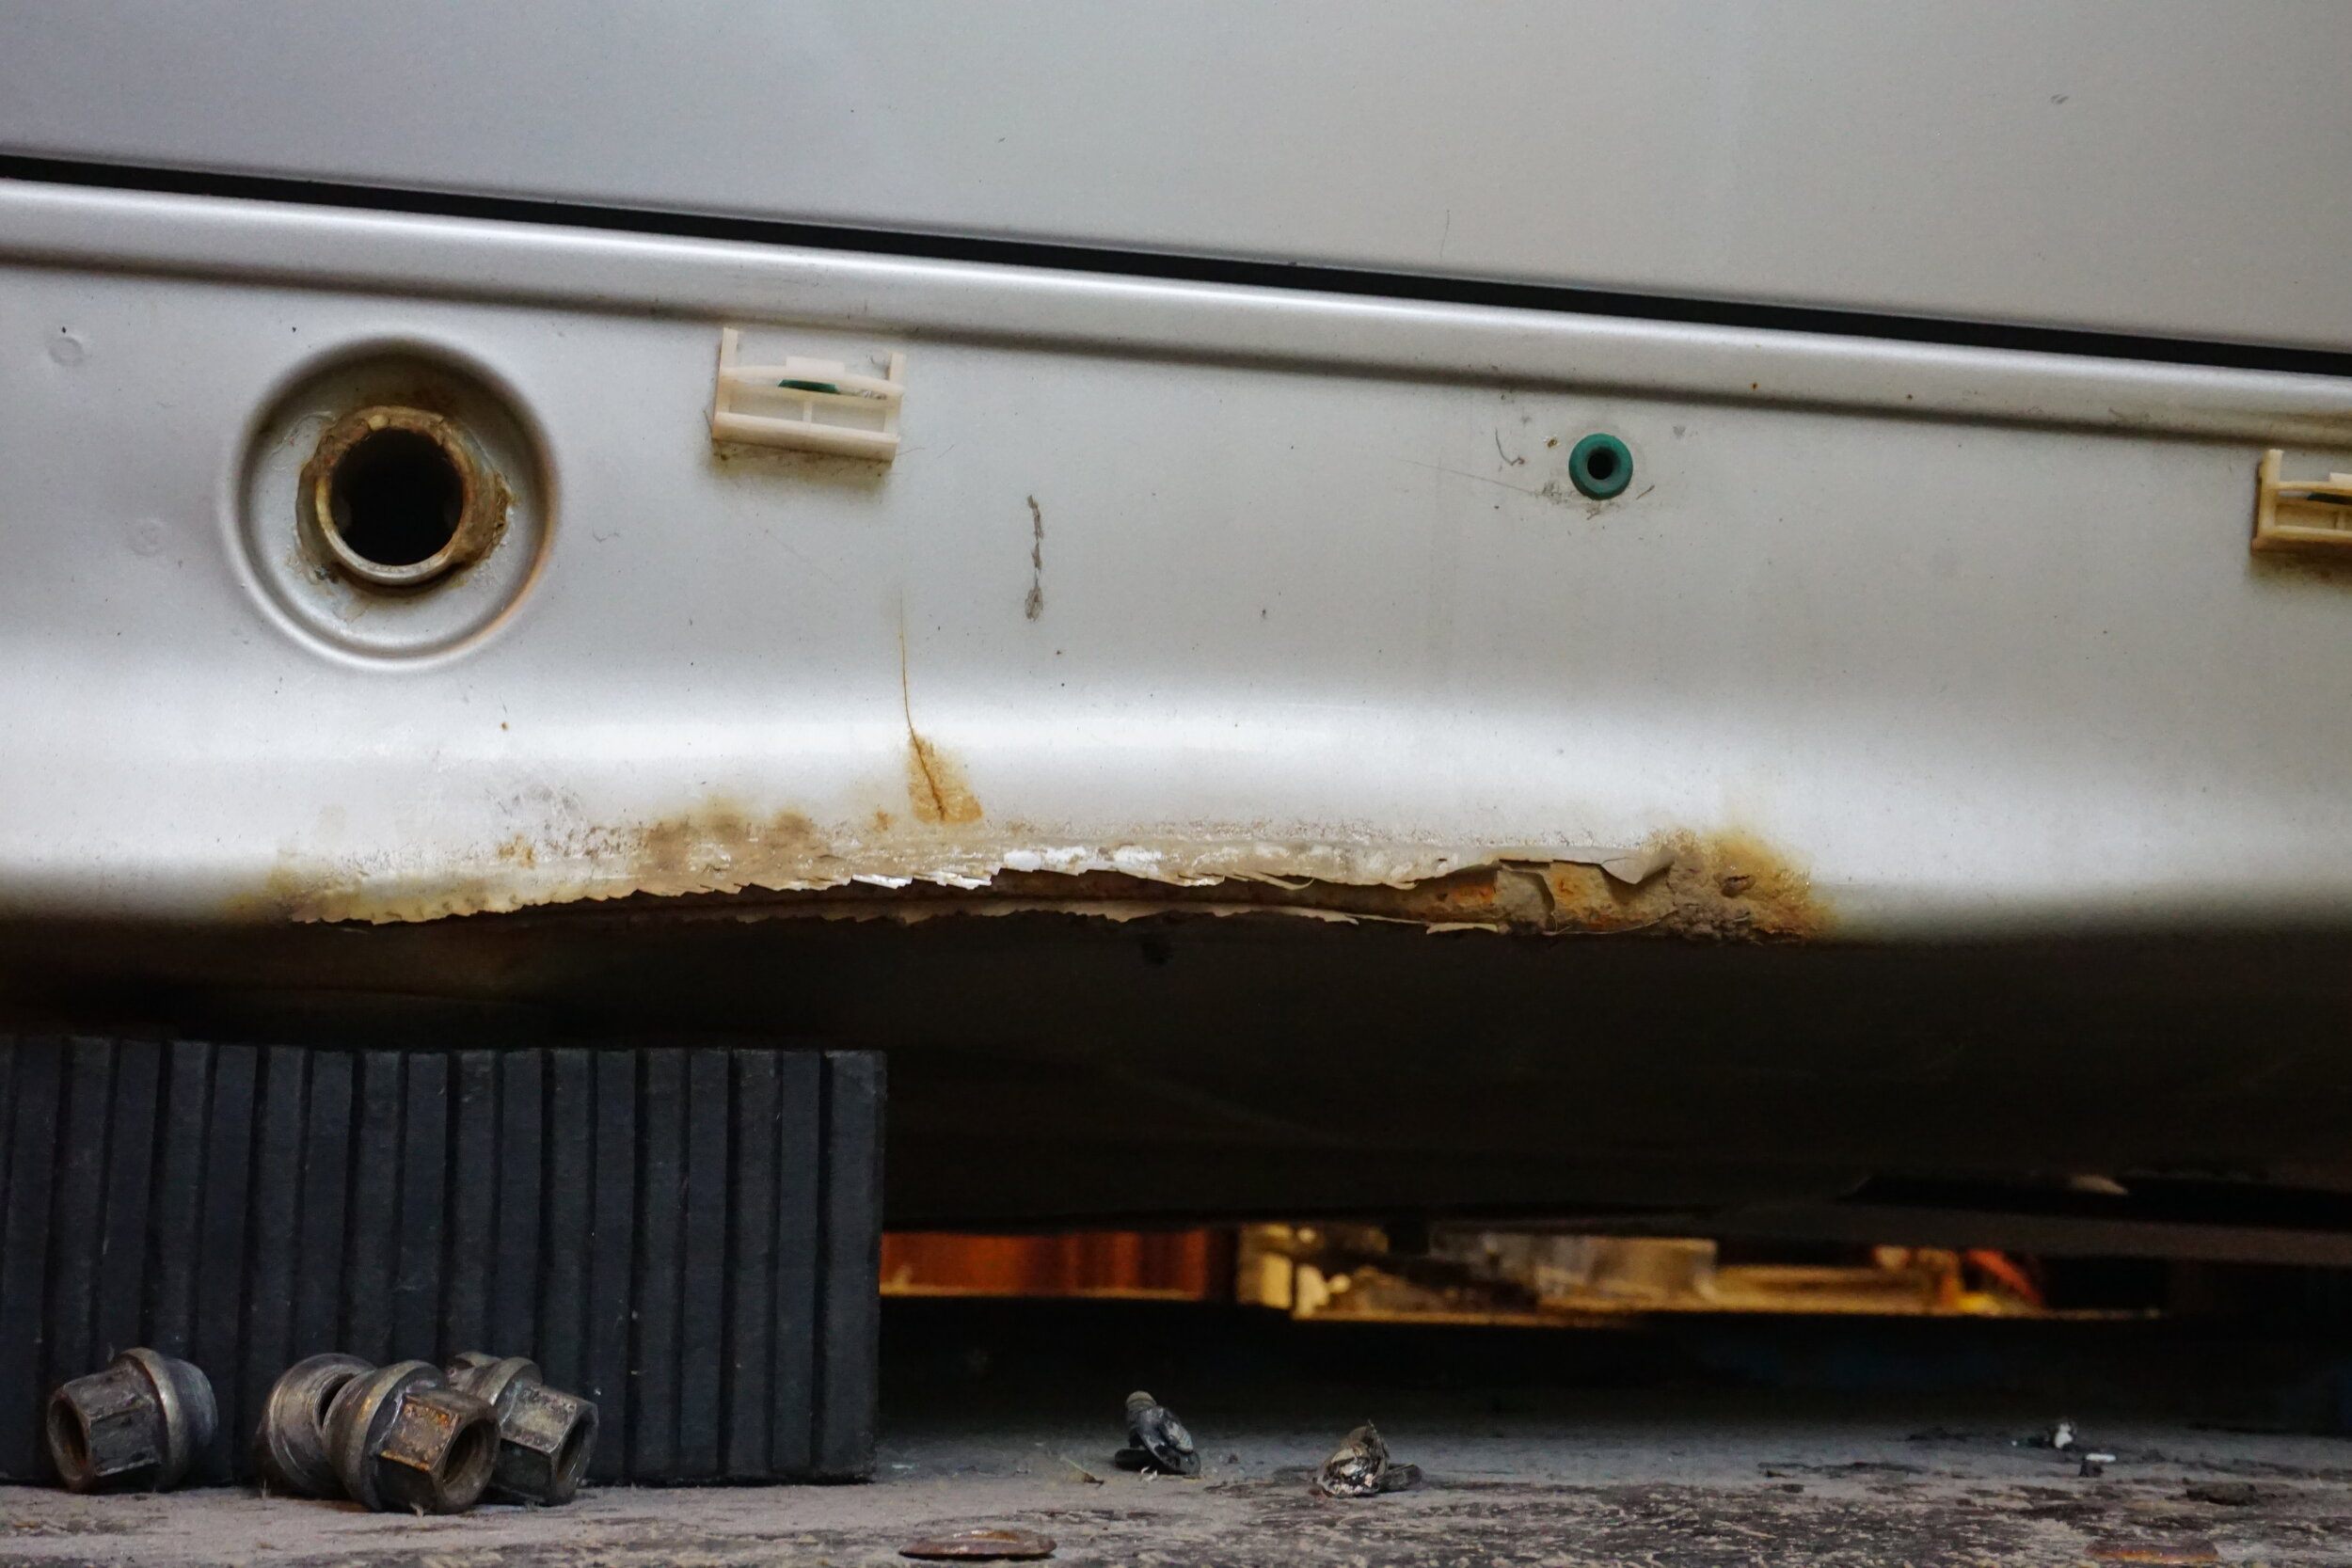
I knew that my front fenders had some rust at their bottom front corners, so I planned to take care of them while I worked on the rust in the rear fender. I had to take off the PS side skirt to get proper access to the rear fender, and when I removed it I was greeted by a little surprise. That led me to remove the DS side skirt as well, and was greeted by another surprise. So yeah, this project just got a lot bigger. I did the same process for pretty much everything involved here, so I'll explain it once, and then just do a photo dump to keep things moving along.
Let's start with the passenger side. With the side skirt off, I saw this:
I then removed the fender, and was greeted by this:
So again I used every grinding tool I had available until I got all the surface rust off things. Angle grinder, dremel, wire wheels, etc.
Then I used the rust dissolving chemicals like I did on the rear fender:
Then POR15 and 3M Rubberized Undercoating
Then on to the area under the side skirt, which turned into this after some grinding:
My magnet pulled all this out from inside the sill:
I figured I would get rid of the useless bits in the center and smooth things out a bit...
Then I dissolved the rust:
And used the Bondo metal mesh patch and more of that POR15 seam sealer stuff:
And finally a layer of regular POR15 on top of that.

Member
Dang man awesome work. Body work always makes me so nervous. You are literally digging yourself a hole you have to fill back in. Props man!
Member
More rust stuff, super exciting, I know. Basically the same routine on the driver's side, except the rust on the sill moved a bit. It looks like the car was improperly jacked at some point which bent the metal and the paint started to peel.
Chemical bath, and then POR15 seam sealer stuff for the hole.
With the fender pulled off....not looking so hot.
Chemical bath....
Everything got 3 coats of POR15.
Sanded the POR15 with 320 grit and cleaned prior to 3M Rubberized Undercoating (3 coats of this too)

Member
I have used some 3M Rubberized Undercoating sparingly on my car after doing rust repairs or welding, and after hearing more about rubberized undercoating in general, I'm now wondering if I should remove it all.
For a little background, here's how I have used it so far. I physically and chemically remove all rust from the surface, then follow the application directions for POR15 and apply 3 coats. Once it's fully cured, I scuff the surface with 320 grit and clean it with a solvent to prepare for the undercoating. I then apply 3 light coats of the undercoating.
I did this when I re-did my shock towers:
And then again for my front fenders:
And for the inside of my rear fender:
My thinking in doing this was that the undercoating would protect the POR15 from rocks and things, since I rallycross the car and also DD it all year where it's exposed to road salt, but it sounds like it may just be trapping moisture and debris against the surface (POR15) if/when the coating is compromised.
I've had good luck with 3M Cavity Wax Plus inside enclosed spaces, like side sills and frame rails, but I don't think it would last very long in an area getting sprayed with rocks and dirt. I've heard very good things about CRC Marine Heavy Duty Corrosion Inhibitor (thanks, Project Farm!) but it's not clear to me if it would just absorb and hold whatever road debris is thrown at it, if it would just get knocked loose, or if it would be just fine. Or would it just require annual applications?
Now that I think about it, I guess my concerns are pretty much localized to my wheel wells, as I haven't used the undercoating in any other areas of my car, nor do I plan to. For all other exposed areas, I plan on POR15 plus the CRC stuff, and 3M CWP on enclosed areas.
Does POR15 need anything on top of it? Should I remove all of the undercoating? What are your thoughts on the subject? All suggestions are welcome!
Member
While I was doing all of that work already shown, I was also working on the front fenders with pretty much the same routine. The PS fender wasn't nearly as bad as the DS fender. At least these could fit in my bucket of Evaporust!
After chemical bath....
Some Bondo wire mesh and POR15 seam sealer....
Regular POR15
And 3M Rubberized Undercoating
The DS was much worse....
Chemicals....
This one required a LOT of Bondo mesh and POR15 seam sealer. With these things being covered up by the side sills, I wasn't in any way concerned about appearances (obviously). I just wanted them to not be filled with holes, and to prevent them from rusting any further. I hope I succeeded.
It's ugly as all hell, but I think the mission has been accomplished. And that ends my rust repair project. I really hope I did things properly, because that was a lot of work and I really don't want to have to do it again.
Member
I'm impressed, that was a lot of work and hopefully it keeps the car from continuing to disappear underneath you. The horizontal section of both of my front fenders is completely gone. I probably should take some time this winter to address a bit more of the rust, I'll probably end up copying what you did as it looks like it should last.
Member
Long time no post! Well the season is starting up soon so I've done all my preseason checks and fluid changes, and all seems to be well. Yesterday I decided to do an oil change so I drove the car around for 15 minutes to get the oil hot before draining it. It was warmer than it has been in a while, so the oil got up to about 200*. I then saw my red low oil pressure light was coming on and staying on at idle. I've seen it come on before, but that was in the middle of summer with the AC blasting, and even then it was more of an intermittent flash rather than steady on. I run Motul 5w-40. I have a BimmerWorld oil distribution block and VDO gauges, and my oil pressure gauge appeared to be reading about 15 at idle. It's hard to tell exactly since the gauge goes to 150 PSI for some reason. I was under the impression that the light would only come on if pressure dropped below 7 PSI. My cold startup oil pressure is about 70, and cruising on the highway it's about 30-40 according to the VDO gauge.
I decided to try some slightly heavier oil I had lying around, some LiquiMoly 10w-40, in the hopes that would make the light go away. Well I took the car for a drive today, and sure enough when the oil got to around 200* the light came back on and stayed on at idle. If I raised the revs by 100 it would go out. As far as I can tell the engine is running normally and isn't making any strange noises. I do not overfill my oil, I put in the recommended 6.3 quarts.
I have done lots of searching on this and the threads never seem to get solved. I should mention that my oil pump nut was tack welded by the previous owner, and the engine has about 180k on it. Possible culprits of this seem to include:
-Bad oil pressure sender
-Bearing clearances are getting larger
-Oil pump is wearing out
-Clogged valves in the oil filter housing
Possible solutions include:
-New oil pressure sender (although this never seems to solve the problem)
-15w-50 oil
-Raising the idle
As far as I can tell the only thing I can do to get a better picture of what's actually going on is to buy a handheld oil pressure gauge kit, and hook it up to where the oil sending unit goes, and see what my PSI is at idle. How is this actually done in practice? Do I hook up the gauge when the car is cool, drive around with it installed for 15 minutes to get the oil hot and then check out the reading at idle? I can't imagine that installing the gauge when the car is piping hot would be a pleasant experience.
I've seen lots of people say that this can be ignored if the light goes away if you rev it above idle, but that's not very reassuring. Does anyone have any guidance on this issue?
Member
I had the Flicker light at idle on my car. Changed the sensor and all was good. Its a cheap and easy thing to try. The unrelated oil pump nut coming off was much later haha. It could just be the sensor if you are finding your gauge is showing enough pressure. Beyond that things start getting tricker.
Member
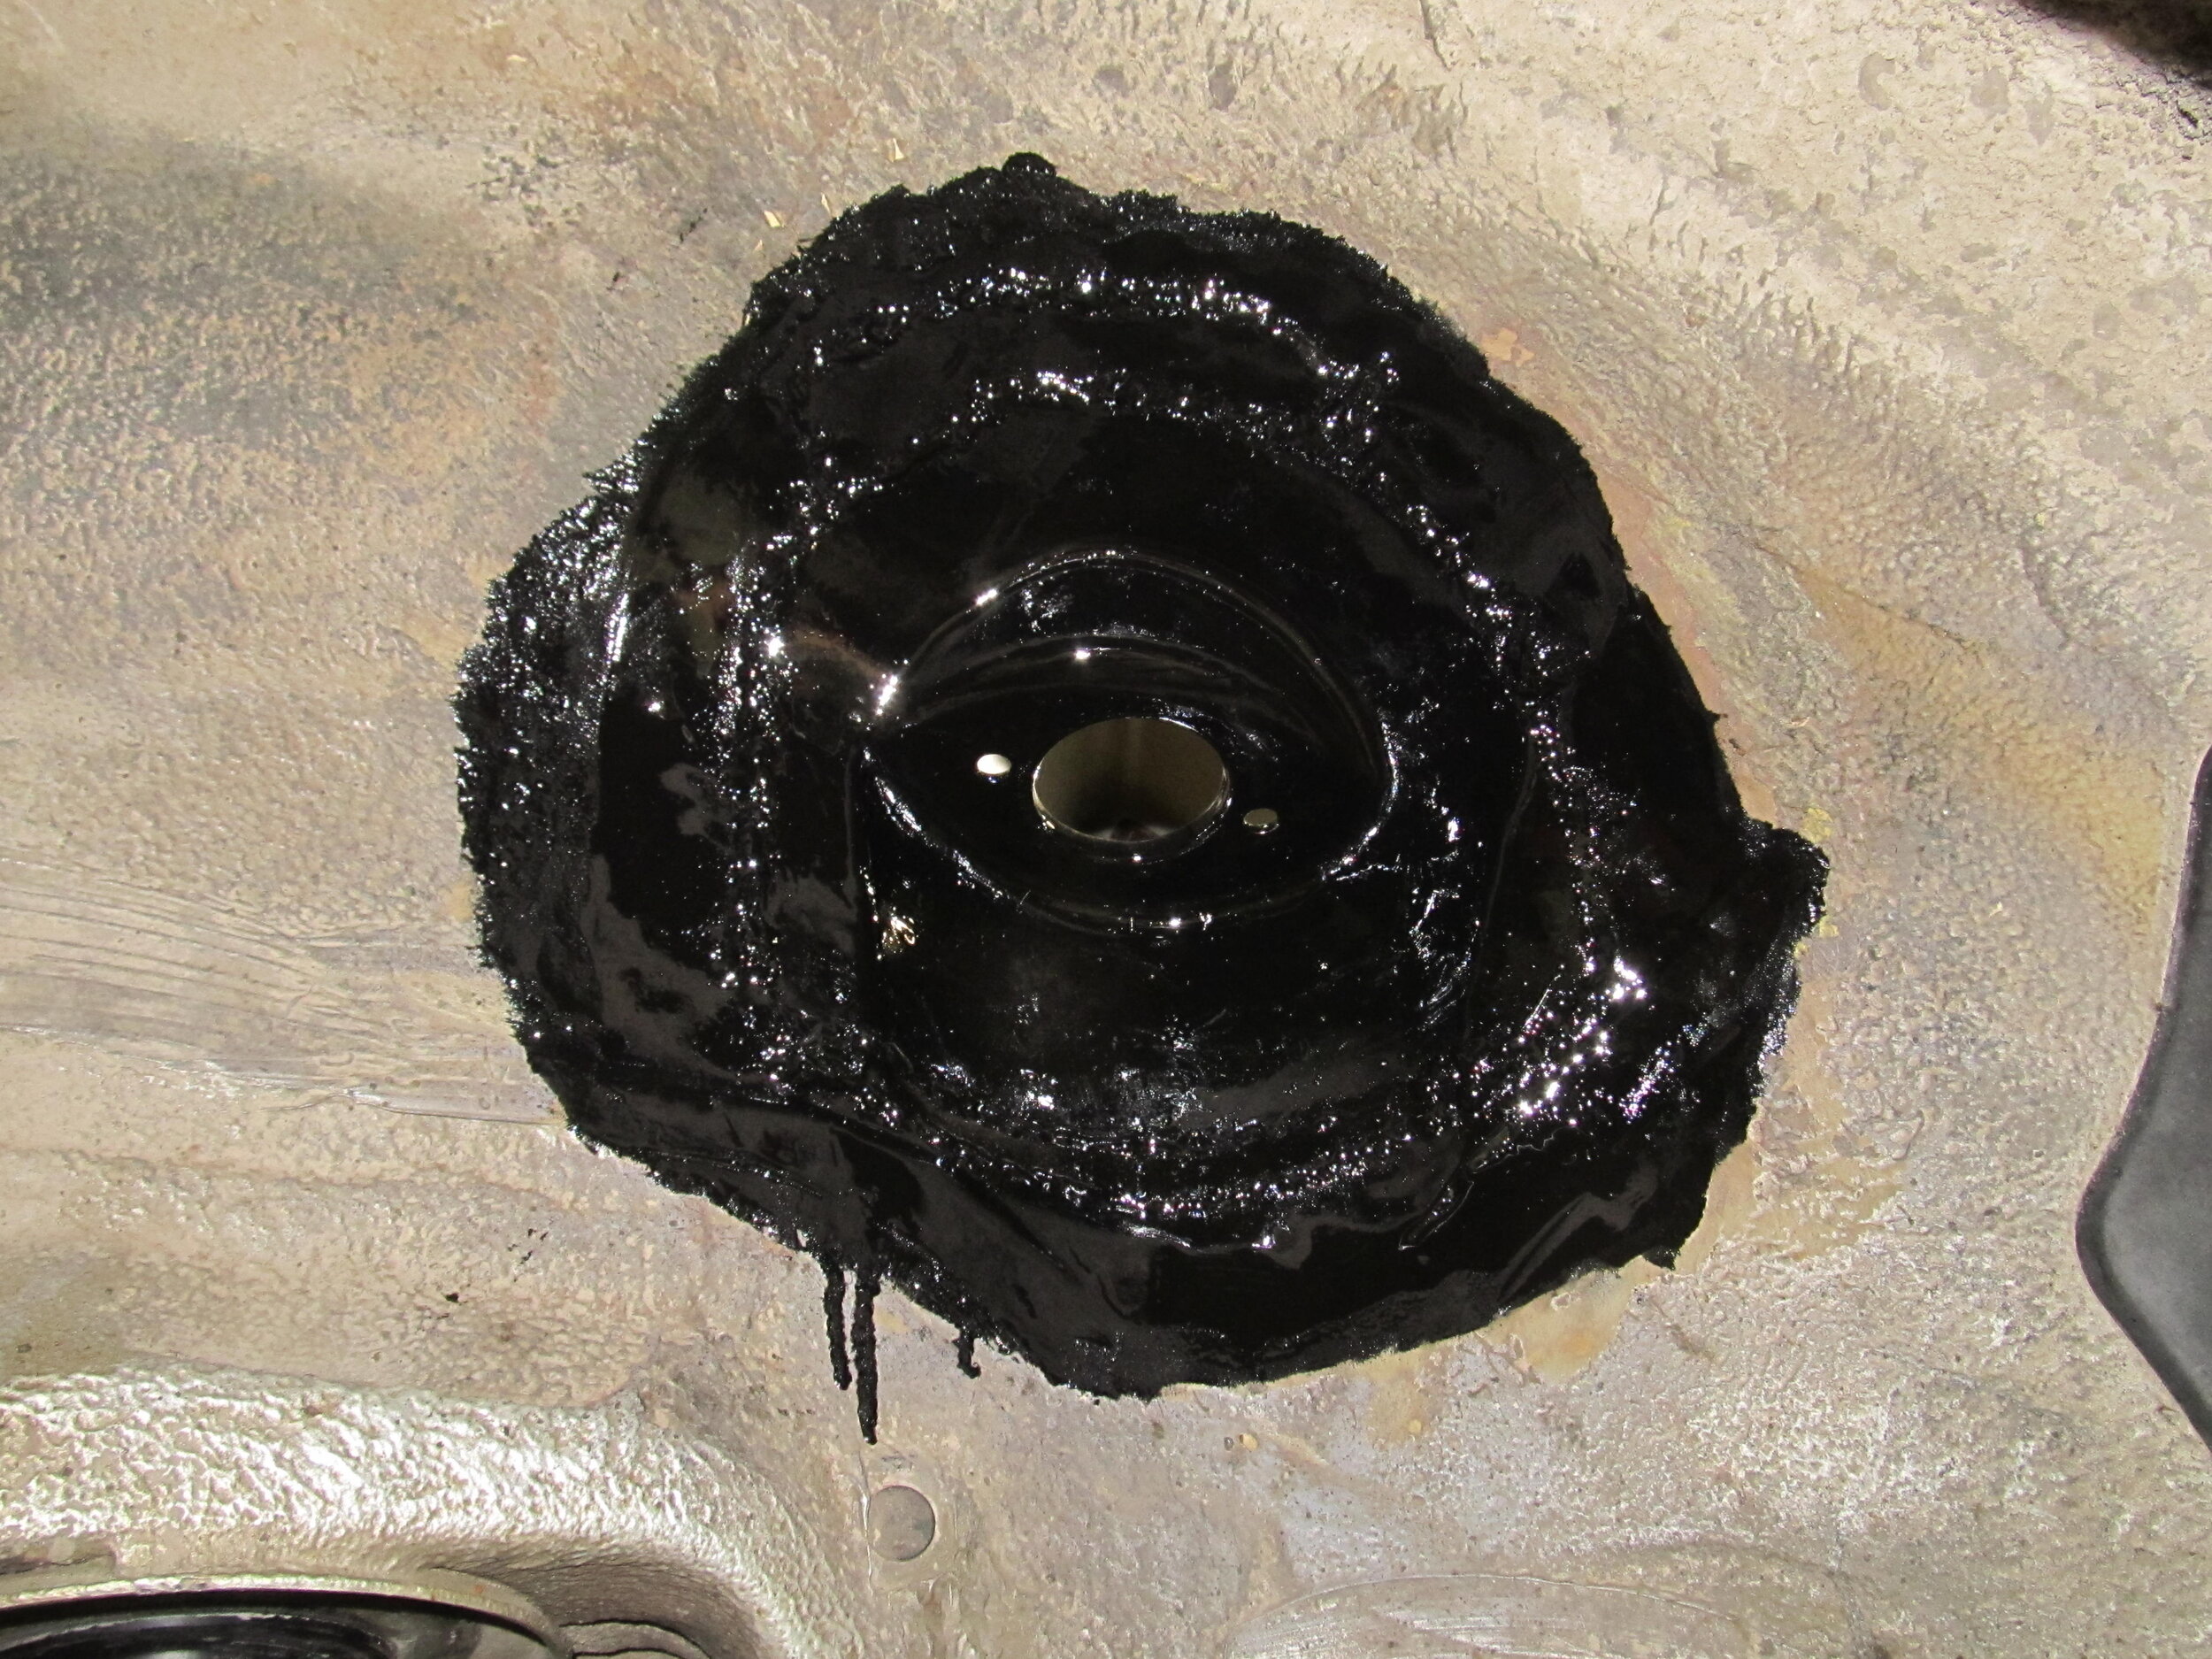
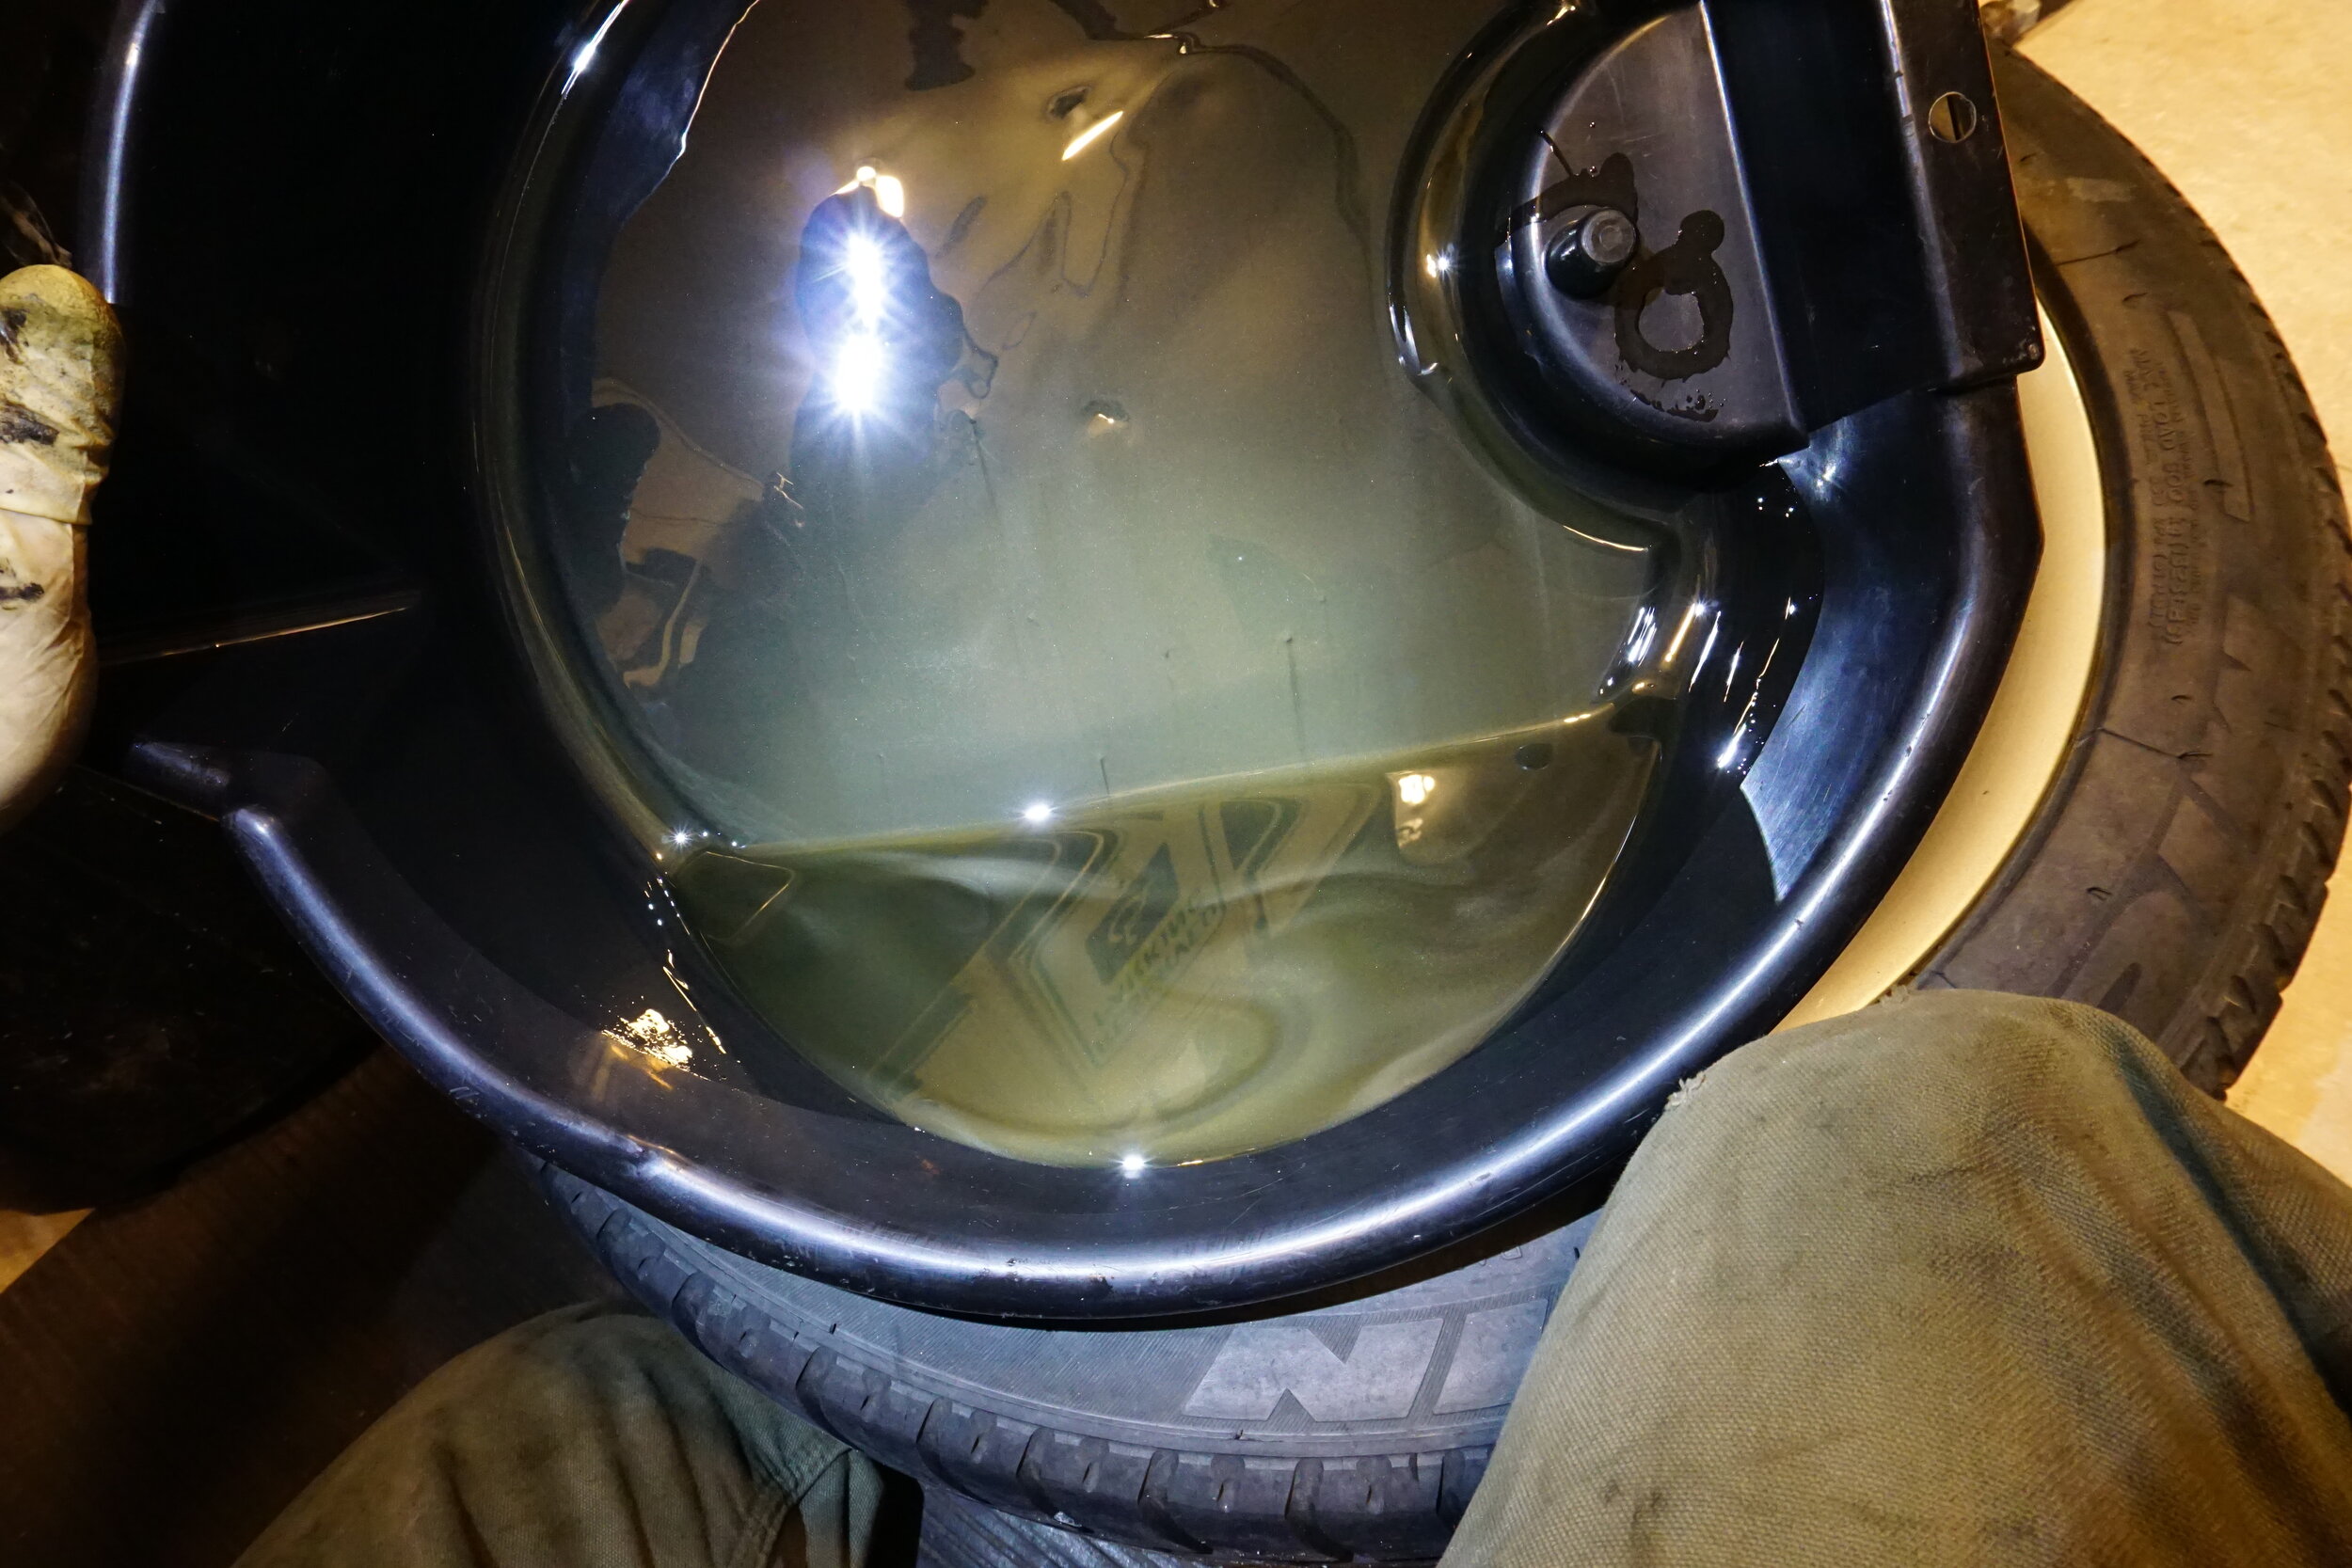
Catching up on things a bit, I put in some fresh fluids. Is it normal that my diff fluid always comes out looking like this even after only like 3,000 miles? I've got an upgraded triple clutch plate LSD.
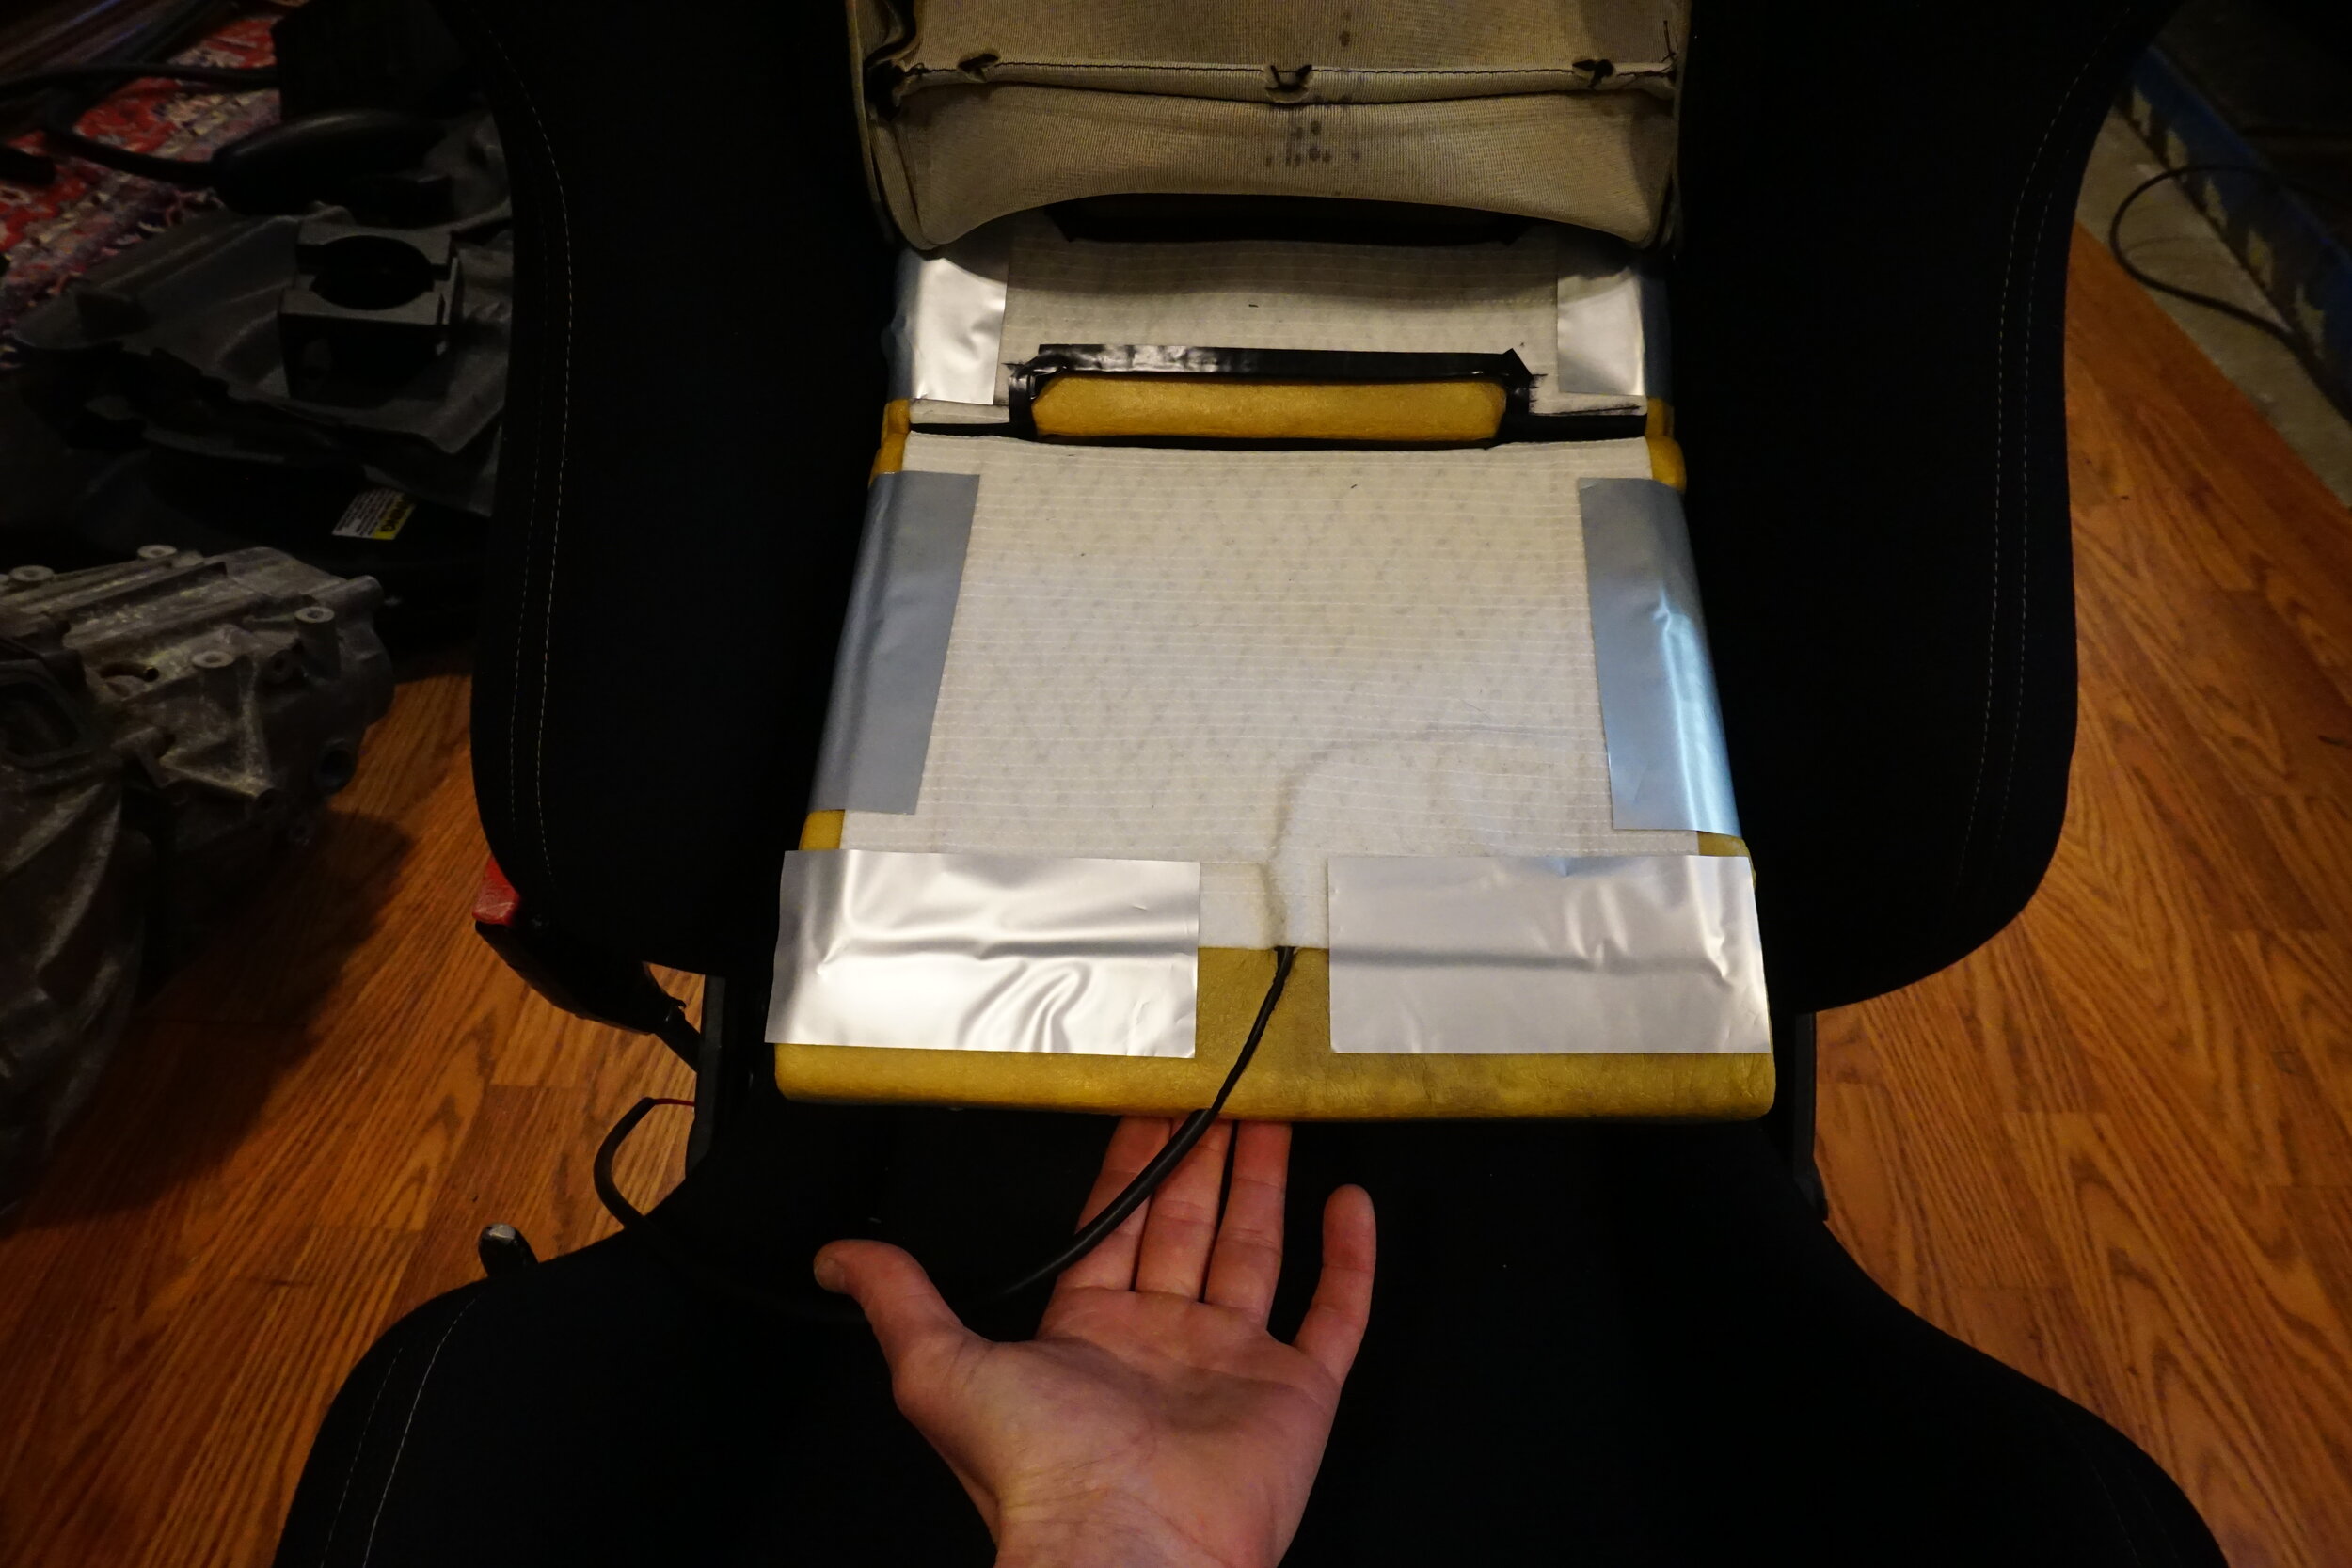
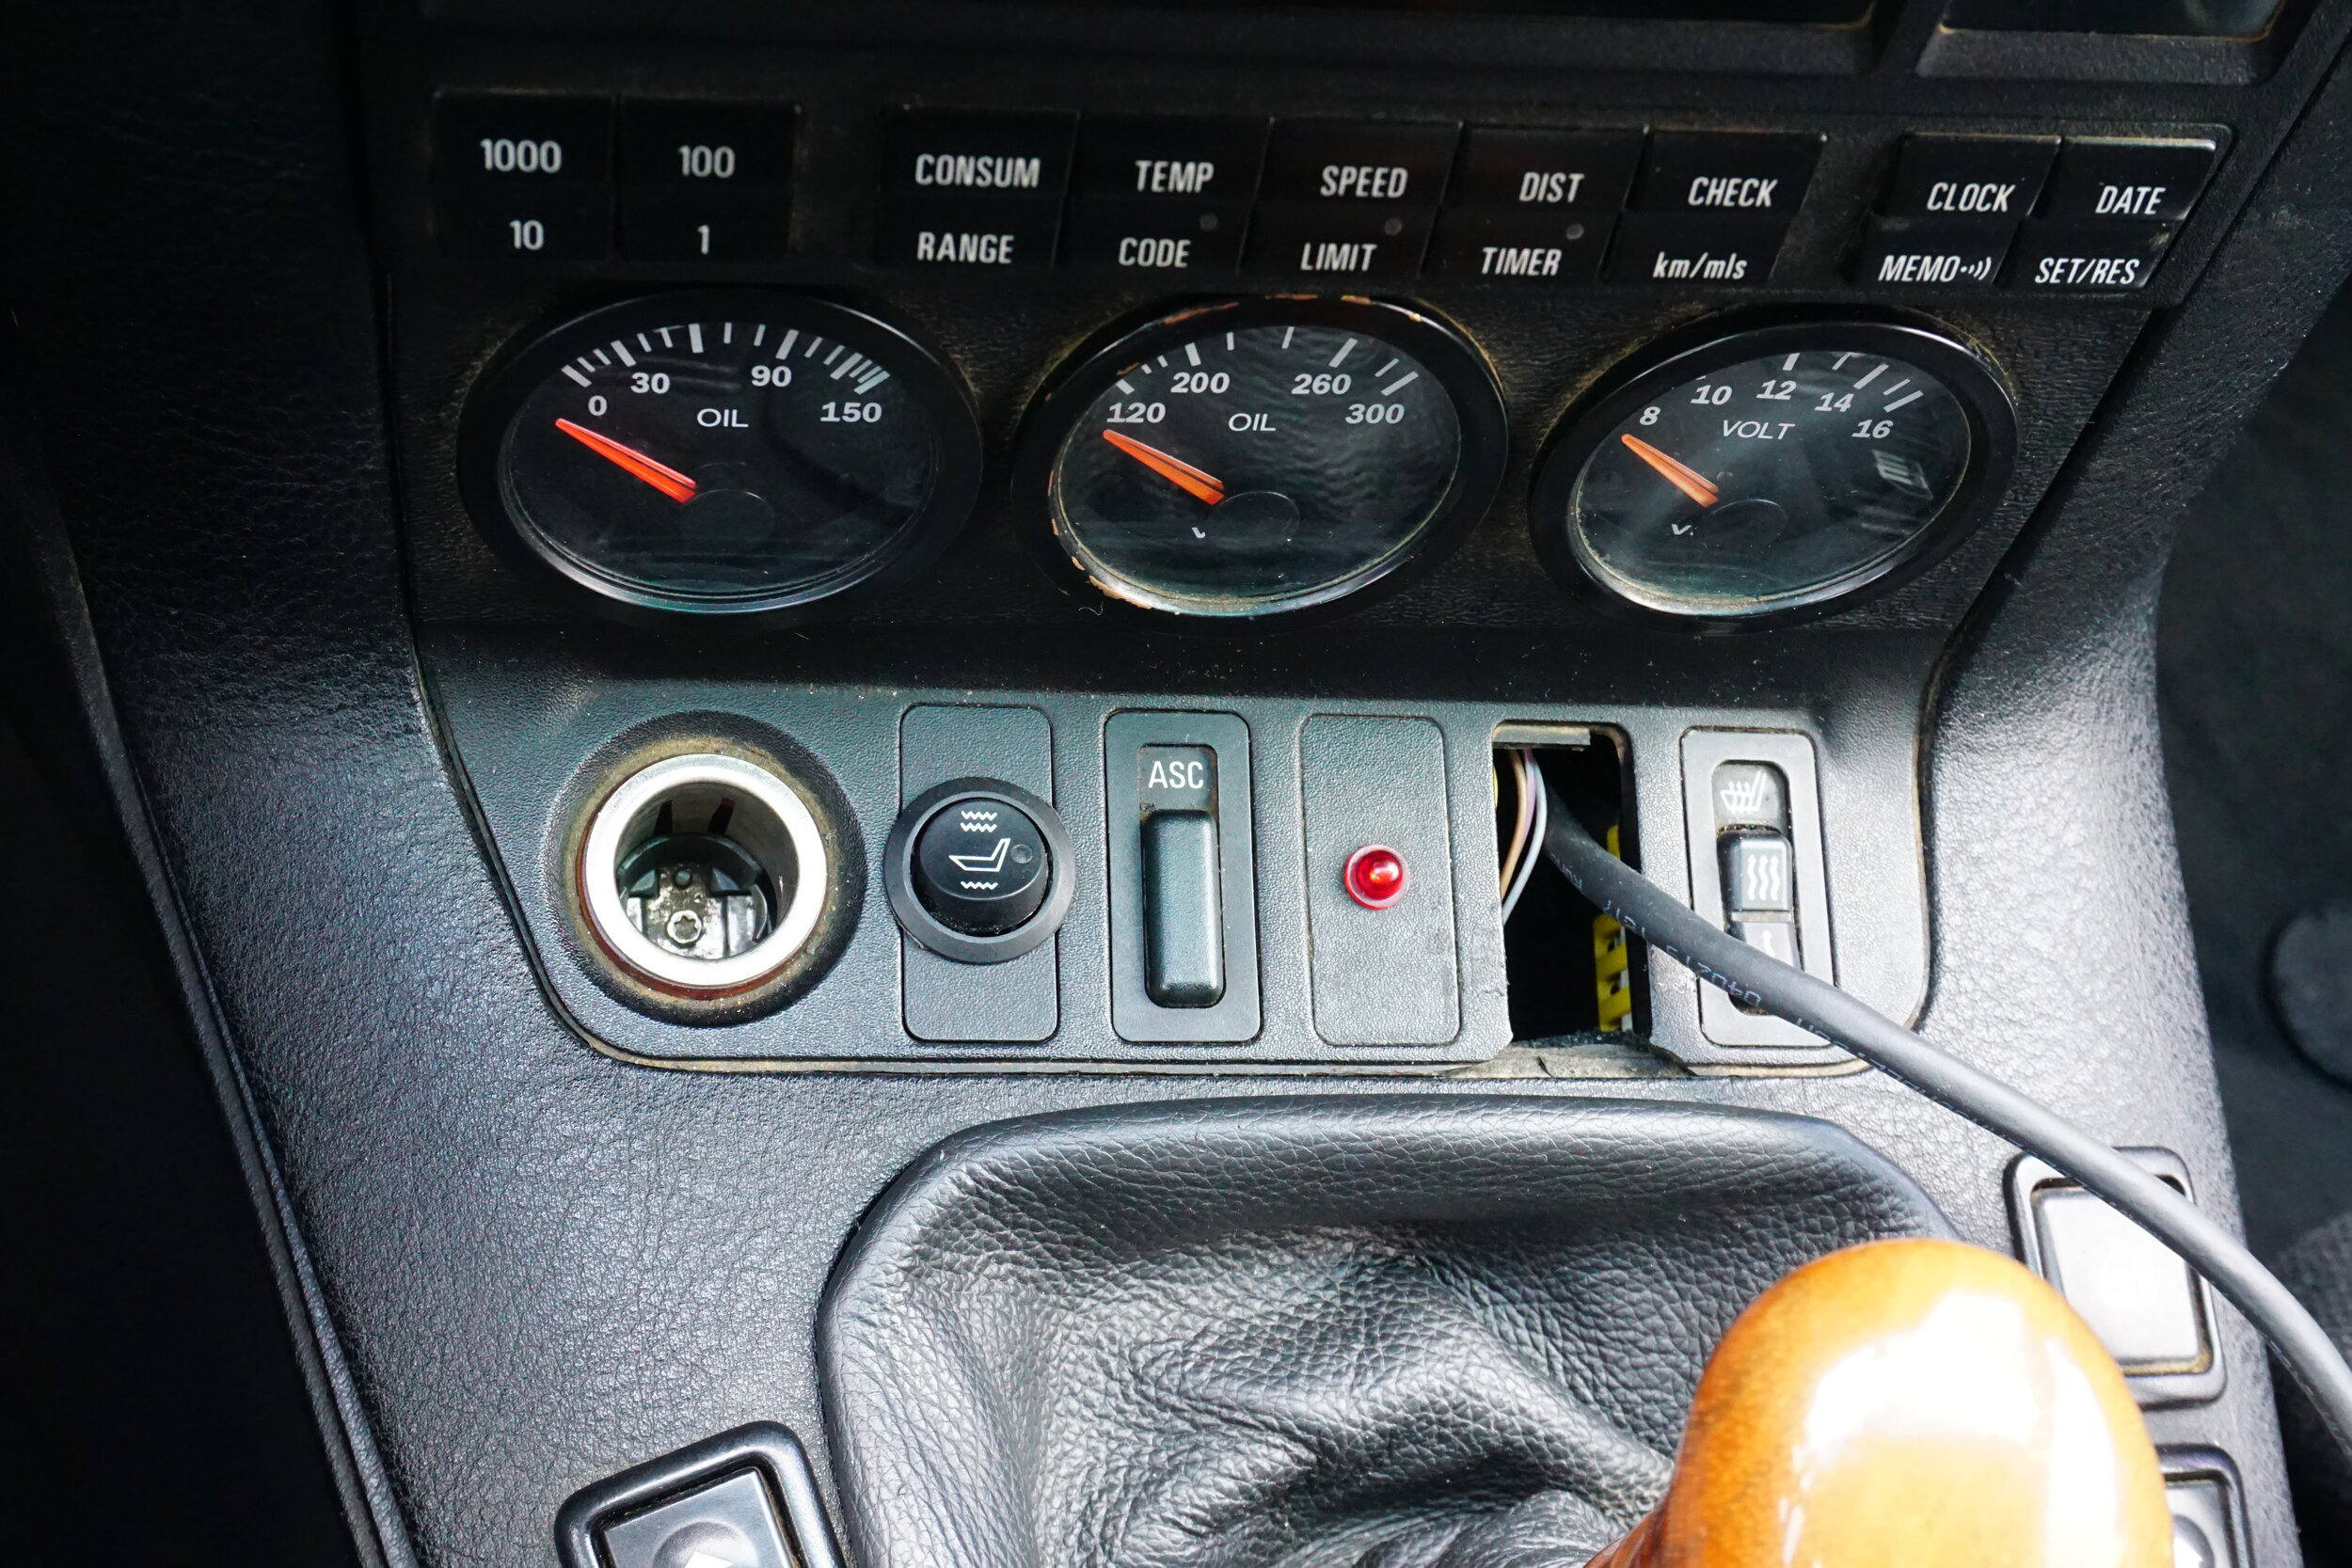
I also finally got around to installing my aftermarket seat heaters that have been sitting in my closet for the last four years. Well, at least the one for the driver's seat. I think I've had someone in the passenger seat like 10 times in the last 5 years, so that one might get ignored for another four years. I really wanted to be able to use the factory heated seats button, but it was cutting out at max heat, running for a few seconds then turning off for a while, then turning back on. On low power they worked fine. Oh well, guess I'll have to use the switches that came with the heaters. I got 12V power from the power seat wiring, and the switched 12V from the factory button. I wanted to make sure that if I left the heated seat on when I turned off the car that it also turned off.
Getting the element on the seat base was easy, but the back was tricky. I had to cut out some holes for the rod that holds the seat cover down to go through.
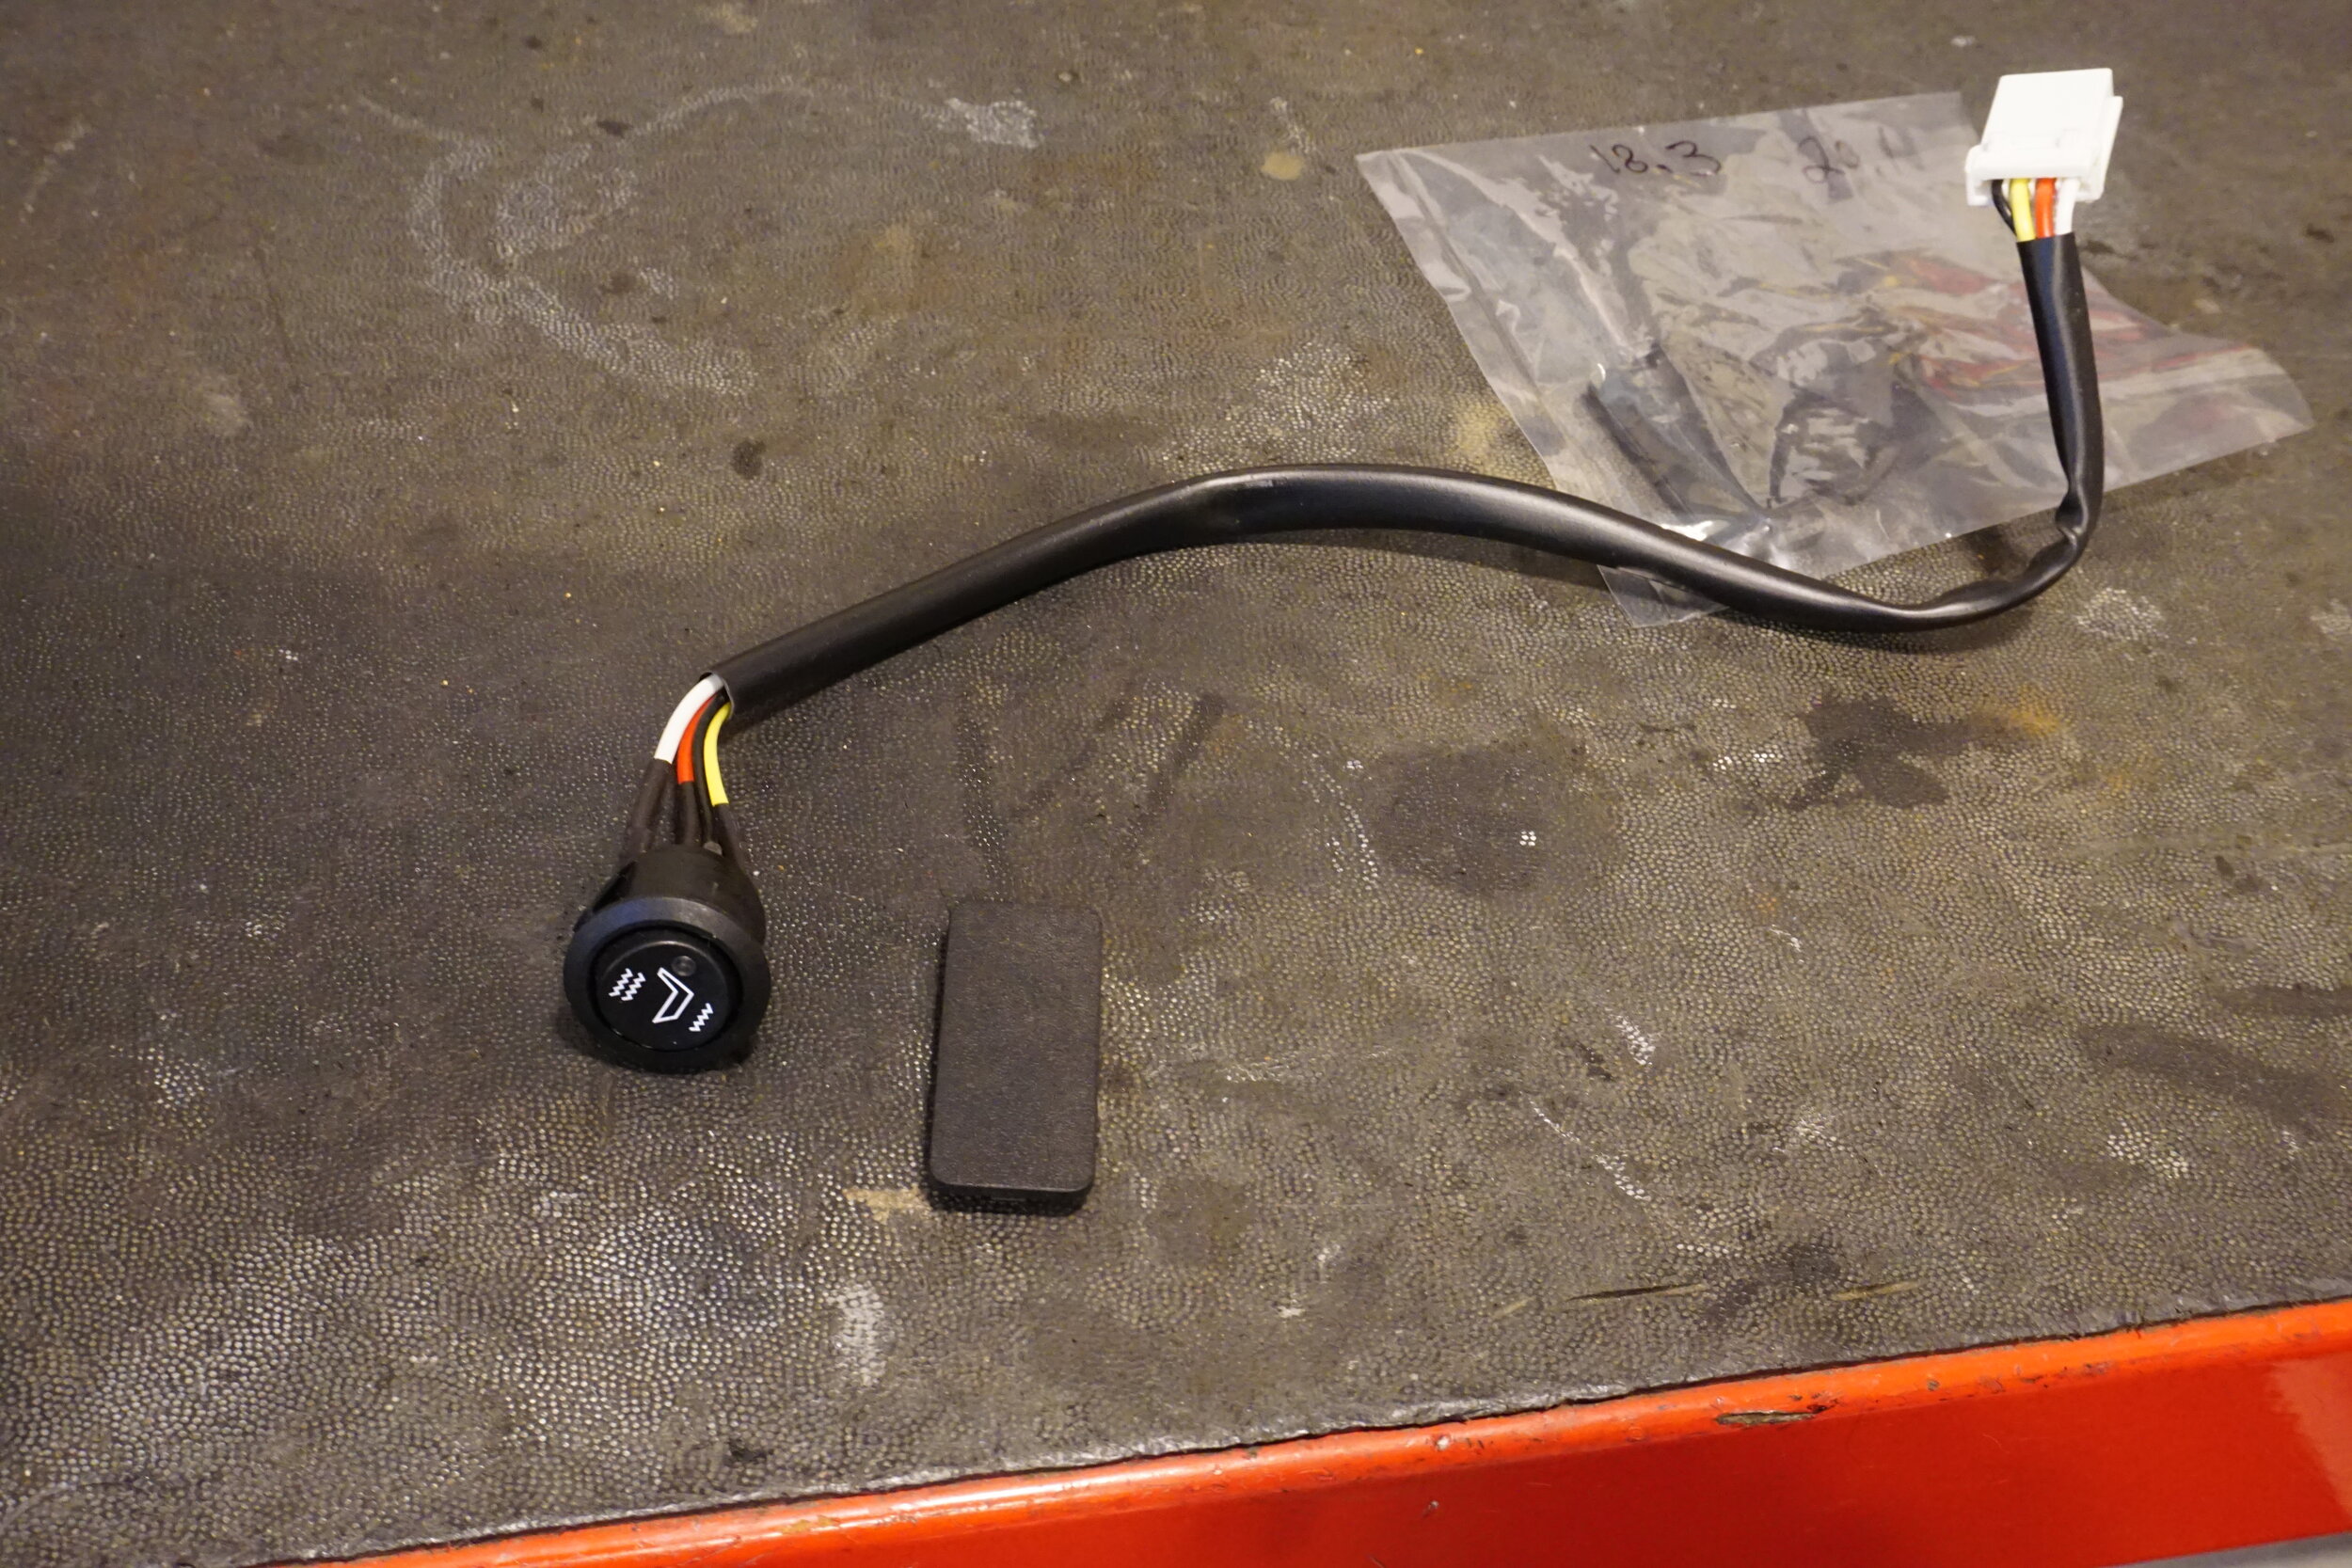
I wanted a clean but removable install for the switch, so I got a new blank plate for the dash and got to trimming. I was left with about 1 mm of material left on the sides of the blank plate, but it seems to be enough to hold it all together. I had to grind off quite a bit of material from the switch to get it to fit into the hole in the blank plate.
But I think it was worth the effort.
I'm kicking myself for not installing these things earlier, they are so awesome! They heat up fast and get really hot. Ahh, heated Recaros!
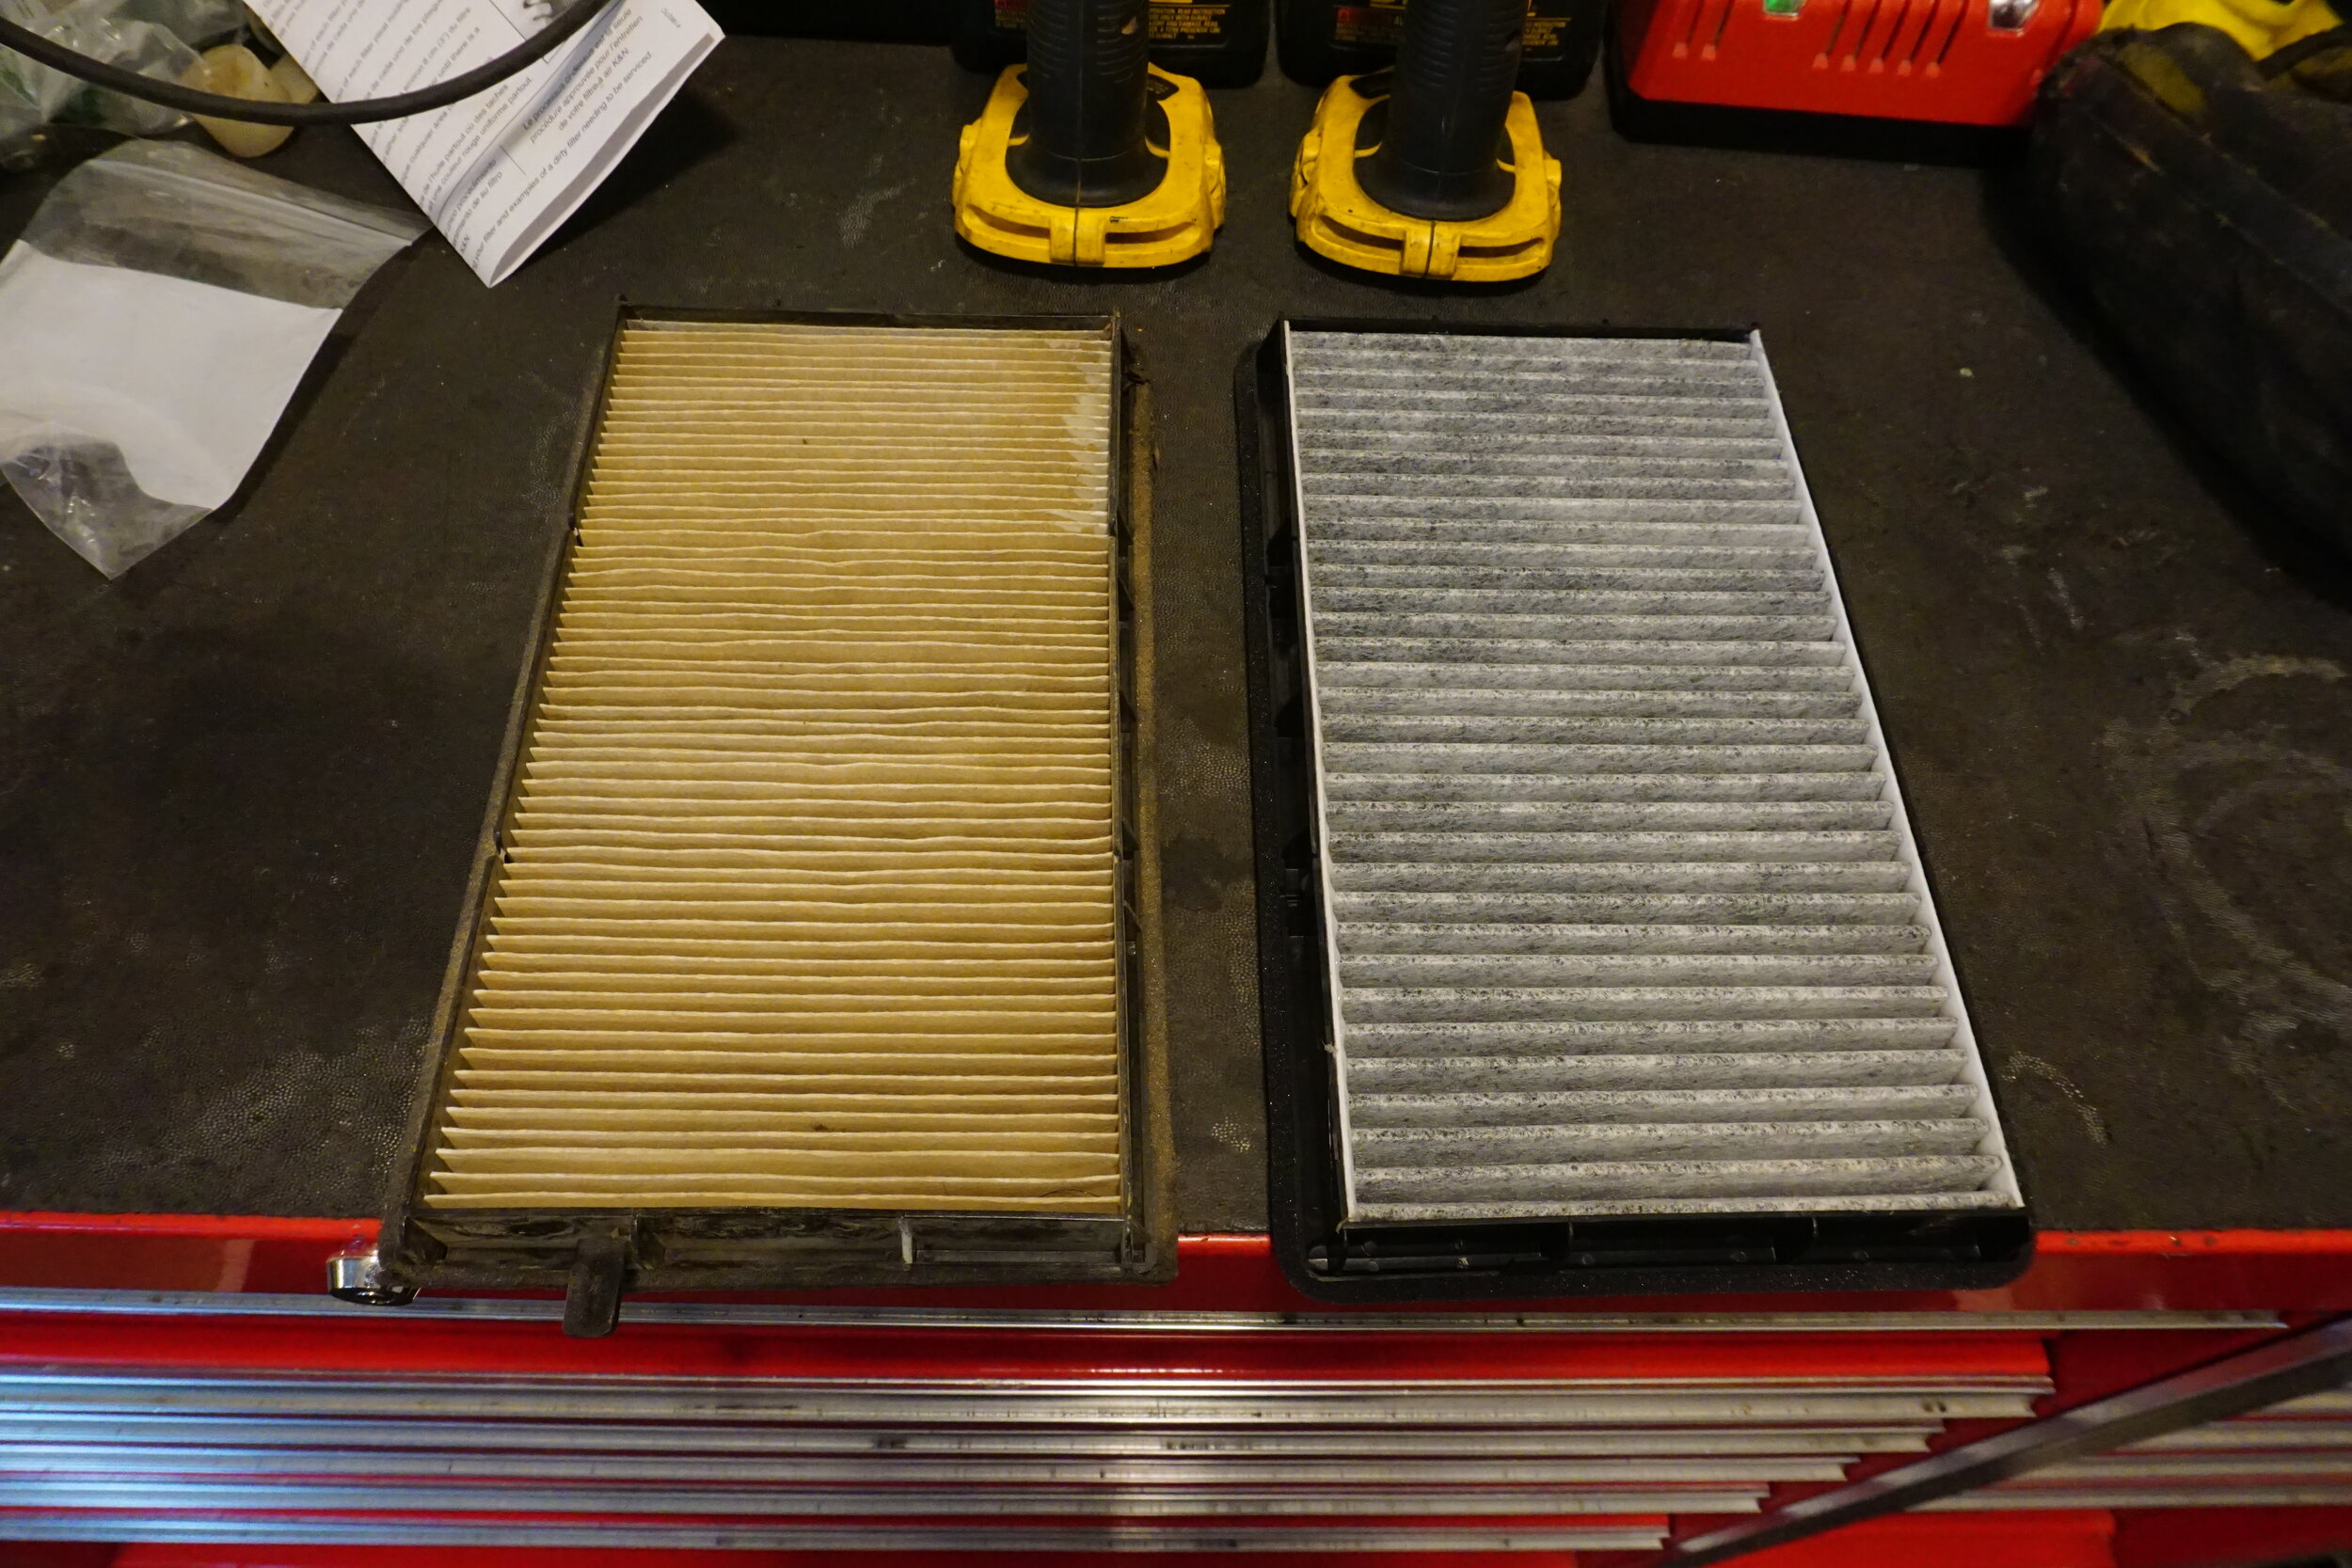
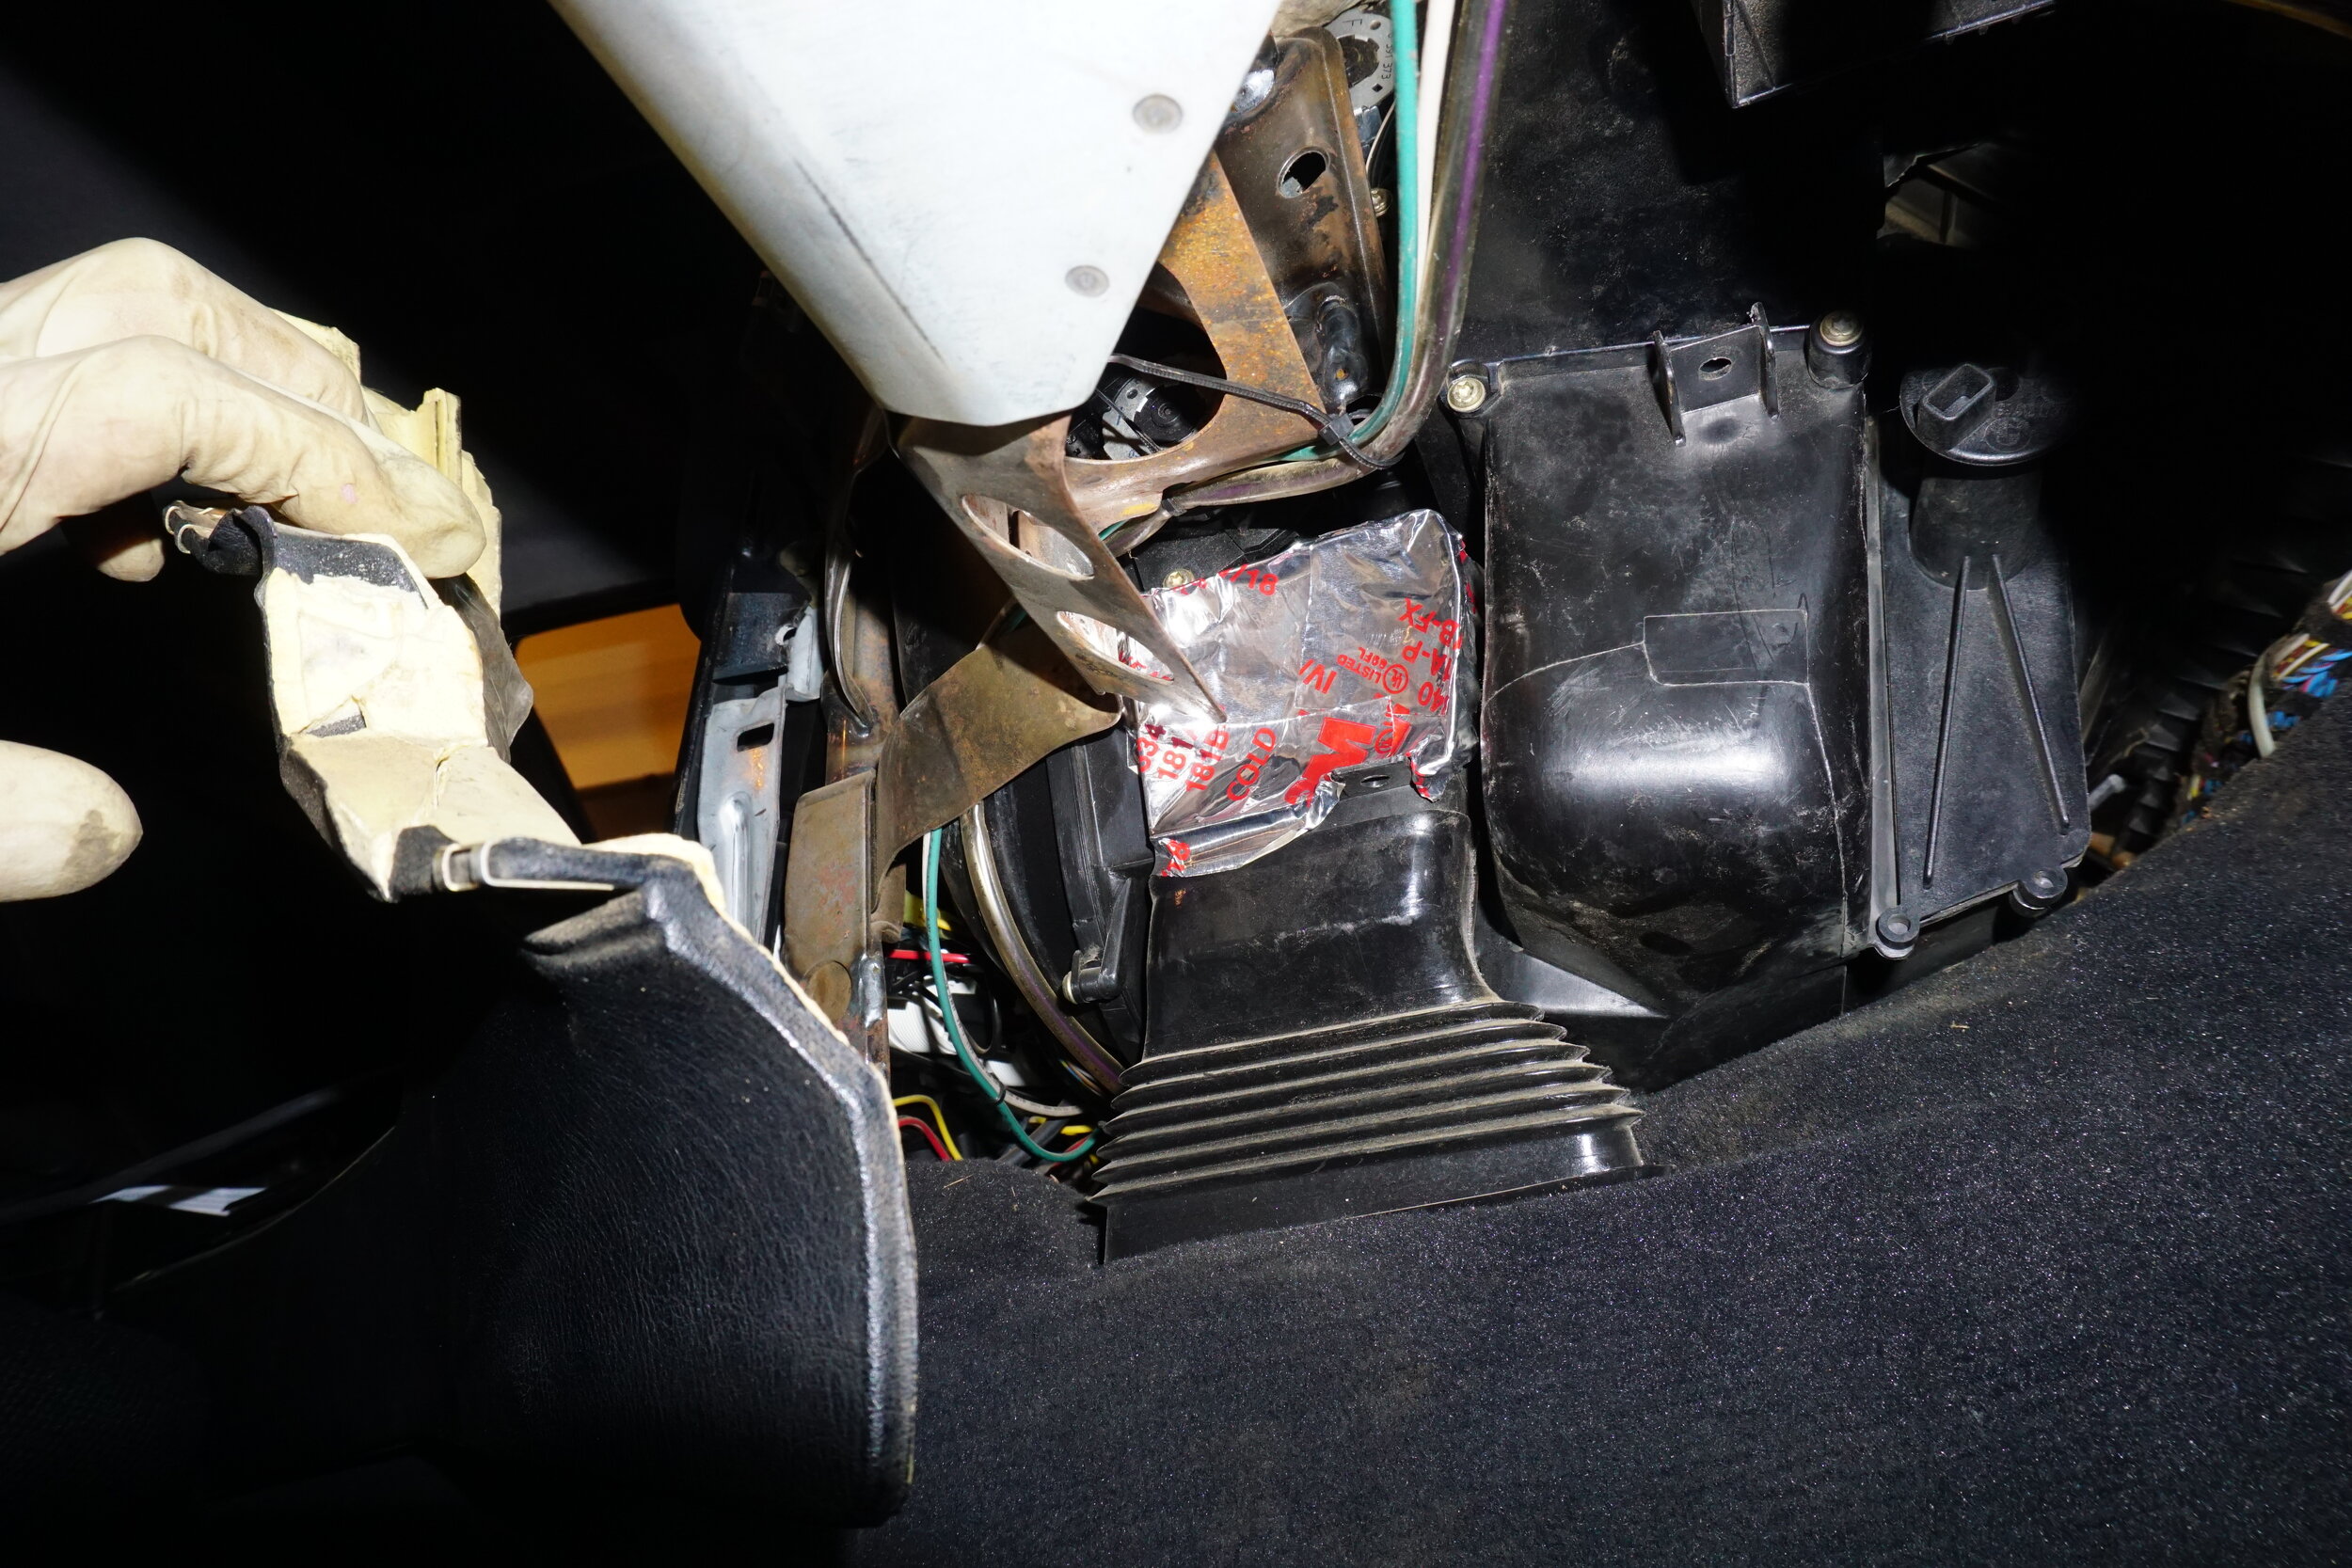
It had been a few years since I replaced the cabin air filter, and I was reminded how much I hate doing that job. The filter never wants to come out, and getting it back in isn't easy either. But at least it's done, and this time I got me a fancy "carbon activated" filter.
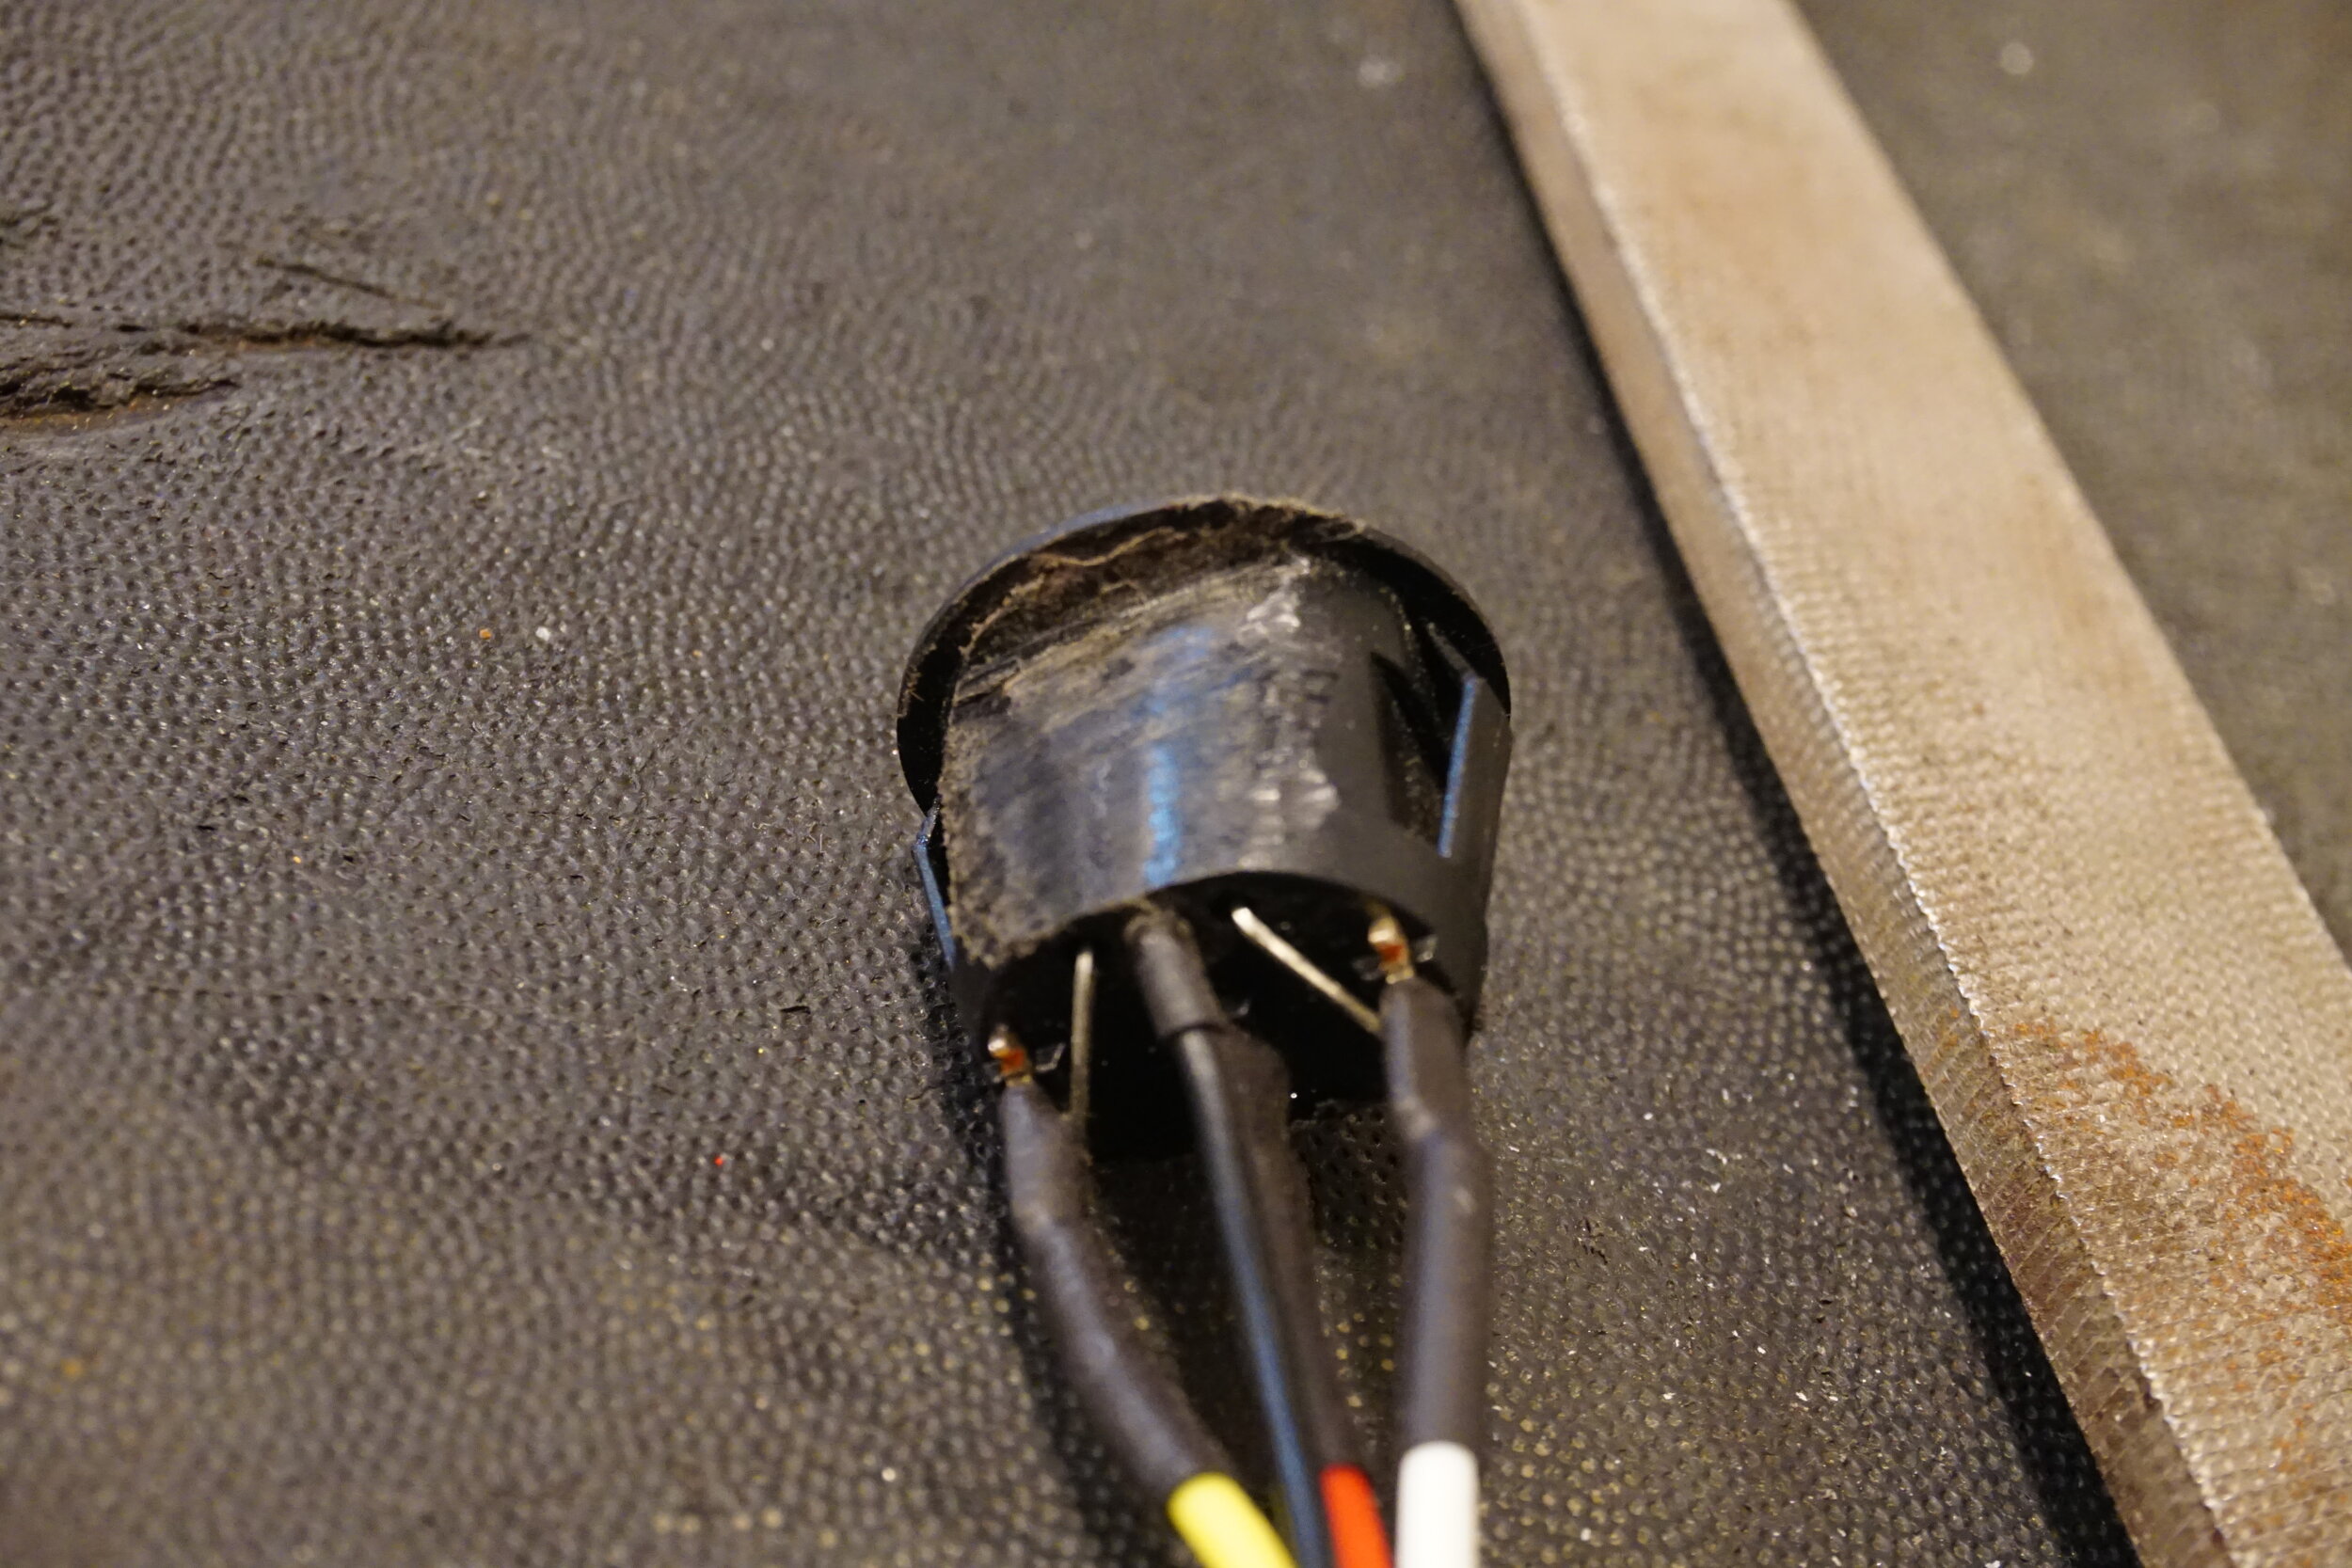
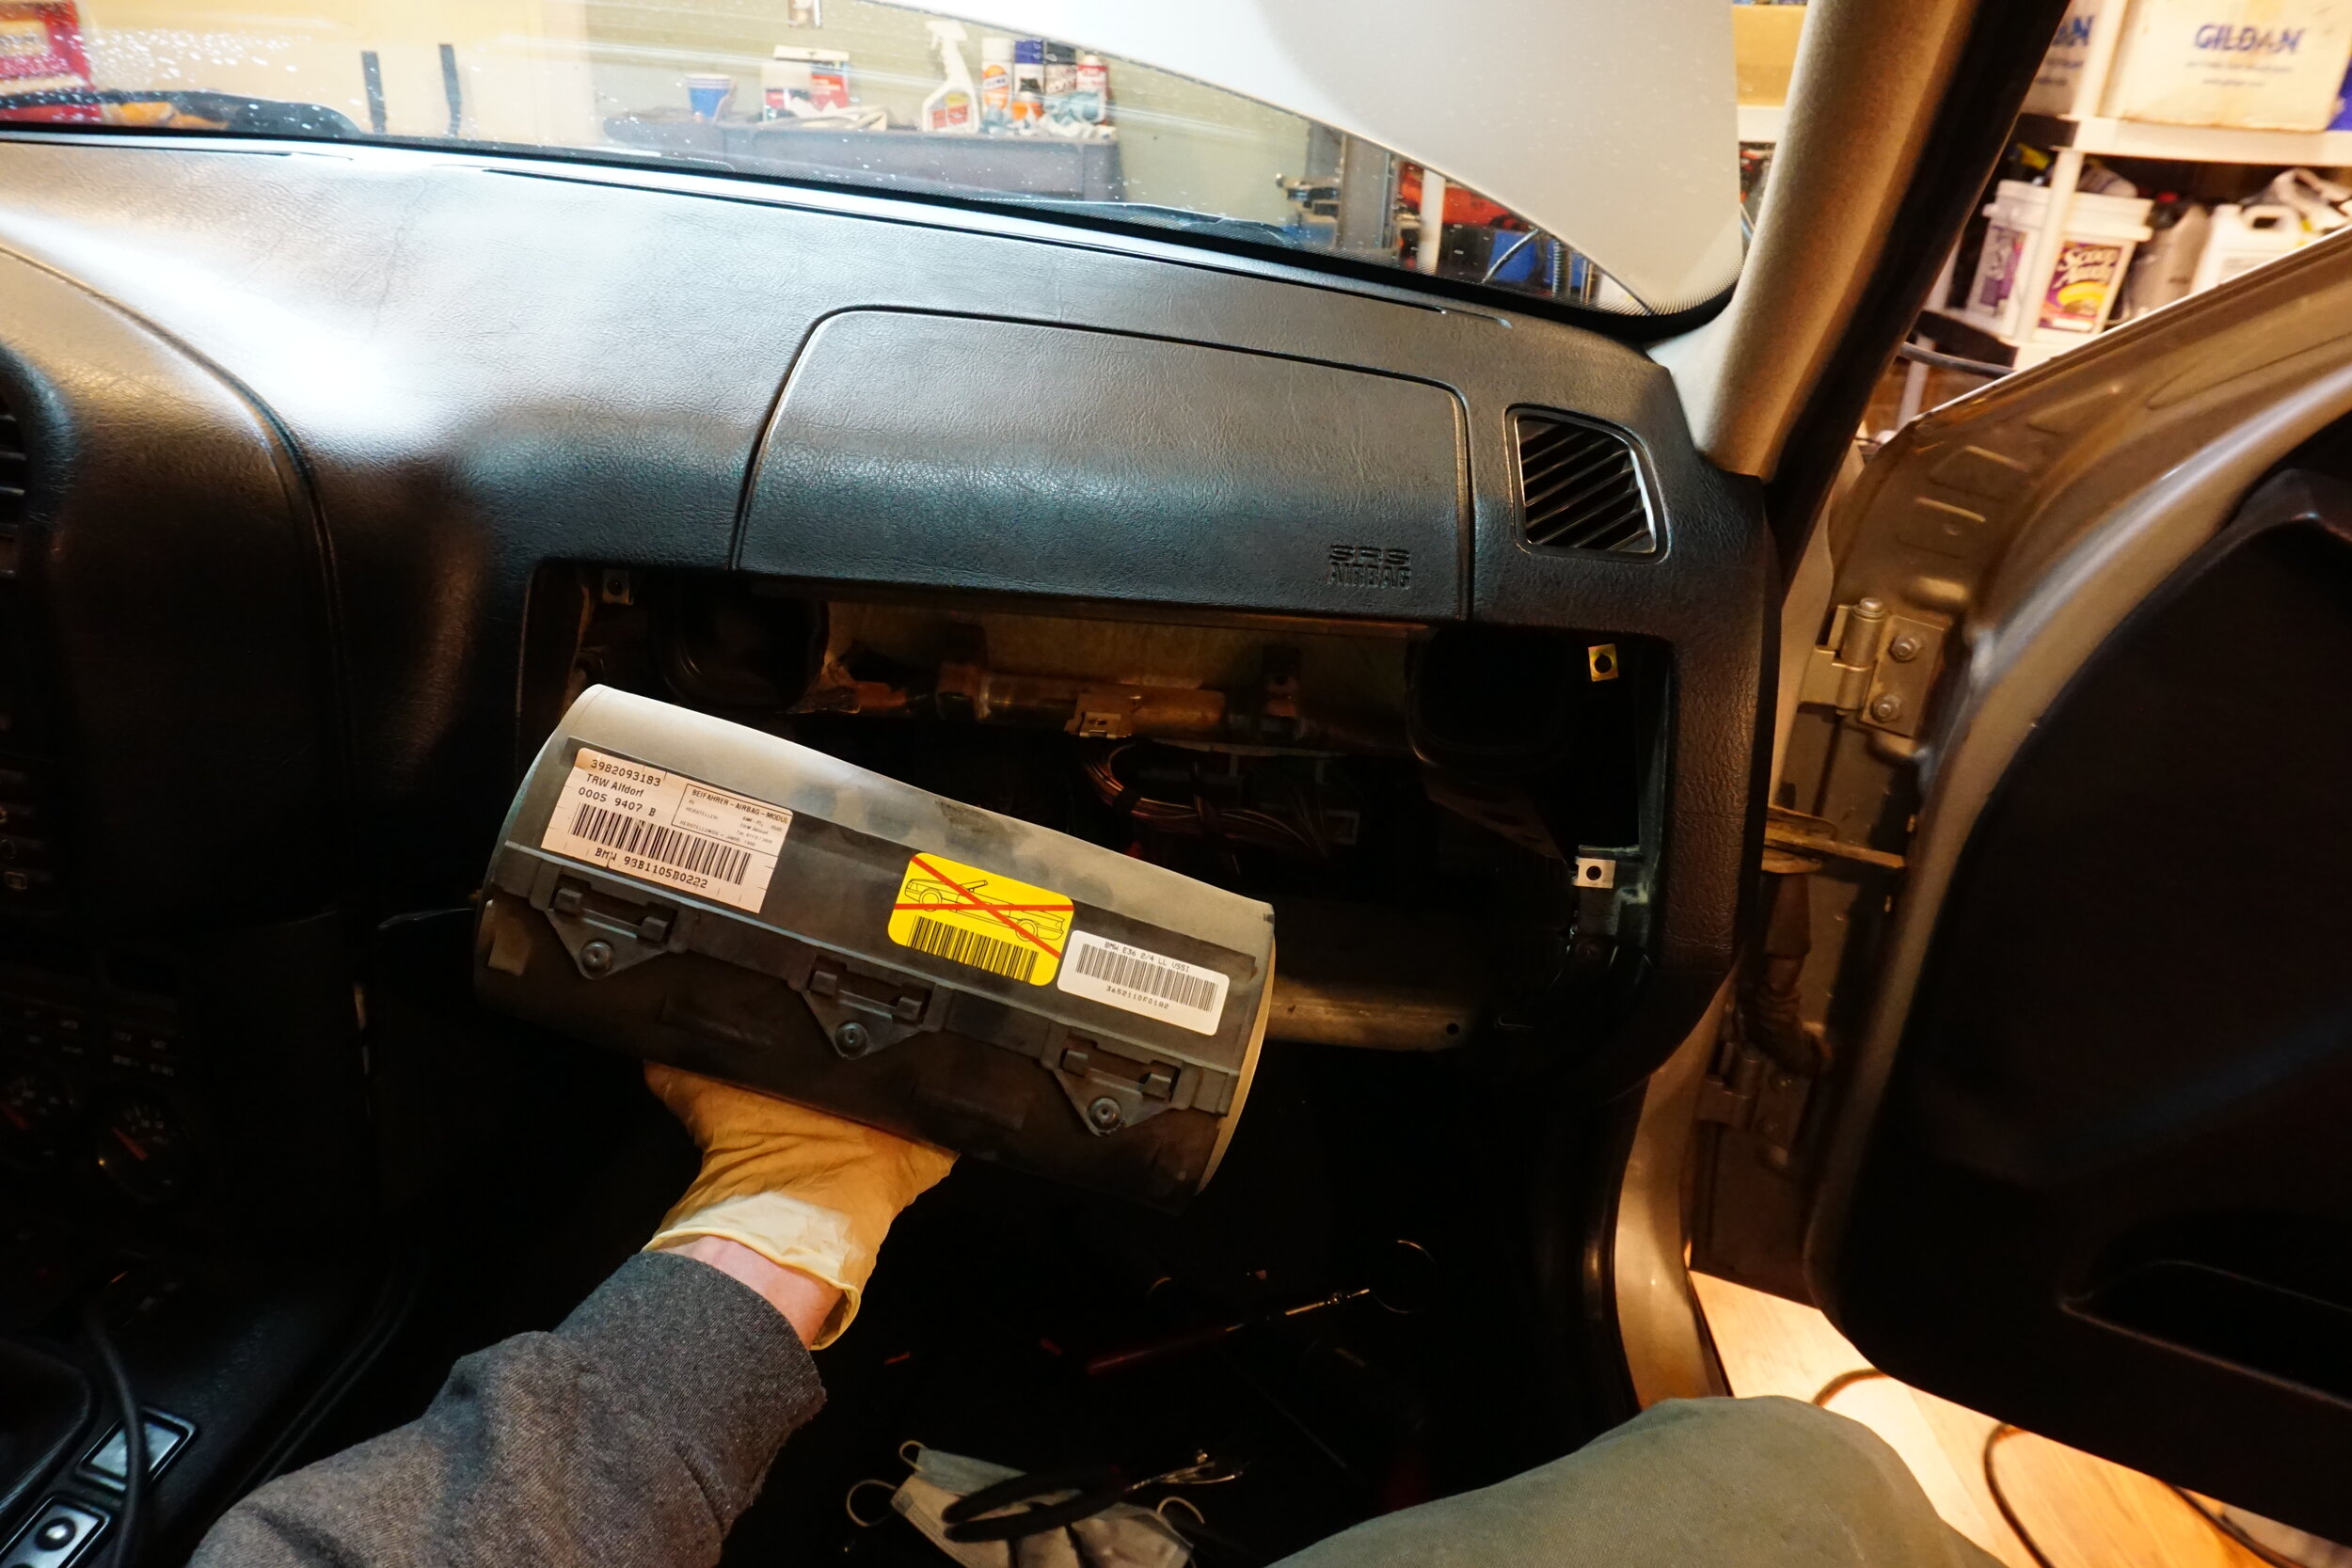
And while I was in there I got rid of this 10 pound paper weight. It's not like it was active anyways. Woo hoo, weight reduction!
Oh, and since nobody ever sits in the passenger seat, I decided to block off the air vent for their feet, so now it should all come to me!
Or maybe it will all get pushed to the vent under the passenger seat, who knows....
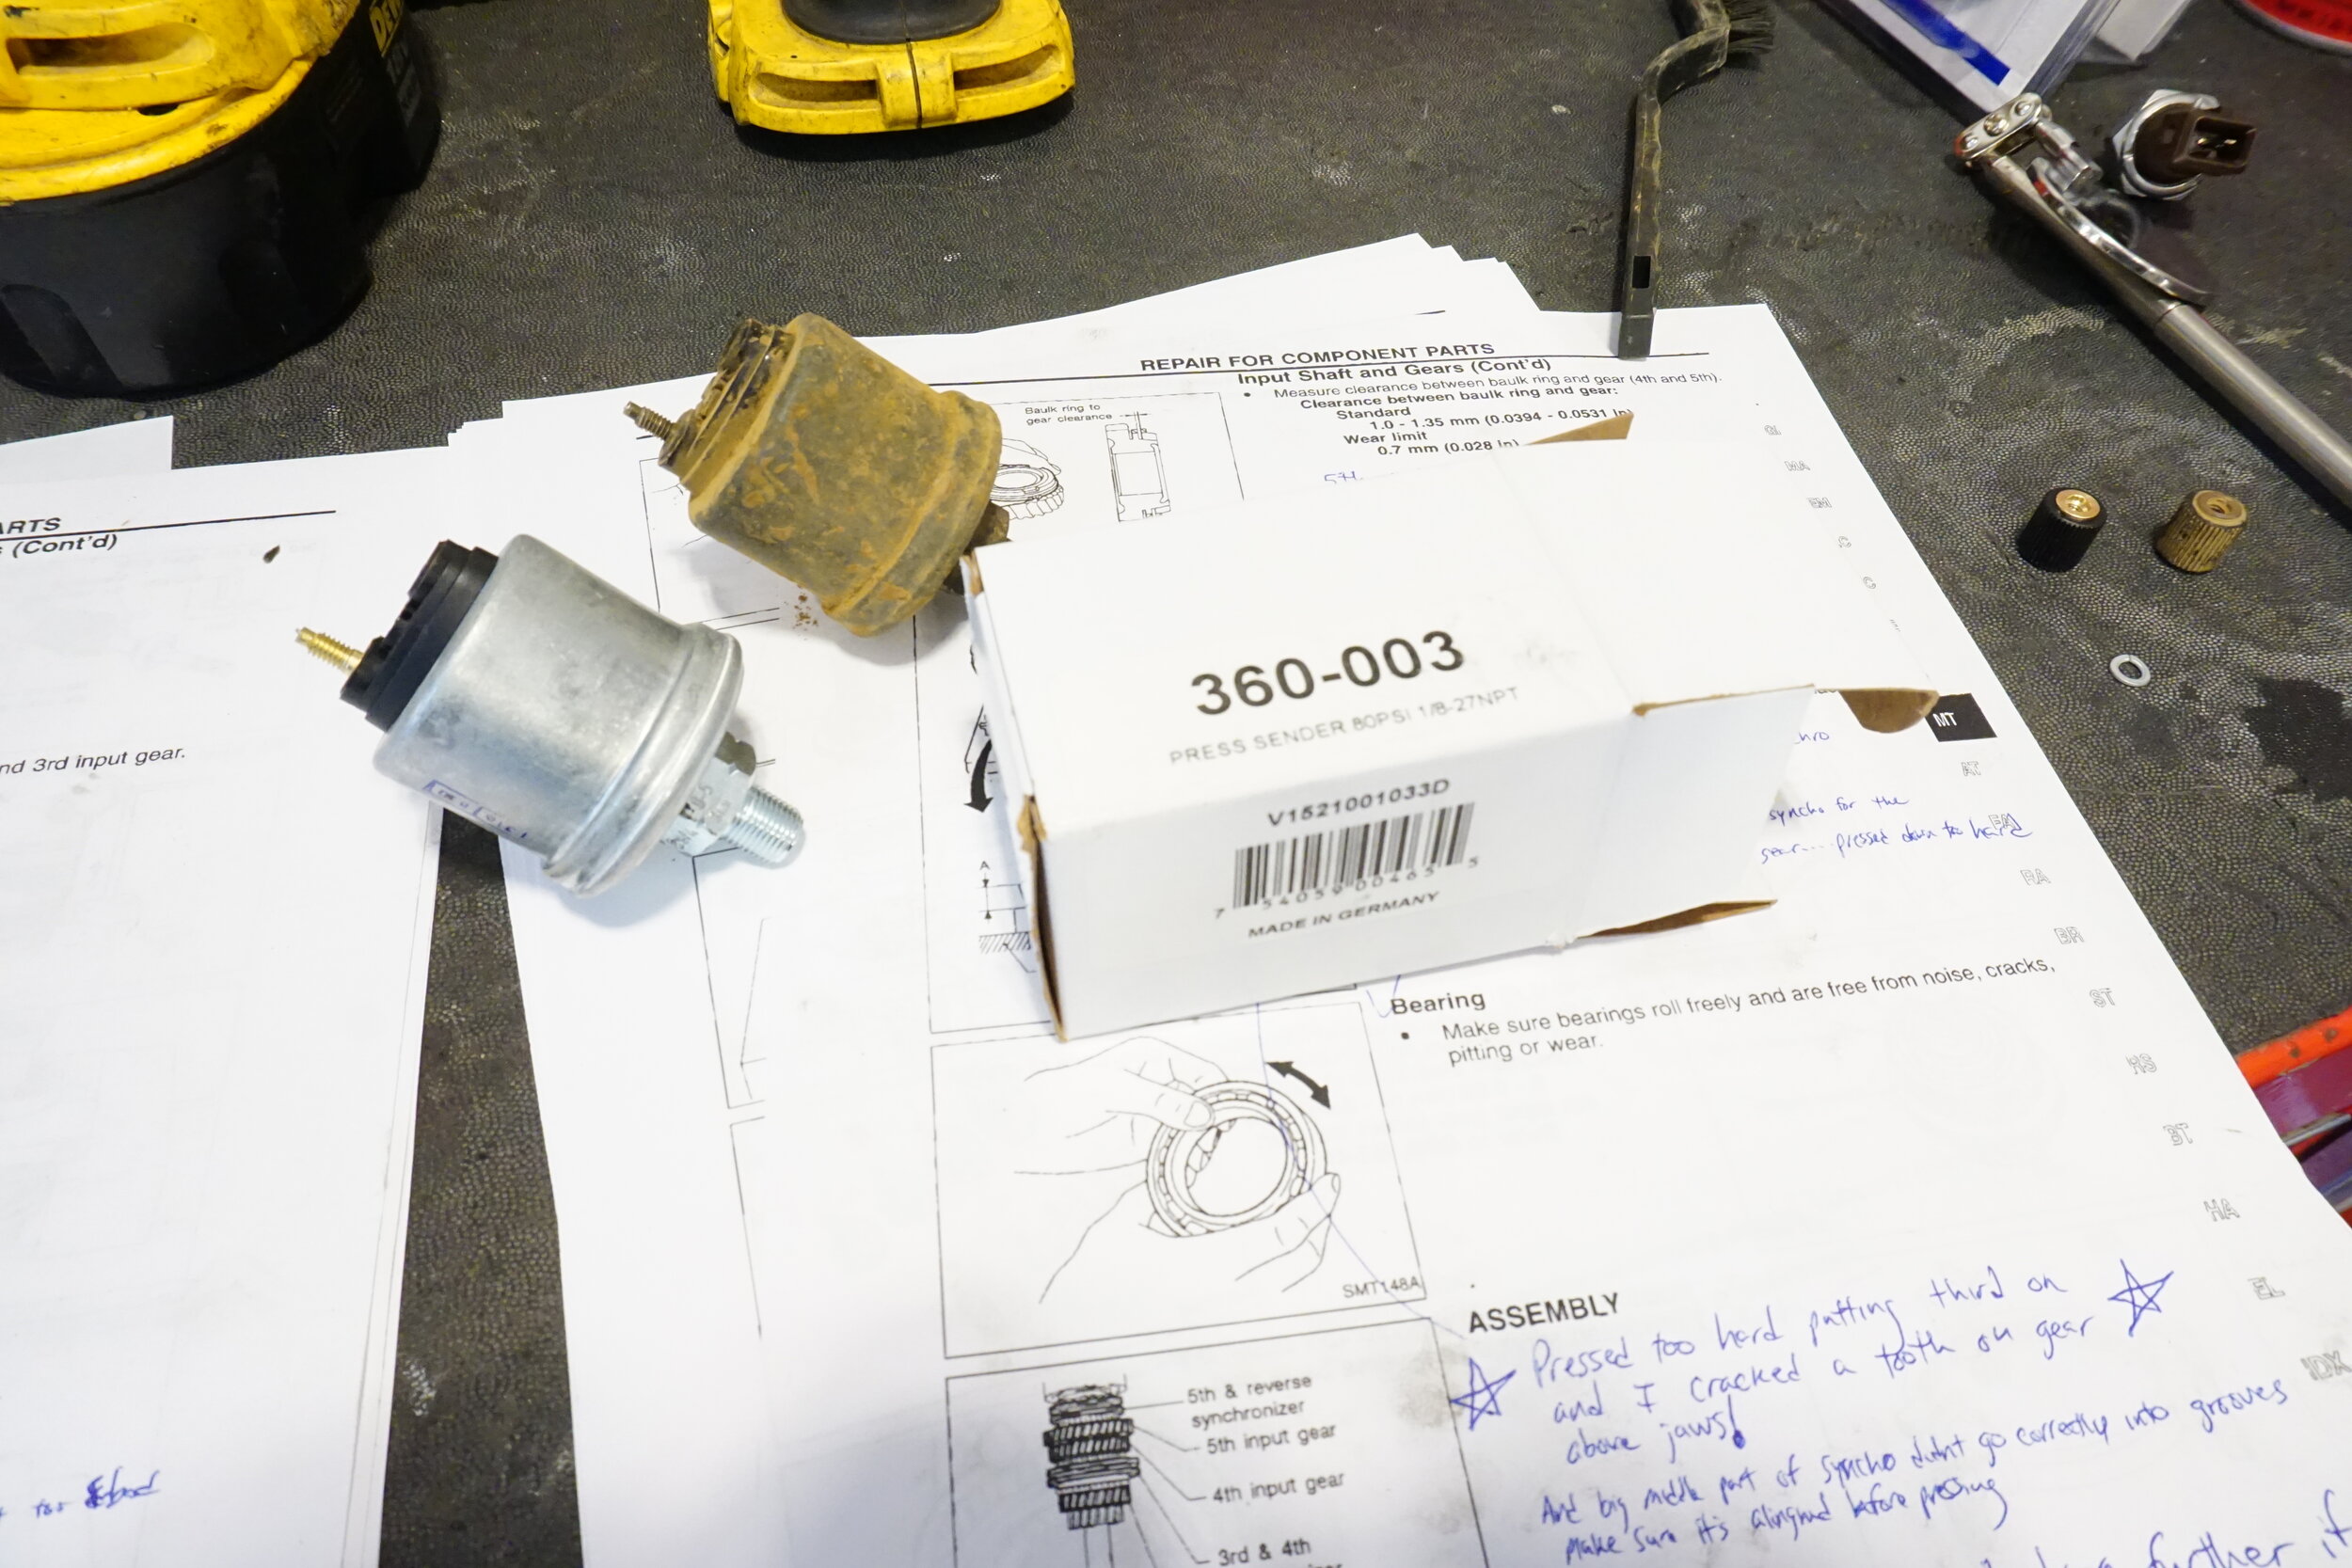
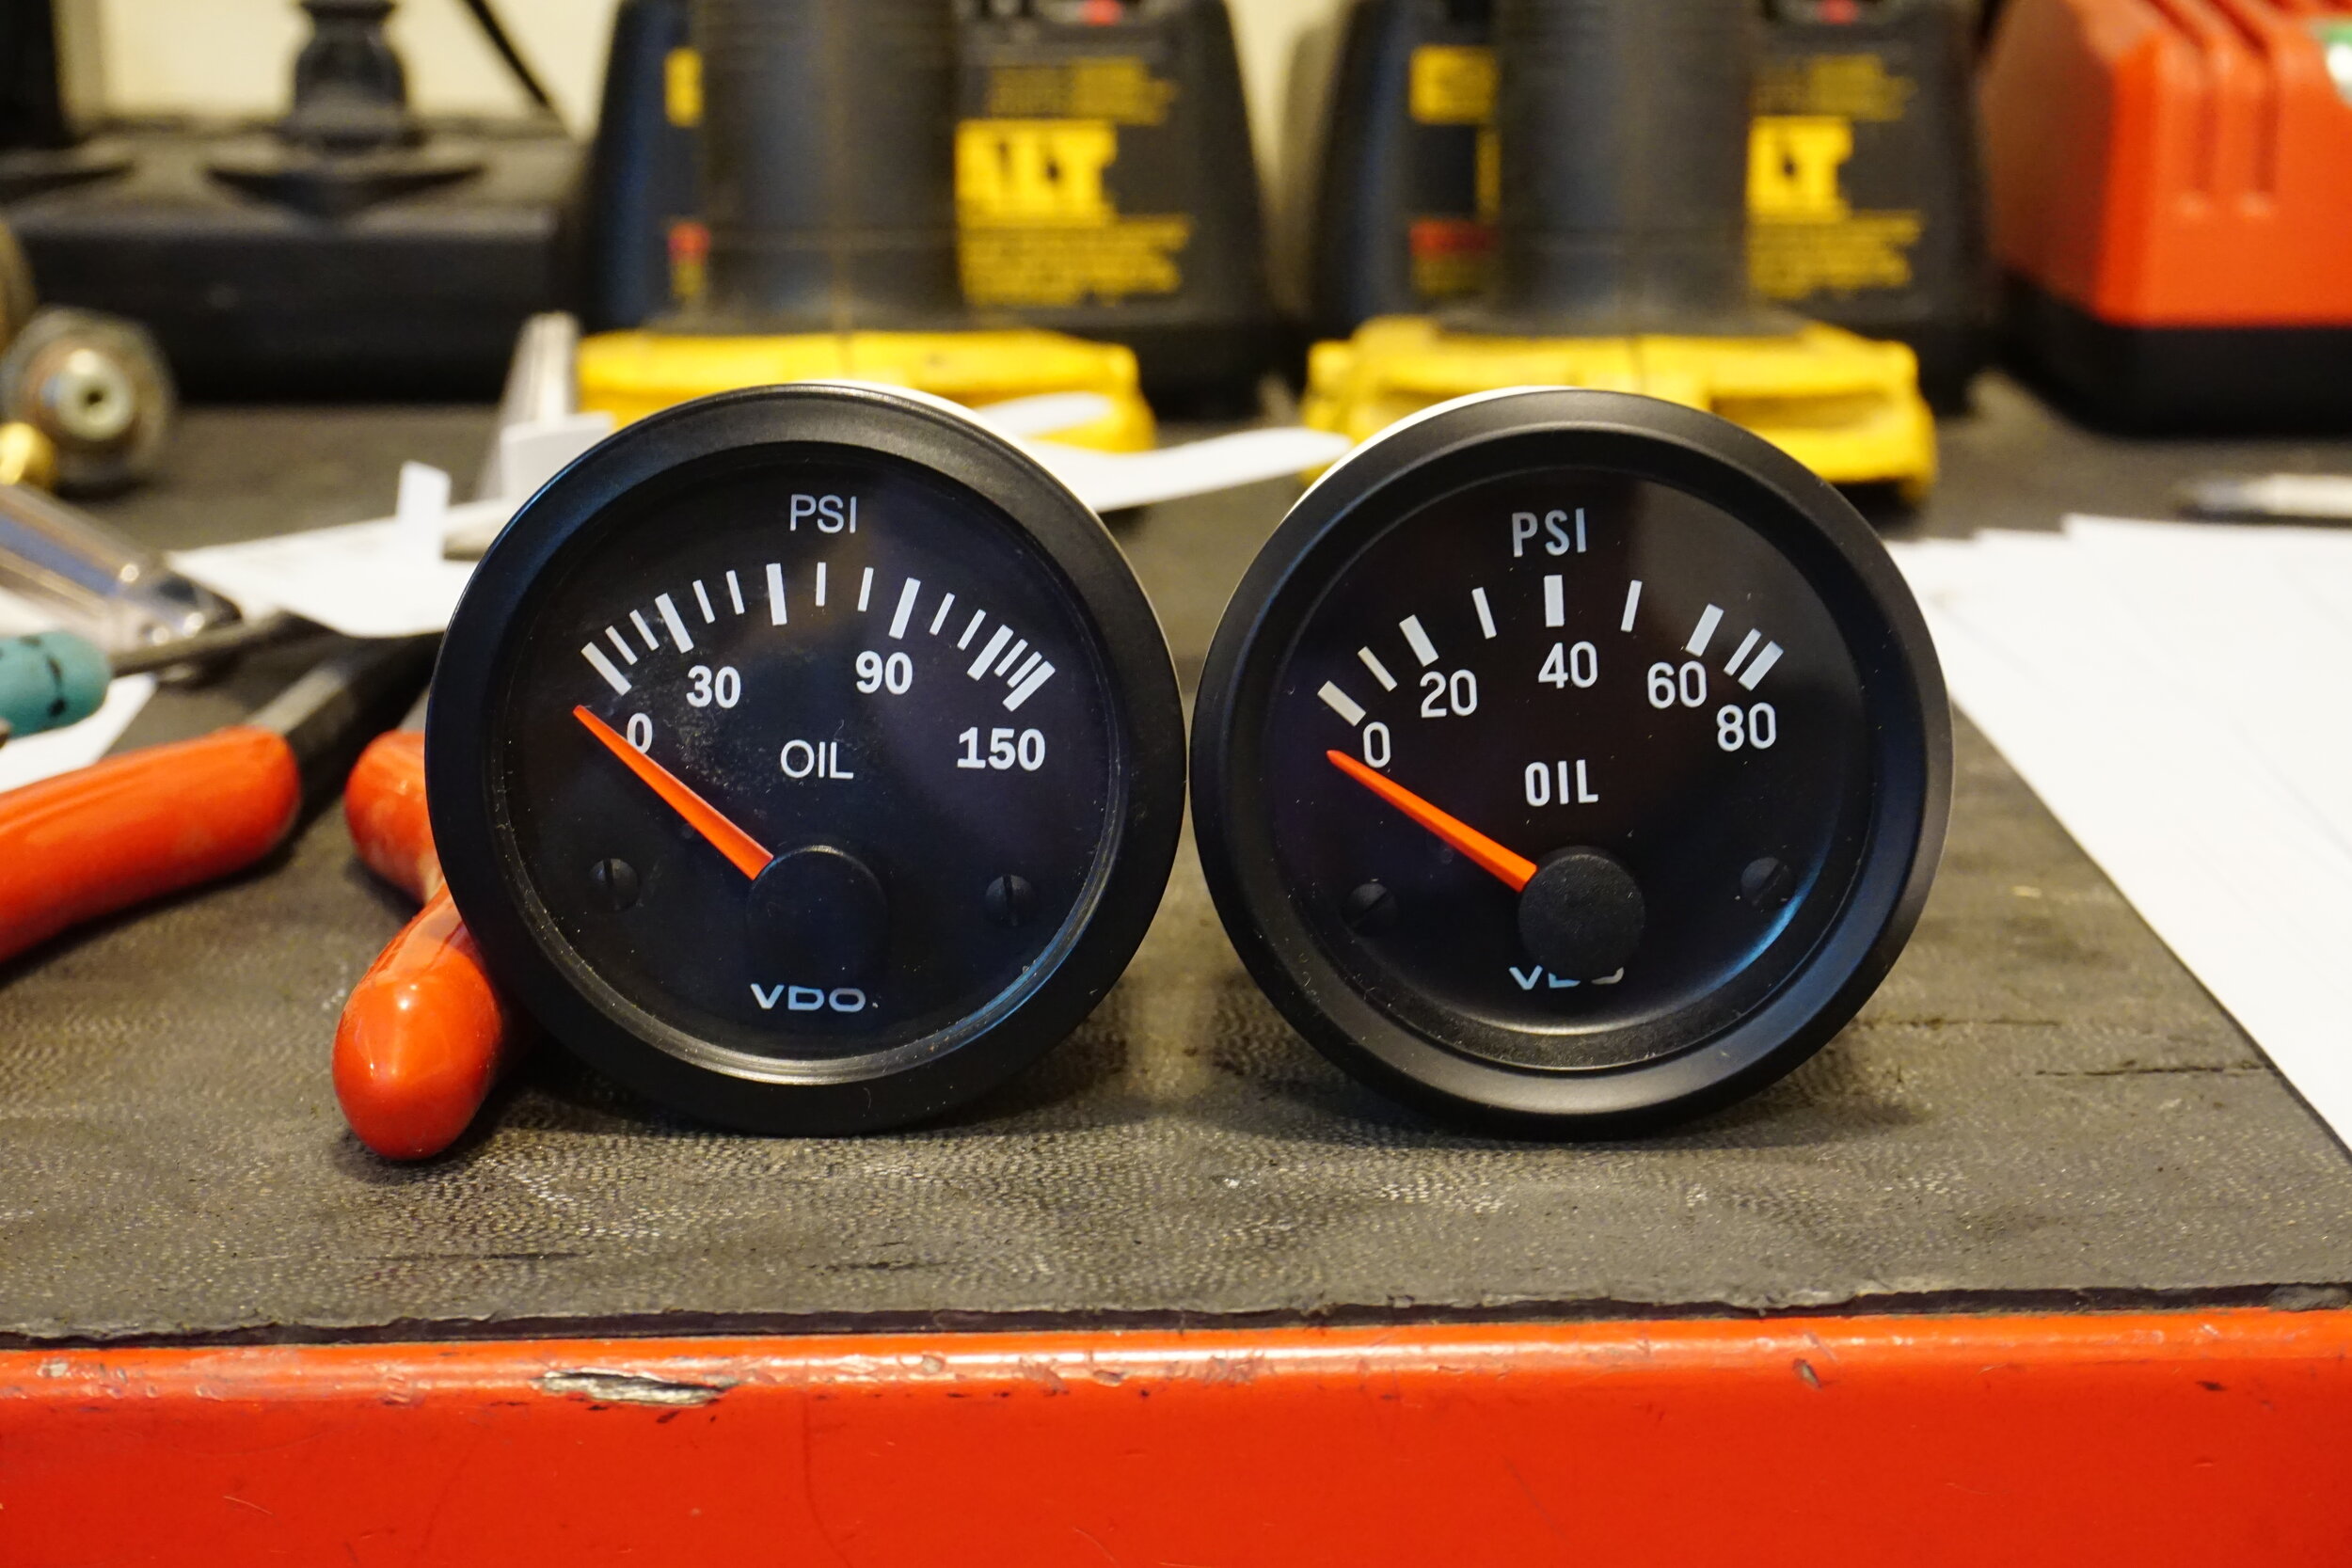
Anyways, back to my oil pressure. I bought a new OEM sender, and decided to replace my VDO stuff as well. My current VDO oil pressure gauge goes from 0-150 PSI, and considering I've never seen pressure go above 80, I wanted to see if I could get a gauge to better match my pressure range. Lo and behold, VDO makes a 0-80 PSI gauge, so I got one and the matching sender unit (0-5 bar instead of 0-10 bar). This should make it easier to see which side of 10 PSI my pressure is when I'm idling.
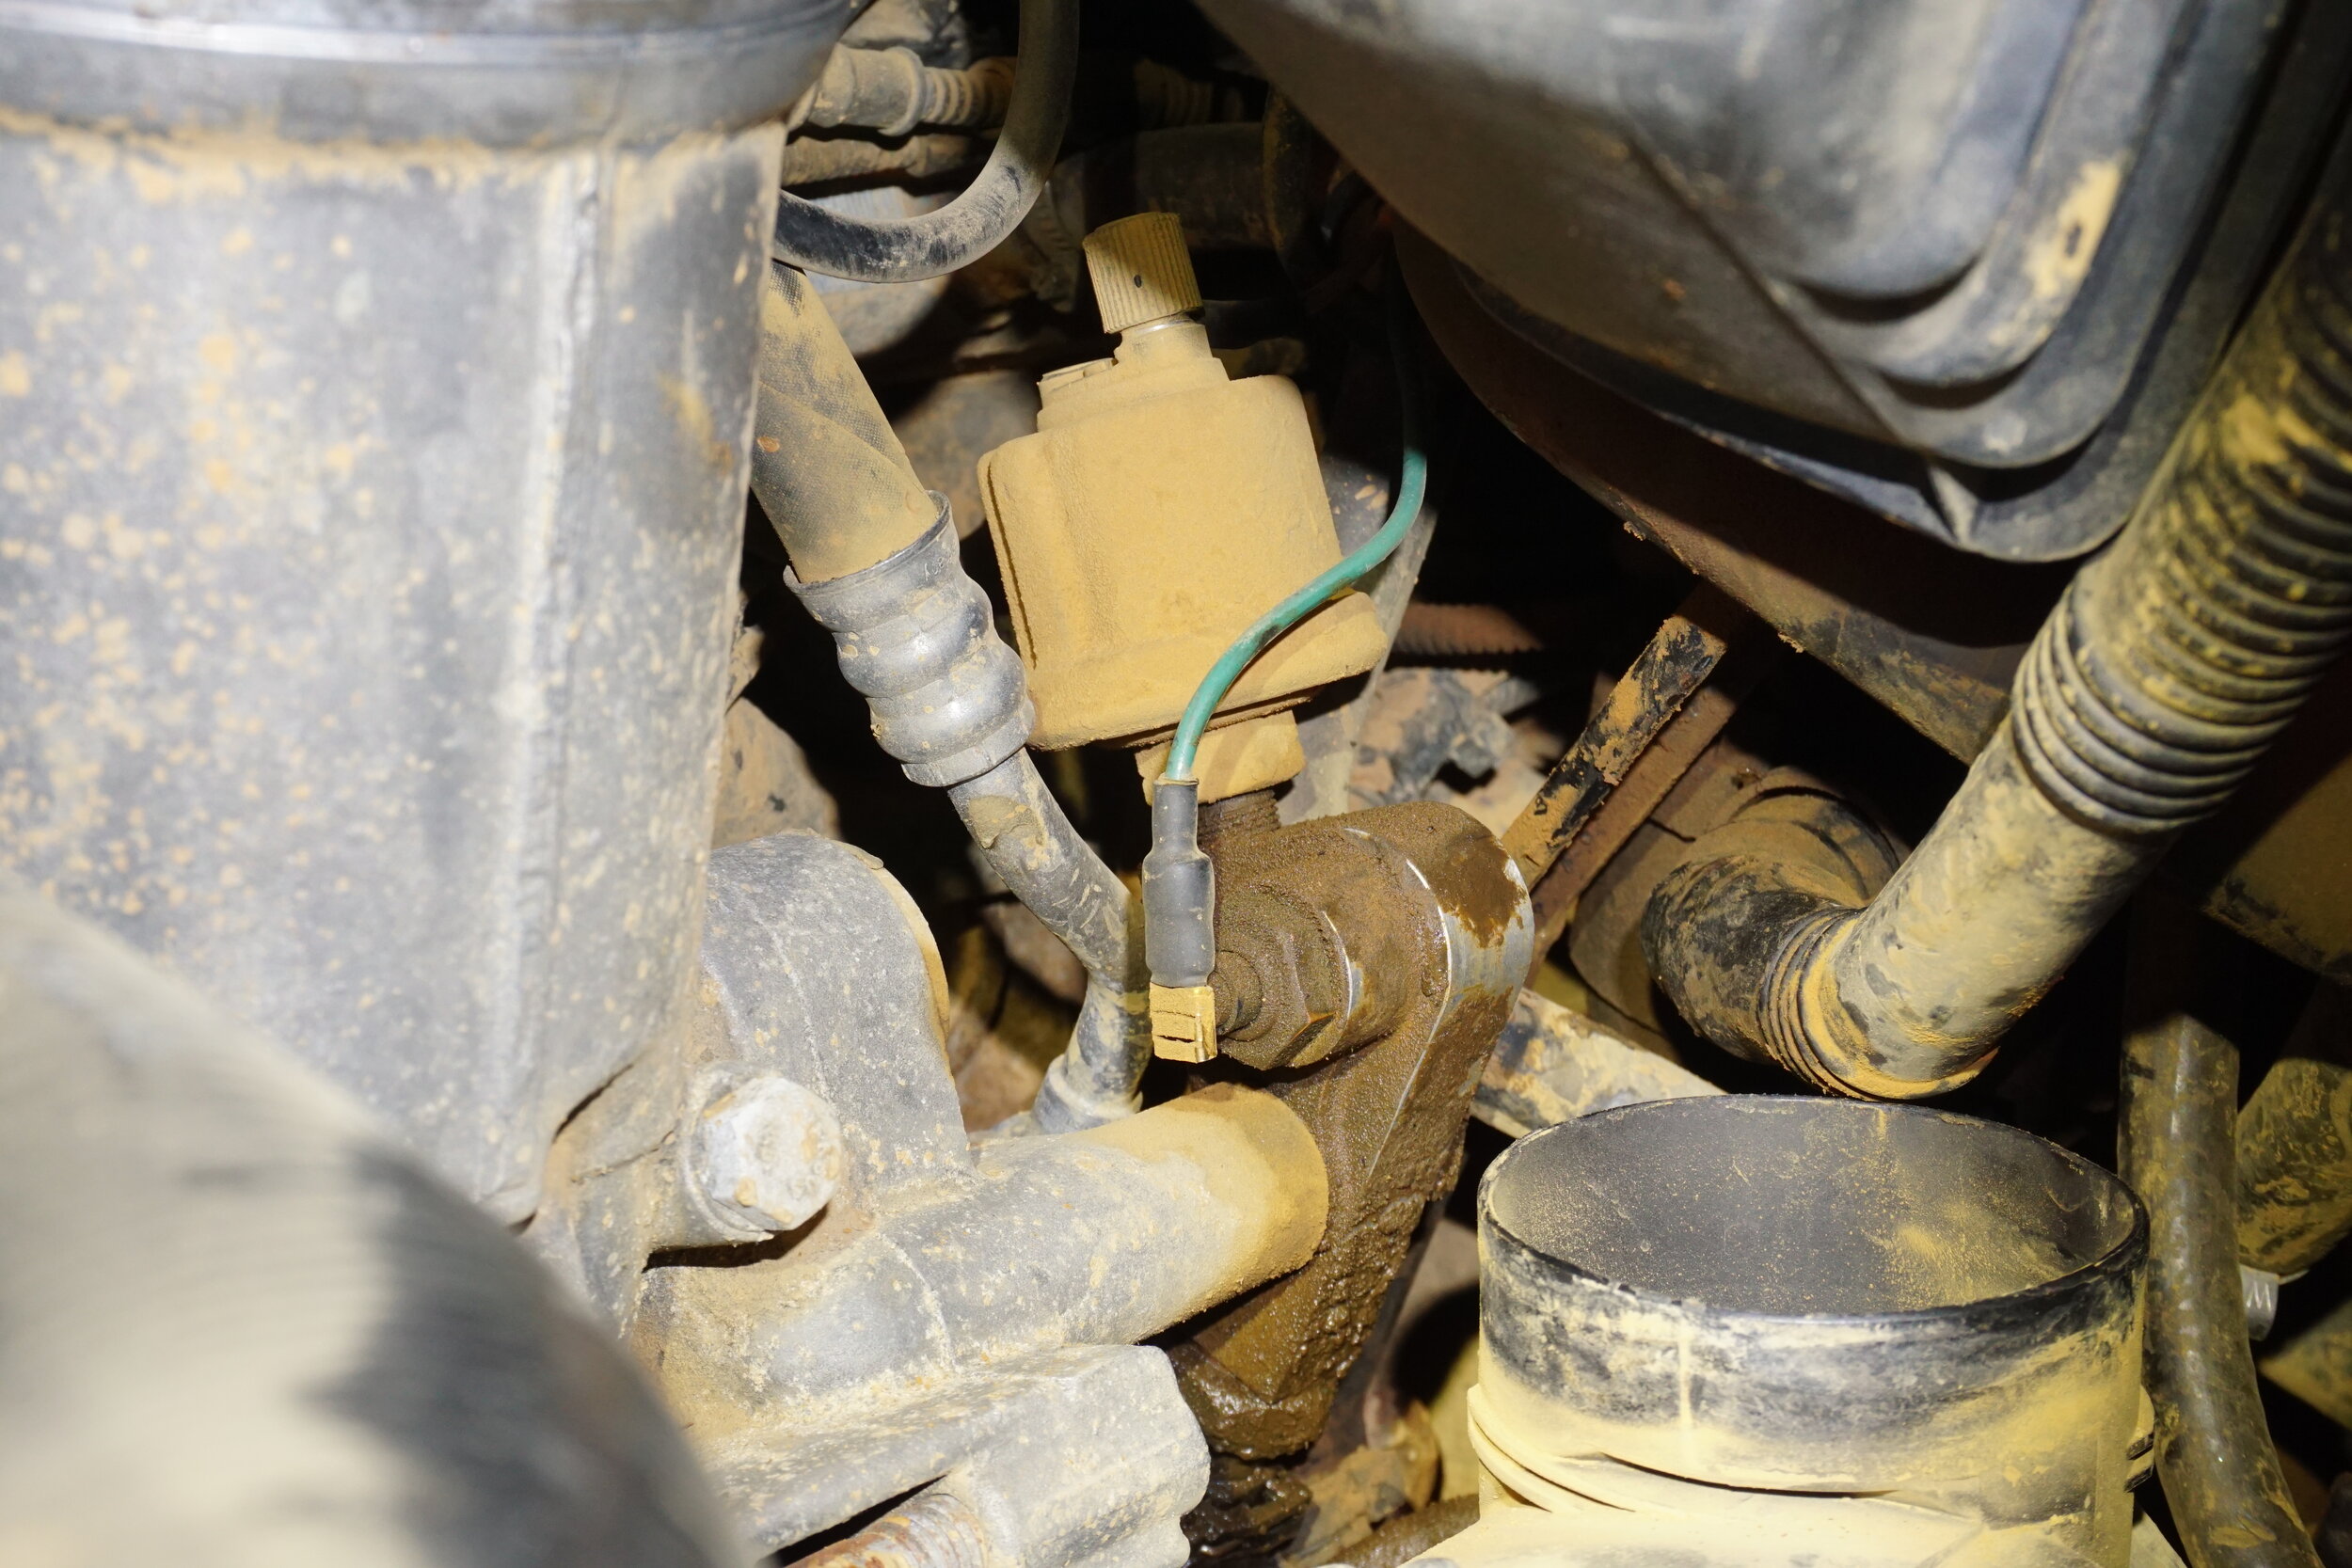
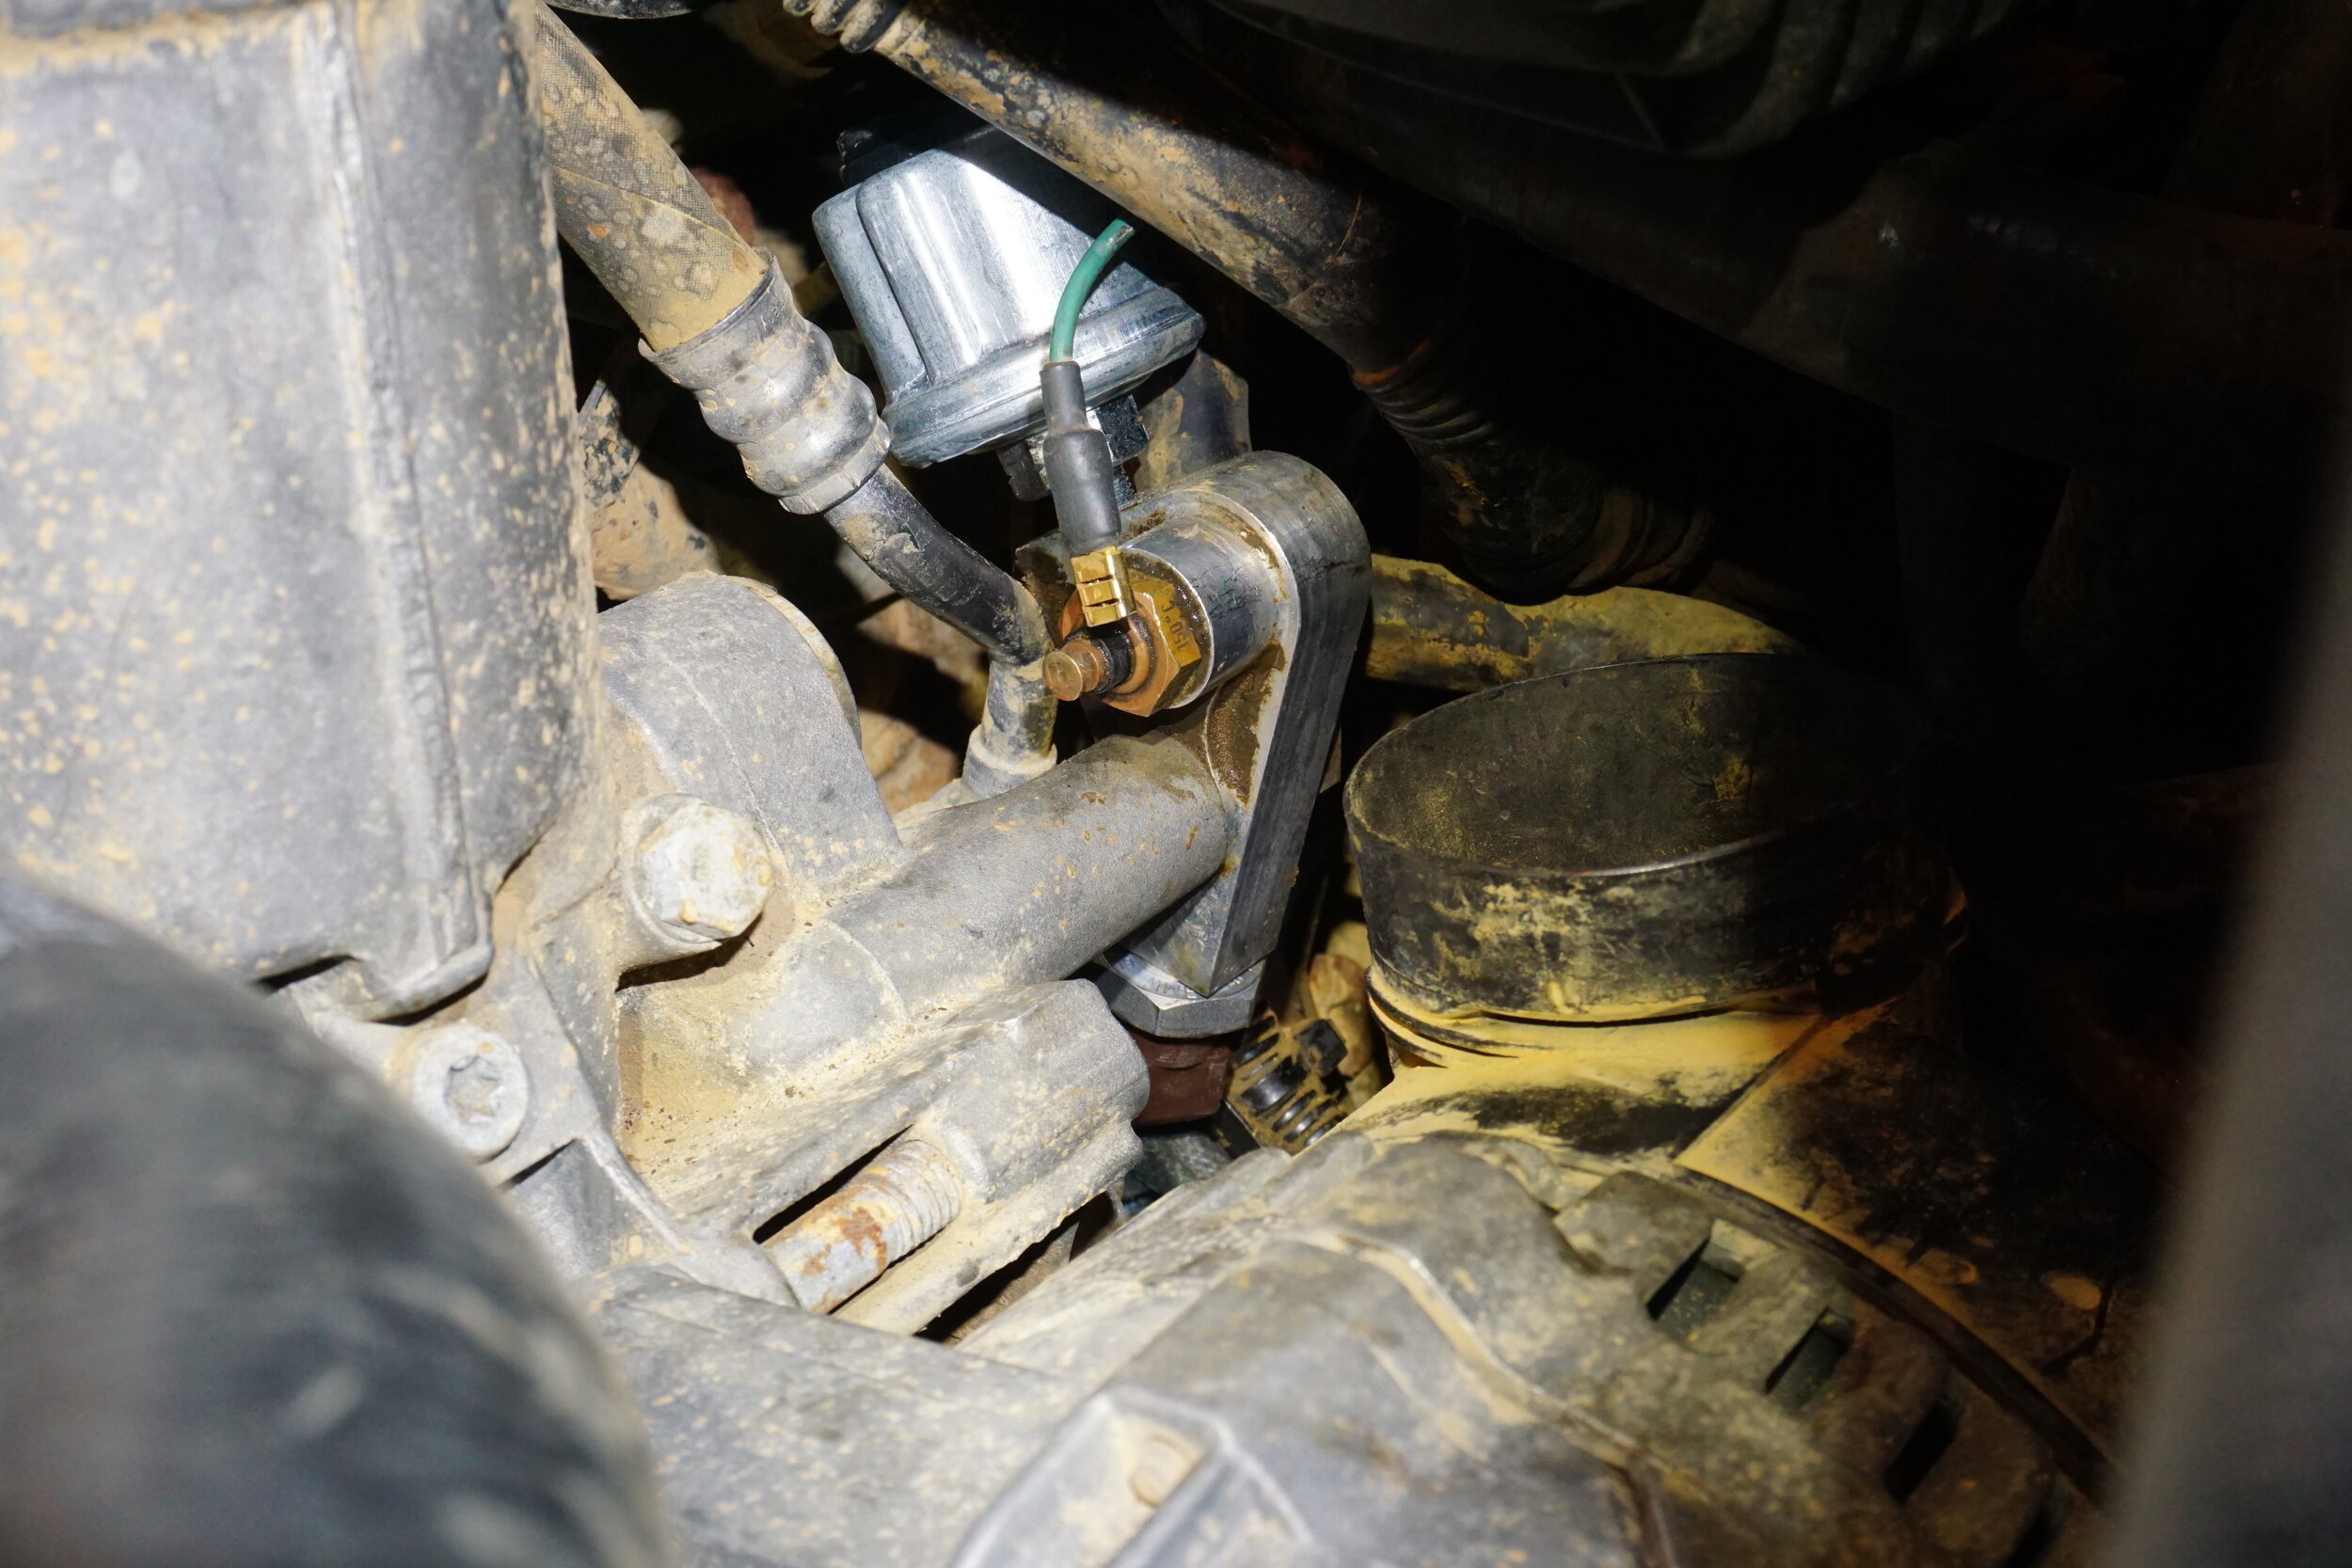
Taking a look into the area where this all lived, I realized access was going to be a bit of an issue. It also looks like a number of these things had been leaking some oil.
New VDO sender (360-003, 1/8-27NPT for BW distribution block). A stubby 17mm saved the day here.
As for the factory sender, well, that was far trickier. It's on the bottom of the distro block, and there no real access from the bottom. My larger 140a alternator wasn't helping matters either, my old 80a was much smaller. I considered taking the alternator off to make things easier, but eventually found I was able to unscrew the old one with a crowfoot wrench.
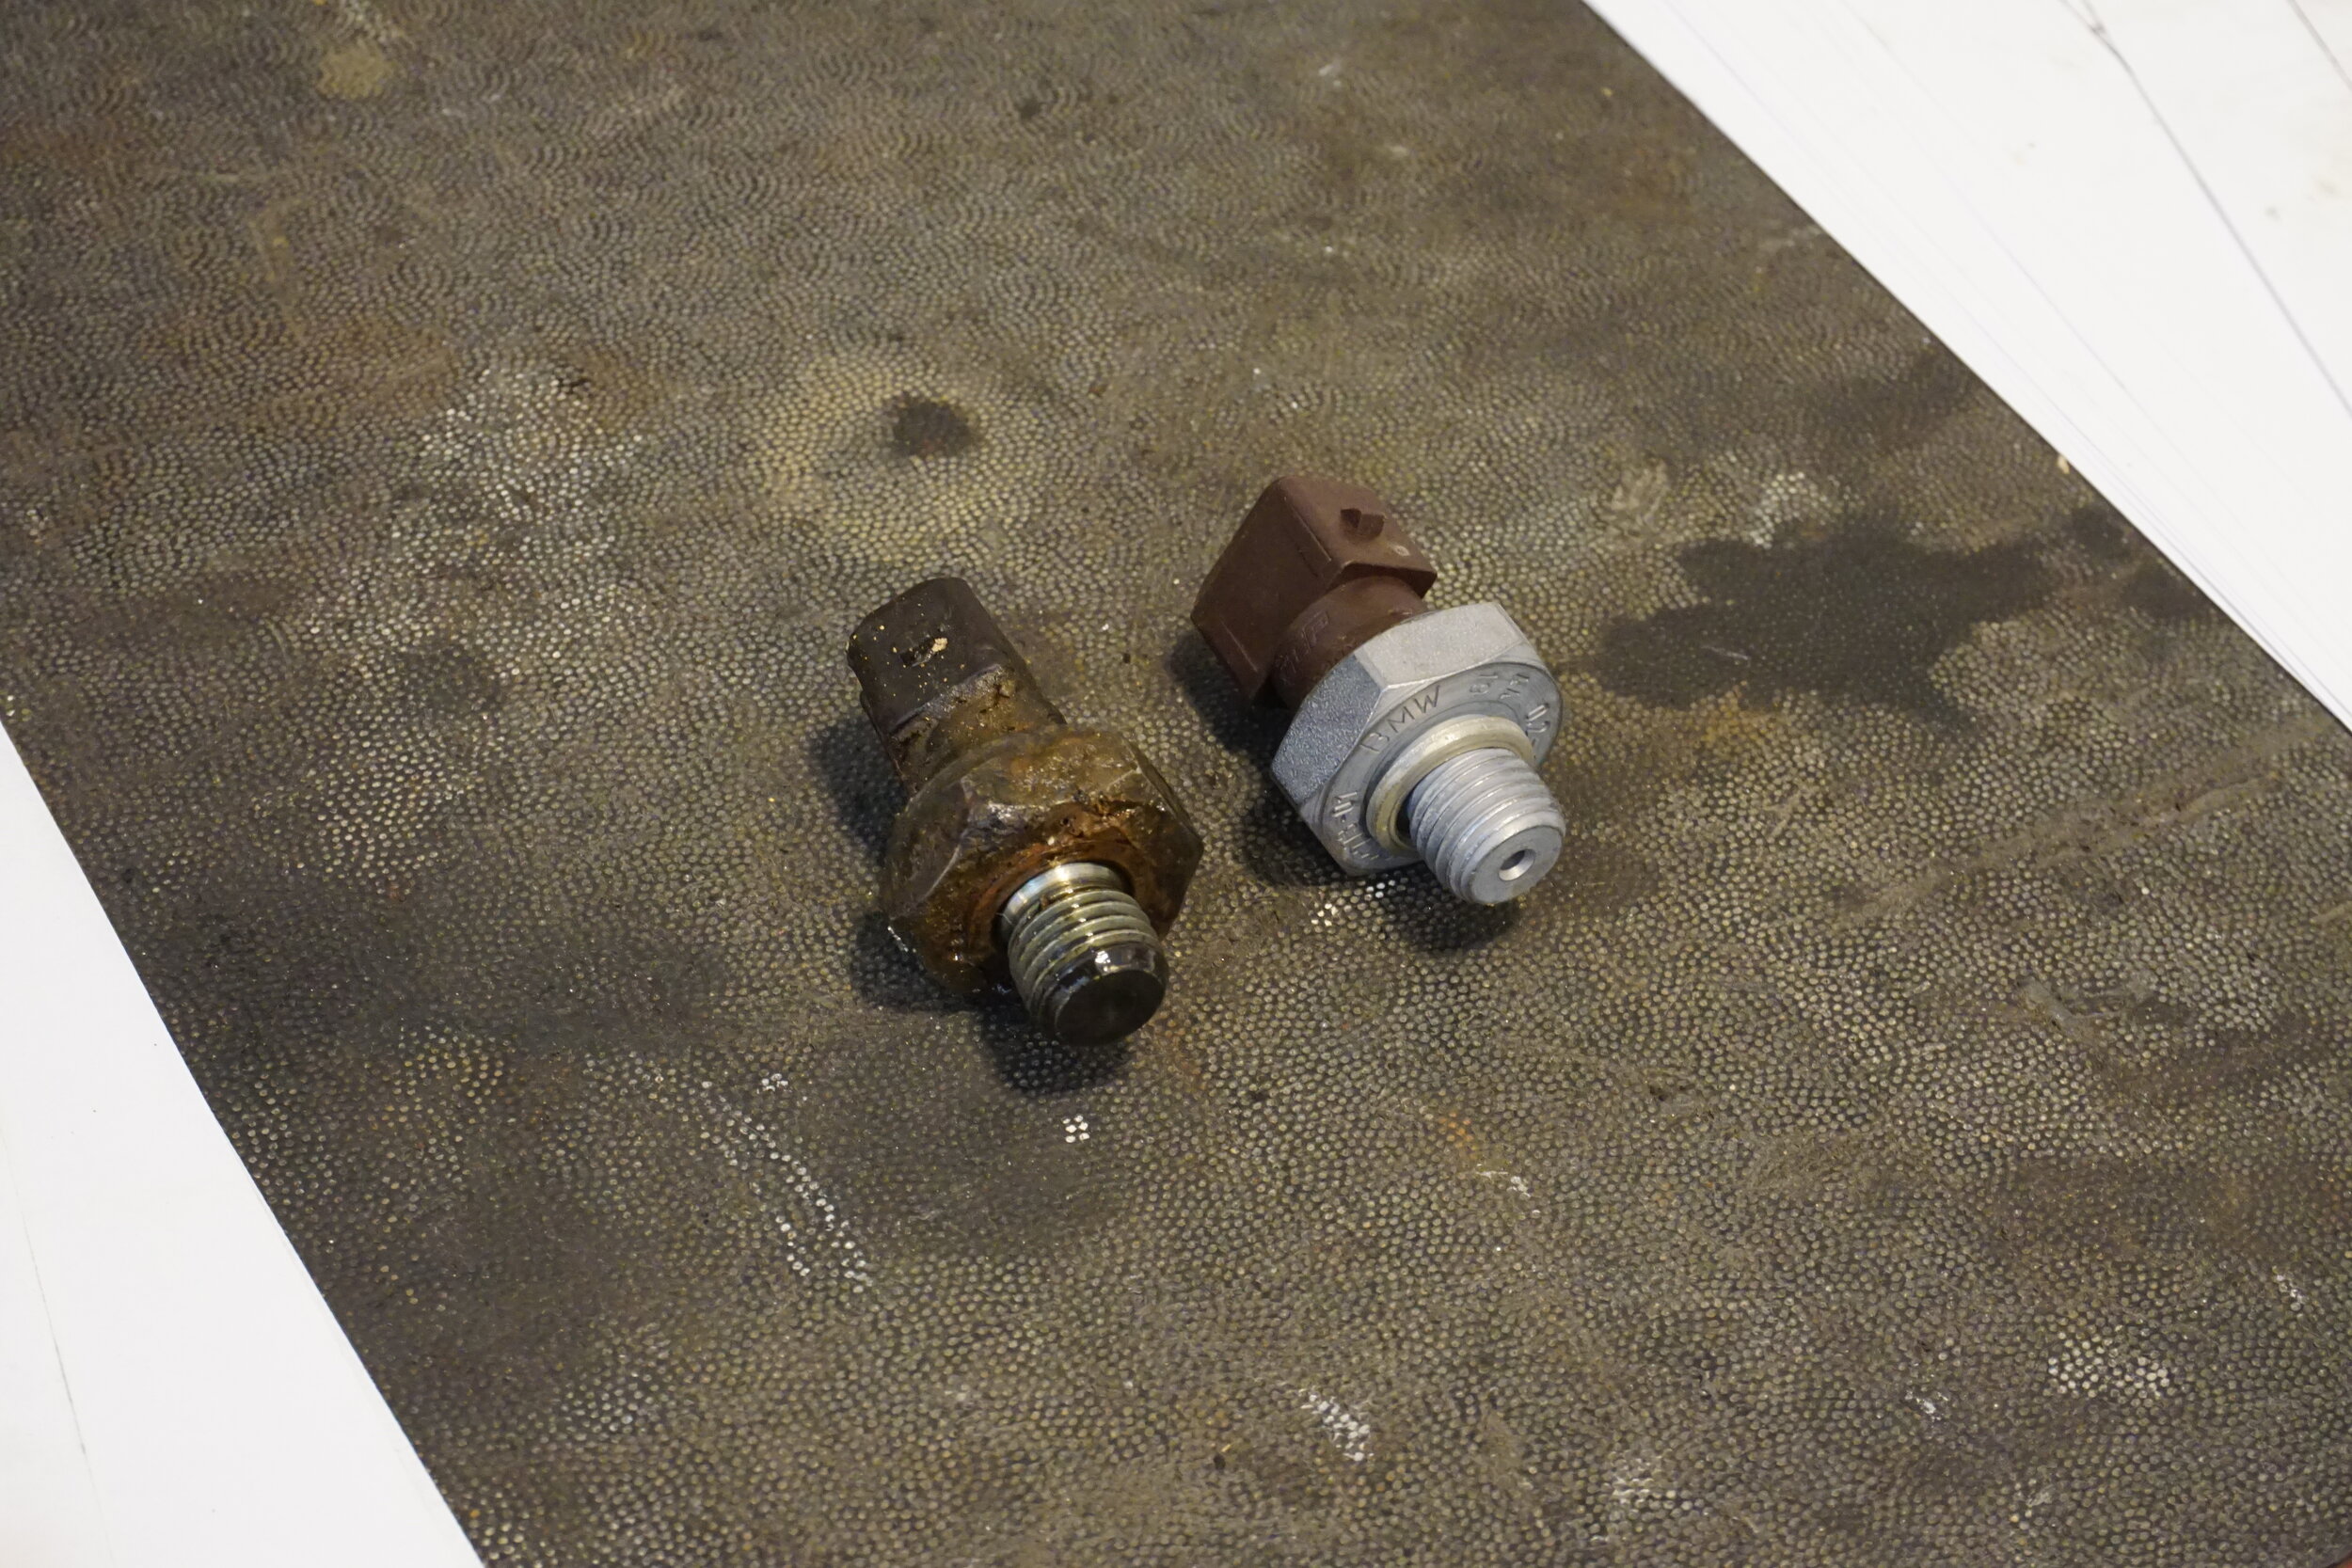
It had seen better days and had been leaking a bit. In fact, when I got the crowfoot wrench on it, it came off with almost no force. If it had loosened up a bit more it could have been very bad. I could read the date code on the sensor, and it was the original one from 1998. But then I was faced with another problem, how do I screw it back in? Access was so tight that I couldn't get it back in there. I tried everything, but no dice. Maybe the alternator was going to have to come off after all. In a last ditch effort I got my wife to come out and help. She held the sensor roughly in place from above, while I got under the car and squirmed my hand up there and was somehow able to get it screwed in. Awesome! The same problem reappeared when I went to reconnect the electrical connector, and again, and second pair of hands saved the day. I made sure to tighten this one in pretty tight, so hopefully it won't leak anymore.
When it was all said and done, I was left with this:
So I installed the new gauge. It's not perfect, but it should be a lot easier to tell if I'm at 8 or 12 PSI.
As a refresher, at cold start I would usually see around 65-70 PSI. I read that in these engines pressure is regulated to 58 PSI, but I haven't been able to verify that, so I don't know if my old gauge was accurate or not. So I turned on the car, and my pressure was only 50, quite low compared to what I'm used to. So now I don't know if the new gauge is accurate, or if the old one was. Or neither? I haven't had a chance to drive it yet, so I don't know if the new OEM sensor fixed my warning light or not.
Last edited by 95maxrider; 03-07-2021 at 09:12 PM.
Member
My brand new Autometer oil pressure gauge reads 50-51psi on cold start.
Also, you should remote mount that oil pressure sender to keep vibrations from giving it an early death. Check my thread for mounting ideas.
E36 M3 journal https://www.bimmerforums.com/forum/s...-Build-Journal
F80 M3 journal https://f80.bimmerpost.com/forums/sh....php?t=1734421
Miata K24 build https://www.miataturbo.net/build-thr...ine-up-105885/
Member
I started the car up yesterday for a short drive and pressure read just under 60 at cold start with high idle. If what I read is correct and these engines are regulated to 58 PSI max, then maybe this gauge/sender are more accurate than my old setup. I got oil temps close to 200* and didn't see the dummy light flicker at all, and my gauge read somewhere around 8, so I'm really hoping I'm in the clear.Originally Posted by bimmerboy318

Good idea on remote mounting the sender, what sort of line did you use for the run? Are you using a distribution block?
Member
Yes, using the same DB as you. I bought an-4 18 hose from Pegasus racing along with the cheapest adapter fittings they had to go from 1/8 npt to an-4. Then bought a cheap conduit clamp from Home Depot and installed where charcoal can used to be.
Member
So I've been driving around with the new oil pressure senders and gauge, and the warning light hasn't come back on since, so I'm considering this a success. With oil at 200*+ I'm seeing pressure just under 10 psi. Looks like the issue was just a worn out OEM sender. At full cold start I'm seeing pressure just under 60, which jives with the 58 psi max I read about in another thread, which leads me to believe this new gauge is spot on. When warmed up, cruising pressure is 30-40+ psi.
I was at a junkyard a while back and they had an earlier sedan without side air bags, so I grabbed the front door panels. At some point I might recover a section with leather and add some padding for my elbow, but for now I just wanted to get them installed. It's always bugged me how much the panels with side air bags stick out where your elbow rests, so these panels give me an extra inch or two of elbow space. It might not sound like much, but it makes a difference on longer drives. These panels were also in better shape than mine, and the backing material wasn't all torn up and flimsy. To top it off, they even came with a fancy little coin holder (not that I'm ever going to use it).
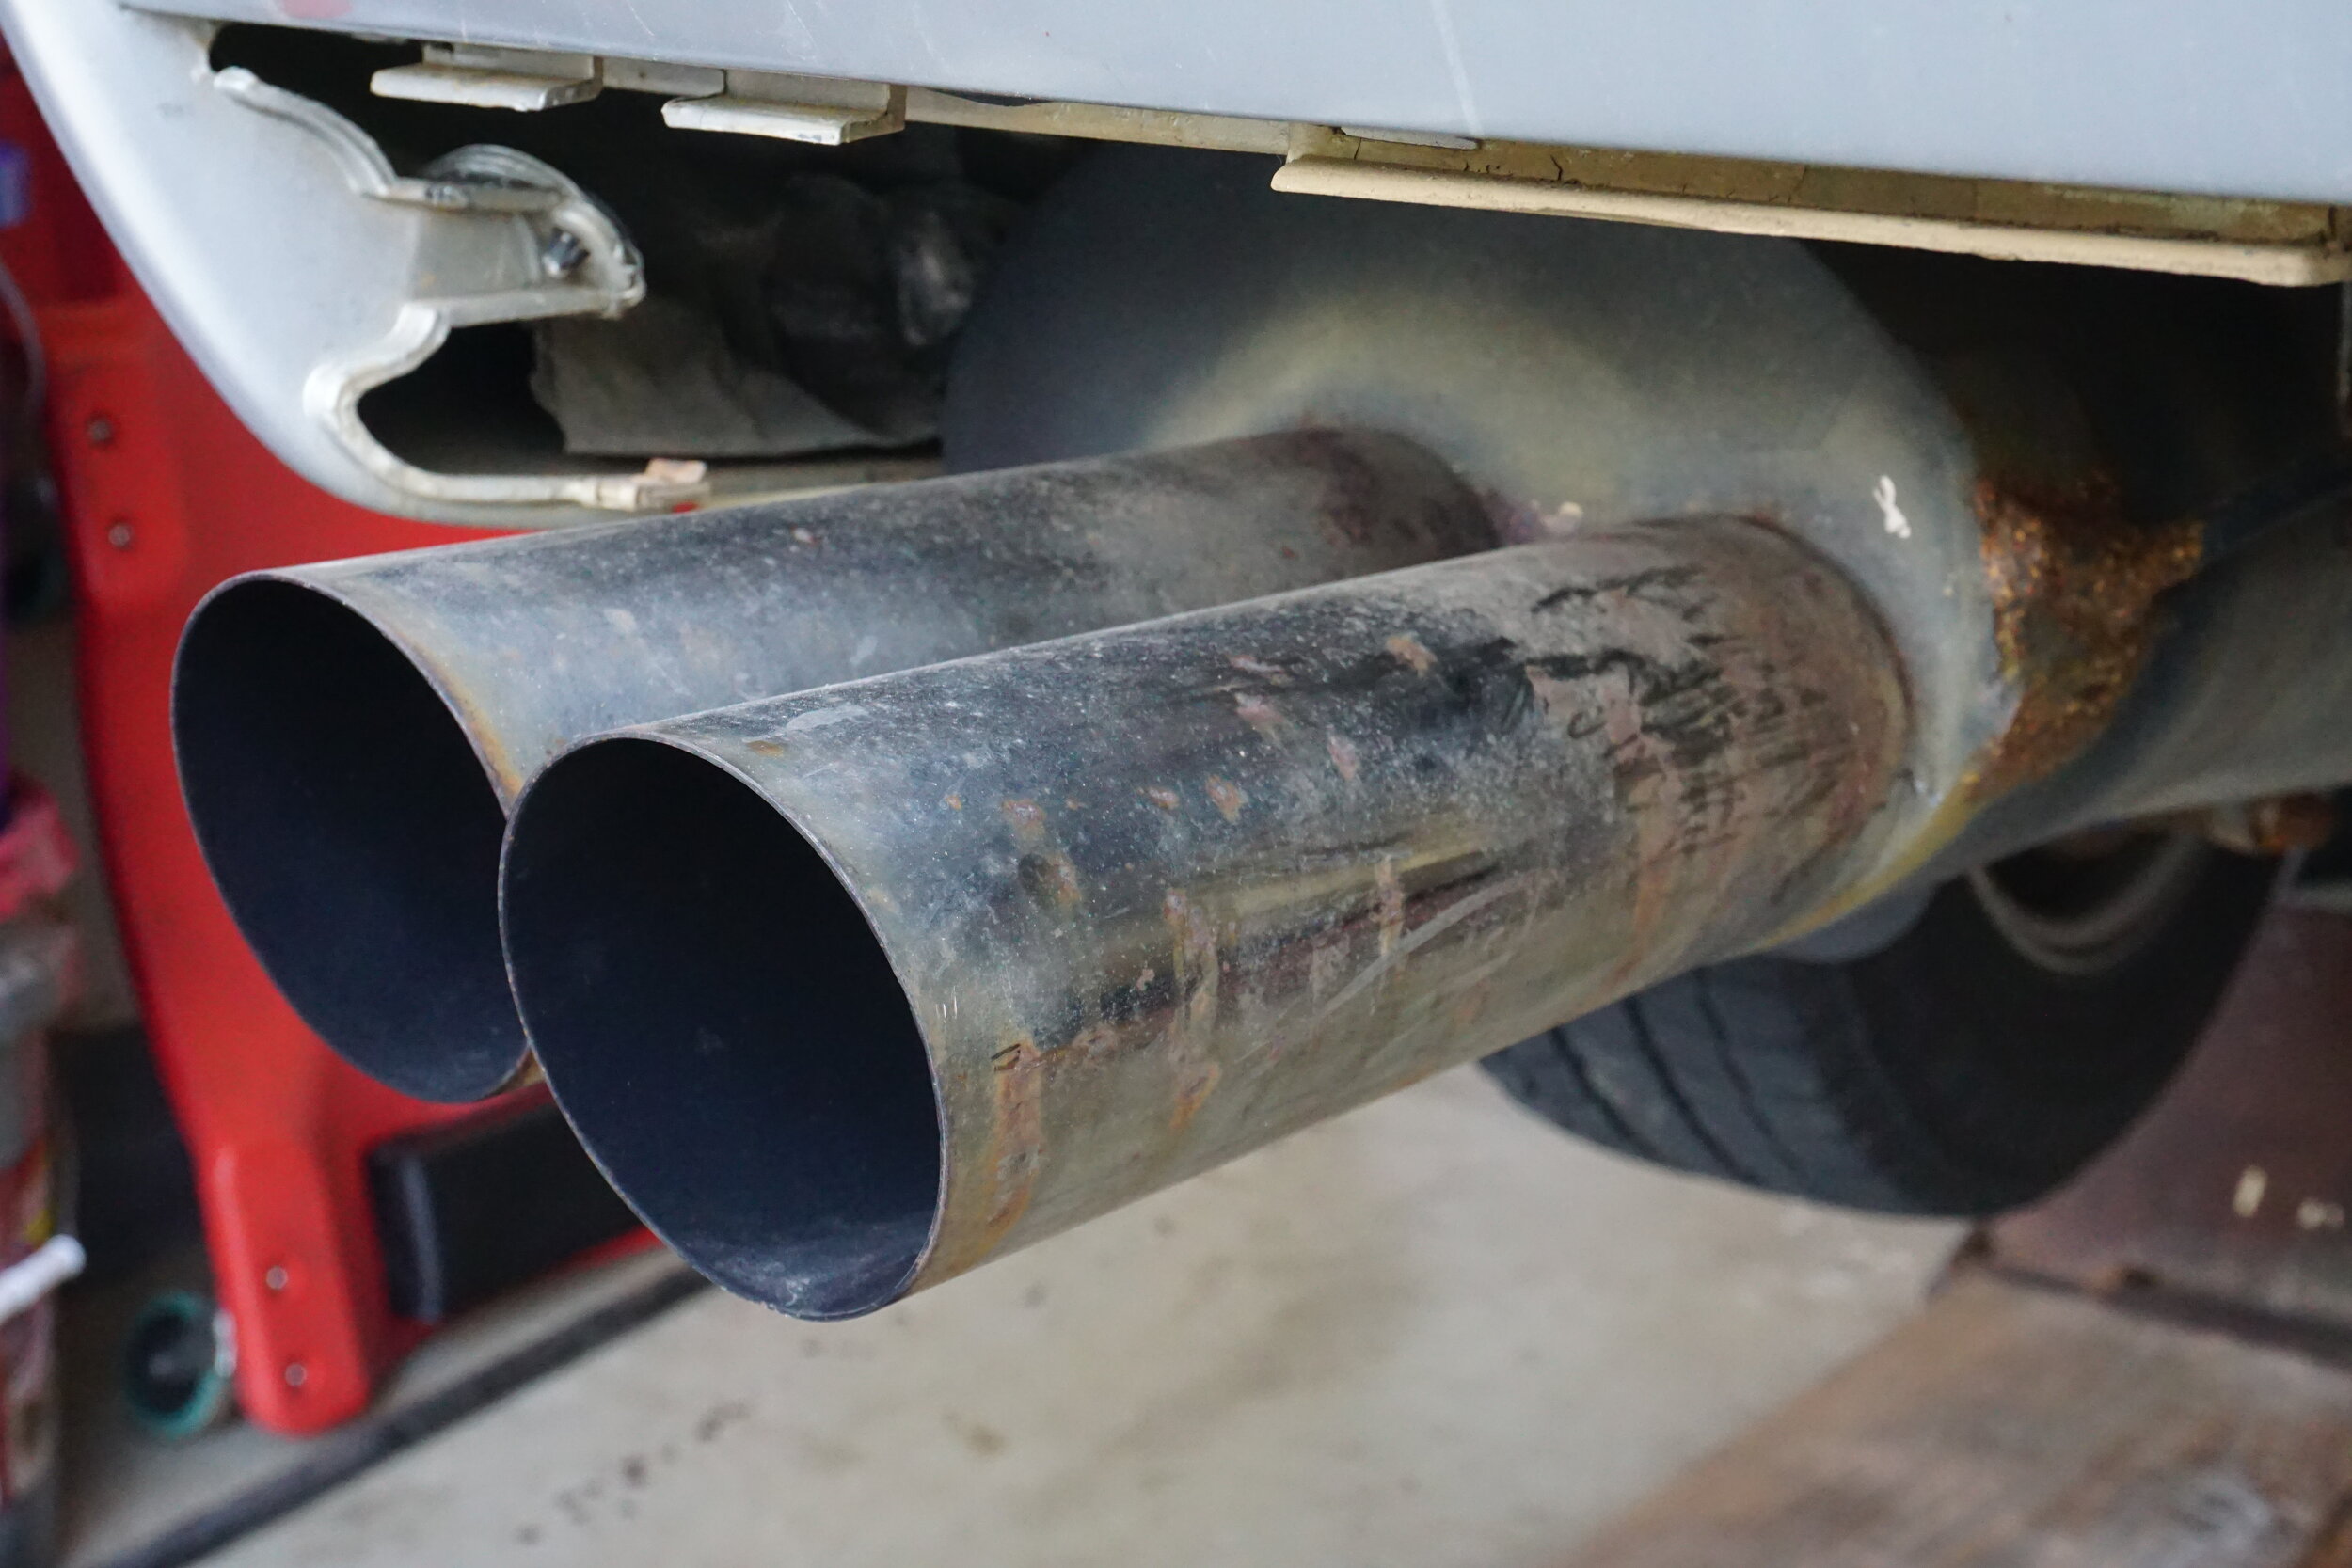
The little trim piece on the rear bumper was all faded and looking crappy so I wanted to repaint it. While it was off, I noticed how crummy my muffler tips were looking, so I knocked off some welding slag, scrubbed them with some steel wool, and polished them up.
And the worn out trim, especially on the right side.
My rear shock bearings had been making some noise so I figured it was time to clean them up and lube them. Unfortunately, in the two years since I installed them, they had welded themselves to the aluminum spacers on either side:
And no amount of penetrating oil, heat, and chiseling would get them apart. Here's a reminder of what the spacers look like:
The only thing I can think to do is to use a dremel to cut the bearing apart and hope I can separate everything when it all falls apart. Anyone else have any good ideas?
Member
Our first couple rally-x events got postponed due to rain (we race on red clay which doesn't drain very well) we finally were able to get some racing in last weekend on Saturday. Naturally, the event on Sunday got postponed due to more rain. It seems like most of this season will be held at Summit Point, with only one or two events at Panthera, which is a disappointment since PTC is a much better venue, but what can you do. At least SP is only a one hour drive instead of two. Another change is that instead of the normal 8 events, the 2021 season is going to have 10 events! More racing is always a good thing.
This event (#2, #1 is coming up tomorrow) was on the Barn Course, which is flat and hard packed, with a few decent straights on it, and not much in the way of technical sections. There are usually some pretty big cone walls near the trees to dissuade people from going too crazy around those turns and having a bad day. Historically I haven't done well on the Barn Course, but I did win an event on it last year, so maybe I'm getting better at it. Chris and Stephen generally clean up here for some reason, and sure enough that's how the day started, with Chris laying down an 80 second run while pretty much everyone else was in the 82s and 83s. After that Stephen started laying down the fast times, with Mike Golden also getting in one real fast lap. Nonack also laid down a real fast one, but his other runs were marred by cones. On the fifth and final run in the AM I got back in the swing of things and laid down the fast run of the group, which was the only run to break into the 77s. The last run got me up into 5th place at lunchtime, but I was only something like 0.2 back from getting into 3rd. Chris and Stephen were like 4-5 ahead of that, and I didn't think anyone had a chance of catching them in the PM. I would have been happy to sneak into 3rd.
Neil started off the PM runs with two great runs, but I wasn't far behind. But on runs 3-5 I was on fire, laying down the fast run for all three. I think after run 3 I got into 3rd, and after run 4 I passed Stephen and got into 2nd. I was the first one to break into the 73s, and then on the next run I dropped another second and was the first in the 72s. There was one run left, could I catch Chris? If I could just repeat run 4, there was a pretty good chance I would, since that was about 1.5 faster than him. Well I knocked another 0.1 off my previous run and finished with a 72.8, which was the fastest time of the PM runs, and almost 2 seconds faster than Chris, giving me the win by 0.6! Stephen laid down his fastest run with a 73.0, passing Chris in the process as well. It felt incredible to come back from 5th and win like that! But to be fair, the course was in my favor being so hard packed and wide open, letting me use my power to my advantage. A tighter slalom here or there could have easily changed things. And when you consider that two cars (in other classes) with way less HP than me beat me by 1-3 seconds overall, the win is slightly less impressive. But considering that my fastest PM run was only 1.4 slower than Adam Kimmett's (usually fastest overall in his modded STI) then I guess I can feel proud of that.
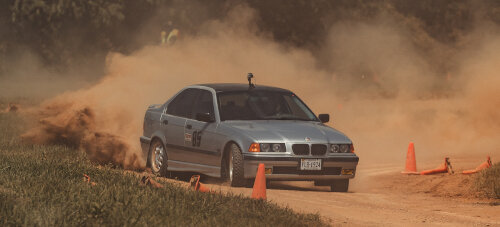
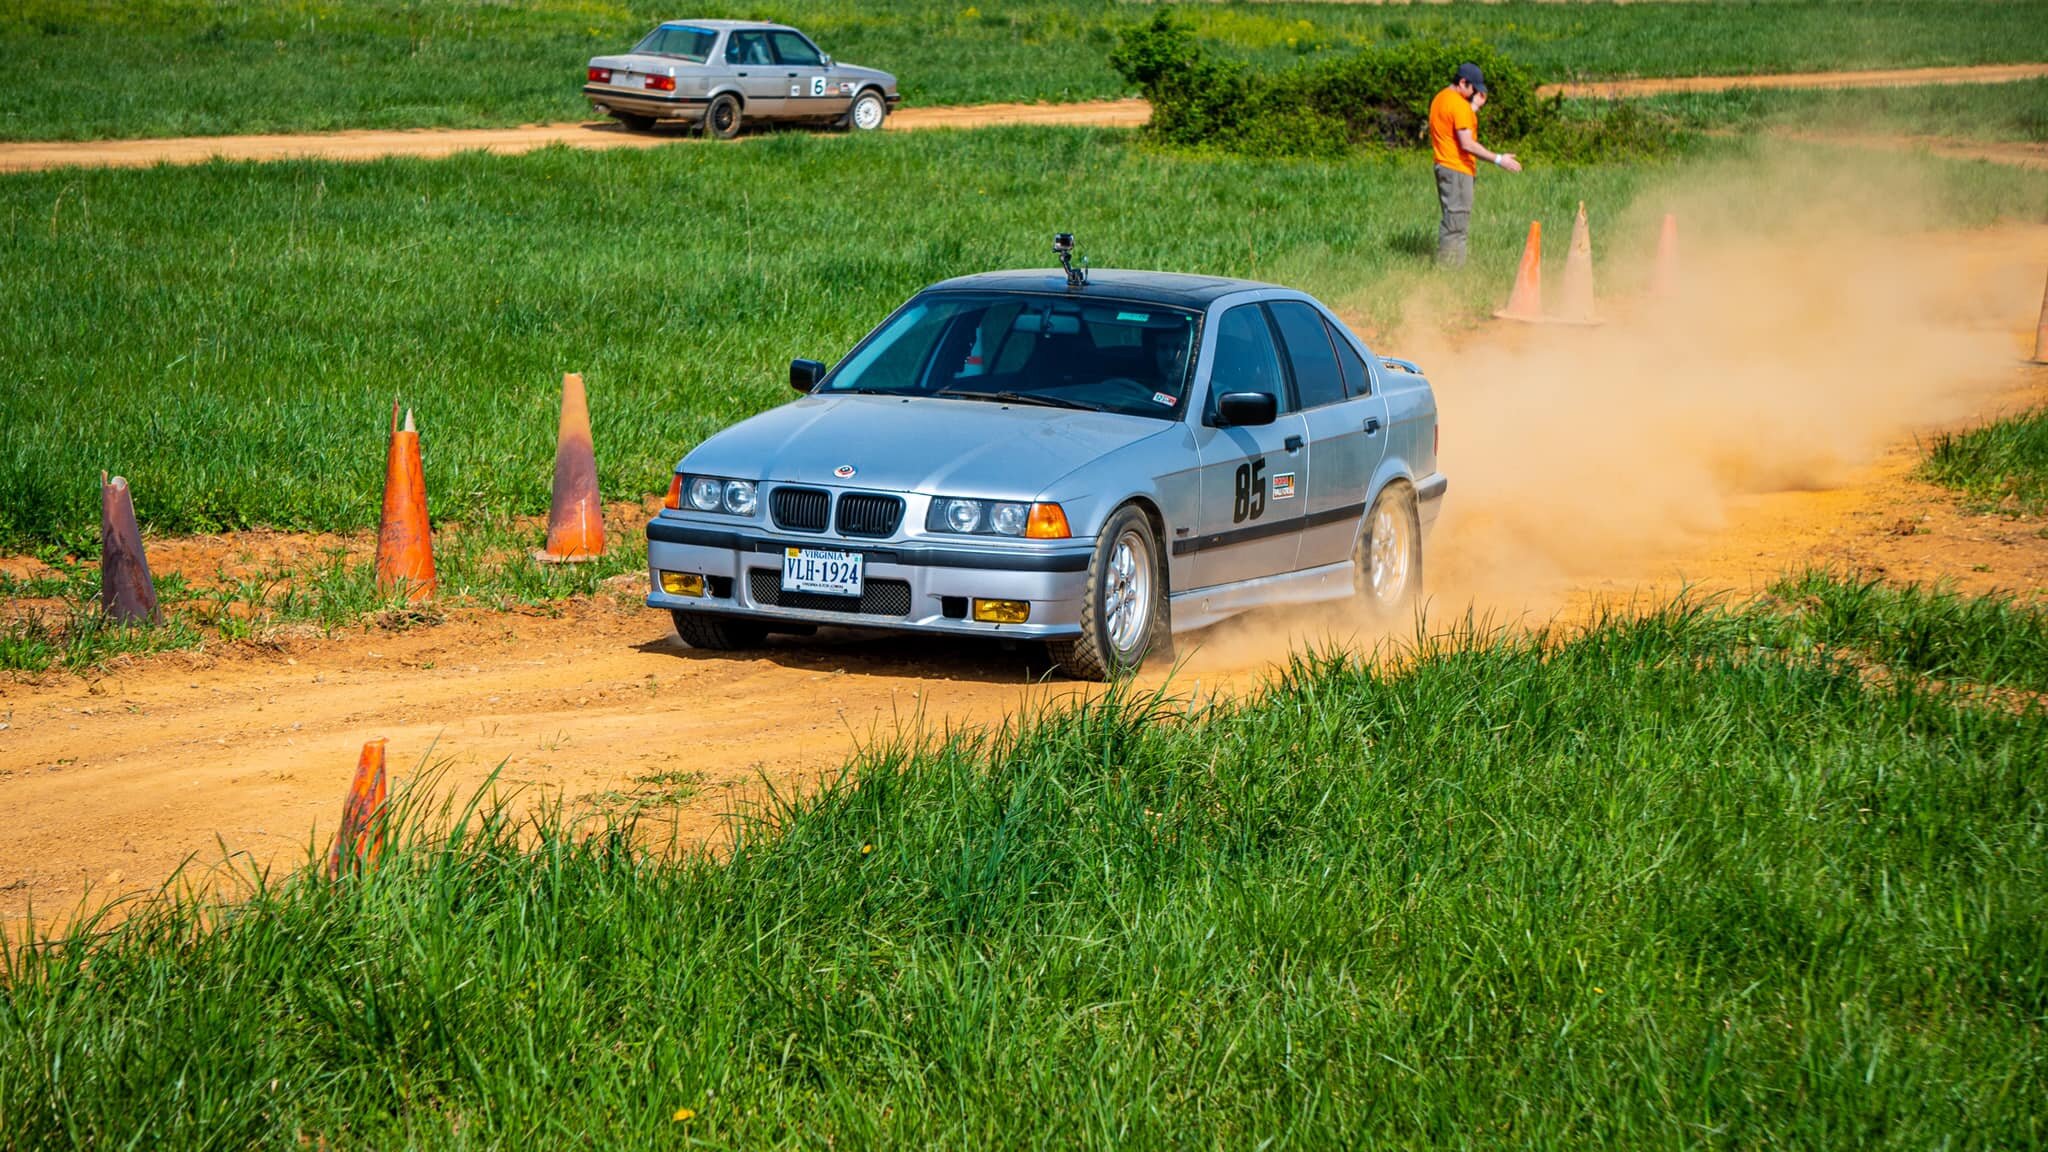
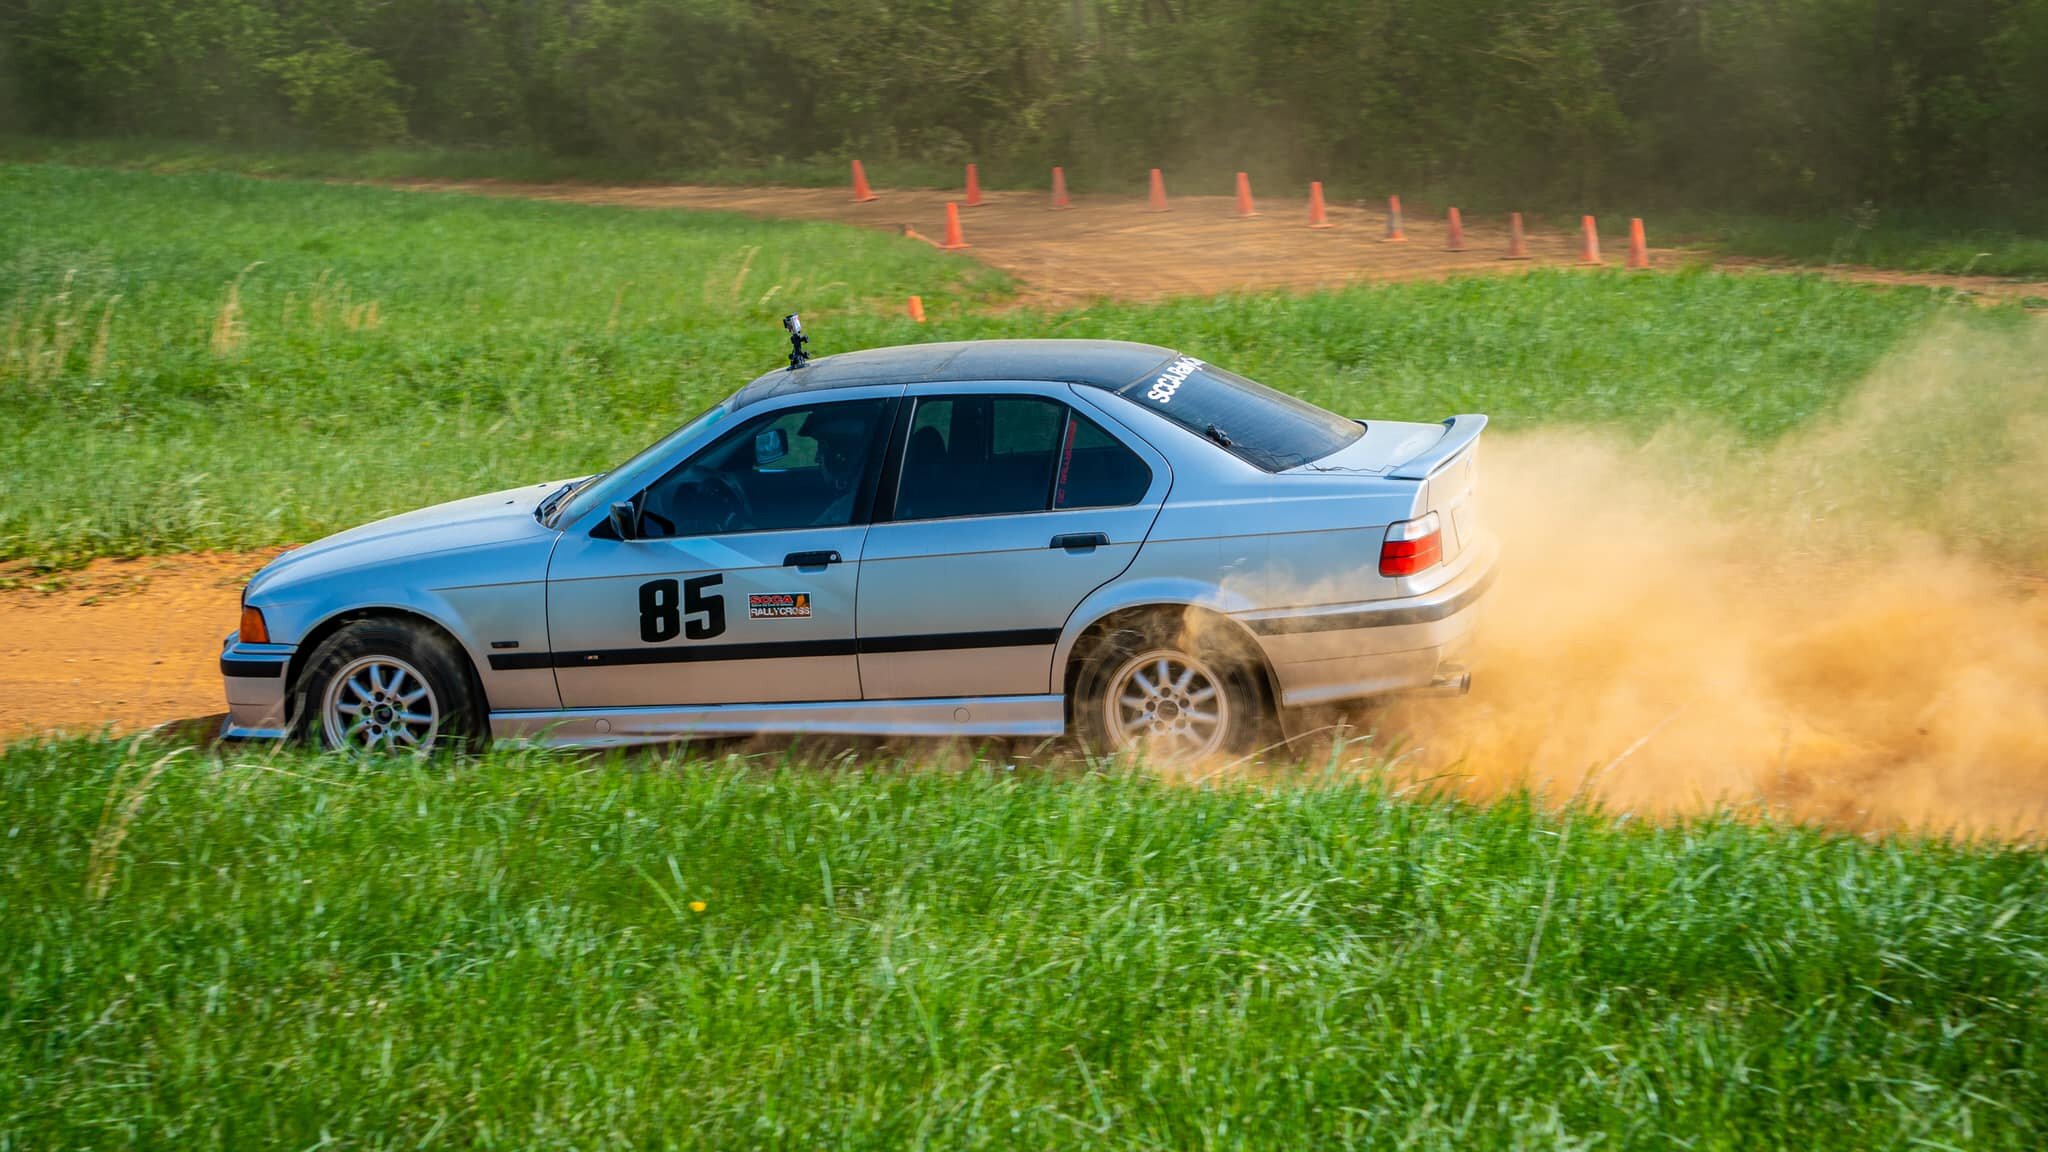
Here are a couple pics from Jeramey Kwan. I finally reinstalled the stock bumper after realizing it didn't sit any lower than the non-M bumper.
And some video:
Events 1 and 3 are scheduled for this weekend, wish me luck!
Member
Great pics and great driving! Love the M bumper back on there.
With the RX-8 for autocross, and considering the state of my M3's underbody, frankly it'd be a perfect dedicated rallycross car. I may have already promised my wife we'd be back down to three cars, though, so maybe my dreams will just have to stay dreams.
Member
Uh oh, you getting rid of something?
Member
I'm a few weeks behind schedule as usual, but better late than never. Here's a wrap up of rallycross event #1 (postponed due to rain).
We ran on the tree course at Summit Point and temps were around 65*. All the usual suspects were there, which meant any one of the top 8 drivers were capable of winning the event. The tree course isn't as hard packed as the barn course, which means less grip and more moon dust on the outside of corners. The course design was pretty open and there weren't many tight/technical sections.
Stephen and Josh started off with fast runs on the first run, but I was only about 0.5 back, which for me is pretty good. It seems I really take the advice given at the drivers meeting to heart, where they recommend to "start slow and build speed throughout the day". On the second run, Tyler, a guest driver in Michael Stock's MR2 set a blistering lap, almost 1.5 ahead of Josh, who had the second fastest run. Then Mike Golden laid down a fast run on the third. On my third run, disaster struck, when I went a little wide into the moon dust on a right hander and took out part of a cone wall, resulting in 3 cones and time lost in the dust. I can't remember how far back this put me in the standings, but it was pretty far back. I guess it motivated me to drive faster, because on the 4th run I had the fast time, and continued to make up time the rest of the day. Stephen laid down the fast times on the 5th and 6th runs, but I was right behind him. On our 7th (!) and final run in the AM Mike Golden laid down the fast time again, but he had already hit 3 cones so he wasn't in contention for the lead. So at lunch Stephen was in first with a number of fastest runs under his belt, and I think Neil was in second with consistent and clean runs, and Josh was in third.
In the PM Eric laid down the fast run to start things off, but Chris and I weren't too far off. On the second run Tyler once again laid down a scorcher, but due to lots of cones on his other runs wasn't in contention for the win. I ran the fastest for the third run, and Chris finished the day with the fast run for the 4th run. Mike Golden finished the day with 9 cones on his last two runs, ruining any chance he had of finishing well, and Neil was the only driver in the class to not hit a single cone all day. Looks like Neil is taking over my title of being Mr. Clean! With my clean and relatively fast runs after my dirty 3rd run I clawed my way back and finished in 4th, less than 3 seconds back from first, and 0.3 back from Josh in 3rd. Aside from that one mistake I ran well all day and had lots of fun, and in the grand scheme of things 4th isn't bad in this company. When I went to pack my car up after my final run I discovered that I had ran all afternoon with my jack, jack stand, impact gun, etc still in my trunk! It was all wedged into my spare tire well pretty tight, which I guess is why I didn't really hear things banging around much when I was on course. Event #3 was the following day, so I packed the car up, drove home, and prepared to do it all over again.
Here's my best AM and PM runs from the day:
Member
Right on the heels of event #1, we had #3 the following day back at Summit Point, but this time we were on the hard packed barn course and temps had risen to about 80*. Our event chair and normal course designer was out welcoming his second child to the world, so the course was set up to be a little more technical than usual with some slaloms on the straight-aways to break things up a bit.
True to form, Chris and Stephen traded off putting down the fast run on runs 1-3 while I was a little off the pace. After the third run I was probably sitting in something like 5th place. It took a few runs for the dust to get knocked off the hard pack underneath, but once it did I was unstoppable, setting the fast time on 5 of the last 7 runs for the day. On the last run in the AM, Josh went a little crazy at the finish and took out a ton of cones, knocking him way back in the standings. With nothing to lose, he laid down the fast runs on runs 1 and 2 in the PM, but there was nothing he could do to come back from that deficit. I finished in 1st, ahead of Stephen by more than 3 seconds, with Chris about 3 back from him in 3rd. Neil extended his run of not hitting any cones to three events and finished in 5th, a little behind Eric in 4th. Come from behind victories always feel extra special, and this was no exception.
I've noticed that when I go back and watch my videos after events, they're always very boring, and I'm left wondering how I put down fast times. All I can assume is that lots of horsepower covers up mistakes and lack of advanced techniques. Oh well, enjoy the display of gratuitous horsepower and unfair advantages!
Member
Smooth is fast, so the most boring-looking runs are probably the fastest! That's why I get mixed emotions when people tell me I'm exciting to watch.
Member
As usual I'm a few weeks behind in posting up race results, and with another race this coming weekend, it's time to catch up!
Event #4 was a few weeks ago, and once again we were back at Summit Point, and we were back on the barn course. Temperatures were around 85* and it was pretty sunny out. Adam, our lead organizer, was back and designed the type of course that he likes to run, which is wide open and fast. With the surface nice and hard packed, conditions were pretty much ideal for my car.
Eric led off the day with the fast run, but I wasn't too far back from him in second. I edged ahead of him on the second run for the fast time, with Josh not too far back running in third. On my third run I gave it a little too much gas in the very tight S curve, sending the rear end all over the place and hitting a cone. This made me feel like I needed to drive super fast to make up for it, and given the time I ran including the cone and my slow down, I guess I did. Eric once again laid down the fast run on that one, and was sitting in first. For my fourth run I drove like the world was about to end, and I put down a time that was about 2 seconds faster than Tyler, who put down the second fastest run, and about 3-4 seconds faster than most everyone else. Eric hit a cone on his fourth run, so with that I was in first and I didn't look back. I slowed down a bit on my fifth run, but it was still the fast run of the group, and then for my sixth run I laid down what appears to have been the fastest time out of every driver at the event for the AM runs, putting myself something like 10 seconds ahead on Eric in second. This sort of lead is extremely uncommon in the MR class, where first through fifth are often separated by like 3 seconds, so I was pretty stoked. With such a large lead, I didn't exactly go wild in the PM runs, and just tried to not make any mistakes. Eric started off with the fast run, then Mike Golden followed, then Neil, and finally Tyler on the fourth with a stupid fast run.
I finished in first, 8.3 seconds ahead of Eric, who was 3.2 ahead of Stephen. Most people in MR hit either one or two cones for the day, and Neil hit his first cone of the season. And for only the second time, I had the overall fast time for the day, beating out Adam (the usual FTD) in his modded STI by about 2.6 seconds! Although to be fair, he did hit 10 freaking cones. But still, FTD is FTD! It's not like I did anything special though, it was just the perfect course for my car, and I could use my power to its full advantage.
Event #5 is this coming weekend, and it's a two day event, so it's going to be a slog with high temperatures looking to be around 90*.
I got some new video editing software as the super old Windows Movie Maker I've been using doesn't support 4k, and I decided to have some fun making a silly intro for my videos. Hope you enjoy!
 Posting Permissions


 Reply With Quote
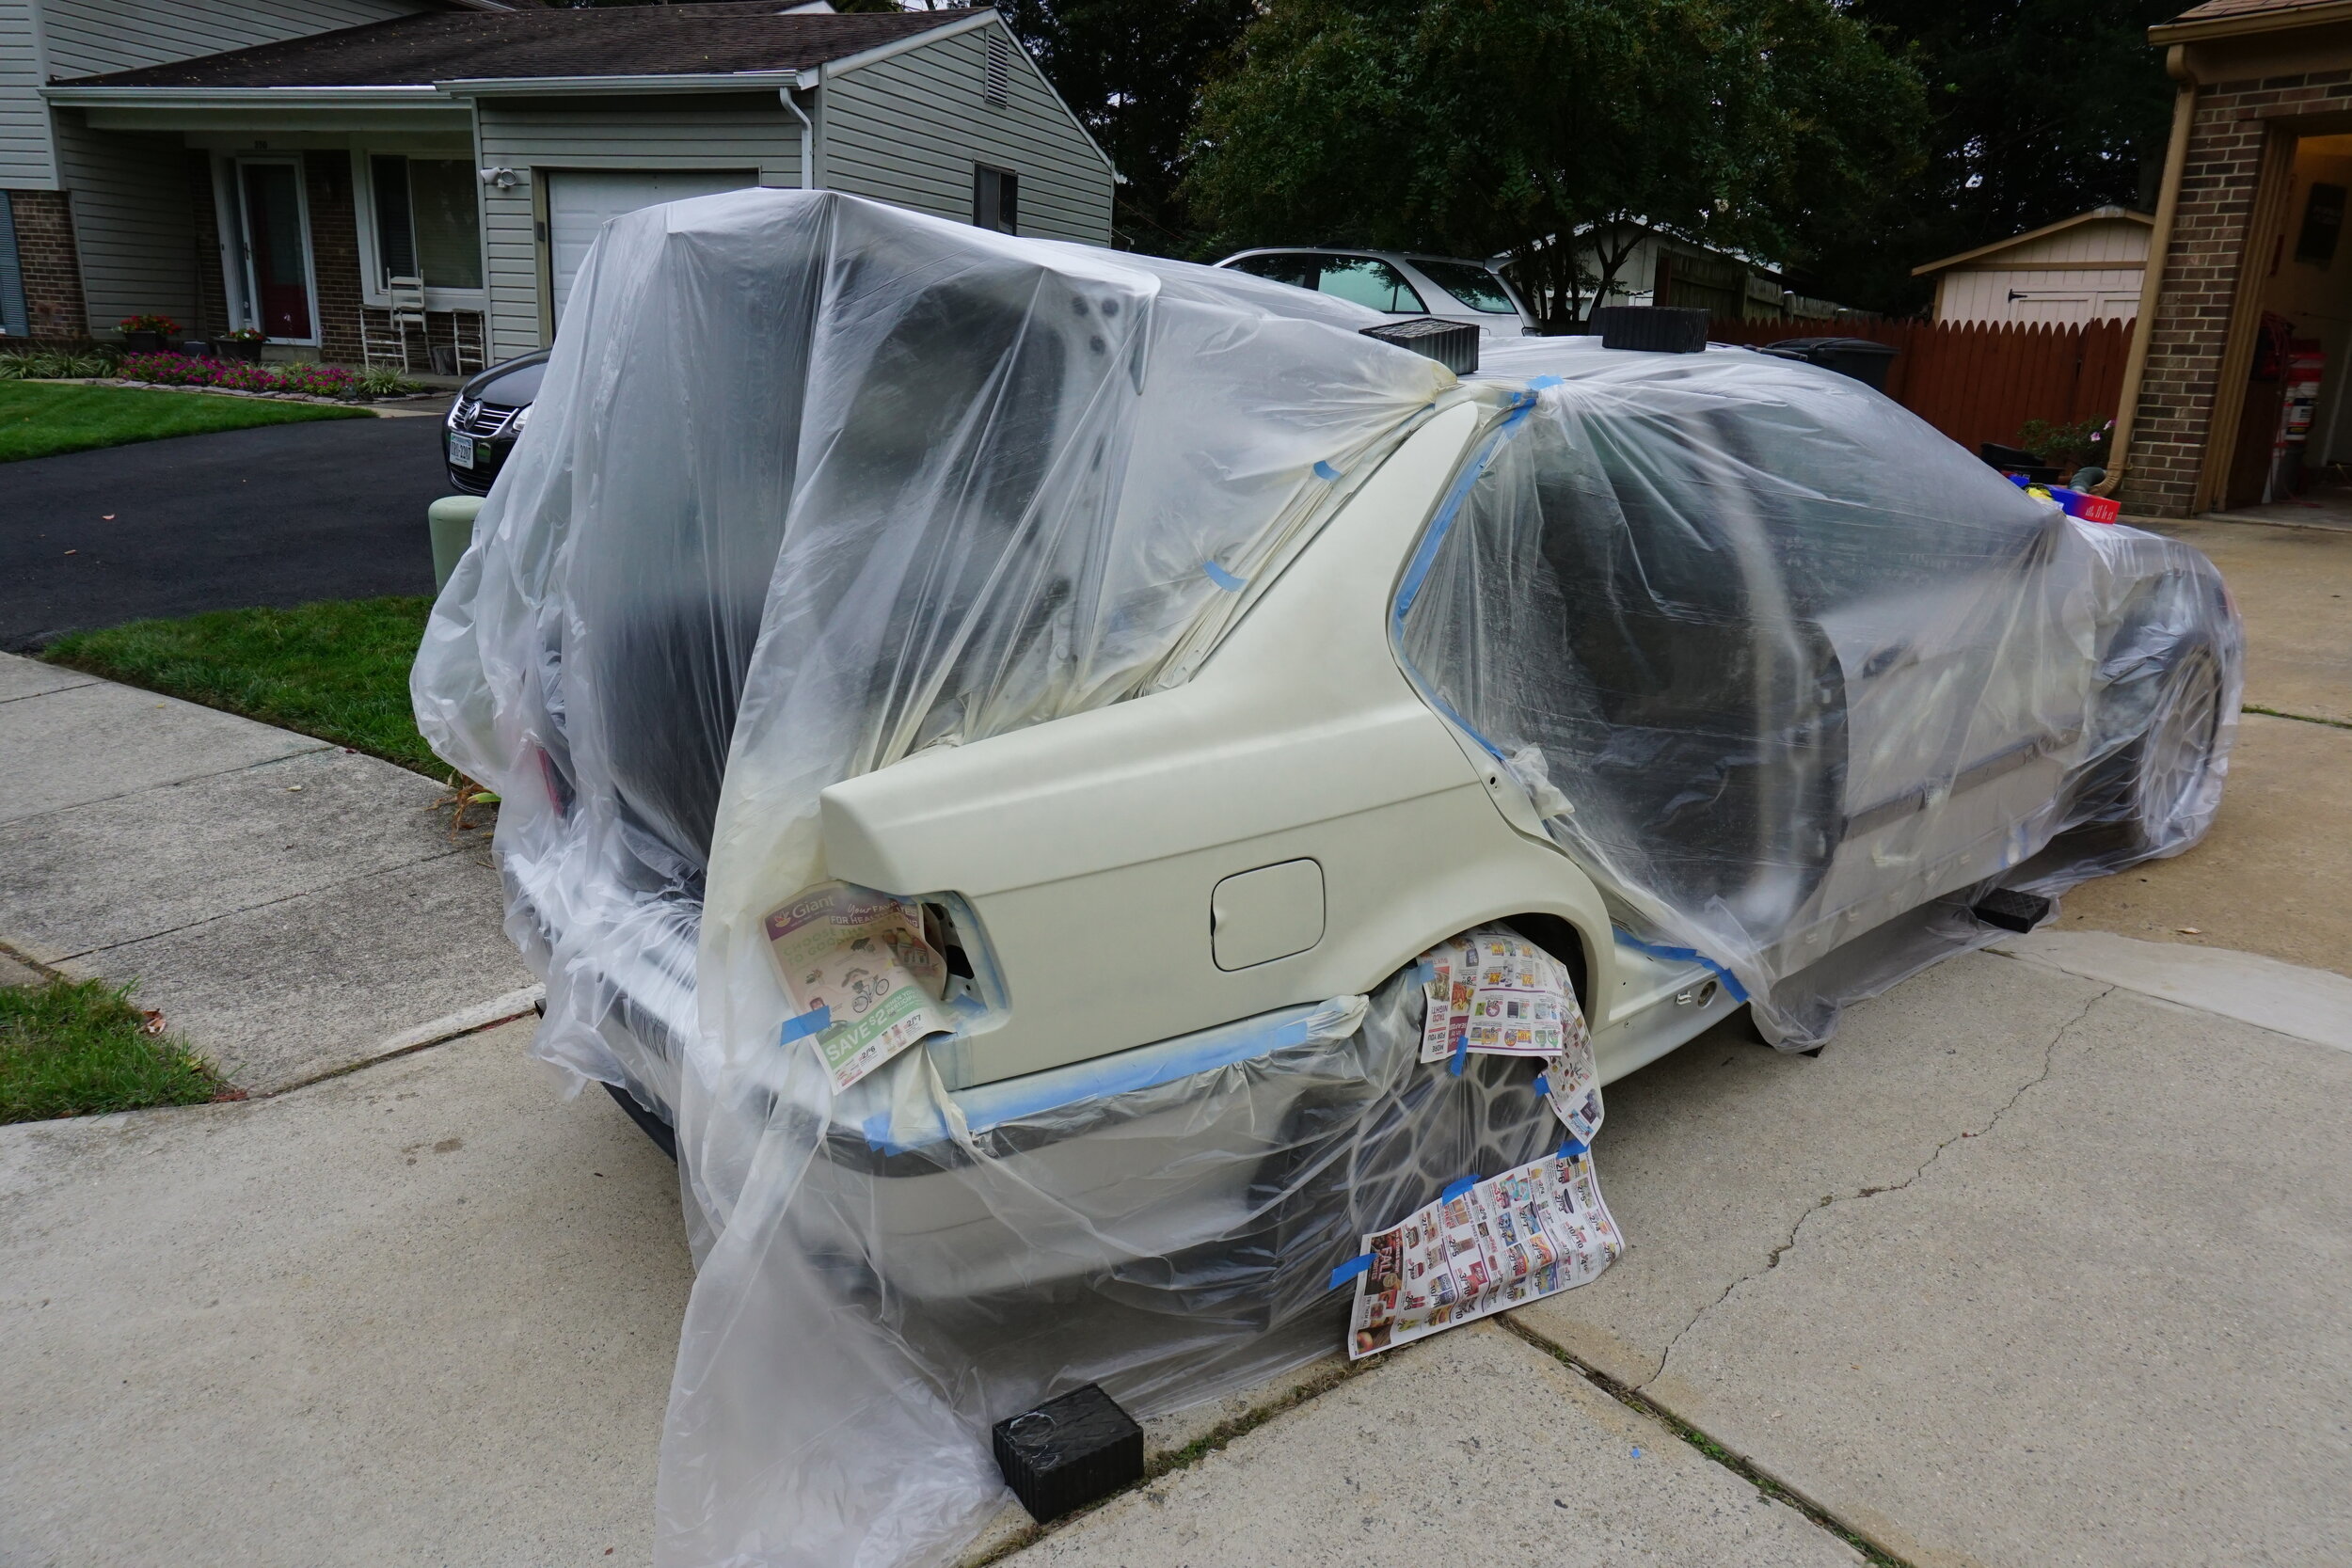


Bookmarks