
 Member
LOL. So was I. It took all my concentration to NOT hit the brakes or to push too hard on the accelerator to make the car downshift thus spoiling the pull.
Member
My DD is ready to yank the motor tomorrow. Pics and details to come. This will be the most painful part, outside of the costs involved.
I'm polishing the v/c's tonight with a friend. Pics as soon as I'm home.
Member
In "The Shawshank Redemption" the factors were Pressure and time. I find myself under the same constraints.
Last night I went to a buddy's place that owns a metal shop. He told me that the castings made it virtually impossible to "polish" so that the nickel would look good.
He said it would look horrible and suggested as a few others have, powder coating. So, that's where I'm at. I was going to wait and see what the v/c's look like from my 4.4 after bead blasting but I won't have enough time before I leave for my trip and I want to turn the key before I board my flight on the 12th of this month.
I'm again disappointed that either I planned poorly or lacked the time/money to do what I wanted.
If the v/c's from the 4.4 look good, I'll still send them off for the nickel plating and sell the powder coated ones I'll use till then.
I found a nice little shop in Issaquah, WA called Powder Vision Inc. JR and Ben were at the counter and we got along great. They understood my time crunch and helped me pick out a good alternative to nickel. I think it'll look good.
Tomorrow I sell my 4.4 and begin to assemble the 4.6 getting it ready to drop in. With some luck and TerraPhantm's help I can delete my cats and secondary air pump. This leaves me with a tad more room in the engine bay and a need for an exhaust extention to fill the gap the cats leave. Perhaps I could just hollow them out...
Will post more tomorrow evening.
Last edited by Plattus1000; 07-11-2017 at 12:22 AM.
Member
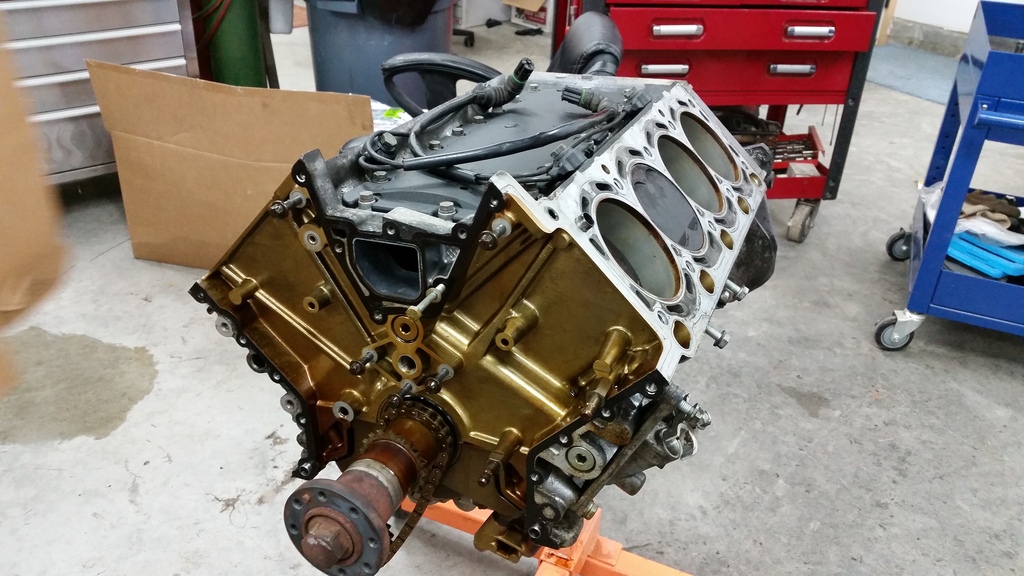
Damn. Look at that casting!
Member
Did you mechanic manage to take the measurements of the deck height and valve reliefs, before it gets sealed for life?
Inquiring minds want to know
Member
Not yet. It's on the list.Originally Posted by whiteghost1

- - - Updated - - -
Right?!
Member
Nuff said?
- - - Updated - - -
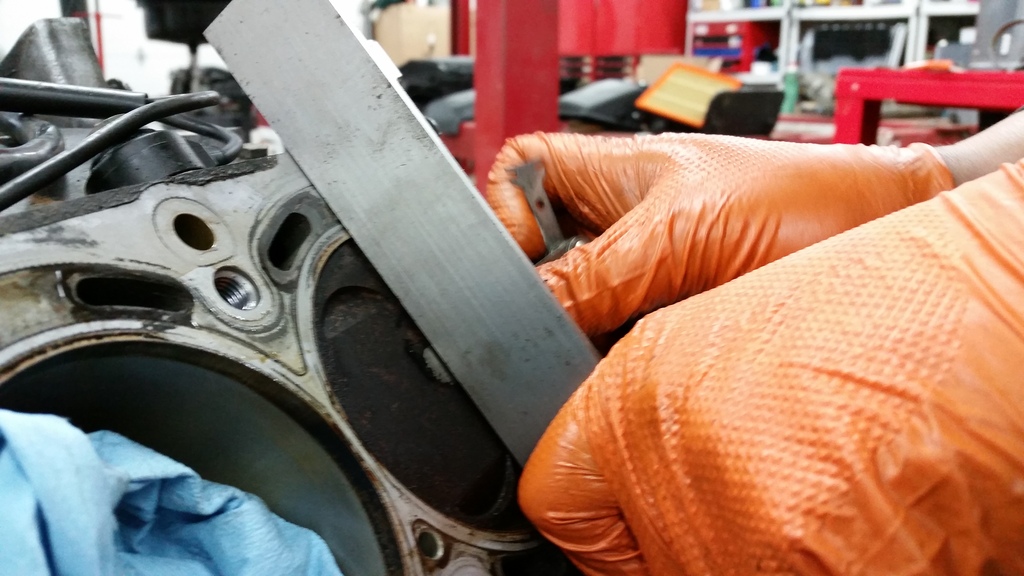
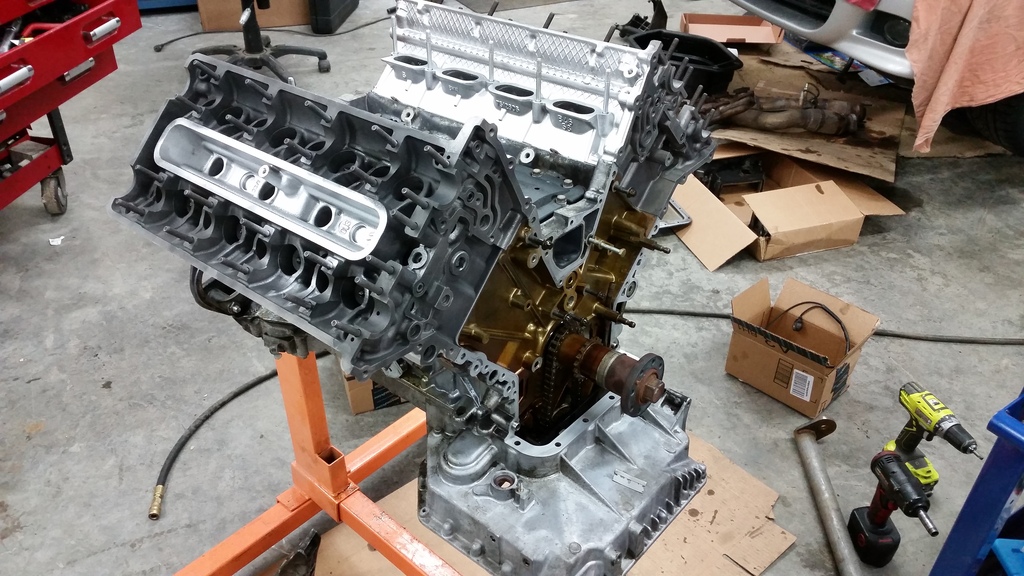
Using a straight edge and some gap gagues we got a pretty good idea:
.559mm give or take a few hundredths. This is to the deck. The recessed areas, hard to measure for us. We don't have a gague that'll do it.
Tomorrow we turn this short block into a long block.
- - - Updated - - -
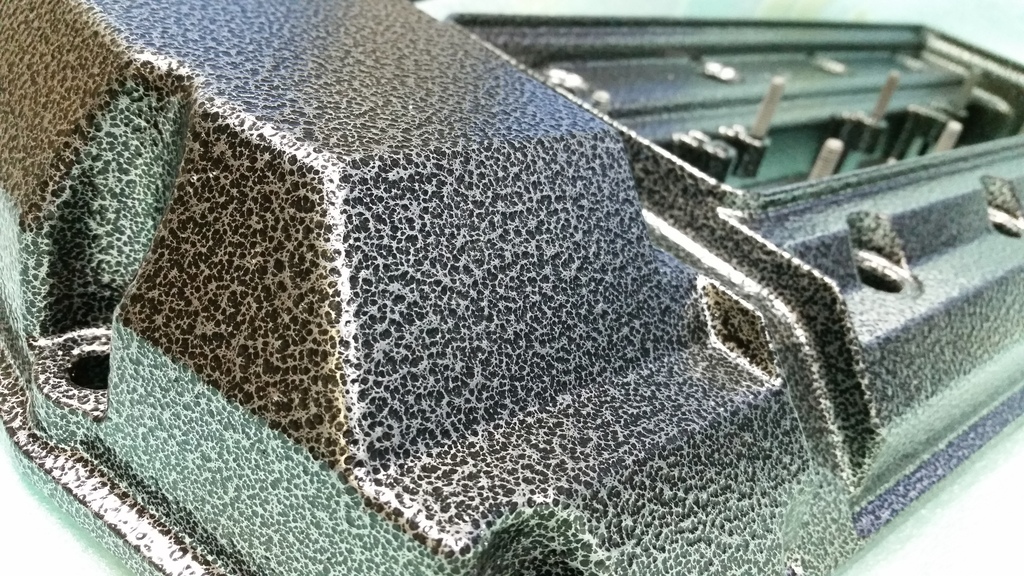
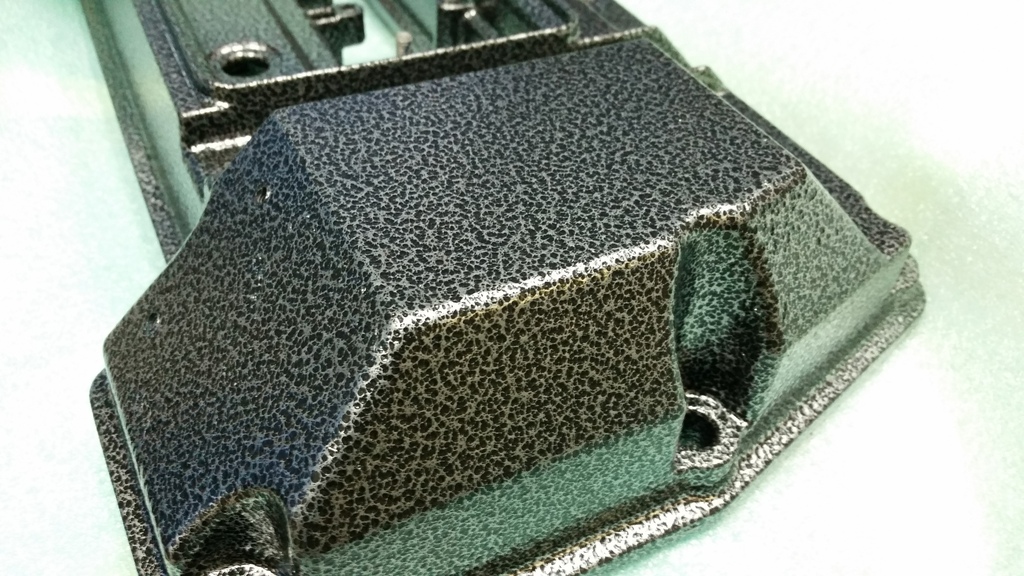
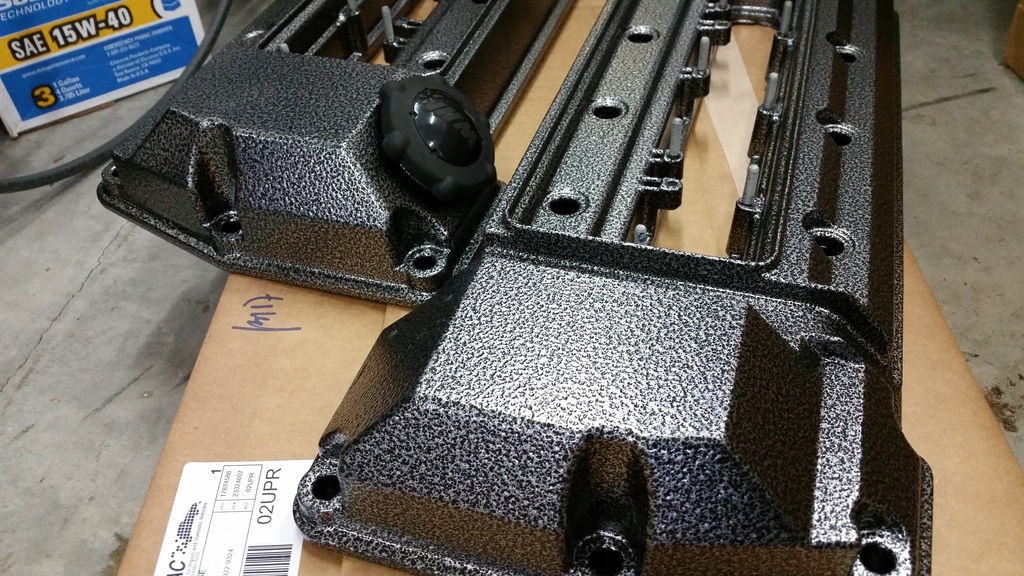
I went with a silver-vein black gloss. They finished them up early for me knowing my schedule.
POWDER VISION INC. Issaquah, WA, Awesome!
They rushed me 3 days ahead of schedule and didn't charge me extra. This is a company I'll go way out of my way for. All the shops in Seattle were backed up, too expensive or just came across like they could care less. I called 6 within 15 miles of Seattle proper and then found these guys. Highly recommended!!! Under $200 otd.
I'm liking these.
Now I don't feel so bad about not having the nickel coating. I still have another set of v/c's to play with...
Last edited by Plattus1000; 07-11-2017 at 12:28 AM.
Member
The valve covers look mint.
Any guesstimate time on the completion of this swap?
Member
You can kiss my a$$ Mr. Pressure! It was you pushing me first to s/c the car then played upon my emotional attachment to the 4.6 idea and changed your tune. You made me this frantic! - - - - (thank you, I really wanted the 4.6)
Kidding.
I'm hoping to have the long block assembled tomorrow night and installed before Sunday eve. If I can figure a way to use the 4.6 exhaust manifolds, I will but it's looking like it'll take too much time and possibly too much money. This kills me because it's out of the car now and I'll have to pay triple when I get another chance next Winter, to mess with it.
I drove into the city today to grab parts and these covers. I'll drive back out to the woods tomorrow morning and get to work. I'm dying to see all this in one complete engine.
My guess is no later than the 10th of Feb, 2 days before I'm off to Switzerland for 2 weeks. (if the wife wasn't making me go, I'd gladly stay to play)
Last edited by Plattus1000; 02-04-2016 at 12:33 AM.
Member
Can't wait for the first run.
Member
You and me both brother.
TerraPhantm just emailed me the.bin file needed to make the DME work properly with the engine. Now I just need to get DUDMD to drive over and flash it to my car. He lives close and did my last 2 bimmers's.
TerraPhantm, this all would fail without your help. If ever in Seattle, please look me up. We have some fine beer to share!!!
Last edited by Plattus1000; 02-17-2016 at 10:17 AM.
Member
That is great stuff, thank you very much for asking your mechanic to measure that for me! It's a shame that he doesn't have any calipers/micrometer to measure the valve reliefs in the pistons.
I have a set of 4.6/Alpina cams which I would like to put in my 4.4; the reason that this is a great opportunity is that rarely does a 4.6 come apart in which someone can take some simple measurements.
Long story short I'd like to find out what the differences are in the camshaft->piston clearances between the 4.4 and 4.6. And by you contributing the 4.6 measurements, I can compare how they stack up in comparison to the 4.4.
Good luck on the assembly and we are looking forward for your results!
Artifically Aspirated
Moderator
Whiteghost, still trying to use those cams. No problem with the exhaust cam.
The valve reliefs in the pistons for the intake valves need to be machined a bit deeper, from what I remember when I measured things with your cams there was only 0.3mm from valve to piston.
Member
How much deep would you have to machine those reliefs? Maybe another 0.5 to 0.7mm to have enough gap even for thermal expansion?
Member
Indeed. When the heads come off the 4.6 cams will be swapped in. I am using your measurements (still grateful BTW
Auaq - In previous motor builds that I have done, I've left a min 1mm gap between the cam and piston for thermal expansion. So far that has worked out well, but I would be rolling the dice to go any closer.
Member
That's what I was thinking. If the gap is around 0,3mm then perhaps a gap of at least 0,5mm to 0,7mm might be good enough if we take thermal expansion into consideration. In fact, why not measure the gap with the stock M62tu engines? That may give one an idea how much machining will be required.
Member
Hold up. We measured wrong. Give me a sec (half hour) we'll figure it out. It actually, the piston, comes above the deck @ TDC.
WE WEREN'T @ TDC.
Sorry... :'(
- - - Updated - - -
The piston protrudes .660mm above the deck.
Sorry about that. BTW, we're not building the space shuttle here so please don't sue us if we're off a micron or ten.
It looks about as elevated as the surface of the gasket when it's on and compressed. Just below the gasket when set on the block.
Again, sorry.
- - - Updated - - -
I don't have a way to measure the distance from the valve to the head deck but you can guesstimate from looking at the quarter (2000 New Hampshire Denver mint in case there's a variance)
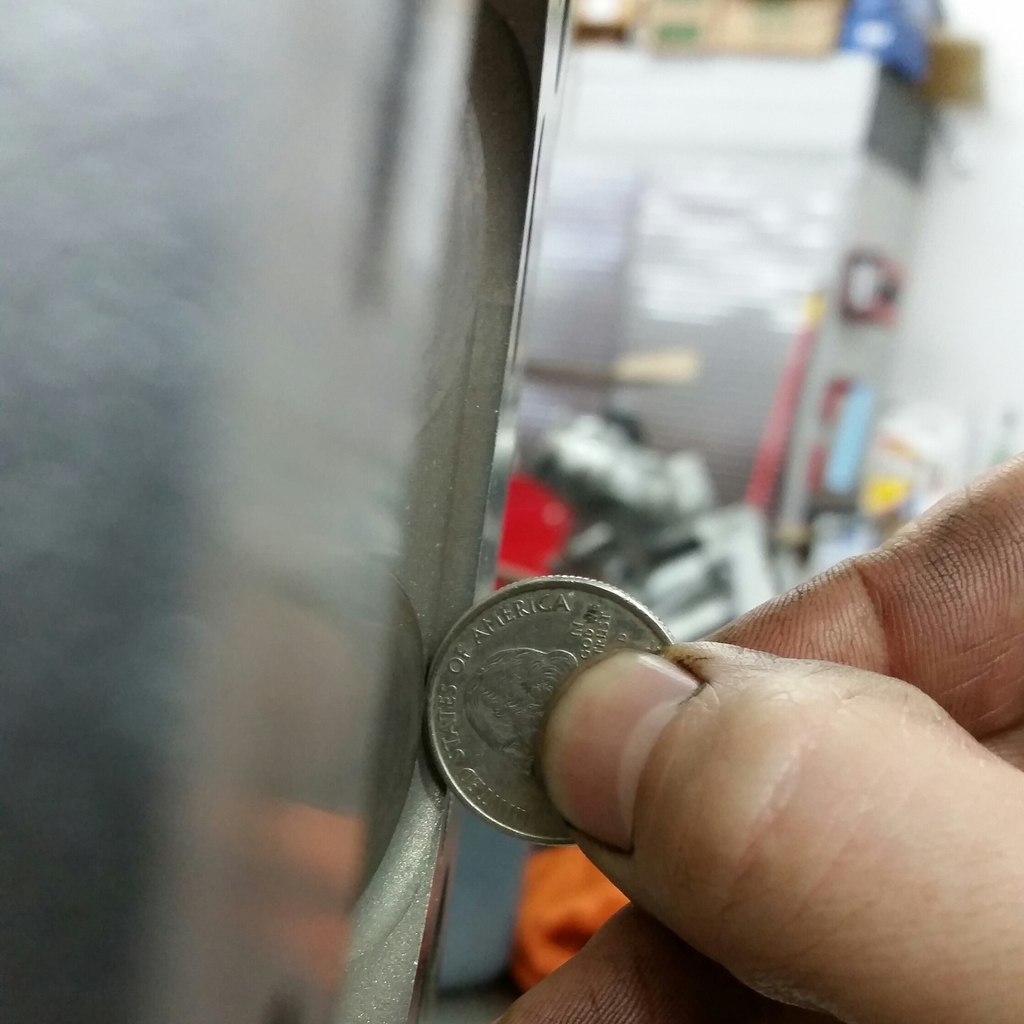
Last edited by Plattus1000; 07-11-2017 at 12:31 AM.
Member
Interdasting!
Member
I could measure the cam timing on a stock 4.4TU engine, but it is a little more complicated than that unfortunately. Because the cam timing and lobe profile is different with the 4.6 cams, the results could be relevant or completely off base compared to a stock 4.4. When Jim measured the 4.6 cams in the 4.4, he (correct me if I am wrong) took into account the worst case scenario: TDC vs max lift vs Vanos full advance/retard.
By getting the piston deck height + valve cutouts depth + stroke on the 4.6, I can correlate the same dimensions on the my 4.4 when I take it apart (Vanos actuation on the 4.4 & 4.6 are identical AFAIK) to see what has to changed. All other comparisons being equal, I can safely calculate how much to flycut the valve cutouts. You don't want to flycut too much material to error on the safe side, as you could weaken the piston crown (I'm running nitrous so it is somewhat of a concern), as well as you loose static compression which may negate any benefits you get by adding lift and duration with more cam.
- - - Updated - - -
Plattus1000 - no need to apologize, as far as I am concerned you are doing me and future generations a service by documenting all of the above.
I'm liking the money shot of the quarter though, and I appreciate the extra effort! I can get a pretty good idea from your pictures so your energy will not be wasted whatsoever. Look forward to that first driving impression.
Last edited by whiteghost1; 02-04-2016 at 06:57 PM.
Member
Well, I'm glad you're all a forgiving bunch.
We'll take a break for a few hours to feed our respective kids/horse. Kids are his and my wife's, horse is our other off-road vehicle. More reliable than an e53 X5 but equally a pain in the ass at times.
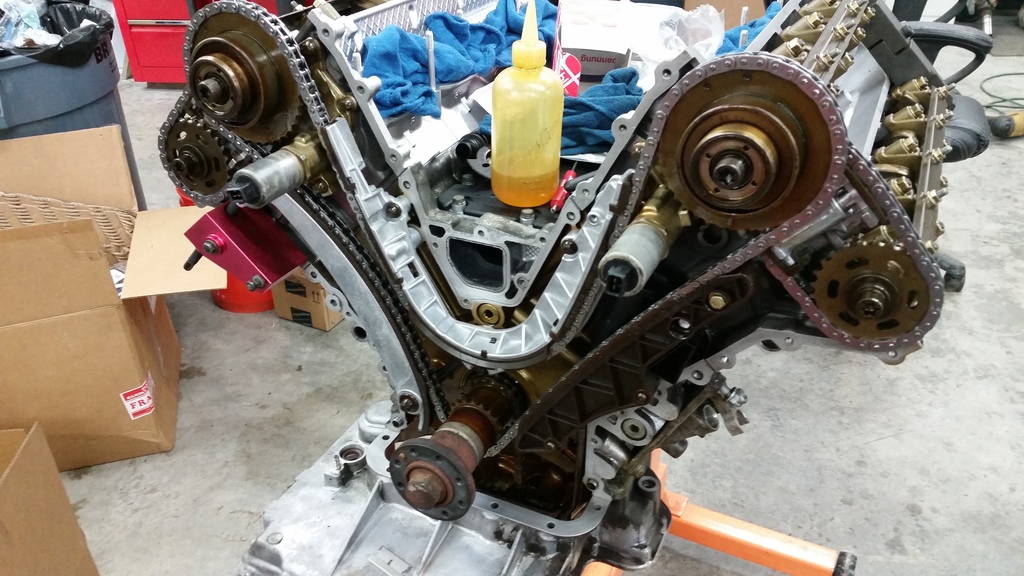
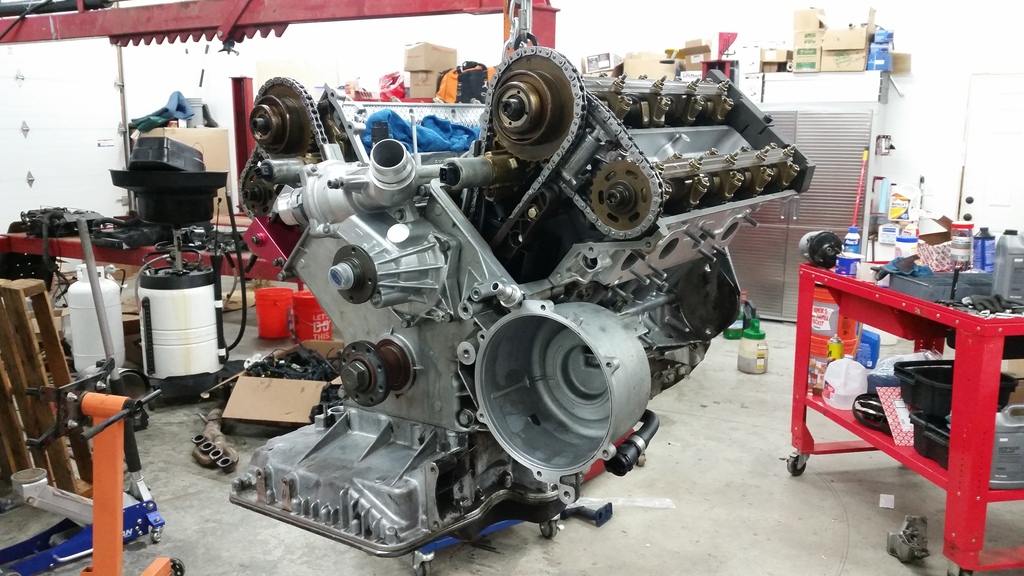
Here's where we're @;
Valley pan installed (URO parts version)
Heads torqued on. (as per instructions in the 1st pic below)
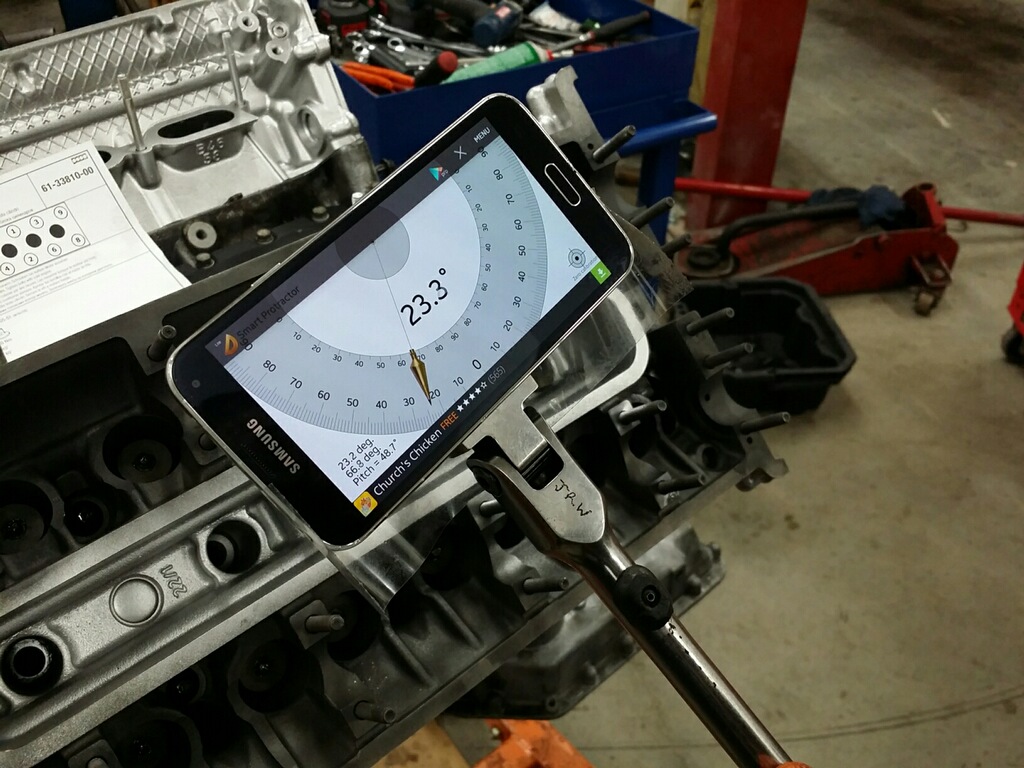
And here's my idea of how to achieve the 2 angle pulls at 80° after the initial torque is done (James couldn't find one of his super fancy torque wrenches with an angle dial) so...
My phone has a magnetic back so I launched my protractor app, calibrated it with a real plumb bob and stuck it to the wrench. Once on, we secured it with tape and ta-da, instant fancy torque wrench.
We'll come back to the shop in about 3 hours and get good and busy. More to come!
Last edited by Plattus1000; 07-11-2017 at 12:42 AM.
Member
Great idea with the phone. Looking nice with the heads on
2000 Silverstone/Silverstone M5 1/34
Member
Thanks. I don't contribute much to the mechanic side of things but ask anyone, I'm decent at thinking outside the box.
- - - Updated - - -
It's late, we're old. See ya tomorrow.
Last edited by Plattus1000; 07-11-2017 at 12:42 AM.
Mad Bimmerist
BMW CCA Member
Union Break ?!?!? Get back to work. Too many are counting on ya man
Member
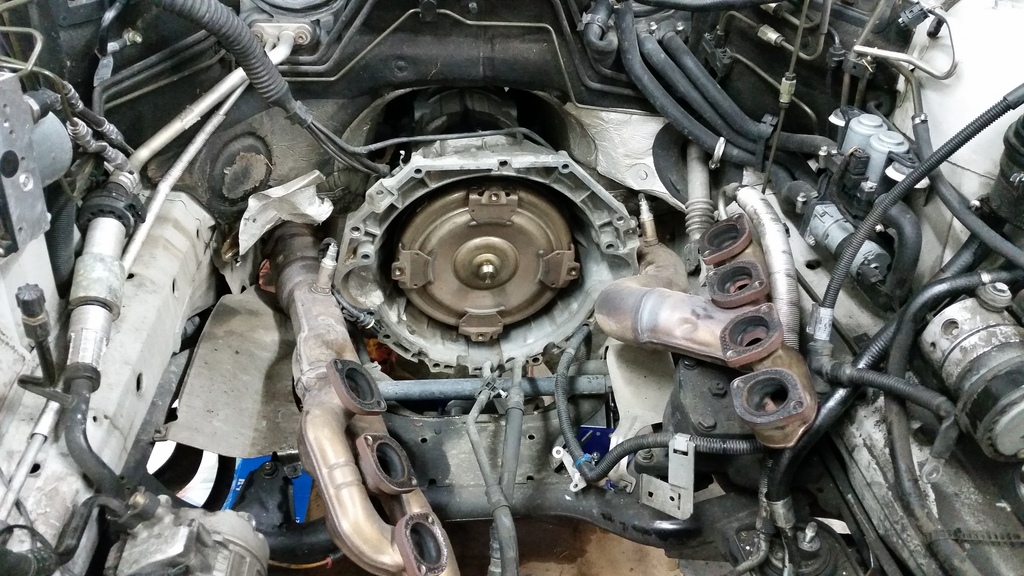
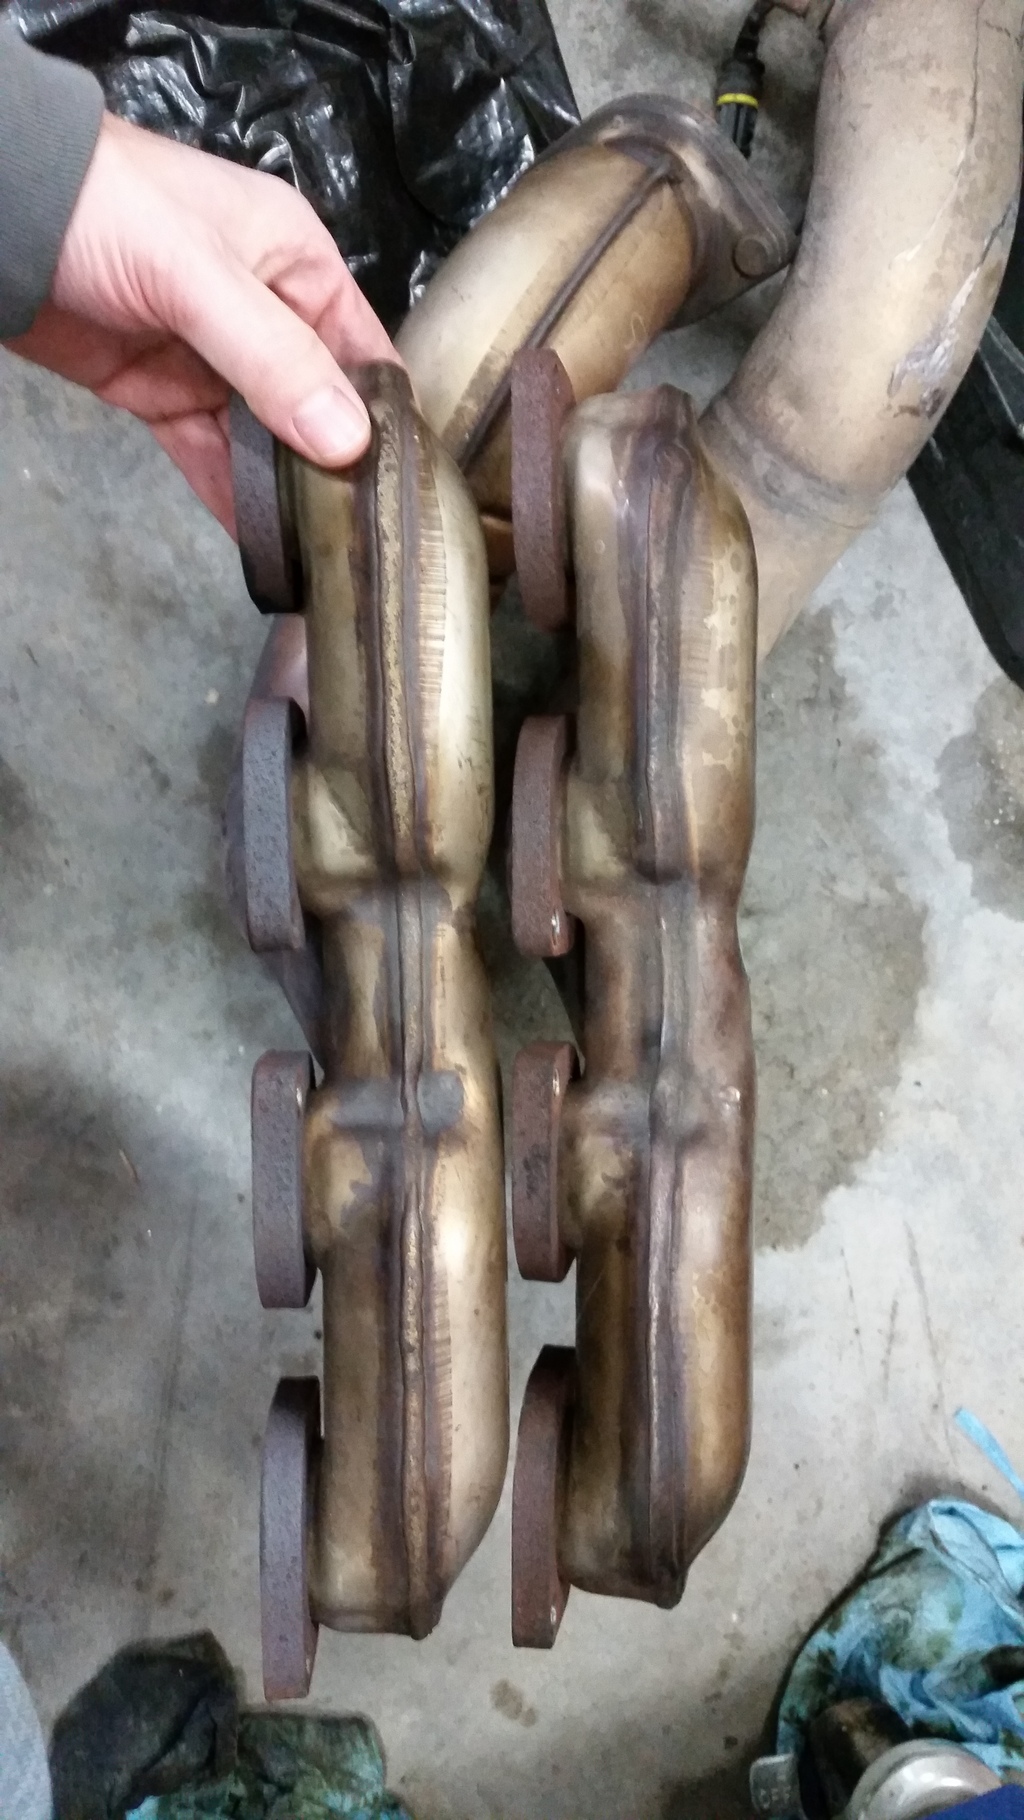
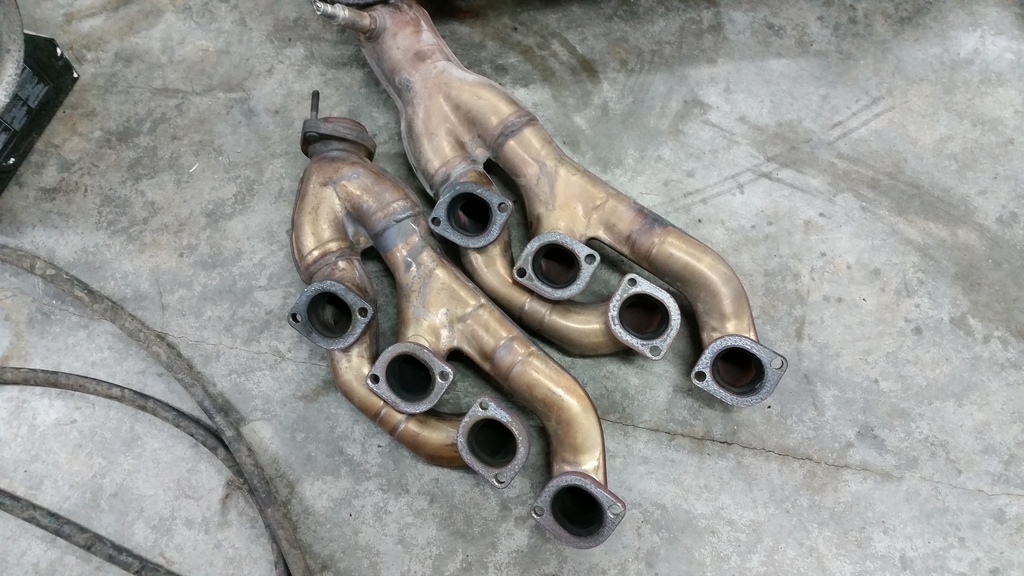
Just some notes.
The exhaust manifolds look identical except for the angles after the manifolds go into one pipe. There, they're different. I'm going to stick with the stock 4.4 exhaust for now and down the road delete the cats.
If anyone wants them, I paid $250 plus shipping. I'll lethem go for less than half that.
The 2003 4.4 has a water cooled alternator so I should be fine with the mounting bracket on the driver's side.
We also decided to go with the 4.4 ccv system but will use the 4.6 intake manifold. This way I don't have to plumb in a line from my oil pan to the ccv of the 4.6.
If anyone needs this for a range rover or X5, make me a decent offer.
We're doing timing chains and covers currently. Sorry for the delay, bad day.
Last edited by Plattus1000; 07-26-2017 at 11:39 PM.
Member
Between you and Auaq, I gets no rest! Glad to see you. I was looking at your thread. Cool car!
 Posting Permissions


 Reply With Quote
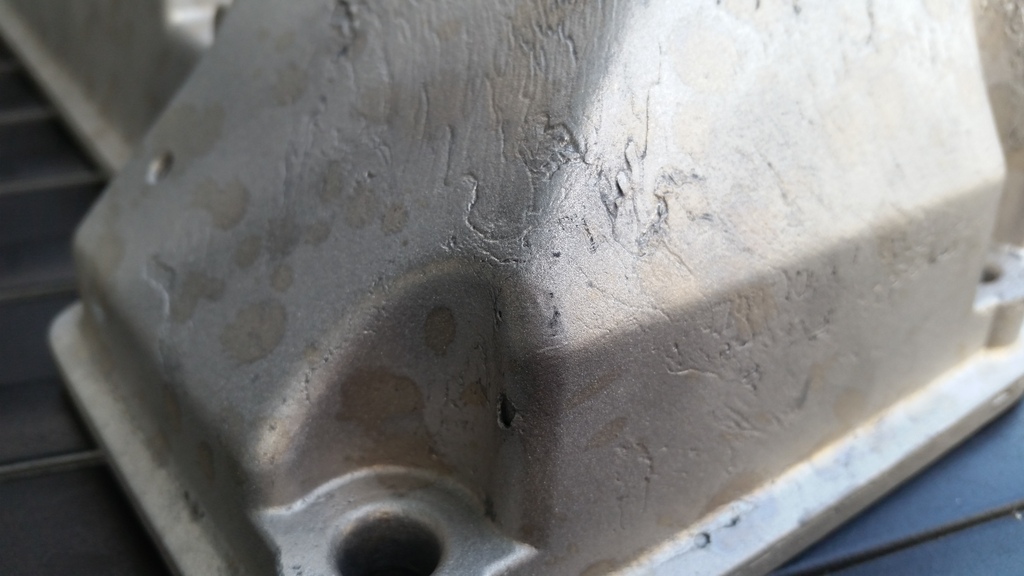


Bookmarks