
 Member
Hi
The leather dash on my 3.0i Z had that pealing look as it had pulled away from the drivers and passengers side units. The instrument pod had air bubbles under it. Got the time to pull the dash and do a couple of fixes and sorting the leather was one of them.
Spent some time looking a contact glue technical sheets. Chose Ados F38 High Temperature contact adhesive because it can withstand 176 degrees C. The other contact adhesives reactivated at around 80 degrees C and this was considered too low for the sort of summer temperatures the dash is exposed to.
Only pulled back the leather to where the old glue was in good condition. Cleaning the old glue off the leather took time using 60 grade sand paper. This softened and stretched the leather a little and made it a lot easier to get the leather repositioned correctly during the gluing stage.
I tried to sand the old glue off the plastic and this did not work well. Decided that I was taking too much plastic off. Ended up using Ados N Solvent which worked really well. I tried not to use the solvent on the leather as it dried it out. It is also very good at taking the colour off the good side of the leather.
There is a felt layer under the leather on the instrument pod. The glue to the plastic had let go in a couple of places and I was able to ease the leather back and re glue it.
Did the gluing on the side units in steps. Positioning the stitching on the edge of the plastic arc and working in both directions. Did the passengers side first (less leather to deal with) and got the stitching almost correctly placed. You only have one go with contact glue. The drivers side was much harder due to the increased amount of leather to glue. Got my good lady to lend a hand and we worked out a technique that included using old lollie pop sticks to bridge the leather on the inside of the stitching arc and stop it from sticking until we had the stitching placed correctly. We then edged the sticks out and pressed the leather into position. This worked really well. Sorry didnt get a photo of it.
Dash is all assembled and waiting for a couple of other jobs to be done before refitting. Really happy with the final result.
DSC03011.jpgDSC03024.jpgDSC03027.jpgDSC03069.jpgDSC03070.jpg
Photos:
1) As found damage, the passengers side was similar.
2) Showing the passenger's unit with sanded leather (light colour) with the orginal glue still on one side of the stitching (dark colour)
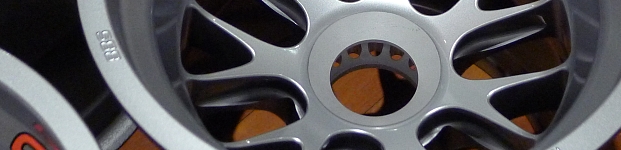
3) The instrument pod is held on with 3 screws on the windscreen end (top of photo) and 4 clips at the instrument end (bottom of photo). Remove the screws and push it towards the wind screen and it pops out.
4) Completed drivers side
5) Completed passengers side.
Cheers
Muzz
Member
Nice. Good to know.
Sim Simma
Moderator
Vast improvement there. Good work. Maybe goes to prove that once the leather dash starts to shrink and peel it isn't necessarily ruined.
I've always wondered if stapling it in place might help prevent the problem. But then I guess you'd just run into other problems, it'd eventually tear at the staples if it got bad enough.
Going into my TENTH YEAR of providing high quality reproduction BMW fabrics!
PRICE CUT on ALL FABRICS
Offering the best prices on the best quality reproduction fabrics!
Member
Excellent work salvaging the shrunken leather as it looks virtually new and untouched. With leather dashes, one just has to be adamant about parking out of direct sunlight and using sunshields when possible. Extreme heat and UV light will take its toll on plastic and leather substrates over the years.
Oh yeah, OE extended leather is mouth-watering.
-2023 Honda Odyssey Elite
-2019 F31 Individual (M-Sport, Prem, Exec, Track)
-2004 Honda CRV
-2002 S54 M Coupé
Member
I thought the leather peeled away from the dash because it shrunk, is this not the case? Is it simply a matter of the adhesive breaking down?
There's a RHD dash on eBay which I've had my eyes on but I considered that the peeling leather wasn't repairable... now I'm thinking there is a possibility it can be fixed!?
Sim Simma
Moderator
Pretty sure it shrinks and peels away from the adhesive underneath. It's never by a huge amount though and as he mentioned in OP, scuffing the bottom with sandpaper softened it a bit so this was probably enough to allow it to be stretched back into the proper position.
Looks like you have Arizona Sun leather in your Z, yalden? If so - a matching Arizona Sun leather dash would look great!
Going into my TENTH YEAR of providing high quality reproduction BMW fabrics!
PRICE CUT on ALL FABRICS
Offering the best prices on the best quality reproduction fabrics!
Member
Thanks Guys, yes it looks great.
For any given section, the old glue was either mainly on the plastics or the leather. It was not evenly distributed on both. This lead me to think that it was the glue that had failed.
This could be caused by:
1) glue failure, possibly heat and total cumulative time in heat exposure.
2) Leather shrinking adding additional stress on old glue.
When I had each unit out and before starting the repair, I sent some time pushing the leather back into place. It fitted just, it was tight and stiff. Once the old glue had been sanded off the leather, it fitted easily and had not over stretched.
Both are possible root causes. The effect of sanding of the leather made the repair easy. The next task was choosing the right glue to ensure that I'm not back redoing the same job in 18 months time. This was covered in the original post.
Anyway, the job was a lot easier than I expected and shows that the damage can be repaired.
I hope you find the post useful.
Cheers
Muzz.
Member
Wow, thanks for sharing. My extended leather has retracted around the air vents and the airbag cover. It's nice to know that repairs are possible.
Member
@BimmerBreaker, yalden has new z3 now
I also bought an extended dash on ebay with peeled leather some time ago. It was in good condition, but leather shrunk very much, maybe an inch or more from the dash on instrument panel. I am still working on this project, but I believe I will be able to salvage it. I can say that leather stretcher spray used for shoes makes wonders on leather. You might need one or two (just to be safe) of small spray bottles for the part over the instrument panel. Remove the leather, spray very good from both sides and stretch it. Repeat. The leather becomes very elastic and soft, almost like a rubber until the spray dries (takes around 30 minutes), so you can stretch it over and glue to the dash.
Member
Okay now I'm definitely tempted to buy the leather dash on eBay...!
Member
Looks great! Thanks for sharing your success... now I want some extended leather.
Wade
Member
Man oh man....wished I would have known about this years ago when I bought the car. The leather was coming up from around both pods. So, I made a decision to put the razor blade to the leather on the dash. I did salvage the leather that fits over the instrument panel pod. Hopefully I can use it again if I can stretch it to cover the instrument pod. I have included photos of the car dash as it is now. Hopefully, I will be able to resolve part of the issue...will give it a try and forward the results when completed. Questions: Can the instrument panel pad be removed WITHOUT removing the entire dash? Does the flannel backing on the backside of the leather need to be removed to prep for sanding so it will stretch onto the instrument pod for gluing? I think the panel that covers the air bag on passenger side needs to be re-glued. I have managed to lift it up but cannot remove it because it's held by a cable that when released will allow the air bag to release....don't want that. So should I just use a strong glue around the edges of the panel to hold it in place? Your help and advice is greatly appreciated.
IMG_20151118_151421862.jpgIMG_20151118_151621653.jpgIMG_20151118_151610645.jpgIMG_20151118_152148065_HDR.jpgIMG_20151118_152155880_HDR.jpg
Last edited by MORRIE; 11-18-2015 at 05:35 PM.
Member
BMW CCA Member
I could find leather dash covers on eBay (searched for bmw z3 dash leather).
Would you share what you got on eBay please?
Sim Simma
Moderator
The only current mention of ebay items was from yalden saying he had a RHD dash available which wouldn't do you much good in California... they pop up used from time to time
Going into my TENTH YEAR of providing high quality reproduction BMW fabrics!
PRICE CUT on ALL FABRICS
Offering the best prices on the best quality reproduction fabrics!
Member
Hi Morrie
1) My instrument pod only had a couple of air pockets between the felt lining and the plastic, so I just put glue between the two. You will need to have a good look at the leather felt bond and make your call. It the leather has shrunk, then either remove the felt and sand the glue off or try the shoe stretch spray as mentioned by others. My feeling is that the spray will only work if the old hard glue has been removed.
2) The three screws that hold the instrument pod in place come through from the front (windscreen) side. The space between the screws and front also has the heater ducts. You'll have to drop the drivers side panels, climb in and have a look, try. Its going to be tight.
3) If you remove the passenger's side panel and glove box, you will be able to see two 10mm? bolts spaced about 75mm apart holding a chrome metal plate that passes through a nylon webbing. This is bolted to a fitting welded to the main dash metal tube. This is the webbing that holds the air bag cover in place so it does not take your head off when the air bag deploys. Remove these two bolts and the air bag cover will come out easily. To take it out, pry out the edge nearest to the passenger. Put this edge in first when installing it.
4) If you want to recover both pods, then get used to the idea of removing the dash. It wasn't such a big deal, take it slowly, work through the Bentley manual instruction on taking the dash out and take notes and photos as you go.
5) EBay UK has RHD leather pod covers. Below are a couple of links, try them to see if they can do the mirror image and produce LHD leather covers
http://www.ebay.co.uk/sch/i.html?_fr...+dash&_sacat=0
http://www.ebay.co.uk/itm/BLUE-STITC...oAAOSwyQtVpQR1
Hope this helps
Cheers
Muzz
Member
BMW CCA Member
I contacted the seller, and he said "to order please buy the item above then please send us a message after you Pay that you want it for the left hand drive and we will do it for you."Originally Posted by Muzz258

Has anyone tried these covers?
Donny
I've bought both shift boots and parking brake boots from TopGaiters in the past and have been very pleased with both fit and quality, especially given the price. I might look into dash covers too.
-Donny
Member
I have a New reupholstered full black extended leather dash but don't have time to advert it on ebay
image17.jpegimage7.jpegimage8.jpegimage9.jpegimage13.jpeg
@Tripfcr
1998 M Coupe: (Euro S50B32), Estoril/Estoril/black, B&M SSK, 6Spd S6S-420G, Strong Strut, R.Forbes sub-frame kit & RE dual ear diff cover, Pro Ramp Variable Lock %75 LSD, Supersprint Race Headers & Resonators & DTM Cat-backs, Bilstein B6 Sport, BBS RC 301 & 303 8.5/10x18" wheels, Alcon Mono6 355x32mm Front & Mono4 332x32mm Rear Full Floating BBK
Member
Would you take 1599 USD?
Member
Would it be negotiatable
@Tripfcr
1998 M Coupe: (Euro S50B32), Estoril/Estoril/black, B&M SSK, 6Spd S6S-420G, Strong Strut, R.Forbes sub-frame kit & RE dual ear diff cover, Pro Ramp Variable Lock %75 LSD, Supersprint Race Headers & Resonators & DTM Cat-backs, Bilstein B6 Sport, BBS RC 301 & 303 8.5/10x18" wheels, Alcon Mono6 355x32mm Front & Mono4 332x32mm Rear Full Floating BBK
Member
Hi Muzz,
I have the exact same issue with my 2002 Z3 3.0i. Was it easy to get the top part of the dash out of the car? Everything I read about the dash talked about a full dash removal. I really just need to remover the pods on the top, Any instructions would be greatly appreciated. Unfortunately won't get to the fix until the spring as the car is in storage for the winter.
Member
Hi Jack
I followed the instructions in the Bentley manual for removing the Dash. It was not as bad a job as I expected. Took lots of photos and labeled ever connector etc.
Others have been successful in removing just the pods. The issues is that there a several screws into each pod that enter from the windscreen side of the pod. Small hands, small screw driver and lots of patients seems to be the answer there.
Regards
Muzz
1999 2.8L Z3 Roadster,
2000 3.0L Z3 Roadster,
There is only one thing more pleasurable than working on a Z3, that's driving it top down on a fine day.
Member
Just to add my experience to this thread, my topaz blue 2000 with extended leather has a dash affected by the shrinkage. A previous owner had tried to repair the small airbag piece and made a right b_ollocks of it with wrinkles and edges peeling off, so I decided to use some of my lockdown time re-doing it. I used ADOS F38 glue, sanded the glue off with 80 grit (some using a renovator tool).
There was no way I could get the leather to stretch the 1/2 plus needed in both short and long dimensions, so I googled it and found tips to use a mix of denatured alcohol (2 parts water, to 1 part alcohol). I brushed this on (just the backing NOT the visible side) and the leather DID get more stretchy. I left it an hour to soak and despite it still being still damp ( I guess from the water still being in the leather) I started gluing in 2 wide sections, the dampness did not seem to affect the glue.
You need to glue in sections to to give yourself an anchor point to pull against when stretching the leather.
It turned out fine, my only mistake was getting the leather too wet on a thin section and it soaked through to the visible face and some of the protective layer rubbed off, hopefully some restorer treatment will hide that.
I will tackle the bigger part above the instruments soon.
These links helped me a lot, not sure how long they will work of course:
https://youtube.com/watch?v=IaSm3zoWrAo&list=LL&index=2&t=0s
https://youtube.com/watch?v=r1X3sSjfgw4
note I did not add shampoo to my alcohol/water mix as I think (possibly wrongly) that is required just to help Mold the leather whereas its already molded in my case.
 Posting Permissions


 Reply With Quote


Bookmarks