
 Almost There
Moderator
Almost There
Moderator
That is way better than the E60 nozzles I have. Looking up that Ford part, I see it does not have the heaters in them and no electrical connection. I assume you just leave them unplugged and there is no issues? I would think the heating would be of minimal benefit anyway, unless your in sub zero weather and the nozzles start to get some ice.Originally Posted by Iamthebull

98 540i 6, 525 whp, 120 mph 1/4, V3 Si S/C'er @16 psi, W/A I/C, Water/Meth, Supersprint Headers, HJS Cats, 3" Custom Exhaust, UUC Twin Disc, Wavetrac LSD, GC Coil Overs, Monoball TA, AEM FP, Aeromotive FPR, AEM Failsafe AFR/Boost, Style 65's w/275's, M5 Steering Box, Eibach Sways, M3 Shifter, Evans Coolant, 85 Deg Stat, PWM Fan, 10" Subs, B.A. speakers, Grom Aux/BT, Still Rolling as my DD!
Member
Thanks !
Yeah , Ive been reading cnns thread .
Basically , to do the job correctly , you need to remove the half shaft , in order to access the E14 bolts holding the rear bearing .
Im kind of surprised that no one shows anything on this . ? lol
I may make a thread on it
A19164E1-3B12-49AF-8D57-26AA6222D0D4.jpg
Looking for an E39 belly pan , passenger front inner fender liner
Member
I didn't remove it, I just pushed it out as much as possible to get to each bolt.
I did the job on a lift.
Sent from my SM-G986B using Tapatalk
Member
Correct. You would just leave it unplugged. No errors. If I could find a nozzle that has this same spread, and took advantage of the heater I'd go for it. I haven't yet though.
Member
I don't have a lift ... lol .
You didn't remove the half shaft , you just pushed it out of the way ?
The boot at the halfshaft / hub is too large in diameter , and prevents the E14 socket from sitting flush , and unbolting the E14 bolts correctly , thus needing to remove the halfshaft .
Looking for an E39 belly pan , passenger front inner fender liner
Member
Yeah, so much that I have access to the bolts. Probably, your halfshafts are bigger, I have a 2.0 engine, so probably the smallest halfshafts.
Sent from my SM-G986B using Tapatalk
Member
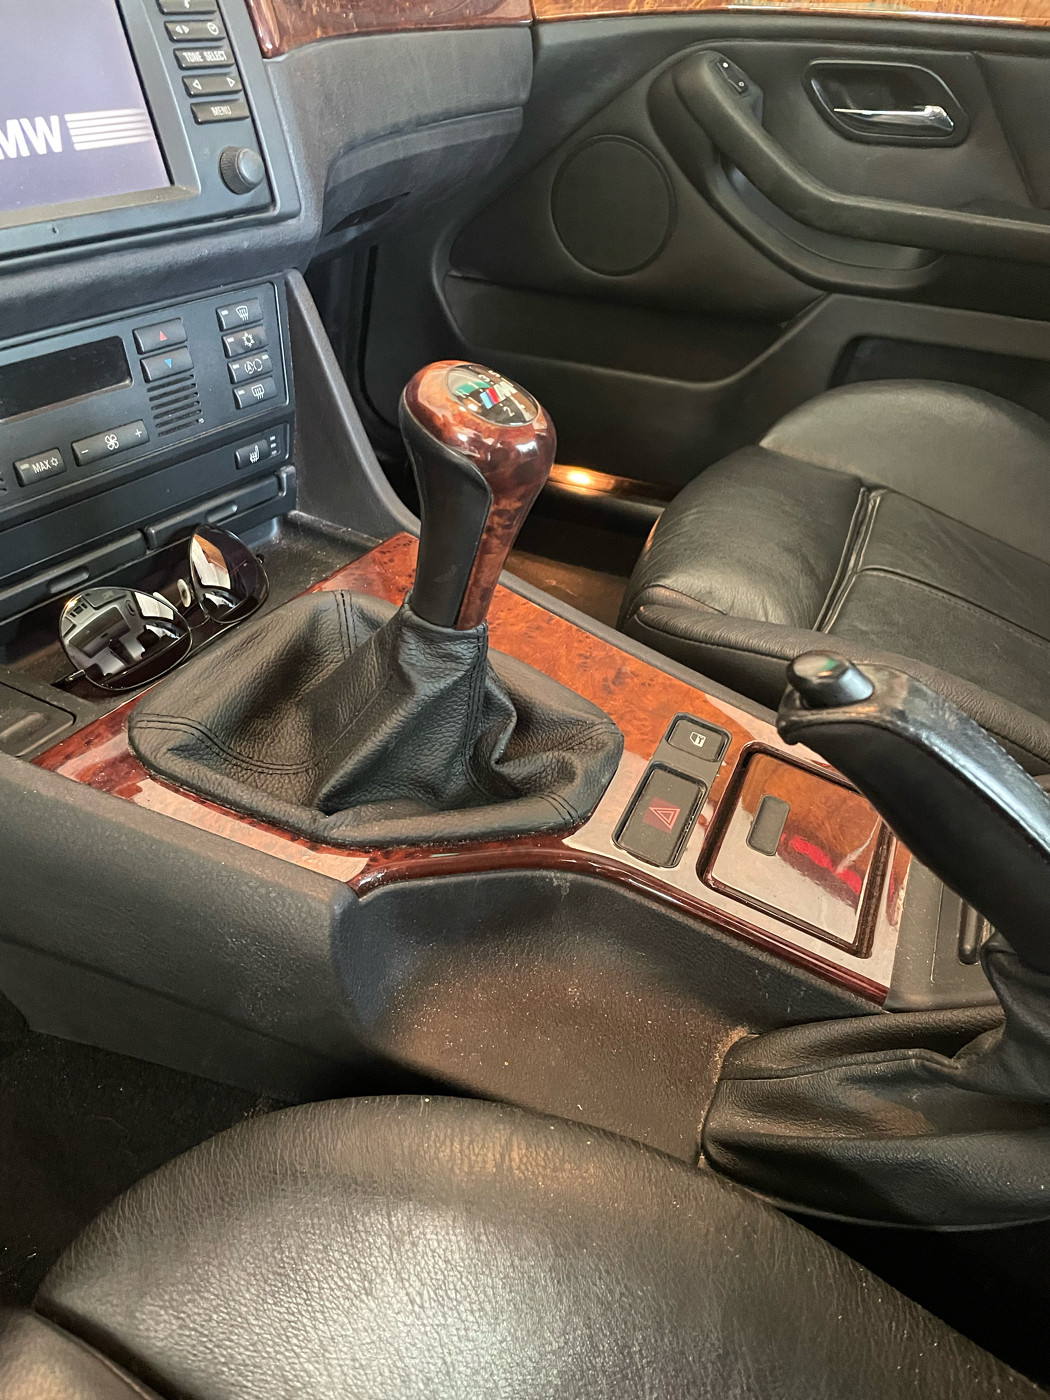
Replaced my shift boot with a new one from Redline Goods. Really top quality product. You can either re-use your shift boot ring or you can order a new one from UroTuning.
I took their installation advice and used contact cement to attach the new boot to the ring and it was a breeze. 5 minute job. Awesome results.
V8 connoisseur
Sorted out the coolant system after replacing the valve covers with a brand new set a few weeks ago. Drove it like I stole it yesterday, no leaks. Turns out the old valve covers were totally the source of my oil leaks.
Also replaced junk hood latch cable with OEM, redid driver window regulator since it popped off the track and sealed vapor barrier properly
Next is the Abs trifecta, AC functionality, determining issue with secondary air system, and figuring out why the CCV whistles with this oil catch can.
Car drives great with the oil catch can preventing oil from flooding intake. So happy I never sold it
Last edited by bimmer7410; 05-29-2023 at 11:57 AM.
Member
Valve covers warped?
Ive got a rear door apart for a regulator. Snapped cable, gonna be a few days to get here ah well, at least its a gorgeous day and.no rain in the forecast.
Sent from my iPhone using Tapatalk
Member
Replaced my cigarette lighter with a fast charger of Amazon. It came out great. I replaced the whole tray as the previous one had wireless charging, and we decided to upgrade from the S20plus to the S23ultra. The wireless charging is rendered useless due to the size of the phone that will not fit the tray anymore.
Somehow, the "P" position of the shifter was not lighting up anymore, even though on the dash it was. Found out that the circuit was burned out. Don't know how that happened as it was ok when I started with the tray replacement.
Repaired the circuit, and everything was back as it was.
Sent from my SM-G986B using Tapatalk
V8 connoisseur
^^ whoa thats nice. Adding to the list. How did you know where to look? Asking as I really want to find the break in the circuit for my clown nose LED.
Dunno about warped, likely. But they were in the typical, crusty shape you see many in after all these years of service.
Great day here too. Lucky cause my home AC unit is in the same non-functional state as my 540. Ha
Last edited by bimmer7410; 05-29-2023 at 03:19 PM.
Member
Well, it was working before I started taking the shifter apart to install the new tray. So it had to be locally. I googled how to rip apart the shifter mechanism and bam, found the culprit.
I would start with measuring the led it's self. Then then inspect the socket for oxidation, circuit board, and the wiring. If it passes QC, move on to a wiring diagram for more in-depth diagnosis.
Or the simple way, try another mirror.
Sent from my SM-G986B using Tapatalk
Member
In the past week, I've done 7 runs to HDepot for a dozen 8' PT 2x4s, and 50 6'x7"x0.5" fence pickets per run. Only two more trips for pickets, and probably 4 more runs for the 2x4s. I love the ability to fit 6' long ____ in the wagon with the seats down, but being only able to do a dozen 8' boards isn't economic. As long as I get other stuff to fill at least half the car I don't mind, but doing multiple trips for just 8' lumber isn't great. First world, right?
'98 M3 5spd - '03 540it 6spd M-Sport
Hope you enjoyed the ride
160 pickets! Can also carry full 4'x8' sheets! :P
160pickets.JPG
2003 540i/6
Member
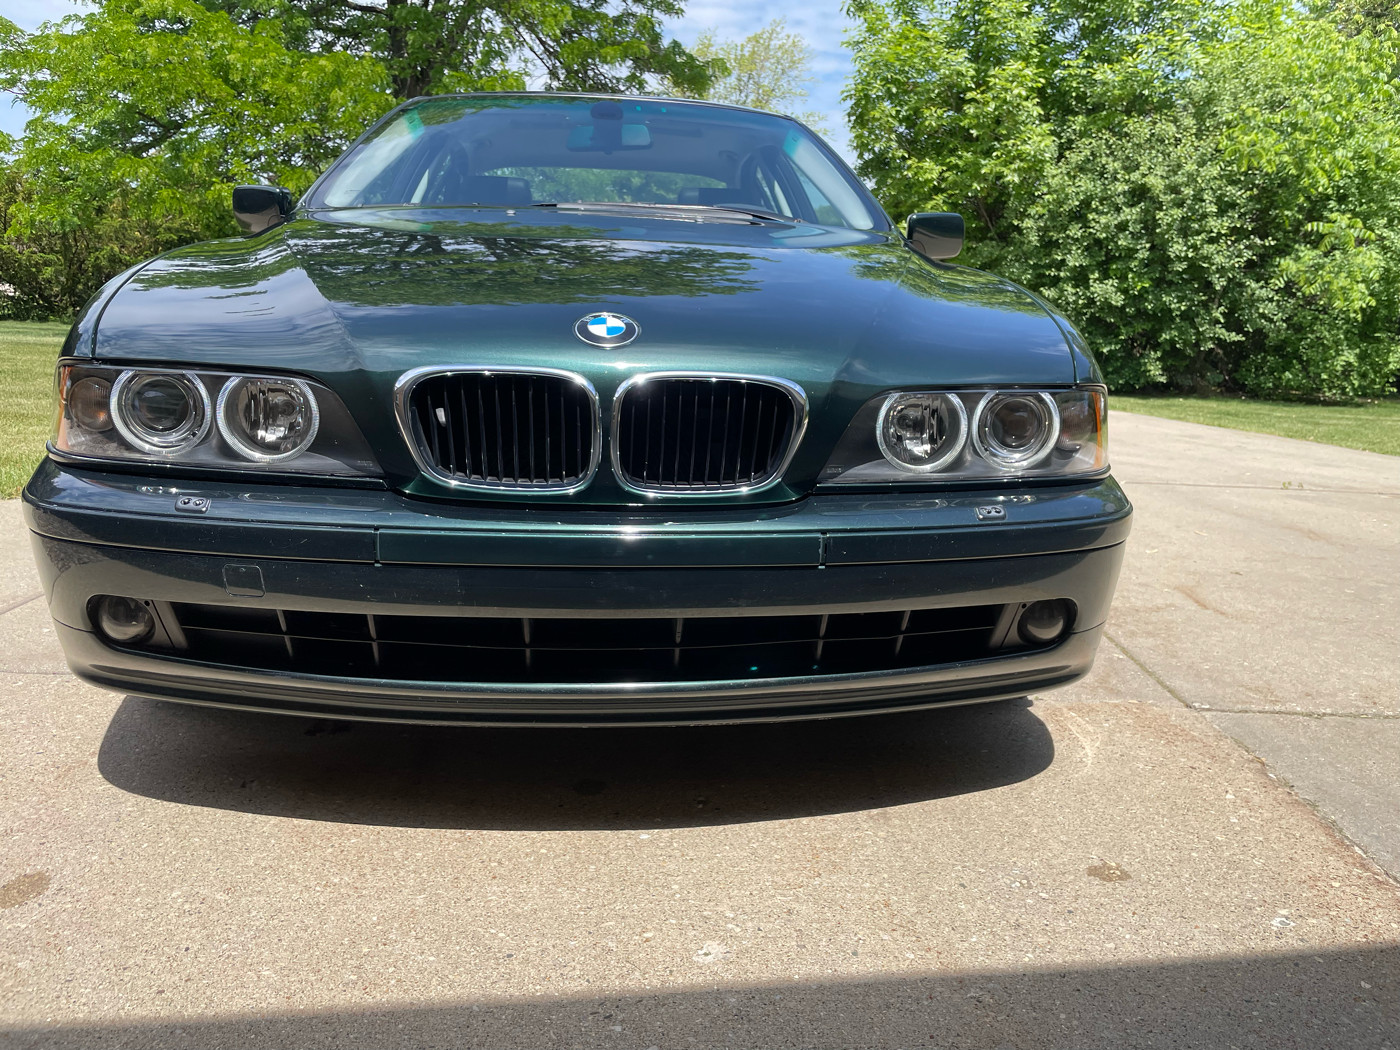
Deleted my front license plate using BMW part #51117005985 today. The part came pre-primed so it also turned into my first rattlecan paintjob attempt. I used a kit from TouchUpDirect and must say I was impressed with the results. Oxford green metallic is a toughie but the match was pretty much spot on.
After practicing with a test strip I learned that clear coat is a real PITA (the stuff runs if you look at it wrong), so I laid the part flat in the garage and built up 3 coats with 15 minutes between applications. I also placed a cardboard teepee over the part while it was drying to keep dust off. That seemed to work out.
Last edited by sleuth255; 05-30-2023 at 01:41 PM.
Georgia Car Scout
Time for a roof rack?
Sent from my SM-G970U using Tapatalk
Member
With clear coat.. resist trying to put on a full coat on the first coat. Put a real light coat on the first, let it flash, and then apply a normal 2nd and 3rd coat if needed.
I've spent time recently learning using to use a real paint gun with automotive paints and virtually every demo on applying clear that you'll find on youtube says this and I had no issues at all with both vertical and horizontal.
I've had the rattle cans pre-mixed with PPG quite a few times in the past and was tempted to stay with it, I used the same 1st coat being light with these too and had no issues. As I wanted to do more area than before I moved to a reasonably priced quality gun Jim recommended and really liked it. With a paint gun you can also cut back fluids and pressure in addition if needed.
Sorry if I still sound excited by the experience, I had a lot of fun and already have three other projects lined up I want to do and can't wait..
Last edited by SW530; 05-30-2023 at 06:23 PM.
A great ending is all you'll see..
__________________________________________________ _____________
Member
Agreed. Learned that when I got into building model cars back in the day using spray cans, then eventually air brush. Start with a very light coat first, almost mist like. Then build it up from there. No need to cover the whole part on the first coat. That's how the paint comes out like crap.
Of course always practice on a spare part first to get a feel for how the paint lays out.
Sent from my SM-S918U using Tapatalk
Member
The color coat was pretty easy. Very mist-like spray from that rattlecan so I was able to do multiple coats pretty easily. Different story with the clearcoat. First coat of clear looked like I'd just done a knockdown finish for a home remodeling project. So I had to spray thicker coats which made it a real chore. They had to be just thick enough so there were no runs but still created a smooth coat. Not sure if this would be the case using professional guns and high quality paints. I'm guessing its a whole different experience.
Member
I dont have much experience tbh but we once had a paint booth at our shop humidity and temperatures can have a huuuuuge impact on how the paint sets up
Sent from my iPhone using Tapatalk
Member
Base and clear are very different. I'm not sure what a knockdown coat looks like.. any chance you had some 2k clear and forgot to depress the plunger on the bottom of the can? If that's not it, and you mixed it really well, then a really light coat for the first, overlap maybe 50/50 at best, let flash, then go back over it 75/25 keeping a wet edge and it should be beautiful, no runs. Check out "Paint Society" on youtube and watch one of their vids on clearing with rattle cans or using a paint gun. It's a different experience between a paint gun and rattle can, but the rules remain the same.
A great ending is all you'll see..
__________________________________________________ _____________
Member
Great suggestion! I checked out this video from Paint Society:
...and I can pretty much say the clearcoat that comes from TouchUpDirect is obviously garbage. It was nothing like the SprayMax 2K they were using. It was also not a two-part clearcoat spray either. Night and Day difference watching them put the SprayMax down. I'd say TouchUpDirect is fine for base color but avoid their clearcoat rattlecans.
Member
That video is from "Garage Noise", did you post the one you meant to?
A great ending is all you'll see..
__________________________________________________ _____________
Member
I did. It came up in the list from the search for "paint society". I liked it because it featured SprayMax 2K clearcoat and a typical DIY garage job. Only thing about the 2K is that its a one-time use clearcoat at $25/can.
Member
Unfortunately some of what he's doing contradicts what the full time paint guys on Paint Society recommend and subsequently he got several runs on a relatively small area.
You're onto something that quality product costs. The PPG shop I've been having my cans mixed at I think charges $21 a can. They can either go by your paint code if the paint is new enough, or they'll bring out a spectrometer and get a reading that way. If you spray a paint card and it's not right they'll keep trying as long as you have patience. They offer different clears but for sure you want to go with the 2k stuff and just eat the cost after you have to toss it 4hrs later. If you want stuff that sits on the shelf for months or years, they have it, but it's a downgrade.
Now that I set up my gear to use paint guns I started using a disposable cup system. This way you can mix pretty small amounts in small disposable cups and not toss what you don't use. Shelf life on these types of products can last at least a year. I suspect if you vacuum bag the can years. I was bagging up about half a quart of clear for my wife's car yesterday and she asked why I was keeping it. I remained silent a bit too long and she got it..
A great ending is all you'll see..
__________________________________________________ _____________
 Posting Permissions


 Reply With Quote


Bookmarks