
 BMW Enthusiast
Hello all,
I felt it was a shame I hadn't shared more detail about my 633 build. I know that many of you are on bigcoupe, but I figured I'd get more specific feedback on my e24 here. Beware I have lots of photos and will bring you up to this point in the process:
5/2014
I stumbled upon a craigslist ad for a Callaway Turbo 633. A couple of pictures and a brief description was all that was included, so I decided to email for more information. After a couple of weeks with no response, I called. I ended up reaching the guy and arranged a meetup. The car was full of trash and obviously on the back burner as one of his projects, but just so happened to have a decent interior, pretty low mileage, and in running driving condition. I took it around the block and found that it needed some work, but the turbo spooled up but seemed to run pretty well.
I have been torn on bringing my 535i to the track as it is a good runner for DD duties, and I haven't been confident yet enough in the M5 or 635 Euro to thrash either on the track, or throw money at them for track use. I figured this could be a car that I wouldn't feel bad about beating up a bit on a track day.
So after making the deal and filling out some paper work, I drove it over to a friends house who was willing to let me keep it there for a while and also happens to have two 535i parts cars that may turn out to be donor cars for both his car and this E24.
So i had to chance on Saturday to get over there and see a bit more of what I am starting with on this car.
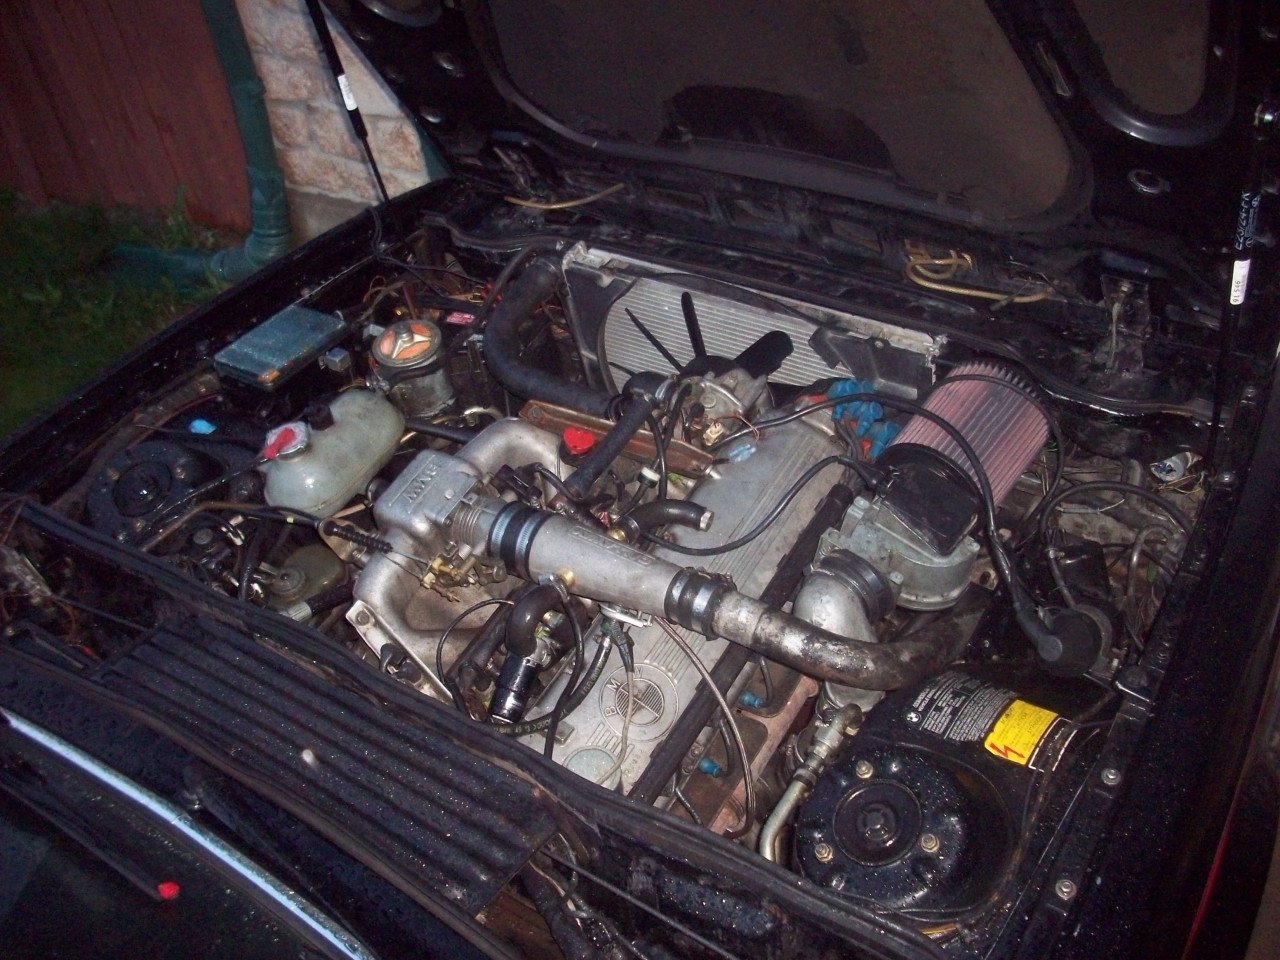
The car was pretty dirty, but it is evident the callaway kit has been on there for a good while. Definitely needs work, but the turbo kit is all there with the intercooler and everything.
7th injector is run by an add on box called the microfueler
It adds a 7th injector into the Callaway manifold, and the injector is controlled by the 'microfueler' callaway brain. It takes input from manifold inlet pressure and looks at the signal from the coil. I'm trying to figure out how it fits in the with ECU, but it seems that it is completely stand alone and adjustable as I have found in my research. My understanding is that is a generic setup that was used on l-jet, k-jet and other cars from the 80's like the 320i, GTI's, and Alfas of the time. That is where I have actually found most of my documentation.
Of course you have the argument that it is a band-aid type solution because the additional fuel is not coming through the injectors, so you probably don't have even fuel distribution to each cylinder. So others have suggested replacing it with an RRFPR to control fuel into the injectors and distribute more evenly. Either way, it seems like a setup with intercooler may be a good basis to start with for moderate power increase, something no more than probably 10psi and maybe ~250hp as seen with the 745i M102.
I figured it would be a good idea to share all the information I have found for this setup...
The complete kit, found on another post on mye28:
Microfueler basic info:
Install information:
Adjustment information:
Back to the car itself, it was a bit messy. The PO seemed to use it as a storage box with a bunch of junk inside. I found tools, cd's, popcorn, fastfood trash, cell phones, clothes, candy, dogfood, etc etc all throughout the interior and trunk. The good news is that a bunch of the BMW parts were still among the mess.
Trash emptied
If you didn't already notice, the wiring is hacked. Going to have to clean all of this up, AFM connections held together by speaker wire nuts...
At least it's a start:
My friends driveway:
The PO says he put a different set of springs on the rear: :shock: I don't really know why you would want to raise it. The interesting part is that he also has undersize 14" tires on the car...
Where it sits until i can get back to work on it. Unfortunately progress will likely be very slow until I get a place of my own where I can keep it, but for now it has a new home.
The biggest needs of the car are brake bomb, passenger side motor mount, wiring, 4th gear synchro is bad, steam cleaning inside, powerwash and exterior refresh, and then turbo system refurb. My main goal for the time being will be to get it running reliably, along with electronics cleaned up and sorted so that I may be able to get it out to a lapping day with the 'as is' turbo setup. Although I have a lot to learn when it comes to FI, I will be doing more research than anything.
4/2015
Hey Guys. So it has almost been a year since I actually bought this car but I am finally getting other projects and things in order to resume working on it.
In August of last year, I purchased a house. I had been searching for a good 5 months and the previous year and a half had me commuting to work and back. With no storage space or time, I was behind on maintenance and other items on my 3 cars. So needless to say, since I got the house I had lots of projects to catch up on, along with the Annual Drive 4 Corners BMW Meet. It takes a lot of time to keep up with planning that event and origanizing all the fine details.
Anyway on to the story of the car. As I mentioned, I purchased it last year and was able to store it at a friends house. I have had in the back of my head for a long time to turbo charge an M30, it has just seemed like a neat platform and there's a decent amount of bolt on upgrades for performance. Really the goal of all this would be a performance oriented car for lapping days at the track, and possibly autocross. Either way, I felt that this car was not perfect when I bought it and has a salvage title from a prior wreck. That, coupled with the PO's 'Fixes' makes me feel like I can't exactly mess up this car more than it already is. I liked that it was running and driving when I bought it, plus it is a manual.
I finally got into the house, and it happened to be a week before D4C. This meant I had a very busy week, especially since I didn't take off work that week! I got extremely lucky to find a 3 Car garage in my price range, and I mean one with a house/interior that would be reasonable for the future.
Unfortunately there was a lot of work to do to in advance. First priority was to sell the GF's Jeep (since it was taking up a garage space after I cleaned it all up). But it was nice to have the storage space for waxing the cars-- a place where they will actually STAY CLEAN.
I installed garage lighting (as there was practically none before) in both bays and built work benches in each. The house was literally empty in the garage, I have been adding storage space such as shelving and wiring the secondary garage door opener to power. It is crazy to me how the previous owners had left it, but this just means that I have more flexibility for my own space. I wasn't sure I would, but I actually like the split 2 car garage, as in the below zero winter, it stays a decent 35 degrees, while the other stall gets below freezing. The means I can still have a work space for a car if I need to do some repairs in the cold season...
I moved the 633 to the house under it's own power, and surprisingly, even though it has a huge exhaust leak, and bad brake bomb, I was able to make it home in a traffic jam through Denver. Parking the car at the house was a good feeling... until I was looking at it every day stuck on the side of the street without tags.
So, I realized instead of getting a ticket, I should move in to the yard. Conveniently the side fence fell down in November from the PO's hack fix (they didn't set the post in concrete, they used nails to hold it together, and they used 2x4's nailed together as a post! :x ). But since it fell down, I had a great opportunity to make a hinged gate into the side yard of my house. Some may have noticed it in the earlier photos. This worked out pretty well, so before I put the posts in, I drove the car into the yard.
I got the hinged gate up and it has been quite convenient so far. The space means I have additional parking for a second car if the need arises. The main reason I have updated this now is that I have begun to make additional progress although it is going to be slow. I started by taking off the thrashed front spoiler and front bumper. This exposed the intercooler and will allow me to thoroughly degrease everything in the near future.
Also the perfect opportunity to mock up my spare euro spoiler and bumper.
Last weekend I met my friend to pull the donor motor for the car. I believe the B32 engine has an oil pump issue, the oil pressure light never goes out except when revving above 2000rpm. Oil pressure stays around 5psi until you get to that point. Maybe the pump bolts are loose, but either way, I figure a new motor will be the best way to go. I grabbed a G265 to go along with the new motor so hopefully no trans issues down the road.
The donor. A US 533i that had a B34 and G265 trans:
Getting the engine and trans out with load leveler:
The engine is a stock M30B34 and it has Ford Lime Green injectors (42lb F83e-a5a). I am thinking these may work for a low 5-8psi turbo build (maybe with, maybe without the callaway kit).
Anyway, the Callaway Microfueler is standalone. This means the 7th injector is more or less an add on kit to the Motronic ECU. The M30B34 allows me to go with an 059 ECU and maybe possibly buy the TCD turbo chip if necessary. If I understand its function correctly, I could disconnect the Callway microfueler/injector lead, and using a RRFPR and the chip, I could have a base tune for a entry level turbo setup. The car already has a starting point as far as hardware...
Parts on order/on hand:
633CSi chassis. E28 Based
M30B34 with 059 ECU
633 Flywheel (to be swapped to B34)
M5 Clutch Kit
G265 transmission
B35 starter
T04B Rotomaster turbo (from Callaway kit)
Callaway intercooler
S3.25 diff
Bilstein Sport Shocks/ struts
H&R Lowering springs
New steering parts - to be replaced with engine out of the car
Euro Bumpers, Euro Headlights, Euro turn signals.
Which leads me to now. I will be cleaning out the car in the next few days before heading out of town for a business trip. I am hoping to get the interior cleaned up and get the drivers window operable again. When I return from my trip, my friend Mike and I will be pulling the engine to do the swap.
Right now, it looks like the B32 block has been tapped for the oil drain. With the new engine I am thinking of tapping a spare pan and swapping it in just prior to the engine install. I will retrofit the oil filter/feed from the B32 engine to the B34. Then, the other hardware should swap over. Any thoughts on this? It looks like a standard NPT fitting to AN hose is the best way, so the hose can be removed quickly and easily
I spent this weekend cleaning up the interior and working on fixes like the hood latch and trunk lock.
I took out both seats to deep clean the carpets and and get rid of all the trash. It's looking better but still a ways to go! At least it's usable inside now...
I still need a window motor, but for the time being I can open and close it manually.
- - - Updated - - -
I had been out of town for work all last week, so I continued some progress this weekend getting the car ready for the engine to be taken out. This included a few things.
I was able to get my hands on a TCD turbo chip. the plan is to use the microfueler to get the car up and running after the swap since so much will be a direct swap onto the engine I pulled out. Here's the chip in the 059 ECU:
I continued this morning trying to track down the wiring issue I am having with headlights. They operate properly with the high beam switch on, however, the low beams do not come on with the normal switch. I have determining that the relays are working and the wiring at the lamps is correct... I am a little bit at a loss because the switch on the steering wheel doesn't look to have been messed with.
I am guessing it may be the white/gray wire that was cut on the headlight switch. I'll investigate more later.
In the mean time, I decided to rewrap the wiring harness, because for some reason half of the protective wrap had been removed. Here's how it was-- I wanted to add another layer of protection from wear along the front clip and sheetmetal parts.
Next, I was unhappy with the gauge pod location so I removed it from the knee panel. It was not usable to look at your knees when driving around. The first step was the dismount the pod location and remove the wiring.
I'll be rerunning wiring, labeling it, and cleaning it up so it is not so much a rats nest. But I did like that the gauges were all still lighted.
The Callaway AFR gauage didn't work, but I suspect it just wasn't completing the signal to the sensor. Either way, I will be using an AEM UEGO Wideband to monitor the fuel mixture. It will be more accurate and real time anyway. Maybe down the road I will log the data on a laptop.
Finally, I spent an hour or so de-greasing the engine bay and piping. This is all in anticipation of the swap. Immediately the engine looked 10x better than what it was before since a nice layer of dirt came off. I take a look back at my original purchase photos and I don't understand how somebody lets their car get like this. The piping is actually much closer to silver than the black it was before.
More photos to come later this week when the engine pull begins
In order to do the swap, my friend will need a bit of additional space in his driveway. So on Sunday, I rode down to his house and drove one of his cars back to my place to be parked on the side of the house.
Also, i realized I didn't post the after photos of the engine bay. It is still super greasy, but much cleaner than before. Shame to get it all cleaned up and not enjoy it, but the new engine will make it all worthwhile. The B32 is leaking oil from the front seal anytime it is driven long enough to completely heat up the oil.
Yesterday I installed the Euro turn signals and trimmed the reflectors so that I could finally remove the 'elephant ear' '83-'87 turn signal lenses.
I tried to identify the issue with the low beam headlights and I believe it is caused by the "Low Beam Check Relay" inside the fusebox board. If I understand this does not usually go out, but it is the only thing that explains why fuses and relays are good, wiring is good, and the low beams only work when the turn signal stalk is moved to the high beam position. Either way, this should be an issue that is found on 533i's, and it seems like in all my searching nobody has a proper fix. People jumper past the relay and complete the circuit from underneath. I will have to think about how I want to do this.
Additionally, I got the AEM UEGO Wideband in the mail, so I installed it. I didn't want to mess with a gaugepod yet, so it is in a temporary position until I can finalize all of the wiring.
And a couple photos of the interior as well. It is liveable now, although there is still more cleaning to do yet!
So today, I got off work early today and did a few things on the car, in preparation for removing the engine tomorrow and Friday. I got an oil drain fitting and had the oil pan tapped for it. The engine in the car has the block tapped, but I figured adding some additional height for the drain to feed by gravity would be a good idea. Plus I had the spare pan and was able to clean it up, it seemed like a no-brainer to do it this way and not risk the metal shavings. 1/2" NPT (m) x -10AN. New Parker hi temp hose will be used also. The -10AN means the passageway is 1/2" in diameter, all in efforts to eliminate as much backpressure to the turbo (oil feed/return) as possible.
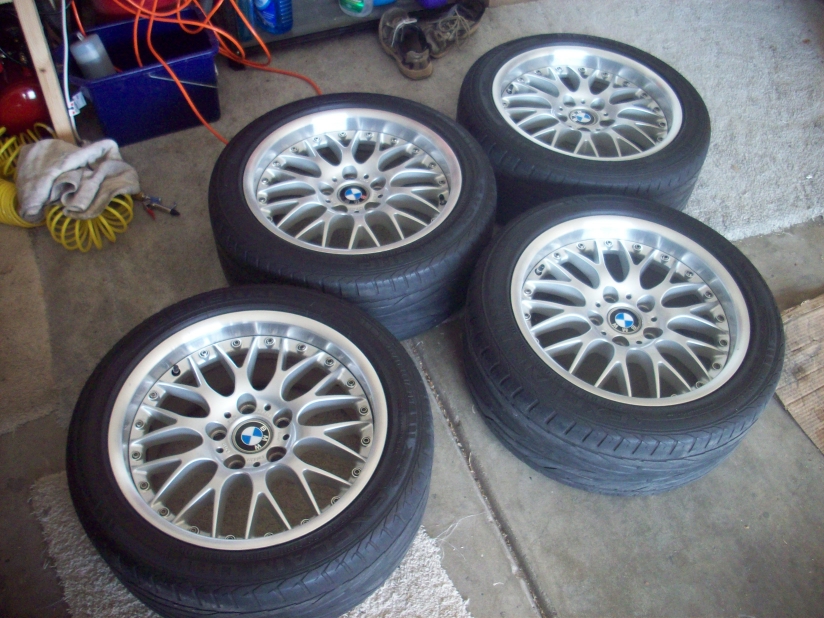
I also pulled the trigger on some Style 42 wheels. I have seen some photos of these wheels and on an E24, they look killer! They are nice enough that even just putting them next to the car makes the crappy paint look that much better.
Tomorrow We will be tearing into it and I have all new steering components like idler arm, center link, and tie rod ends so that I can replace these while there is clearance with the turbo dismounted. So here's a few photos of the car currently. From 10 feet, the paint looks decent and I think will be good enough to become a track vehicle. The spoiler is off so that I don't have to mess with it and store it when we are actually doing the swap.
Euro headlights.
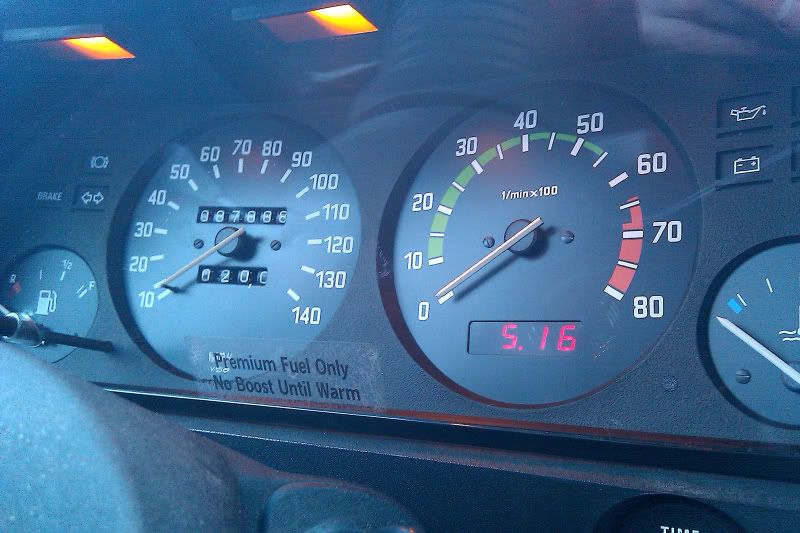
So driving the car right now is a little interesting because the 260/5 only has gears 1,2, and 5. That coupled with the exhaust leak means that it is a little noisy, and you have to rev it up quite a bit to get up to speed to use 5th gear. It feels like the turbo never really spools in 1st gear because of this leak. Also, this means I don't know how accurate the wideband reading is at the moment. But with that said, the vacuum/boost gauge will sit at 5psi when accelerating in 2nd gear. Even with the leaks, it feels like it is pulling as fast as the M5 in second gear(at altitude). The good news is that the microfueler is keeping the AFR's at about 12.5-13 when on the gas. When off the gas however, and maybe it is because of the exhaust leak, I am getting 17 readings on the AFR. Getting the exhaust leak fixed will be the first priority with the new engine, and dialing in the microfueler to keep a steady AFR will be next.
I want to add a turbo bypass valve, as the car currently doesn't have one. I want to add it so that the new engine won't be subject to any sort of surge. Now at 5psi or less in the intake manifold, I don't know if that's possible, but it is one of the first items I will address. Not sure if this means the turbo will need to be refreshed, but I know it can't be good. I'd like to position it as close to the throttle as possible, so in my head, I was thinking at the ICV. Maybe I can remove this and the car will still idle when cold? It will have the larger injectors so I'll try it at least.
So i certainly have a lot of work ahead of me, but I am hoping to make major progress with the engine swap in the next 2 days as I am taking off work to get it done.
SO, continuing the updates.
The donor engine had to have a few changes since it was already out of the car.
B35 smaller starter. Re-manufactured Bosch unit.
Starter in place, light weight flywheel in place (my friend had a spare and he was going to take mine when it came out). Oil pan off, for installation of tapped one. Cleaning of the mating surfaces.
Oil pump bolts all nice and tight.
New oil pan awaiting installation
Oil pan installed.
While it is accessible, we replaced this fuel line, I believe this is the cold start injector. PITA out of the car, how do you do it in the car??
Moved the car inside to start the teardown.
I think the front main seal was the culprit of this greasy mess. The other interesting part was that the coolant was a nasty brown color, and the radiator was coated with the same sludge as well.
Radiator out, harness coming off the fusebox (C101 connector I believe).
Removing the exhaust was the next step to get the driveshaft off and transmission crossmember removed. The down pipe could not be unbolted in the car, so we were looking to see how the exhaust was fixed. Unfortunately, it was looking like the we were going to have to cut the down pipe to allow clearance for the motor pull since it couldn't be unbolted.
Well, remember that block of wood jammed in between the firewall from this picture?
We decided to remove it to see what sort of clearance we had to work with.
That's when the rear section of the exhaust decided that it was now free to separate:
That's when the wastegate downpipe flange became available.
This was a sigh of relief for both of us- we were laughing at the hillbilly engineering. Of course this block of wood wasn't a Callaway special part.
Full exhaust down after cutting and removing the chian and bailing wire that was holding it all in place :shock:
ECU and such removed. Besides the transmission and removing the AC unit, it was a good stopping point for the night.
The next day we continued and started on pulling the engine.
It was quite greasy so I didn't get a ton of photos, but we managed . After a good bit of finesse we were able to get it up and out! Unfortunately I will have to replace the heater core as some point as we didn't take off one of the hose clamps. :oops: :x
Turbo off:
Rolled the car out to have some more space to work:
Here's the turbo, flange and downpipe orientation. I am going to have this remade. Somebody tried a 'fix' at some point and failed miserably. The weld bits got everywhere and did not seal at all. Maybe at one point it was held in place, but it had obviously cracked by this point in time.
Wastegate gasket also blown. This is the correct/original rotomaster wastegate.
I plan to have the unit retapped so the mounting screws go in all the way nicely. Notice the failed turbo gasket. I believe this is a T3 turbo gasket that I should be able to get at the local turbo store? I'll find out this week.
This gasket has the rotomaster part number on it too.
The turbo seems to not have any side to side shaft play, and spins smoothly. I may have been lucky. As the other kit sold here, it has the Rotomaster T04B53 turbo.
Here's the Callaway manifold. I don't believe you can mount the turbo with the engine in place, and I also don't think you can remove the manifold while it is in the car (It's a PITA out of the car).
With what I have found online, this turbo is comparable to the T04B H trim (possibly S), but seems to be sized quite well for my application at altitude. Pr=1.413 at 5psi and Pr=1.826 at 10psi. Lb/min~ 30.56 and 39.1, respectively.
Here we are putting on the M5 Clutch kit.
I didn't get photos of the oil canister switch. The tapped unit went on the new motor and we switched the rear coolant line connector for the heater core.
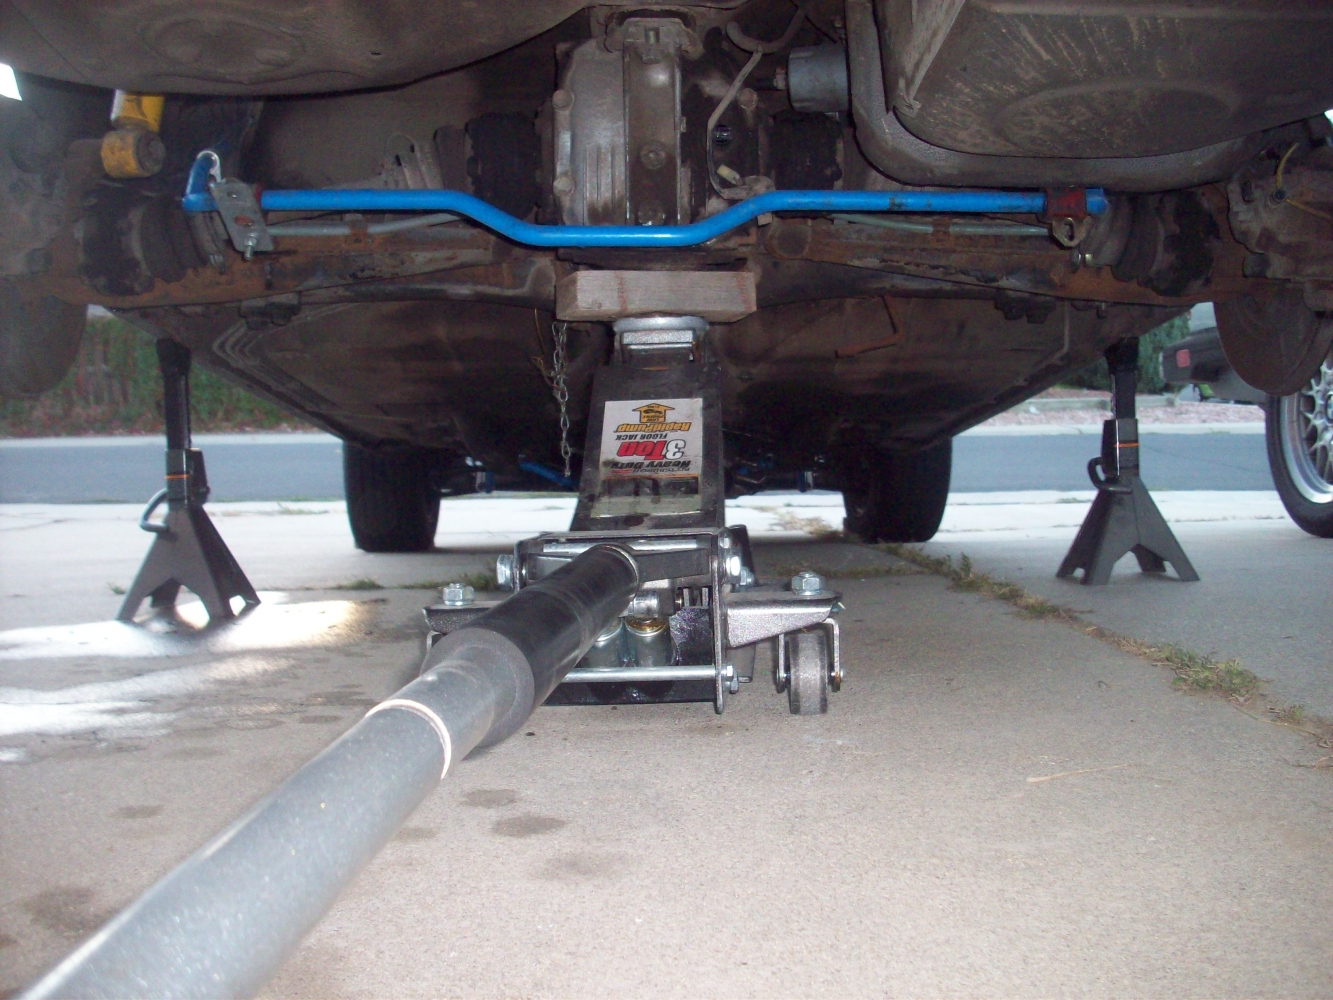
Here's some of the hillbilly mechanic work we encountered. Needless to say, I replaced the sway bar end links asap.
Brake bomb replacement since we now have access to it:
Here's how the engine sits ready to go besides the manifold, turbo, down pipe and an ICV. Going with the Bosch E30 T type for an elegant solution. Oil drain hose length to be sized properly once the manifold and turbo is reinstalled.
Making more progress!
Here's the nasty coolant that came out of the B32. I'm super surprised it ran and that it didn't overheat when I drove it!
Here's the bad clutch bearing I got with my clutch kit. Glad Mike had a spare on hand when we did that.
The remade downpipe from Bud's Muffler here in Denver. It's a tight slide fit but will use these muffler clamps to get everything together (but maintain disassembly/reassembly). This was prior to trimming either end for fitment.
The new gasket from Central Motive Power here in Denver. This flange seemed to be slightly warped so I'm glad to have used the gasket.
The turbo compared to the stock KKK turbo on the 745i. This rotomaster is:
Roto-Master Inc.
Mod T04B53
P/N 104237
I didn't take it apart and measure, but from another poster, the compressor specs: inducer: 1.90", exducer: 2.75", so 48 trim unit.
Added some silicone to the gasket due to the slight warp. Here's the new (metric) SS hardware:
Didn't take a ton of photos getting the turbo cleaned up/degreased, but it is not completely coated now. This was nice during assembly.
The manifold and turbo was very difficult to mount into place, so I am sure the engine had to be out of the car/lifter in order to install the kit. If not, maybe that's why the manifold flange only had 3 bolts on the turbo (and the blown gasket). Regardless after much trial and error, we got 11 of the exhaust manifold nuts into place (12 we couldn't get the wrench on with the turbo in place). It's the upper bolt on cylinder 5, conveniently behind the turbo. Either way having the clamping force of the log manifold on bottom and cylinder 4 and 6, we felt this was the best way to create the seal. That way, the turbo flanges would be super tight and all the other manifold nuts would be as tight as possible.
While we had the space, I replaced the main fuel and return lines. The old ones seemed pliable, but cheap insurance. It turned out the originals were date stamped 11/82, so they were original! They didn't look cracked anywhere though, so I feel better knowing the BMW fuel line is worth the money!
The patient ready for heart transplant surgery!
I waited to hook up the Oil drain line, but here we are putting the engine and transmission in place. You can see we also used the BMW exhaust manifold gaskets. The old Callaway ones lined up to the log manifold, but one had slightly failed. It didn't however, line up properly to the head exhaust ports. The same but opposite was true of the BMW gaskets. We felt having the single piece BMW units would be best, and thee have the integrated heat shields which is a bonus. You can't see it here, but we had to separate #6 since the heat shield was right in the way of the wastegate.
Having the load-leveler was super critical to putting in the engine this way. Getting the engine and transmission in place this way is almost a work of art--- the E28 has a few more critical inches in this section to get the harmonic balancer clear of the nose panel/AC condenser.
Getting the engine on the motor mount was tricky because we can't move the supporting beam in the garage the same way a hoist can roll around forward, back, left, and right. So getting the engine on the drivers side mount took some persuasion, I think it was because of our limited space on the exhaust side of the engine. Finally, though, we got the engine in it's resting place.
Plenty of things we did last night after the motor was in place way hook up the oil drain, mount up the wastegate/downpipe (it was a tight fit!). Swap AC unit in the nose (back to the old style, this new one had the wrong connector), mount power steering pump, hook up C101 connector, install transmission crossmember, assemble shift lever/console and install, install shift linkage, install slave cylinder, install throttle cables, hook up fuel lines, route ECU wiring harness, resplice 02 Sensor cabling, install 02/wideband sensor, clean up glovebox wiring nest, etc, etc
The driveshaft is in and the clutch feels good. Pretty excited to think about how it's going to run.
There's a short list of things to do still, but it is getting shorter:
-hook up coolant lines
-reinstall AC bracket/compressor and belt. Recharge the system
-mount ICV and plumbing. Also add BOV port? (now or later, TBD)
-reinstall sway bar
-realign drivers side wheel/tie rod
-install lower exhaust section
-Remount intake/Intercooler piping
-Mount AFM/filter
-install new fan clutch/fan
-Clean up/install grommets for glovebox and firewall
Hoping to get this list finished up Tuesday night and have the car drivable!
I found a Callaway E23 image. I like how clean this looks with the Callaway kit, but it looks like some parts have been modified from what I have. I don't see a BOV, but I do see the Evap Control valve installed still...
I was planning to spend some time yesterday evening swapping parts to understand why the car was running lean, however it has been raining the last two days and unfortunately now the car won't start.
I had power at the coil, swapped the main/fuel pump relay, and swapped AFM's, but that was about as far as I got. I am wondering if some moisture got into the cap/rotor, but I won't know until it dries up (rain forecast for the next full week, which is insane for CO). I may try my other 059 ECU tomorrow as that's a pretty easy test.
In between all of this I did replace the fuse of the OBC I, so I did get excited when the display started working, although the functions aren't as intuitive as the 85+ OBC II. I found some useful info on the forum here about how to use it. although I don't think that's the problem, I may disconnect the battery to rule out any code issues that could be caused by my button fiddling.
I added the E30 idle control valve and added a port on the callaway manifold for diverter valve. I was going to route that in once I get the fuelling issue figured out. Here's a photo of the engine currently.
So to feel like I made some progress, I mounted up the front euro bumper/spoiler. At least it looks like it is closer to getting out on the road!
The plan was to unplug to the 02 sensor when I start it and see how the fuel mixture changes. Swapping the AFM with my spare would then tell me if it is operating the same as my known good one. Based on those tests, I was going to assess the condition of the spark plugs and injectors to get the car running properly.
Also found the Waterpump leaking, so a new one is coming in to be replaced asap, along with the replacement heater core.
Today hopping in and doing nothing else, the car started. Not sure what the no-start is caused by (except moisture), but I won't be driving the car much until I figure it out.
AFM is actually unopened, but the idle control screw was turned in. I adjusted it back to 3 turns out, however it didn't seem to change much.
I am still a little puzzled why the engine idles at 16-17:1. Drove it around the block and it gets moving pretty well. It doesn't like gently getting onto the accelerator and sticks are 15:1, so I haven't pushed it. But it does like full throttle, where AFR's show 12:1-13:1. It is seriously quick though, third gear pull showed 8psi boost. It seems like the turbo is set pretty well to the mid range. Nothing crazy extra past 4500rpm, but it was pulling slightly harder than the S38.
Getting it running right will make a pretty sweet setup. Just until then :x
I will replace the FPR with a spare as pulling the vacuum line didn't seem to change anything. Also need to test the CTS and TPS with a meter.
After replacing the 02 heater relay, I got it working again! I believe the old relay was incorrect, it was some noname brand and there was no power when the engine was running. Getting the o2 sensor plugged in and operating has made a huge difference in the idle and mixture. Now it is returning to 14.5-15 and responding much better to throttle inputs!
Here's a short video. Yes I still need to fix the window, my window motor replacement was a late model and had a different mounting pattern
Quality not great, but thought I would share:
With the wastegate set all the way relaxed, it's currently running at about 8psi. And yes, I'll need to get an alignment once I swap shocks/springs.
- - - Updated - - -
For the immediate future, MS is off the table until I can get on top of other items like normal drivability-- finishing exhaust, suspension, brakes, alignment, heater core/waterpump. I am not driving this further than a mile from my house since I don't want to get stranded. Part of this was due to the ECU, the other is a weeping water pump.
So I took apart the ECU causing the no-start issue and found the transistor joints had cracked. After soldering, this ecu fired right up 3 times in sequence last night! I am still carrying the spare so I don't get stranded anywhere. But here's a photo I found on the subject, along with the repair procedure:
Great procedure, not always shared here in my search for "ecu solder joints cracking transistor" because it isn't an actual thread on the forum: http://e28-535i.com/technical/e28-ECU_Repair.php
I will be swapping the FPR as I think the one in this engine is bad. No change at idle with/without vacuum line hooked up, and the power delivery is not very smooth after 4500rpm (even though AFR's bounce between 11.5-12.5). After I replace this, I may try the BEGI 2025 for fuel control. To do this, I will need a 255lph pump for the flow capability and larger injectors.
I will also be soon replacing the waterpump, gasket, temp sender, and at some point, replacing the heater core. These parts are coming in today, so hopefully I can start on this soon.
I have a few other items I need to repair on both the M5 (clutch return spring is damaged), 535i (front lower control arm ball joint is bad), and X5 (Air springs on the fiancé's vehicle just failed). So I have plenty of car projects and it may take me a while to get these turbo car items completed.
The next big project will be swapping shocks and springs between cars. In my head all three of my E28 based cars need a set of shocks/springs from another car, or what I have sitting in the garage.
Here are a few other random photos from the swap last month.
pulling out the donor
The assembled Callaway setup (hillbilly special wood block not shown)
Installing the new engine:
So another update.
I have been in discussions with Ken H. (Lucifer's Hammer) and he was kind enough to spend some time digging for me. Based on the specs/part number on the turbo he was able to determine that the turbo in this car is a T04B S-4. I had assumed based on some posts by a member here, that it was S trim, and that the generic turbo map I found was correct. Well it is not correct. Further research (big kudos Ken) shows that this is the correct compressor map.
Unfortunately with the higher altitude and larger displacement of the B34, this moves the map further into choke. At ~485cfm and 1.8 pressure ratio, it's sitting outside the 60% island :shock: Well, unfortunately I'm gong to have to change turbo's when I want to actually drive this thing. It sucks because the manifold is a PIA, but I will figure it out when I come to that.
But anyway, onward with progress. Late last week, after work I spent the evening replacing the water pump. Since the swap, there had been a leak from around the water pump area--dripping off the oil pan. From all my research this indicated water pump. The shaft didn't have much play but I figured I ought to replace it. So after swapping the front control arm off my 535i (it didn't solve my clunking :x so I'll have to resolve that later), I started on the 633. Good news, it was pretty straight forward and I was able to get the old one out. I think the gasket may have failed, causing a slow leak. Got the mating surface nice and smooth and put the new one in. From my research on here, I went with the Saleri brand. I buttoned it up and was able to get it all back together. Good news, no more leak.
I replaced the coolant temp sender, but still not getting anything. I think it's bad wiring because everything was working before, and ground the sender doesn't move the gauge. I didn't want to have to track this down, but oh well. Will follow the repair procedure: http://www.mye28.com/viewtopic.php?t=34049
I drove it around the block again and still no leaks. However, with the new knowledge about the turbo size, everything made sense. The engine runs out of steam after ~4500rpm, I believe because of compressor choke. Also, the manifold and turbo seem very hot, even for 65 degree weather, which makes sense for the condition. Also, it makes sense because a very similarly sized turbo was put on all of the other Callaway models-- the M10 and other 4 cylinder VW's that Callaway modified in the early 80's. So down the road I am definitely changing the turbo, but I currently don't have the funds for it, and probably won't until next year when I got on top of my other projects.
So over the weekend I was able to do a few more items. I got some rotors in the mail and calipers from my brothers old parts car. So I installed E34 rear rotors and the calipers. Pretty excited about this as I have them on my M5. The fronts, however, will have to be rebuilt, and I will need to get rotors still.
I didn't drive it around yet because I also started on the heater core replacement (remember our mistake when pulling the engine??). Well I tore into it Saturday and spent a couple of hours on it until I stopped at my brothers house. I continued working on it yesterday for 4 hours or so. Lots of removing of parts, but I wasn't taking pictures as I really wanted to get the job done. The toughest part is getting all of the vent out of place, removing all the AC bits, and then pulling out the heater box. It took me a while to understand that there were 4 nuts/bolts holding the heater box in place. Once loose, it took another 15 minutes to get it situated on the passenger floor for core replacement. I'm glad I got it removed because I found a little friend and his home inside the box. No photos, but there were nuts, insulation, leaves and other misc stuff.
I'm pretty glad to have changed it for this reason.
Old and new.
I figured the heater didn't work well because of the heater valve, but I didn't really drive the car enough in the cold to know for sure. The valve looked pretty good (except for the brown crud in the filter), but I replaced it with a new one anyway. Now I know the heater didn't work because the heater box didn't ever get enough airflow to actually transfer heat to the cabin. So for the time being I have to finish putting the center console back in, along with the glove box and driver's kick panel. It has been a good opportunity to clean out the dirt and trash, along with getting the wiring cleaned up underneath the dash. Still have a ways to go, but I'm getting closer.
SO the plan with the car once I get it sorted is to be more of a track car than my 535i, which doubled as my DD. This means down the road I will probably need a bigger intercooler and bigger turbo.
But for the time being, I am working on getting it running a bit better. In part throttle conditions, I still have a slight hesitation and lean condition (~15.5:1 afr), but everything drops to 12.5 on WOT where power delivery is smooth. I am thinking of playing with the Fuel Quality Switch in the ECU to see if I can richen the mixture, before I add the RRFPR and the start messing with anything else.
According to a post on the forum here and also a Porsche website, the 535i (059 ECU) values are:
I'd like to see if the Setting #1 improves this fueling issue. In addition to the lean issues in the middle range, at WOT my mixture slowly creeps up from 12.5 to 13:1 as the revs increase. I'd like to think that the stock Motronic can control this slightly, so before messing with any other settings, I'm going to take a look at the FQS and see if it improves anything.If you mean the blue thing in the photograph, that's the Fuel Quality Switch. It is used to adjust the fuel mixture and retard the ignition timing in case you need to use substandard fuel. Notice that it has eight numbered settings. Normally you'd keep it at setting zero.
For the 535i (059 ECU):
Setting 0: Mixture 0%, Timing 0°
Setting 1: Mixture +3.9%, Timing 0°
Setting 2: Mixture -3.9%, Timing 0°
Setting 3: Mixture -6.3%, Timing 0°
Setting 4: Mixture 0%, Timing -3.1°
Setting 5: Mixture +3.9%, Timing -3.1°
Setting 6: Mixture -3.9%, Timing -3.1°
Setting 7: Mixture -6.3%, Timing -3.1°
Next, I have been swapping out brakes. In anticipation of use on the track, I have the big brake upgrade from E32/E34 on the rears, where I also put on the Bilstein/Eibach rear shocks from my 535i. I'll get a couple photos, possibly tonight. This means my 535i is going back to stock height for a smoother DD ride and higher clearance for winter and snow use.
It was unfortunate to find out that the rear strut bar (jake b made) from my e28 won't fit in the E24. I will have to decide how I want to proceed. For now, likely none.
At some point I will be adding the IE 25mm front sway bar, along with replacing front control arms and shocks. Steering components are good but will need to be aligned.
The last more or less major drivability issue is oil pressure. The same symptoms were exhibited with the old motor that came out. With 20W50, the oil pressure takes a good 10-15 seconds to build, and also once warm the dle pressure drops to less than 10psi, which is where the oil pressure light comes on. I was going to try a .090 orifice/restrictor at the inlet of my turbo. Right now it is a -4AN nipple. Any thoughts on this or any reason why I shouldn't try this? I am thinking that the turbo is getting too much flow through which is limiting the pressure that's allowed to build.
With an increase in revs, the pressure does increase about 10psi per 1000rpm. I believe the oil pump is good, all the bolts were tight when we had the oil pan off... Any tips and or tricks?
I just got my window motor/gearbox swapped and so the door is back together for the first time since I have owned the car. Little by little, it is coming together! More photos maybe tomorrow if I get the big brakes swapped on the front.
Member
Great read. Thanks
Member
Nice find man ! I had an 82 callaway 320 it was a really fun car
Me E30 87/ 325i + F25 12/ M-Sport + E32 94/ 740i
G/Fs E34 92/ 525iT + F48 18/ X1
BMW Enthusiast
Excellent, that car looks awesome!
I think this turbo is very similar to the M10 turbo they used. I will eventually upgrade but am still working on getting everything running better. Just finally got the window motor fixed, along with the E34/E32 big brake upgrade installed. Nice to actually have brakes now!!
Fixed better than Factory
Love the thread! Didn't even know there was a Callaway 633csi that existed! Can't wait to see it all done!
BMW Enthusiast
Small update. I had to reconnect clutch master supply line on my M5 as it had popped off-- the overcenter spring assembly got damaged and it was not getting fluid to the master. The pedal felt weird (since it didn't have a fluid supply!) but I got it back together for now. I just need to get a new overcenter spring assembly (70 bucks online kinda sucks).
Anyway, onto the turbo car:
I have installed the big brake upgrade from E32/E34 all around. I am quite happy with this and it is no longer sketchy to stop.
New rotors all around, I have used pads for the moment but am thinking about race pads like PFC 06's. I don't want to spend 500 bucks on this right now, so that will have to wait.
As I mentioned, Bilsteins are switched between the 535i and this car. Now the 535i is back on stock Blue shocks, The fronts will be switched sooner than later.
I got the drivers window motor back together finally-- I switched the guts from another I had laying around and made one good one from the two (damaged) early motors I had. It took a bit of time to get that back installed, but I finally have a working driver's window and a door panel that's actually complete! I found some of the mounting screws underneath the passenger rear seat :roll: but got it all together. I also scraped off and cleaned the drivers window as it still had a sticky layer of tint from whenever the tint was removed. The window slides much smoother and looks great. It is tempting me to remove the tint from the whole car.
I also hooked up the heater core and test drove the car with all of this but found out that the temp control knob is damaged also. I only have full heat (and currently only through defrost vent) for the moment, so the center console will be coming out again. I'll try to fix all of the HVAC bowden cables at that time also.
Just a couple of photos since I haven't yet shared:
Additionally, I set the FQS switch to position 2 and was able to get some drivability gains by adding fuel. This lowers my AFR from ~12.5-13:1 down to 11.8-12.3:1 while boosting. I am still trying to identify why this ratio creeps up when under boost and following some suggestions, I think it has to do with maximum flow from the current injectors. I have some 24 lb's sitting in a box along with a RRFPR, but i want to continue to understand what could be the issue and what is working properly.
I rigged up a fuel pressure gauge and checked my pressures tonight. With the vacuum line on, I get ~36psi. When I disconnect it jumps to about 43psi. I believe this means it is working properly, but I am concerned that it doesn't have enough difference.
Another small update. Last night I installed the oil restrictor in the line. This helped oil pressure slightly, especially with pressure build on start up.
I used a ~.090 ID fitting and it seems to be helping to maintain pressure in the system. My turbo line is sourced from a tapped oil filter housing, this was there when I bought the car, so I transferred it over to the new B34 engine. My oil pressure signal comes from a sensor at the stock sender location at the back of the valve cover. I imagine since the main supply was being split between the turbo and the head, the turbo was getting slightly more flow, decreasing the overall pressure. On cold starts after sitting for a day or more, I think this meant the pump had to supply maximum flow that the turbo would accept before being able to build pressure in the head. If facing uphill, that was taking up to 10 seconds.
With the restrictor in place, pressure builds more quickly than before when revving. Idle pressure is slightly better, although it still trips the 7psi indicator light when hot. I think this is about as good as I am going to get with this pump-- I don't want to restrict flow to the turbo any more than it already is....
Also, I drove around with my fuel pressure gauge on the windshield. A good 35 psi at idle, bumping up slightly when driving around (especially when at 0 psig and under boost). Would it be wise to add a check valve to this line so the FPR doesn't see boost pressure? Maybe this isn't important?
Also good to see was that pressure was staying close to 30psi for a good 5 minutes after shutting down the engine.
Good to know Jelmer-- I'll stick with it for the time being and buffer it with high quality fuel until I get a better idea of the reliability of the stock pump.
Lastly, I unplugged the microfueler for the test. It seems it makes no difference for running conditions! I am not sure if this means it is wired wrong, or if something in the board is fried. For the time being, I will remove it. Just one less variable to mess with. I am sure it could be useful for meth injection, but for the time it makes sense not to worry about.
Otherwise, I did some shock work on my M5. Soon to be finished so I can finish the 633. But i found out one of my front shocks was damaged. Not sure if I want to rebuild them or what...
Finally had a chance to get the temp gauge working again! I'm not sure if it was wonky because of a bad connection on the BLAU "Tempo" connector. I cleaned that off at the same time as running new wiring to the fusebox Violet/Brown. I'm thinking it was just a bad contact on the back side of the cluster but I will re-investigate next time I look at the car. I believe my fan-clutch is going bad, temp gauge is running slightly above 12 o-clock. In my experience a nice working cooling system will sit at 11 nicely.
I developed a coolant leak at the heater valve. I think the old housing was damaged. Replaced that today and it is looking leak free. Slow progress, but getting closer to the end goal little by little.
I installed the oil restrictor in the line. This helped oil pressure slightly, especially with pressure build on start up.
I used a ~.090 ID fitting and it seems to be helping to maintain pressure in the system. My turbo line is sourced from a tapped oil filter housing, this was there when I bought the car, so I transferred it over to the new B34 engine. My oil pressure signal comes from a sensor at the stock sender location at the back of the valve cover. I imagine since the main supply was being split between the turbo and the head, the turbo was getting slightly more flow, decreasing the overall pressure. On cold starts after sitting for a day or more, I think this meant the pump had to supply maximum flow that the turbo would accept before being able to build pressure in the head. If facing uphill, that was taking up to 10 seconds.
With the restrictor in place, pressure builds more quickly than before when revving. Idle pressure is slightly better, although it still trips the 7psi indicator light when hot. I think this is about as good as I am going to get with this pump-- I don't want to restrict flow to the turbo any more than it already is....
Also, I drove around with my fuel pressure gauge on the windshield. A good 35 psi at idle, bumping up slightly when driving around (especially when at 0 psig and under boost). Would it be wise to add a check valve to this line so the FPR doesn't see boost pressure? Maybe this isn't important?
Also good to see was that pressure was staying close to 30psi for a good 5 minutes after shutting down the engine.
Good to know Jelmer-- I'll stick with it for the time being and buffer it with high quality fuel until I get a better idea of the reliability of the stock pump.
Lastly, I unplugged the microfueler for the test. It seems it makes no difference for running conditions! I am not sure if this means it is wired wrong, or if something in the board is fried. For the time being, I will remove it. Just one less variable to mess with. I am sure it could be useful for meth injection, but for the time it makes sense not to worry about.
Tonight I will be working on switching shocks/springs on my M5 to Bilstein/ H&R sport. Then the fronts on my 535i before I get to a suspension refresh on the 633.
Well, the temp sender issue was related to the connection at the back of the cluster as I thought. The extra lead I ran isn't necessary, but now it works.
Last night I fixed my headlights. For some reason the low beams would not work except with the high beam switch on the turn signal stalk. I traced it back to the low beam relay pin 30. This pin should always be hot but it was not getting power from the lead that came through the high beam relay. Something in my fusebox must be damaged, I'm not sure. Anyway, a quick jumper wire and things are working as they should be.
I also tested the FPR and found that when the return line was plugged, pressure spiked. According t the Bentley, this means the FPR wasn't working correctly. Put the spare in and it is working properly. Pressure was close enough for operating, but it wasn't regulating as it should have.
Sorry no pictures still.
Driving around the block I had the system running about 4psi. It gets moving once the turbo spins up, but spool up is slow. I want to make a pressure tester and verify that all of my piping has no leaks. Little by little we will get there!
I also found that one of the shocks I was planning to install is damaged. It blew on my 535 months ago it seems. Right now that one shock can't be compressed by hand, so the ride was super stiff (especially for a DD). Thinking about sending them both in to Bilstein for rebuild...
Finally took some time to use a multimeter and measure my O2 sensor voltage. I measured my existing O2 only to find it was not even producing a reference voltage. So i have been driving with it basically unplugged. Just drove it around the block this way and everything seemed quite normal.
I have the AEM UEGO in P4 mode (0-1V), however whenever I connect the signal the car starts to idle crappy and not want to run. But when disconnected, I am getting idle readings of right about .430 (~14.5:1, see below).
I wanted to investigate this because I was wondering why my AFR's slowly creep up above 5000rpm. I think this is due to the extra airflow from the turbo pulling me above the WOT 12.5:1 default (that or I have a injector oring seal that is sucking in air). But anyway, I am having a tough time getting up to even a measly 4-5psi. What i think is happening is that I have a charge pipe leak. I'm going to get a pressure/leak tester and verify that my charged pipes aren't leaking. If the problem persists, I may swap injectors to rule out the injector oring as a leak point.Lambda...AFR....(Gasoline) Analog Output...............Voltage Modes
(λ)........AFR.....LED "ON" Range........P0.........P1.........P2.........P3.. ..... P4
1.008......14.75.....14.625-14.875........ 2.375....2.375......1.475.....0.238.....0.410
I got a bracket to mount the front spoiler and finally have it supported. So I took the spoiler off to have it blasted and then I'll probably paint it with some spray cans... I'm not sure if I want to spray the airdam or not. I think it might be kinda cool to have a bronzit spoiler with the bronzit pin stripes. I'm leaning towards taking off the red ones, they just don't work. Thoughts?
And since I have been bad about getting any sort of photos, here a few with the Style 42's mounted. I had been waiting until I could get wheel locks for them. I really want to get the euro bumpers on and finalized, it's all just taking more time than I expected. I think I would now put more value on a clean running put together car for sale than I would have in the past... This stuff takes a ton of time and money to get things right...
Oh and in the mean time I got shocks and springs swapped on the M5. Bilstein and H&R. This photo was taken right after. I'll probably bring the shock to the top perch (it's second from the top right now). The rears give a bit more bounce than I was expecting (esp compared to my Eibach's), so i'm a bit unhappy with that, but oh well maybe the perch setting will help. Also the front end looks a bit high so there's mroe reverse rake than I like, but the ride is quite comfortable with the progressive coils). I will do something with the front end sooner than later, I just hadn't been happy with the Pfeba front spoiler that I had before.
Spent some time taking apart the center console. Found the temp control knob seized. The temperature knob spun, but the linkage between the two was damaged. A new one is coming to my house.
Today, i spent the afternoon mounting up the rear euro bumper. Pretty happy with the fitment considering I eyeballed it after a test fit. After I drilled the holes, I thought I could have mounted the chrome above the extended tail panel. It wasn't meant to be and so it is tucked underneath. Very tight clearance under the euro rear valance, so it will likely stay where it is at...
I'm trying to determine if I'm going to stick with the euro side trim covering or try to modify the US panel. Either way, some photos:
Getting the US trim panels removed was a bonus when I did it originally, so i'm probably going to stick with the Euros...
Member
great read indeed, brought back memories on an 81 ? 633 callaway I worked on about 20 years ago. Canadian was on the way back to Canada from Florida after getting a head gasket replaced down there when it blew again. I got to replace it in Ga while he sat in a motel....not a great memory, but we got it done and he got back to Canada in good order..in December, it was cold that year
BTW, I hated HR and Eibach springs on my M5, went with Mtech and totally satisfied, the others bottomed out too easily
Last edited by 88m53453; 06-26-2015 at 07:43 PM.
BMW Enthusiast
I had to head out of town for work for about a week, so I didn't get as much done as I wanted.
However I have another update for the time being. I mounted my rear Zender spoiler. I used the two studs to bolt it to the trunk, along with 3M double sided tape. unfortunately the edges are still lifting slightly, so I may have to try it again or use an adhesive instead. Onto some overdue photos:
I also spent some time cleaning up my bumper and airdam to be painted. This was definitely a DIY job as I don't need it to be perfect, but I think it came out pretty good. I just need to get the bumper aligned nicely on the passenger side. I just used a spray can enamel and a clear coat to get some sheen. Good enough for a track car, I am liking how it is coming along.
The front will be going down once I replace the shocks/springs, but that won't happen until I install a new TCD turbo and get my exhaust/ downpipe cleaned up.
I know it's dirty
City lights all hooked up. You can see the alignment issue that I need to fix.
Bad news:
I had been hearing a creaking/clunking noise which sounded like it was coming from my drivers side rear window. I removed the seat and after not finding anything for a while, I noticed something shifting which i got in and out of the car.
The rear subframe bushing mount seems to have separated from the underbody. See pictures below:
Can I have this welded and repaired? Any suggestions/advice greatly appreciated.
At some point I was going to install a cage, but that was quite a ways off in my mind. Maybe I need to do some structural reinforcement sooner than later...
BMW Enthusiast
Since I am hesitant to drive the car, i was hoping to swap injectors. Well it was raining so I took a quick walk around. More slow progress to come later...
BMW Enthusiast
Going to update since I haven't in quite a while:
Still waiting for fittings to come in to install my Begi. Also waiting on my welder contact will come to fix my rear subframe mount issue (he won't come until next weekend).
In the mean time, I mounted the IE rear sway bar. I was able to fit it to the early 533/633 style mounting ear even. I haven't driven the car yet, but I'd like to have the welder reinforce this as well when he comes out to my place.
The front, I need to continue modifying the frame rail so the new bracket can be mounted flush. Once flush, I can drill through and mount the bolt. Anyway, waiting to get these issues fixed before trying it out and driving the car. I'd like to keep everything reversible until I'm sold that I want to go forward with these bars...
Some great photos of these bars for later reference (not my cars). These are from Jeff at IE. Notice how the frame rail has to be pounded in to fir, sort of a silly design...
I am not the most happy with this design, especially since it contacts the control arm when trying to get to full lock (Kohler has mentioned this before).
From another poster here:
And another customer who bolted them
In the mean time I picked up some E21 Recaro's from a friend. These seats are awesome (I have them in my Euro 635)! Not sure if/when I would have them recovered but my friend says he will get me some replacement foam for what I paid him. I couldn't wait to try them out in my car this morning.
I was thinking that the comfort bases/sliders would work with these seats, but they are too wide so I need adapters. I took some measurements and plan to make my own.
- - - Updated - - -
Part way finished with the IE sway bar in the front. Putting the other bolt through tonight. You can see the low hanging downpipe (which is getting closer and closer to becoming priority #1).
Also, my co-worker helped me make these after I put together my measurements. Going to try to install one or both seats tonight also.
More updates to follow later tonight
.
- - - Updated - - -
My welder is supposed to come this weekend to fit my cracked rear subframe mount. I'm also going to have him weld my rear sway mounts and get them reinforced as much as possible.
In the mean time got my sway bars both mounted, the front I finished up last night and got it tight to the frame rail.
The rear is also on, but here's a comparison of the 19mm vs the stock 14.5mm unit.
It's so tiny, I now understand why the car felt like a big whale when matched with the PO's random cut rear springs and blown shocks. I haven't yet driven the car with the new bars, but will once the repair is complete.
Also a glamour shot of the Recaro seat brackets. My coworker made them real nice, .250" AL.
They fit perfectly also
Putting a radio in the car and awaiting fittings so I can finally install the BEGi. They sent me the wrong fittings (i want 5/16" ID barb x 1/8" mNPT, I got 1/8" ID) last week, so I'm sitting around waiting. But not I think I have a bonus couple of fittings to use as spare boost ports if I get a tee somewhere.
- - - Updated - - -
I know I have been bad about loading pictures, so I took some today after installing my (old) radio and putting the glovebox and knee panel in place. I have previously fitted the Recaro seats, even though the Driver's needs to be redone. The main pieces missing from the interior are the ebrake surround and the rear seat for access during the repair when the welder comes tomorrow.
Some pictures of the 24# injectors that my brother gave me. They are from Ford crown vic's
The front sway bar after mounting the other night.
The rear sway bar/mount.
The front window all fixed and door panel all back together. I found almost all the pieces in the mess from when I bought the car. Nice to have the window working properly again.
The seats installed. You can see the custom brackets. The good news is that seating position is great.
Cockpit and laughable gauge pod. I wired this up in this position and at least it is functional! At some point I will probably upgrade to something that isn't damaged and looks better, but it works for now.
the trunk cleaned up pretty well, including the toolkit, tire lug wrench and spare which is such a far cry from when I bought it.
Passenger side. This seat I was going to put on the drivers side, but it only has a tilt lever on the outside bolster.
And of course, an engine bay shot
I drove it around the block because I couldn't resist with the new bars. It is sooo much better. Even with clapped out shocks and the stock springs, the front of the car feels so much more agile than before. It is much more accepting to change directions and feels much more similar to the M5's handling characteristics.
Additional video once i get the subframe mount fixed.
Adding a signal line onto the BOV helped to open and hold close the valve during normal operation. At the moment, it will run up to 8/9psi with my current settings. Fueling is good (11-12.5) up until the higher revs where it starts to go lean (13-13.5). I obviously haven't driven it hard up top because of this.
My biggest concern is intermediate throttle between WOT and below. Up until the threshold throttle position, I see 14-15 AFR's even if accelerating slightly. I am hoping the RRFPR will help aid this in boost related settings, but that leaves the transition when boost in less than 0psi (but more than -15psi).
Or maybe the RRFPR will operate at a manifold condition in he range and not just +psig??
I am just wondering in the scenario where I am on boost and I left off briefly and then continue with part throttle where there's still engine load/accelerating may 2/3's). This scenario is where I see the lean condition and it worries me.
- - - Updated - - -
A couple photos of Frank the welder doing his job. The issue must have been there a while as there were a few locations he couldn't weld due to the lack of thickness in the metal. But in all he got a good 3-4" of weld in there. He used carbon/stick welding and it took about an hour
Cleaned up, you can see about 3/4" of the way around the welds had been damaged/cracked.
Here's a short video on my way into work.
I really only got on the gas in second gear. Running 8psi and O2 sensor disconnected. It idles right about 14.7 in 70/80 temperatures, but it was about 50 this morning.
The camera placement allows you to see the gauges. On transition throttle and -10-0psi, you can see AFR's in the ~13-14 range. I am hoping to remedy this with the RRFPR. Under WOT the larger injectors give about 10-11:1 AFR until the turbo starts moving air. As I understand this is rich, but maybe still acceptable. Once reaching 5+psi AFR's go lean, and this is where the RRFPR will really help.
https://youtu.be/9aw1Uw0aPNE
You can see oil pressure flickers at 7/8 psi at hot idle. Is this something to be concerned with? I'm running 20W50 conventional...
Once in the revs at this temperature, I see anywhere from 10-40psi oil pressure.
Curious to hear you guys' thoughts on this and overall drivability. Going to try the RRFPR but I now have MS in the back of my mind as a future upgrade.
- - - Updated - - -
In other news, last night I installed the BEGI 2025. I mounted it just under the coolant reservoir, pretty much where the return line runs.
First thoughts: Throttle delivery felt smoother, especially in the midrange and getting off idle. Really with this old-tech turbo @8psi on a stock engine, it gets going much faster than I could have anticipated!
I ran down the street and back, fine tuning the part throttle AFR's and adjusting the gain and main pressure of the begi. Cruising is just about 14.7, which will decline depending on the vacuum/intake pressure. I feel I have a nice stock pressure setting at about 40psi, and it barely creeps up when at atmospheric. I haven't run my gauge through to the windshield yet, but I imagine I'm at no more than 55psi max at 10psi (see calculations in an earlier post). I'll double check this when I get some time.
Now I have it in a nice place where slight acceleration/load brings the AFR's from 14.7 towards 13-13.5 near atmospheric. I think 12.5 is a good target here, so I might increase the gain slightly.
When it reaches boost, the number continues to creep down towards my target of 11.5:1. I am happy with the feel of all of this. The car will really get going at 3/4's throttle once the turbo spins up; before it just wasn't as smooth.
There is one caveat to all of this. WOT signal from the TPS throws everything out of whack and way rich. My gauge shows 10:1 at anything less than atmospheric into the intake.
As I understand, this is too rich, and is a result of the 24# injectors and stock WOT fuel map dumping more fuel than it thinks.
What I'd really like to do is disconnect the WOT Pin of the TPS and see how it all responds. Of course this means I'd rely on the BEGI for all fuelling needs in boost, but I practically am right now anyway.
All the switch does is activate Idle circuit or WOT circuit-- nothing in between. You can disconnect it and the car will still run, but returning to idle may be tough for the car.
So basically I'd keep it to activate the Idle circle only, just like the automatic cars do. I don't think I want to tune the RRFPR to have less gain as there will still be a segment of the fuel curve that is too lean for the condition, and a segment too rich (WOT).
- - - Updated - - -
So time for another update. D4C has come and gone, so I have a bit more time to continue with small progress (hey I warned that it would be slow!).
I started driving this car to work and have put approximately 1000 miles on it. To start with, I was mainly tuning the mixtures and experimenting with the FQS switch.
Where I have it now seems to be reliable and I haven't touched it for over a week. First, I jumpered the TPS to the harness, only connecting the GRD (middle pin) and Idle pin. For the moment, WOT is not used because I was getting super rich conditions while under vacuum and full throttle.
**Slightly adjusting it seemed to help, along with cleaning the ICV and Throttle body with carb cleaner-- highly recommended**
The FQS switch is set to Position 0 or 2, which is either standard or -3% fuel. I think this just adjusts the duty cycle of the injectors slightly and holds them closed. This gives me idle AFR's of 14.7-15.3 depending on ambient temperatures.
The RRFPR is set with the gain needle all the way out, and the center screw maybe 2/3's of the way out. However, I found out that I don't have the restrictor required for this device, so I may need to continue tweaking when I install the new turbo.
Last night, I installed a Walbro GSL392 inline pump in replacement of the stock external pump. I like reversible modifications, so if I ever wanted this could be reverted back to a standard Bosch pump, or it could be repaired on the side of the highway if ever needed.
I found a great write up on the subject, which I will save and share below for somebody else's future reference.
The old pump had been having issues at 5+psi boost of going slightly lean. It was strong otherwise, and will remain a backup for my other two NA cars. I think it was not able to keep up with the higher pressures at the required flow rate as asked by the RRFPR. Static, it was good to 80, but in the required condition, it seemed to be limited to about 60psi. Somehow, the bracket had been missing some hardware, allowing both the pump and filter to wiggle freely, held in place only by the fuel line. I was able to round up the required hardware and mount both properly and secure it all.Follow the pictures how to swap from your old 130lph vane type inline pump to a modern 255lph gerotor design from Walbro that flows more at the same pressure. The gerotor squeezes fuel from in between to gears up to your rail versus being pushed with the old vane style. This allows the pump to be small, light, quiet, etc. Everything you want to ease your mind while zipping down the road.
First step it to verify you have all the tools and knowledge to do such a repair. This entails safety glasses, wheel chocks, hoses, drivers, clamps, etc.
Here is what you need:
1 - Walbro 255lph inline fuel pump (I used Walbro GSL392)
1 - 8mm barb - 10mm x 1.0mm male (Walbro P/N 128-3024)
1 - 12mm barb - 10mm x 1.0mm male (Walbro P/N 128-3025)
1 - Few meters of 8mm x 13mm fuel house (BMW P/N 13311722262), 5/16" works fine.
1 - Meter of 12mm x 18mm fuel hose (BMW P/N 16121176440)
1/2" will work IF you can locate high pressure EFI line.
1 - New hose clamps, ABA or style that does not cut into hose
1. First, secure car on ramps or jack stands and chock wheels. Disconnect fuel pump relay when vehicle is running (if you have it) or let pressure bleed off after a few hours. Then identify the fuel pump beside the filter.
2. Here is your new high volume at high pressure Walbro with fittings installed. 12mm on side to lift pump, 8mm on side to filter.
3. Next, go ahead and disconnect the old fuel lines. You will spill fuel, so put that stogie out and locate a suitable container to catch this fuel.
4. Remove 10mm bolt from bracket and nuts that secure power wires. Should be 7mm and 8mm.
5. Compare new pump to old. You will notice that the dampening unit needs to be swapped over. You need simply a short length of 12mm x 18mm line, around 2".
6. Loosely tighten clamps on dampening unit and new hose. This device can be removed, is so, just replace with an elbow fitting, or run the large fuel hose straight to the pump.
7. Slide new pump into position. Attach lift pump hose to dampening unit and pump supply to fuel filter. Attach pump wires, brown is ground and green is 12V.
8.. New lines at lift pump. I cannot show with pictures what to do, but simply slide the new lines down the top of the tank and they will come out the opposing side. Cut to length.
Jump fuel relay and verify no leaks. If none found, go ahead and start the vehicle on up with extinguisher handy. Let idle for a few moments and go over all connections as vehicle idles.
If all checks out okay, lower car from ramps or stands and wash up. Congratulate yourself as you now have sufficient fuel supply to make massive power and one less headache to worry about.
I need to continue some tuning as now the AFR's are a bit too rich (10-11) when approaching atmospheric and 1-2psi. I realized I needed to install the restrictor to delay this rise in the BEGI 2025. Since mine didn't come with one (Bell references P/N: F2815-301), I will use a smaller I.D. vacuum line and see if that helps.
I only drove it around the block, but initial trials suggest AFR's of 12.5 in 3rd gear under boost. Excellent. Before, this was the point where the numbers would go lean and the stock Bosch pump couldn't keep up.
Next up will be to continue 'shakedown' progress of the car. In the near future, however, I will plan to upgrade to the TCD 60-1 turbo--I was waiting partially for the fuel pump, but also pending results of daily use.
Sort of reserving the use of the WOT signal, in case the RRFPR can't keep up with the flow capability of the new turbo. Will explore more at that time, but the idea would be to use a 1psi pressure switch with 8psi check valve that opens when the RRFPR can't keep up. Then the WOT signal means the ECU opens the duty cycle of the injectors to get 20% more fuel when at 8psi+.
I have a small leak on the valve cover, by the ICV. It seems like coolant/oil, but is always gone by the time I look at it in the morning. I think the Valve Cover Gasket is leaking coolant, so I may do a valve adjustment and valve cover gasket first, before changing the turbo.
- - - Updated - - -
I had replaced the external pump with a walbro. Fortunately this has cured my lean problem in high revs, and even made things slightly rich. After things more, I have decided to go forward with a TCD turbo in the near future before getting the exhaust completed. This will push more air and hopefully bump up the fuel requirement into a range my RRFPR can be used. Right now it is all the way open, and I still have fuel pressure rise too quickly.
The other benefit of the turbo, I think will be reduced back pressure. Right now the light weight flywheel and such doesn't seem rev very feely and I think this is due to the small turbo and high backpressure. With the larger turbo, I want to reduce this back pressure. In addition, the new turbo spins so much more freely than the Rotomaster. It feels very noticeable by hand when spinning the two. I imagiune this will be a huge upgrade in spool time and overall response. Right now, the response it press the gas, count 1...2...3.. and then it starts to go...
Progress stopped mainly because i realized that the welded "fix" did not solve my problem. Upon closer inspection the under body is cracked, almost like the rear wheel was taken off a jump, and the subframe mount cracked the underbody. You can see it in the images previously posted.
I had some other issues with some of the other cars and some personal stuff, so I took a break working on the car. The heat of the late summer didn't help for work on the car after work. Now it is cool, so I am just starting the progress again. I actually put the car in the air tonight and took off the exhaust. Tomorrow and Thurs, I plan to try to drop the rear subframe so the welder can come back on the weekend.
I spent some time tightening up the front spoiler to the nose, so it is a much better fit.
I also found that my radio power cuts when I turn on the lights. I have to take that out and rewire it, along with unsticking the temp control knob. It got stickier and stickier for the mornings that I actually was driving the car.
In the mean time, I decided to remove the ugly red pin striping and the horrible window tint. I got stuck on the back window with the glue separating from the tint layer. not sure how to remove it without cutting the defroster units. Maybe worth paying somebody?
In the mean time, I replaced the engine bay fuel lines on the euro 635 (M90). Got that back together which was handy, and snapped a photo of the euro car next to the (super dirty) turbo car :
The turbo car looks worse paint wise, but is in better condition rust-wise.
- - - Updated - - -
So I continued progress today in removing parts from the rear end. I have everything ready to go for removal, minus the shocks on either side, the brake lines, and the diff mount.
Speaking of which, how do I remove rusted brake lines? I think I need to remove the hard lines so the assembly can be lowered and rolled away for repair access.
I loosened it tonight to make sure the assembly would move as I suspected.
Fortunately it dropped down slowly on the side I am concerned with. More pictures to come when it is fully off. But you can see the crack, which is maybe 50% around the mating parts:
This photo shows how part of the underbody is torn enough so that it is pulling downward slightly from the weight of the loosened assembly.
I have replacement subframe mounts here ready to go, however I am unsure how to remove the old ones... At 150k and their current condition I'm half tempted to leave them alone--- Of course on the other hand, I don't want to be in here again on this car if possible.
Any suggestions or bookmarked threads on the actual removal?
Here's how the driveway looks. The M5 front end is apart as I'm fitting a euro valance. Having some issues getting it fitted where I want before installing the fogs, turns, and possibly new spoiler.
Oh yeah, I also bought some parts on Ebay and pieced together a coarse spline hub and Raid/Racemark I steering wheel (330mm) and Alpina horn button! The turn signal shut off was damaged, so I may just live with it or get one at some point. I won't install it until I get the front end of the car redone (control arms, shocks, springs). So it's patiently waiting hanging above my work bench.
[
- - - Updated - - -
With the subframe out, conveniently my welder Frank could make it out today and finish cleaning up and re-welding the mount location. We were able to pull the plate that is hanging in the photo, out completely by hand. Pretty sure it scraping/shifting is what caused the noises I was hearing.
We cleaned up and prepped the area with a grinder and in the process saw the full extent of the cracking. I don't know how this happened, other than by somebody beating the crap out of the car. I guess it's possible the cracks were caused by the accident damage, and over 4-5 years of daily driving after the 'repairs'. Fortunately the bolt for the subframe was solidly in place. I think everything had just been shifting upward before the initial repair a couple months ago. Lately I still heard a small squeaking sound, which I think was that plate rubbing against where it had torn off.
Frank at work again. In the last test drive, he was really impressed with the performance of the car, saying he felt it 'hauled ass' after I described I wasn't happy with the Callaway turbo response.
Today he closed up the holes inside the wheel well. These were there from the initial welding work where his stick welding was too hot and cut through the rusted metal.
From the bottom, his weld beads show the extent of the cracking that wasn't visible originally:
The largest crack moved outward to the edge where the uni-body met the lip/skirt that runs the length of the car.
Now no more light is visible through the body. Before we could see a few locations-- such as the wheel well. I'm going to clean up the areas where he welded, pull off the burnt under-coating, and then re-coat it all before reassembly.
I won't have time tomorrow to do much unfortunately, but I plan to jump on it Sunday.
After this is all back together, I will have the following:
-T04E turbo replacewment
-Tclamps, and coupling replacement
-Intercooler piping sand and clear coat
-finish exhaust so that it doesn't sit so low(quick coupling method?)
-front shock/strut replacement
-front control arm replacement
-front alignment
Not sure how fast I will get to it-- funds are limited. some items may be in the next month or two, others may not be until 2016.
- - - Updated - - -
"]I have another update. This weekend was my bachelor party for a wedding in December. With that said, it sort of explains my somewhat slow progress. But anyway, my brothers both signed themselves and me up for a lapping day at High Plains Raceway here in CO. I have been there about 4/5 times prior in my 535i. I have the same shocks/springs from that car on this car now, but the fronts haven't yet been swapped over.
It was good thing I got the subframe issue resolved a little over a week ago, because my brother planned to bring a new project e30, but he ran into issues literally the night before the event while driving it to my house where he was going to spend the night. We thought we fixed the problem, but his temp gauge heated up just a couple of miles from my house so he pulled over. As we were looking at it, all of the sudden a coolant pipe (plastic) blew right in front of us. The plastic barb had broken off.
After some issues, we luckily had a trailer, unloaded the other car and the got the E30 loaded and back to my house.
I had my car ready to go, as I had sort of anticipated the issues and wanted to have a small backup plan. With confidence of driving the prior full week to work, I headed out in the Turbo, knowing that temps would be 50-65's. I had stole the wheels off the M5 and headed out.
At the track it almost didn't work out because I forgot to grab the standard lug bolts (the RA's use extended lugs) and was sitting SOL when I went to change my wheels and tires.
I decided I might as well check the air pressures and anticipated using those wheels and 'going easy', like that would be possible at the racetrackA nice camera makes it look like a fairly decent car!
The car did very well, I ran probably a good 3 sessions, with the next 2 being cut short due to hose coupling issues. I still haven't yet upgraded from the originals on pg 1. I have pressure tested it, so I had been fairly confident. It was very easy to drive, the sway bars really helped and seemed to grip nicely. I really didn't push it in the corners, nor on the brakes. The sport seats worked great, and the sway bar mounts didn't break like I was worried about! I still flew by my friend jesse (Blue Owl) in his 535i on the straight where he was hitting 100 and I was at about 115mph.
The turbo was really laggy, like full throttle... count one....two...three... and you'd hear the spool and feel the power kick in. Very interesting as it made me break early and get on the gas ASAP in the turns. Really neat to drive this car and then hop in the 02 for a few laps and have a car with max corner speed, a car that really is meant to be thrown around a bit.
A short video following my brother is the car my dad built, a 1600 with a 2.0 M10.
I may have a few others in the next week or so.
Here's a few other photos which turned out pretty sweet. I taped the headlights as a tribute to the racing E24 heritage-- IMO it makes the car look that much more aggressive.
In the pit between sessions with some of the other BMW guys who showed up together:

Last edited by tschultz; 10-28-2015 at 10:08 AM.
Member
thanks for all the hard work/updates...Writing it all up is the tough part
BMW Enthusiast
Thanks!
I have been updating my thread over at mye28 since there are more FI guru's there, but I figured you guys would enjoy it also.
Another couple videos with some of the other cars present:
Here are some photos my brother took of my car Sunday at the track:
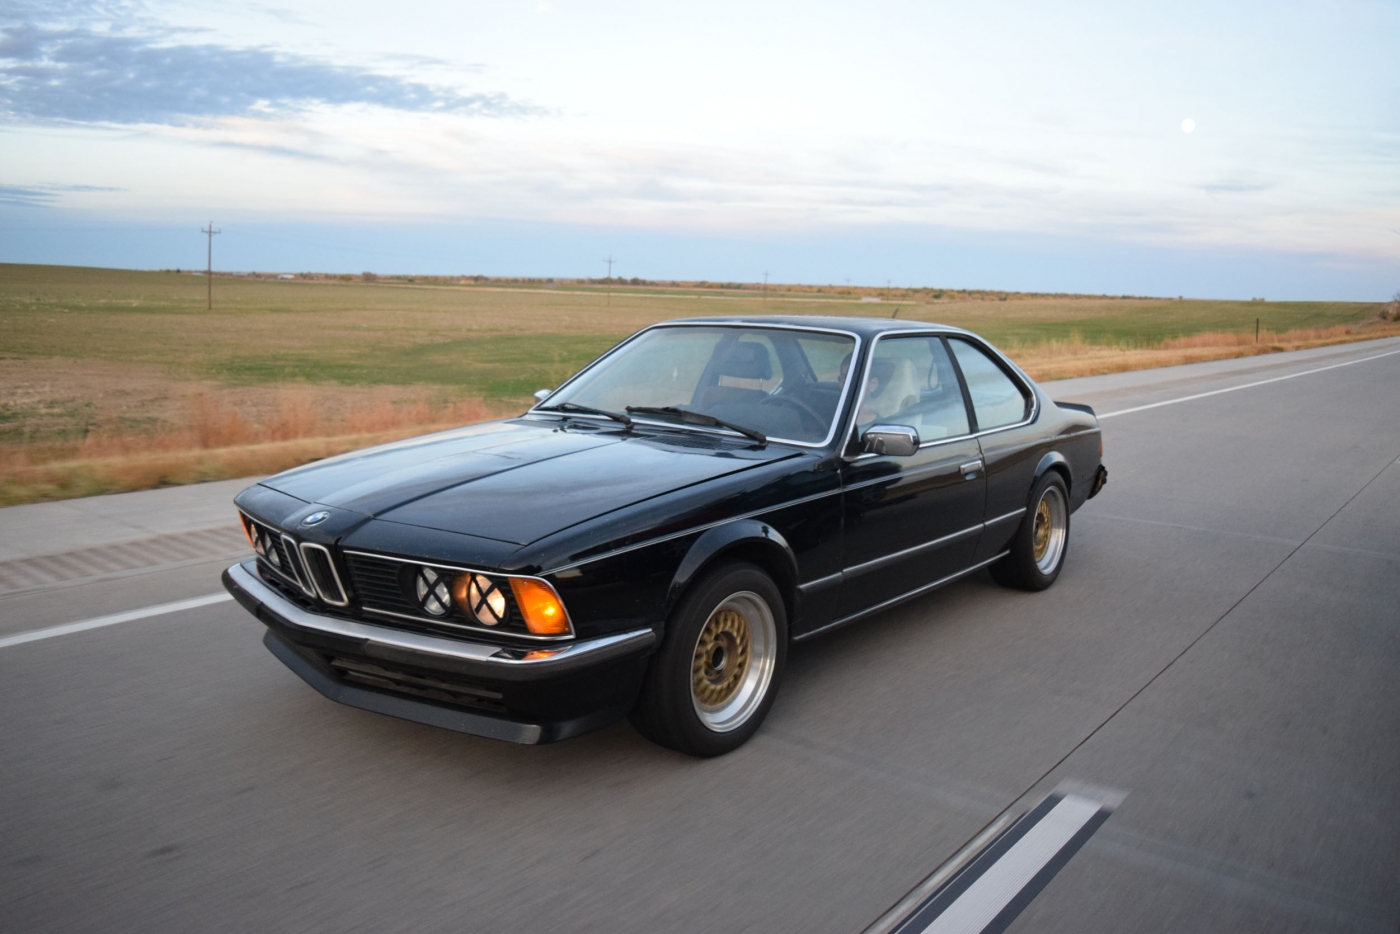
Last edited by tschultz; 10-28-2015 at 10:10 AM.
BMW Enthusiast
Some proper photos since I had some spare time today.
It looks quite a bit different since I purchased the car. Not great lighting, but I didn't have many high quality photos of the car so I figured I'd shoot them anyway.
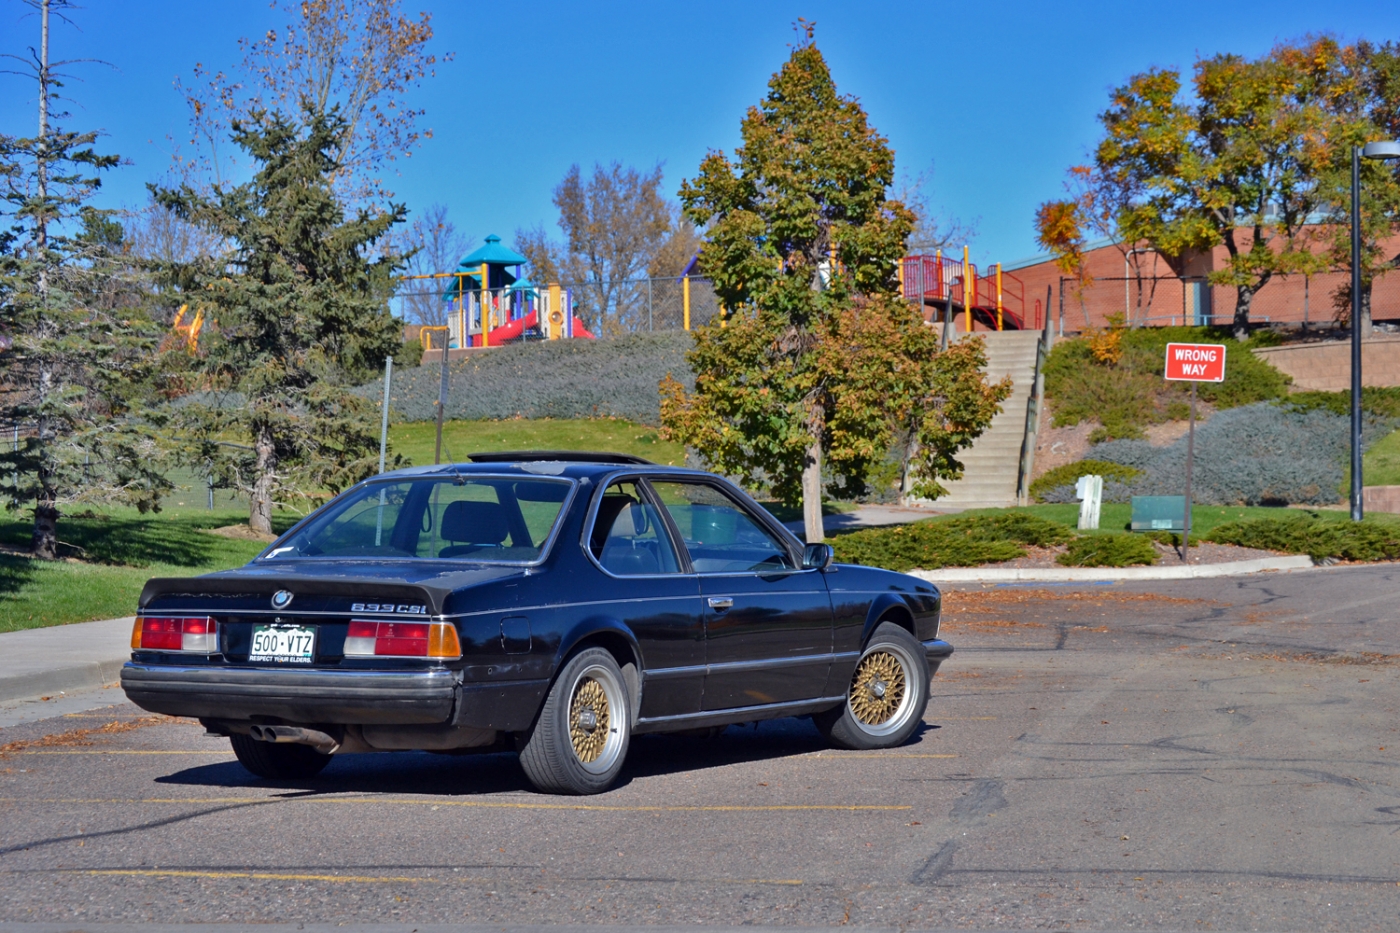
Member
Freude am Reparieren
Thanks for wasting about three hours of my time!!
I'm kidding, of course. This has to be my favorite "rescue" & project build ever. Outstanding work, thanks for sharing!
BMW Enthusiast
Thanks guys! I'll definitely keep the updates going. And once it get's to page 2, i'm sure the page will load much quicker also!
Member
I love the look of this car. The wheels work beautifully and really fit the period. There's something really attractive about a fast car that is weathered (is that the right word?) and can really get going. It's like you give it a soul. Loving the thread and cannot applaud your effort enough. From one e12 633 owner to another, your car is simply fantastic!
1977 633 CSi RHD Euro. S38B38 3.9L M5 Transplant. 5 Speed Getrag Dogleg. 3.73 LSD. 417hp, 369lb/ft
1971 3.0CS E3 2dr Alpina Special Coupe Racer, 347hp, 295lb/ft
BMW Enthusiast
Thanks shipper!
This car is actually a 9/82 model so it is a E28 based car, but I do have another e12 based E24 -- see below:
I made a bunch of headway now that things have slowed down a little bit since getting married and finishing another stage of home updates earlier in the month.
I recruited my brother to help me with my turbo swap since he was itching to get out of the house, so this past Saturday we went on a drive with some other BMW's. I took the euro 635 and had a blast. He was in the 318is with german stripes:
Anyway, we came back to my house after so that on Sunday we could start on my project. I have had this TCD turbo from Todd since summer of 2105 when he got me a great price on one. Considering he indicated that it would fit on the manifold and have clearance to the block, I decided to spring for it, although at the time I was still just getting the car running with the Rotomaster. It's been sitting patiently waiting ever since as I have slowly worked out the kinks in the car. The 633 has been reliable for me and is to the point that I have the basic turbo system operating reliably. This was confirmed when taking it out to a local lapping day. The only issue was a coupling popping off the Callaway manifold. I attribute that to the crapy hose clamps, but knew eventually I would upgrade.
Onto the main content: I had prepared for the swap by pulling off the front spoiler- here's how the car sat when getting started:
Then we took off the AFM and piping for access. The oil return line came off, the wastegate came off, and we could start removing the 12mm exhaust nuts.
I had not been looking forward to this, but the nuts were all reasonably accessible, with the slowest one being #6 on the lower side. The advantage of doing this from when I did it last year was that it had been off about 3000 miles prior, and the engine was now secured to the chassis. The last time I did this, we had it on a dolly and could not get underneath to access the lower nuts, for safety reasons and clearance issues to the ground. Of course when on a dolly, it would also want to rock, so we couldn't really loosen the nuts the best.
Regardless, we finally got it off, and the manifold and turbo came out as one unit. This was a tight fit, and we scraped the front inner fender arch a little bit because of the tight fit. Removing one of the exhaust studs was also necessary. so here's how it all looked after the aforementioned ~3000 miles. The exhuast gasket and mating ring was taken off on the bench, this photo was just after we removed it.
We separated the parts, and then got out the new turbo. in comparison, the compressor housing is bigger than the rotomaster. According to Todd, this is T04e, 60mm compressor wheel. Standard journal bearing turbo with P trim turbine and .58 A/R on center housing. This is from the TCD M30 kits.
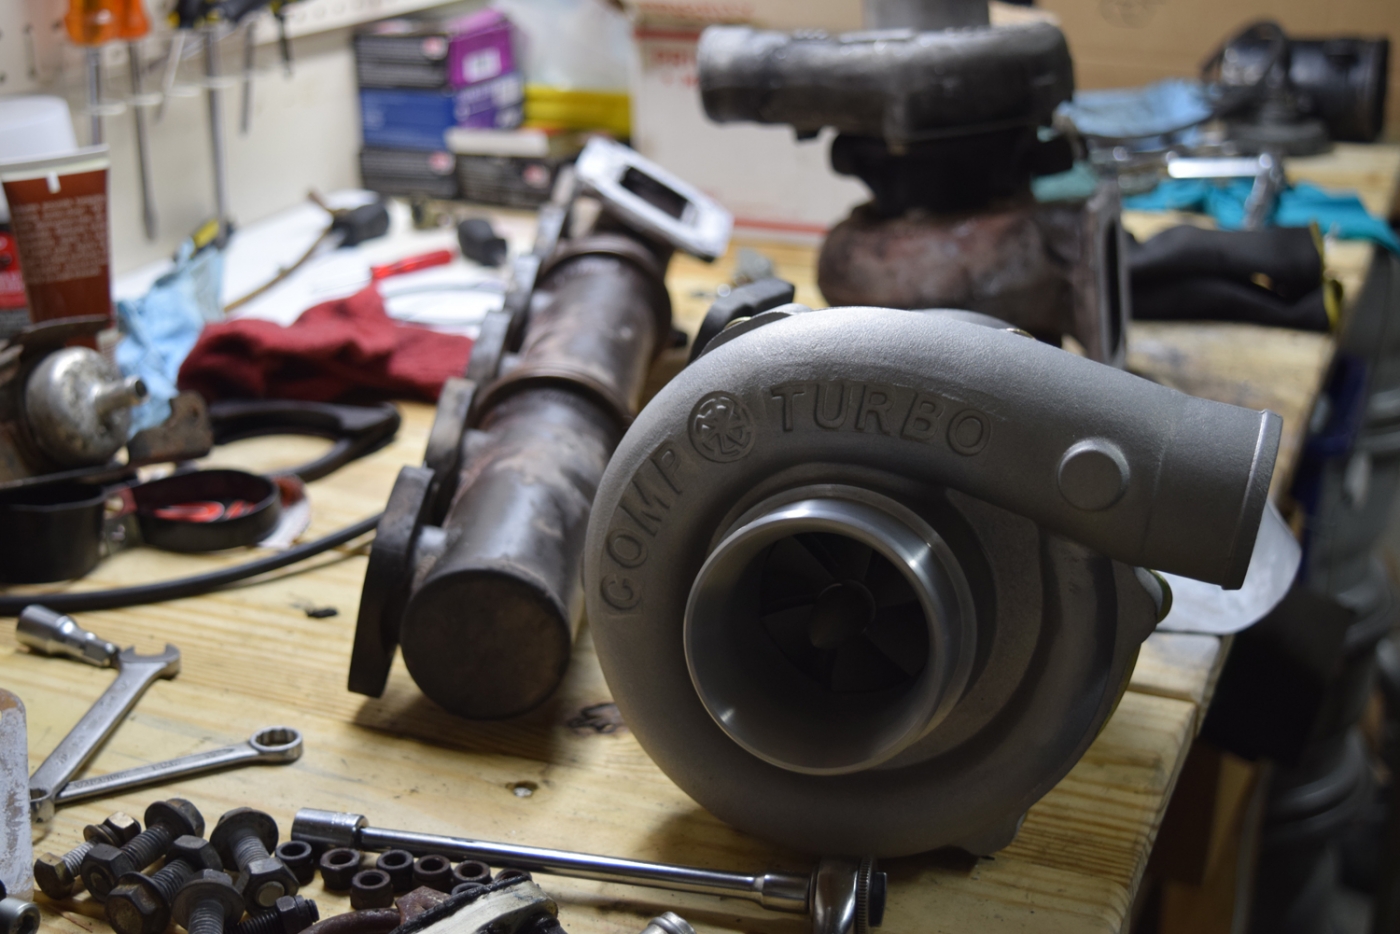
Getting it ready.
Due to the size of the compressor housing, we quickly realized we would not be able to mount the manifold+turbo in one swift motion the way that we had removed it. This meant the two could not be mated on the bench prior to installation. We thought for a minute and then decided to place the turbo on the side of the exhaust and then maneuver the manifold into place above it. My brother was nice enough to support the turbo as I got the manifold in and tried to start the mating S.S. bolts. This meant I also added the silicone while he held the turbo. Fortunately we got it together and then could focus on tightening the two together. This gave us the clearance we needed. One small addendum, the clearance from the Rotomaster to the Comp turbo was not the same for the most inward/forward mounting hole to the manifold. This was the same hole missing a bolt when Mike and I took off the manifold last year. Both the manifold and turbo were designed to have a screw enter form the opposite side. We got create and used a threaded exhaust stud through. This part barely fit, and then we were able to thread new 12mm exhaust nuts on both sides and tighten.
My brother also happened to bring his no-name spare waste-gate. We had realized that without a gasket I was getting major exhaust bypass through the waste-gate in normal operating conditions. This would explain why spool up was rather slow for such a small unit.
Installed
To clarify, I think there are some major reasons why this setup should improve dramatically from before:
1. Waste-gate bypass should be eliminated. This will likely be a major difference in the two waste-gates. My brother thinks that this no-name has a 10psi spring in it. We will find out, but the turbo won't have to be fighting a manifold exhaust leak to get up to boost pressures.
2. Turbo airflow capacity. The new unit should be very well matched to the airflow generated by the M30B34. This places the engine in the efficiency zone of the turbo at or very near to the optimum 78% island at my current boost pressure. This efficiency means less heat generated, and hopefully more dense charge air being delivered.
In my prior posts, I document that the rotomaster is drastically undersized for this application in terms of the turbine size. I believe that it was causing a high exhaust back pressure on the engine. Of course the ability to move air really depends on a pressure differential, so this is a critical piece to the puzzle. The high back pressure meant that the old unit had to work even harder and overcome this back pressure before being able to flow additional air through the engine. This would explain why the car felt sooo slow (slower than NA) when I would lose a hose coupling just enough not to build boost pressure. This happened at the track, and the engine had to work to overcome the back pressure, but with no gain of additional air for the lost 'work' put into spinning the turbo.
3. New turbo technology. It is very evident that the new Comp unit has improved technology over the Rotomaster. This is very obvious when looking at the compressor inlet on both. The Rotomaster has an exposed threaded shaft and nut. The new Comp unit has an aggressive looking cover on this shaft, much to the similarity of a jet engine. I imagine this is to delay the separation point of the boundary layer to turbulent flow, and better control the airflow in. This new technology is probably leaps and bounds different from that of 30 years prior.
4. General condition of new vs old. It was evident that the rotomaster had a lot of friction or something causing the shaft to be somewhat difficult to spin by hand. I attribute this to oil coking or something similar. It simply won't spin freely like other turbos and the new Comp unit. I don't attribute this to the technology, but rather the general condition of the Rotomaster. I mean it, worked, as you can see from the videos, but there are likely major gains to be had from this difference of condition. The nice thing is that the Rotomaster did not have shaft play or oil leakage, and I didn't have to pay for a new turbo when I was so new to the game.
5. The last difference should be intercooling. I am upgrading the charge piping to remove boost leaks and add an intercooler with additional frontal area. I did notice a lot of heat in the engine bay on hot days, and the car was noticeably slower. My brother fortunately had an spare intercooler and I started getting it fit in place. I also plan to make a couple of heat shields to help protect the charge piping and air filter from the high temperatures. Fresh air can only help to increase power and reduce the risk of detonation.
I also took the opportunity to adjust the oil return as the old method had a kink. It didn't drain as I had hoped because the fitting I wanted to use would not fit with the steering arm underneath. this had resulted in a snaking line to the oil pan that actually went around the motor mount. This was certainly something on my list to change. I used the adapter block from the Rotomaster and then added a 3/8 NPT x 3/8 NPT m/f adapter fitting to space everything downward. This allowed me to reinstall the same 3/8" npt elbow from before where I could install the hose. I may have to shorten the hose but I didn't want to cut it too short...
Here's the clearance with the clocking of the compressor outlet. It is very tight, but after clocking it a couple times, it should work. The oil inlet is on the other side (180 degrees apart) and barely clears the manifold, but I didn't want an elbow that would disrupt smooth flow.
We had a spectator too
Here's the charge piping and intercooler. Still working on this, but I am close to what I want. I basically added an elbow and changed some of the positions/angles of the Callaway piping.
I put the last few pieces back together to get the car started today. Removed the wiring for the OBC horn, added some heat shielding and just got it in place so I can finally take the car to an exhaust shop in the next week or 2.
Another view of the intercooler piping. Right now the front bumper won't clear, so I will have to decide how I want to proceed...
A shot underneath. still using basically all 2 in diameter piping from the callaway kit and an extra elbow and the new intercooler. Fortunately the charge piping immediately post turbo provides another location to receive fresh, cool air for cooling before reaching the IC.
My piping is slightly larger than 2in diameter so it is difficult to get my 2in diameter tbolt clamps on place. I may still use them, but I need to decide how I am going to fit the front spoiler and bumper over all of the piping.
I started the car and got it idling for a good 10 minutes to check for leaks and such. Still idling at about 1000rpm, but everything else appeared in good shape. after getting the exhaust on, I took the car around the block. Initial impressions, it feels very similar to before, but likely smoother power delivery. AFR's were slightly rich as I tried the FQS switch at both 0 position and the 2 position (where I had it). The car was much closer to 12.5 target AFR's with the FQS switch still at position 2 (where it was before). I was confidant enough that I opened her up. The new wastegate has a 7psi spring and overall power delivery is nice and steady. the car felt very similar in acceleration to the Rotomaster turbo at 11psi, but of course I was going easy and not getting up to speed or pushing the car.
The intercooler is definitely working as I could feel a nice temperature gradient from one side to the other, something I couldn't say for the Callaway unit, which was just totally warm throughout. The heat shielding was also helping I think as the charge piping to he intake didn't seem as hot-- Recall it sits right above the exhaust manifold.
The good news is air dam fits in front of the intercooler! I had to shift everything over slightly for it to all fit, but it fits! Maybe some photos of it later in the week when I have some more time. I'll be curious to note how much the intercooler stands out from behind the airdam. I didn't really like how the Callaway unit looked behind the airdam (it didn't really fitt it out enough).
Going to try to bring the car to an exhaust shop soon so I can bring everything tighter to the body and finally put on the new bilstein sports, eibach spring, and front strut bar.
- - - Updated - - -
I decided to try to install my rear Mason Engineering strut bar.
The old Jakeb e28 bar wouldn't fit, so I bought one of these. The good news is that it fits! The proximity is very tight just because of the rear geometry of the E24. I think the parcel shelf sits lower than that on an e28, so there really is almost no space for a rear bar. I was glad to finally get everything in place after dropping rear shocks/springs from each side. See photos below.
The expansion tank fits above the bar, but I did have to pull it out to get everything into place.
The front-most nut on the right side I can't tighten much past finger tight. That's ok because I won't be able to get it off later if I can tighten it. I don't really care to remove the parcel shelf at this point...
All buttoned up, and you can't even tell it is back there! At least this means it doesn't reduce storage space in the trunk!
I removed the restrictor fitting, so I have the standard #4 JIC x 1/8" NPT DM nipple supplying oil to the turbo. I swapped a new oil pressure sender in the head and found that the oil pressure is a bit better than the other sender indicated. I think oil pressure is acceptable for this engine, albeit maybe on the low side at idle because of the oil pressure being distributed to the turbo. At hot idle, it seems to be in the 8-10 range, the light will flicker when the revs drops slightly. At 2000rpm fully warmed up it has a healthy 30psi, so I am not worried.
I drove the car around tonight after getting everything reinstalled. With the larger injectors and fpr, cruising AFR's are actually richer than where they were with the other turbo. Cruise is close to 12:1, instead of about 15 where it was. The FQS switch is still in position 2 (-3% fuel), but I have larger 24lb injectors, a 3 bar FPR, and the BEGI 2025 with both adjustment knobs all the way relaxed.
In boost, AFR's are about 10.5-12.0:1. Slightly richer than what I want, especially in 1st/2nd gear where they are near 10.5. I am thinking about reverting back to the 2.5bar FPR to see if that helps to bring cruise back to a reasonable level. The other option would be to go back to the stock 17lb fuel injectors and keep the 3 bar FPR and simply increase the rail pressure on the RRFPR. Not sure which of the two I want to try first. I am thinking the 2.5bar FPR won't make a significant difference, but only one way to find out.
SoCalEights - CA
BMW CCA Member
This is an outstanding write up! I'm glad I found it. Keep up the good work, the car seems to be coming together well. I'm impressed with your wrenching ability. Congrats on having such an understanding wife.
BMW Enthusiast
Thanks for the message^^ It's been a project that has made great strides!
Interestingly, my dad has a 1948 Buick Super 8 Convertible-- purchased by my great grandfather new for my grandmother's high school graduation. I figured you would appreciate it:
But back to the 633:
I am dropping the car off at the exhaust shop tonight so that they can work on it tomorrow. Then commences the front end refresh: (finally!)
Some photos with the Style 32's. They make the car look a lot more aggressive than any of the other wheels I have had on it so far:
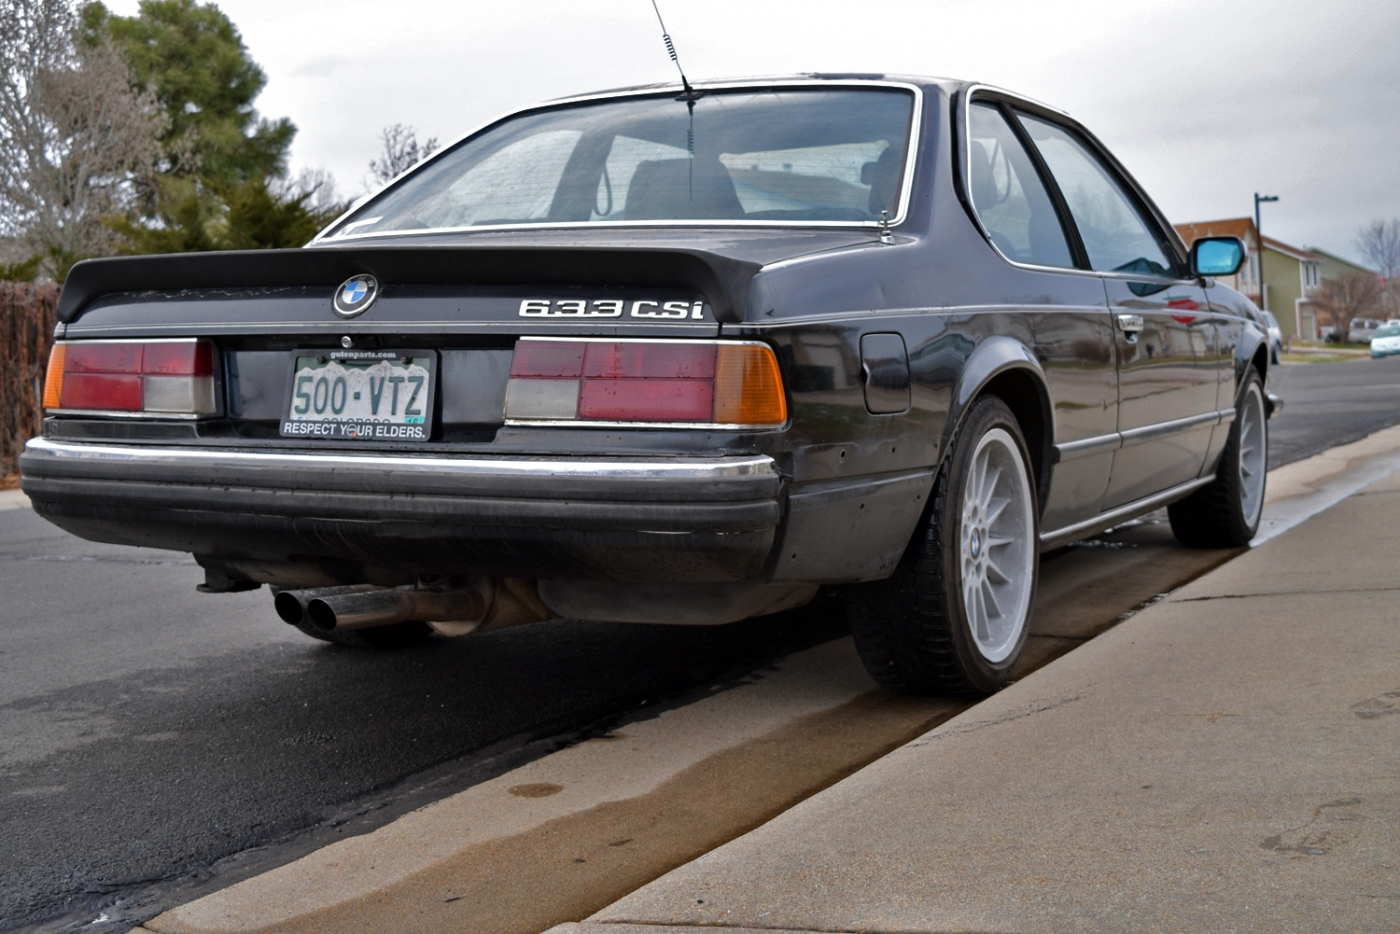
SoCalEights - CA
BMW CCA Member
THAT is gorgeous! My car was purchased by my grandfather new, also. It was originally a car meant for the commanding general at March Air Force Base in Riverside, CA but the general moved and they bought it. The car has 57K miles on it...really. It looks like crap but its a work in progress. Runs great, looks like crap.Originally Posted by tschultz

BMW Enthusiast
Very cool^^
Definitely a unique car, and I appreciate the heritage and history more now that I am getting older. Original condition can't be replicated!
The funny part was the repurposed version of this same color/year car by Jay Leno:
Last edited by tschultz; 03-09-2016 at 10:38 AM.
SoCalEights - CA
BMW CCA Member
Now I'm inspired! Jay's Garage is just a few miles away. We see him around town fairly regularly, Nice guy, will always talk about cars.
BMW Enthusiast
So this week I was able to get the car out to the track with all of the major items installed. I wasn't quite happy with my mixtures, but didn't want to spend the day fiddling, so I went with the setting on the BEGI. Those settings were full open needle valve and center screw of RRFPR. Transition to boost was slightly rich (12.5:1), and with boost got progressively richer down to 11:1 and even in the high 10's on the long straight. I didn't get the correct restrictor with the BEGI, but I was using a .080" vacuum connection. From what I read this was the same as supplied with the begi from the start.
Either way, the car would cruise at about 14.2:1 and this got worse in colder temperatures, so I was hoping for a warmer day.
We drove out to the track and my friend Mike who swapped the engine with me decided to cruise out with us for his first time ever at a track. He really seemed to enjoy the sights and sounds. Here's a photo of his '86 635CSi with the early euro bumpers behind my car.
I had installed the Racemark steering wheel earlier in the week, but had found it to obstruct my view of the gauges (330mm). It felt really nice and made the car seem to steer more quickly, but I decided to put on a similar wheel that I purchased, I think it is 350 or 360mm. It's the same steering wheel, but instead of leather, it had a worn suede material. This was great compromise between the stock wheel and the 330mm and was very easy to grip with driving gloves.
A couple photos of the engine bay. Fuel pressure gauge is still in there for fine tuning. At some point I will have to clean up the wiring. I have the WOT connection disconnected with terminals if I wanted to reconnect it. You can also see the Turner fixed camber plates.
I swapped on the BBS RS wheels again, with the same tires as last fall for comparison purposes.
The BMW friends joined in once again, and my brother finally got his 318is out with us. If you recall, last fall he blew a cooling pipe as we were leaving for the track. He had bought this car with E36 5 lug swap and bolt in cage. He let me drive it later in the day and it did very well. For reference he was able to run 2:23/2:24's with it, about the same speed or faster than my stock 535i E28.
stock 325i 4 door
E39 540i/6 (and some Style 66's I sold him)
Another 540i
Pretty serious E36.
My dad's 1602. My older brother was driving it. I was able to take the wheel later in the day and play cat/mouse with the 318is (for about 35 minutes straight!). The cars were so even, we weren't able to get around each other without point-by's on the straights. Now of course we weren't taking chances, but it was really awesome to drive. Adjustable camber plates, larger front sway bar, 9.3:1 2L M10, bolt in cage, 3.91 diff, (old) r-compound tires. Was really easy to slide around and induce off-throttle oversteer. You drive it like the gas-powered indoor carts and get on the gas as early as possible in the turns. I was really surprised to feel how similar it makes power to the M30B34. It falls off at 5500rpm, so there's no point in revving it out as there is more torque in the next gear at about 4000rpm.
A friends e28 lemons 535i was there also. I have a bit of video but the driver was still working on lines and such. I rode with him and gave him some pointers in his 5 series AWD wagon.
But onto the E24. It really was blast to drive! With the reinforced sway bar mounts and mason engineering strut bars, the chassis felt solid and the rear of the car felt a lot more tossable than ever before. My 535i always seemed to understeer with the shame shocks/springs but stock sway bars. Power delivery from the turbo was fairly modest, the TCD turbo and manual boost controller meant that power delivery was very smooth, and never sudden. This made it very easy to drive, and with the recirculating setup and new exhaust, the car was super quiet. No BOV noises or anything, but it did allow me to really listen to the tires when feeling out the car.
The most challenging thing about driving this car was the brakes. With the PFC 11 race pads all around (E32/E34 BBK), the brakes felt awesome. But the rears always locked up first- recall this car doesn't have ABS. This was a new challenge for me, and forced me to get the car slowed down before entering the corner. I didn't play with trail-braking because of this, but I was fine with that. It meant I tended to brake early and get on the gas at or before the apex so I could get max acceleration out of the turn and on the straights. As the day went on, this tendency to lock got worse, mainly because of low fuel. Next time, I may put the spare tire back in on the track for some extra ballast/balance during braking. Otherwise, I might have to relocate the battery or remove the AC compressor.
Regardless, I really enjoyed it out on the track, and with the same tires as last time, I was able to shave a good 5-6 seconds off my laps time. Obviously 8psi vs 11psi before was a difference, but I think I was hitting the same straightaway speeds. I know I was losing power on the straights at 11:1 AFR's. Once I dial in fueling a bit more, I may go to 10psi, but I want to keep it reliable and I want to be very comfortable with the power level before stepping up. I don't want to pop a headgasket just because of lap times. I enjoy pushing lap times via driver skill rather than vehicle power.
Some more great photos:
Temps were about 60 degrees, but I liked that it would keep the engine cool. I know my oil got hot after each session, but I don't have temp gauge for that (or an oil cooler yet). I was able to pass both 540i's, one which have the 6 pot front brakes, along with the Ford Focus ST (seen in the video below). The car felt really good and it really seemed like a good bit of power for the car. It ran all day, about 125 track miles and didn't have any hiccups. The only issue was a shimmy under braking, even with new control arms. I should have gotten the HD ones :evil: .
The tires were squealing quite a bit and I think very much becoming the limiting factor in my lap times. Of course dropping some weight would help the car, but I do like it being streetable with quiet interior and radio. I don't know, maybe it would be quiet enough if I took out the carpeting, parcel self, seats and other (along with AC). I know that the rear seats are pretty light, but still.
More photos for those interested: (not mine) https://www.flickr.com/photos/stevea...h/25777408214/
Also, some more car setup notes that I thought were useful. I didn't experiment with tire pressures, but I may do that to try to get different braking characteristics next time.
VIDEOSCar Setup Notes
Springs
Run as soft as practical for maximum grip
Hard:
◾Reduced Grip
◾Increased reaction
Soft:
◾Increased Grip
◾Decreased reaction
Soft Front, Hard rear = Oversteer
Hard Front, Soft rear = Understeer
Anti-Roll
Primary effect in slow turns
Front:
◾Hard = Steering precision in slow turns, understeer, bad turn-in, more precise handling
◾Soft = Grip in slow turns, oversteer, better turn-in, less precise handling
Rear:
◾Hard = Reduce Understeer in slow turns, oversteer, better turn-in
◾Soft = Reduce Oversteer in slow turns, understeer, worse turn-in
Large effect on relative L/R tire temp, Soft front/hard rear may balance. Run zero or low in wet conditions. Harder increases tire ware
Dampers (Shocks/Anti-shock)
Dampers work in speed rates (Fast (low numbers) and Slow (high numbers)) not Soft or Hard
Slow Dampers
◾Slow F+R = Slow weight transfer, Corner stability
◾Fast F+R = Fast weight transfer, Good grip
◾Slow F, Soft R = Corner entry+exit oversteer
◾Fast F, Hard R = Corner entry+exit understeer
Fast Dampers
◾Fast Rebound will normally need to be faster than Fast bound.
◾Slow F+R = Reduced bounce over bumps and curbs
◾Fast F+R = Good grip over bumps and curbs
◾Slow F, Soft R = Bump understeer
◾Fast F, Hard R = Bump oversteer
Bound/Rebound (Mainly for Slow dampers (weight shift)):
Front Bound
◾Slow = Slower weight shift under Brake, Reduce oversteer on Turn-in
◾Fast = Faster weight shift under Brake, Better Turn-in response + Reduce understeer
Rebound
◾Slow = Slower Nose Lift under Accel
◾Fast = Faster Nose Lift under Accel
Rear Bound
◾Slow = Slower weight shift under Accel
◾Fast = Faster weight shift under Accel
Rebound
◾Slow = Slower Nose Drop under Brake, Better Turn-in response + Reduce understeer
◾Fast = Faster Nose Drop under Brake, Reduce oversteer on Turn-in
Slow dampers
Left turn Oversteer Right turn Oversteer
Corner Entry Increase FR Bump, Decrease RL Rebound Increase FL Bump, Decrease RR Rebound
Corner Exit Increase FL Rebound, Decrease RL Bump Increase FR Rebound, Decrease RR Bump
Left turn Understeer Right turn Understeer
Corner Entry Decrease FR Bump, Increase RL Rebound Decrease FL Bump, Increase RR Rebound
Corner Exit Decrease FL Rebound, Increase RR Bump Decrease FR Rebound, Increase RL Bump
Differential
Power
◾High = Good propulsion out of corners, power understeer, Snap oversteer with overpower
◾Low = Poor propulsion out of corners, power oversteer, easier but more frequent traction loss with overpower
Coast
◾High = Stable braking, lift off understeer
◾Low = Unstable braking, lift off oversteer
Pre-load (low throttle range)
◾High = Nervous transitioning from braking/acceleration, easier to balance turns with throttle, harder to keep stable accelerating from slow turns, easy to spin under power, easier to break traction with rapid power lift-off
◾Low = Less responsive transitioning from braking/acceleration, easier to accelerate from slow turns but tendency to understeer
Wing
◾High = Good grip, Oversteer
◾Low = Good speed, Understeer
Tires
After running in (at least two minutes):
◾Target temp = 70-90C (155-195 F)
◾Inner edge should be approximately 5c hotter than the Outer edge, increase camber to increase difference
◾Center temp should be roughly in the middle of the Inner and Outer temps, an increase in tire pressure will raise the center temperature (may require a softening of the springs to counter the effect on handling)
Tire pressure Front:
◾Higher = Oversteer
◾Lower = Understeer
Tire pressure Rear:
◾Higher = Understeer
◾Lower = Oversteer
Brake
Duct
◾Target = 300..600c range while running
◾Bias
◾Target = Front+Back Lock simultaneously
Caster
◾Increase for harder steering + feedback or Understeer
◾Decrease if too firm or unstable in high speed turn
◾Large effect on tire temperature distribution
Camber
Always run negative cambers
Higher neg angle will increase the temperature difference between the inner and outer tire edges
Too high will result in loss of grip
Toe in
Front
◾+ for line stability
◾- for sharp turn-in
Rear
◾+ for line speed
◾- for rear end stability in turns
Front ride height
Front
◾High = Understeer
◾Low = Oversteer
Rear ride height
◾High = Oversteer
◾Low = Understeer
Afternoon traffic after getting more comfortable with the car. According to my gopro my fast lap was about a 2:19, about 5-6 seconds faster than in the fall:
My brother's video of the 318is. Part of the day he was in a different run group:
Can't wait until the next one!
BMW Enthusiast
With the warmer temperatures I went out on a drive yesterday. A friend asked to join, so we went in the late afternoon. He bought this 930 years ago after a fire (aptly named, Scorch) and I was surprised at how well my car was able to keep up with it!
Cool 60 degree temperatures felt great!
We did a bit of dirt road driving, climbing to over 9000ft.
Overall the car did very well, and reaching 7000ft along most of the journey, it was sure nice for the car to not feel 'out of breath' due to altitude! Quite a contrast to the same route in my 535i.
still trying to decide if I want to go with a brake proportioner or not. I haven't decided but have been doing misc fixes on the other cars and the house lately
 Posting Permissions


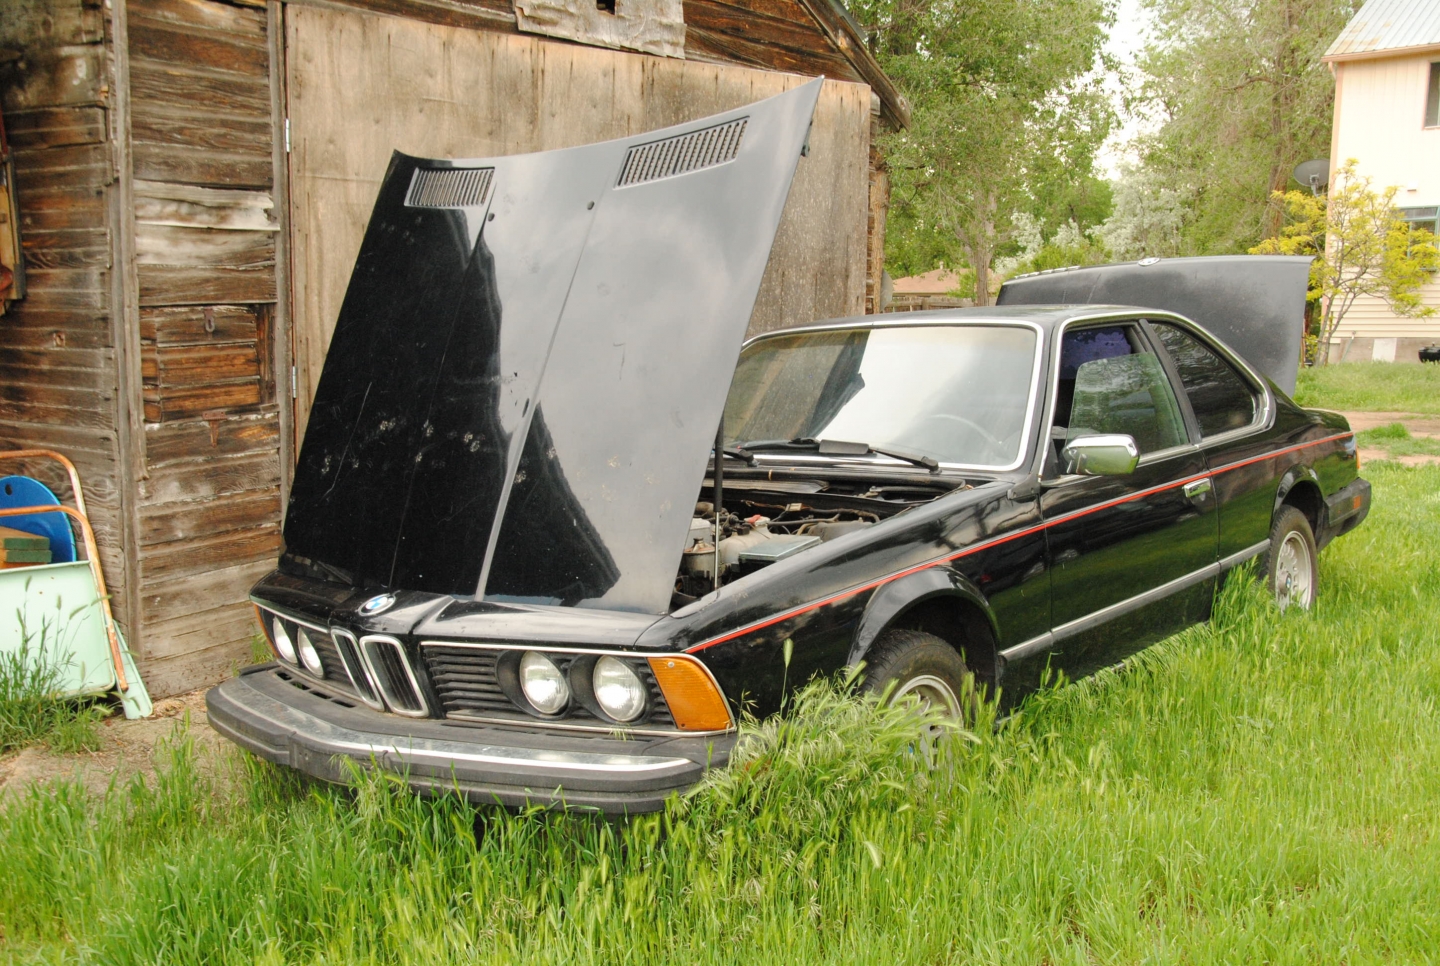
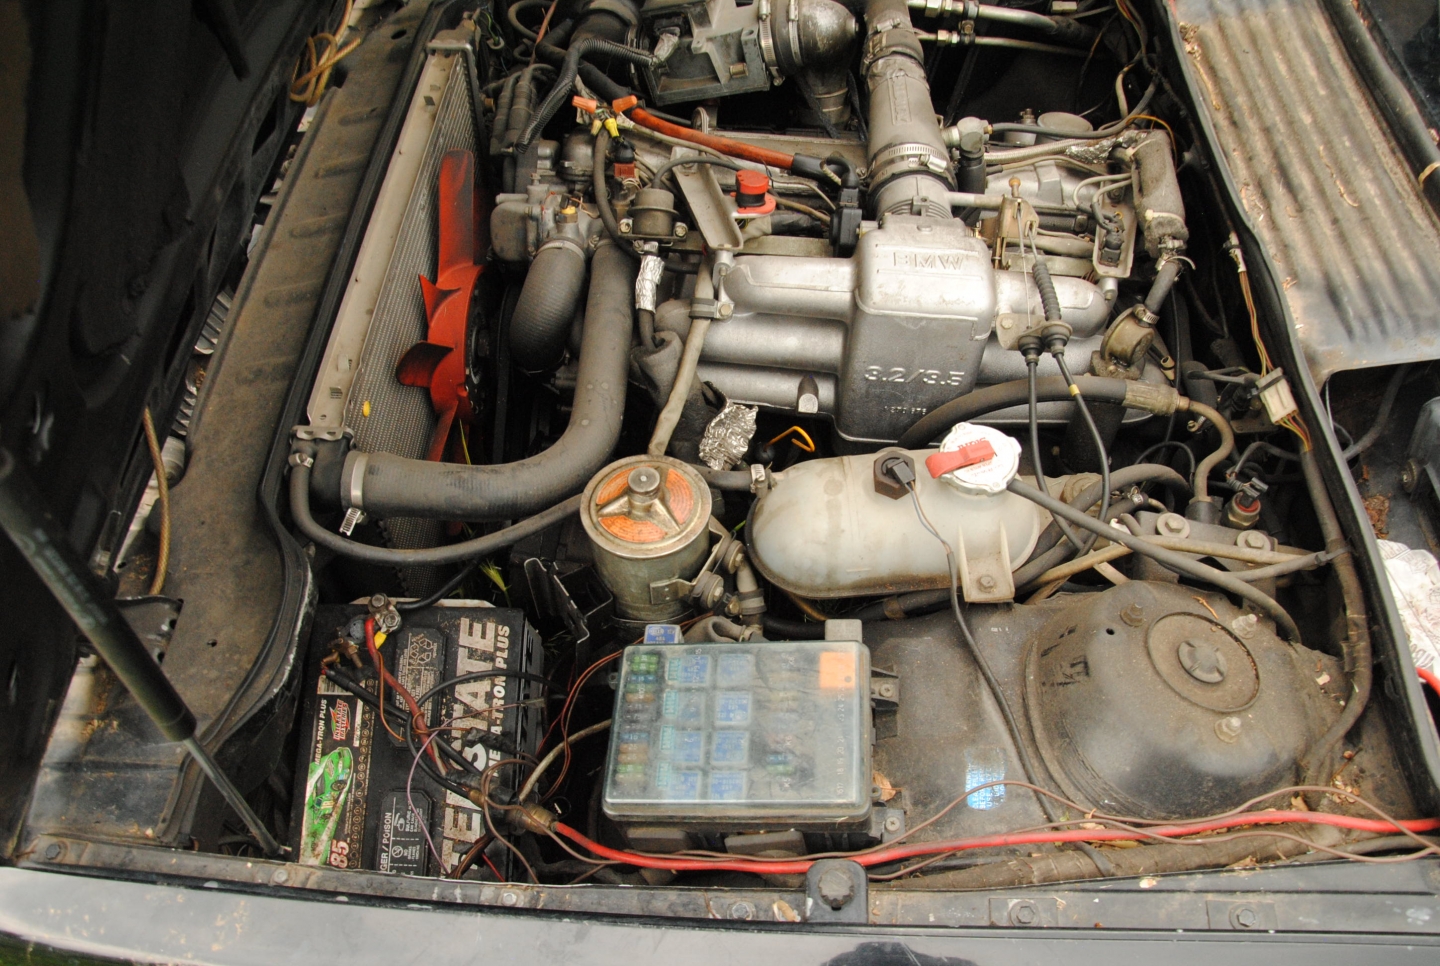
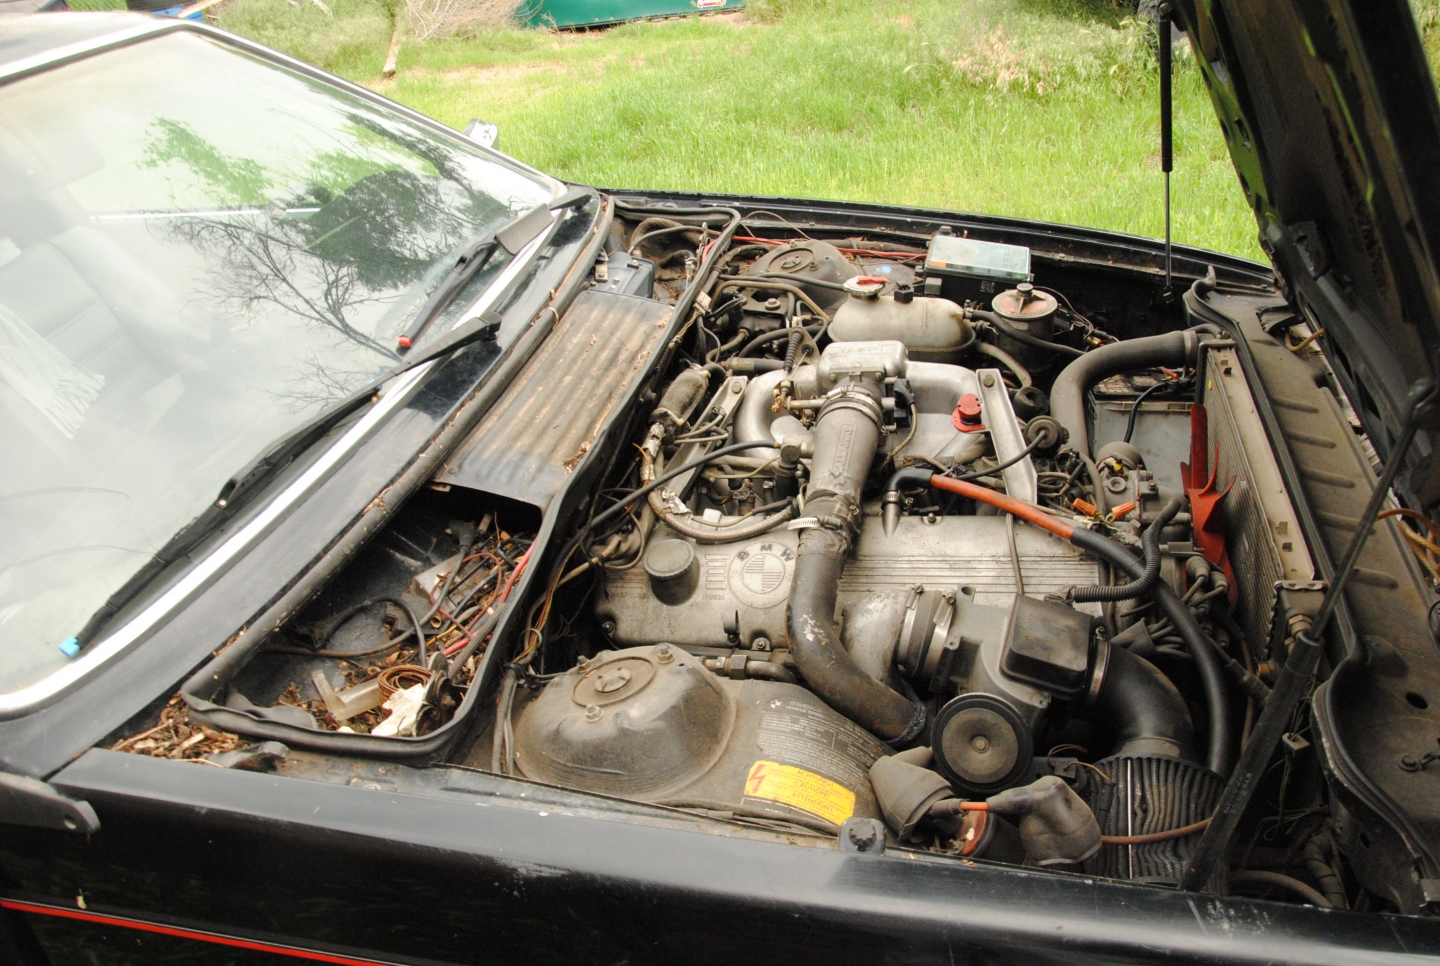
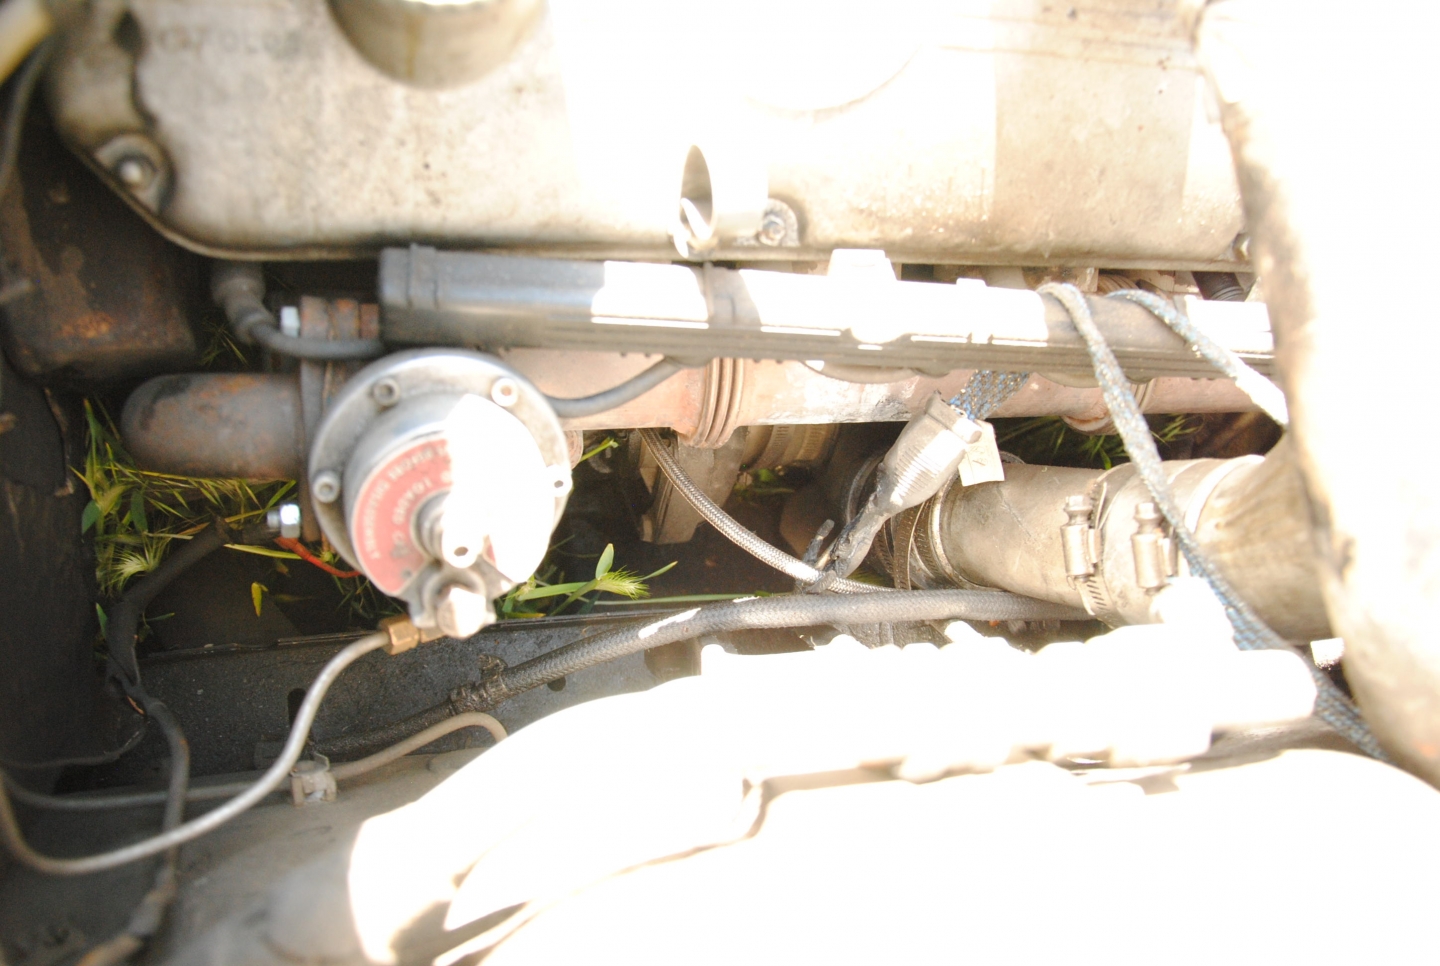
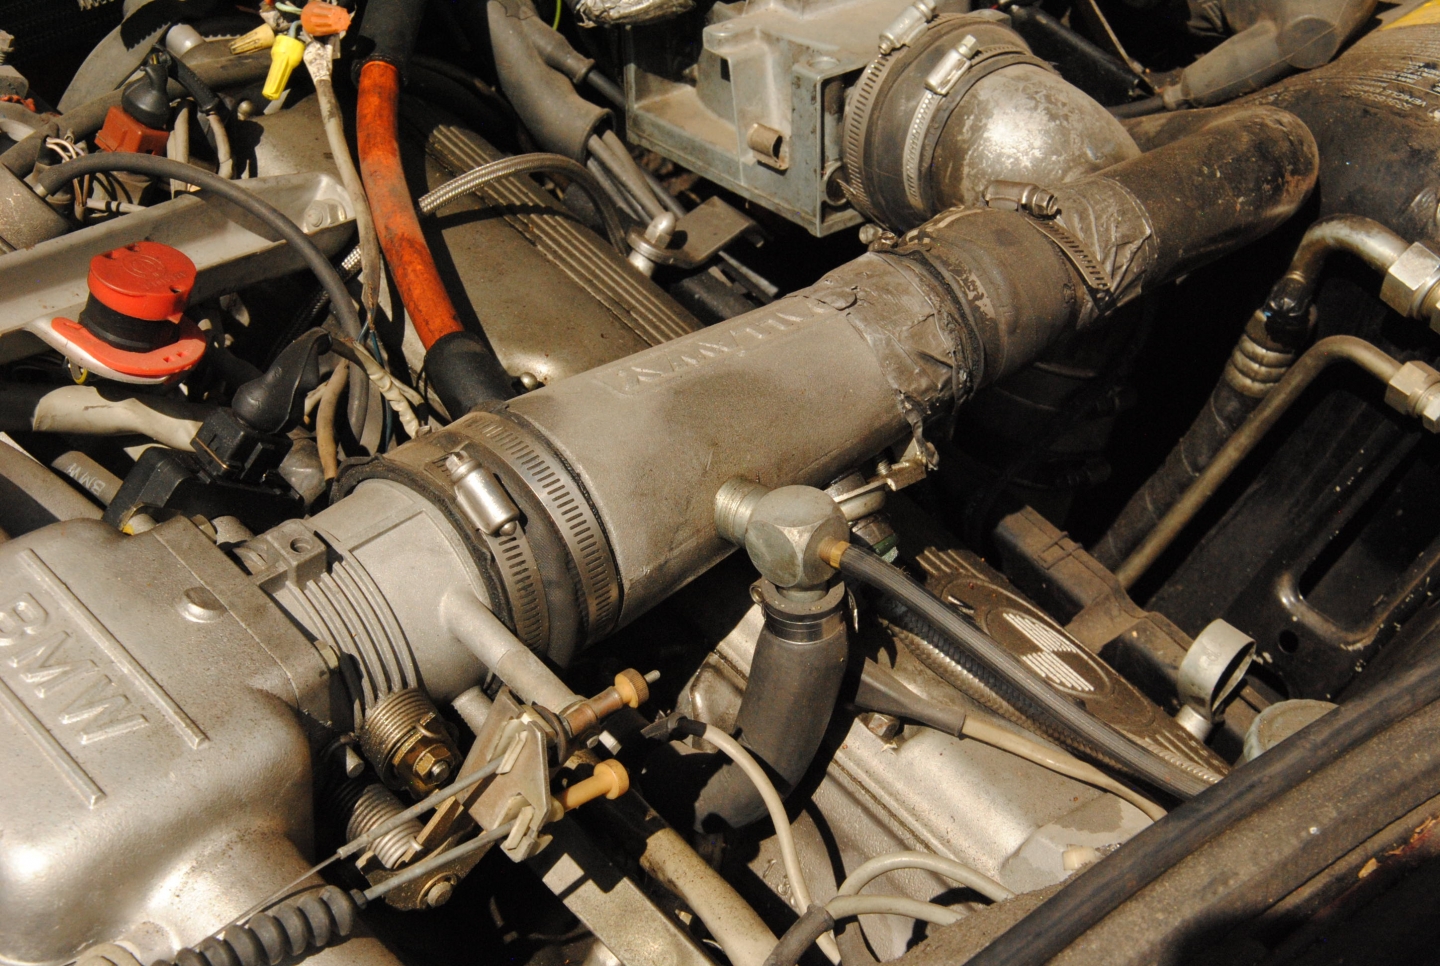
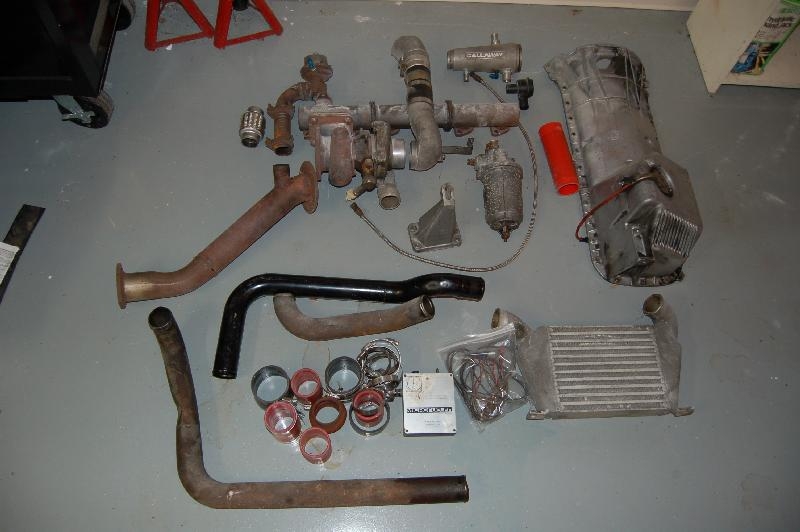
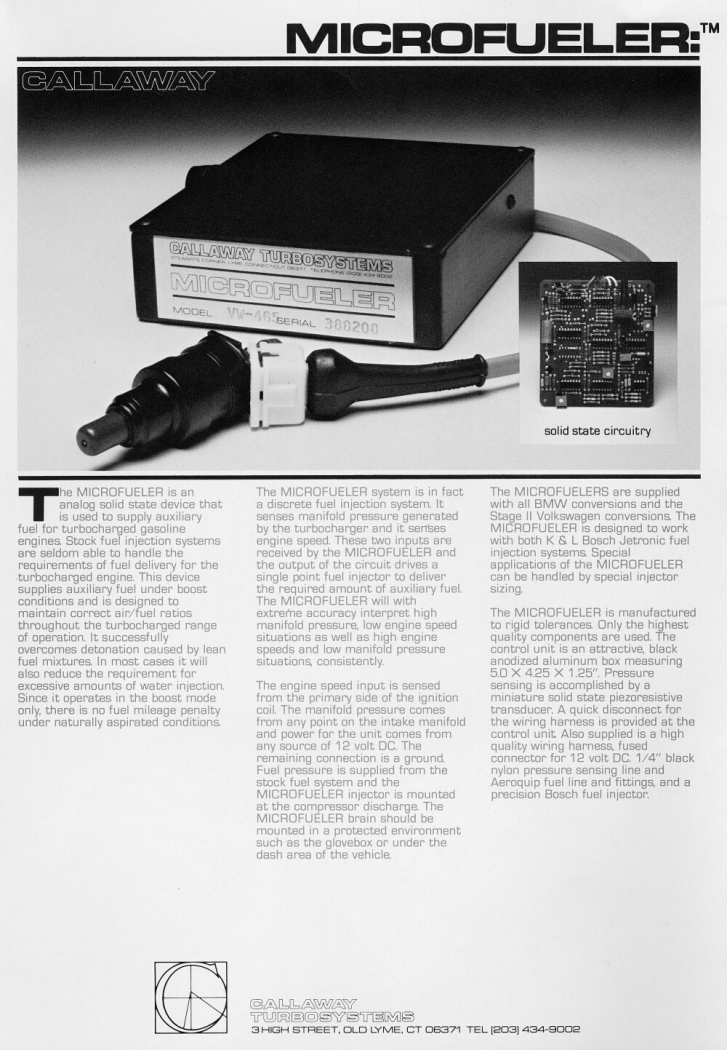
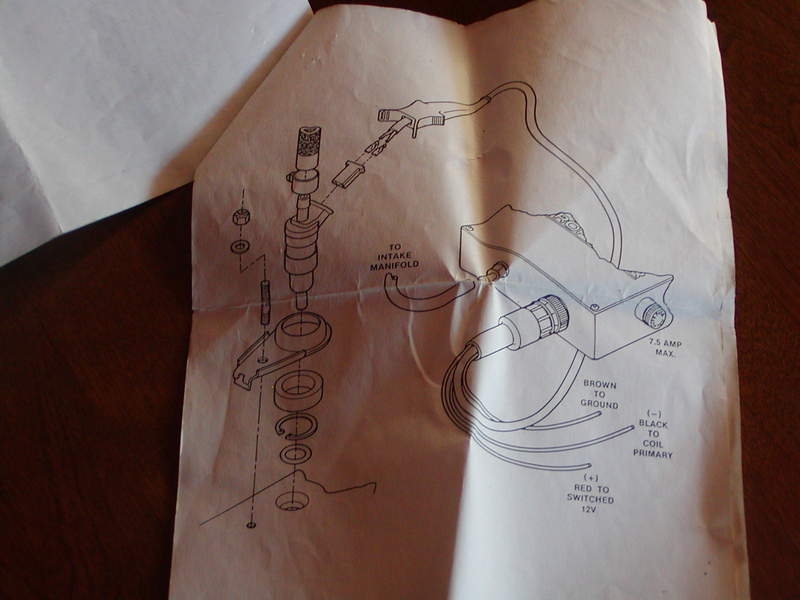
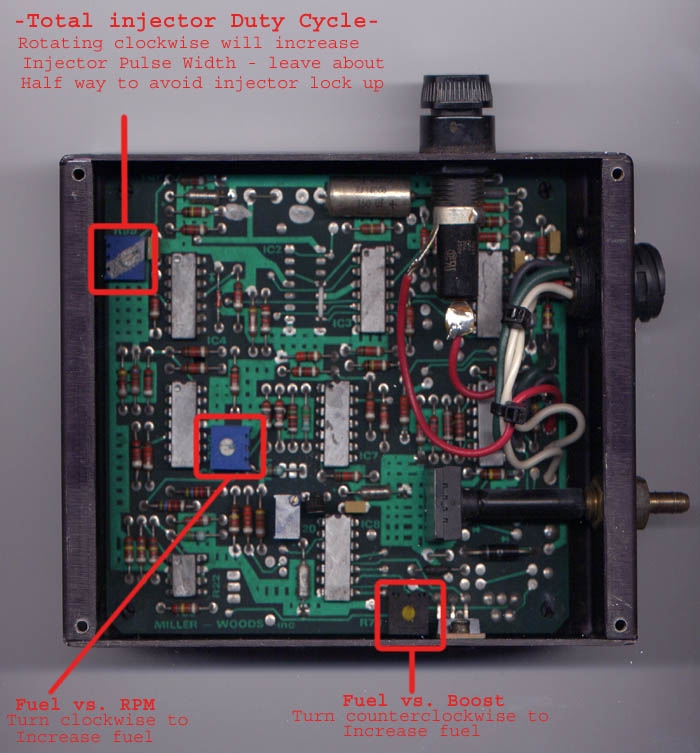
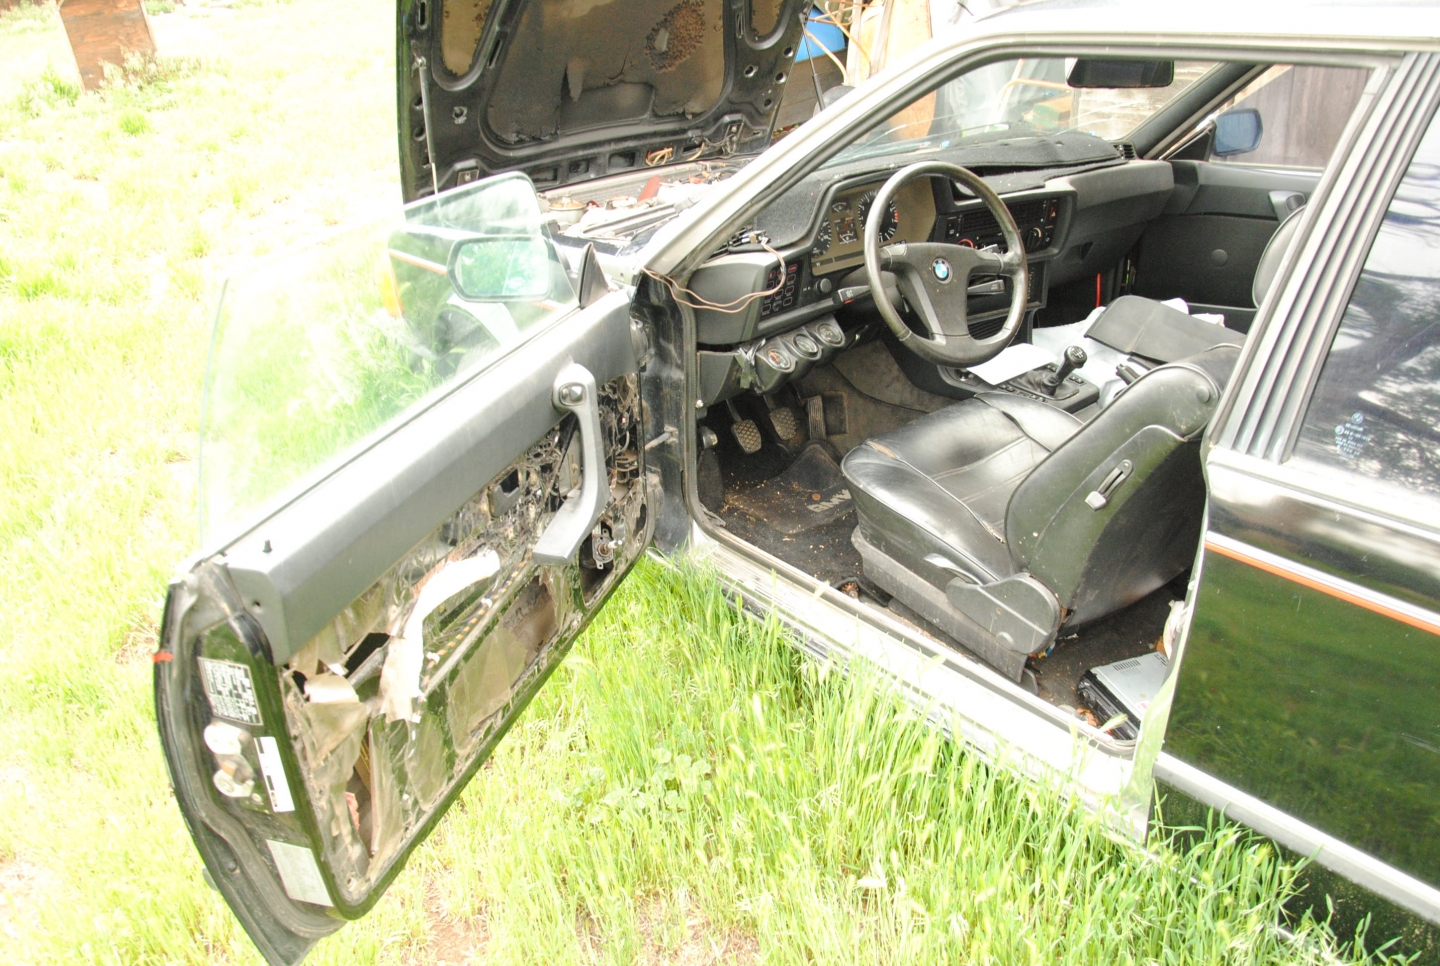
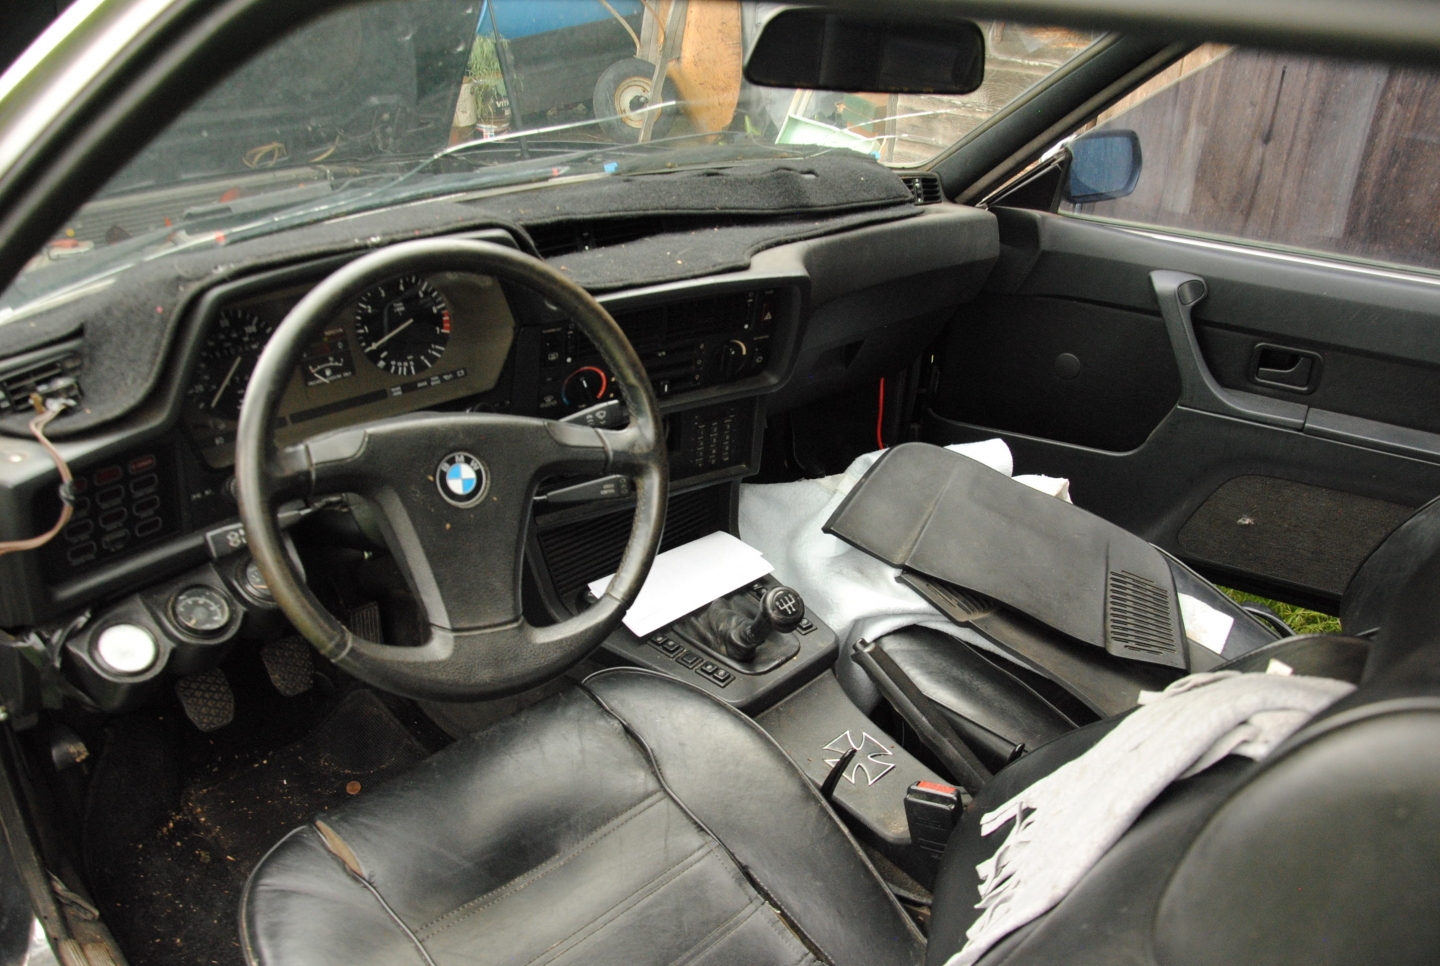

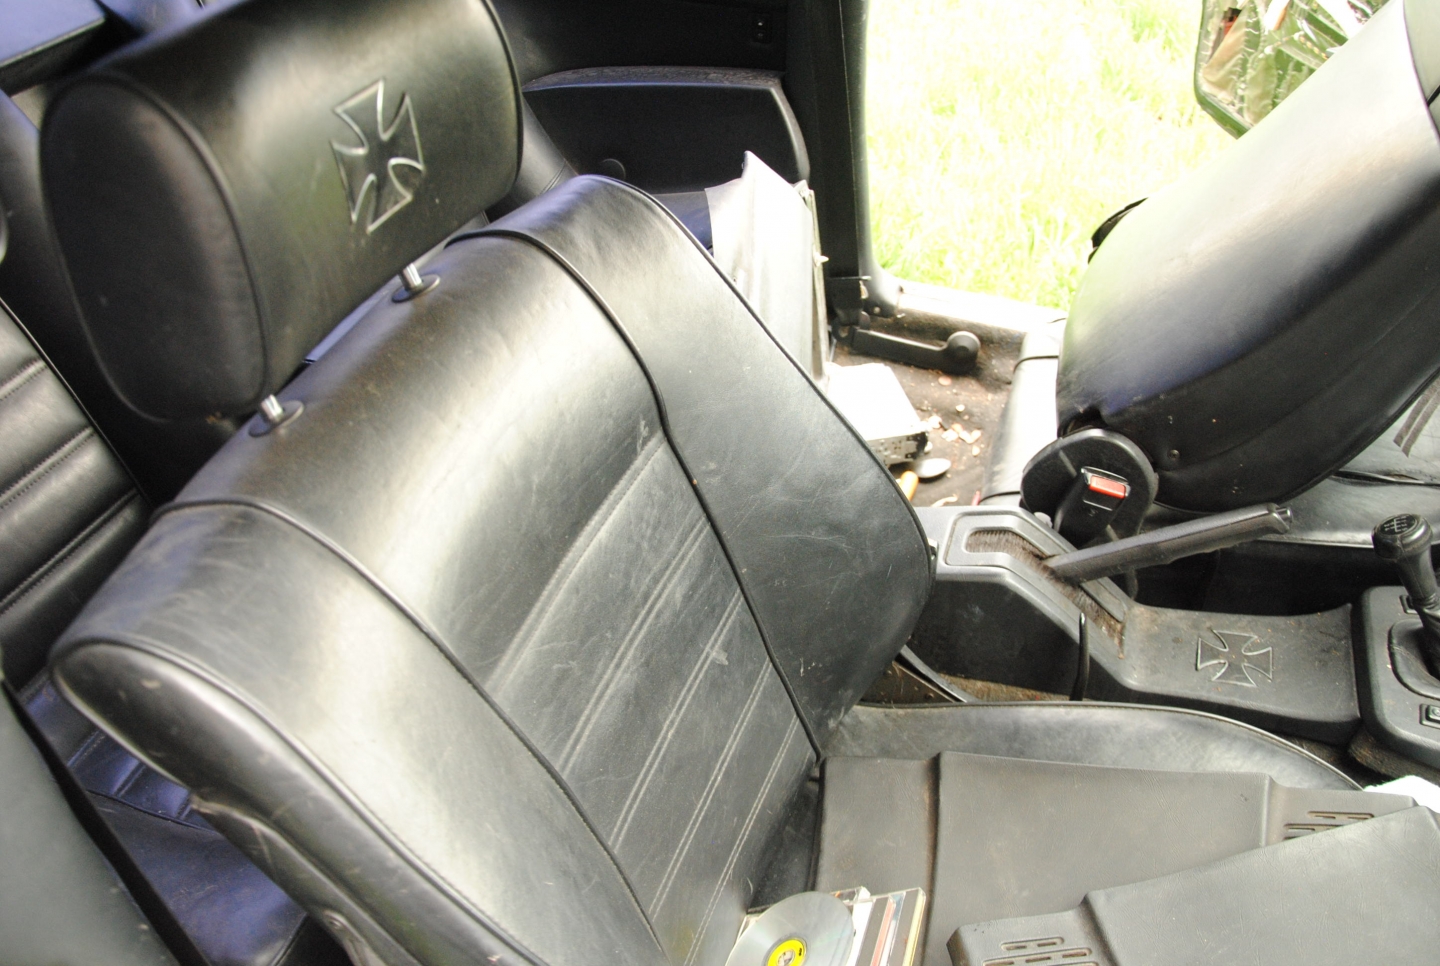
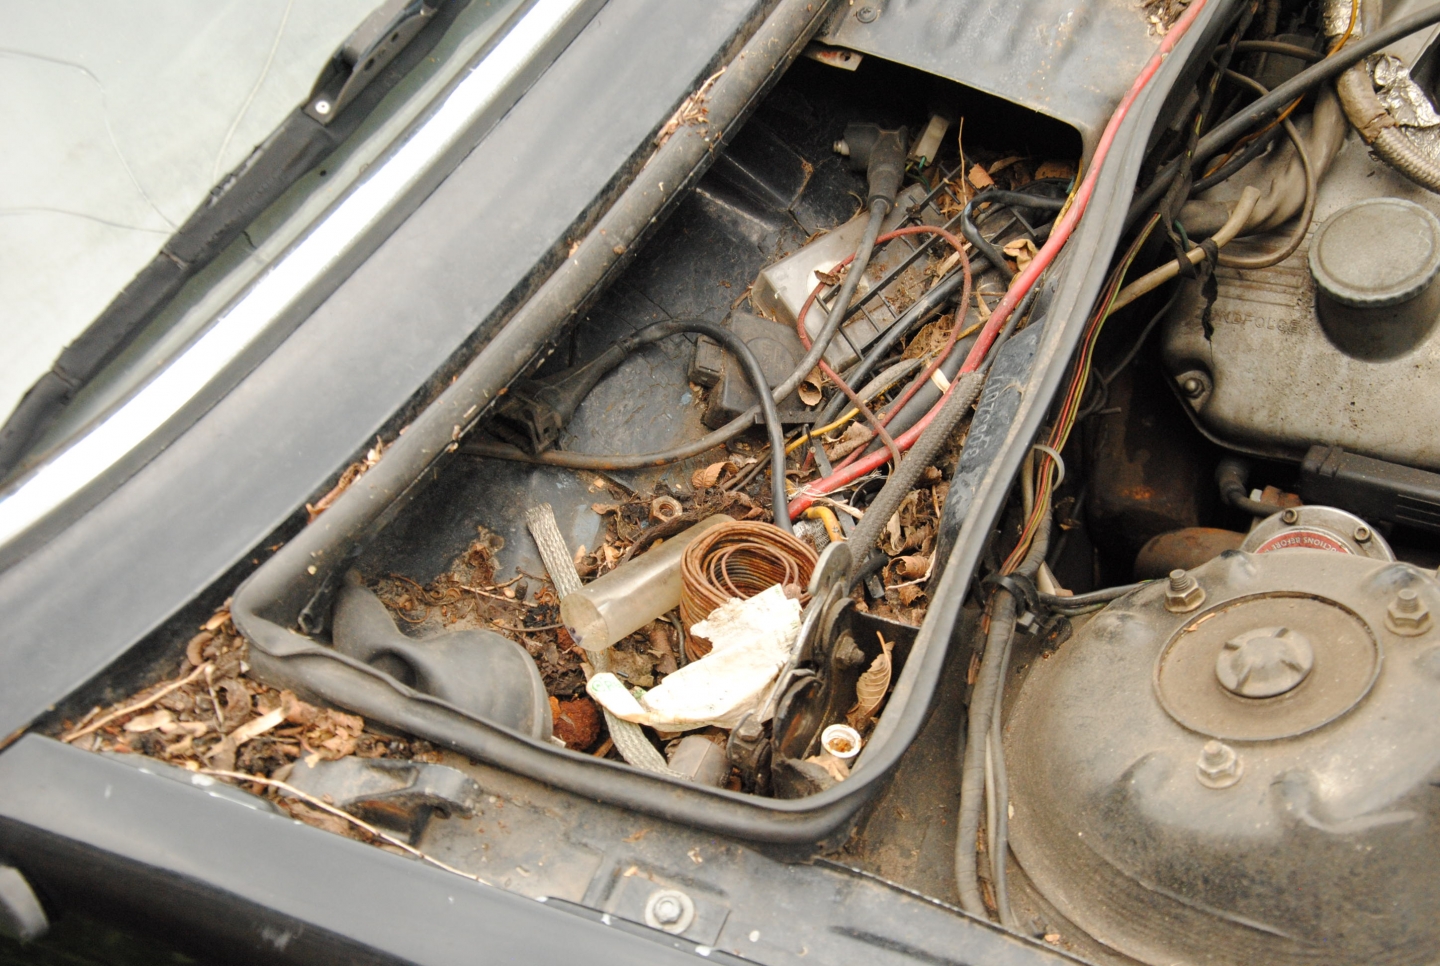
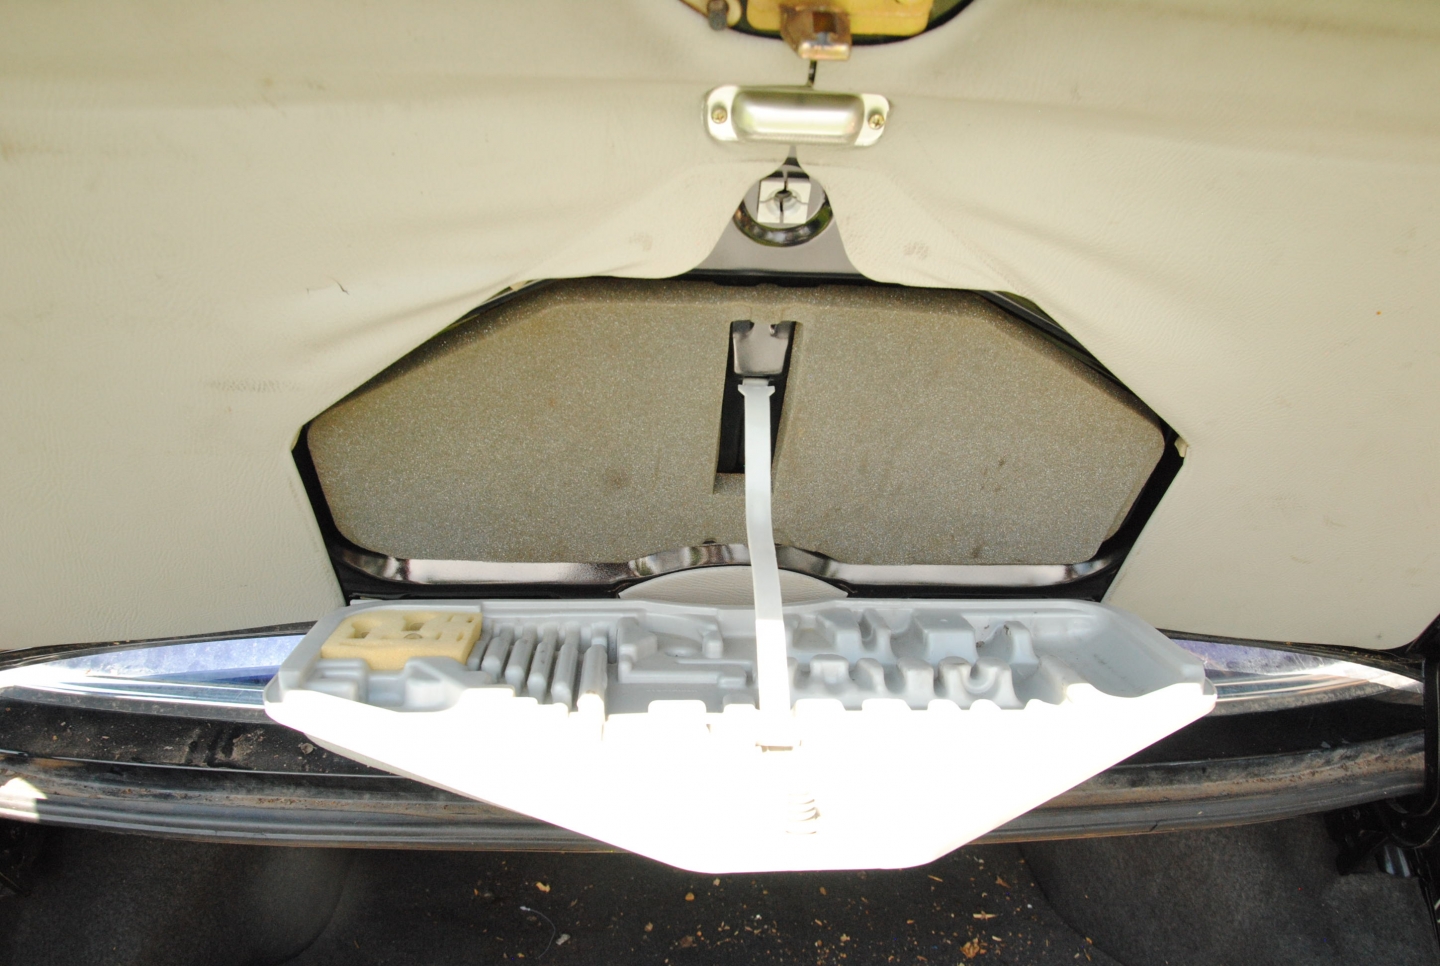
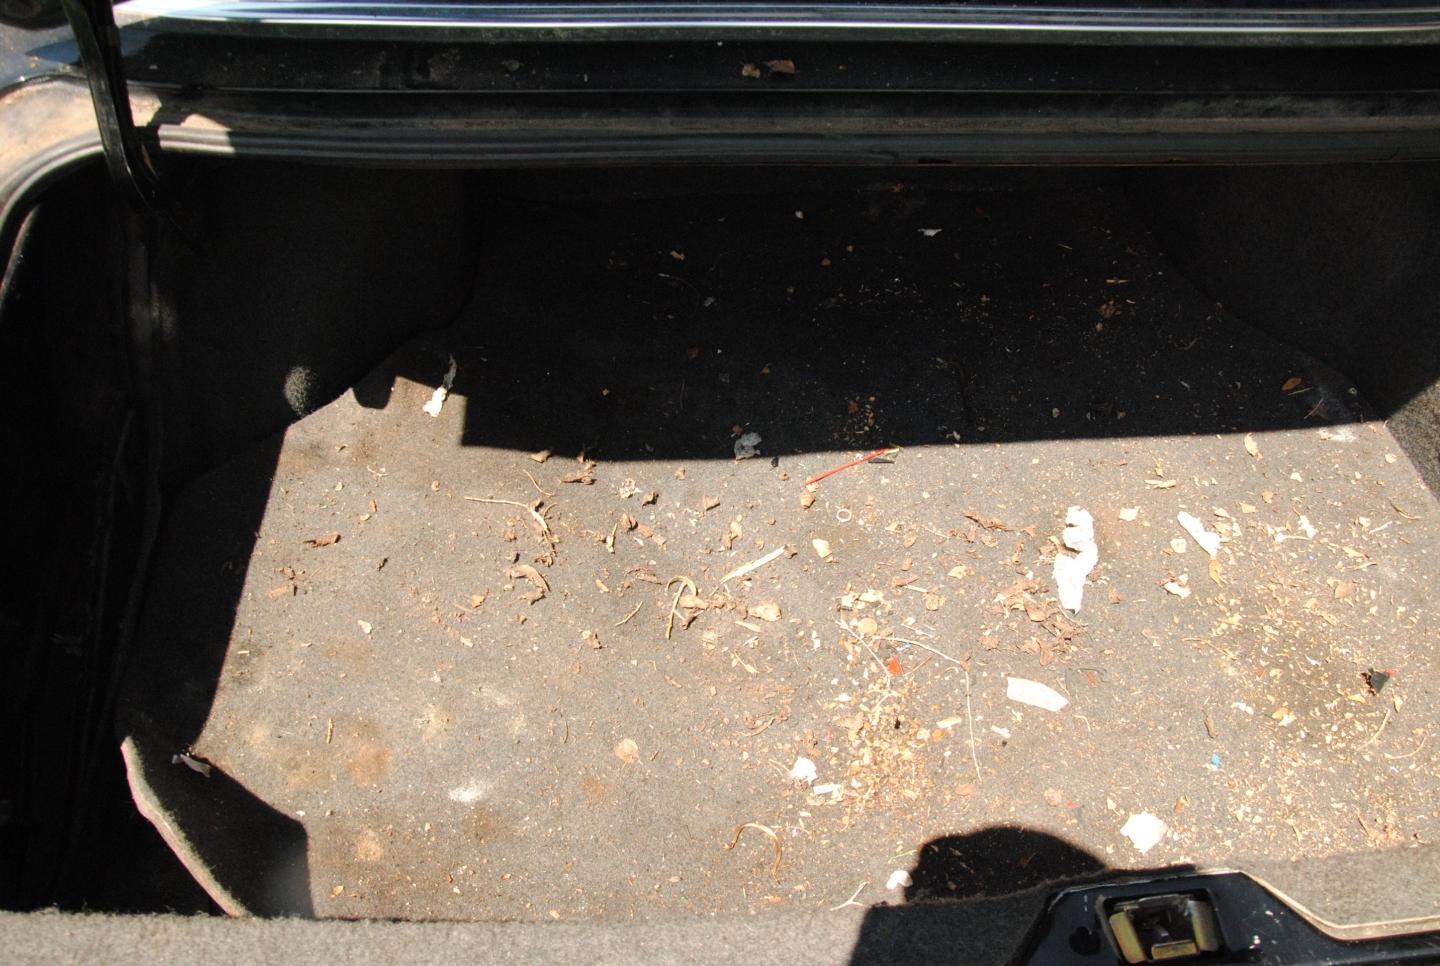
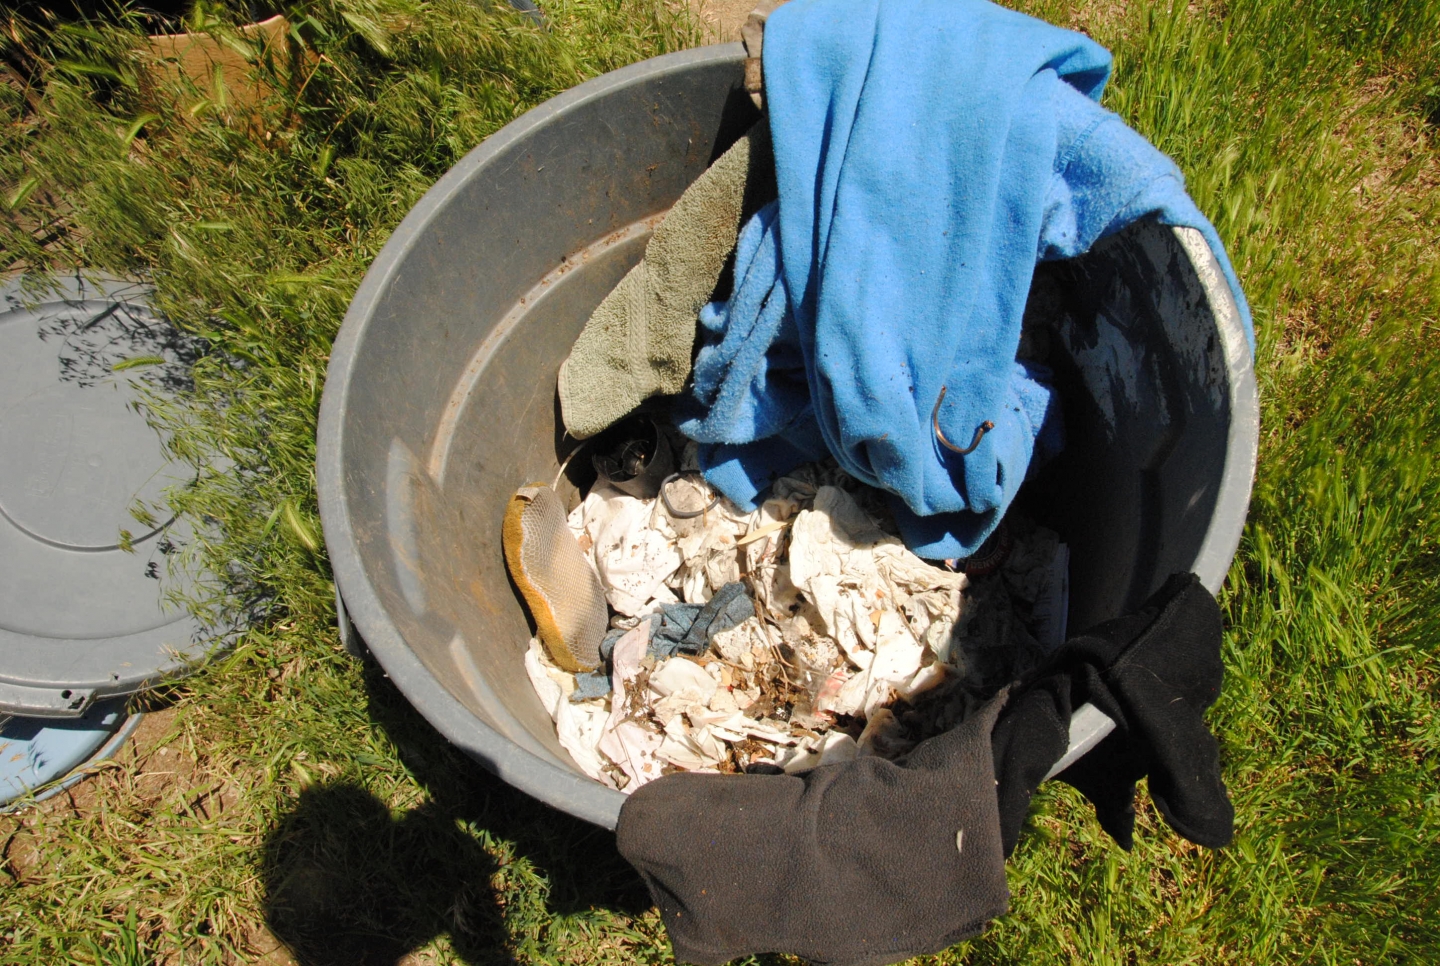
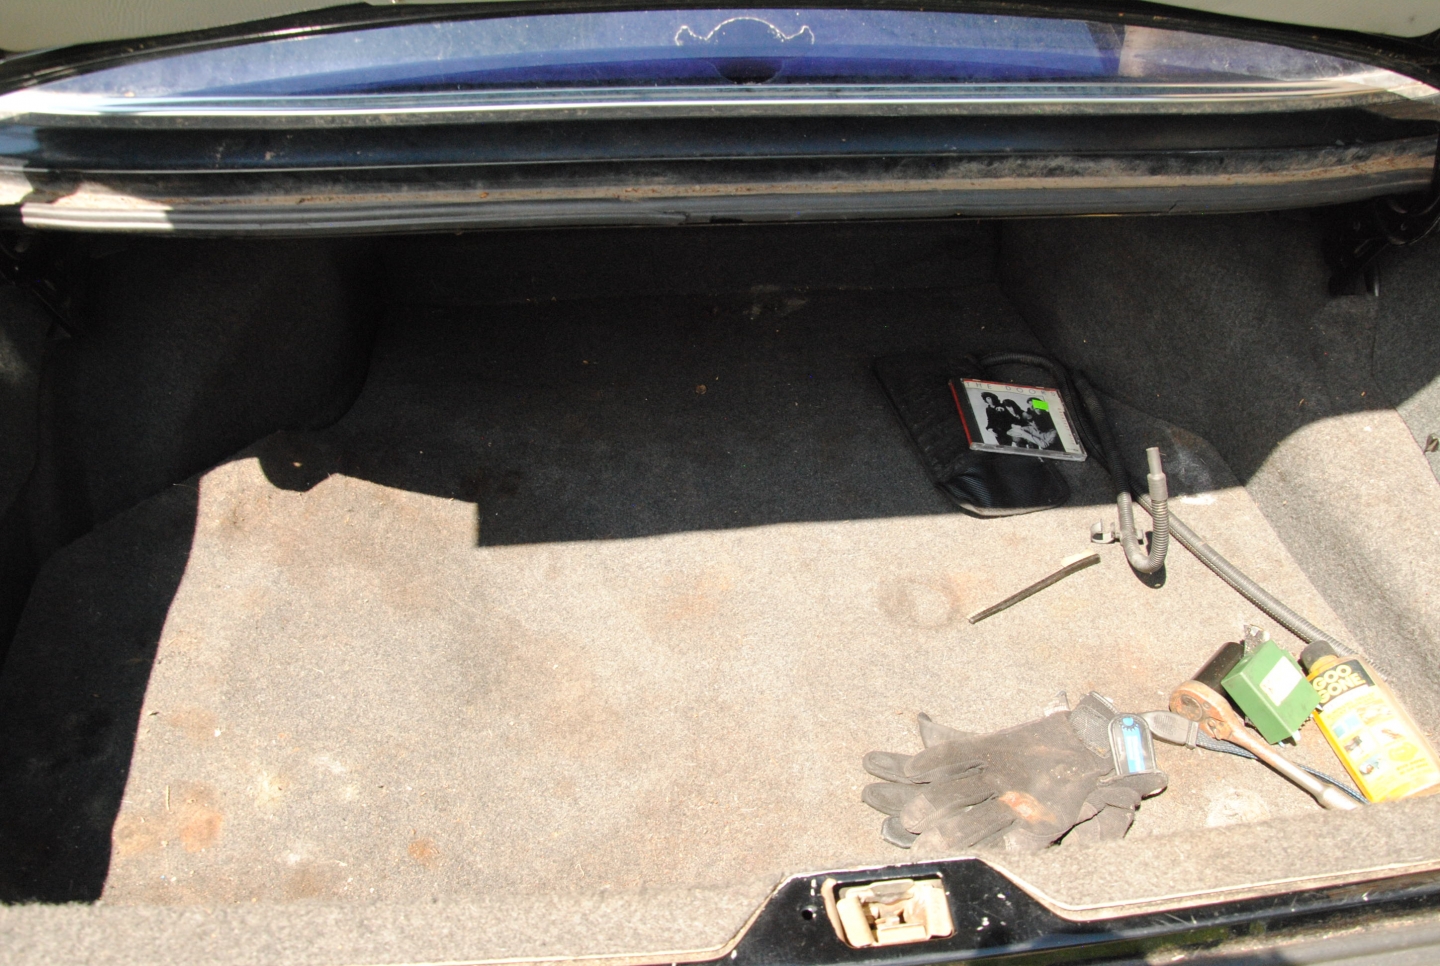

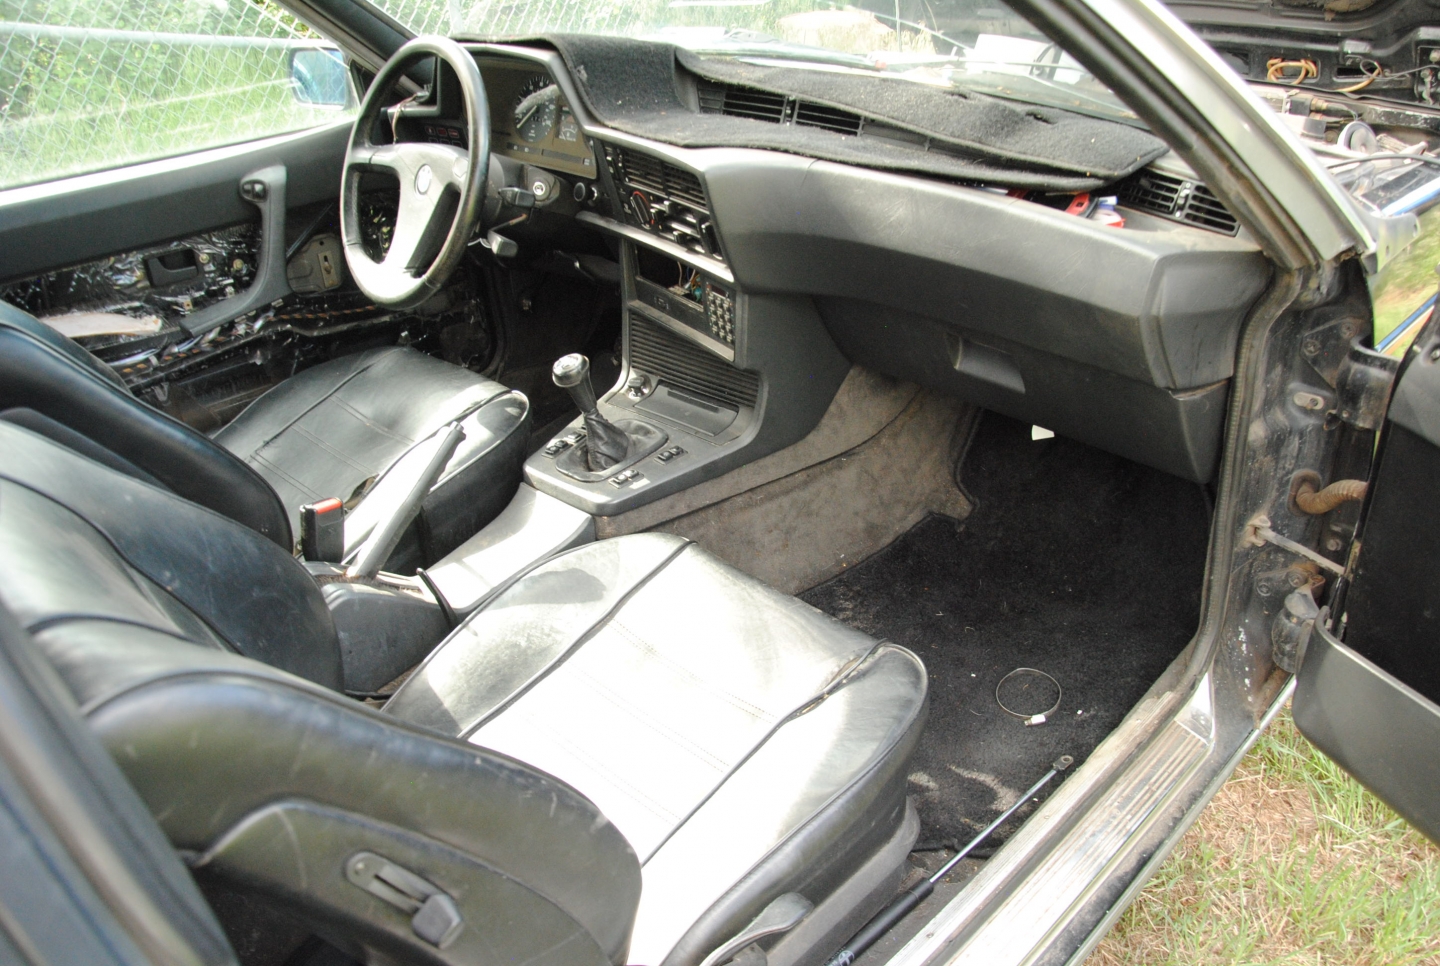
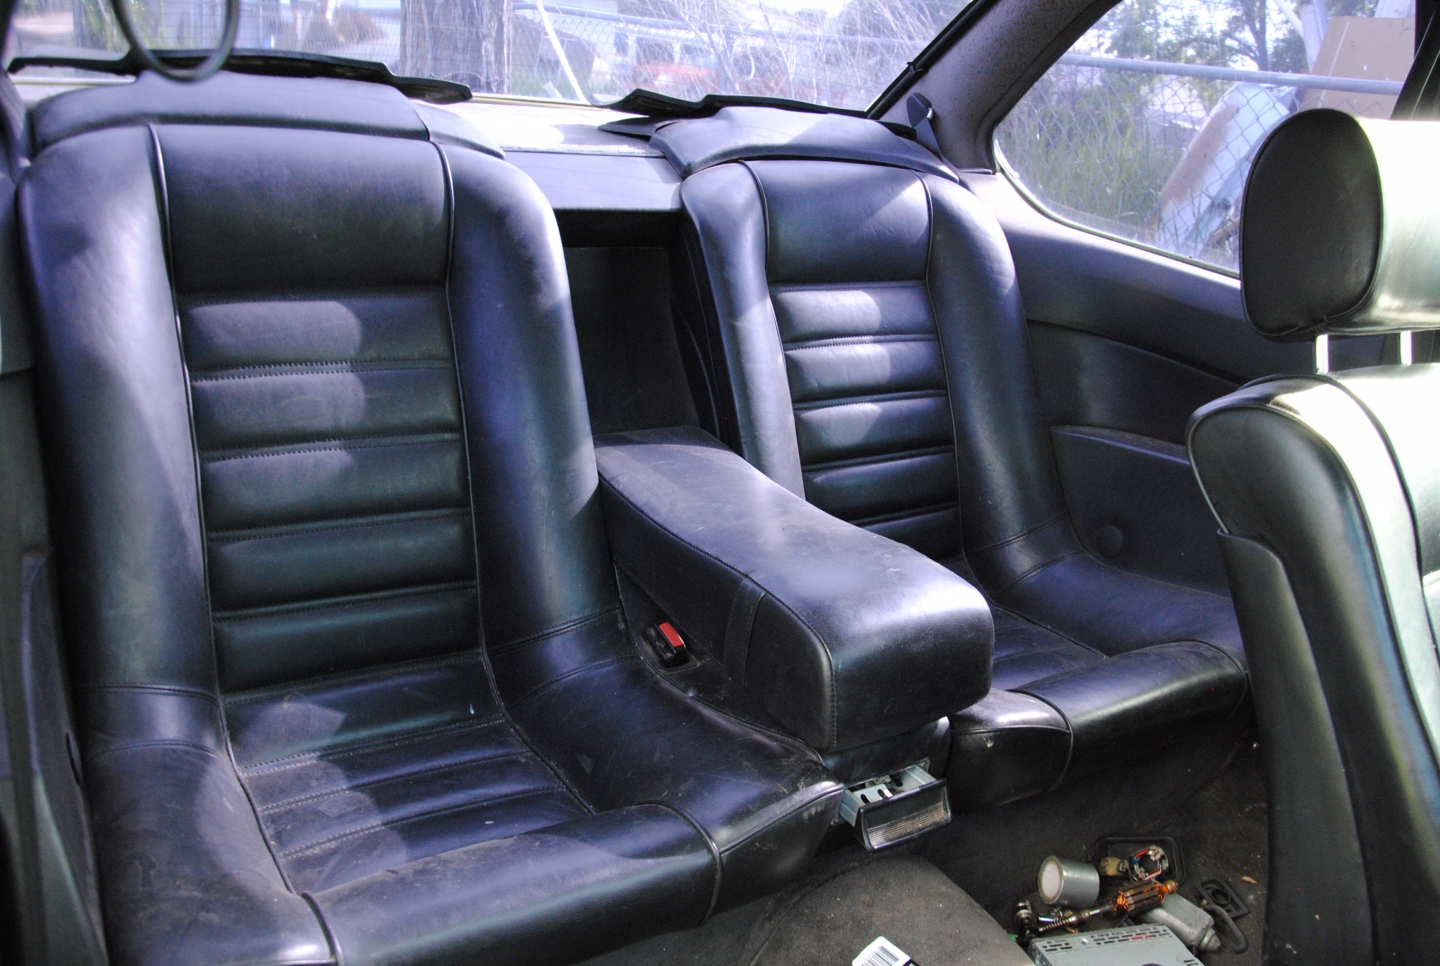
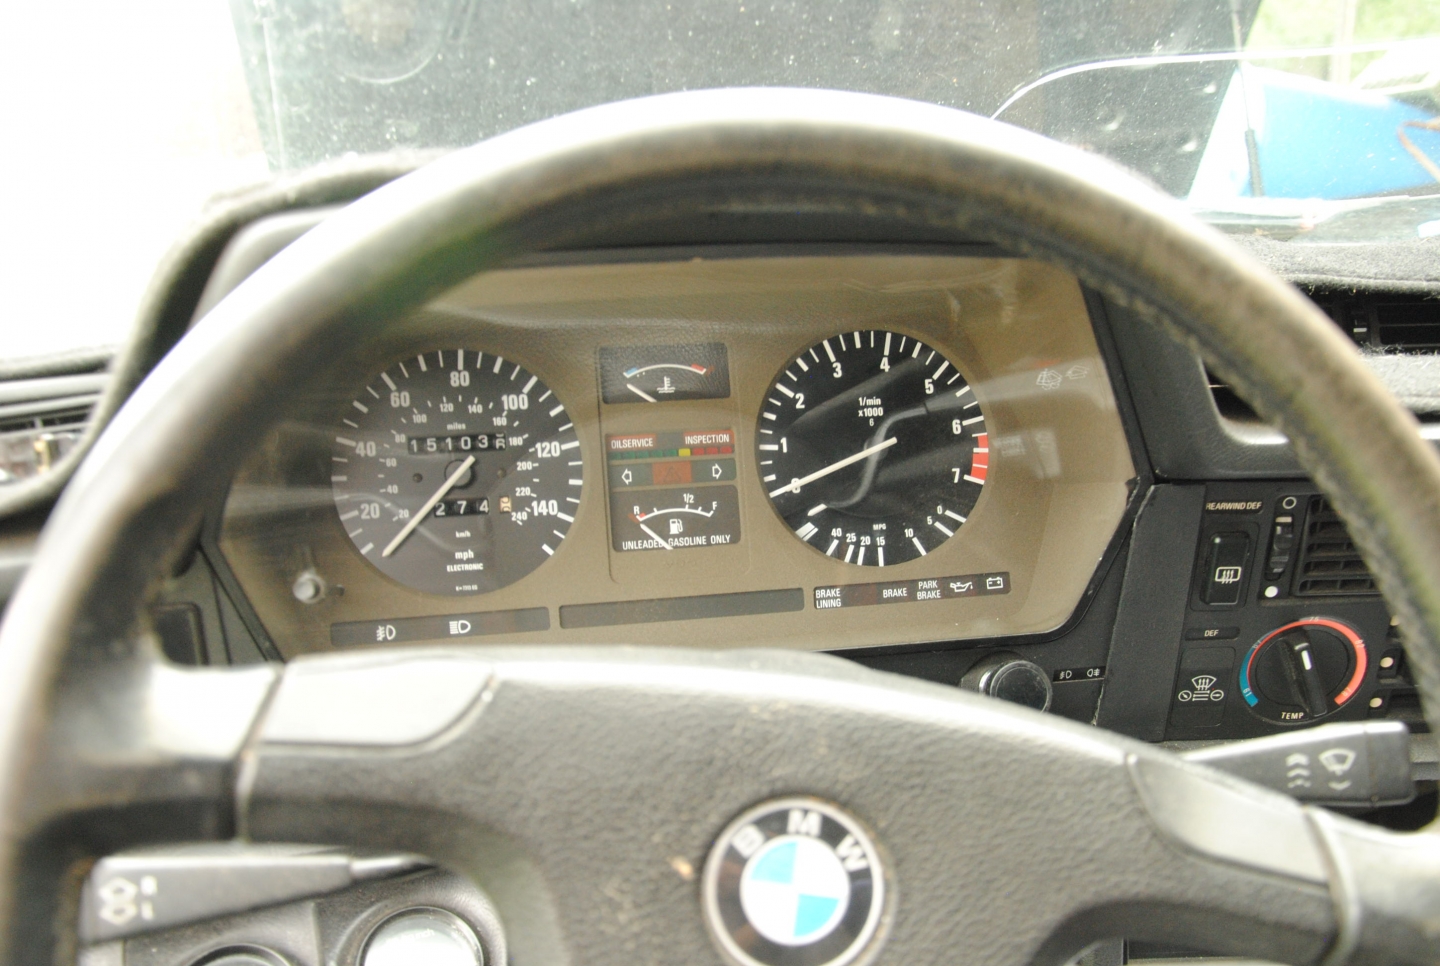
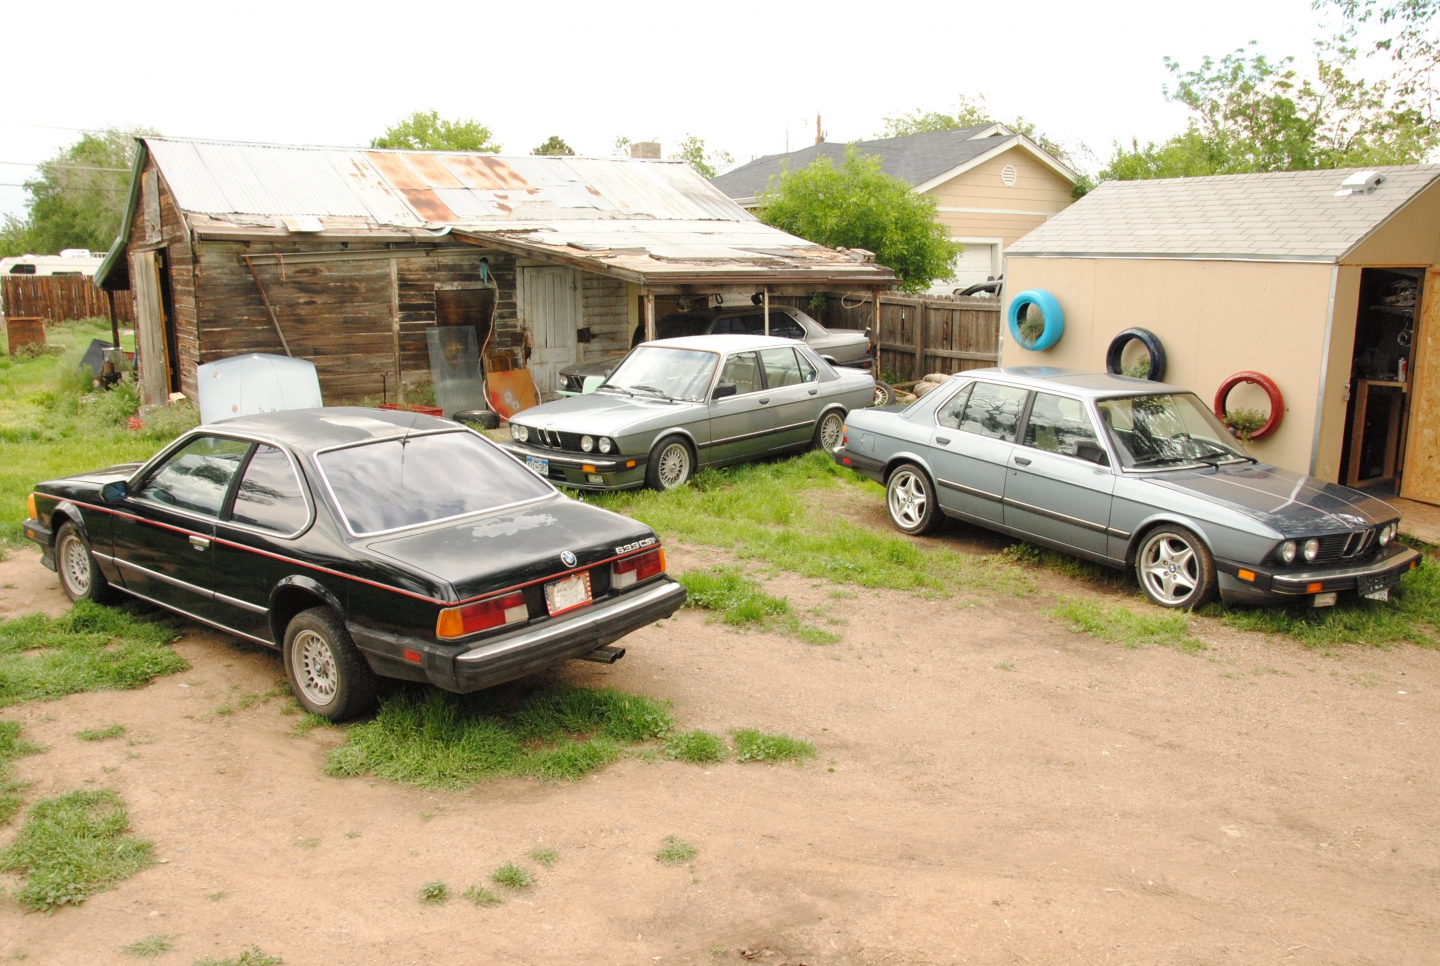
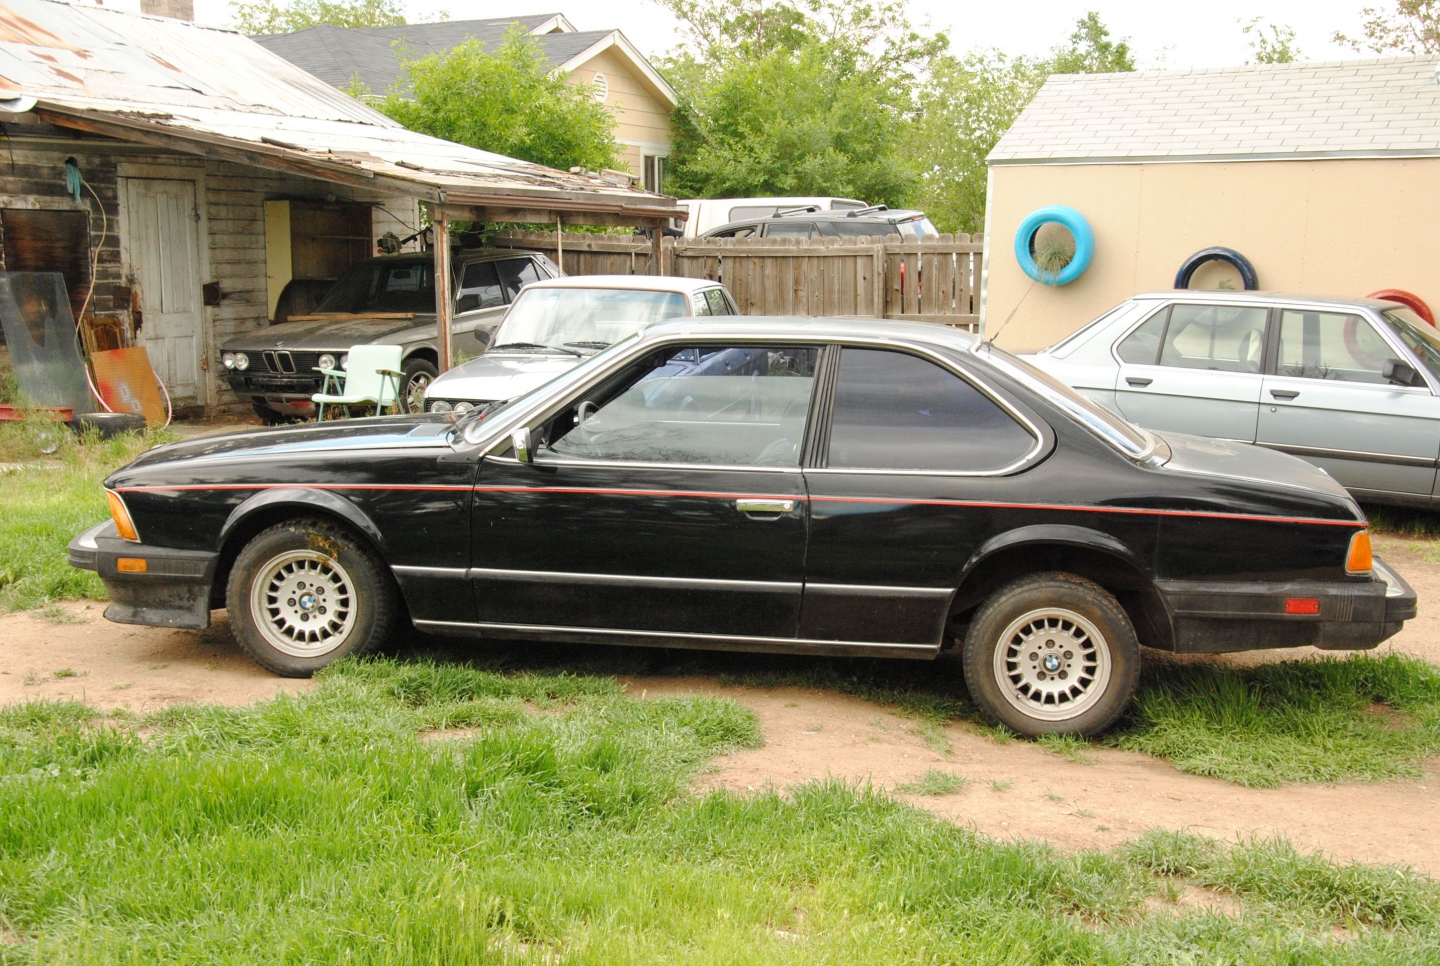
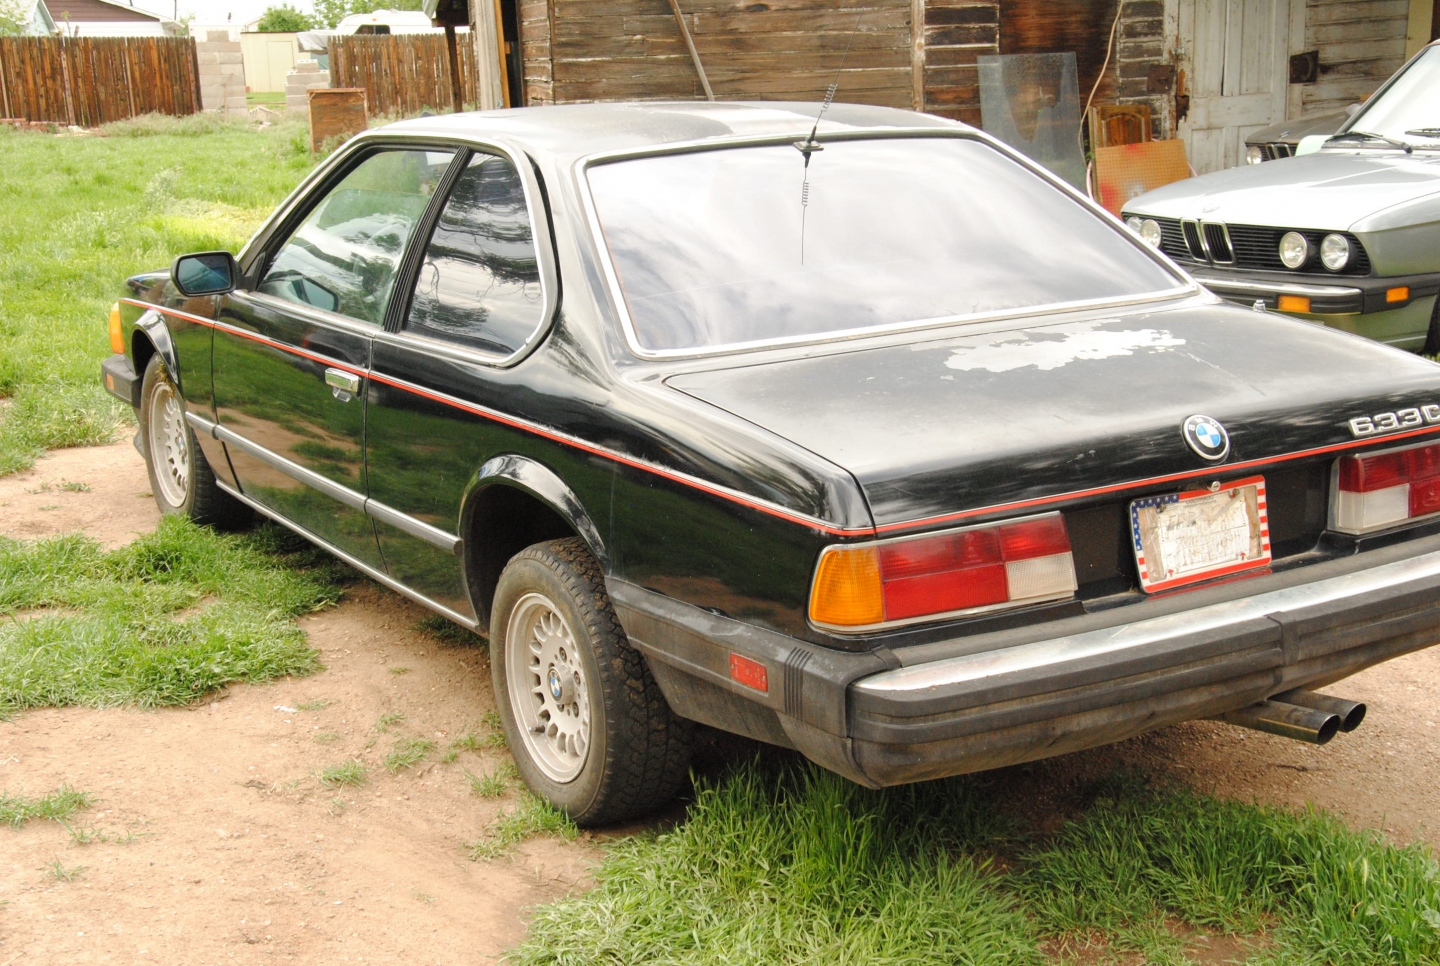
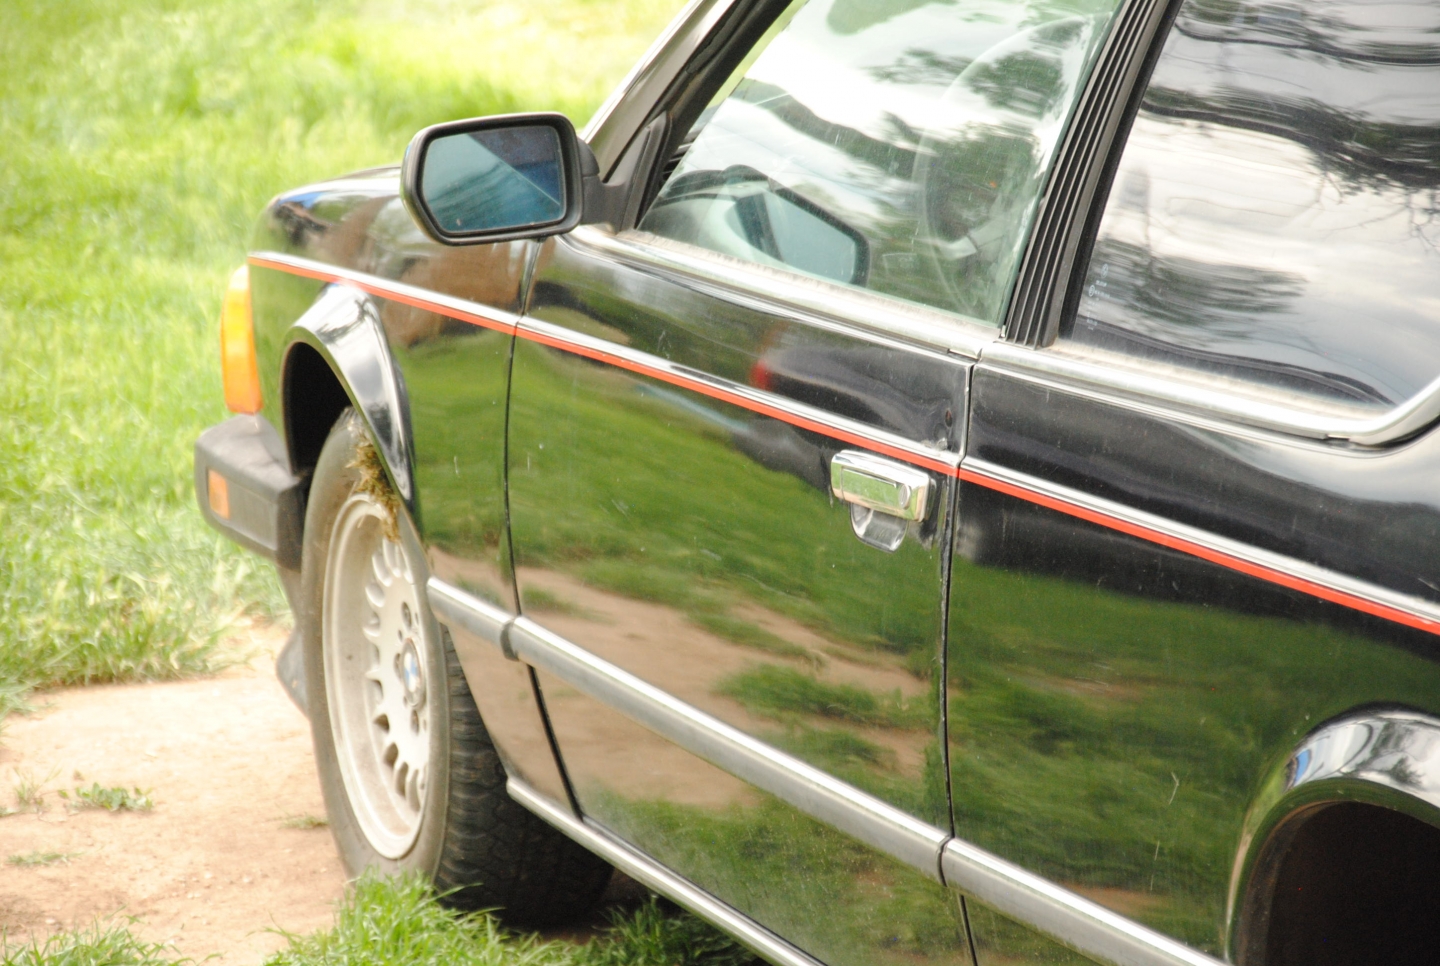
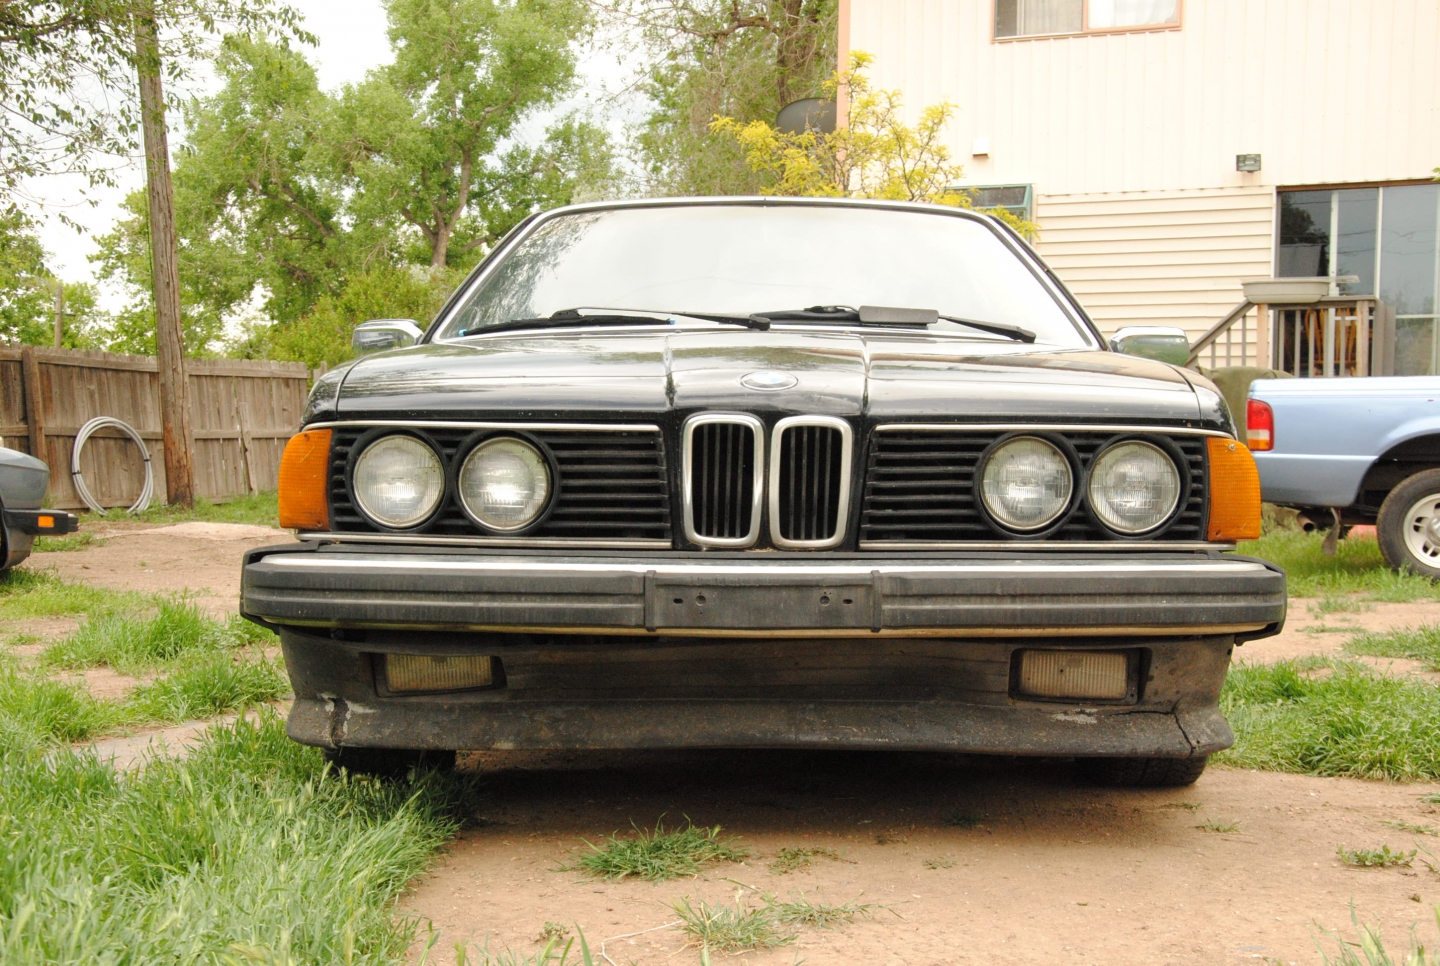
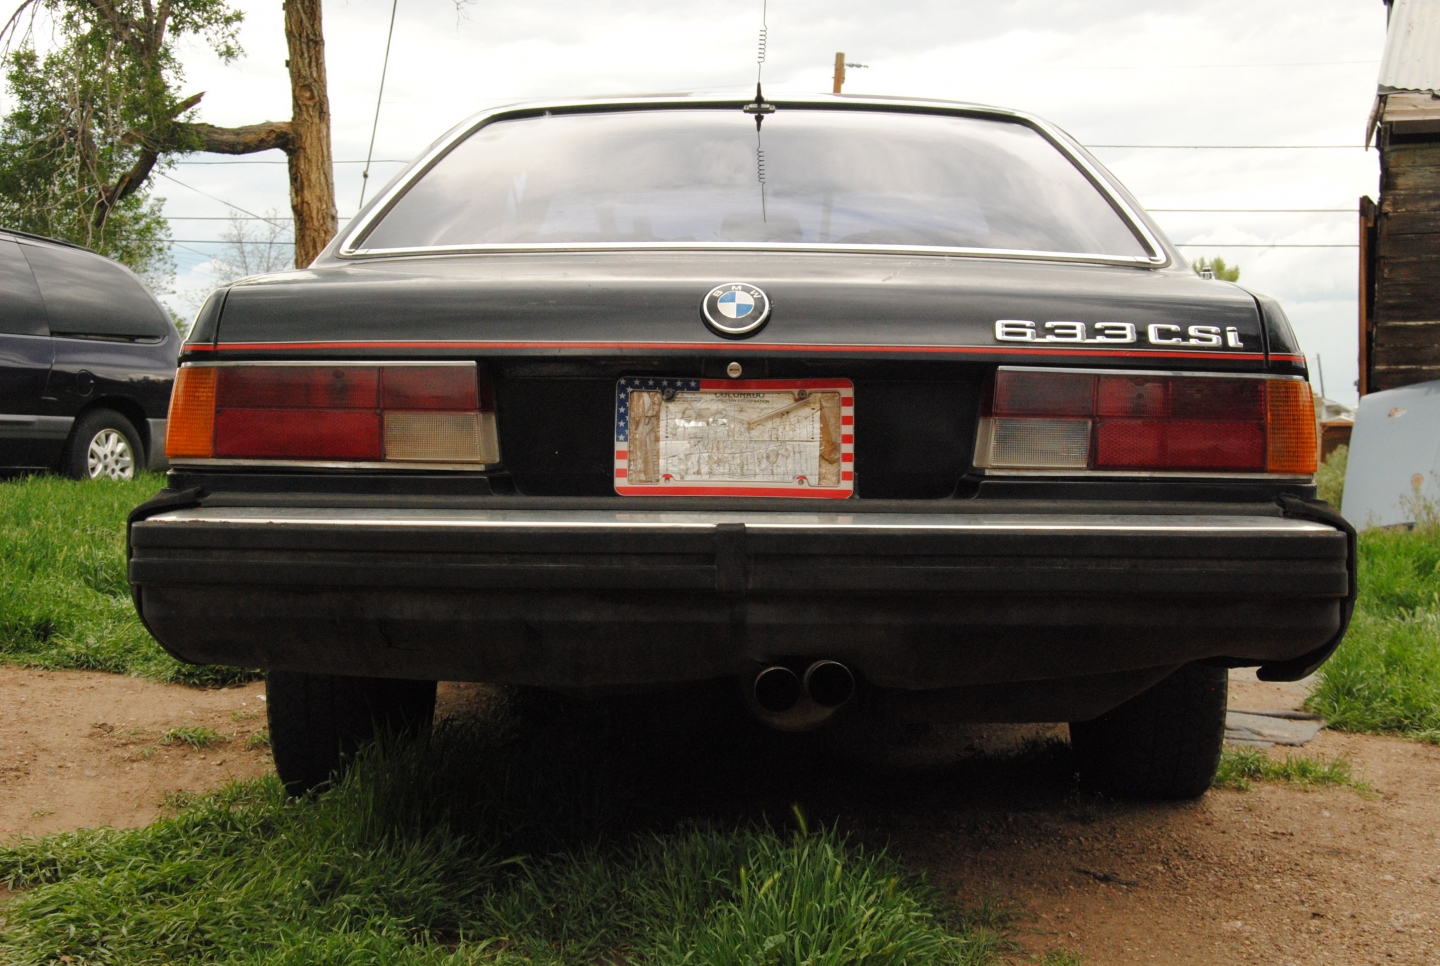
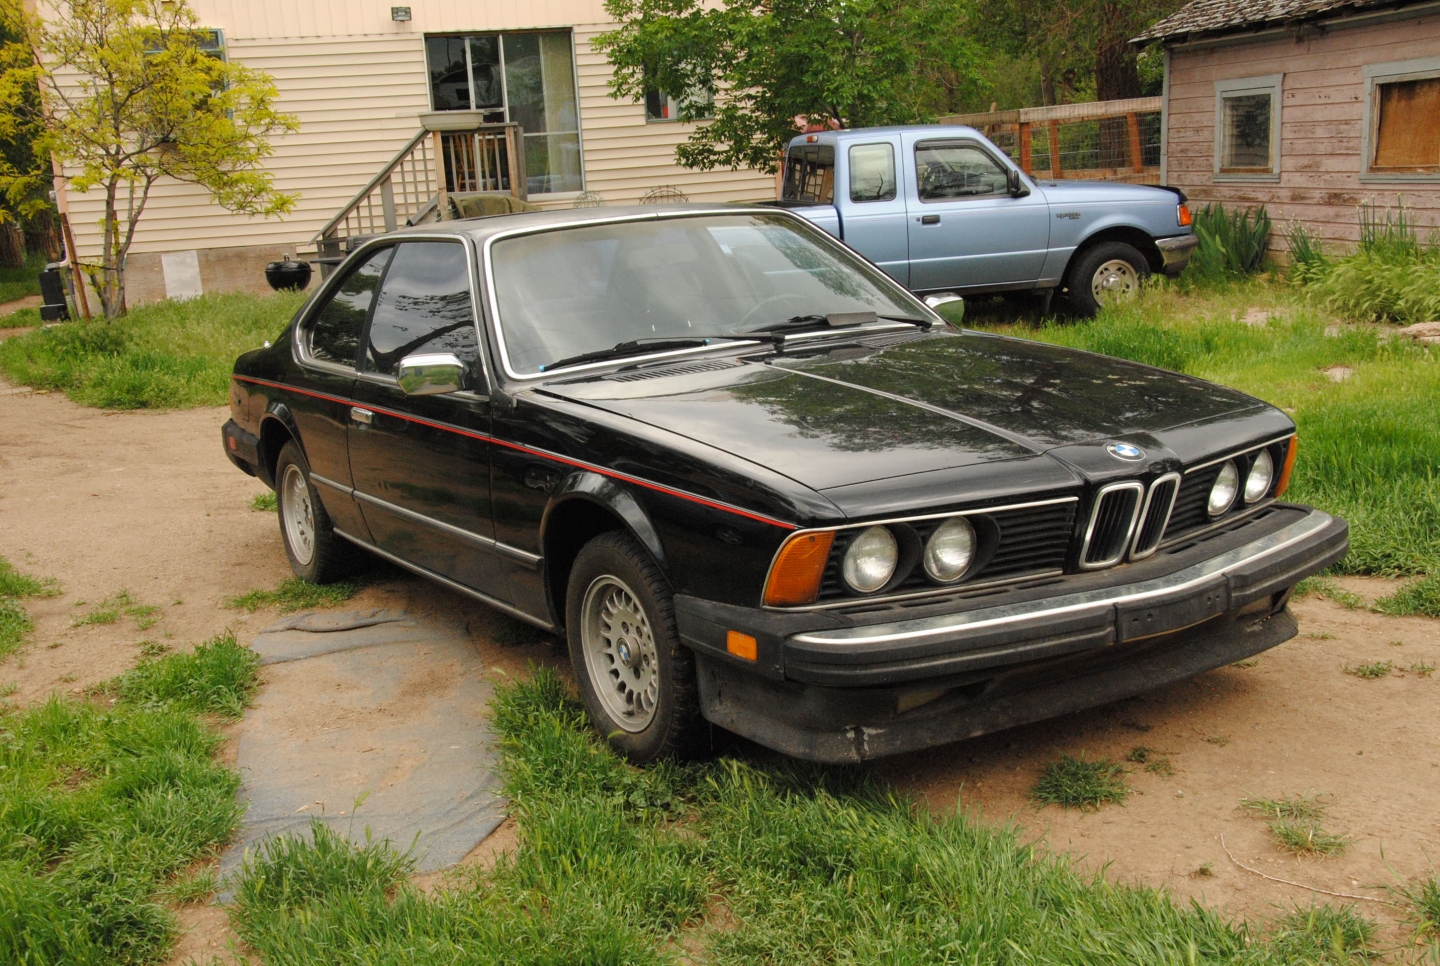
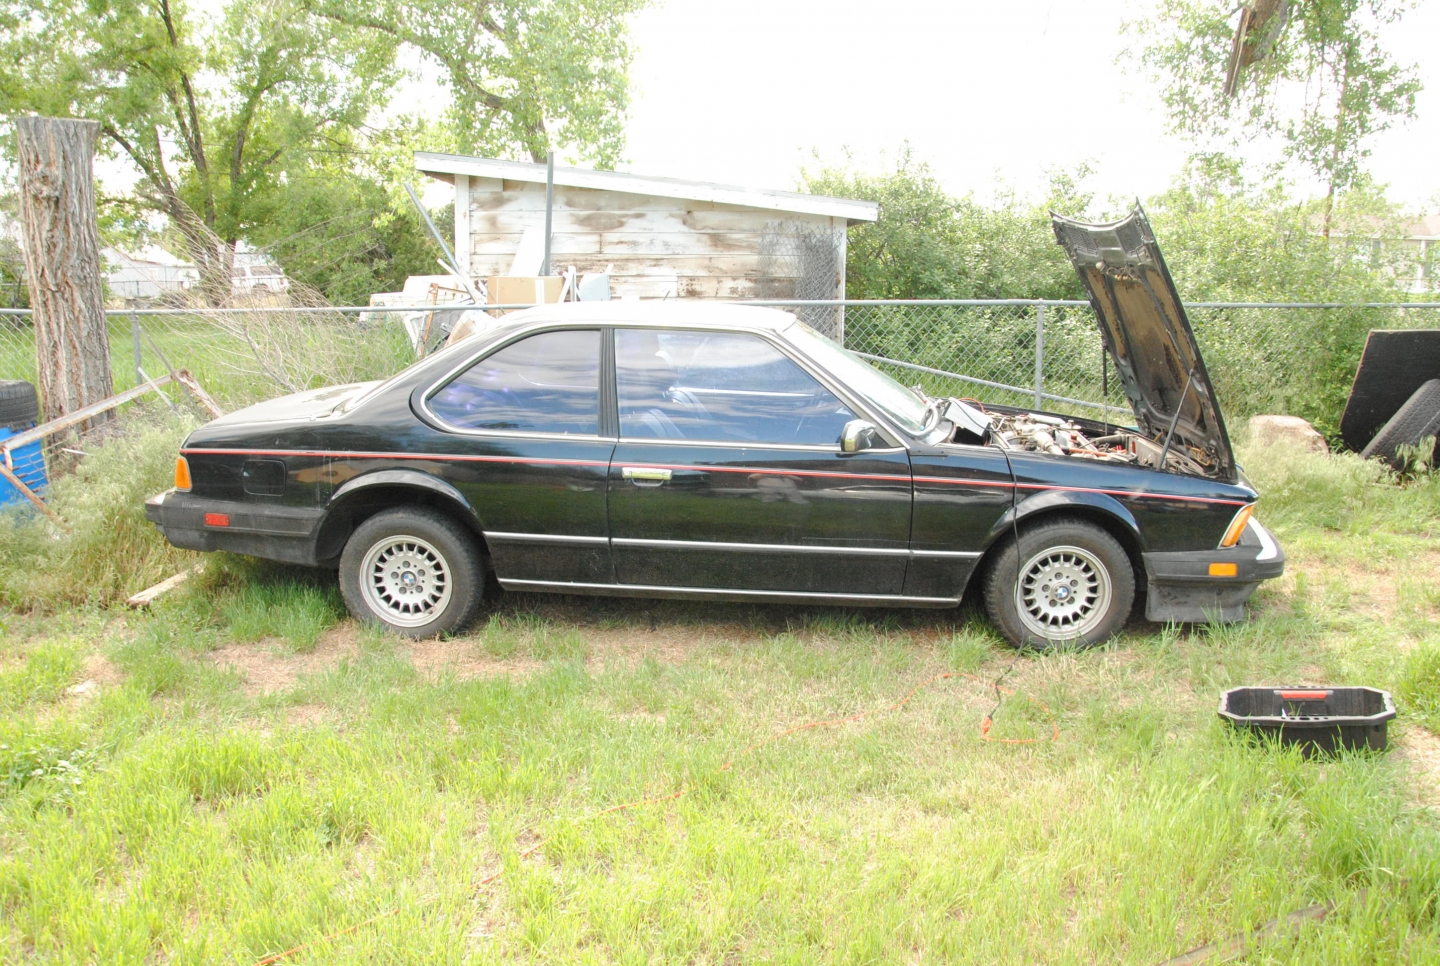
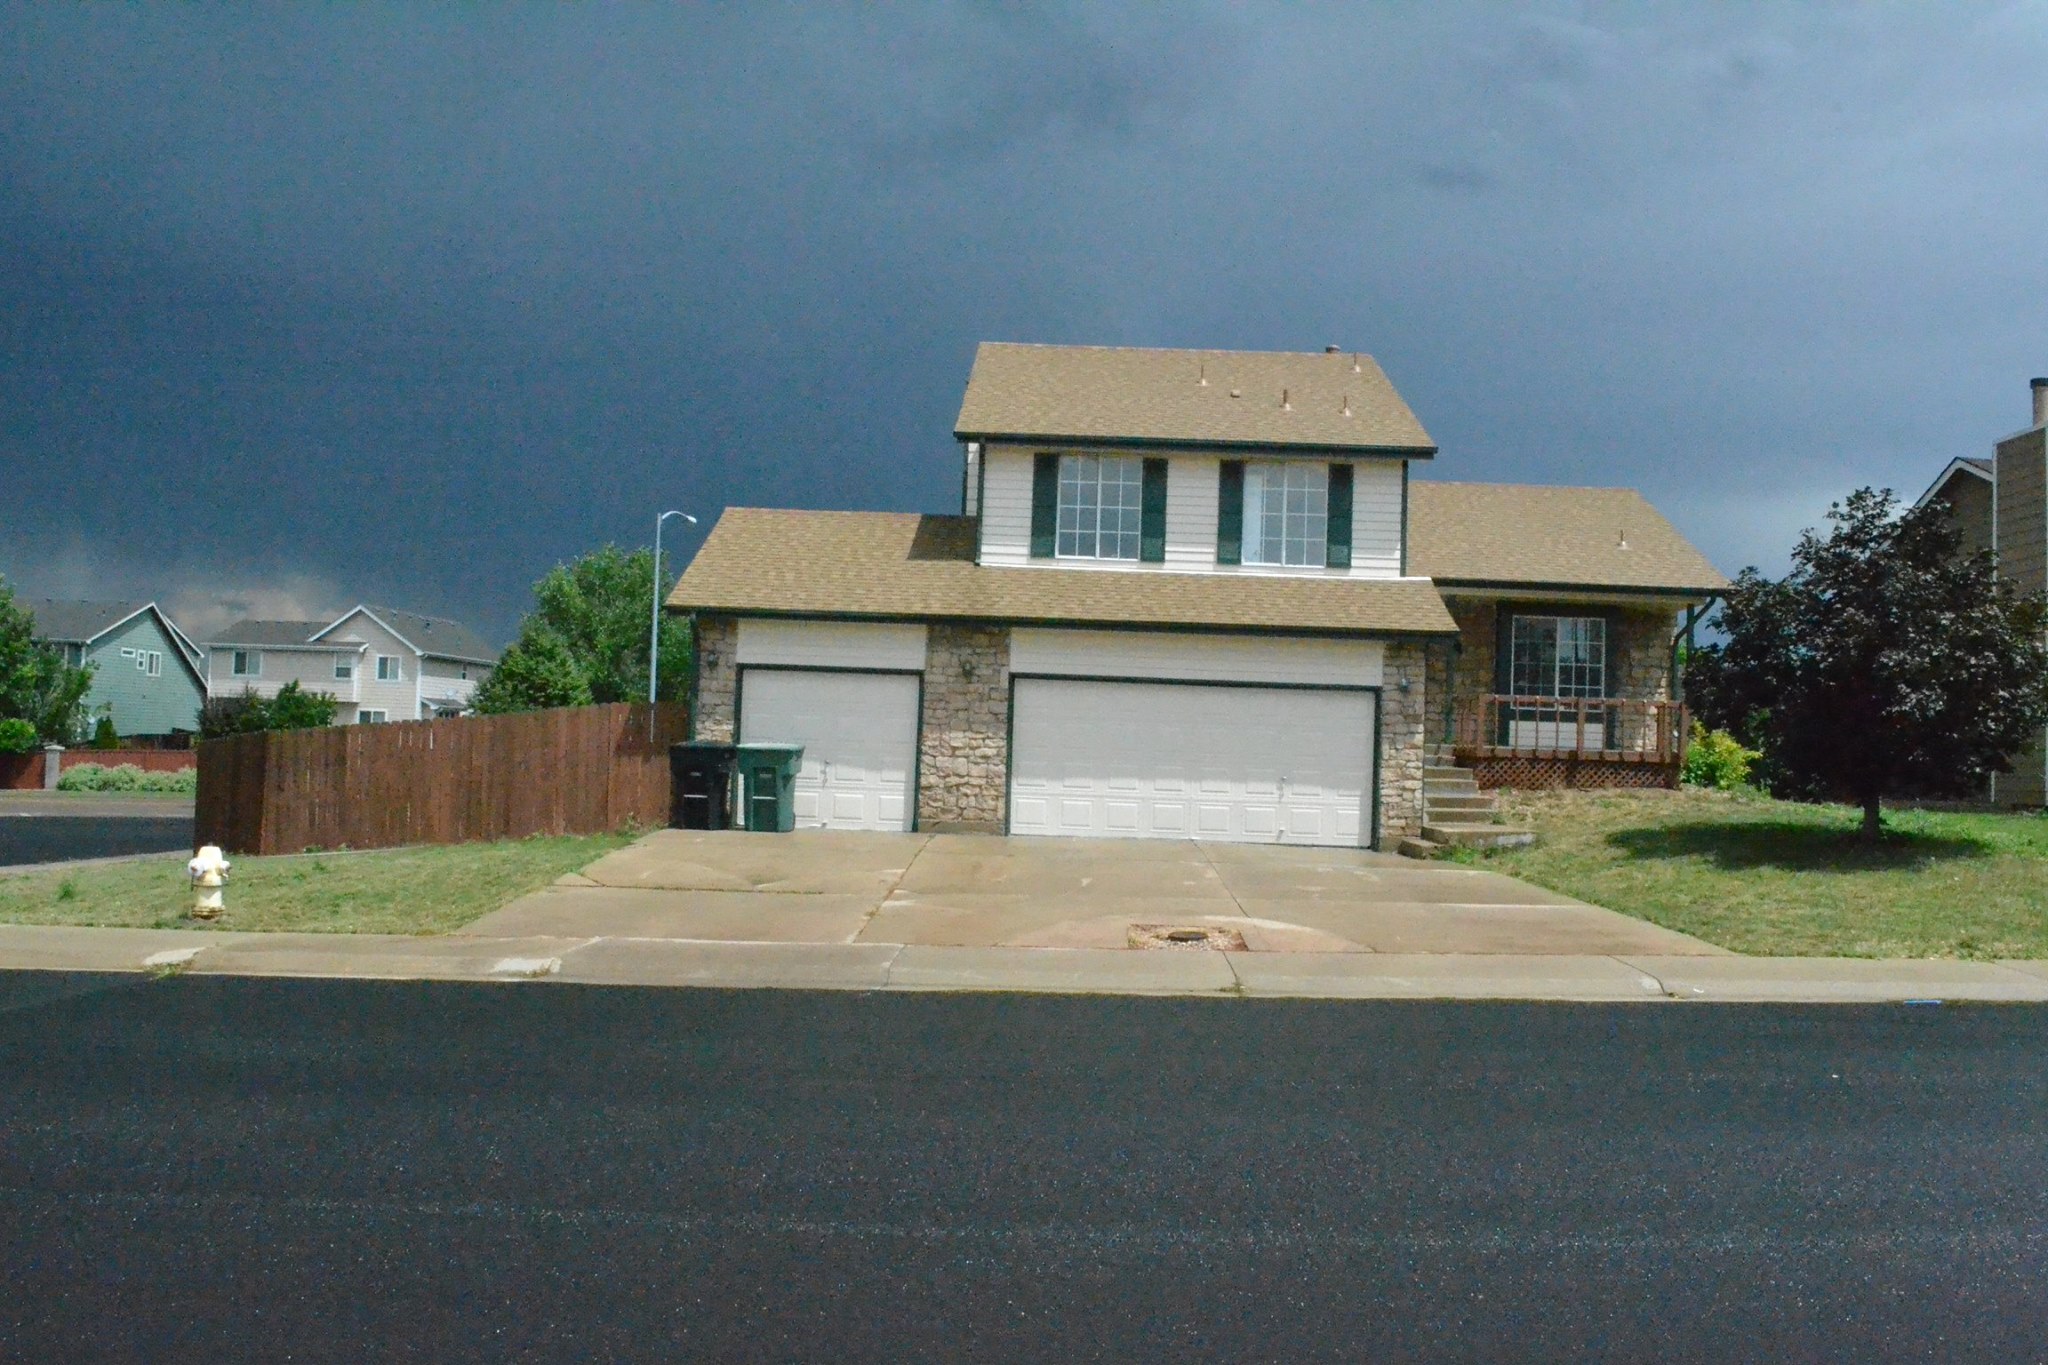
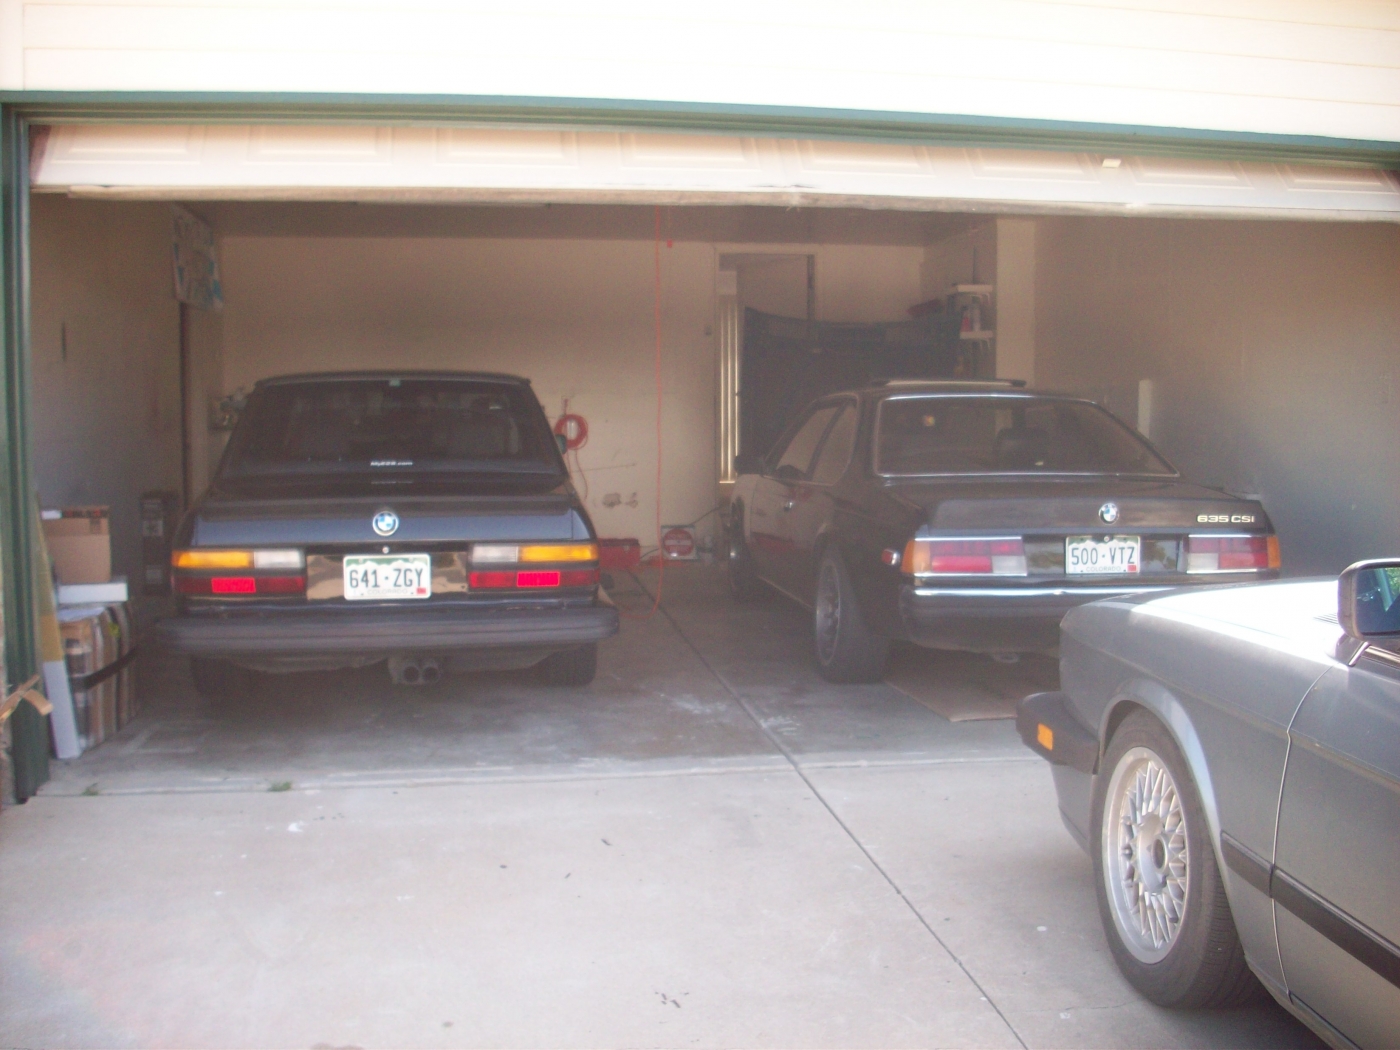

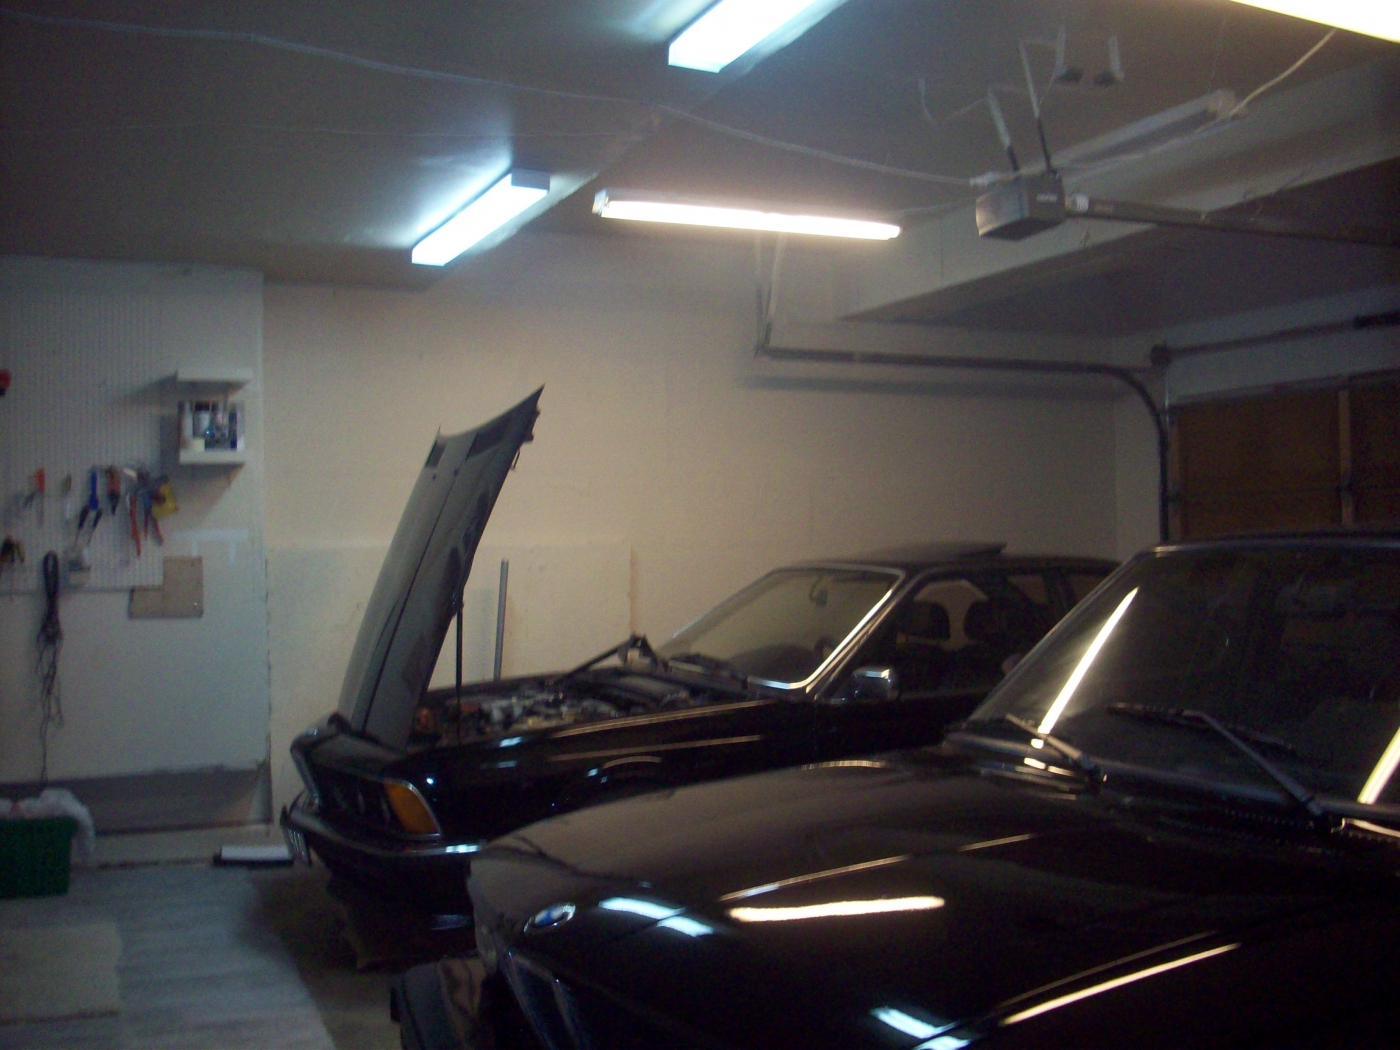
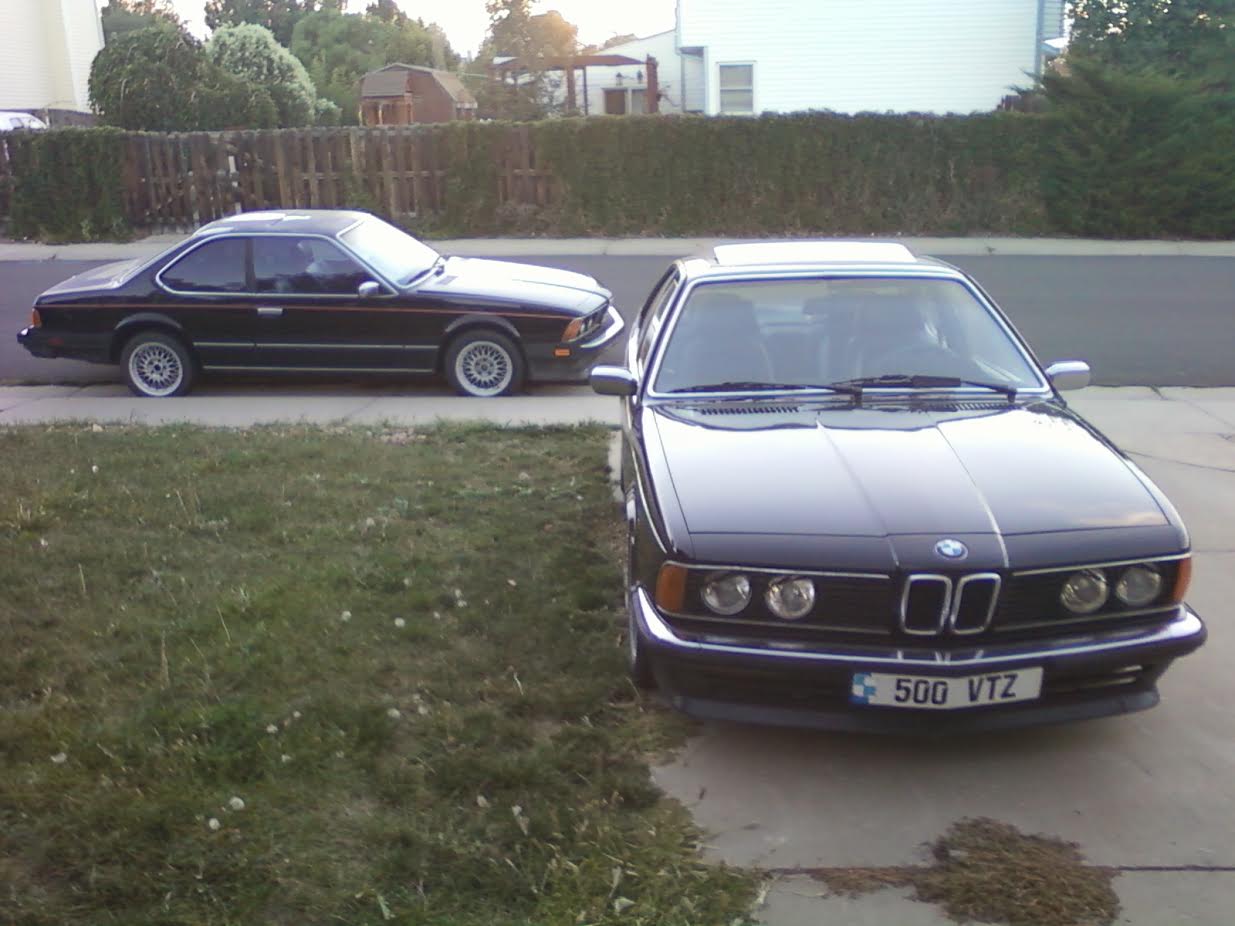

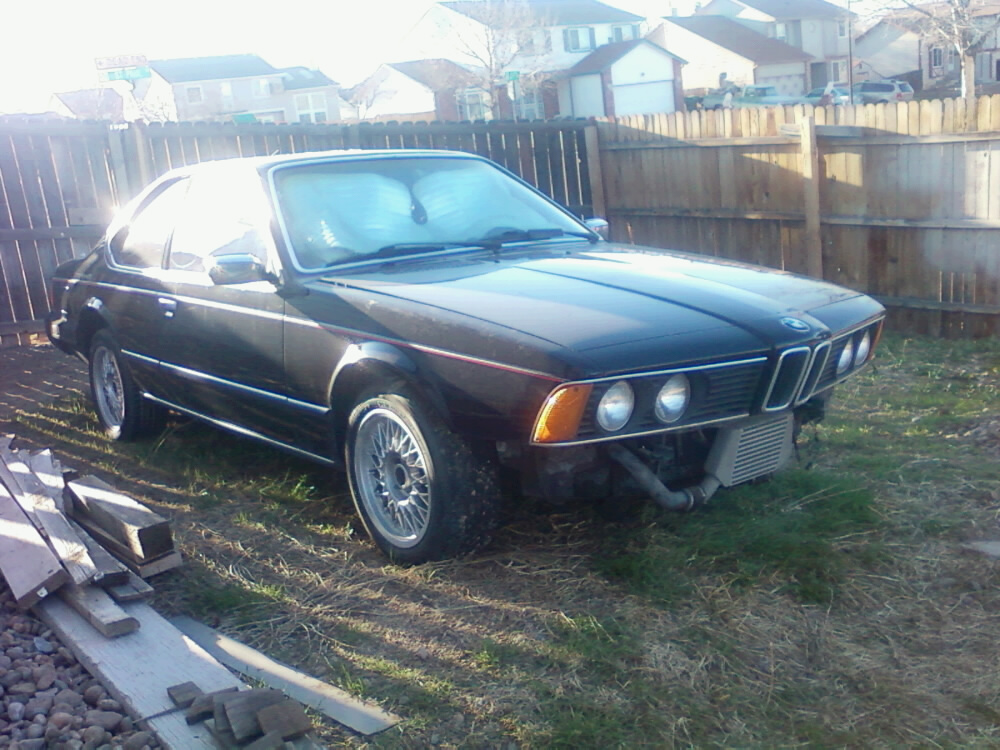
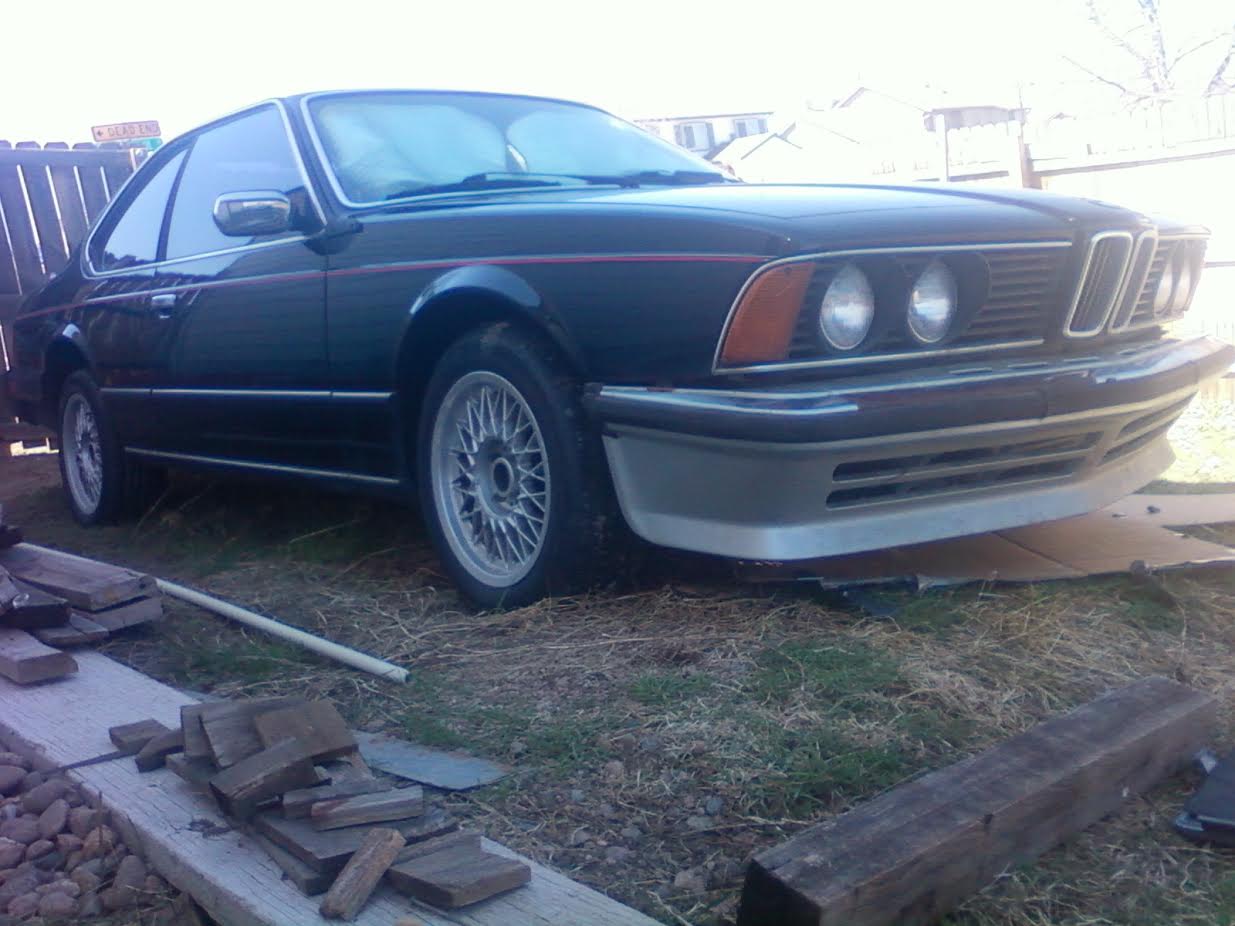
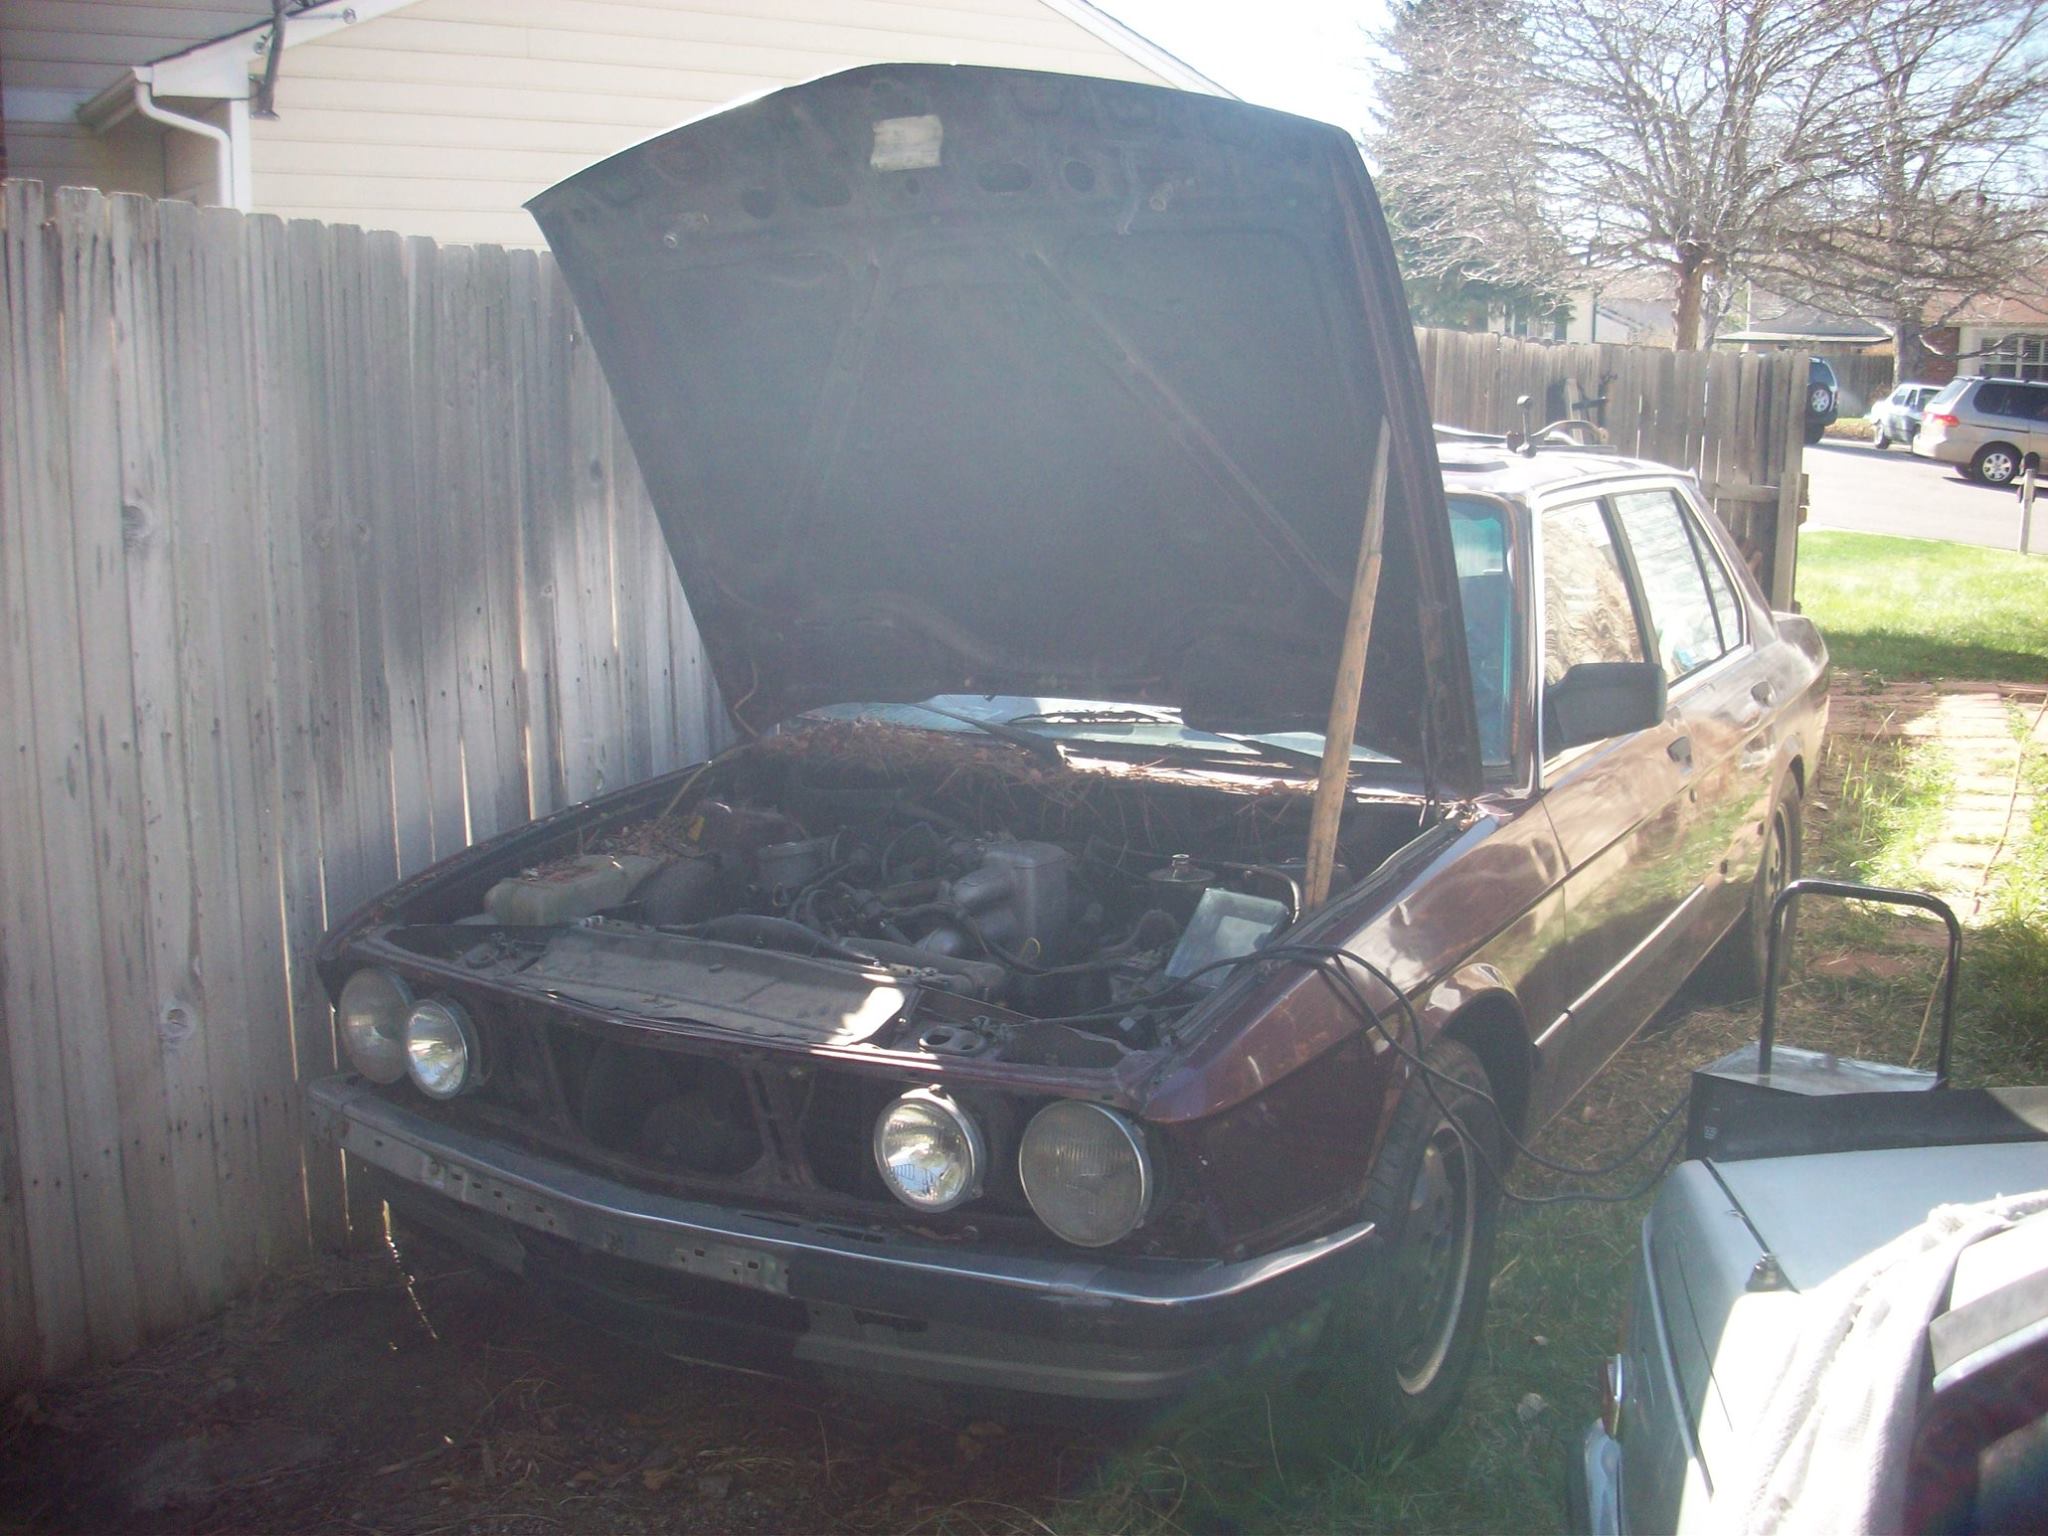
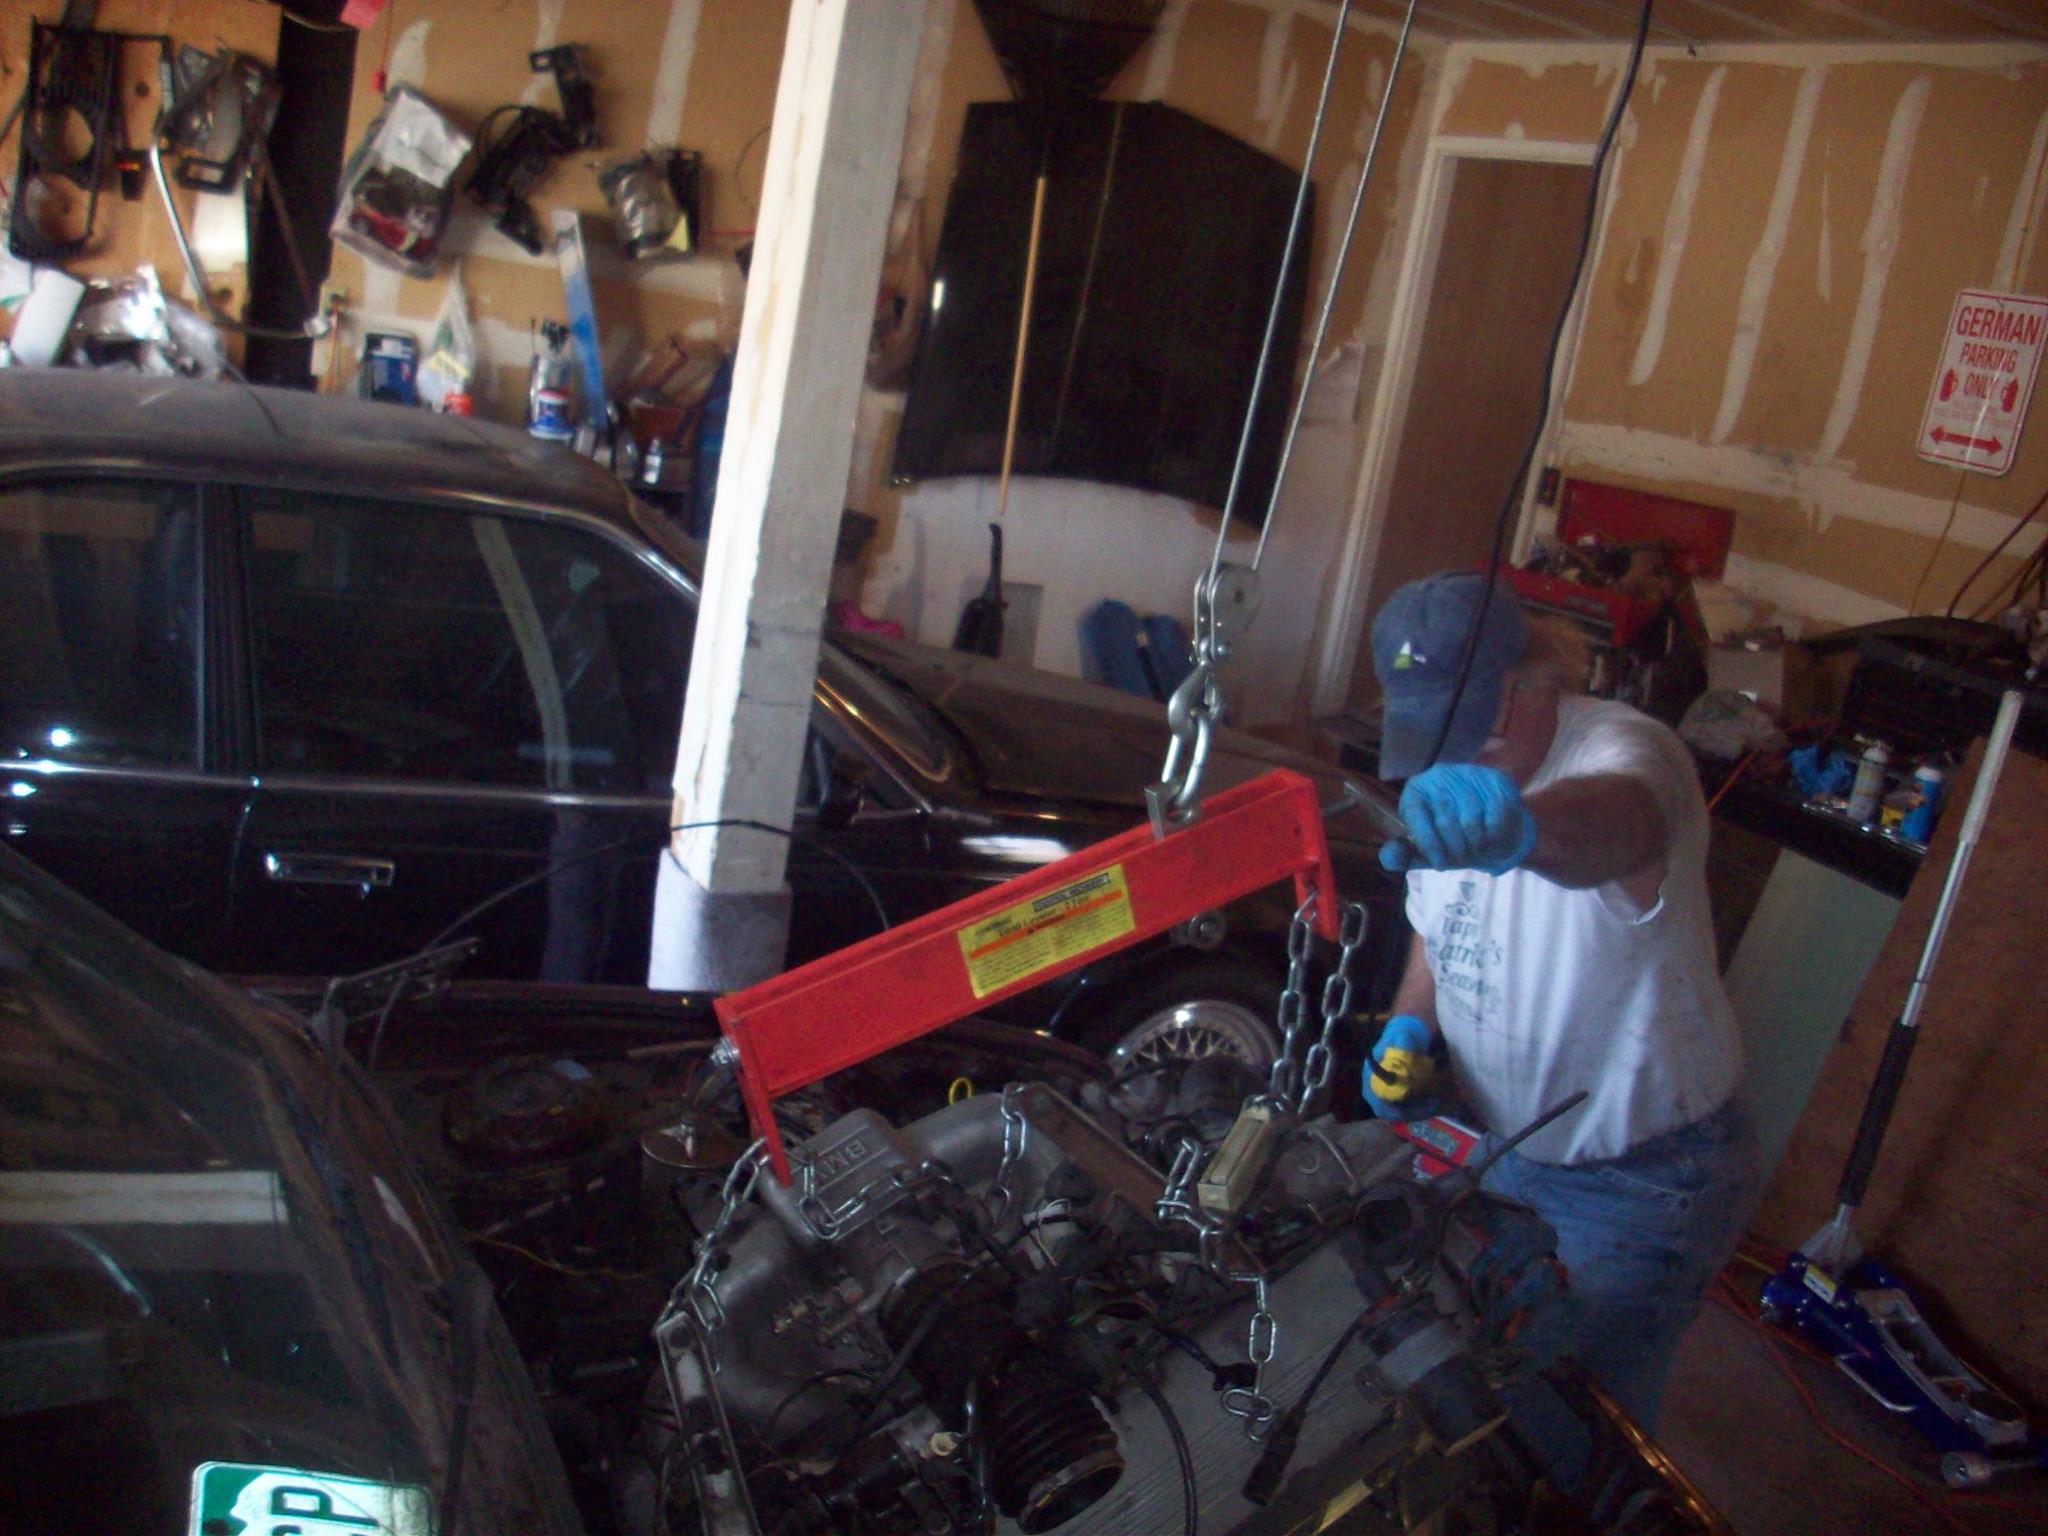
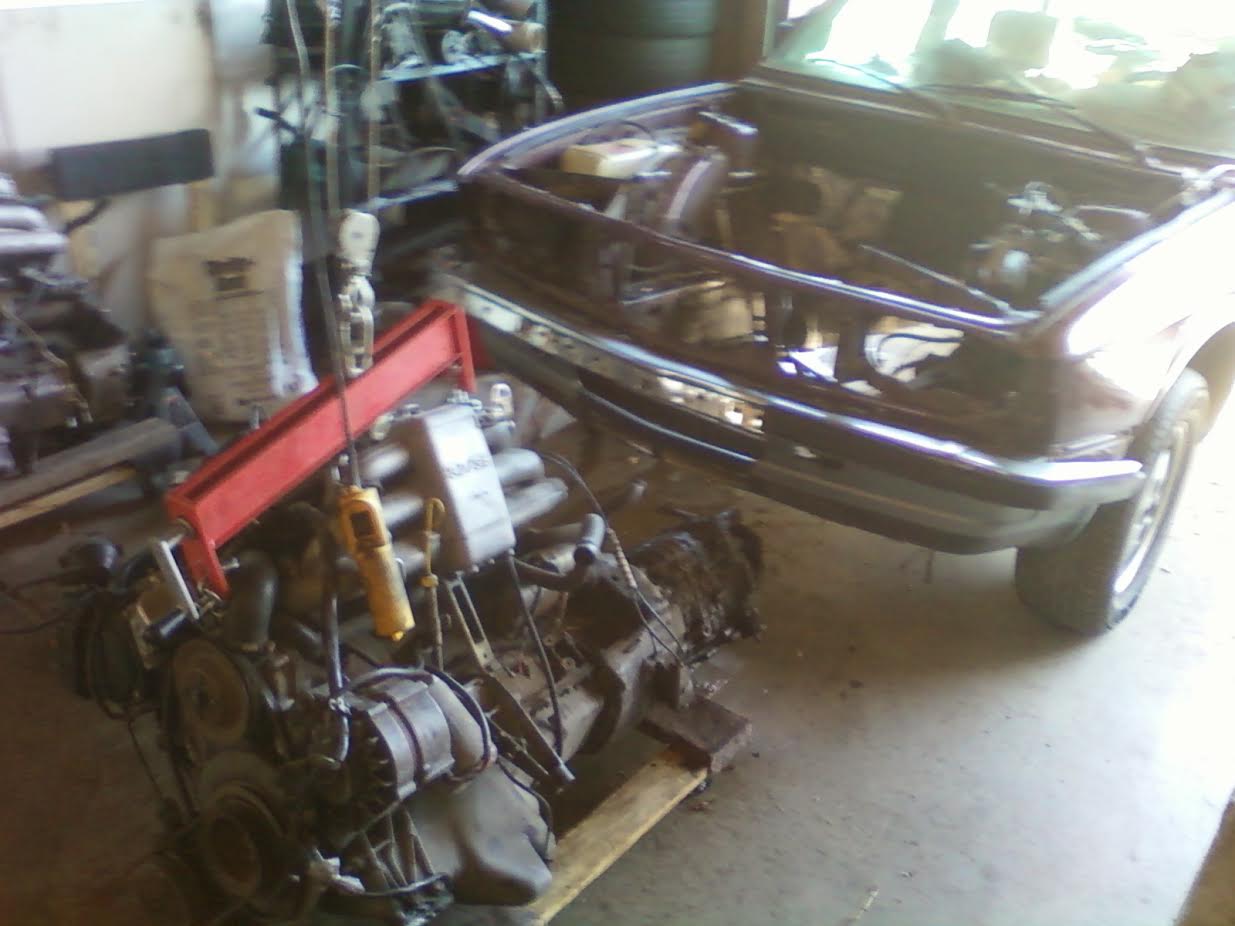
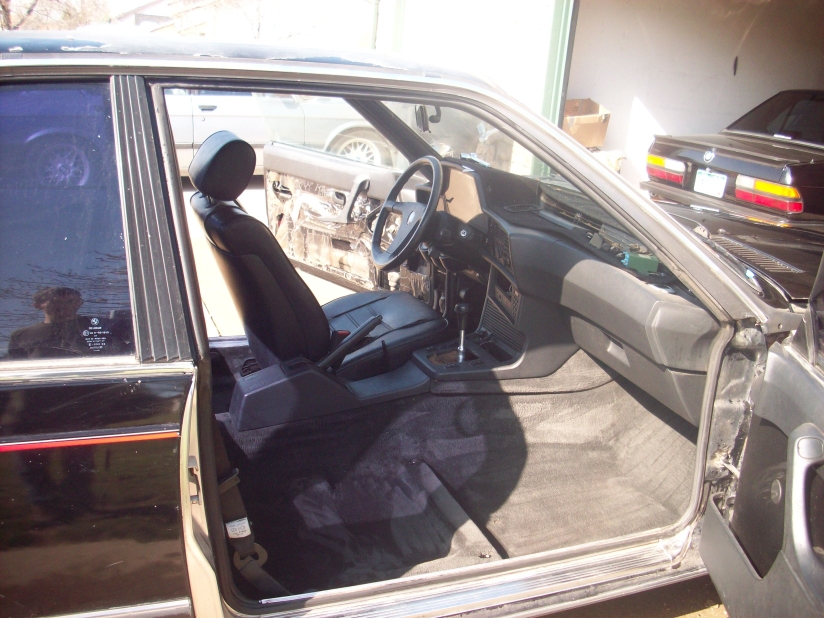
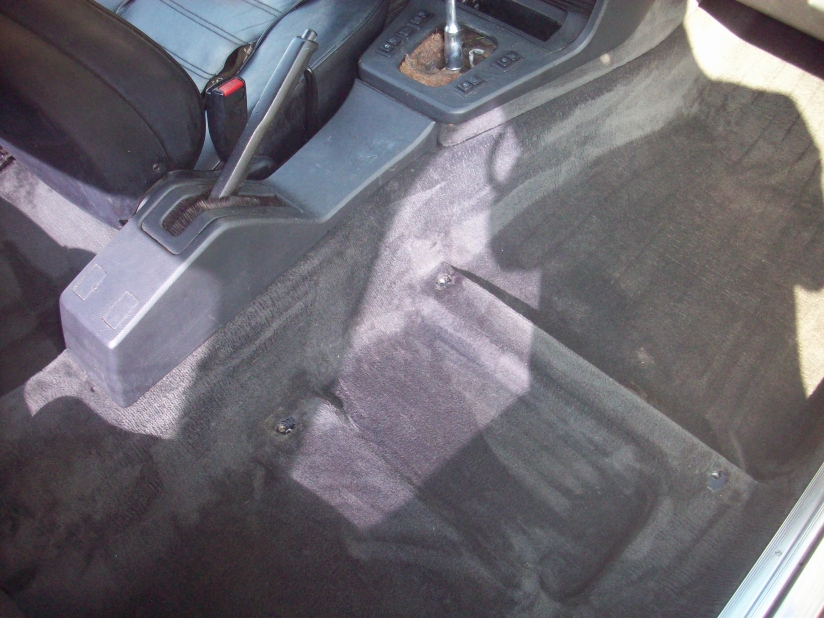
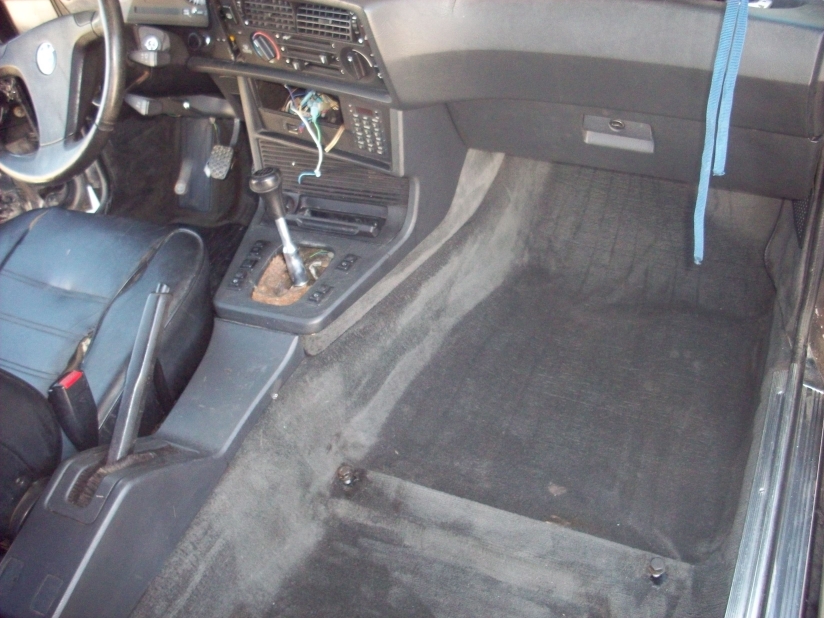
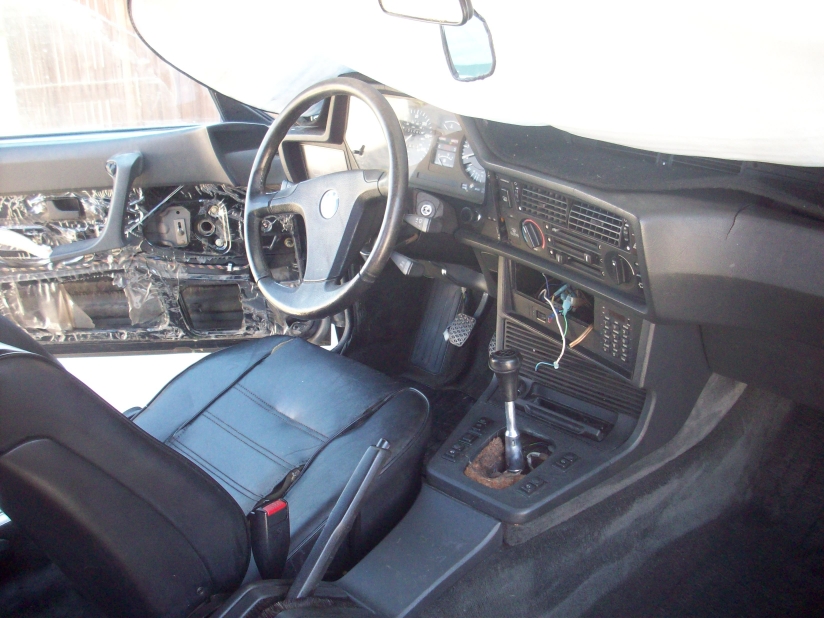
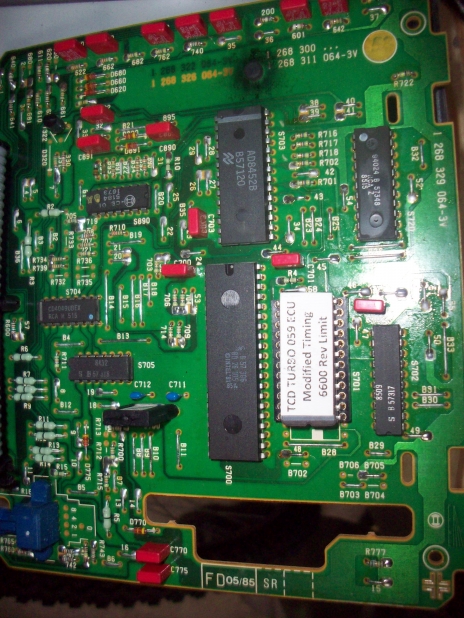
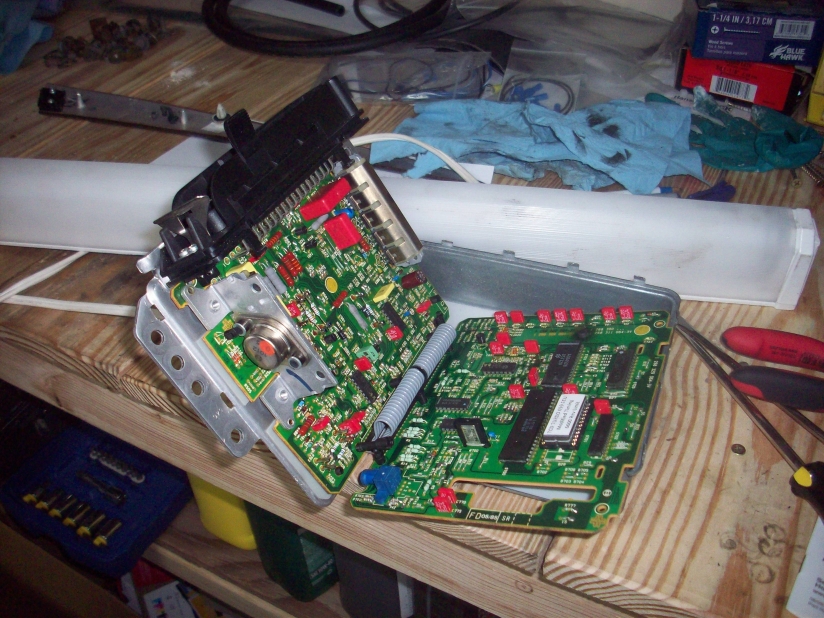
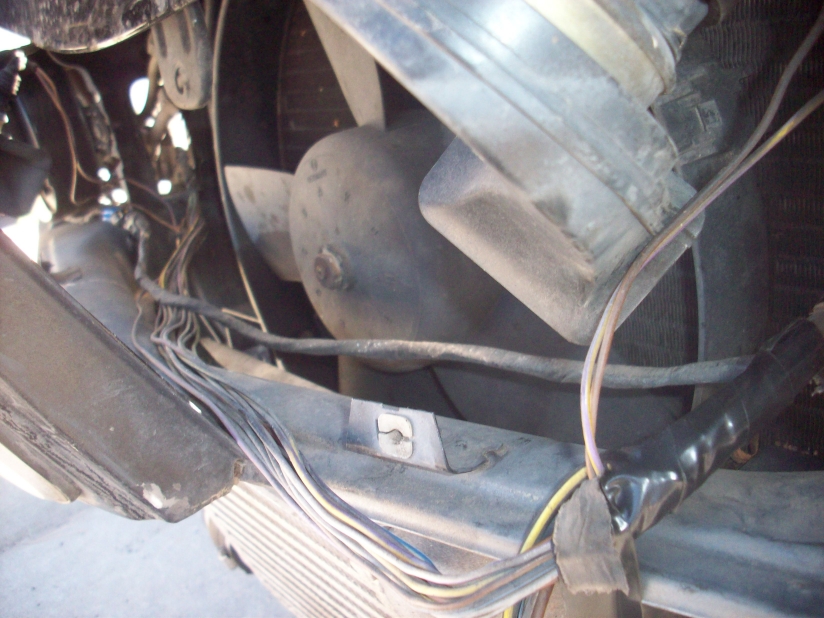
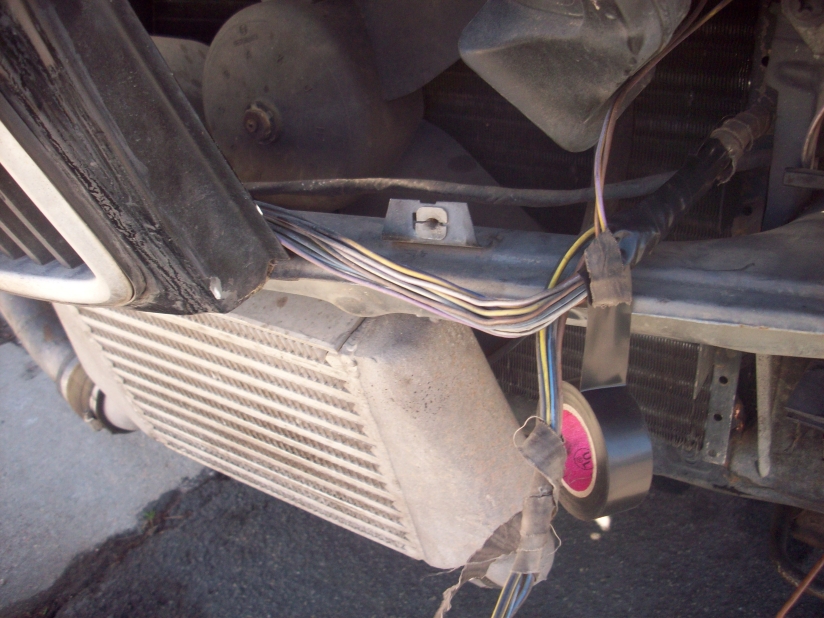
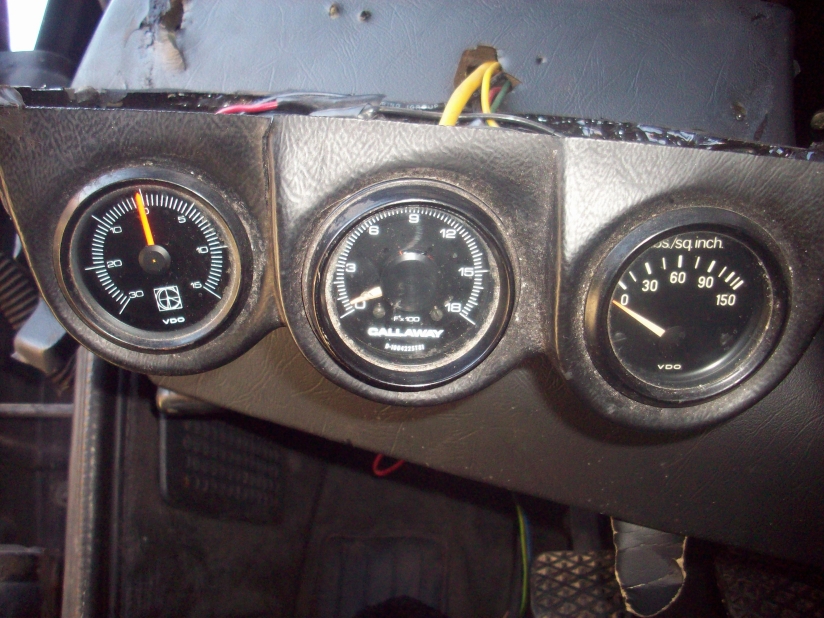
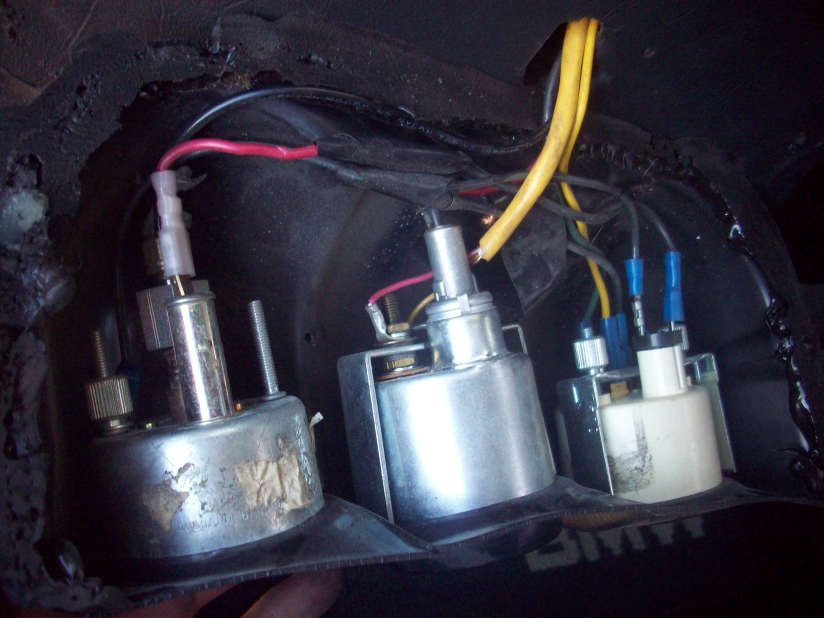
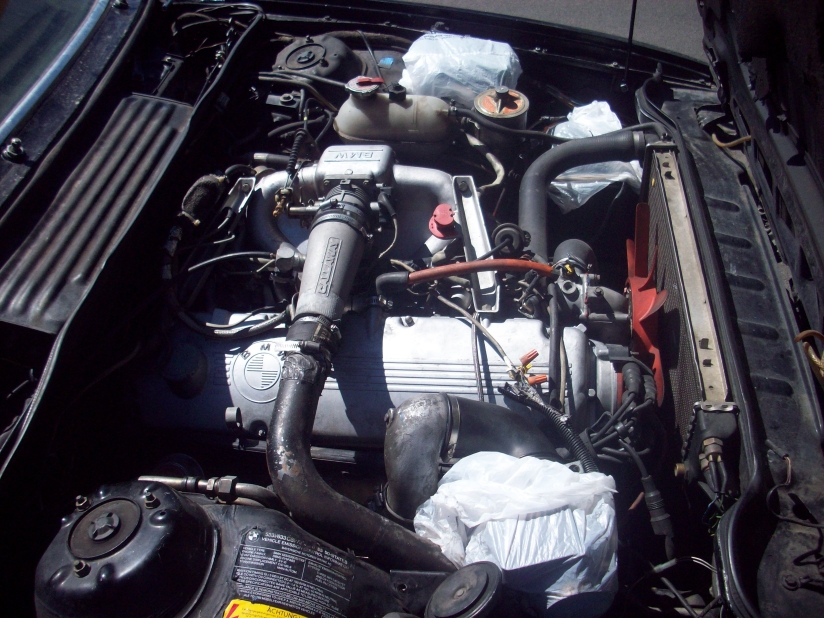
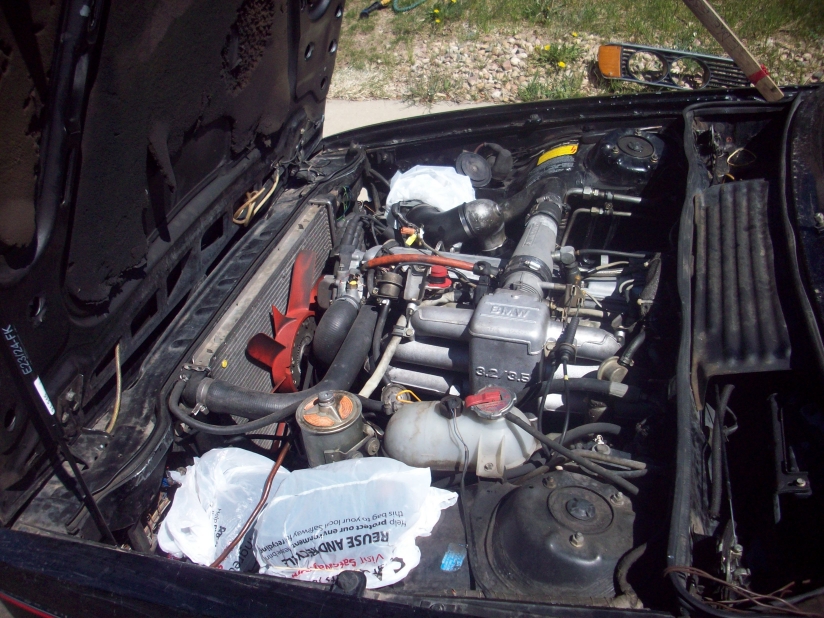
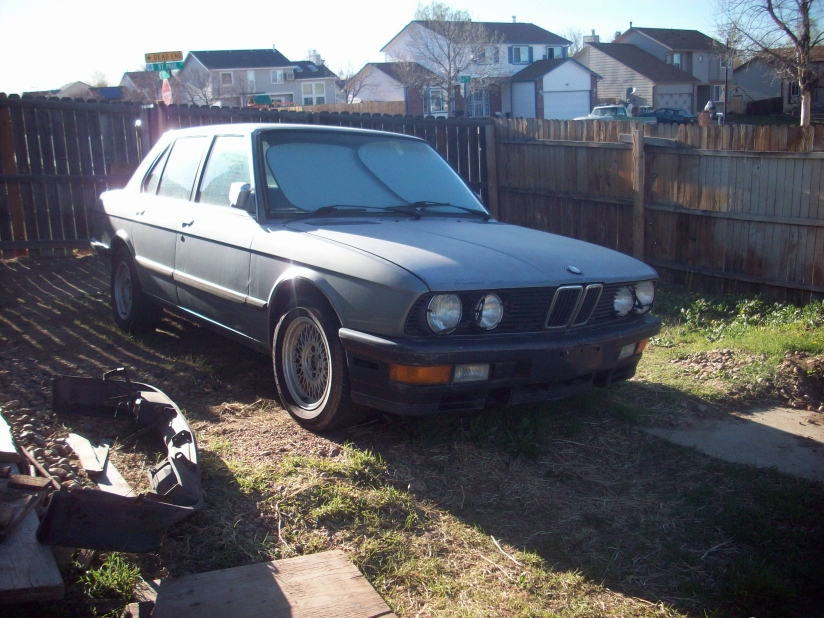
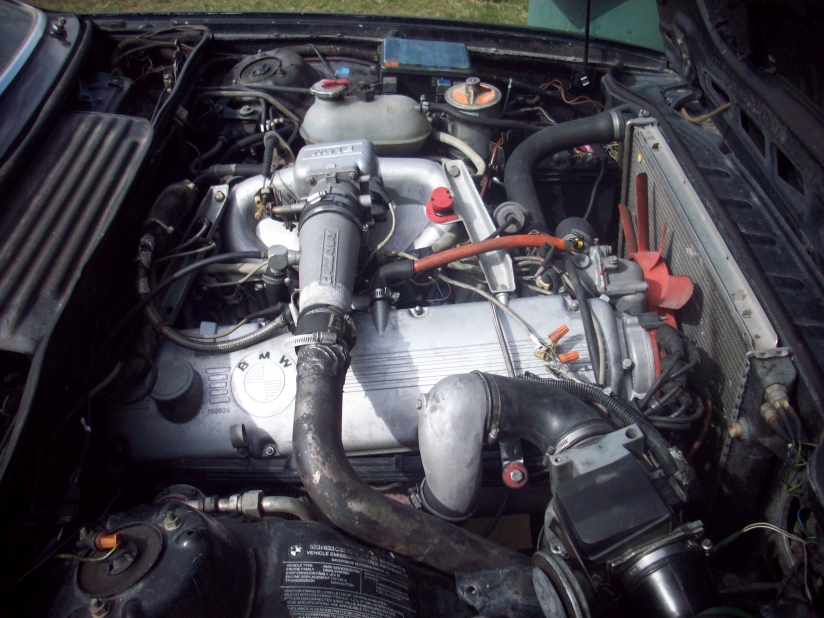
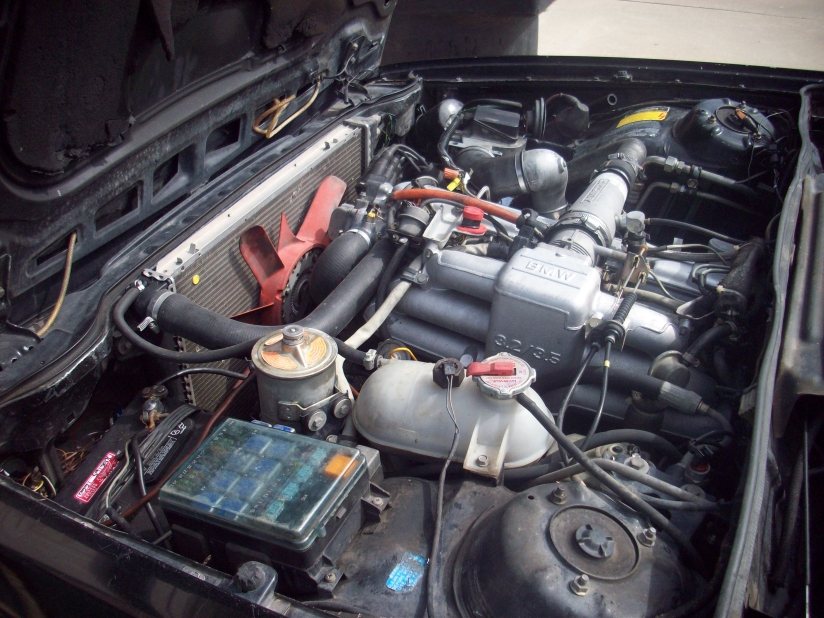
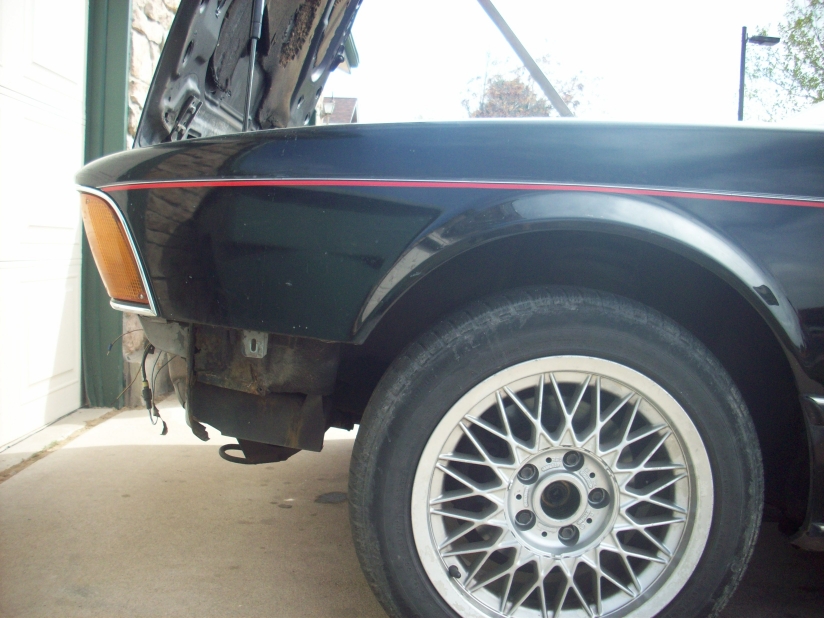
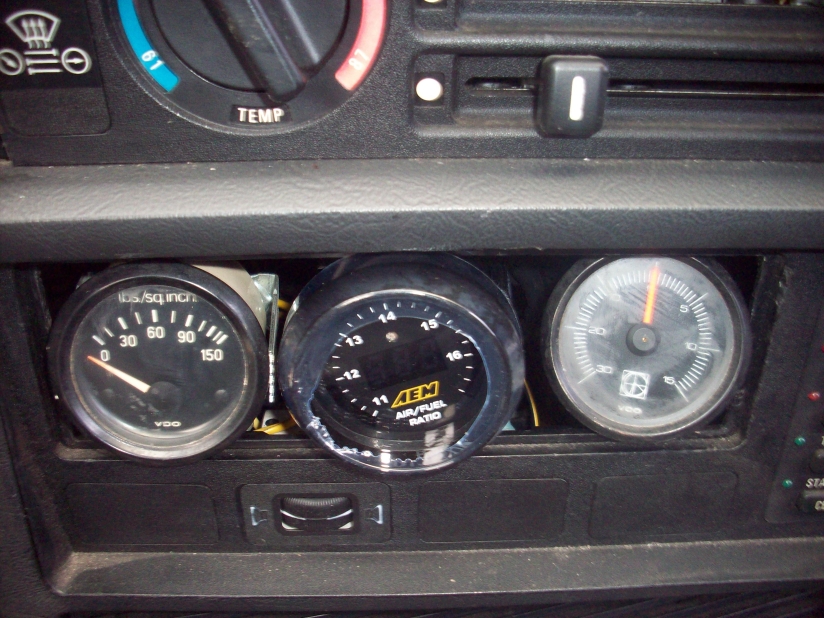
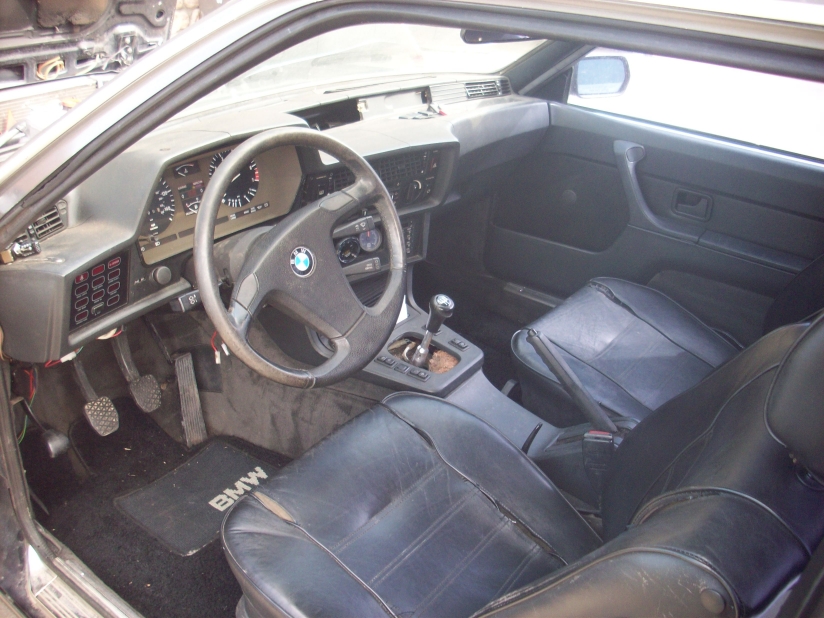


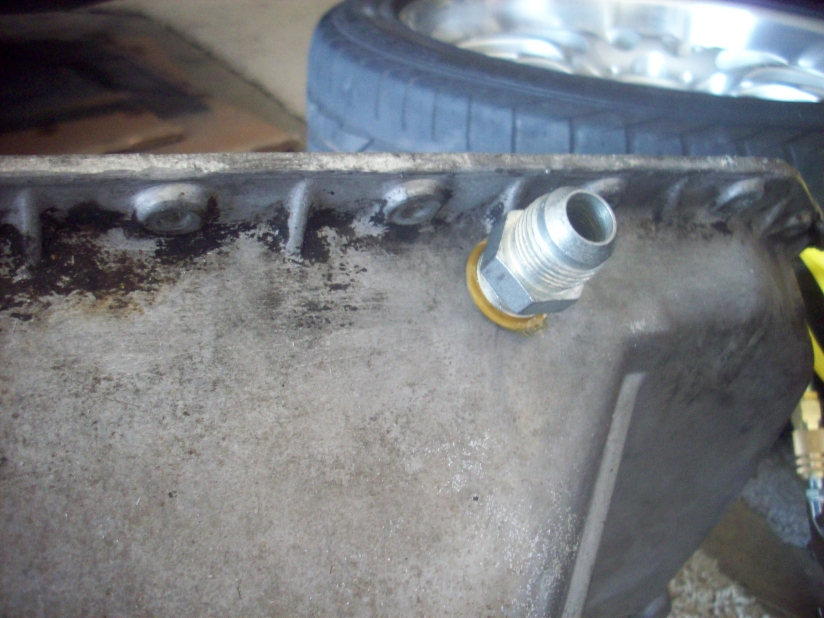
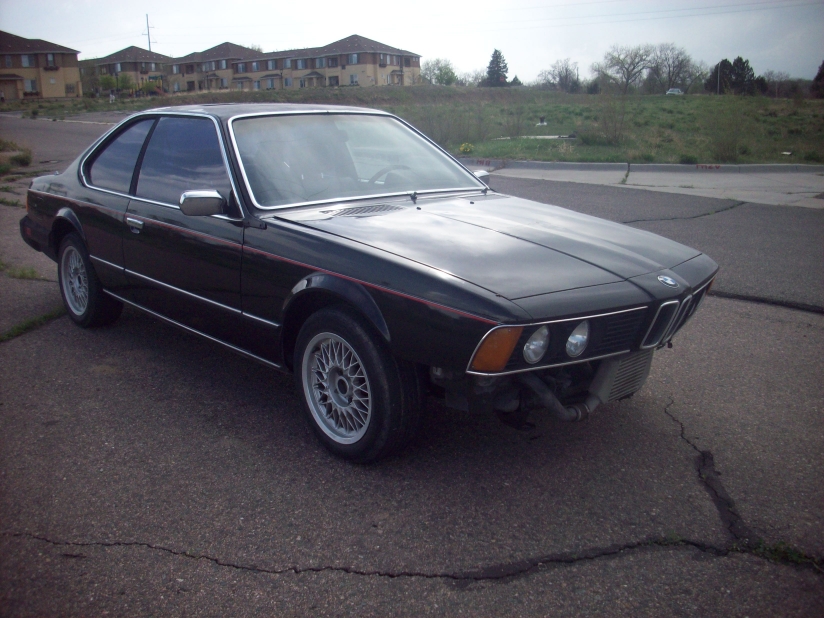
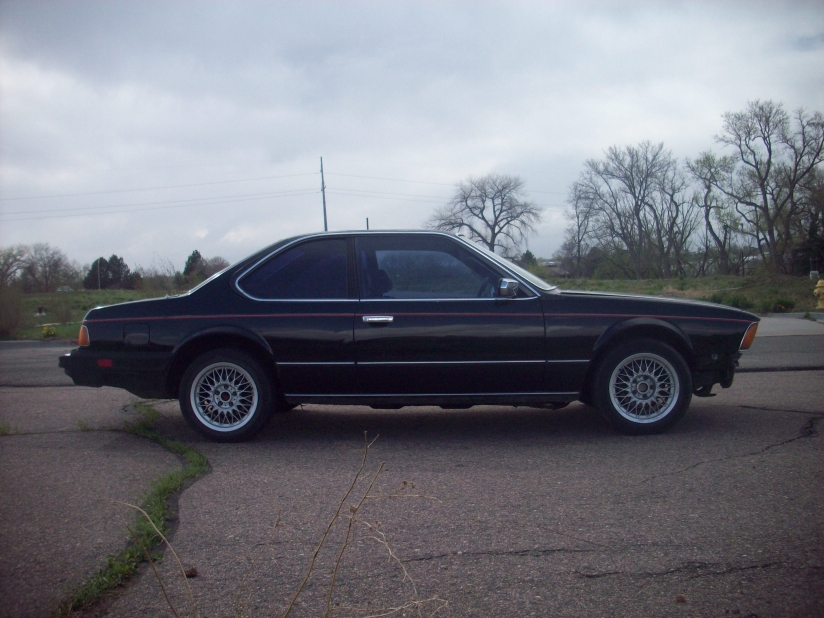
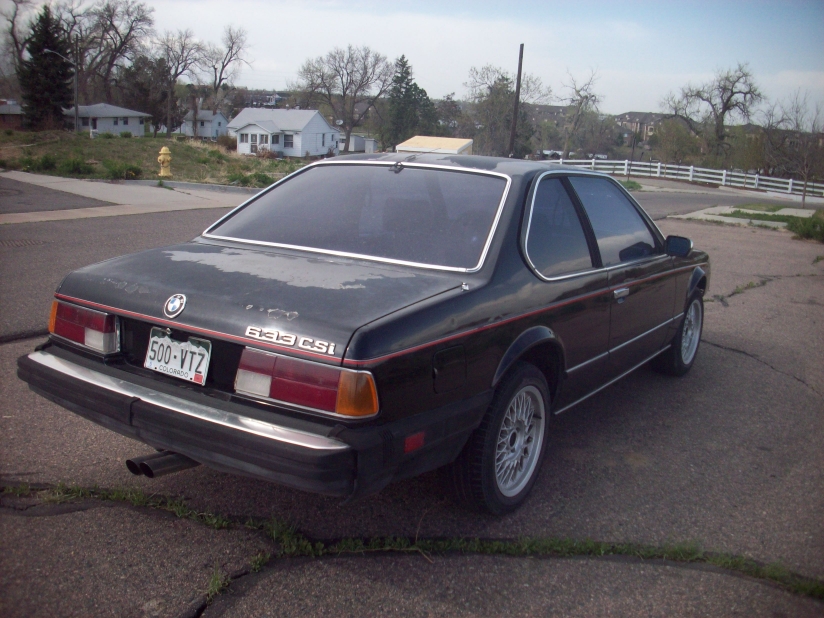
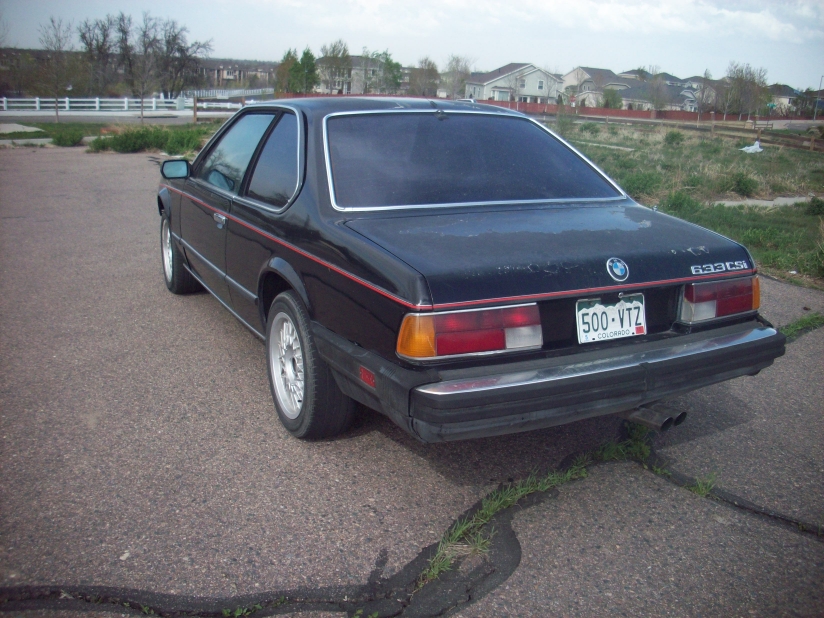
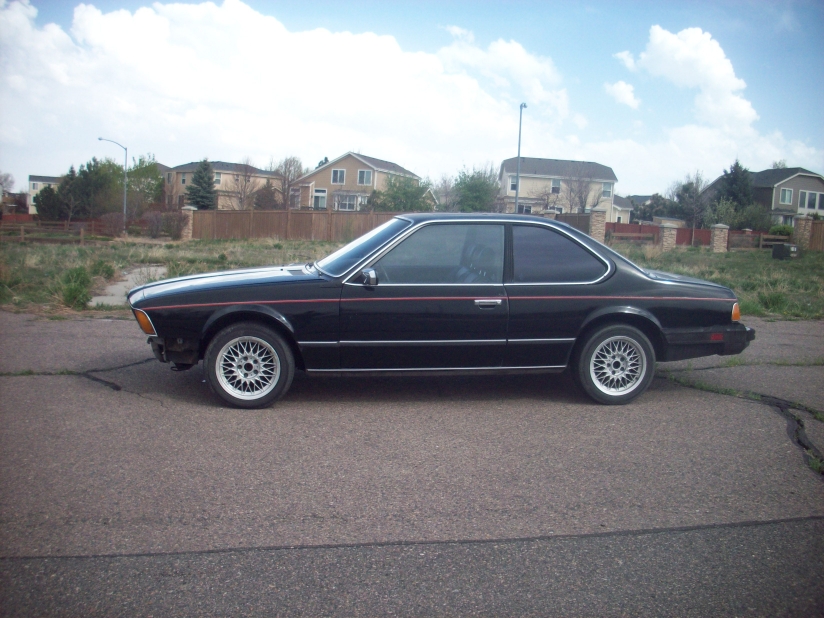

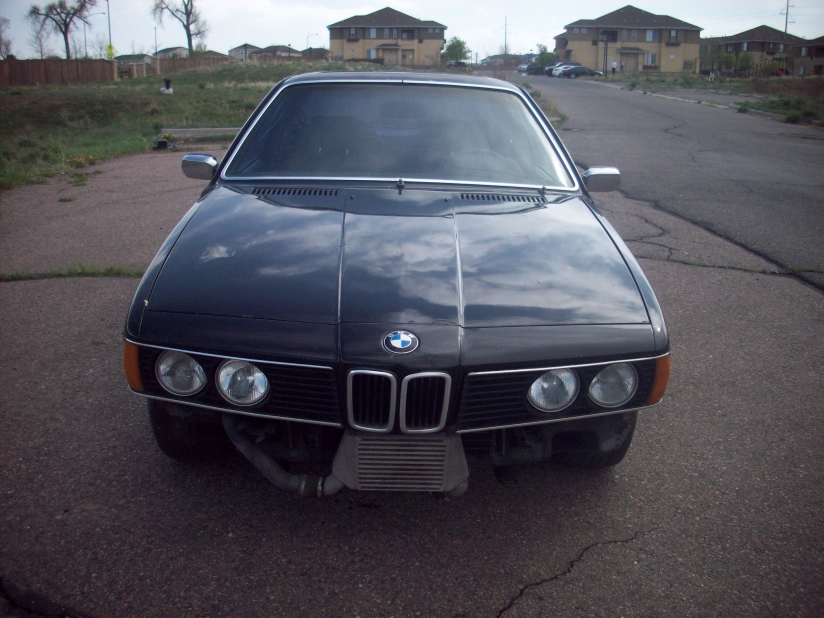
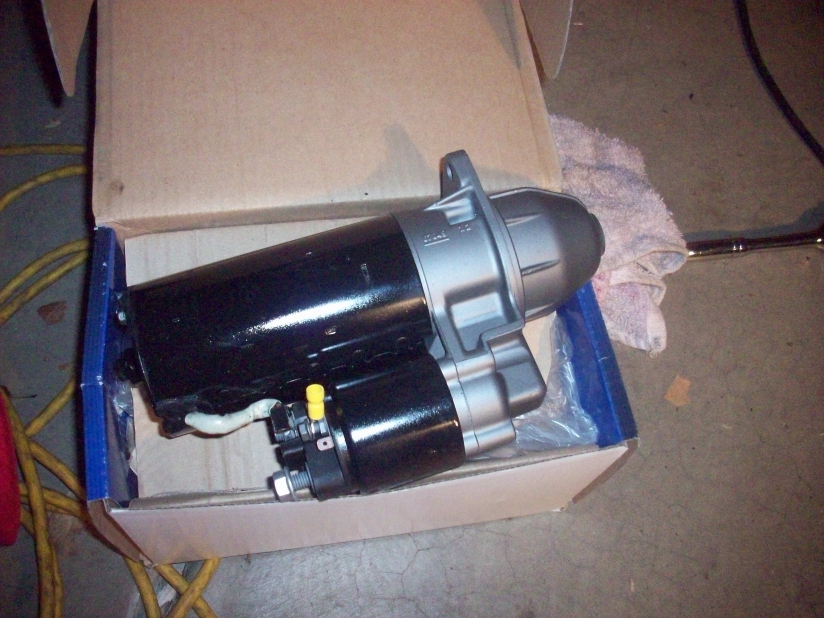
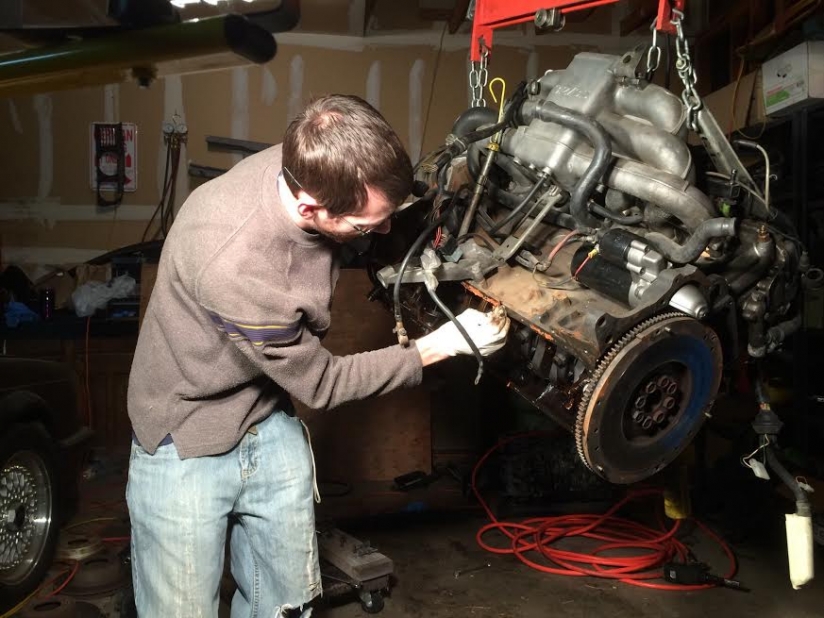
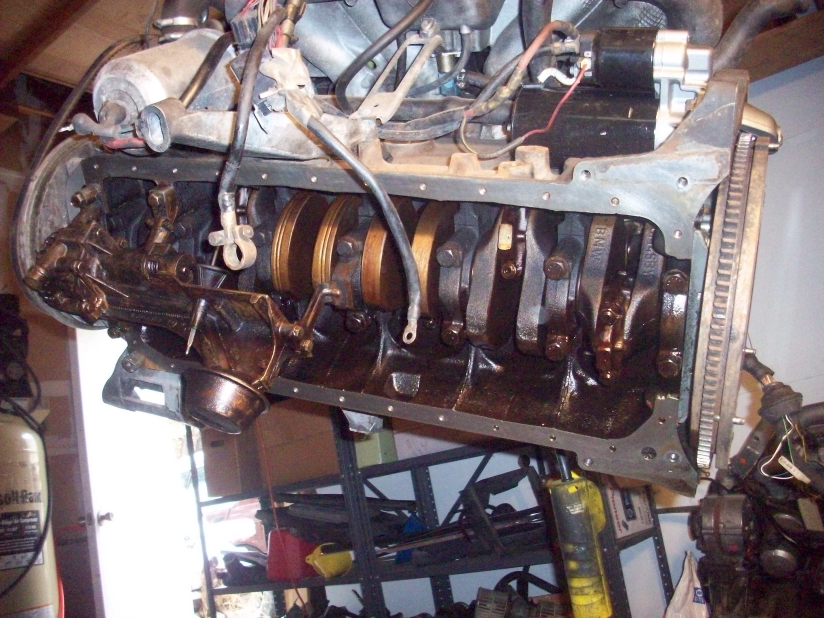
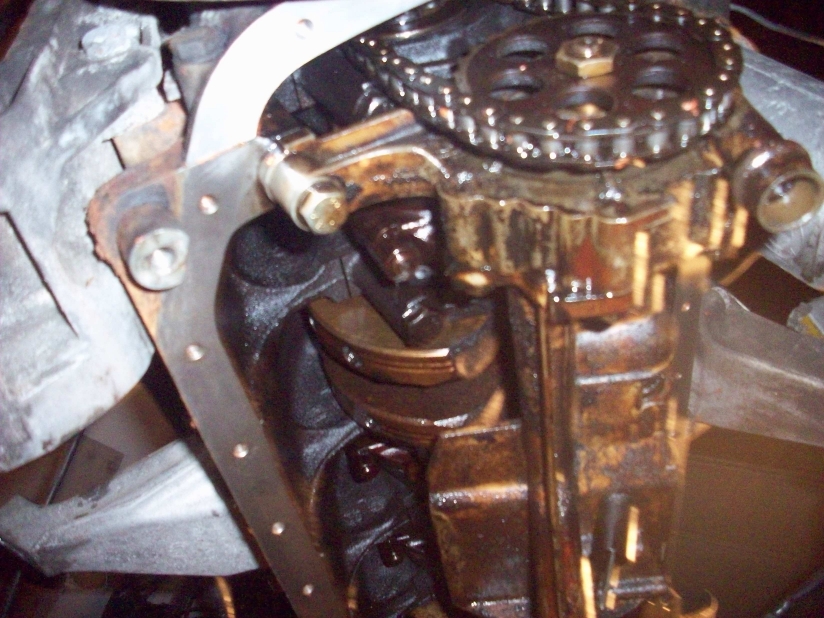

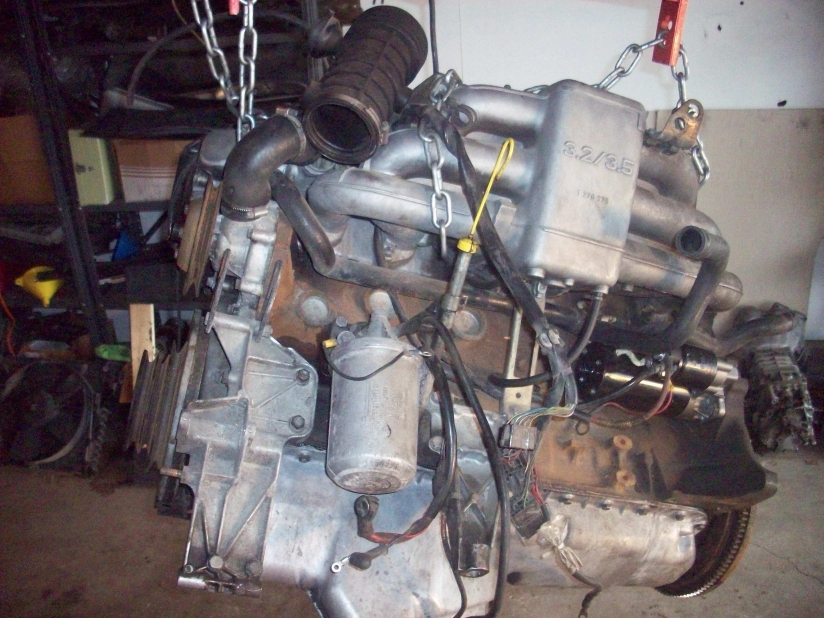
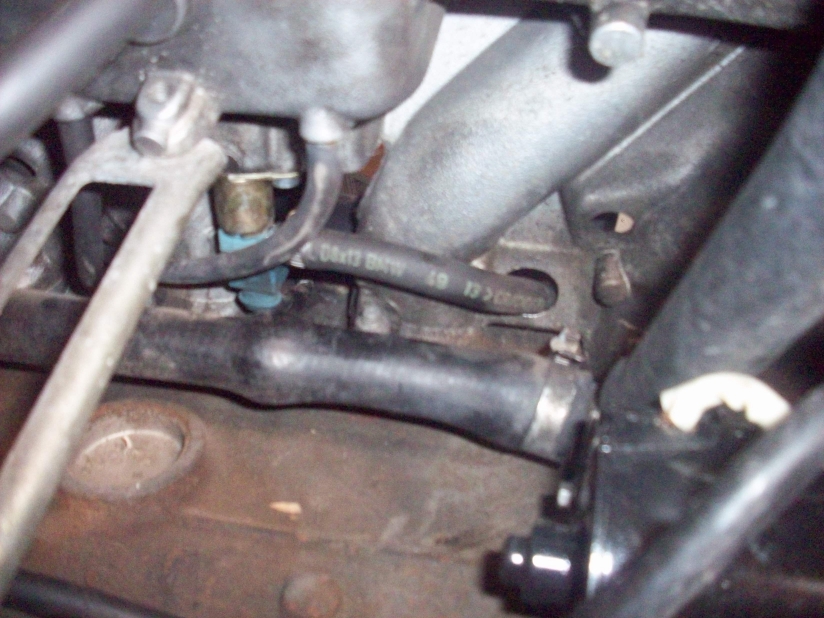
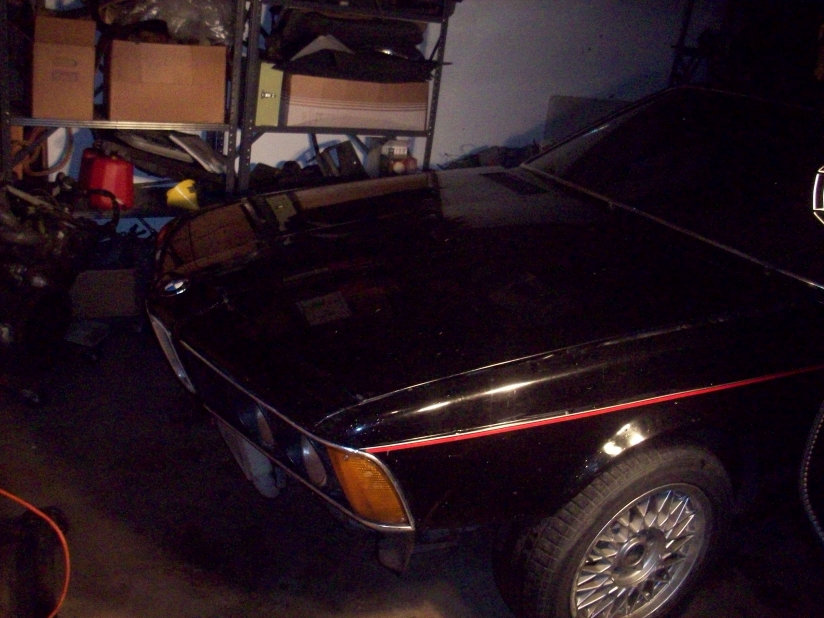

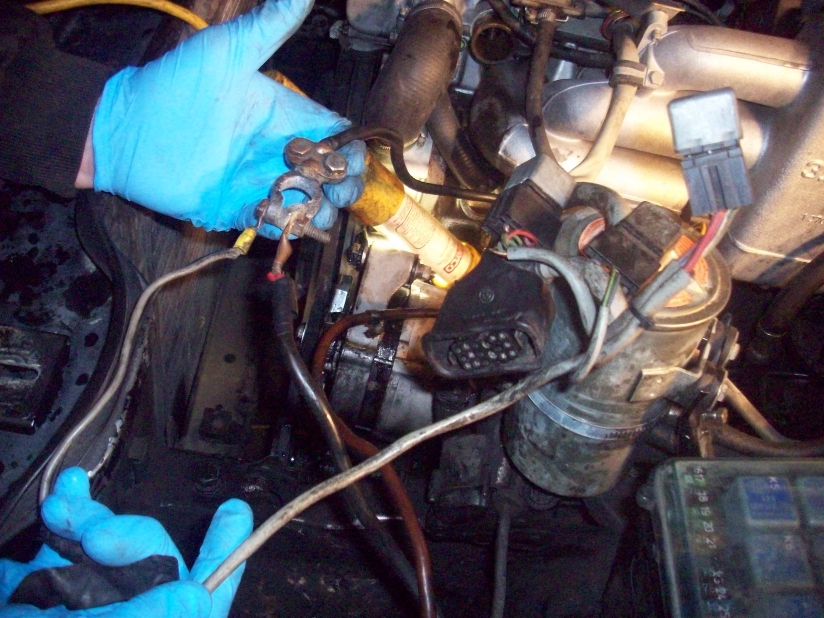


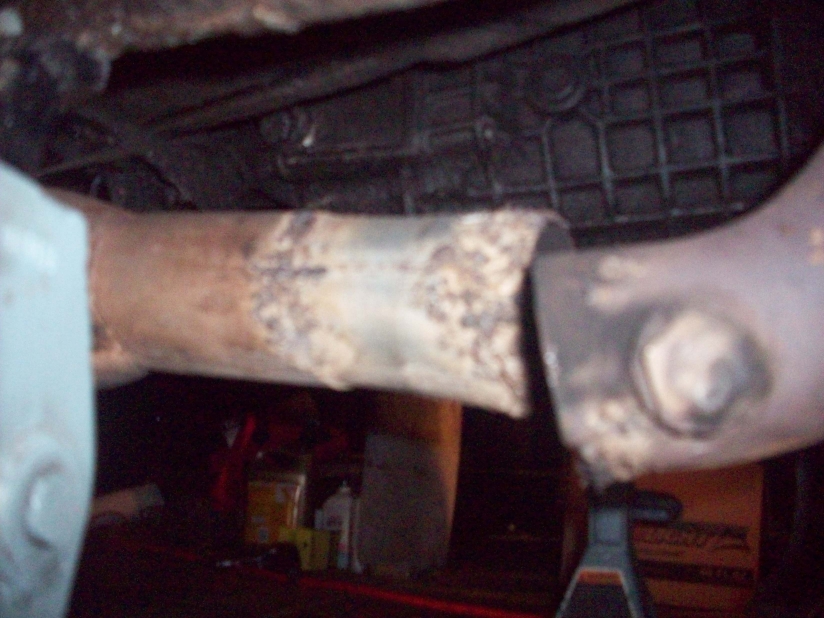
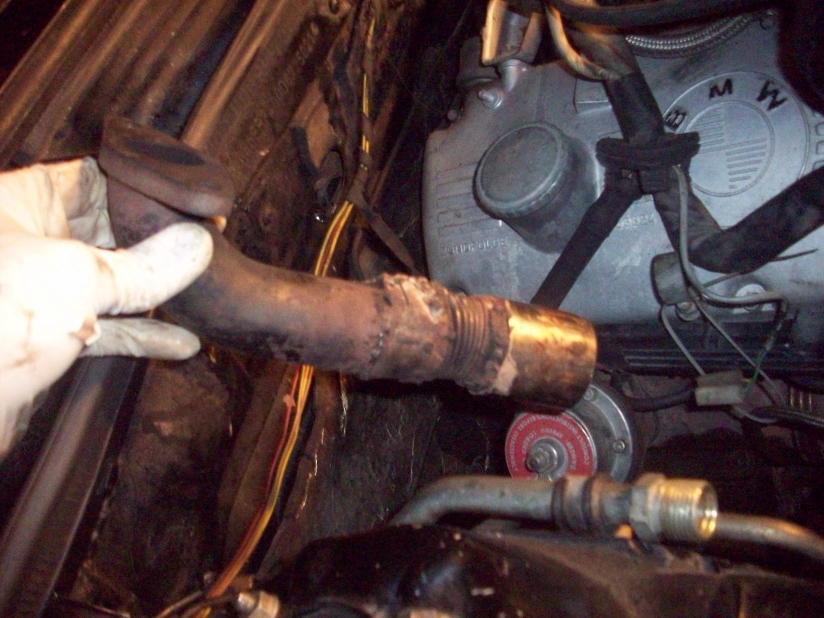
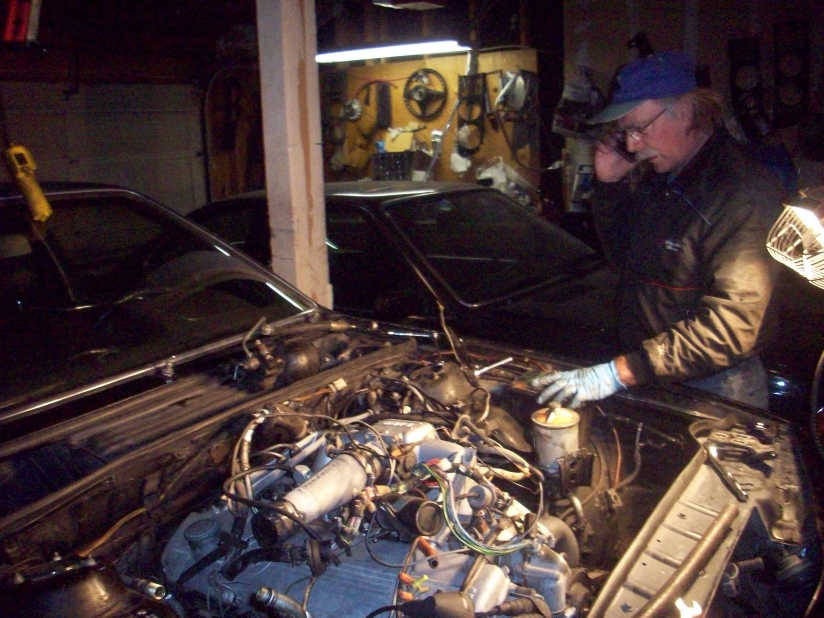
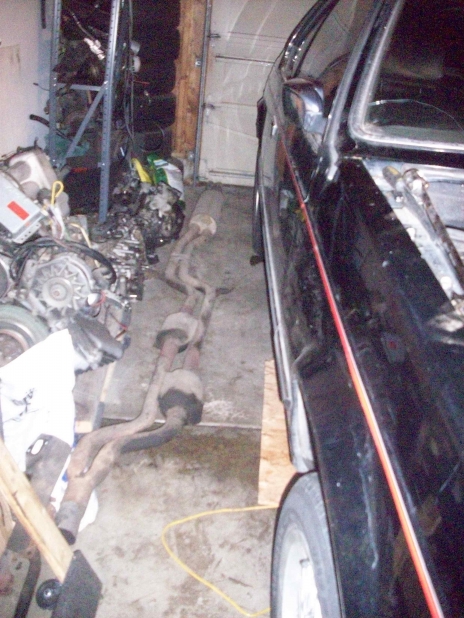

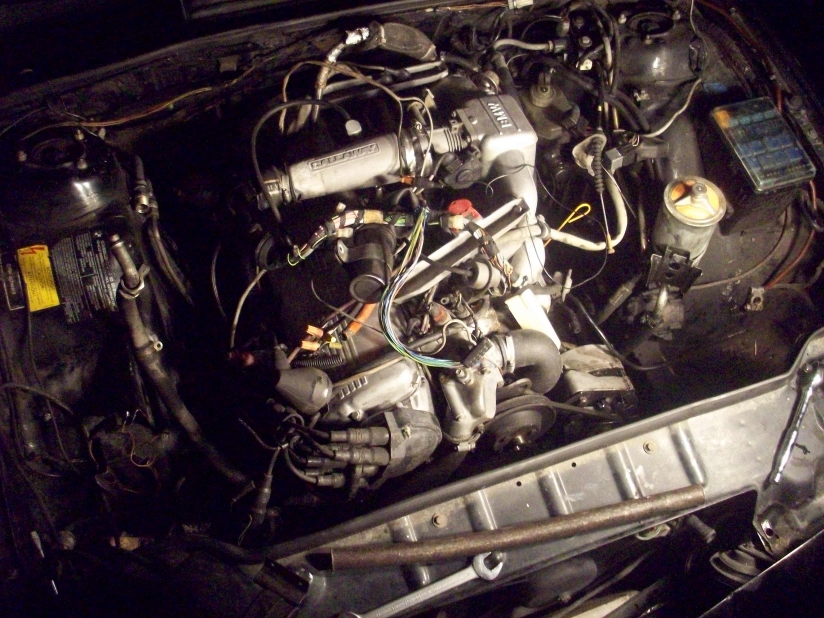
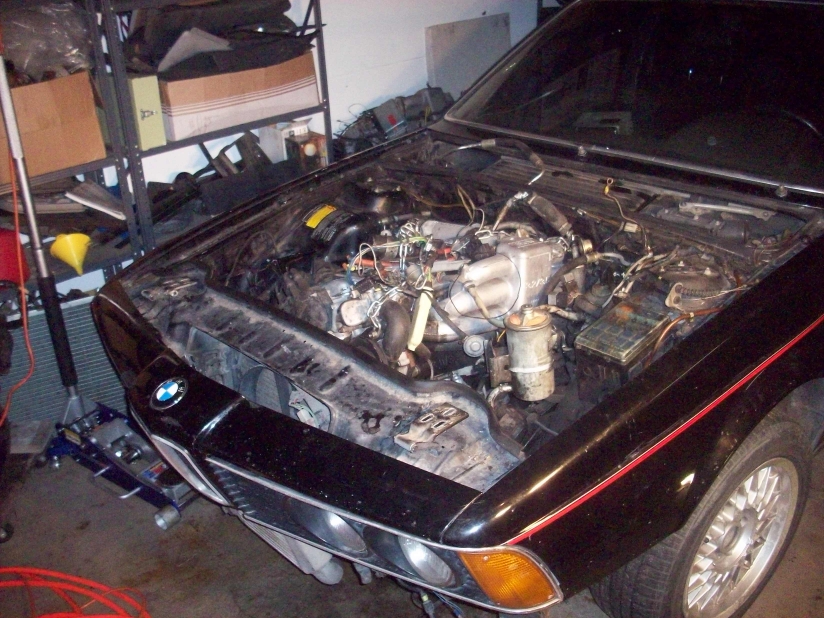
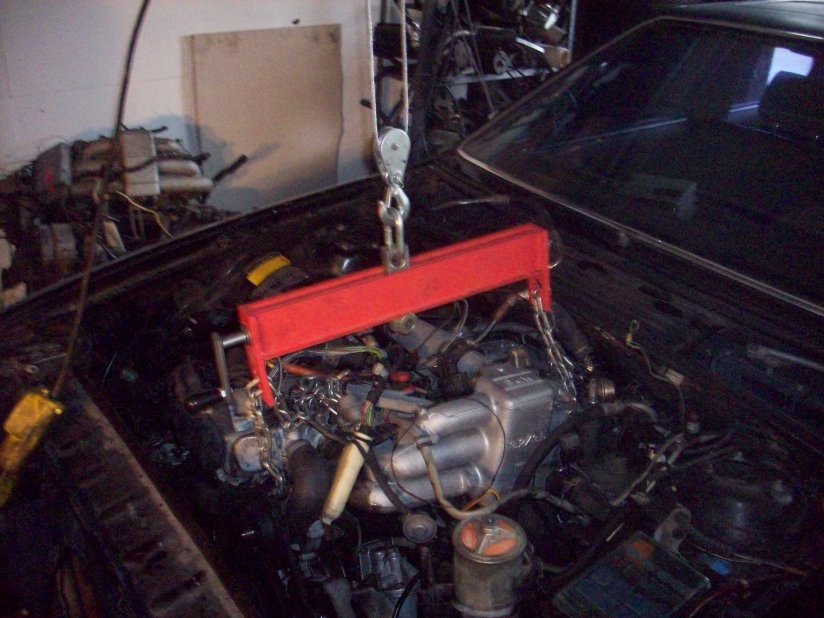
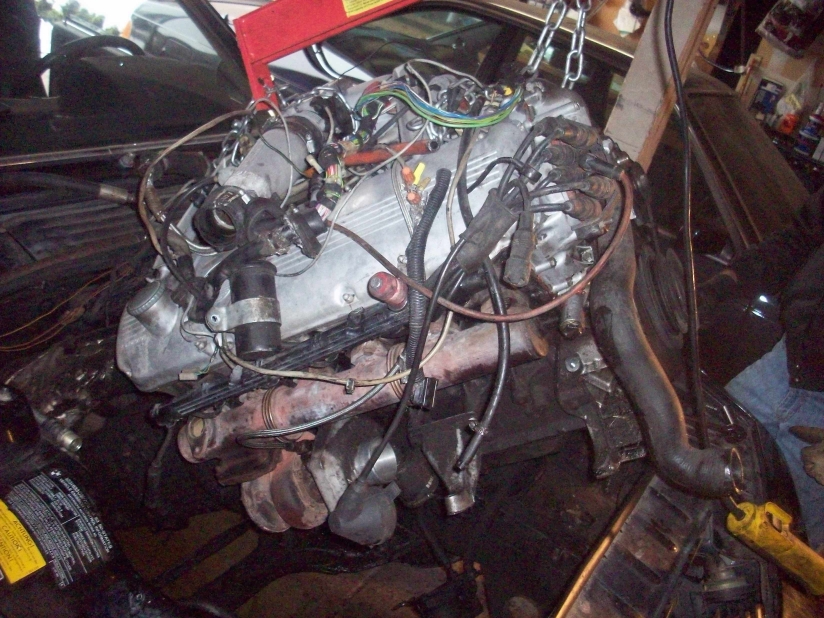
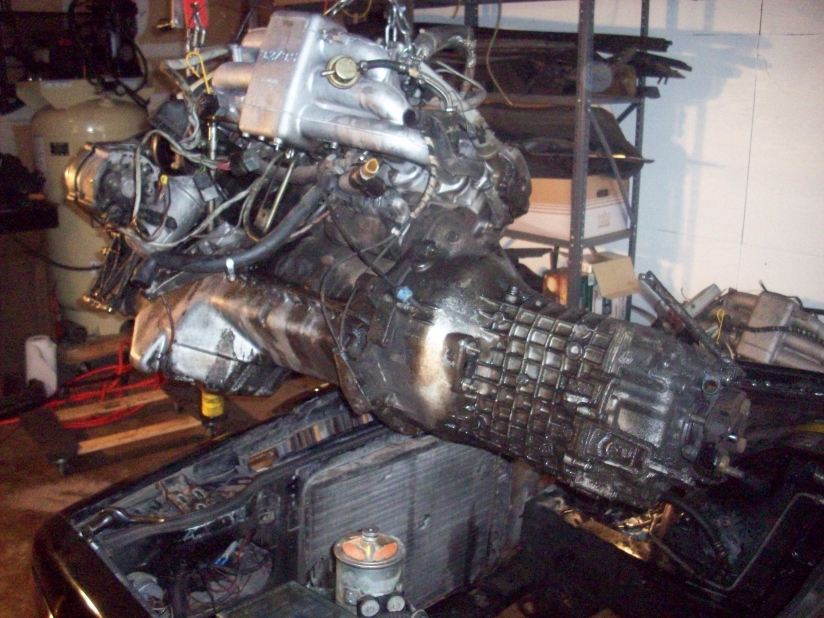
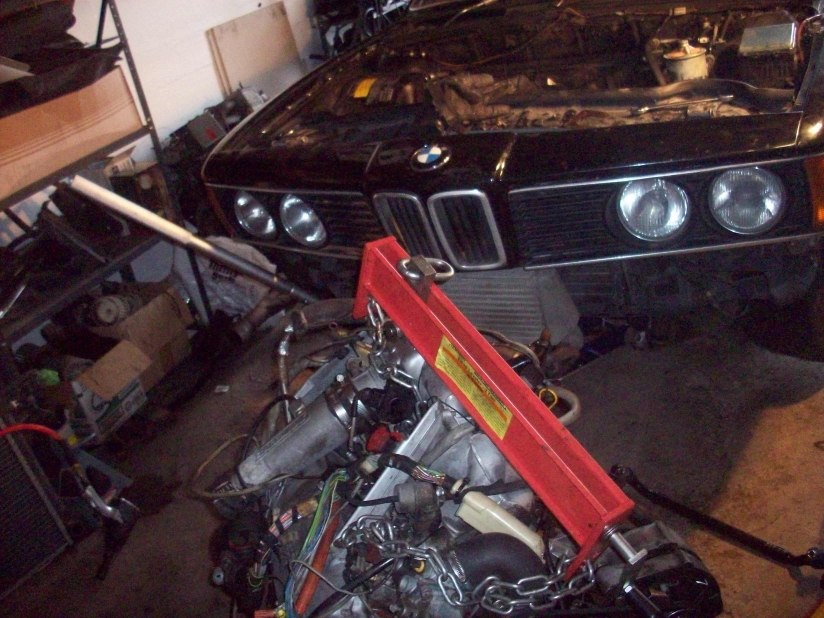
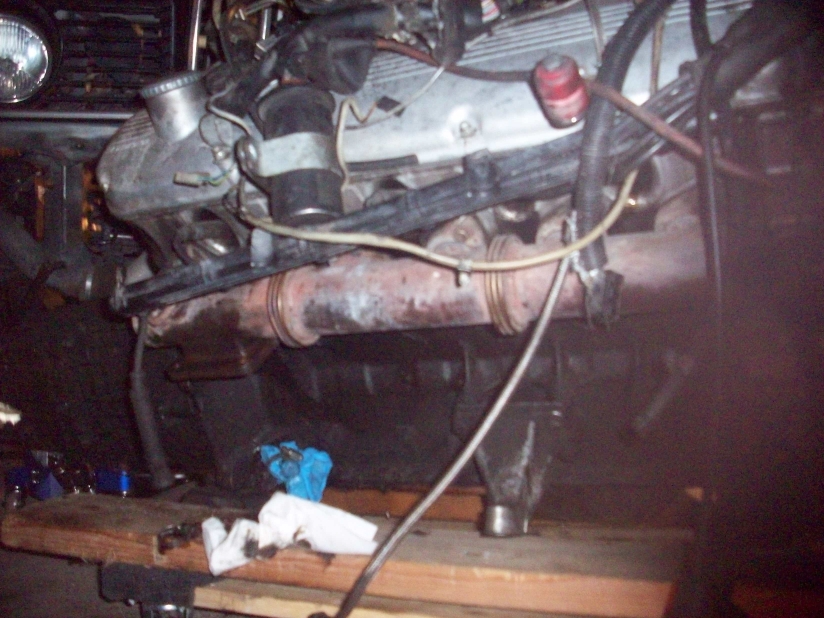
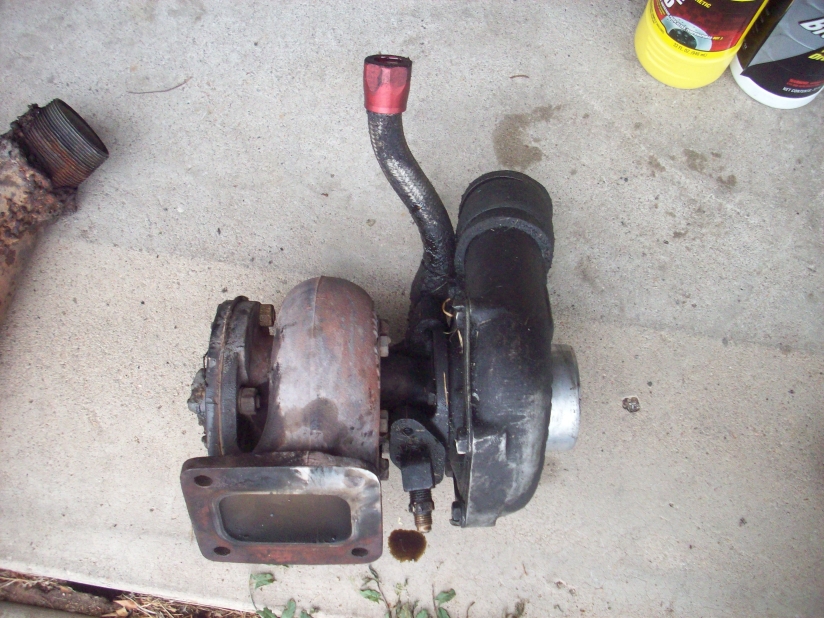
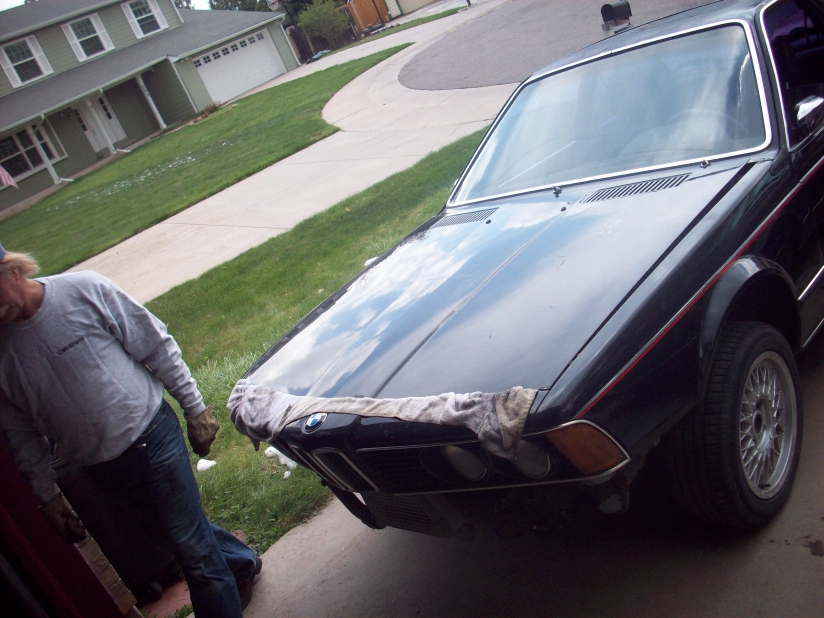
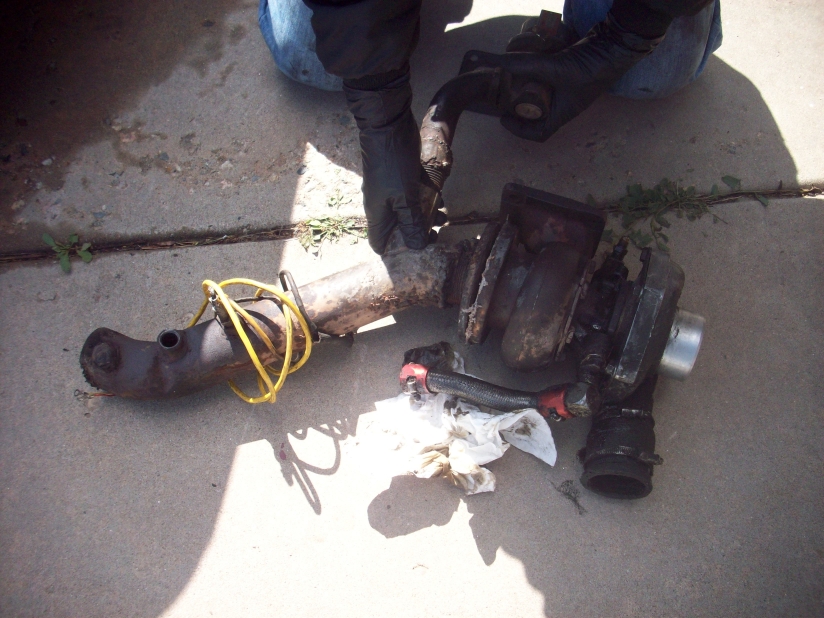
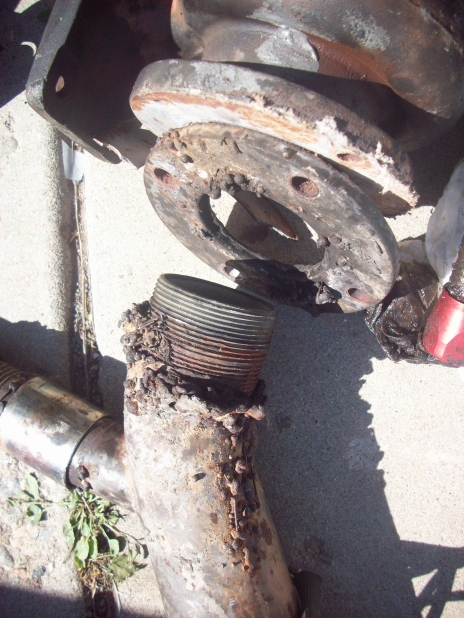
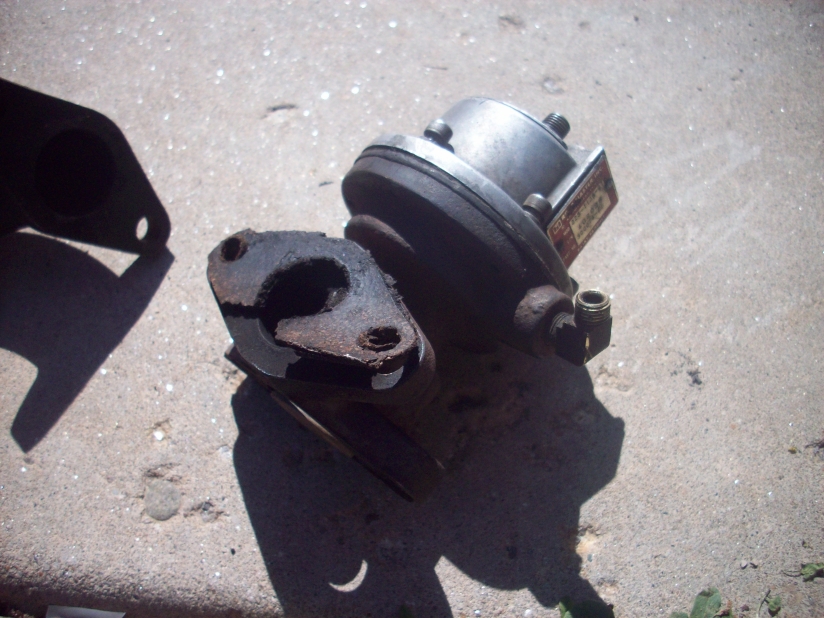
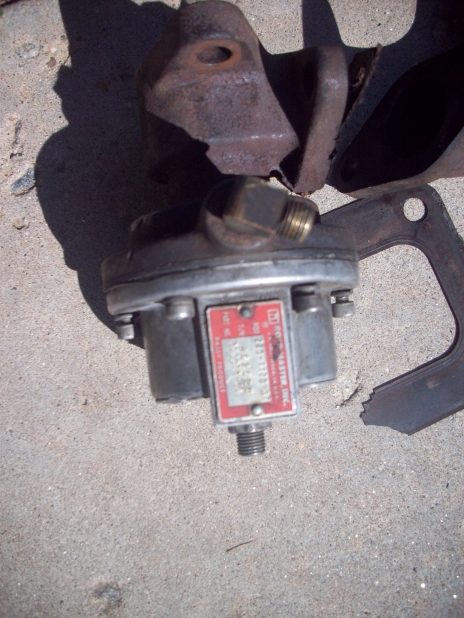
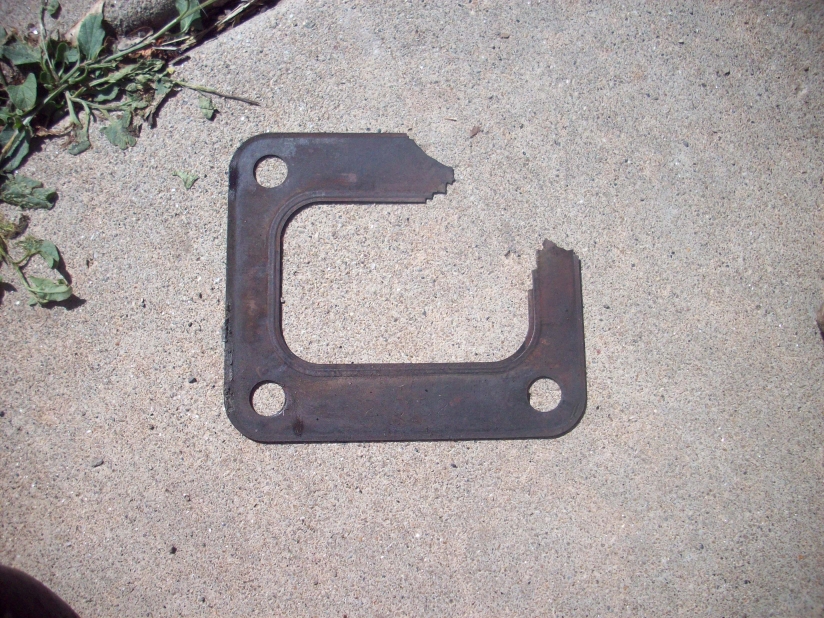
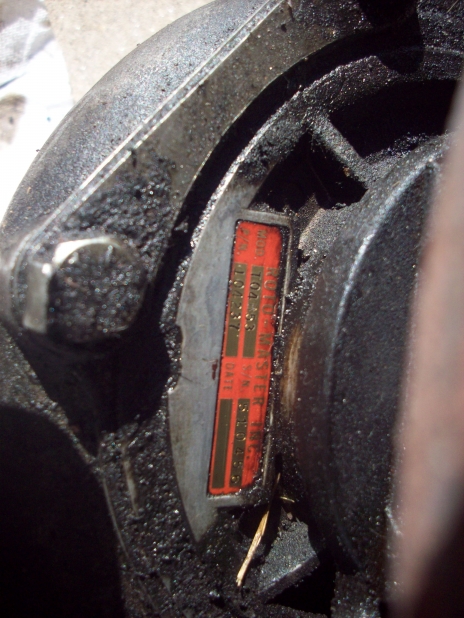
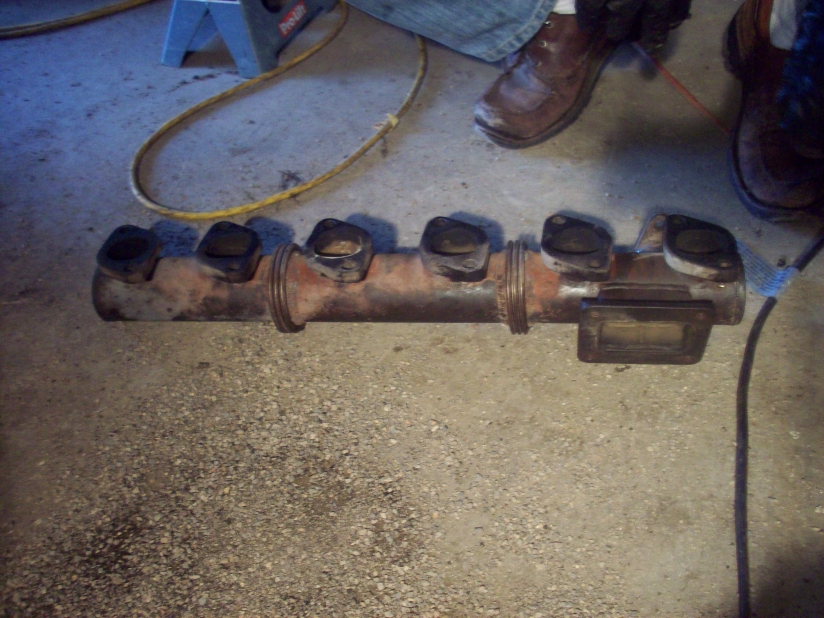

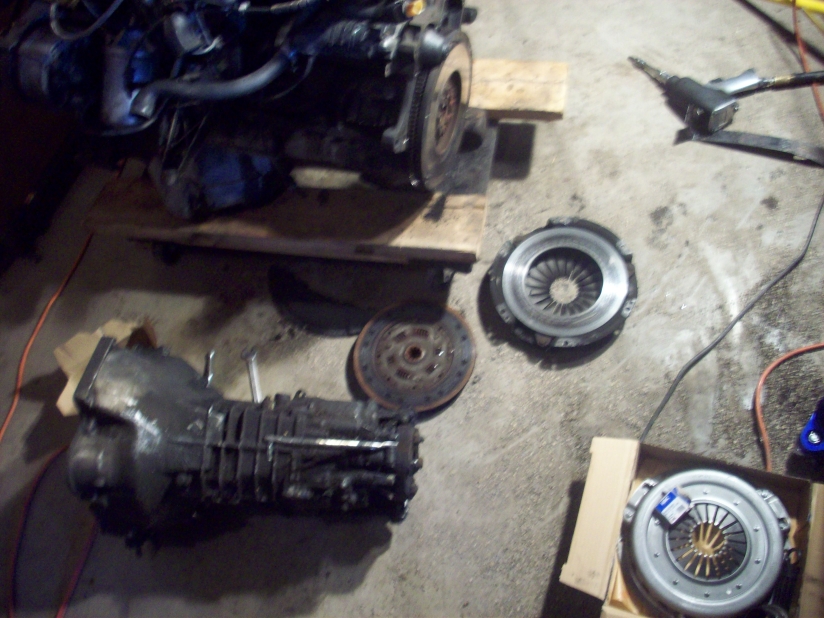
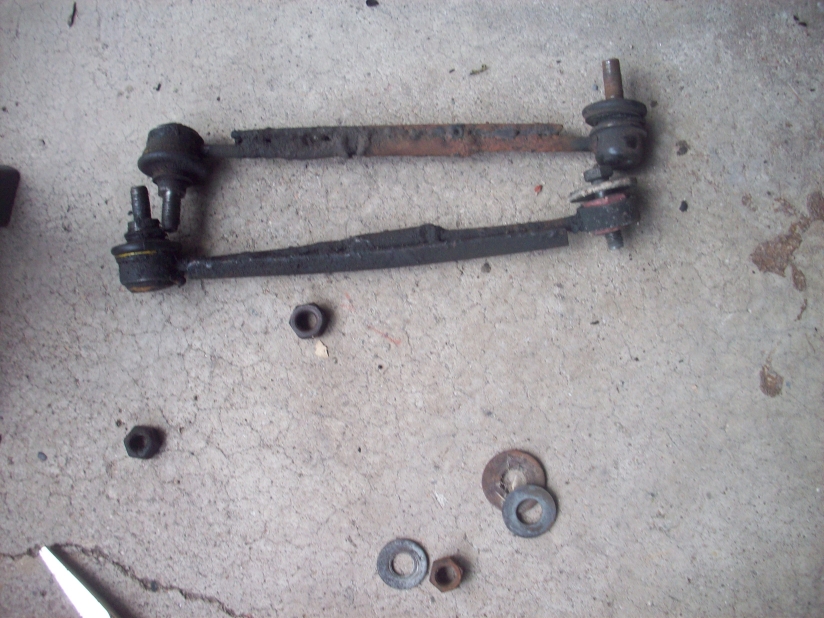
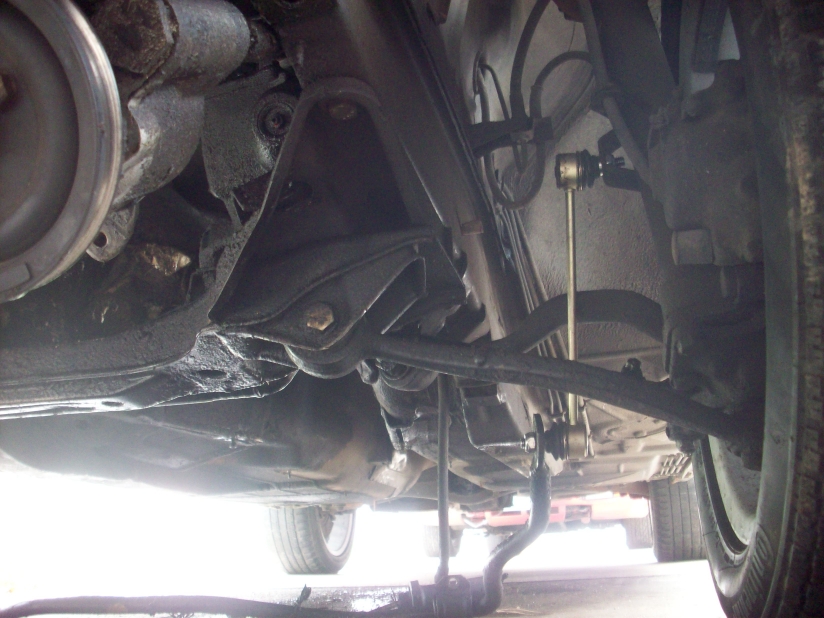
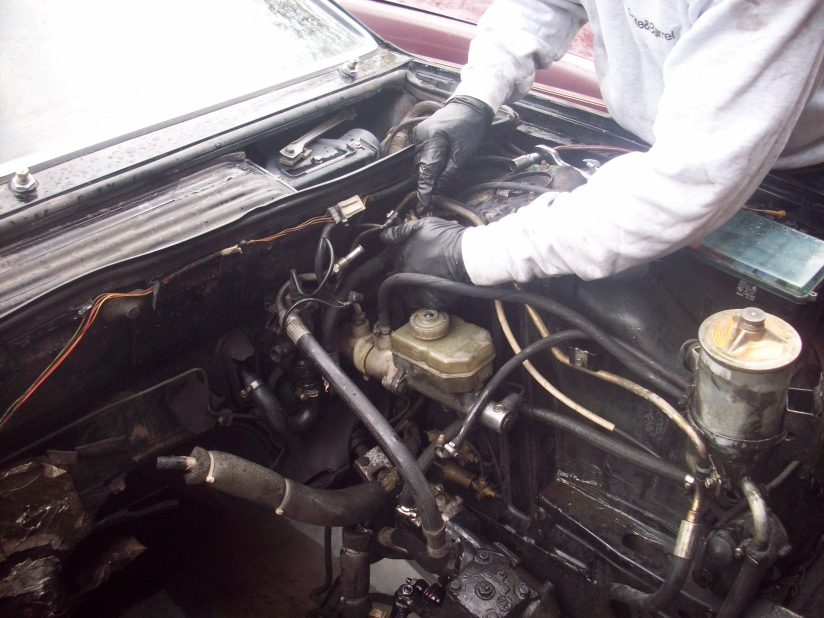
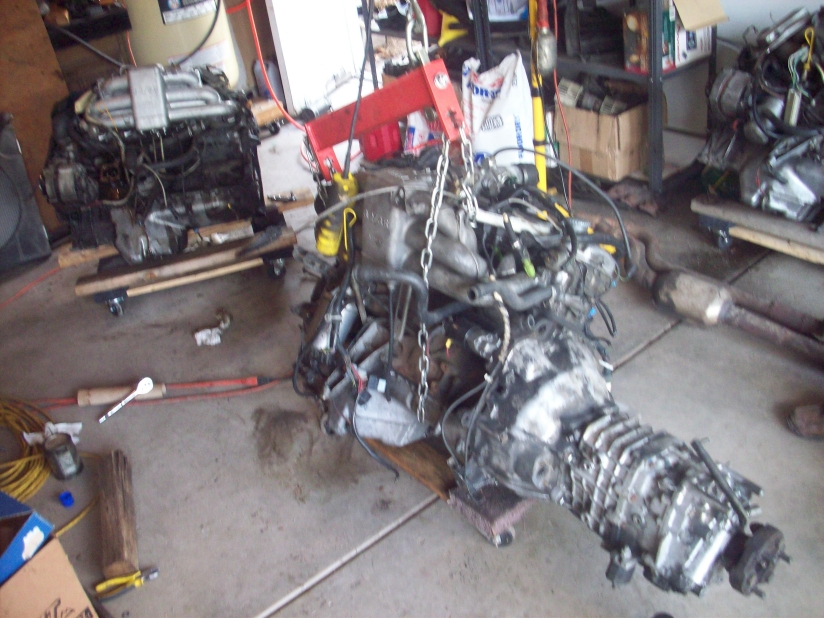
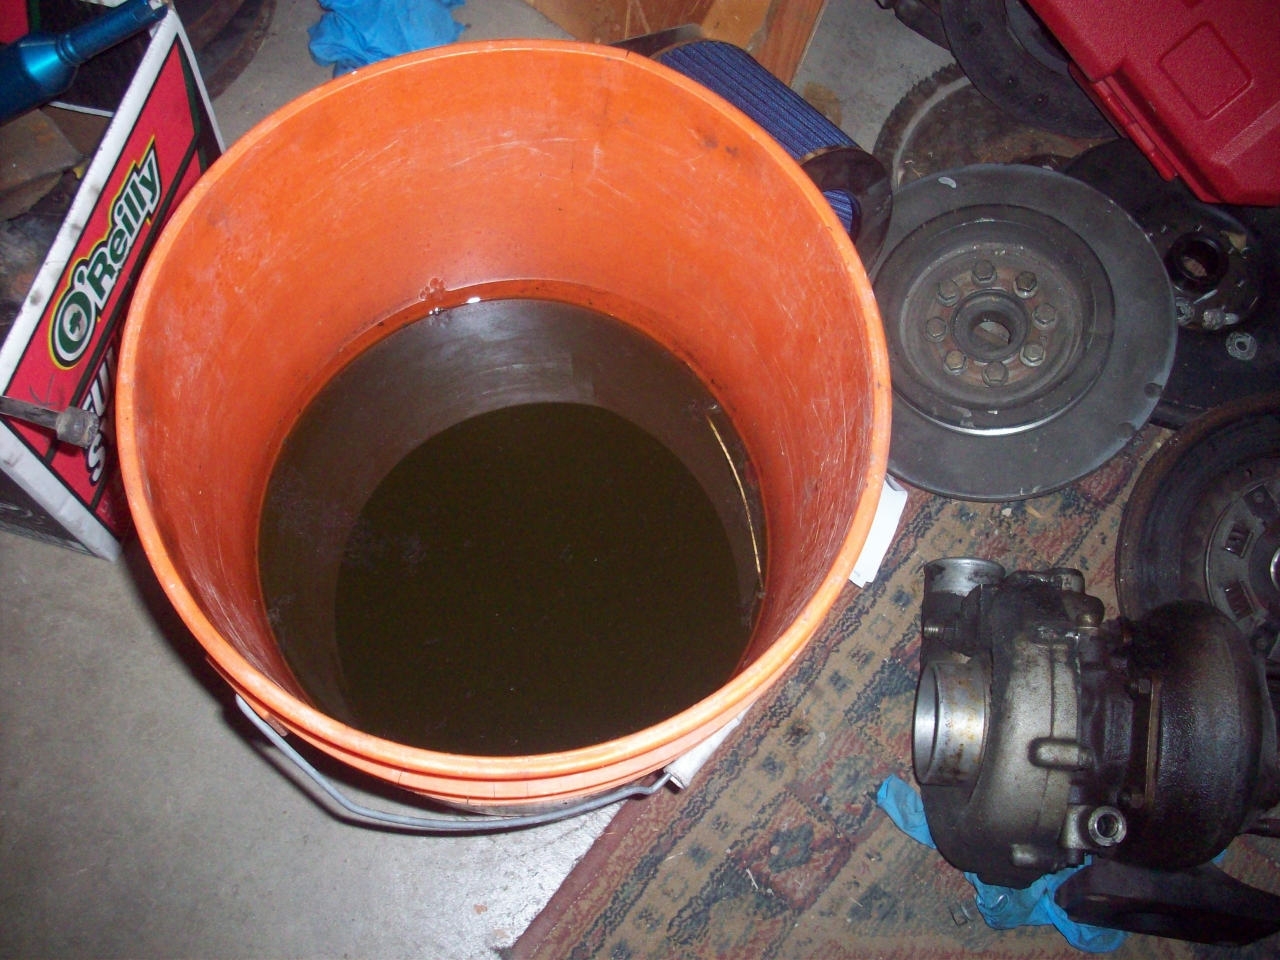
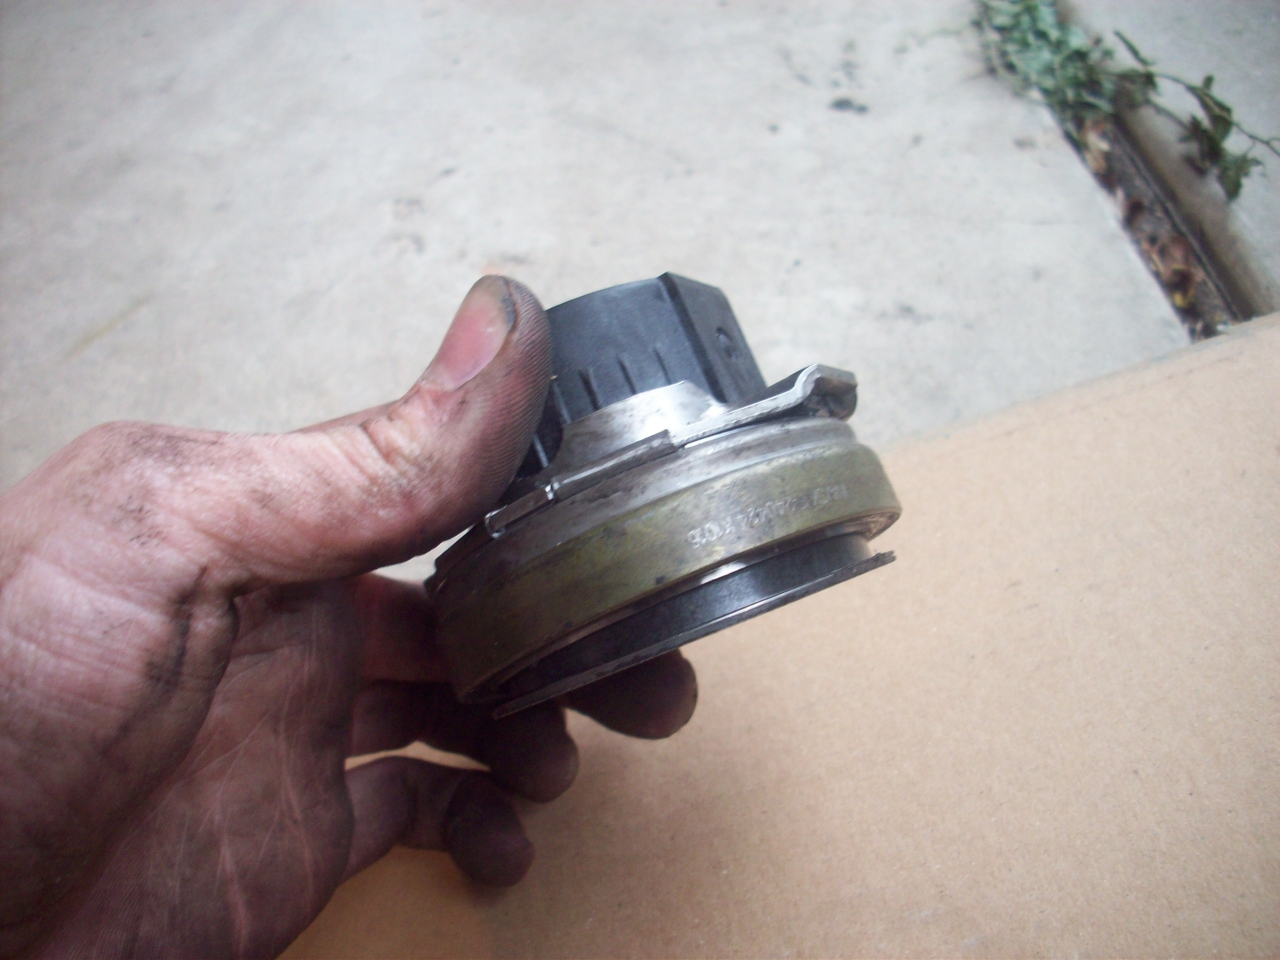
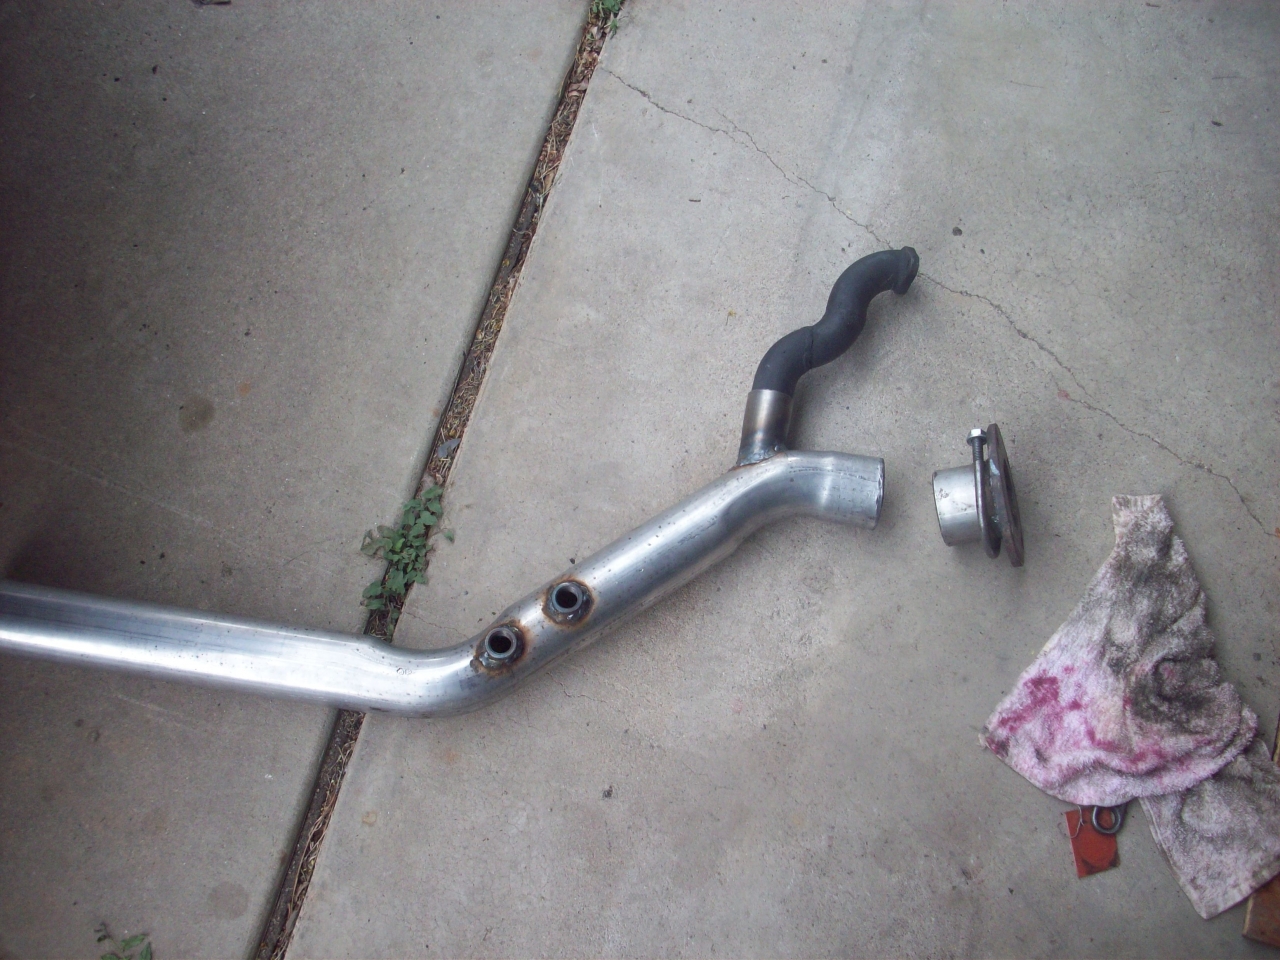
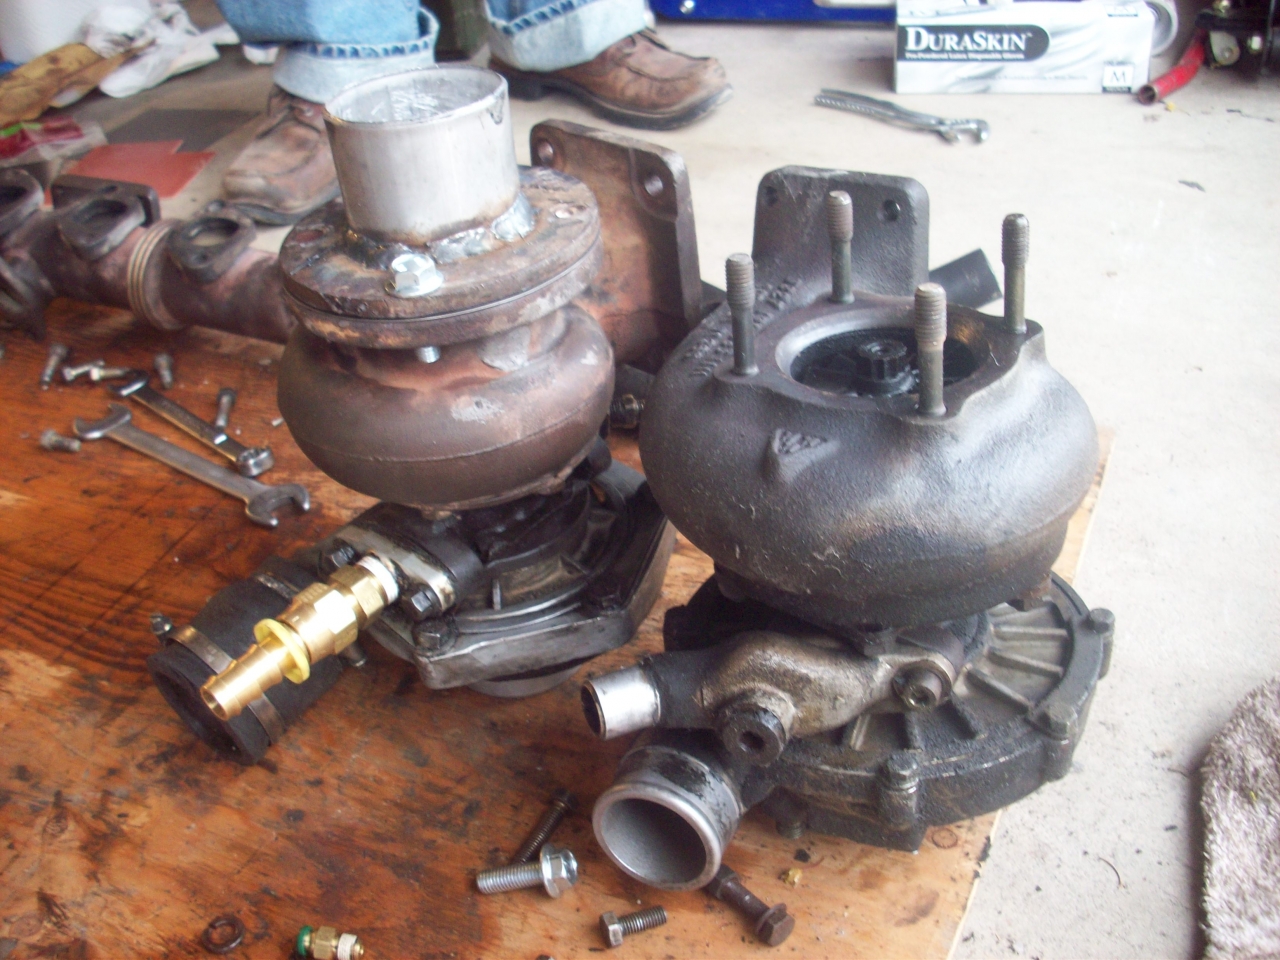
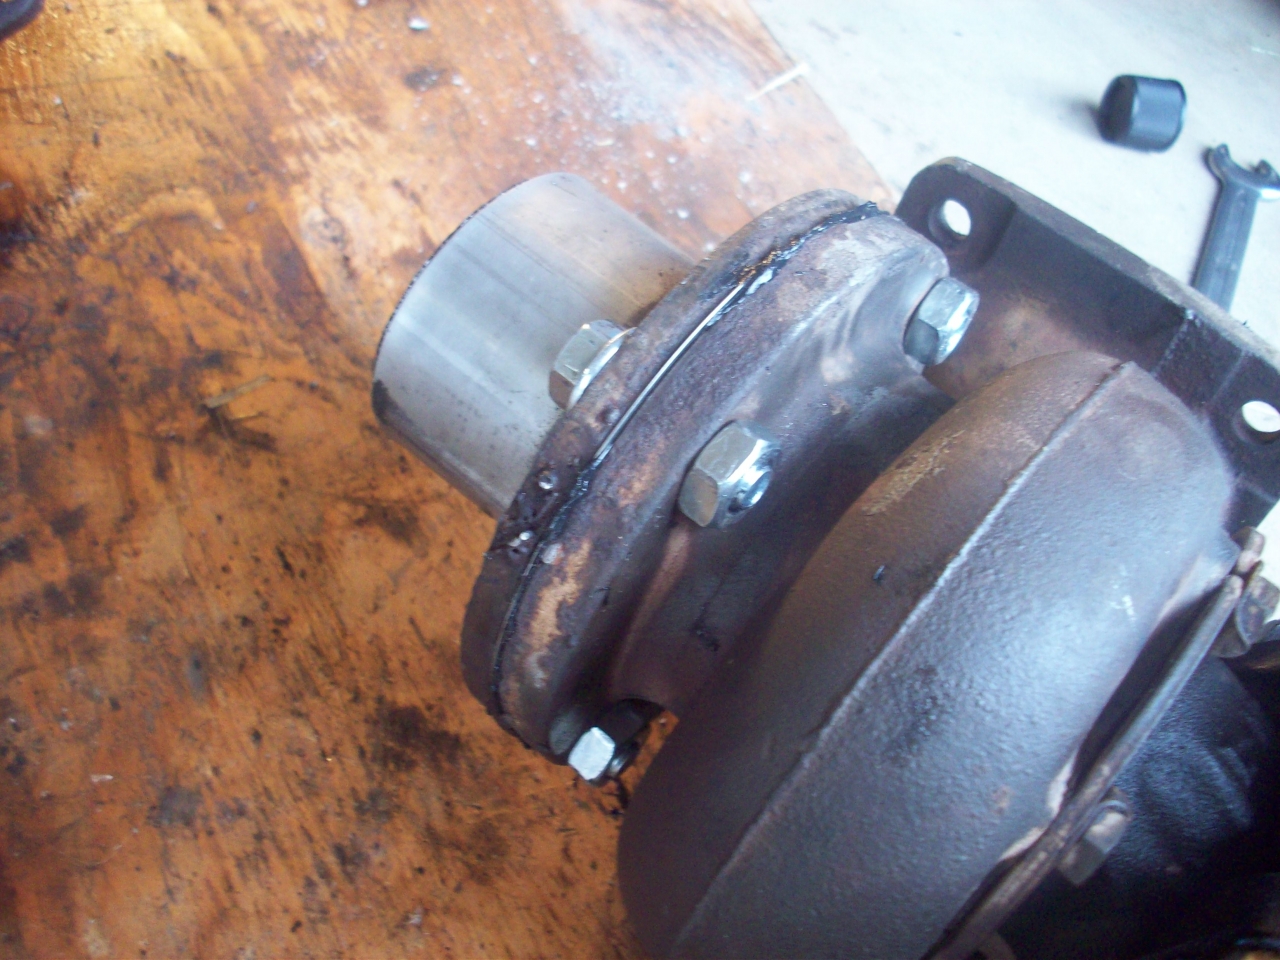
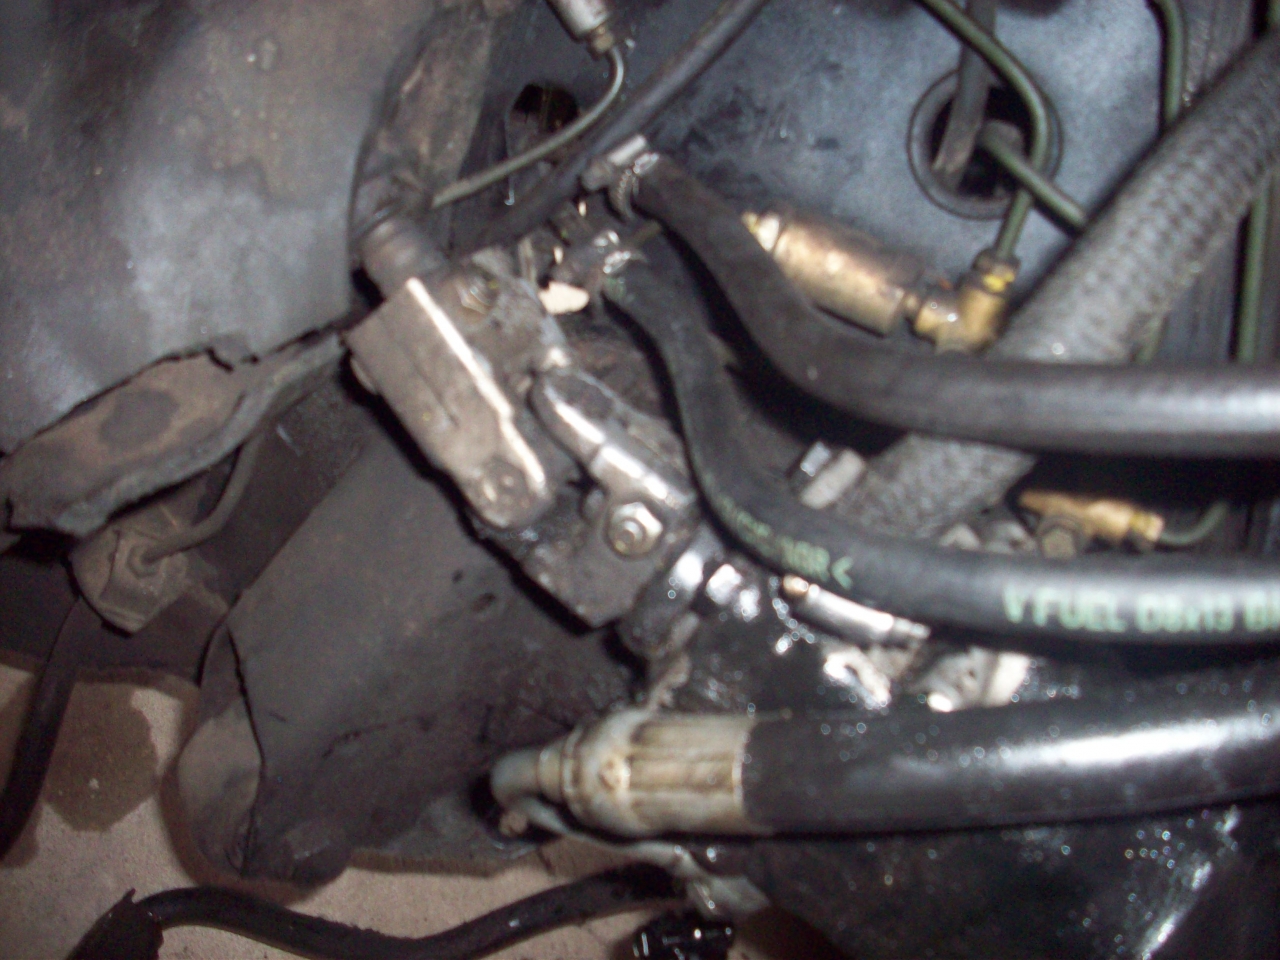
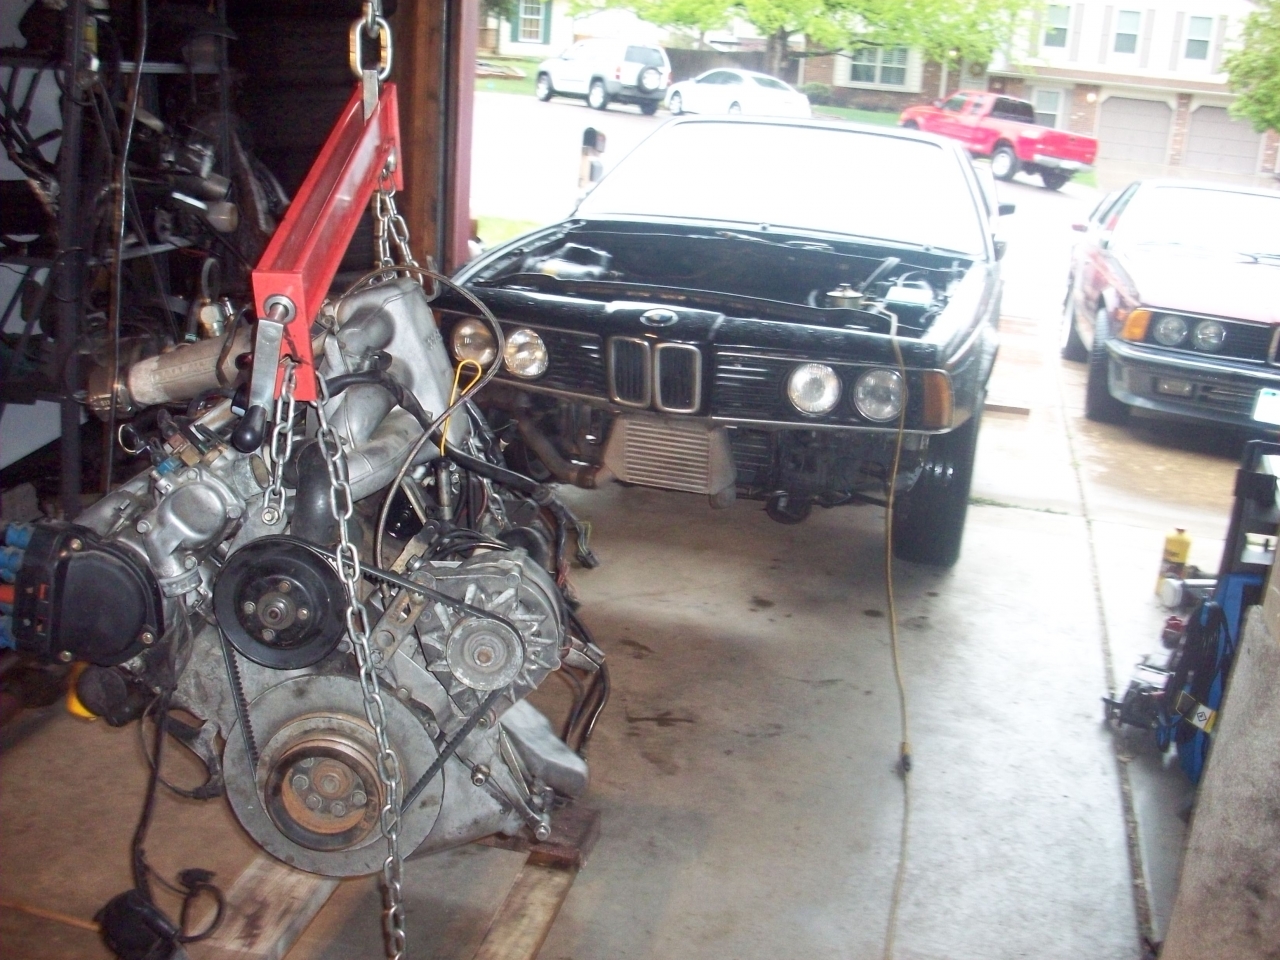
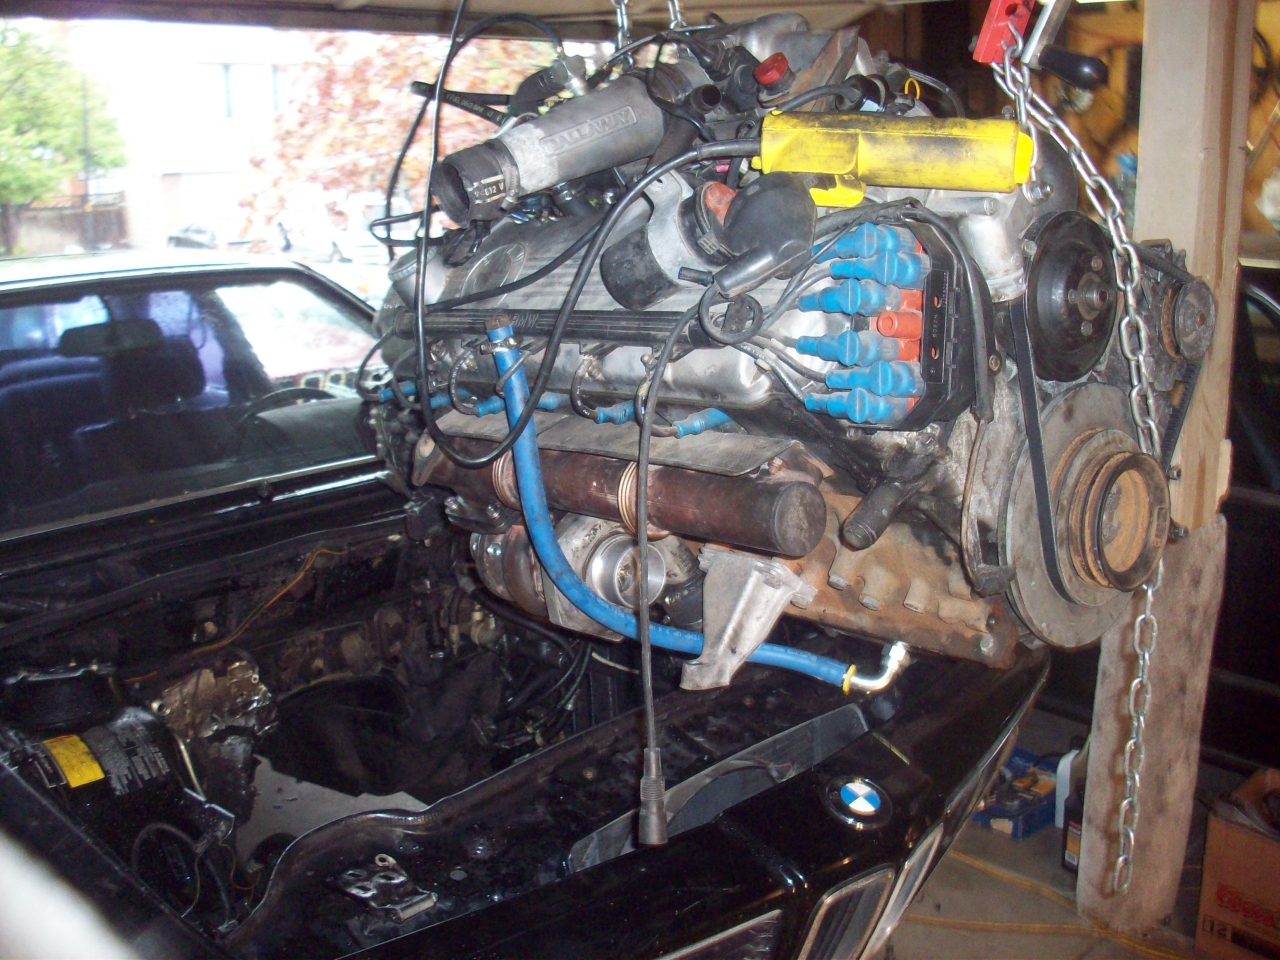
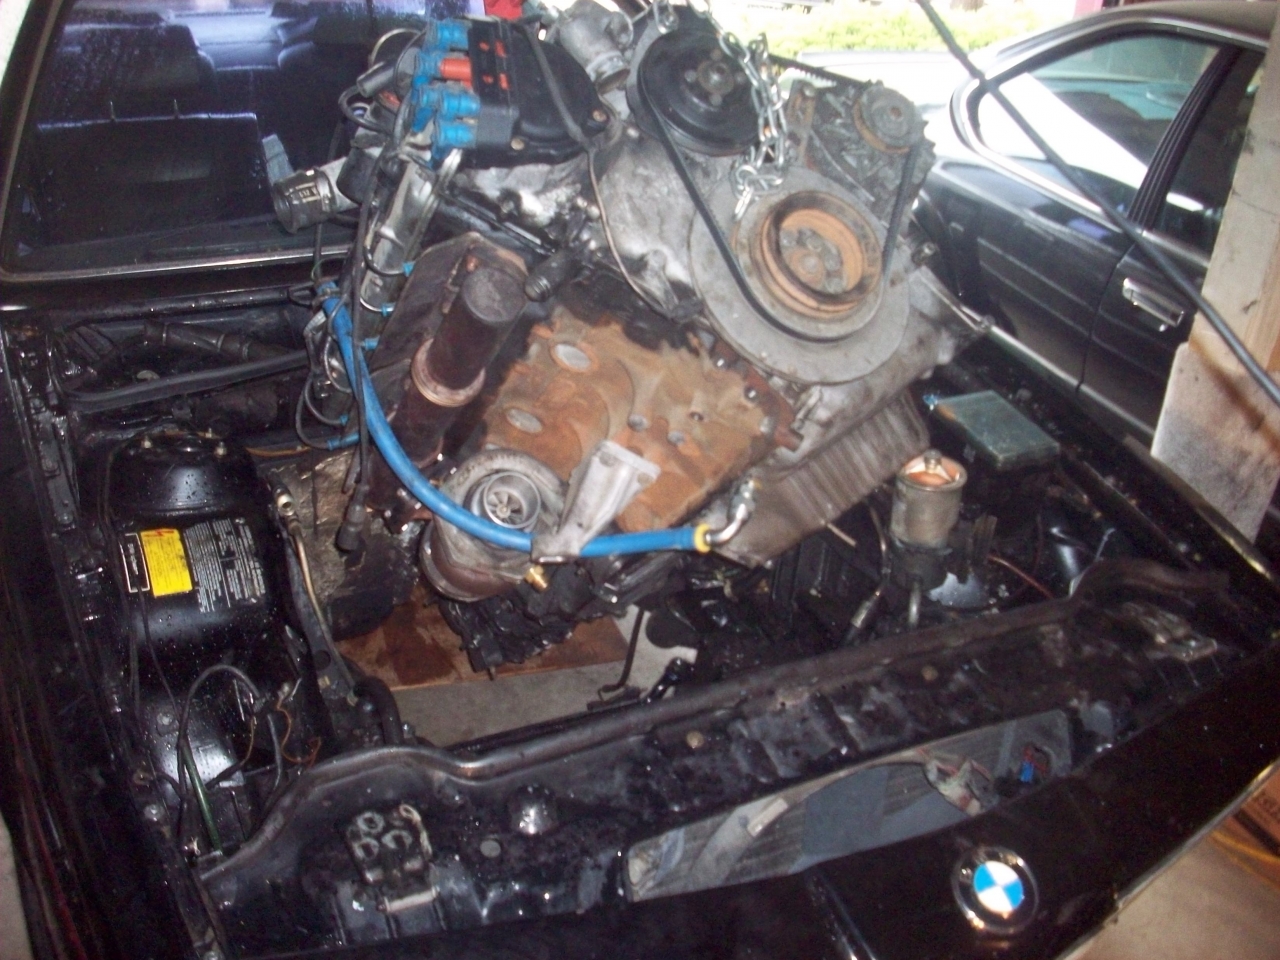
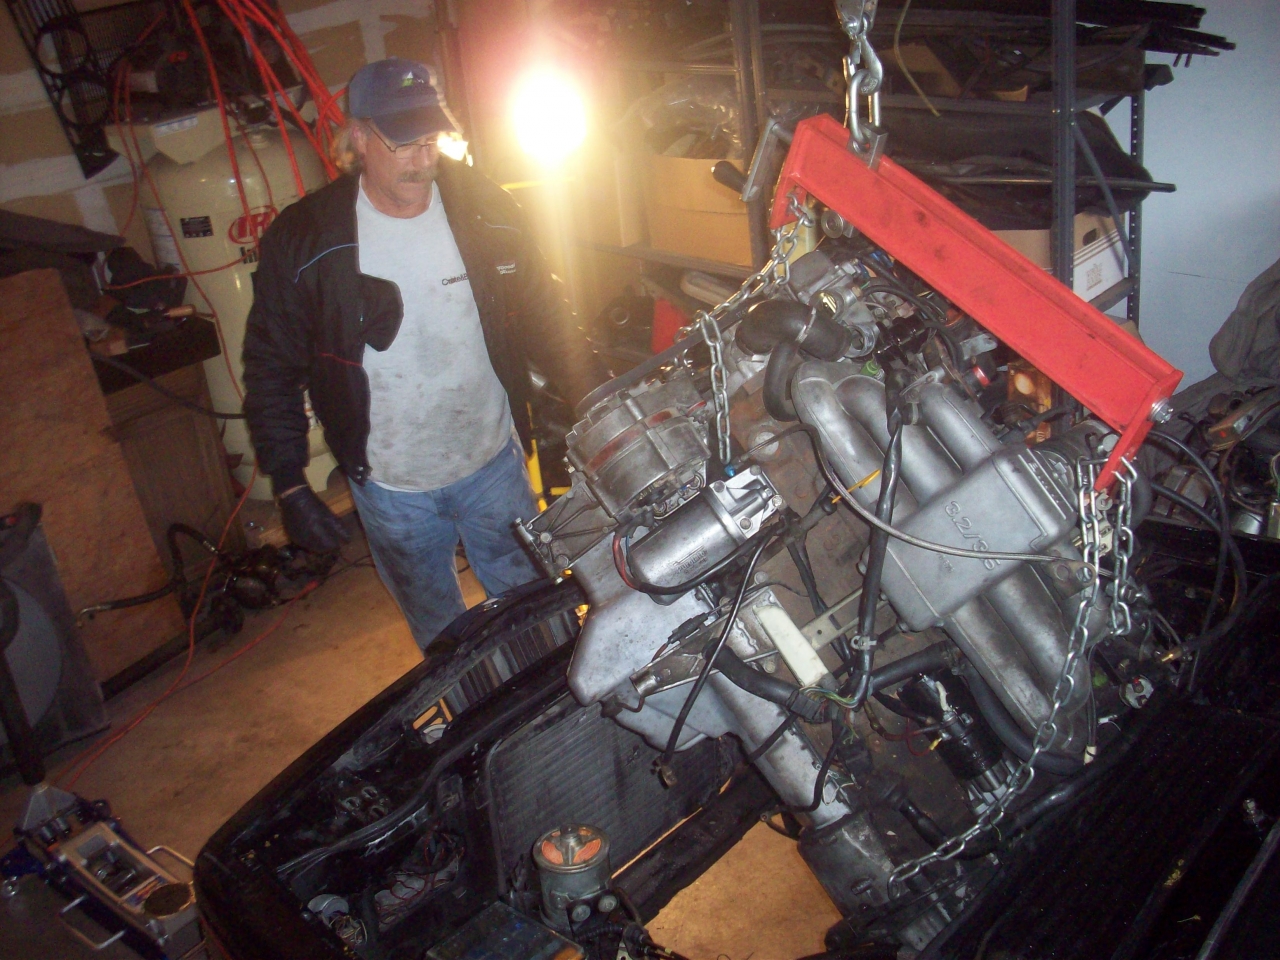
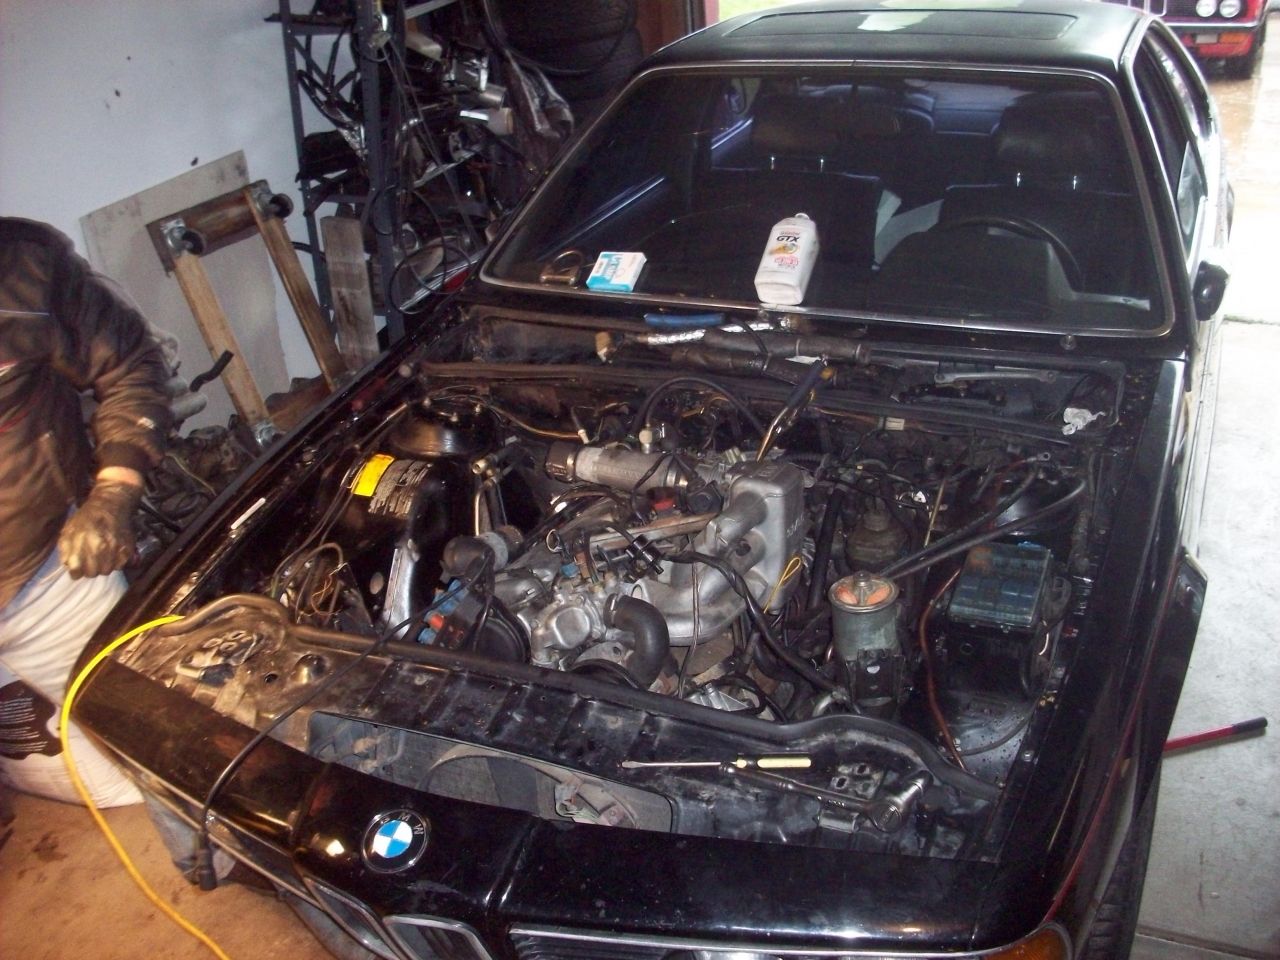
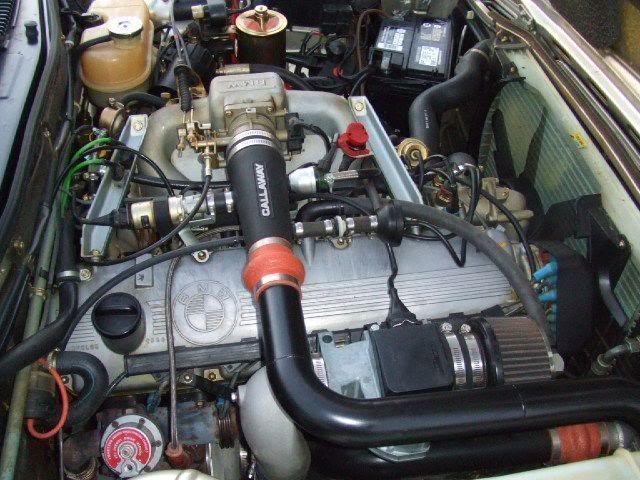
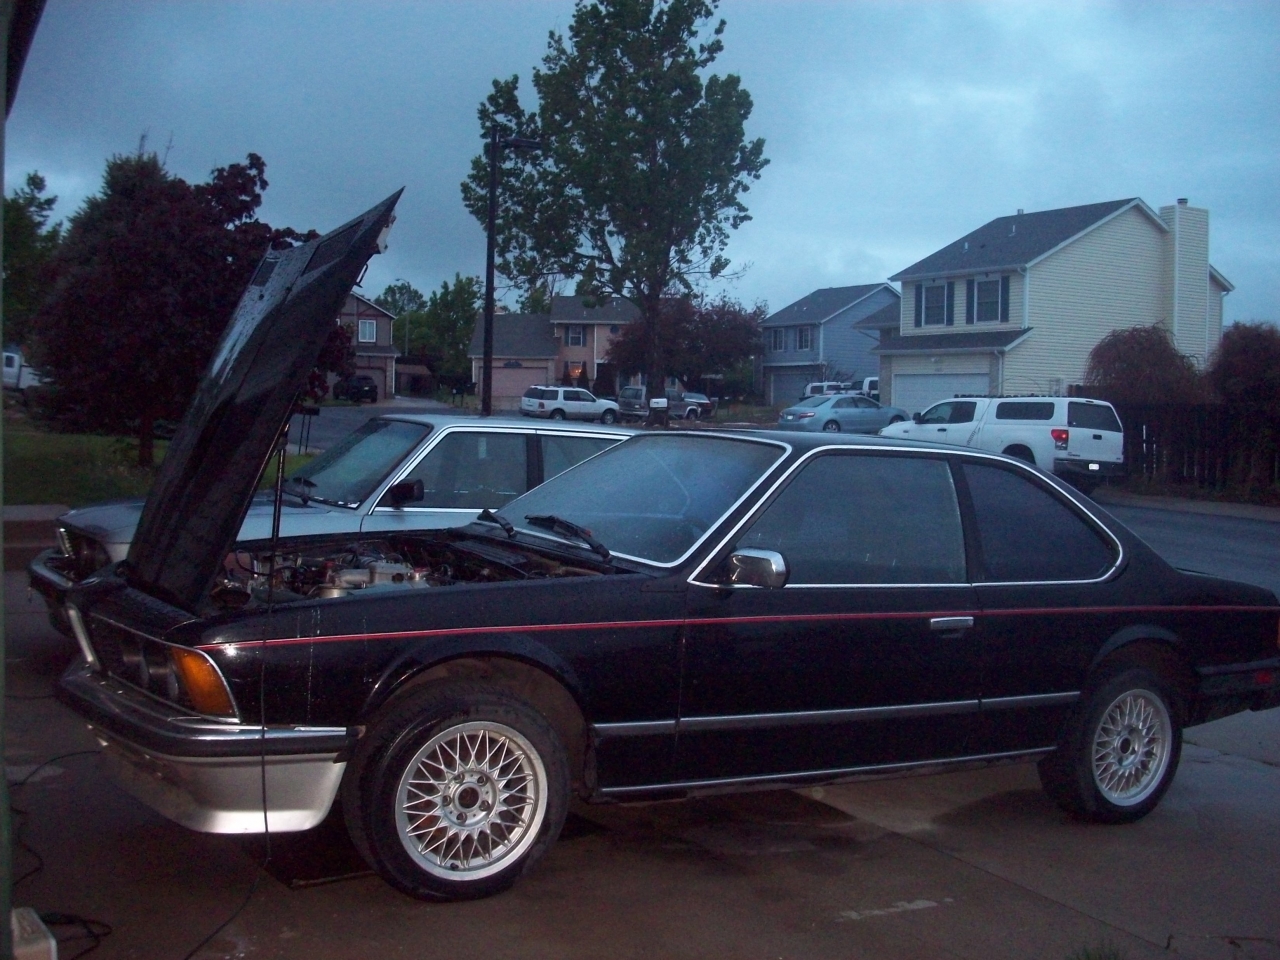
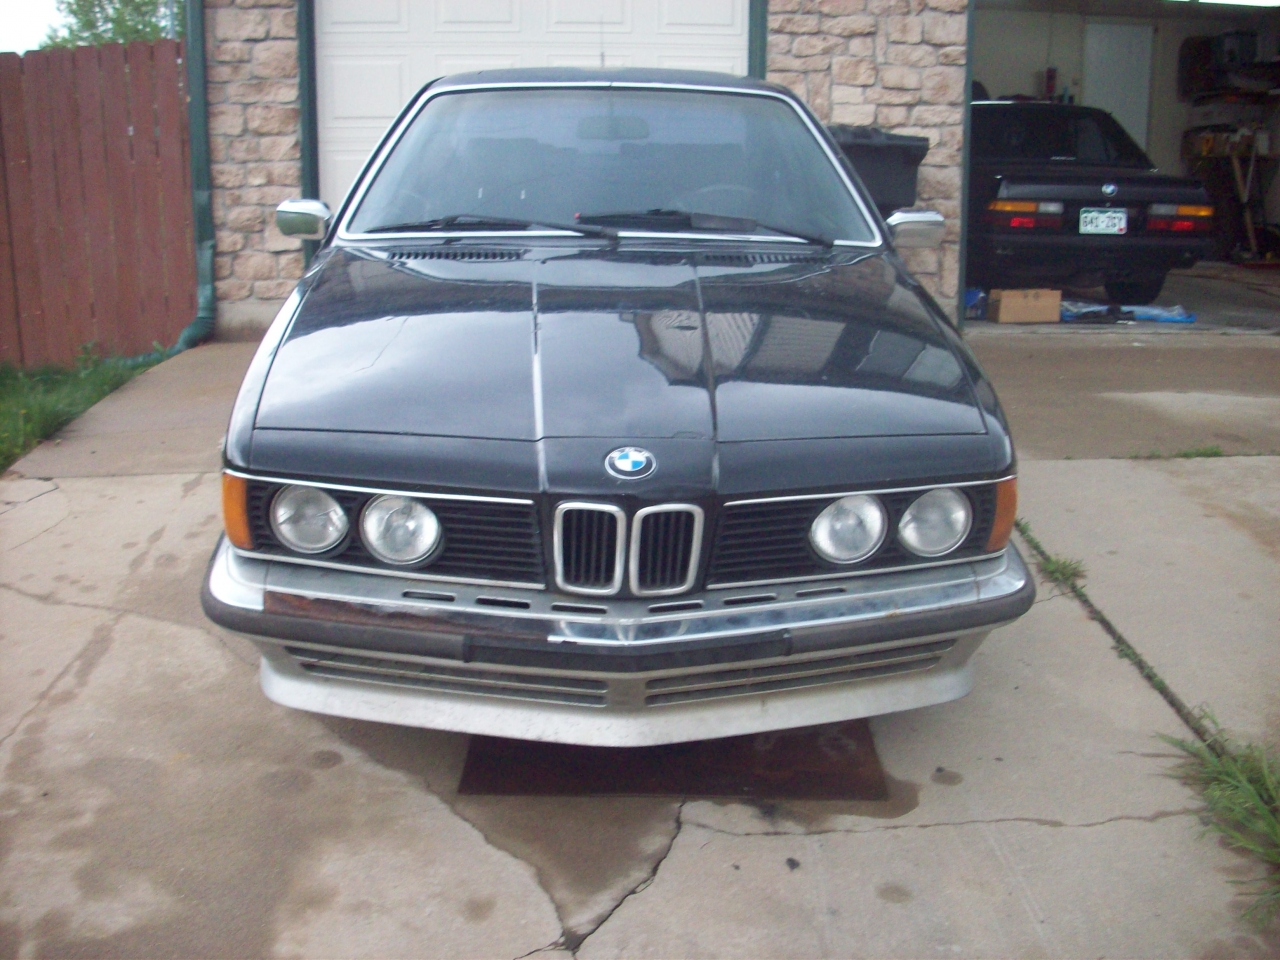
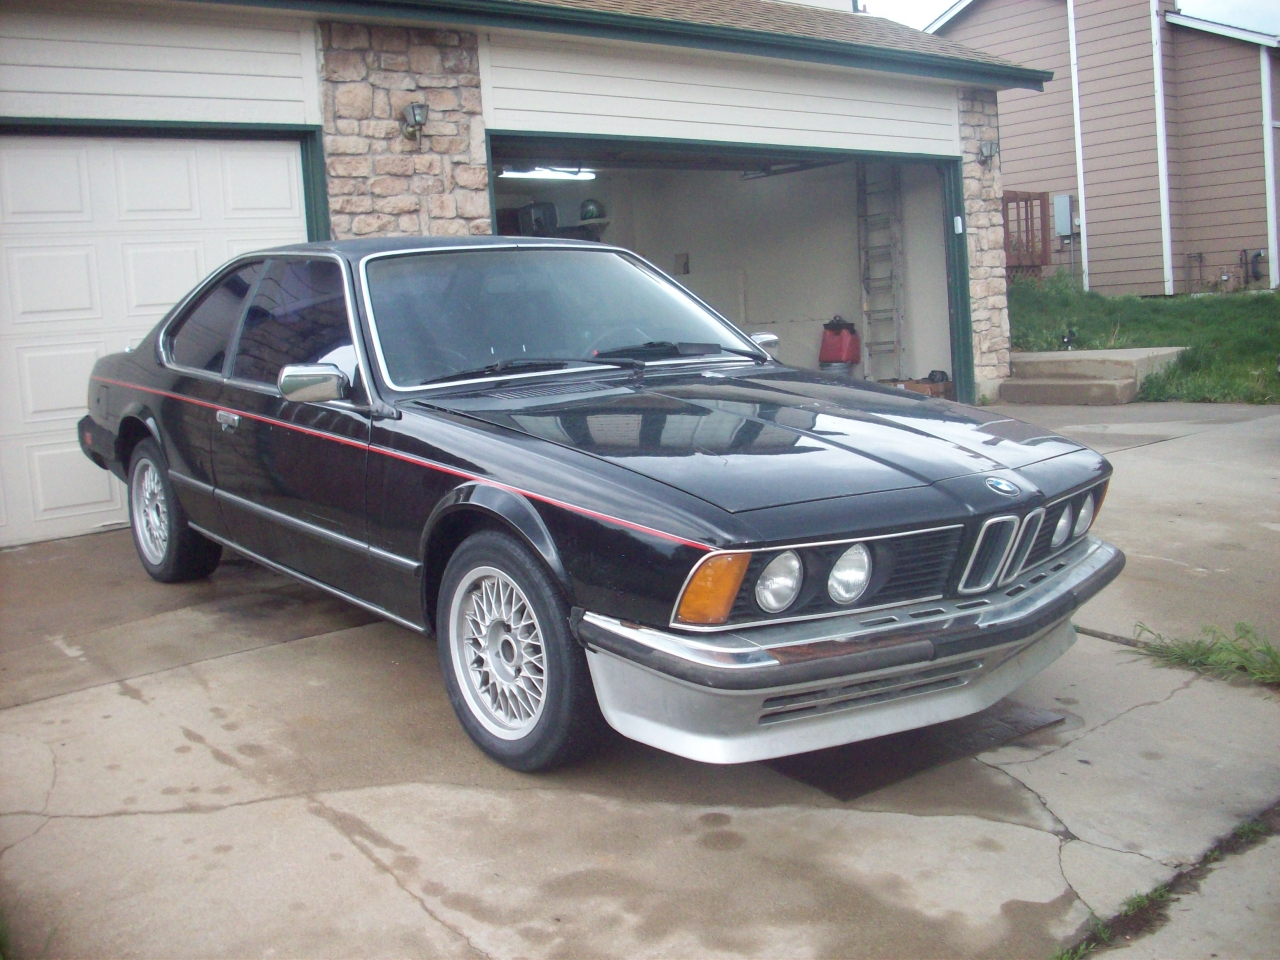
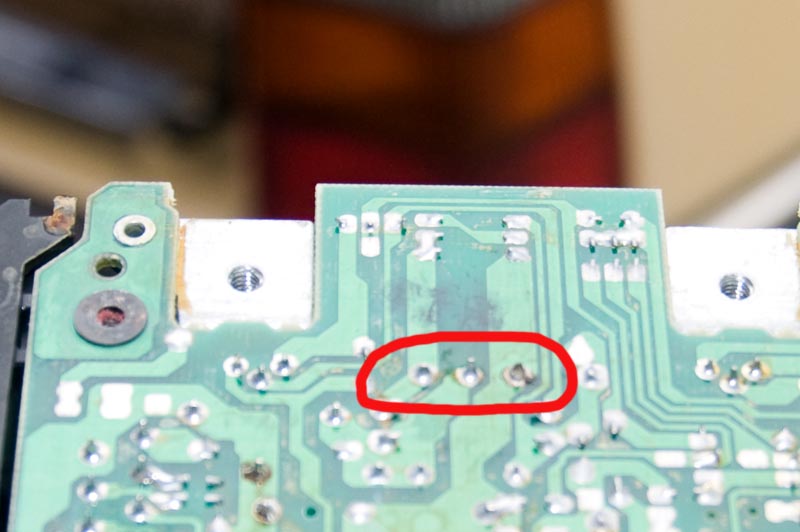
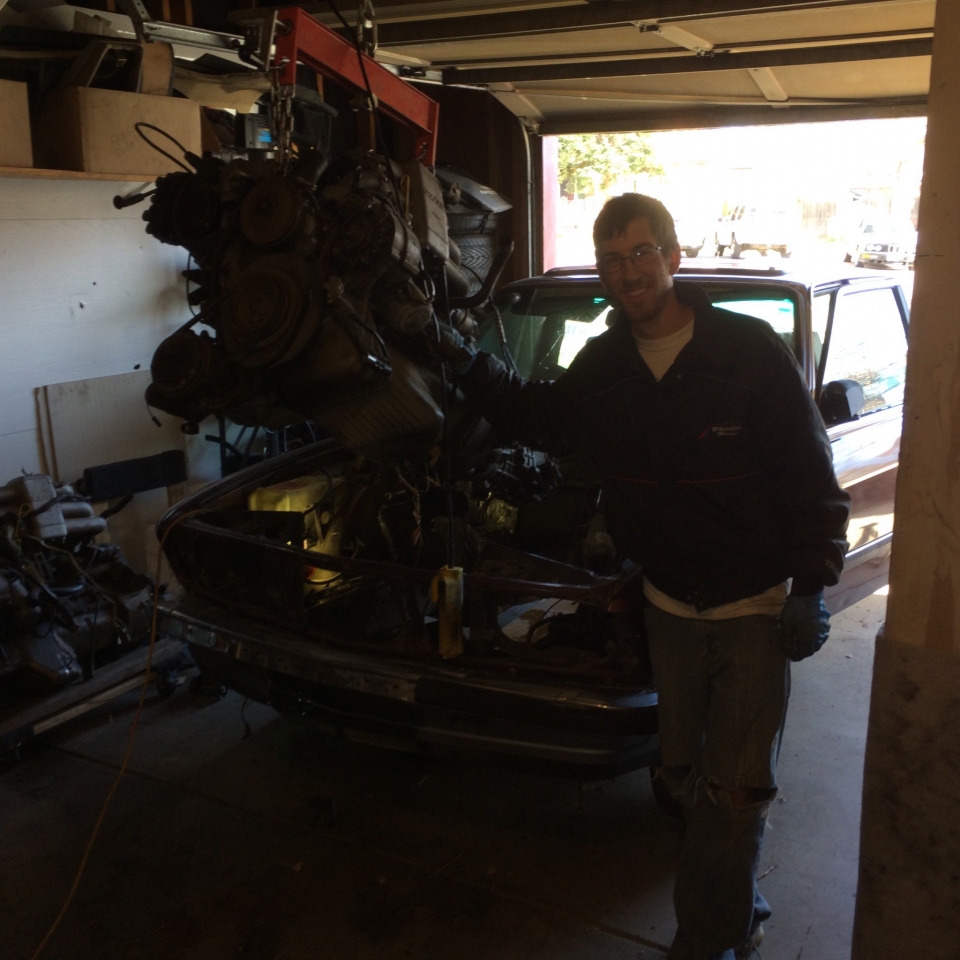
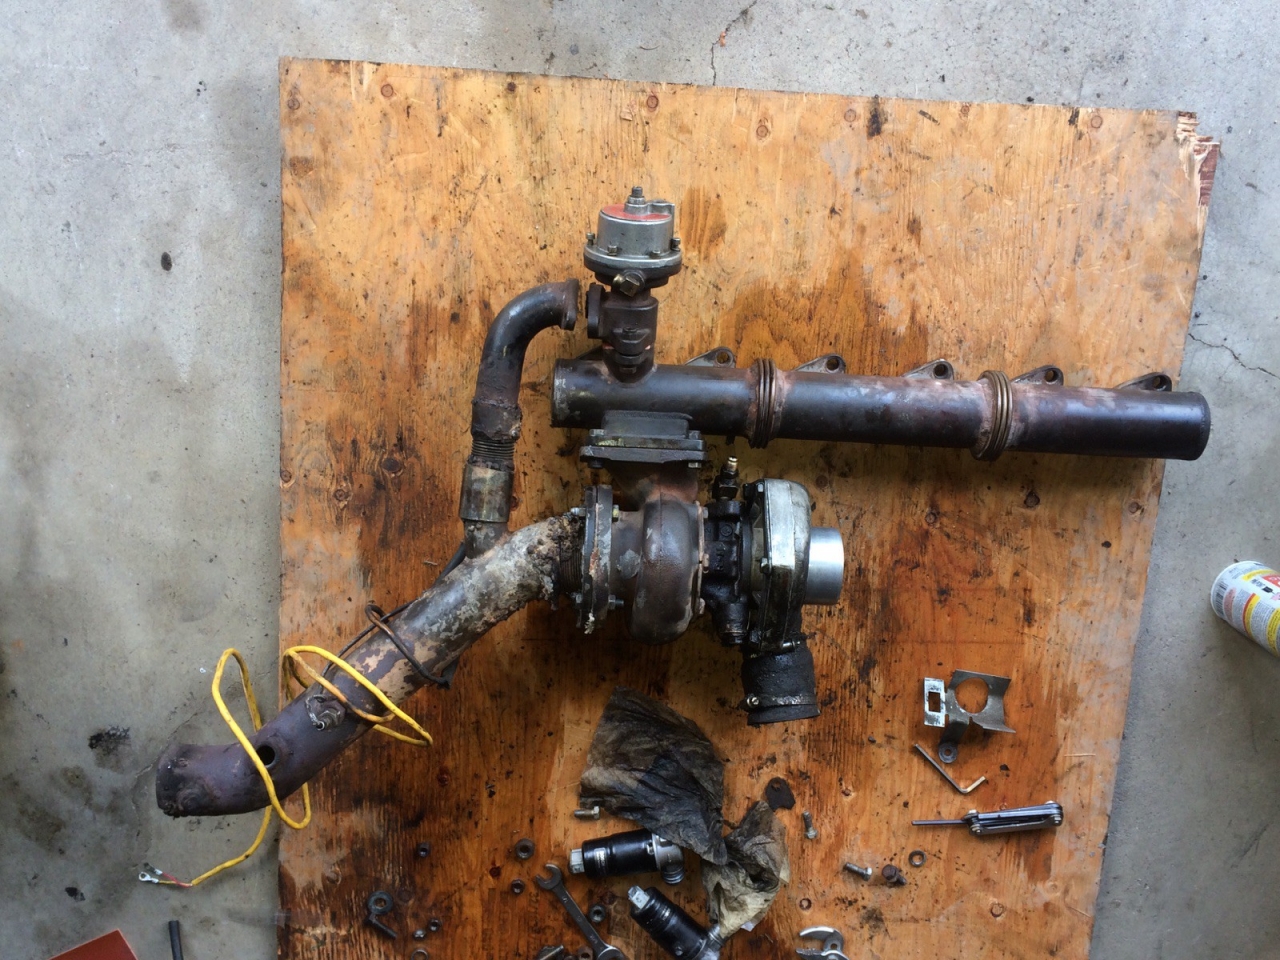
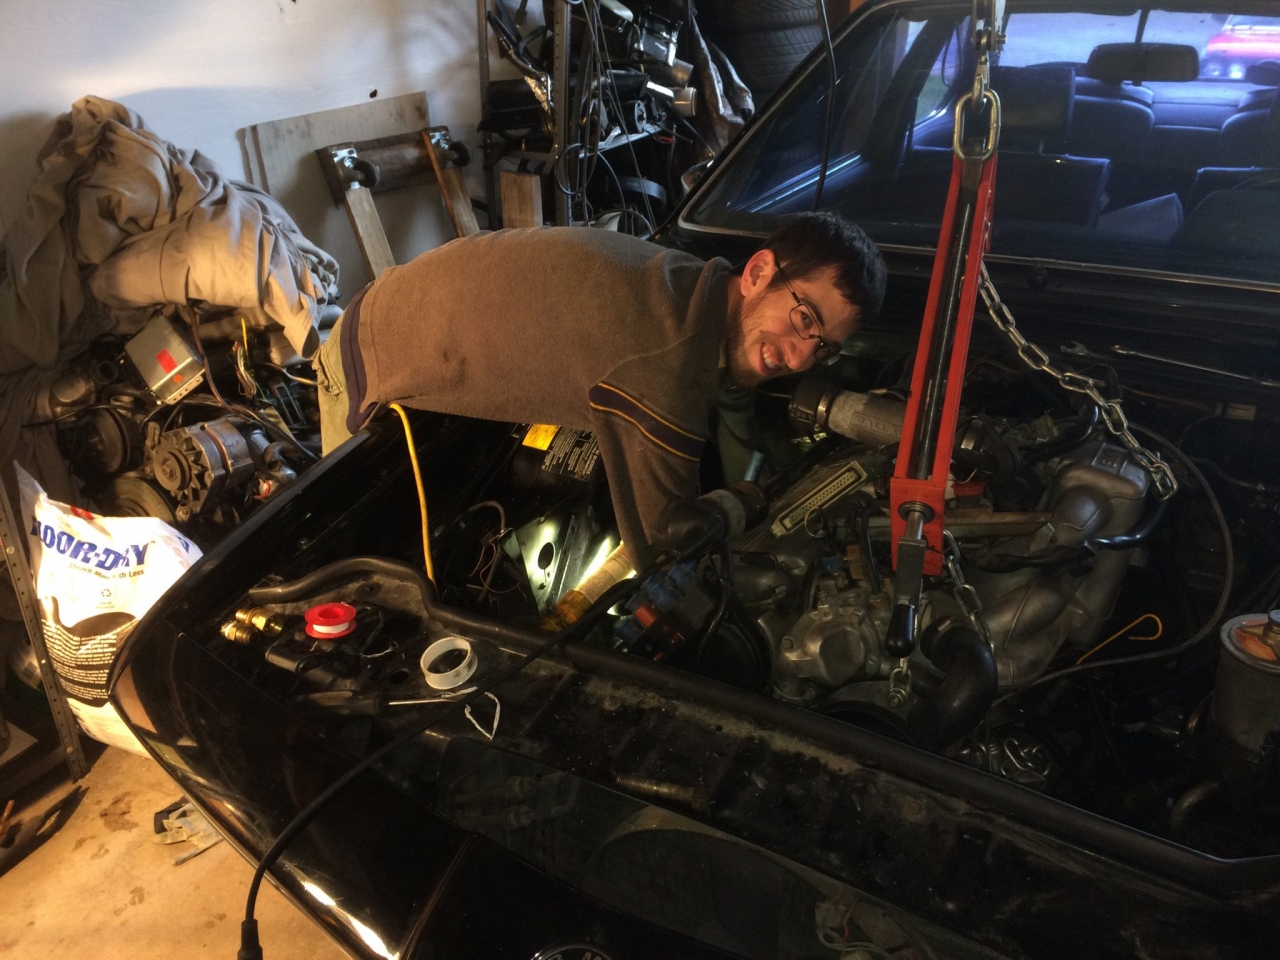
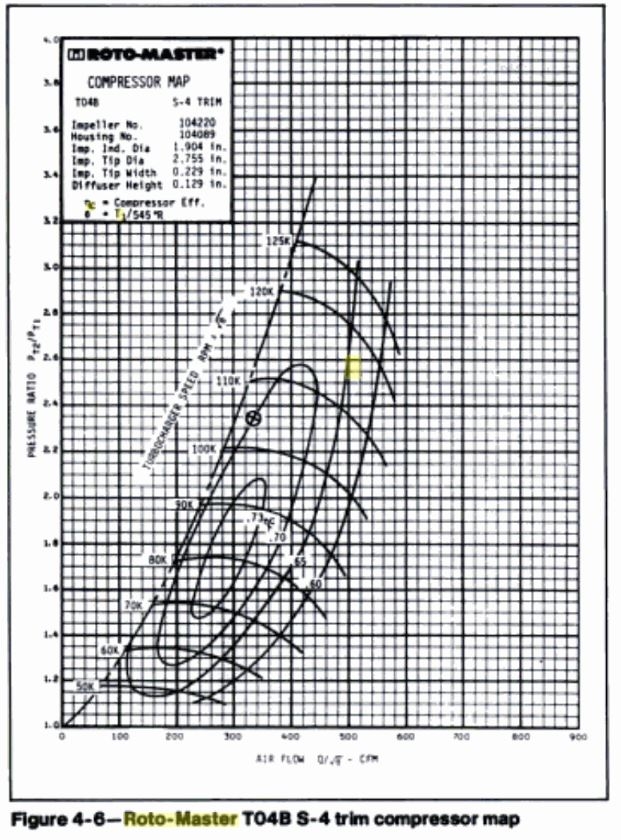
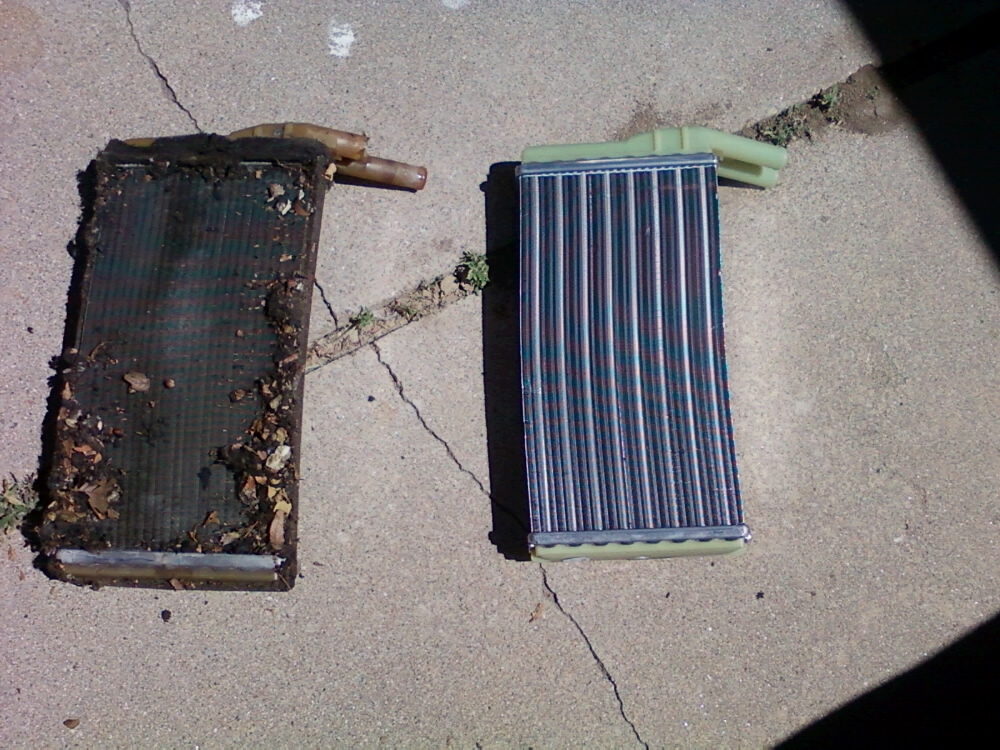


 Reply With Quote


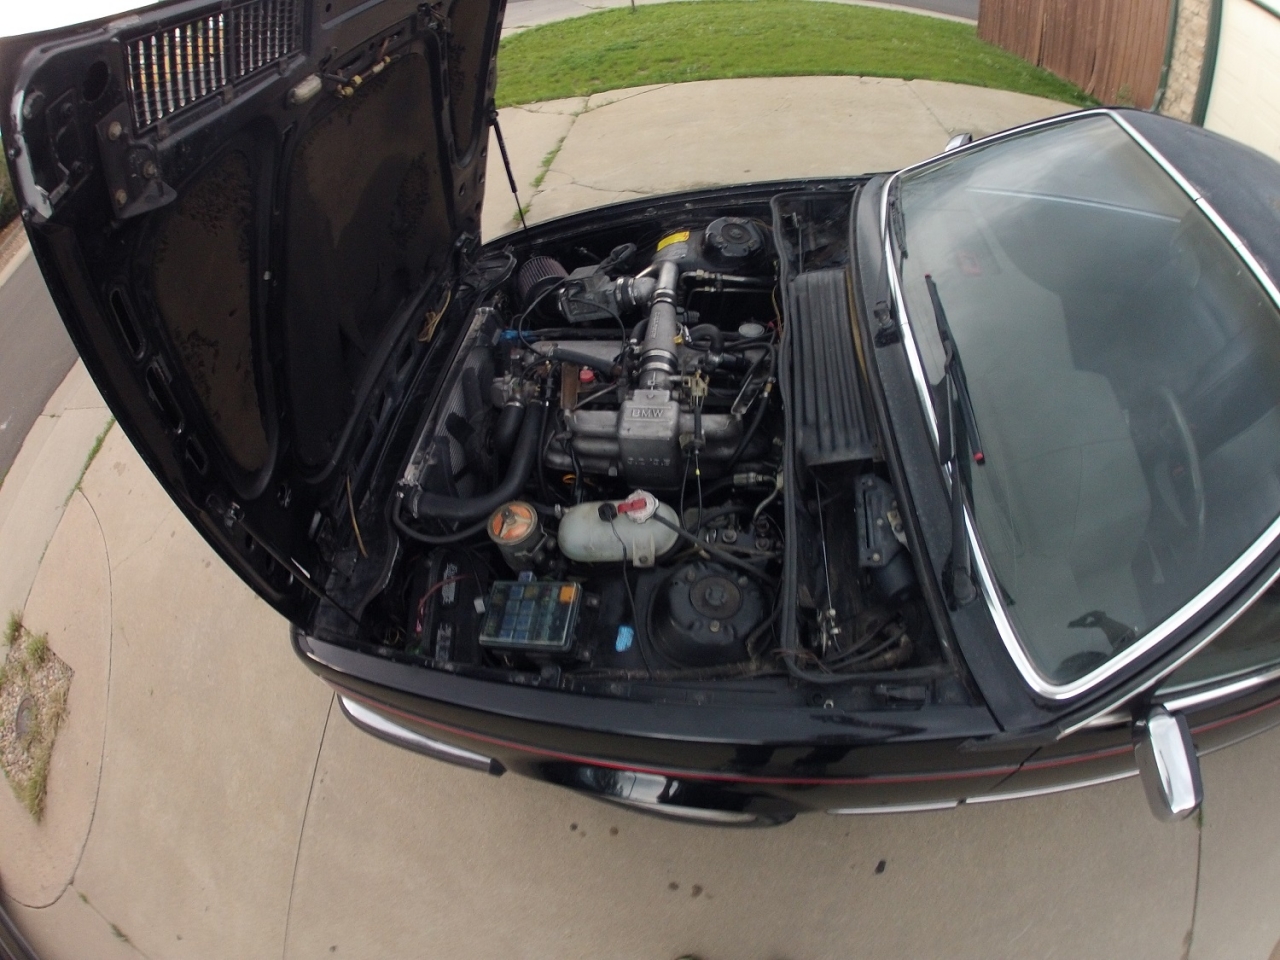
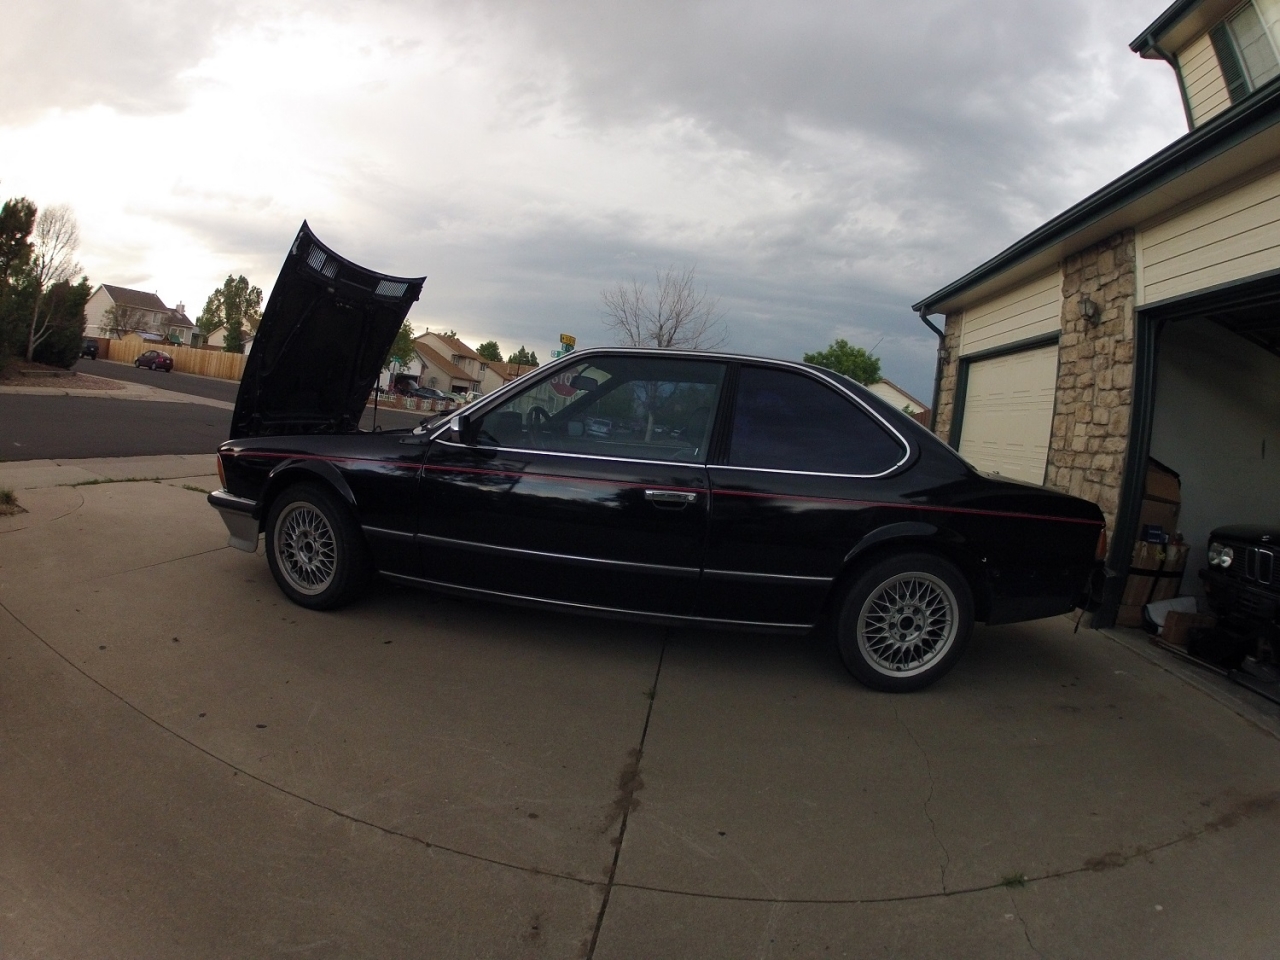
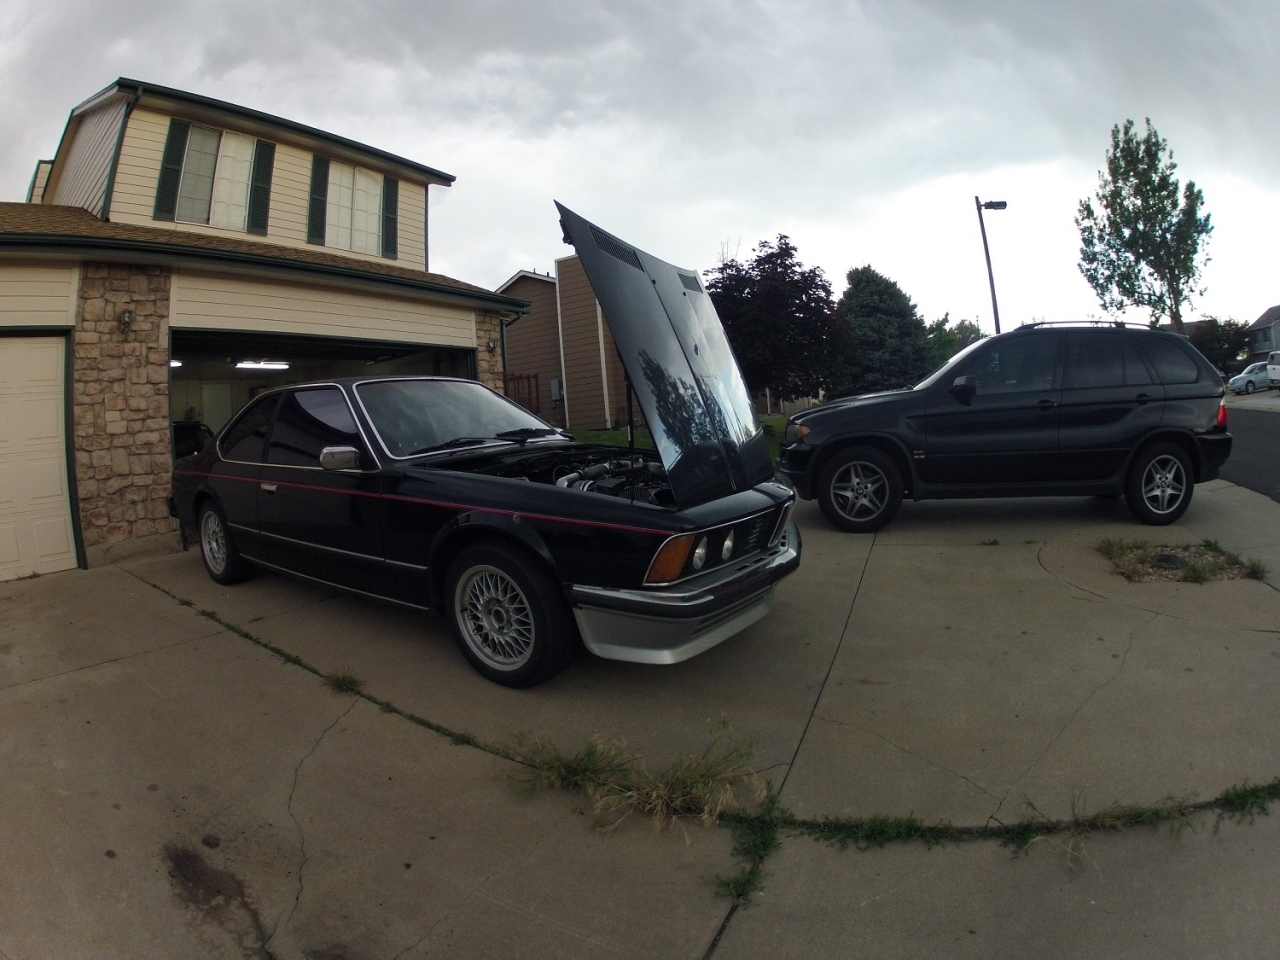

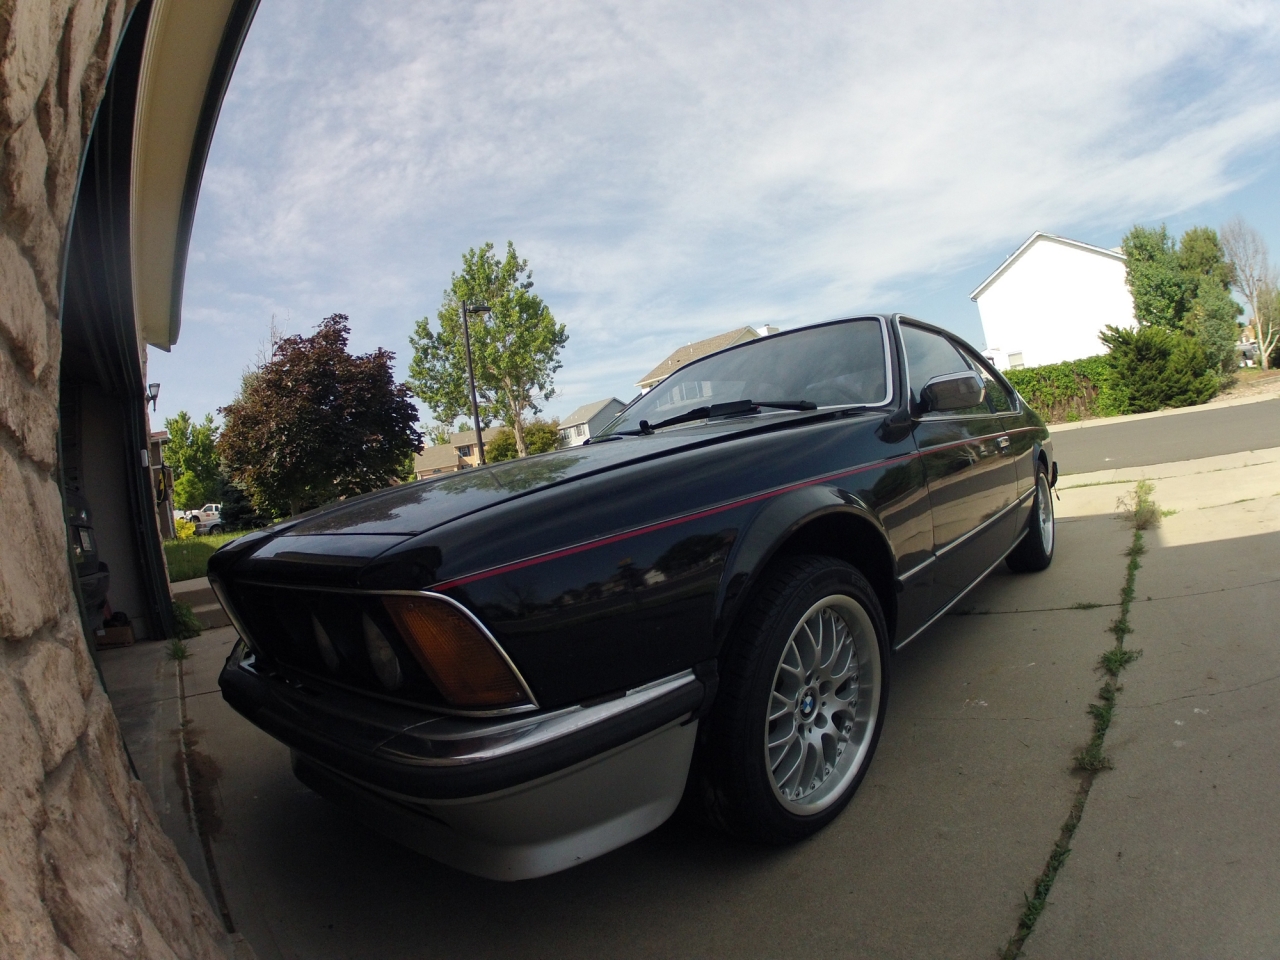
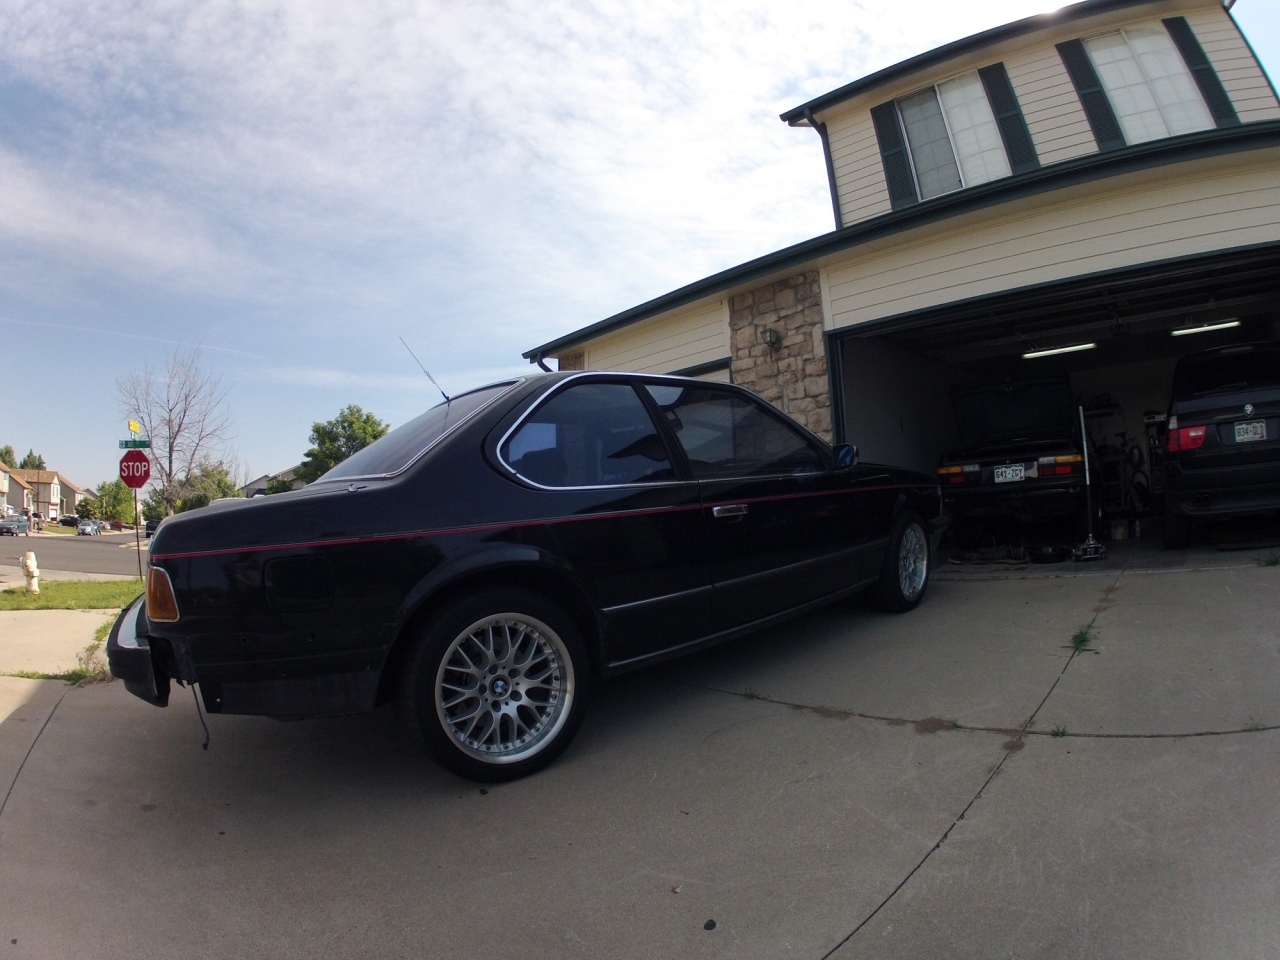
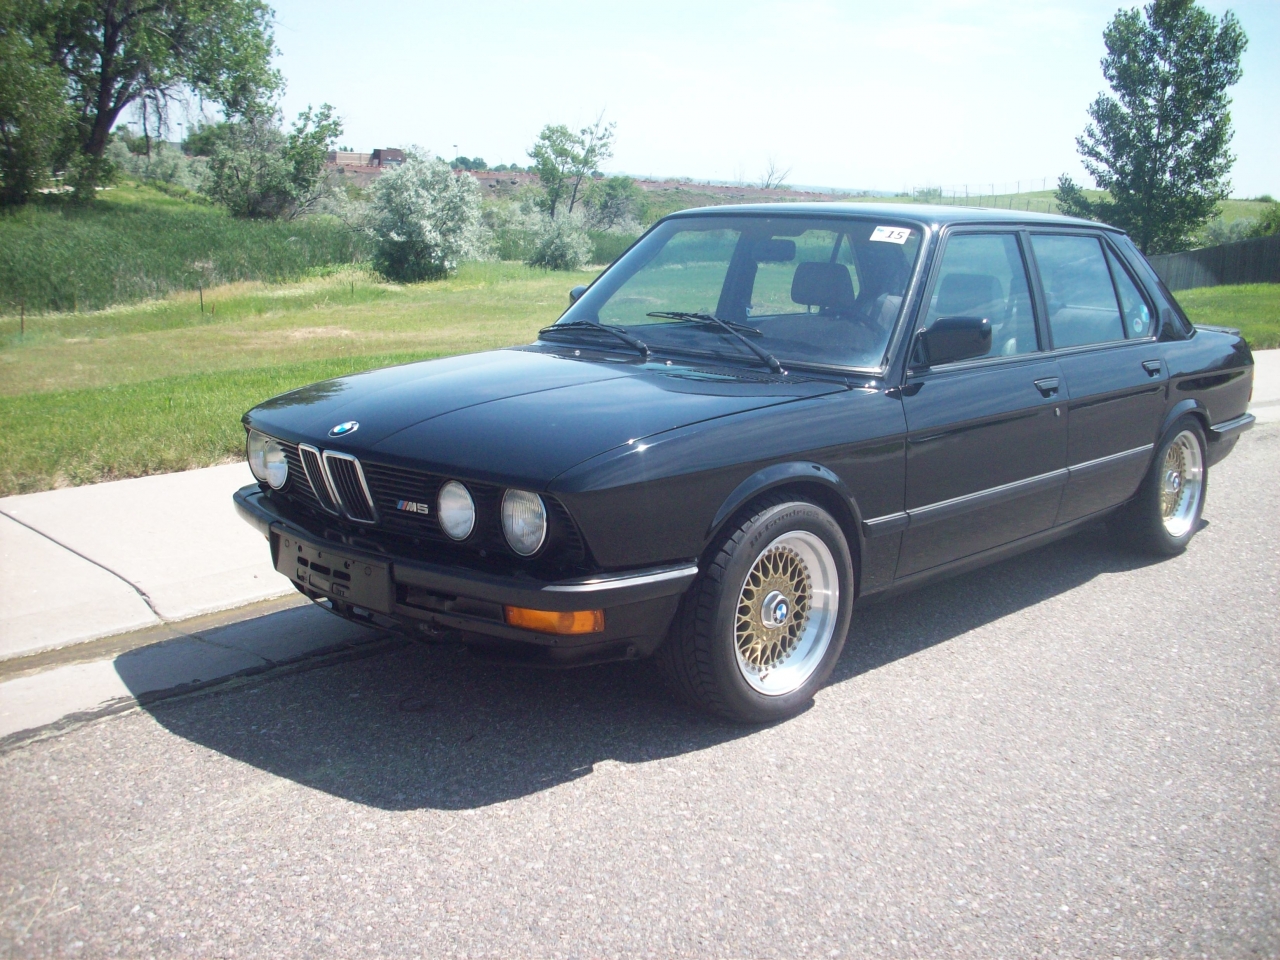
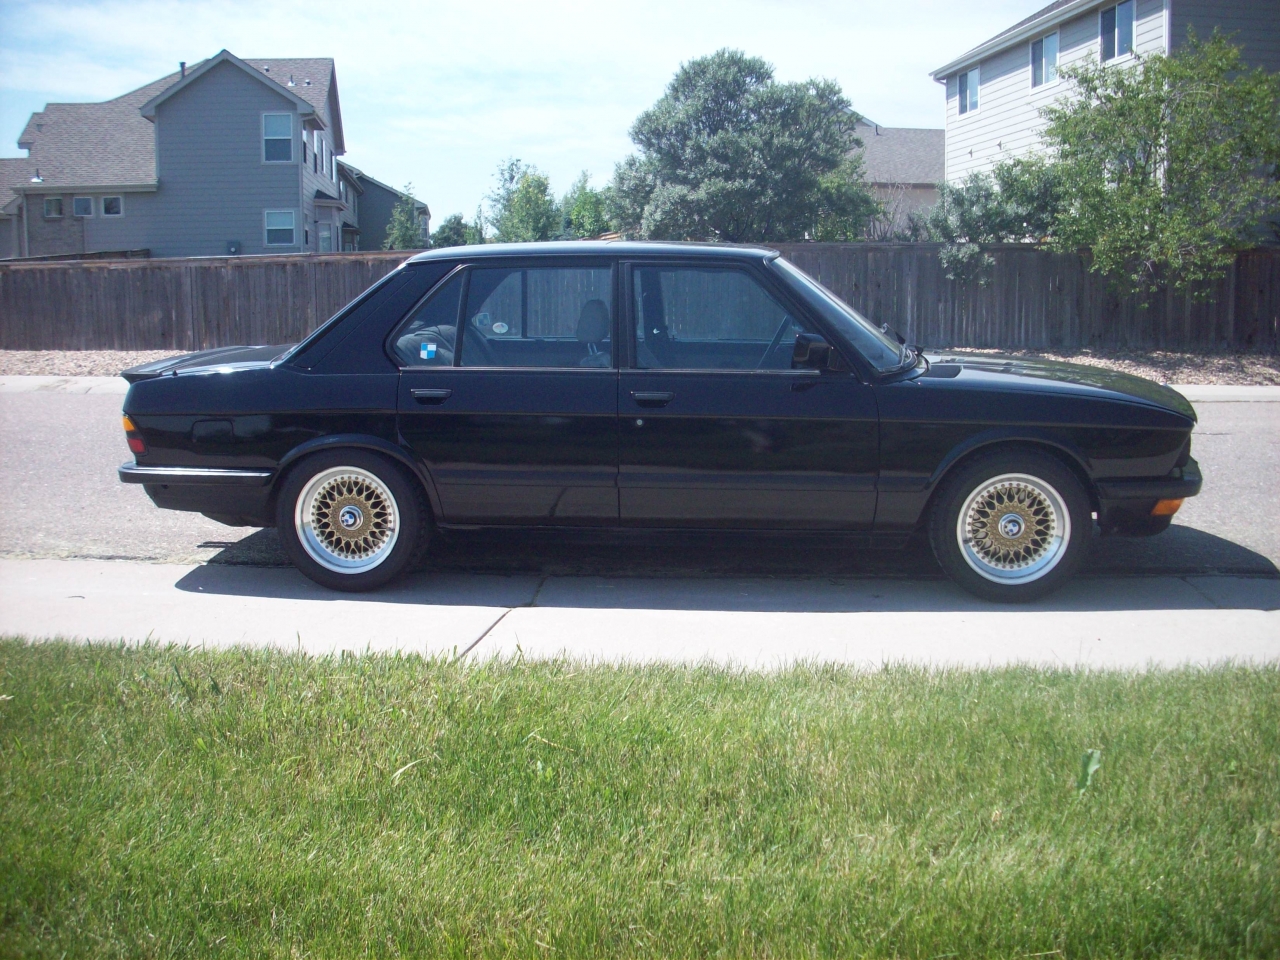
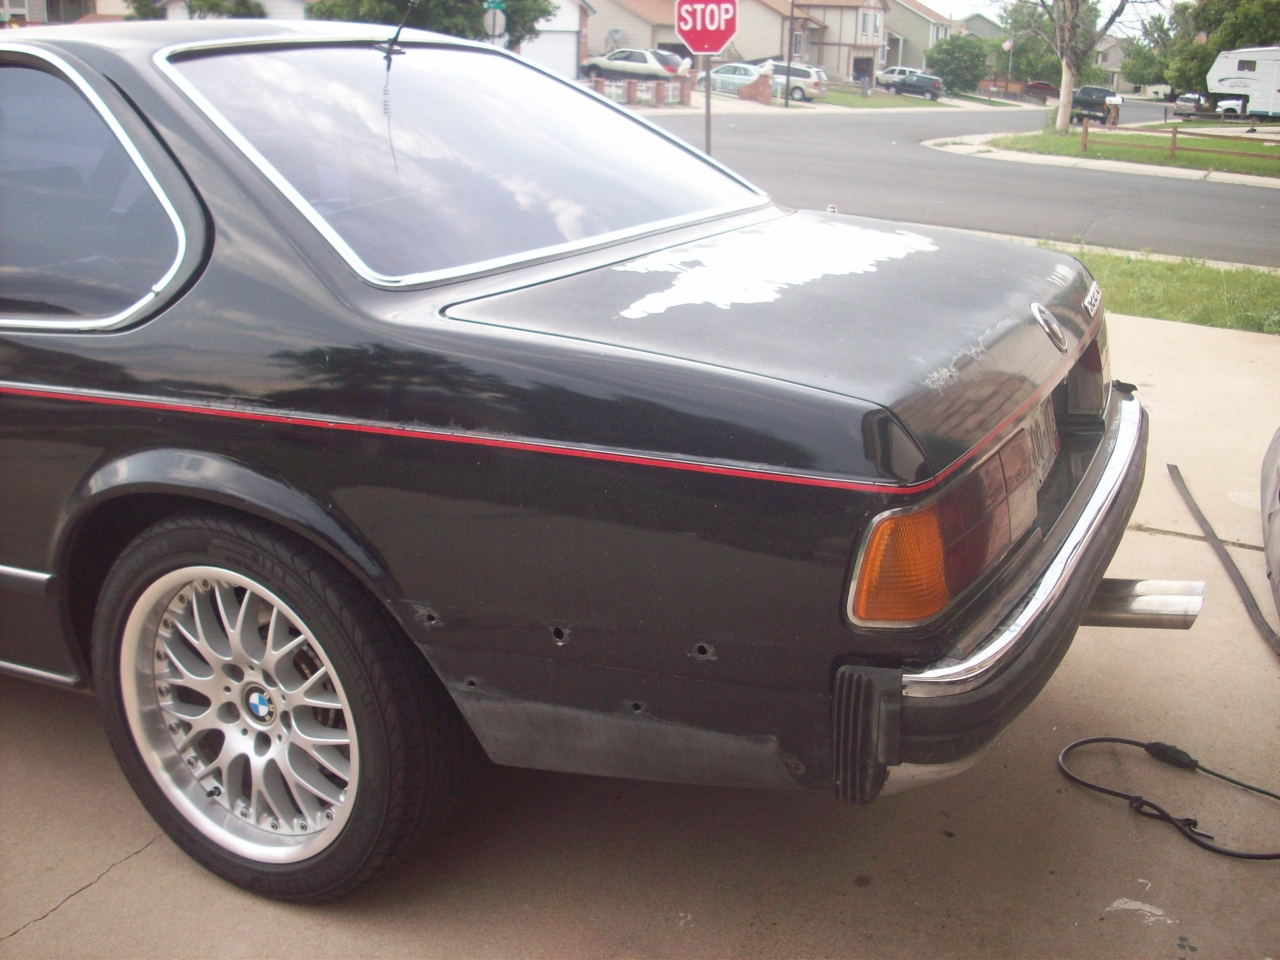
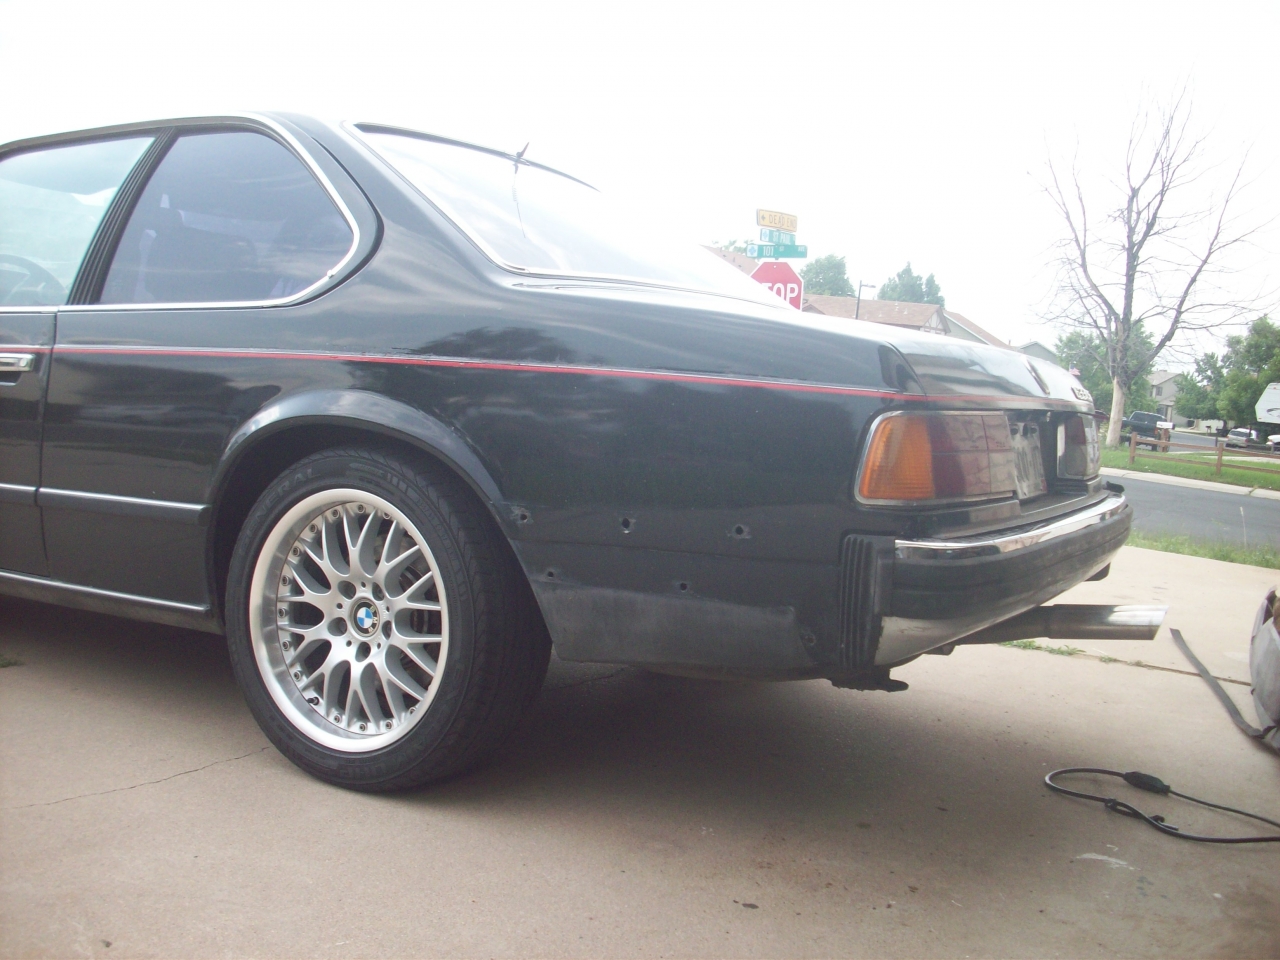
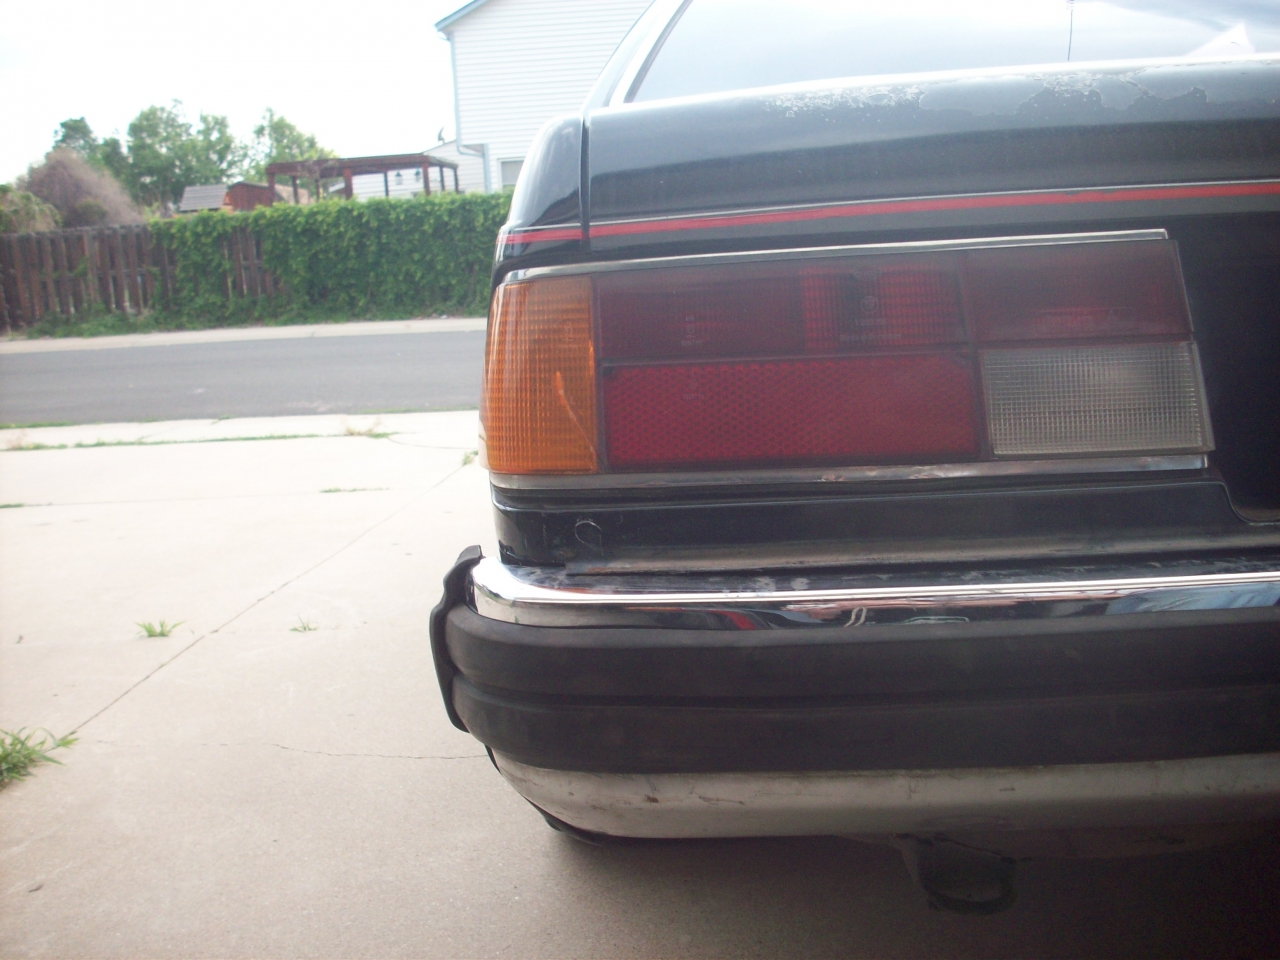

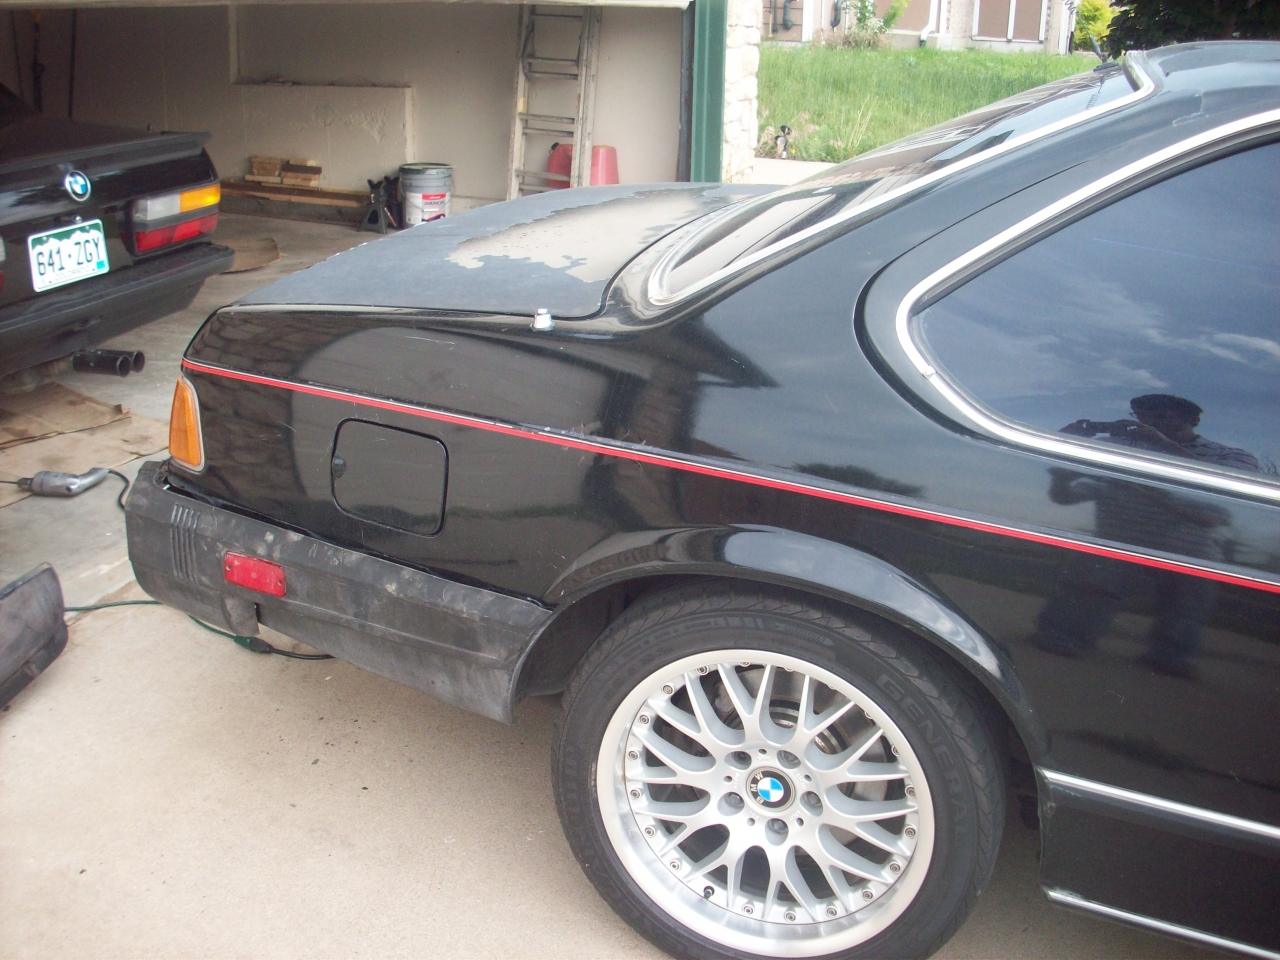
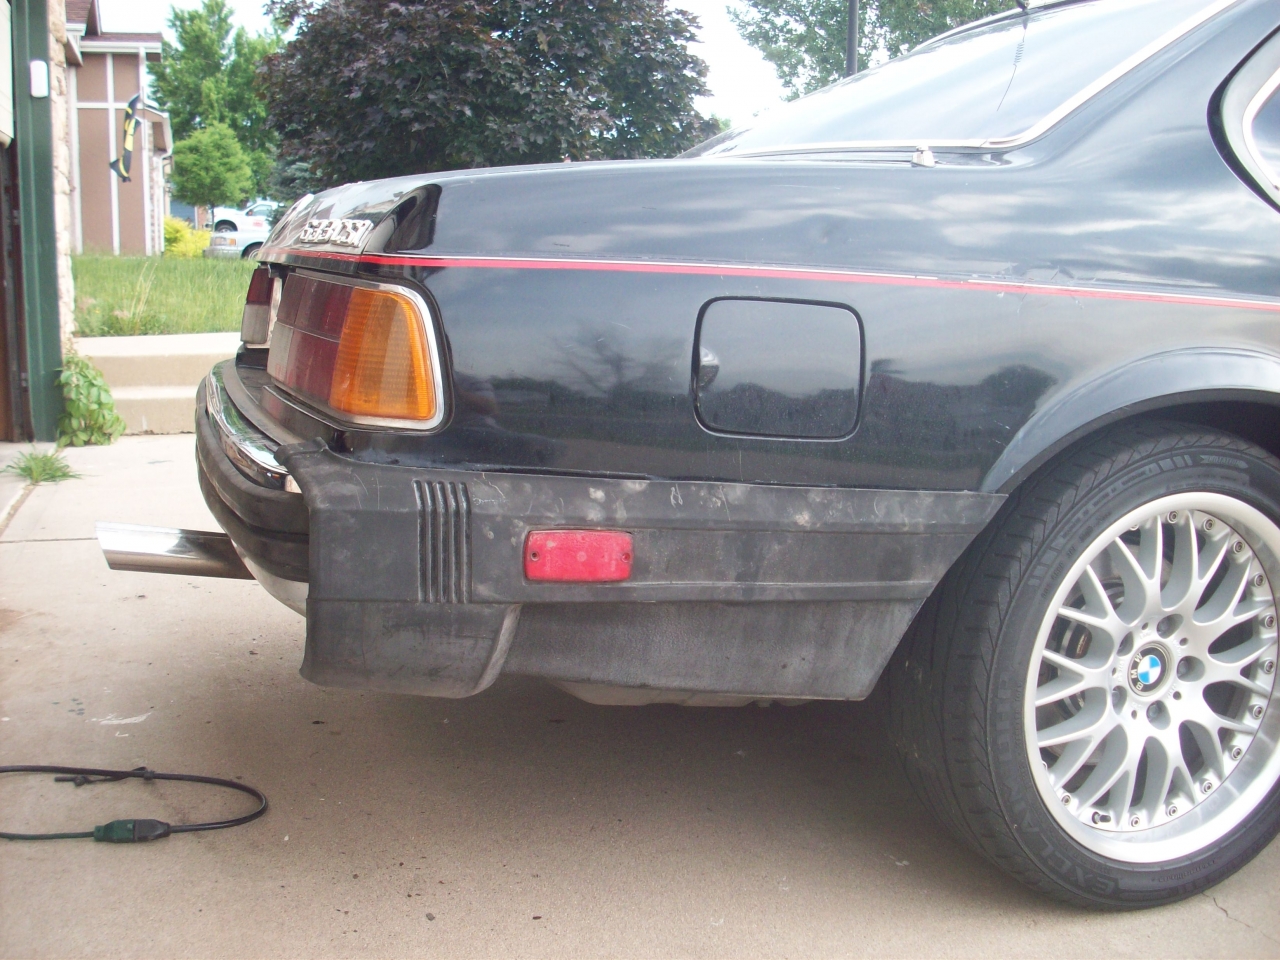
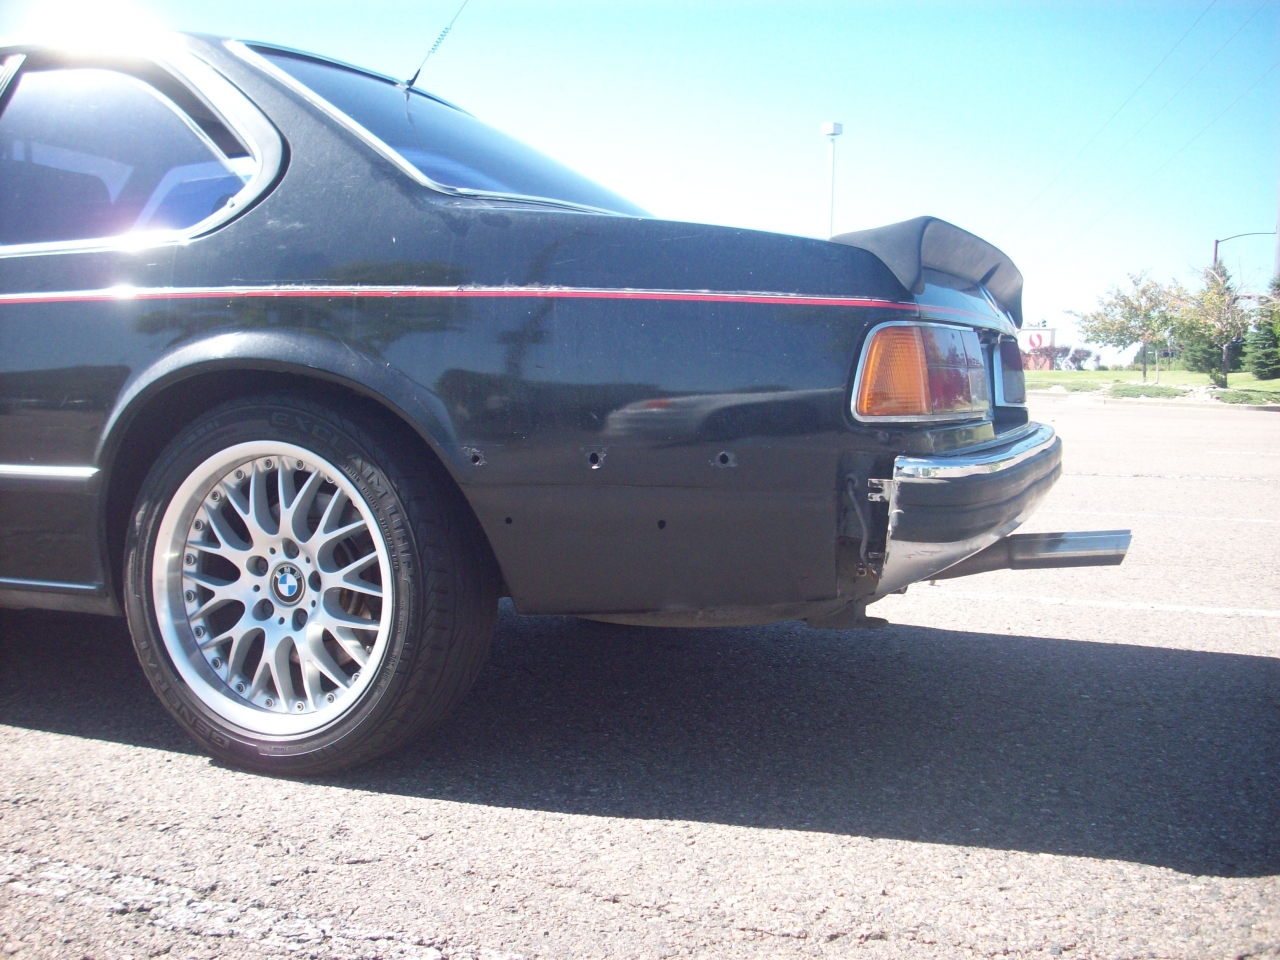
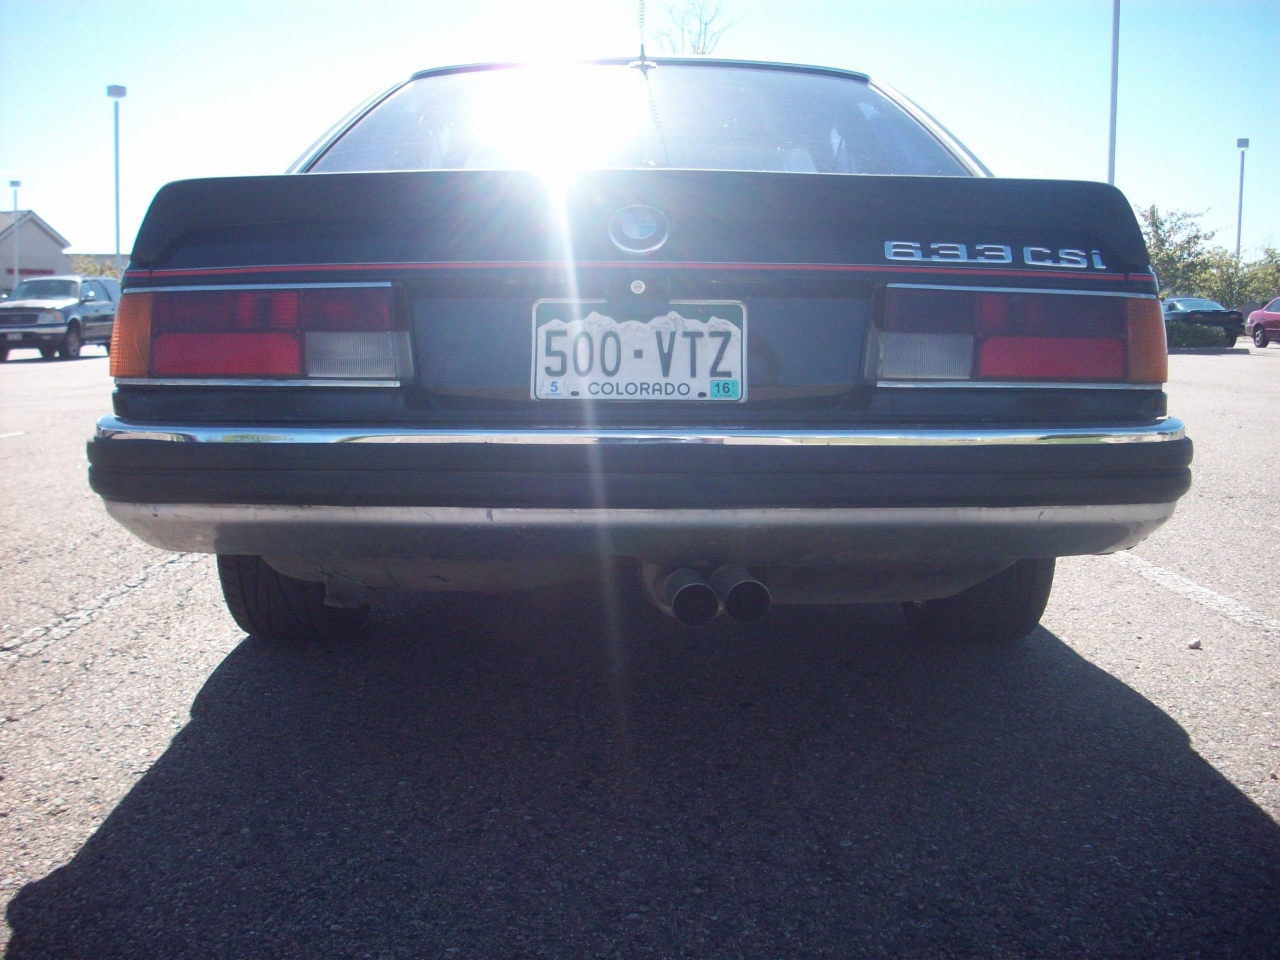
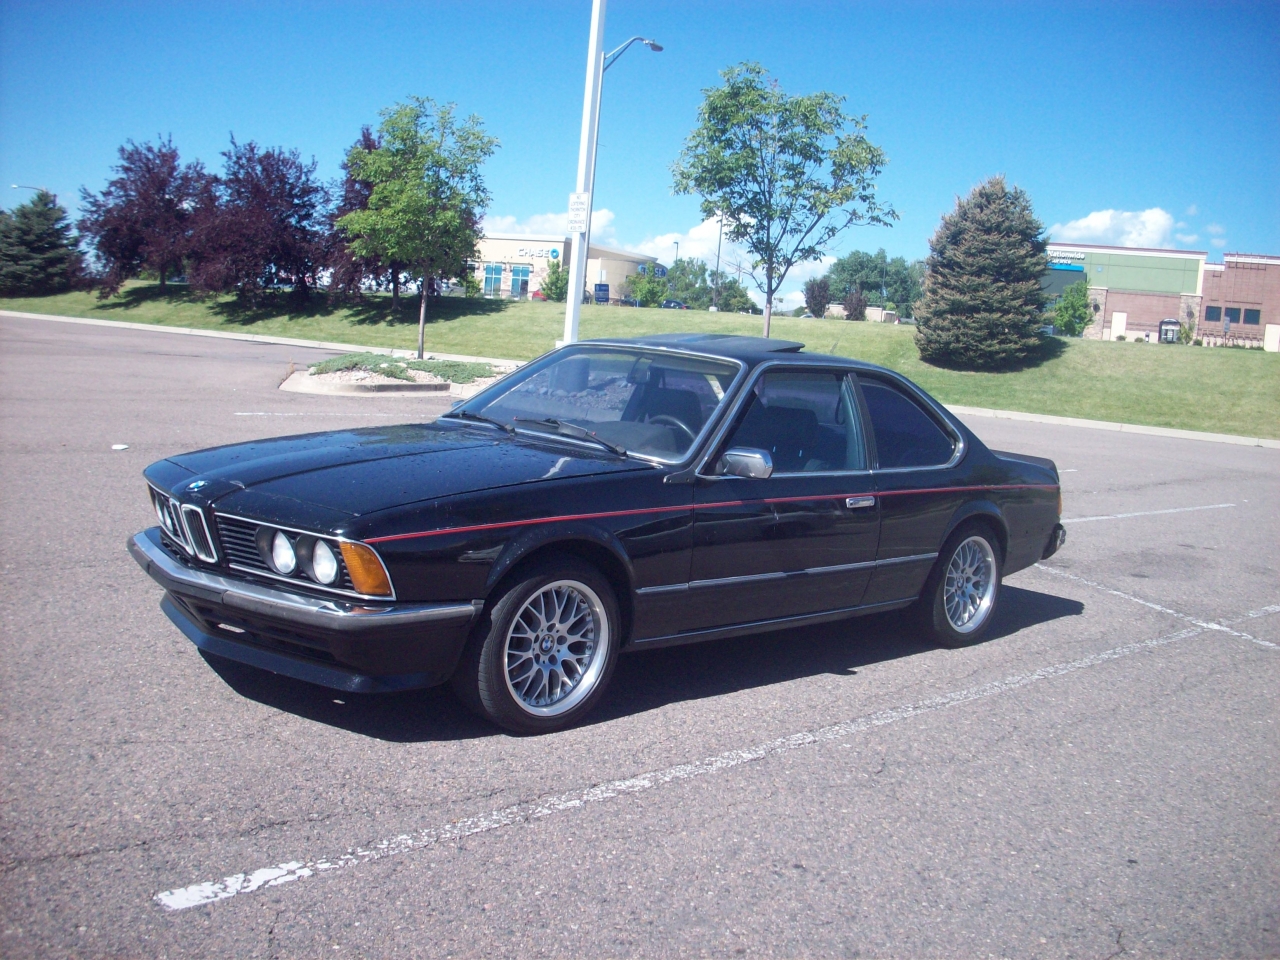

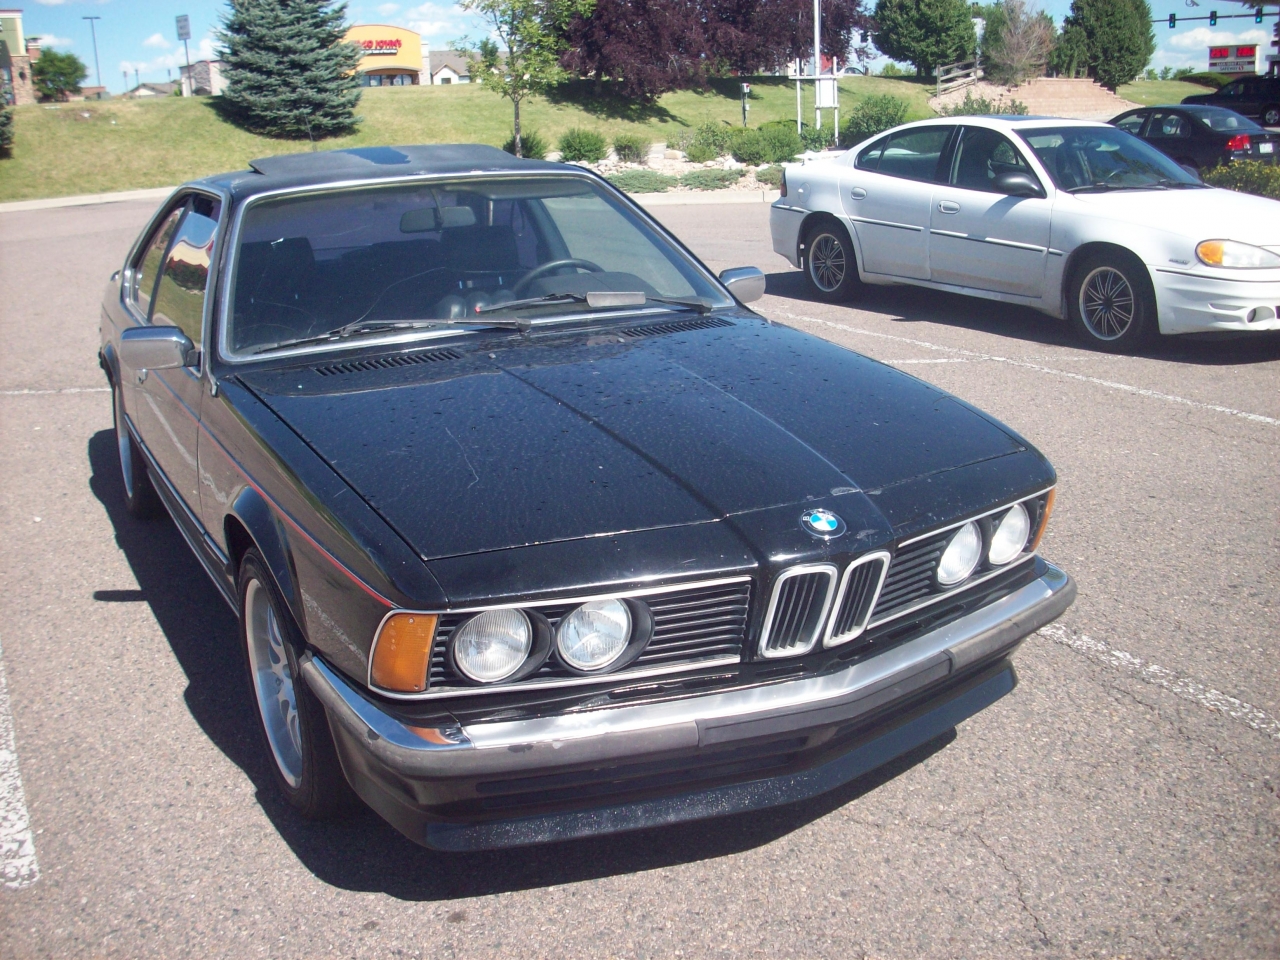
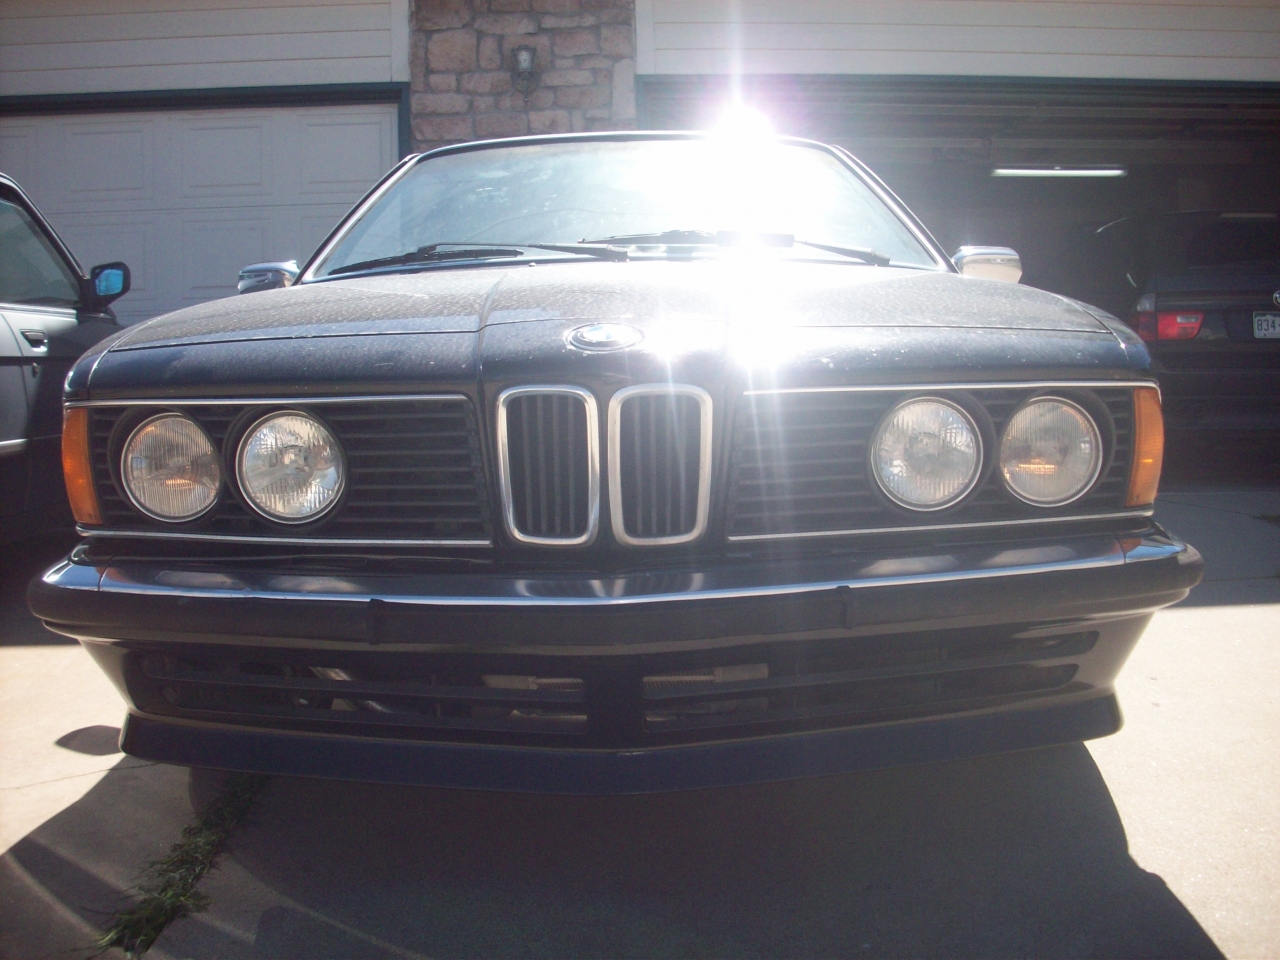
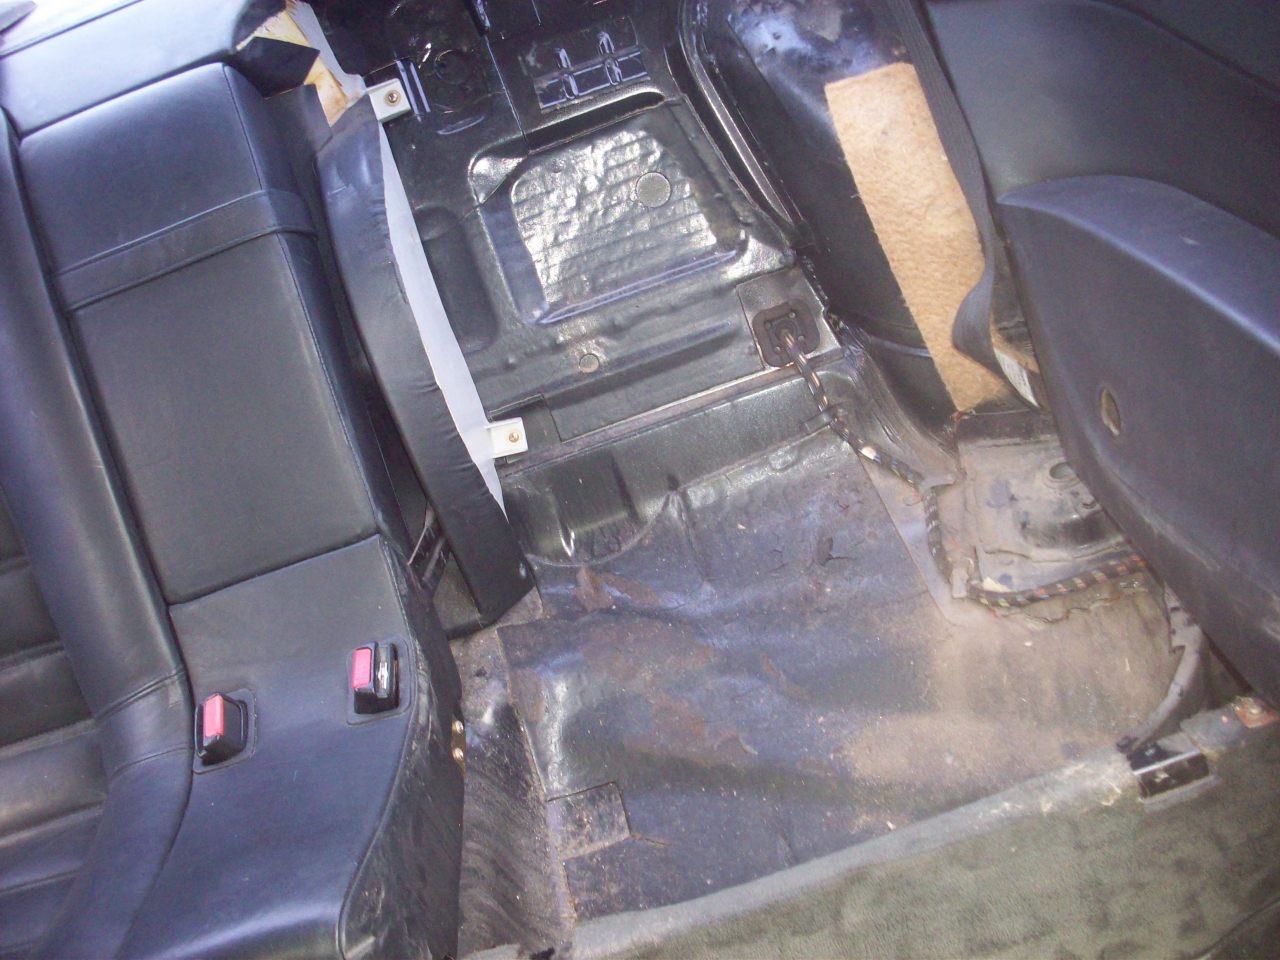
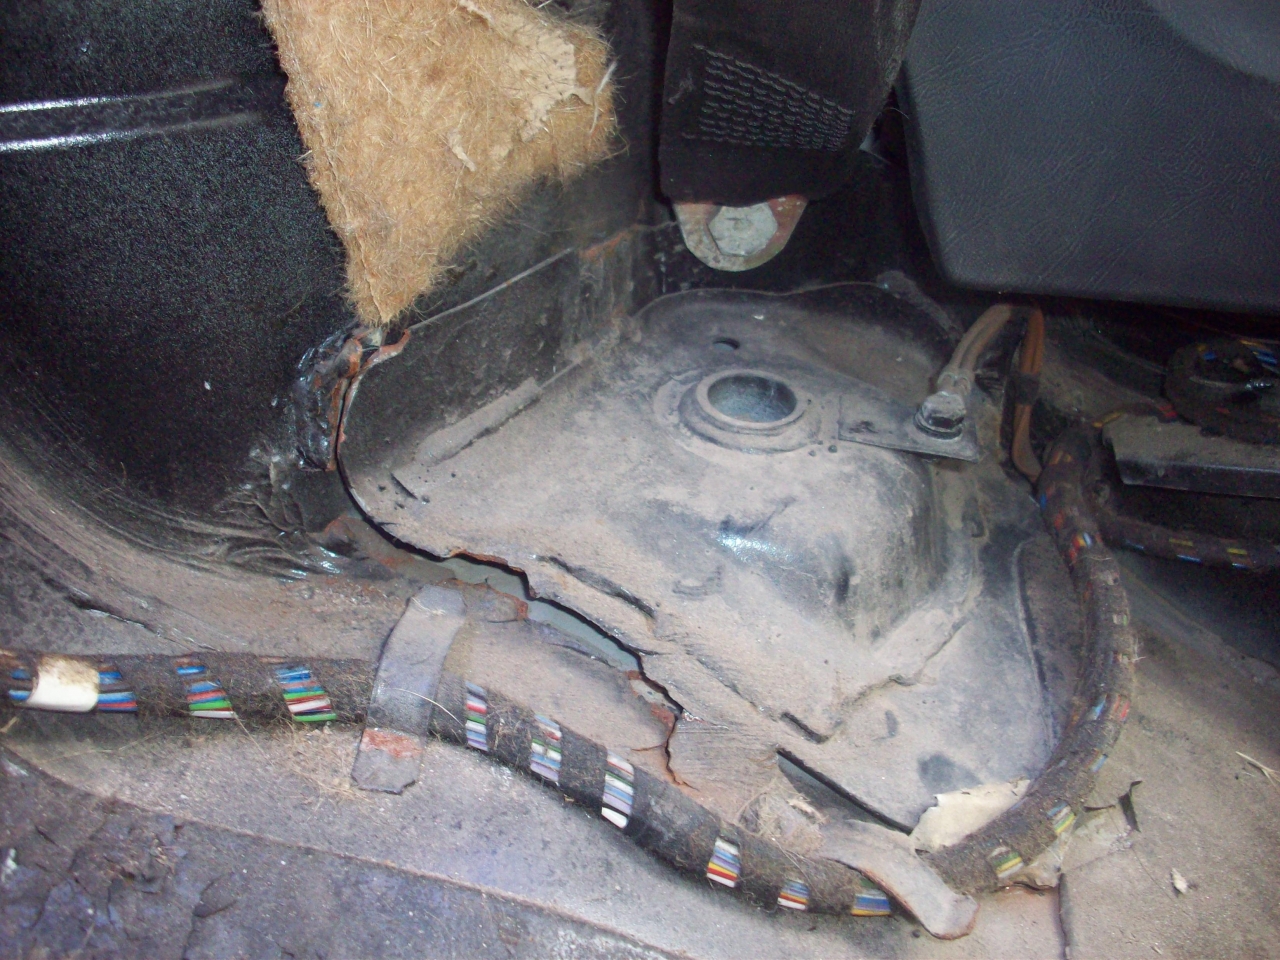
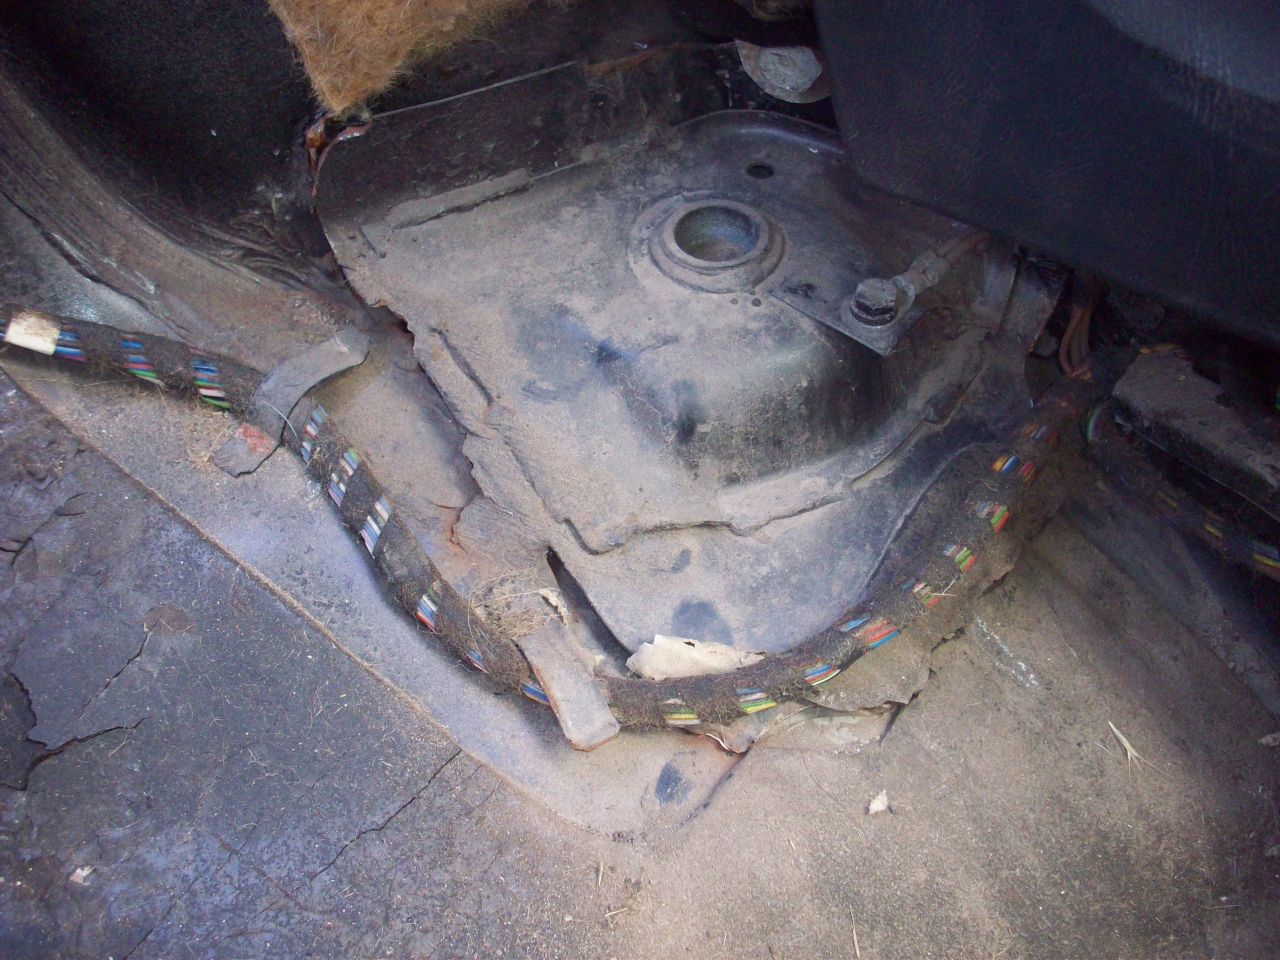
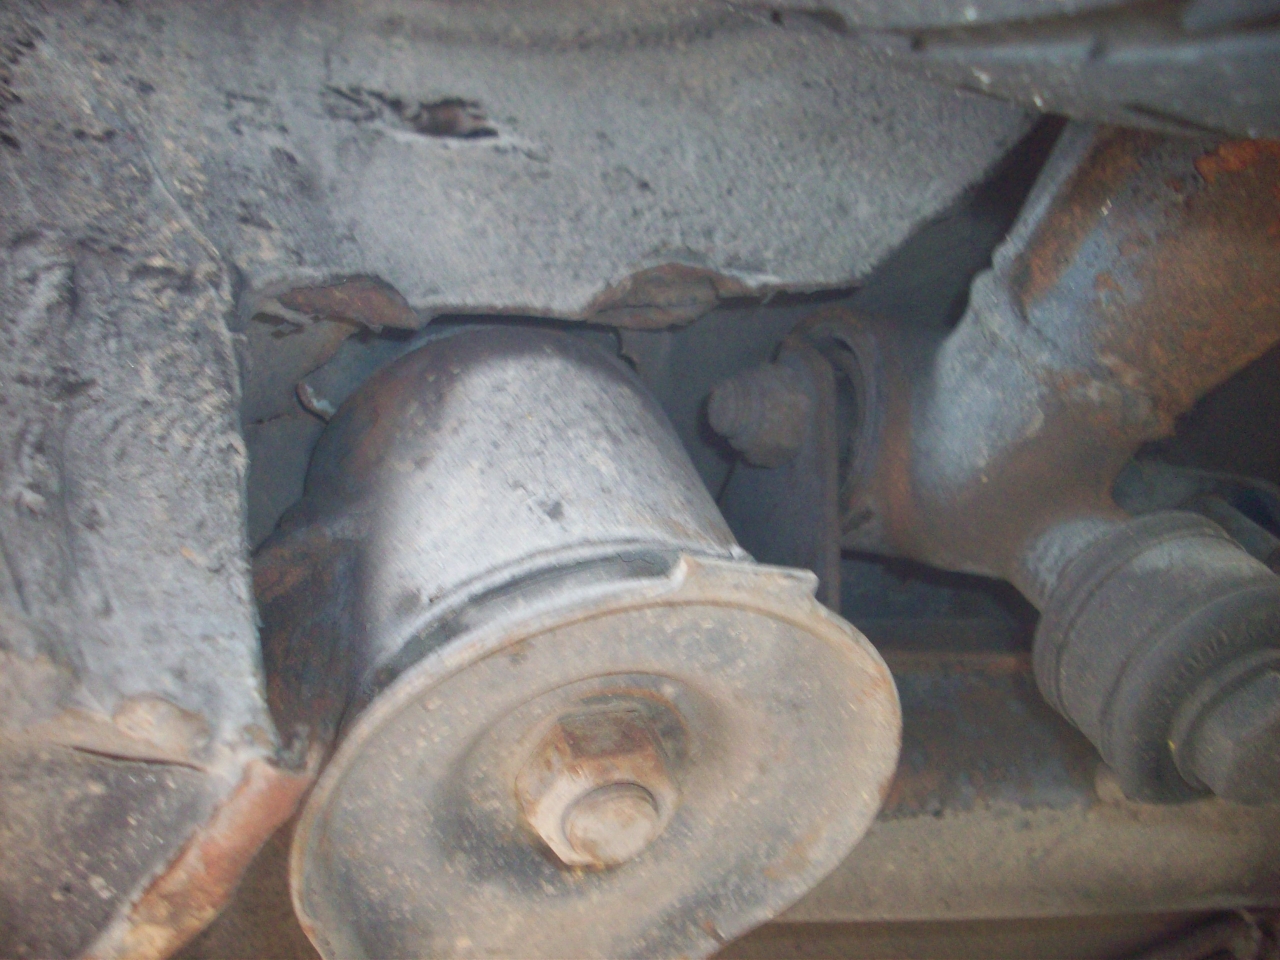
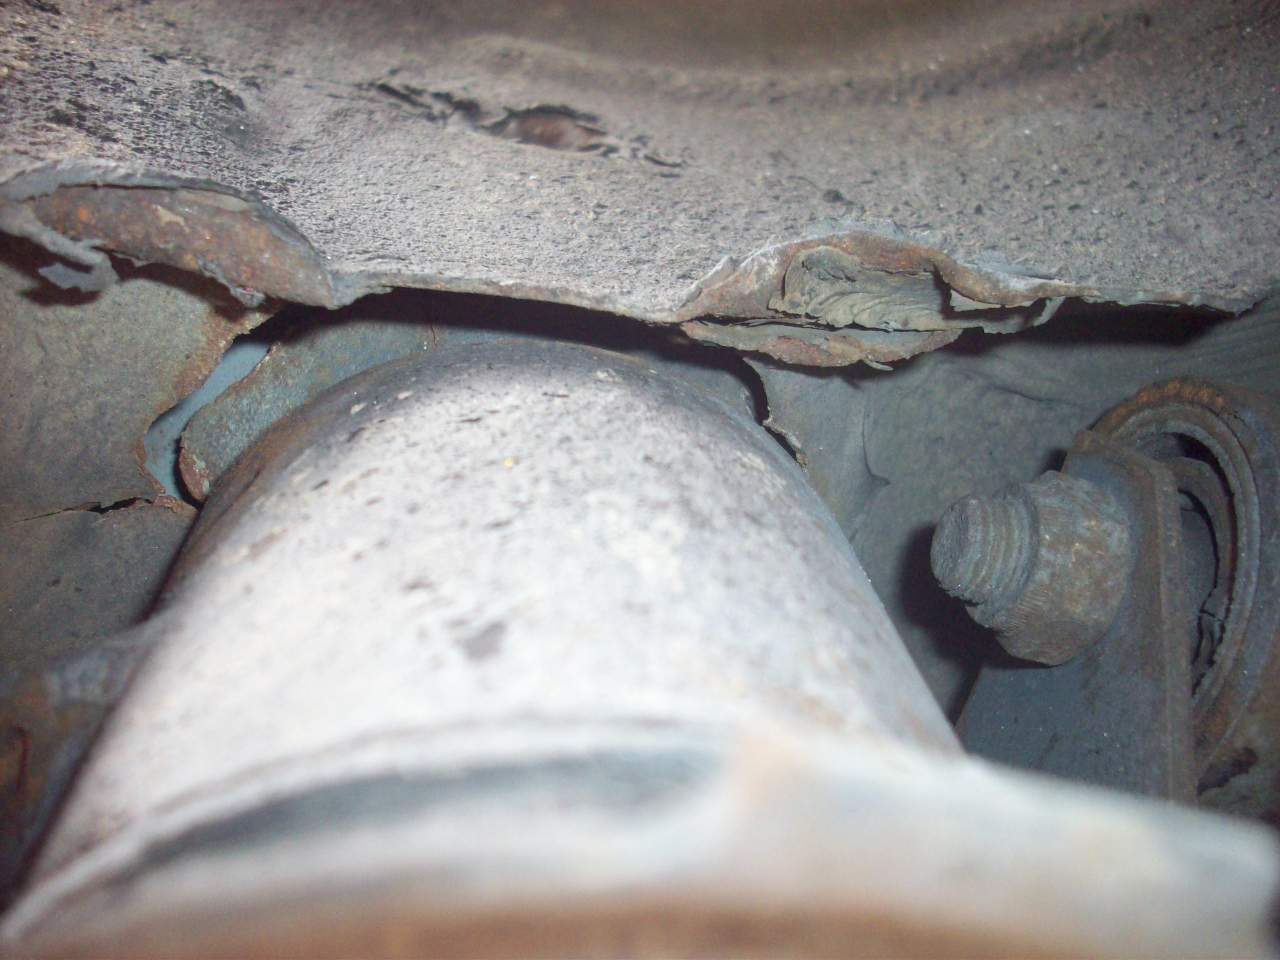
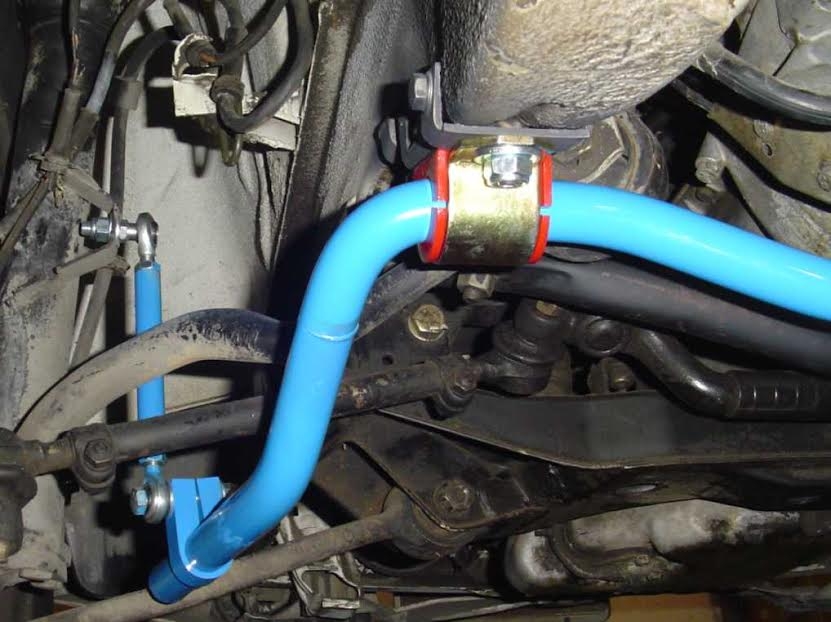
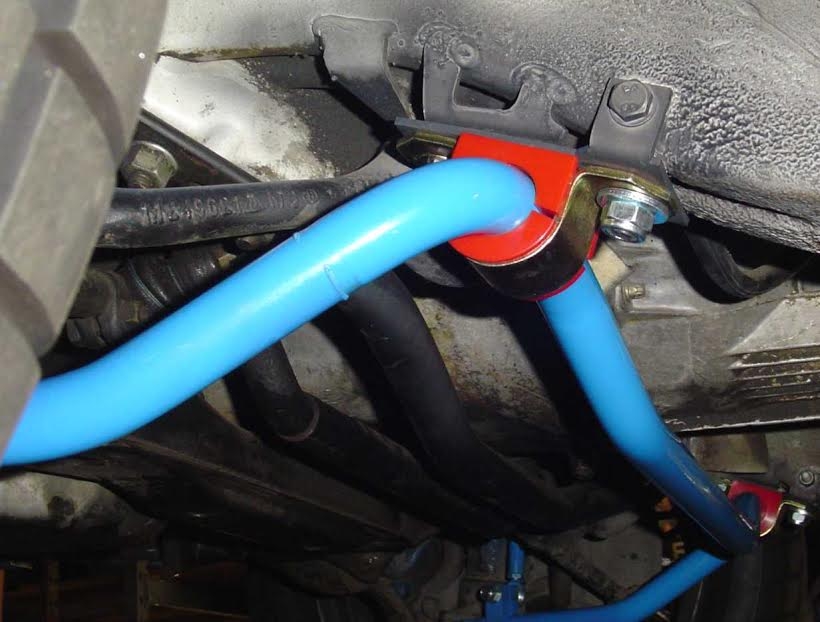
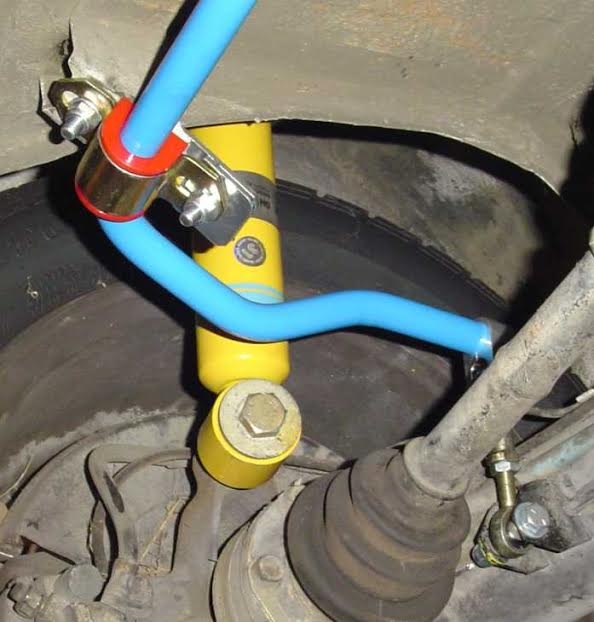
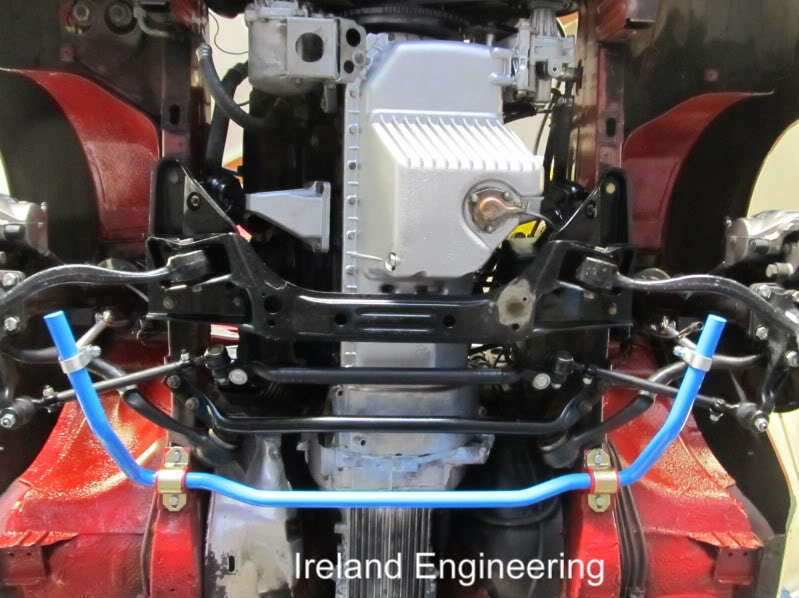
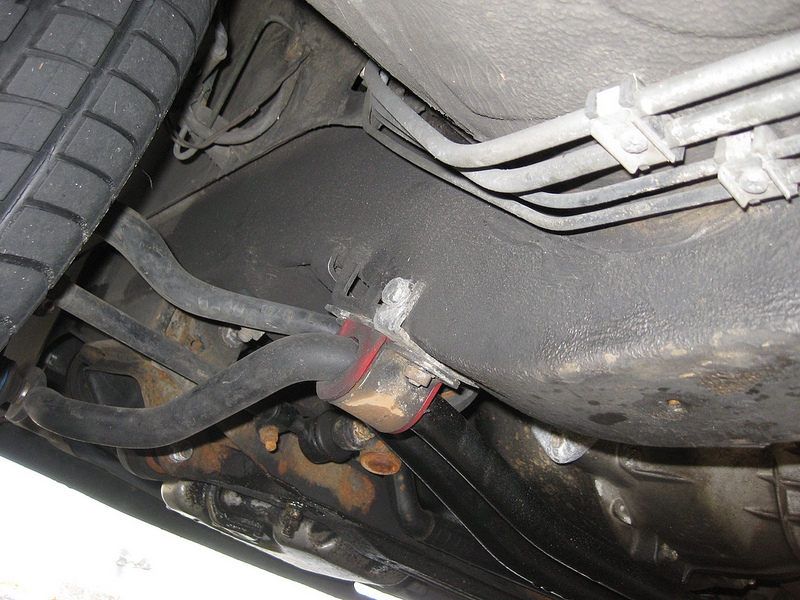
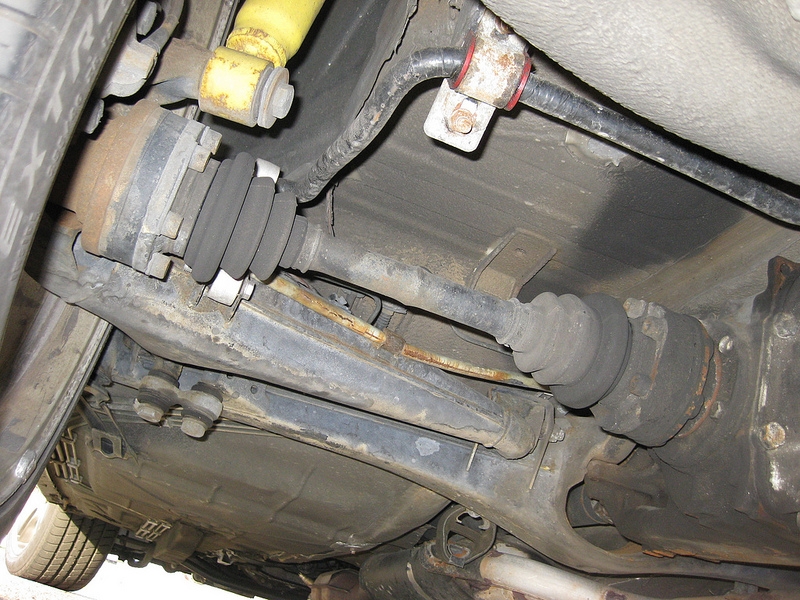
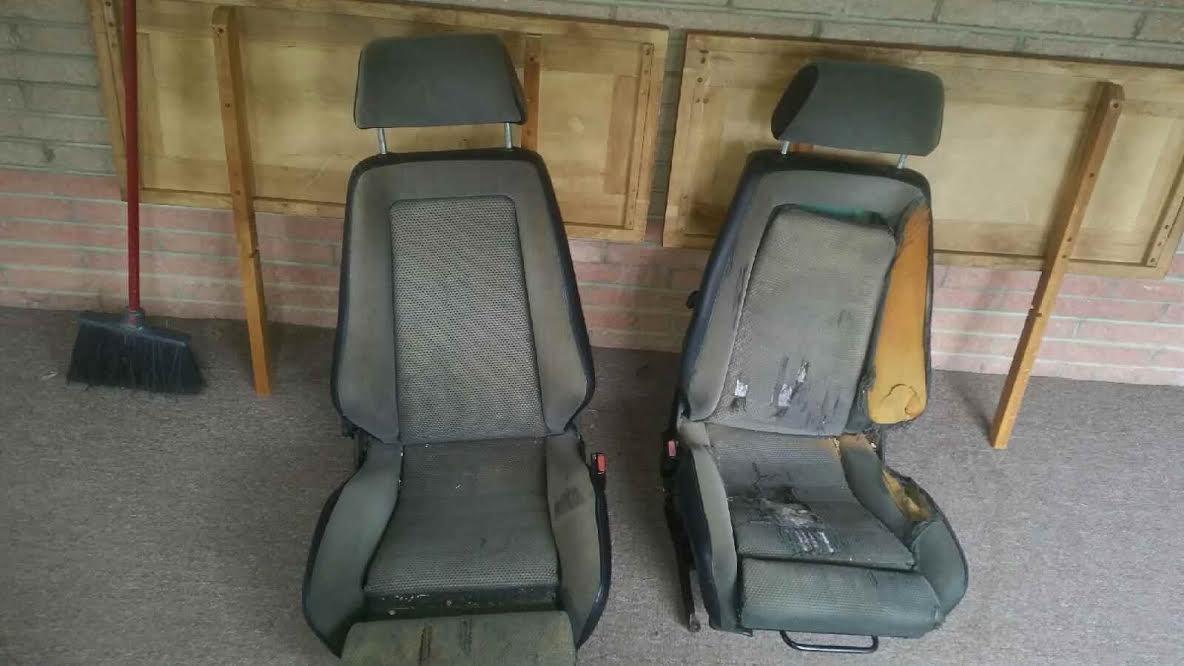
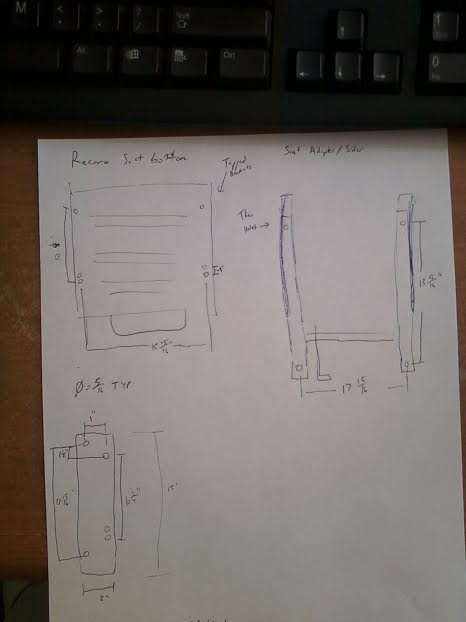
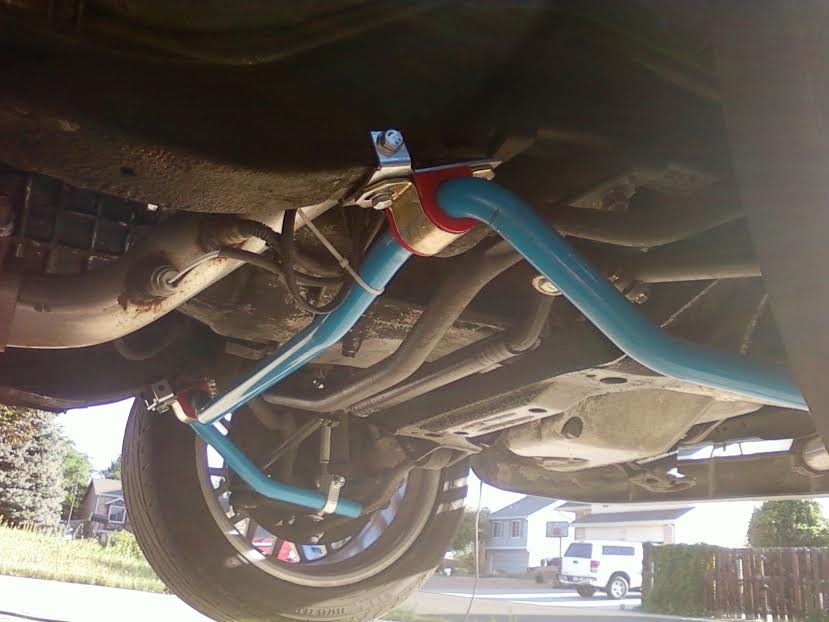
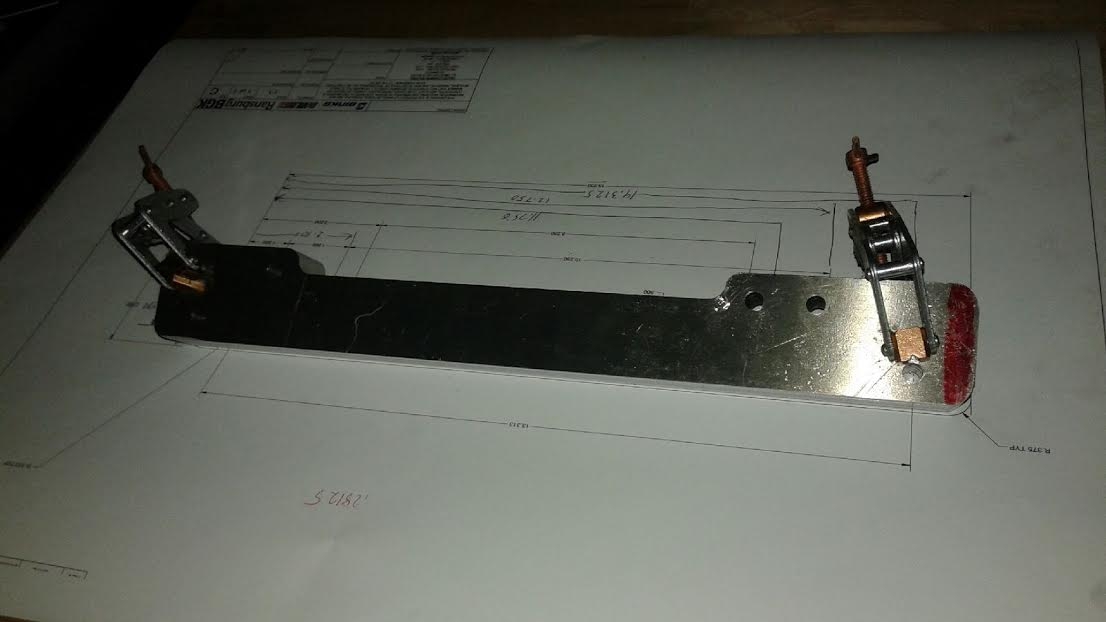

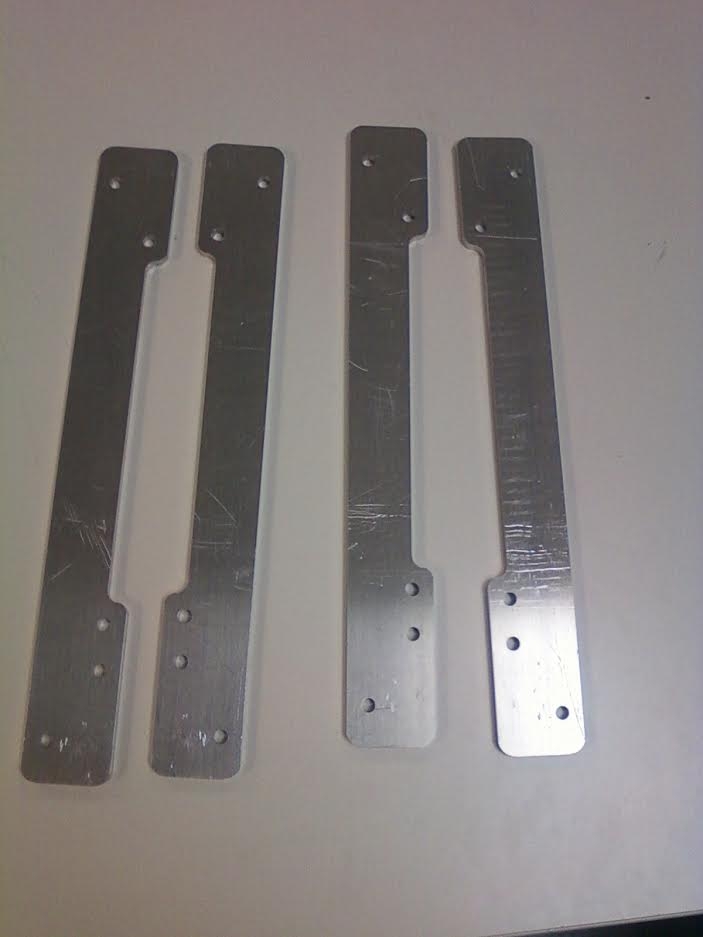
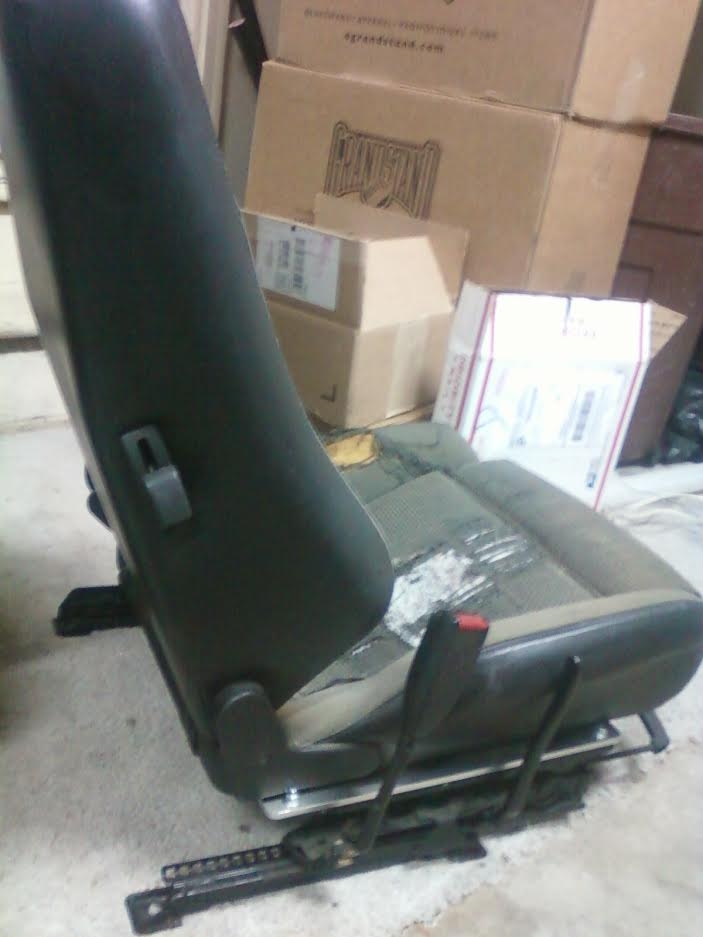
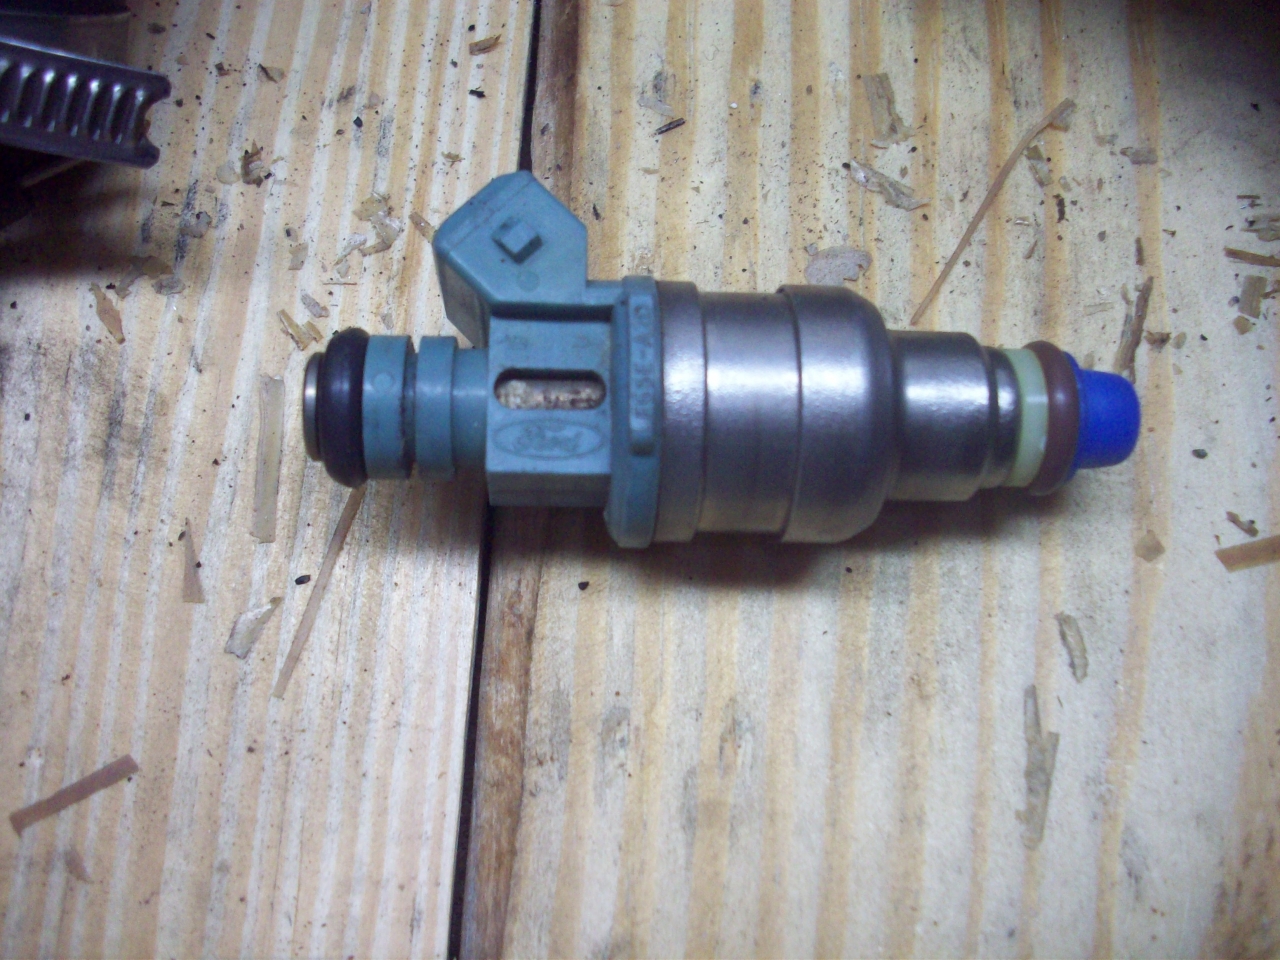
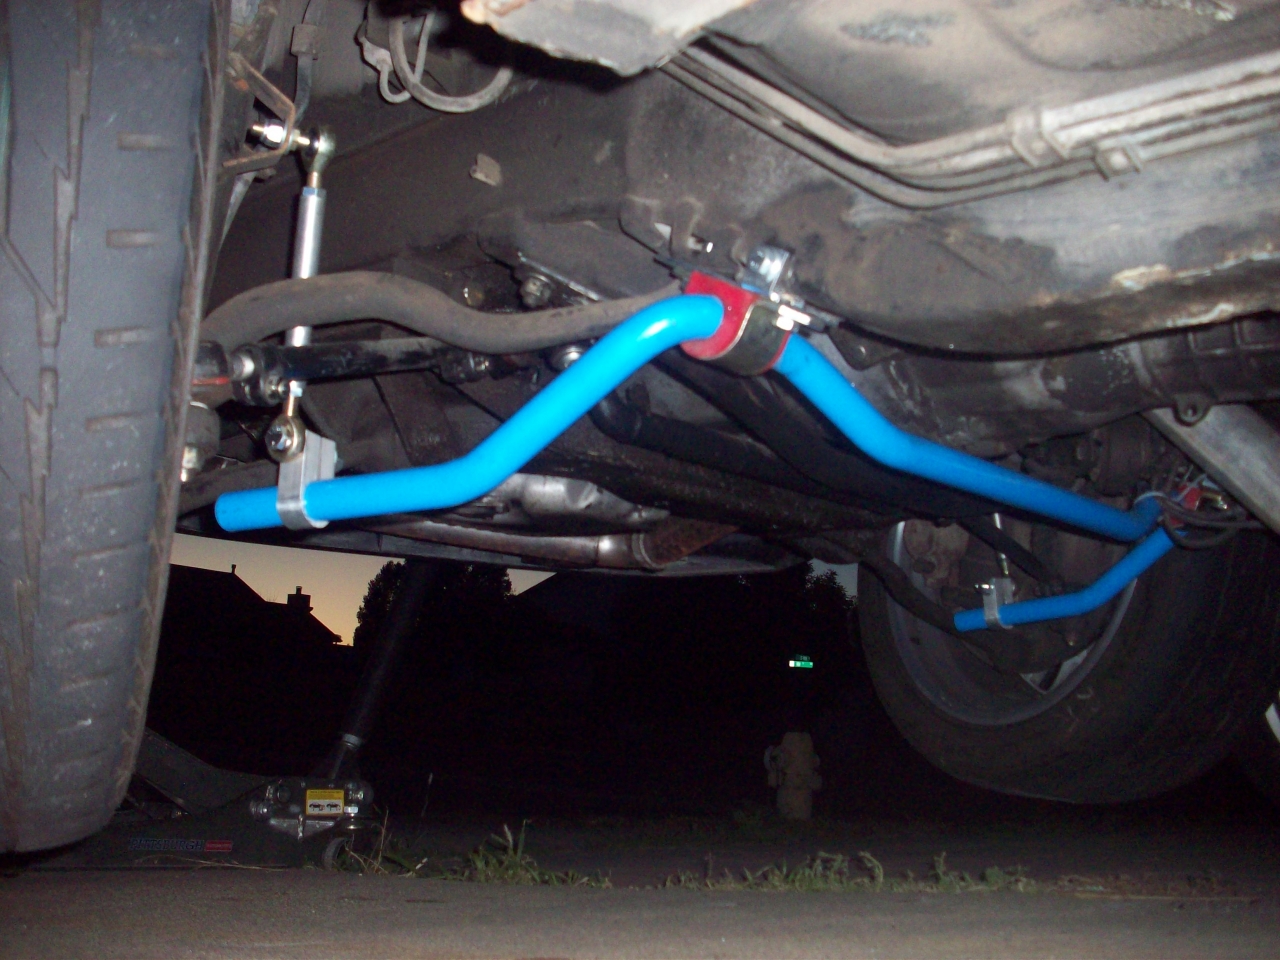
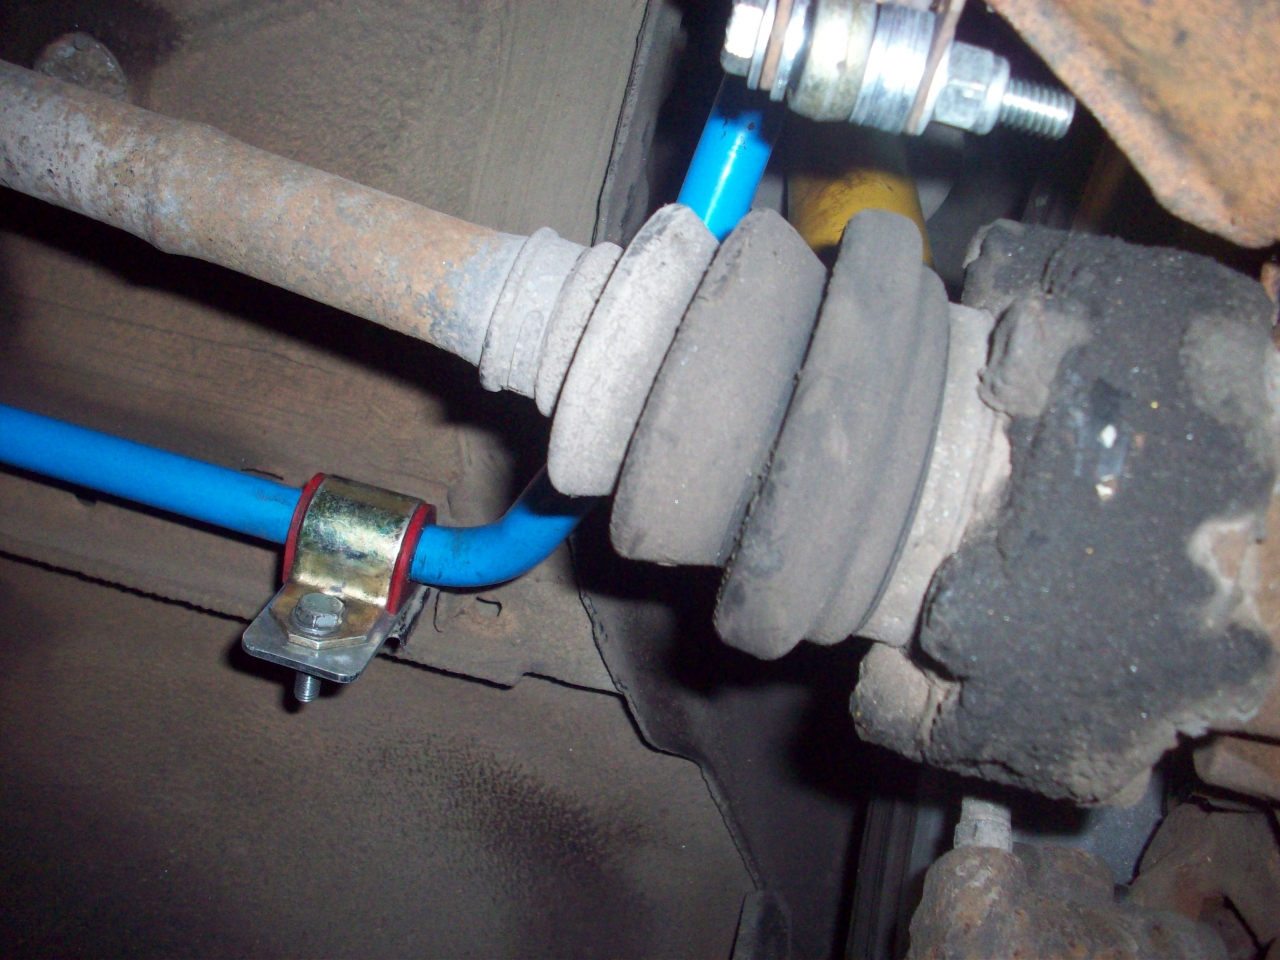
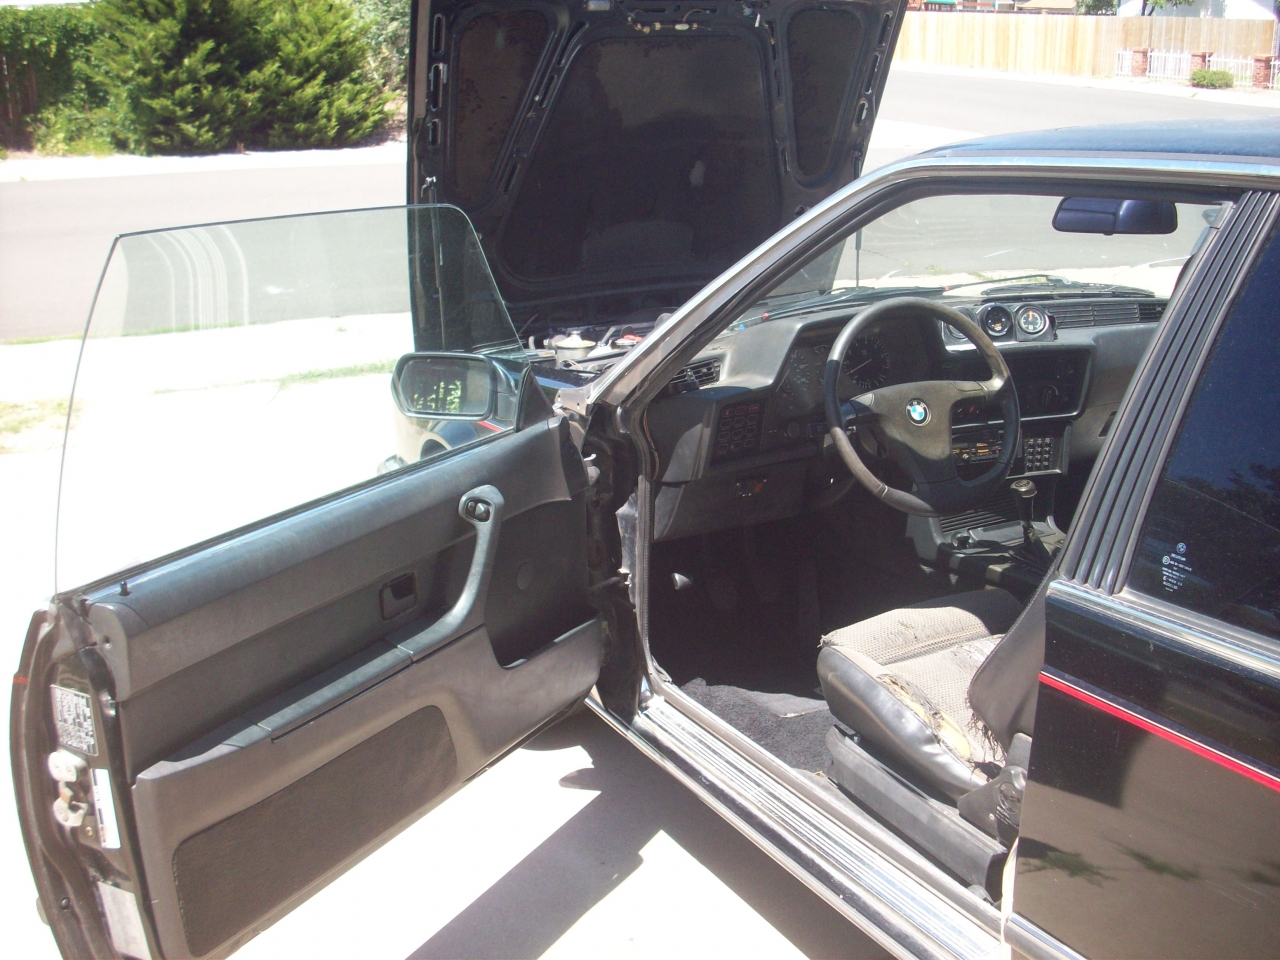
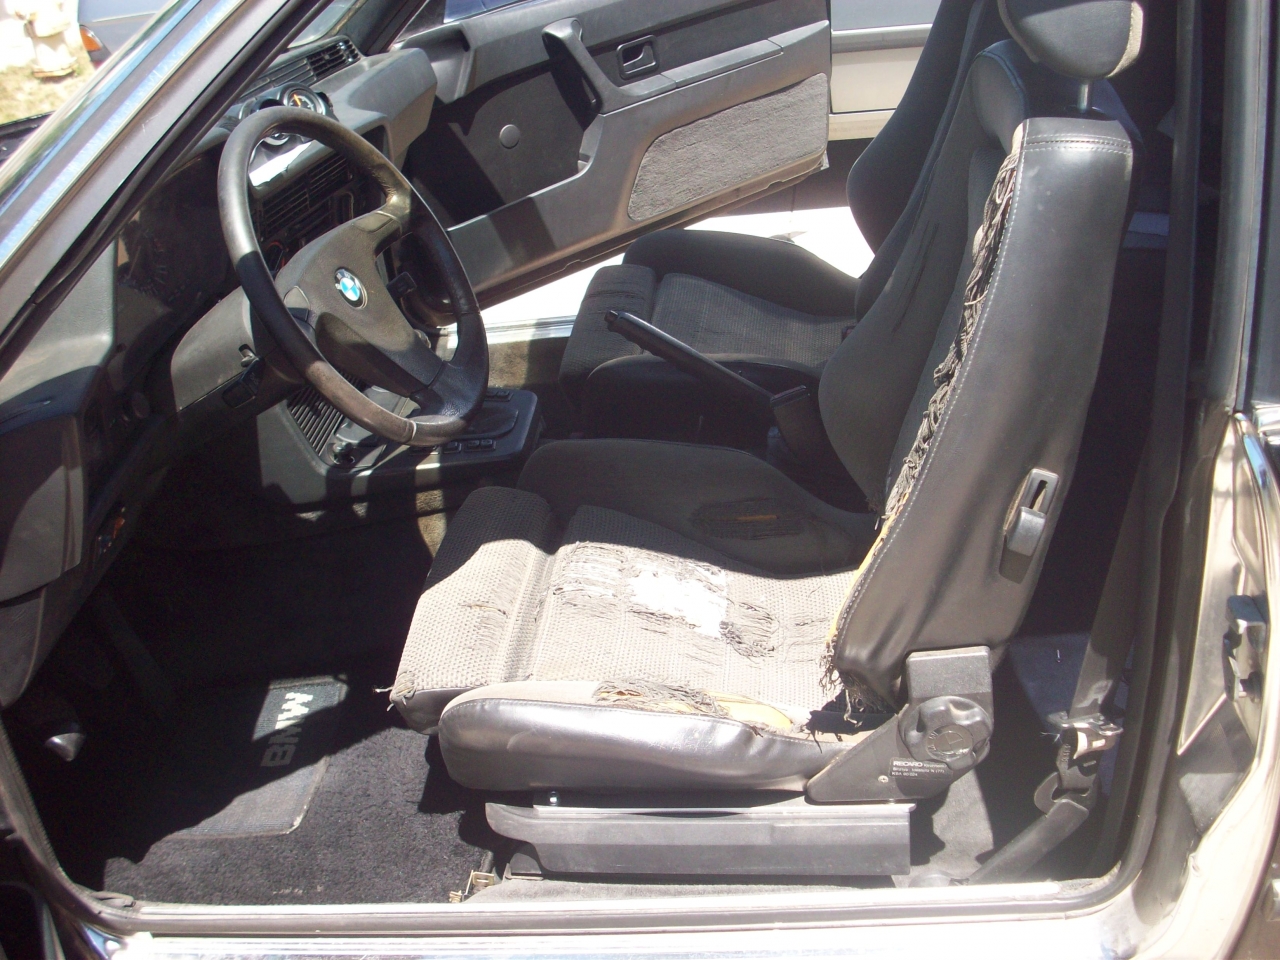
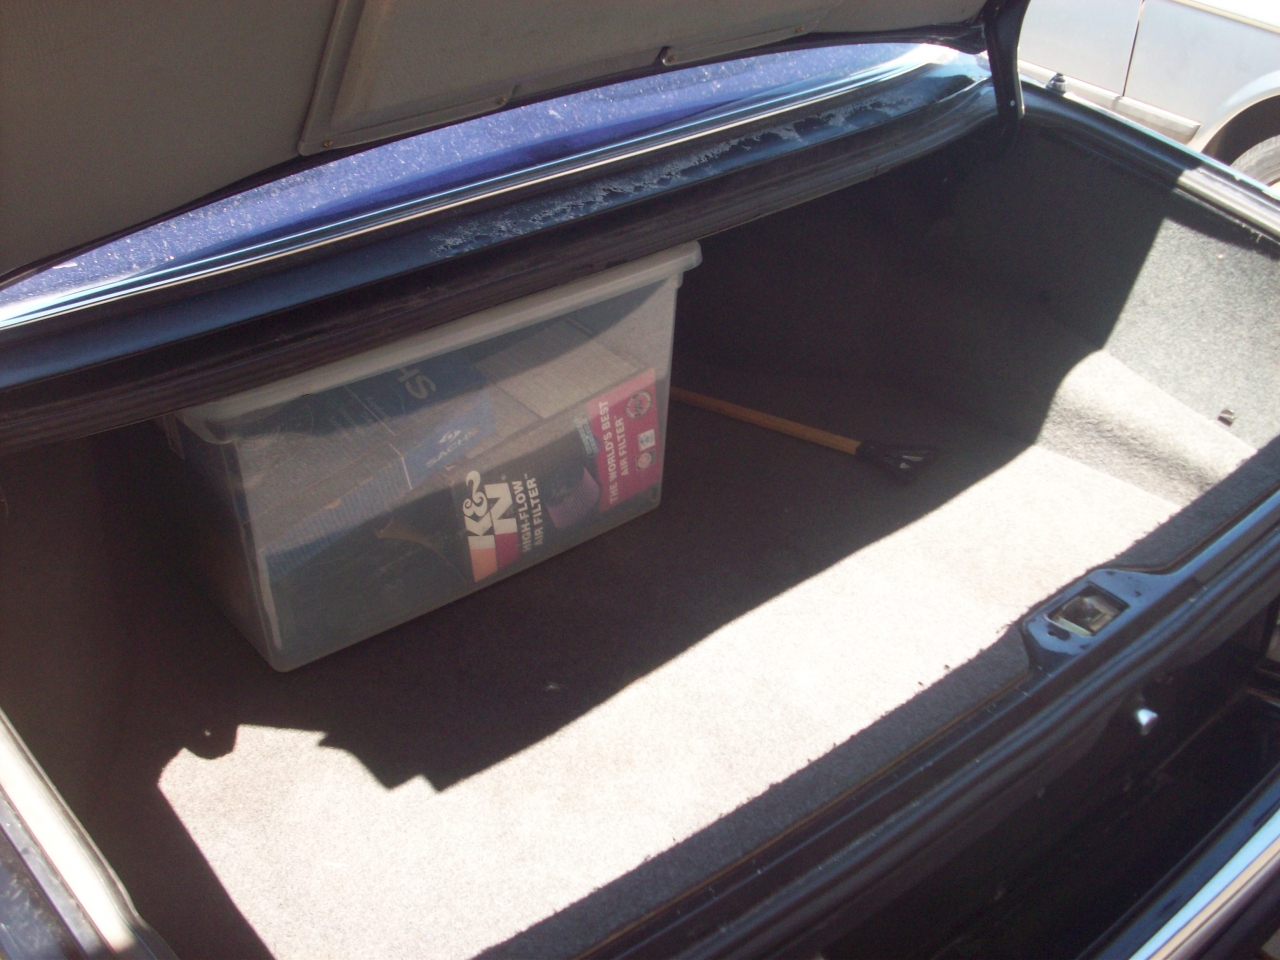
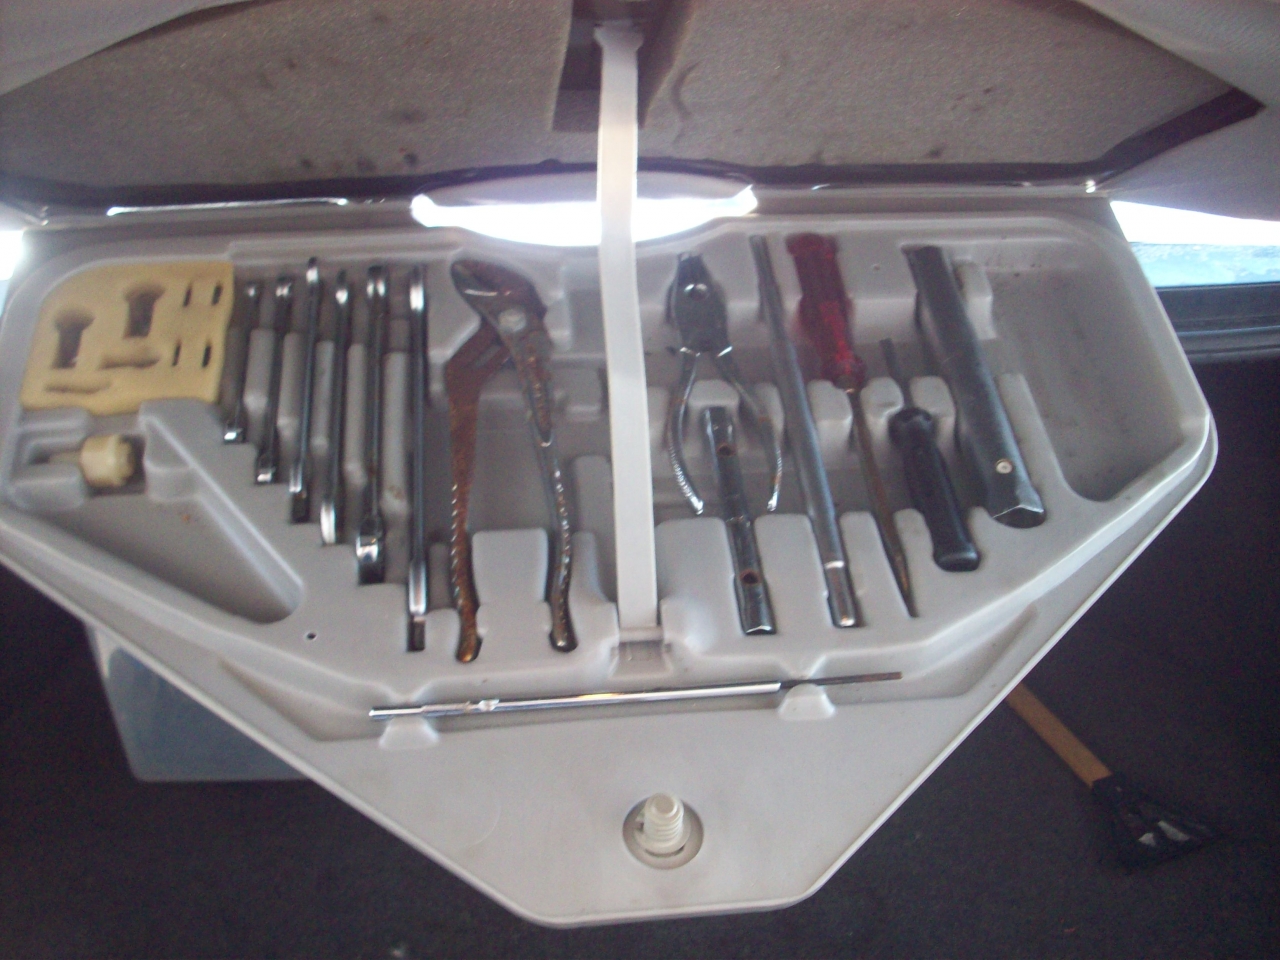
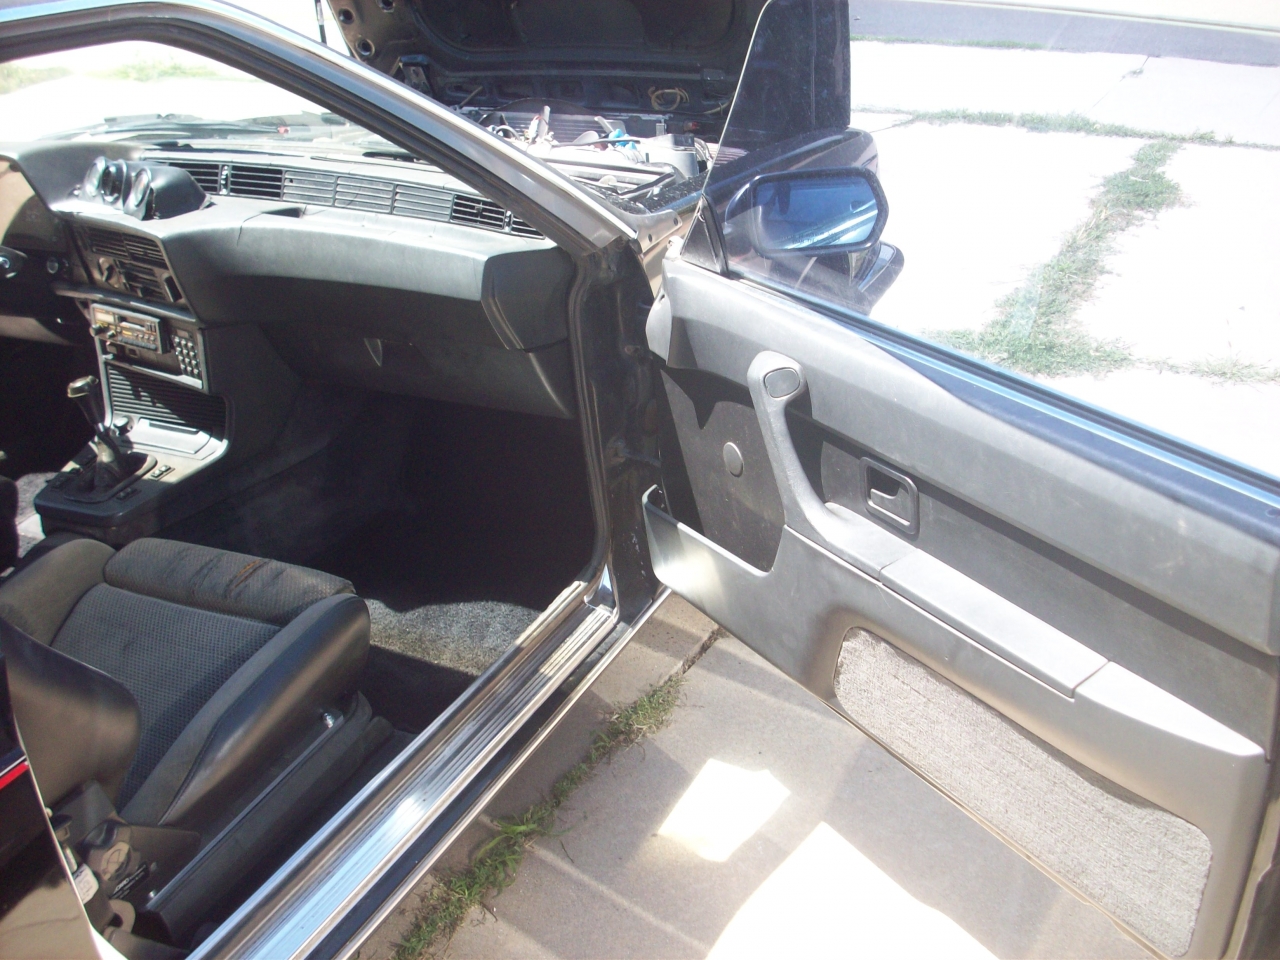
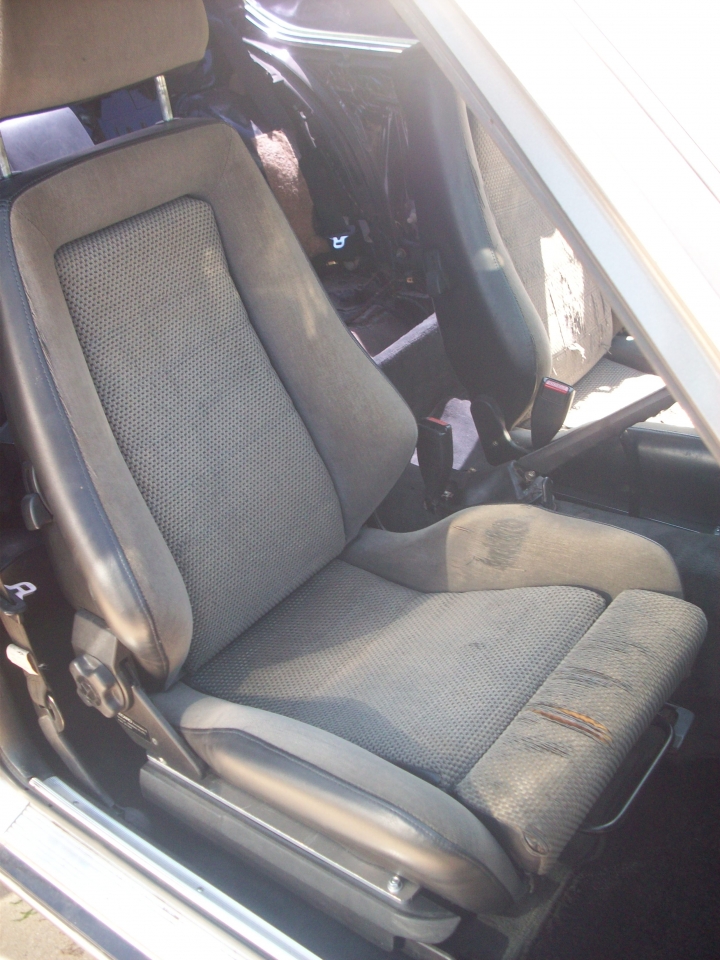
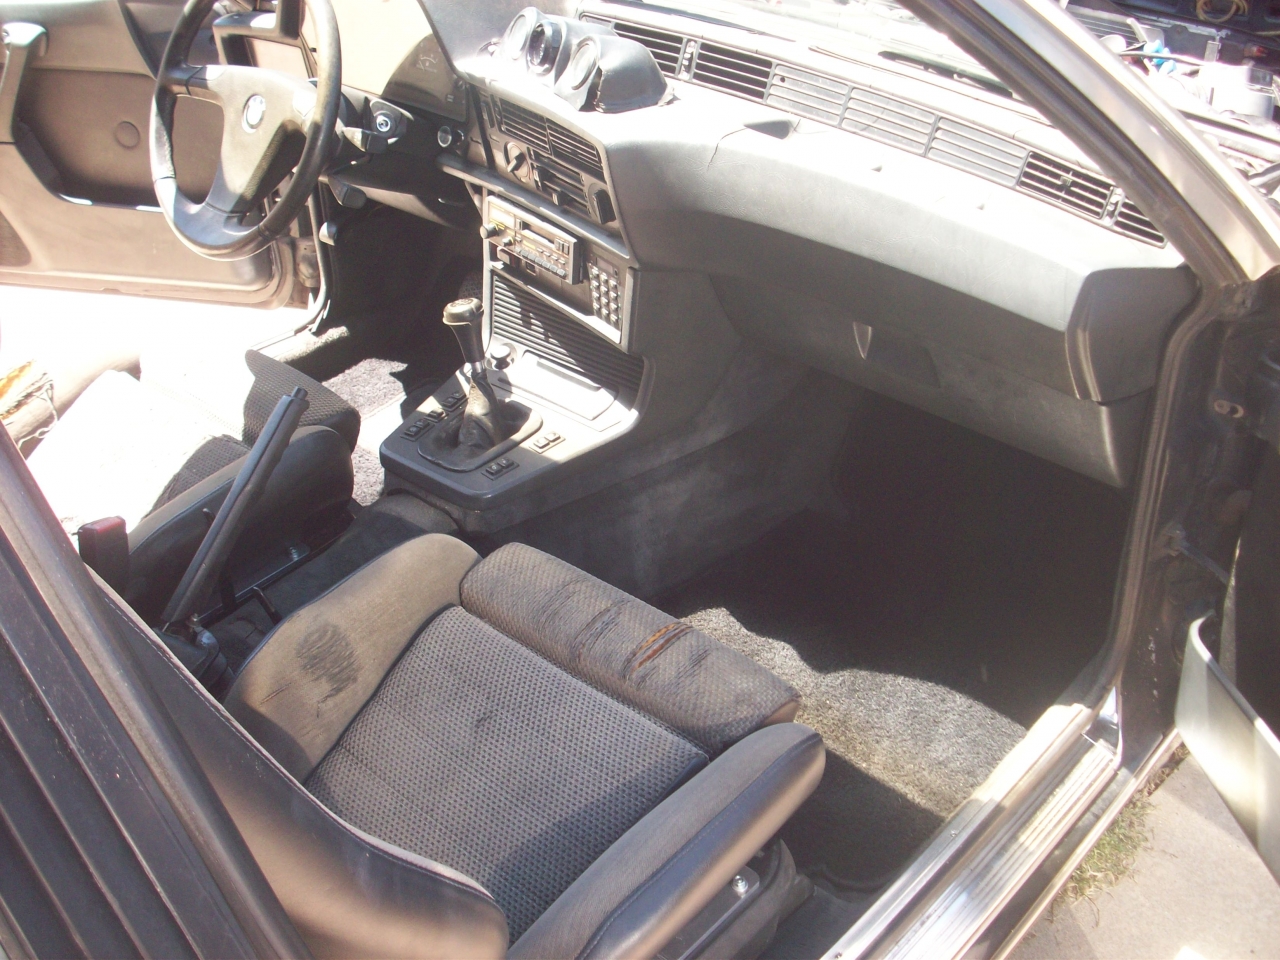
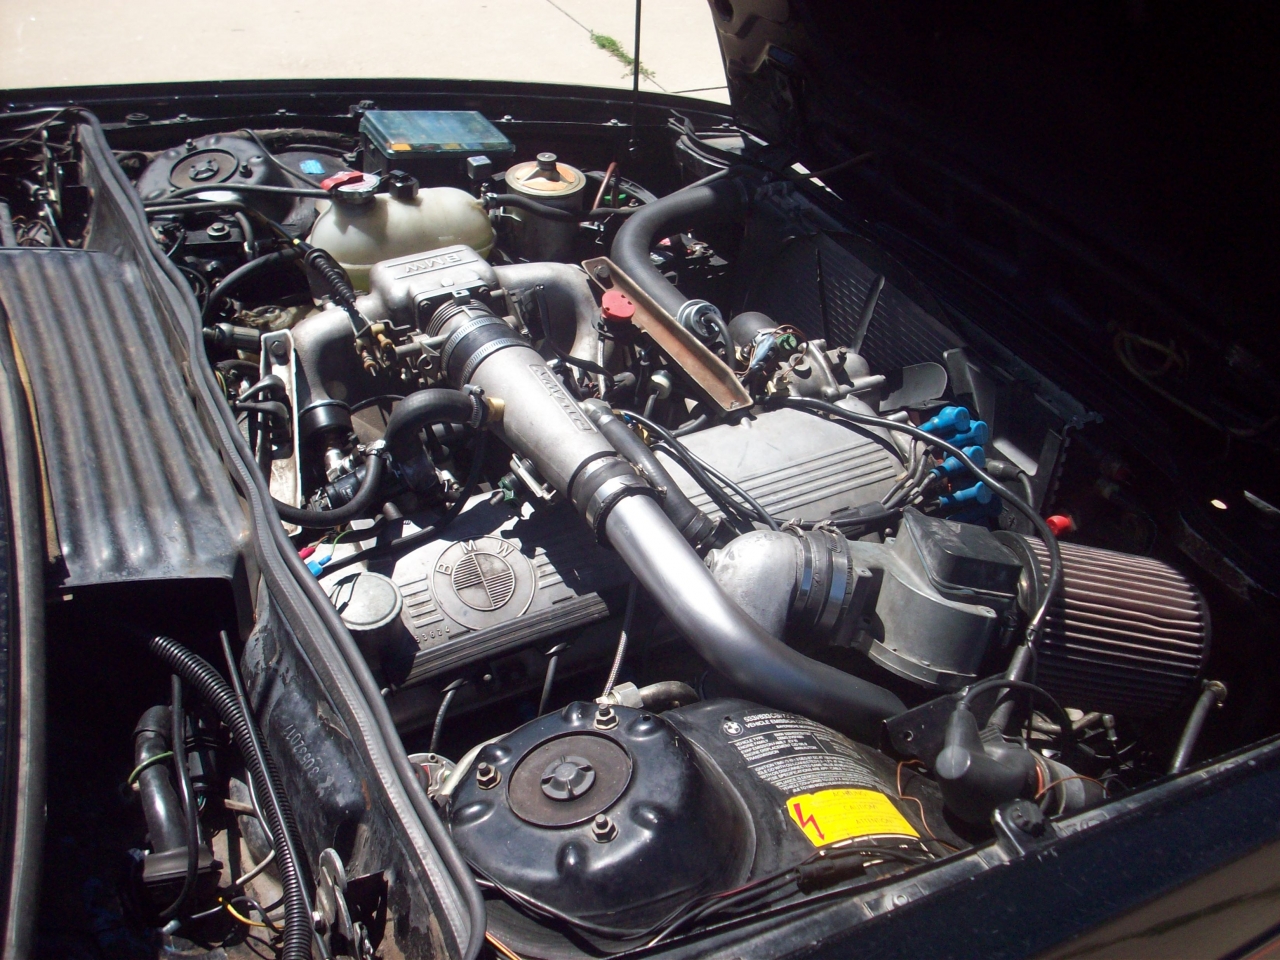
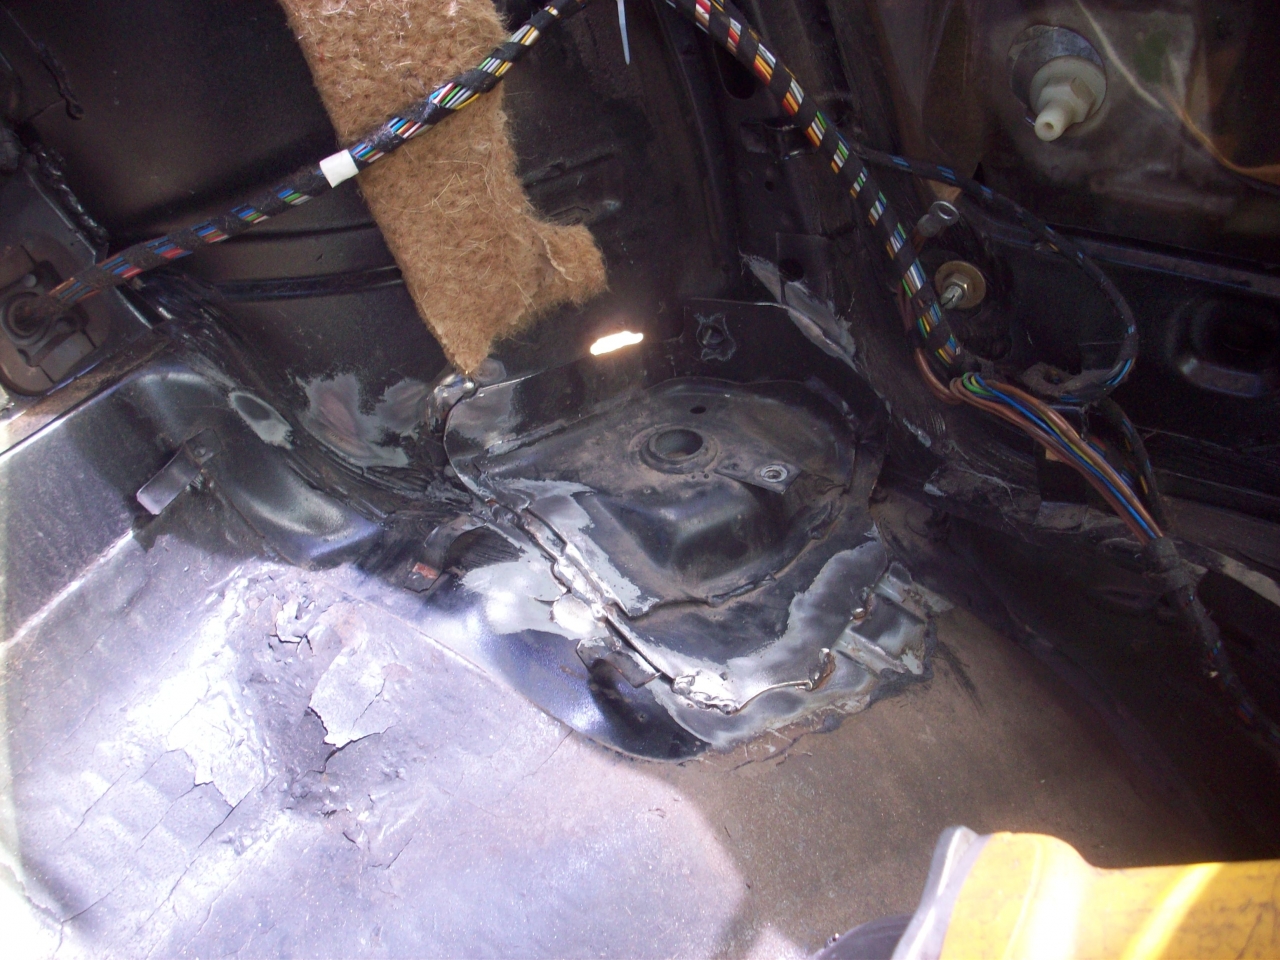
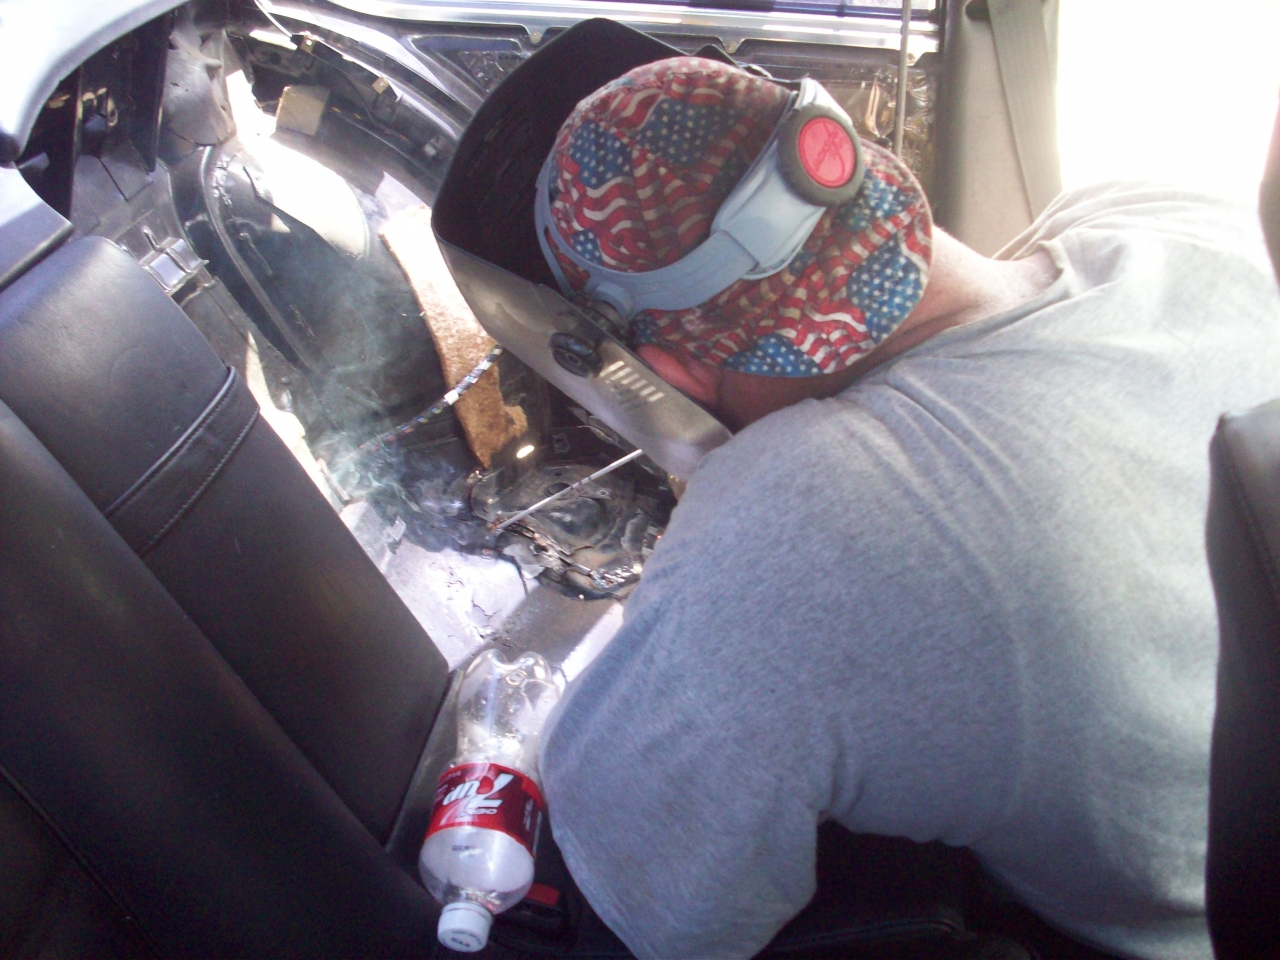

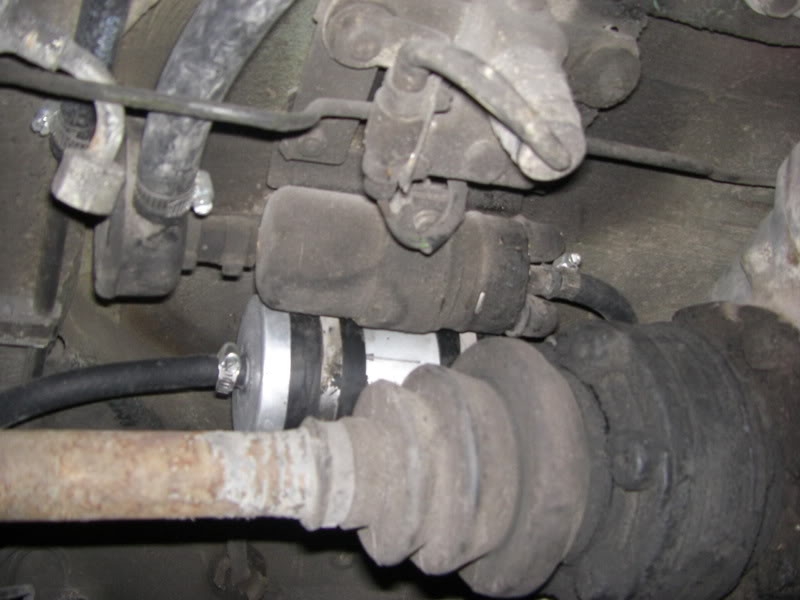
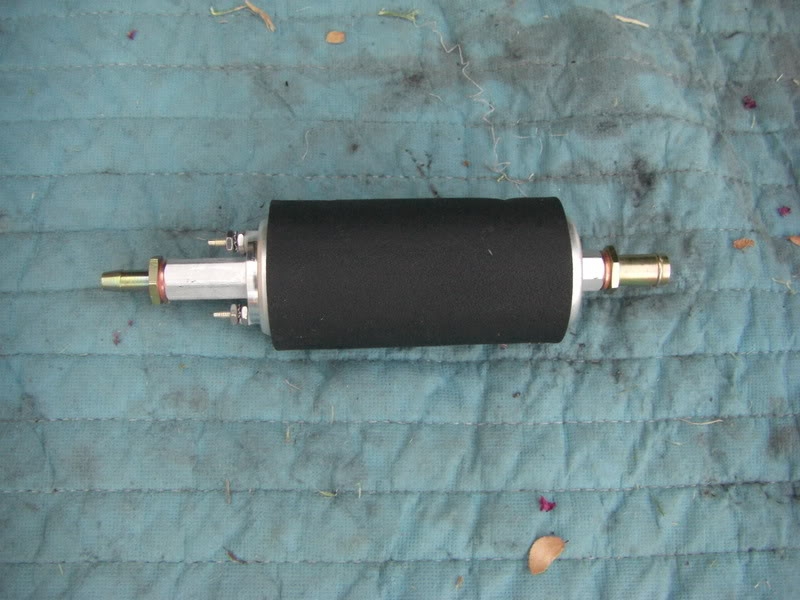
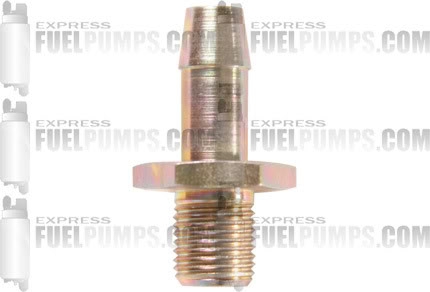
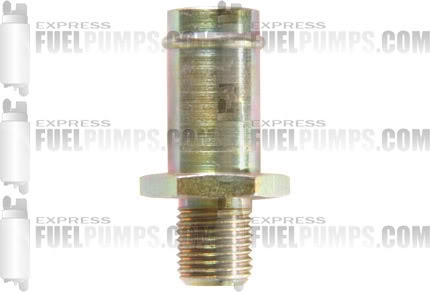
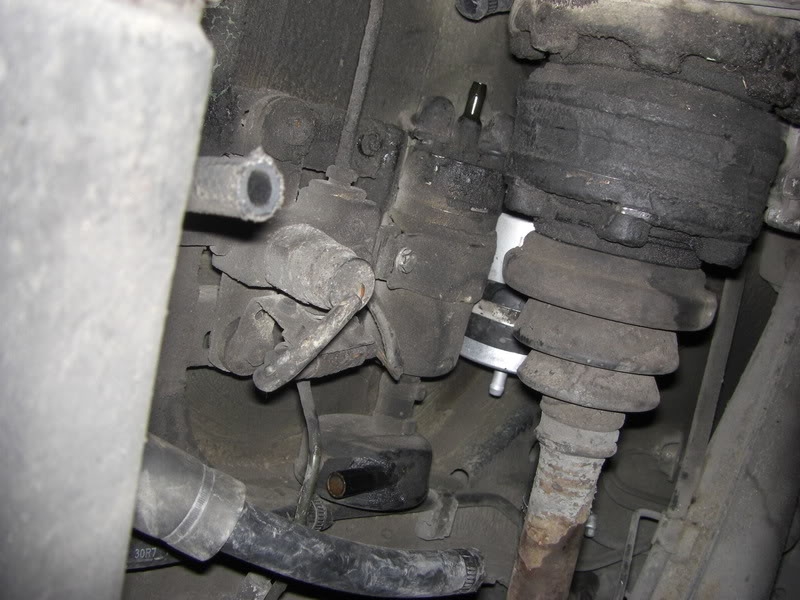
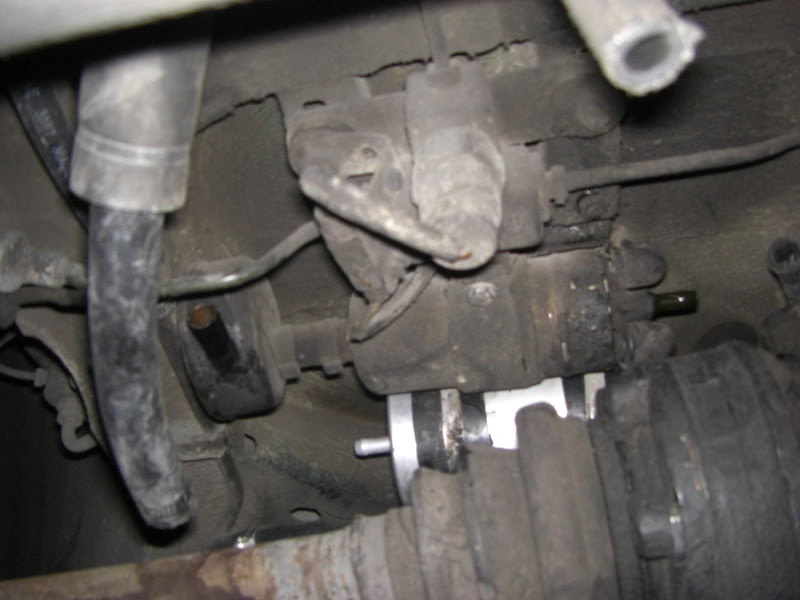
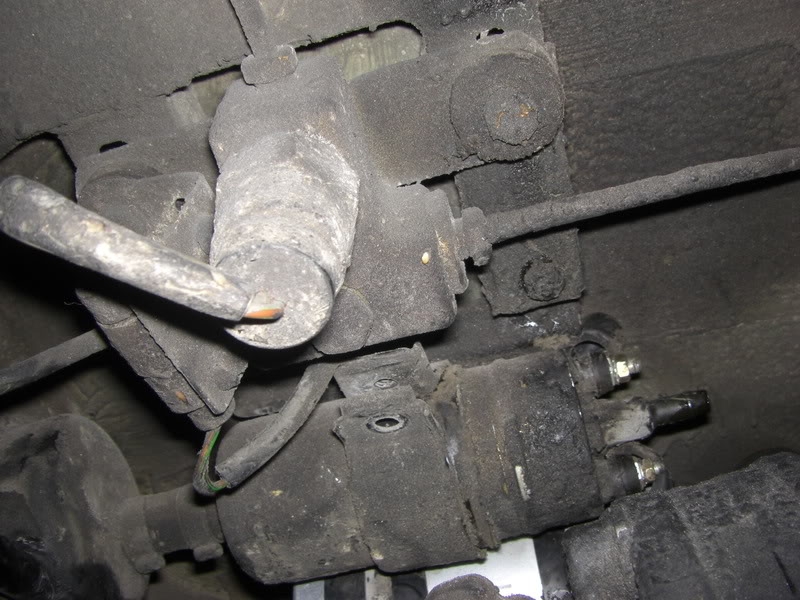
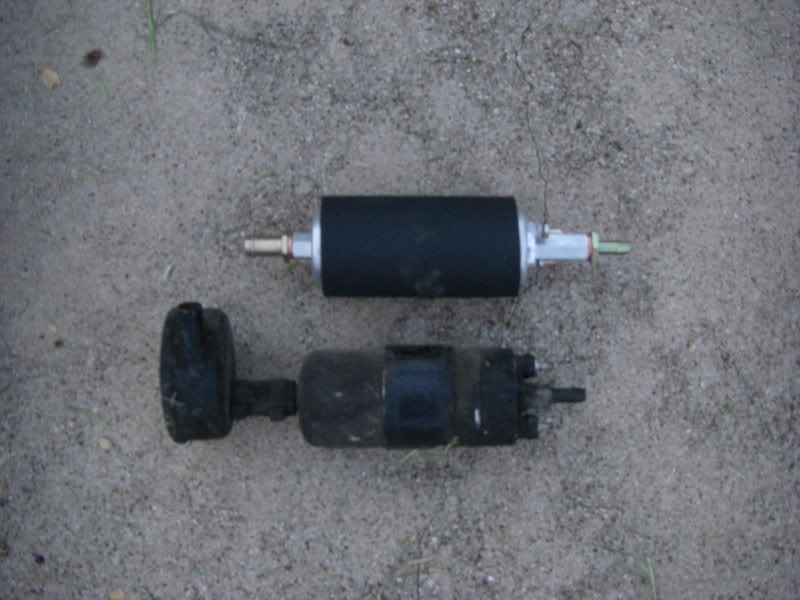
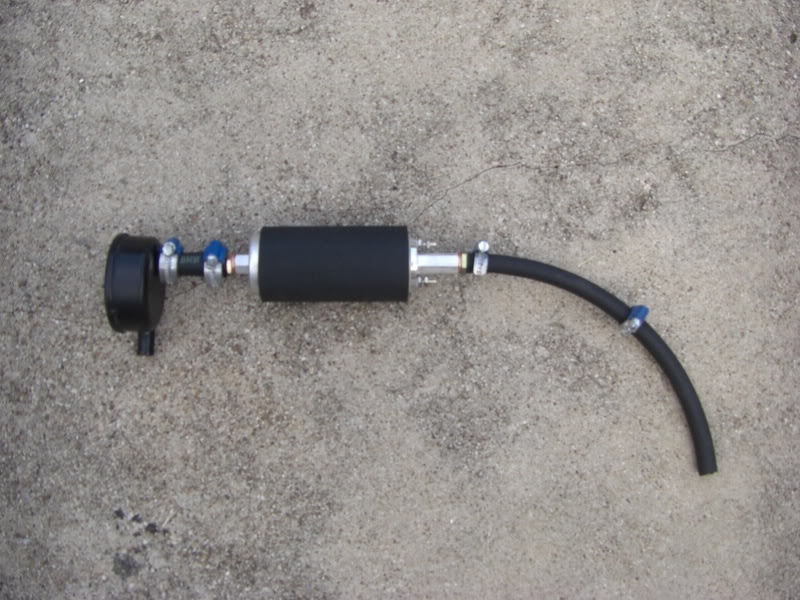
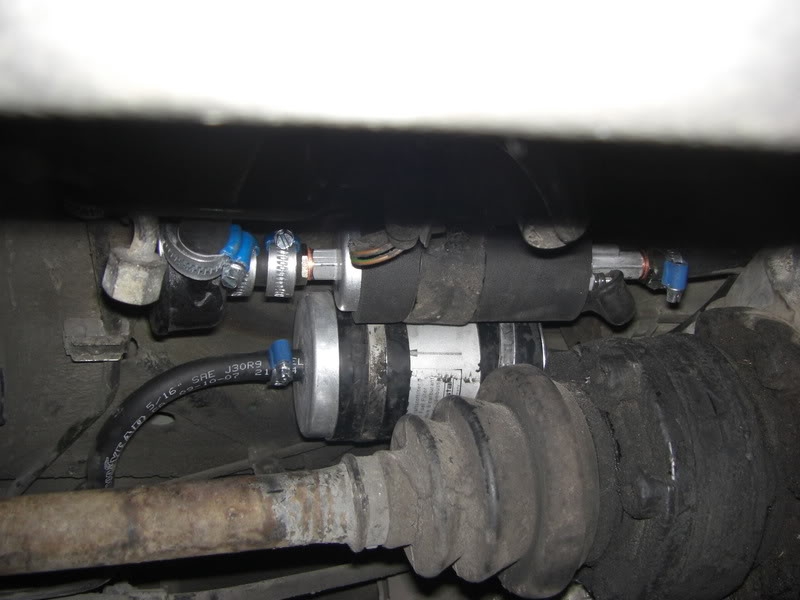
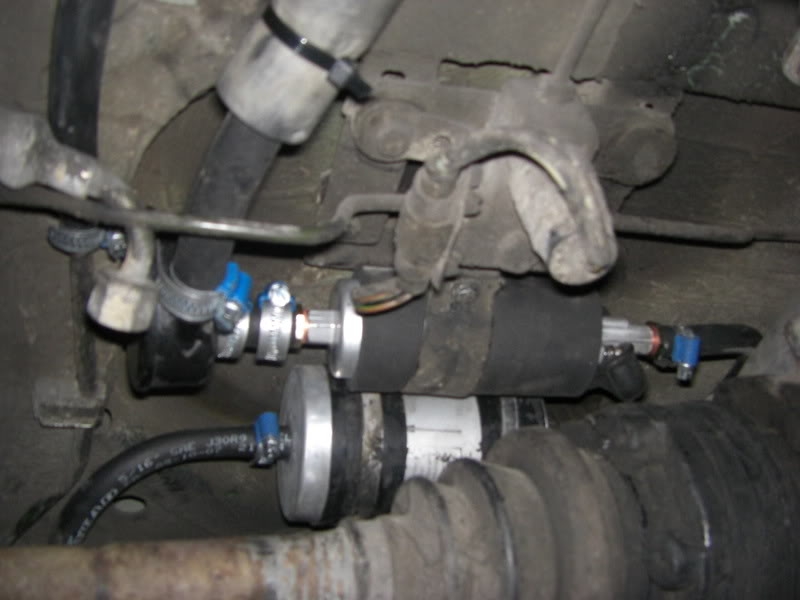
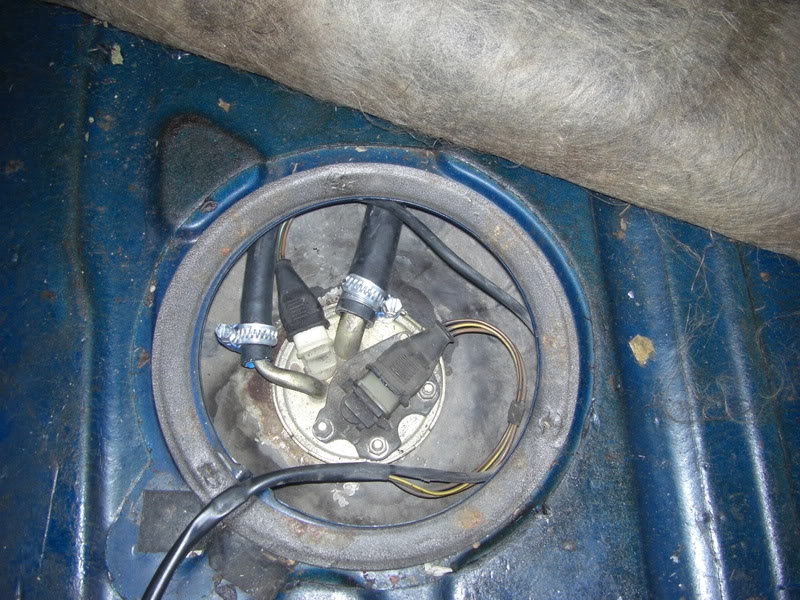
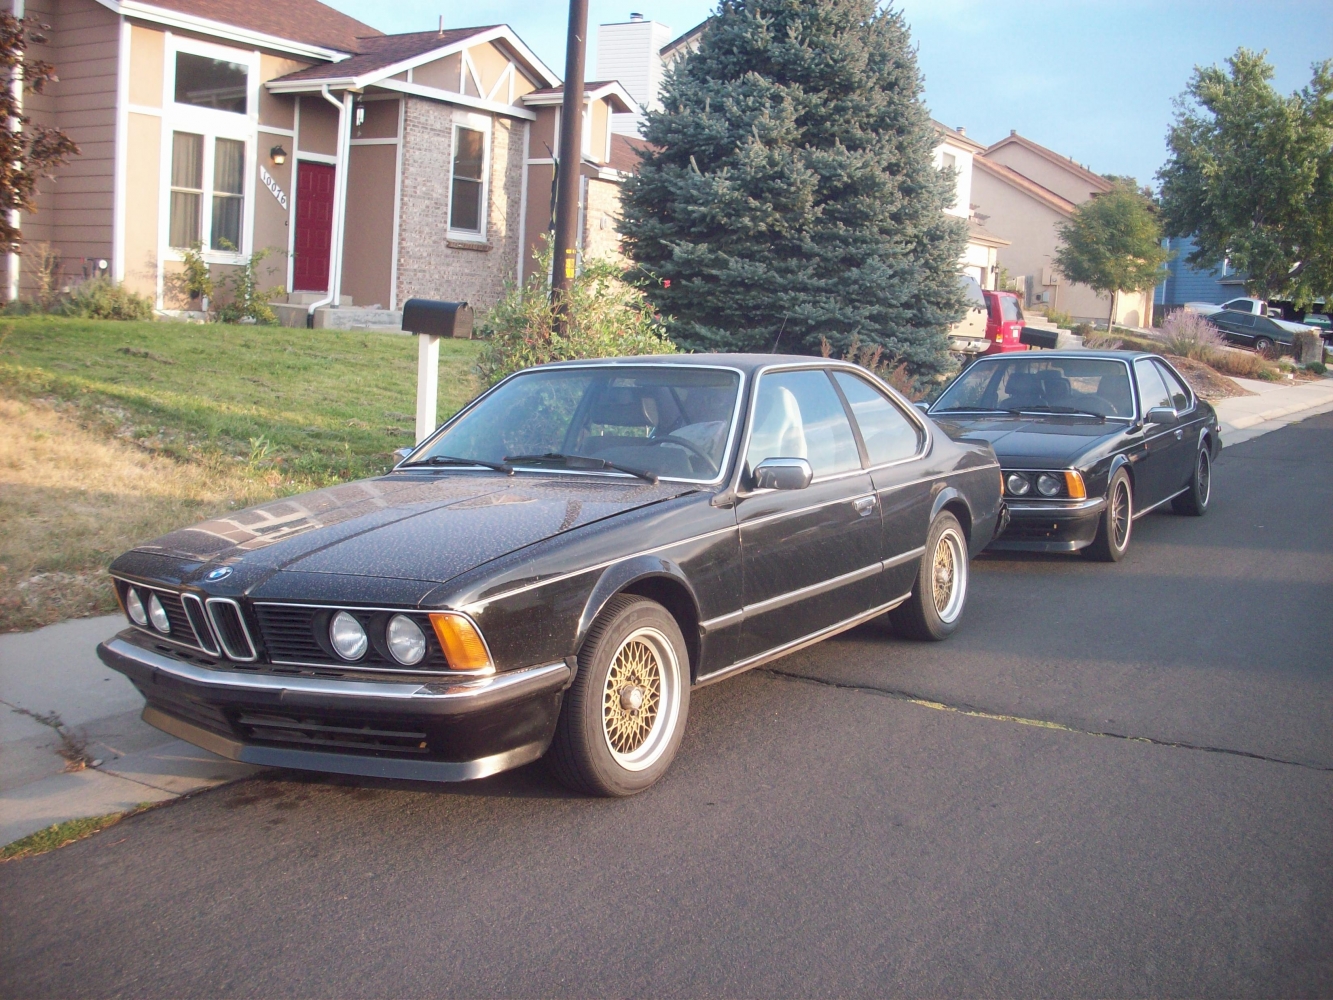
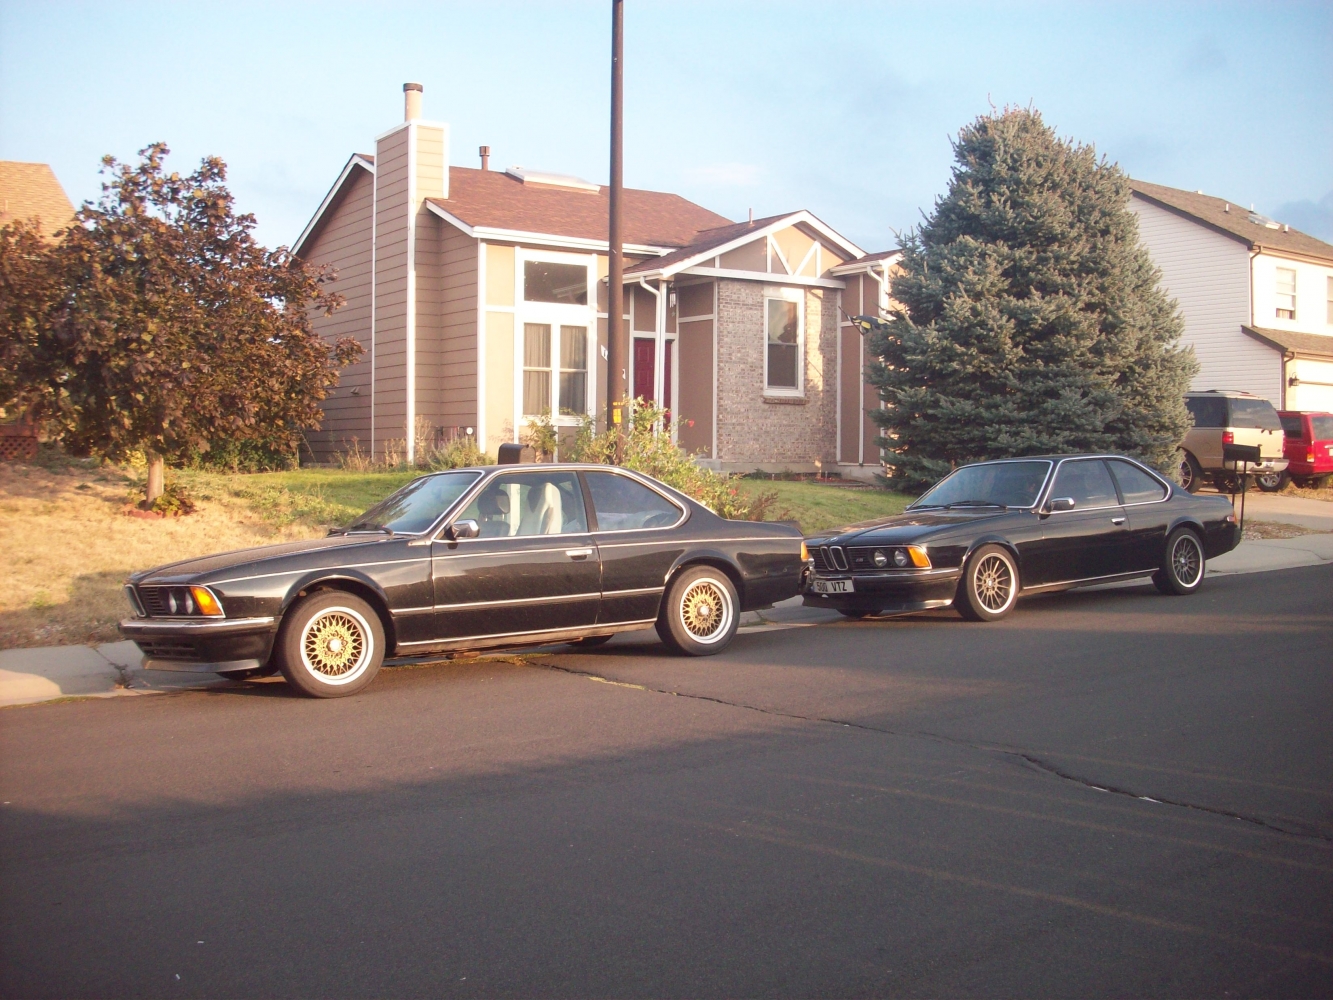
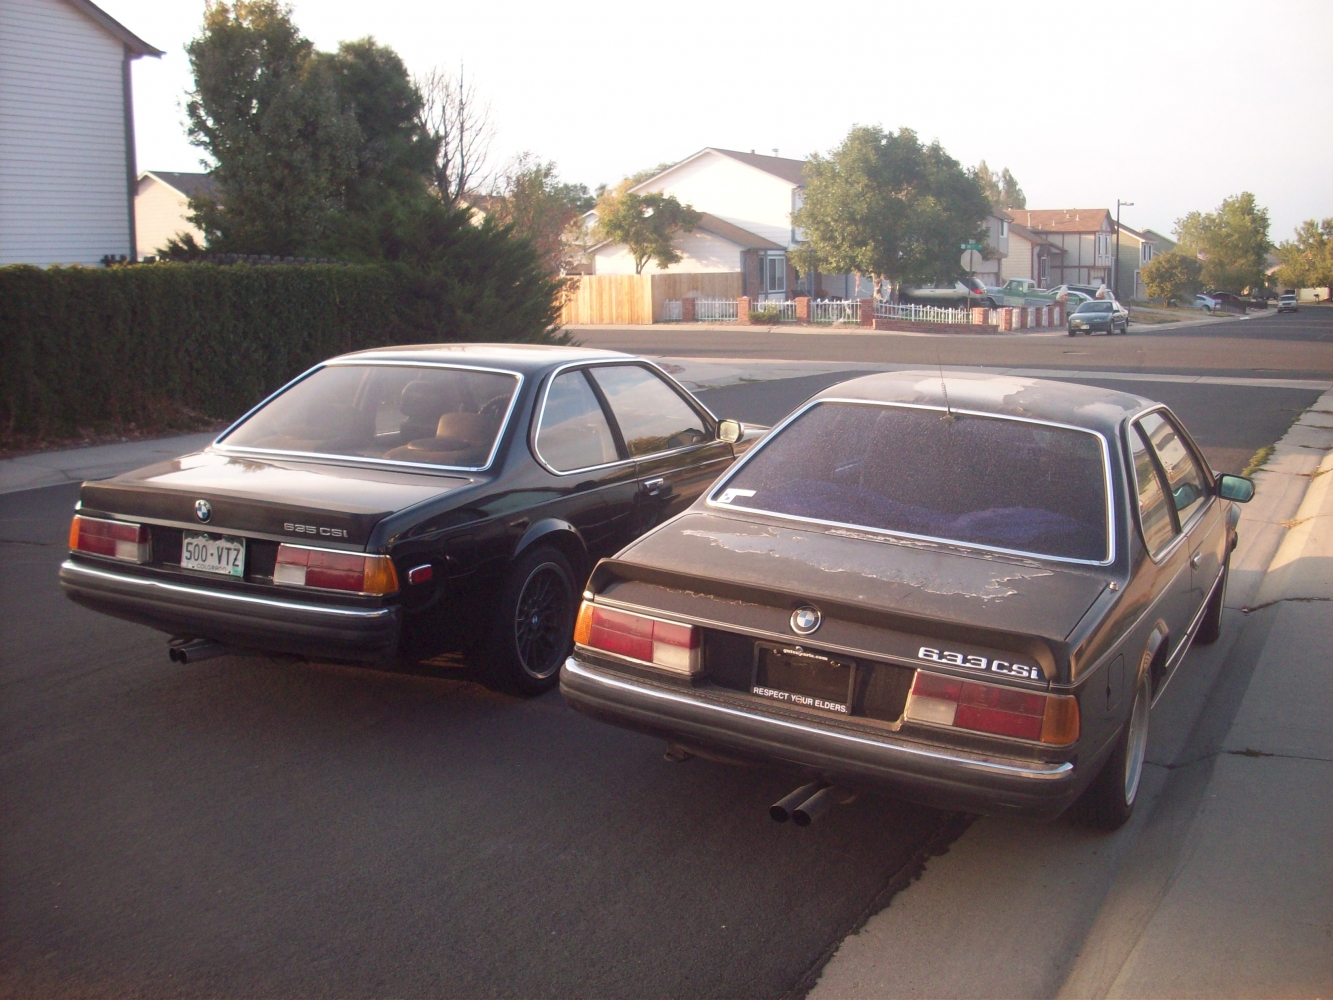
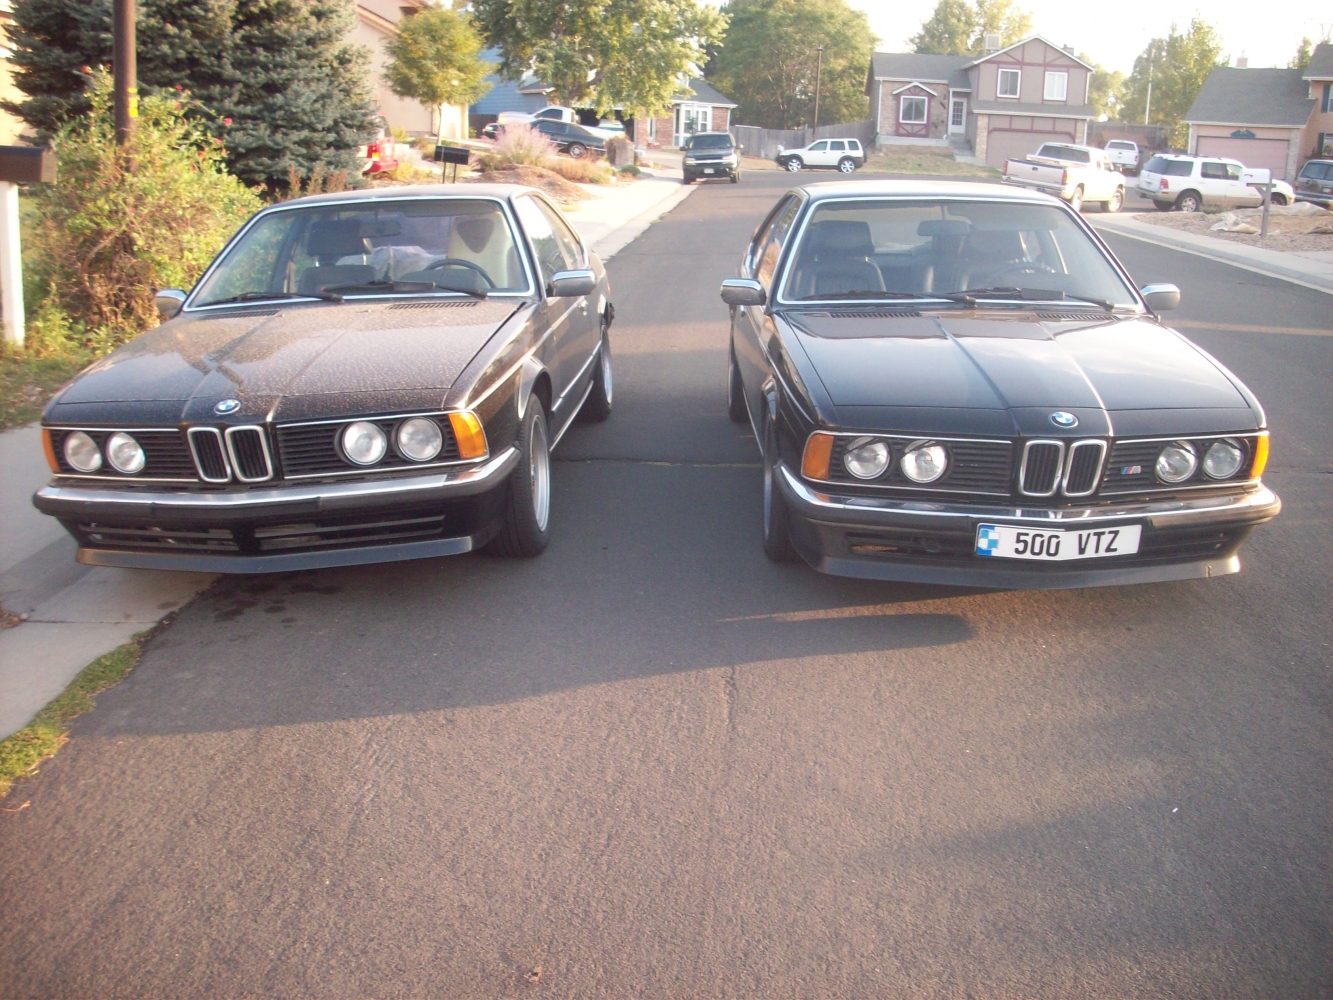

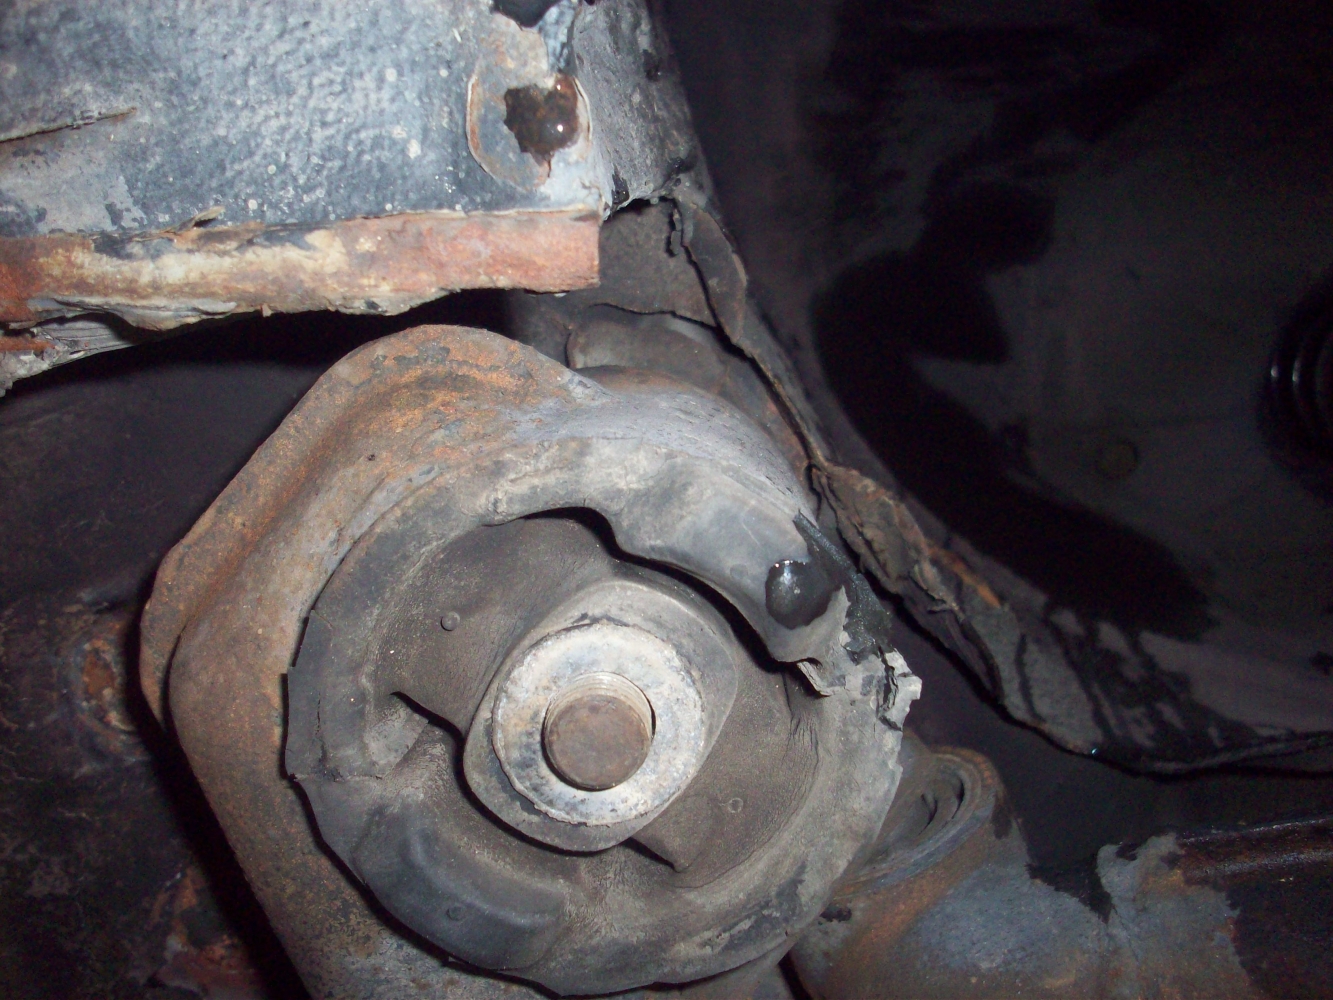
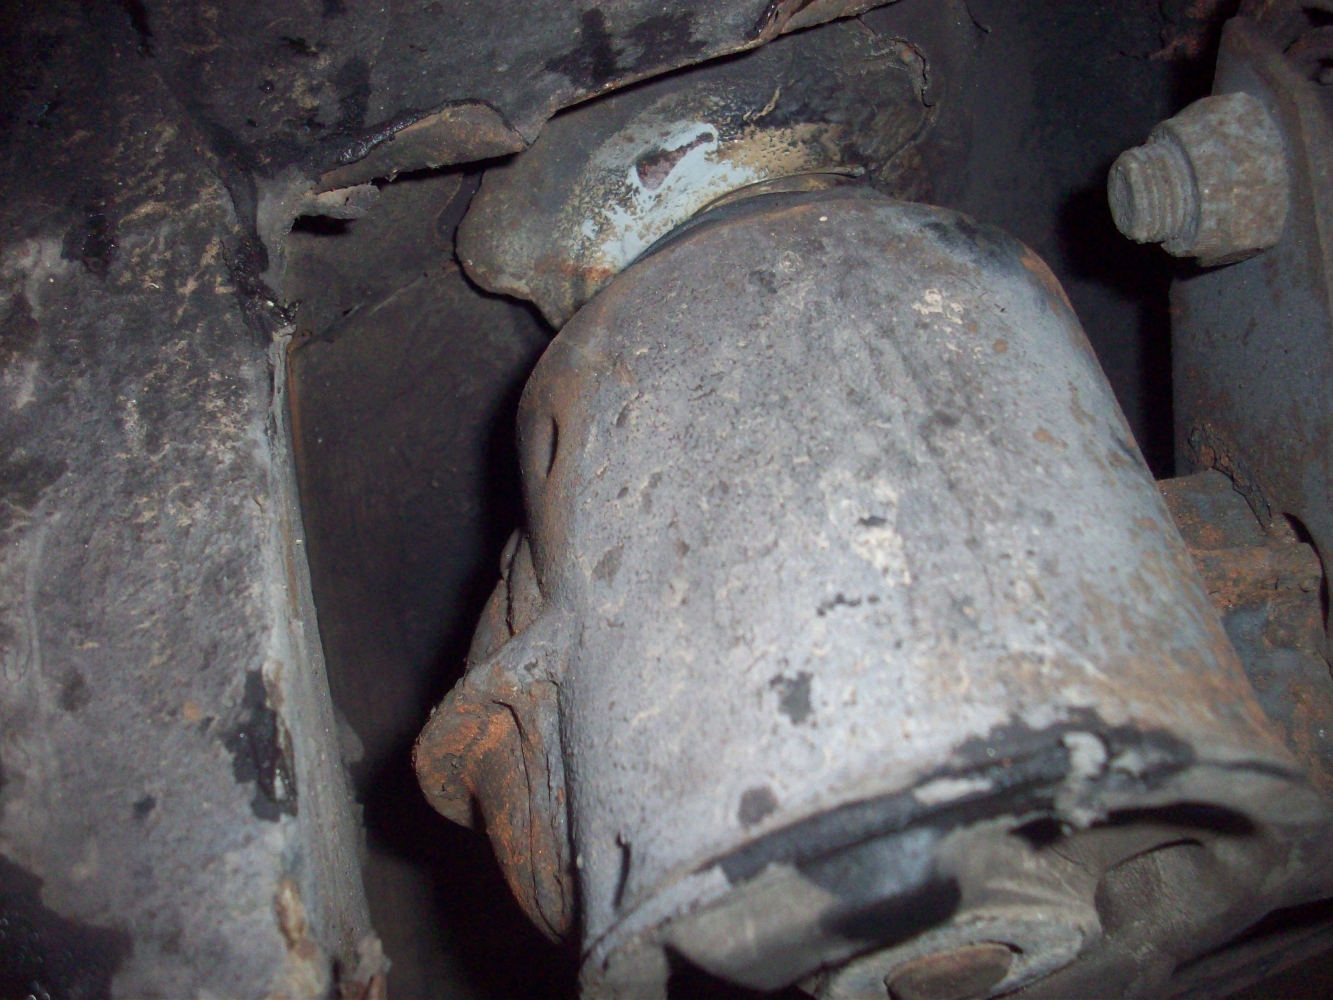
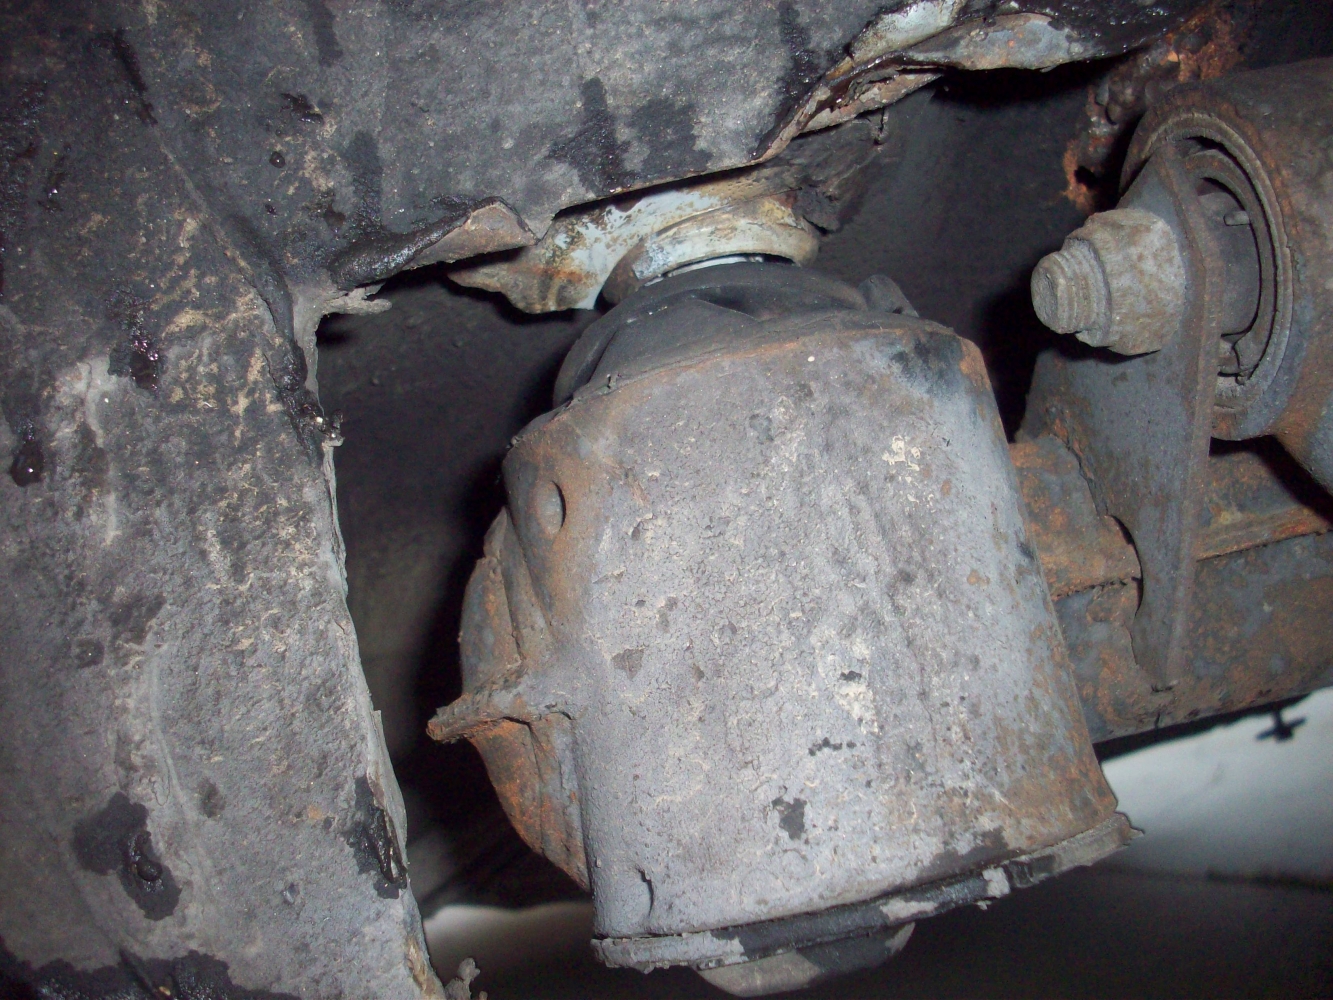
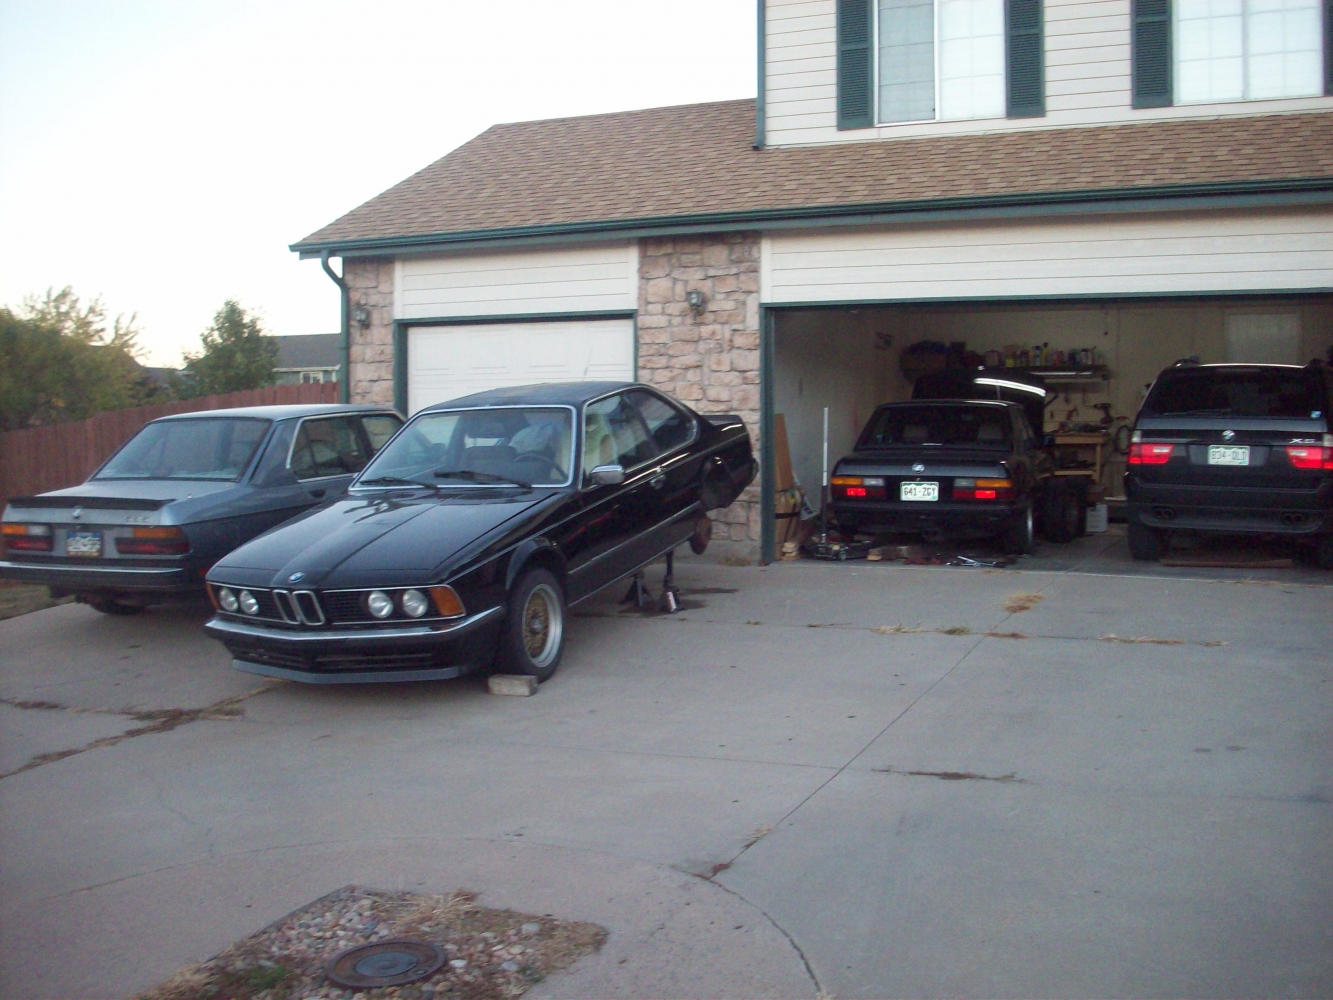
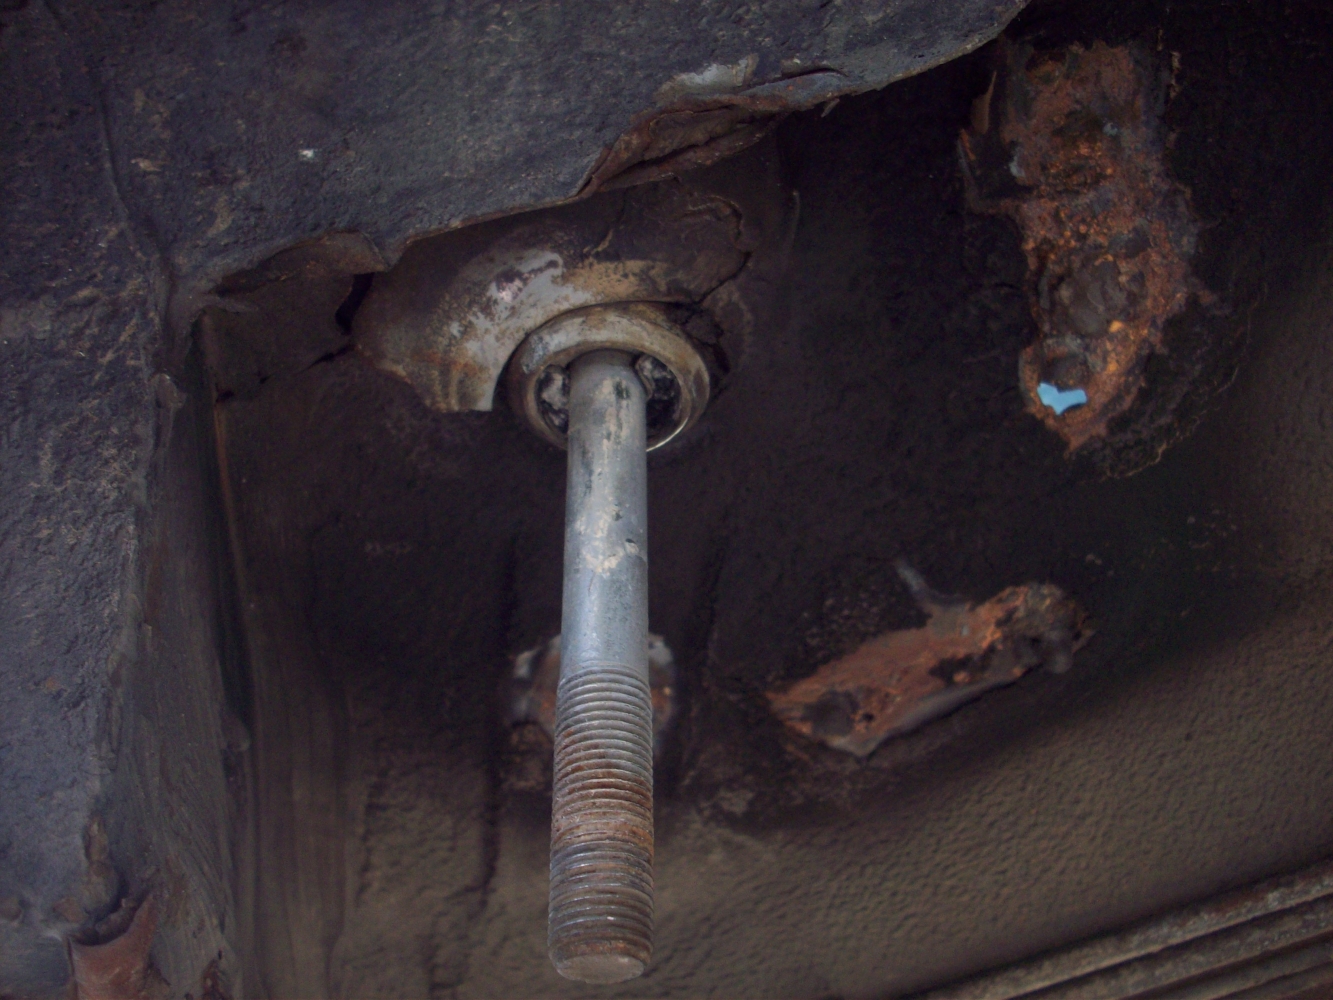
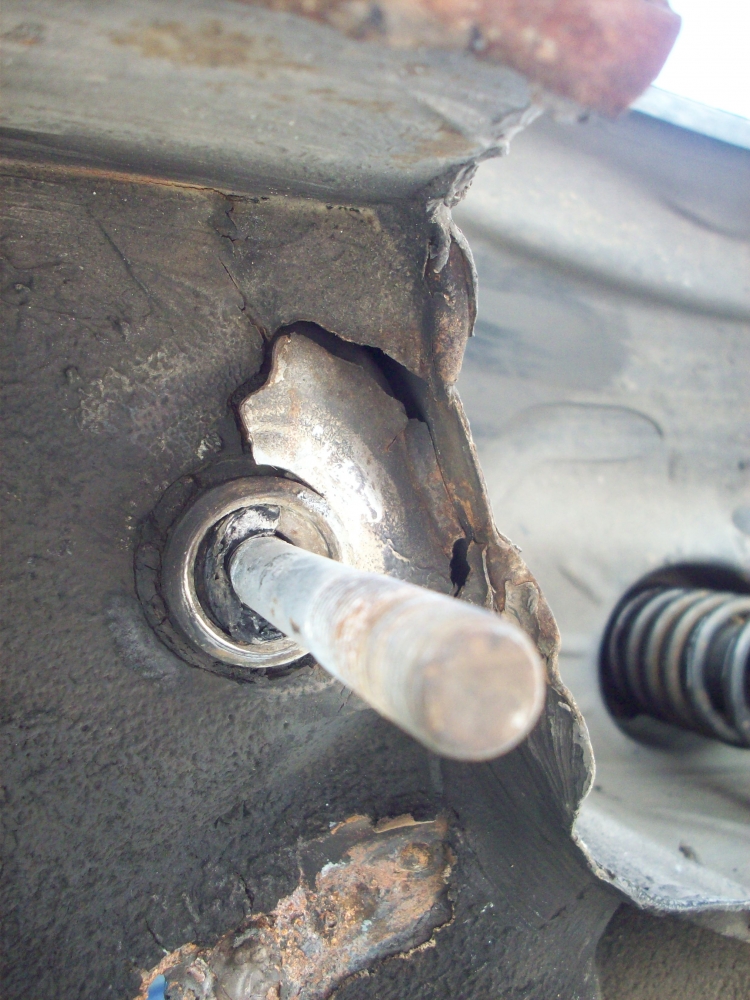

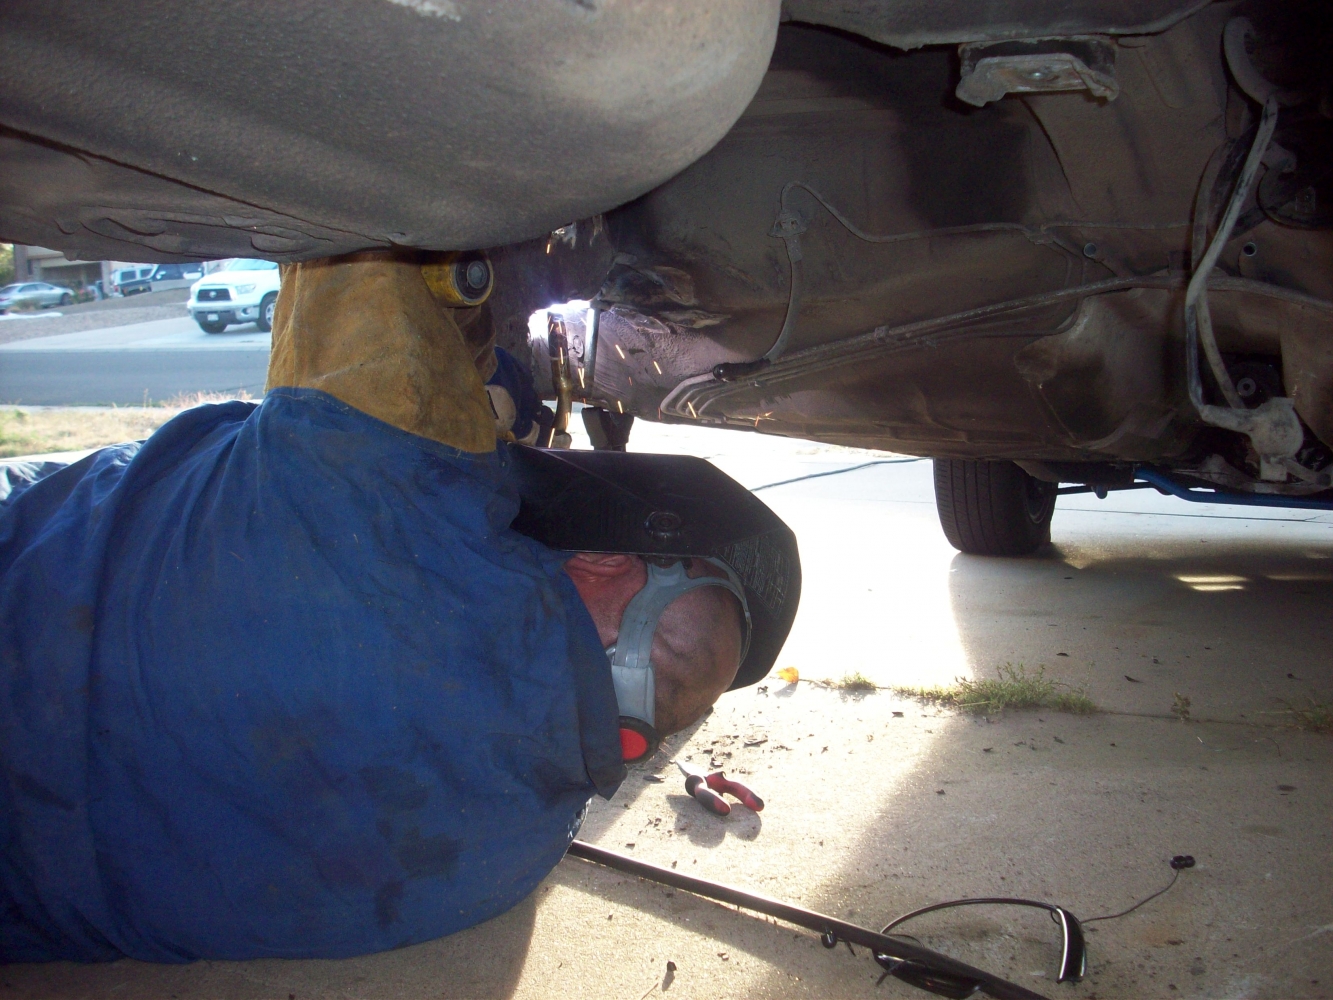
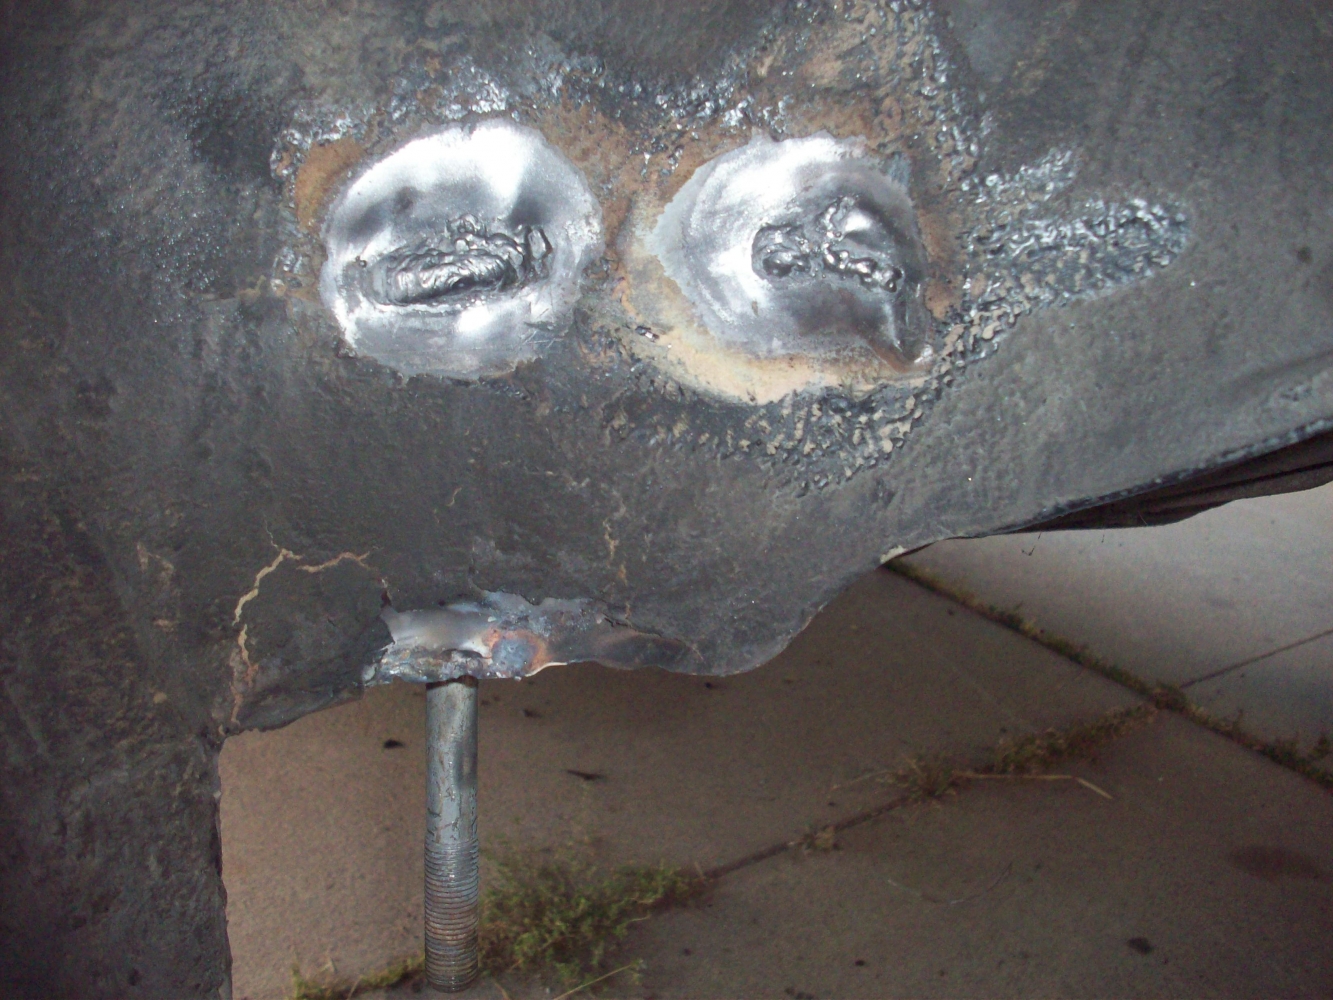
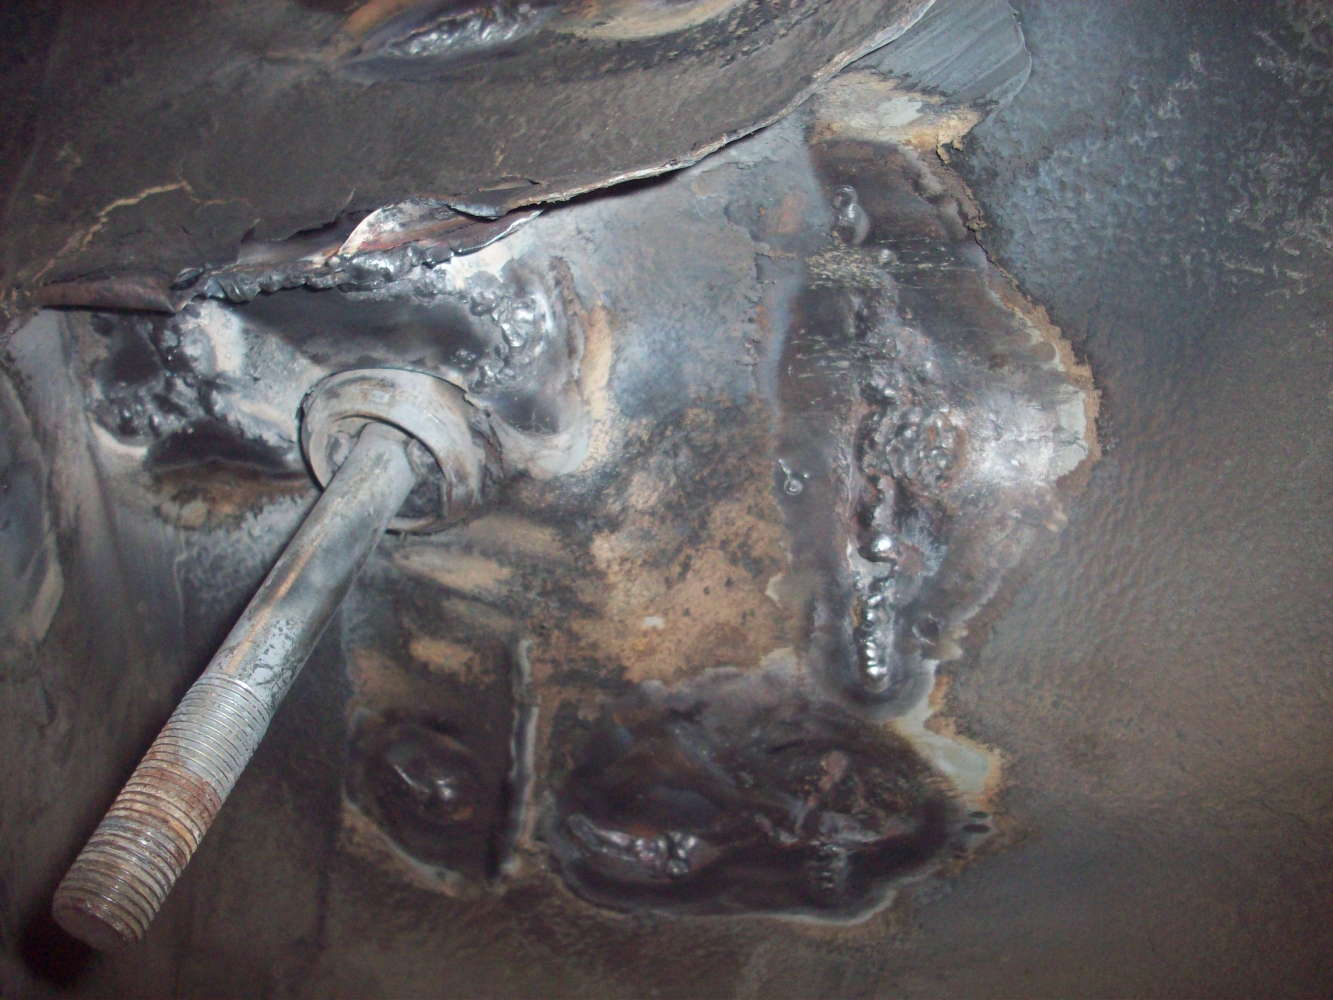
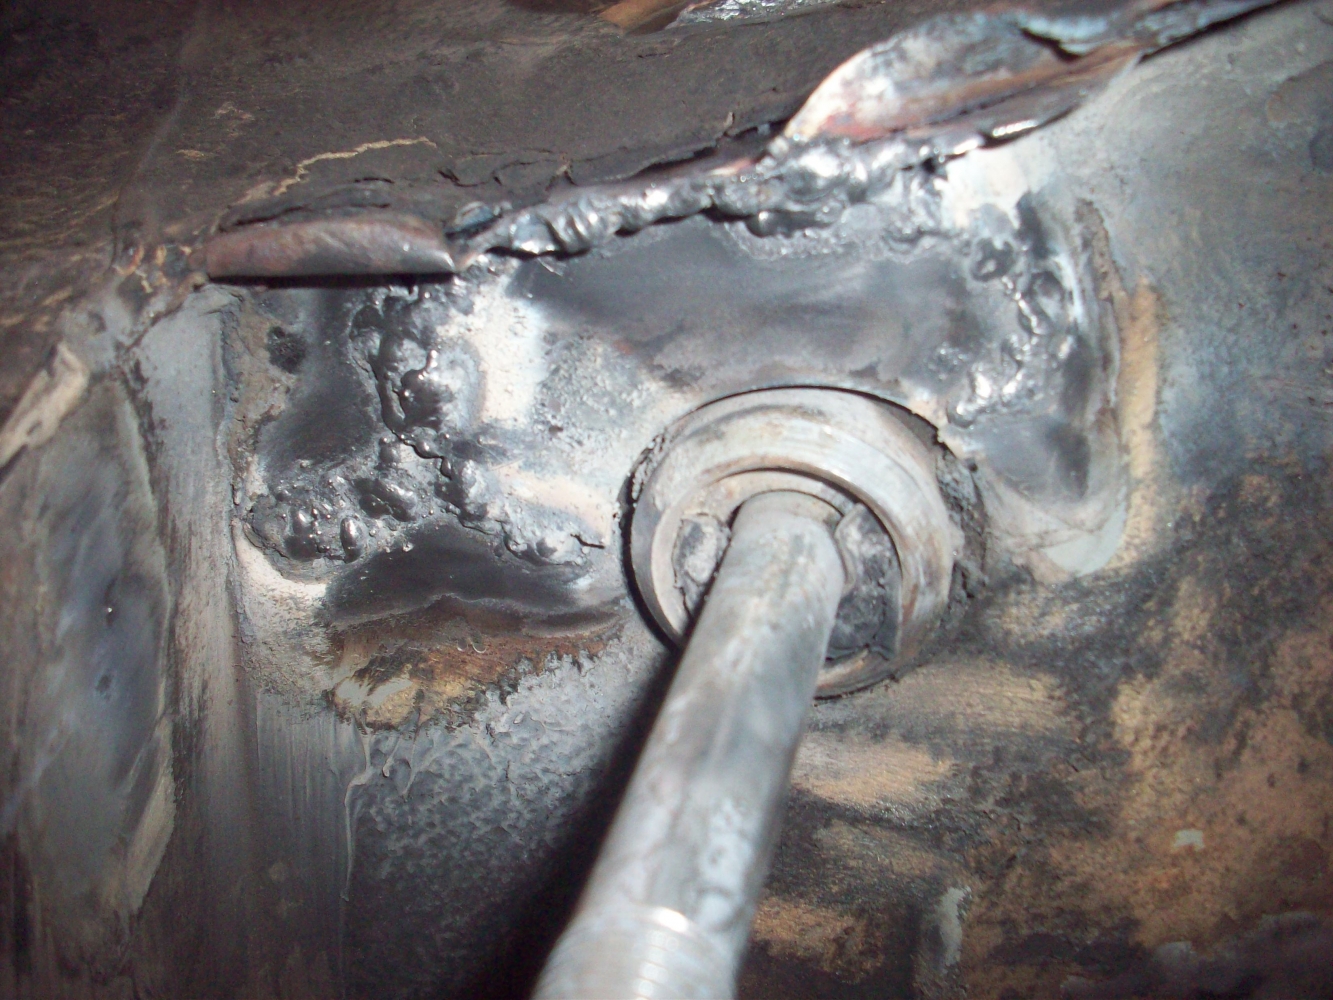

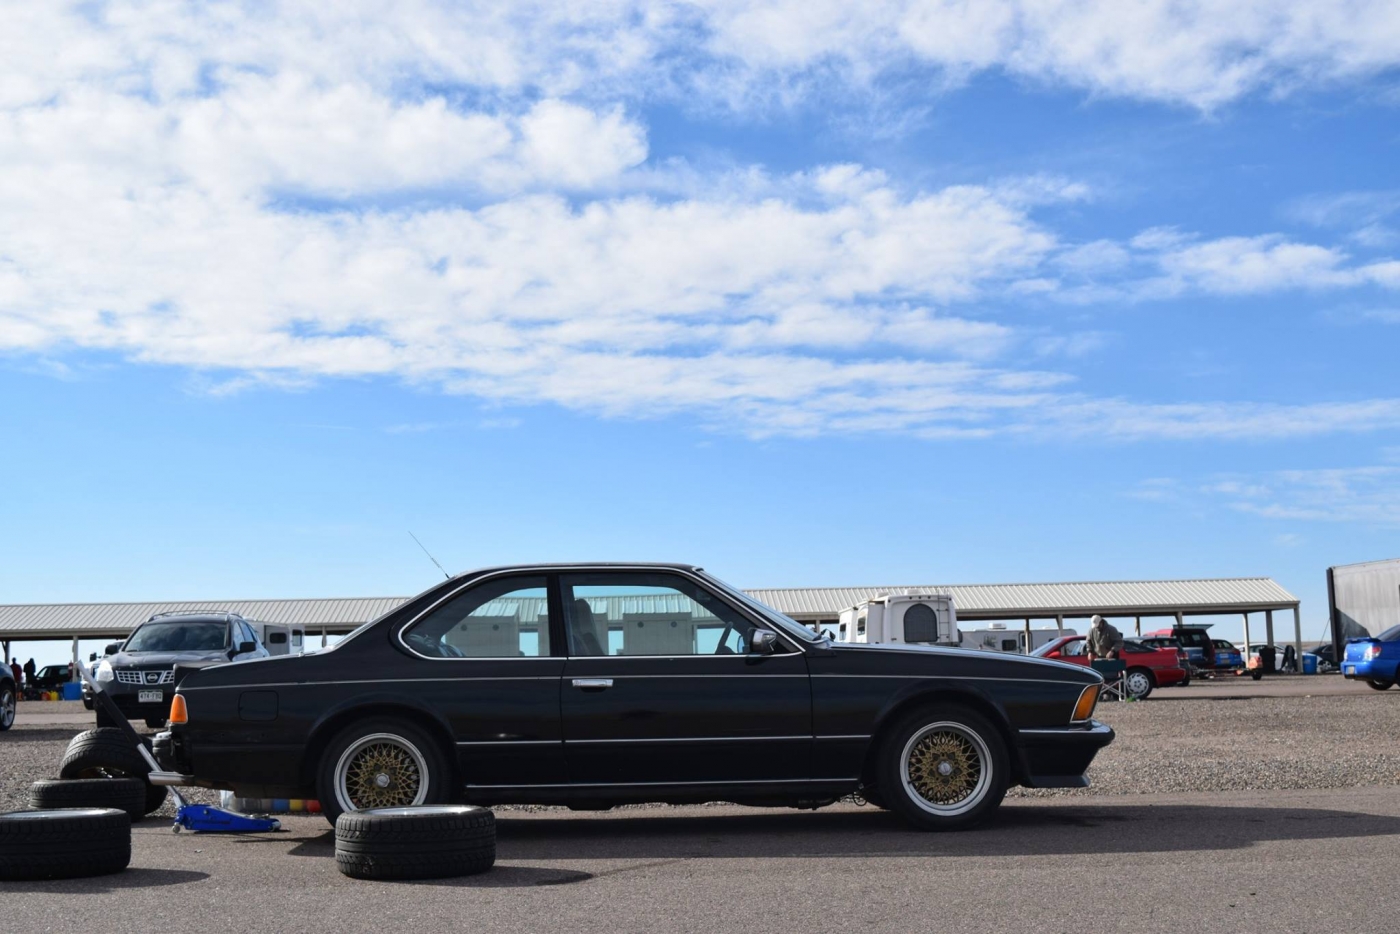
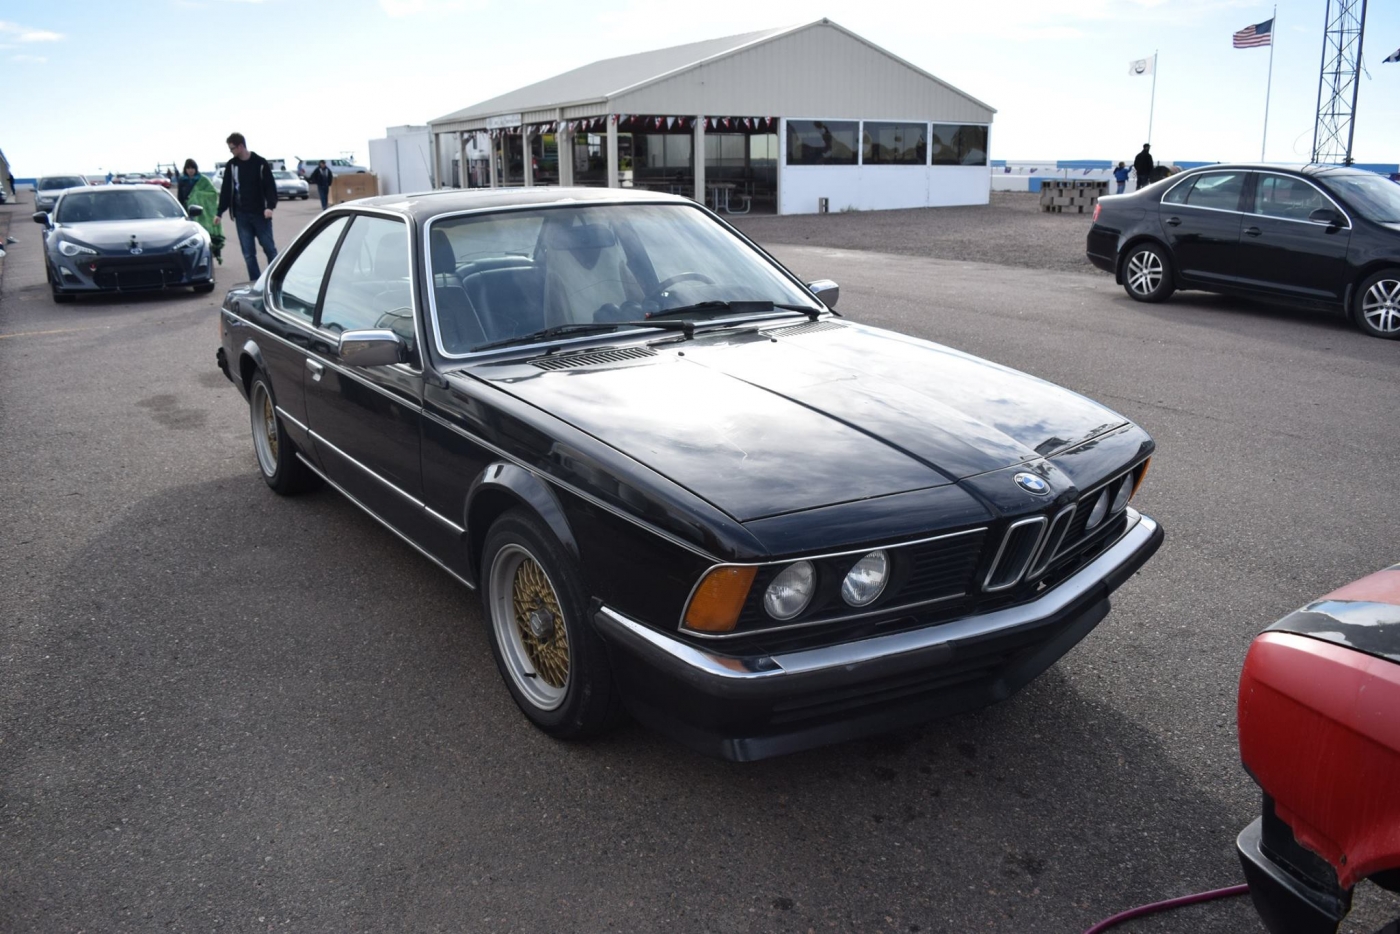
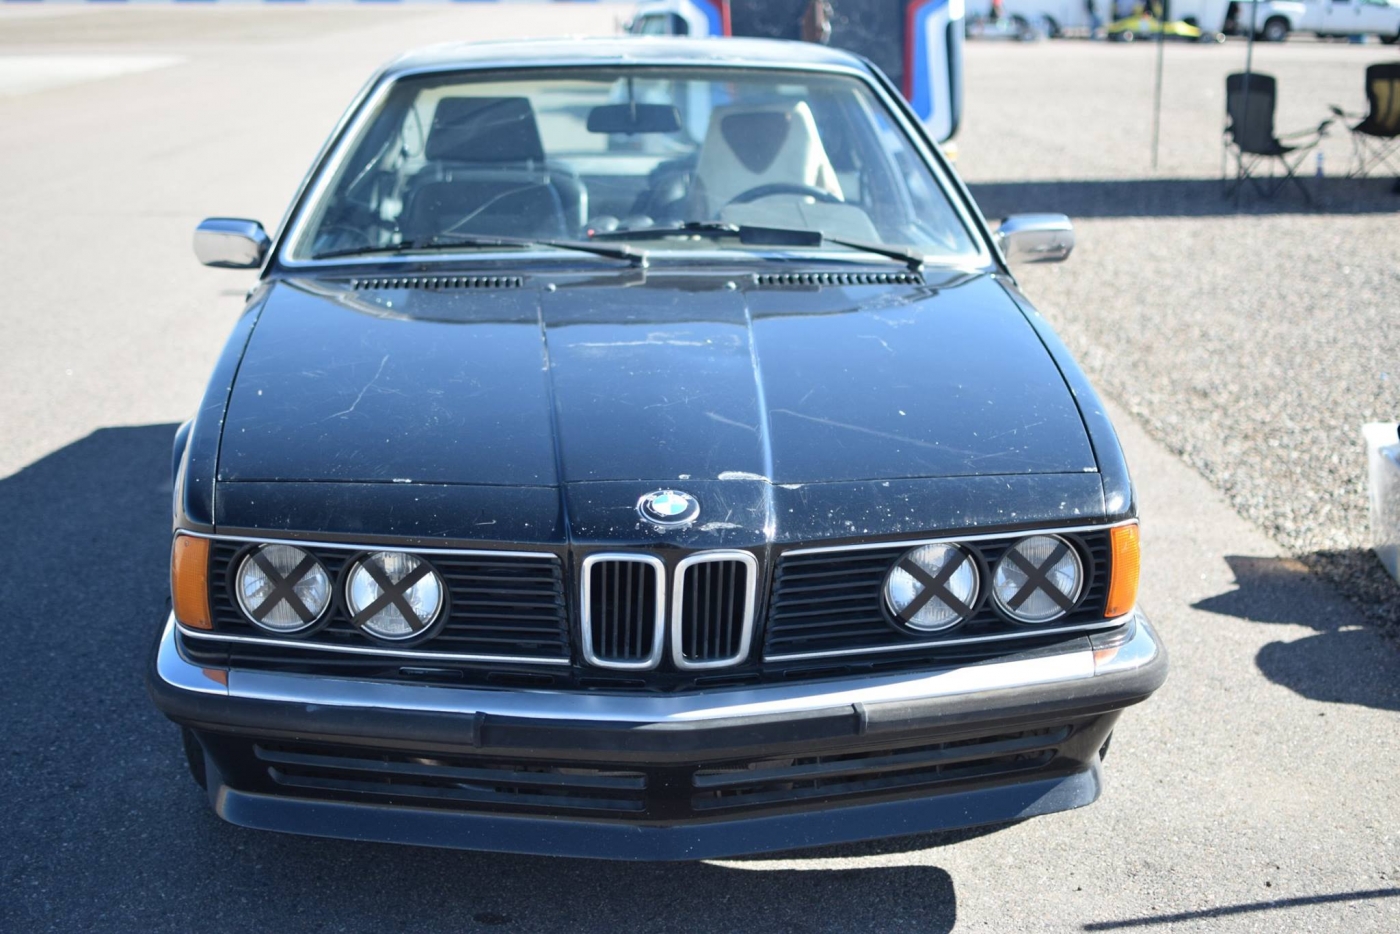
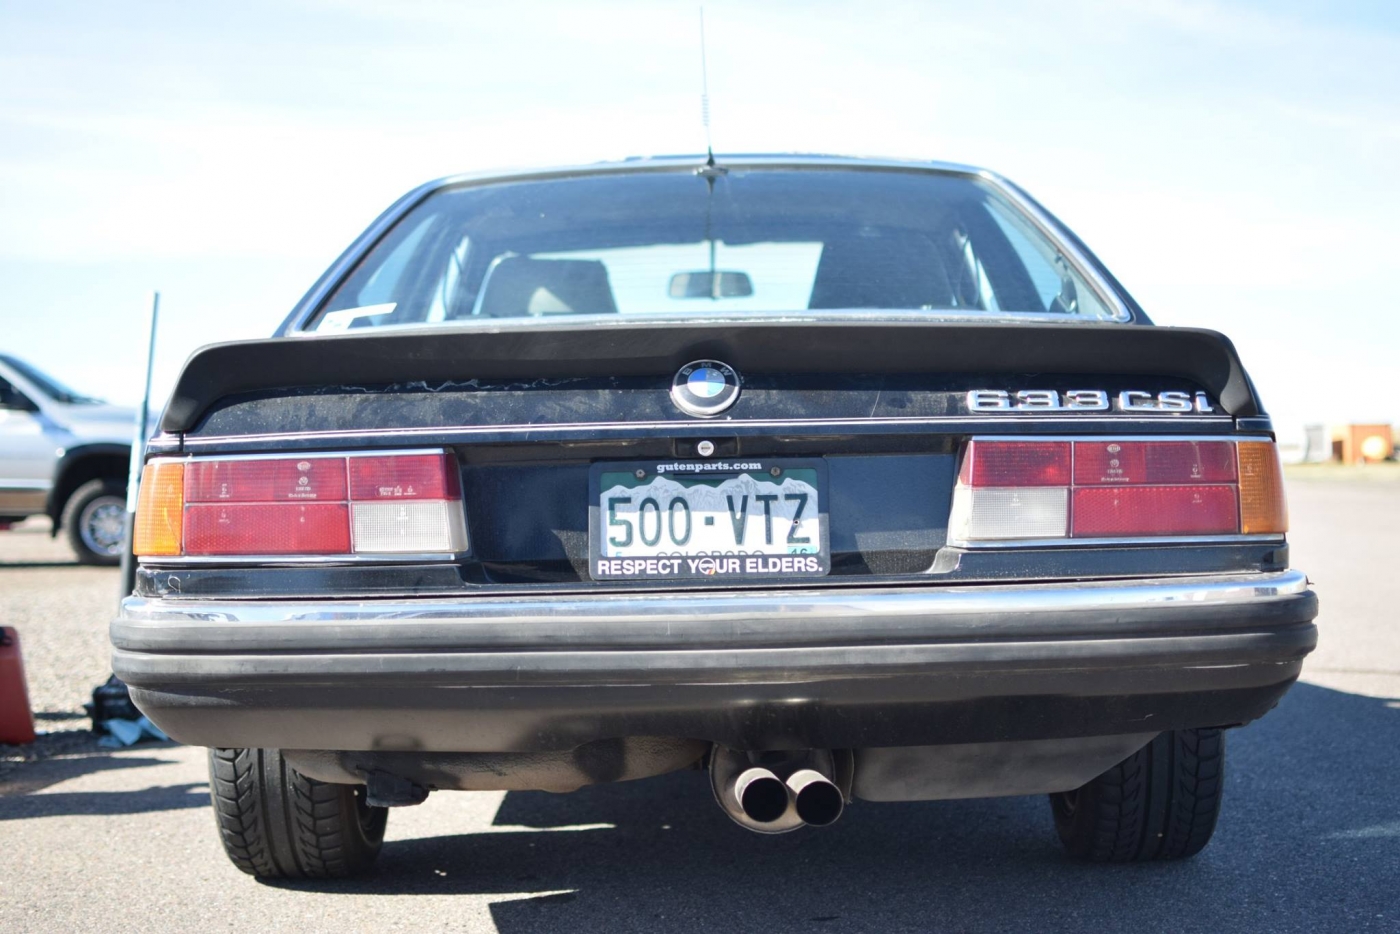
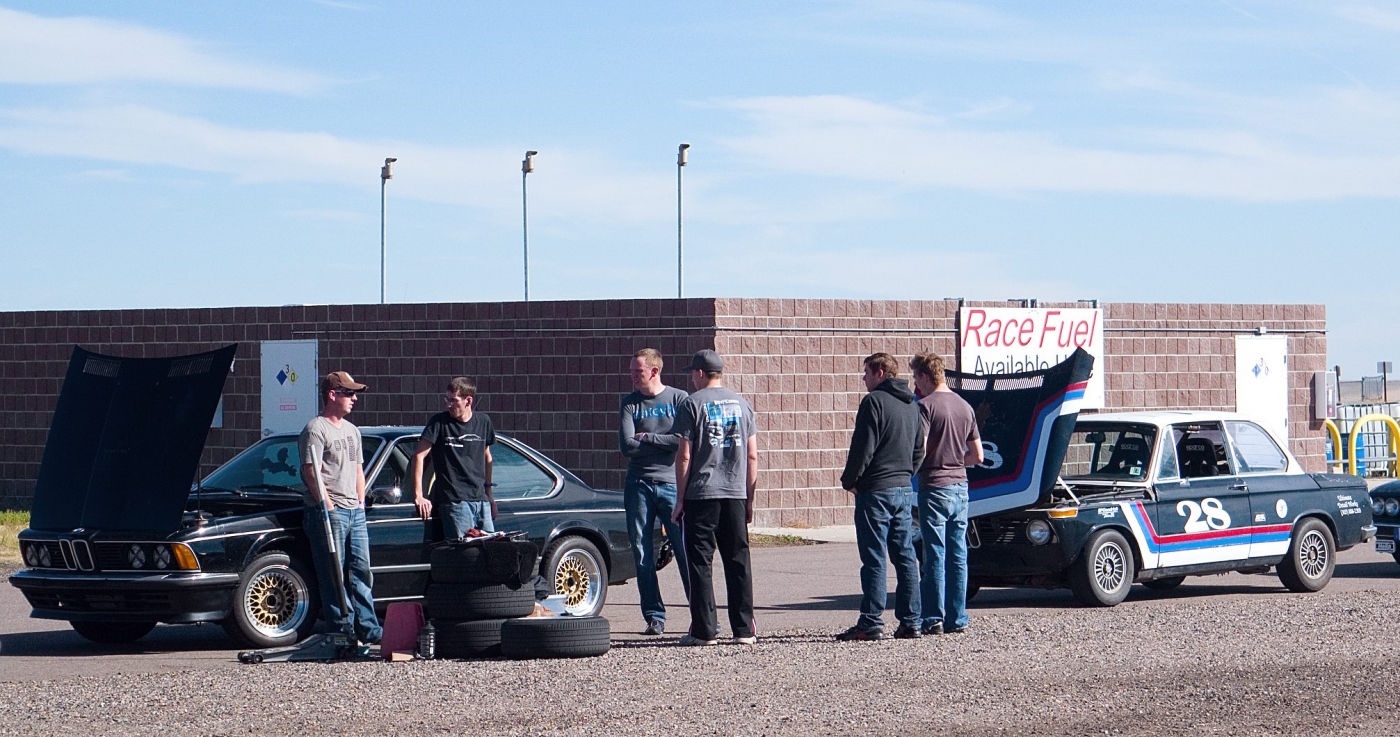
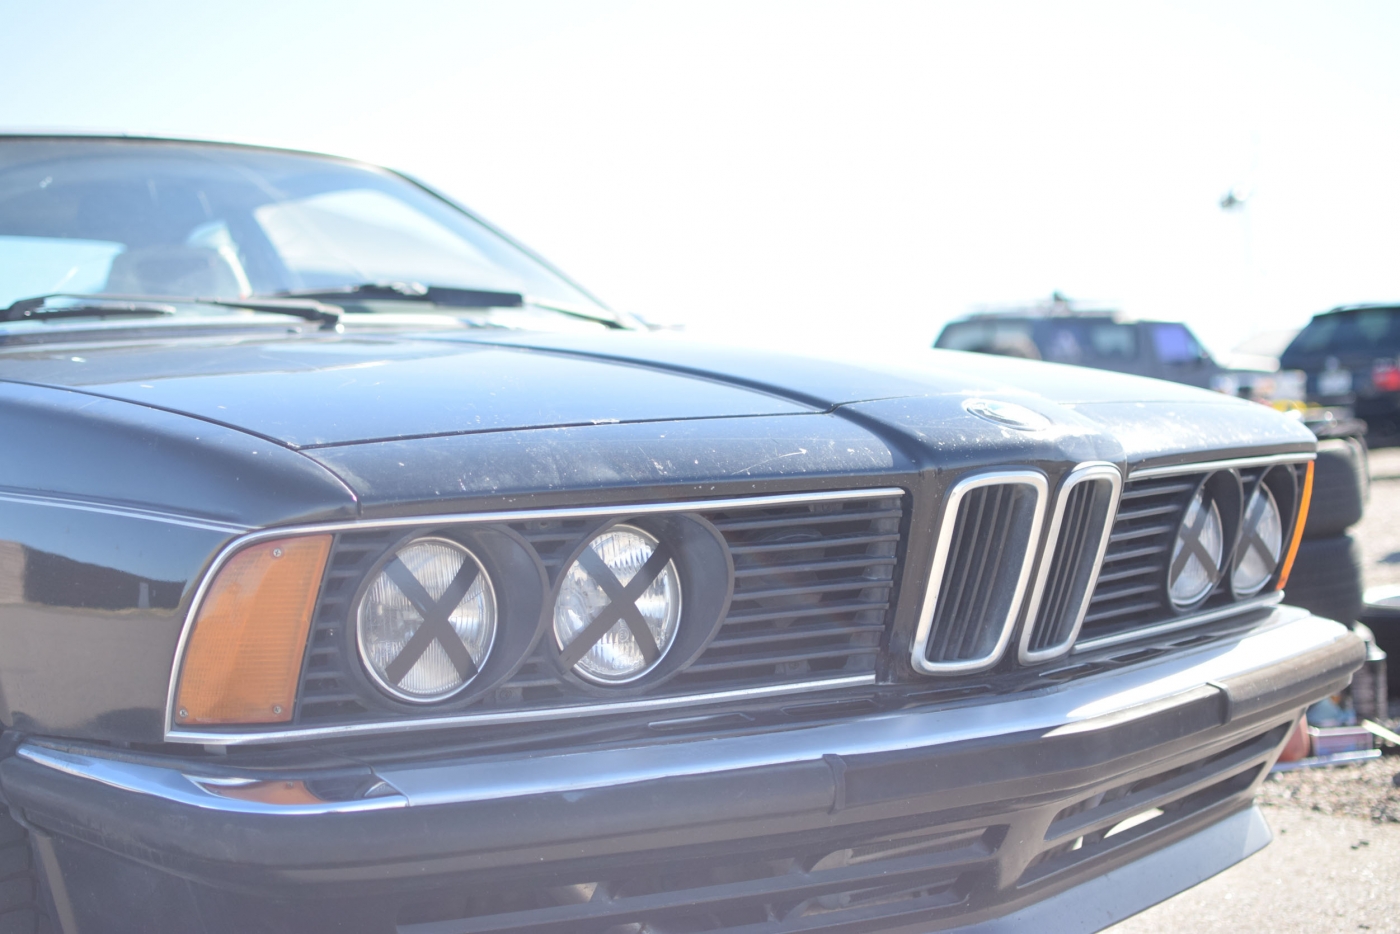
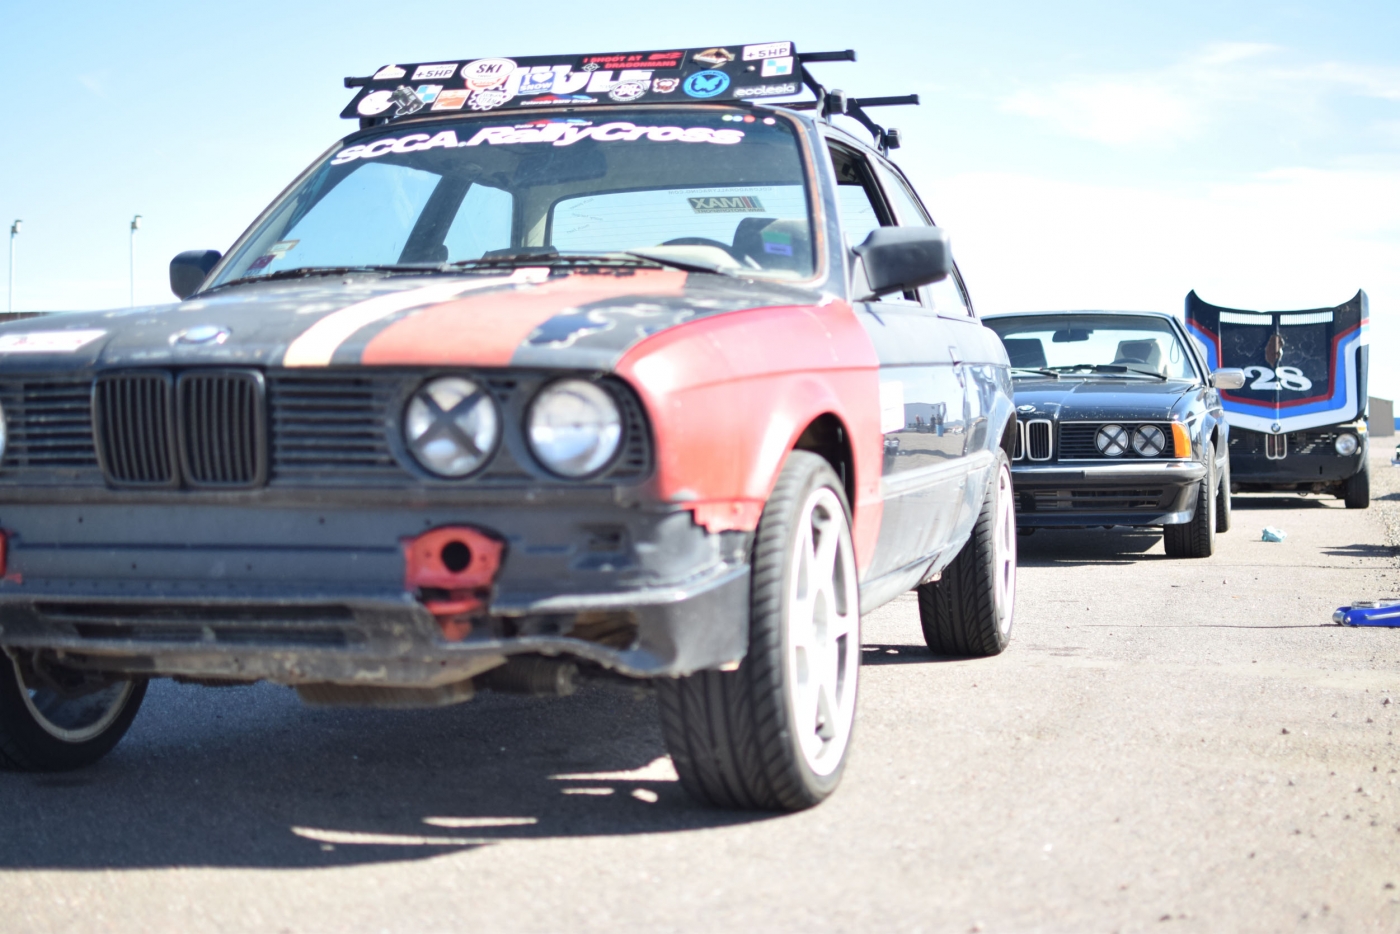
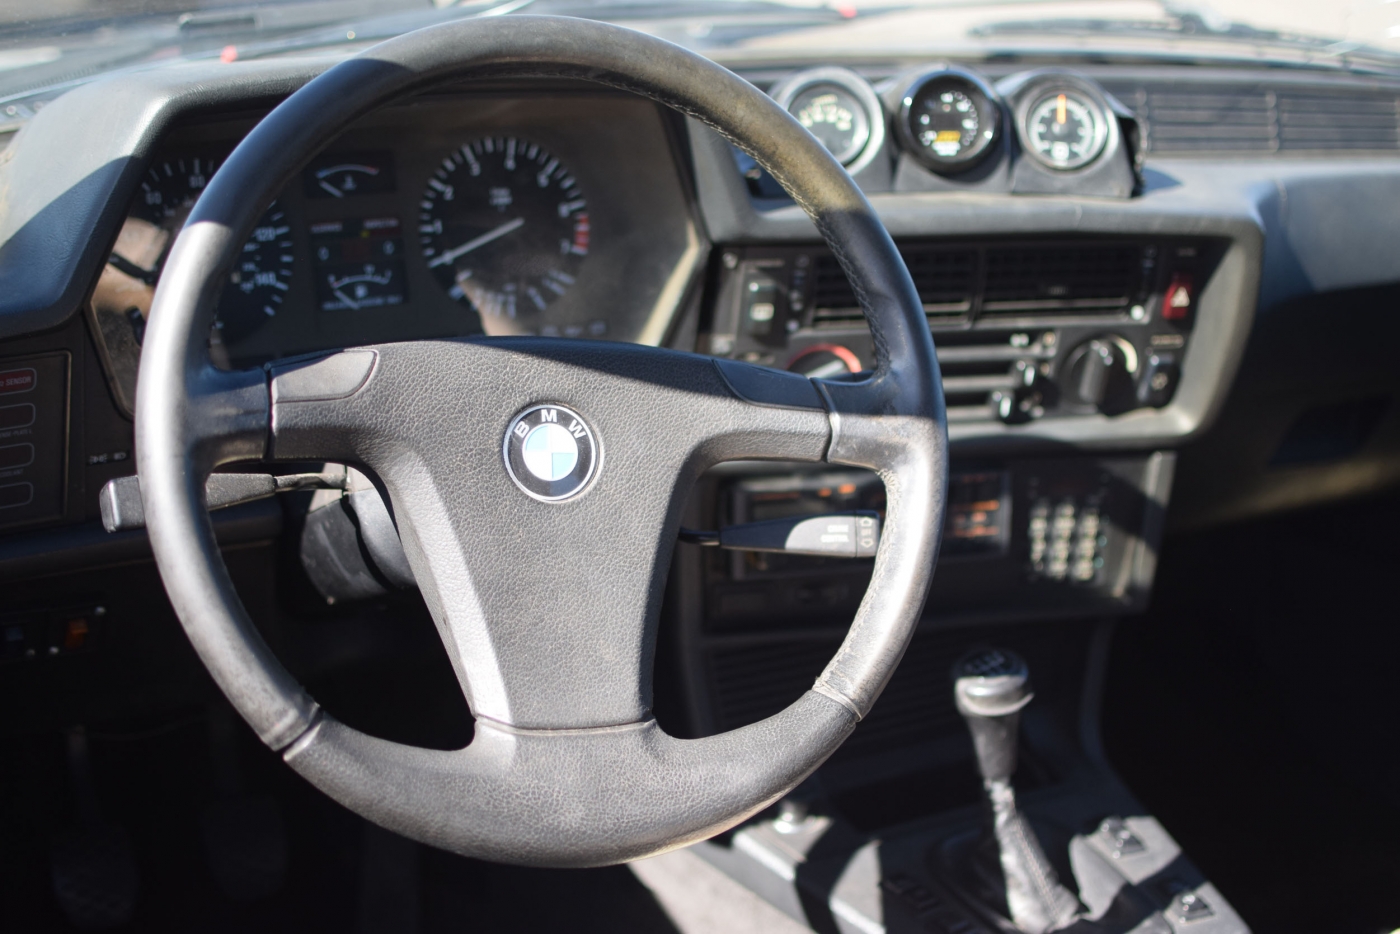
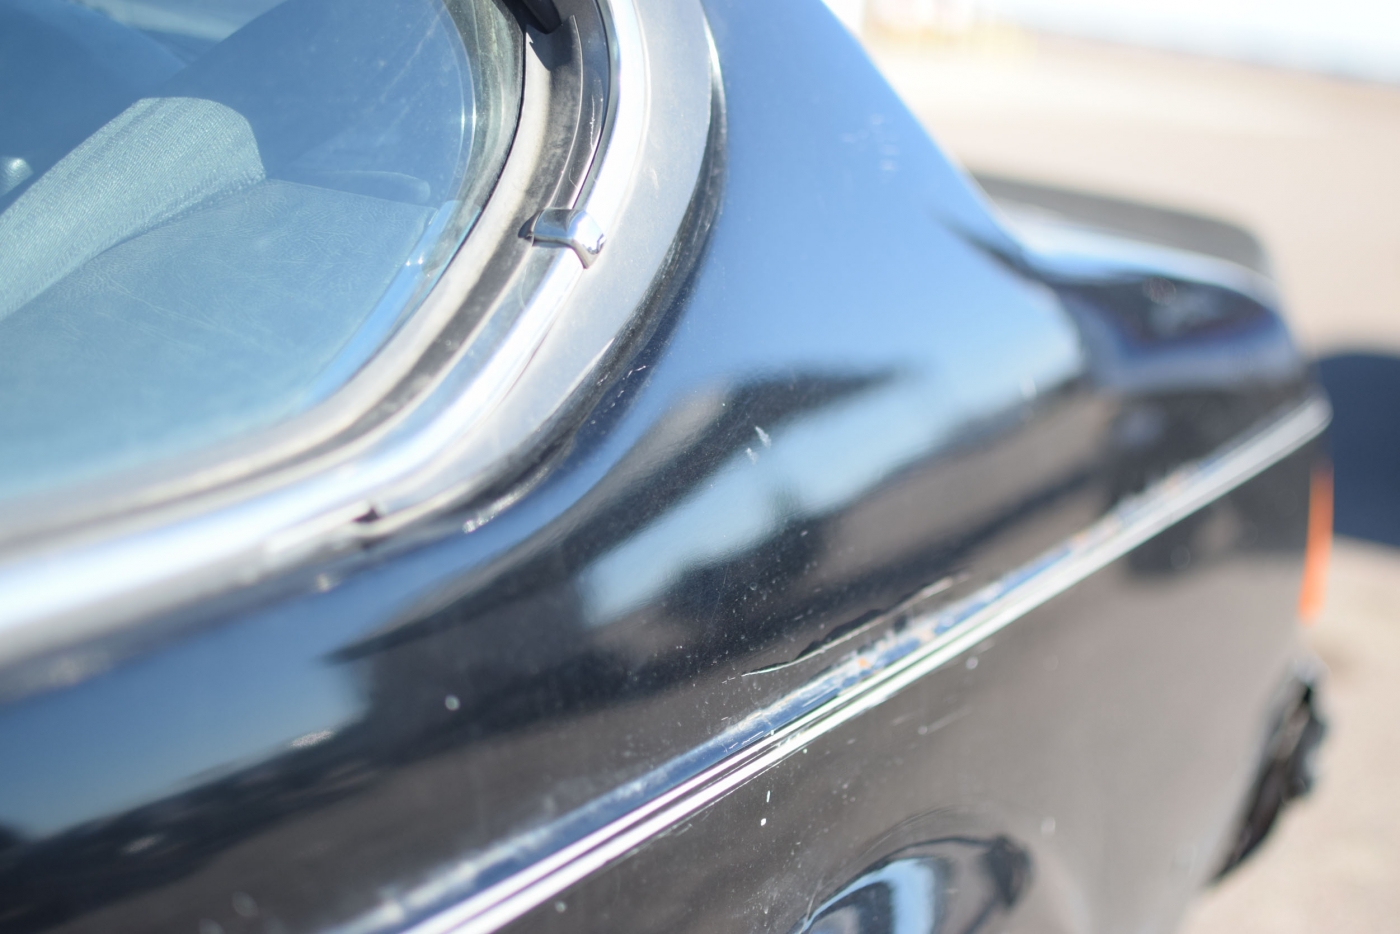
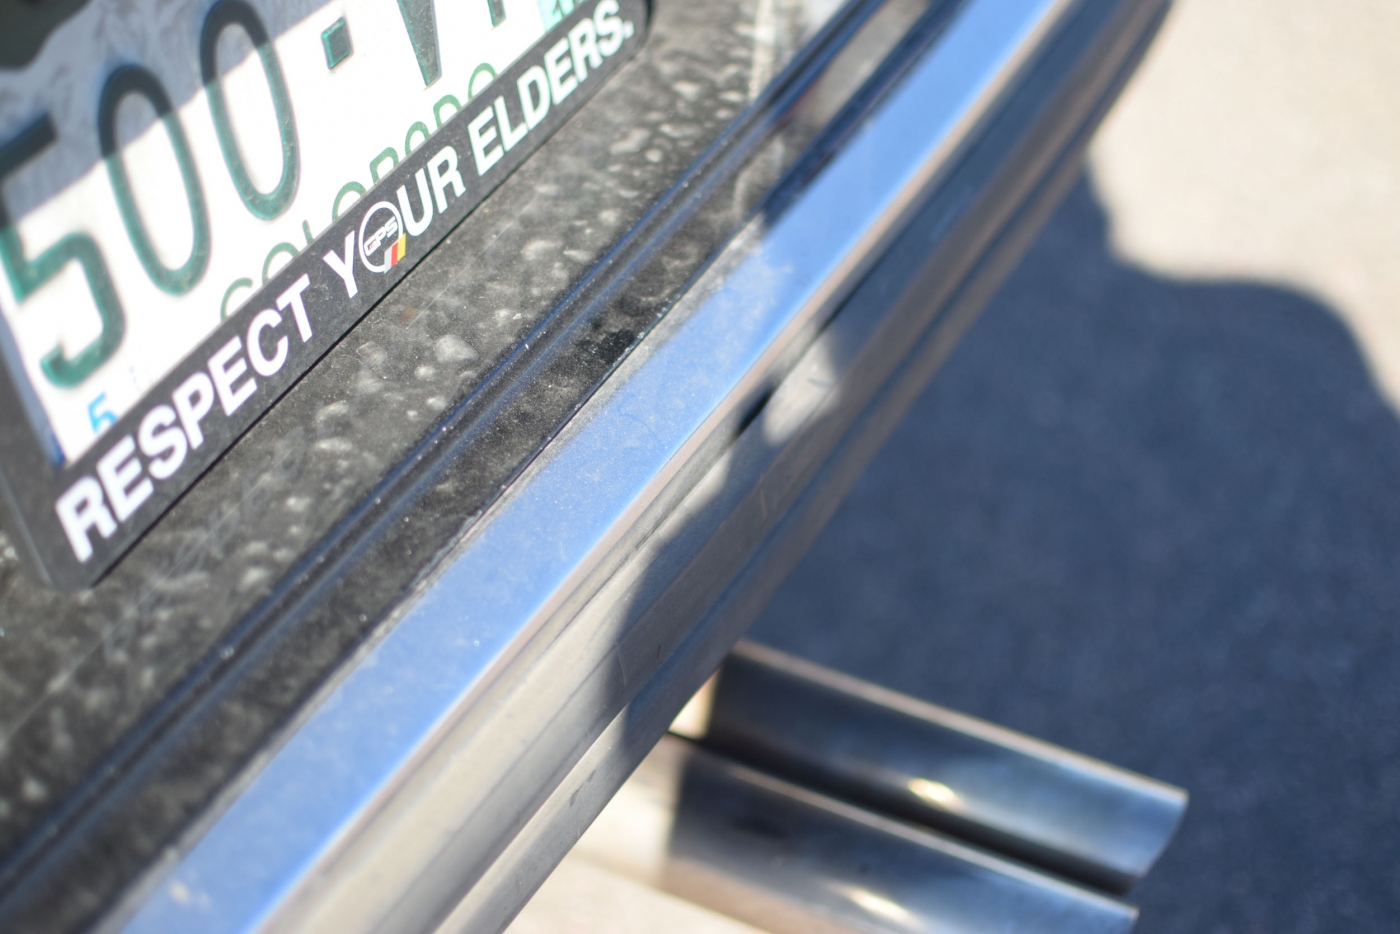
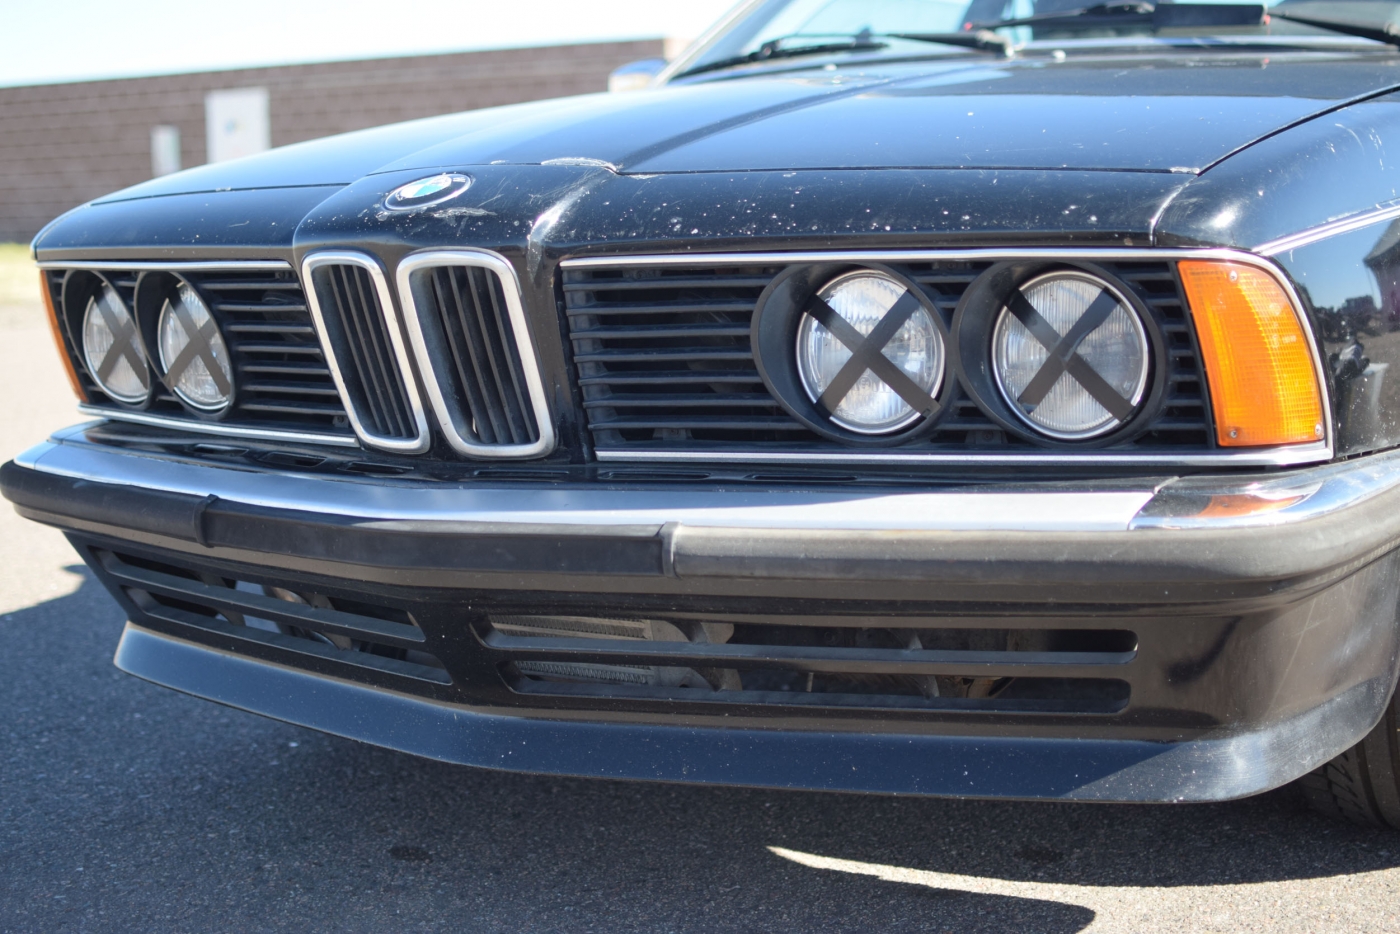
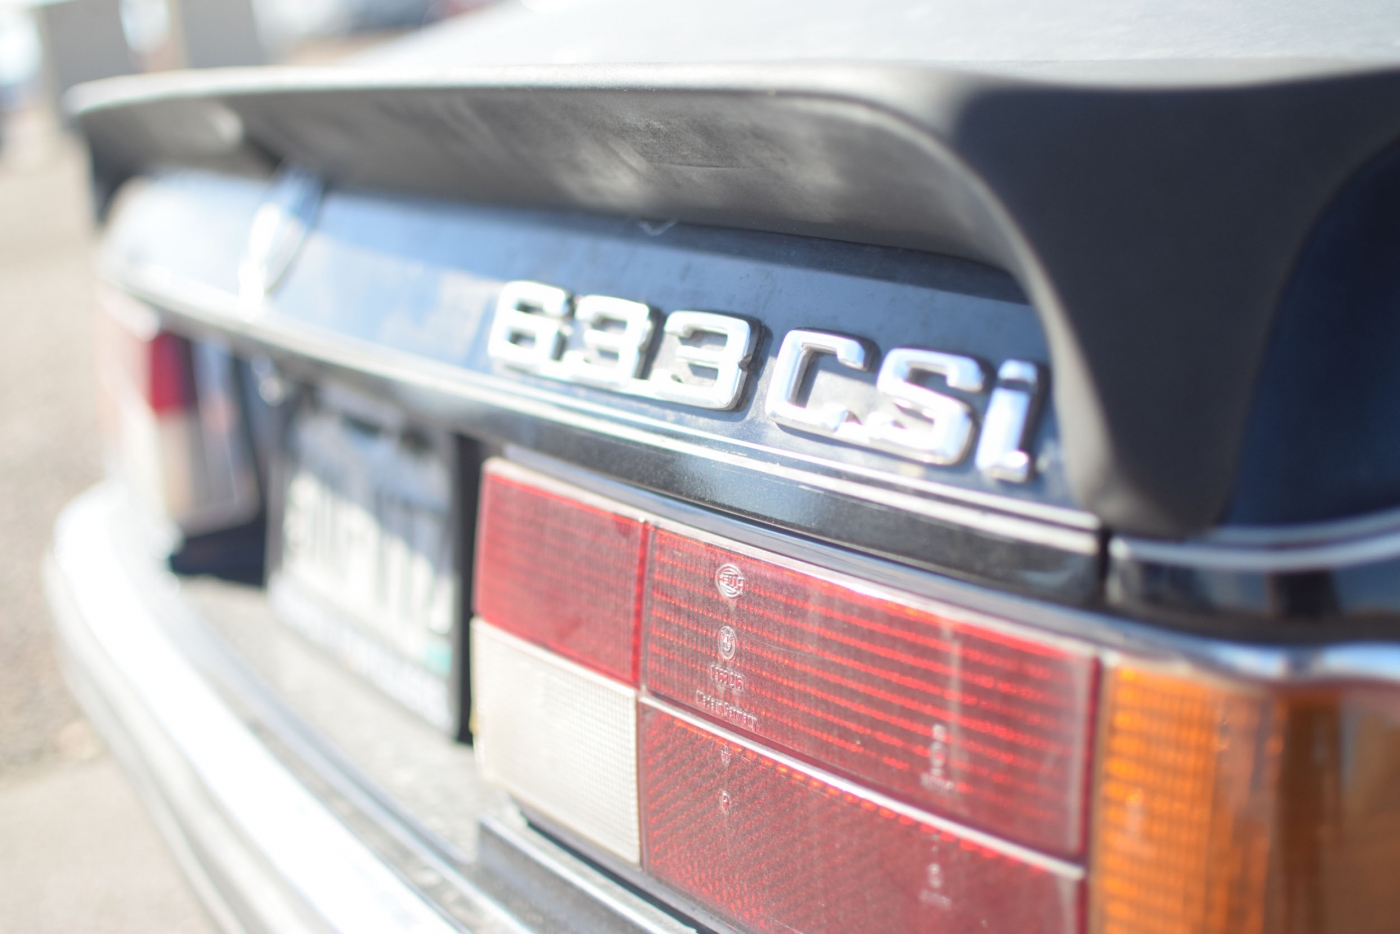
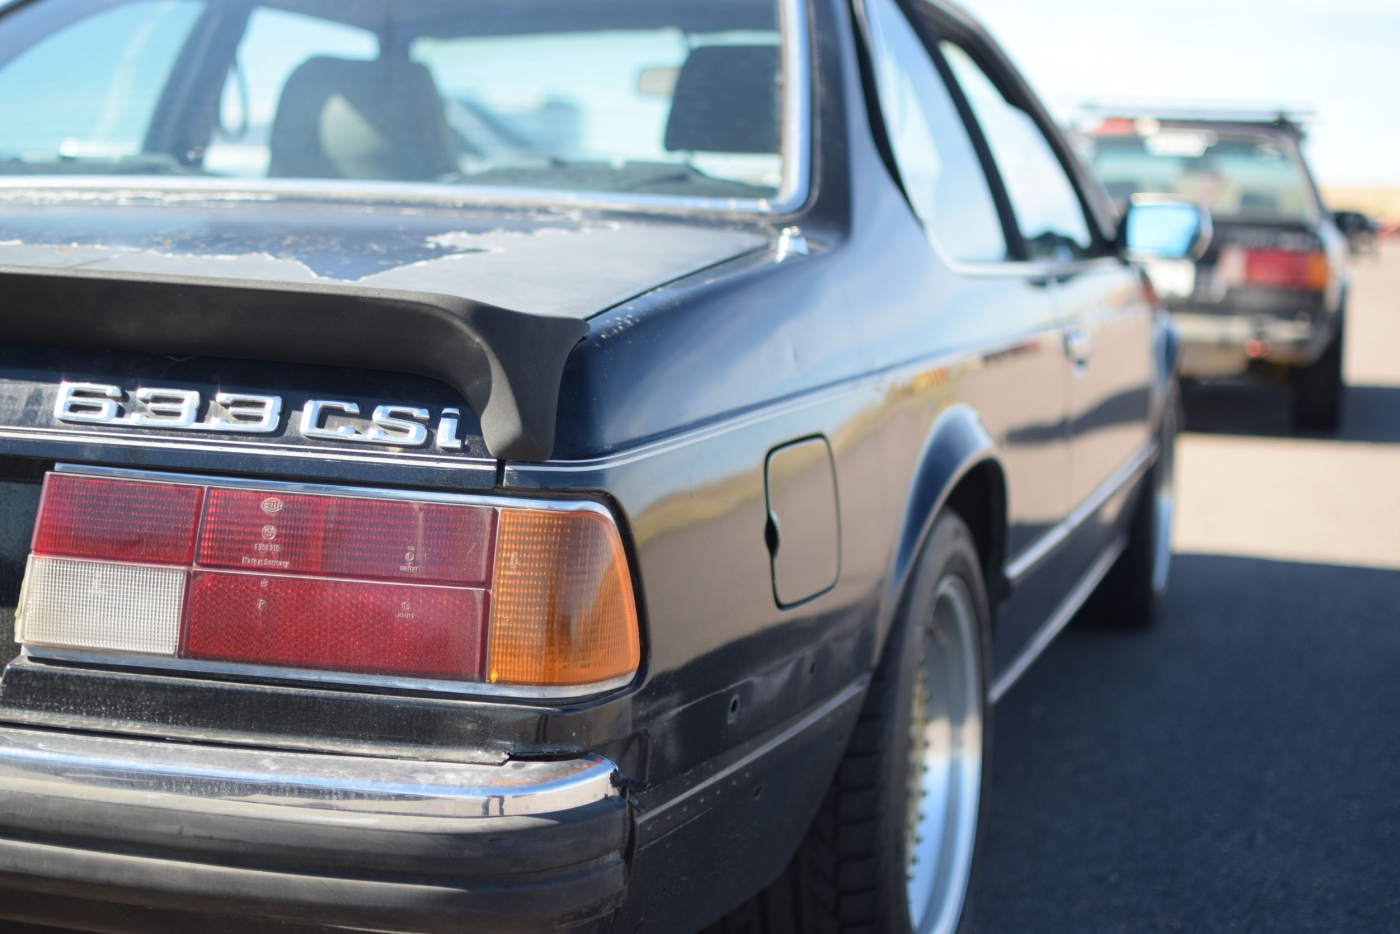
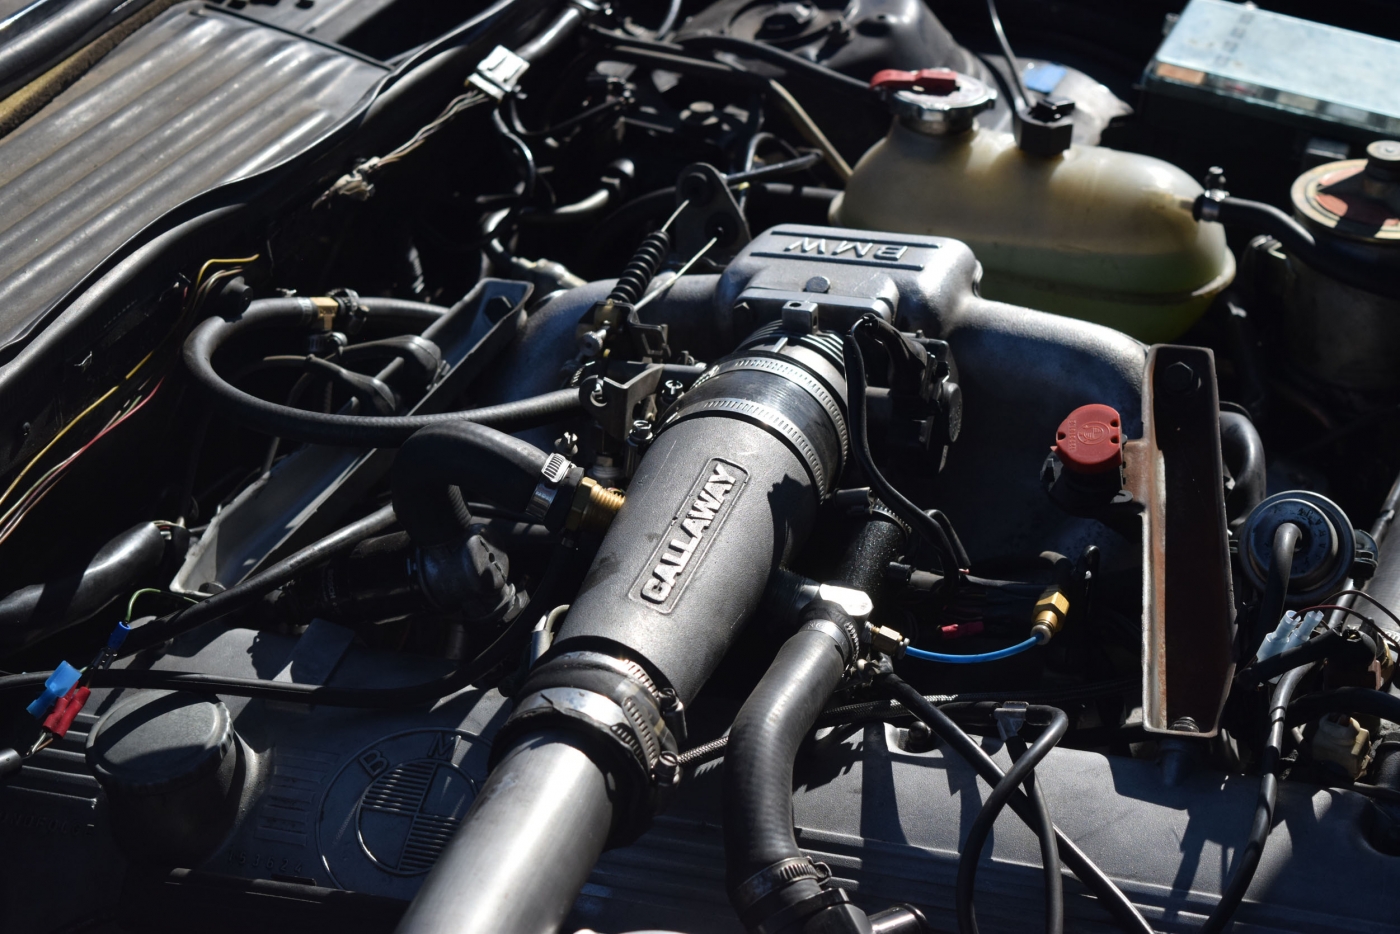
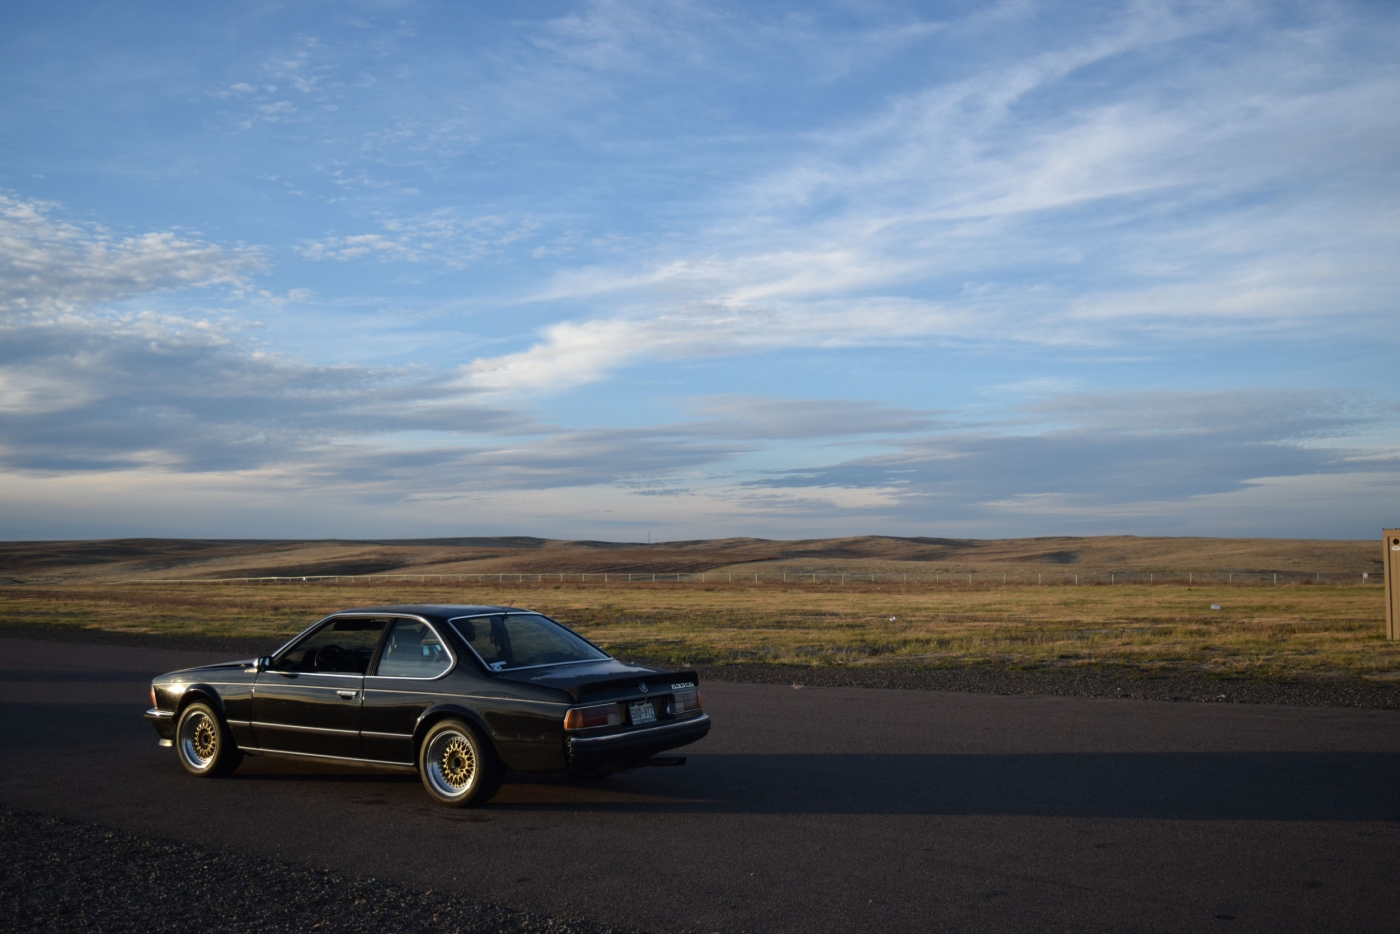
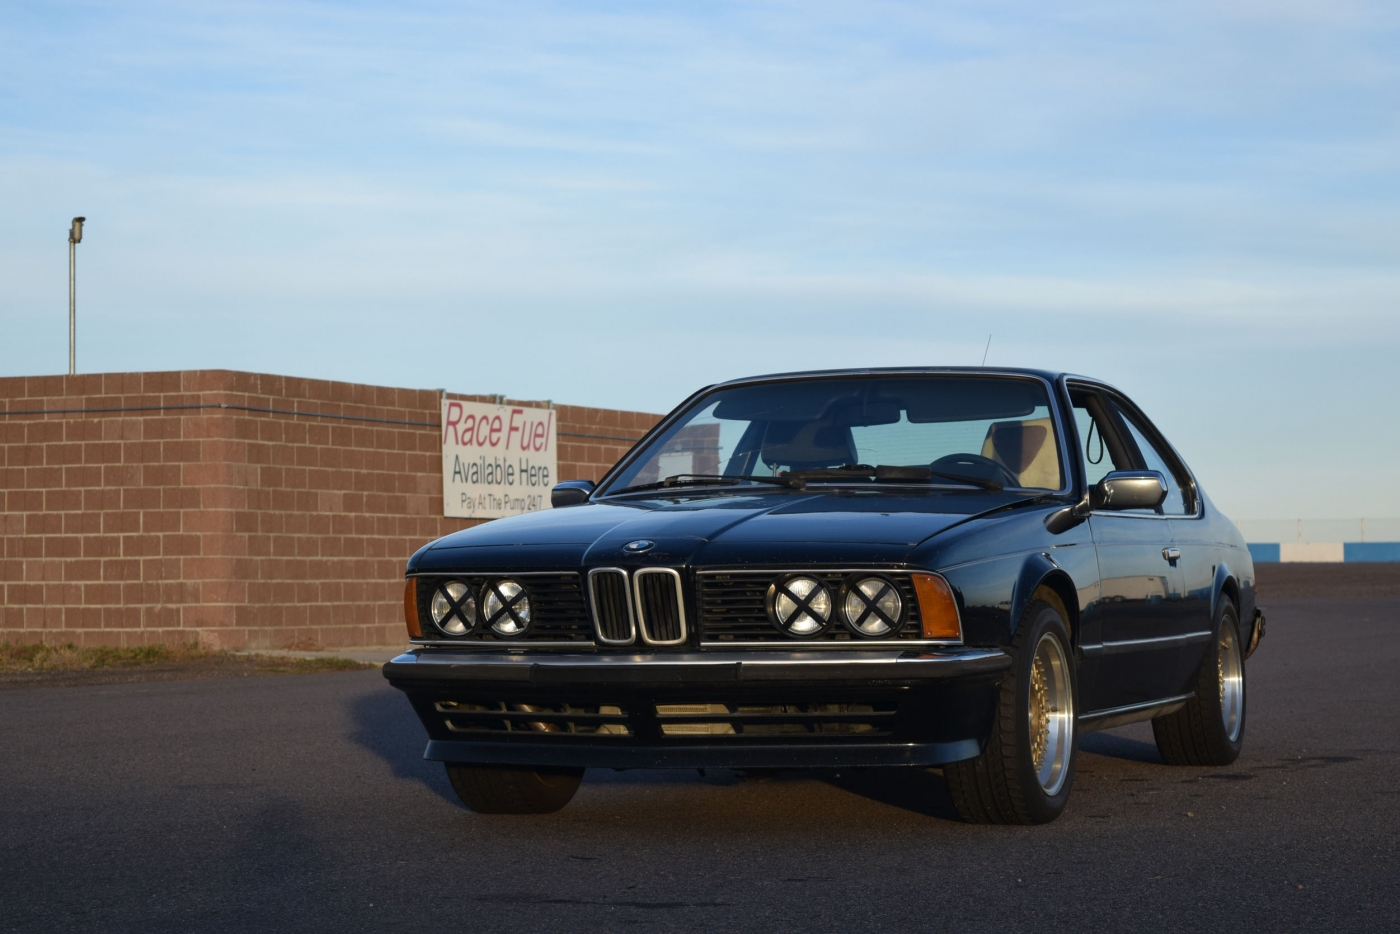
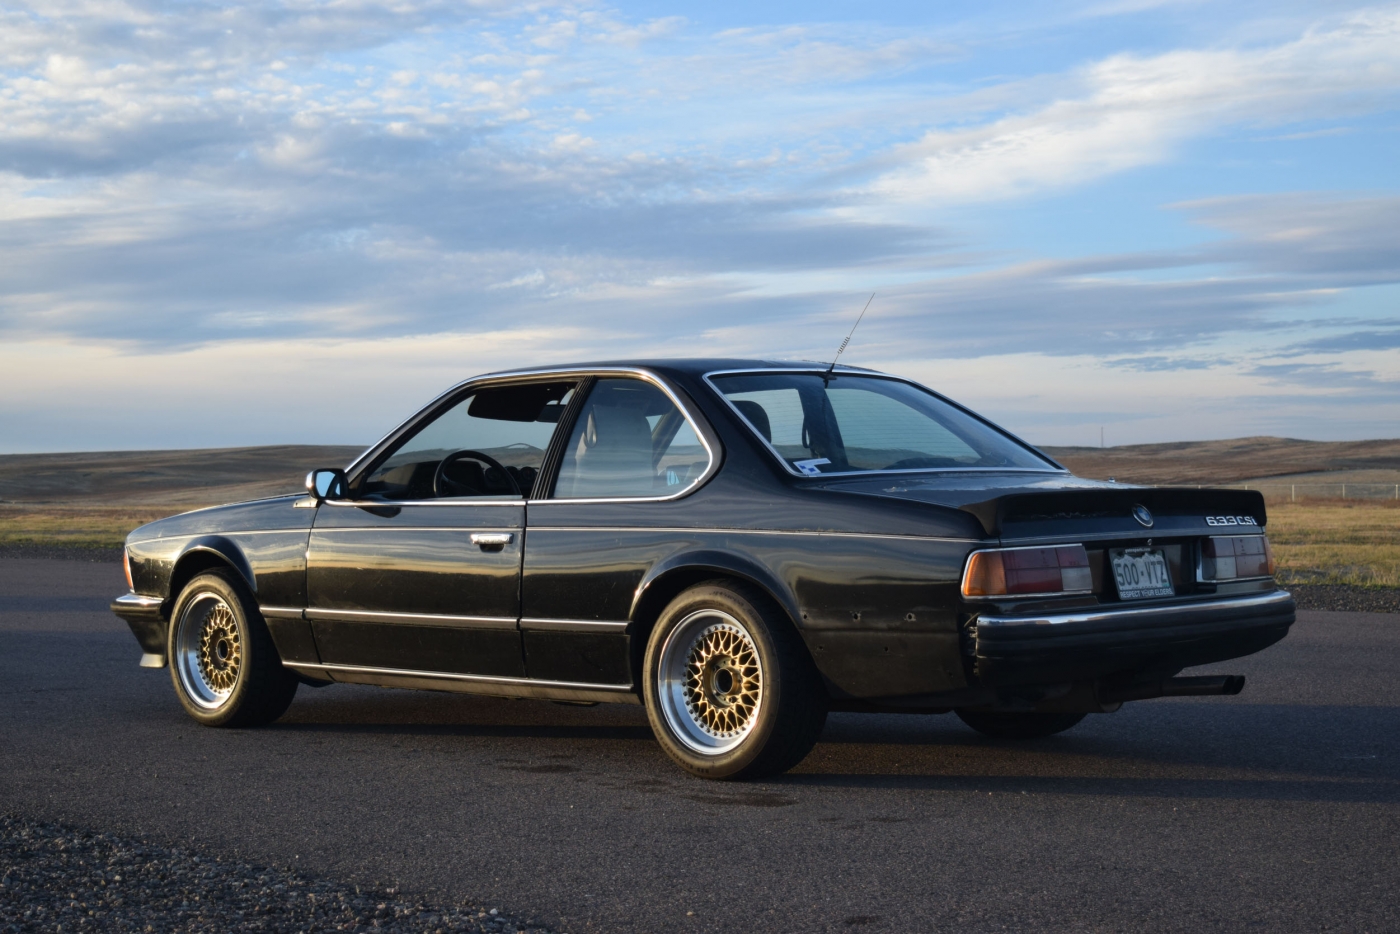
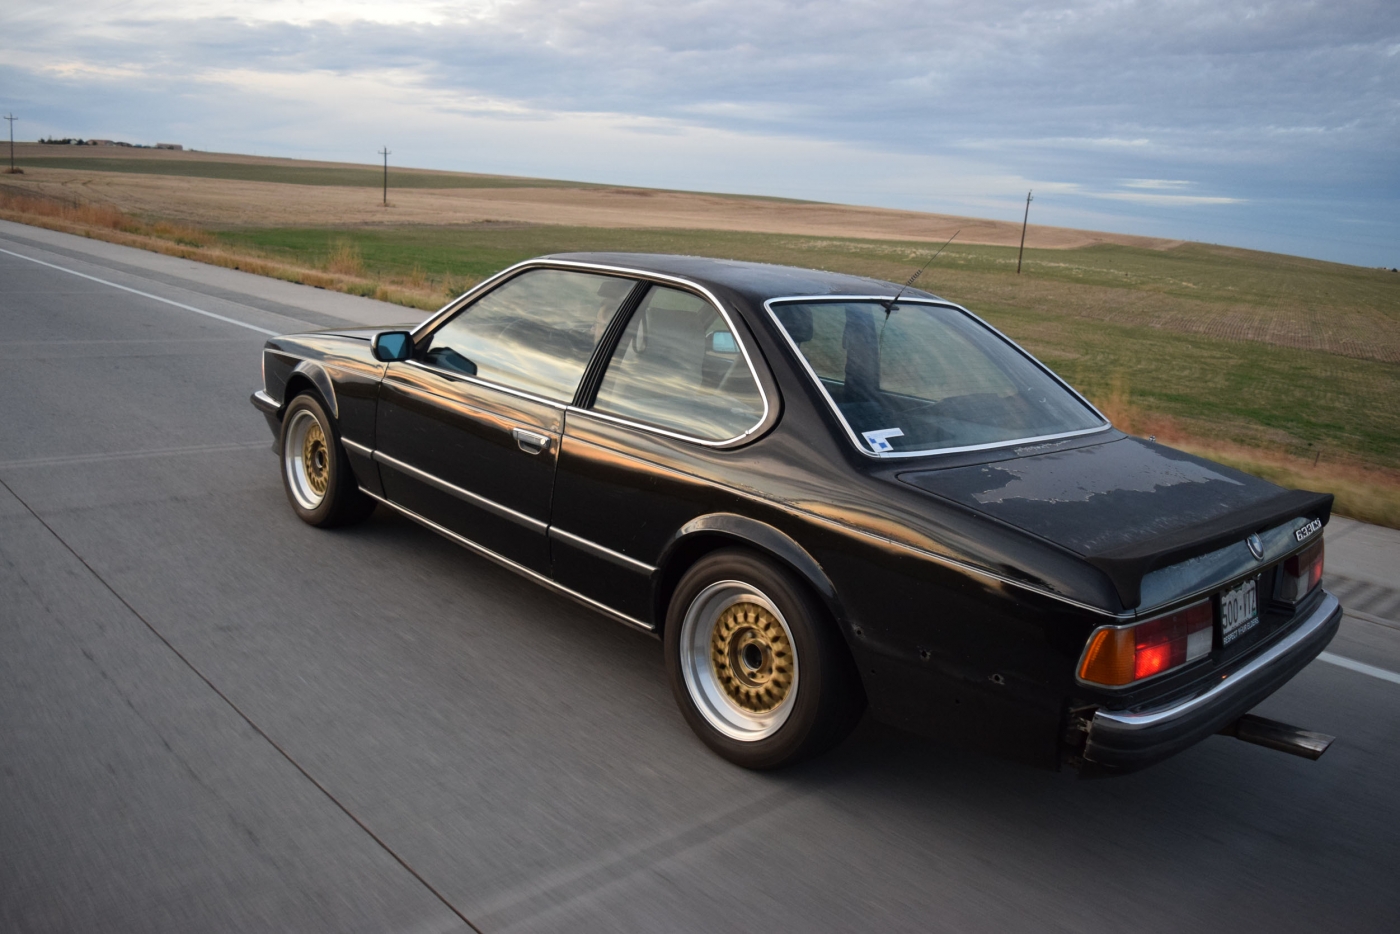
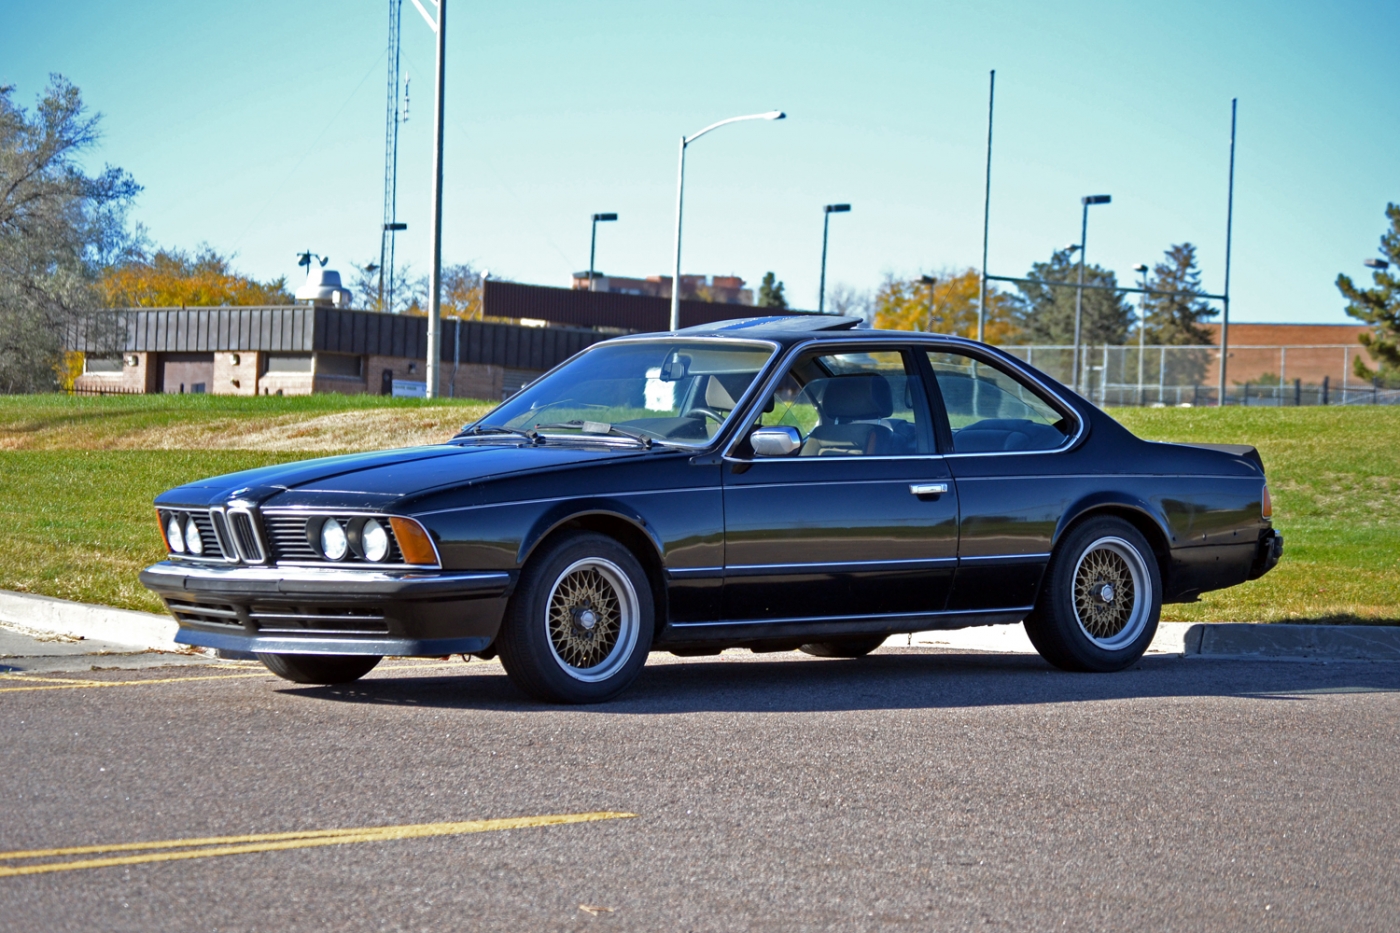
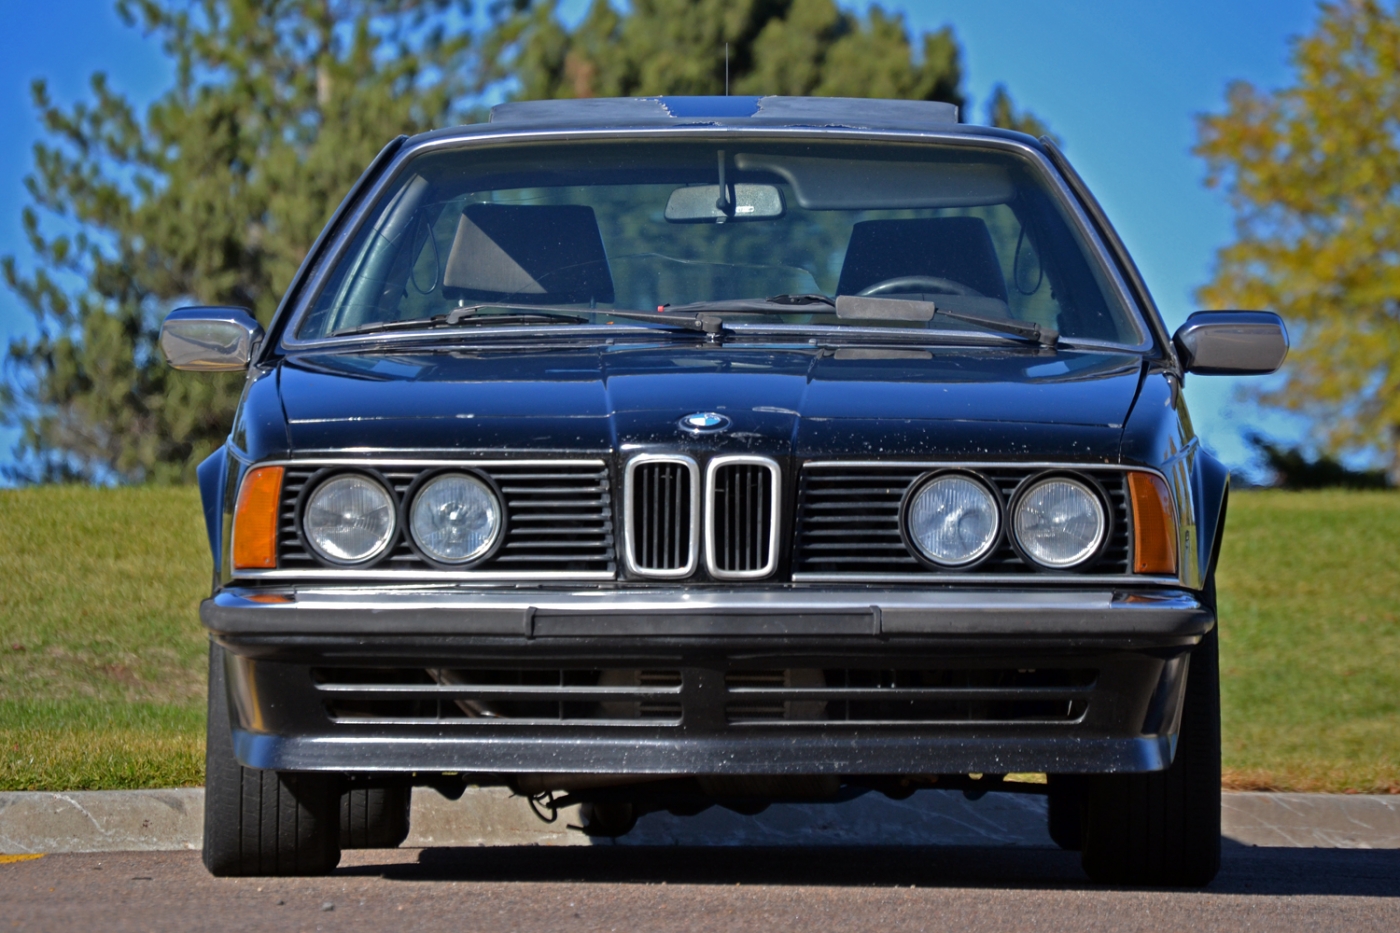
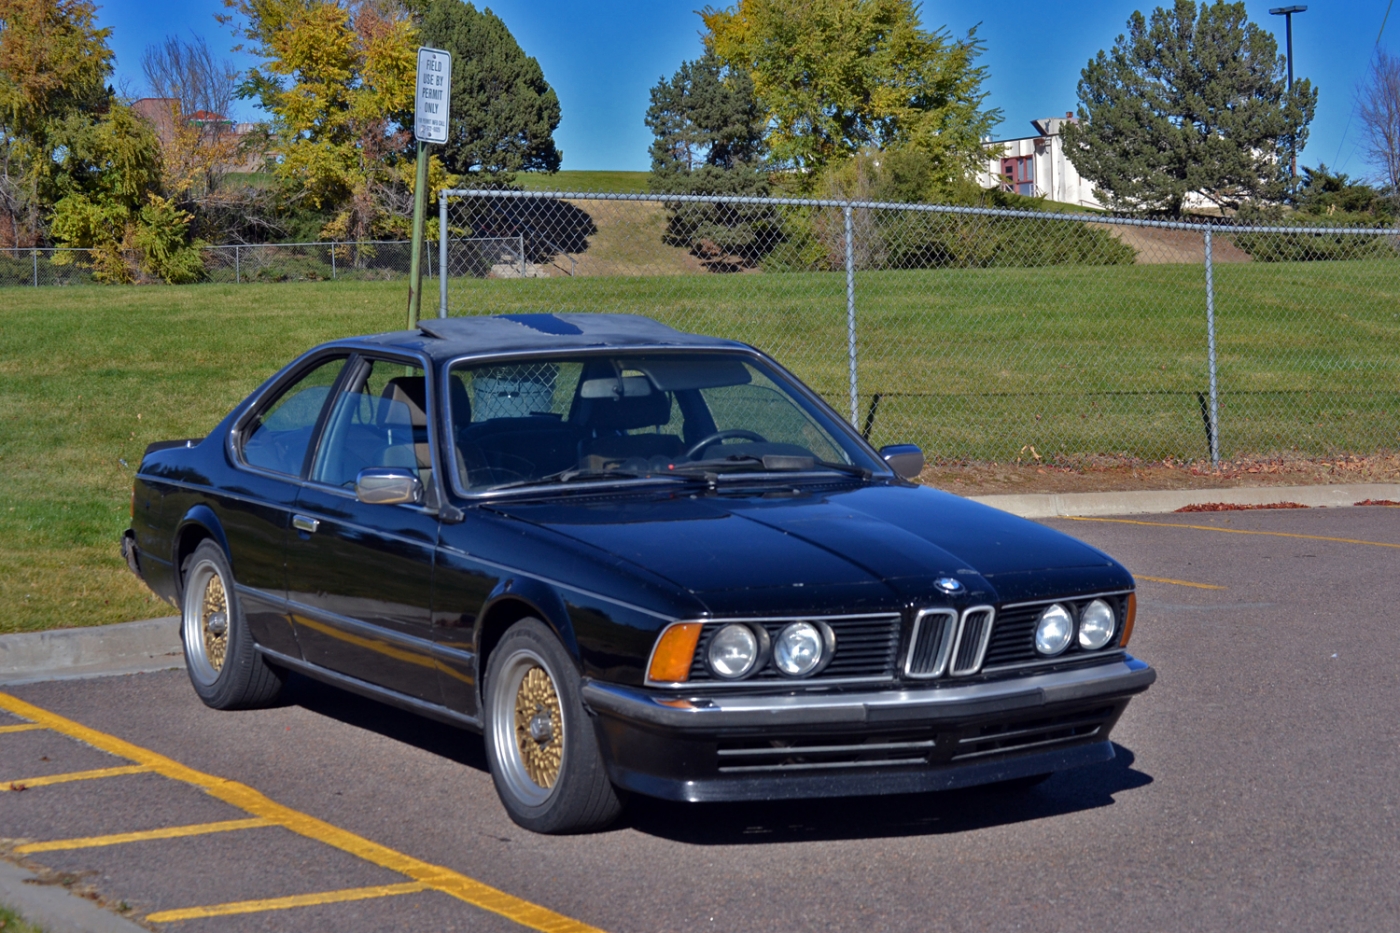
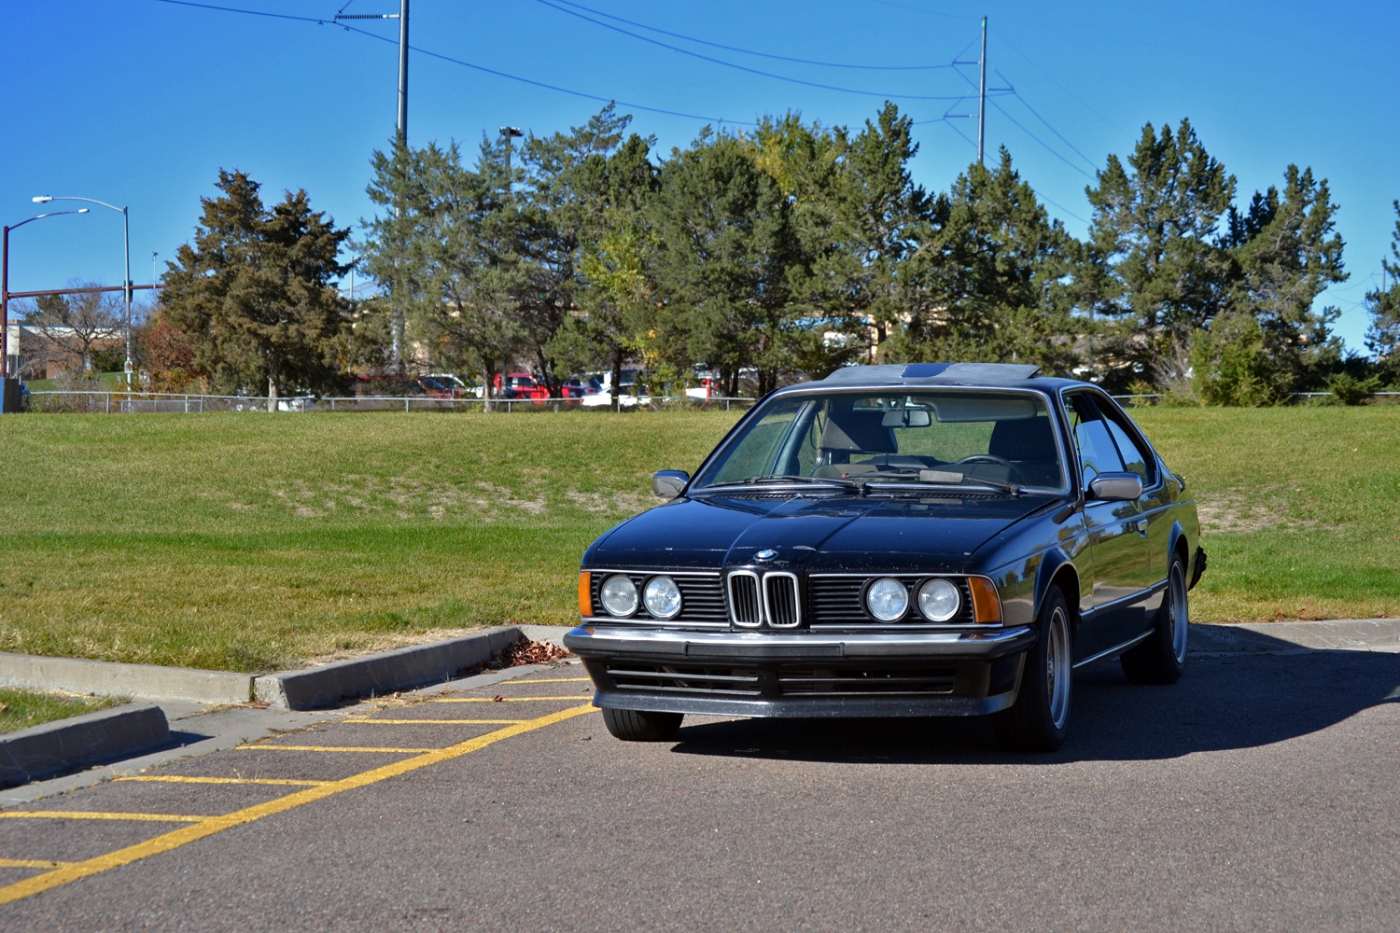
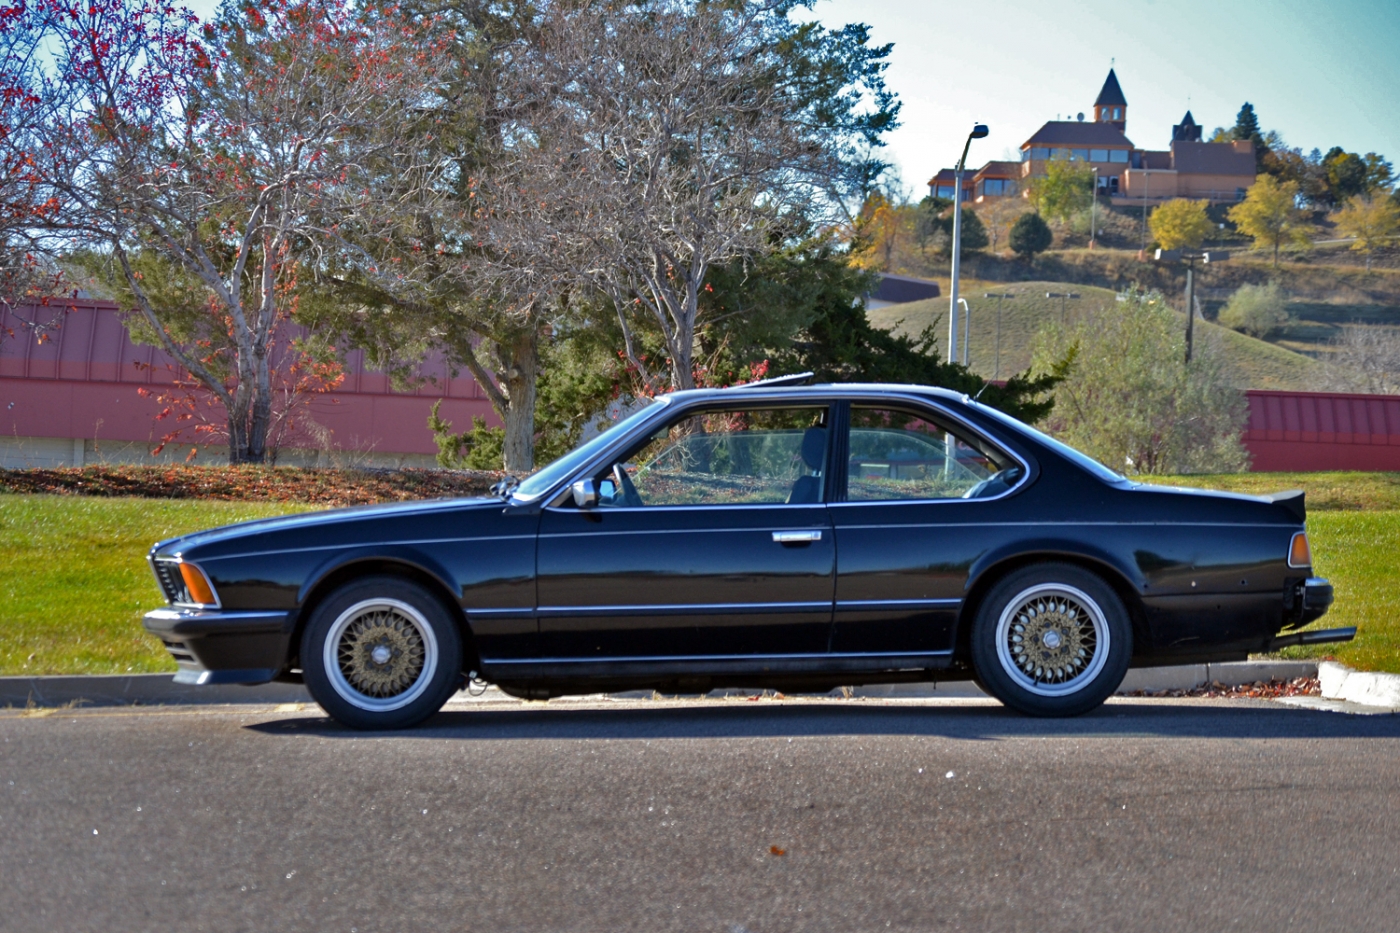
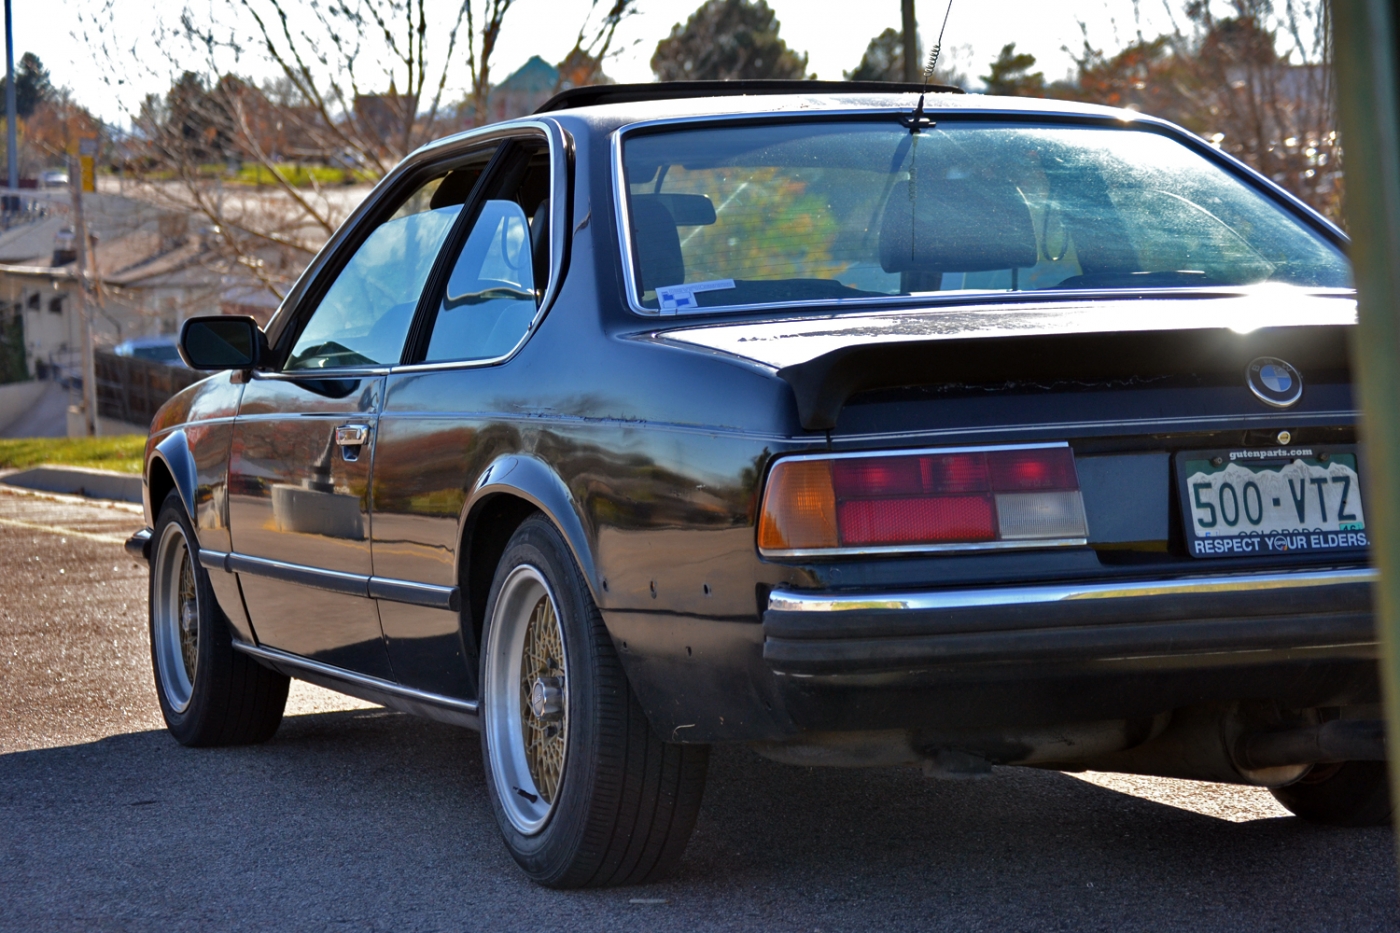
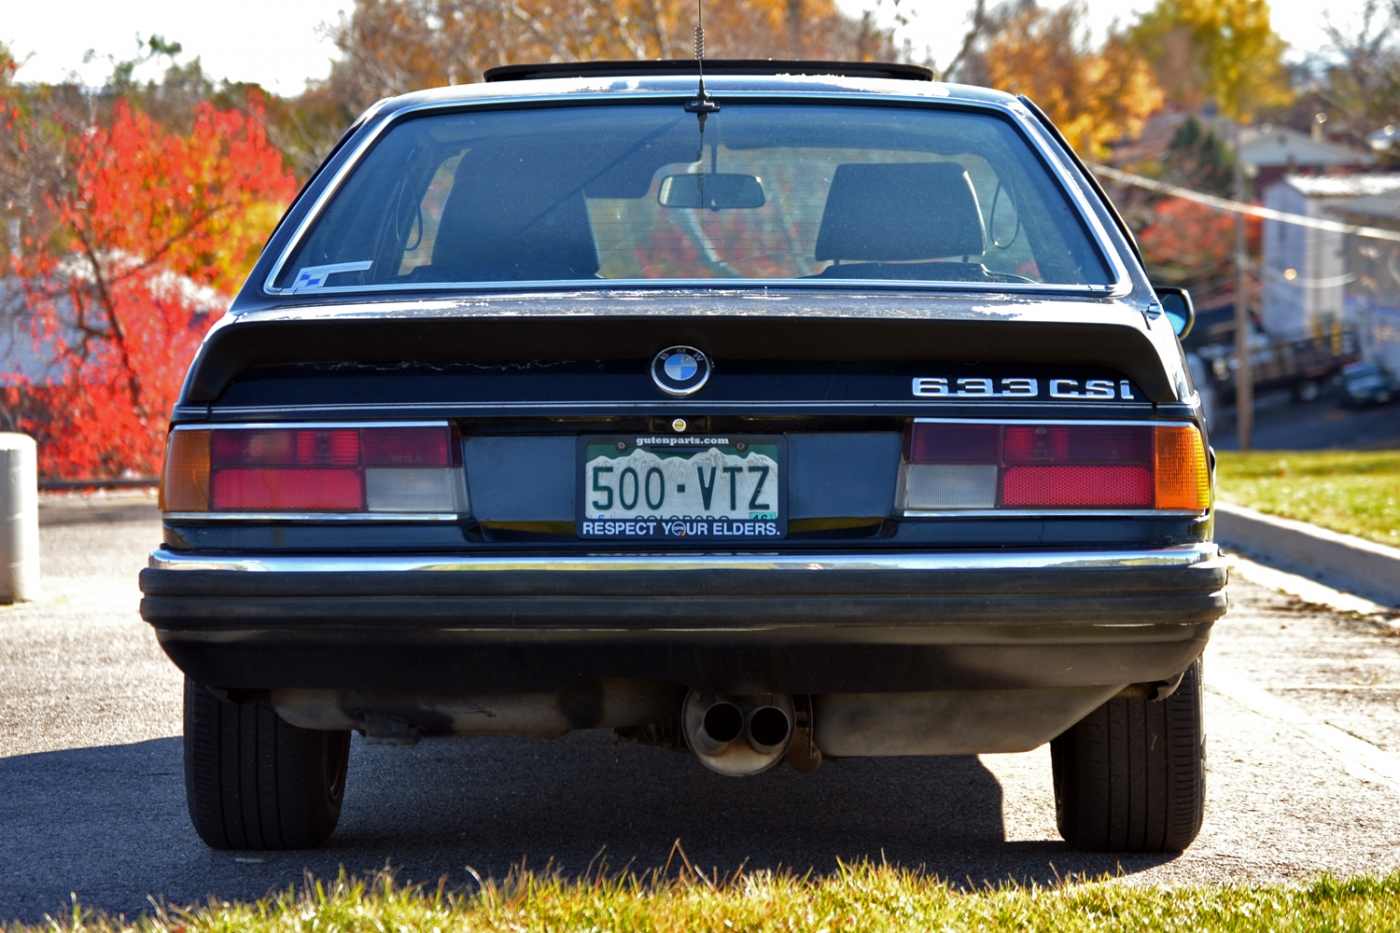
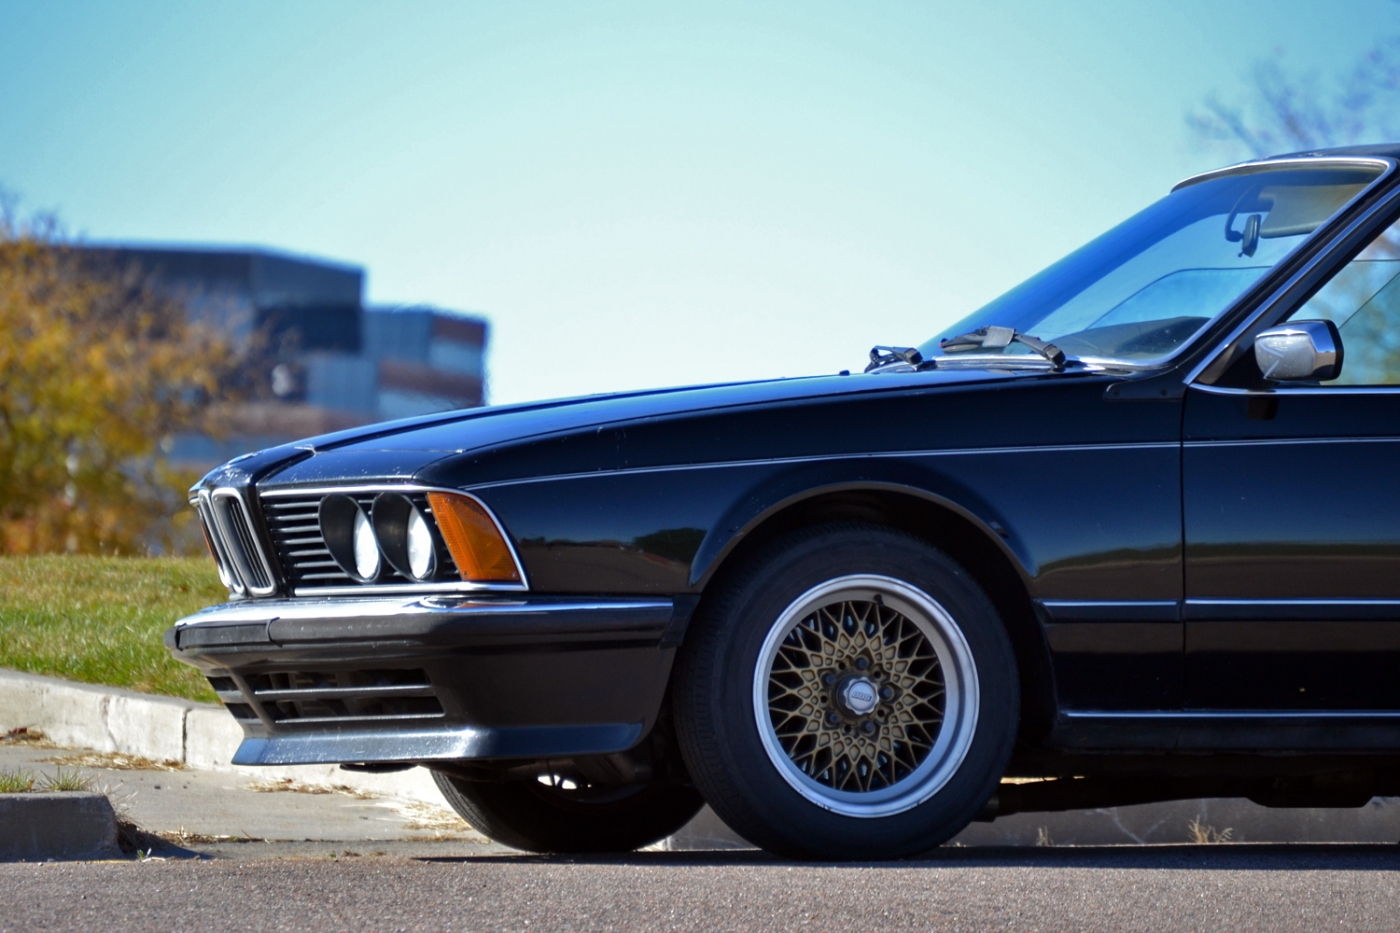
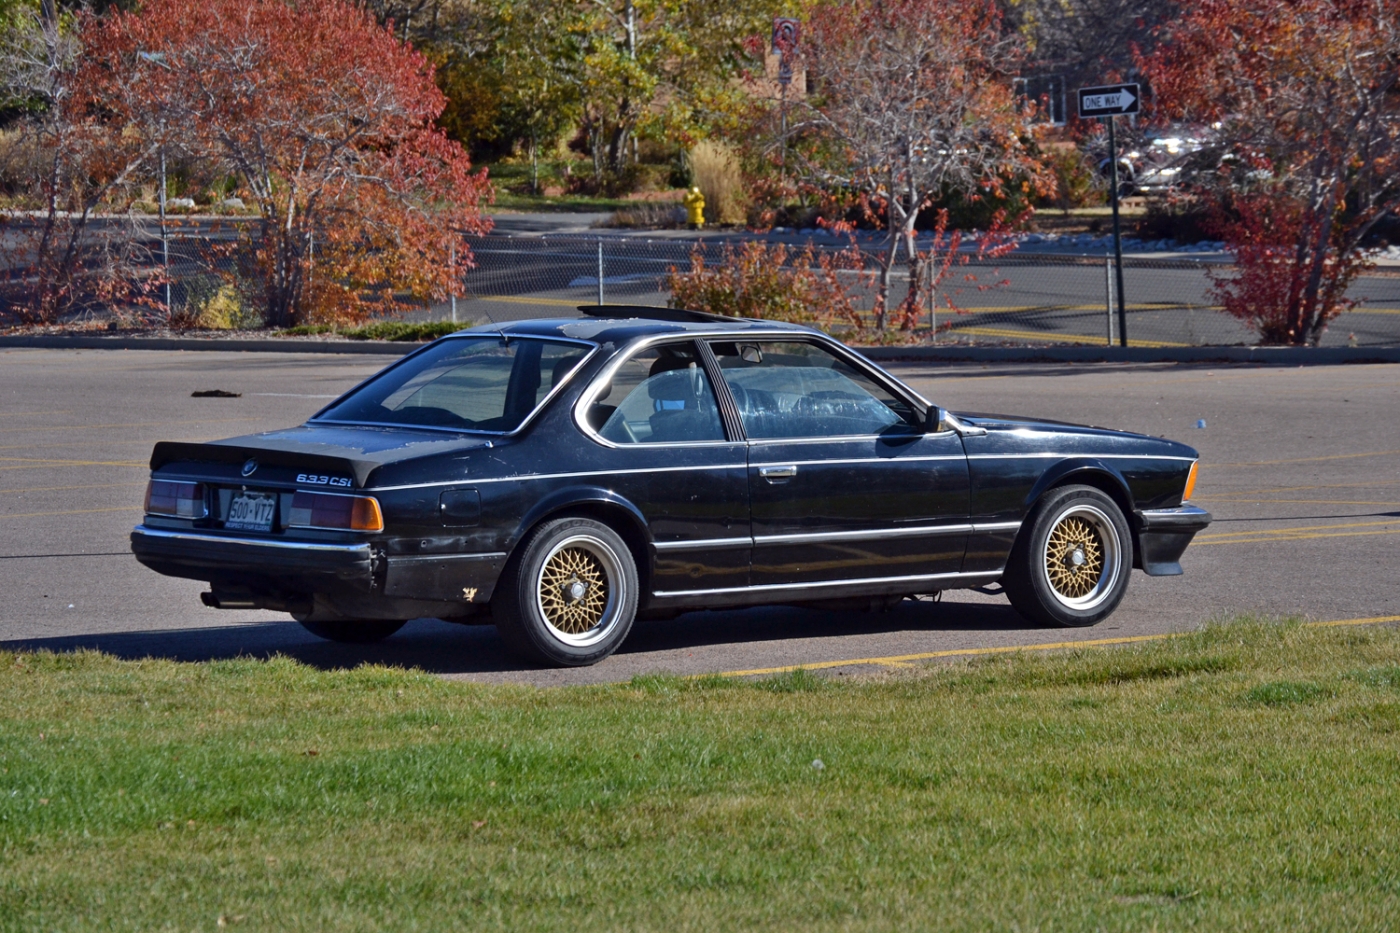
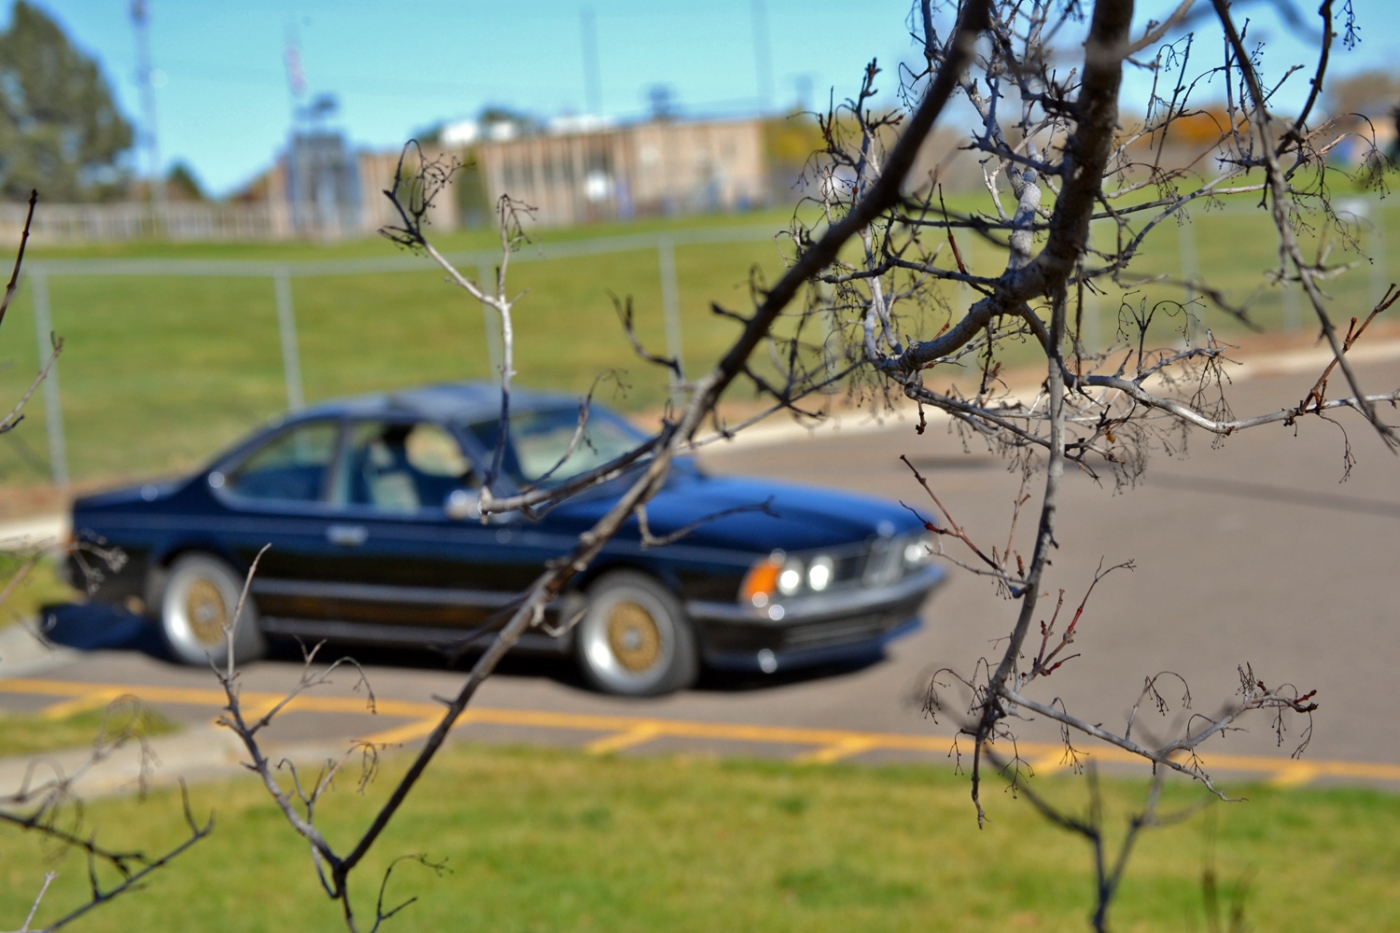
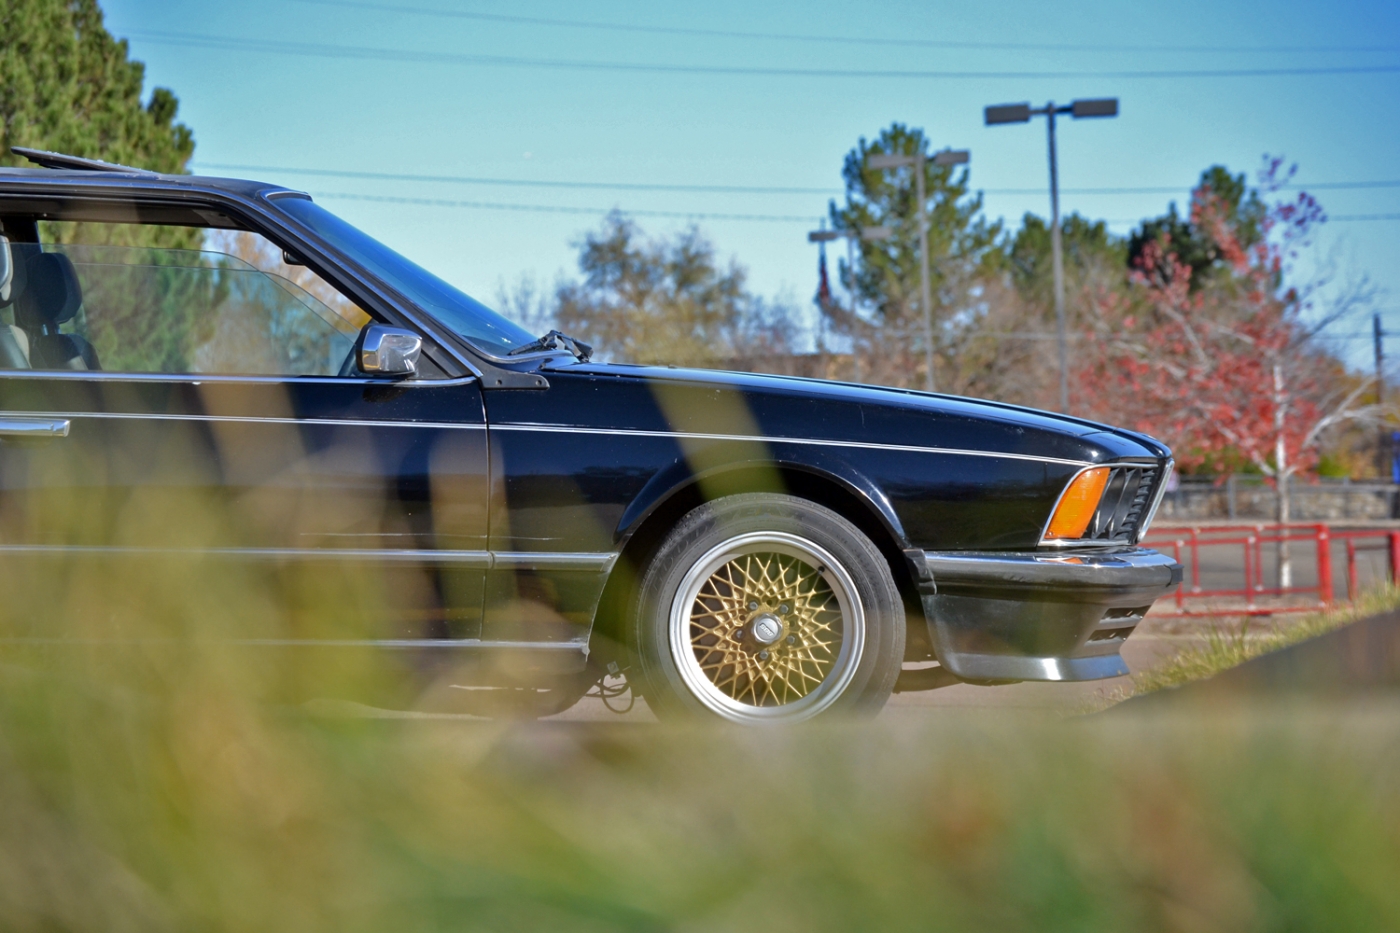
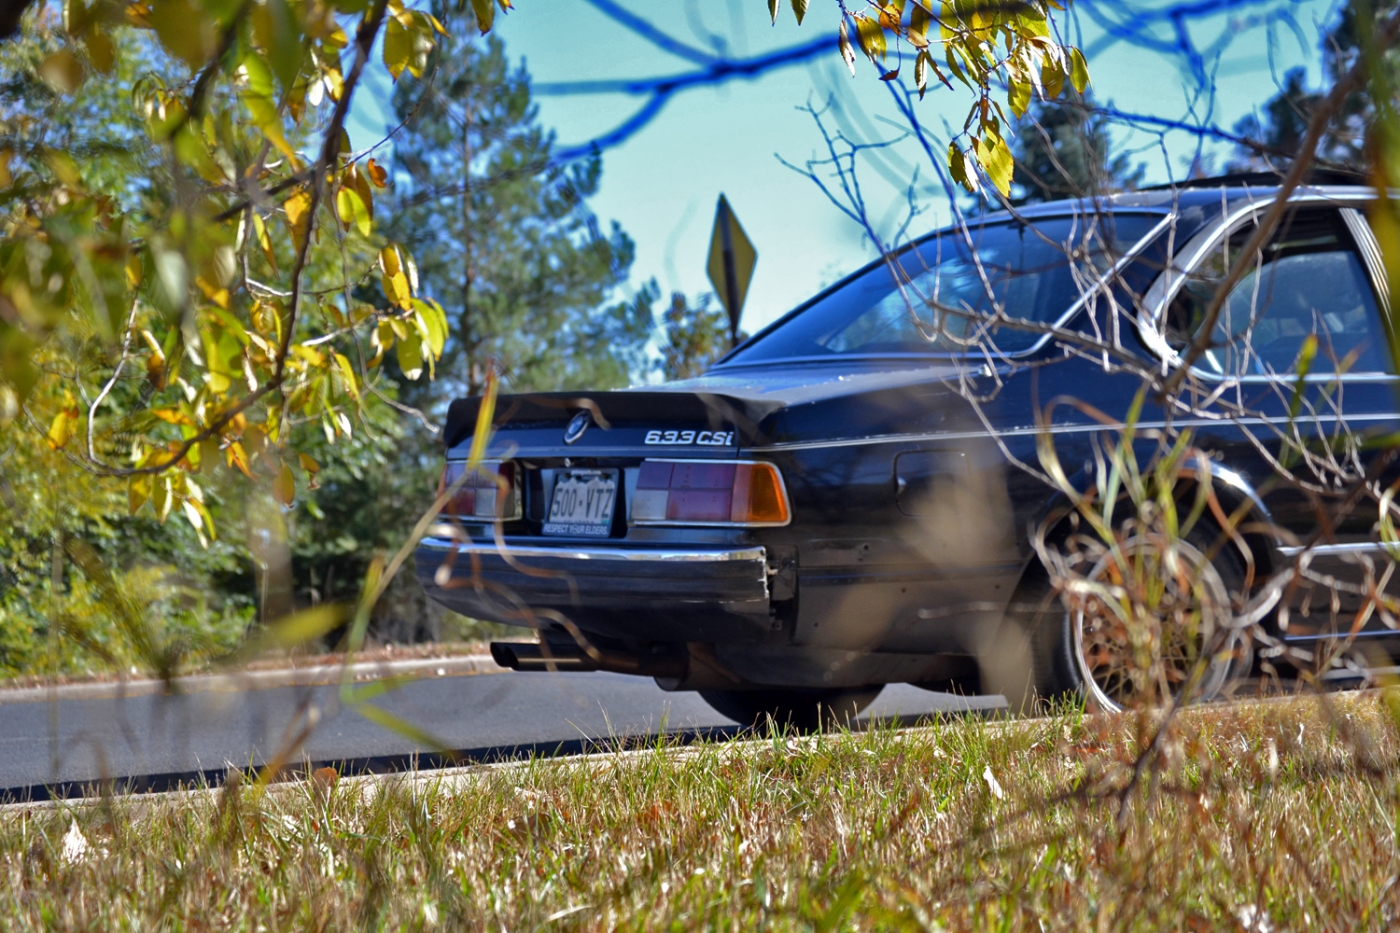
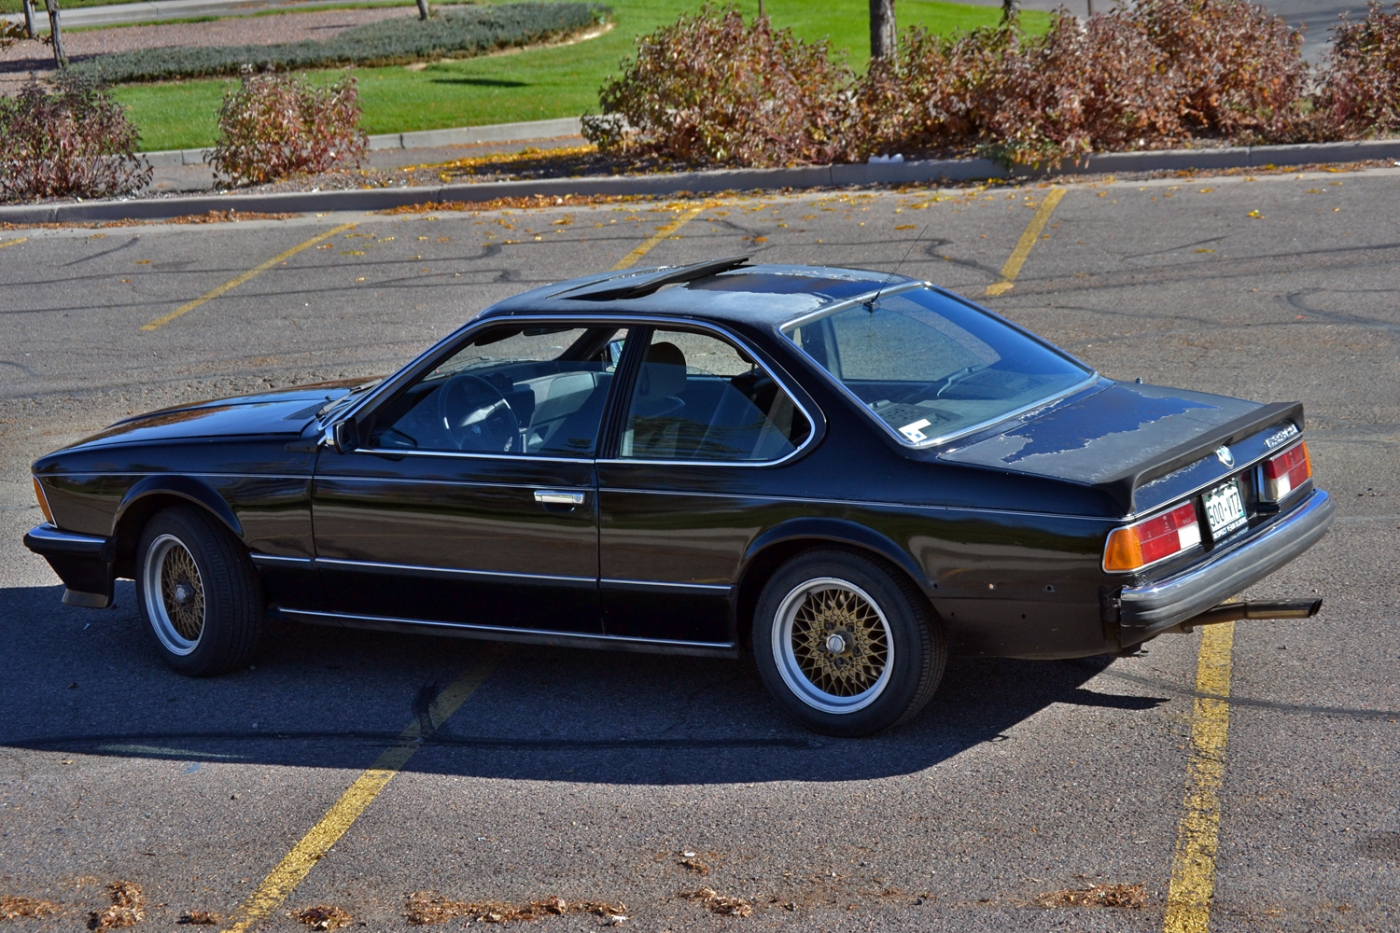
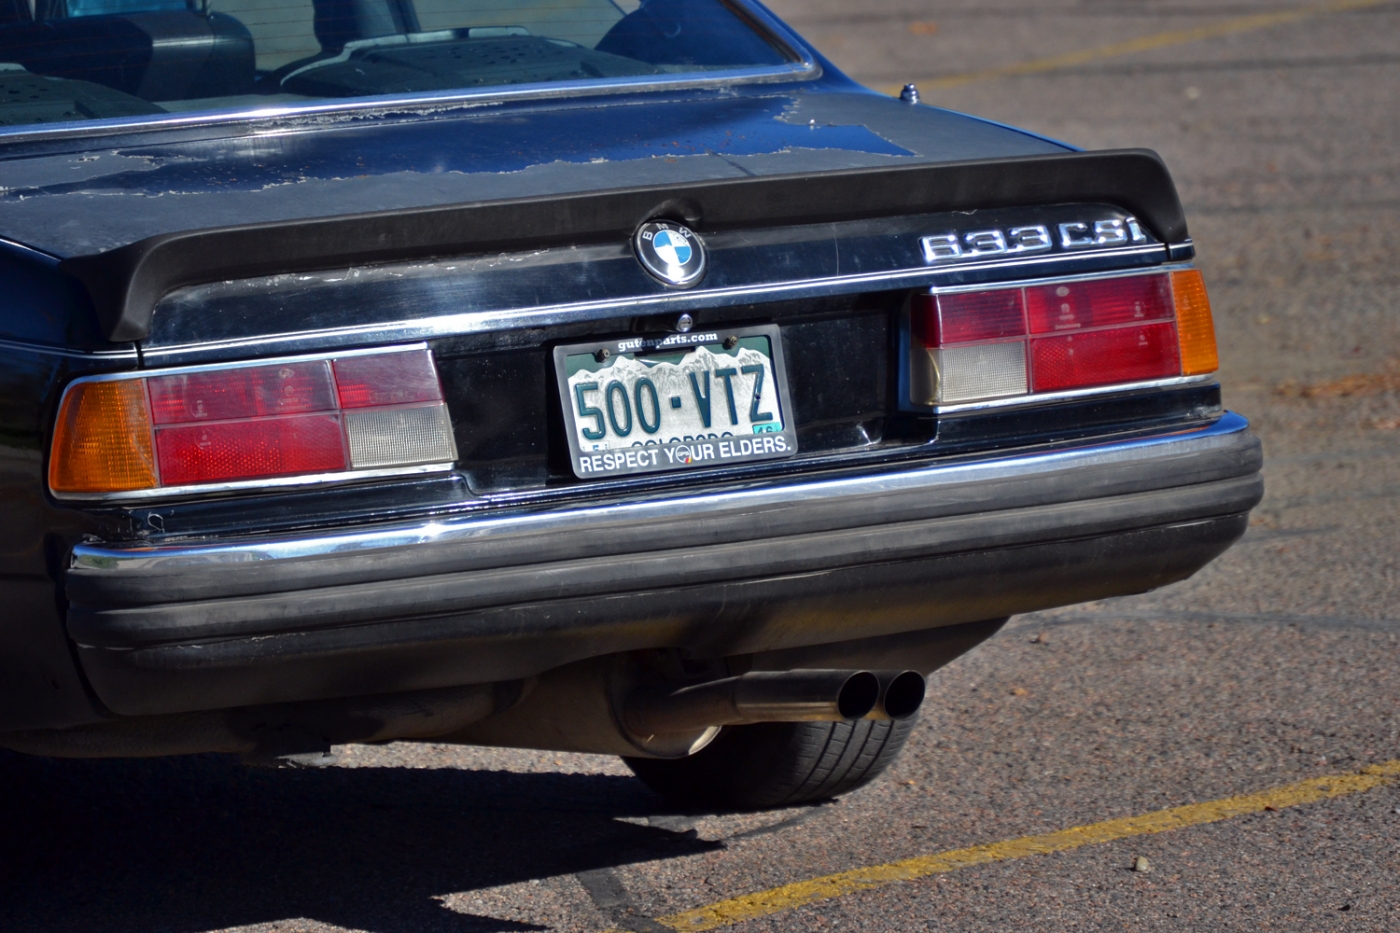


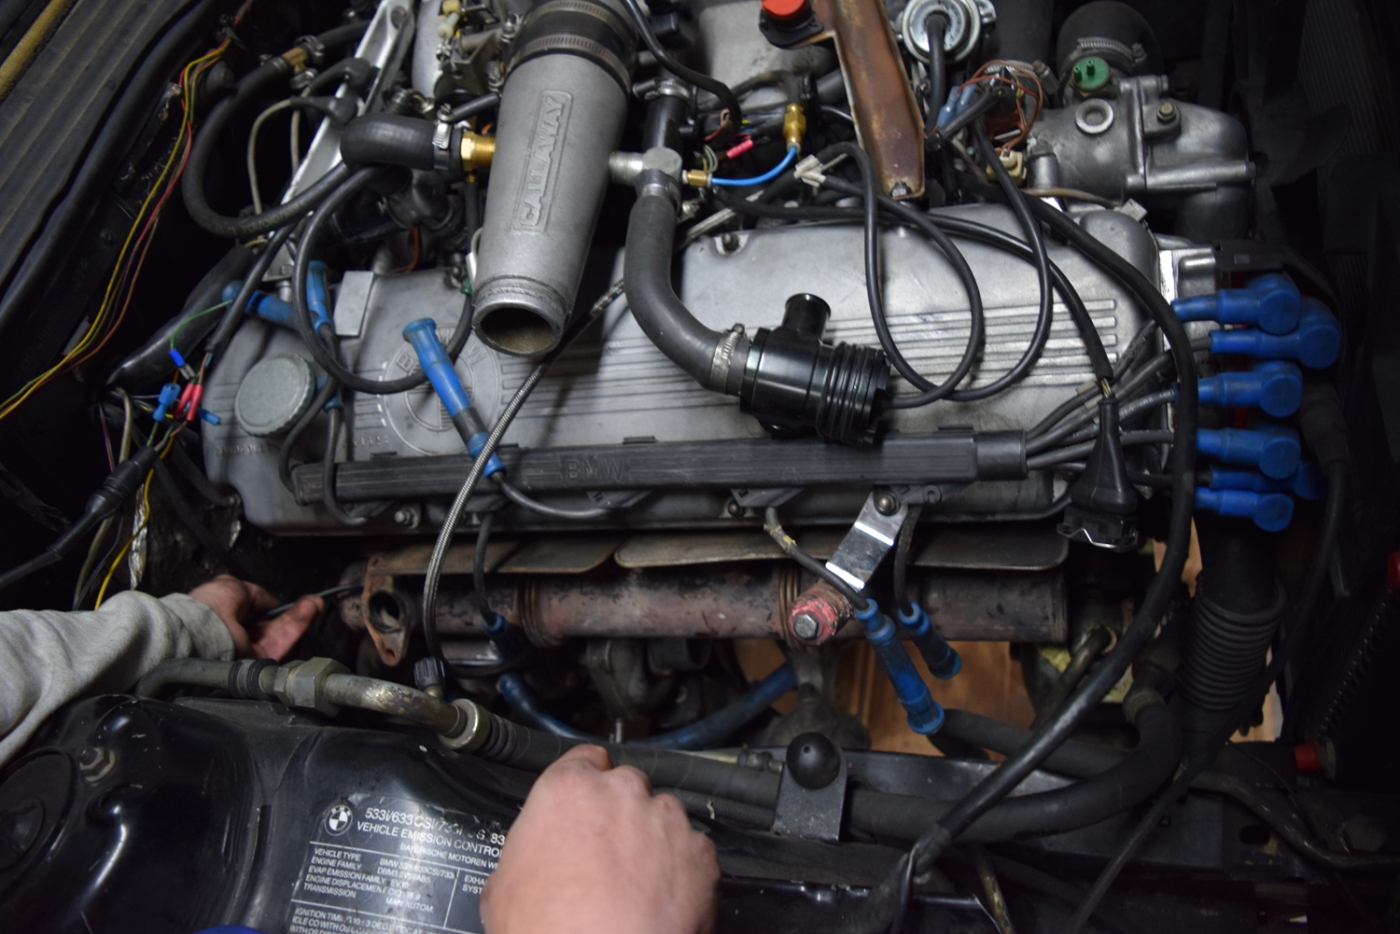
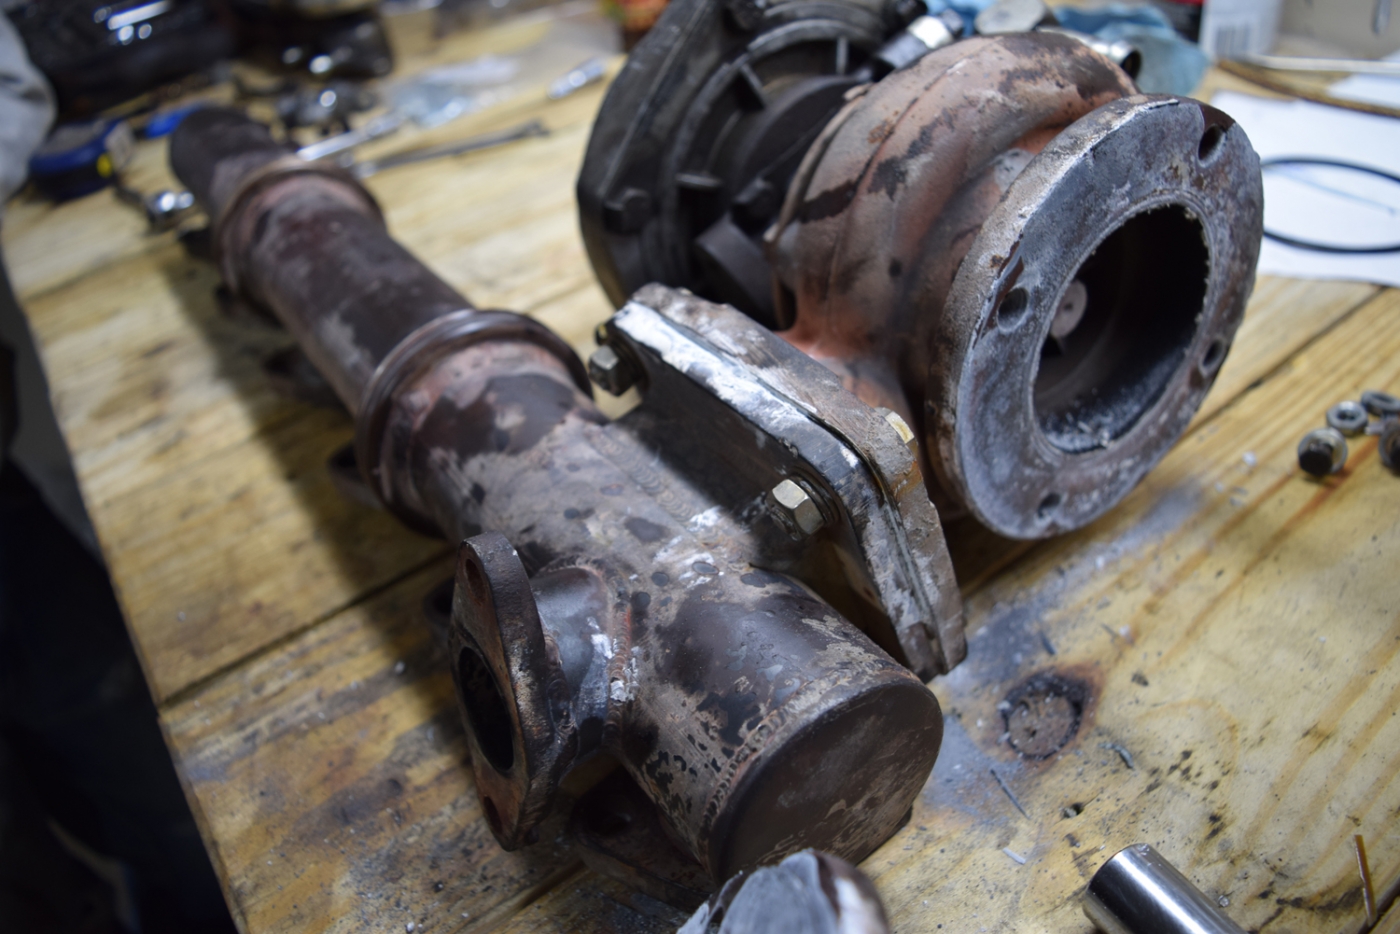
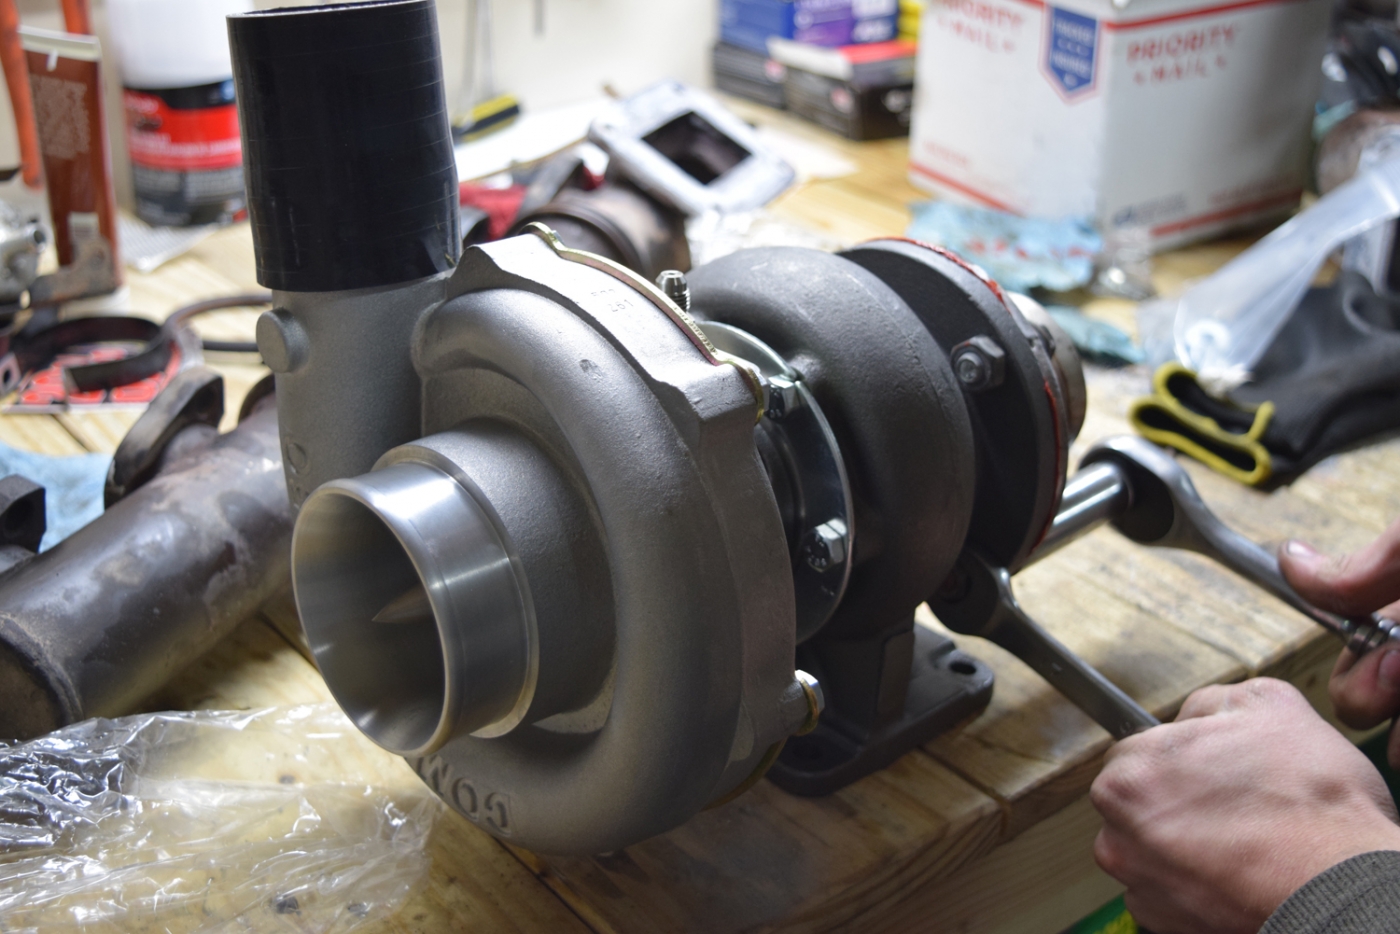
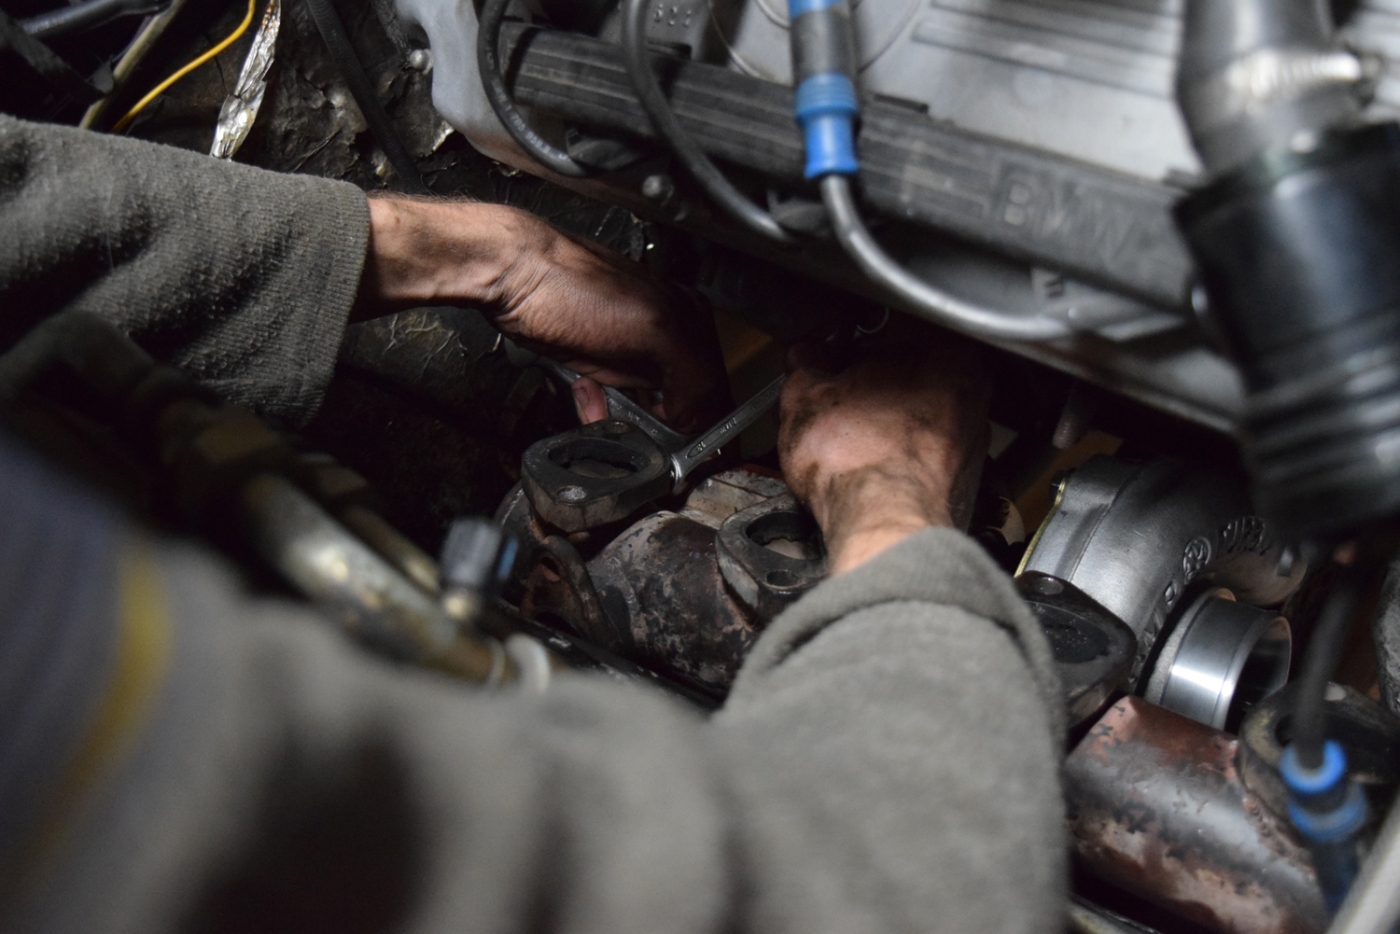
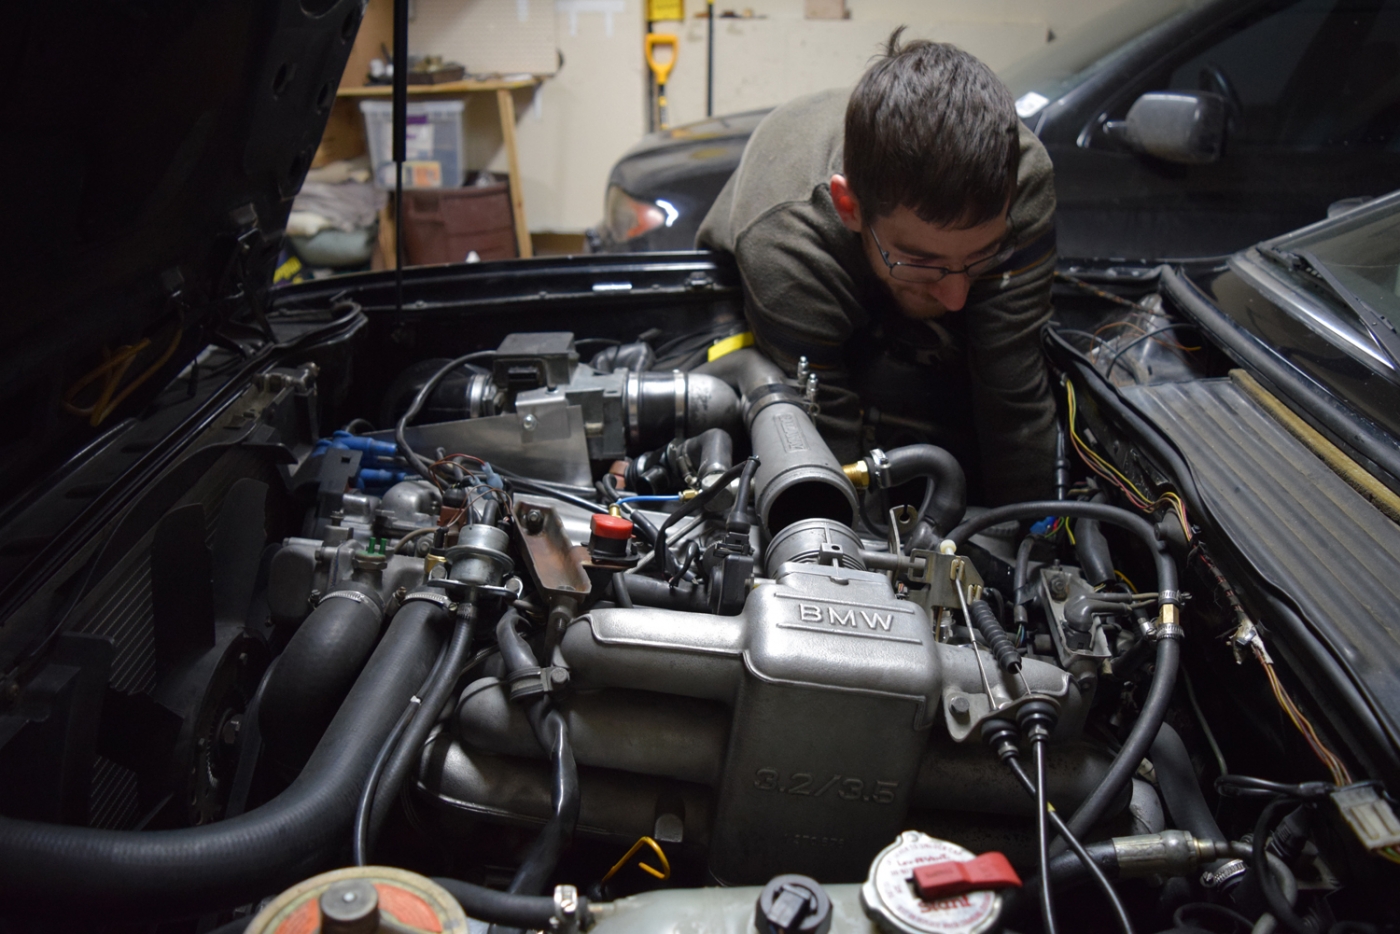
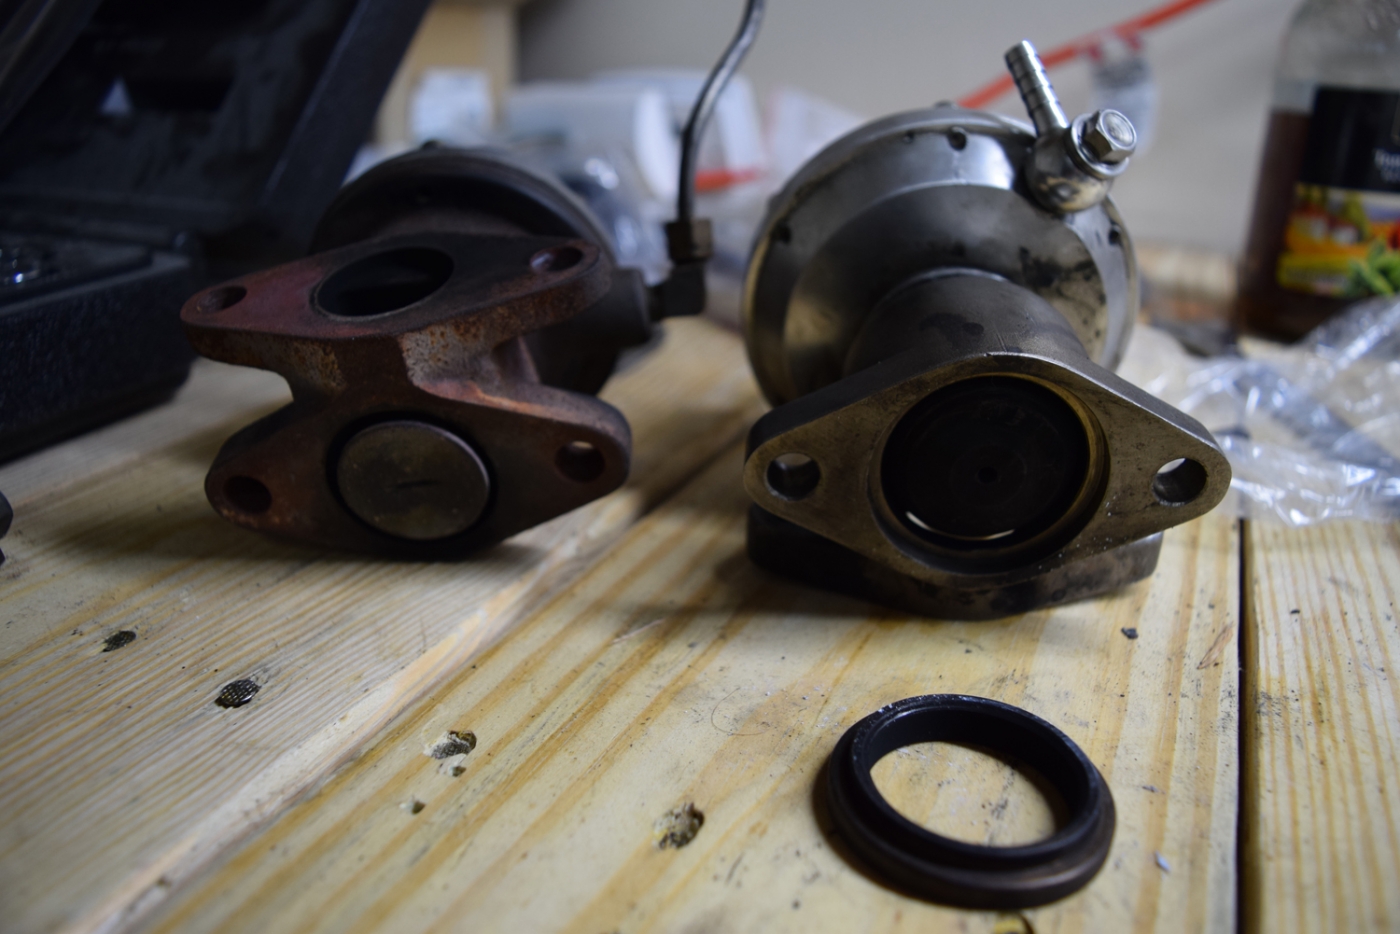
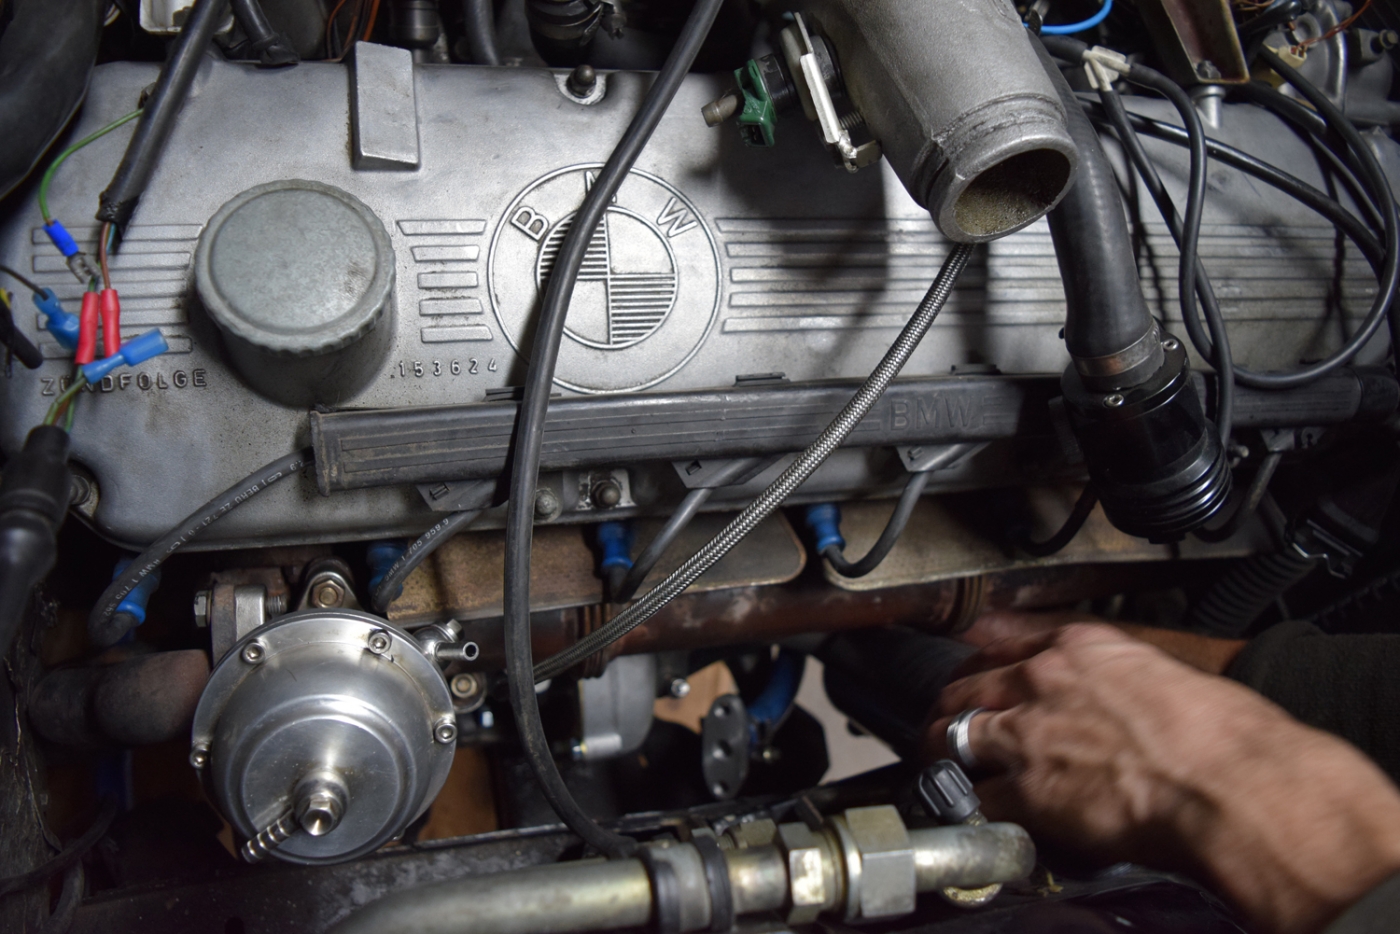
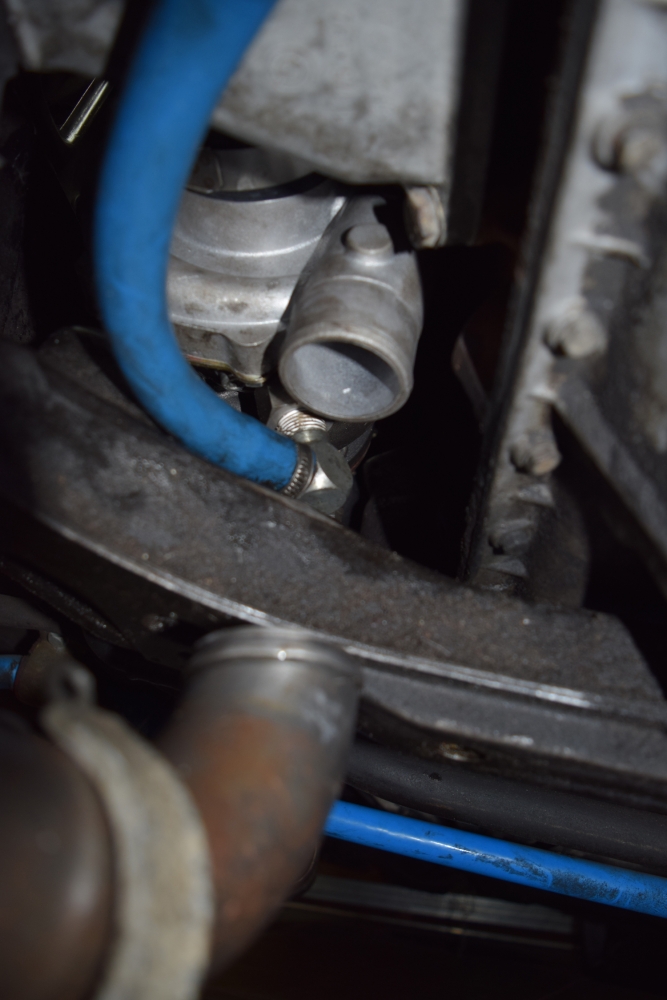
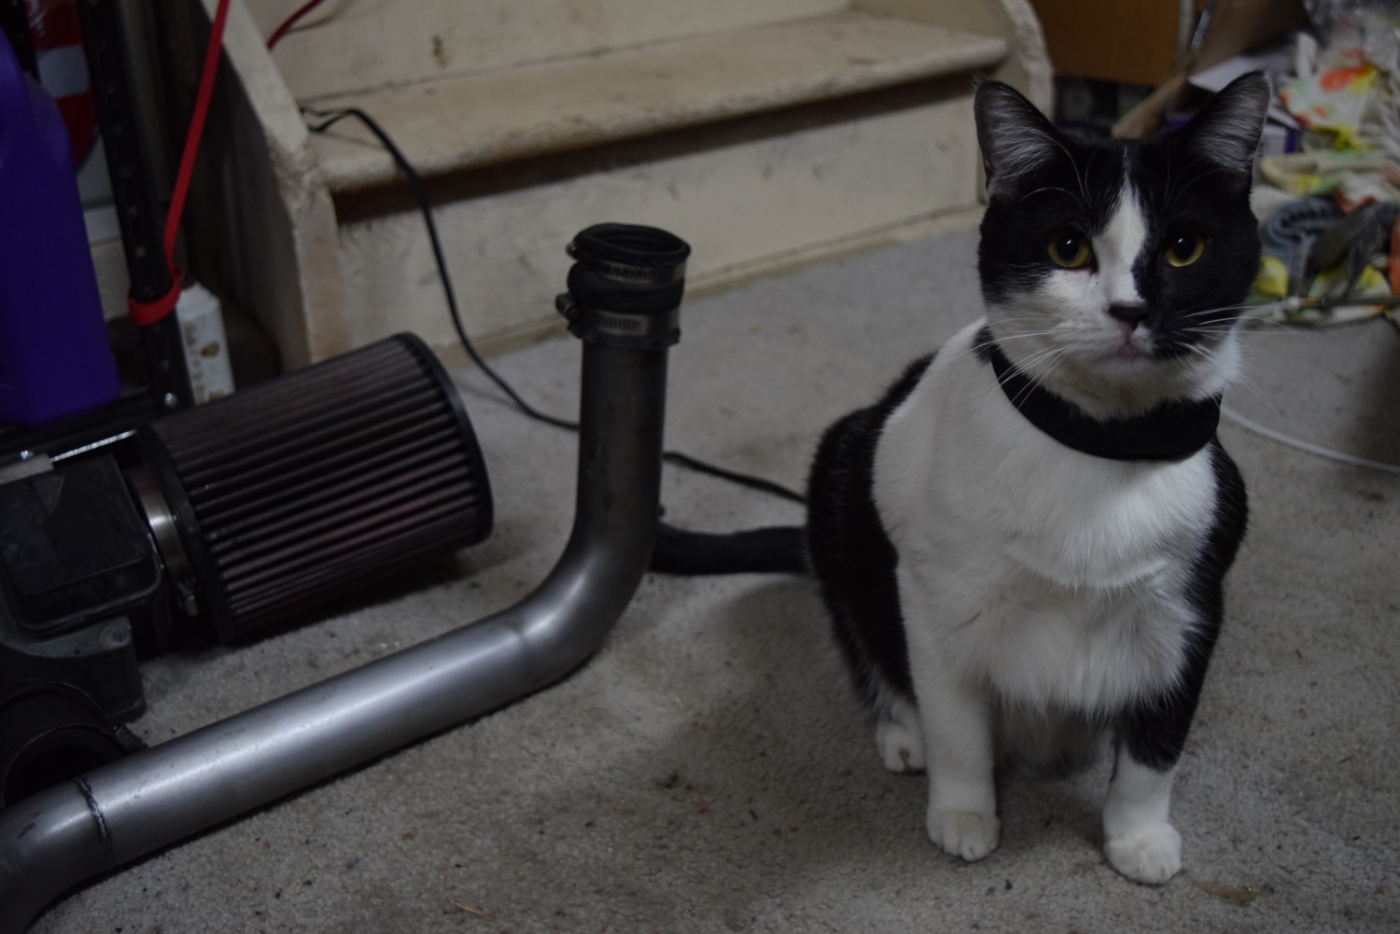
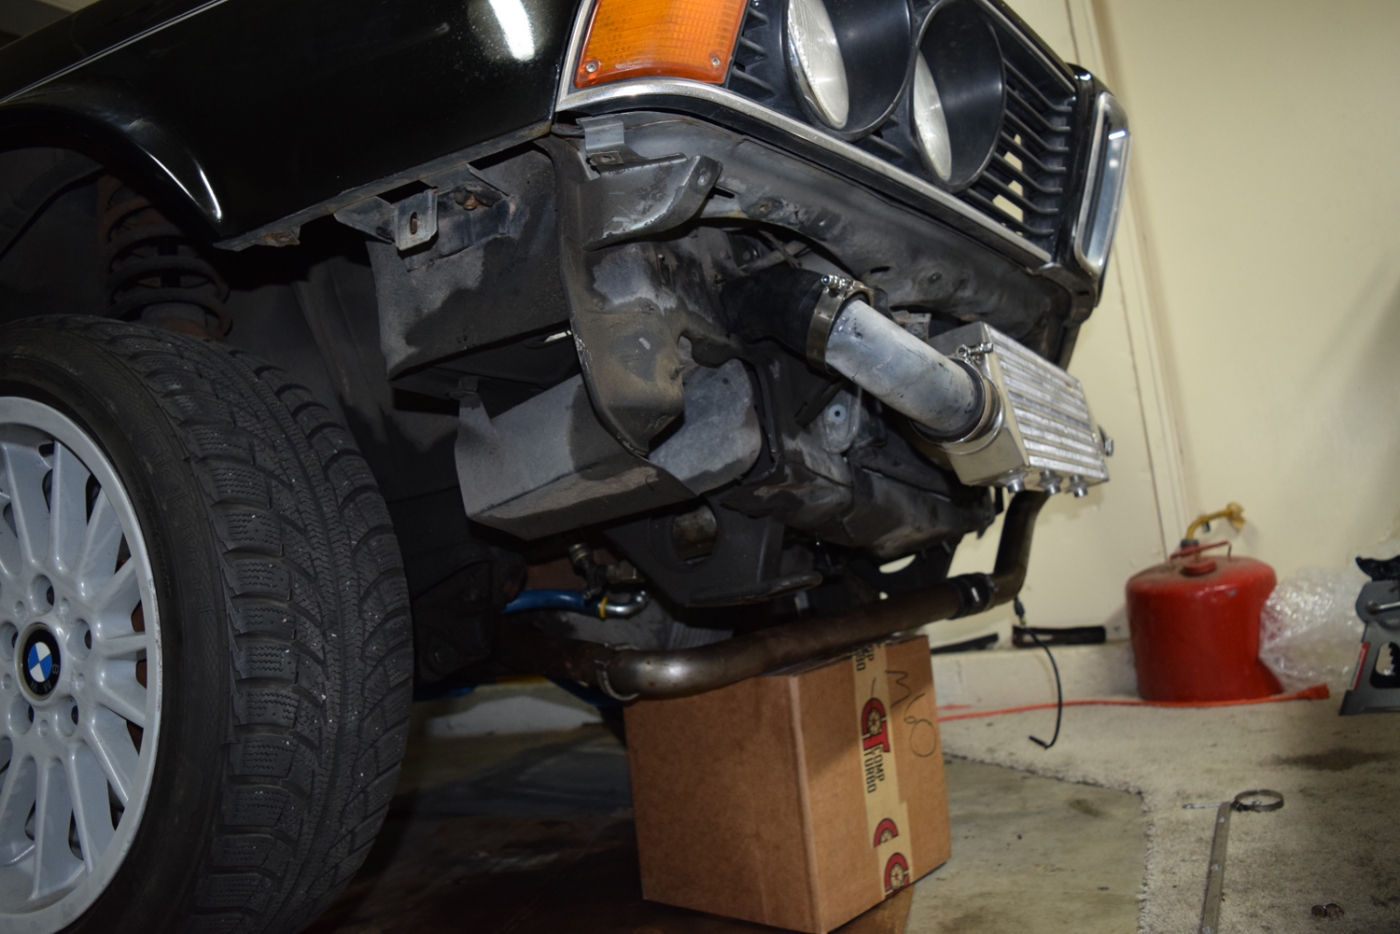
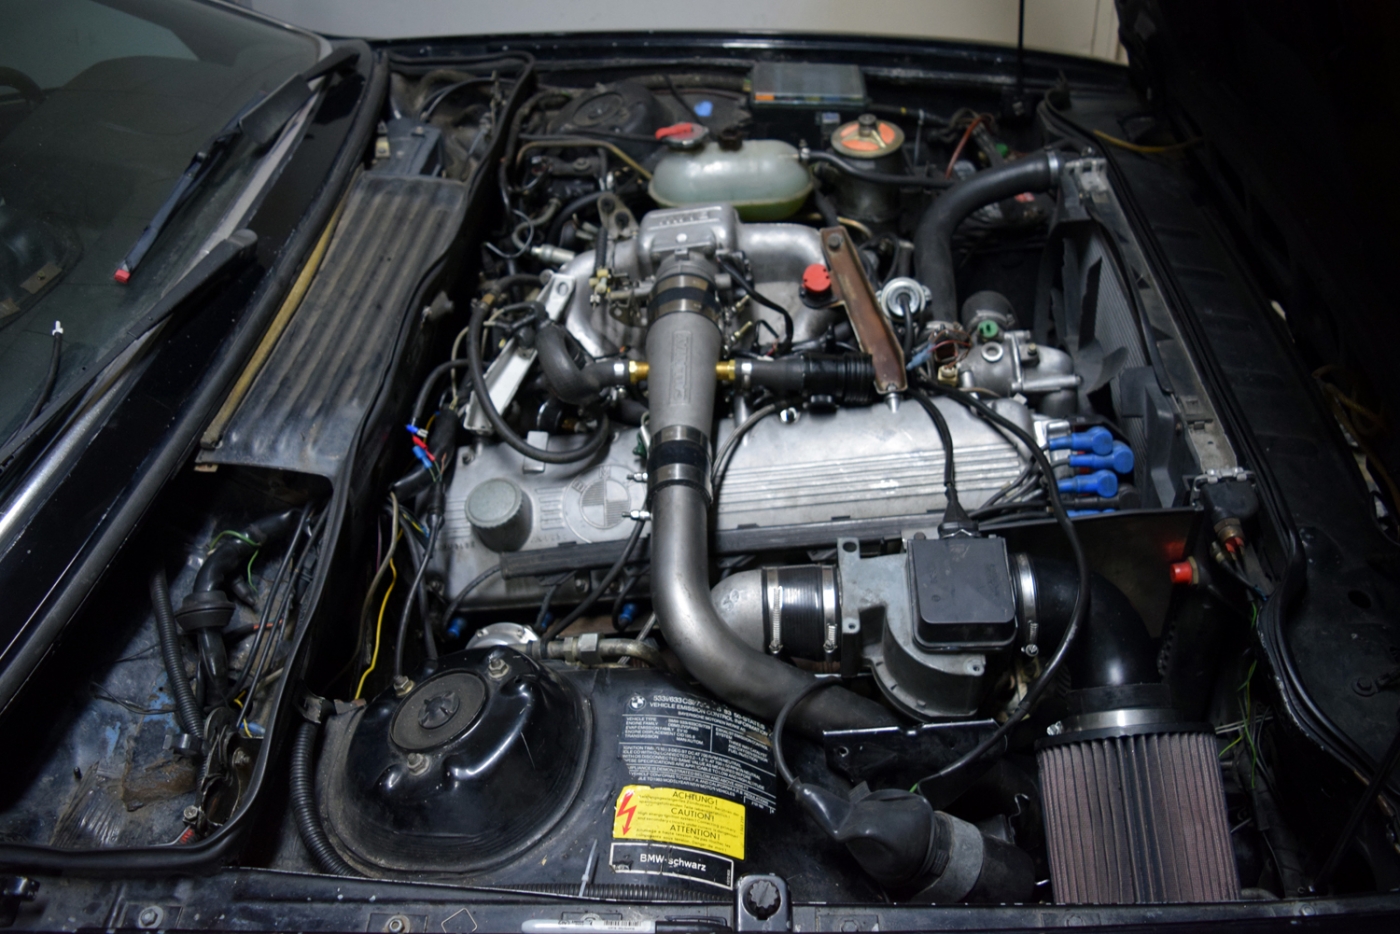
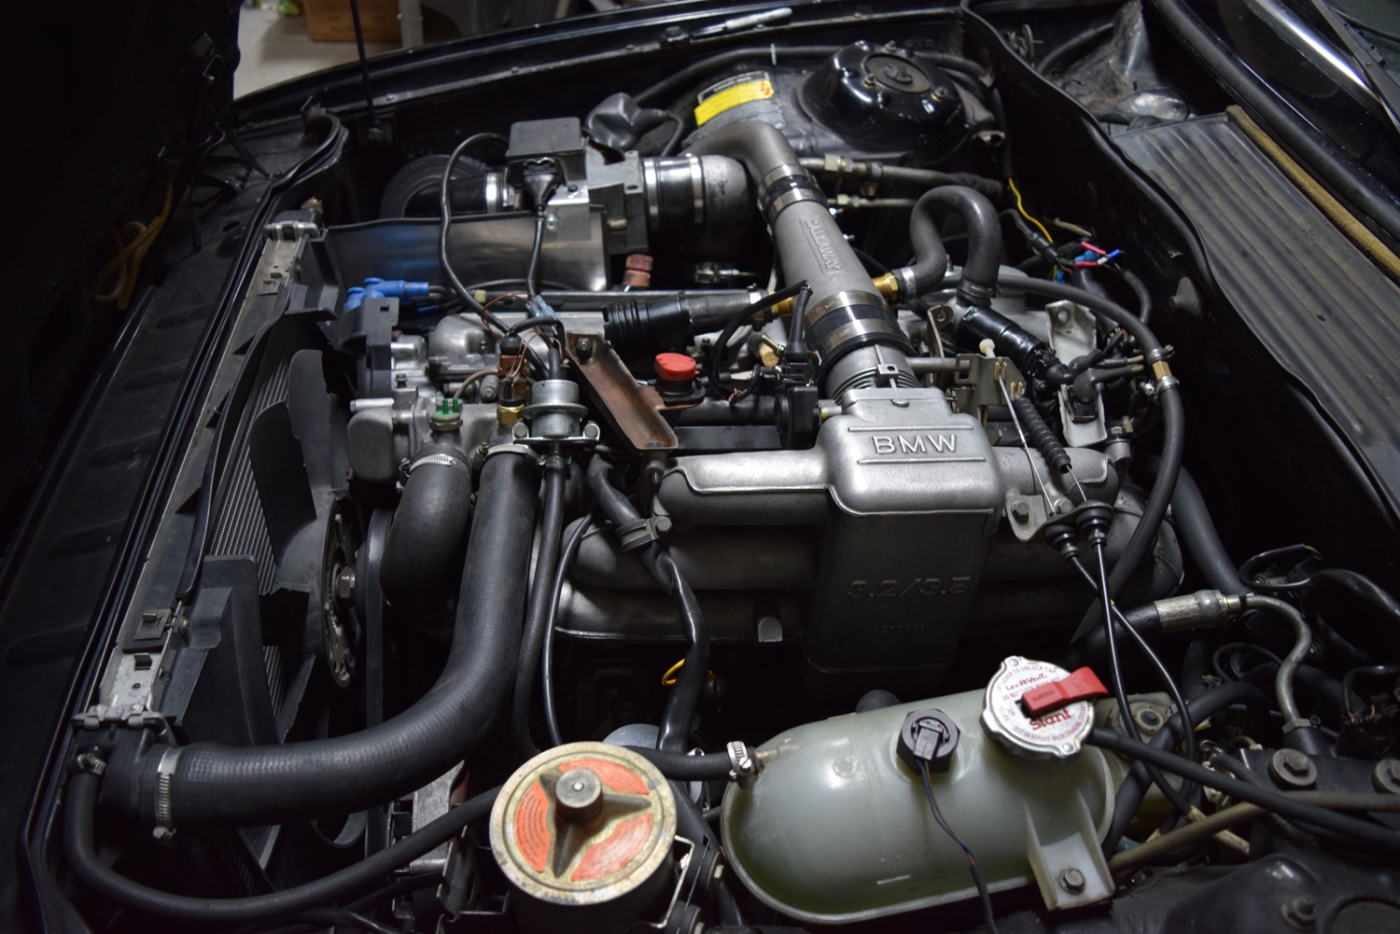
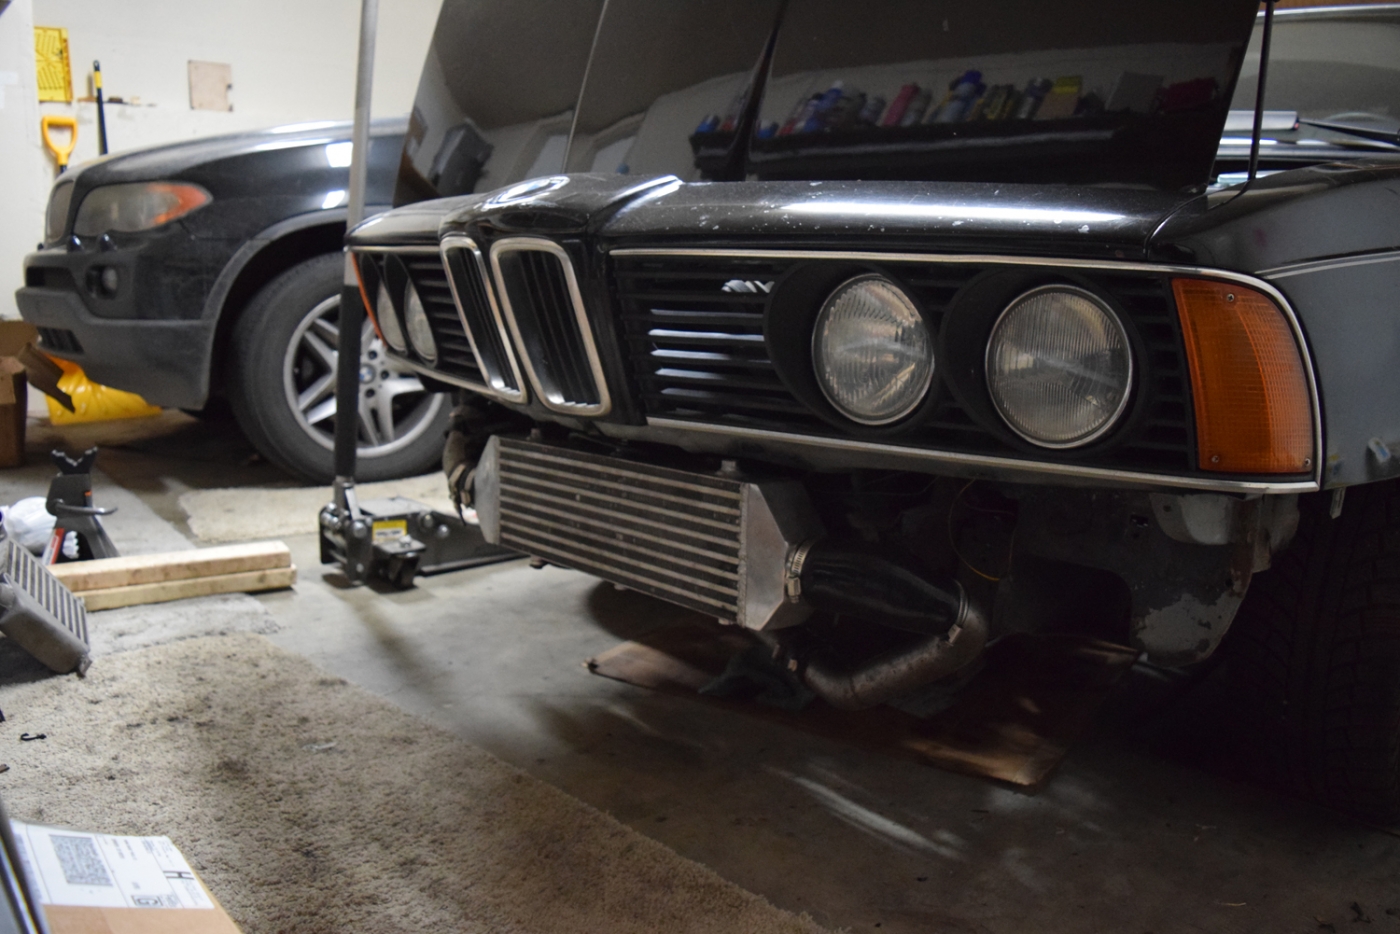
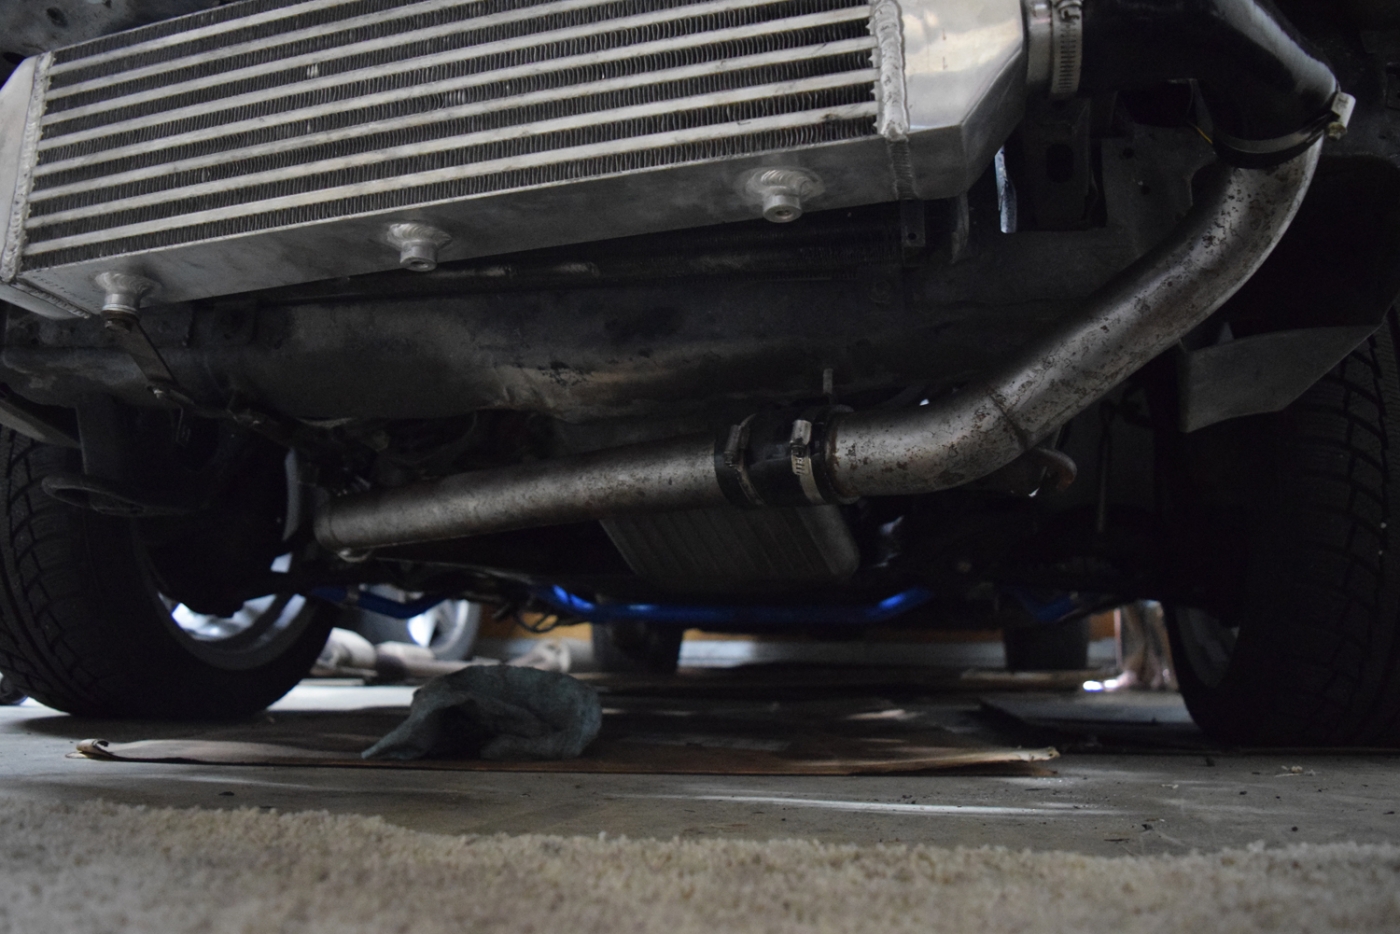
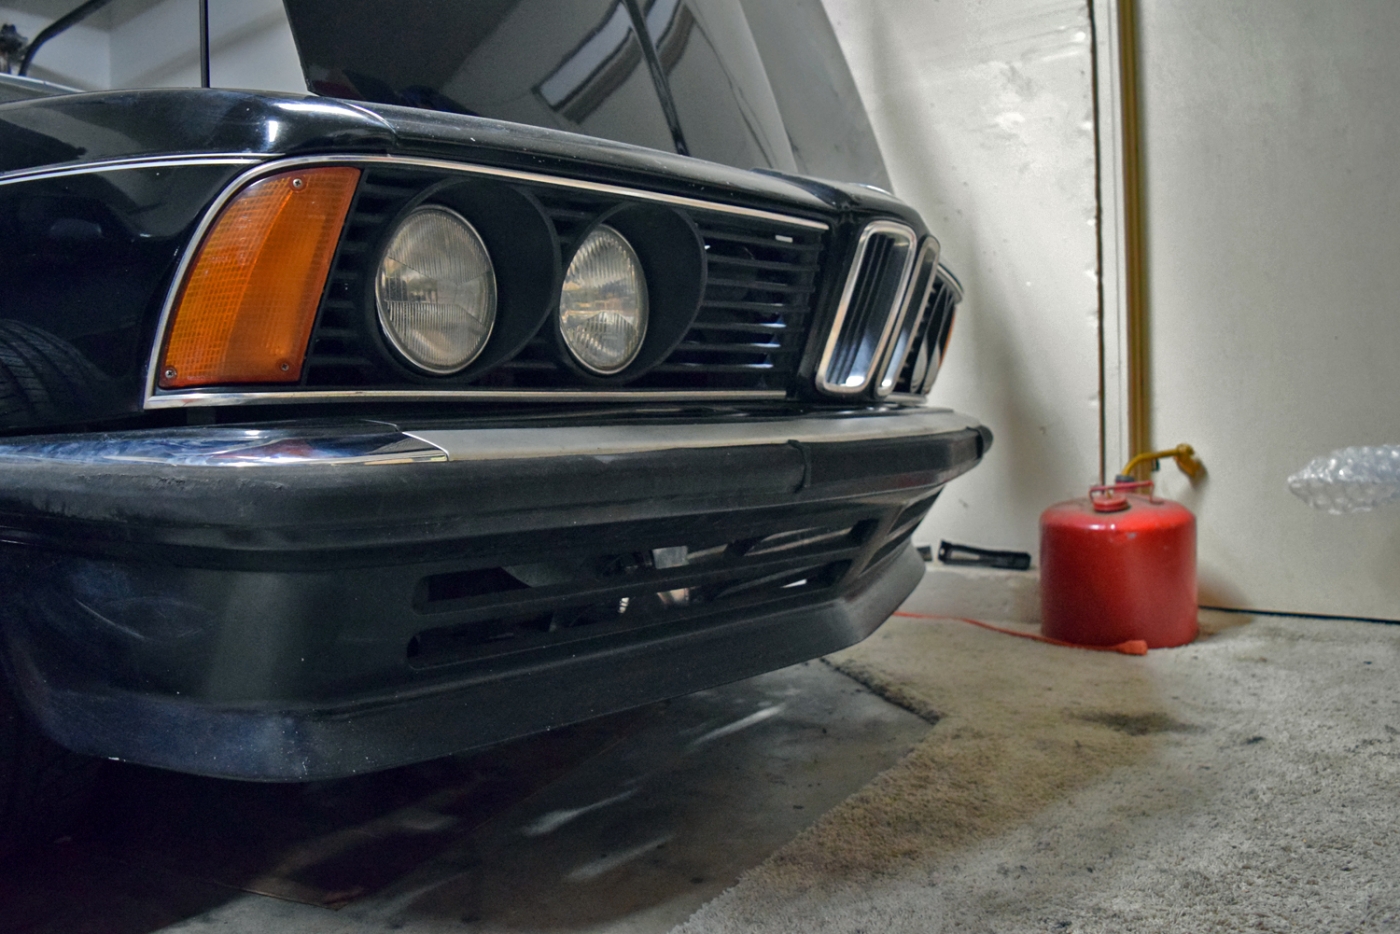
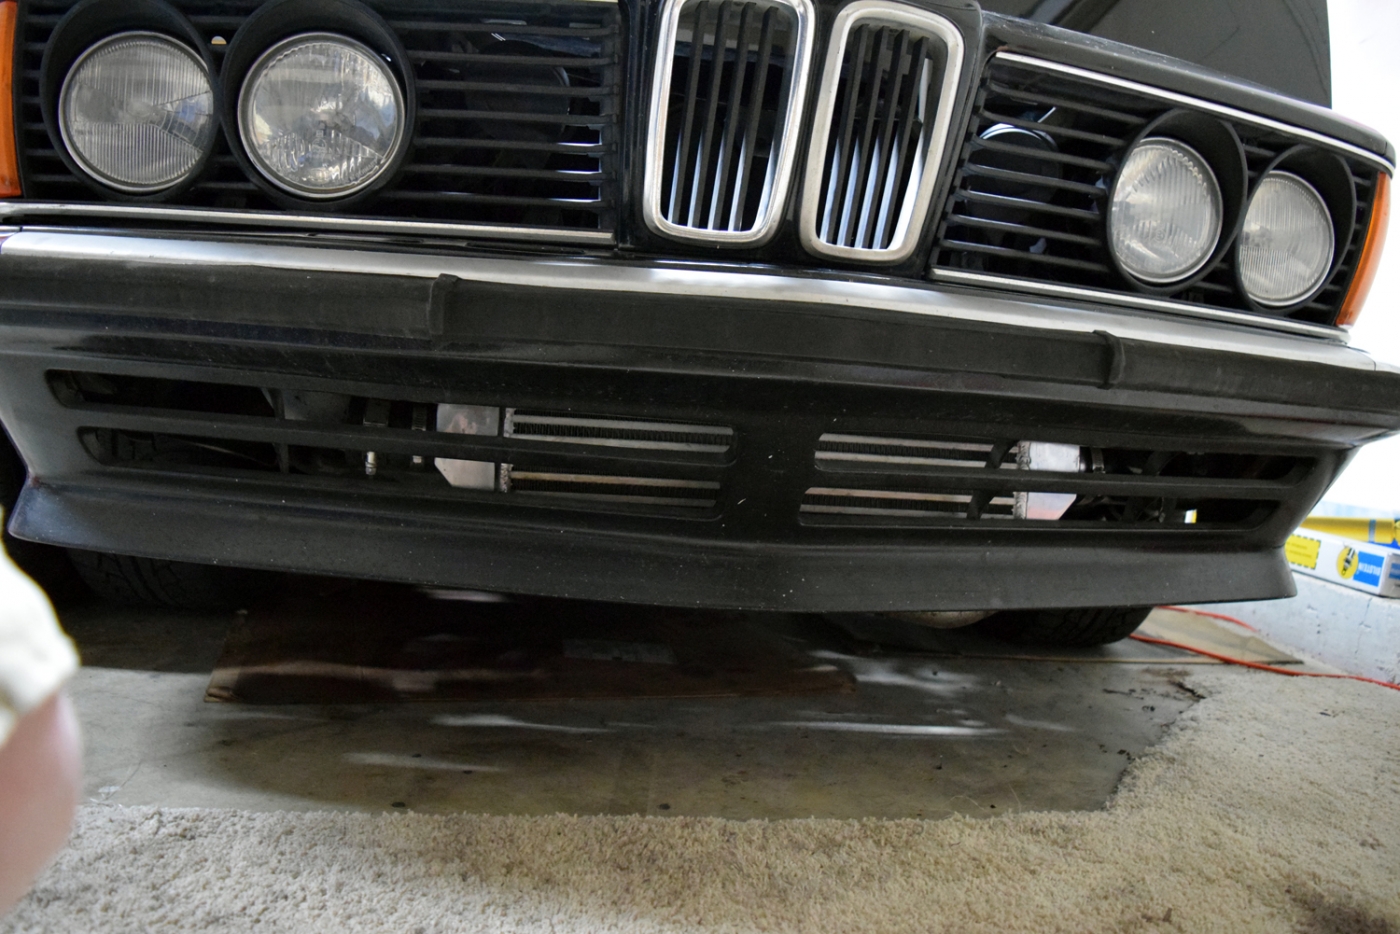
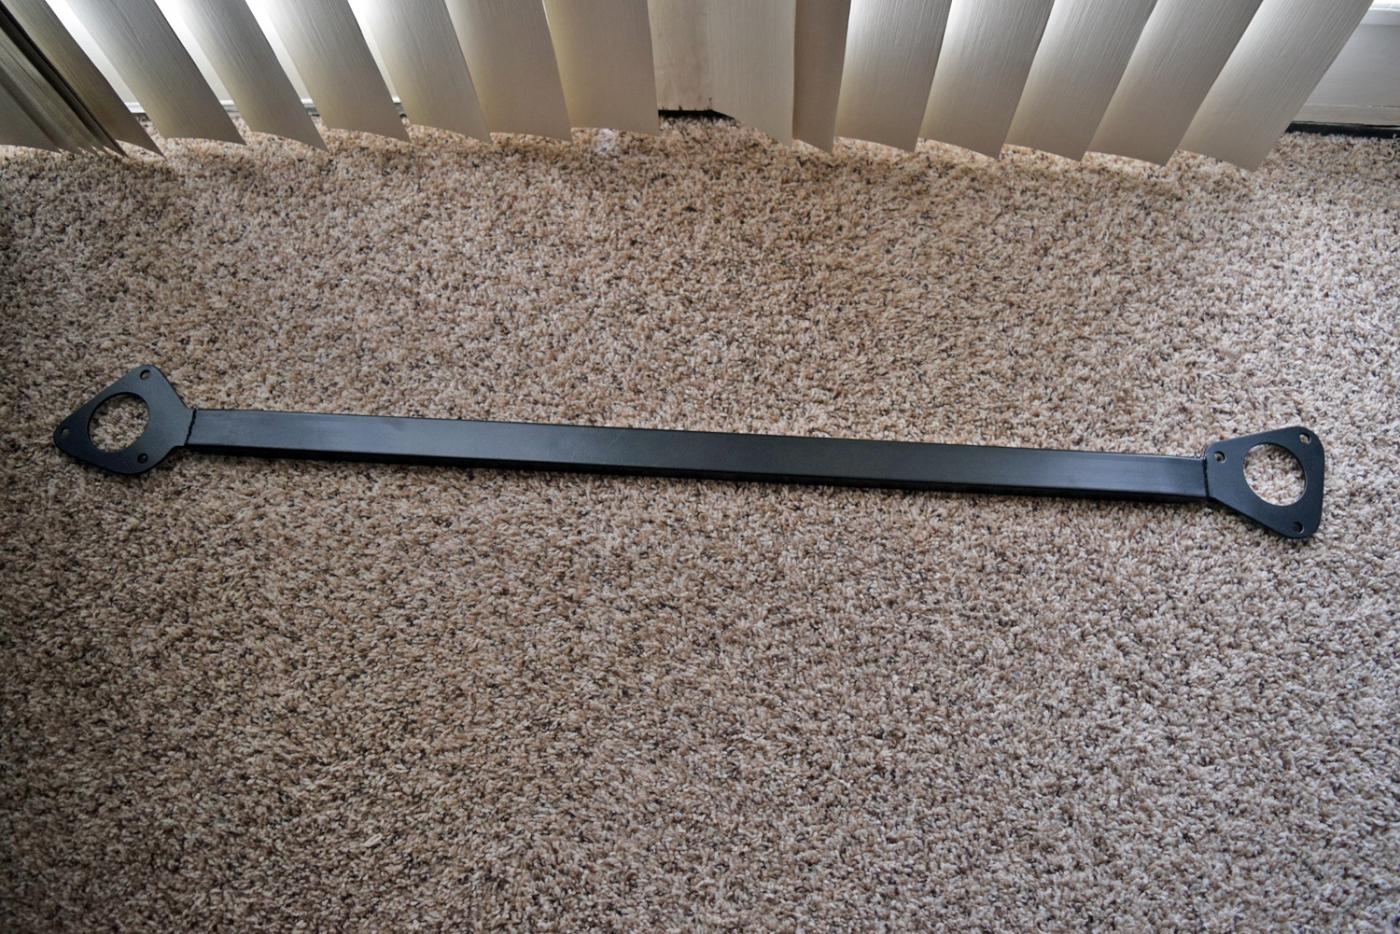
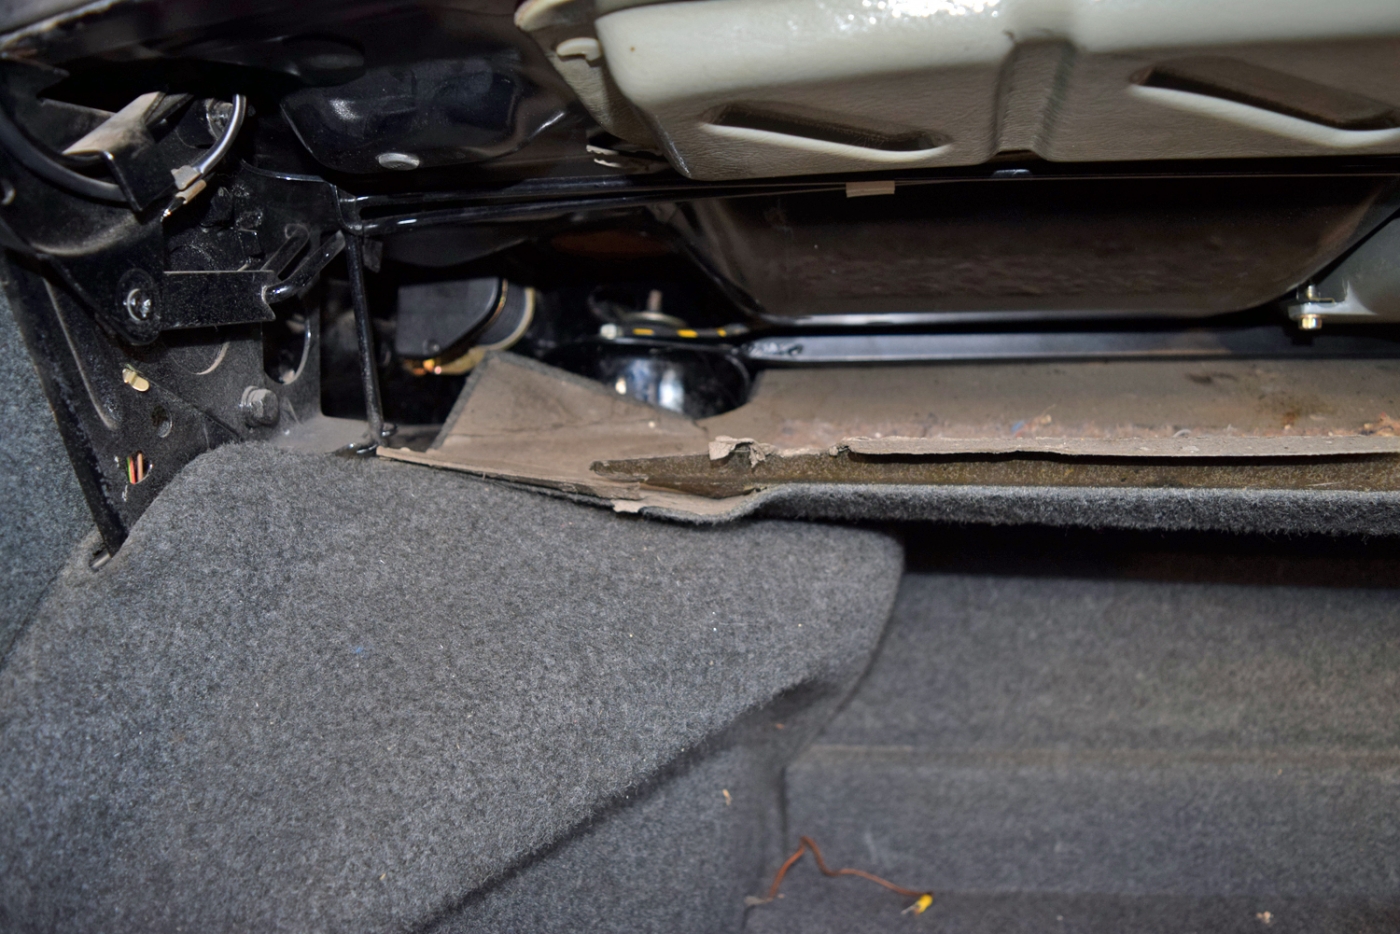
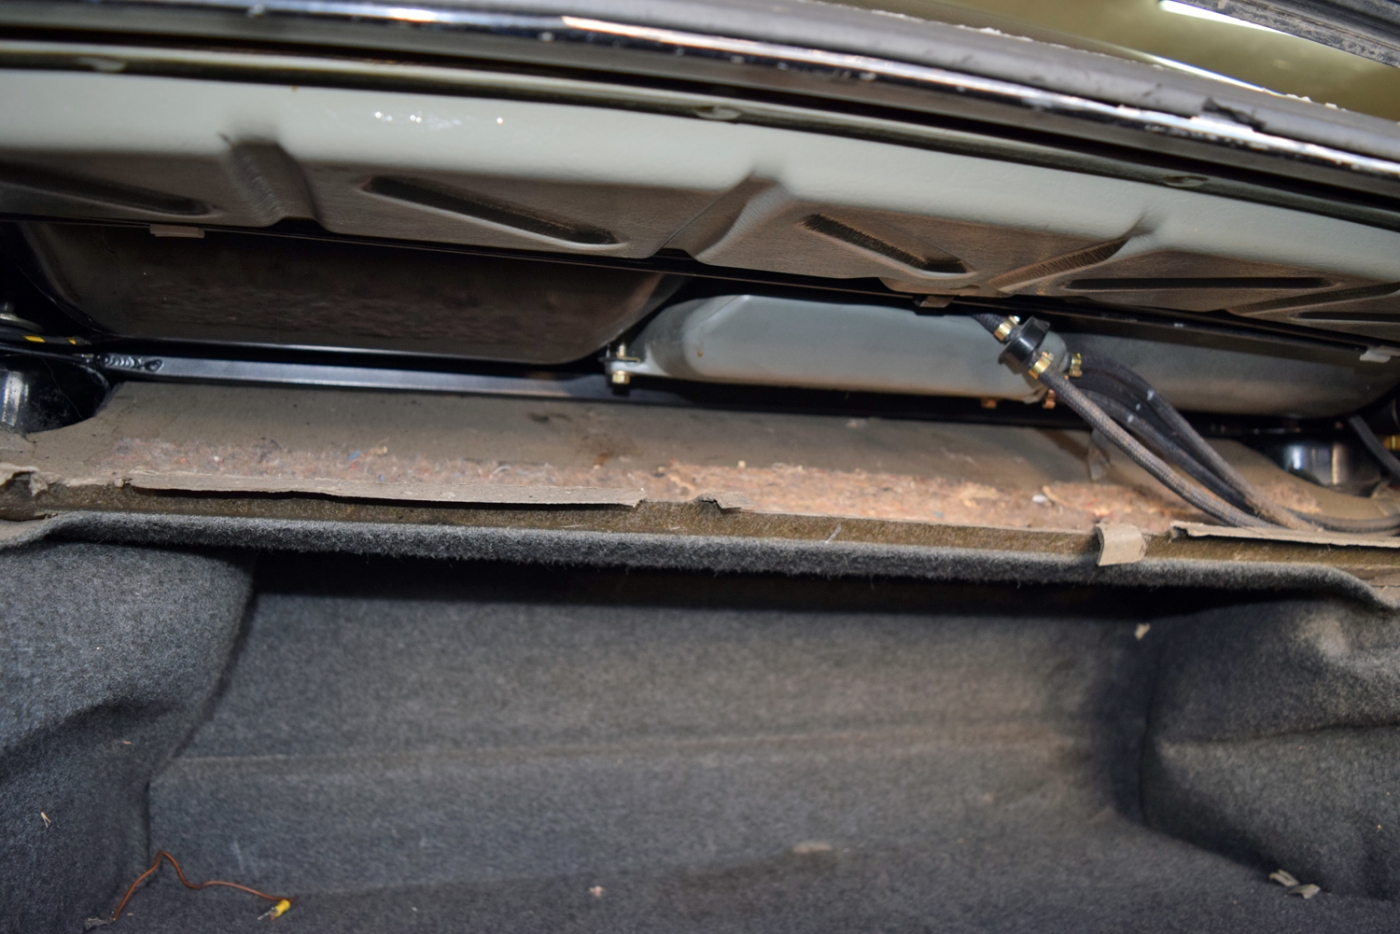
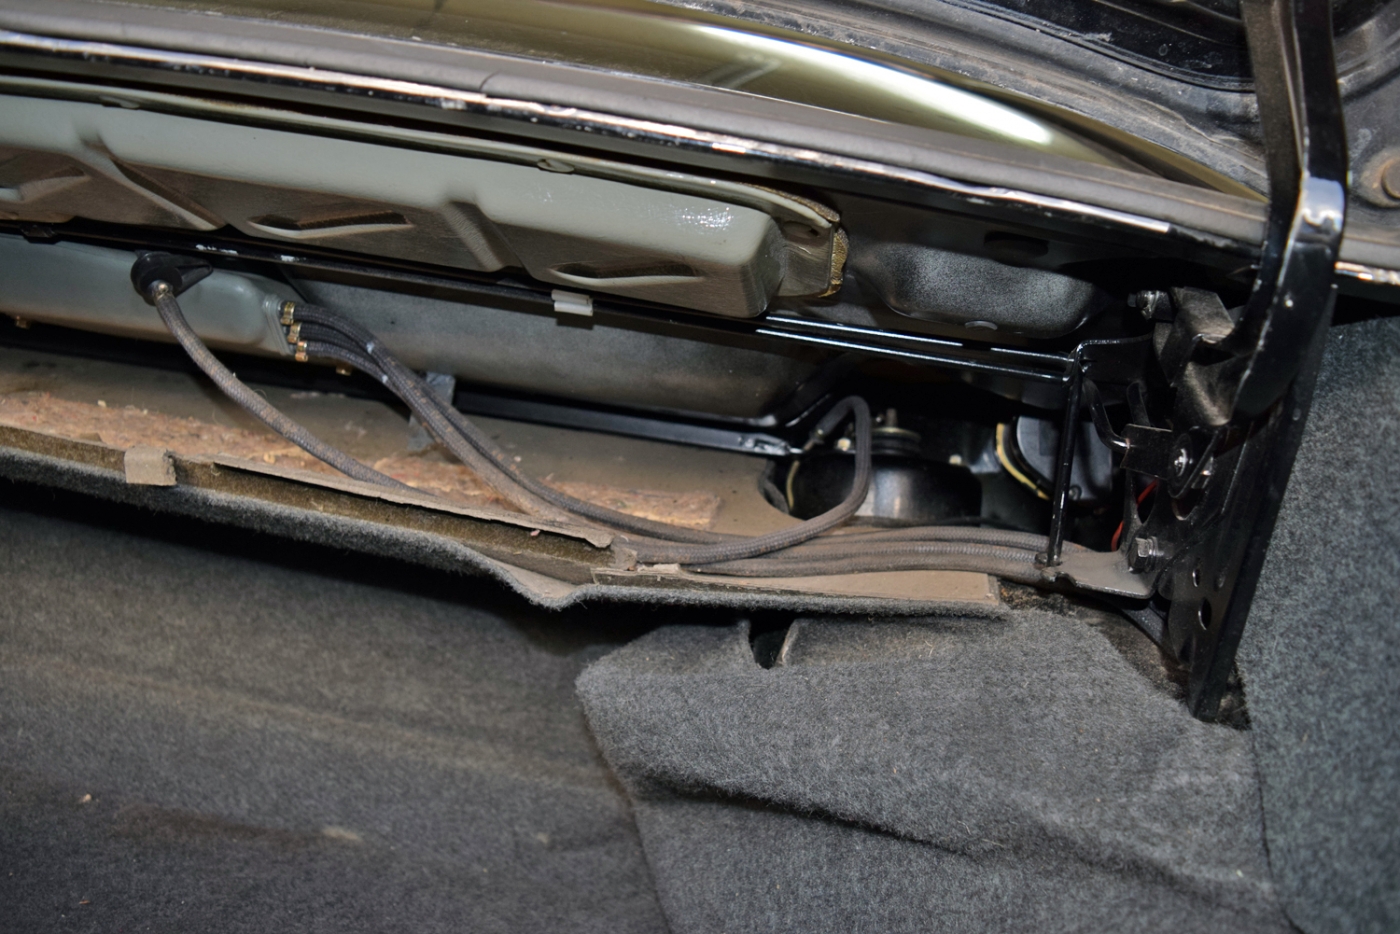
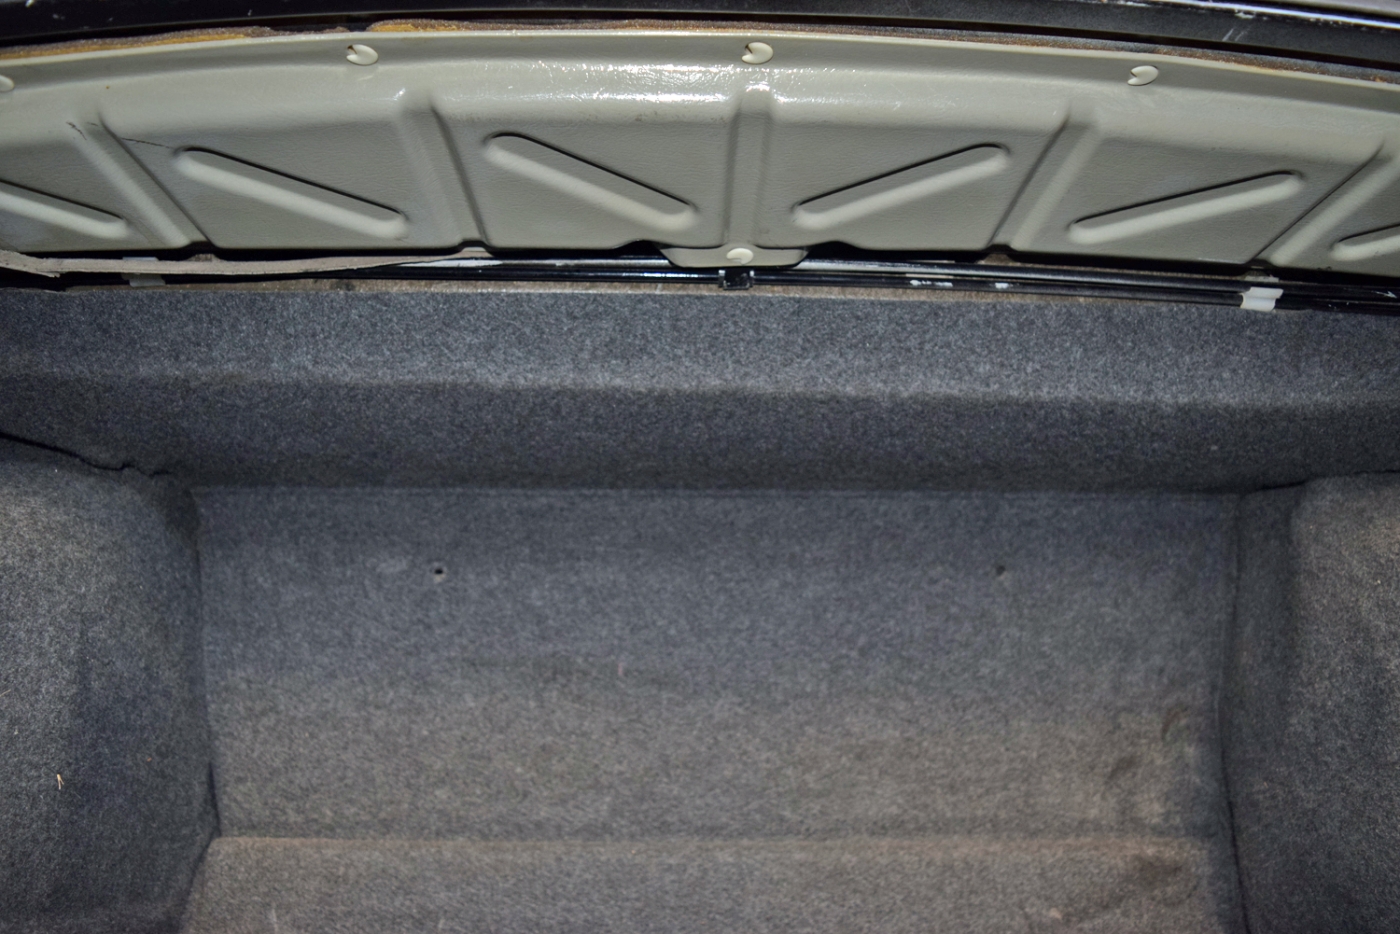

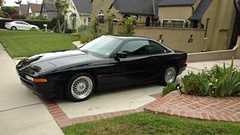


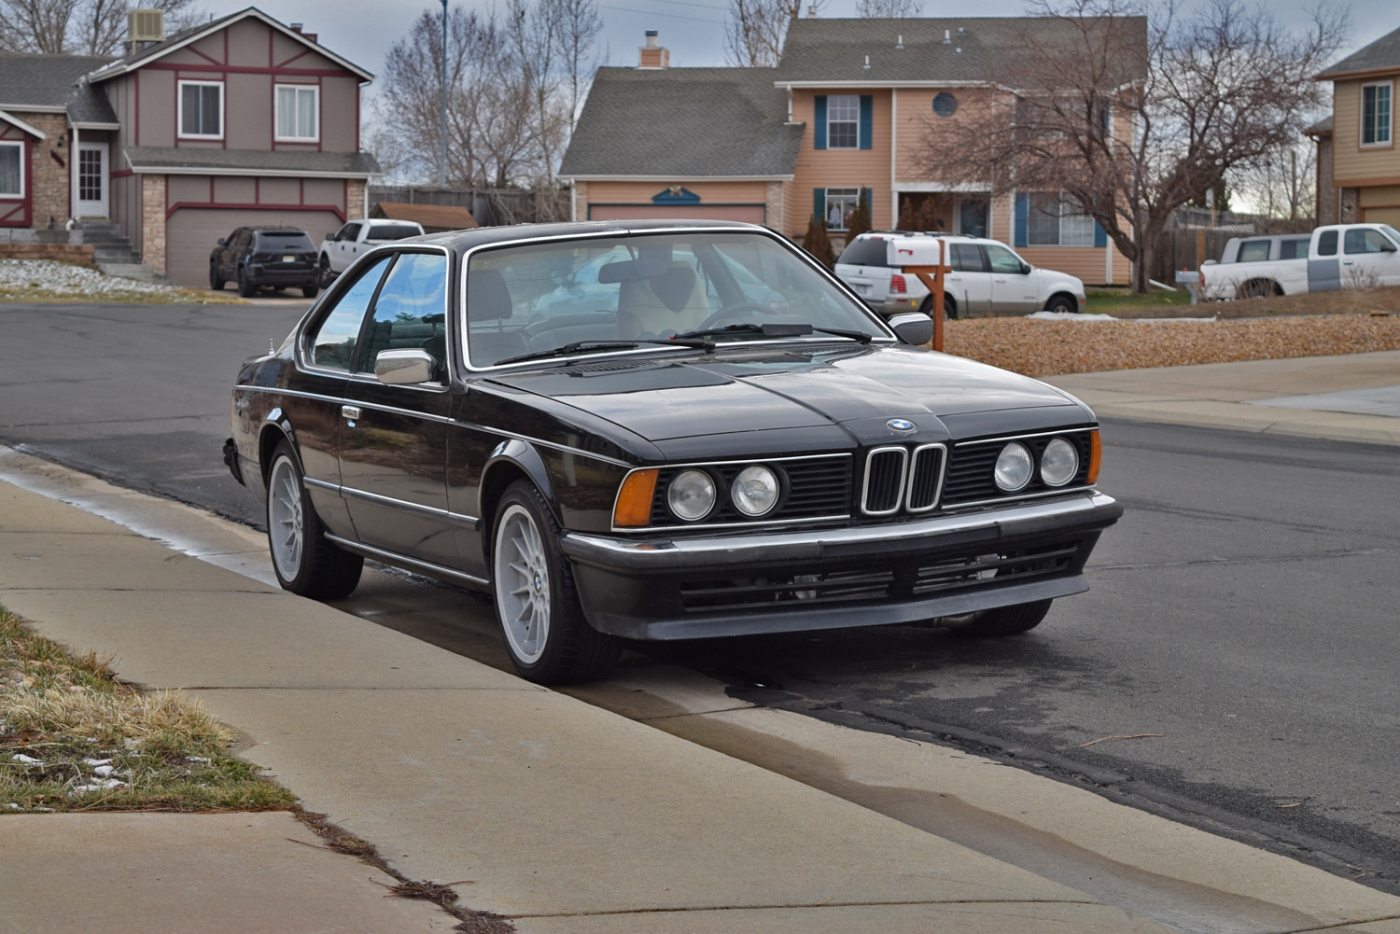
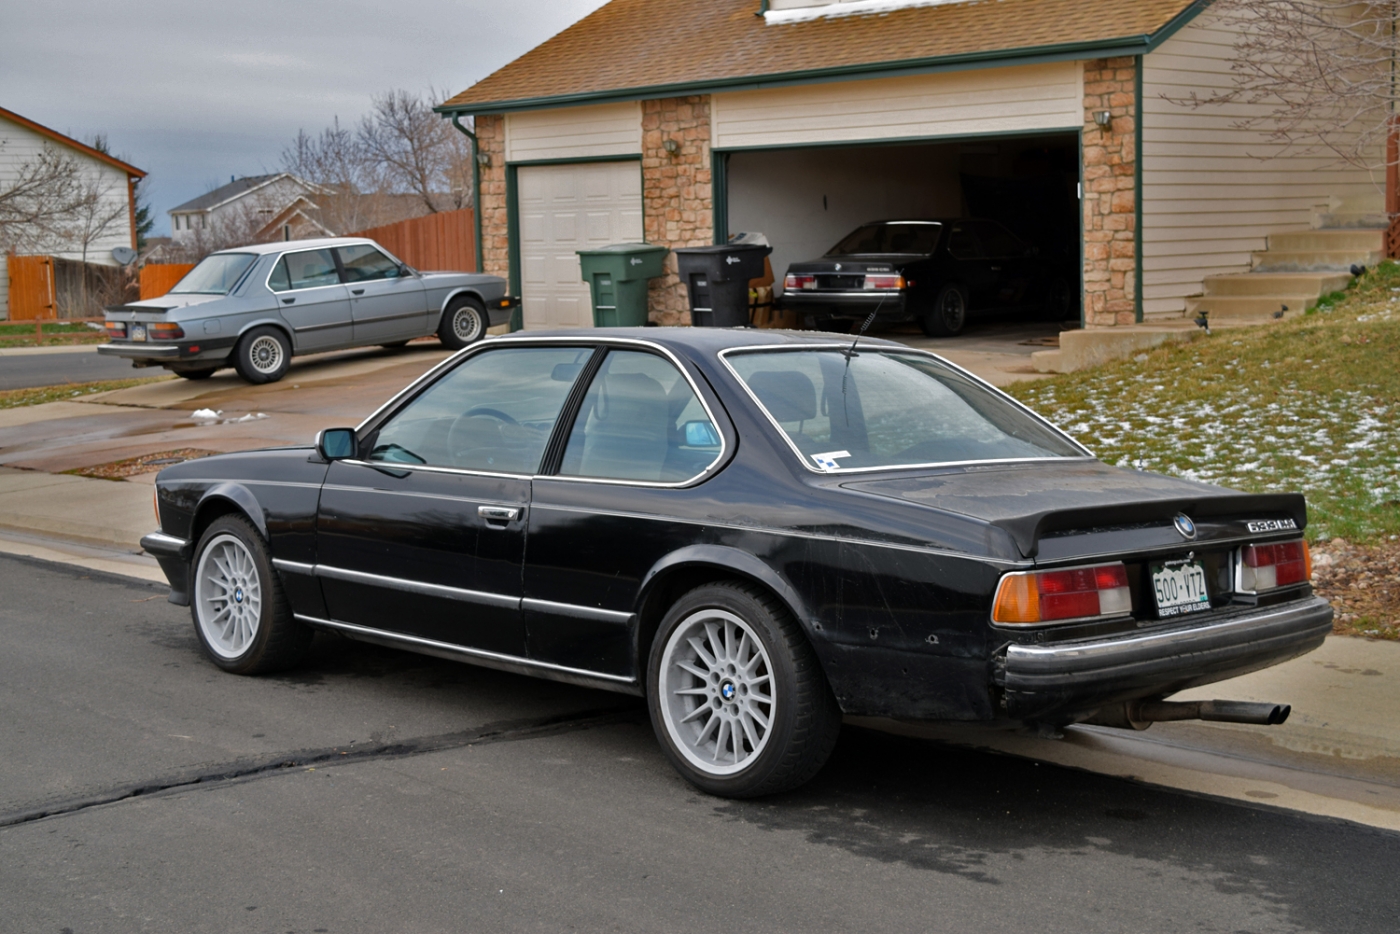
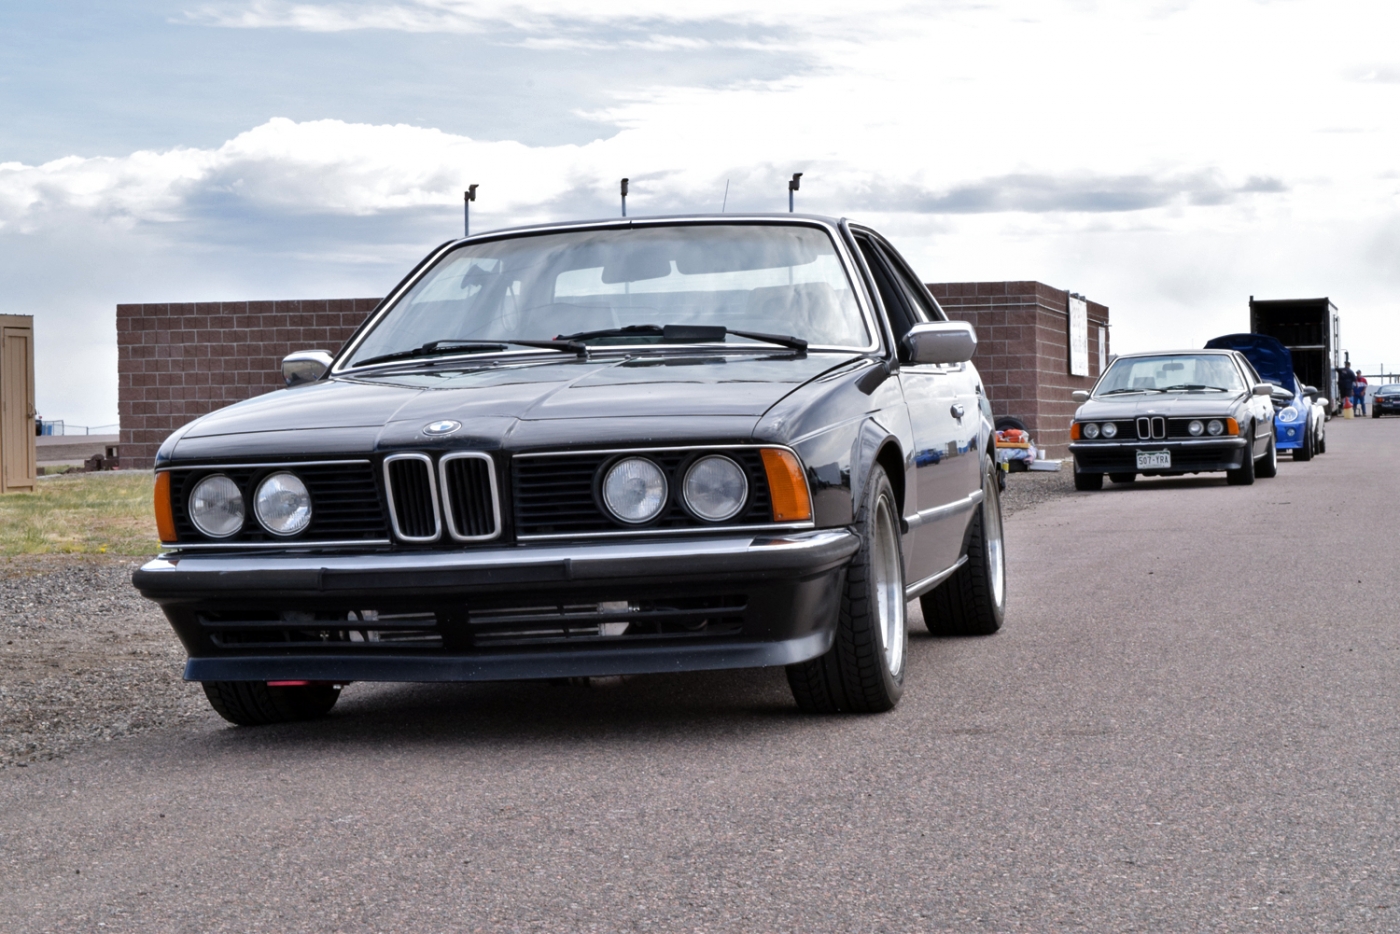
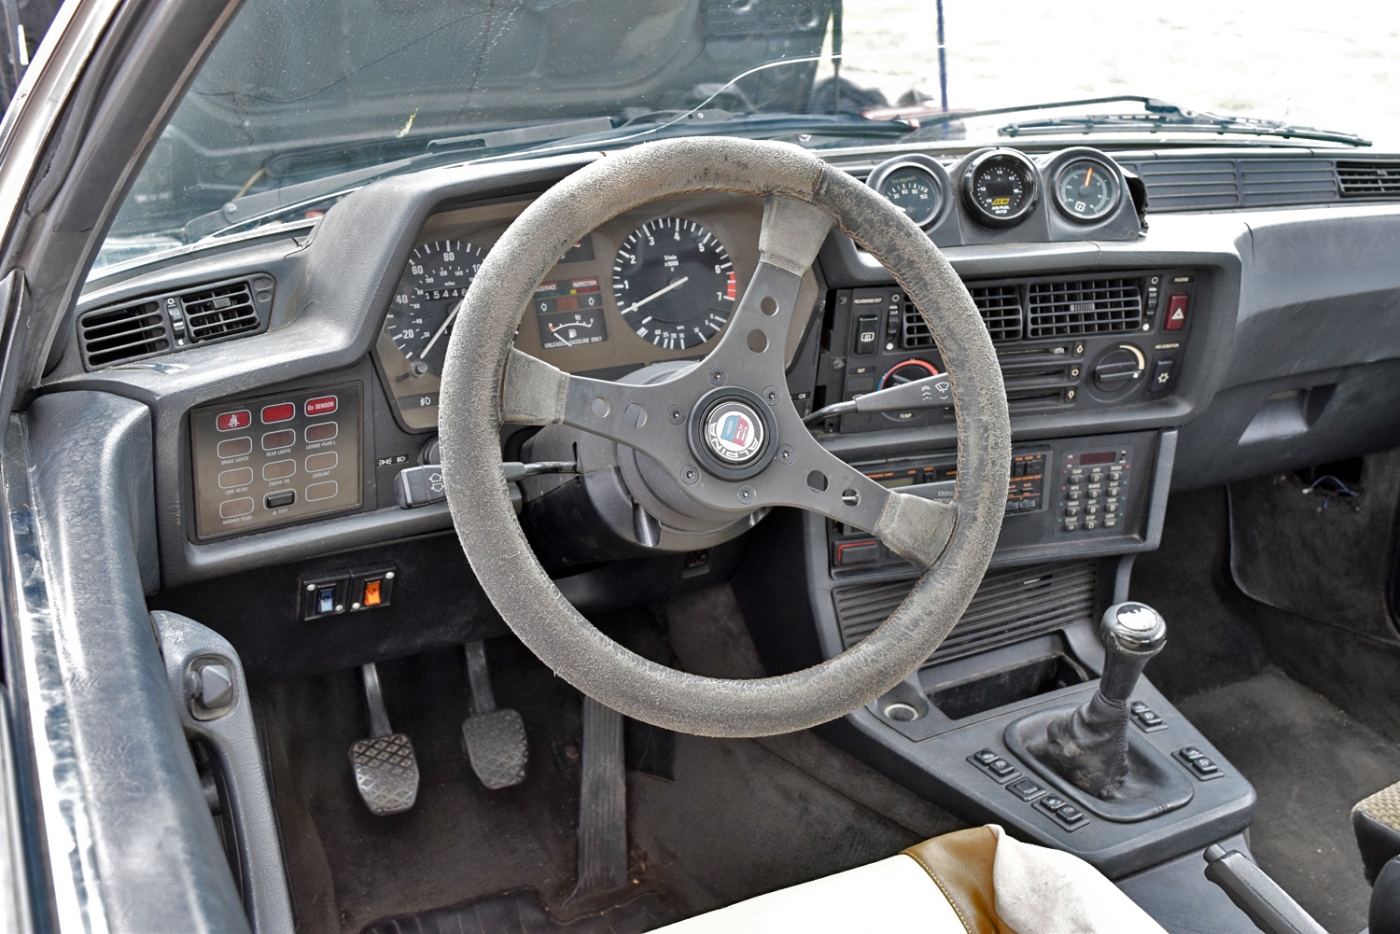
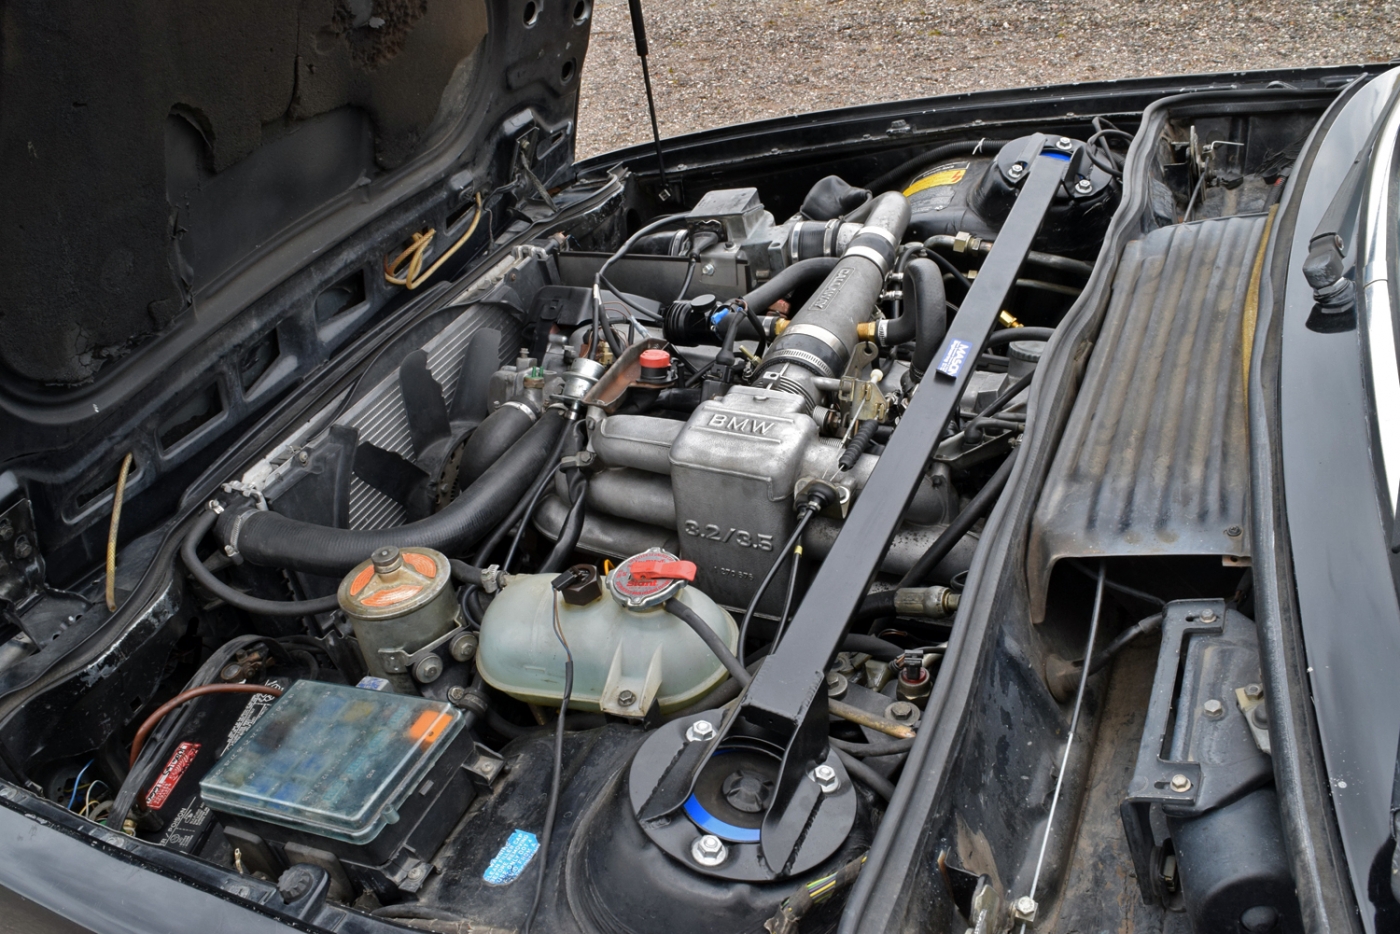
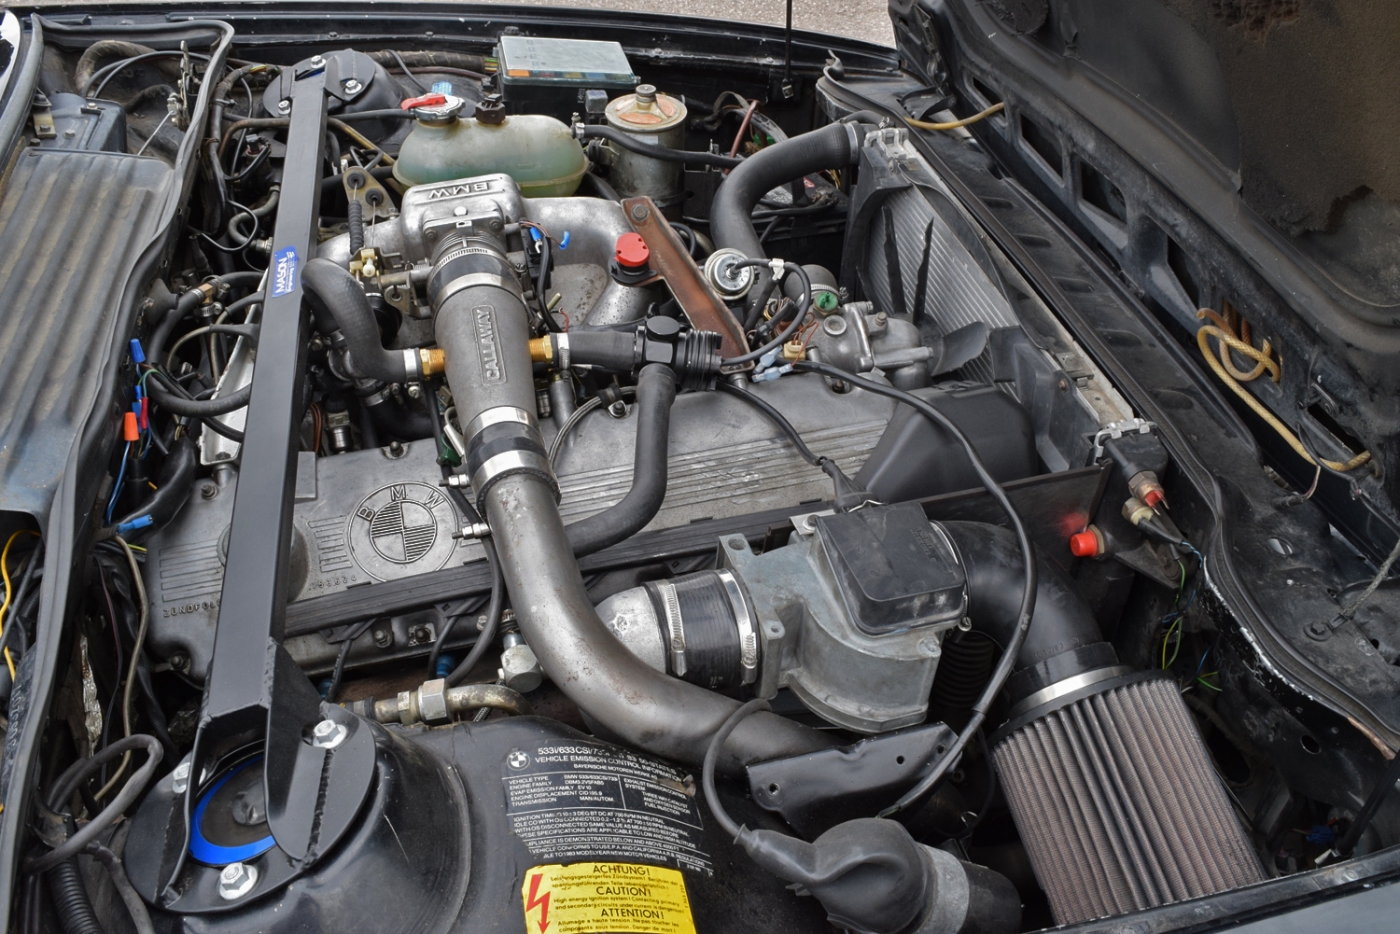
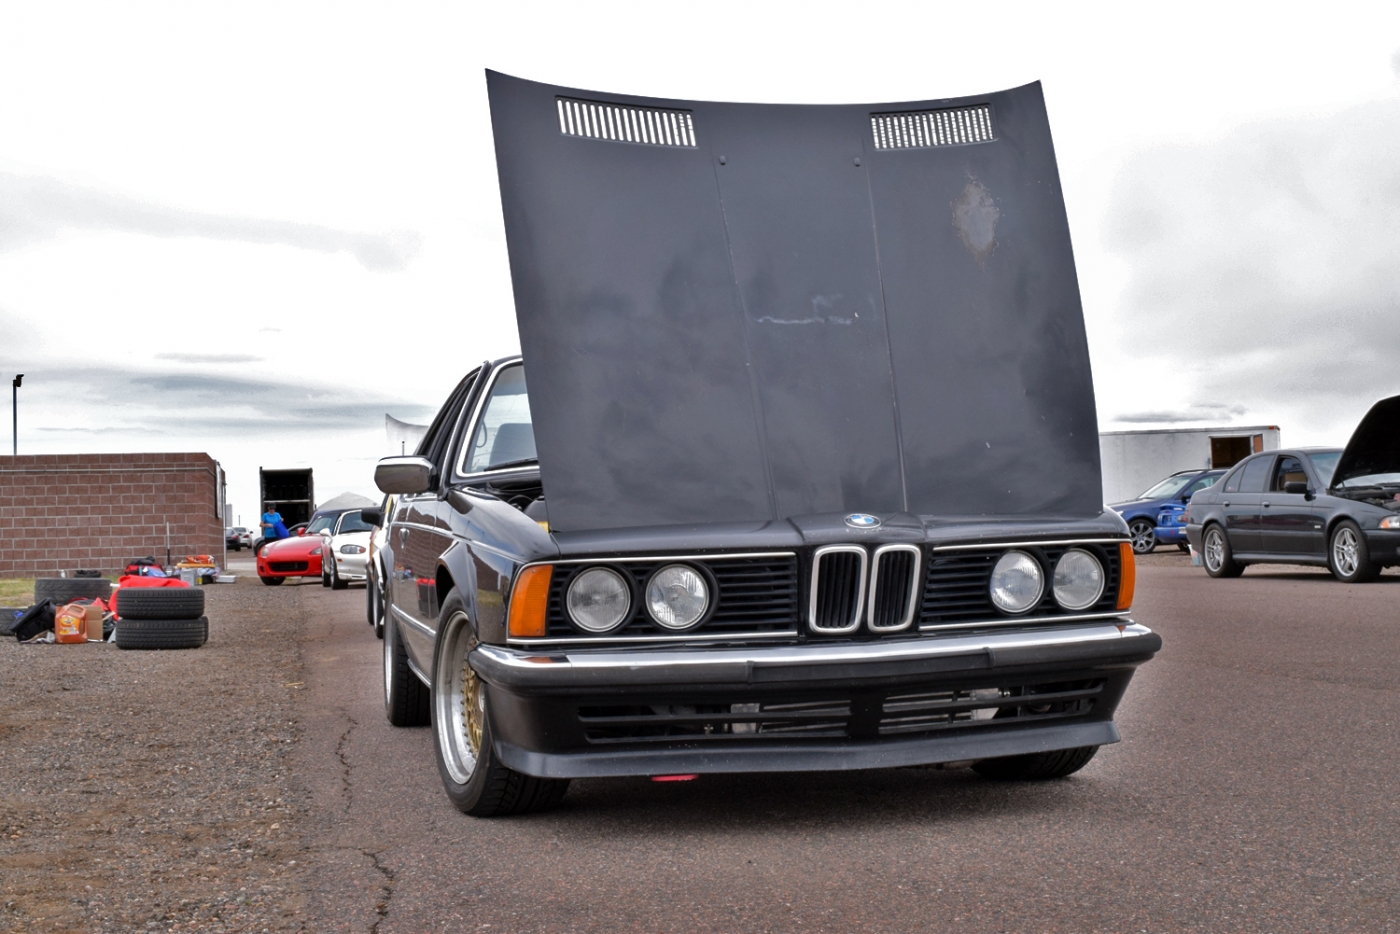
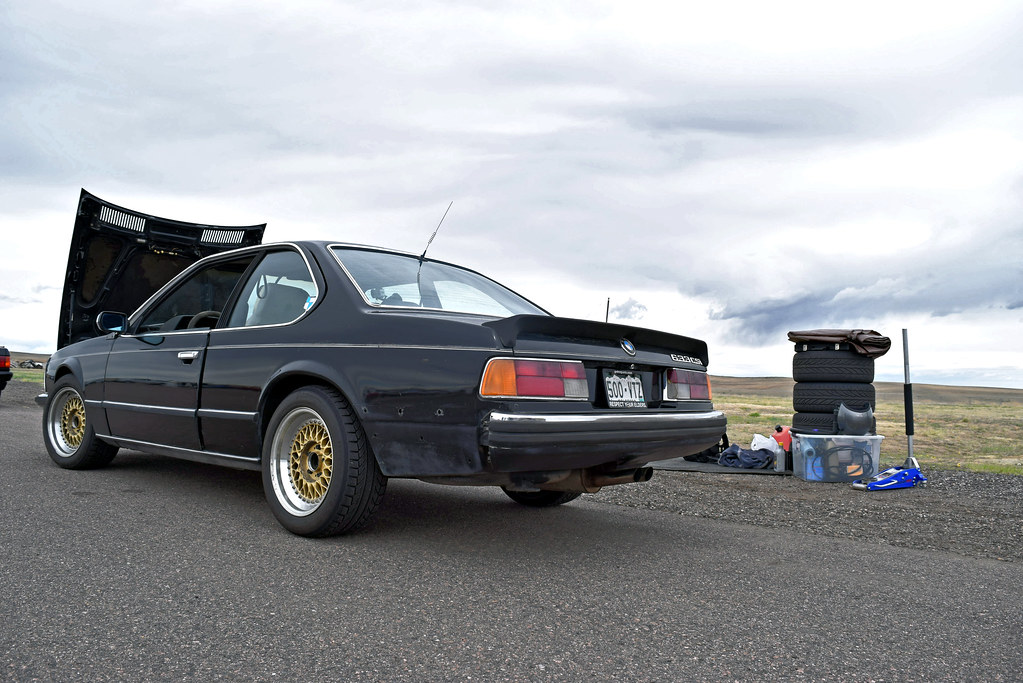

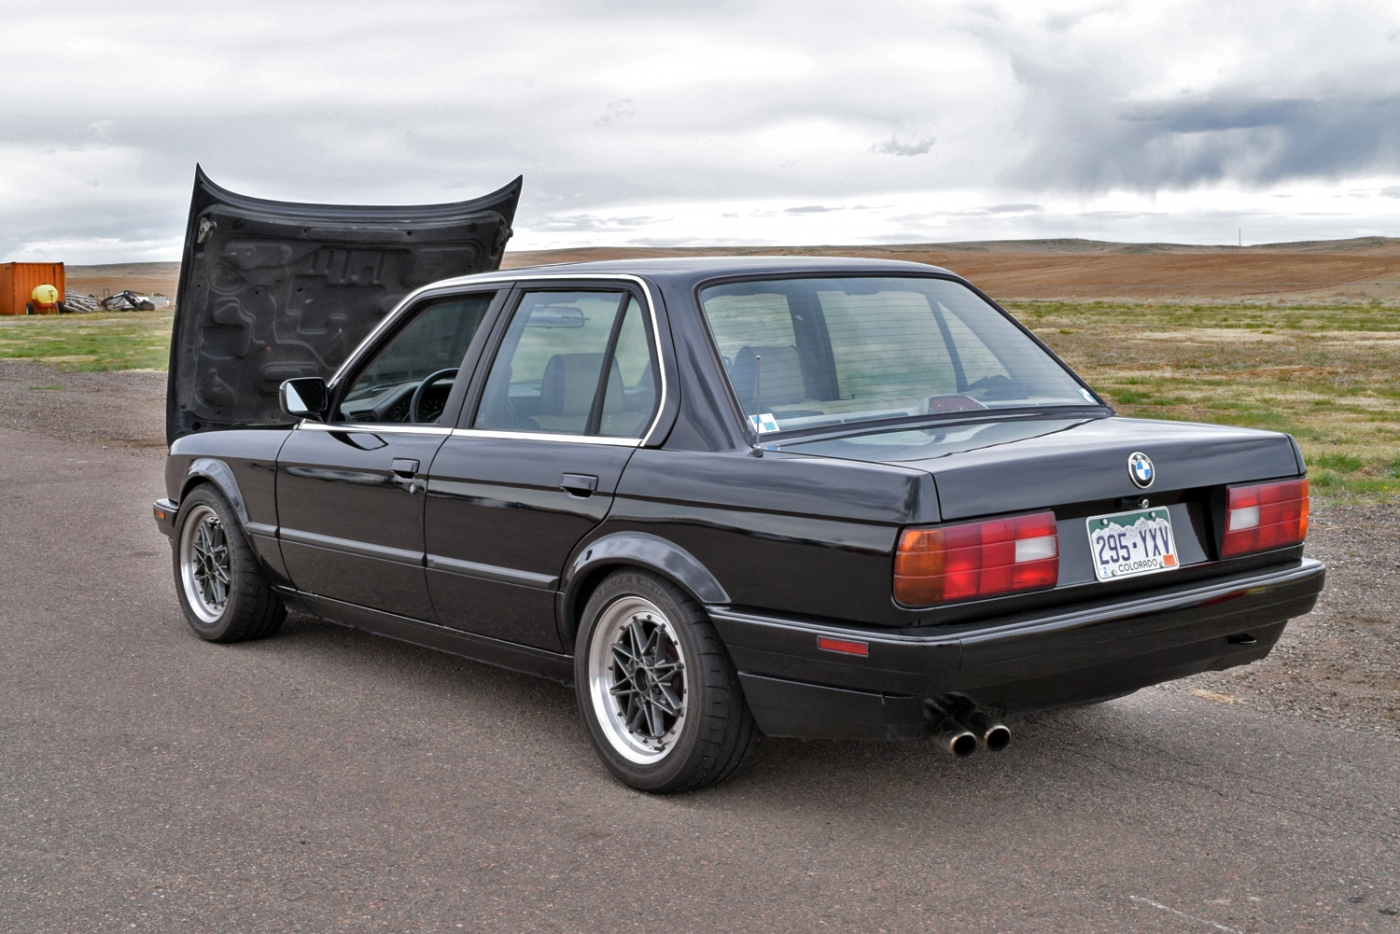
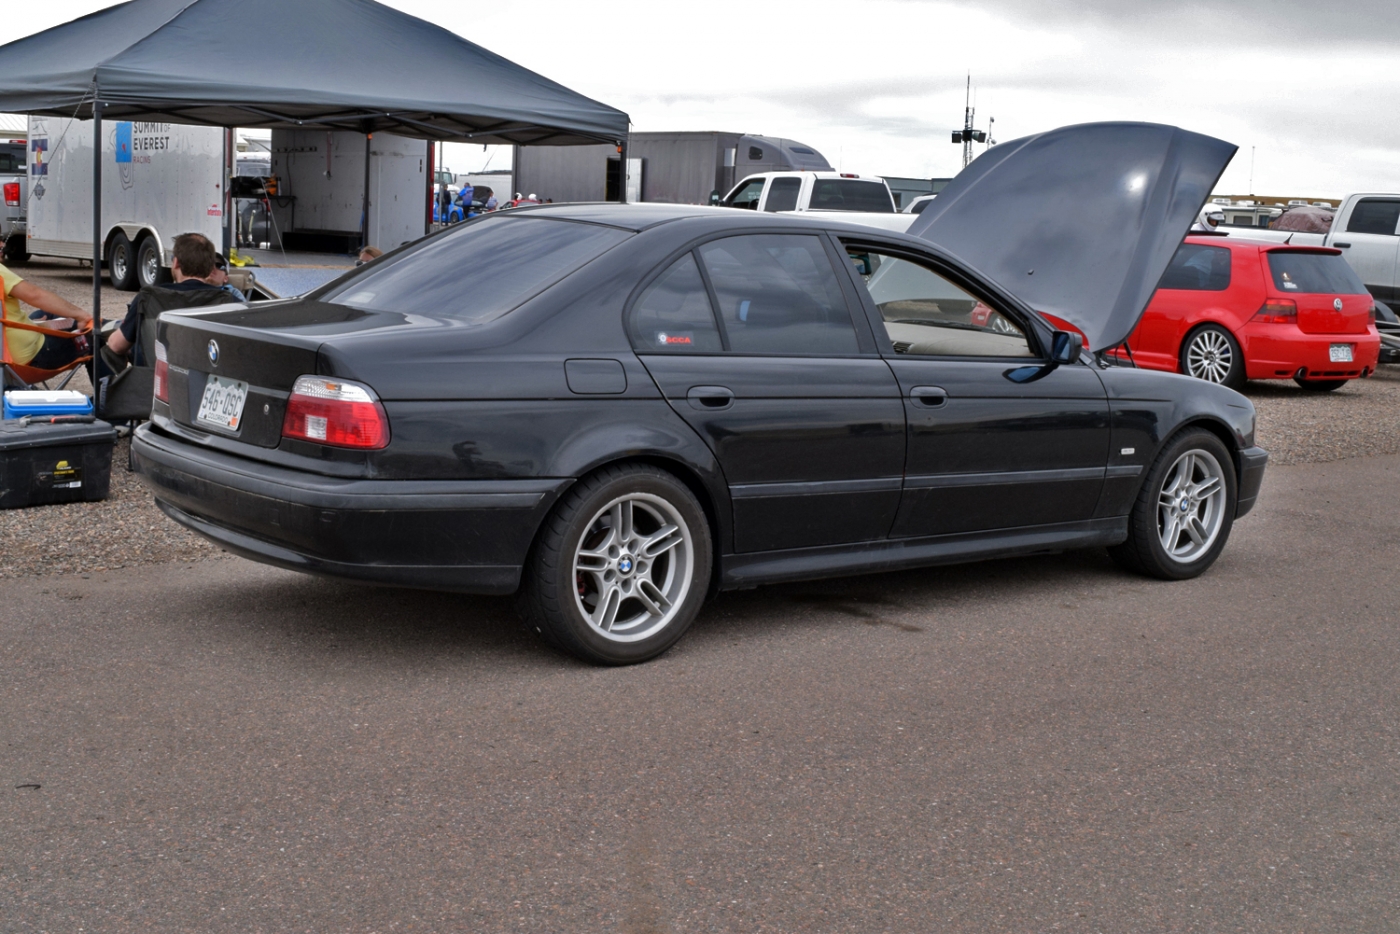
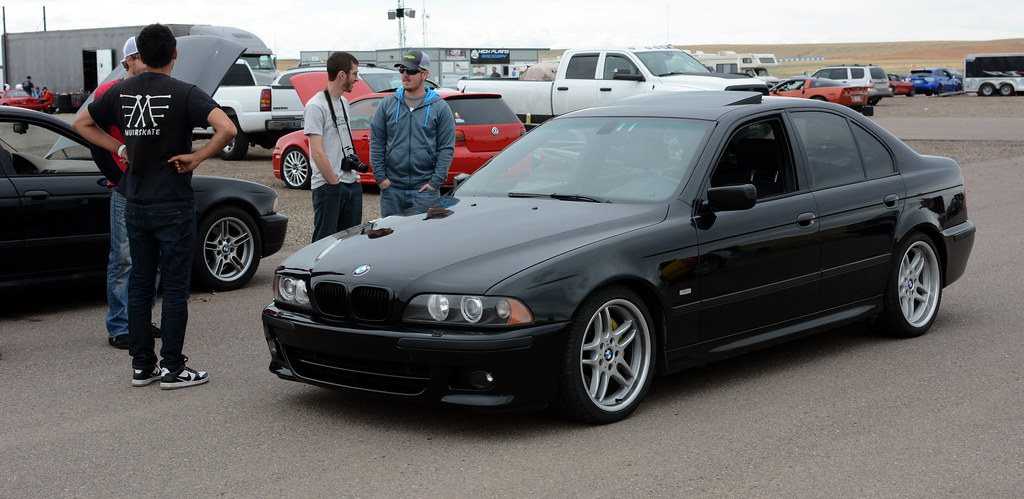
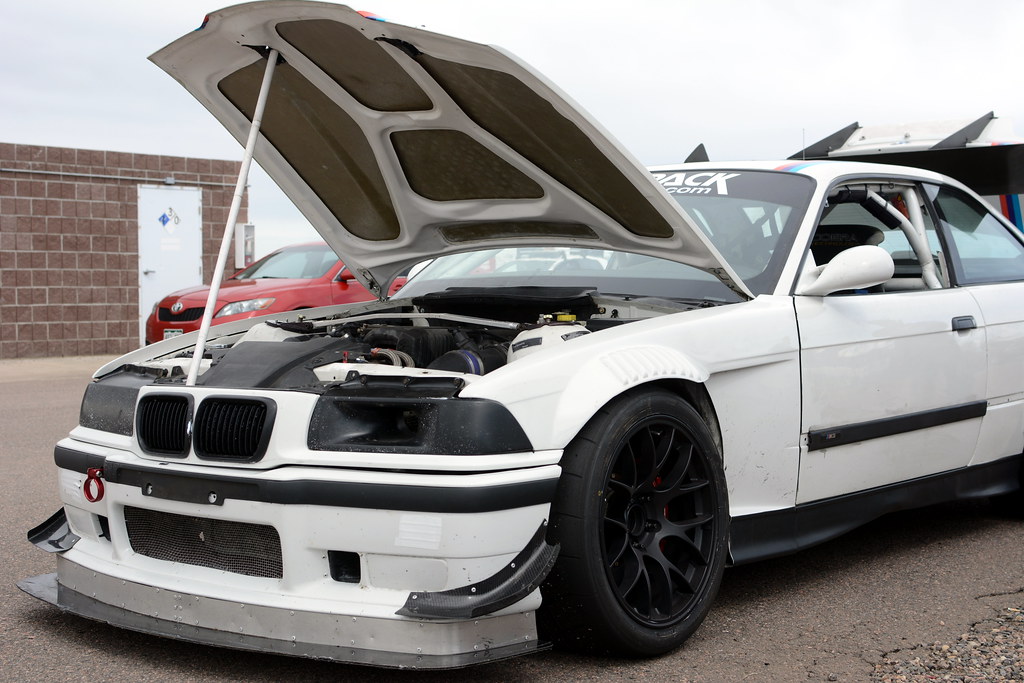
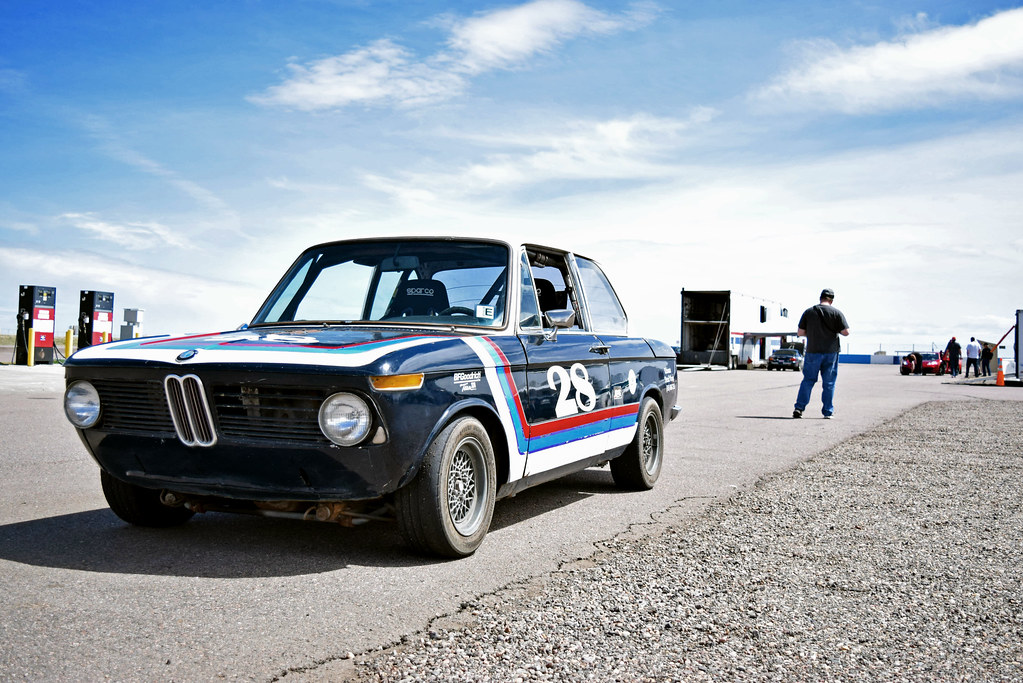
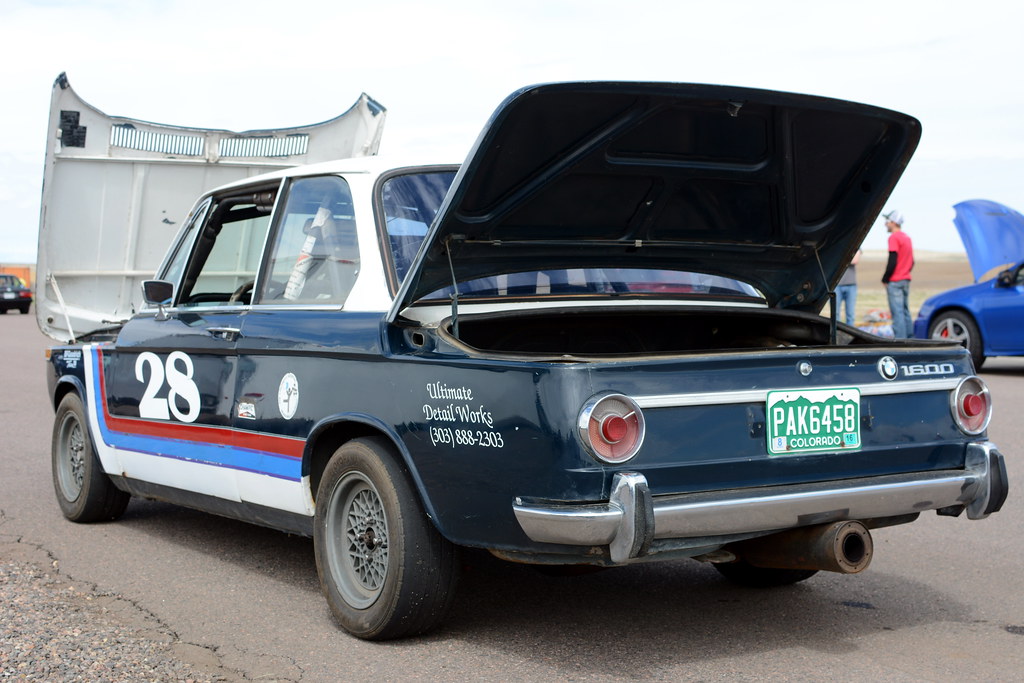
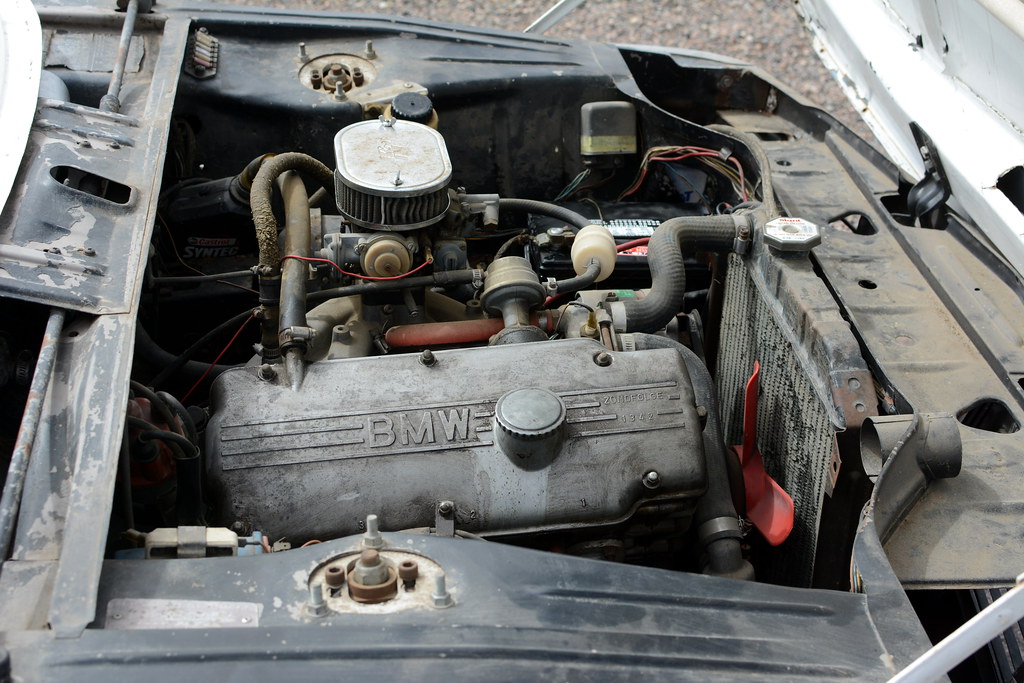
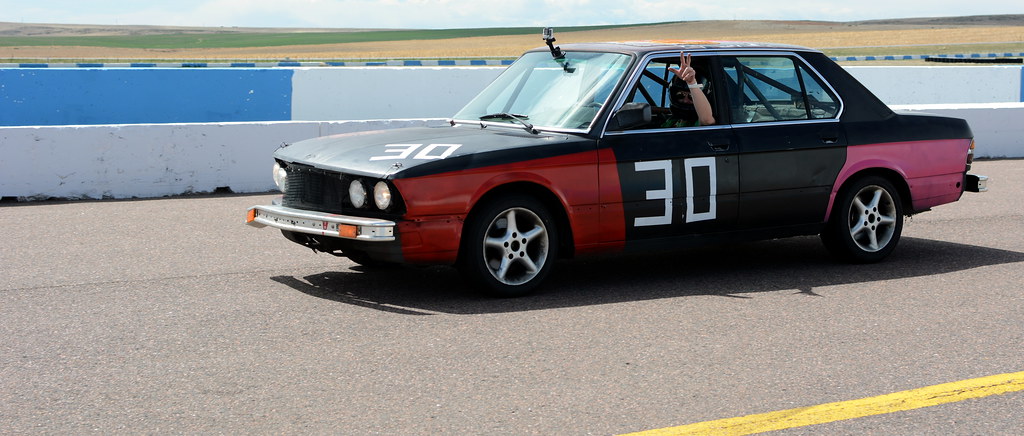
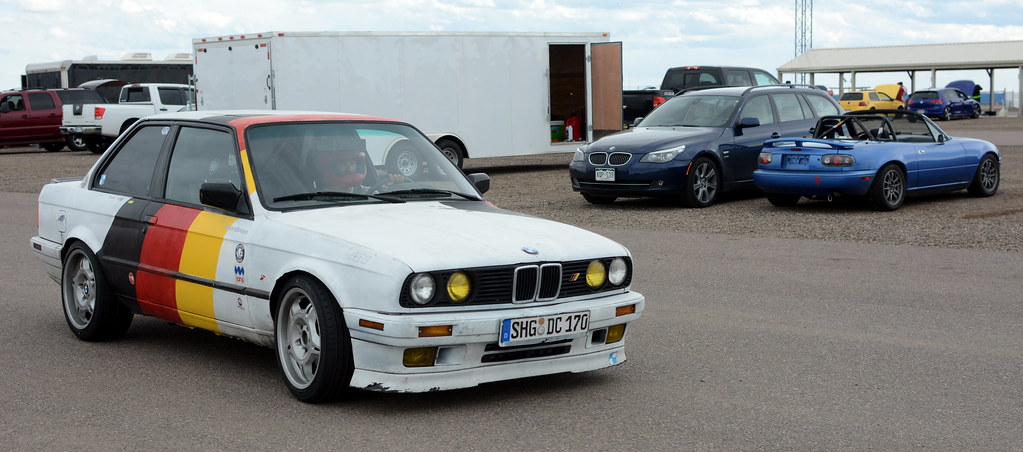
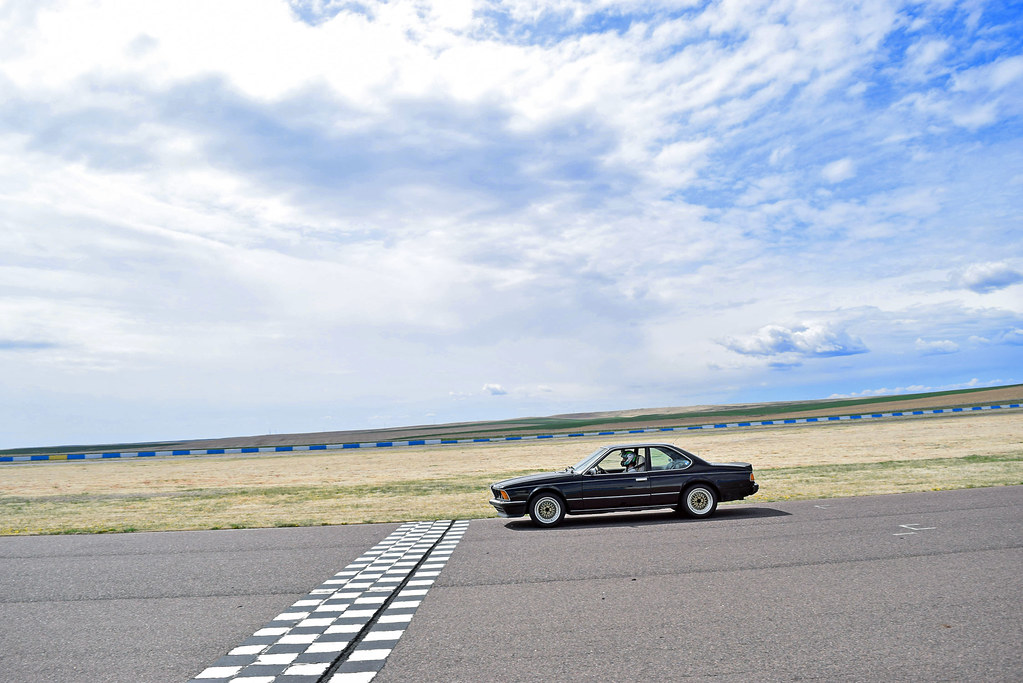
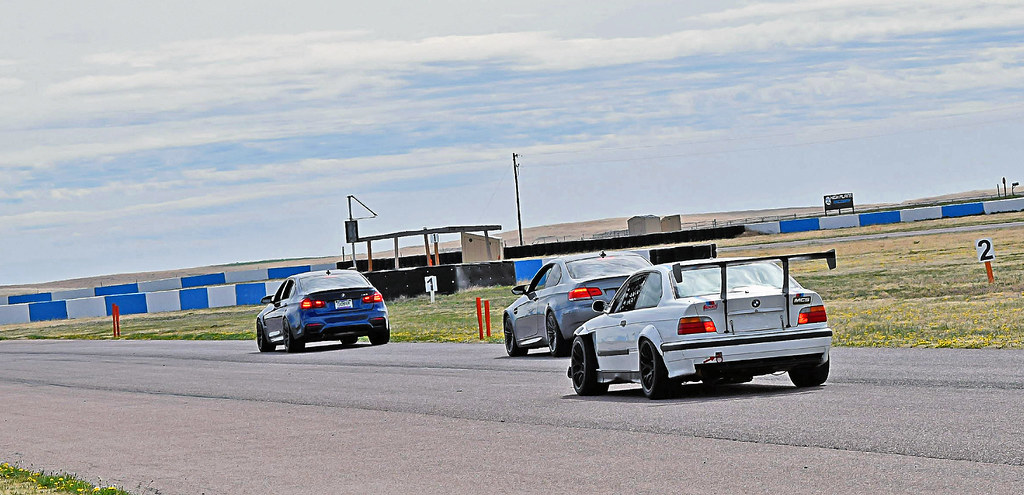
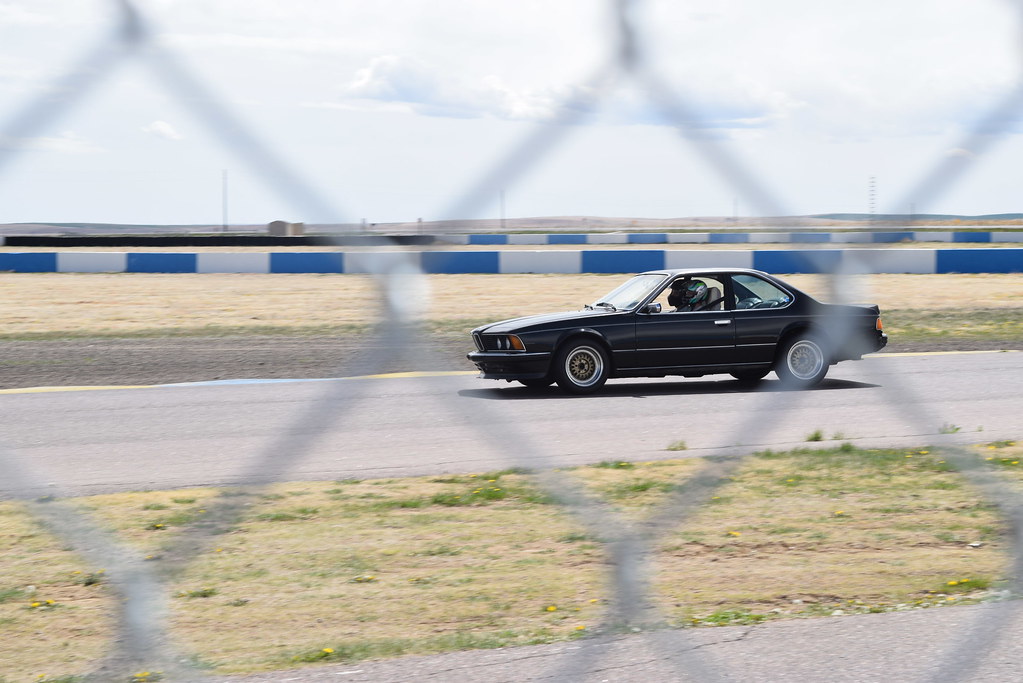
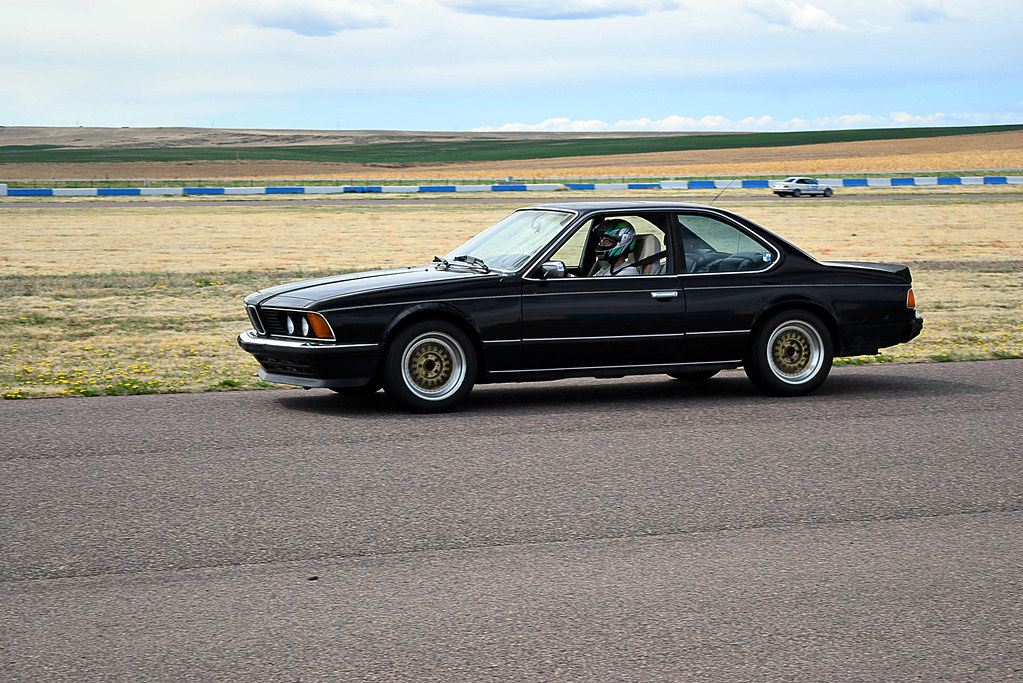
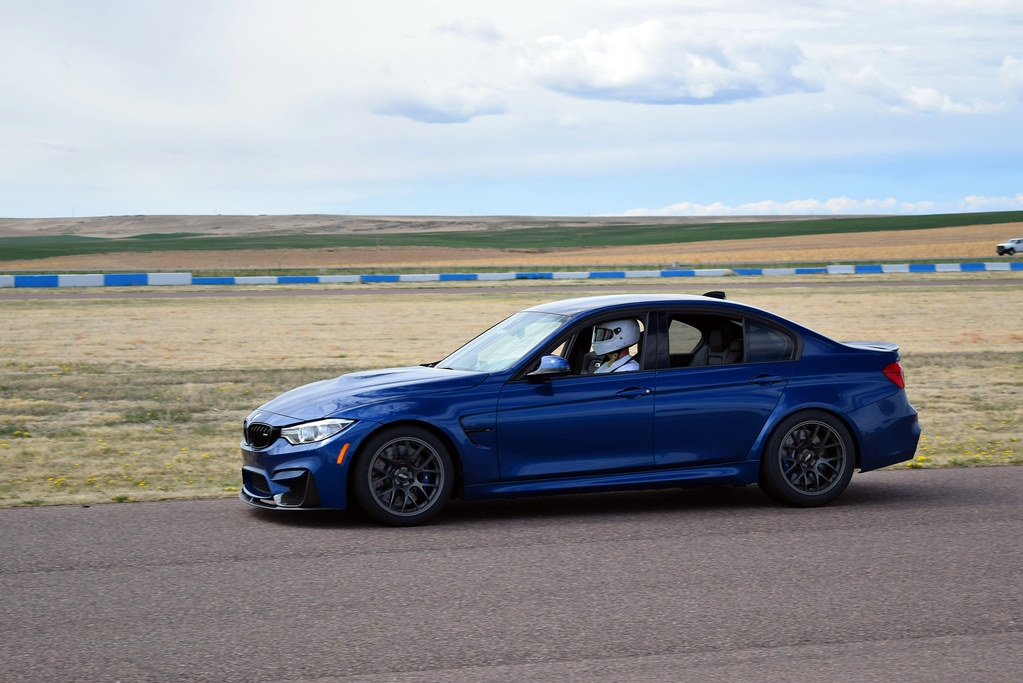
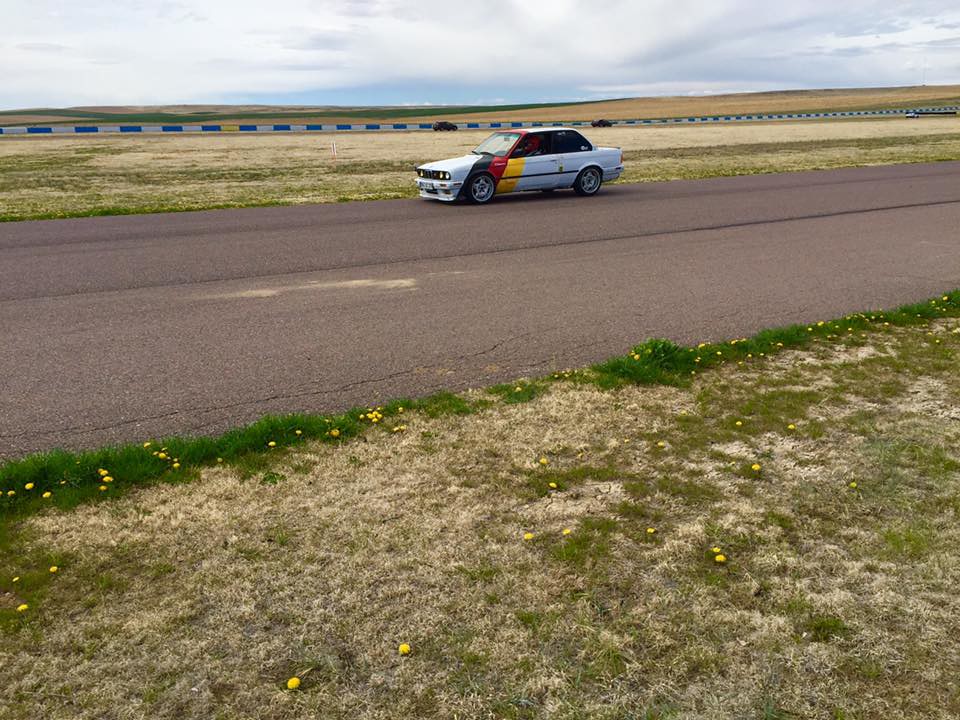
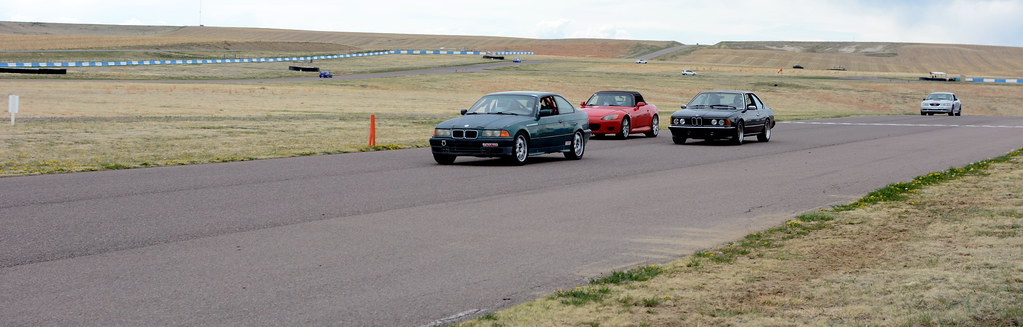
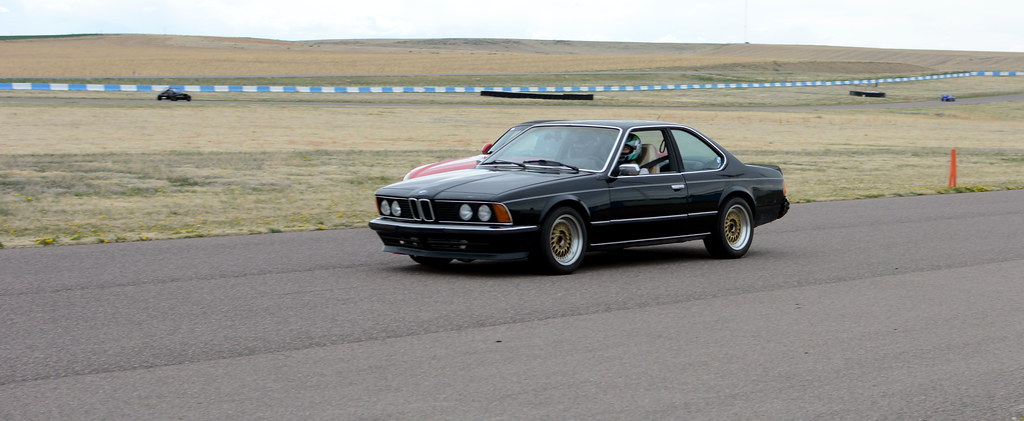
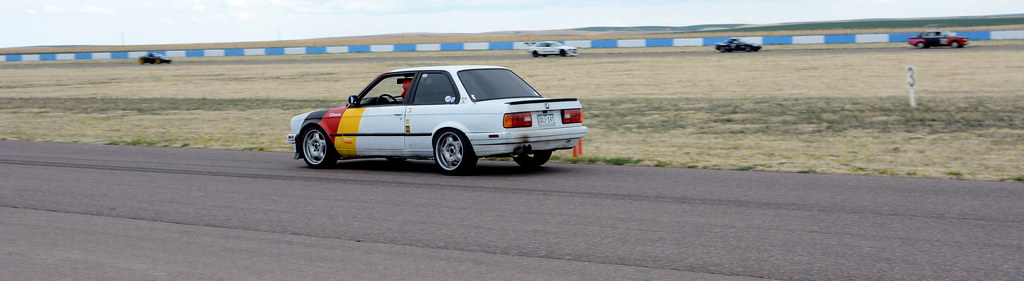
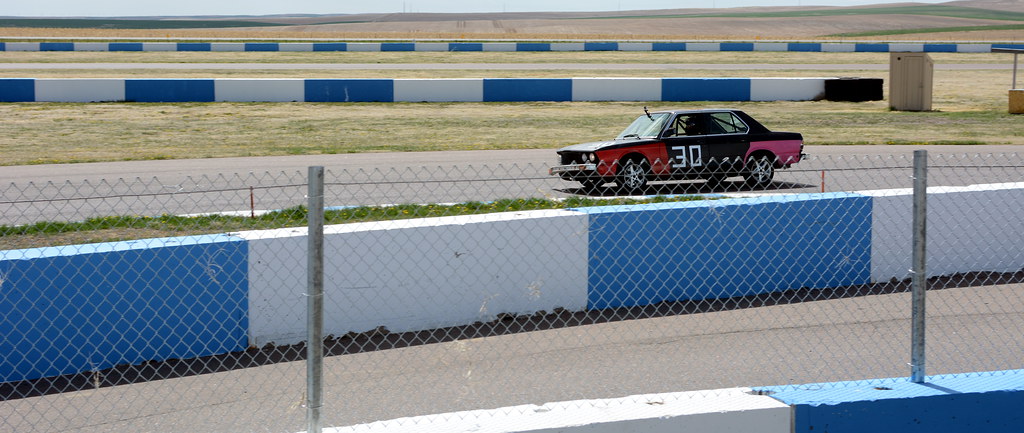
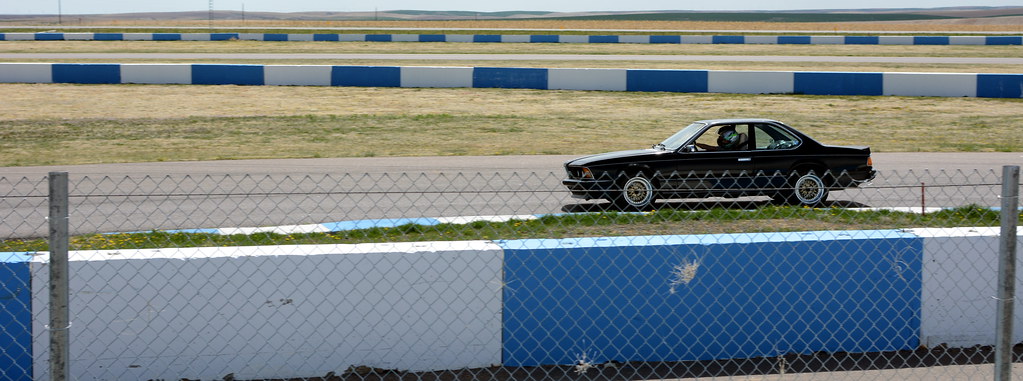

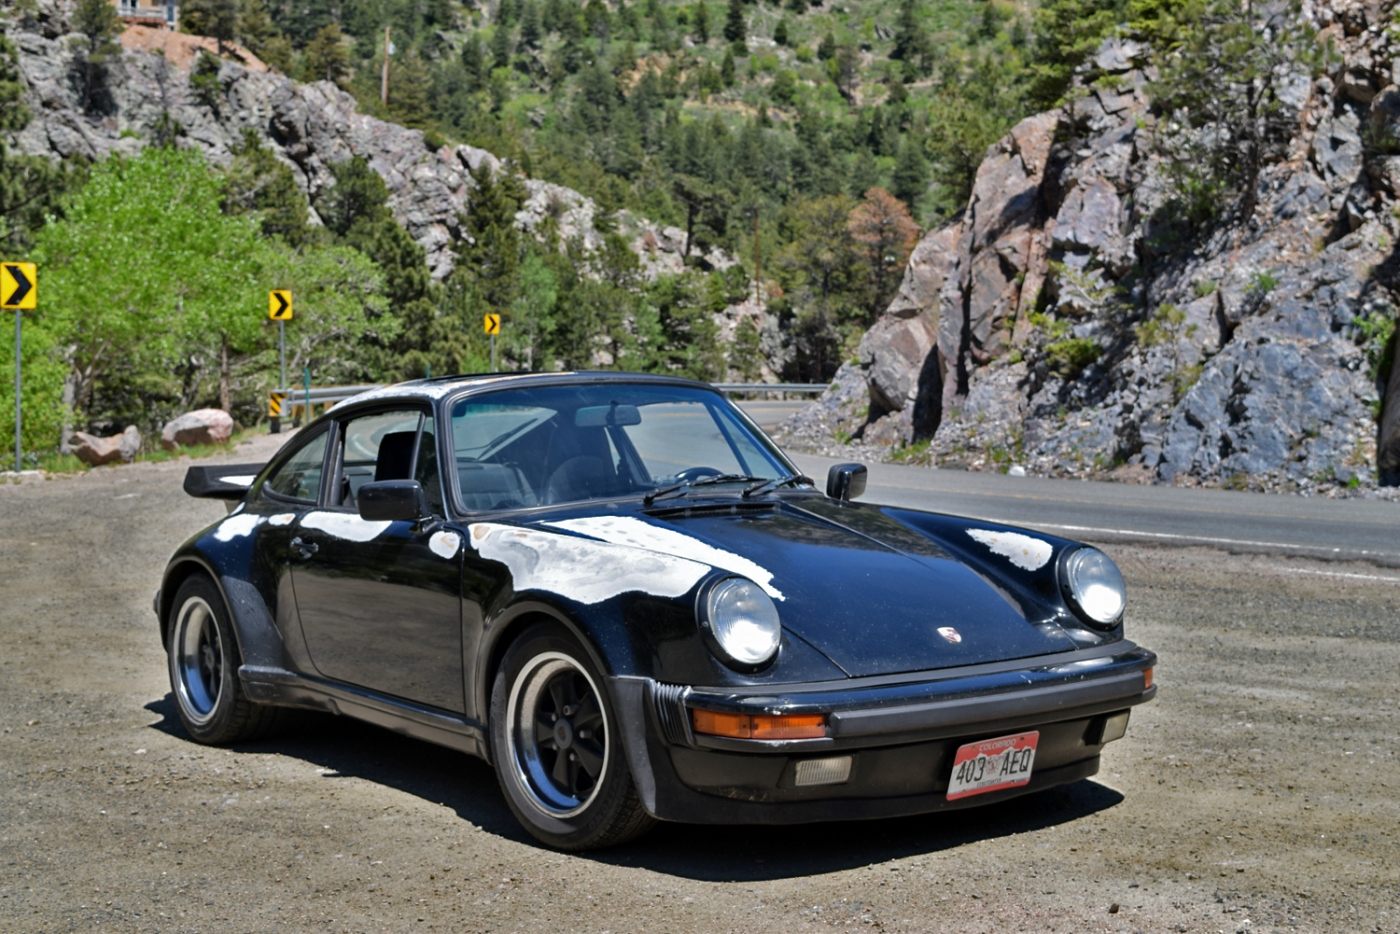
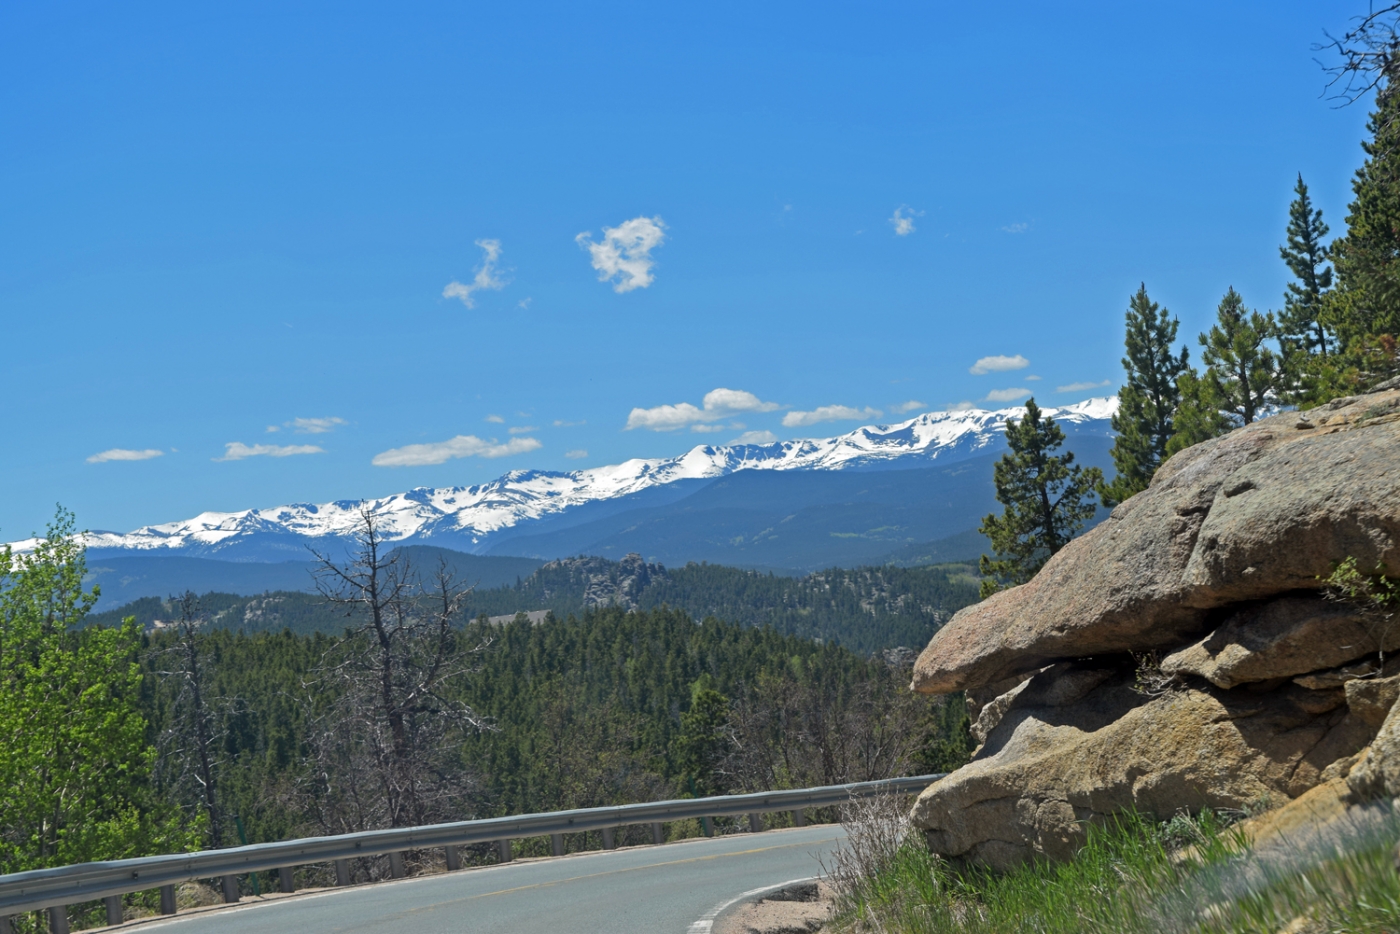
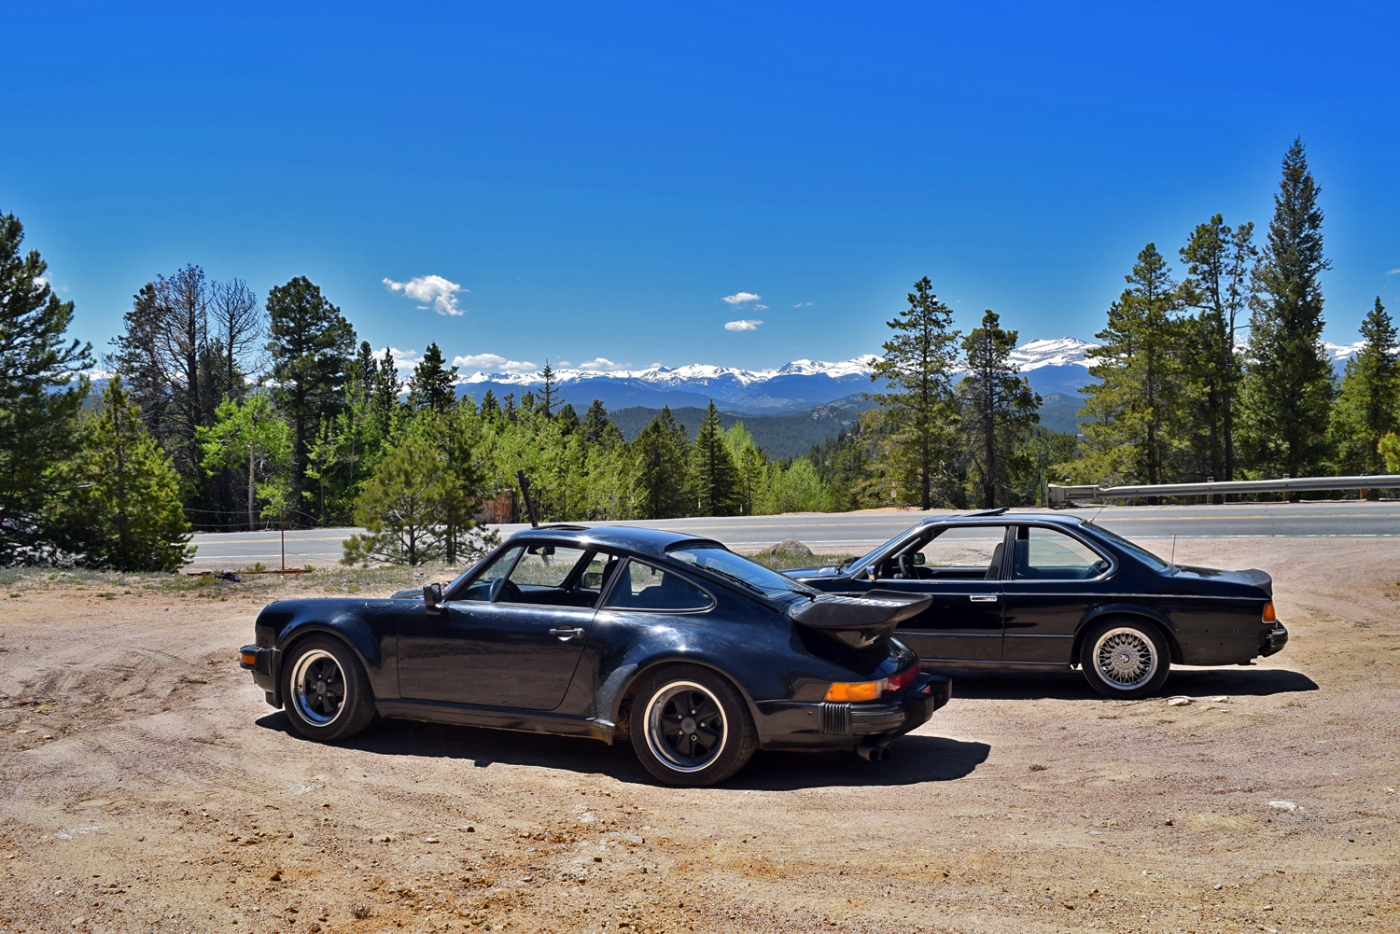
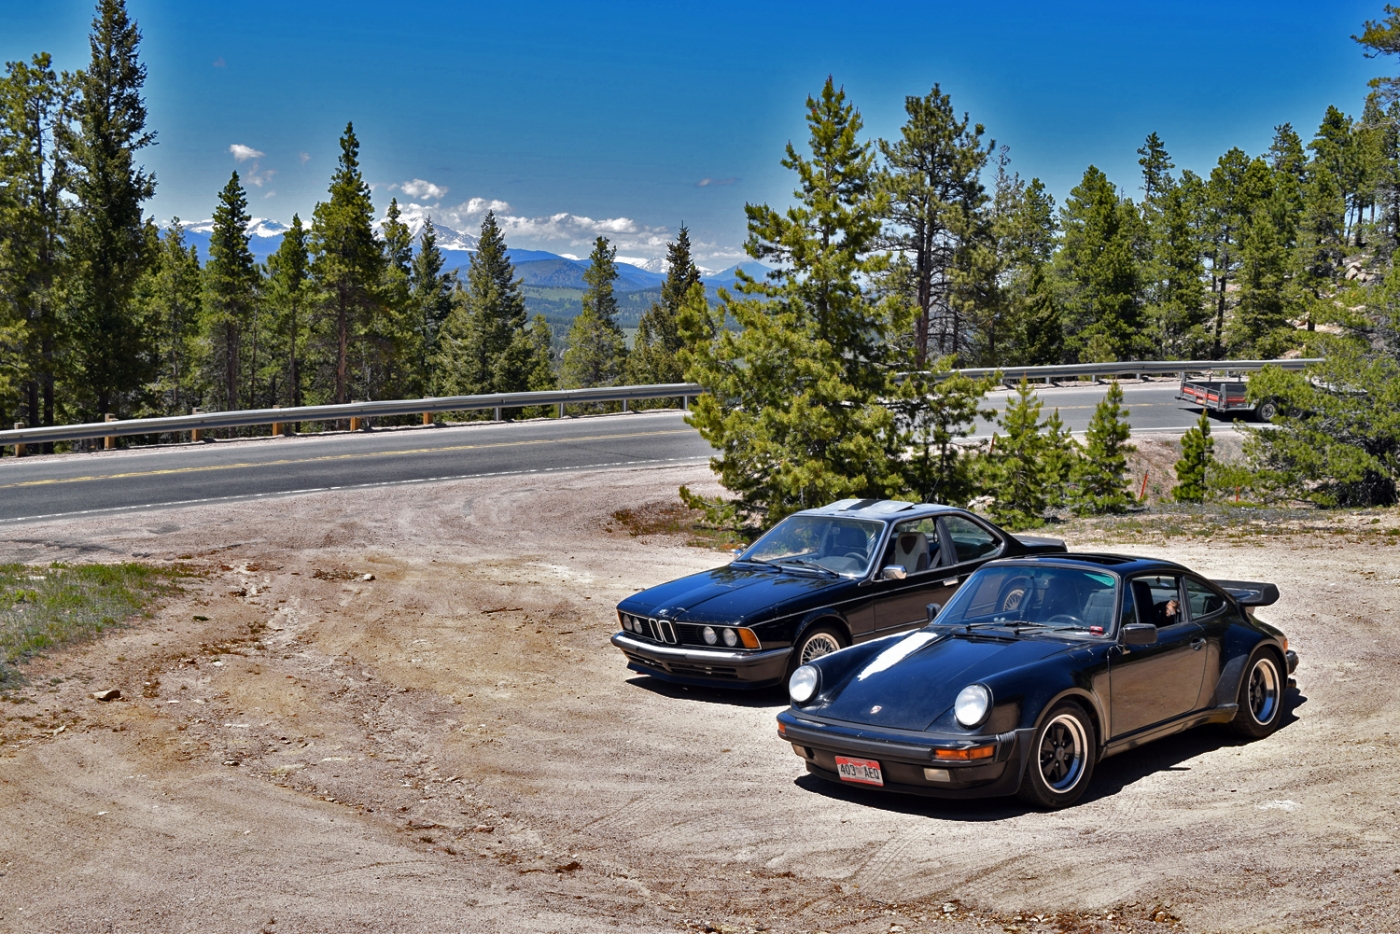
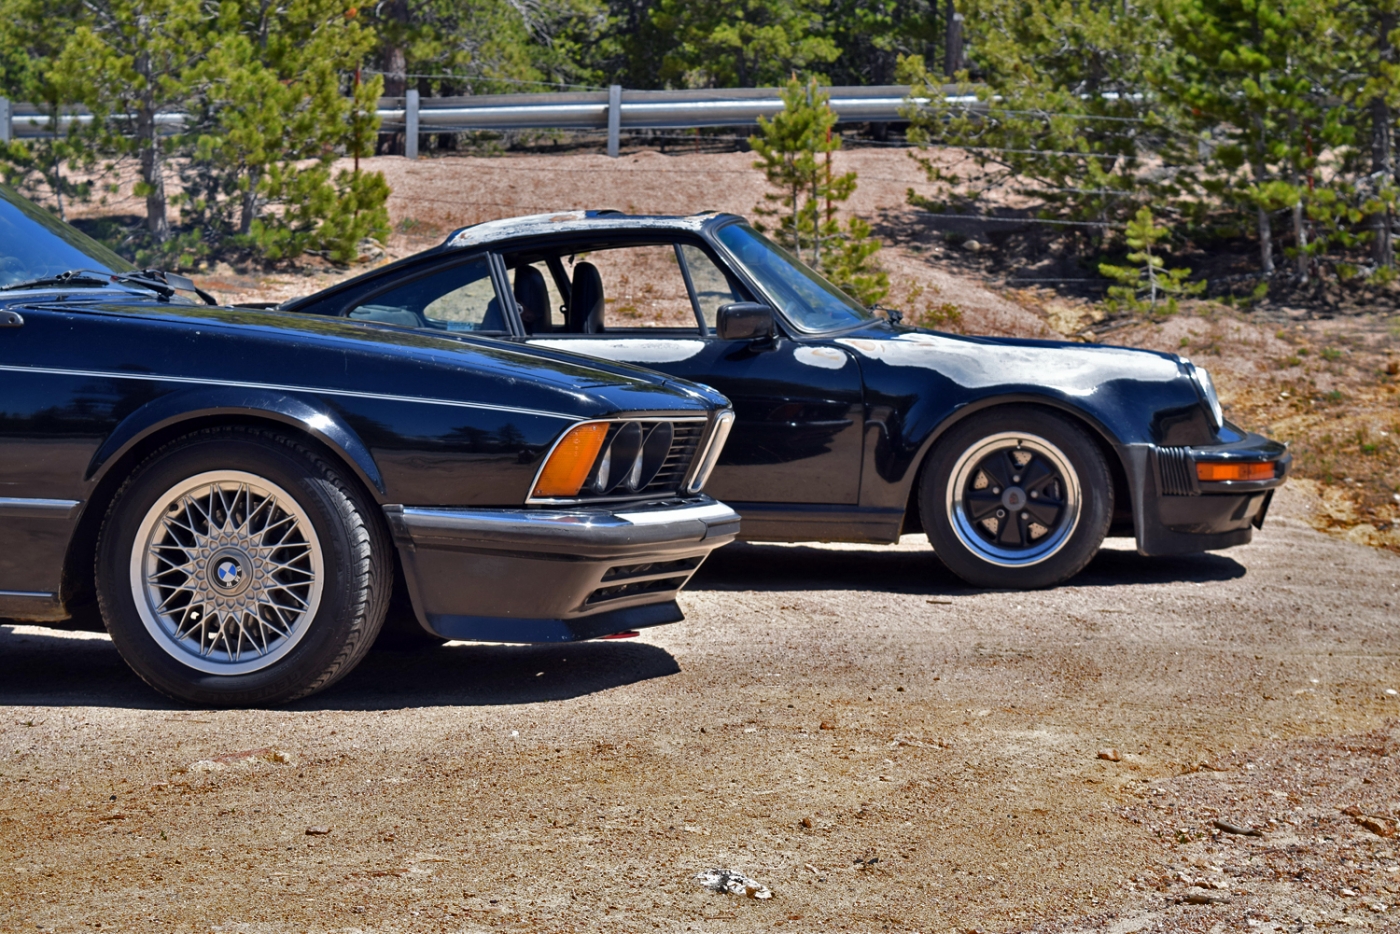
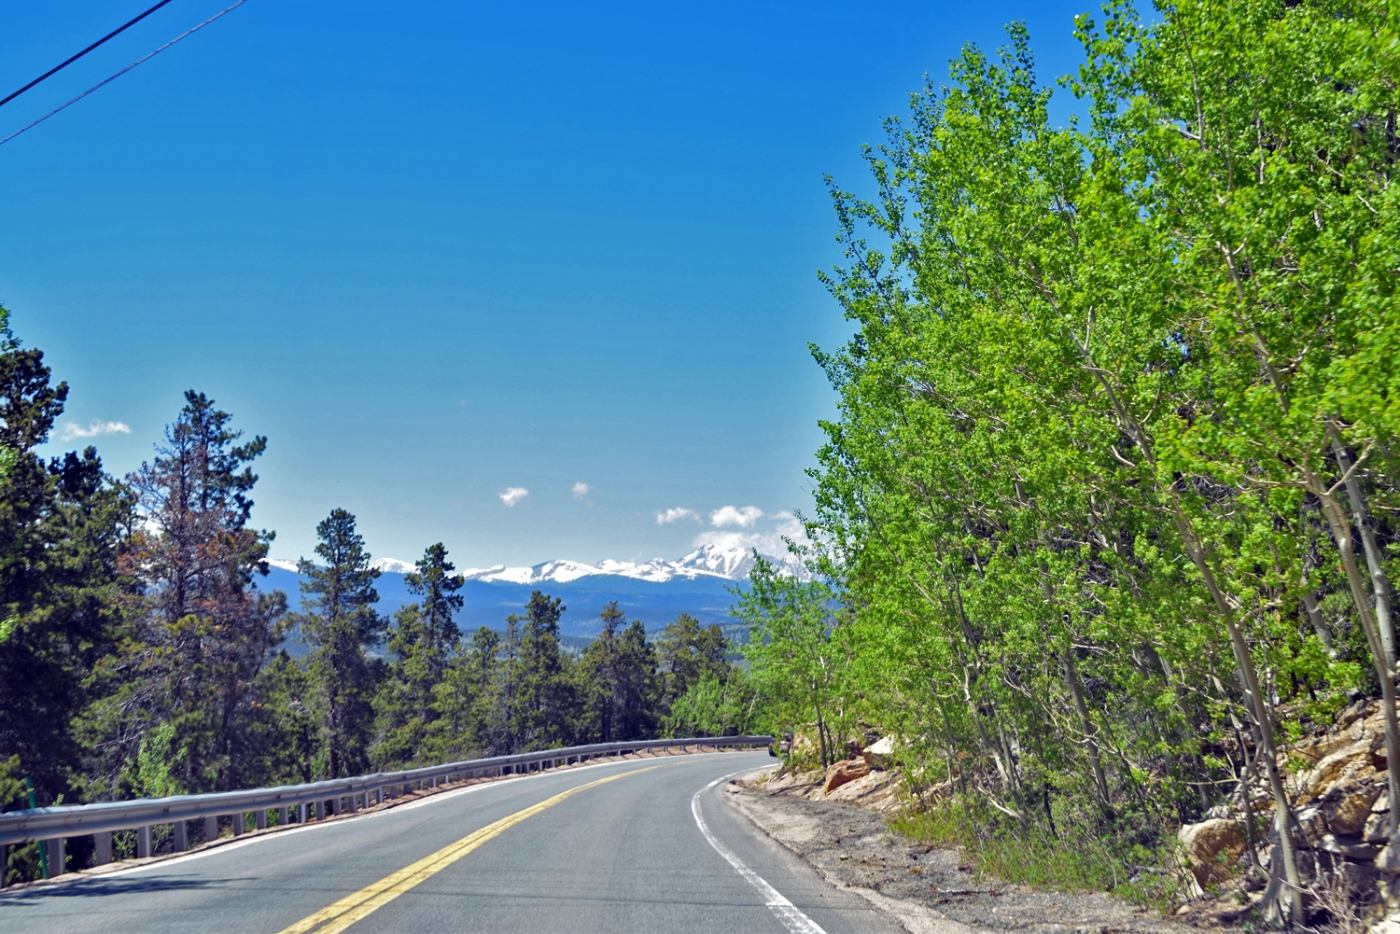
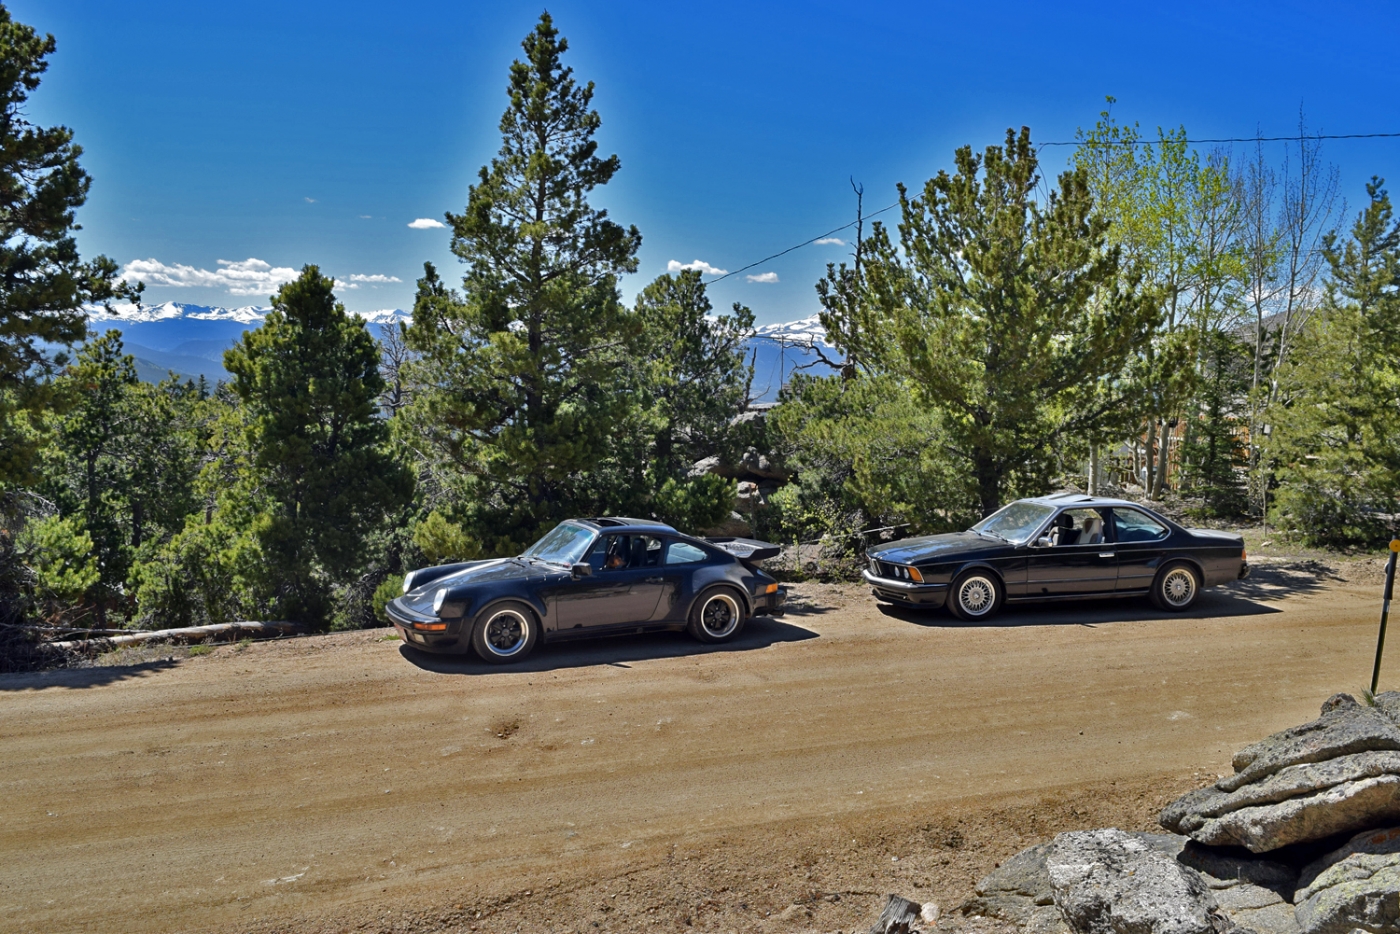
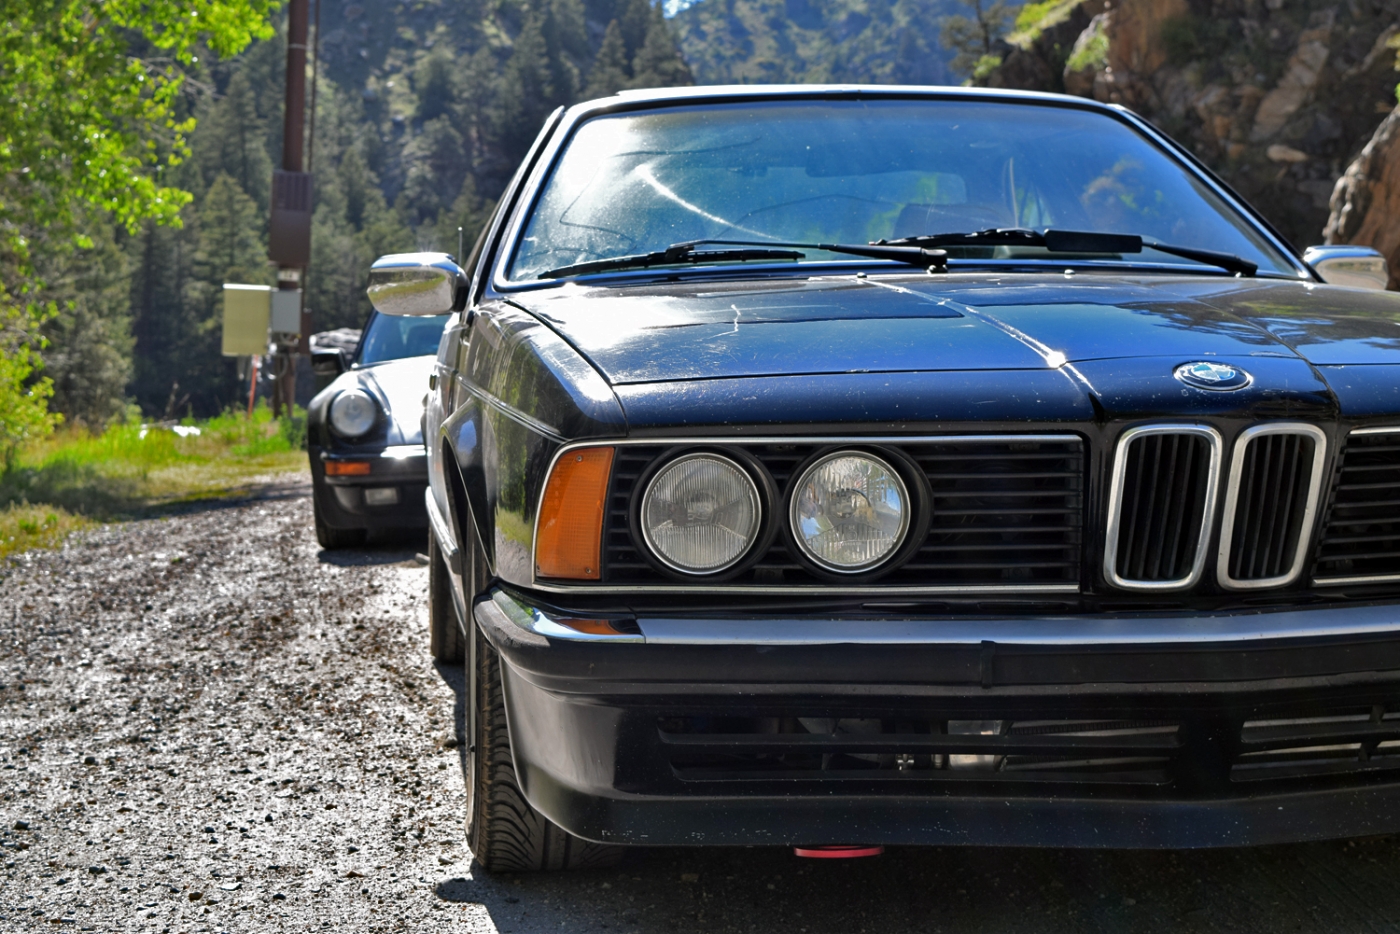
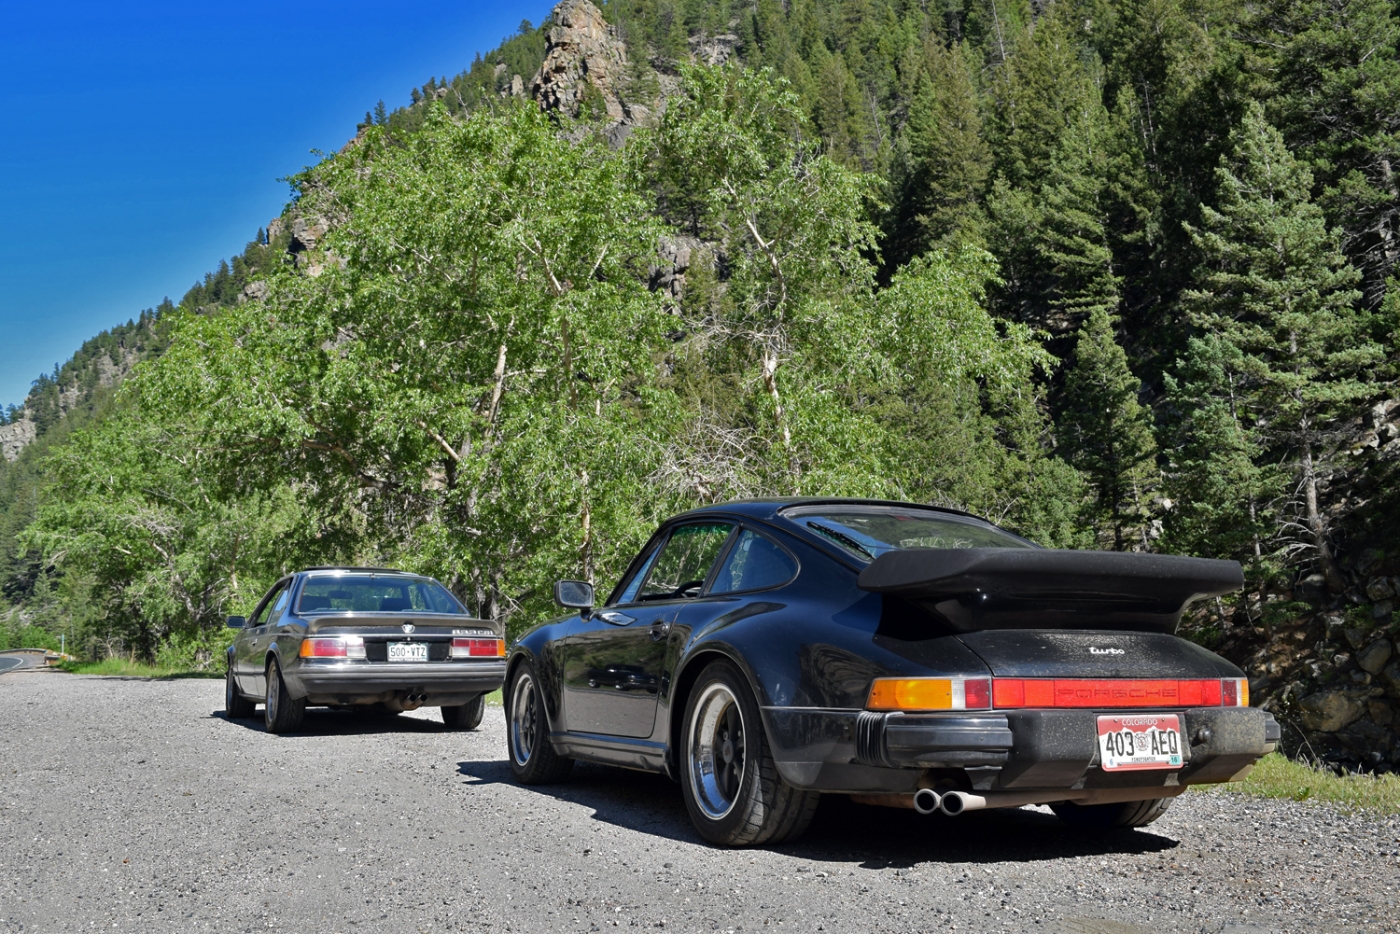
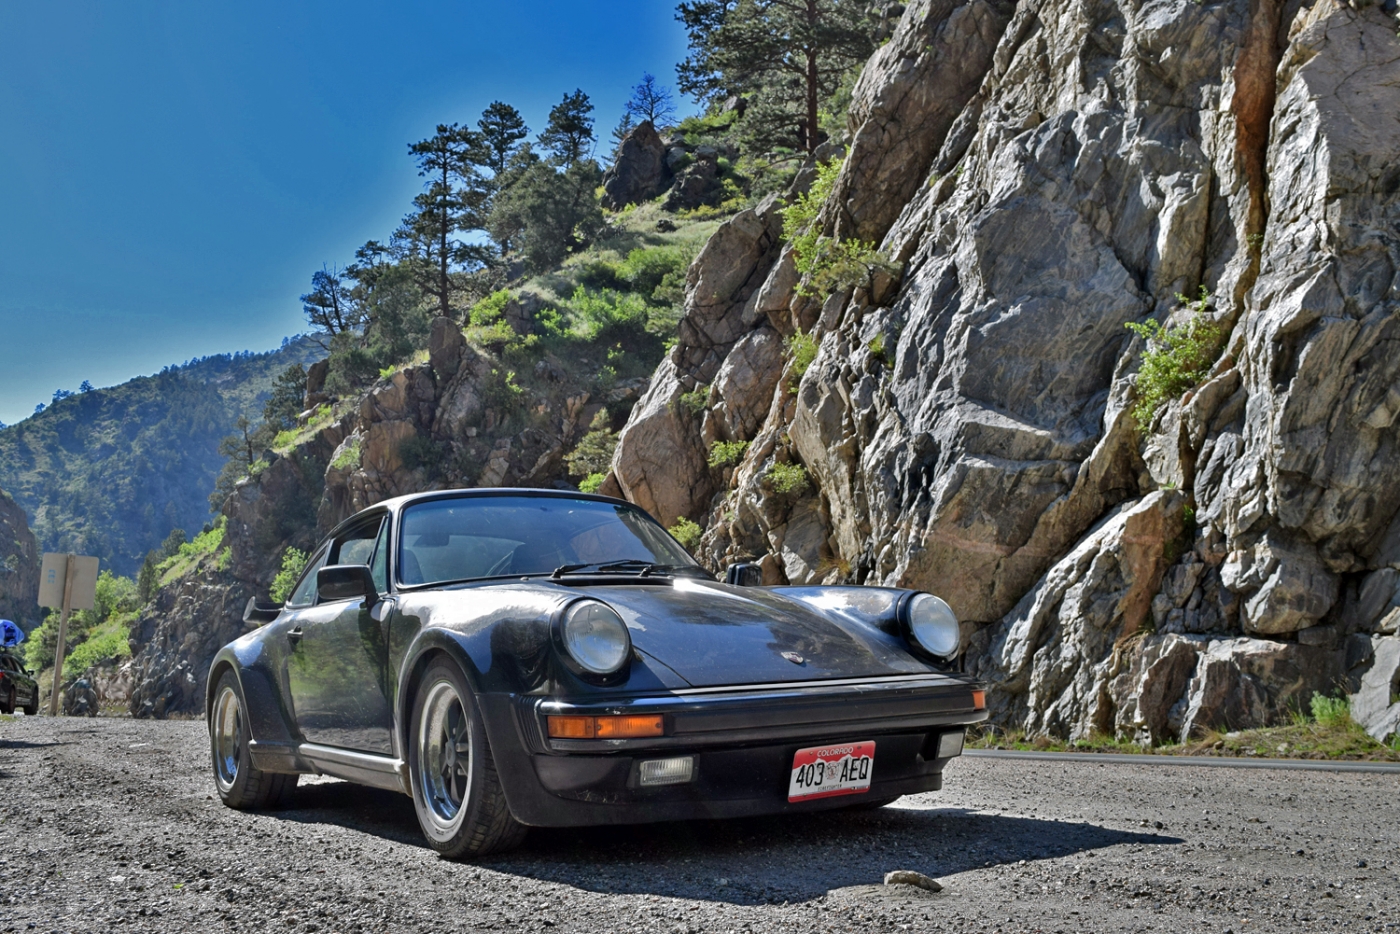
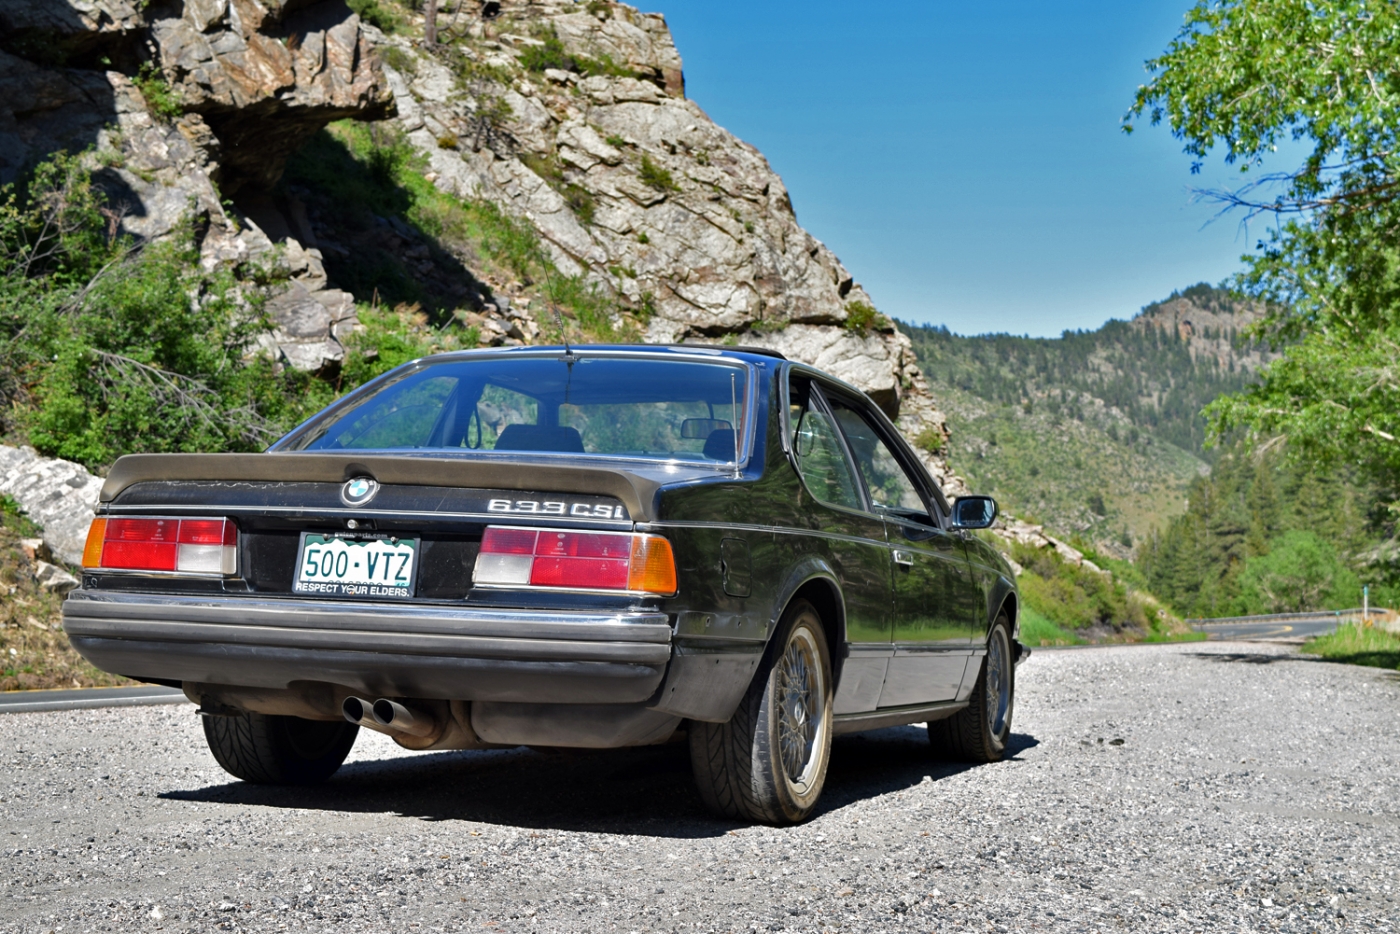
Bookmarks