
 Member
That SSI manifold is going to leak in stock form. I sold mine after it kept blowing the bottom plate seal. Now using a LS6 manifold. It's the better choice.
Todd DeHate - Turbo Charging Dynamics
1985 535i euro LSX Turbo
503rwhp/485rwtq
Member
Originally Posted by Turbo Charg Dynam

Thanks for the heads up.
Member
Small victory, but an important one!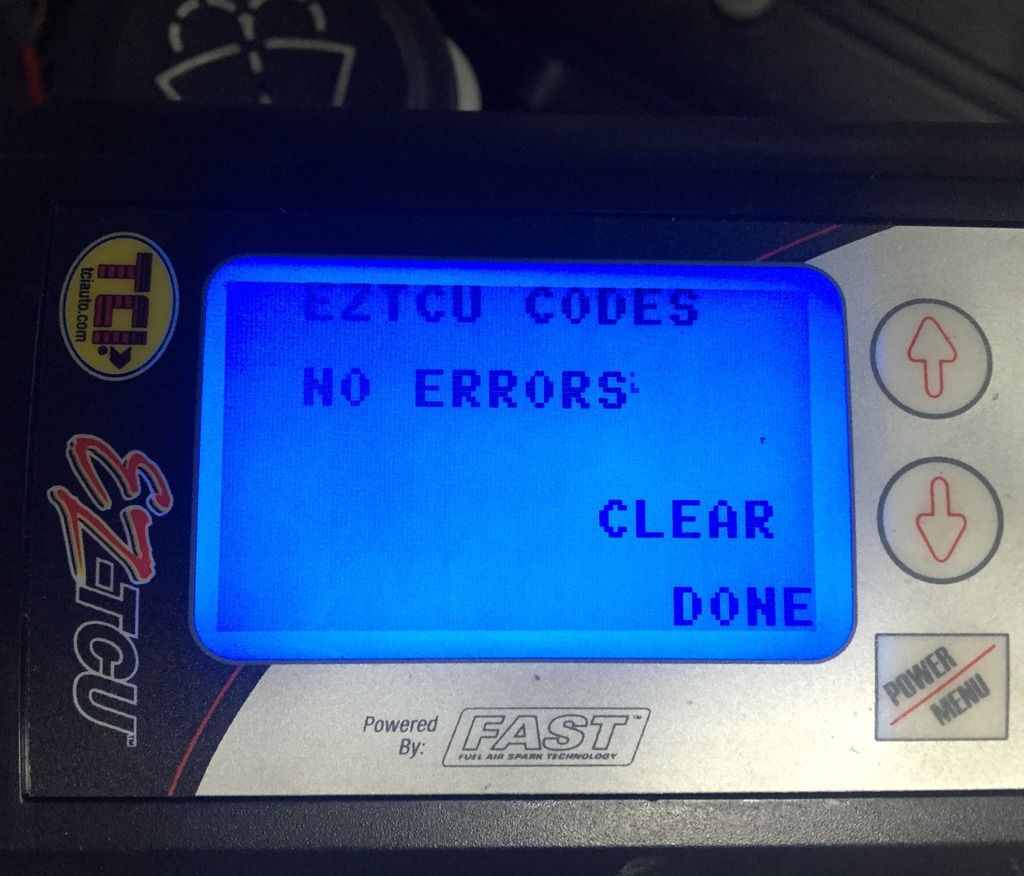
Member
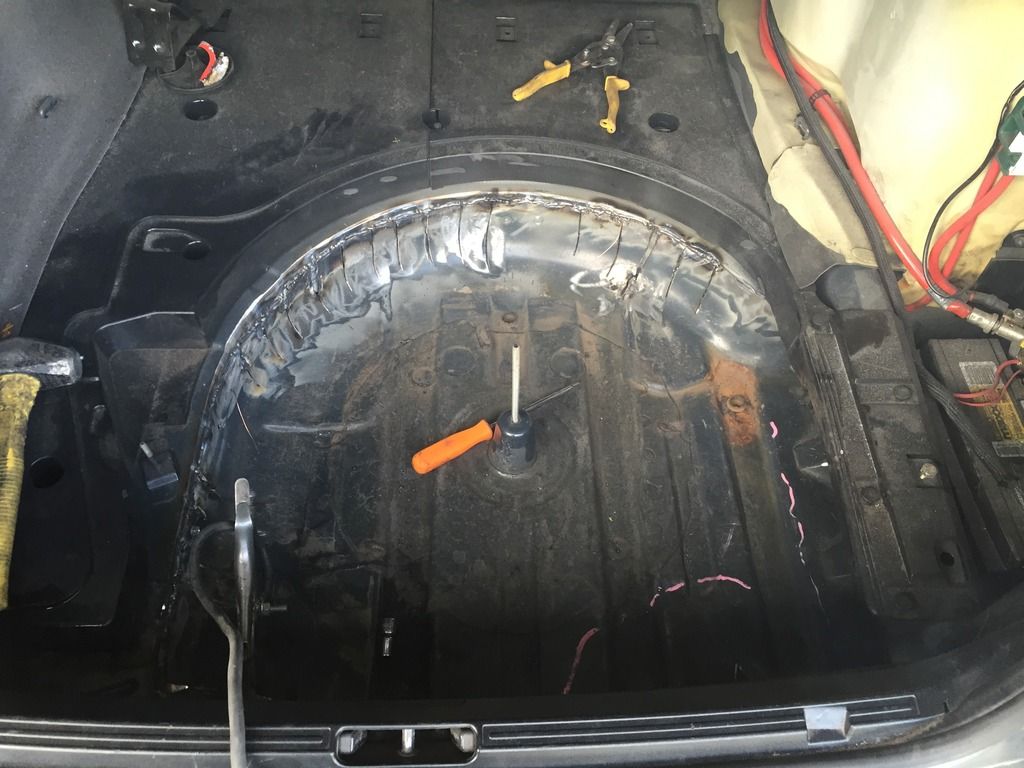
Starter clearance
Spare tire well moved up to make room for dual exhaust and a trans cooler. It still needs to be fully welded and seam sealed.
Member
I've been looking for a low key gauge substitute for the Holley touchscreen. The E39 interior is larger than the E36, yet there is much less room to install gauges/ touchscreen without looking gaudy.
While searching eBay, this came up.There are multiple models, I went with the "pro." It will display every parameter that I had on the Holley touch screen and more. The display is remote mounted from the "brain box", thus allowing a multitude of mounting positions. I sat in the drivers seat and placed the display all over the car trying to decide the best position. I wasn't happy with anything until I discovered the display is the same width as the center a/c vent. It is also about 1/2 as tall. I'm going to attempt to install it in the top half of the drivers side vent. The lower portion should still be functional.
Member
It looks awesome installed. Very subtle and easy to read from the drivers seat. I'm really pleased with how this worked out!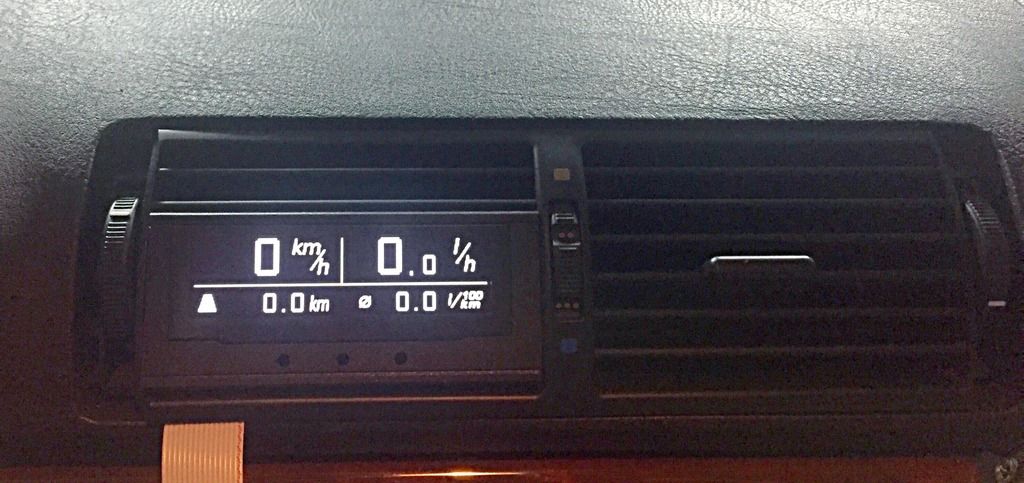
Member
Looks very cool, good job. Plus the fact it doesn't look too unnatural like some gauge installs is always nice
Member
I see what you did there ;-)
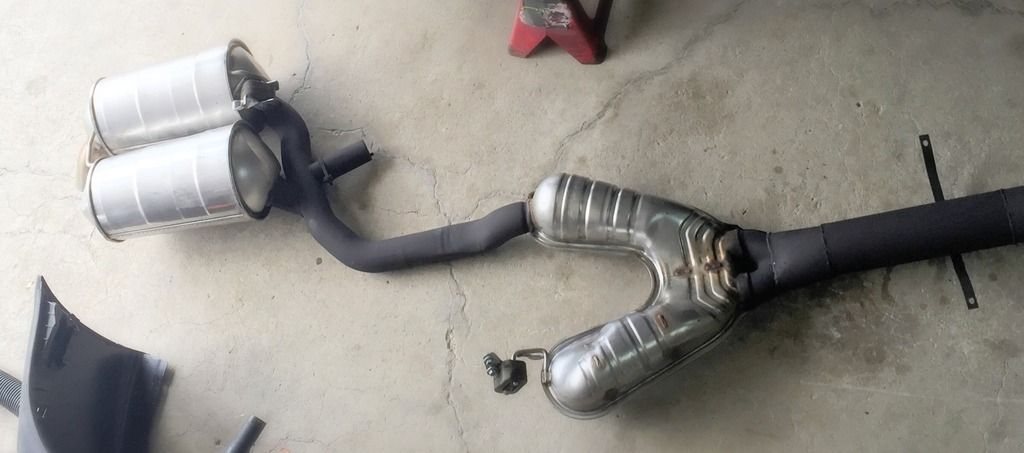
Thanks for the compliments. I'm trying to keep this one fairly low key. This leads me into the interesting exhaust system I worked on yesterday. The exhaust is 4" from the turbo up to the OEM Y-pipe. The 4" transitions into the OEM Y-pipe & mufflers. From the back of the car it looks 100% stock.
Before anyone gets upset, I know this isn't anywhere near optimal for the engine and turbo. I want the car to be tame and quiet under normal driving conditions.
On the other hand, there needs to be a solution for when the conditions aren't "normal." I'm looking at different styles of exhaust cutouts. There are boost activated butterfly valves, electric butterfly valves and others have used a large wastegate. I do have a 60mm Chinese wastegate that is a possibility.
The passenger side of the Y-pipe is probably where this will end up. There is a ton of room in that location.
Member
Exhaust pics. It's not beautiful but it will work!
Rear section
Front section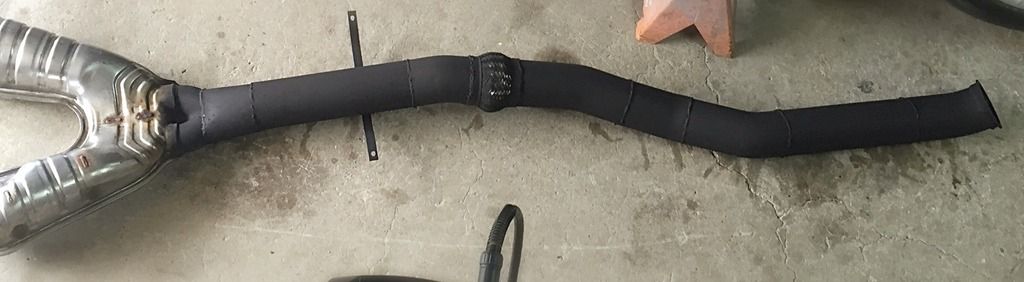
Member
Good Lord that final section before the rear muffler is horrible. Please enlarge diameter!!!!
Member
I'm stoked you hate it so much! :-)
I've installed a wastegate on the passenger side of the y-pipe. It is going to function as a boost activated cutout. I know this isn't "optimal", but the car isn't a race car. There is a trade off with giving up power and achieving a truly drivable car (this is subject to 100 different opinions). I'm sure the exhaust will work OK. When the wastegate is open, the exhaust is roughly equal to dual 2.5" pipes. This will flow roughly the same as a 3.5" single. Many others have done this. A "proper" exhaust will net more hp, there is no question about it. However, the 40, 50, 60?? h.p. isn't that big of a deal to me. If it chokes stuff that bad, things can be changed
I moved on from my Turbo E36 LS project because I hated driving it. The exhaust had a lot to do with that. It was loud as hell. The large piping fit like s$&t.
Member
I've been on a mission to repair, replace or change all of the little annoying problems on the interior of the car.
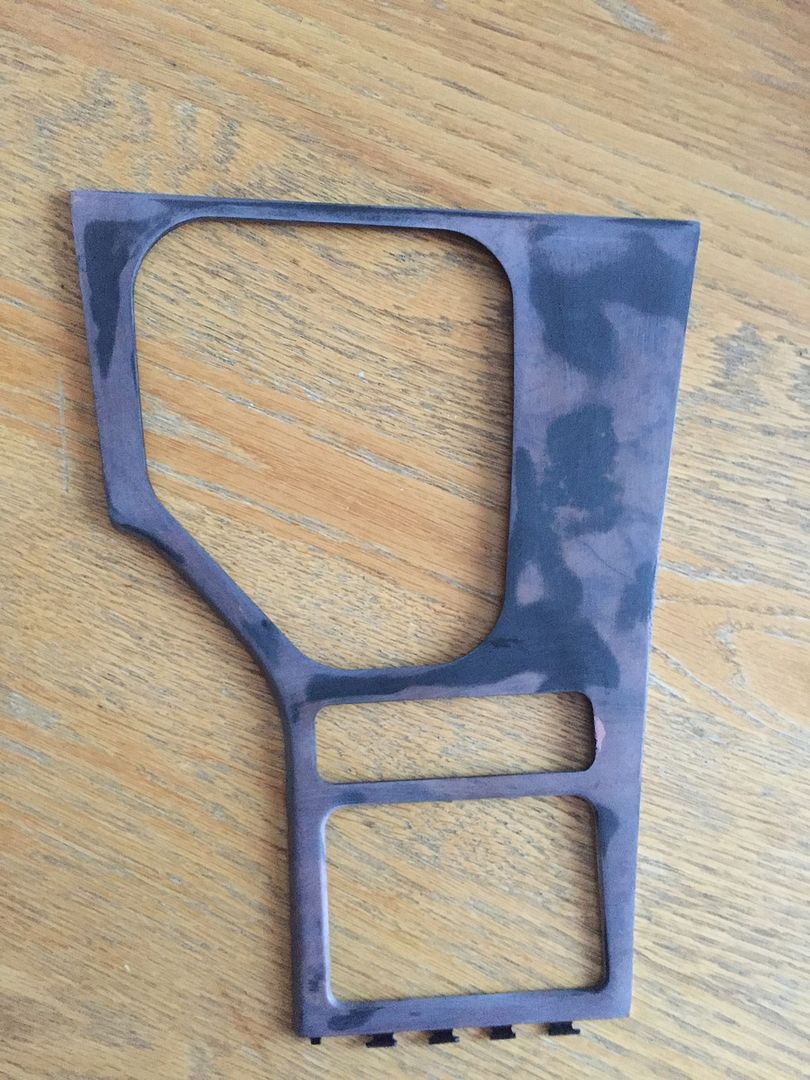
Project 1: Wood grain trim
The brushed aluminum wrap did not stick to the wood grain very well. It pulled back in several spots that had to be heated and stretched. I peeled it all off and decided to paint it rather than use the 3m wrap. Superglue and feather sanding with 400 grit smoothed out the cracks that were present in several pieces. I used a black lacquer spray can to paint the pieces. It took almost 2 weeks of painting, sanding, clear coating and polishing. The finished product is much better than I expected. I'm going to use a matte black wrap on the shifter surround, as the gloss looks out of place. The matte matches the hvac controls and doesn't look out of place.
Project 2: Drivers seat
The seat base wasn't horrible, but stitching between 2 of the panels had come apart. After searching for the correct replacement seat, I ended up buying a "parts" seat. My car came equipped with the higher optioned seats, they are hard to find. Luckily, the comfort seats have the same leather cover on the bottom. I swapped the upholstery and the plastic trim from the parts seat onto my original. It worked out really well. I have extra motors just in case the dreaded seat lean ever happens.
Project 3: Scrub the interior
All of the plastic pieces that have been removed for one reason or another have been scrubbed. I may be a little OCD here, but other people's dirt and grime makes me crazy. I normally remove the carpet and take it to a car wash to clean it, but the carpet in this car wasn't all that bad. A little spray on cleaner and a shop vac was all it took to clean it up.
I'm also working on the trans cooler's (2), fuel lines, adapting a 450lph in tank pump and turbo feed/ drain lines.
The fuel pump is much more challenging than the dual 255lph setup that I did for the E36. The E39 has the pump mounted in the tank, the sending unit is removed and installed separately. After a lot of trial and error it is installed as close to the OEM pump as possible. The 450lph pump has a 3/8 outlet (stock is roughly 5/16). The 3/8 is adapted to -6an coming out of the sending unit and to -8an to the fuel rails. The return is overkill at -8an, but the line was the same price as -6an. The -8an is stepped down to the stock line on the drivers side sump (original setup). Dual -8an filters from the E36 project are mounted in the stock location and mounting bracket.
There will be (2) B&M stacked plate type coolers mounted under the spare tire well (spare tire well was cut and raised approx 6" to accommodate this). After the intercooler, cold side piping, air filter and electric p/s pump were mocked up, there is no room to put a decent cooler up front. Both coolers are mounted 3" off the bottom of the spare tire well. Each cooler will have a dedicated fan triggered off of a temp sensor installed in the outlet of the second cooler.
The turbo feed was taken from the original oil pressure sender location. I found a fitting on eBay that screws into the block and raises the oil pressure sender. The adapter fitting has (2) 1/8" taps (one is plugged, one has the 1/8 to -4an). A -4an 48" pre made nitrous line worked perfect for the feed to the turbo. The drain line is exactly that. Bottom of the turbo to the left side of the oil pan.
I'm back to the waiting for parts game now. The second trans cooler, fittings, etc to finish the fuel system and trans cooler are on the way.
Member
Can I send my car to you?
Nice work.
БМВ Фанат!
We need pictures!!!
- 96 328is 6.0L. (LS1 to LS2 build thread: http://forums.bimmerforums.com/forum...ad.php?2098938)
- 96 328is 5.7L. (LS1 build thread: http://forums.bimmerforums.com/forum....php?t=1289987)
- 95 ///M3 6.0L. (LS2 build thread: http://forums.bimmerforums.com/forum....php?t=1619249)
- 97 ///M3. (e46 Fender Flares/track car build thread: http://forums.bimmerforums.com/forum....php?t=1727098)
- 96 328is (Dual Fuel Pump to Surge Tank thread: http://www.bimmerforums.com/forum/sh...ad.php?1964025)
Member
I'm horrible with taking pictures! I will get some later and post them.
Member
Shifter surround after sanding (lots of chips and cracks repaired).
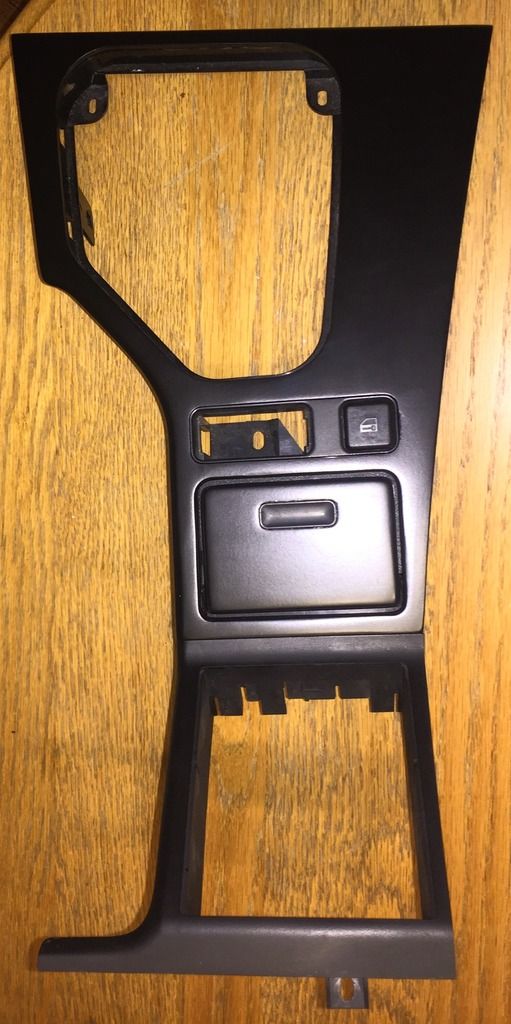
All "wrapped" up
Member
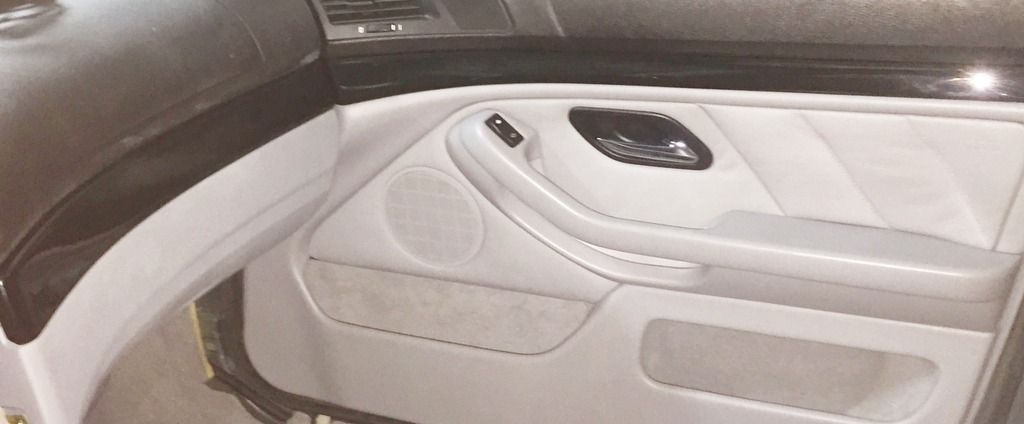
Pictures of the painted trim. It was difficult to get a decent picture with the car in the garage, these will have to do for now.
Drivers door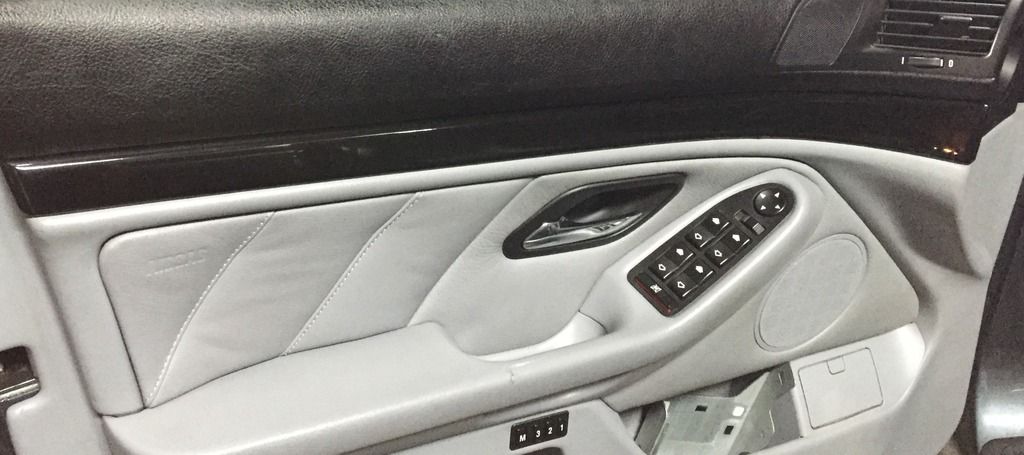
Pass side of dash and RF door
This is a borrowed pic of the original look (never thought to take one before tearing the car apart).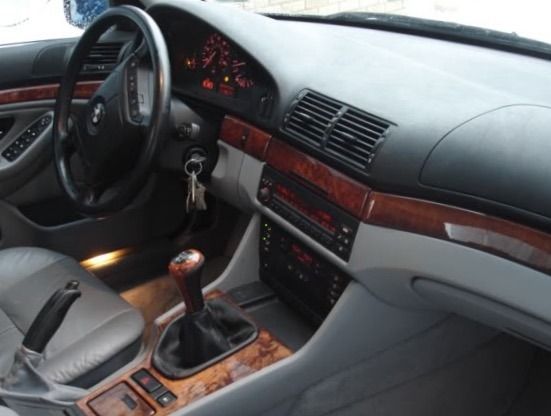
Last edited by unnatrl; 10-28-2015 at 01:37 PM.
Member
Not a fan of wood-grain. Nice improvement.
Tipsy
Member
I agree. It makes a nice car feel like an old man should be driving it.
Member
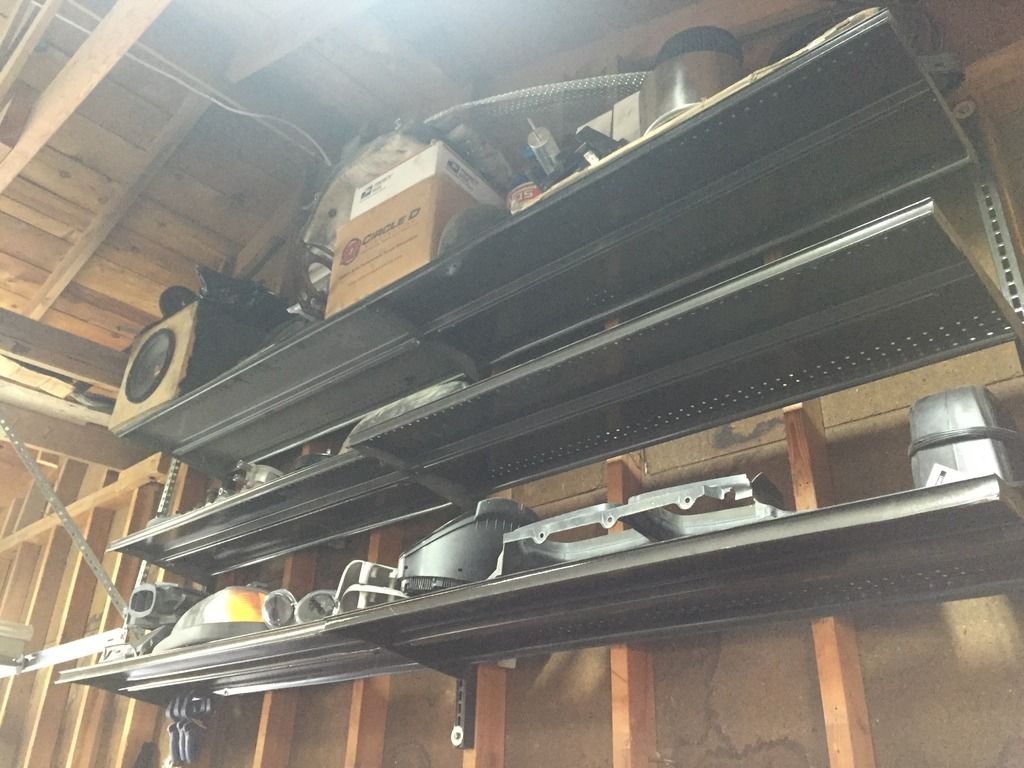
Yesterday started with a near melt down on my part. It's amazing how much "stuff" you collect when doing a project like this. Compile this with switching from one small project to another (always waiting for parts to complete a small task). Intentions were to insulate and drywall the garage before putting the shelving up, but that will happen later. It's so nice to have all the parts for the car organized in one spot. Really should have done this months ago!
These two finally gave up. Apparently cleaning the garage isn't much fun.
Member
Trans coolers and fans mounted. Cooler lines are complete. The fans need to wired and the lines need to flushed, but his part of the project is almost done!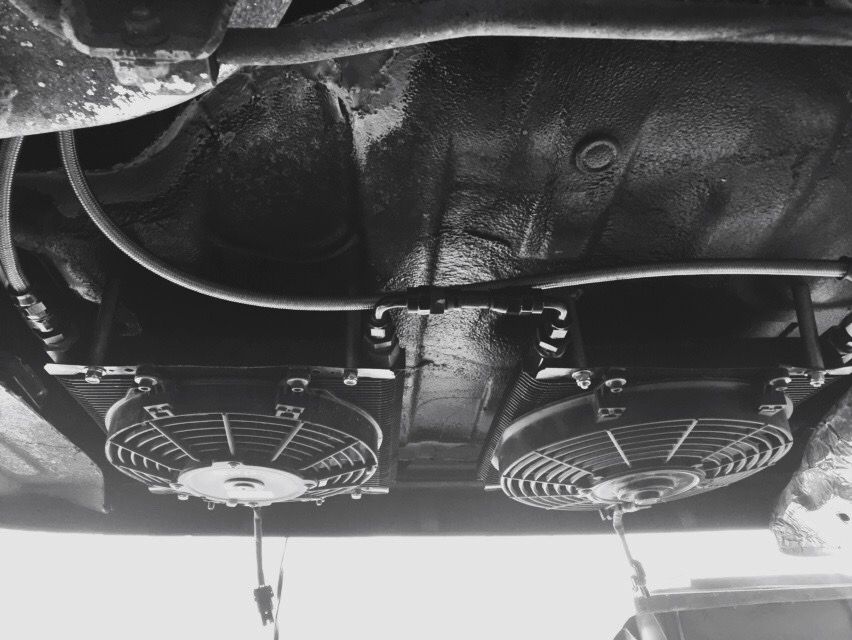
Member
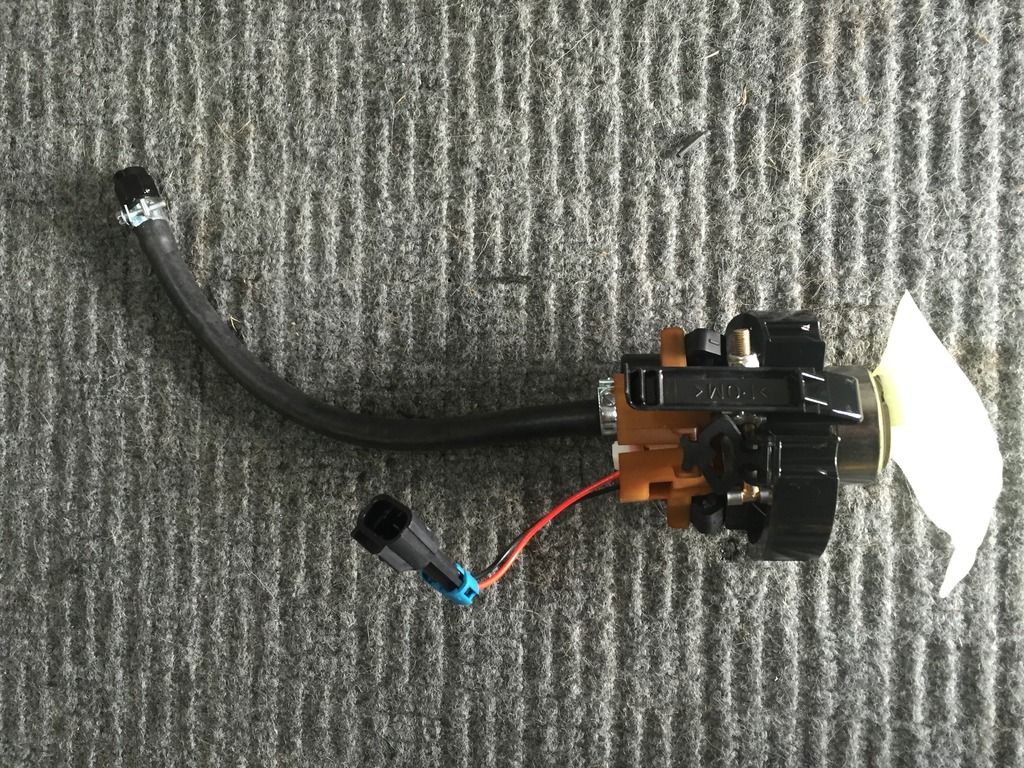
Fuel pump fun!
Stock lower portion of the pump cage was modified to accept the 450lph pump- approx 1" cut off of the bottom. I used the part that was cut off as a "spacer" as the new pump is slightly smaller in diameter (on the upper portion) vs the stock one. A stainless T-bolt clamp was used to secure everything together. The stock pump uses a 5/16 corrugated line that is very flexible. This is important as the pump housing assembly snaps in to the tank and the sender is installed afterward the replacement pump uses a 3/8 line, thus the black hose you see in the picture. Make sure it's "submersible", normal fuel line will turn into sticky goop and pop off under pressure.
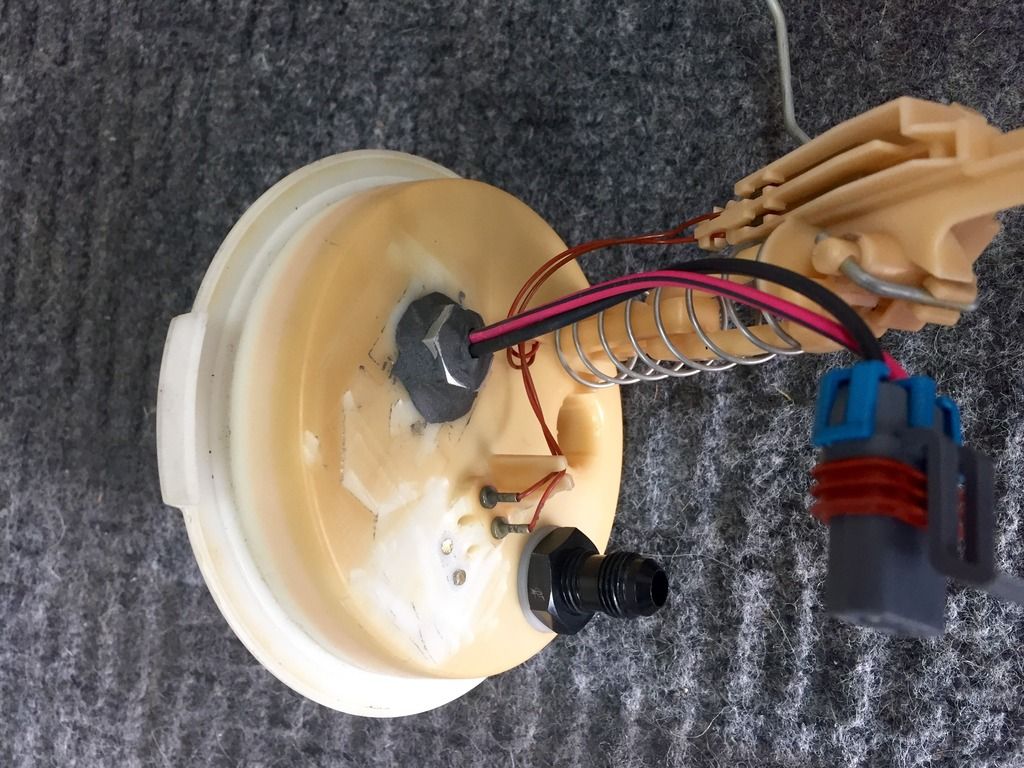
Fuel pump housing installed in the tank.
The feed line from the pump has to be threaded on to the fitting that is on the sending unit. In addition, the pump wiring has to be plugged in before the sending unit can be installed. I used a -6an bulkhead to pass the fuel line through the sending unit and a -4an fitting and bulkhead nut to pass the new pump wiring through. The ghetto looking stuff around the wiring fitting is JB Weld Steel putty. It's fuel proof, and that's what matters!
Sending unit installed. To maintain decent flow, a -6an female 90* to -6an male fitting comes out of the top of the sender/ bulkhead pass through fitting. A 12" -6an nitrous line is threaded to the end if the 90* fitting. On the other end of the nitrous line is a -6an to -8an adapter, then it's -8an to the fuel rails.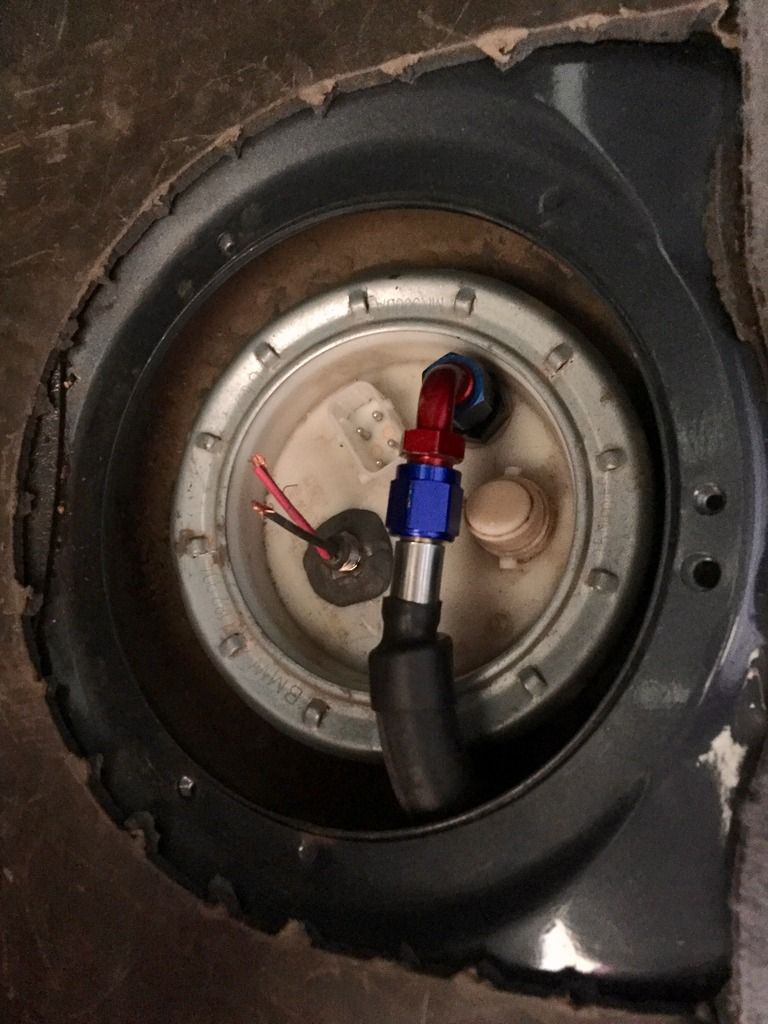
Member
Finally finished the center console & shifter surround. I went back and forth between using a manual trans boot or filling the gear indicator portion on the auto shifter plate and wrapping the plate in the same wrap as the wood grain. Ultimately the latter won out. It turned out really well.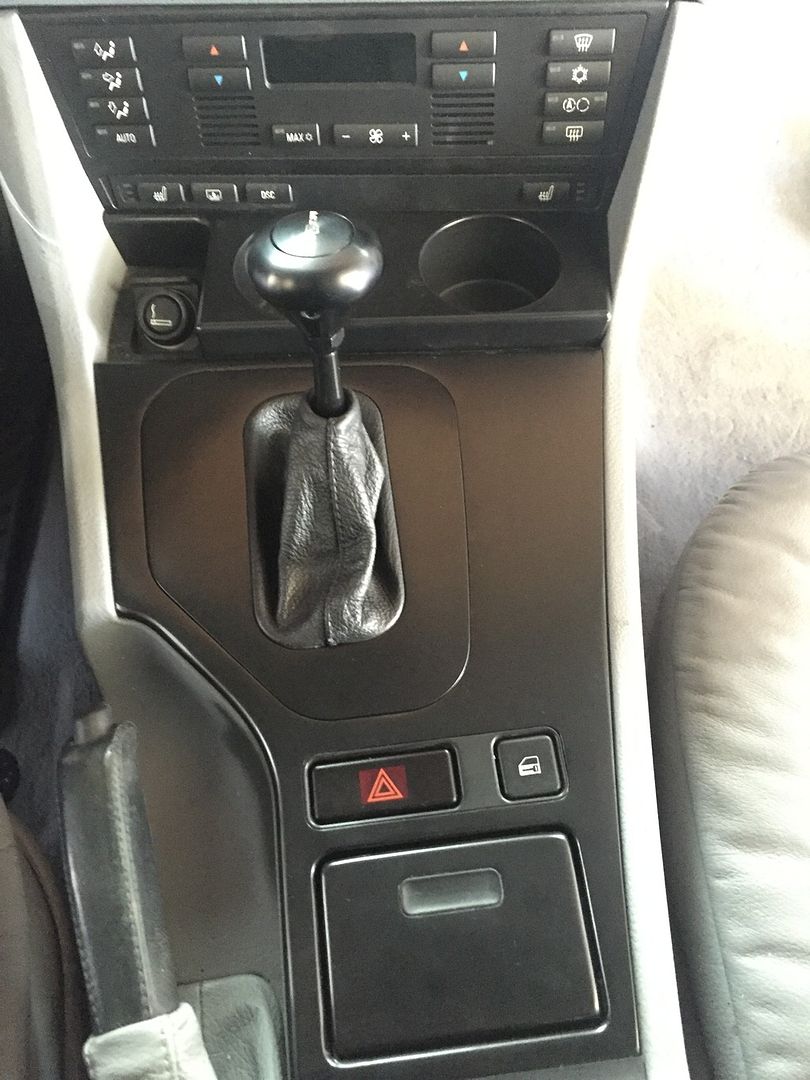
БМВ Фанат!
Looks neat!
- 96 328is 6.0L. (LS1 to LS2 build thread: http://forums.bimmerforums.com/forum...ad.php?2098938)
- 96 328is 5.7L. (LS1 build thread: http://forums.bimmerforums.com/forum....php?t=1289987)
- 95 ///M3 6.0L. (LS2 build thread: http://forums.bimmerforums.com/forum....php?t=1619249)
- 97 ///M3. (e46 Fender Flares/track car build thread: http://forums.bimmerforums.com/forum....php?t=1727098)
- 96 328is (Dual Fuel Pump to Surge Tank thread: http://www.bimmerforums.com/forum/sh...ad.php?1964025)
Member
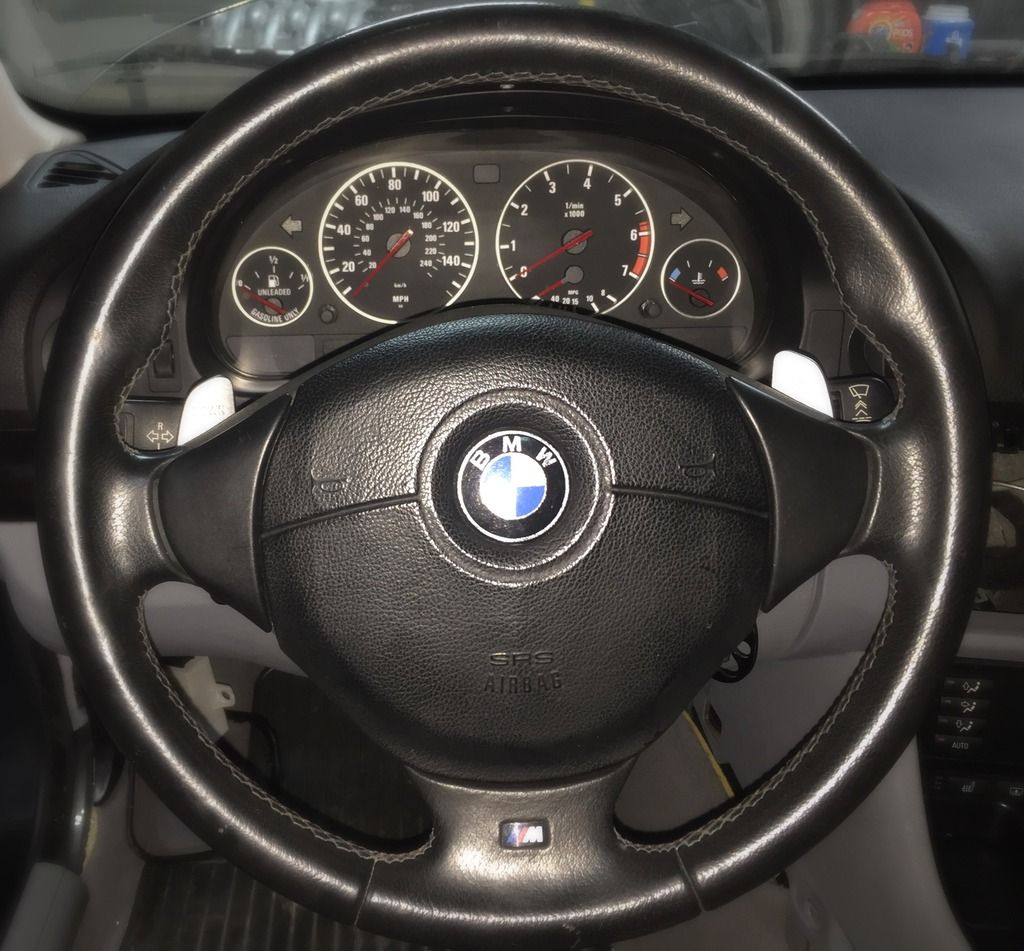
After spending a lot of time modifying a nearly perfect E36 M3 3 spoke wheel for the paddle shifters on the M3 project, I had to make it work for the E39. The E36 wheel is normally a single stage airbag- meaning the clock spring is attached to the wheel. My E39 uses a dual stage airbag- clock spring stays mounted to the steering column. I drilled the holes for the E39 alignment pins and drilled and ground the opening for the E39 clock spring connectors (all hidden behind the air bag). It slips on just like a dual stage wheel. I'm going to use the radio/ cruise wiring for the paddle shifters. Just need to source a dual stage drivers side air bag. Not bad for 30 mins of work!
 Posting Permissions


 Reply With Quote
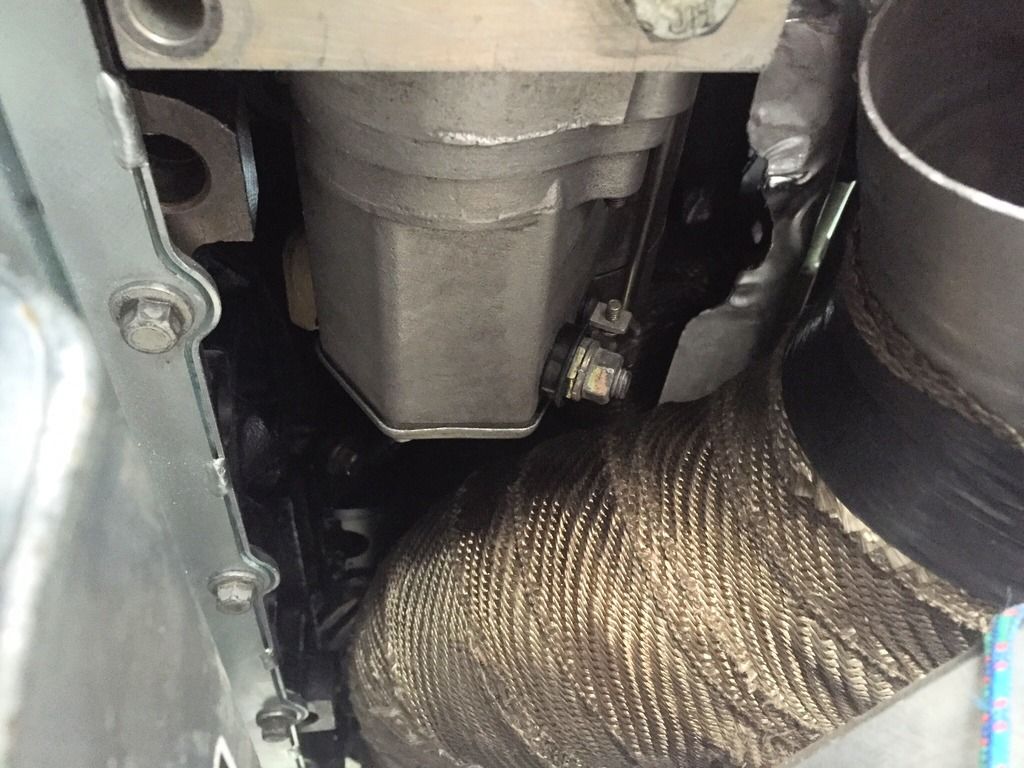


Bookmarks