
 re-engineering as a hobby
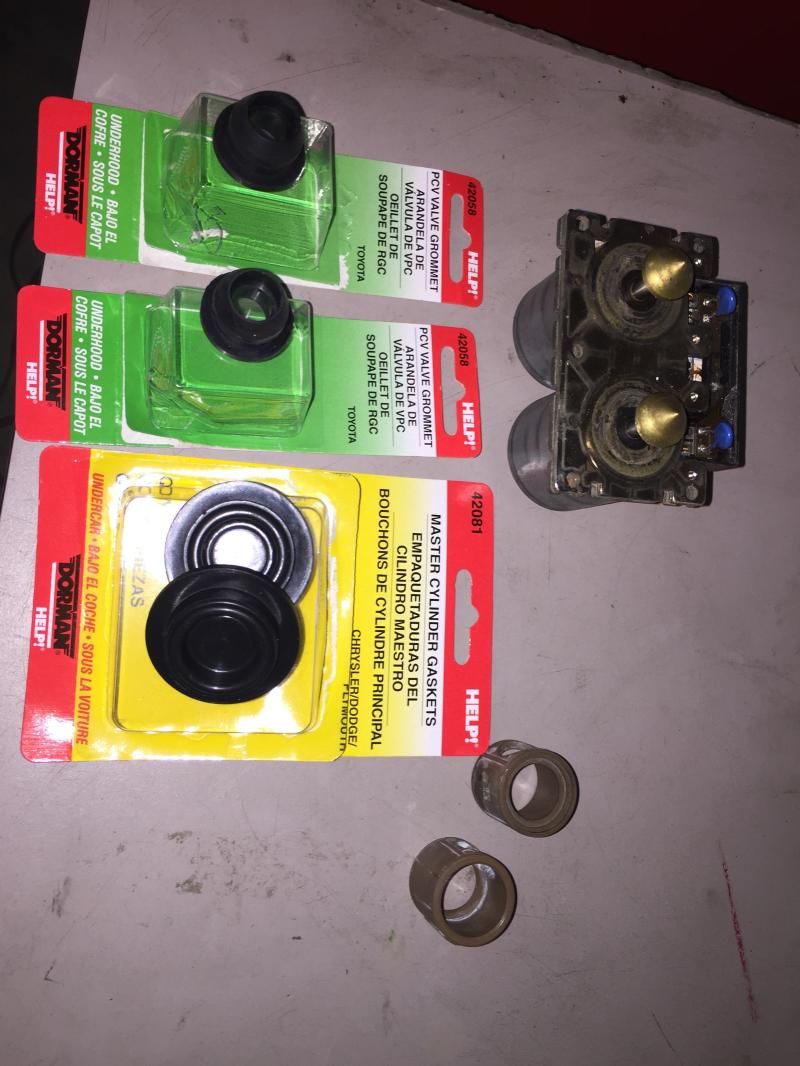
I followed at thread on xoutpost dot com that used master cylinder gaskets to fix one part of the valves.
I used PCV valve grommets to fix the rest...
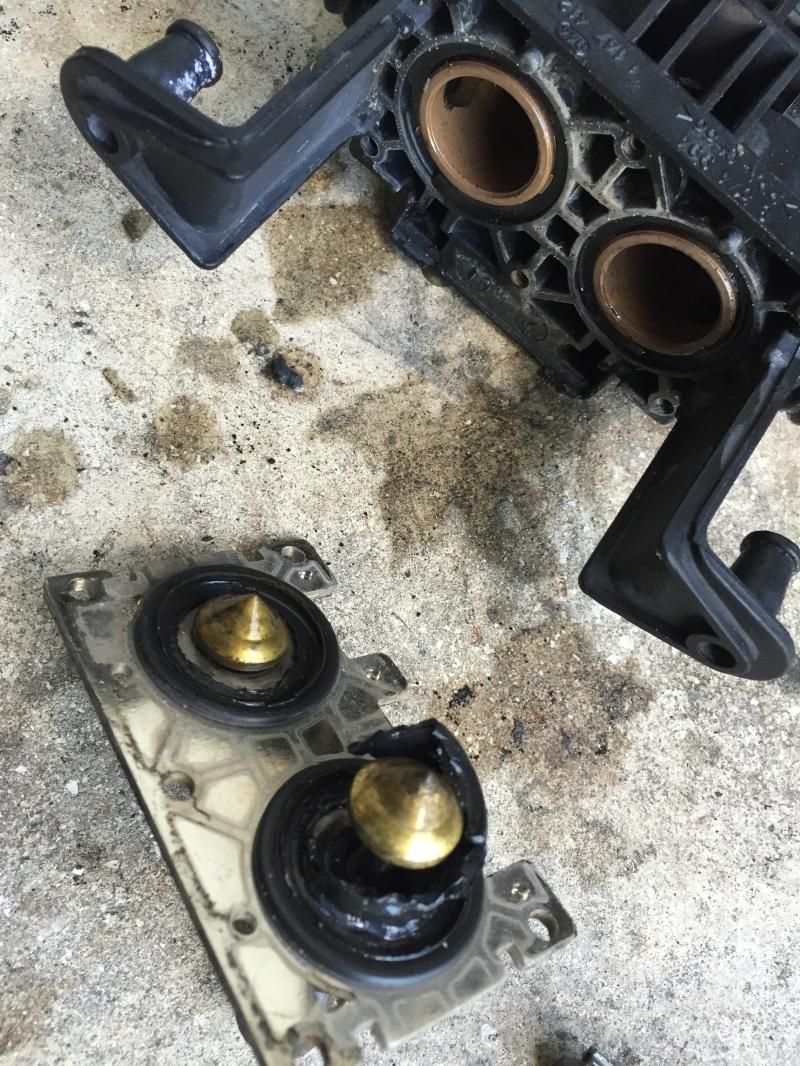
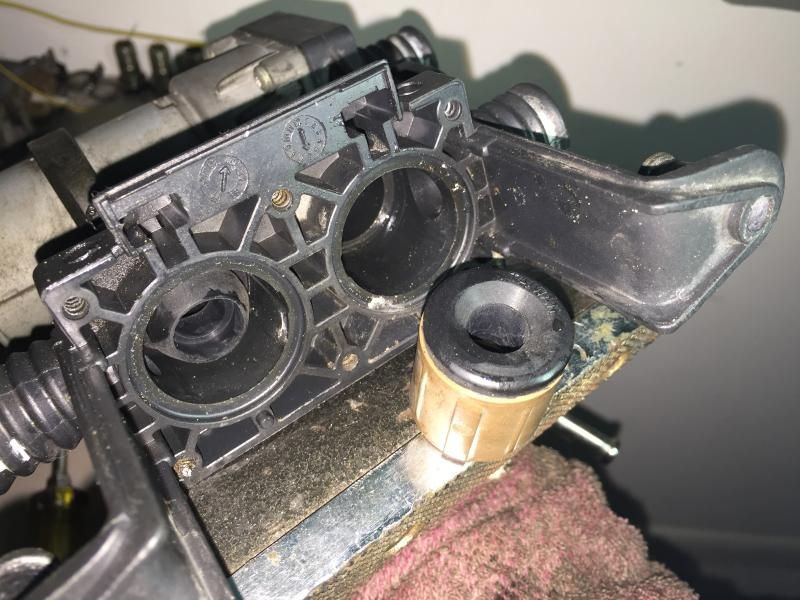
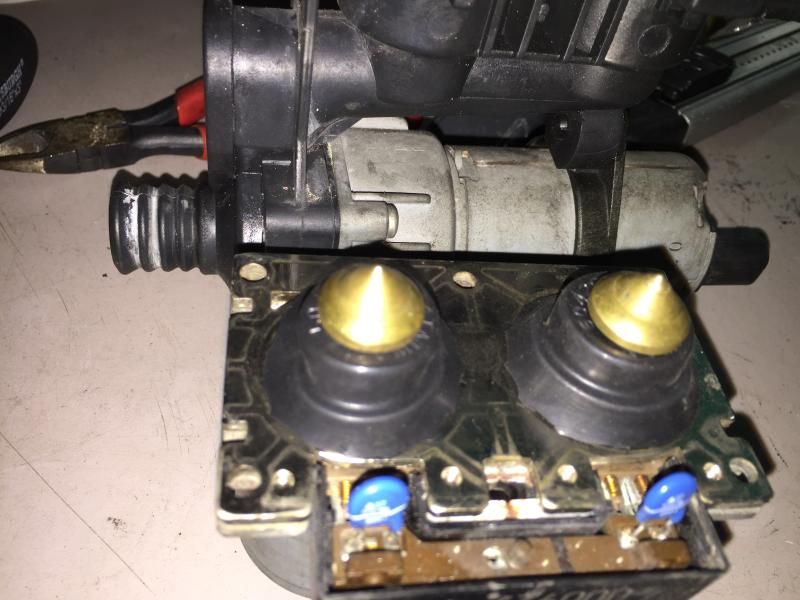
Removed Heater control valve.
Looks like the car has been treated will with respect to the correct coolant based on the condition of the valves.
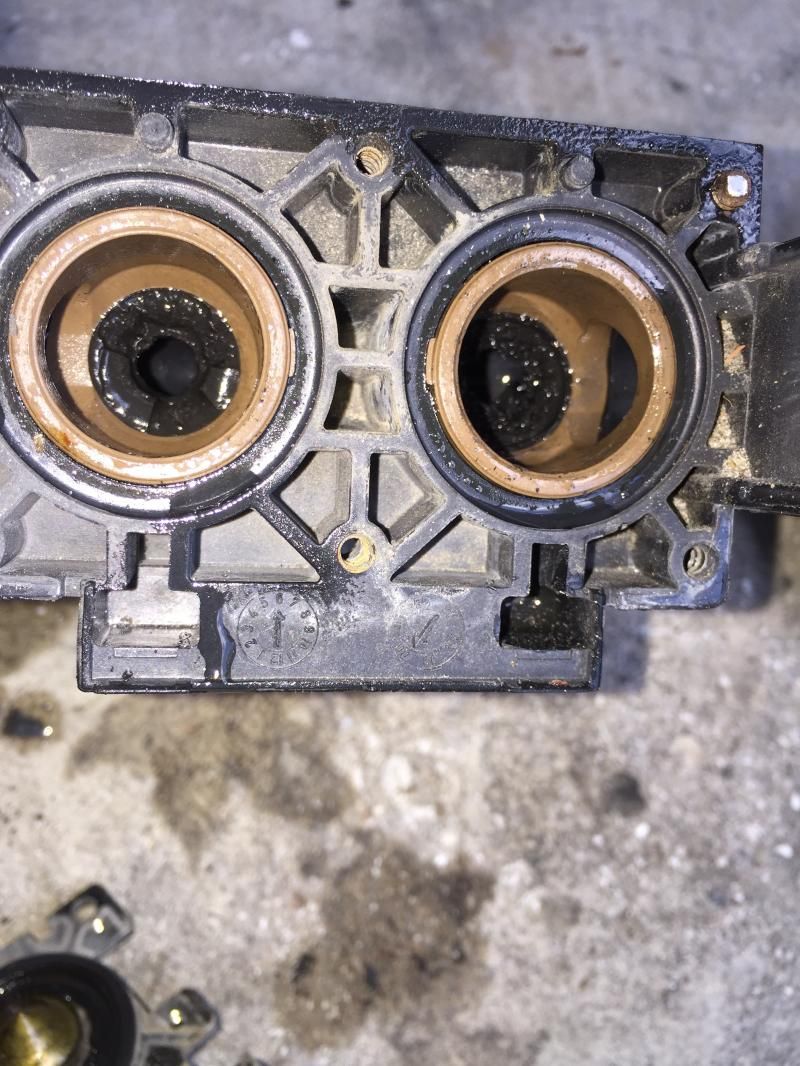
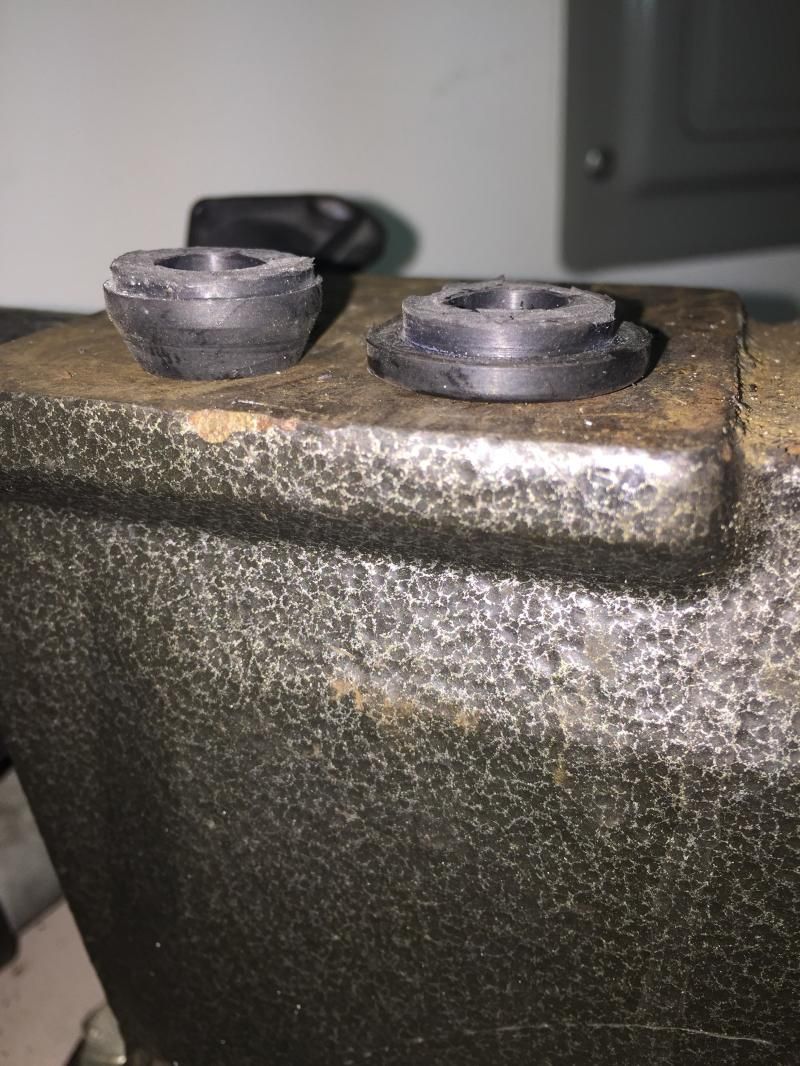
Old seals torn
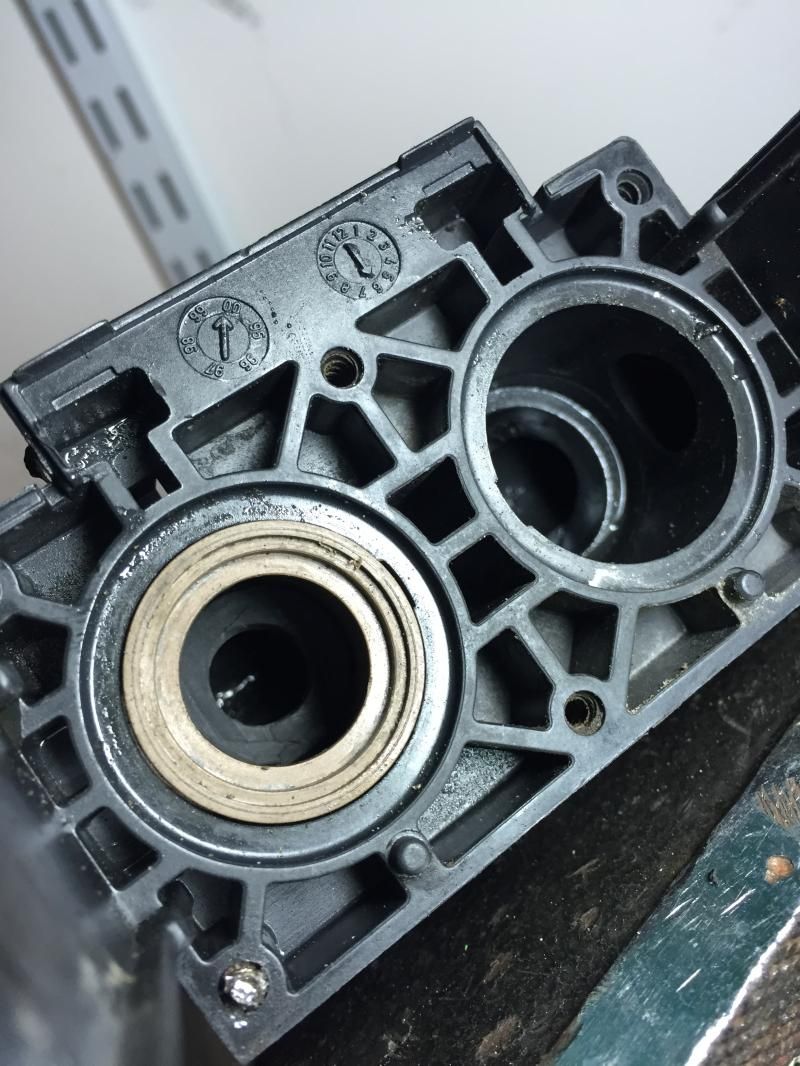
Valve seats worn
My $12 worth of parts from Advanced Auto Parts.
I test fit the grommets,
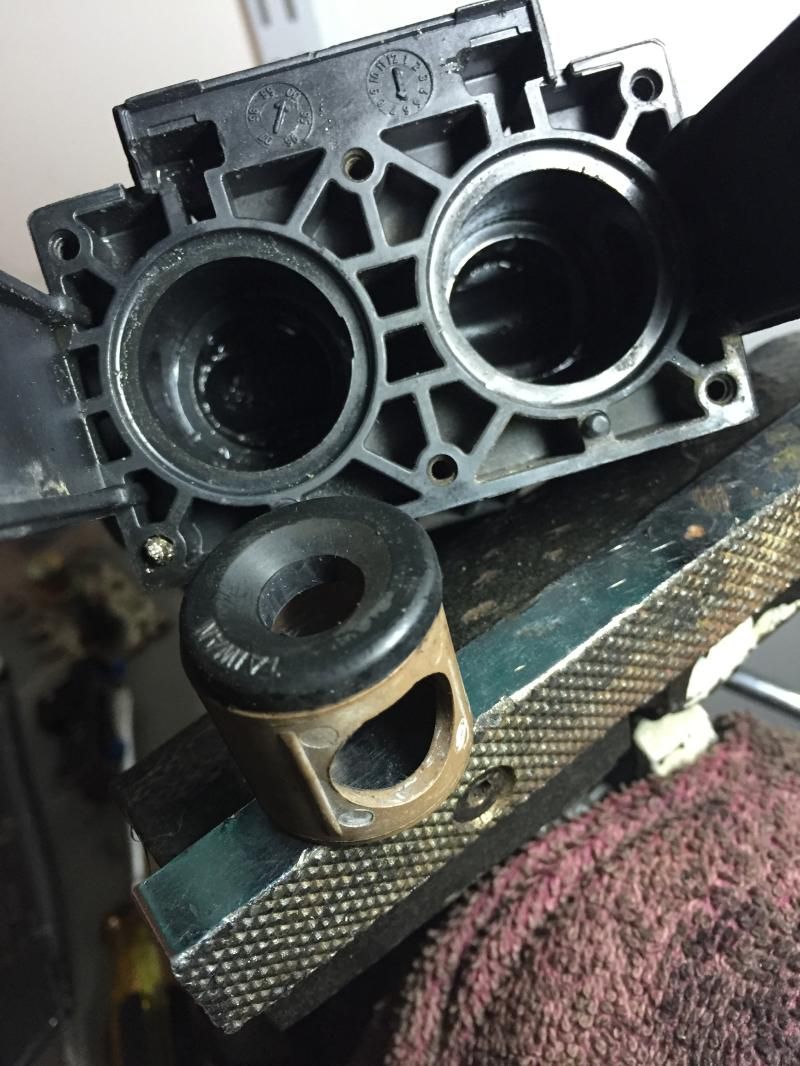
Then I cut the top off the PCV grommets.
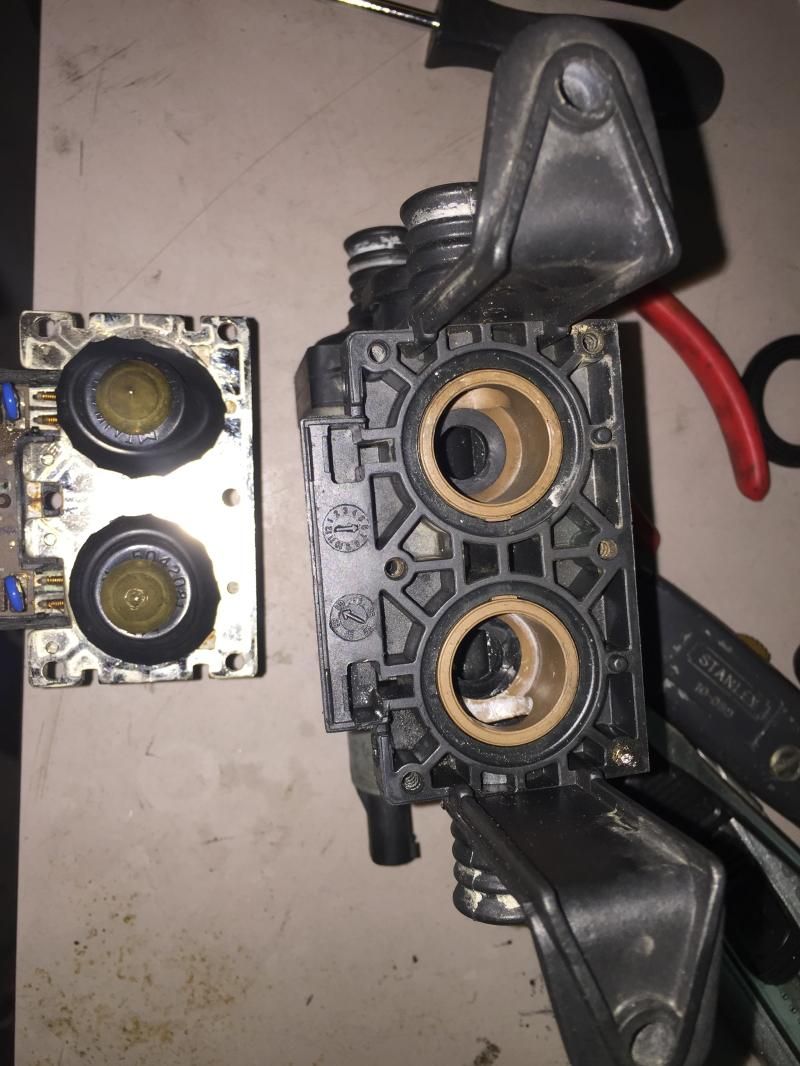
See how I place the cut off part into the valve housing
In theory, the valve will seat into this part once the solenoid pushes it out .
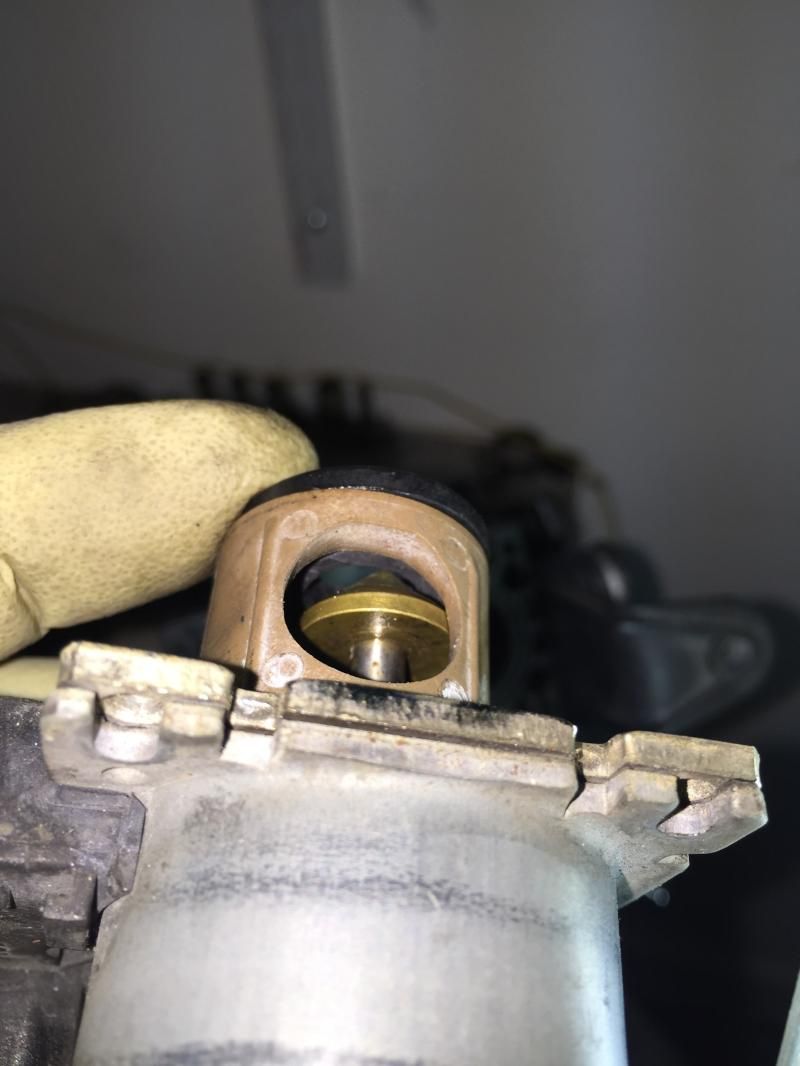
Test fit to see if the valve will touch the seat once extended.
Did the Artman fix using the master cylinder gaskets
Both parts ready to be mated together...
- - - Updated - - -
You could also just buy one of these.....
https://www.fcpeuro.com/products/bmw...air-kit-fmw202
Member
BMW CCA Member
Thanks for posting this. I have one of the kits but I have not done it yet. This gives a good overview of what's involved.
-Messan
The above is my 2 cents. Take it or leave it.
01 Shorty Sporty BLK/BLK
Member
Amazing how you knew theses seals were going to fit so well
Member
good luck! inused copper silicone gasket maker to make the seal around the metal plungers since coolant temps can be hot. been working for a year now
re-engineering as a hobby
that is what is interesting, I took a chance.Originally Posted by dnyceli

Havent got car running yet, waiting on parts so I'll be sure to report back.
- - - Updated - - -
I'd be scared of pieces getting loose and clogging up the cooling system.
But it's all good.
My E38 Project...................DSP Rear Deck Subwoofer box with Monsoon Speakers and Metal pulleyed window regulators NO longer for sale (click link to see how to make your own)....................................
Member
We have heard of these rubbers give out and stuffing the heater valves even as oem. It's all a gamble at this point. Haha
re-engineering as a hobby
Fix is holding up so far
My E38 Project...................DSP Rear Deck Subwoofer box with Monsoon Speakers and Metal pulleyed window regulators NO longer for sale (click link to see how to make your own)....................................
Member
My silicone seals are also ok while we are updating
Member
Following in your footsteps with this heater control valve rebuild dville... I must say it's brilliant, I just hope I cut those PCV grommets square/straight enough. Used a single edge razor freehand. Figure if not it'll cost me another $7 and an afternoon to redo.
sure beats the alternatives...
Member
Looks like I'll be spending $7 bucks and some more curse words, its still blowing hot from the floor and defrost, regardless of temp setting. Vents go cool, but heat through them is strangely lukewarm.
Do you know if there is a way to check the solenoid function on the bench?
re-engineering as a hobby
Yes there sure is.
Get a 12v power supply and alligator clips from harbor freight, or cut the harness from junkyard.
There are 3 wires going to the two solenoids.
Shared ground which is brown, and the positive for each solenoid.
Apply power to non-brown wires and ground to the brown wire and watch the solenoid extend downward.
Test the aux pump same way too.
Last edited by dville; 11-14-2016 at 10:53 PM.
My E38 Project...................DSP Rear Deck Subwoofer box with Monsoon Speakers and Metal pulleyed window regulators NO longer for sale (click link to see how to make your own)....................................
Member
How do your remove the brown collars to install the valve seats?
Member
Thank you. I couldn't get enough leverage with the pick so I pried it out using a flat head driver in the opening in the side of the collars.
Member
Hey dville do you still have the pics? I plan to rebuild one valve I have at home and need to see how to cut the bottom (plunger) seals.
re-engineering as a hobby
Pics are in this album
http://s356.photobucket.com/user/sxd...?page=1&sort=1
Member
This link does not work. I just found your posting, I'm having the same issues. Only rebuild kits I can find are from Ukraine.
I tried looking at your album and when I picked the photos individually, it came up as not 3rd party hosted. No photo to look at closer. I see you mentioned PVC grommets, can you provide P/N's? My seats for the cone shaped plungers are shot just like yours.
Thanks,
Henry
Member
There are 3 wires going to the two solenoids.
Shared ground which is brown, and the positive for each solenoid.
FYI, the heater control valve receives constant 12 volt power from Fuse #7 the red/green wire, each solenoids ground (yellow/brown and yellow/purple) are grounded (to closed) as required by the climate control module. The valves fail to the open position.
Member
I'm not exactly sure why...but my master cylinder gaskets don't look the same, even though I bought the same part numbers.
When you flip them inside out, I can see the stamped out letters on them.
If I do the same, my gaskets get all crooked.
But if I turn them on the other side, the top is not flat but rather round.
I'm wondering if they changed the gaskets or I'm doing something wrong?


Member
Proper job available here:
https://www.ebay.co.uk/itm/BMW-E31-E...gAAOSwDZJbGLny
Did the swap on my valve a few weeks ago - the large O-ring is the seal between the auxiliary pump and the motor.
Member
Thanks for the link!! It doesn't ship to canada unfortunately, but I'll try to find a similar kit.
The current DIY didn't work for me at all.
There's no point replacing seals on the inside, they're very robust and made well. The PCV replacements are not even the same size at all.
As for the master cylinder seals, they just don't work. The won't hold their shape. I don't know if Dorman changed something. Also all those seals are made in china, so I wouldn't trust that at all...


Member
I've seen these so bad to the point where they can't be rebuilt lol
- - - Updated - - -
you'll need to order the proper kit. I may have a spare set laying around and I'd ship to Canada.
Member
What do you mean they're so bad that they can't be rebuilt? It's just a piece of rubber you replace.
I found a bunch of proper kits on ebay, around $30. They actually ship to Canada but they're all coming from Urkaine or Russia, so shipping is about a month.
The most complete kit I found is this:
https://www.ebay.com/itm/112177753023
$40 USD seems a bit too steep
I can buy a new one for $30
https://www.ebay.com/itm/282323254480
And shipping is a lot faster
Granted it's Chinese, but I don't think that the seals on the first kit are of any higher quality...They have good reviews on Amazon.
I don't know if the electronics have very tight tolerances in this part and if the Chinese part would break quickly.
Well, even if one was to buy the Chinese unit, it would be pretty easy to replace the electronic part with the original one.
Member
When I was researching the heater valve problem I had, I came across a link to a YouTube video about the Chinese valves; basically they were cr*p because nothing fitted properly and had to be stripped apart and rebuilt before fitting.
What I did was to source two duff valve/auxiliary pump units on the Bay and make one good one with the seal repair kit I mentioned in post #19 above so I was able to swap it out with the duff one in the car. You have to be careful with the little Torx screws that hold it together; on one of the duff ones I acquired, the heads broke off but the pump was OK. The other one came apart OK but the pump was seized; so one good assembly and some scrap left over.
Member
So badly clogged up and degraded/corroded. probably from running the wrong coolant, water or too much water and there looked to be a lot of stop leak in one of them. Also coolant debris, very high mileage, etc..
Even the screws were all rusty, so when I tried to remove them to take one apart, the heads broke off. at that point I gave up on that one and tossed it.
I've seen some really nasty ones haha
Member
You did it properly, and the seal is the correct type, it gets squeezed flat when you put it back together.
see this thread for the original instructions:
https://xoutpost.com/bmw-sav-forums/...-temp-fix.html
 Posting Permissions


 Reply With Quote
Bookmarks