
 Member
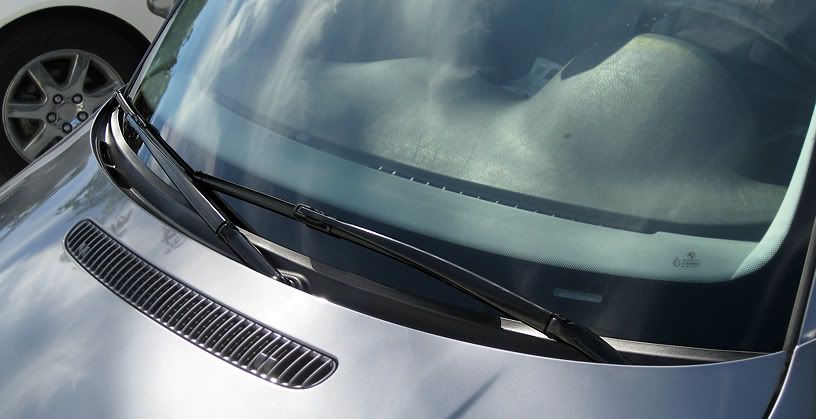
The windshield cowl is all plastic, so it gets baked in the sun. Over time, it will begin to fade to grey and become brittle. Pieces of it will begin to break off, making your shiny E46 looks cheap.
The part that you will need....
PN:51718208483 (Sedan)
PN:51718232894 (Coupe)
They cost around $50 depending on where you get them. The dealer generally sells them for nearly $100!
Try Here....http://www.ecstuning.com/ES129793/
Or Here....http://www.trademotion.com/partlocat...&siteid=214672
Ooops....I circled number 17, but it's actually number 5.
Tools you need:
flat head screw driver
15mm socket and rachet
Torx 27 head
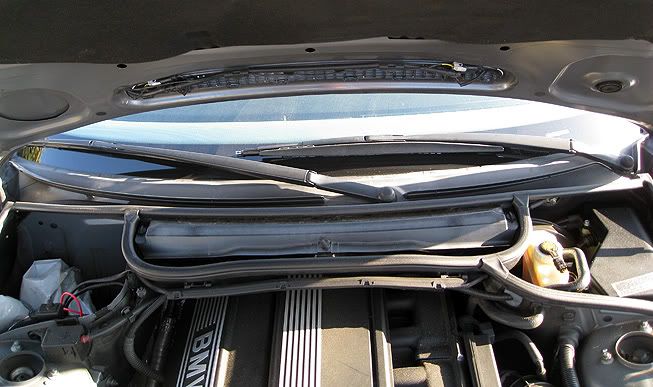
First..pop the hood
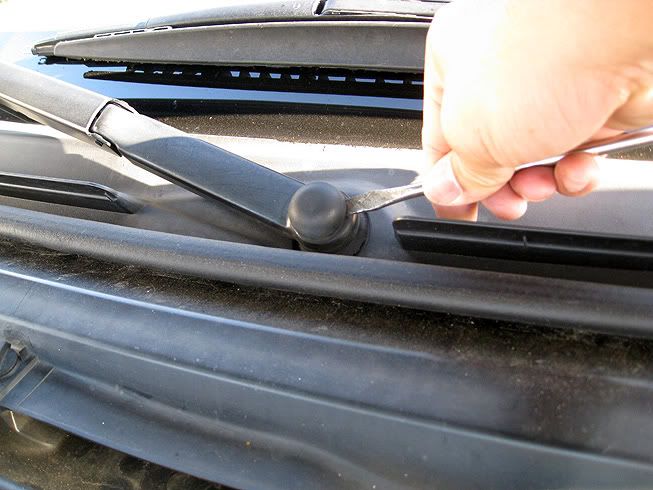
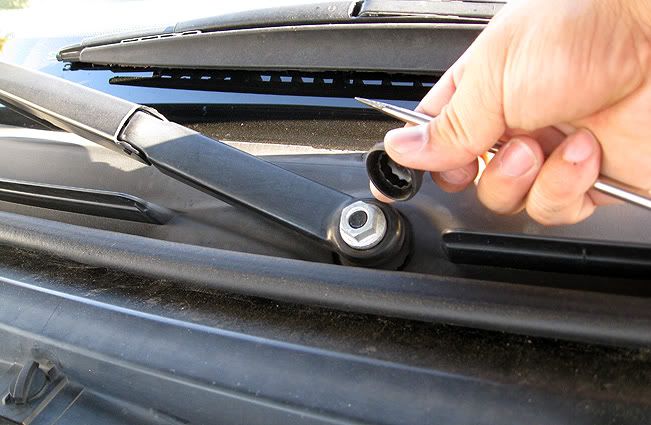
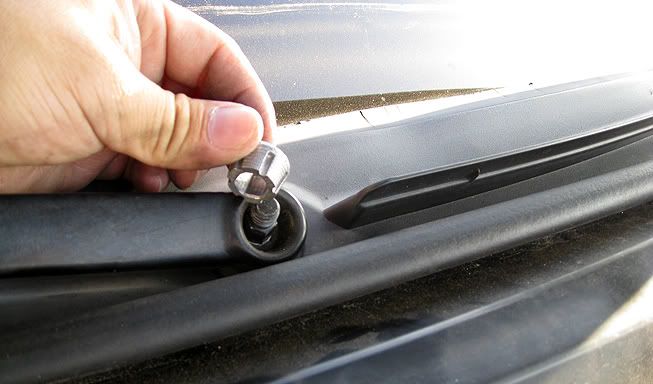
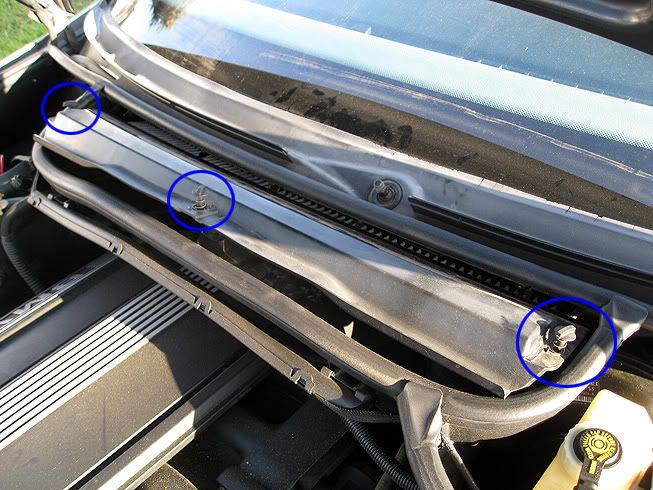
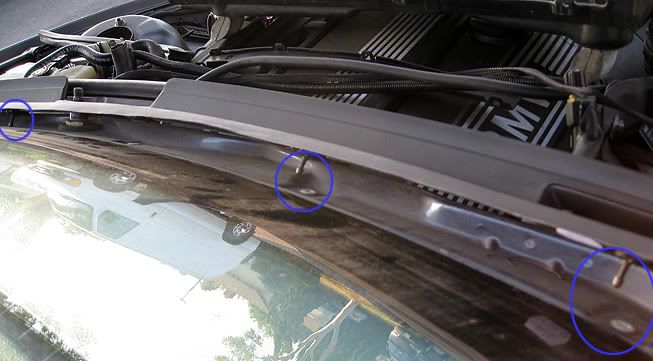
pry off the cap off each wiper arm to expose the 15 mm nut. Use a 15mm socket/ratchet to remove the nut.
Remove this pressure nut that holds the arms in place. The Bentley manual said that you have to use a puller tool. I just wiggled my wiper arm back and fort and the nut pops out. Mine popped off so hard it fell into the engine compartment, so becareful.
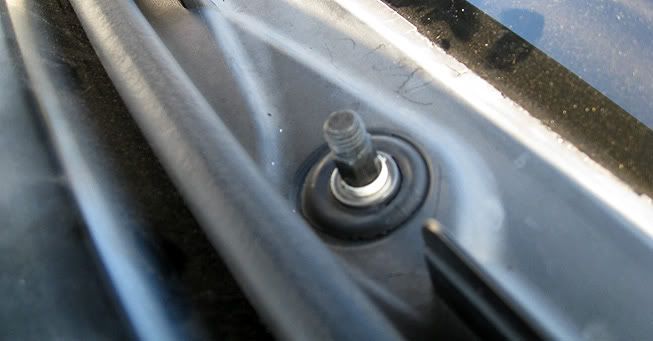
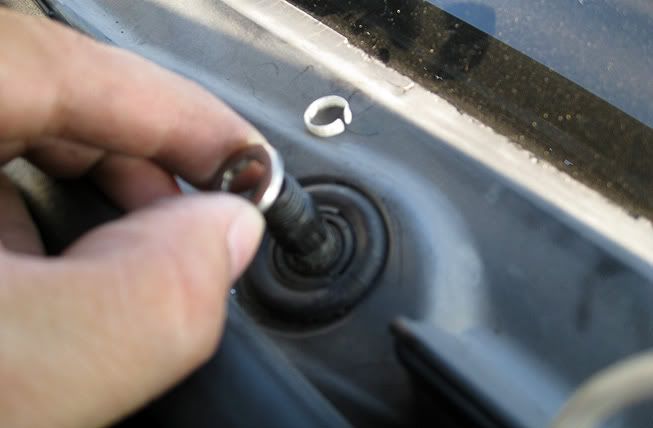
After you removed the wiper arms, you will see a white plastic sleeve and a washer. Go ahead and remove both of them.
Loosen the 3 lock rivets to remove the microfilter cover.
Remove the cover and then remove the microfilter underneath once you have remove the cover.
Unclip the wire harness holder and loosen the harness from the microfilter housing.
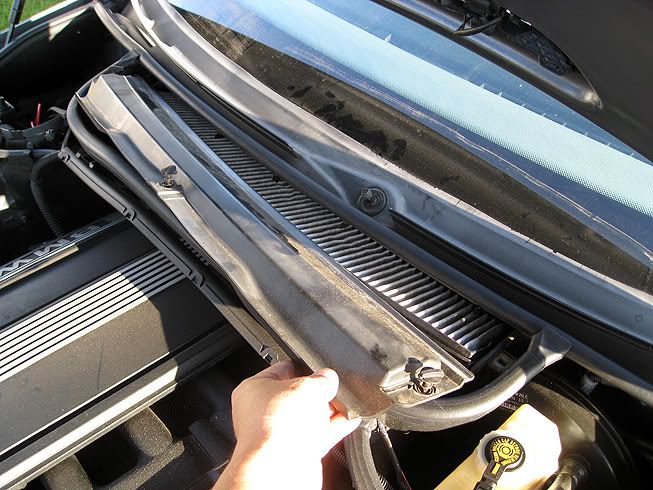
Use a driver with a Torx 27 bit to remove the 4 torx screws. Pull the entire microfilter housing from the firewall after you have all 4 screws out.
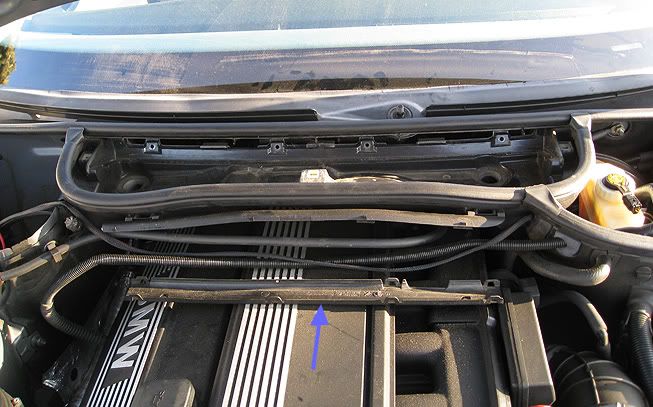
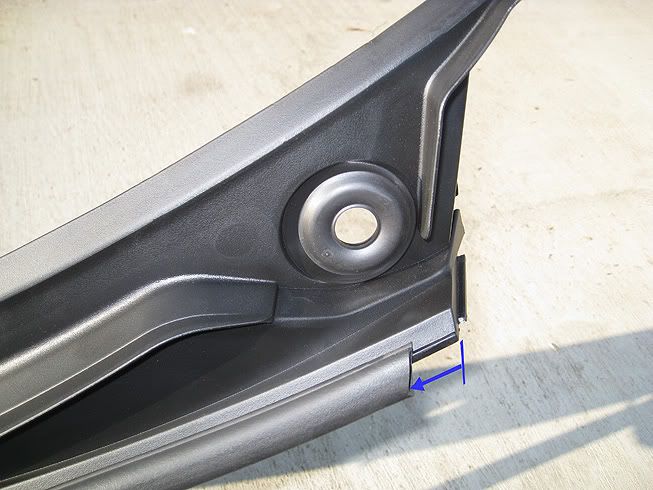
Start from one side and pull the cowl away from the windshield. Here I start from the left to right. There should be 7 clips holding the cowl. You should also remove the old clips/anchor (the white plastic stuff around the holes) that are left behind in the holes when you removed the cowl. Your new cowl should come with new ones, so if you don't remove the old ones, you may have a hard time getting the new clips to fit into the holes. Thanks to beenyweenies for point this out.
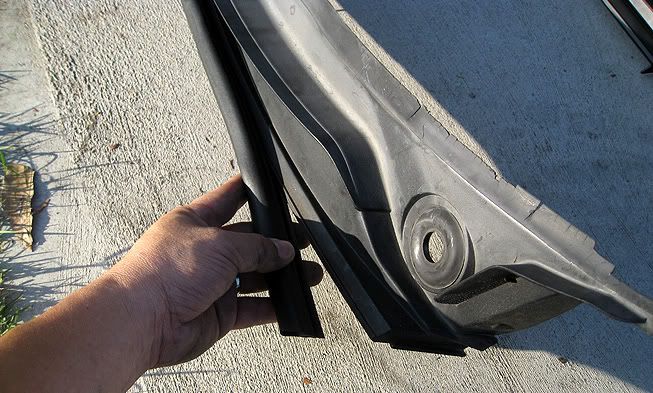
After you have removed the cowl from the car, remove the foam seal that is attached to the cowl. You will reuse this piece with the new cowl. You may have to buy a new foam seal if your's is in bad condition. I doubt it cost very much. Don't install a bad seal, otherwise you will have to take everything apart again to install a new seal.
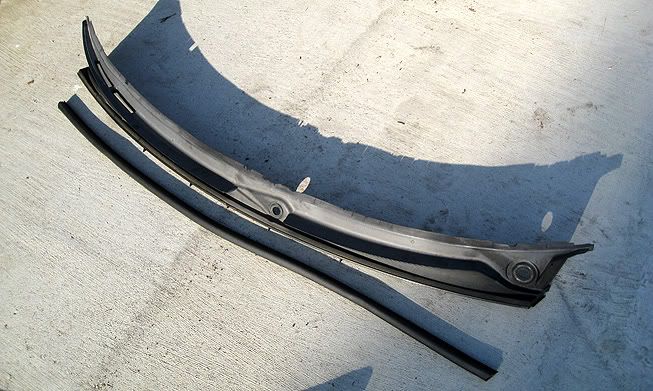
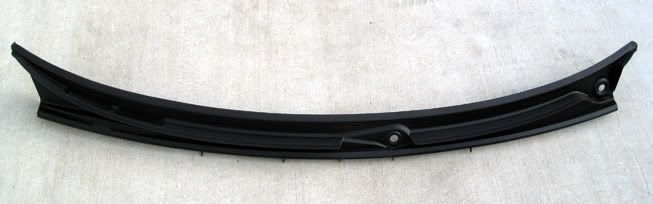
Here is the cowl along with the separate foam seal
Take your new cowl and spray it with a plasic vinyl protectant like Armorall, then wipe it dry. I used Chemical Guys New Car High Shine protectant. The cowl is now shiny and protected. It's a good idea to do the same for the foam seal.
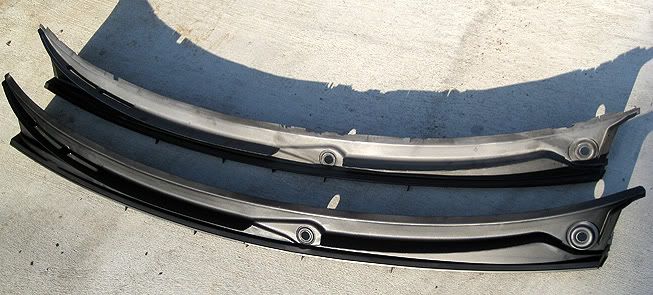
I put it next to the old cowl for comparison..Noticed how the old(top) cowl is discolored and cracked along the edges. You just have to touch the edge of it and pieces will break off. Check out the shadow, the edge is really nasty.
Now insert the foam seal onto the new cowl. The foam seal is shorter than the cowl, so center it by Leaving about 1/2inch on each side.
Now to put the cowl back on the windshield. The new cowl should come with 7 new clips. First lay the cowl onto the windshield and look underneath to see that the clips are aligned with the white anchore holes. You can adjust the clips by moving them left or right. Once you got them all aligned, go ahead and press them in. Again, go from left to right.
After you get the cowl on, you basicly go in backward to reinstall the wipers. I install band new BMW Evo wiper blades when I had the wipers out. So I got 2 things done.
Now step back and look how new your windshield looks
Last edited by Zimmy330; 10-30-2009 at 08:34 PM.
Jimmy
Member
Great write up!
Member
Very nice I think that might be my next job that I do.
///Member
Awesome, i've been looking for a good DIY for this since i bought my car. Thanks!!
Member
I have one point to add to this DIY because it tripped me up when I did this a few months ago.
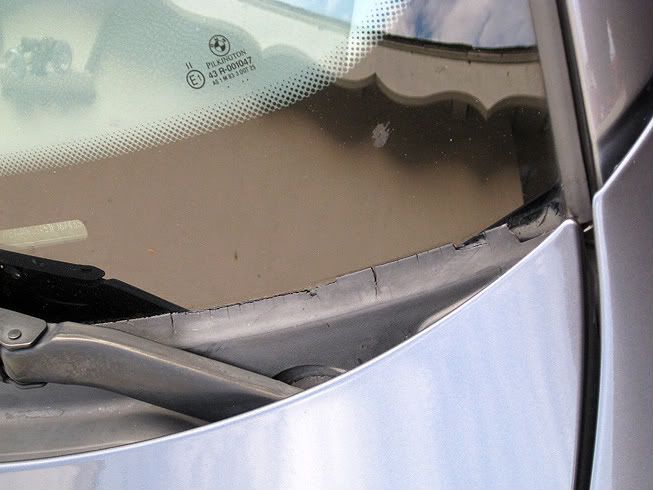
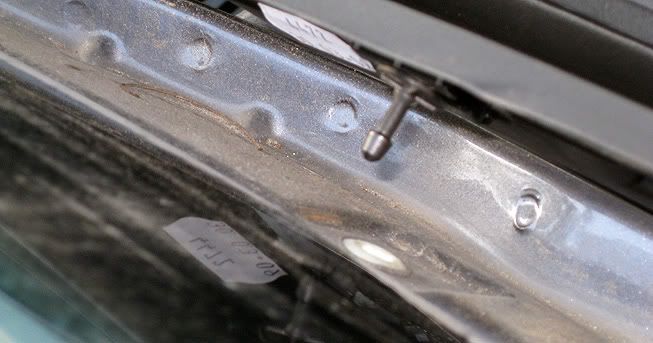
The old cowl will very likely leave some of its old clips behind in the clip holes, they seem to pop right off of the old cowl as you're removing it and you never notice this happening. The problem is, the old clips are white (just like the clip holes) have holes in the center of them and look, to the untrained eye, like they themselves are the holes your new cowl's clips snap in to. The replacement OEM cowls have black clips instead of white, so this is a pretty easy thing to miss.
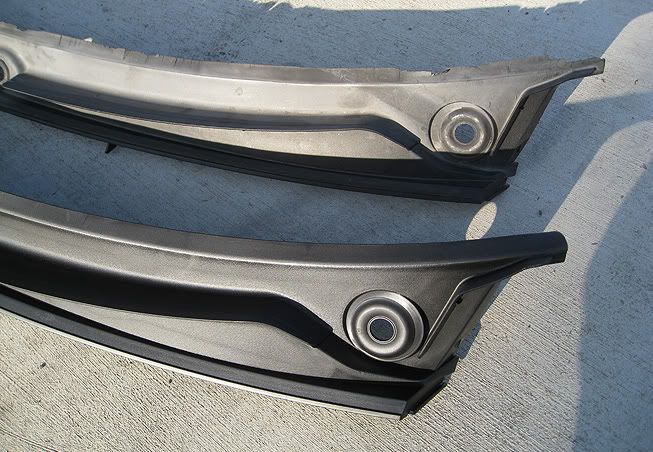
Notice in the OPs picture below, how the clip hole on the far left is wide open, but all of the others appear plugged up with something white with a cross in its center? These are the old clips that MUST be removed for the install to go properly.
I found myself pushing down pretty hard on the new clips to get them in, but never hearing the affirmative snap of the clip engaging. It's because I was trying to stuff the new clips INTO the old clips! The clips WILL eventually worm their way into the old clips (the hole in the old clip is just barely big enough to accommodate them), and the cowl WILL go all the way down to the windshield, but it never locks into place and you will still have tiny areas of gap between the cowl and windshield. Needless to say, this is a BIG problem since rain and other moisture will leak past the cowl and soak your cabin floorboards if it isn't done right!Originally Posted by Zimmy330

The only way to prevent this is to make SURE you have removed all of the old clips before installation. When this is properly done, the clips slide in and affirmatively snap into place with minimal pressure.
Member
Thanks for clearing this up...and you are absolutely right!
I had the same problem. Some of the old clips did not come off, so I thought that they were part of the opening. On my new cowl, the clips came already mated, making me think that the clips was one piece. You have to remove the old clips from the firewall and use the new ones that comes with the new cowl.
Jimmy
Member
For those of you wishing to do this, and move to the Bosch evo wipers.......I do not believe Tischer offers the evo wipers......but ECSTuning does. Both shipped out yesterday for about $115.00 shipped. I paid a lil more for the cowling to only pay one shipping charge. Just a heads up. Thanks Zimmy for the write up.....
WiL d[-_-]b
im getting my cowl today from dealer... seems like a good DIY. thanks!

Quality
Thanks bro.
Member
Great write up! I had a rock hit and crack my windshield, and just had it replaced. The technician reminded me about the cowl piece being in bad shape. I picked up the part from the dealer for $65 with tax, and I'll be following this DIY to install it this morning. Thanks Zimmy300!
Member
Just did this myself today - great match for a new windshield ($216 from Safelite).
Only difference noted was that the torx screws for the cabin filter were T30 on my 325i (not T27). Very timely posting for me! Thanks -
Member
I found the diy very useful, but I may add that you do not need to remove the filter tray, or remove wire harness, just be sure to remove the white clips from the old cowl. just did it today, and took me a whole 45 min and I have above ave. auto mechanic skills. Just a note, you can use an allen for the torx bolt head, instead of purchasing the torx bit.
Thank you once again for the diy
Member
Good point about the old clips, but it is not true that a loose or broken cowl will allow water into the cabin. The cowl is pretty much 100% cosmetic.
Member
I agree with the water not entering cabin. There is a designed angle to deflect water away from cabin. Dealer scare tactic to earn a quick $300.
Member
Anyone know what the torque spec is on the bolt holding the wiper blades on? Thanks
Member
Very help DIY instructions - it took me all of 15 minutes to complete the job. Again, no need to remove the filter tray and wire harness. You do have to pull out the old clip retaining sleeves because the new cowl comes with both male and female clips.
Much thanks, Zimmy330!
Last edited by davidp1911; 02-20-2010 at 04:24 PM.
Member
Thanks for the write up! I did this today with GREAT SUCCESS! Took me about 20 minutes, and I have very little mechanical experience.
Member
ordered a new cowl piece last year when I had my windshield replaced. My windshield installer really butchered up my cowl piece....
I have saved up a few things to do to my 2000 328CI and this will be the first...
good write up...
Last edited by piaaump; 03-15-2010 at 04:14 PM.
Member
Could have finished this in no more than 20 minutes but i took the time to clean all around the cowl and the cabin filter....
many thanks to all who contributed to this write up....worked like a charm...and the difference is startling...I reccommend doing this if your cowl piece is any bit ragged....
Last edited by piaaump; 03-27-2010 at 07:46 PM.
Member
Just want to suggest www.ecstuning.com for purchasing your cowl. I got mine and paid no more than.. ~$65 dollars? I see other people have paid much more than that..
I am not affiliated with them or anything, but I like my cowl and it came with everything I needed!
Member
Great write up. Thanks. I ordered a new one from ecstuning today, along with the sunroof shade clip set.
Member
My ride is BMW E46 318i 1999
i have the same problem with the cowl ive check the part no is 51718189100. Ive checked around the part is out of production? Does the cowl part 51718208483 can be fitted to my car?
Member
Just found this write up a while ago, and bookmarked it. Time to replace my cowl as well. I've got a 2000 323i touring. Anyone with a touring replace theirs? Is there a part no. specific to the touring, or can I use the model for the sedan?
Thanks
E34 Mods: OEM Coin Holder / Cup-Holder / Rubber Mats / Seat Covers / Warning Triangle / Sachs-Boge 750il bushings / Windscreen reflective sunshade /OEM Euro-spec Hella lamps to be installed soon.
Looking for OEM 15 or 16" basketweaves & cassette holder.
Member
xfu5ion, I just picked up a cowl for my '99 e36 from a dealership ($52) and they actually had it in stock. Try asking another dealership maybe? Find it hard to believe mine was in but yours is out.
Matt
'99 323is Hellrot Red
Sub. Part. Acc.
That's on my list of "to dos". Thanks for the writeup (and for teaching me the name of the part! (a cowl, who would have guessed its not a plastic hingamajig resting on the winshield?).
 Posting Permissions


 Reply With Quote


Bookmarks