
 M54B30 Inside
CAN output from the Motec M1 to the Mainline, 110 channels available.Originally Posted by wazzu70

CAN input from the Mainline to the M1, direct torque readings.
You would have the ability to datalog engine parameters, in direct comparison to measured torque, at constant load targets.
6 weeks to build, and 6 weeks to ship...so we're potentially looking at a spring delivery.
My only reservation is that I don't have a business to write it off with....
M54B30 Inside
Getting my hands dirty again...
M54B30 Inside
Ready for the Auto -> Manual transmission swap:
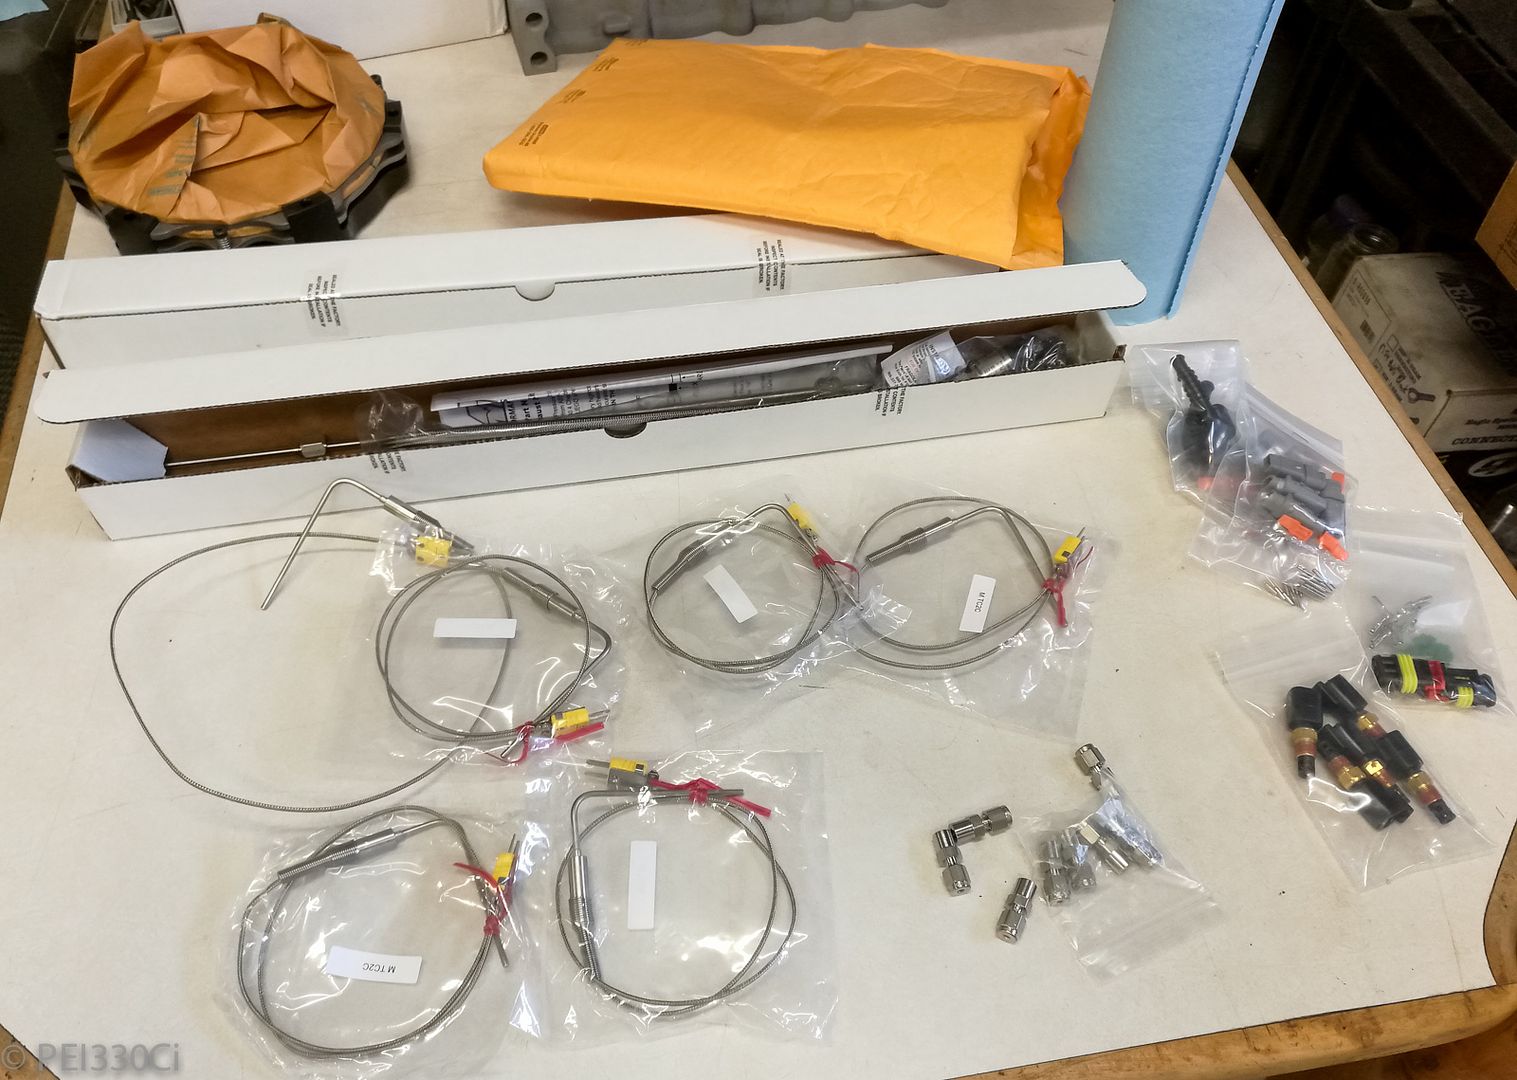
Sensors/supplies from Racespec for revisions:
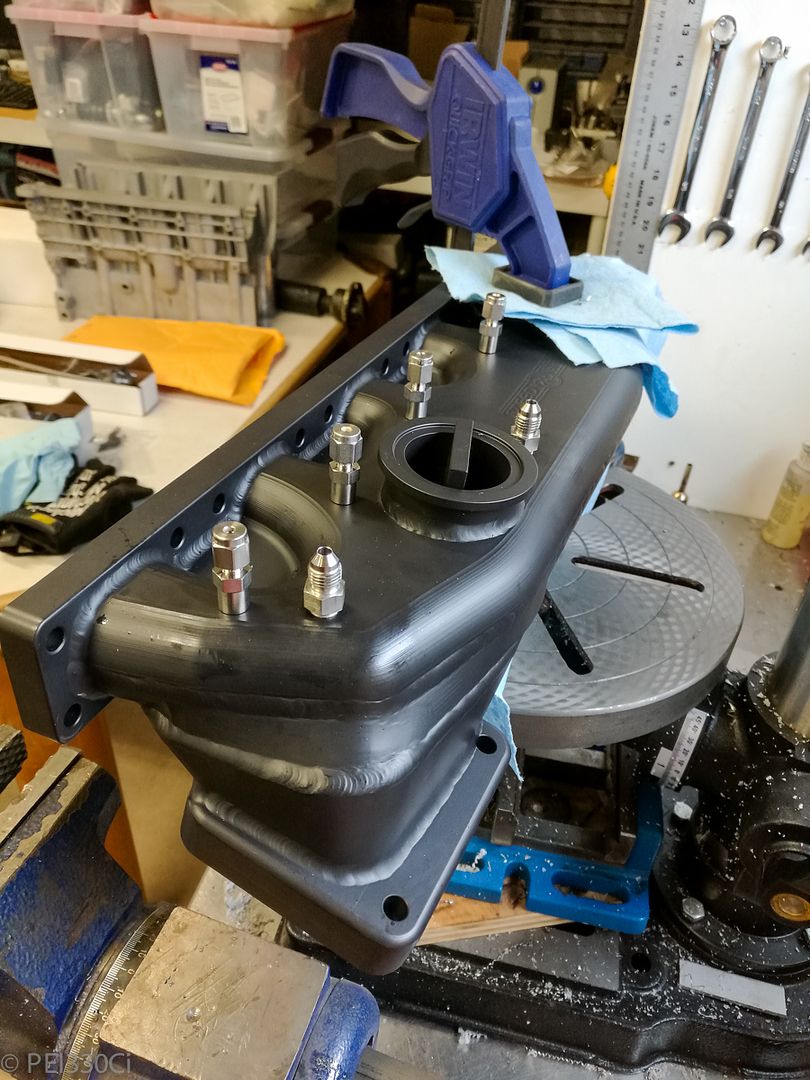
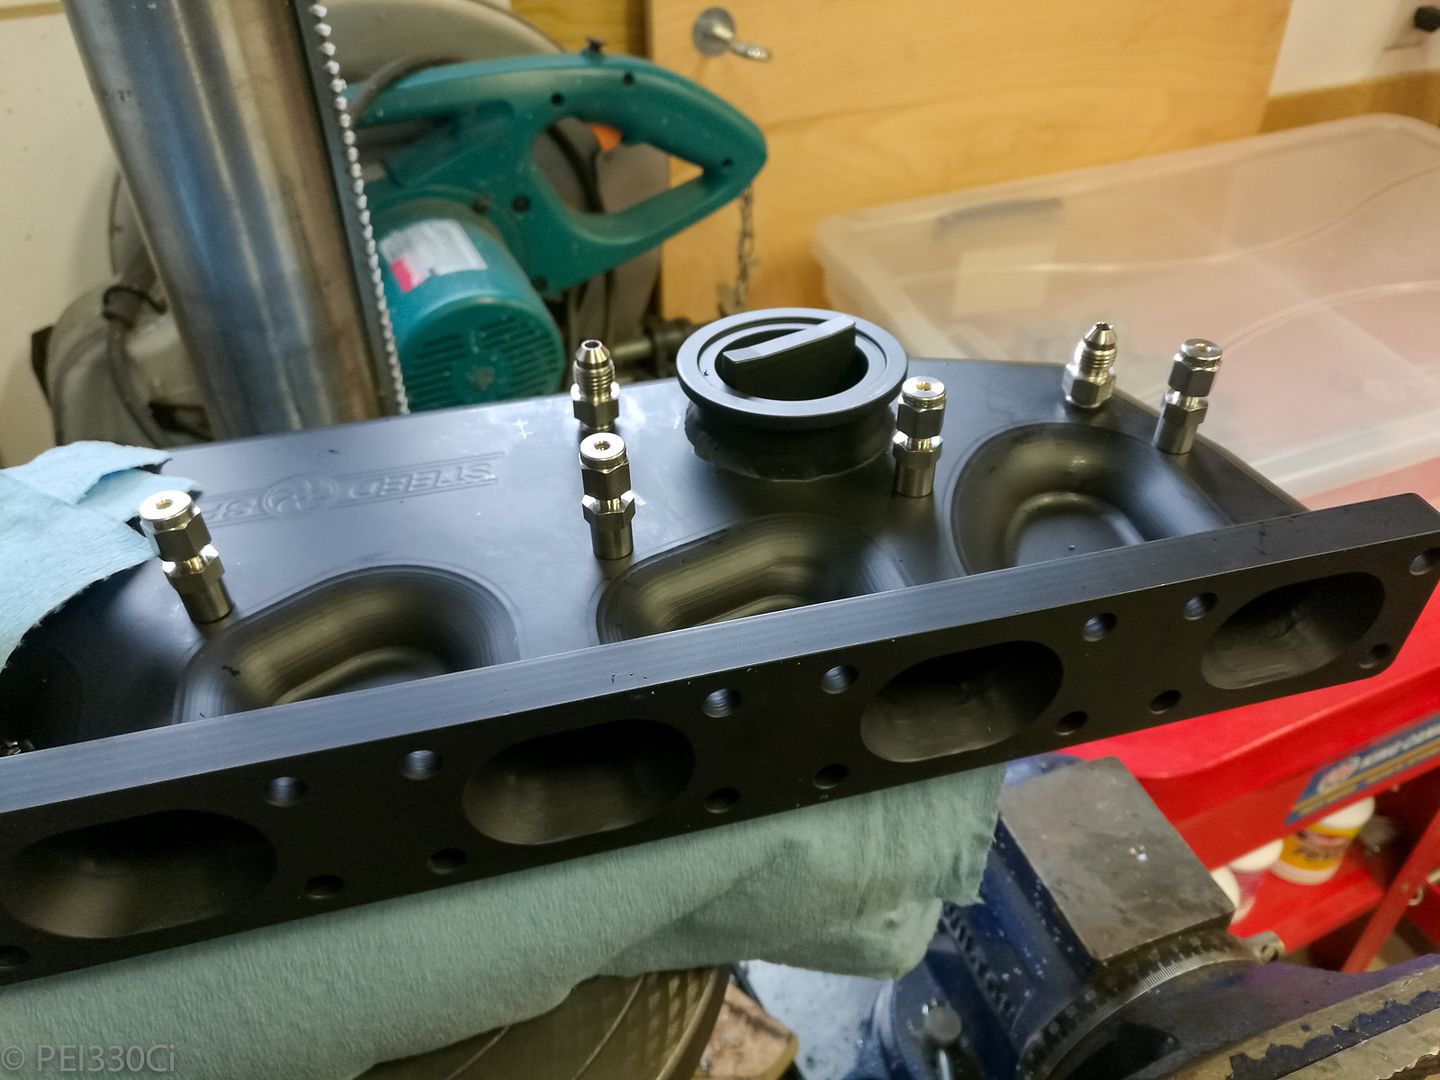
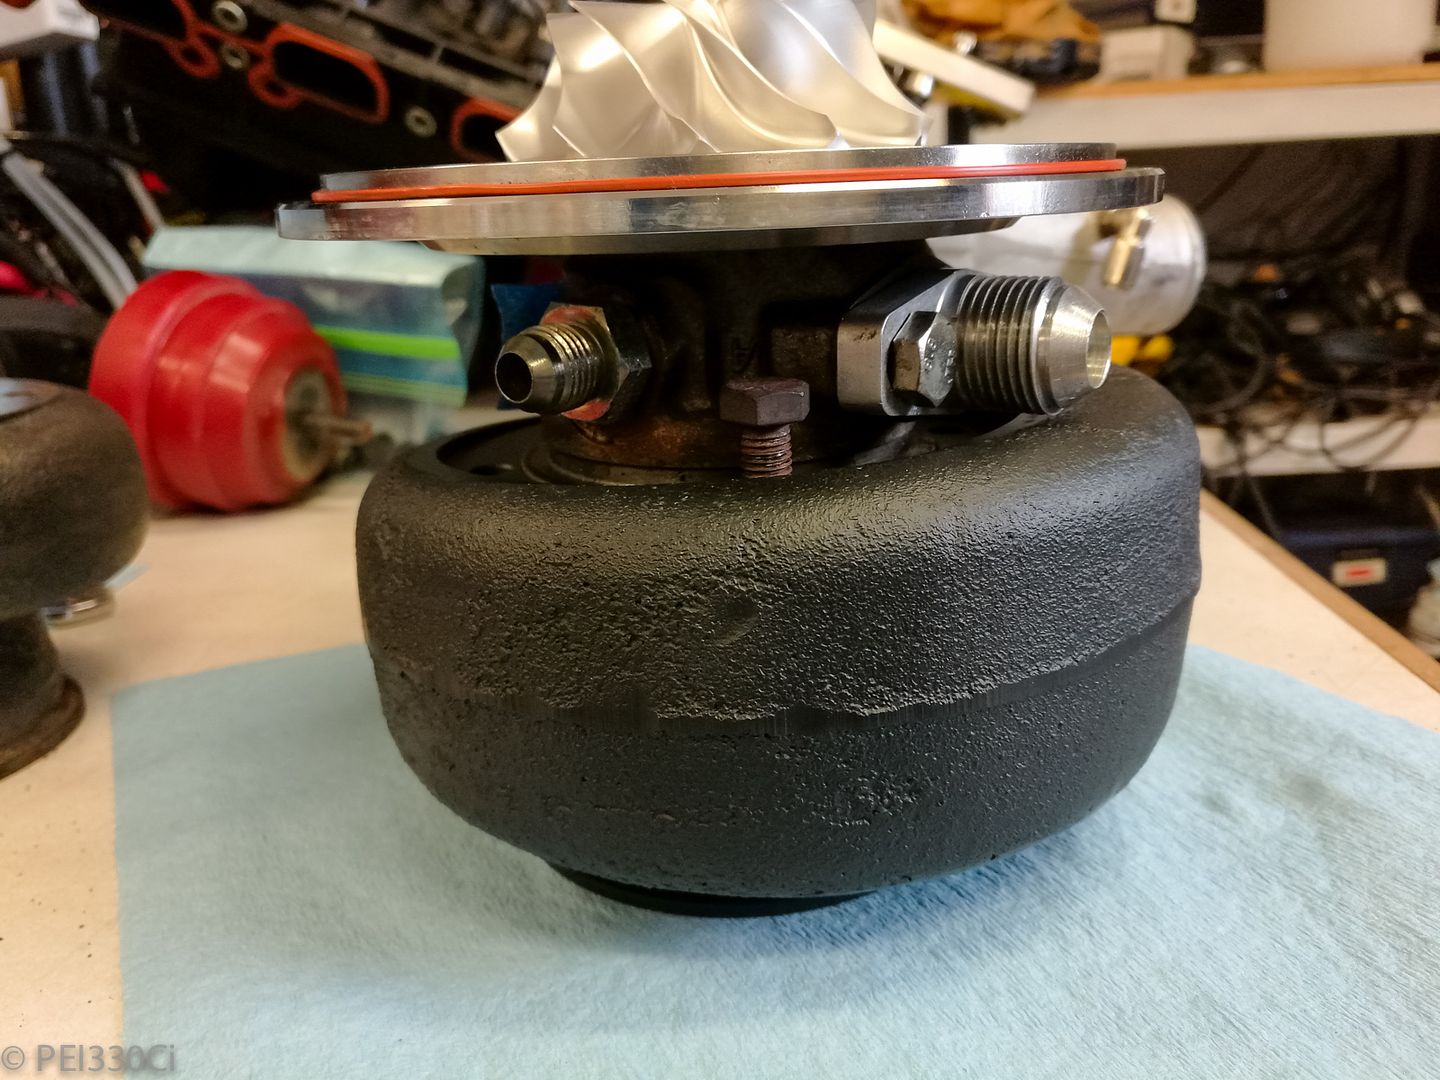
The Steed Speed Twinscroll manifold getting worked:
Locations for the EGT bungs before welding:
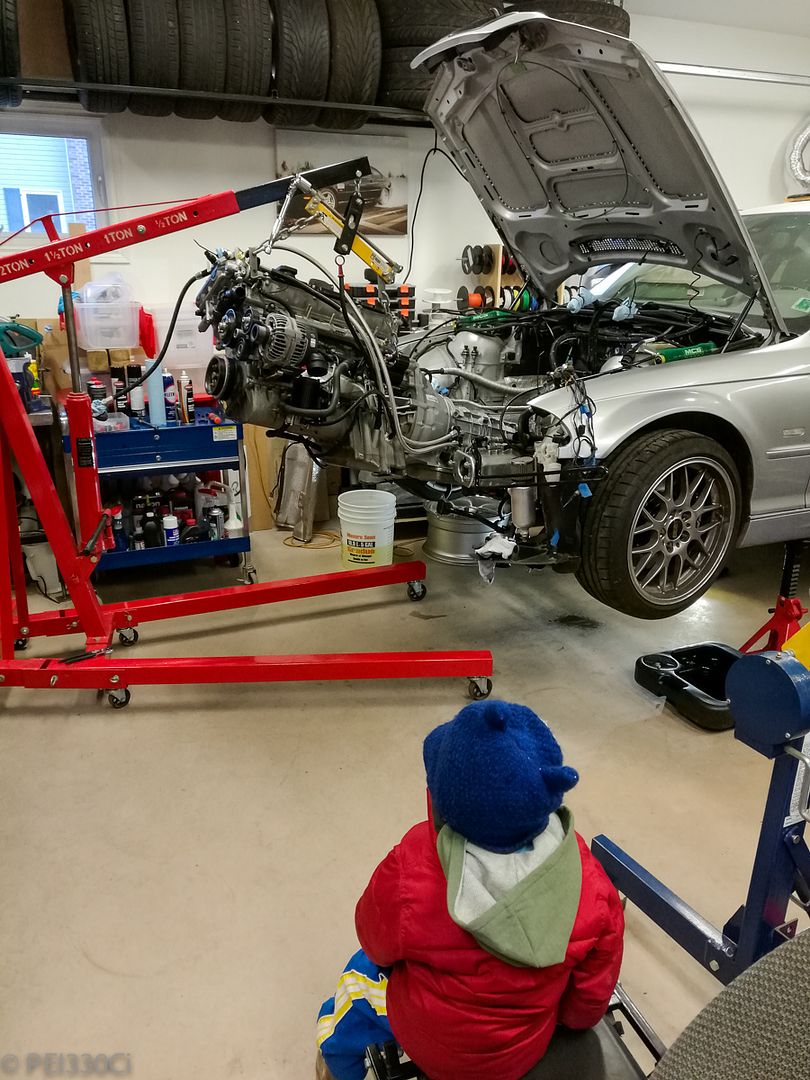
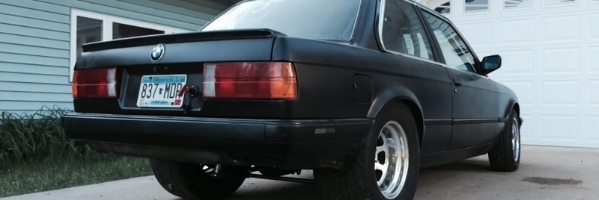
My son and I pulling the engine out of the car...again:
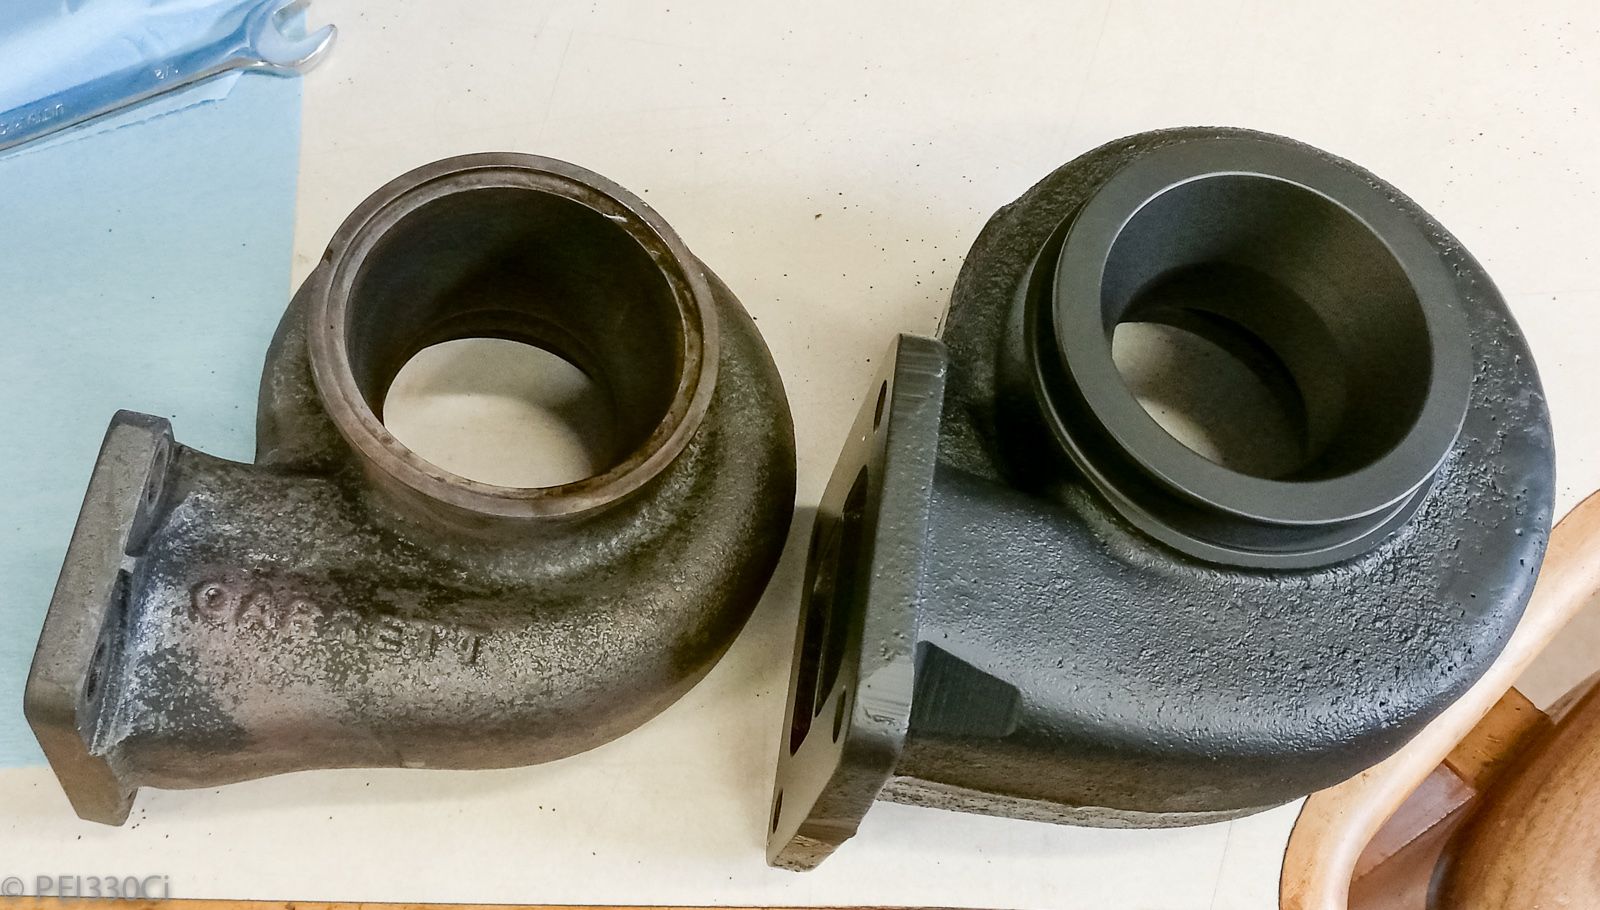
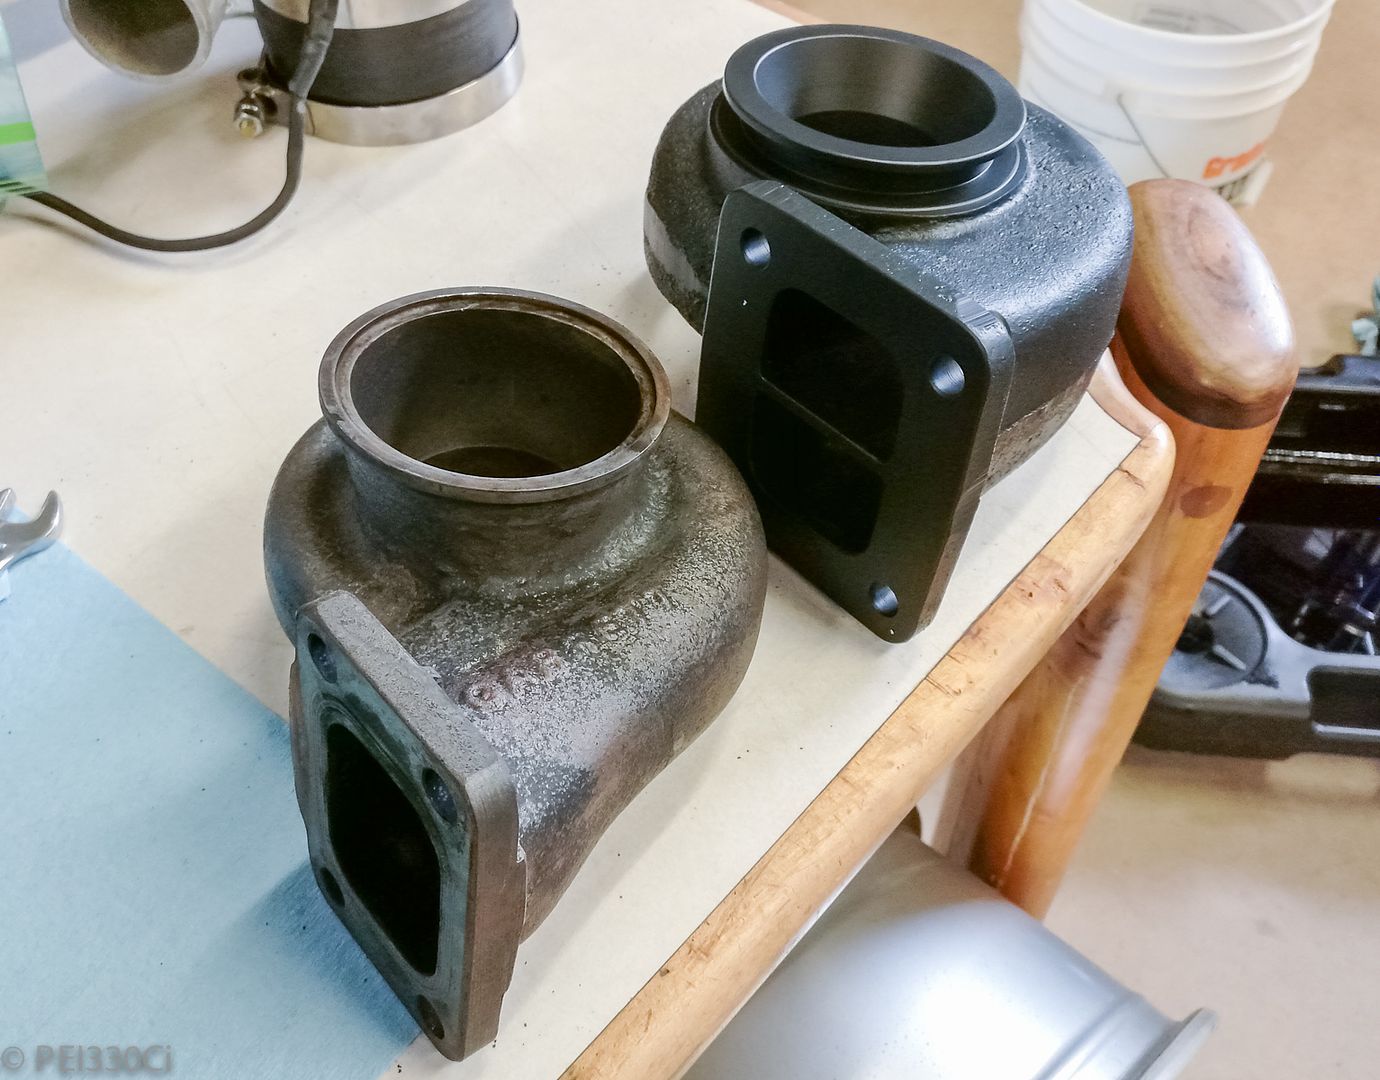
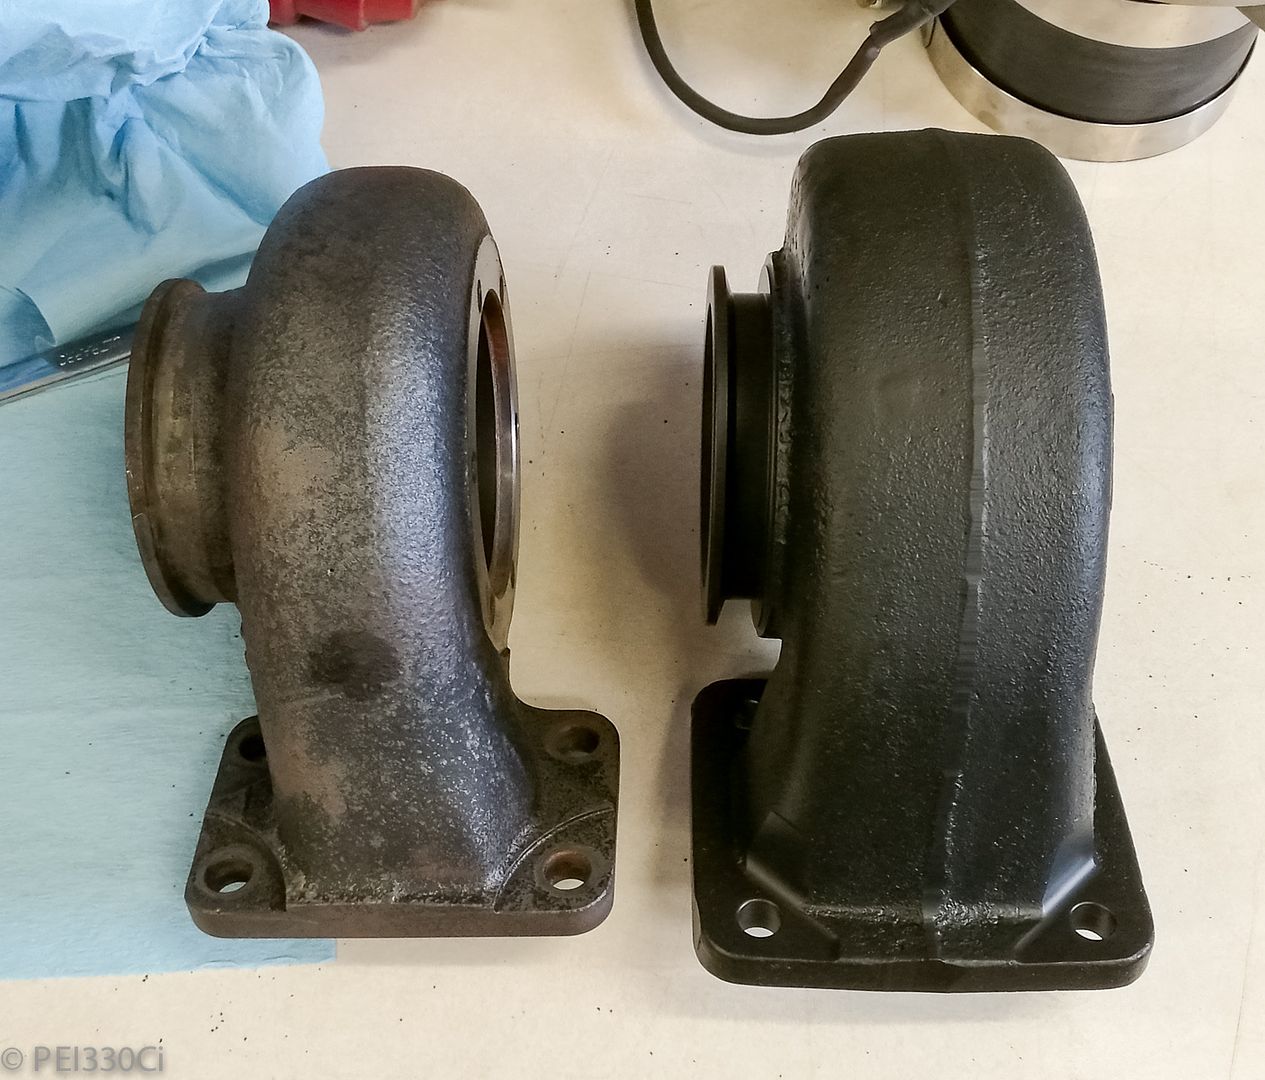
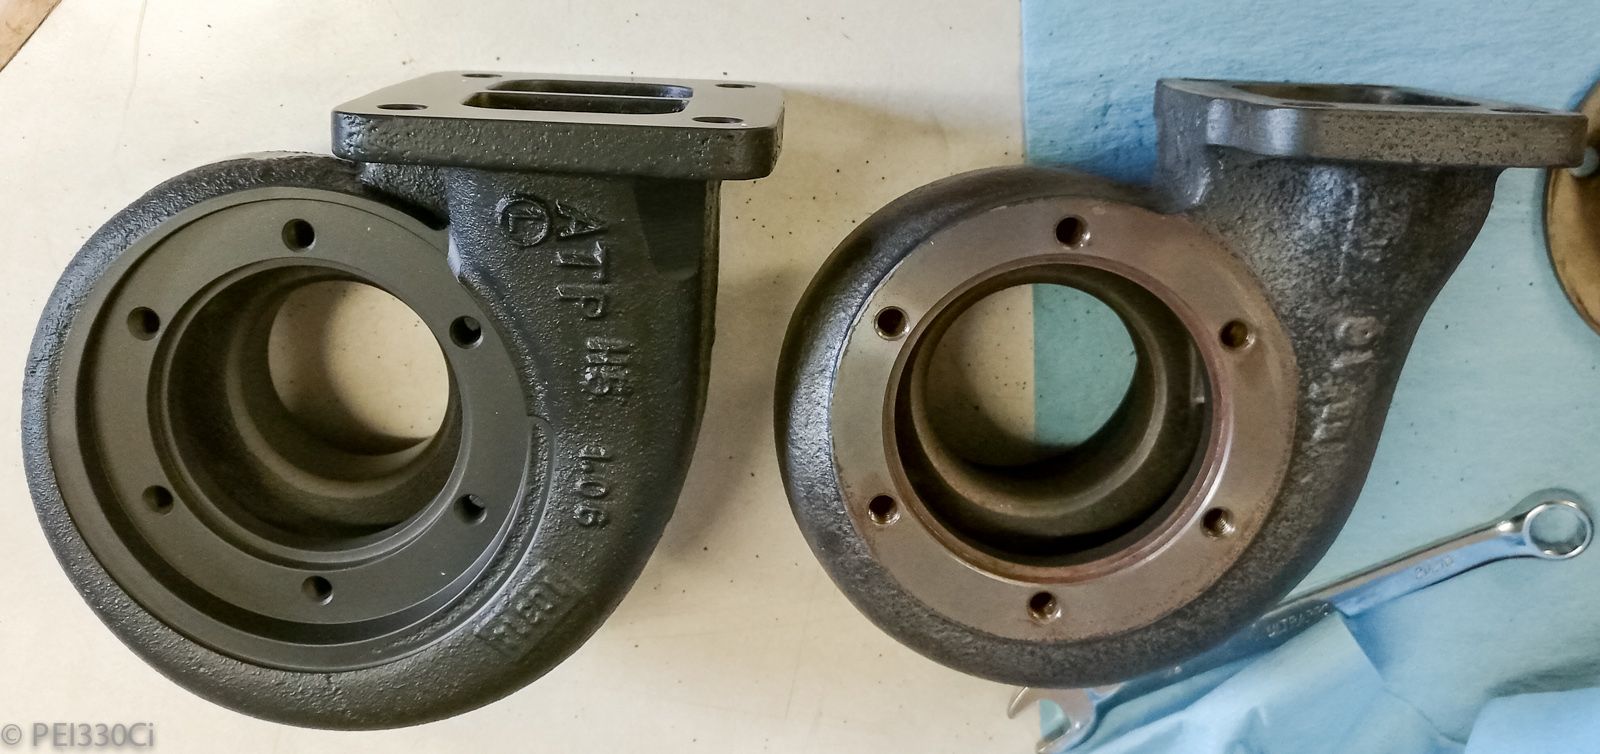
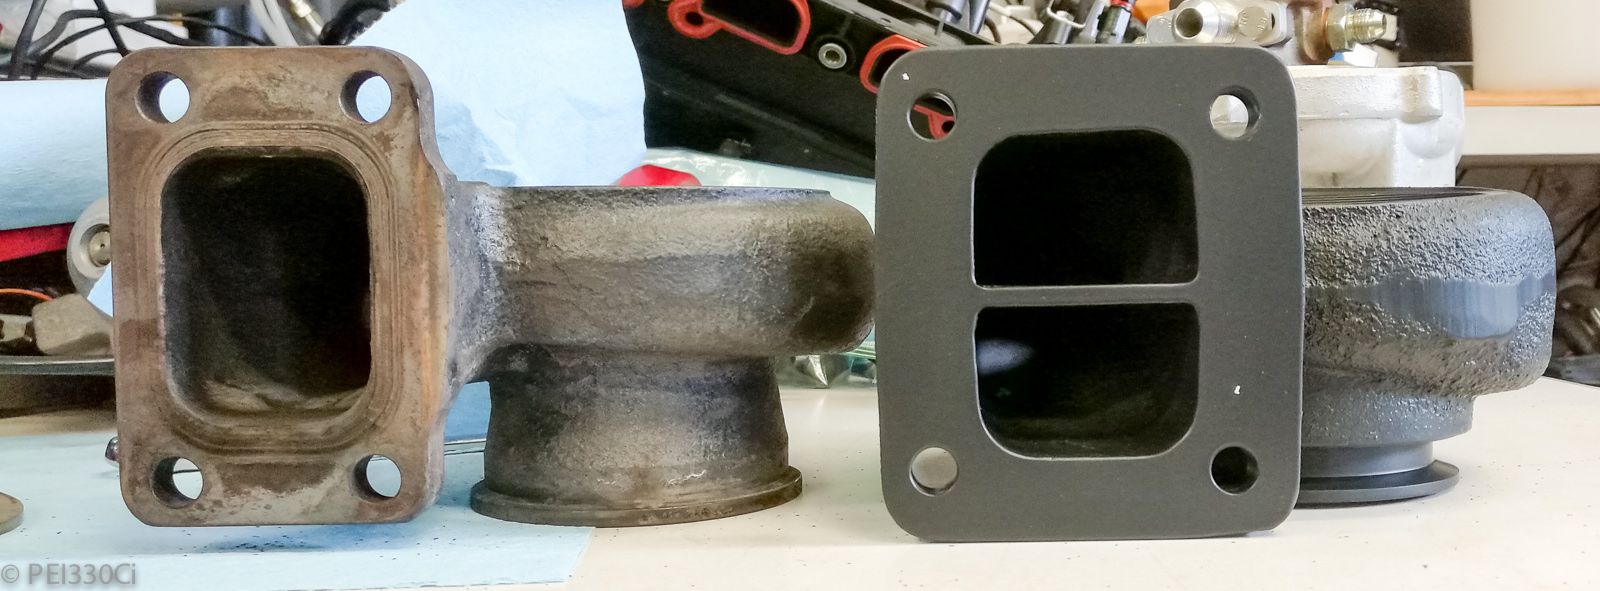
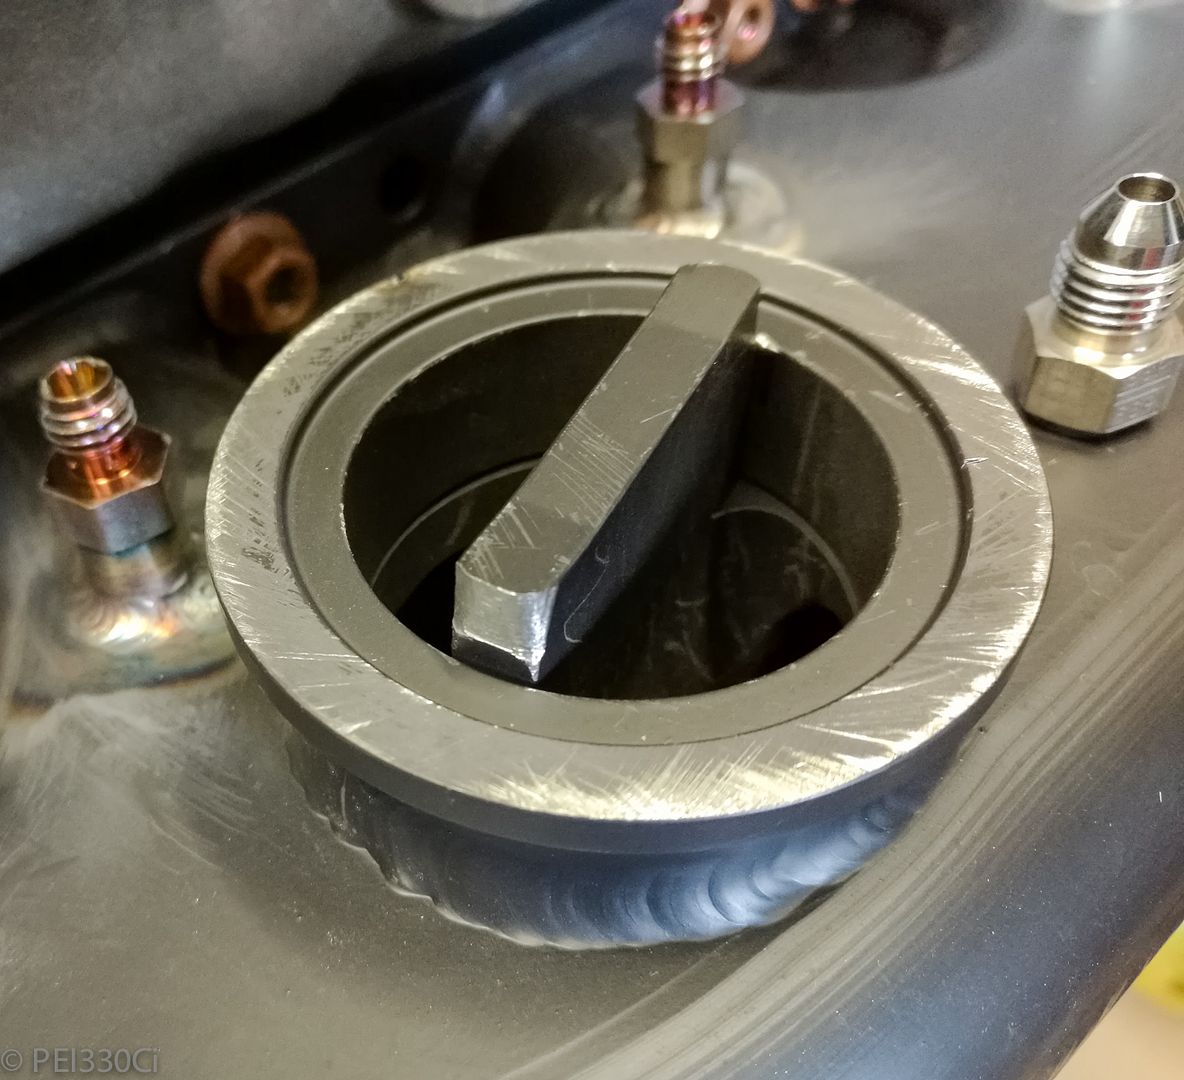
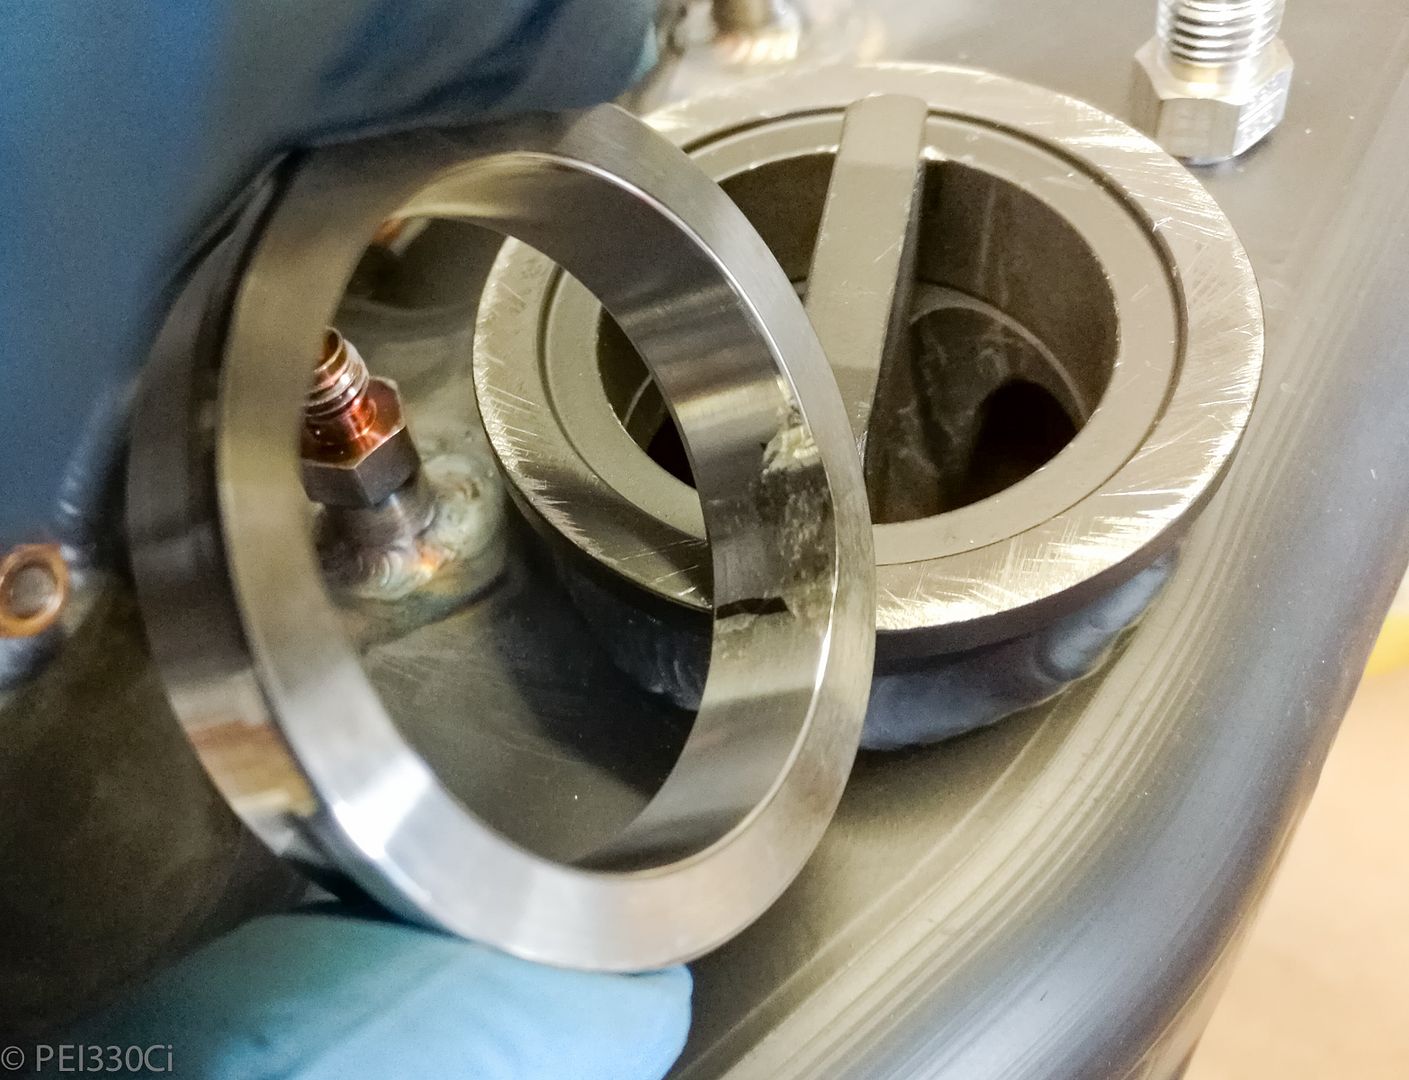
T3 0.82 A/R (Left) vs T4 1.06 A/R twinscroll (Right):
The T4 housing wasn't going to be a bolt on affair:
- - - Updated - - -
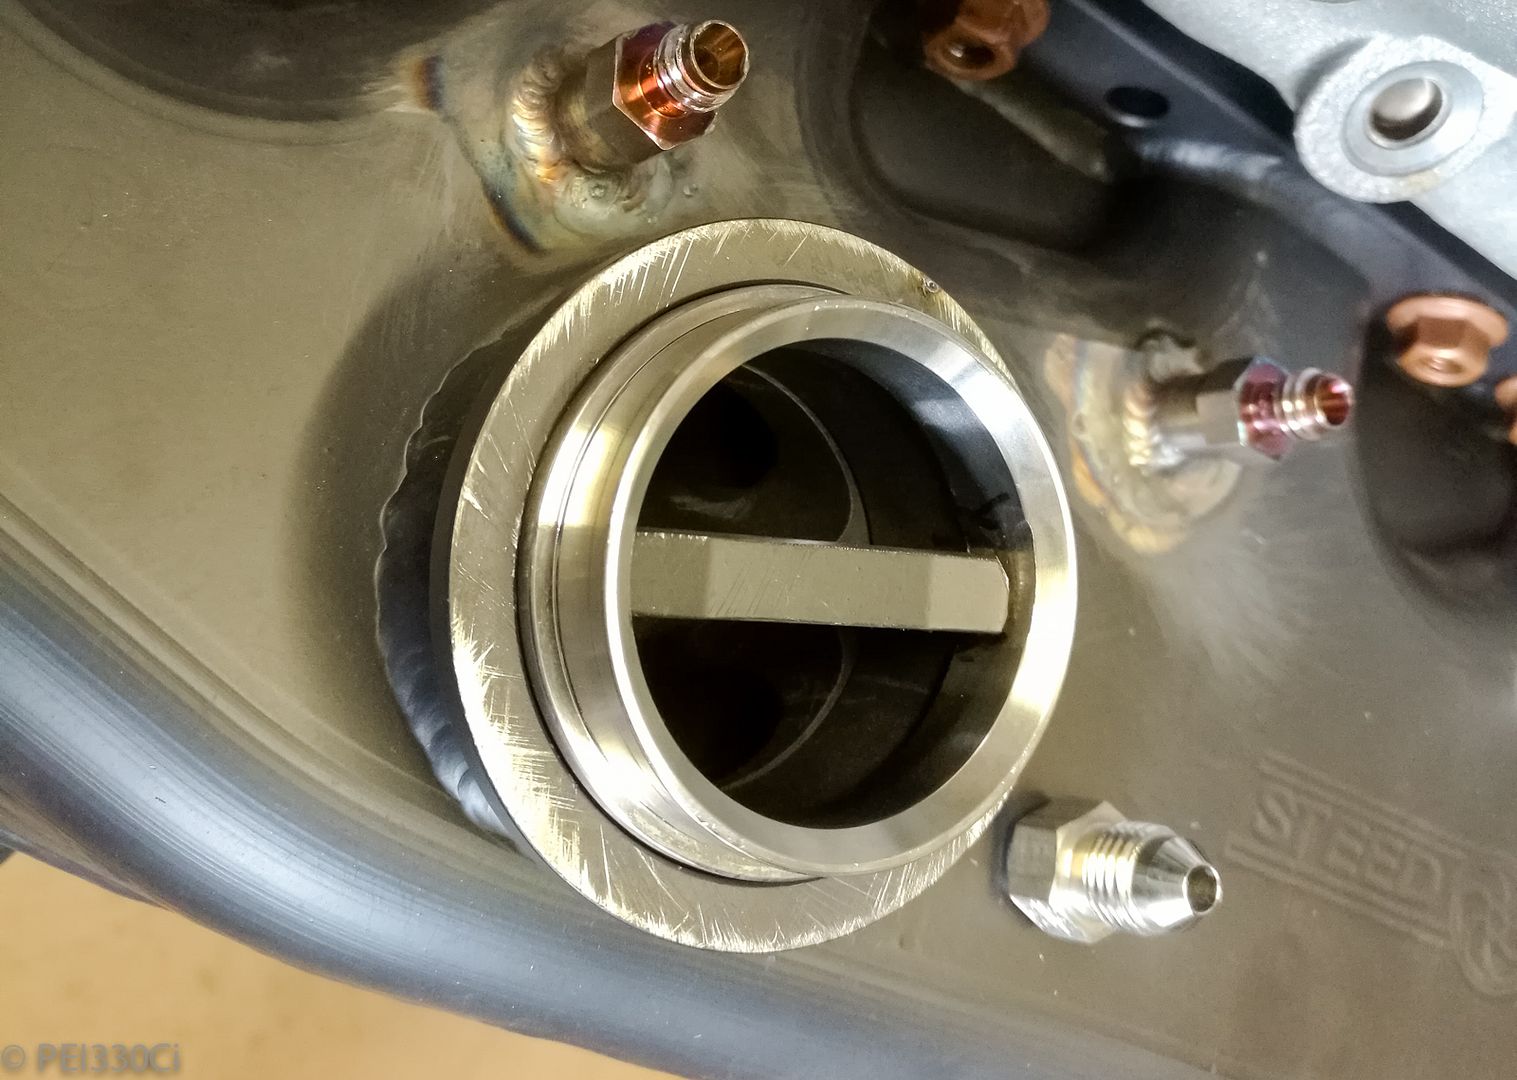
Steed Speed Twinscroll back from welding:
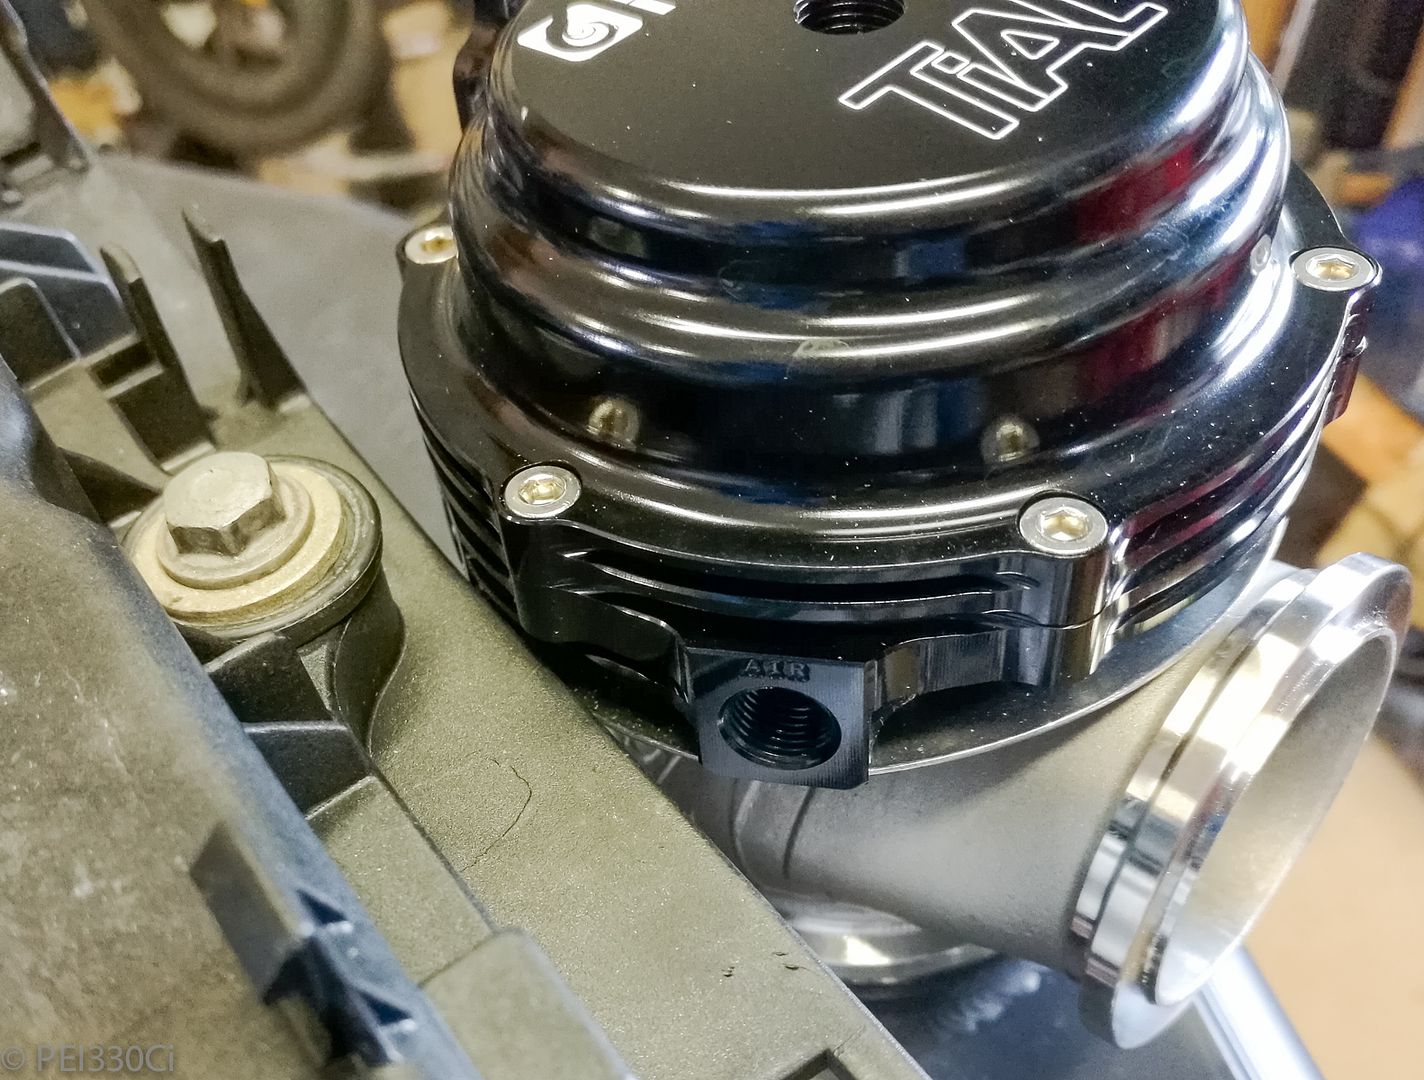
Fitting the Tial MVR:
M54 Valve Cover needs to be clearanced:
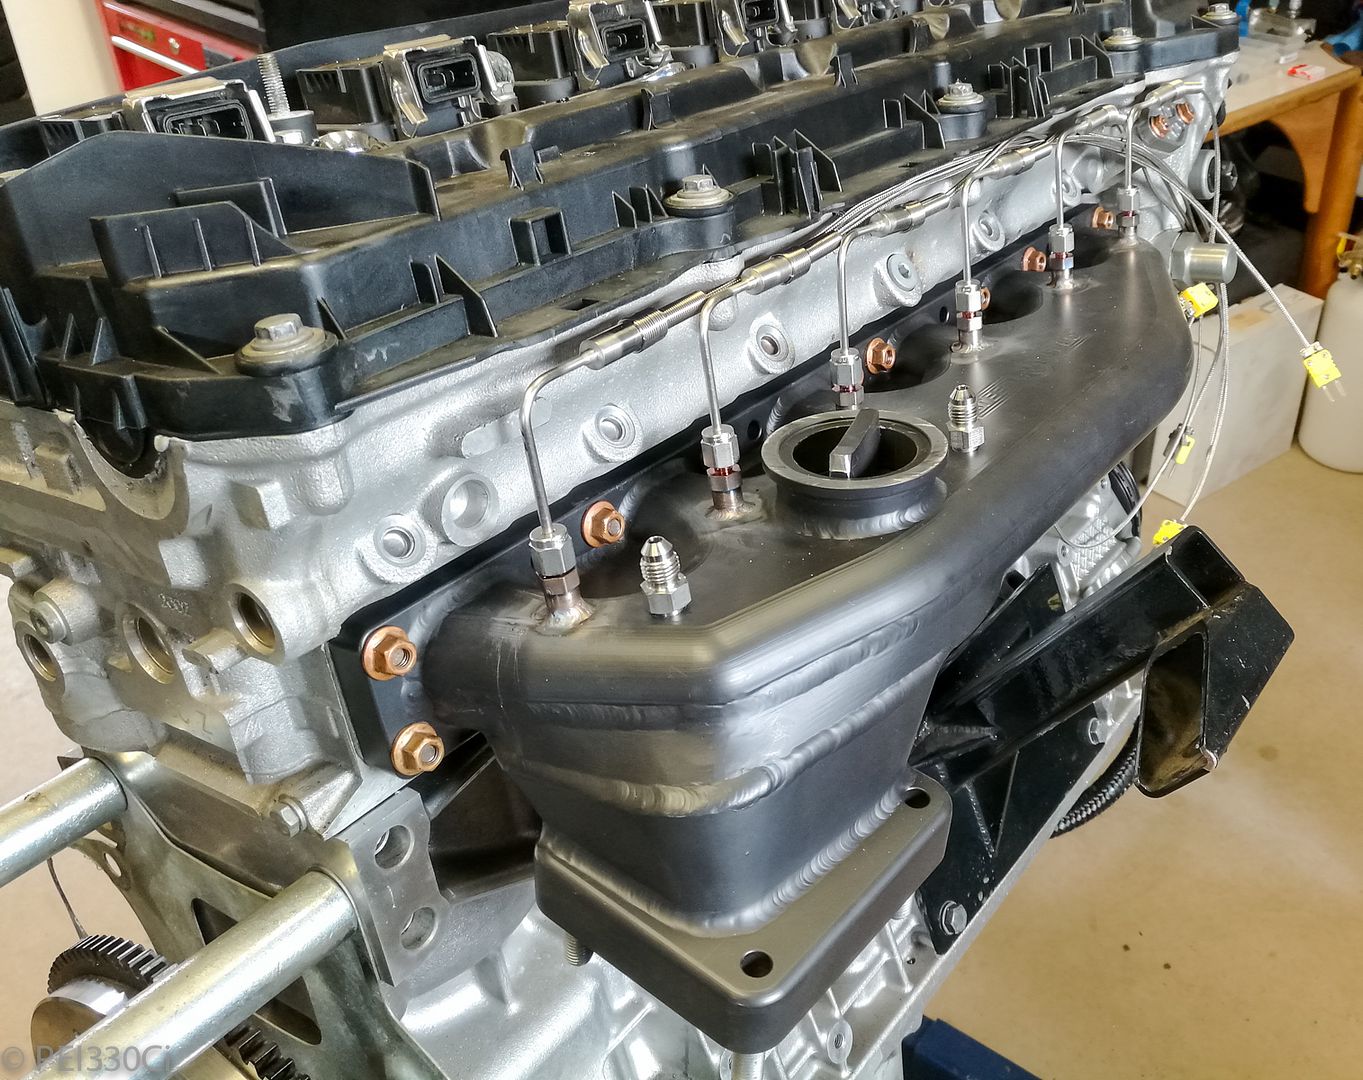
Fitting the EGT probes to each cylinder:
Exhaust back-pressure (EBP) signal lines being fitted:
Yes....I'm putting a sensor on each "scroll", or bank of 3 cylinders.
- - - Updated - - -
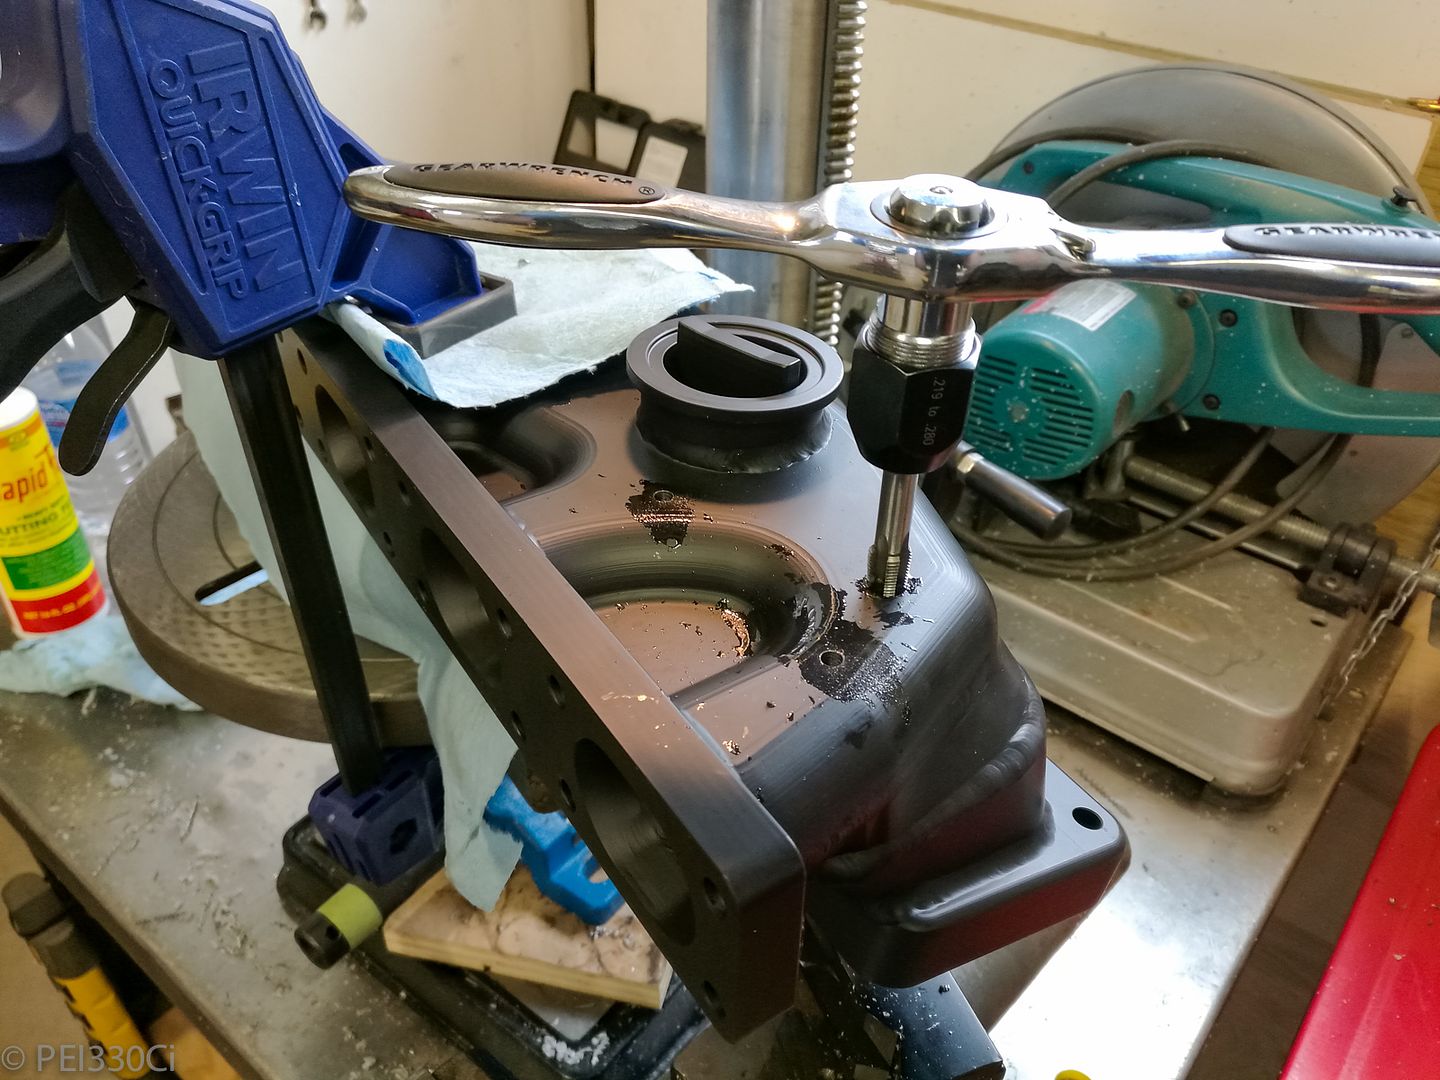
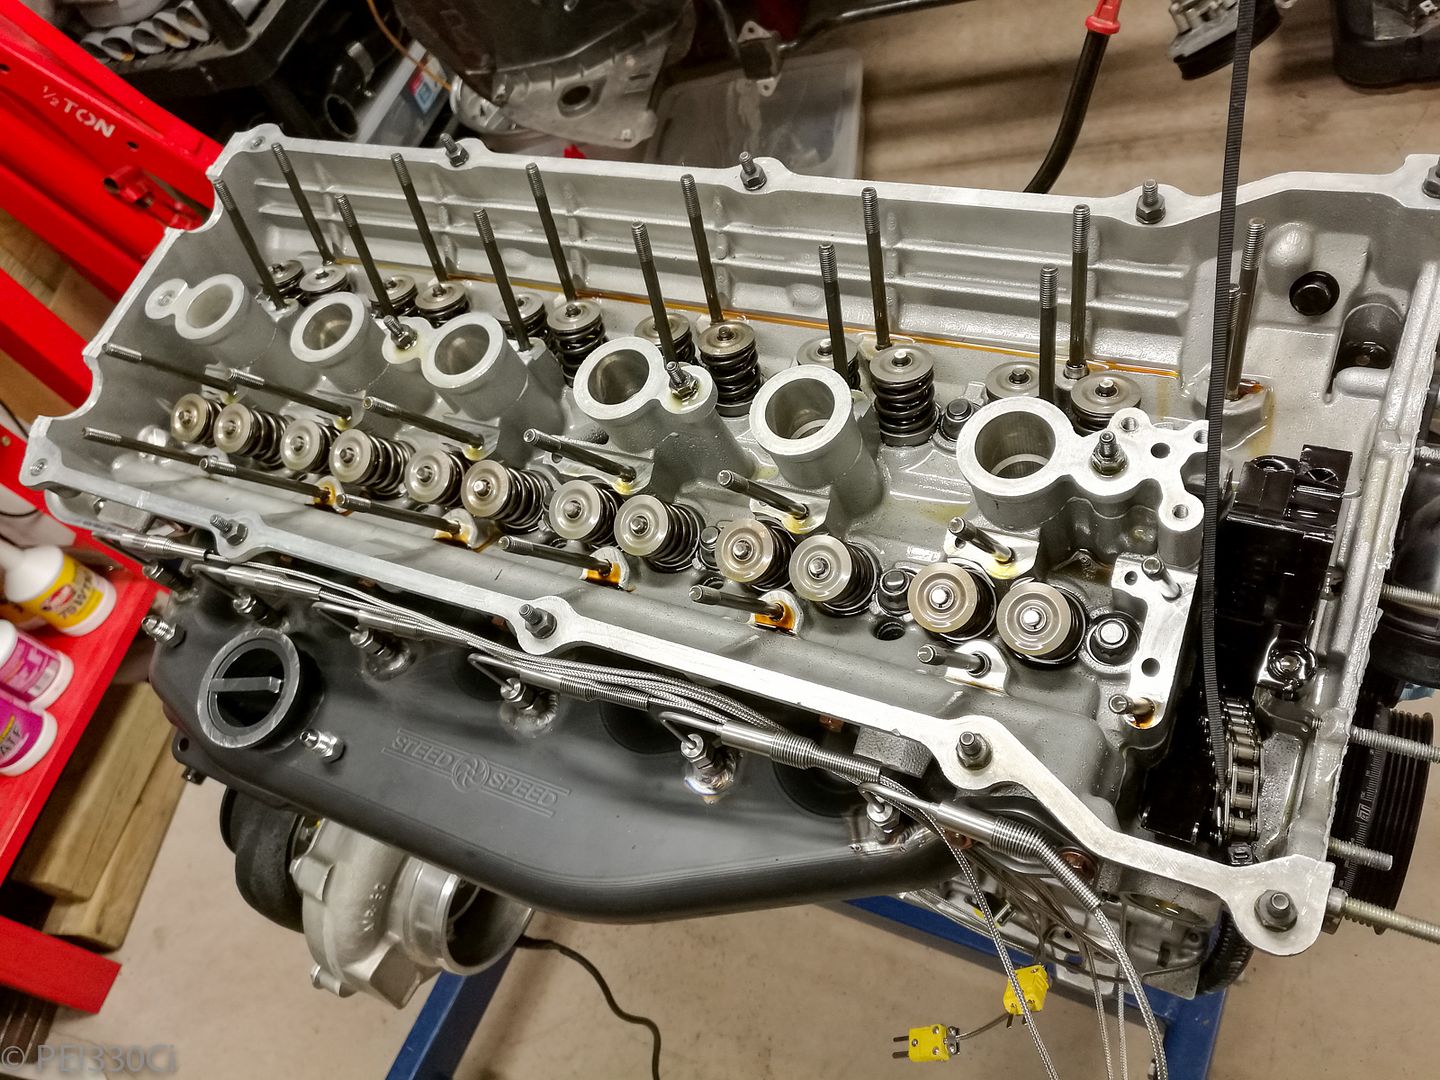
Removed the VANOS, Cams, and Cam trays to re-torque the 11mm head studs:
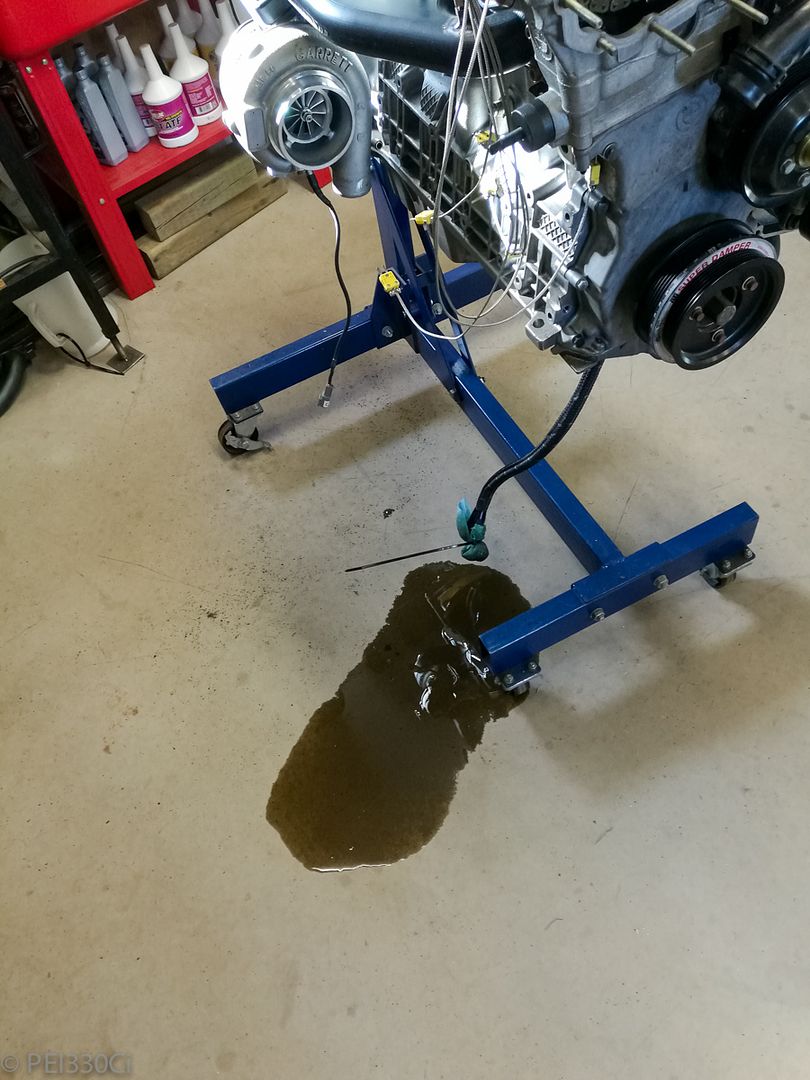
Oil scavenge line left a mess for me overnight:
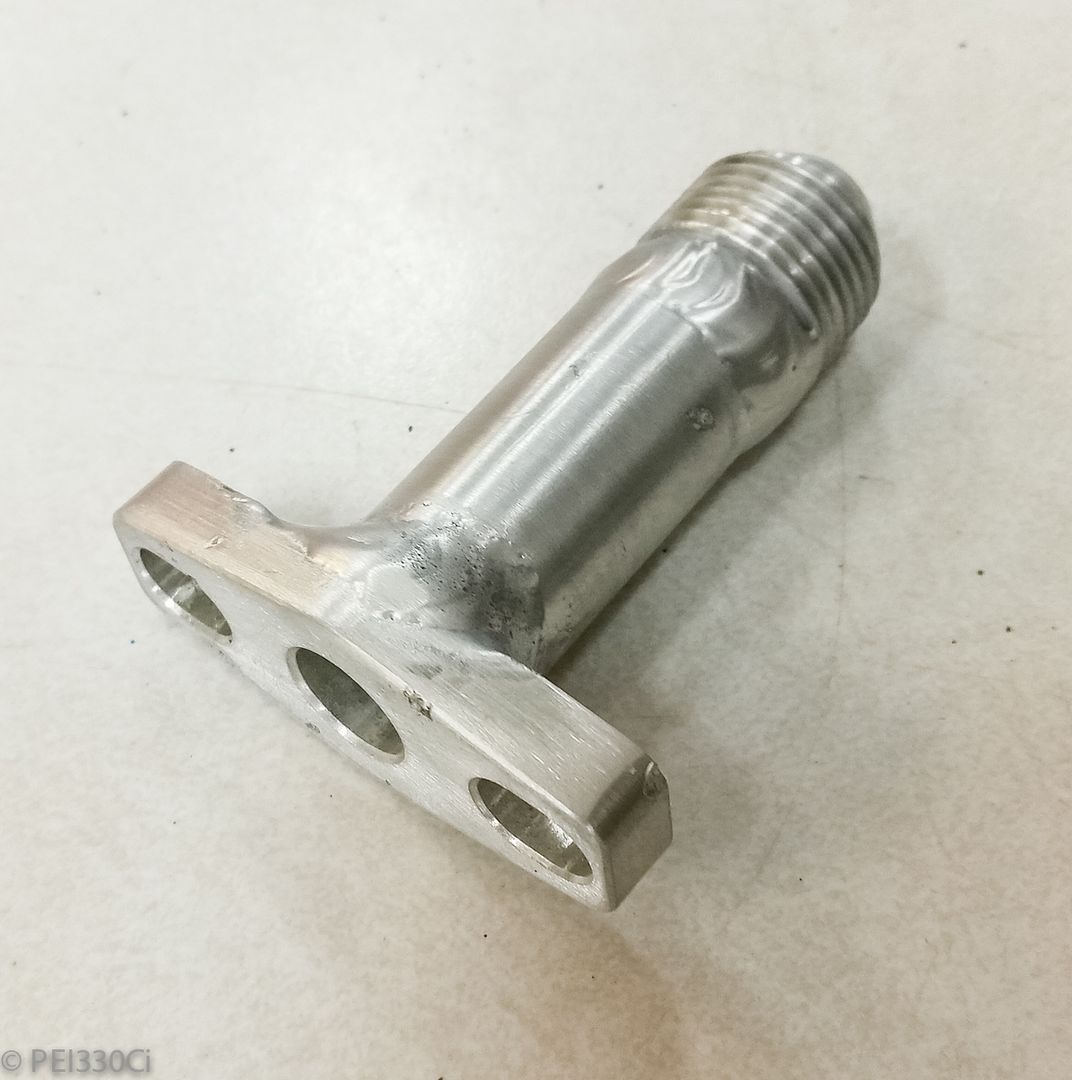
I had to extend the oil drain flange by 1.5 to clear the new twinscroll housing:
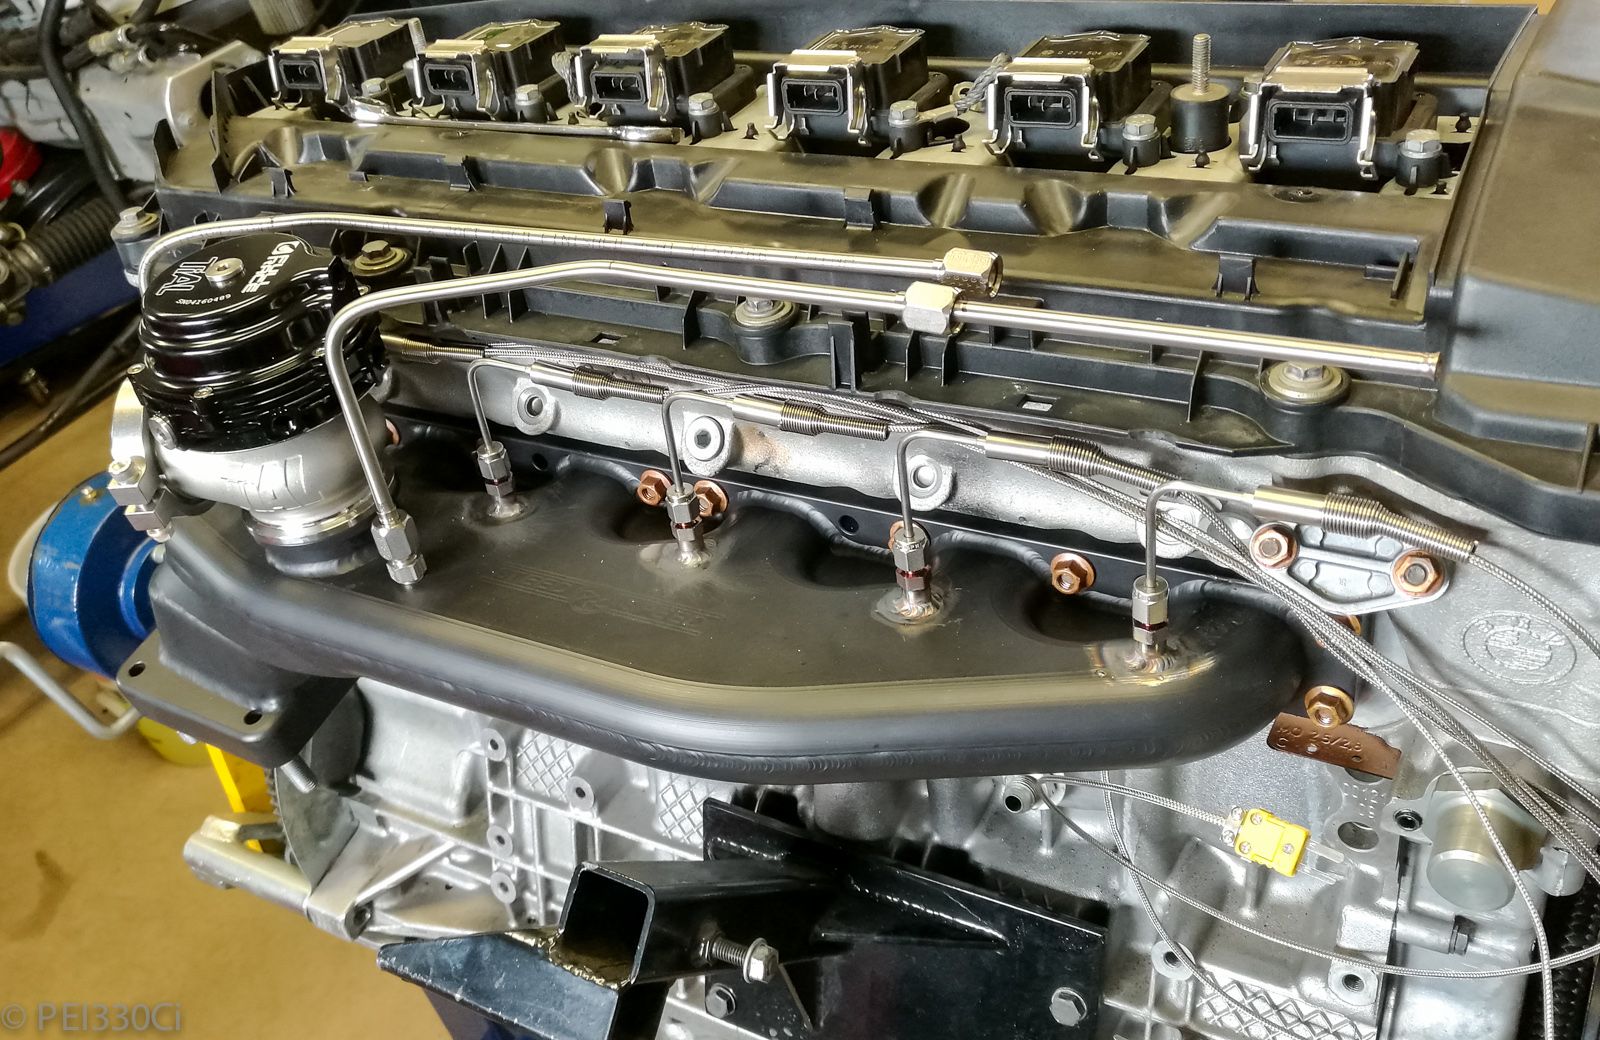
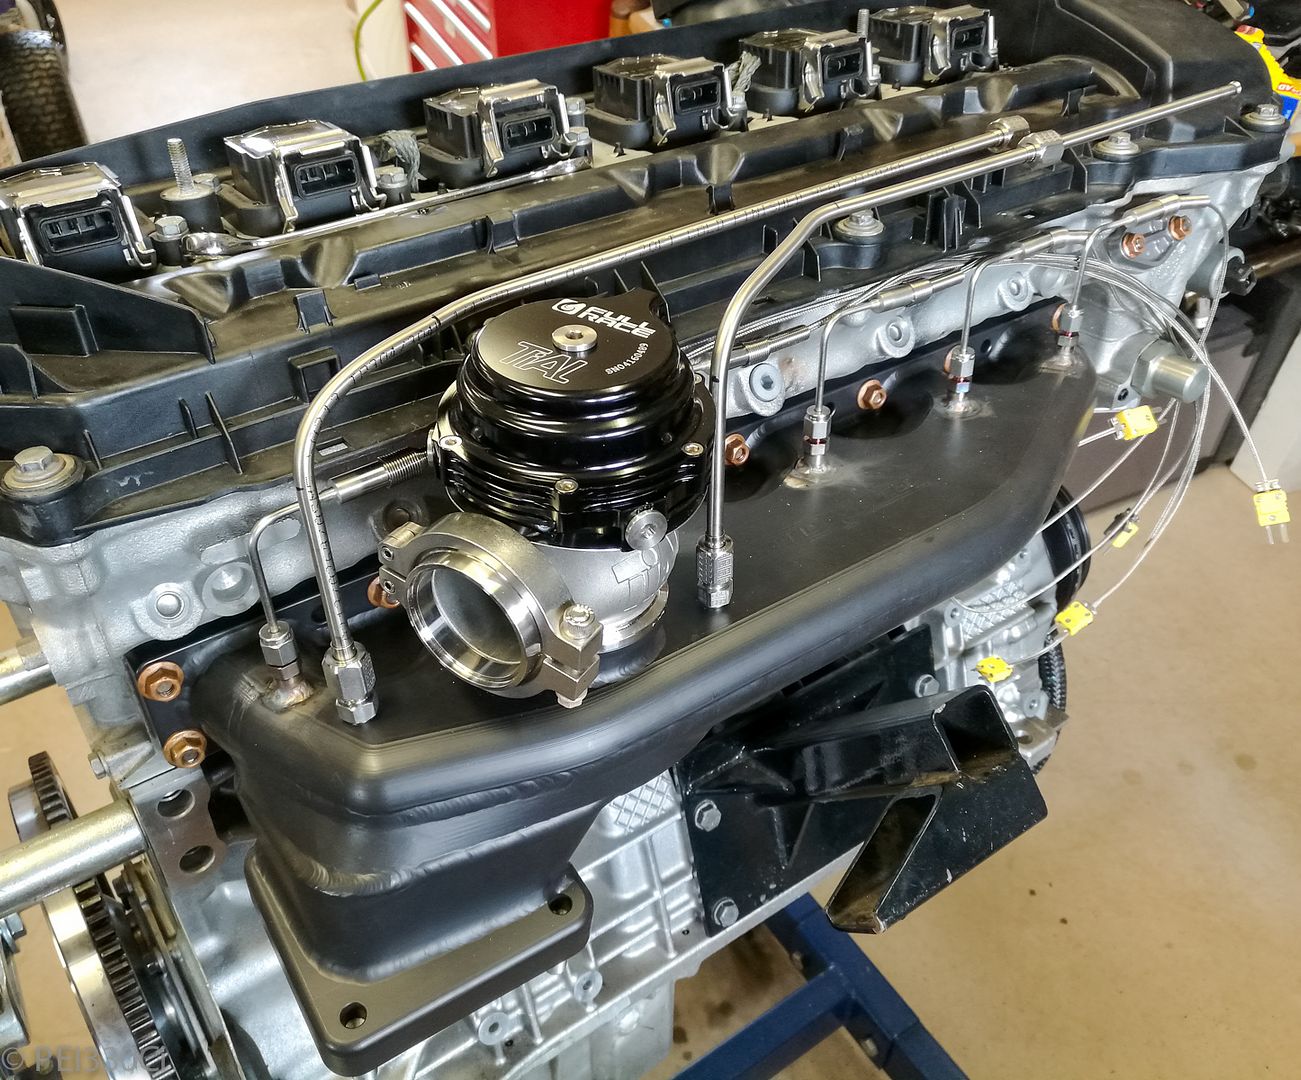
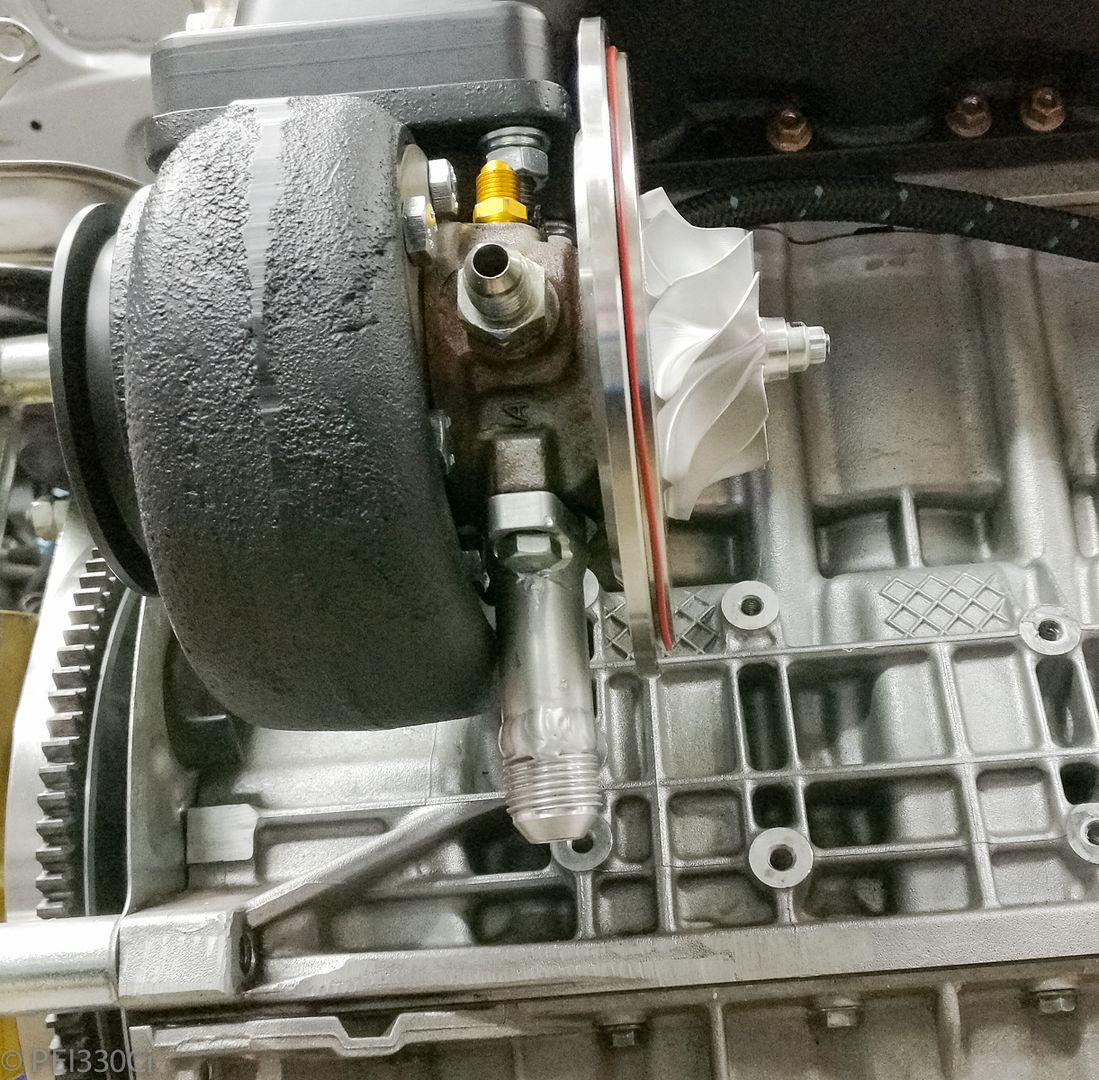
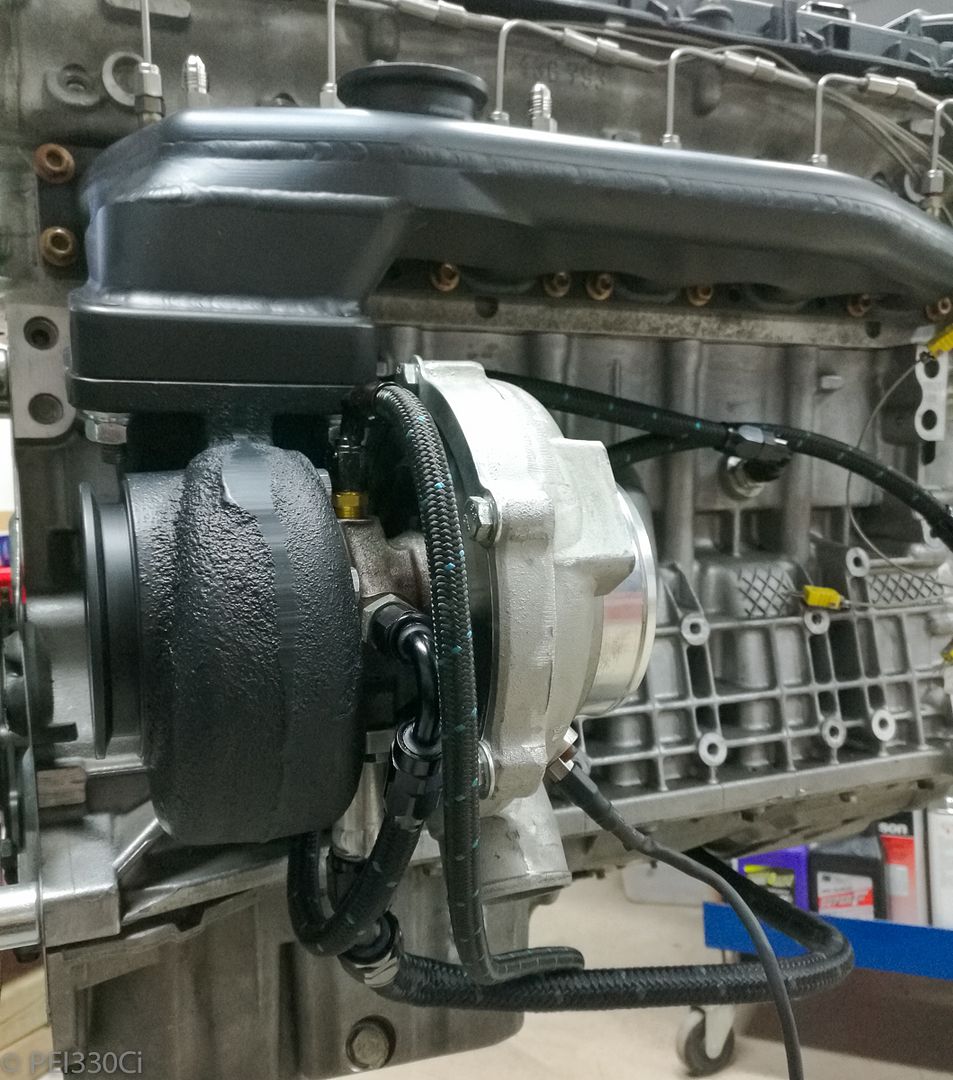
Turbo all plumbed up:
EBP lines trimmed to length, and WG installed:

Member
You are a mad genius, Adam! I love it! Right back to it!
Best,
Peter
Member
What makes you think that the head bolts will not rip out of that block when you make all that sick power? I already predicted the transmission fiasco but you did not listen.
Member
.......... here we go.
M54B30 Inside
Clearly, you need to come up to Canada and show me how it's done!
Success is lacking in my life.
Fun with my son is not.
Last edited by PEI330Ci; 03-15-2017 at 06:47 AM.
Member
Sac de douche!!
u owe my mule an apology
lol, wisdom through inexperience.
86 325es, 2.8L m50, S476sxe, ProEFI 128 ecu, e85, solid rear axle, TH400 trans, 28x10.5w slicks, zip ties, popsicle sticks, tape
best time 9.06 @ 151.8 mph, best 60 foot 1.30
M54B30 Inside
Thanks Buddy!
Now if I could just borrow your parts cleaner for a week....
Member
Go back to your dumpster fire and stay out of this quality thread.
1000+RWHP, Lab22 Built Turbo S54 - BMW Half Mile Record Holder
Member
Turns out coffee is pretty good coming out of the nose
LICENSE SUSPENDED
At least he recognized the sick power. That's a giant leap for Hacky. It would be nice to see a new leaf turned by Hacky, before Trump does what he does.
1996 332IS
Built 3.2
CES/Steed TS Precision 6466, spraying a "$π!℅" load of meth.
Technique Tuning 80# tune.
1/4 mile 10.84 @ 136.72
Your 1 and only stop for all your BMW performance needs
WWW.CESMOTORSPORT.COM
Big engine, small pistons
Not to mention, iirc head studs were upgraded long ago...
Sent from my Nexus 6P using Tapatalk
Light Fires N Burn Tires
So whats the point of monitoring each exhaust port with EGT?
Can the Motec adjust anything based on info coming off of them?
Noob here BTW. Also in search for which standalone I will go with and why.
Great work!
M54B30 Inside
Answering in reverse order:
Find a tuner that you will enjoy working with. Then let that person steer you towards the ECU that fits your requirements, and their knowledge base.
Yes, the Motec M1 can compensate for EGT. Using a standard GPA package, compensations can affect boost, AFR, and ignition on all cylinders. Using a development license, you could further refine this to trim individual cylinders.
Monitoring each cylinder for EGT gives a comparative value for the amount of heat exiting each cylinder. I say comparative because Thermocouples, at least the ones we use, are not precise enough to give absolute measurements. This is partly due to sensor deviation, and partly due to installation deviation. (Everything is not equal) So by looking at the trends for each cylinder, we can get an idea of what is going on. Now....many people at this point would state that a lean cylinder will show up with a higher EGT than other cylinders. This could be correct, but higher temps could also indicate higher mass flow through the cylinder with perfect AFR. Some tuners HAVE seen a direct correlation with individual lambda sensors on each cylinder between AFR and EGT. But there also have been exceptions. How this CAN be validated is by holding the engine under constant load, then making step changes to the Lambda target for all cylinders, and then evaluating the changes seen on each cylinder. There should be a curve to the EGT response for each cylinder, then you can set the trim for each cylinder to have the shape of the curves center on each other. The EGT used in this way is a comparative tool to trim fuel from cylinder to cylinder, and also a good indicator of when something is wrong (Fuel supply problem) with only 1 cylinder under load.
Luchador
Also, keep in mind thermocouples are slow to react relative to the speed an engine moves. You need to hold steady state to make sure the thermocouples are reading correct values. For fast transients the readings are not trustworthy.
Just some info for people who are not familiar with using them.
M54B30 Inside
Has anyone built a transmission mount from scratch out of steel?
I see lots of re-enforced aluminum pieces...but I don't have a manual trans "core" to work with, so I've decided to fab the trans mount out of steel.
Running solid engine and trans mounts....
Member
What's the power goal with the GTX3582R with the T4 and how much were you making with the T3? I'm debating what turbo I want to upgrade to when I install my steed and right now I have a SPA T3 GTX3582R
Sent from my SM-T707V using Tapatalk
M54B30 Inside
It's a GTX30
400+ rwtq, with early spool is the goal.
Lead Disagreement Eng PE
Why solid mounts? Some simple urethane mounts will provide some vibration damping and make everything last longer and need to be less beefy and annoy you less in the process.
I actually really like CJ7 Jeep rubber mounts - stupid cheap and very stiff for a rubber mount since it's an encapsulated steel sandwich, but the vibration profile is great with them. My engine at ~360-380 rwtq moves like 3/8"... imperceptible from the drivers seat over a stiffer mount.
As far as making the mount out of steel, sure, use roughly 1/8" plate (cold rolled preferable) and go to town. Make sure it has enough second moment area of inertia to resist the torque moment. Aim for ~50-66% peak stress in bending. You can find beam calculators online to assist you in this calc, wouldn't take long to teach yourself if you're not familiar with mechanical engineering.
Or you could just toss some plates together and get to welding, but I'd advise using some sort of vibration damping, as it's much more likely they'll live for an extended period of time.
M54B30 Inside
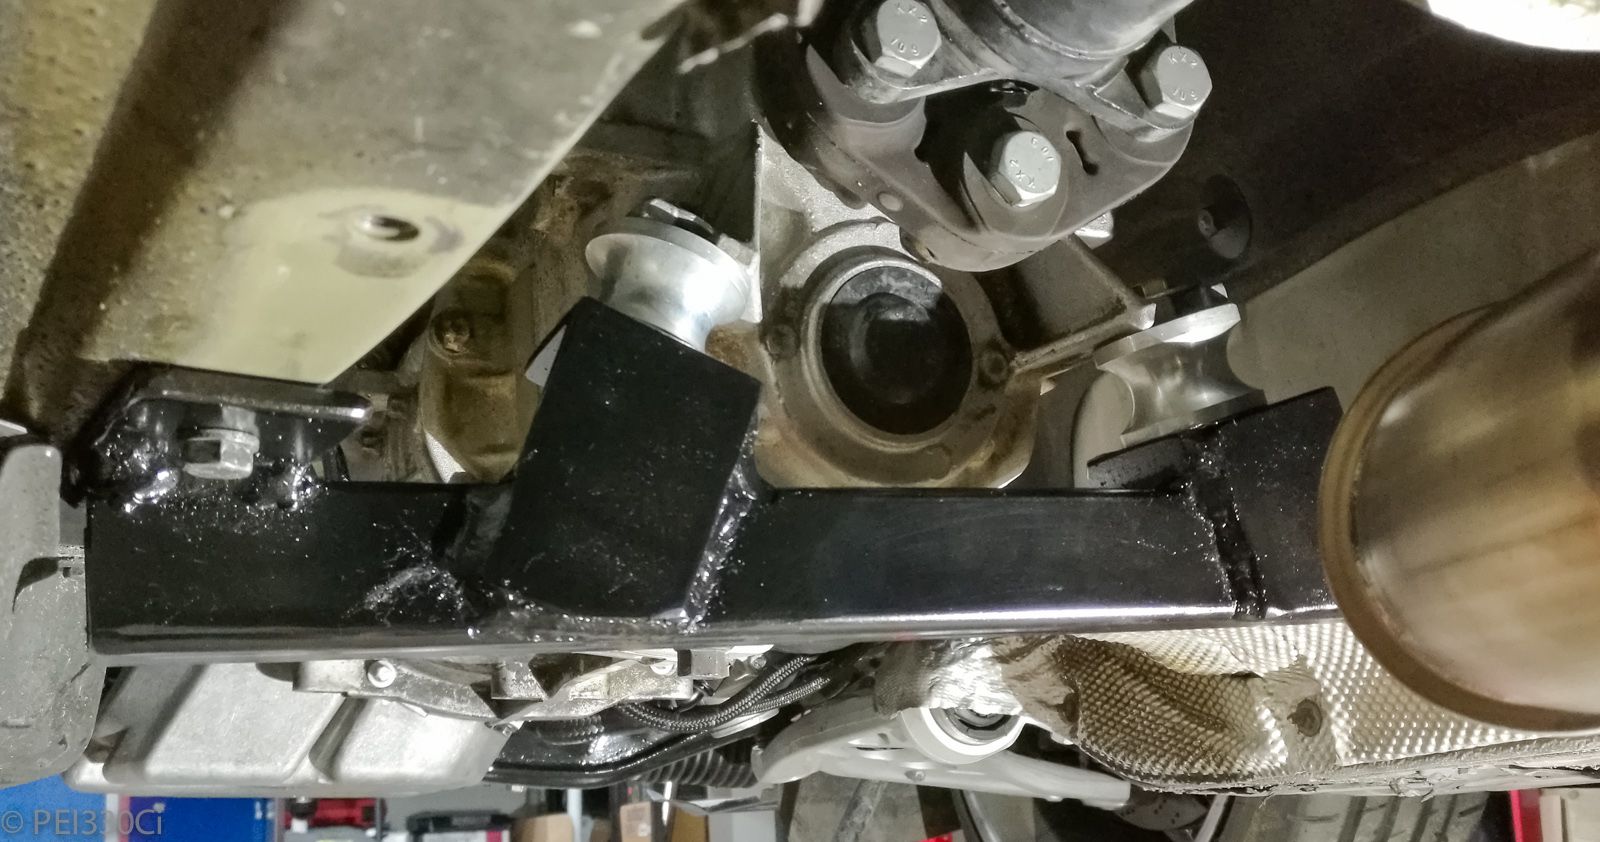
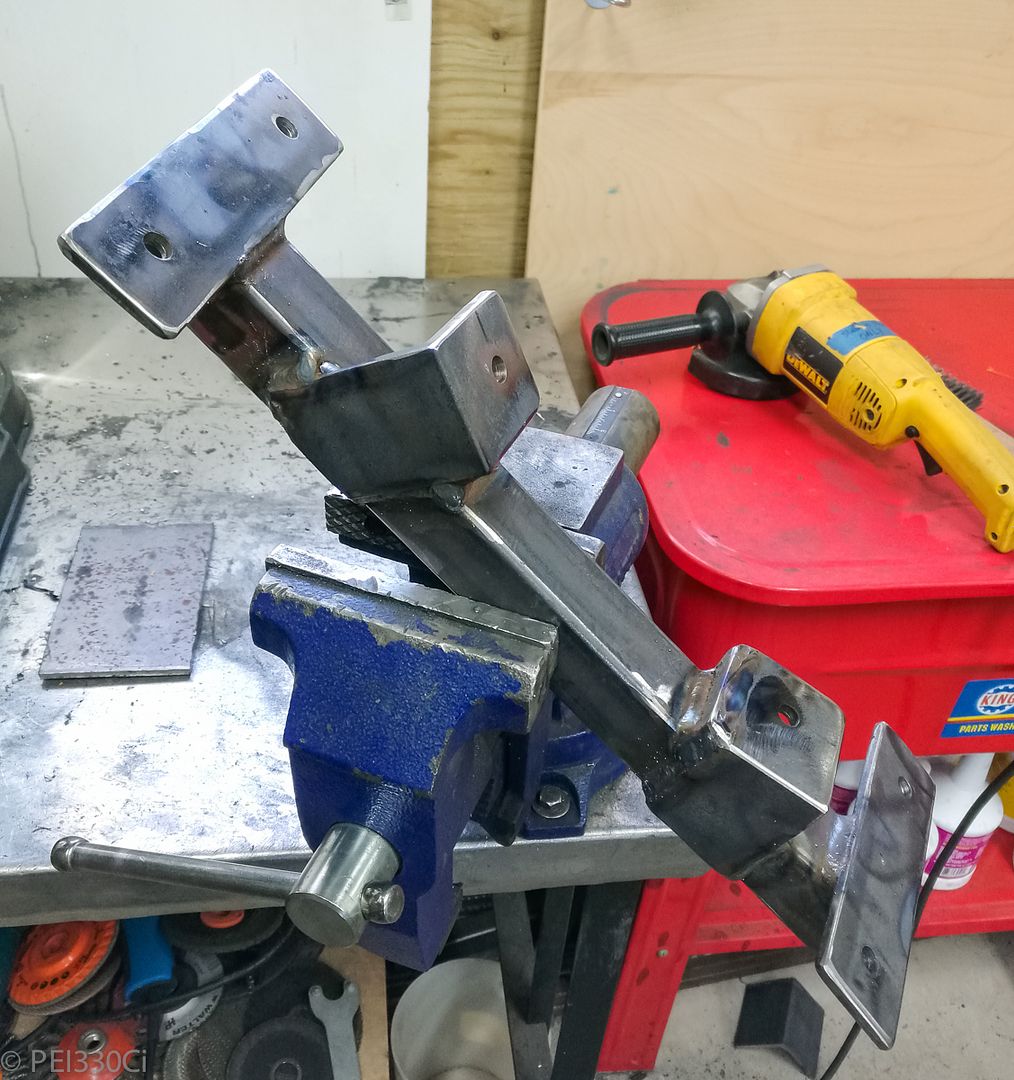
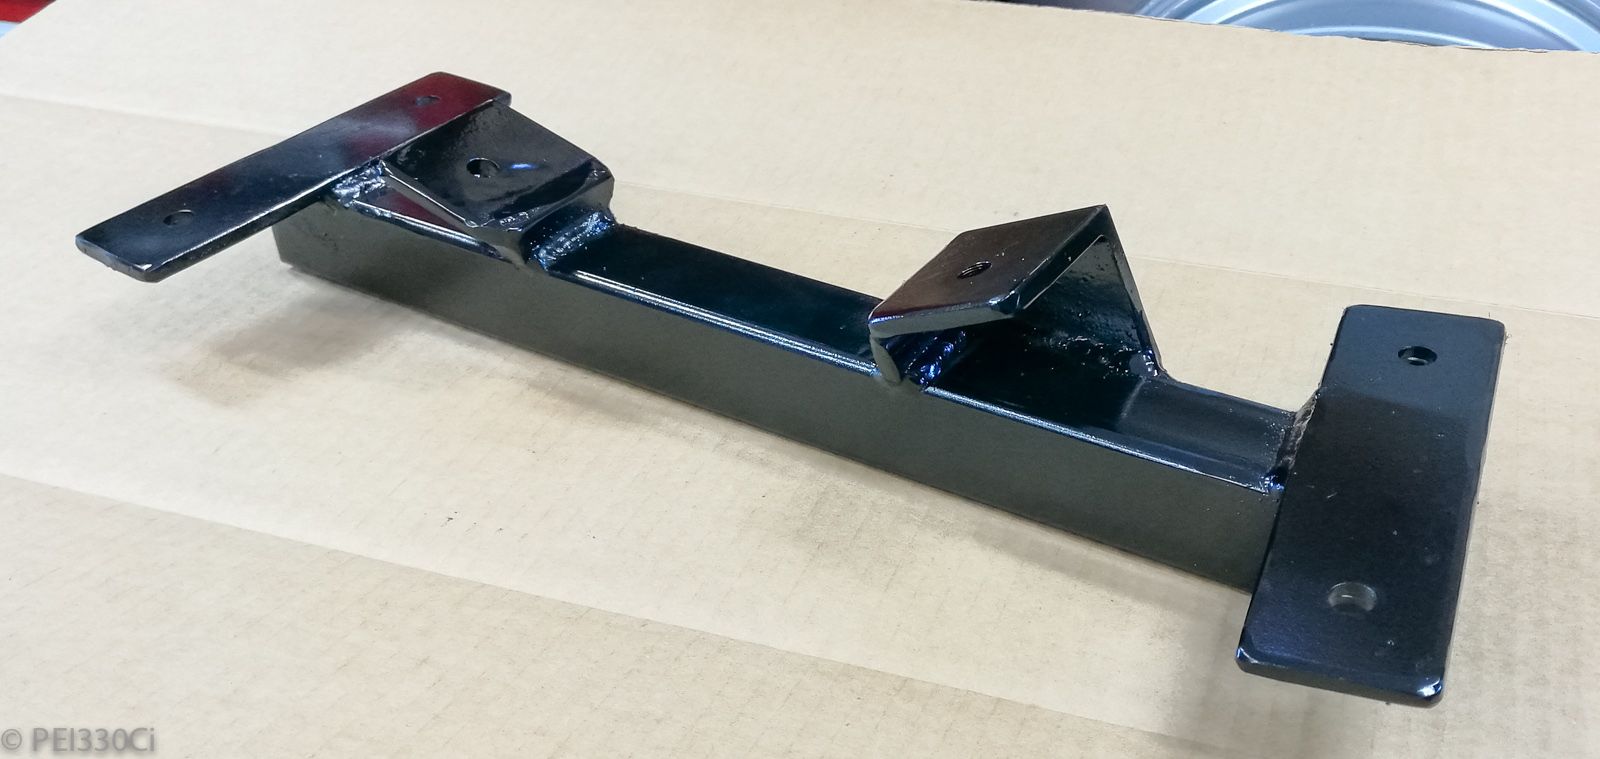
The trans mount is done.
Made it with 1.75" X 3/16" square tubing, 3/16" angle, and 1/4" steel plate.
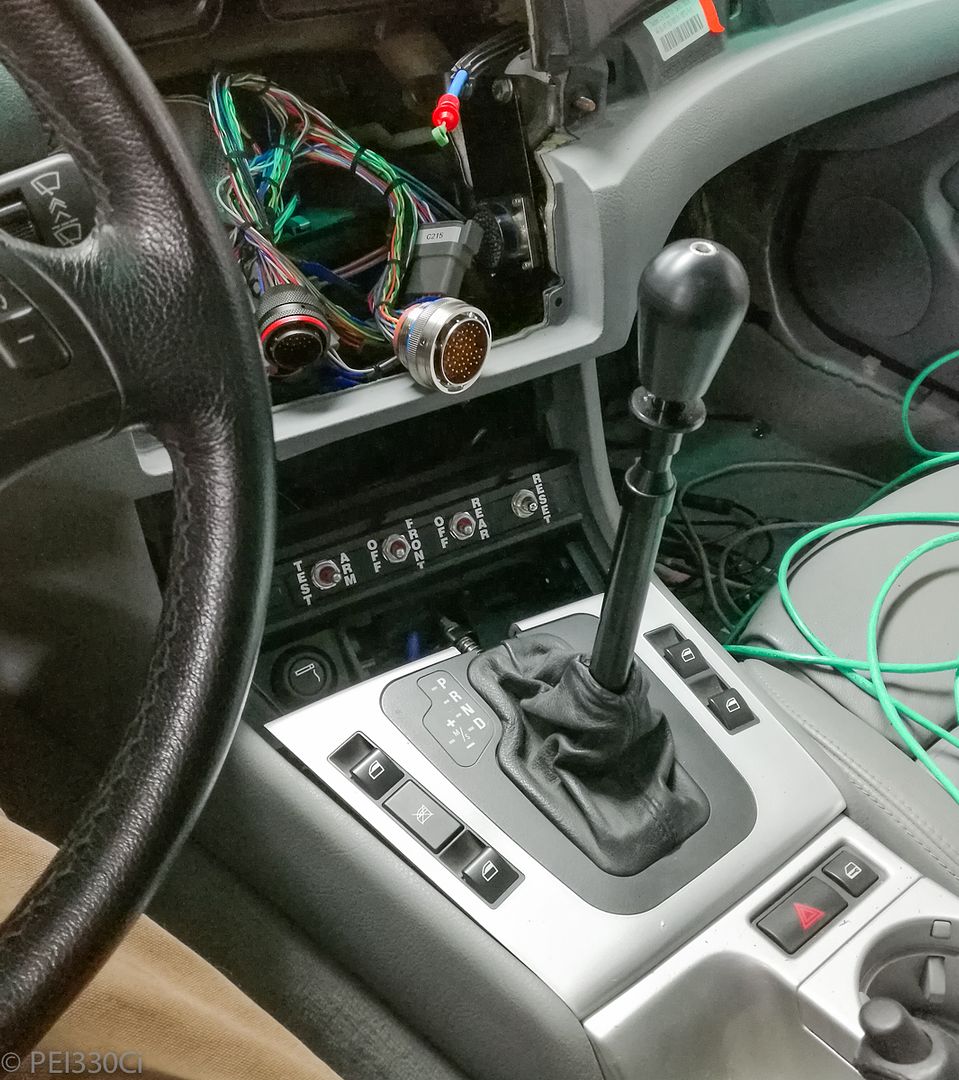
I put solid mounts on the black car, (330Ci) so I'm familiar with how harsh it is. I was running UUC Poly engine and trans mounts, but when I pulled the engine out last week I found that one of the engine mounts had started to deform after only 1,000 miles....
I'm running a CAE shifter, which bolts directly to the chassis. (Doesn't use the OEM arm that attaches to the transmission) What this means is that you have to keep the engine/trans fairly rigid, or your shifts are going to miss.
I've got pictures of the above, but haven't made the time to upload them yet...
Last edited by PEI330Ci; 03-18-2017 at 07:03 PM.
M54B30 Inside
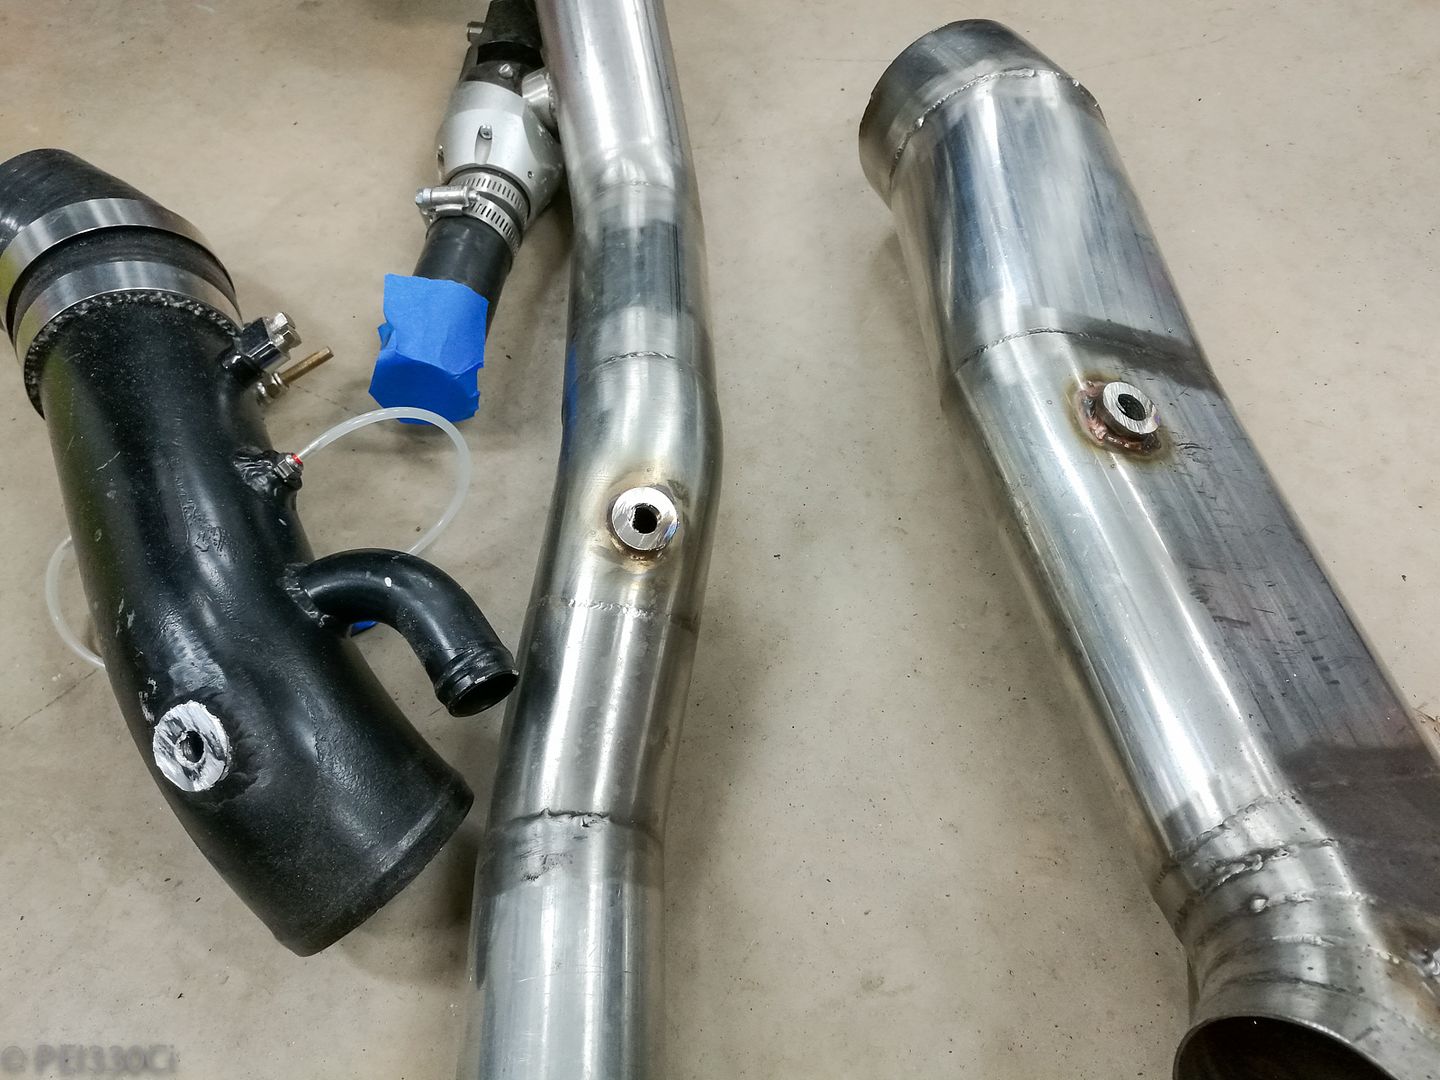
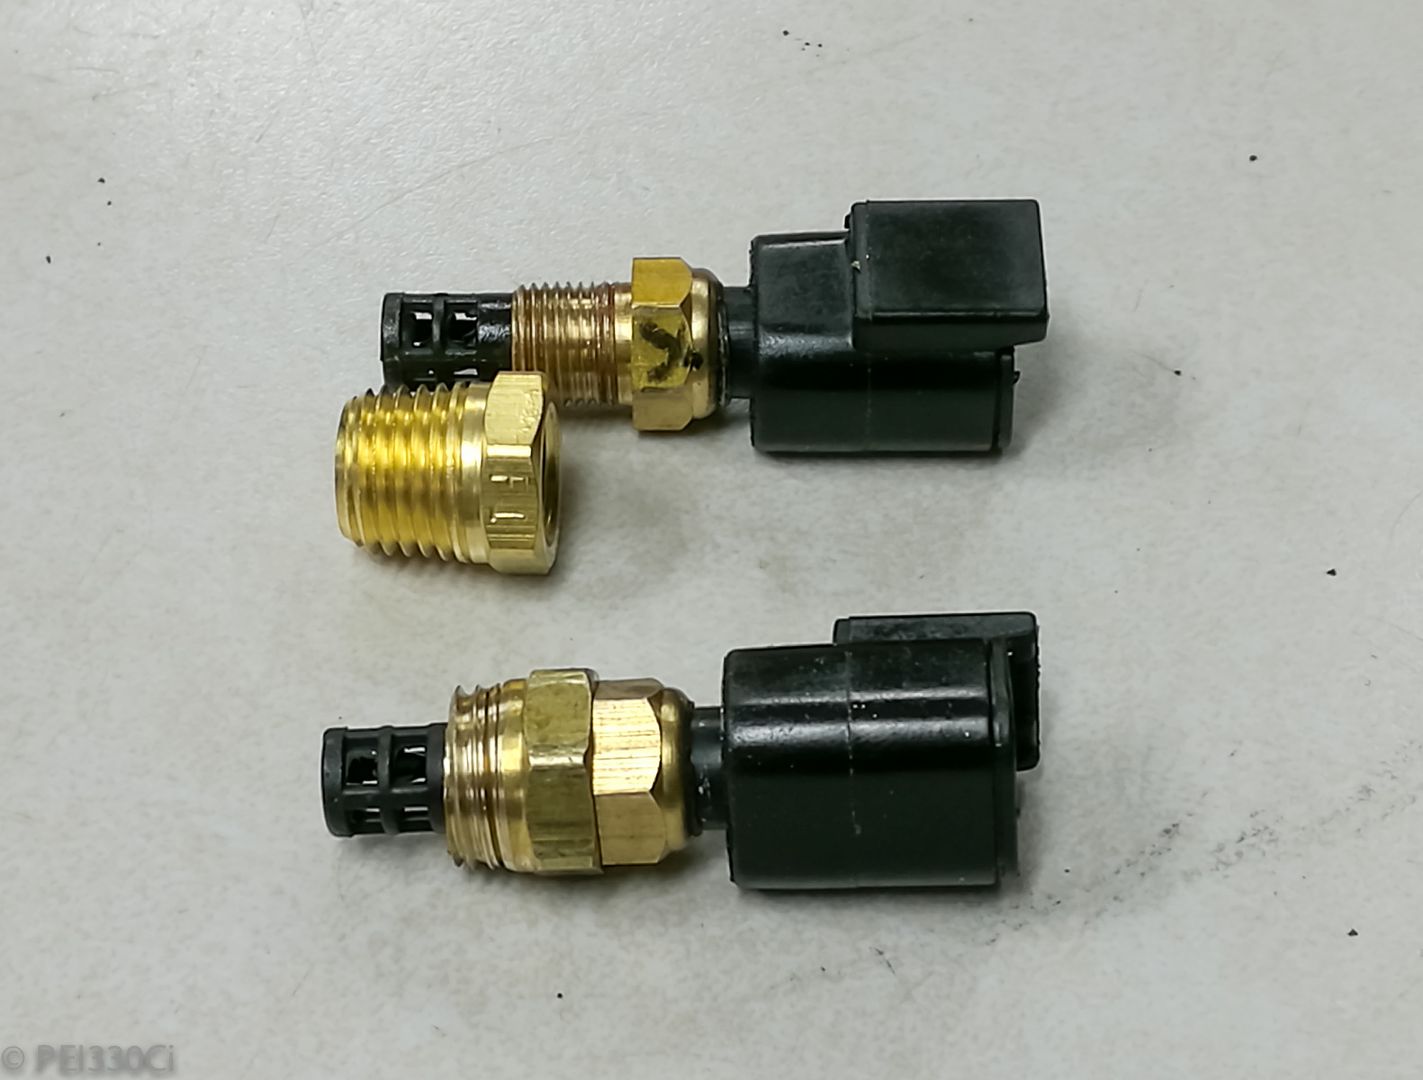
Due to the slow response of the Bosch air temp sensors, I decided to replace them with something faster from Delphi. The problem was that I had welded in M12X1.5 bungs onto the charge pipes, and the Delphi sensors are 1/8" NPT. Rather that cut the M12 bungs off, then machine 2 new stainless and 2 new aluminum bungs, and weld them in, I came up with another another plan. (Which ended up possibly being just as much work)
Step 1, cut the old bungs down to get the sensor tip properly into the airflow:
Step 2, tap the old bungs to 1/4" NPT
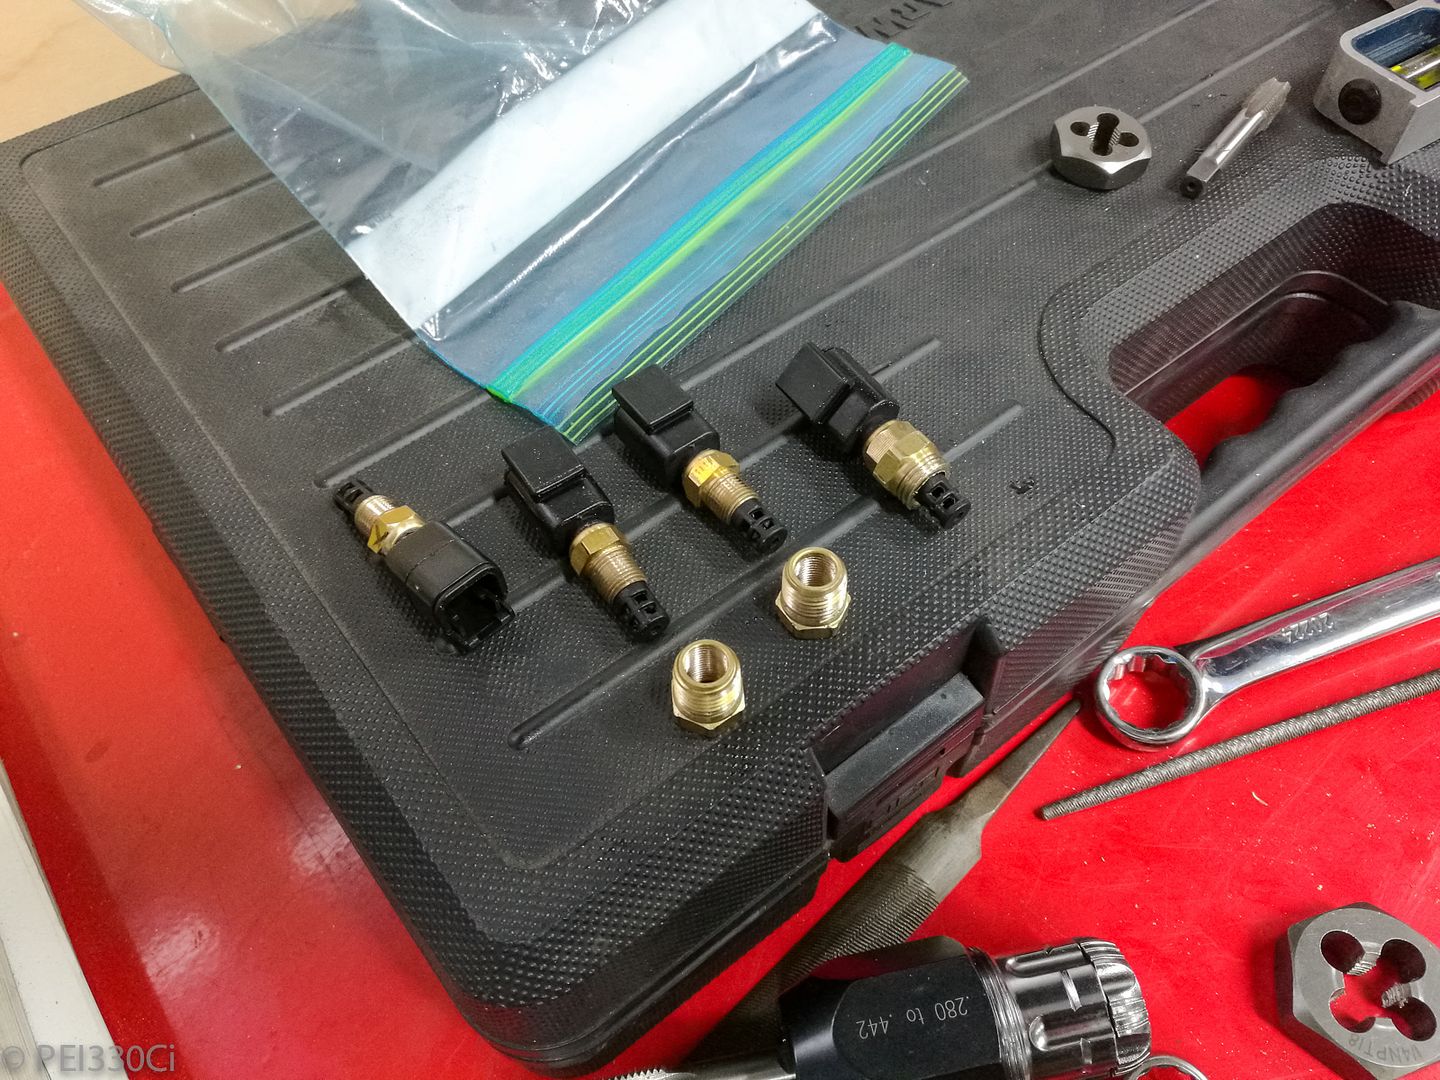
Step 3, take 1/4" NPT to 1/8" NPT adapters and re-cut the threads all the way deep.
Step 4, take the Delphi sensors and re-cut the 1/8" NPT threads all the way.
Step 5, cut the 1/4" to 1/8" adapters to fit perfectly onto the Delphi sensor's threads:
Step 6, install into rethreaded sensor bungs:
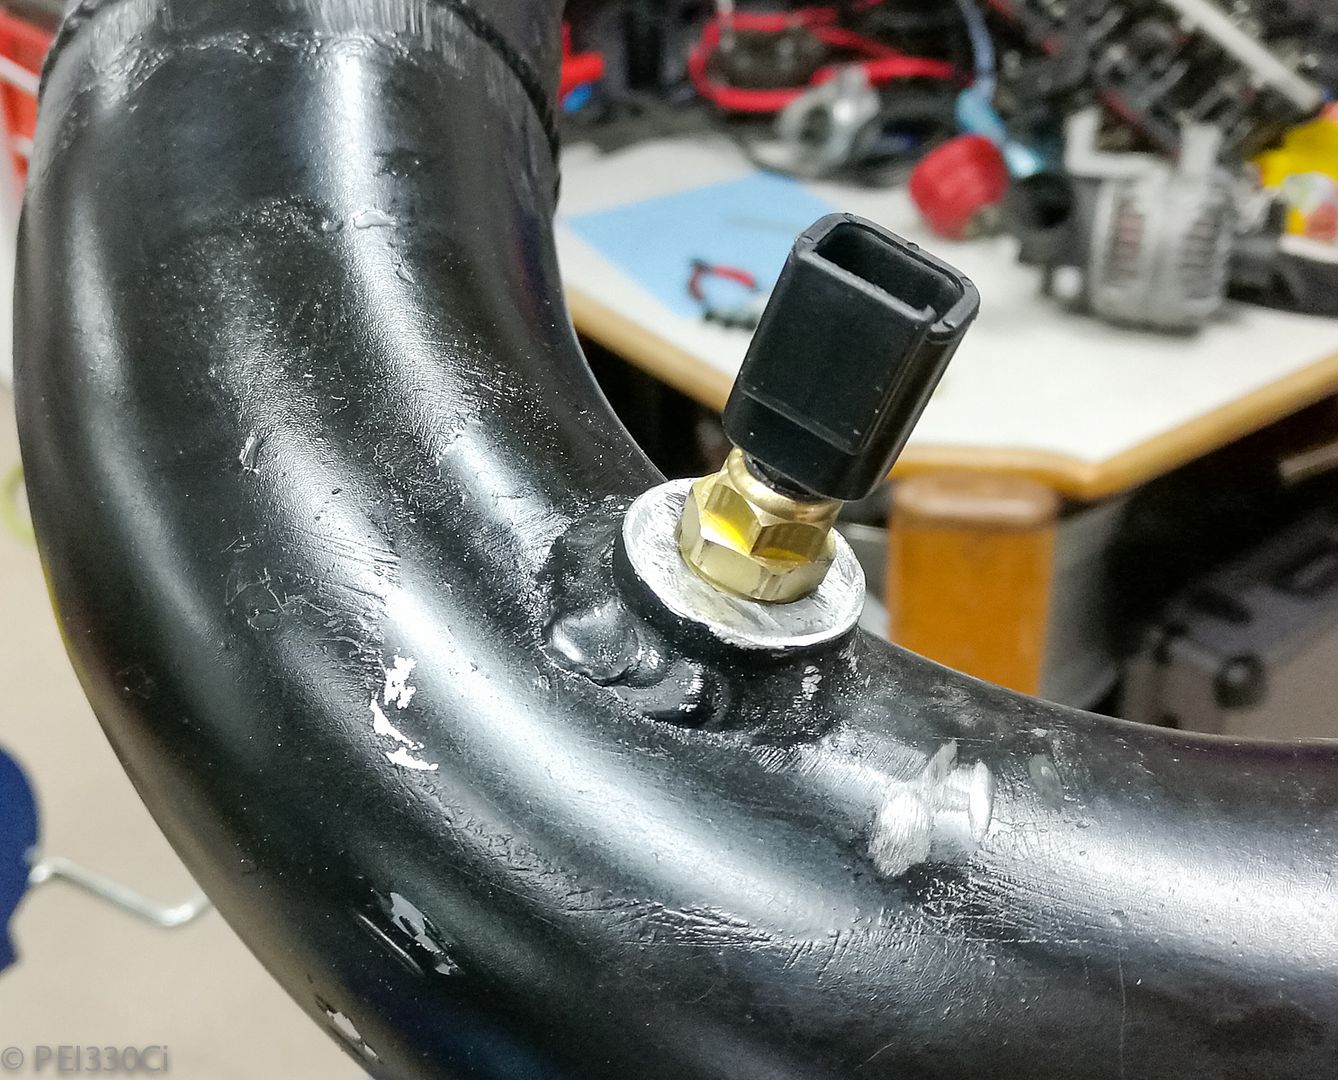
The aim here is to get real-time air temp data at the following points:
- Turbo air inlet
- Turbo air outlet (Compressor outlet)
- Intercooler Outlet
- Pre-Throttle Body (After water injection nozzles)
M54B30 Inside
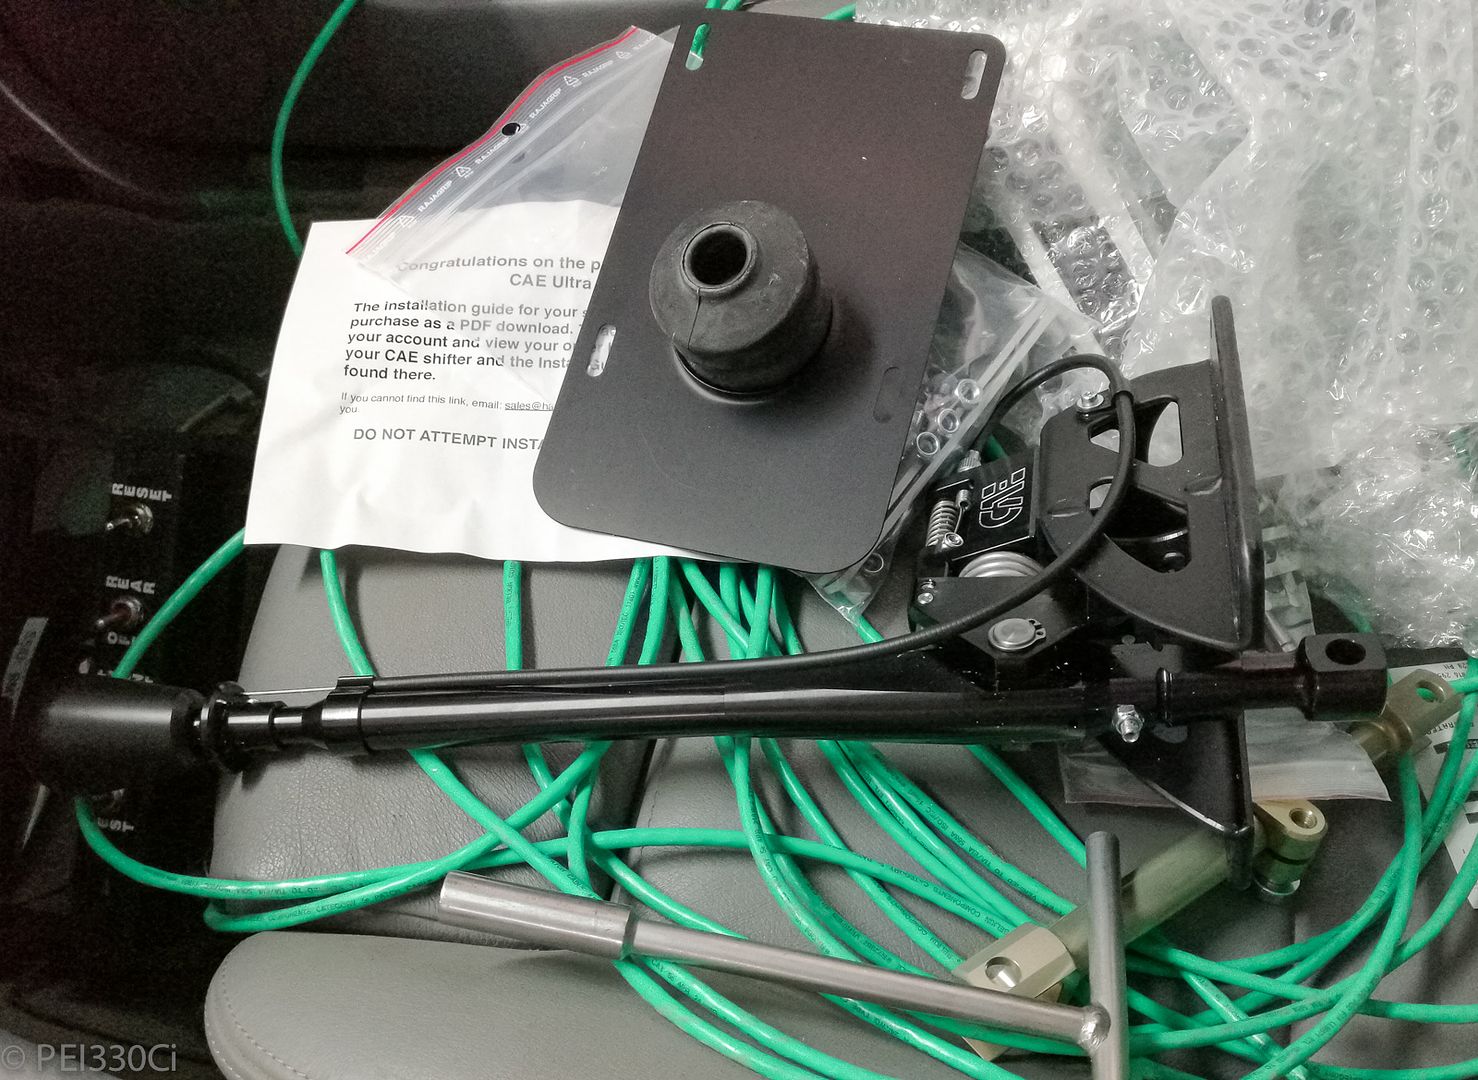
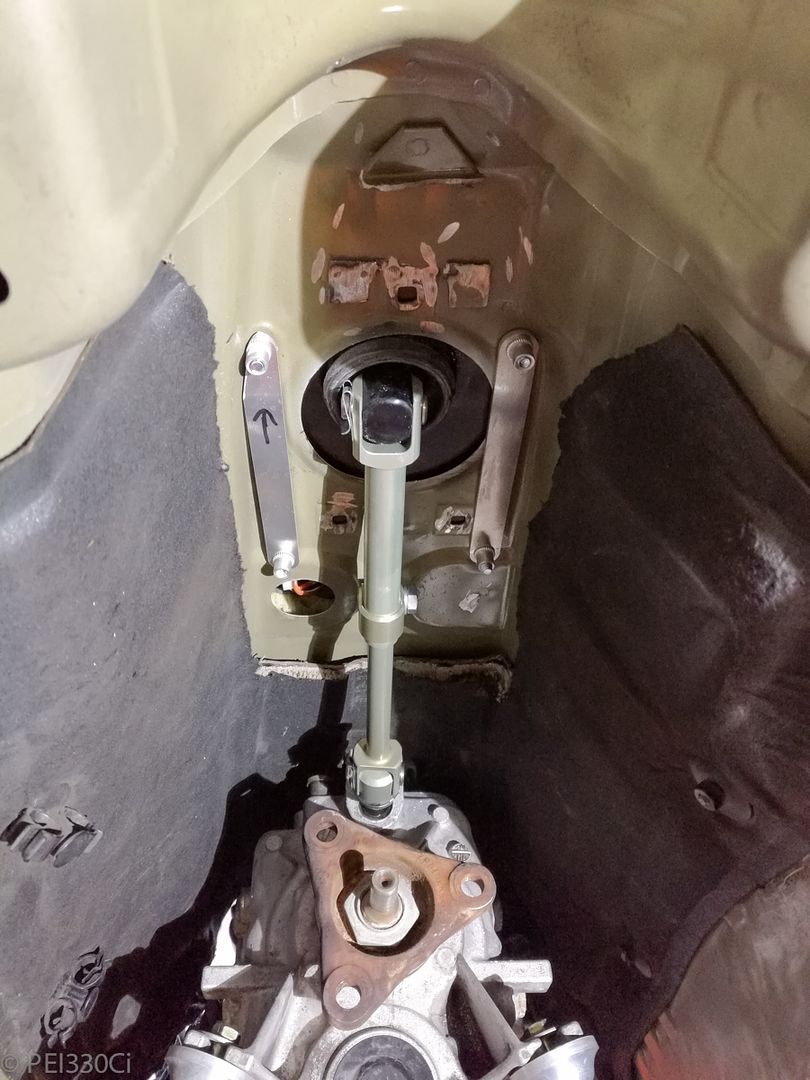
The CAE shifter parts....sitting in a glamorous pile on my passenger seat:
I realize I'm not doing the shifter any favours with that picture; it really is a work of art in person.
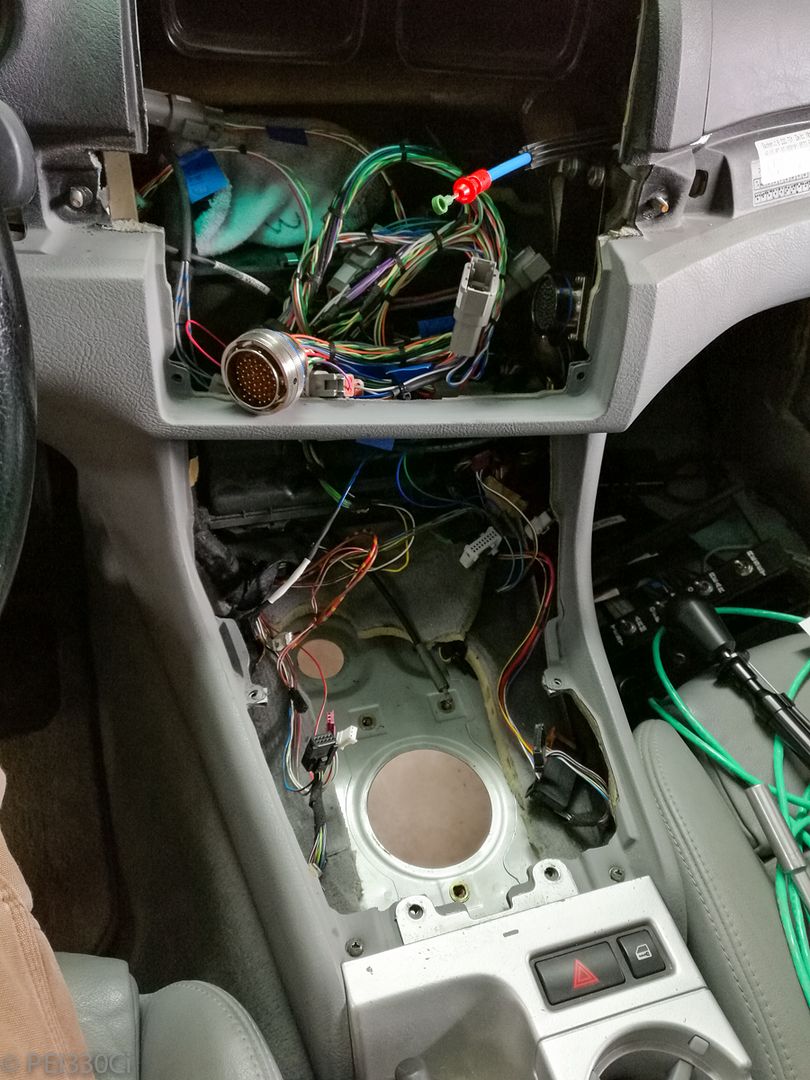
The automatic shifter parts removed from the trans tunnel:
The shifter and shift linkage installed:
The most stealth install of a CAE shifter I've seen yet in an E46:
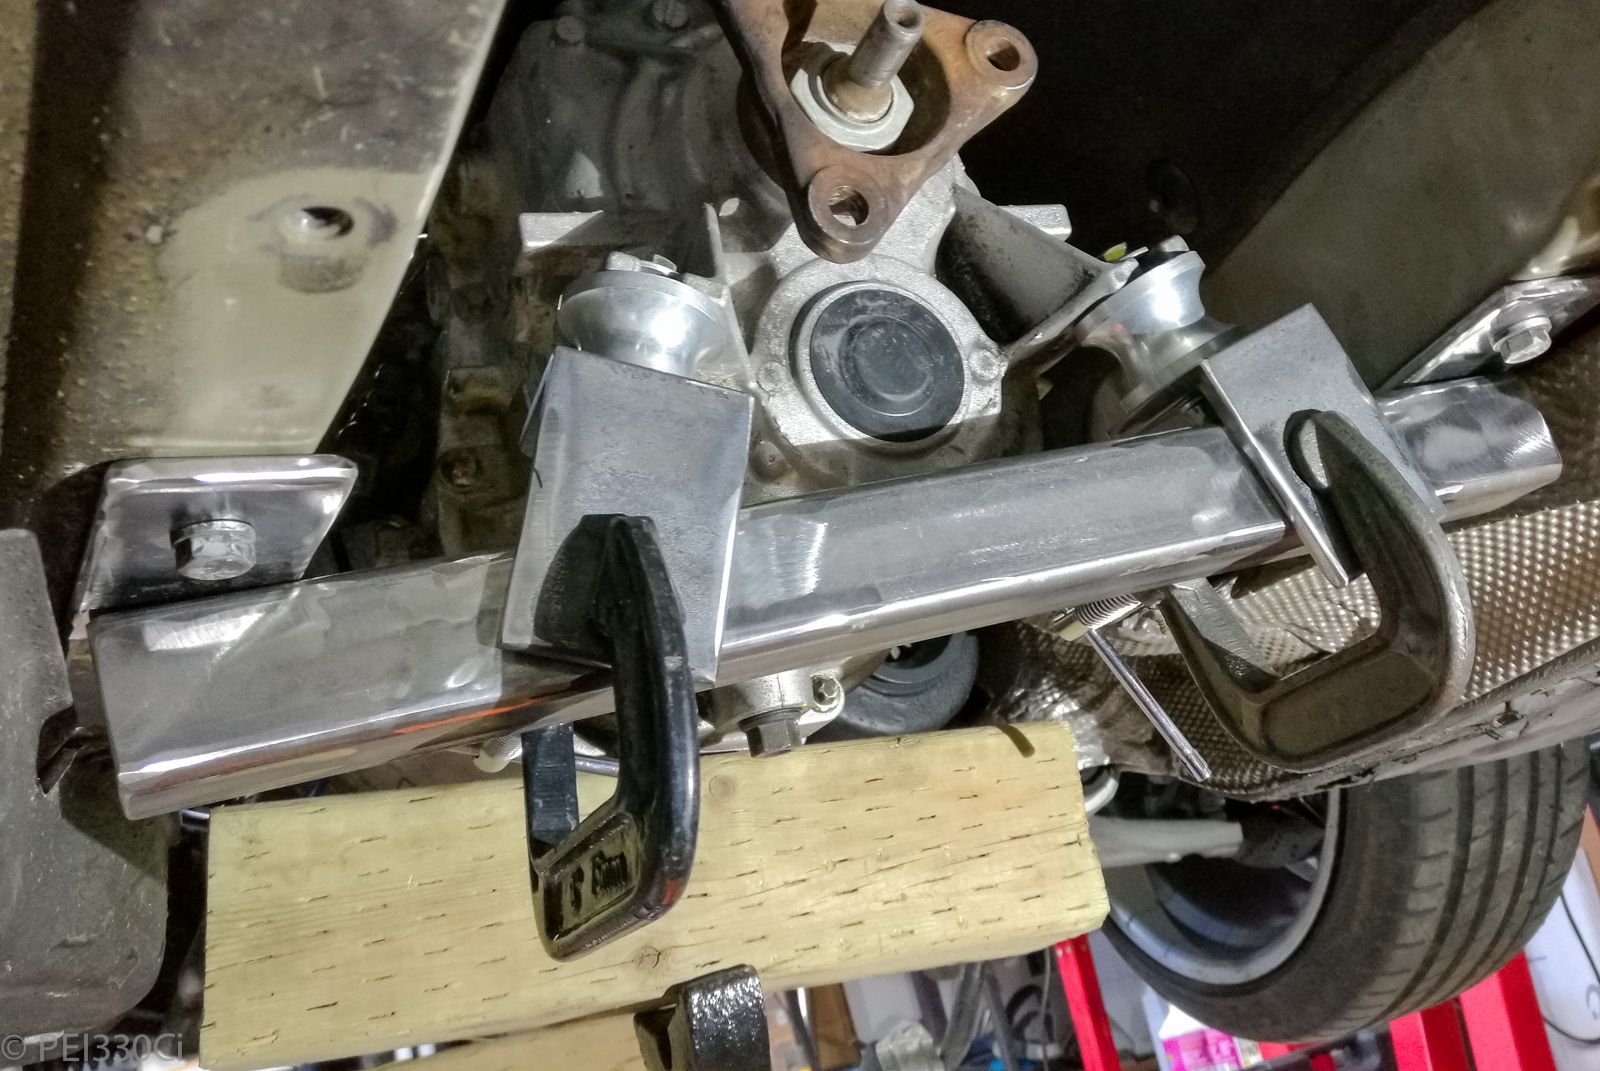
Mocking up the transmission mount pieces on the car before tack welding them:
Finish welded:
Paint:
On the car:
Member
Curious how the CAE compares to the AKG race shifter.
 Posting Permissions


 Reply With Quote
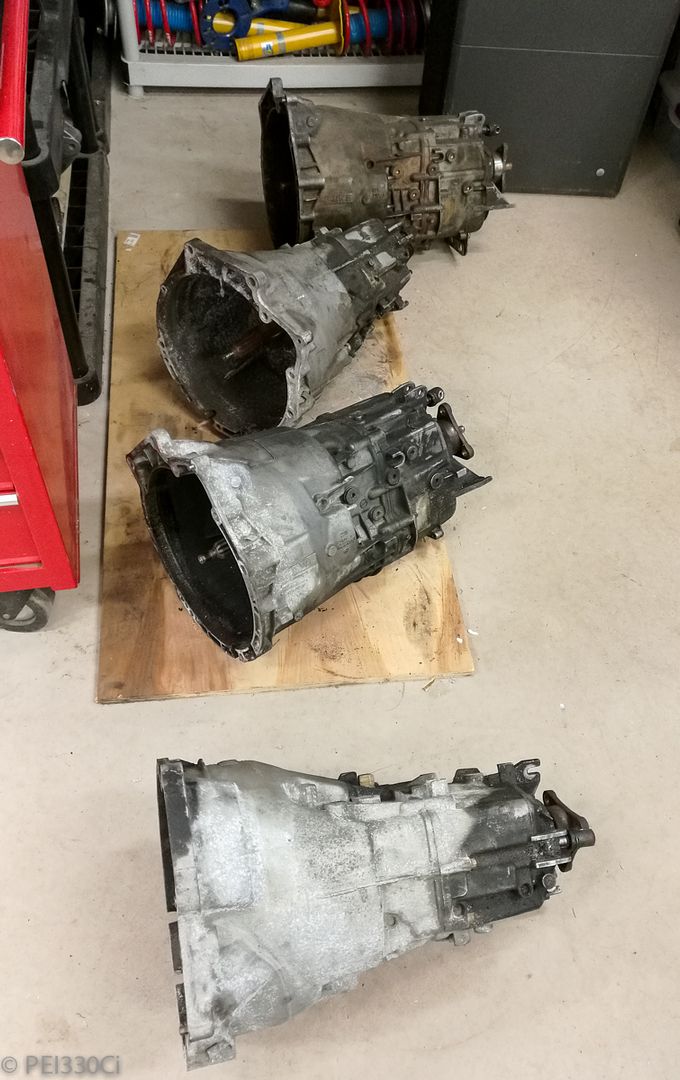


Bookmarks