
 Member
Thank you lughed!
I've forgot to post few updates, but here's one video clip
Follow us on Facebook or Instagram:
https://www.facebook.com/magnusracingteam
https://instagram.com/miugemrt
Member
Here's more comprehensive update of what's done and what not:
S369 turbo seems to fill up the space effectively, in fact my earlier S467 was equipped with a rare small comp cover which is smaller in diameter...
I got my injectors and made couple of weld bungs which turned out too short after drilling the holes
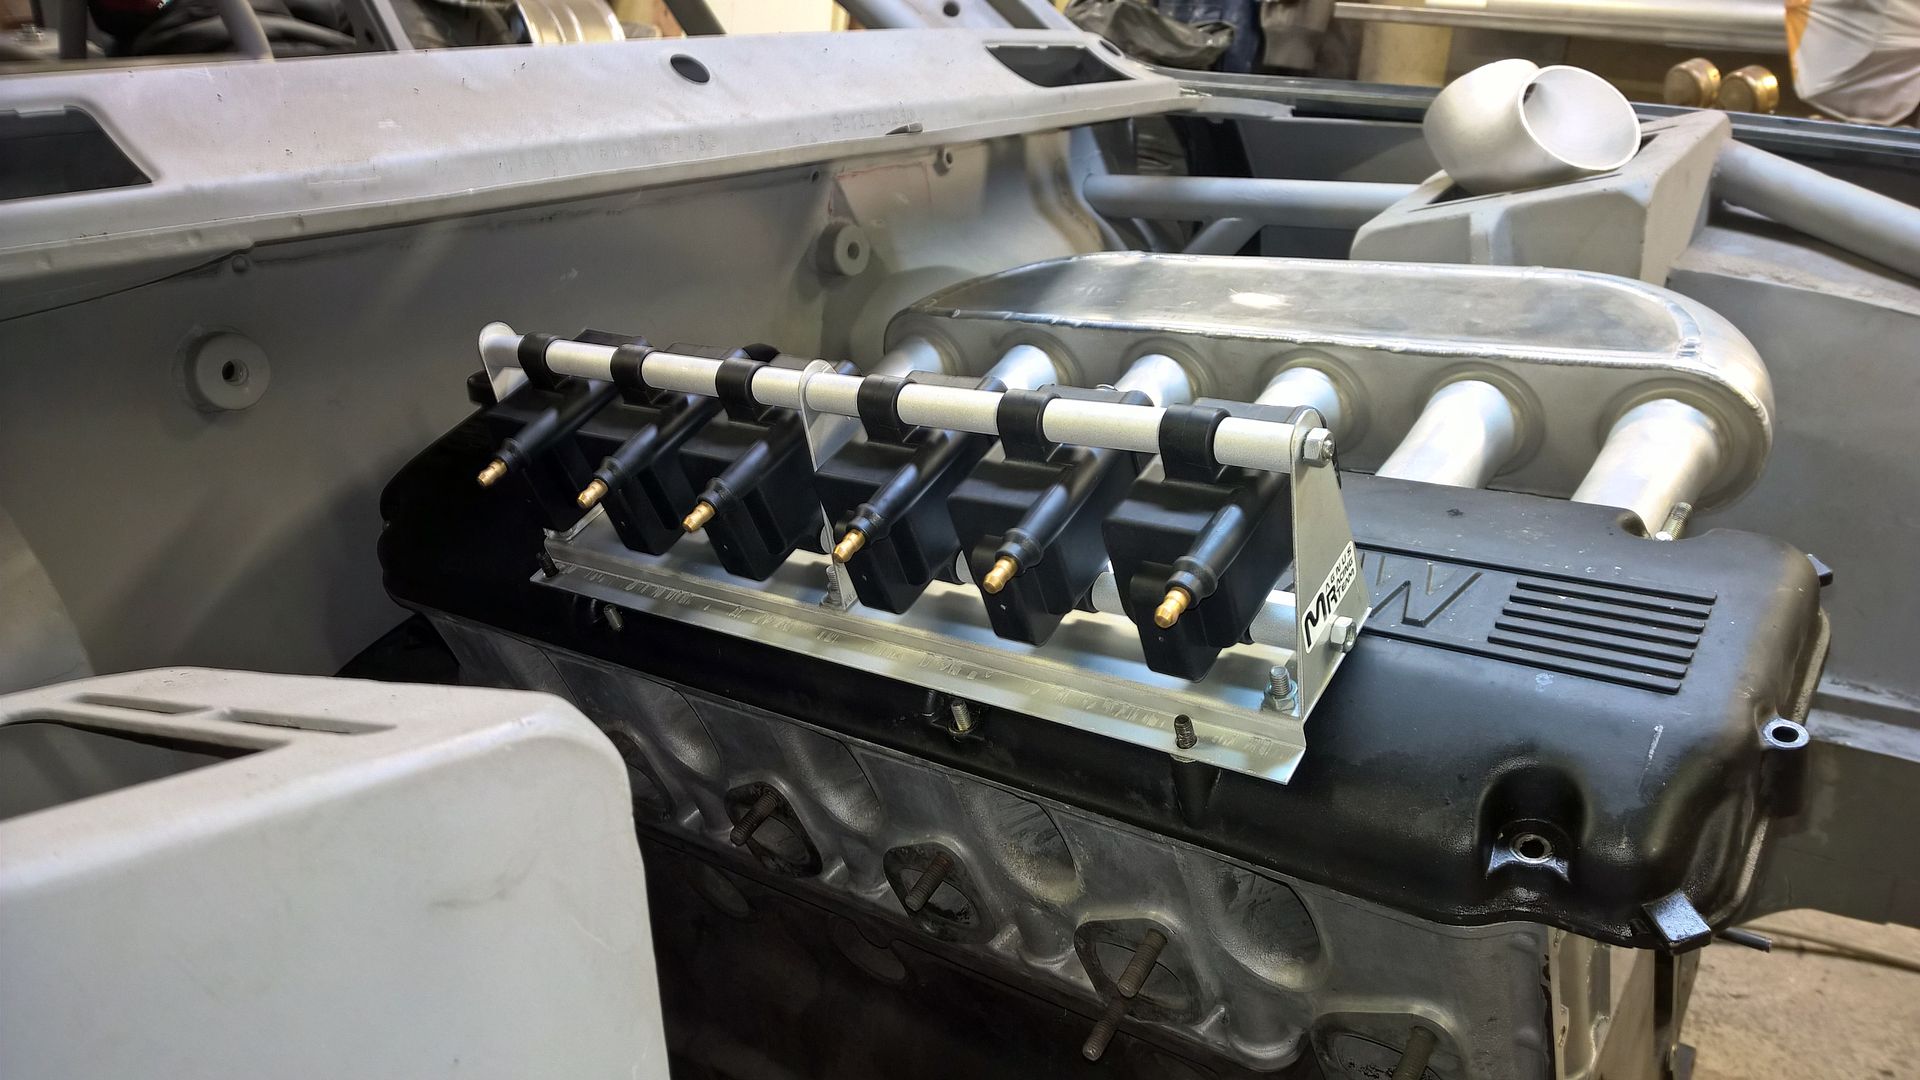
Pile of ignition coils:
I was thinking to order a laser cutted rack for coils, so I made a "coarse" 3D mockup one evening:
Primarily I focused on drivetrain, gearbox adapter plate needed a few holes, apparently I had cutted my cardboard mockup along the wrong line and there was not enough material for one hole, but it was easily fixed with a welder:
Before I was able to make a cross member I hung gearbox from the inside, also I've forgot to take pictures of the cross member and mounts in the chassis:
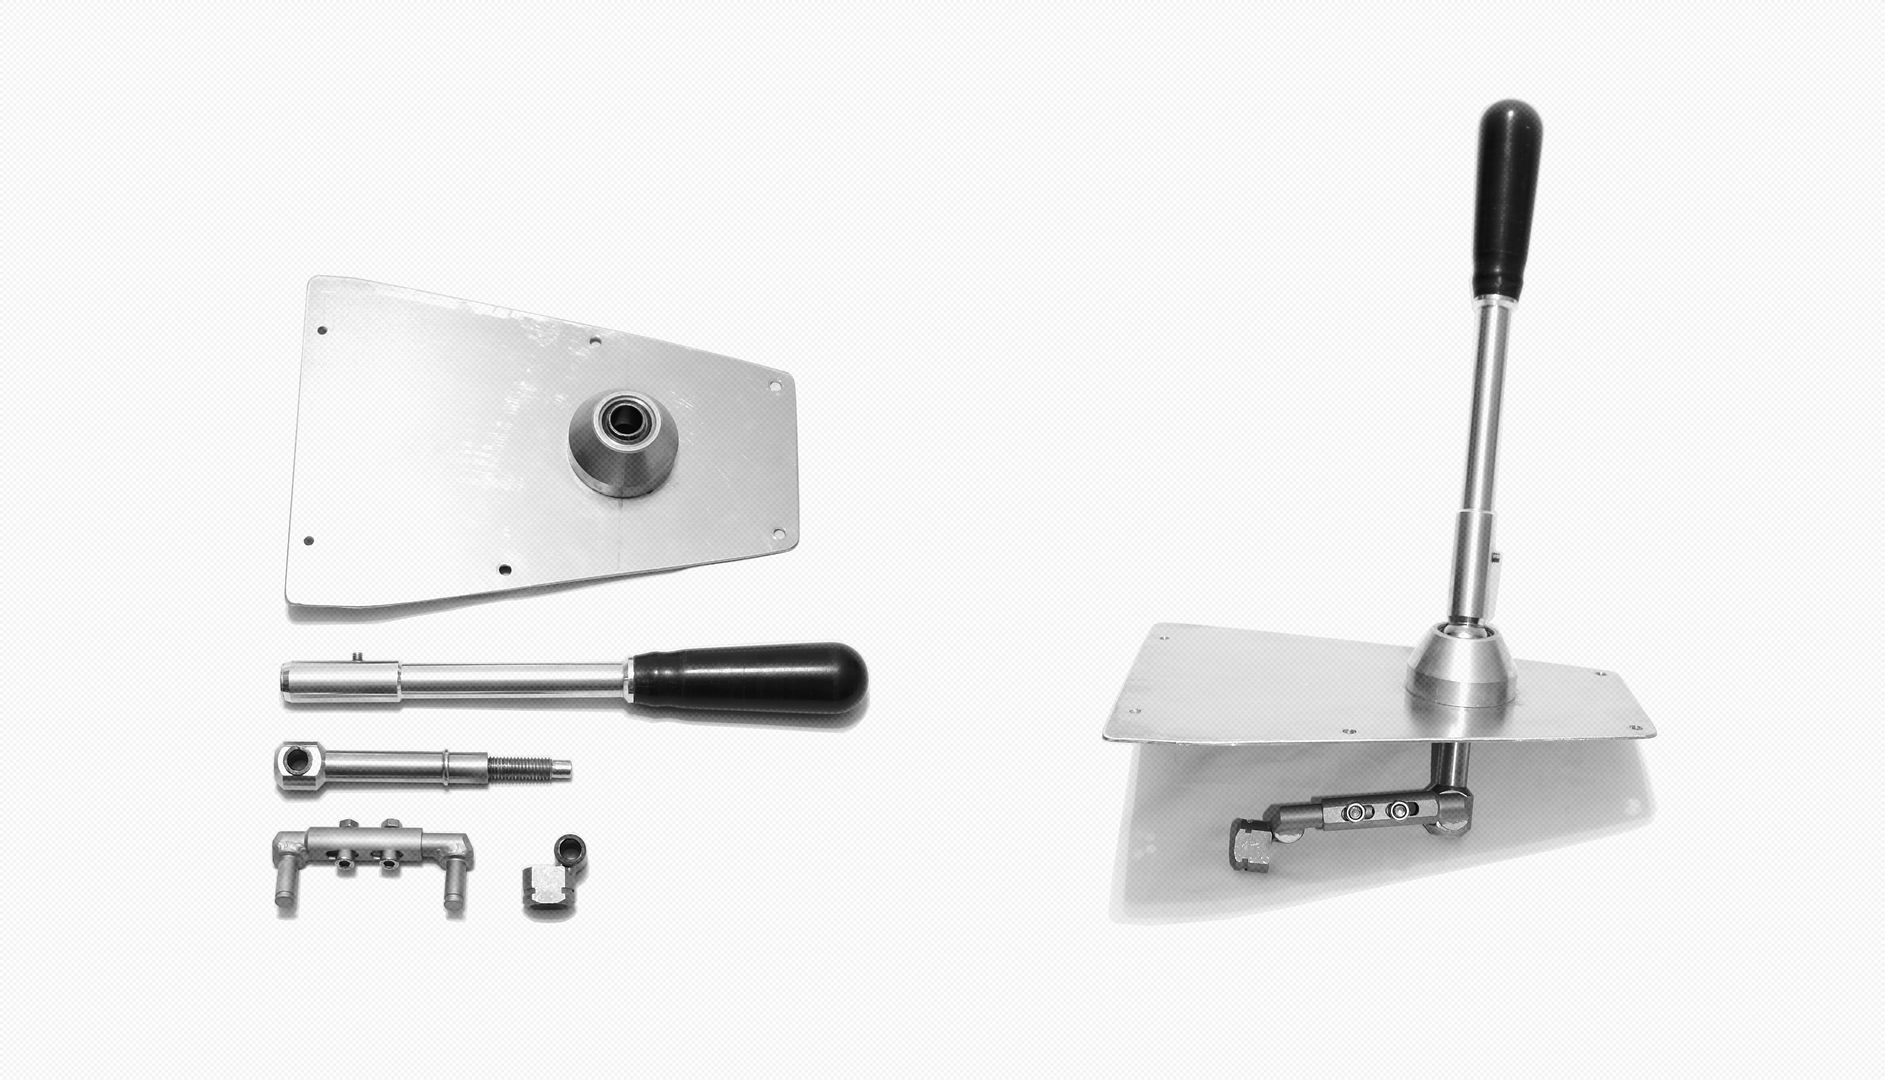
The gear shifter episode:
Got to start from somewhere, this is what felt a good location:
And how it turned out:
Follow us on Facebook or Instagram:
https://www.facebook.com/magnusracingteam
https://instagram.com/miugemrt
Member
super solid update!
keep them coming!
always trying to make it lighter and faster
^^former build: http://www.bimmerforums.com/forum/sh...-neglected-M3/
current build: http://forums.pelicanparts.com/porsc...car-build.html
instant grams: doktor_b
Member
Sick
Member
absolutely gorgeous work man!
Paynemw
I Live in Stuttgart, DE now!
1986 Toyota 4Runner SR5 - Sold!
1987 BMW 325is 2.7L Track Build & Grocery Getter - Back in RVA driven by my pops
1988 BMW 535is - RIP but my dream BMW
Member
Oh man this is some hot action! Keep it coming
Member
Thanks everyone!More updates as requested:
I got my new longer injector weld bungs and welded the plenum chamber together. Injectors are Bosch 210lb with 15mm extensions with filters.
I also got 2x 380LPH fuel pumps which will feed E85 through the 7micron inline filter.
One day I scanned the oil pump back plate and made a 3D model, a blank will be most likely water jet cut, then machined:
Apparently it was time to finish the new engine mounts, now with delrin bushing:
You might remember I just did one gearbox cross member, but surprisingly I wasn't happy with the outcome so I did a new one:
[/QUOTE]
E60 M5 driveshaft needed to be shortened 400mm, I hope my welds will hold:
While fabricating the drivetrain I wanted to revise rear axle carrier mounting one more time. I machined a couple of delrin bushings and formed some sheet metal pieces to get this appearance:
Prototype of a M30 ignition coil rack was finished too:
Follow us on Facebook or Instagram:
https://www.facebook.com/magnusracingteam
https://instagram.com/miugemrt
Member
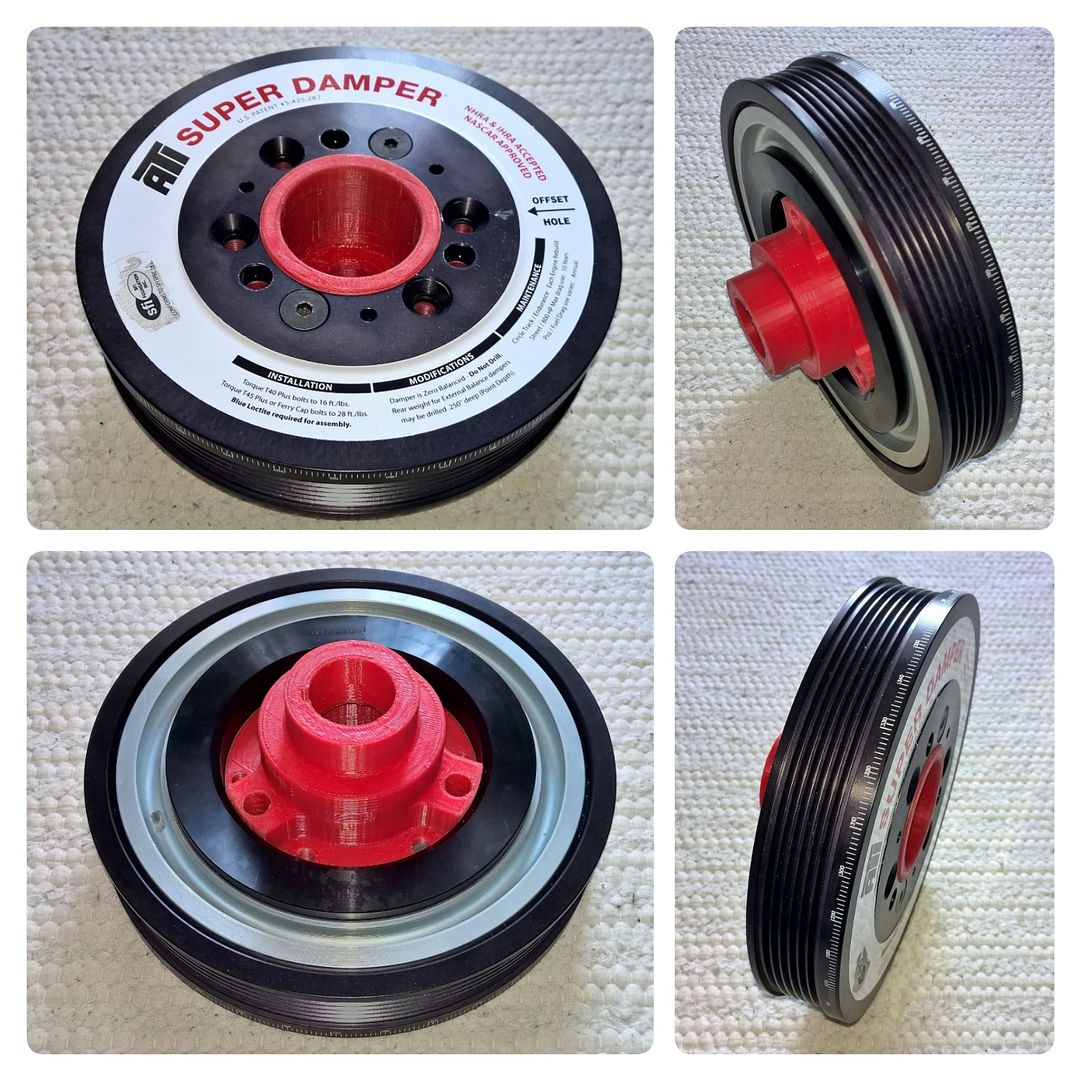
I've seen lot's of discussion about damper/crank hub related problems in M30 engine builds lately. I found out some Finnish builders have used ATI 2JZ damper in their builds (both M20 and S38), but I wanted to have some facts before heading to buy one. That made me contact ATI directly, luckily I did, because they didn't recommend using 2JZ damper, probably because it's low weight/inertia (for M30). Their recommendation was bigger 7" damper for a SBC so I started to search one..
One very slightly used item showed up on eBay so I had to buy it
I'll have to fabricate a new crank hub and trigger wheel to make it fit, a good thing that's a serpentine damper so I can directly drive my alternator belt with it:
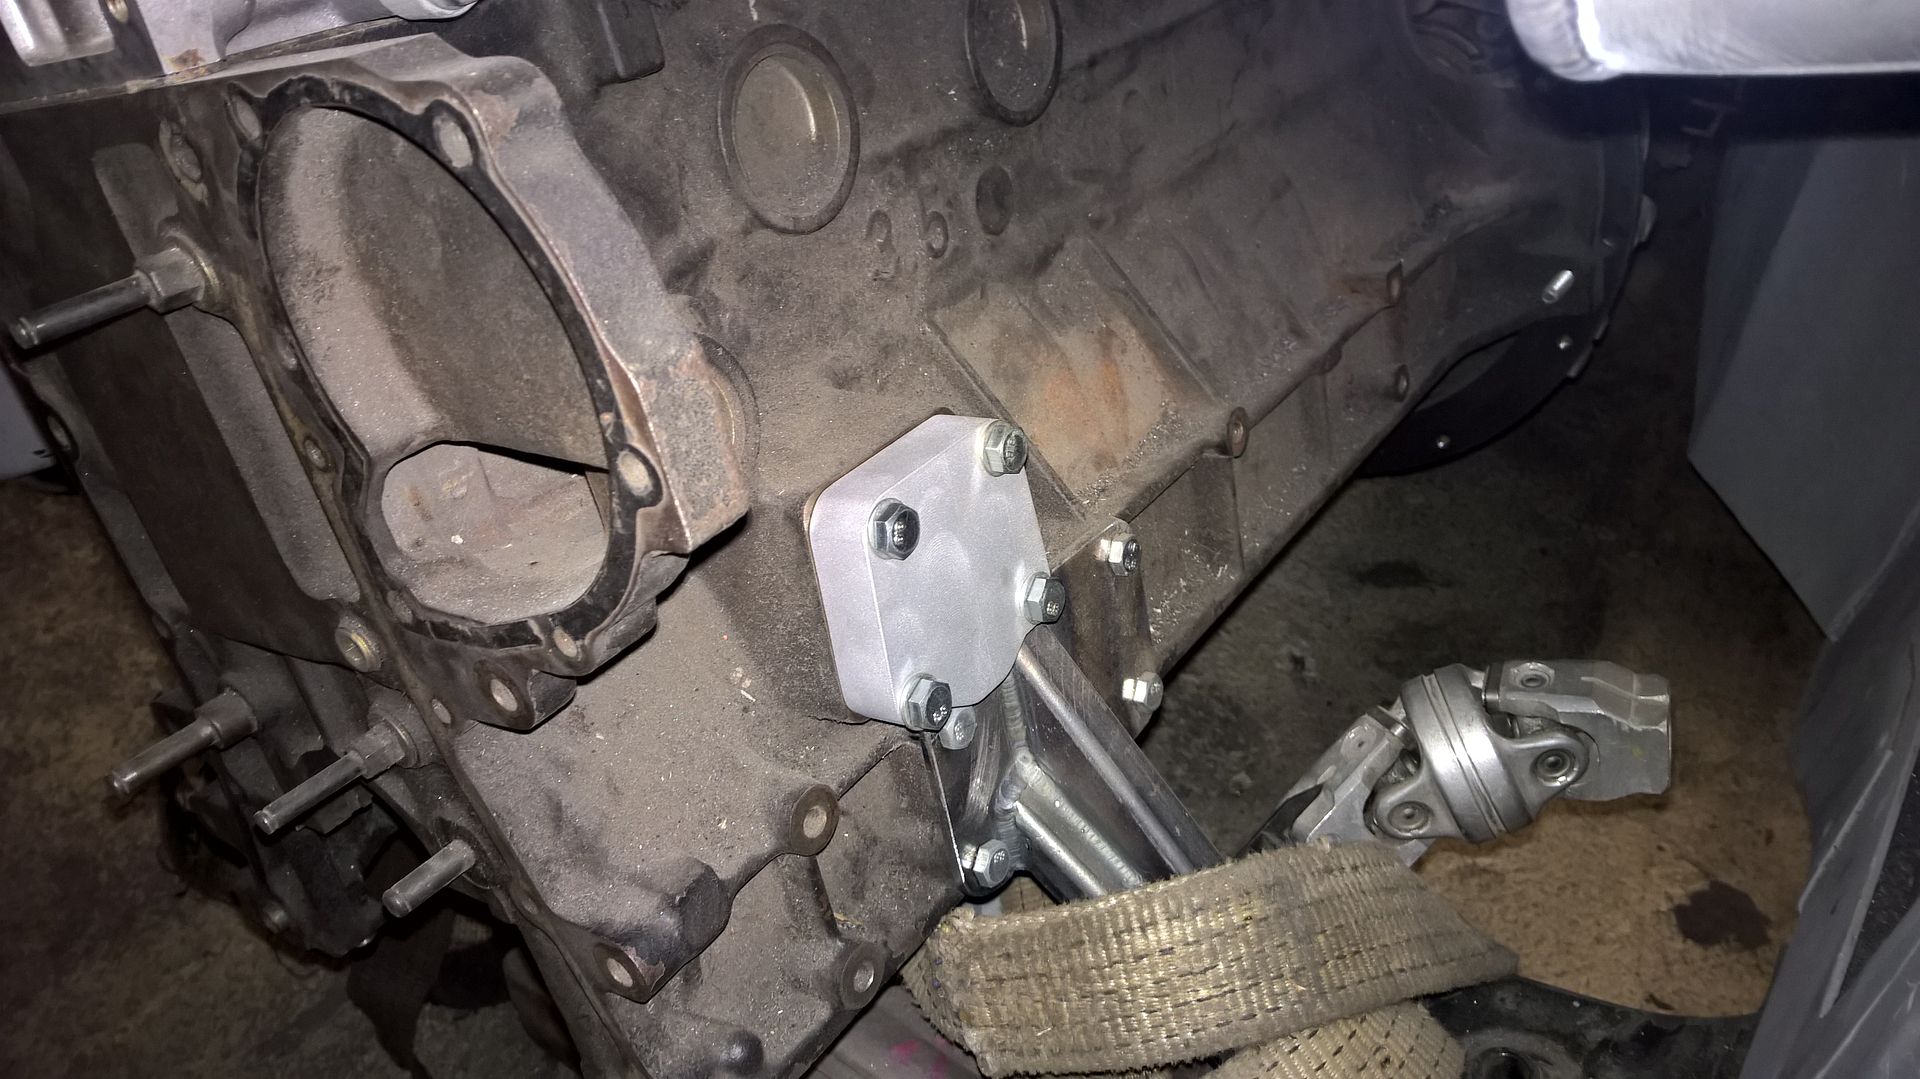
Some time ago I acquired couple of aluminum chunks to fabricate some engine flanges, the first one was oil pickup plate I made by hand. Still need to add AN10 fittings to draw the oil line to remote oil filter sandwich plate.
Follow us on Facebook or Instagram:
https://www.facebook.com/magnusracingteam
https://instagram.com/miugemrt
Member
this is amazing work, keep it up !
Member
Sure, thanks!
Yesterday I spent few hours thinking about the damper solution, first I gathered critical dimensions of the orginal damper, crank and hub, then I moved on designing new parts.
Chevy hub is much sturdier than M30 hub, but changing the crank front seal to a next ID size I could grow the wall thickness
Everything seems to fit rather well, trigger wheel could be located behind the damper which means orginal sensor location could be used, also belt line remains pretty much the same as orginal of course the v-belt pulleys should be changed..
Follow us on Facebook or Instagram:
https://www.facebook.com/magnusracingteam
https://instagram.com/miugemrt
Member
I made two more flanges, one for water in and another for water out, I'll weld 40mm bends to both flanges. No more need for that big thermostat housing because EWP
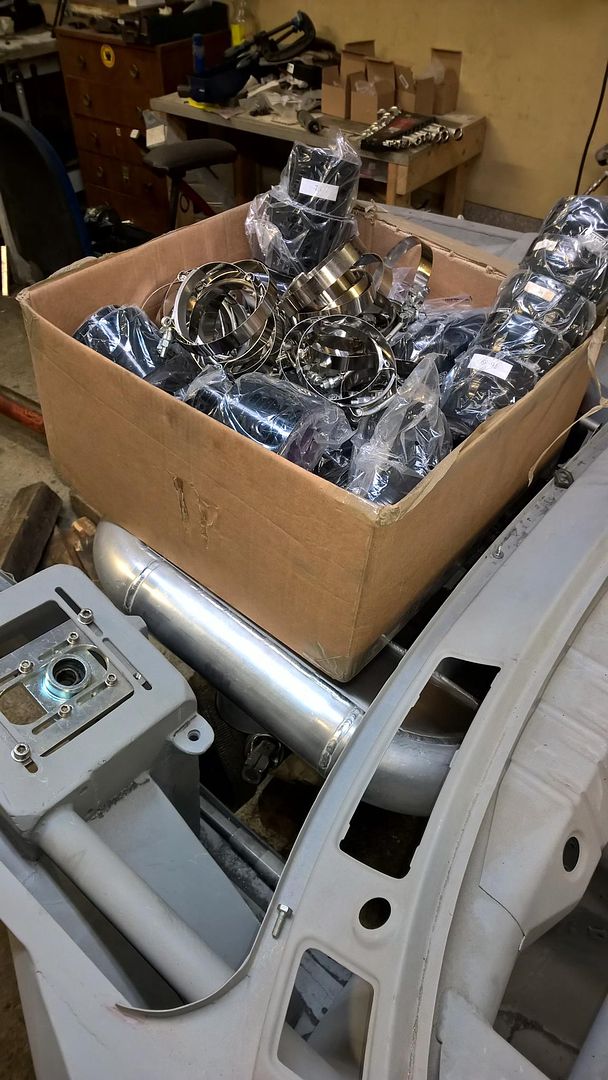
Earlier I acquired boxful of silicone hoses for coolant and charge pipes from size range 16mm to 100mm:
Follow us on Facebook or Instagram:
https://www.facebook.com/magnusracingteam
https://instagram.com/miugemrt
Member
Quick update of the ATI damper
Follow us on Facebook or Instagram:
https://www.facebook.com/magnusracingteam
https://instagram.com/miugemrt
Member
Here it is, took almost 1½ hours to print one third, at least it looks what it supposed to:
Next I should try if it fits in the engine
Follow us on Facebook or Instagram:
https://www.facebook.com/magnusracingteam
https://instagram.com/miugemrt
I like cones
This is awesome! great use of a 3d printer too! makes me wish I had one.
- Brad
Member
Thanks! 3D printing can become a quite addicting hobby too I can tell... A printer isn't that big investment nowadays, they're getting cheaper and cheaper.
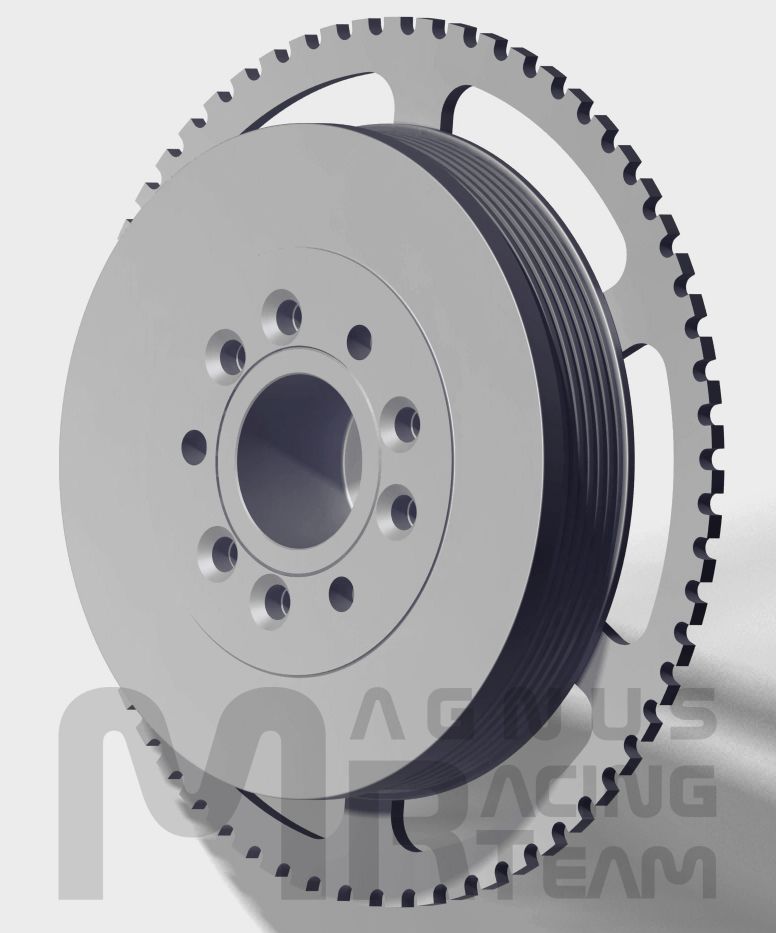
Clutch setup arrived, probably not going to use twin mass flywheel
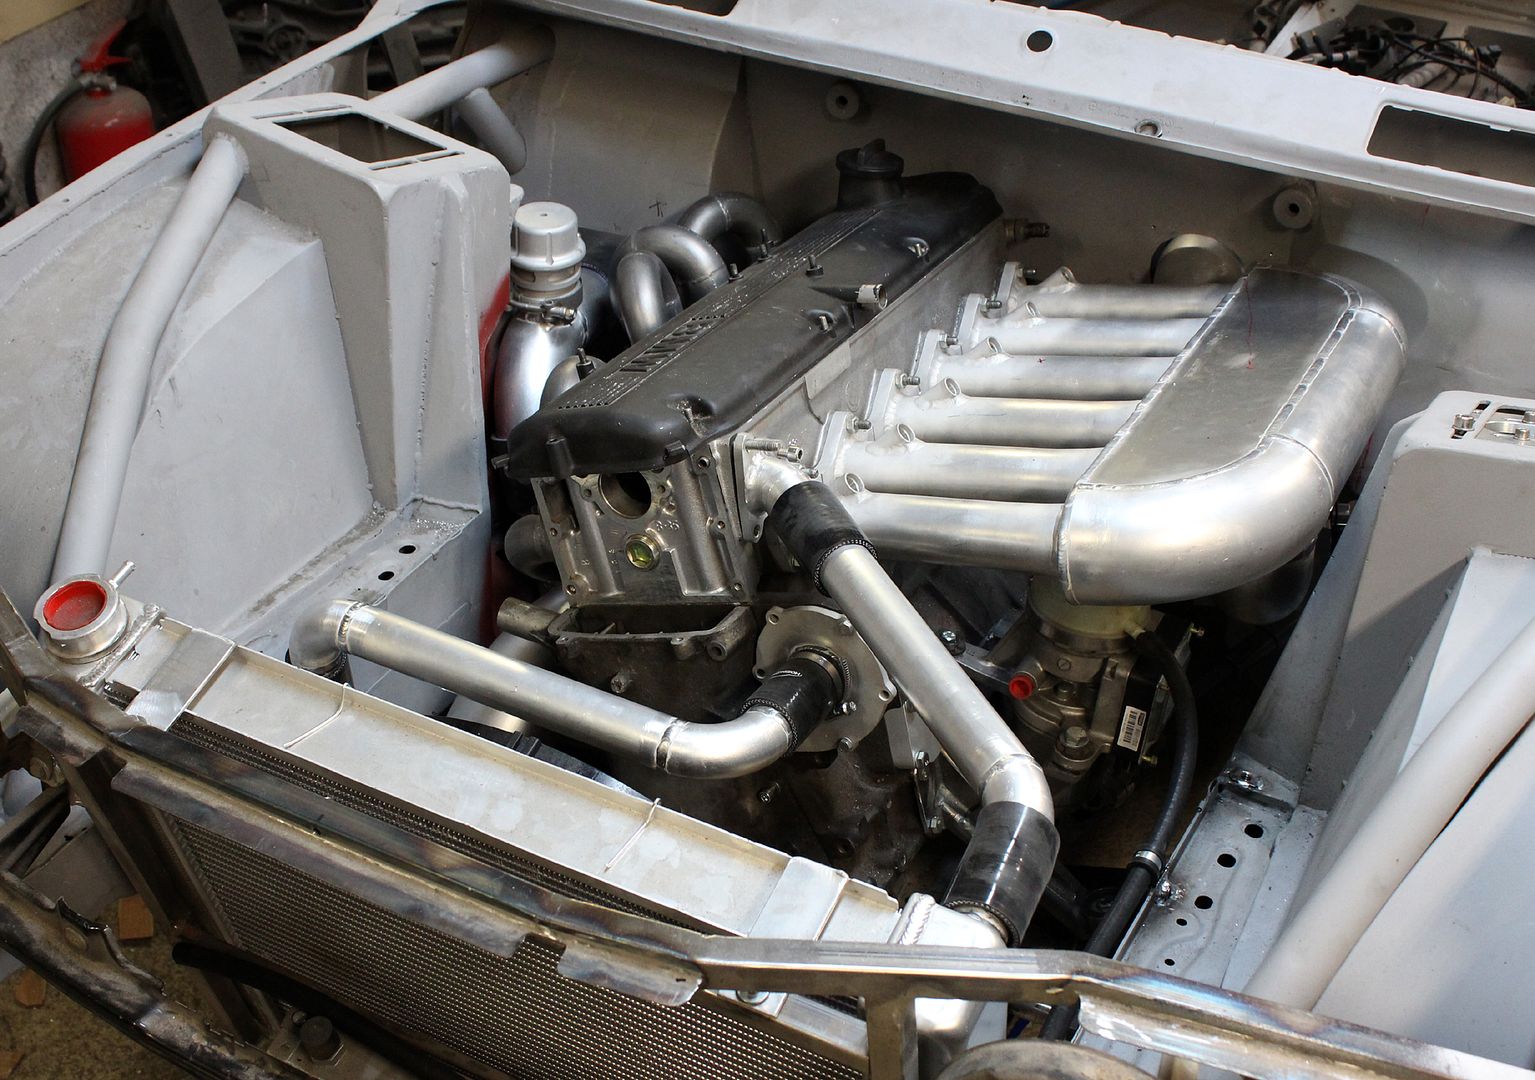
Now that I also got silicone hoses I continued welding, first mounted a throttle body:
Then the other side, that's the only place where I was able to mount blow off valve:
Some coolant pipes and new mounts for the power steering pump:
Follow us on Facebook or Instagram:
https://www.facebook.com/magnusracingteam
https://instagram.com/miugemrt
I like cones
is that a nascar quartermaster? I take it you'll be adapting it to work with the current trans/engine combo?
- Brad
Member
It is, I'll just have to change disc hubs, a local company makes them. Those fine spline BMW discs are hard to find, anyway they're almost as expensive than this whole clutch assembly
Follow us on Facebook or Instagram:
https://www.facebook.com/magnusracingteam
https://instagram.com/miugemrt
Member
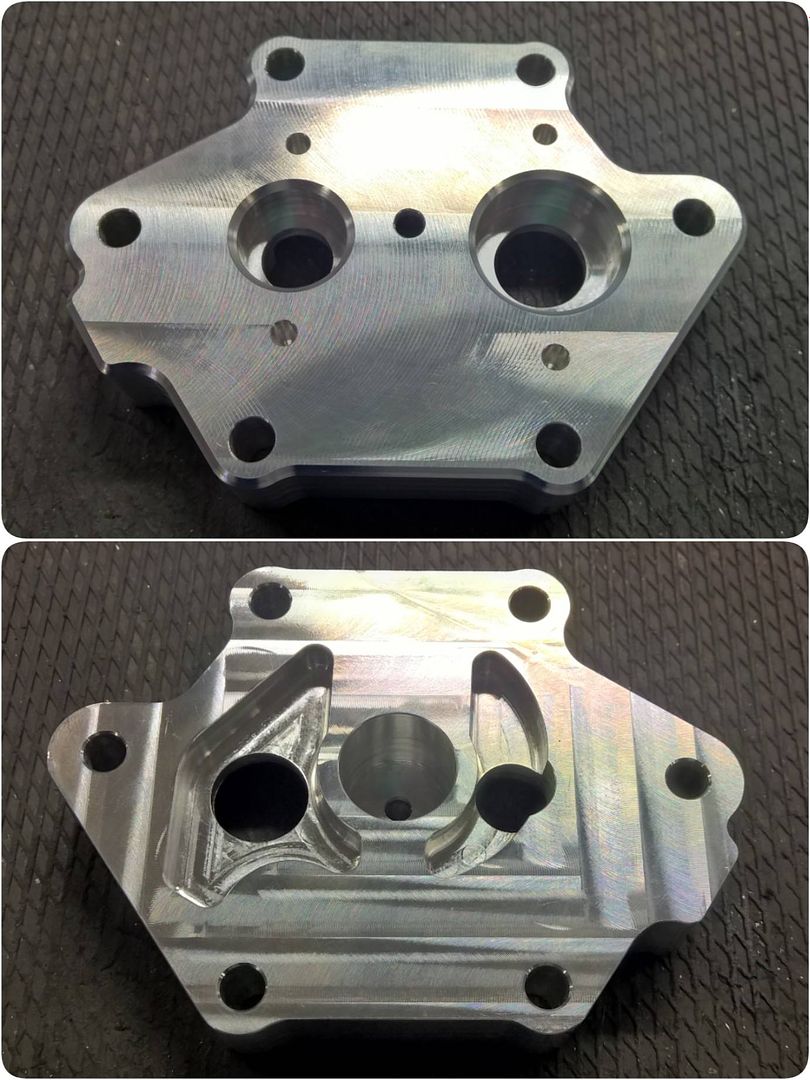
I had some struggle machining the oil pump back plate manually, I did two versions which didn't turn out too good. I also tried a shortcut welding a sleeve into the orginal cast cover.. Because of the high Mg content welds won't hold even if they would look good, here's the result of light hammering, crispy:
It was time to start over, I did some changes to model and discarded the idea of a water jet cut blank because of it's ridiculous price. I happened to find a company which would machine the part for me very cheap with their 5-axis machine. I just confirmed it fits by 3D printing a mockup:
The final part (made of AW-7075) should arrive in three weeks
Follow us on Facebook or Instagram:
https://www.facebook.com/magnusracingteam
https://instagram.com/miugemrt
Member
...Not again
Reason? I managed to change the engine position after modifying steering rack mounts, so when I renewed engine mounts I positioned it as low as possible and even further back. Besides the welds looked terrible now that I've learned to TIG somehowUpcoming version will be looking quite different.
Now that I got the taste of cutting I cut the comp housing outlet too:
To change it to this:
Few Finnish fellows were inquiring M20/M30 cam sensor covers from us as we had made some 3D printed prototypes earlier (in co-operation with Juuso's Garage), these anodized aluminum versions are about to arrive soon:

Follow us on Facebook or Instagram:
https://www.facebook.com/magnusracingteam
https://instagram.com/miugemrt
Member
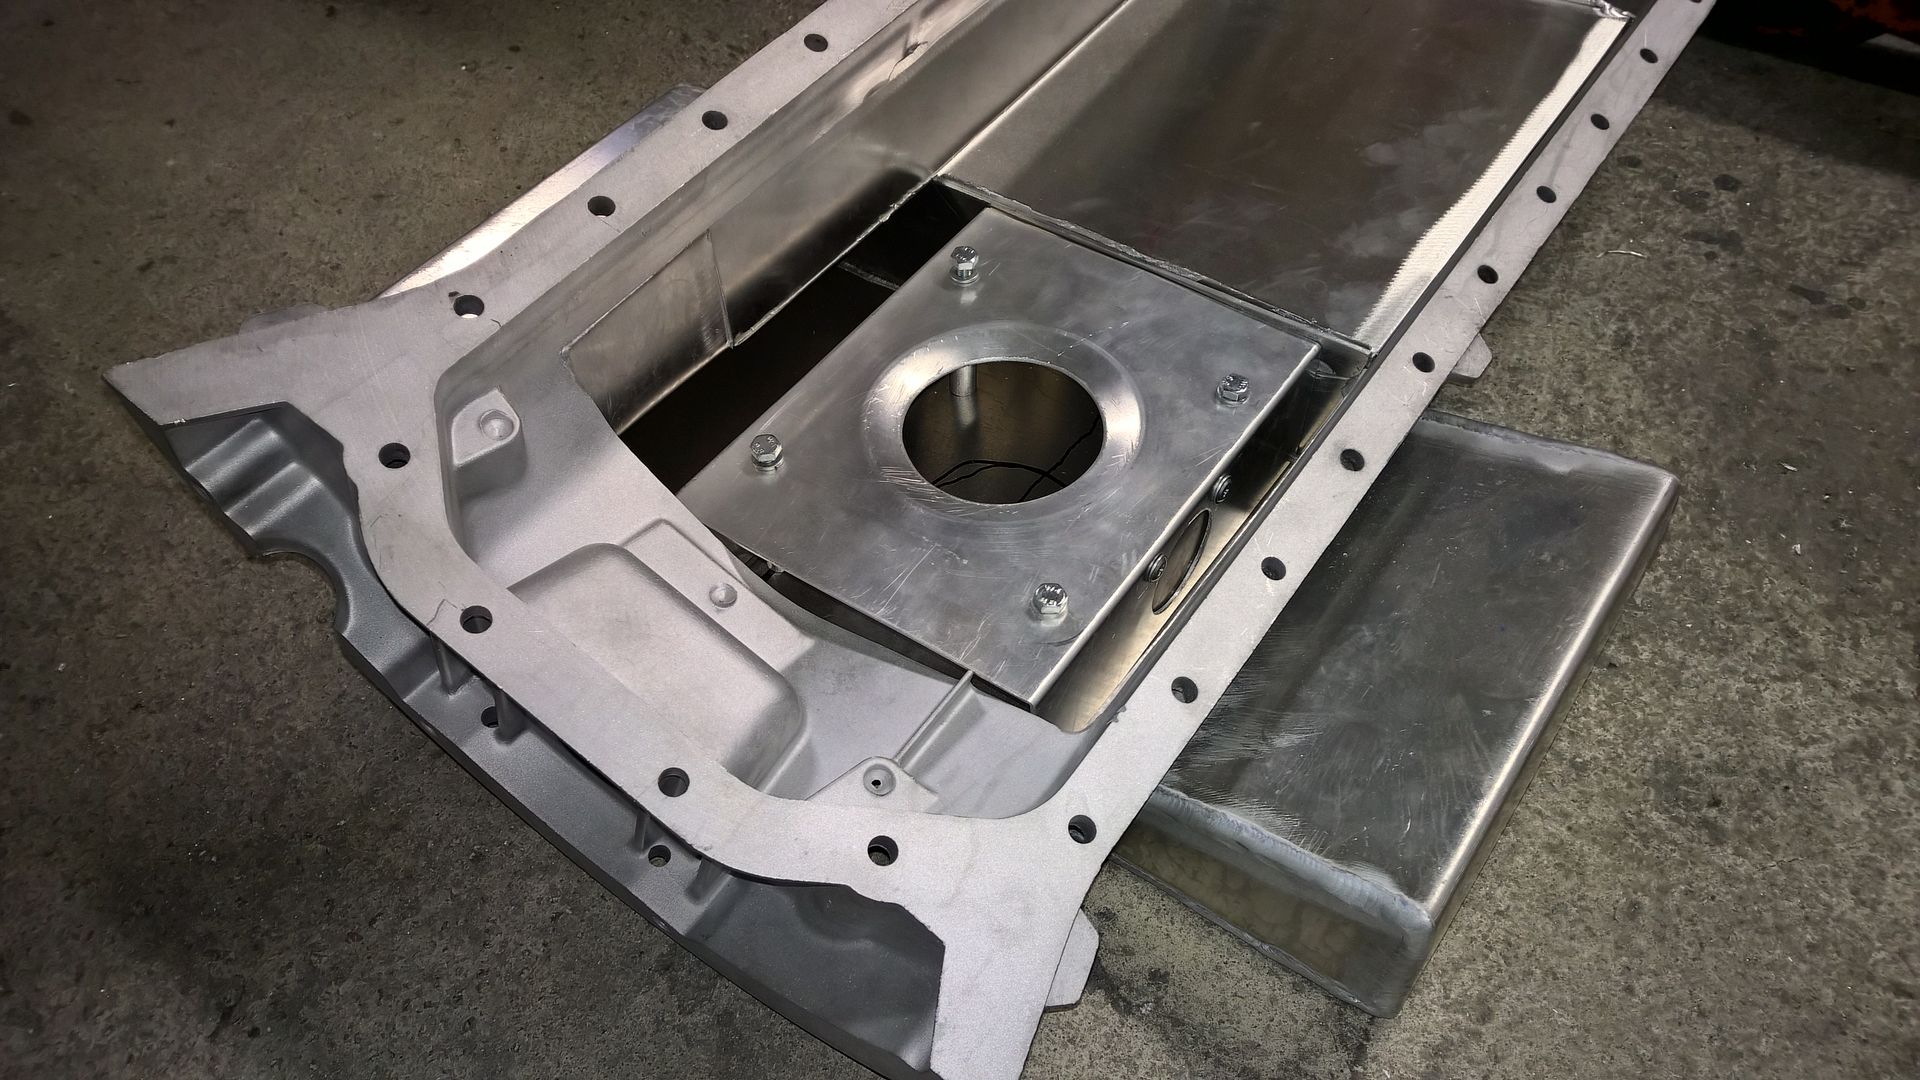
Oil pan project:
Front sump is only to clear oil pump:
Long welds:
Oil pan baffle with trapdoors, screws are only temporary, those will be replaced with rivets:
Assembly taking shape:
Follow us on Facebook or Instagram:
https://www.facebook.com/magnusracingteam
https://instagram.com/miugemrt
Member
Stainless steel oil intake screen, not yet welded, custom made of course:
Aluminum fuel rail, not yet anodized, custom made of course:
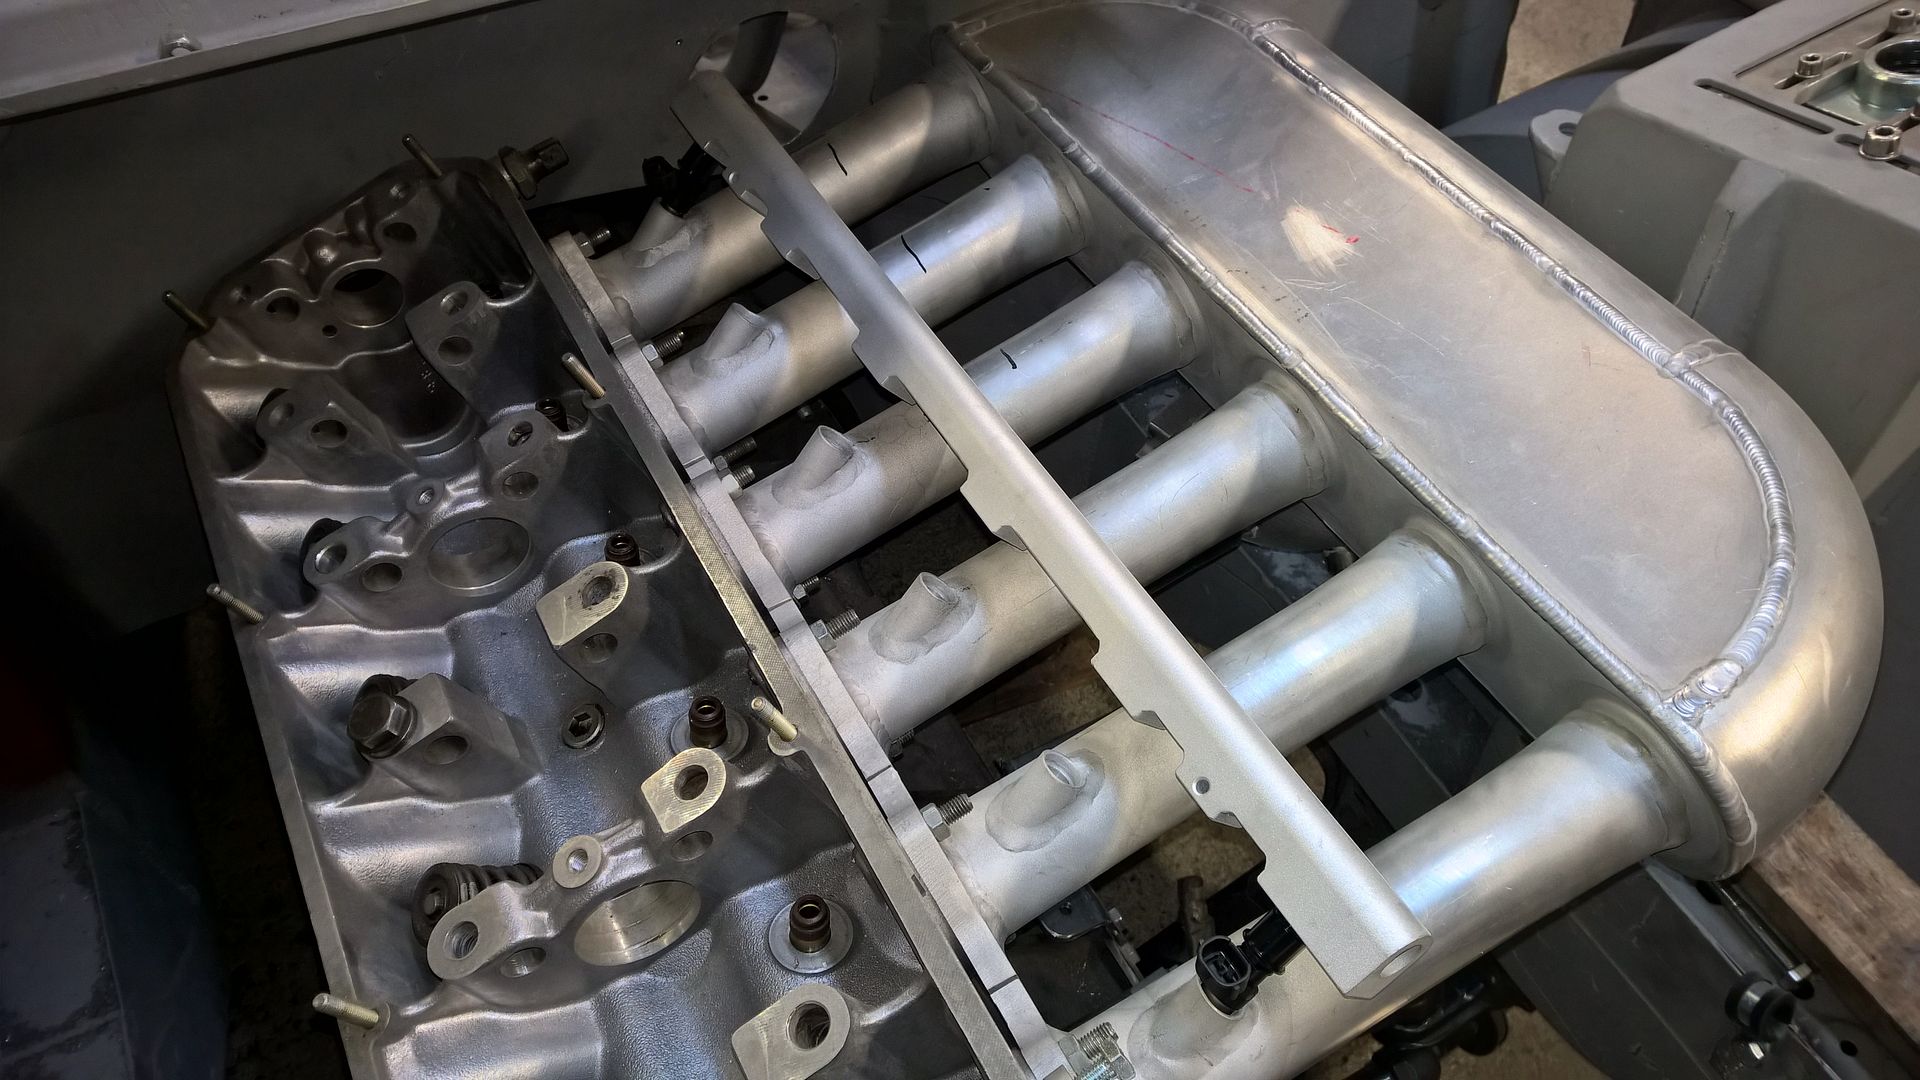
Follow us on Facebook or Instagram:
https://www.facebook.com/magnusracingteam
https://instagram.com/miugemrt
Member
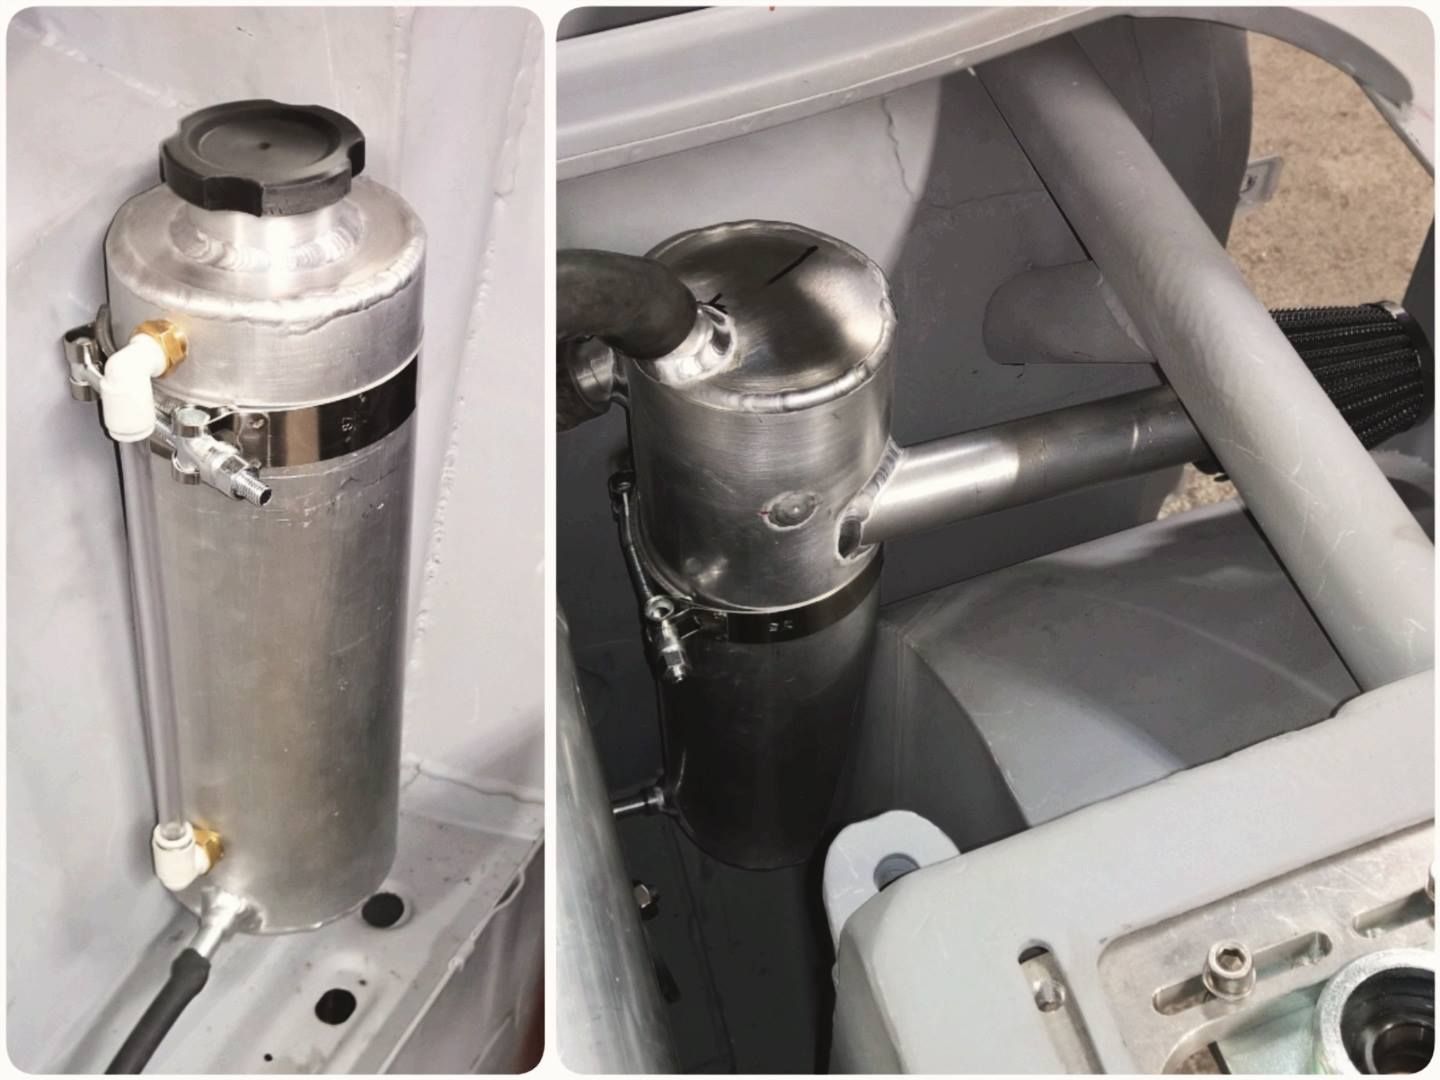
This week I started and finished making a coolant reservoir and oil catch can with crankcase + cylinder head ventilation:
Follow us on Facebook or Instagram:
https://www.facebook.com/magnusracingteam
https://instagram.com/miugemrt
Member
One more aluminum tank.. Fuel surge tank that has been in progress for a loong time. It needed a baffle inside, end cap and AN fittings for fuel in and out, unfortunately AN6 fittings were out of stock at the local store so I wasn't able to completely finish itUnderneath my FPR with AN10 in/outlets:
Finally got this part I've been waiting for, shiny aluminum bit from Italy:
Follow us on Facebook or Instagram:
https://www.facebook.com/magnusracingteam
https://instagram.com/miugemrt
Member
So I take it you're sticking with turbo only now? No more Eaton SC to be added any more?
Member
Yes turbo booost only, I should update the first post some day
Okay where were we..
Oil pan bolted to the engine and it still fits, couple of small additions need to be done before I can say it's complete. Oil stick will be attached with AN fitting, as easy as it gets:
I ordered a batch of AN12 fittings and hose for IC water lines and oil breather lines (yeah I already welded stupid hose fittings in the breather can so I need to change them):
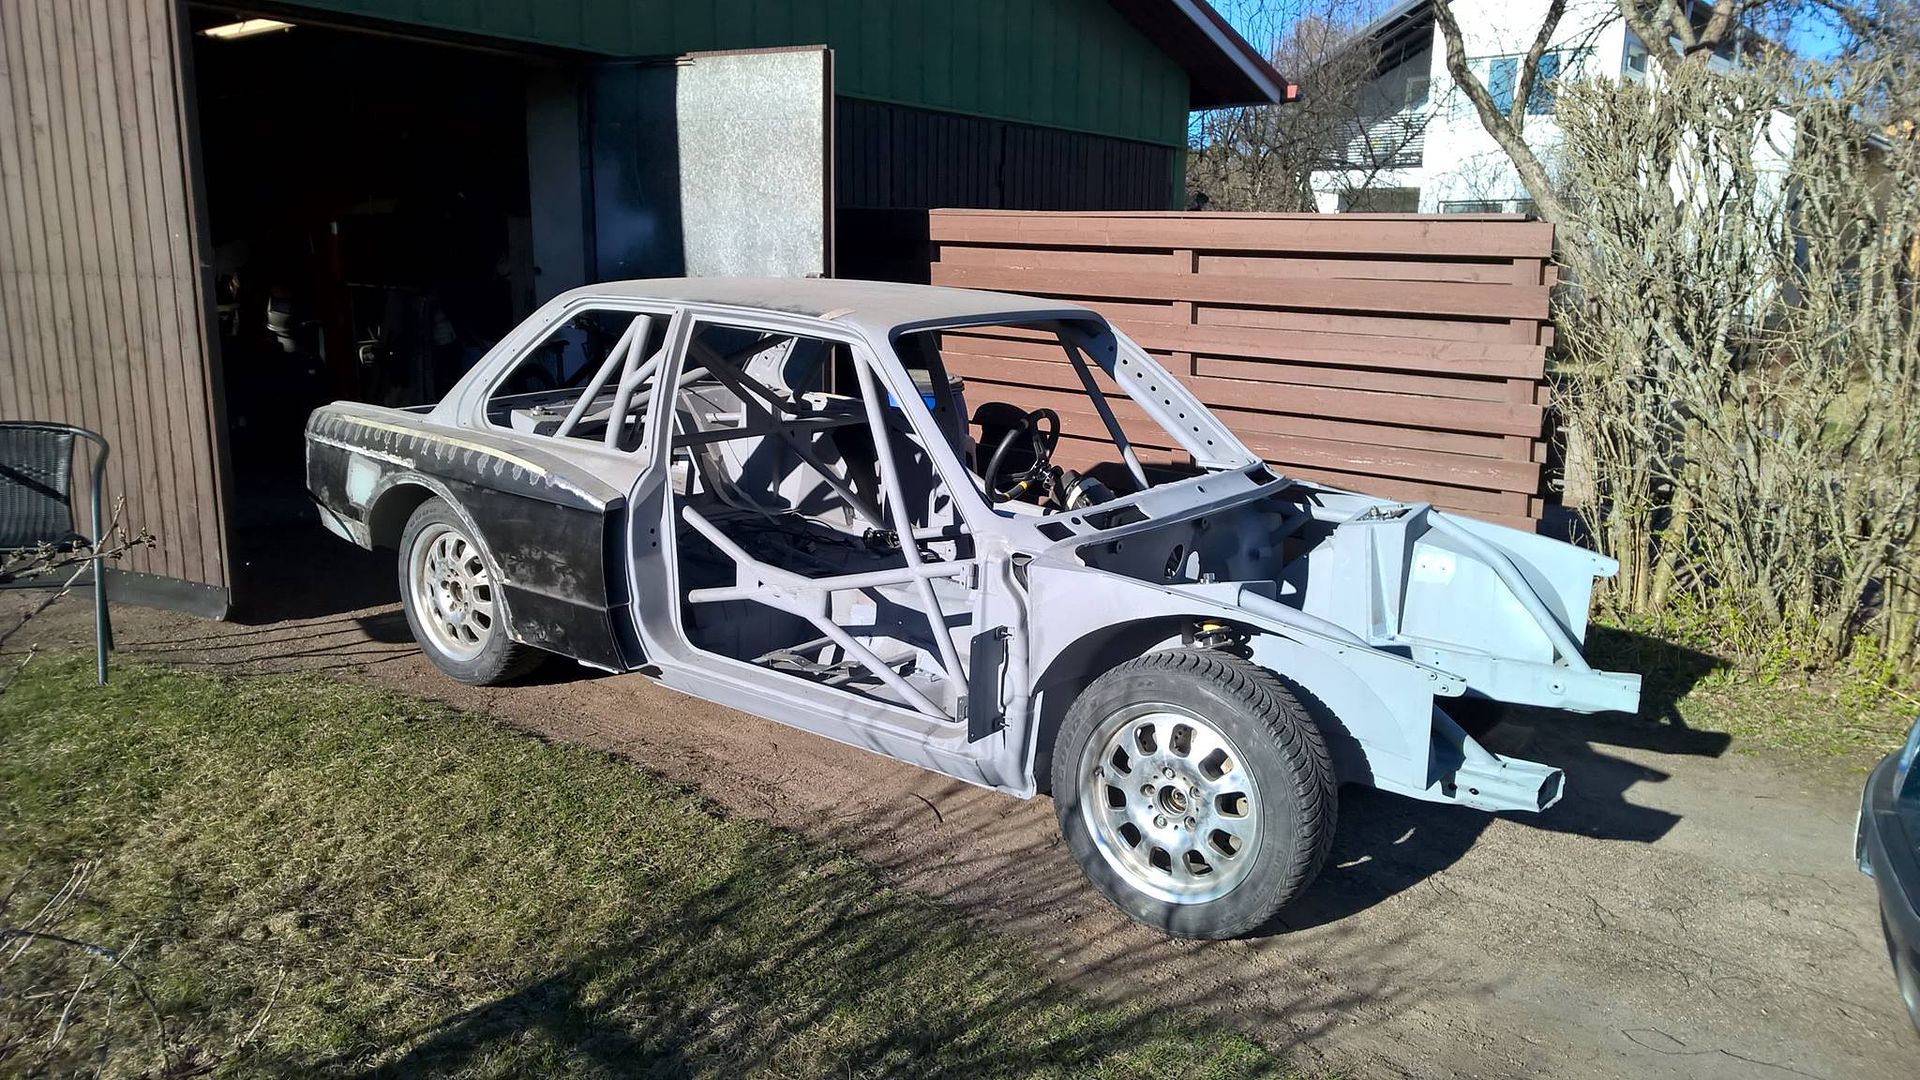
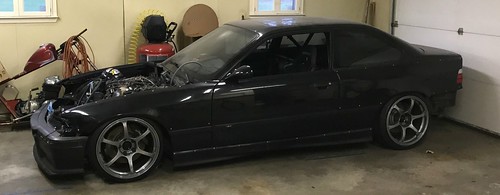
Had to push the car out while cleaning the garage, notice my nice new wheels:
Follow us on Facebook or Instagram:
https://www.facebook.com/magnusracingteam
https://instagram.com/miugemrt
 Posting Permissions


 Reply With Quote


Bookmarks