
 Member
I know there's the OEM replacement via reskinning half the seat that's been covered in about a dozen DIY's and videos, so I'm not going to reference that fix here.
Also many forum members have indicated that removing the seatbelt from the guide prior to moving the seat forwards is a good way to prevent breakage in case the belt accidently locks in place.
That said, I was hoping to get a bunch of pictures of various alternate fixes, prevention, or replacements here.
Maybe this would be good to add to the manifesto? I see there's a bunch of similar posts, but nothing quite "clean" like is being done for the stereo thread.
I'll try to get us started.
- Using nylon drywall anchors into an OEM setbelt Guide
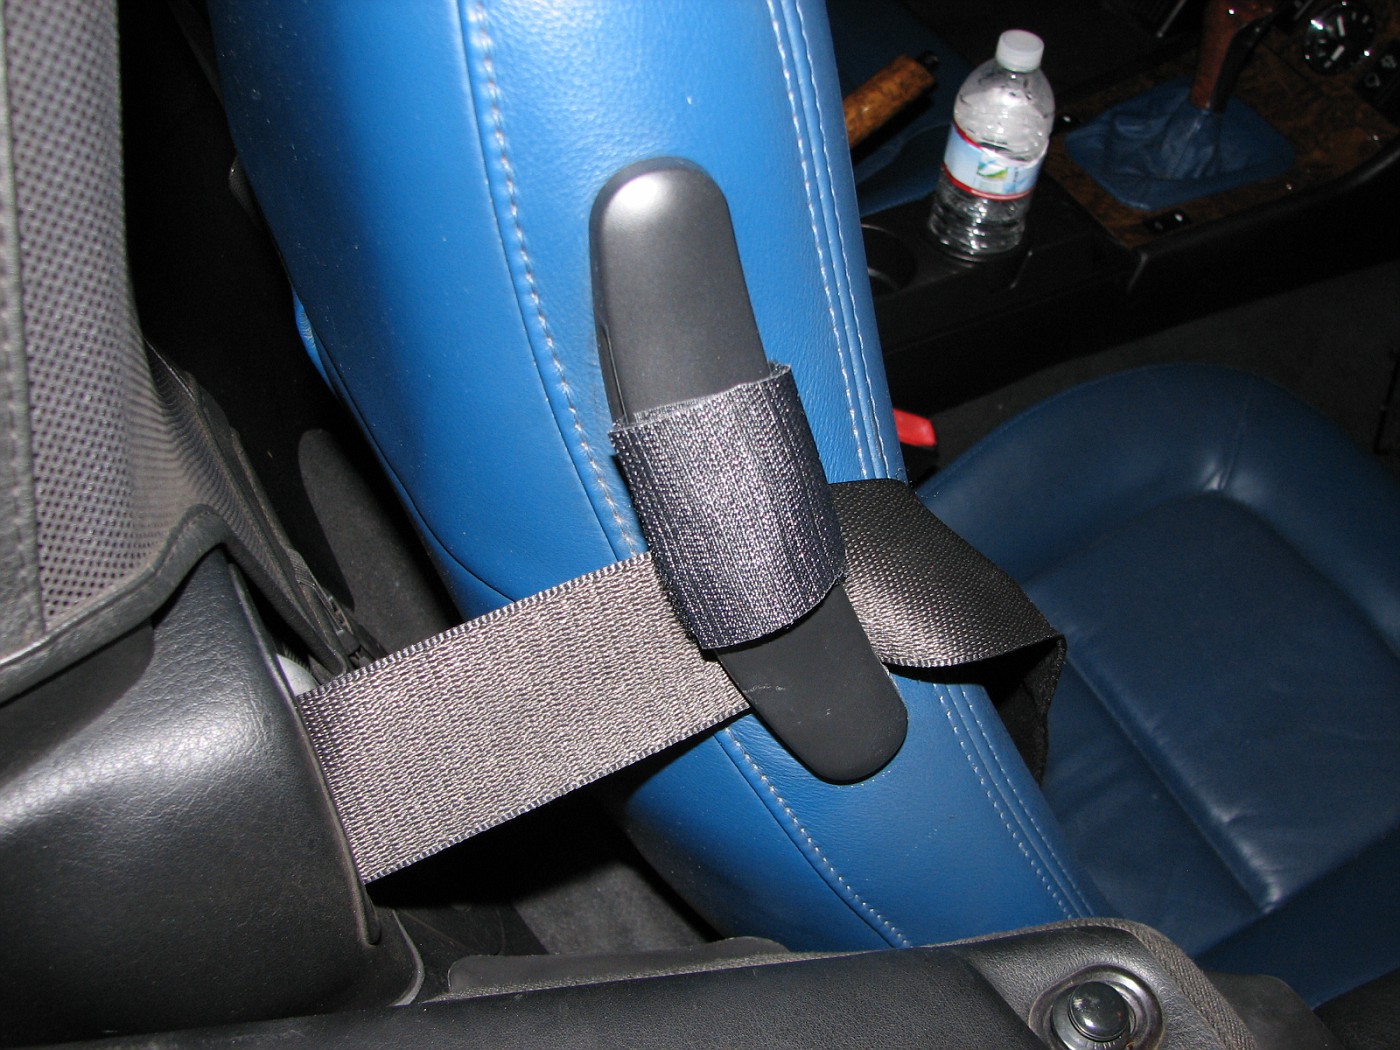
- Nylon Wrap
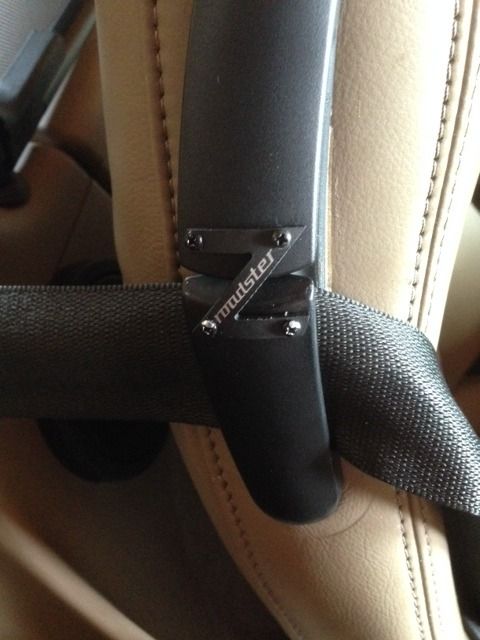
- Metal Z brace
Final Clearance. PM Southernboy - http://www.zroadster.net/forum/viewtopic.php?f=11&t=43225
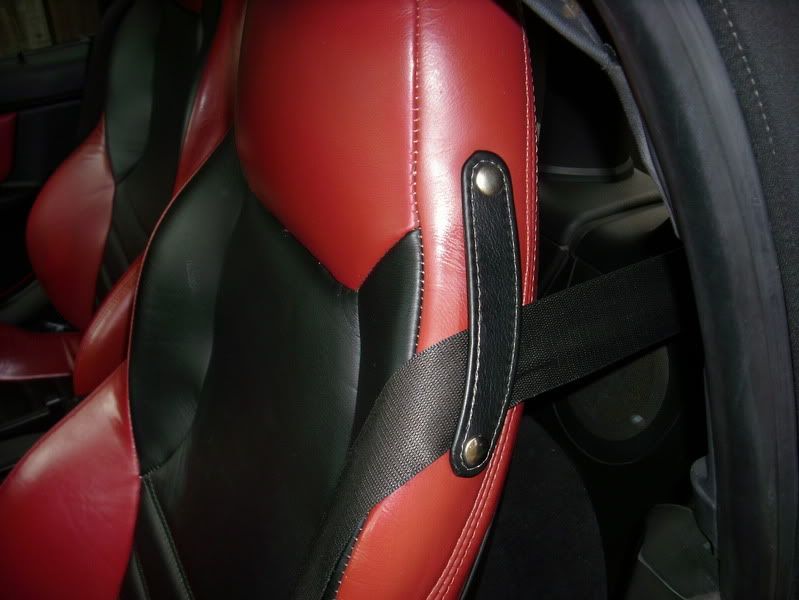
http://www.zroadster.net/forum/viewt...38769&start=50- Custom Leather Loop
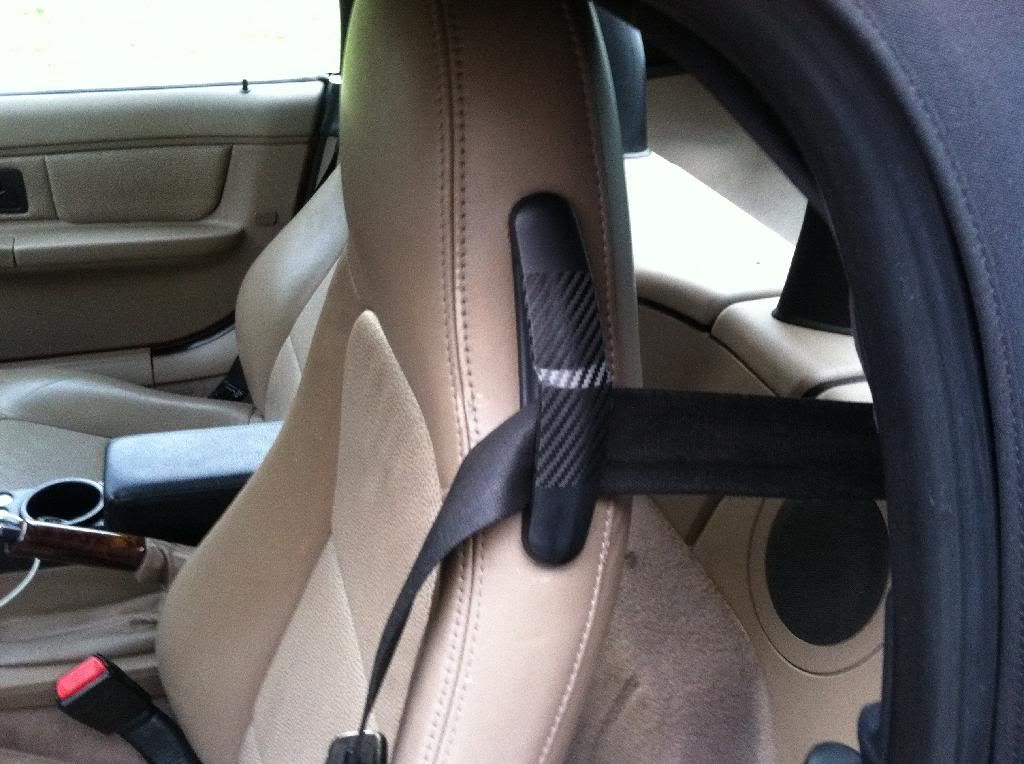
- Carbon Fiber Wrap
- Heat Shrink Tubing
- Anodized Metal Clips
Made of durable aluminum. Easily snaps on seatbelt guide. Available in two finishes: Black Annodized $45 or High gloss $55 includes shipping (last known prices... may be different now). Contact: Z3beltfix@hotmail.com Designed by a tool and die maker and a Z3 owner. Use if guide is broken or not yet broken.- Fixing via re-stitching side seam
cutting the stitching in the seam by the guides to give access to do the job, then stitched it back up from the outside. It took about 1 1/2 hours per seat, working quietly and with patience
Last edited by esses; 02-06-2016 at 12:49 PM.
My wheel bolts require more torque than your honda makes.
Member
The one thing I have not experienced breaking on my car is the seat belt guides... They still feel quite sturdy, too! I don't know, guess I got the lucky batch? I keep putting off new leather because of it, too. I'm going to wait for them to give because I want to go the custom leather loop route.
-Adam
Member
Great thread. Mine are broke but I have not messed with them yet. I'm always looking to do things inexpensively so this thread saves me some search time.Originally Posted by esses

Last edited by BimmerBreaker; 05-20-2017 at 02:23 PM. Reason: please do not quote multiple pictures
Ralph
It's just a theory, but think that the issue with seat belt guides arises upon adjusting the seat position forward and the belt locking--the belt will pull the guide until it breaks. I unhook my belts from the guides whenever I reposition the seats (which I only do to work on them--otherwise they stay in the full back position--I've never had a passenger try to move her seat forward).
Member
Sorry, but replacing OEM is the way to go. It's a PITA, but keeps original. Check searches for insturvtions.
Member
I couldn't agree with you more. I have found that several times, while trying to reposition my seat, the belt magically locks! I have always caught it before allowing the belt to do any damage, but I can only imagine how easy it would be to not think twice about it until you hear "snap".
-Adam
$$$$
Black shrink tubing is the best way to go, super easy to do. Someone posted it on here awhile ago, and it was a great tip. I found the shrink tubing at a local electronics store.
Member
Ohh that's a good one! Got a pic you can post up in here?
My wheel bolts require more torque than your honda makes.
Member
Only options #1 and 4 address replacing a broken guide, while they don't really fix the issue. I went with option #1, which also makes them easy to replace if they do break again. Fortunately since I'm careful with the belts I haven't had a problem.
Cyrus Mistry
Member
I have to agree moving the seat forward with the belt hanging from the clip is what I think kills them. That is the only time mine come unsnapped.
Member
I used CF wrap.
~Mike
Member
Another vote for heatshrink. Gives an almost invisible repair. I've had it on a broken guide for about 2 years and it works perfectly. Also have it on the unbroken one to provide extra support.
Member
25 mm (1 inch) heat shrink tubing...
25mm 1.25%22 Heat Shrink.JPG
$$$$
Thanks for posting, my car is in a million pieces in the garage right now so couldn't grab a good picture last night. Exactly what mine looks like. Has held up great for probably 3-4 years now.
Sim Simma
Moderator
The heat shrink may not be particularly beautiful IMO, but it sure as heck beats a broken guide. It doesn't look worse than any of the other fixes either. That's probably what I would do.
I do love the leather loop though. I wonder if someone could make it so we could remove the seatbelt guide without disassembling the seat, and then make a kit to install a leather loop like that? A man can dream...
Going into my TENTH YEAR of providing high quality reproduction BMW fabrics!
PRICE CUT on ALL FABRICS
Offering the best prices on the best quality reproduction fabrics!
Member
There is also this one... This is on someone else's car but I also have a set and they are pretty nice. They are black anodized aluminum clips. Very small and work really well. They almost look like they are ment to be there from the beginning.
http://forums.bimmerforums.com/forum...3#post27191313
Last edited by fiv; 09-11-2014 at 01:32 PM.
_____
5
Member
Thanks guys. Updated the original post!
My wheel bolts require more torque than your honda makes.
Member
No info on where to buy/find the metal clip?
2001 S54 LSB/NAPA. 1 of 7.
Member
Both of mine in the yellow Z broke at different times. I replaced both OEM style.
2001 Z3 3.0i -Oxford Green/Sandbeige
2016 428xi -Estoril Blue II/Black
2018 430iC- Estoril Blue II/Black
2018 330it - Melbourne Red/Venetian Beige/Black
Member
This thread makes me wonder what a broken one looks like.
And on a related note, adhesives are doing miracles these days.
Member
I searched the intertubes and wasn't able to find anything.From the link it looks like some retired guy was making them ... if anyone has a lead on where to get them, I'll happily update this thread with the info.
I will post pics of both of mine today. Driver's side is snapped clean off and the adhesive eventually failed. The part that's left stabs me in the shoulder and hence my irrational fixation on the stupid seatbelt guide. The passenger side is broken but the adhesives on the nylon wrap are still holding it together.
My wheel bolts require more torque than your honda makes.
Member
I forgot to add his contact info. Here is the text copied directly from his PDF brochure. Not sure if the pricing is still current as I bought mine a while ago. His name is Peter. (I have no affiliation to him)
Text from Brochure:
Z3 Belt Fix
Made of durable aluminum. Easily snaps on seatbelt guide.
Will SAVE you hundreds of dollars on future labor and reupholstering costs of seats.
Precision design for a slick look and a tight fit.
Available in two finishes: Black Annodized $45 or High gloss $55 includes shipping
Z3beltfix@hotmail.com
Designed by a tool and die maker and a Z3 owner.
Use if guide is broken or not yet broken.
Last edited by fiv; 09-11-2014 at 05:09 PM.
_____
5
Member
Thanks fiv. Updated!
My wheel bolts require more torque than your honda makes.
Member
I can take pictures tomorrow (by the time i get off work it will be dark). After 10 years of being careful, my driver's guide finally broke during a seat rail bushing install.
There is really not much to see. Using the already posted pictures as reference, these guides tend to break in half... the part that is right up against the side of the seats. They split right down the middle (parallel to axis of the car and to the outboard split portion of the guide). Hope I'm making sense? The day is dragging and my brain is down a few cylinders.
I've thought of using Superglue (the gel type) but any excess application would likely mess with the leather. Since I am running Wet Okole covers, I'll probably leave it until I have the time to pull the seat and fix it proper.
Oddly, Pelican parts has a step by step DIY on the replacement procedure. Came across it via Bing search.
Last edited by felonious monk; 09-12-2014 at 06:05 PM.
2001 S54 LSB/NAPA. 1 of 7.
Member
Oh yah, that makes it much more complicated to glue if it's the backing portion that cracks. I thought it might be one of the tabs snapping off.
 Posting Permissions


 Reply With Quote


Bookmarks