
 The Real Transporter
BMW CCA Member
The Real Transporter
BMW CCA Member
Video tutorial on how to refinished hazy/foggy plastic headlights by applying clear coat. This is intended to be a long term method compared to the other two methods which I have done in the past that was the wet sanding/polishing method and the method using strictly toothpaste. The headlights do not need to be removed from the vehicle or disassembled as I have shown the in the vehicle. Removing the headlights from the vehicle does help to eliminate the chance of any over spray from the clear coat or adhesion promoter landing on the paint which would need to be cleaned afterwards. This particular video was done on a 1997 BMW 540i E39 body style.
Tools/Supplies Needed:
-800 grit wet/dry sandpaper (if your headlights are severe)
-1000 grit wet/dry sandpaper
-bucket of soapy water
-isopropyl/rubbing alcohol
-clean lint free cloth
-tape
-paper
-adhesion promoter
-lacquer/clear coat
Procedure:
-if you decided to remove your headlights, start with that step first (headlight removal varies between makes/models of vehicles)
-wash the headlights thoroughly to ensure no contaminants will get into the wet sanding process
-tape off around the perimeter of the headlight lens or vehicles paint to protect it (optional)
-ensure the lens is always well lubricated during the wet sanding process using the soap water
-if your headlights are severely hazy/foggy, wet sand starting with 800 grit and finish with 1000 grit
-if headlights are mildly hazy/foggy, start and finish wet sanding with 1000 grit sand paper
-once satisfied, wash the headlight again to ensure there are no contaminants which would affect the lacquer/clear coat
-once headlight is dry, wipe it down with isopropyl/rubbing alcohol
-tape off the areas you do not want any lacquer/clear coat on
-wipe headlight lens down again with isopropyl/rubbing alcohol, do not touch the lens with your hands (oil from your skin can cause imperfections when apply the lacquer/clear coat)
-use the adhesion promoter to ensure there will be maximum adhesion when applying the lacquer/clear coat
-once adhesion promoter has setup, then go ahead and apply the lacquer/clear coat
-lacquer/clear coat can be applied in 2 coats if you are not planning on wet sanding afterwards
-if you are planning on wet sanding to a polish afterwards, apply 3 coats to ensure there is enough material for the next process
-wet sanding tutorial located here https://www.youtube.com/watch?v=RBENX1uvZak
-be sure to remove any paper or tape after about an hour of setup time
-let the headlight fully harden in the sun for at least 24 hours before the wet sanding and polishing stage
1994 BMW 740I E32: SOLD
1984 BMW 733i E23: Hartge engine, Hartge strut brace, Centra type 7 staggered 16" rims
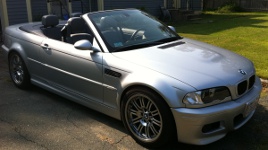
1997 BMW 540i/6 sport: polished/ported throttle body & traction control unit, E60 short shifter, ss braided flex lines, 2000 M5 tail lights, genuine Alpina bumper lip, genuine M5 auto fold mirrors, facelifted color matched trim
Member
Wow!...That lens looks great! I've always told people that polishing headlights helps a lot, initially, but often, the lenses seem to revert back to a hazy appearance, rather quickly. (Varies with the make of vehicle, but here in the SW, the sun is especially brutal, as well!) I love the clear coat idea; thus making for such a long lasting repair. I assume that after that, you simply wax the lenses with the rest of the car...brilliant!!! Thanks for the tutorial; I thought it was well done as well as a great subject!
Member
Looks great!
The video is pretty slick too.
Wagons Ho?
Thank you for posting the video, This is how it is properly done, the clear coat protects the plastic from oxidizing any further. While the clear in the video is of a sufficient quality, I would also recommend the below:
http://www.eastwood.com/spray-max-2k...t-aerosol.html
It is a bit more expensive but the durrability of the two part clear is excellent, I used it to restore my E-code tailamps which had some crazing and used it on several of my and my friends cars to do their headlights.
 Member
Awesome
Member
Looks really good, well done!!
Artifically Aspirated
Moderator
Looks good.
After they are all done and looking good you may want to put this on the lenses to protect them from all the sand and stones that will pit the plastic.
I put this on my new smoked lenses many years ago, they still look almost new. It is removable.
The Xpel film will make pitted lights look much better as the adhesive will fill the pits.
The pic in the image isn't an E39, but the p/n is correct. It comes pre cut and includes film for all the different fog lights.
http://www.autosportcatalog.com/inde...d=332&addcar=1
More info here, better price from Autosportcatalogue.
https://www.xpel.com/products/headlight.asp
Last edited by JimLev; 06-14-2014 at 07:21 AM.
Having No Trouble Here
BMW CCA Member
Hmmm... I wish I had seen this as an option. I just did mine and used duplicolors headlight-specific UV protectant clear coat. Not sure if there's anything special in it or not but my hope was that they dose up the extra UV into it...Originally Posted by hon2bmw

I also didn't use adhesion promotor - hopefully the duplicolor stuff works as advertised but I know guys who use generic clearcoats have issues w/ flaking later - I bet that's a great tip for preventing that.
The last thing is, I used a variety of polishing compounds with my detailing random orbital to final polish, I'm surprised that 1k sandpaper is fine enough for final finish alone?
2003 M3CicM6 TiAg
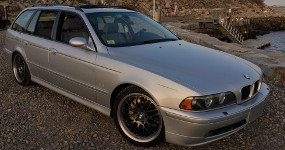
2002 540iT Sport Vortech S/C 6MT LSD TiAg
2008 Audi A3 2.0T DSG (the daily beater)
2014 BMW X1 xDrive28i (wifemobile)
Former:
1985 MB Euro graymarket 300SL
1995.5 Audi S6 Avant (utility/winter billetturbobattlewagen)
Member
I have 2-part urethane auto clear coat that I'm really thinking about trying for this. Should that have enough UV protection, or should I hunt down that duplicolor headlight specific clear?
Having No Trouble Here
BMW CCA Member
Good question. Prob be hard to get detailed specs on UV performance for most retail stuff.... Im guessing the headlight specific stuff is 1. Dosed up on UV inhibitors, and 2. Tweaked with something for super smooth "sheeting". It does cure incredibly clear and flat in a way that is unlike any normal clear i have sprayed. No drips/runs/peel at all. But who knows maybe the application and finish performance comes at the expense of uv stability and the 2-part would function better...
would be great for a paints expert to ring in...
2003 M3CicM6 TiAg
2002 540iT Sport Vortech S/C 6MT LSD TiAg
2008 Audi A3 2.0T DSG (the daily beater)
2014 BMW X1 xDrive28i (wifemobile)
Former:
1985 MB Euro graymarket 300SL
1995.5 Audi S6 Avant (utility/winter billetturbobattlewagen)
The Real Transporter
BMW CCA Member
Thanks for the compliments everyone!
I thought about putting on the stick on clear stone guard, but the only problem is it tends to fade over time and the dirt sticks to the outer edge of the film which would eventually drive me crazy lol.
I would think clear coat just in general does have a certain amount of UV protection, otherwise the base coat on standard paint out also fade or discolor. I have noticed with this clear, looking at the lights at a certain angle it does show that rainbow shine. That is also another sign of why I think it does have UV protection in it.
As for using 1000grit to sand and then polish, it would depend on what grade the compound you were using also. If it's a coarser compound, than it takes it the place of the 2000grit sandpaper. But if you're using a finer compound, I would imagine it does take a little longer on the polishing process in order to achieve that clear shine.
1994 BMW 740I E32: SOLD
1984 BMW 733i E23: Hartge engine, Hartge strut brace, Centra type 7 staggered 16" rims
1997 BMW 540i/6 sport: polished/ported throttle body & traction control unit, E60 short shifter, ss braided flex lines, 2000 M5 tail lights, genuine Alpina bumper lip, genuine M5 auto fold mirrors, facelifted color matched trim
Member
I tried the 2 part urethane clear since I had some on hand and I can't recommend it. It's kinda thick, it takes forever to dry and it runs like crazy. And on top of that, it's not perfectly clear. It looks like the headlight specific product is a much better option. It seems like a very thin product is needed
Wagons Ho?
Currently I do not use any polishing compounds, I wet sand with 1K until the oxidation is removed and I have a consistent surface, then I follow up with 1.5k and 2K paper, moving perpendicular to the last grit and then follow up with the clear. No adhesion promotor. The spraymax is an excellent paint once you know how to use it, it is meant for small panel repair, I use it on bumpers, spoilers, mirrors, etc. for small jobs were I don't want to pull out the gun and compressor. I prefer to use the "Glamour" type, they also have a "rapid cut-in" wich is meant for door jambs etc. that dries quicker but also doesn't level as well. The plastics does not need to be optically clear before using the clear coat, one of the benefits of using the clear is it fills in the scratches left by the sanding and then levels itself, polishing the plastic completely smooth before adding the clear will leave the paint with nothing to adhere to since the surface is so smooth.
Runs can be avoided by using the proper technique, you really have to practice, it all started for me back in the 80's when I started building car models with my Dad, 25+ years of experience can pay off. The spraymax dries to the touch within 30-40 minutes and can be handled lightly in several hours. The point of using a two part clear is that it chemically hardens/cures where as most spray cans simply dry because the solvent the paint was carried in evaportates, the finish is much less durable and can easily be attacked by other solvents.
Last edited by hon2bmw; 06-17-2014 at 12:31 PM.
BMWCCA Member - NJ
UV/Clear coat makes so much sense . Looks great. Thanks for the video.
Grumpy
BMW CCA Member
I've been doing this for years. The problem is no matter how well it's prepped, the clear will eventually start peeling. The headlight specific stuff may be a bit better, but I suspect the real problem is previous cleaning attempts have saturated the lens with waxes and oils.
They do look really good for a while, though.
/.randy
Having No Trouble Here
BMW CCA Member
Yeah the headlight specific stuff sheets and self-levels so nicely without running its like magic, I was really impressed.
I bet you are correct about the 2 part stuff being harder / better as a rule but dont make the mistake of thinking that anything one part is purely solvent-drying and doesn't cure.
Plenty of polymer coatings and adhesives cure via exposure to atmospheric moisture meaning they just need to be exposed to atmosphere to "kick". They still cure and do not dry but they don't necessarily have 2 components. POR is a good example of this for instance. And plenty of urethane formulations.
Again agreeing w/ you that the 2 part is probably excellent but just sayin... just cuz its one-part or spray can doesn't necessarily mean it's not a curing polymer and it's just a drying paint.
2003 M3CicM6 TiAg
2002 540iT Sport Vortech S/C 6MT LSD TiAg
2008 Audi A3 2.0T DSG (the daily beater)
2014 BMW X1 xDrive28i (wifemobile)
Former:
1985 MB Euro graymarket 300SL
1995.5 Audi S6 Avant (utility/winter billetturbobattlewagen)
Member
Excellent post, thanks.
 Posting Permissions


 Reply With Quote


Bookmarks