
 Member
That's what I figured. Thanks for the feedback.Originally Posted by bimerok

Tipsy
Last edited by TipsyMcStagger; 07-12-2017 at 11:37 PM.
Member
I've dealt with PS on another car and it was forever failing-some poor design issues.
I replace everything that could be associated with sealing.
I'm not familiar with your crush washer, but if copper...new ones would go on my car!
Progress...cool.
Member
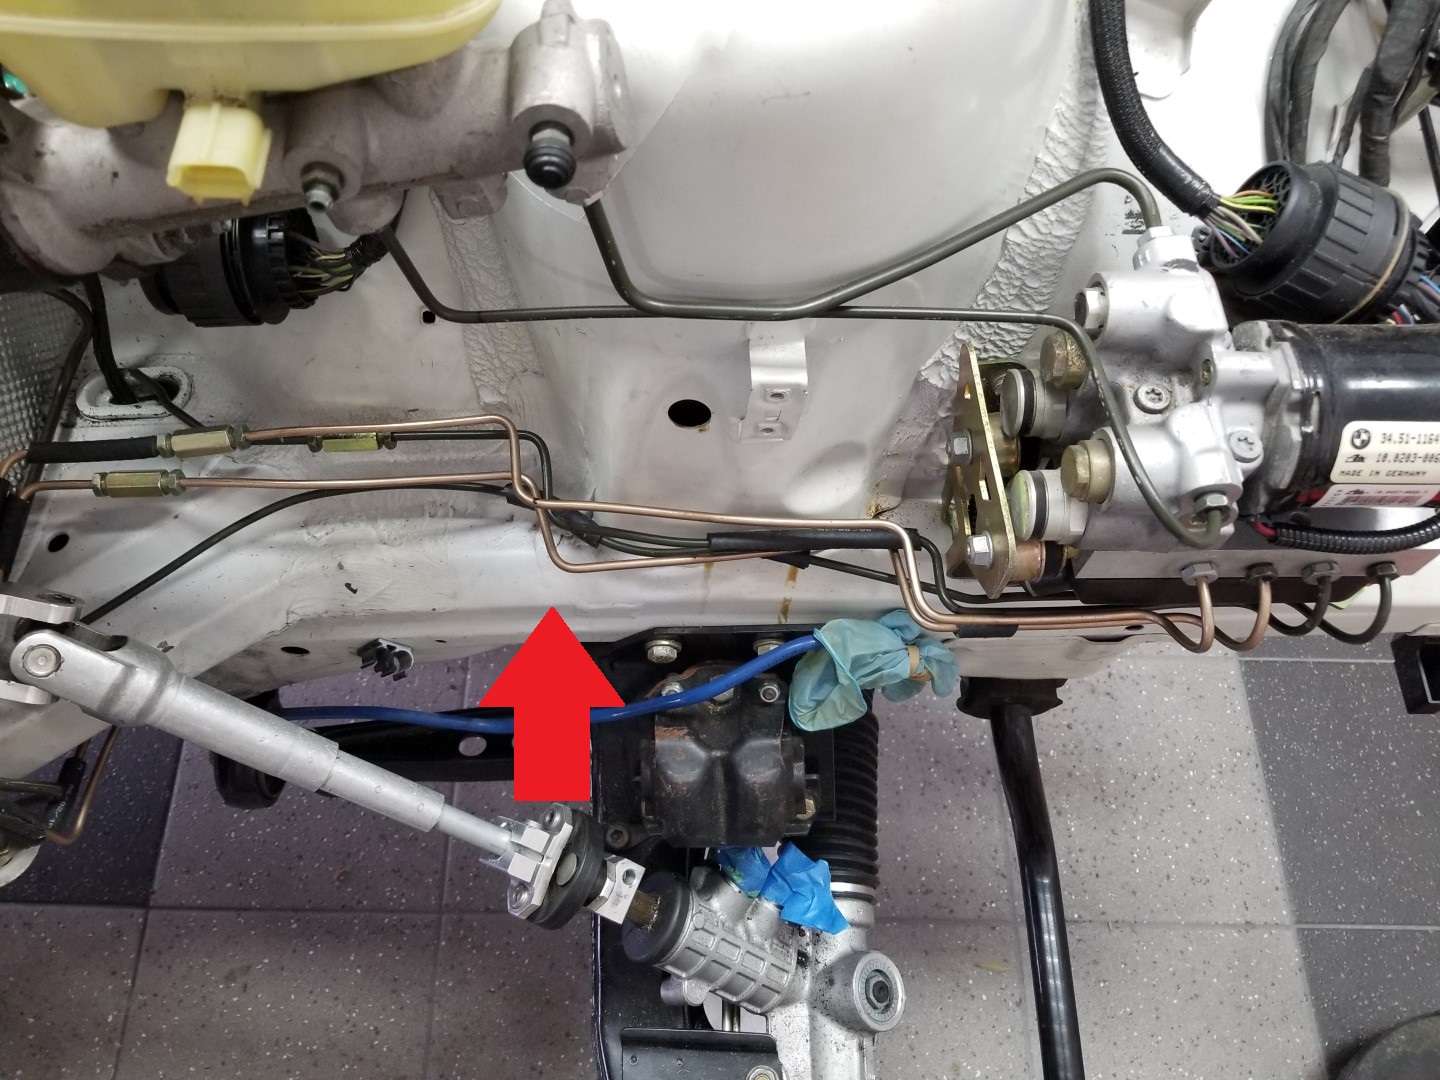
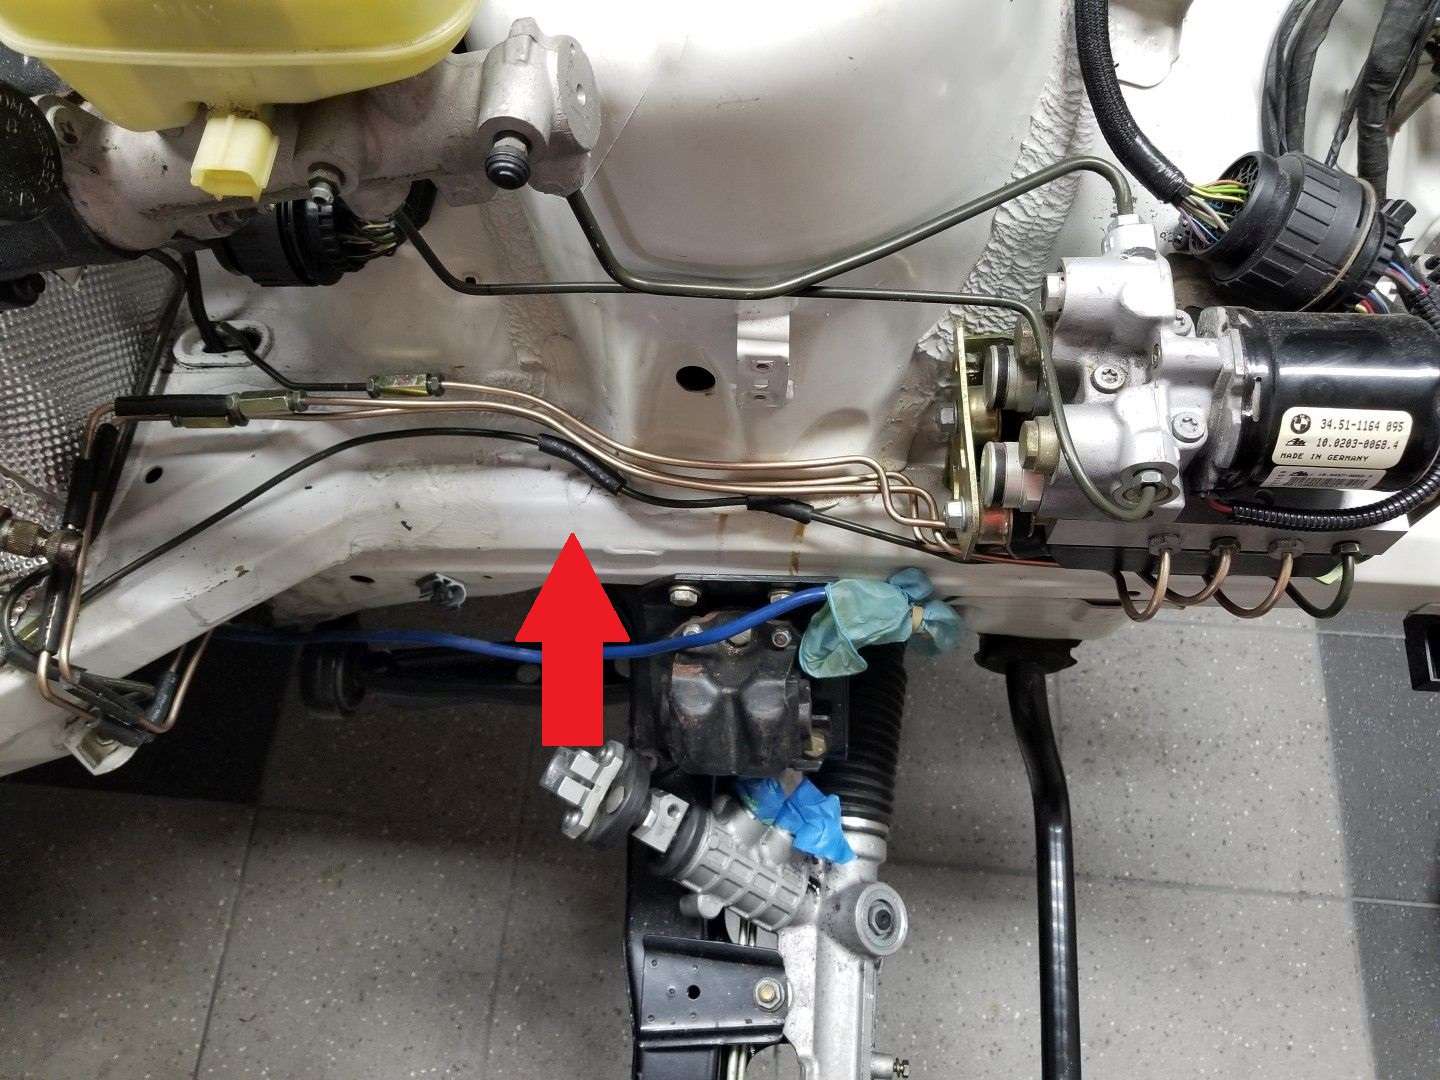
Guess who remade brakes lines, again? This guyI've lost count of how many times I've messed with these lines but, oh well. Better to get it right now than have issues later. I've learned two things in messing with these lines; (1) Given my skill set, I'll never be completely satisfied and (2) as previously mentioned, Nicopp line is SO much easier to work with than steel.
After the most recent engine test fit, I wasn't happy with the clearance (or lack thereof) between the header and the lines. I think I've gotten this corrected. The only thing I'm concerned about is whether I might have a leak. After completing the lines yesterday afternoon, I hooked my pressure bleeder to the master cylinder and pumped 10 PSI into the lines. At 4pm yesterday, the needle was a needles-width above the 10 PSI tick mark. This morning, it's a needles-width below the 10 PSI tick mark. It could just be the pressure bleeder seal at the master cylinder, a leak in the pressure bleeder hose or, a cheap gauge. Or, I could have a leak in the brake lines.
A needles width in 16 hours. Thoughts?
Tipsy
Lack of header clearance
Previous version
Newest version
Pressure Gauge

Last edited by TipsyMcStagger; 07-16-2017 at 10:54 AM.
БМВ Фанат!
You can guess all you want, but there is only one real way to find out
Fill the system and bleed it ...
- 96 328is 6.0L. (LS1 to LS2 build thread: http://forums.bimmerforums.com/forum...ad.php?2098938)
- 96 328is 5.7L. (LS1 build thread: http://forums.bimmerforums.com/forum....php?t=1289987)
- 95 ///M3 6.0L. (LS2 build thread: http://forums.bimmerforums.com/forum....php?t=1619249)
- 97 ///M3. (e46 Fender Flares/track car build thread: http://forums.bimmerforums.com/forum....php?t=1727098)
- 96 328is (Dual Fuel Pump to Surge Tank thread: http://www.bimmerforums.com/forum/sh...ad.php?1964025)
Member
We use those Motive bleeders at work as well as having my own for home.
a needle's width after 16 hours is better than any of our bleeders would hold.
you're fine.
if it had an actual leak in the lines, you'd have zero pressure in 16 hours.
always trying to make it lighter and faster
^^former build: http://www.bimmerforums.com/forum/sh...-neglected-M3/
current build: http://forums.pelicanparts.com/porsc...car-build.html
instant grams: doktor_b
Member
LOL. Yeah, I'll know for sure at that point. I'm just trying to avoid getting brake fluid all over the place.
I think you're right. It's now been more than 24 hours and it's still reading 10 PSI. I can flick the gauge with my finger and make the needle move a needles-width back-and-forth. Looks to be leak free!
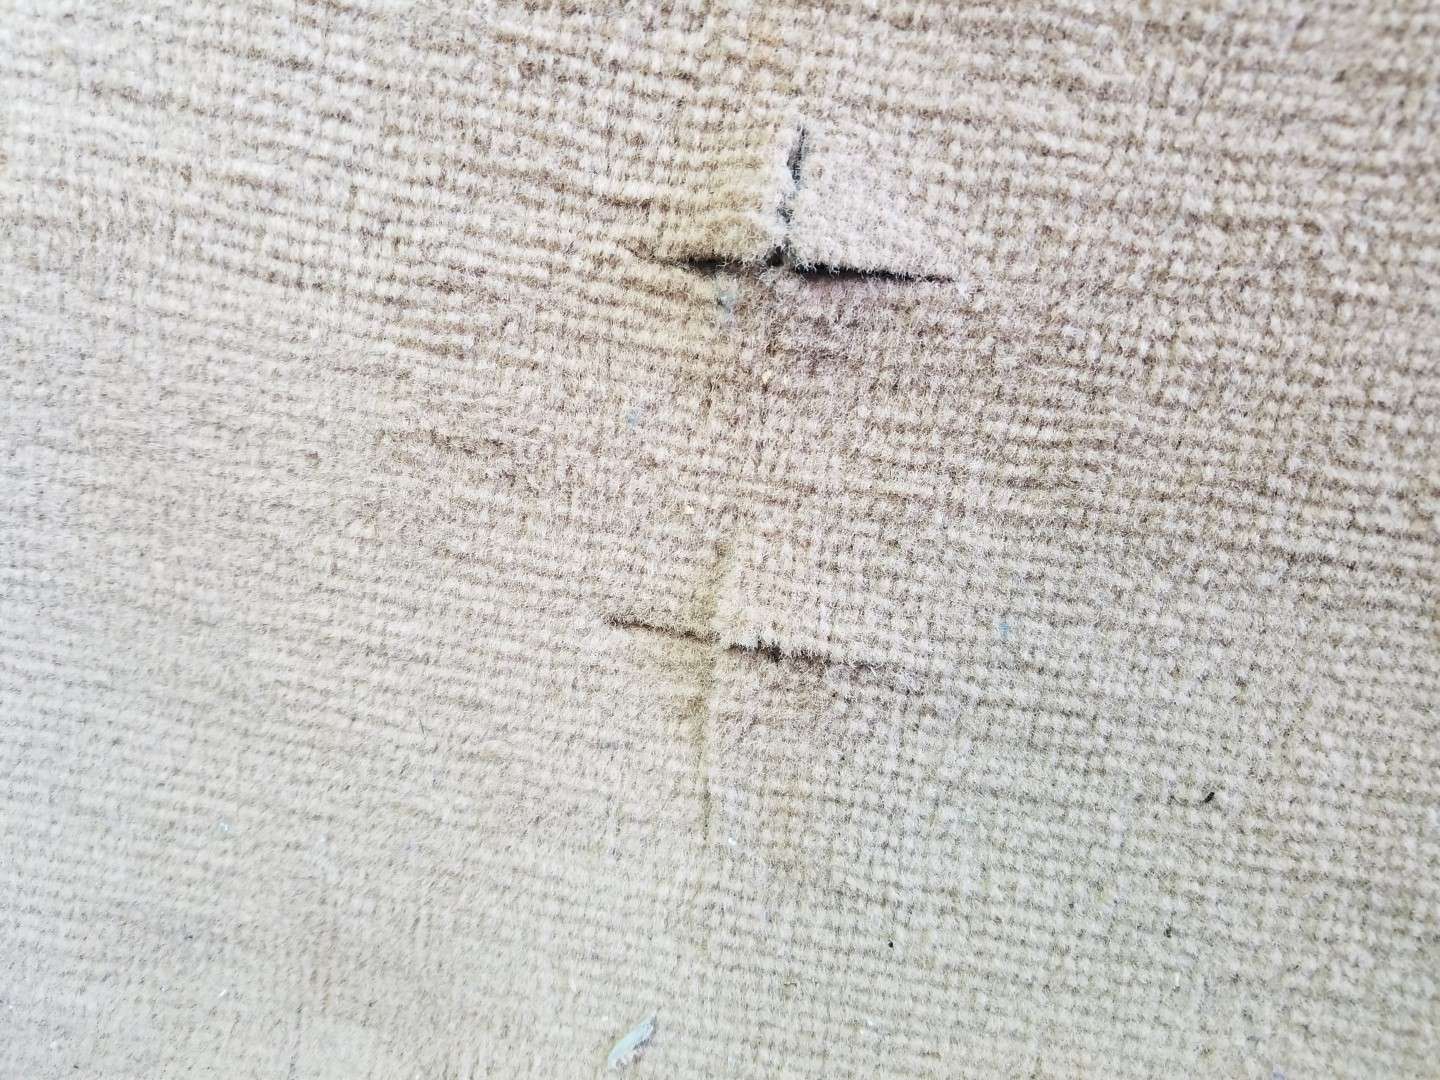
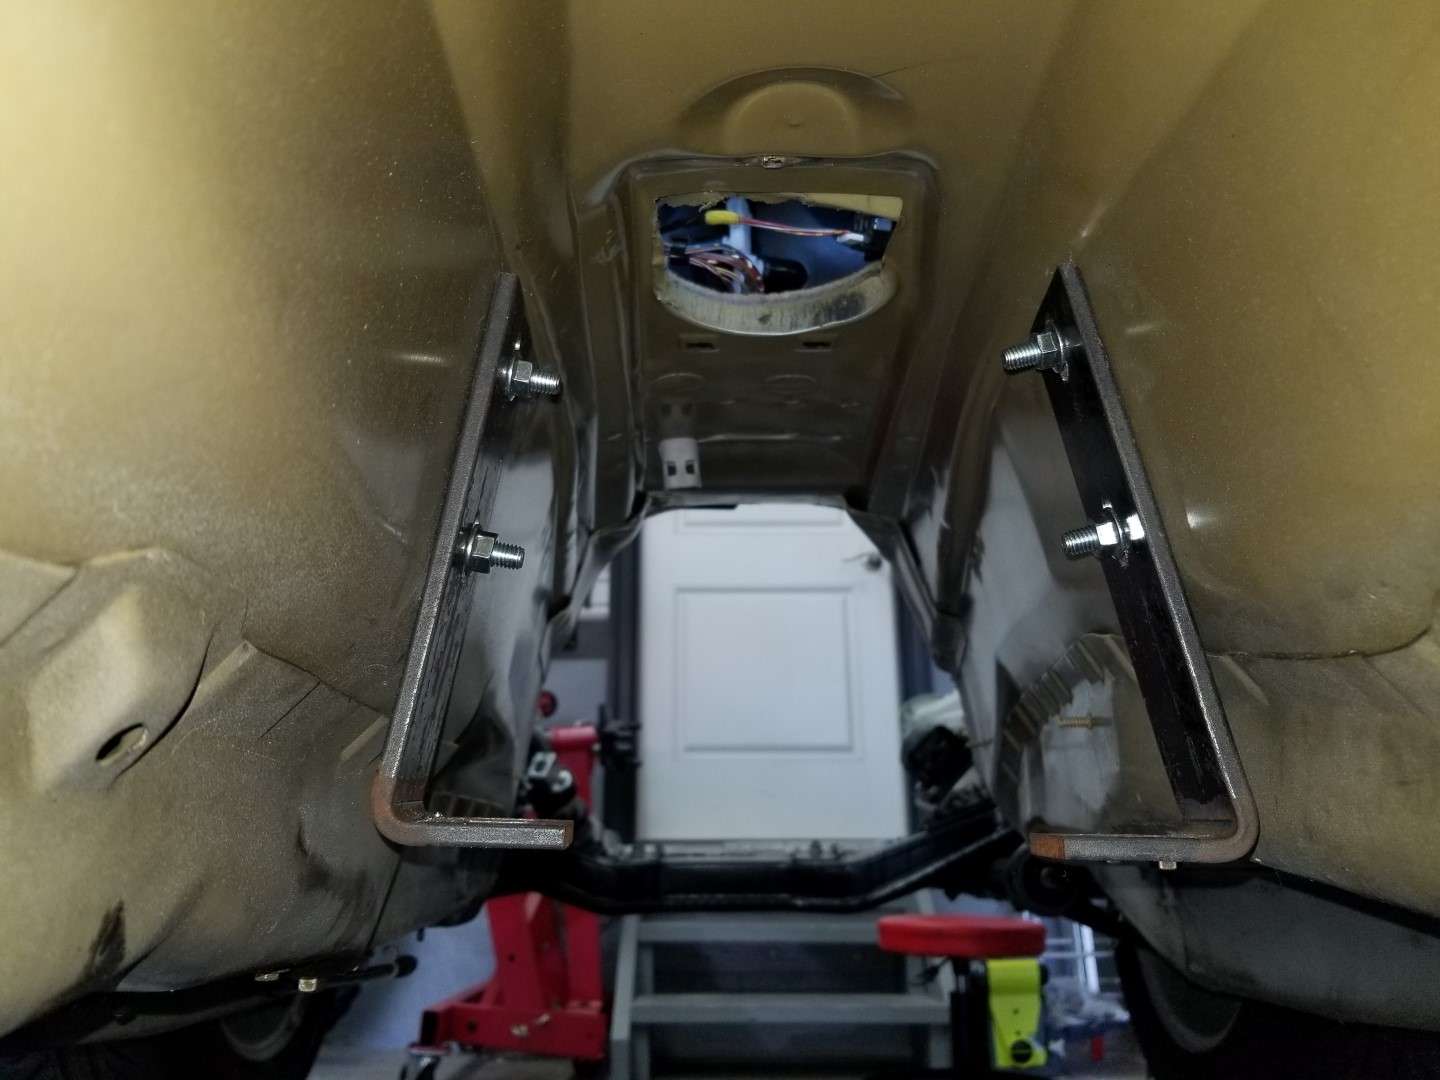
This is such a minor thing but for some reason, I've been avoiding it for so long; I finally drilled the holes through the tunnel for the JTR transmission hangers. It's tight working in the tunnel, so had to go buy a new tool. I then slit the carpet on the tunnel and inserted the bolts from the cabin. Now that they are bolted in place (and hopeful in the correct place), I'm going to start lining the tunnel with the same heat barrier I used on the firewall. I'll leave the hangers in place while I apply the heat barrier. I don't want any barrier on the tunnel under the hangers. I think I'll drop the trans-crossmember at the powder coater this week, too.
Tipsy
Yay! New Tool
JTR Trans Hangers Bolted in Place
Last edited by TipsyMcStagger; 07-16-2017 at 05:27 PM.
Member
Sweet! It is tough to cut into virgin metal...especially such a nice model.
Looks like you hit a home run on those brake lines.
Member
I left that brake bleeder attached for three days and it was still reading 10 PSI, so I'm pretty happy about that.
I've been working on lining the trans tunnel with DEI Floor and Tunnel Shield. Just a little more to do.
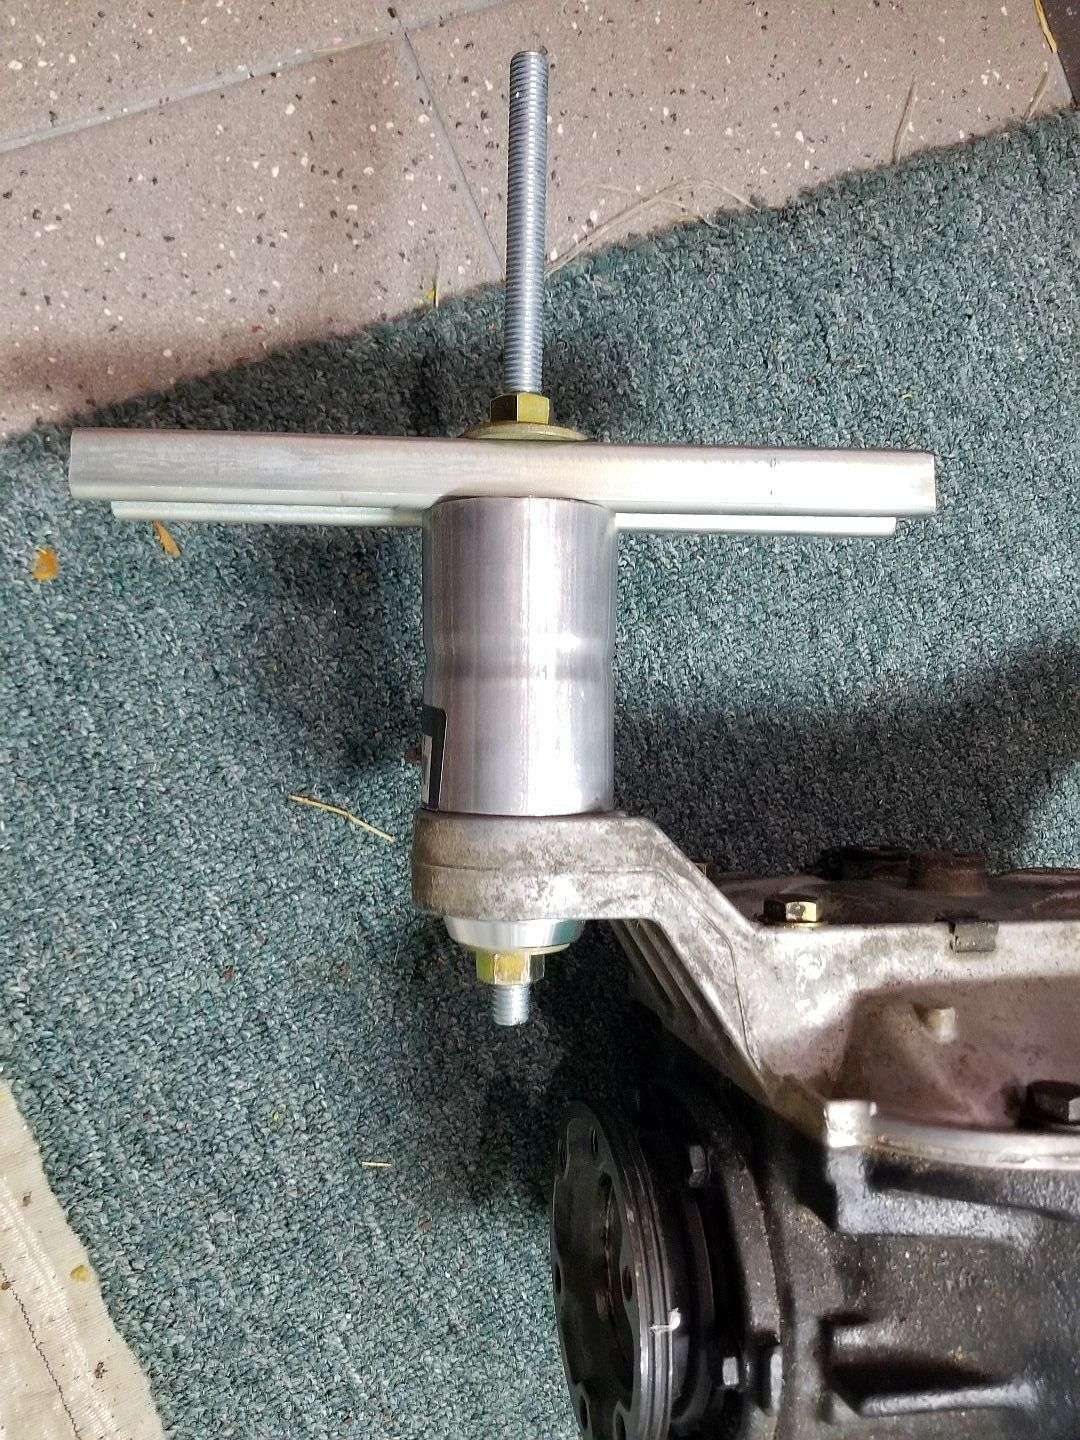
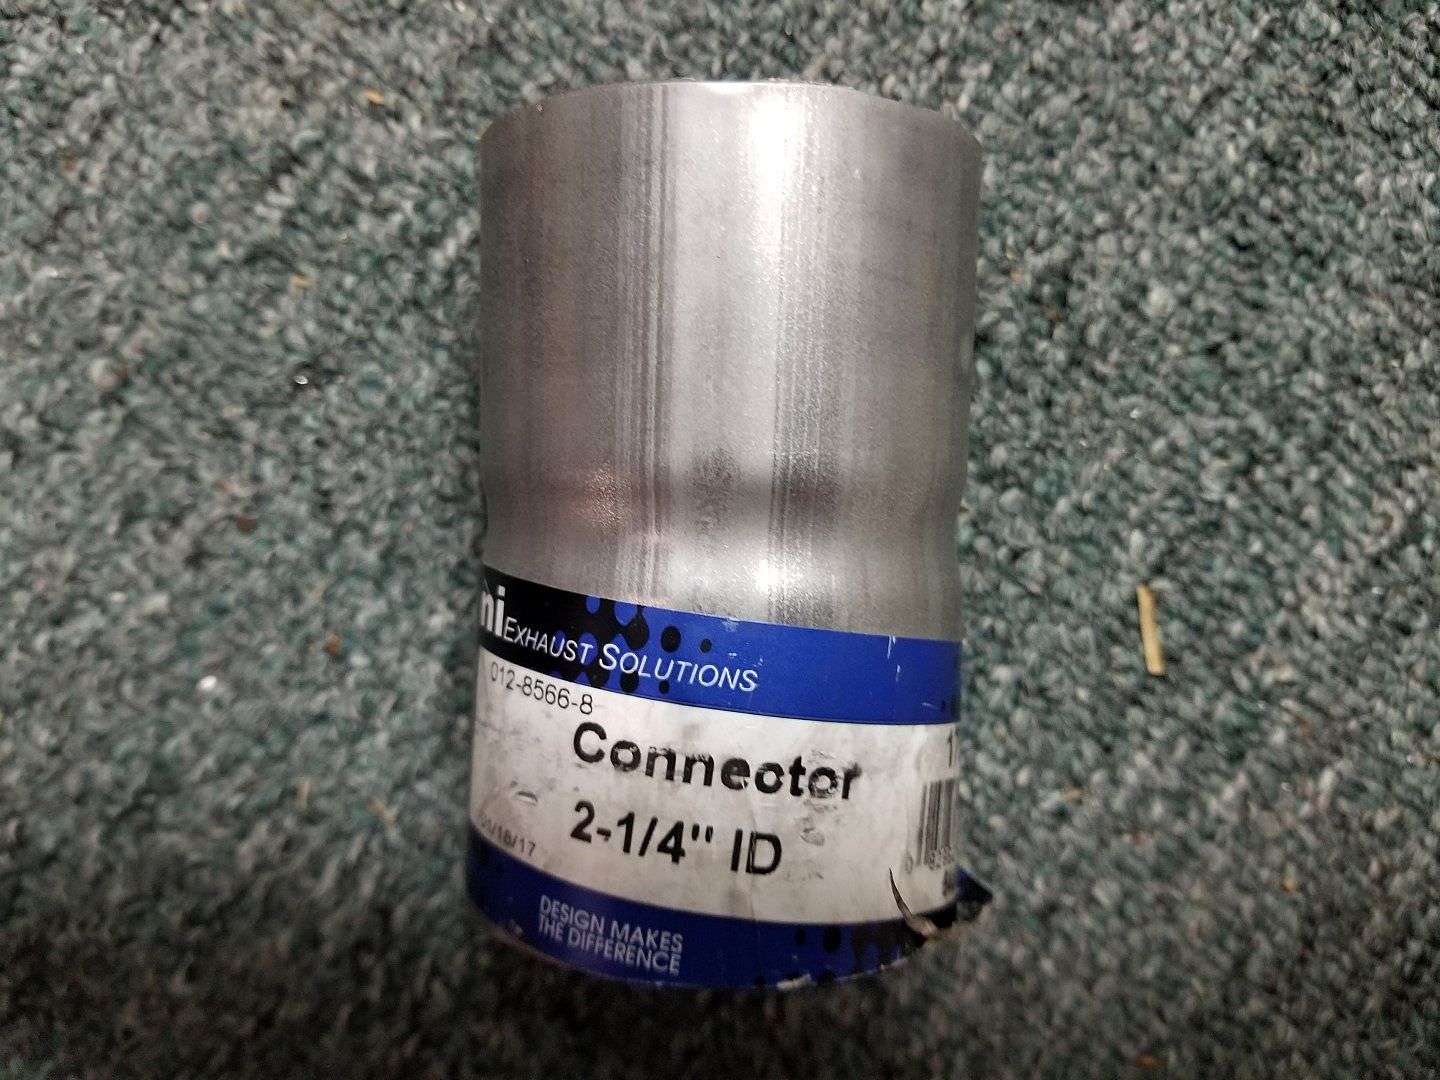
I got sidetracked today and decided I want get the 3:38 LSD I bought a while back ready to be swapped-in. The diff bushings that are in the cover don't look particularly bad but given the "might as well" theme of these builds, I decided to replace them anyway. There are so many methods for removing bushings online; many of which amount to hackery, in my opinion. I decided to put a small press together using some scrap Unistrut, some 1/2" threaded rod, a few nuts and washers, an exhaust fitting and a bearing-race driver. I used a 25% off HF coupon and picked up this HF kit for $30.
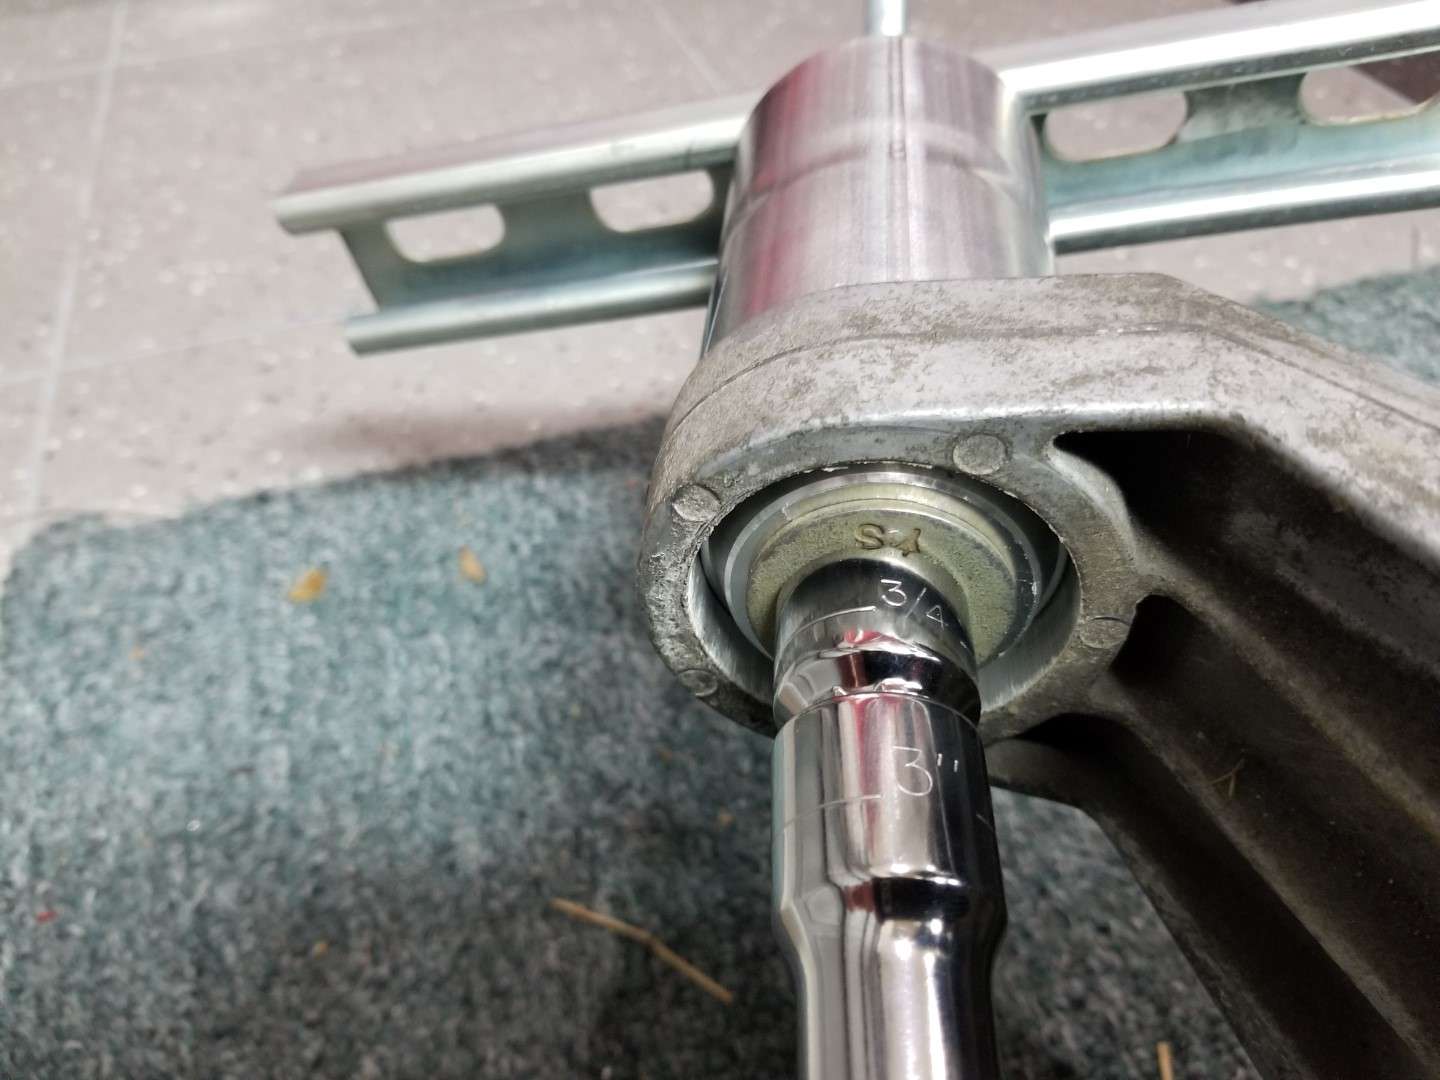
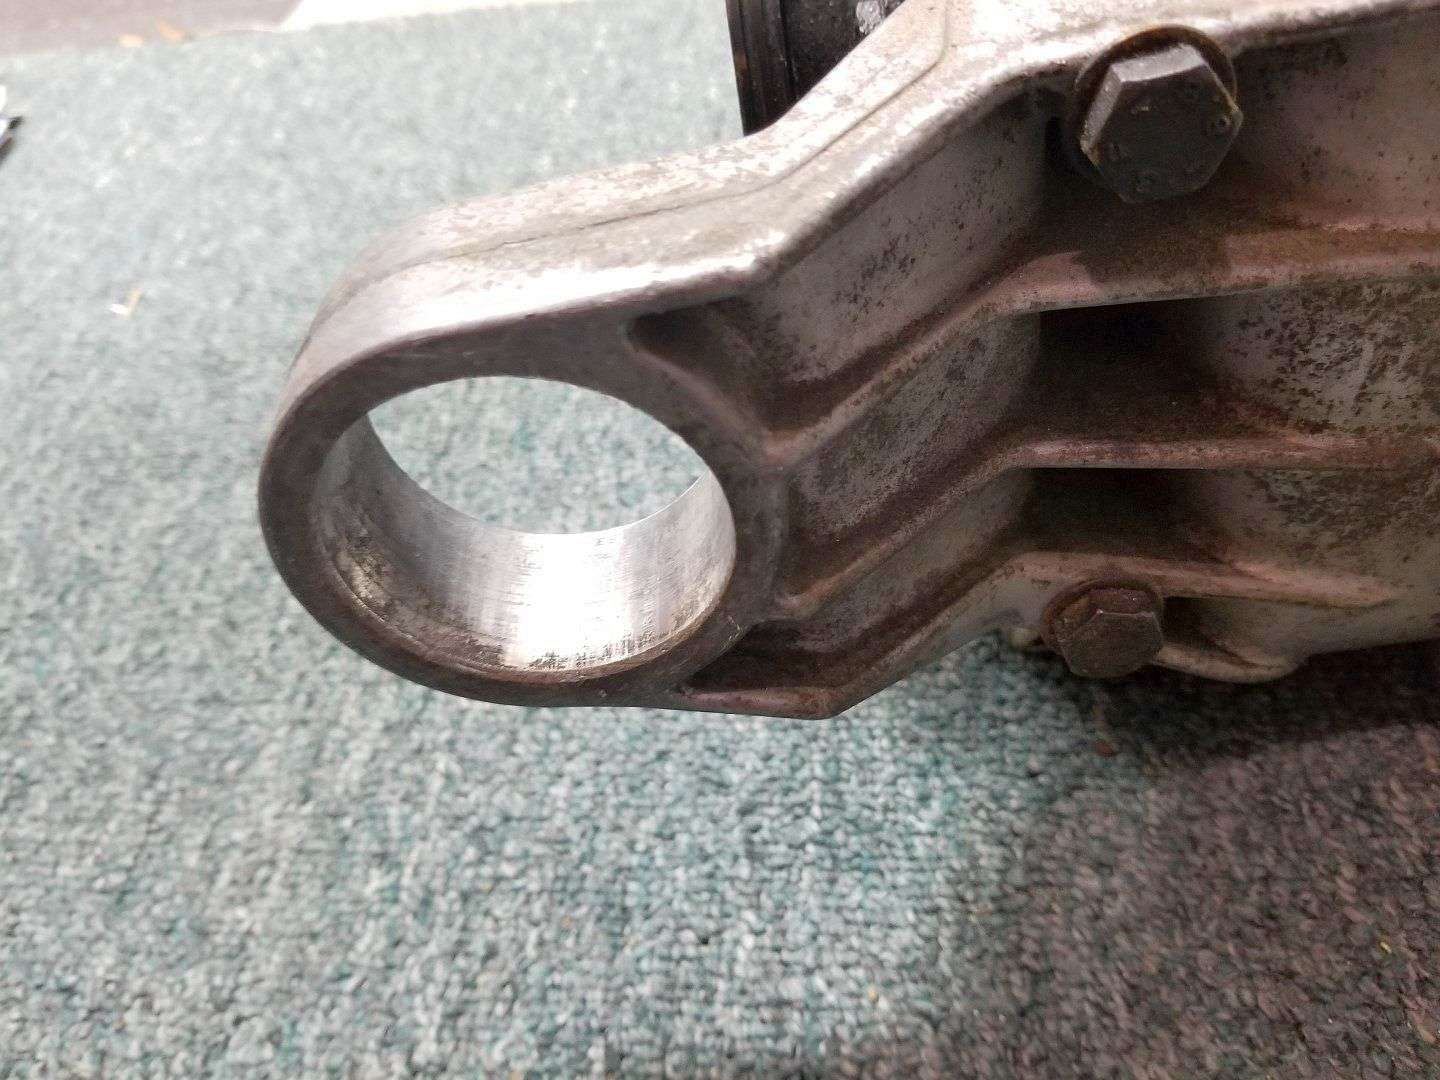
It worked pretty well. The first bushing came out quite easily. The second was a little stubborn. The Unistrut began to crush the exhaust fitting (good thing it was only $3). I got a little nervous that I might crack one of the "ears" on the cover but after making sure the 50mm driver was properly seated on the bushing, I kept at it and the bushing came out. I should be able to press the new bushings in using the same method.
I haven't got the new bushings yet. I'll order them while I'm traveling this week. I'm not planning to use any urethane for now...sticking with rubber. So far, I've used all OE rubber bushings (on the front). Any thoughts on Febi rubber? The Febi bushings are about 1/6th the cost of OE. But then again, it's a little late to worry about how much things cost
Tipsy
Old Bushing
Simple Homemade Press
2 1/4" Exhaust Fitting
Bushing Being Pushed Out
Bushing Removed
Crushed Exhaust Fitting

Last edited by TipsyMcStagger; 07-23-2017 at 04:06 PM.
БМВ Фанат!
Nicely done!
When I see the hackary of burning bushings out, it make me wanna puke in the face of who's doing it. It's like they don't want to move half of brain cell to come up with alternative.
Last edited by bimerok; 07-23-2017 at 09:20 PM.
- 96 328is 6.0L. (LS1 to LS2 build thread: http://forums.bimmerforums.com/forum...ad.php?2098938)
- 96 328is 5.7L. (LS1 build thread: http://forums.bimmerforums.com/forum....php?t=1289987)
- 95 ///M3 6.0L. (LS2 build thread: http://forums.bimmerforums.com/forum....php?t=1619249)
- 97 ///M3. (e46 Fender Flares/track car build thread: http://forums.bimmerforums.com/forum....php?t=1727098)
- 96 328is (Dual Fuel Pump to Surge Tank thread: http://www.bimmerforums.com/forum/sh...ad.php?1964025)
Member
Ill admit. I resorted to burning the rear two bushings out of my rear subframe simple because they wouldn't fit in my press. I want to add that the firewall and tunnel insulation is a great idea. I added a cheaper version of that and it still gets hot in my car after cruising for a while. I don't want to imagine it without it.
Member
I actually just picked up a spare rear subframe. It's rust free and didn't cost much. I intend to attempt to remove the bushings using the same press I used above (with a 3" piece of pipe). I will have to heat the subframe with a torch, but that's just to soften the rubber. I won't be burning them out (I hope).
I'll then get the sway bar reinforcements welded on and press-in new bushings.
Tipsy
Member
The pipe and threaded rod works great, I have been doing that for years on bushings and hard to get to bearings. Greasing up the new ones and sticking them in the deepfreeze for a few hours helps to install them.
For the pressure changes you saw in your line test, don't forget that ambient temperature will make pressure swing too. Holding 10 psi is one thing, but holding the hundreds of pounds in the brake system is different. If your still concerned about it then fill/bleed the system and force the pedal down for an hour. See if any drips or wet spots develop.
Sent from my SM-G935W8 using Tapatalk
Member
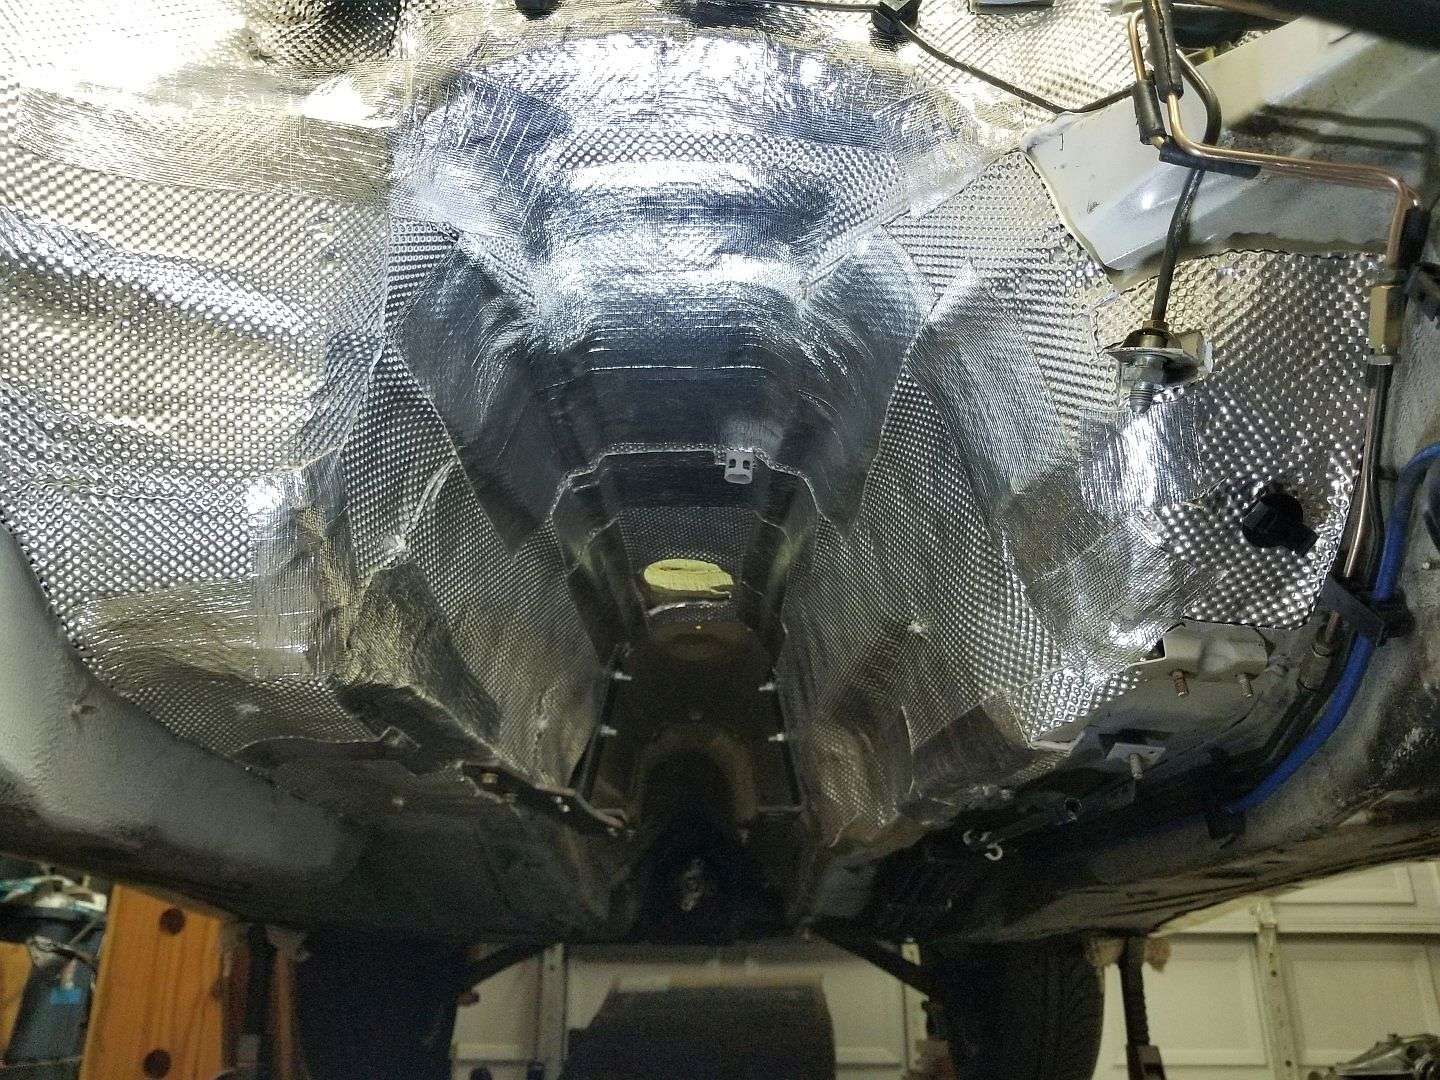
Still have a little bit to tweak here and there but it's more or less done. I covered most of the seams in in the DEI materiel with a considerably thinner heat shield from Thermo-Tec called Cool It.
As long as all of the adhesive backing holding this stuff in place holds up, I'm hoping it will be effective.
Tipsy
Last edited by TipsyMcStagger; 10-22-2018 at 11:32 AM.
Member
Any word on if the ssr ecm has working tach? Or is a converter still needed. Im going down the same path on my 540i swap.
Sent from my SM-N920P using Tapatalk
Member
I can only assume the SSR OS will be the same as the GTO OS with regard to the tach.
I know Bimerok needed a Dakota Digital box to get an accurate tach reading with the GTO OS.
Tipsy
Member
Very nice work on the tunnel. I'd also hope you don't have issues...if you do, I'd say you are driving too slow!
New bushings are investments...I'm going with OEM rubber as well. I've have my fill of poly-urethane.
Member
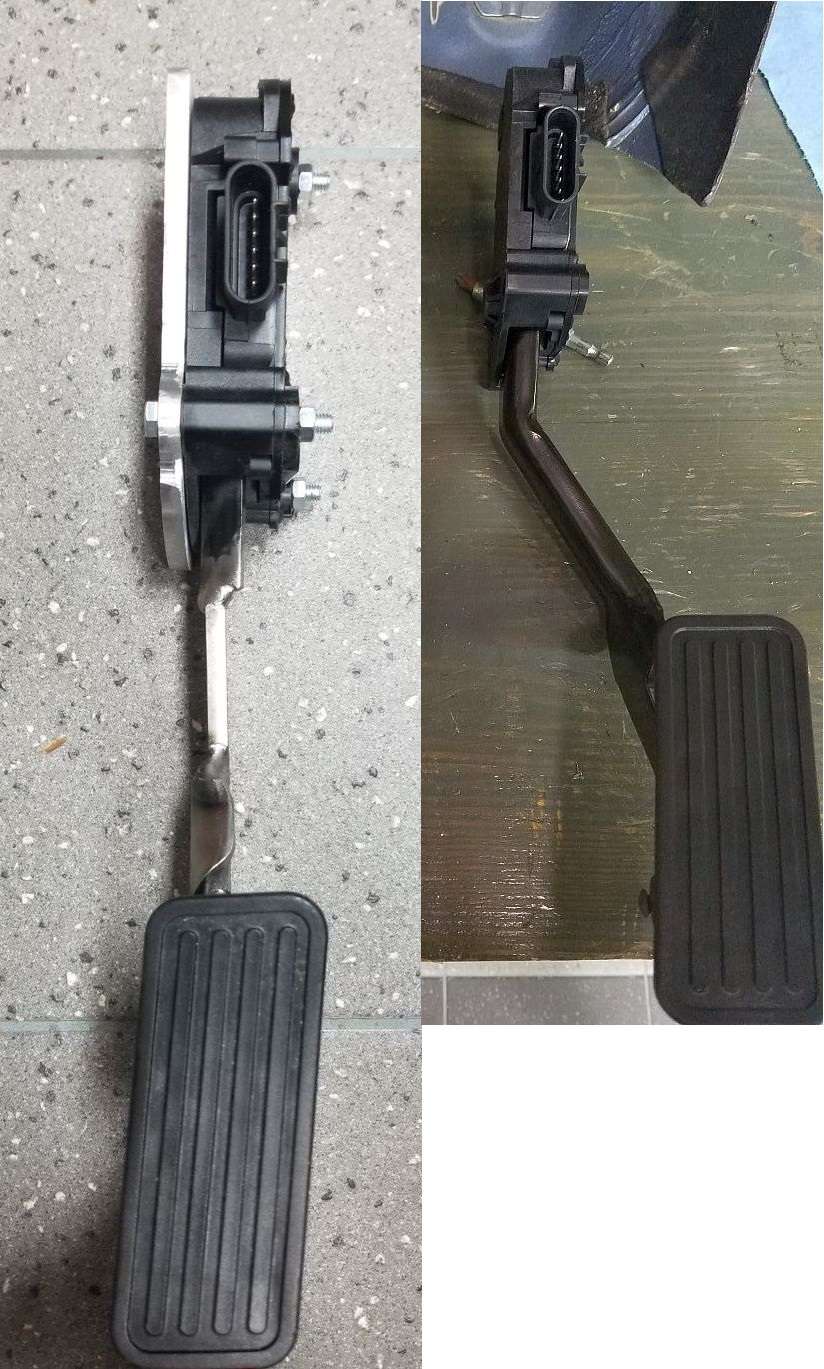
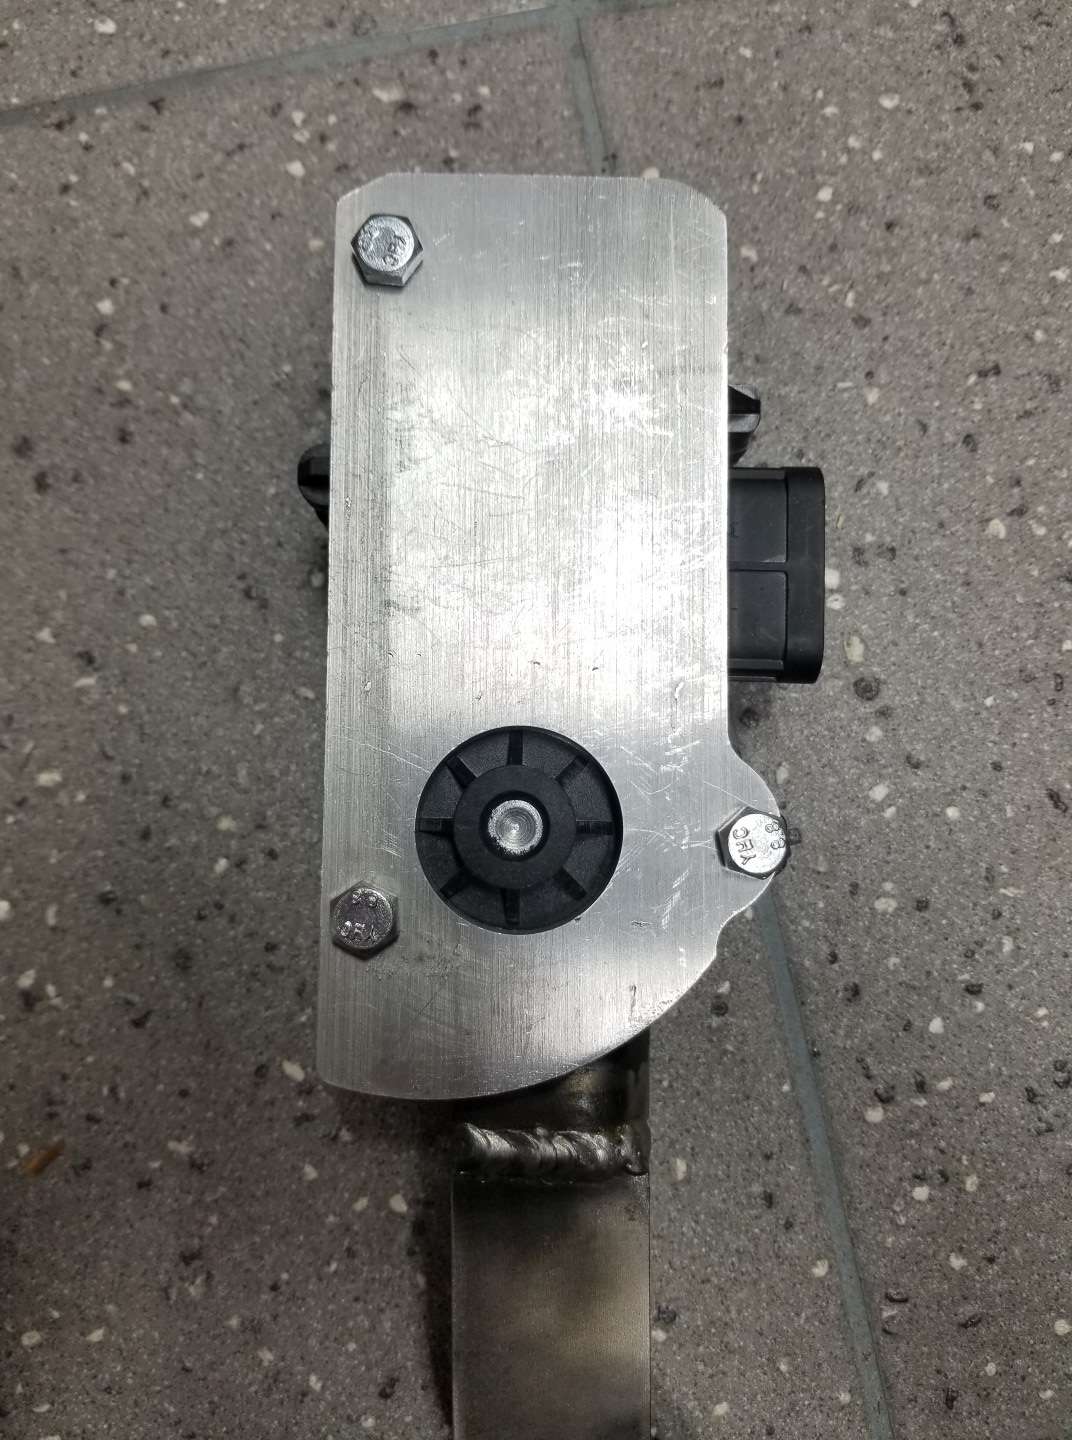
Given my limited wherewithal for in-house fabrication, devising a mounting solution for this giant SSR/TBSS pedal has been one of those things I've been procrastinating. It's not going to mount itself, so I found a local precision welder to straighten the pedal shaft. He used a heat absorbing clay to protect the electrical componentry and monitored the temperature of the clay while he welded.
Below is a picture of the straightened pedal, with an aluminum plate attached which will be used a part of a mount. I should have the mount completed later this week, hopefully. Stay tuned.
Here's a picture of the welds.
And the aluminum plate.
And as best I could, here's a side-by-side of the pedal after is was straightened and before:
Last edited by TipsyMcStagger; 08-15-2017 at 07:39 AM.
Member
Nice!
Member
Need help guys. I'm trying to bleed the brakes with the Motive pressure bleeder. As is typical, I started at the right rear. With 15 PSi in the pressure bleeder, I cracked the caliper bleeder and got no fluid flow. I went around the car and was able to get flow at each of the other calipers.
Working from the rear forward, I disconnected the hard line where it connects to the flexible line at the right rear caliper. No flow. I have a few unions in the line as a result of the ABS relocation but long story short, with the hard line disconnected from the ABS pump, I can put 10+ PSI in the Motive bleeder and there is no fluid exiting the ABS pump.
It seems that fluid is making it into the ABS unit (as evidenced by flow at the left rear caliper) but not out, for the right rear.
Not really sure where to go from here. Should I try removing the ASC relay and manually activating the ABS pump by jumpering pins 30 & 87?
Tipsy
Last edited by TipsyMcStagger; 08-16-2017 at 11:57 AM.
Member
Stumped.
I jumped pins 30 & 87 on the ASC relay to power the ABS pump. I put a line on the right rear port of the ABS pump, directly into a catch can. No fluid.
I have to assume fluid is making its way from the master cylinder into the rear channel ports of the ABS pump because I was able to bleed the left rear caliper.
It's been sitting a long time and who knows what kind of crud has made its way into the system but at this point, the only thing I can think to do is try replacing the ABS pump.
Tipsy
Member
Partial success. I got fluid to the right rear. How you ask? This is my first time doing a full bleed with a pressure bleeder. I'd read that the pedal wasn't part of the equation. But after cycling the ABS pump to no avail, I figured I had nothing much to lose by actuating the pedal. That's all it took!
The reason I'm calling this a partial success is because after two full rotations around the car with the Motive bleeder (with an activation of the ABS pump in between), I don't see any bubbles at the calipers but the pedal will go to the floor.
This is a used master cylinder/hydroboost setup from a Mustang and I didn't bench bleed the master. I propped the brake pedal down with a broom stick and the calipers are definitely activating but I'm thinking the pedal should be way higher. I can literally put the pedal to the floor.
Thoughts?
Tipsy
Last edited by TipsyMcStagger; 08-16-2017 at 04:51 PM.
Member
Can you pump the pedal and build pressure in the lines? (No power bleeder, all bleeder screws closed)
if so, try pressurizing the system again and then crack the outlet fittings on the ABS module. It'll be messy, but chases bubbles from the ABS module. I had to do this at work a few weeks ago to get a brake system to bleed. Real PITA.
always trying to make it lighter and faster
^^former build: http://www.bimmerforums.com/forum/sh...-neglected-M3/
current build: http://forums.pelicanparts.com/porsc...car-build.html
instant grams: doktor_b
Member
I'm not sure I know how to answer that. Can I pump the pedal? Yes, I can physically actuate the pedal. I can only assume it is building pressure since the system is seemingly bled, the master is full of fluid and the caliper bleeders are closed.
Won't cracking the lines exiting the ABS pump simply reintroduce air into the system? Are you proposing actuating the pedal while cracking the lines at the ABS module? In other words, do I need a helper?
Tipsy
Last edited by TipsyMcStagger; 08-16-2017 at 05:02 PM.
Member
I mean pressurize the system with the Motive bleeder and then crack the lines.
that will prevent air intrusion whilst bleeding any bubbles trapped in the ABS module. They will present as foam in my experience.
my original question about pumping the brake was referring to pumping the pedal to see if the pedal got higher indicating the presence of air in the system.
always trying to make it lighter and faster
^^former build: http://www.bimmerforums.com/forum/sh...-neglected-M3/
current build: http://forums.pelicanparts.com/porsc...car-build.html
instant grams: doktor_b
Member
Okay, I understand now. Thanks.
To your second point; unfortunately, no matter how many times I pump the pedal, the feel and position do not change. I'm not sure if it's air in the system or a faulty MC. This is a used MC and hydroboost.
As you're suggesting, one would think if the culprit were air, the pedal would stiffen while pumping. Hmmm.
Tipsy
 Posting Permissions


 Reply With Quote
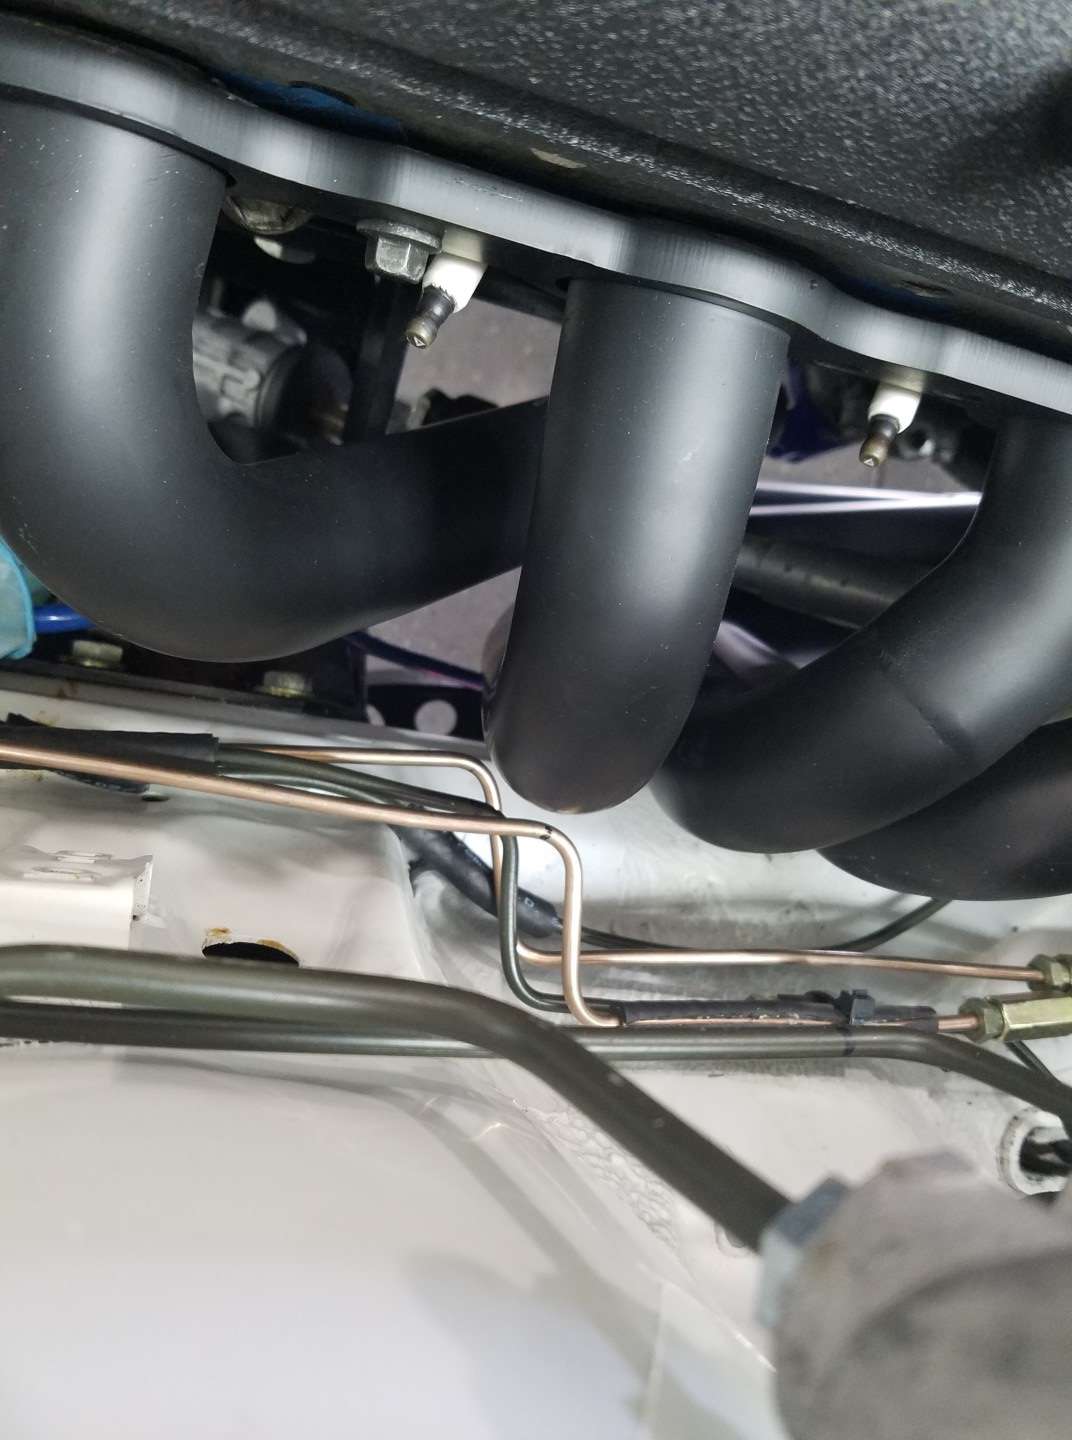


Bookmarks