
 RaceComm
Yeah plywood sounds like the best way to go. I've got tons of it laying around. For me I went for the RS lip because it's slanted out which I hope will create less of a high pressure zone and enable smoother airflow compared to the typical straight up and down spacer most use. It may be negligible or it may help, but I need to try and keep my car as aero efficient and light as possible since I'll be seriously down on torque compared to you m3's out there.Originally Posted by hoki06

You should give carbon a try! It really isn't hard to do, just time consuming as hell. I'm sure once you start talking maximizing strength/weight and sexiness, more advanced techniques are difficult to master, but for the average DIYer, it's not too hard to do a decent enough job. Also you can do it fairly inexpensive. All in for 25 meters of 1m wide carbon cloth, west systems epoxy, mixers, brushes, squeegees and foam, I think I spent a total of $400-450. Not bad for the plethora of parts I can get out of it.
--Update--
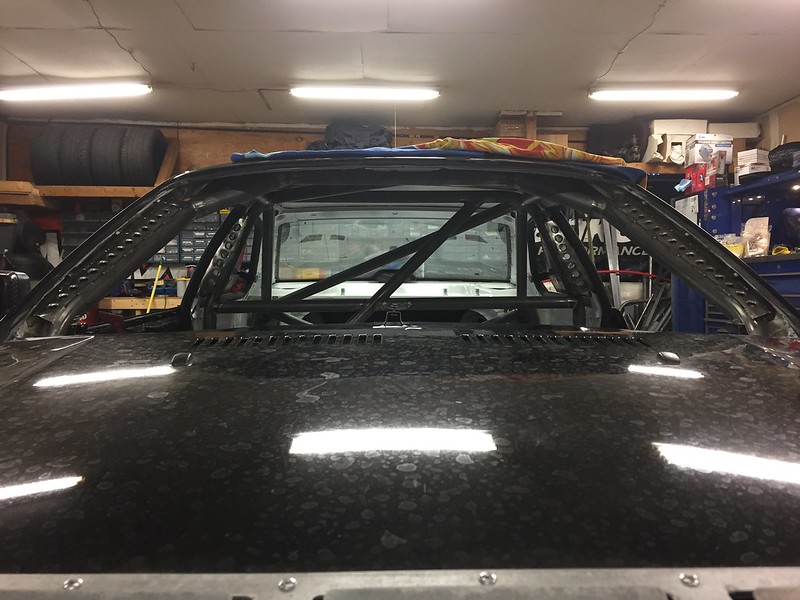
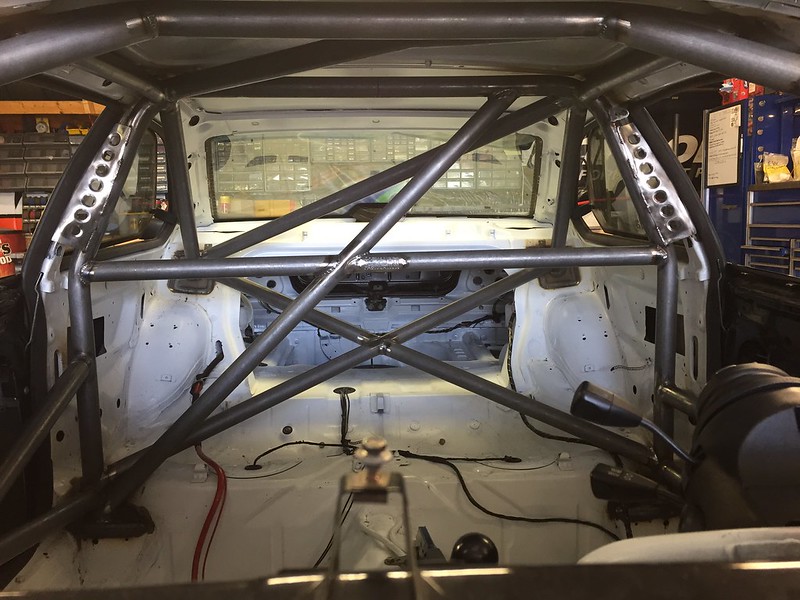
The jungle gym is all welded together! Going to go pick the car up in the morning. I'm super stoked. Next order of business is paint.
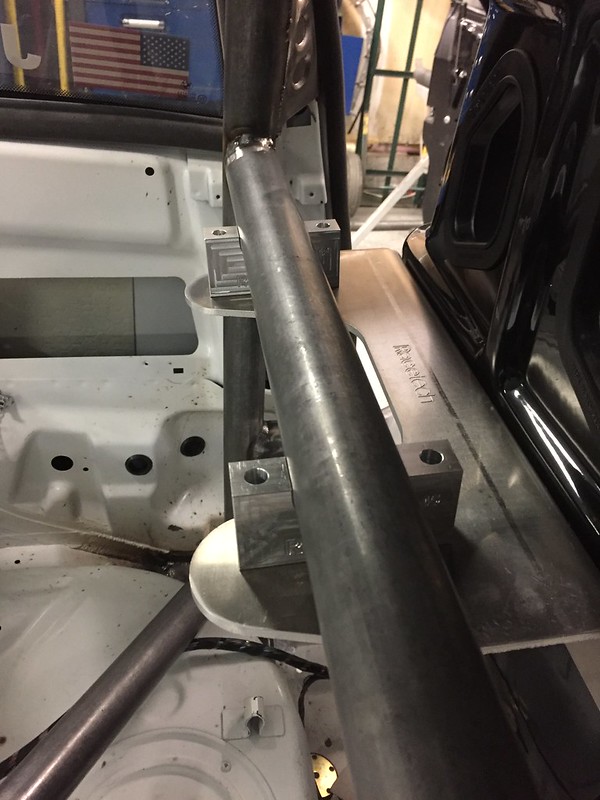
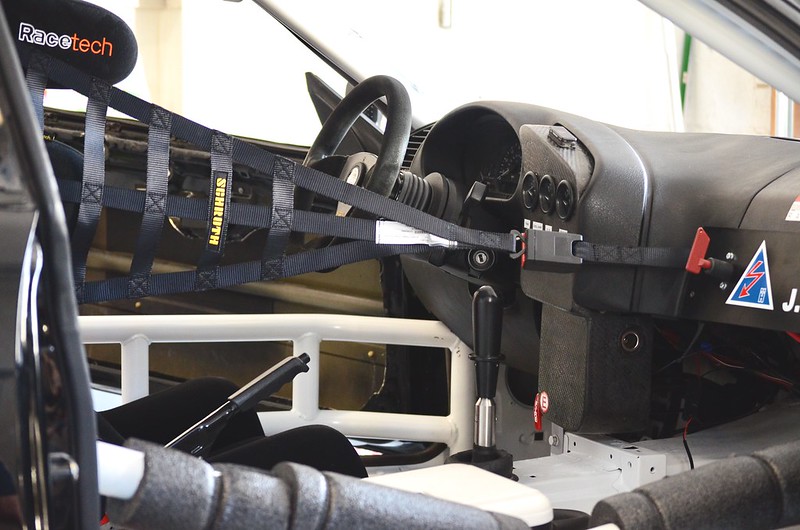
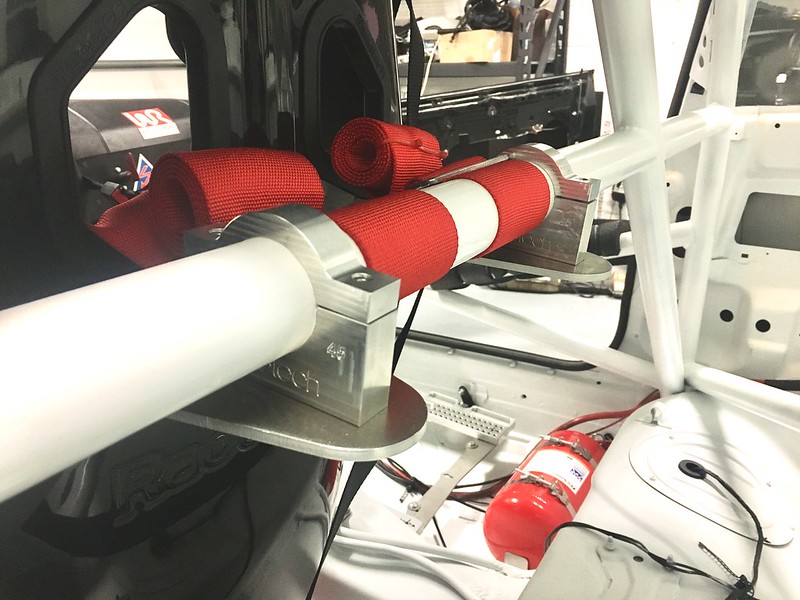
Also the racetech seatback mount lined up absolutely perfectly with the harness bar.
Last edited by Jfriday11; 02-10-2017 at 12:16 AM.
RaceComm
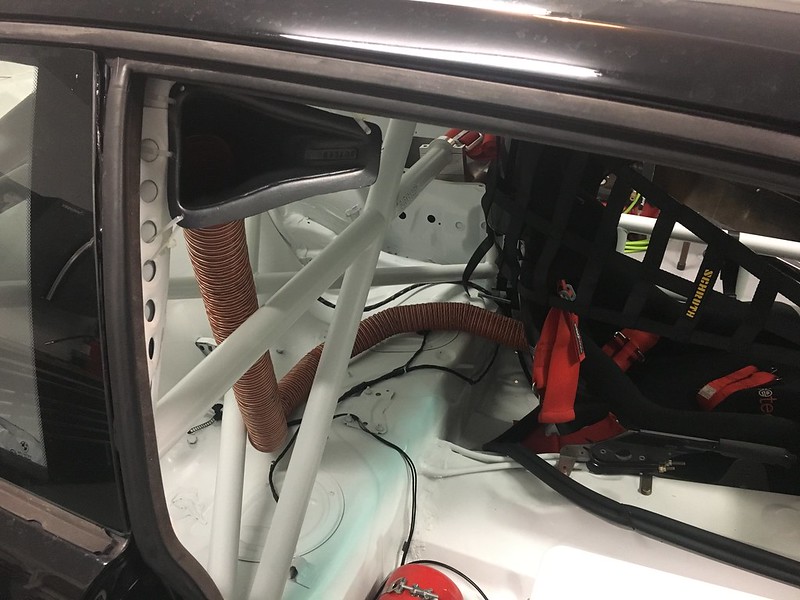
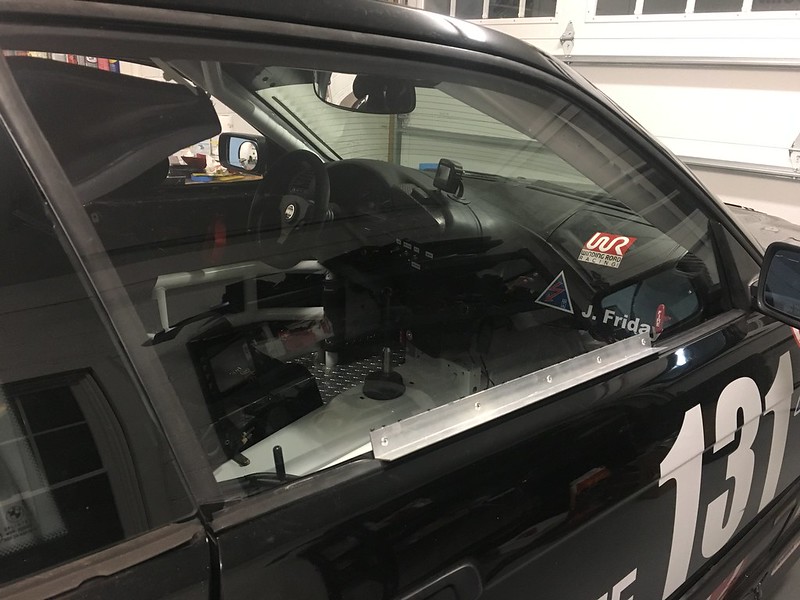
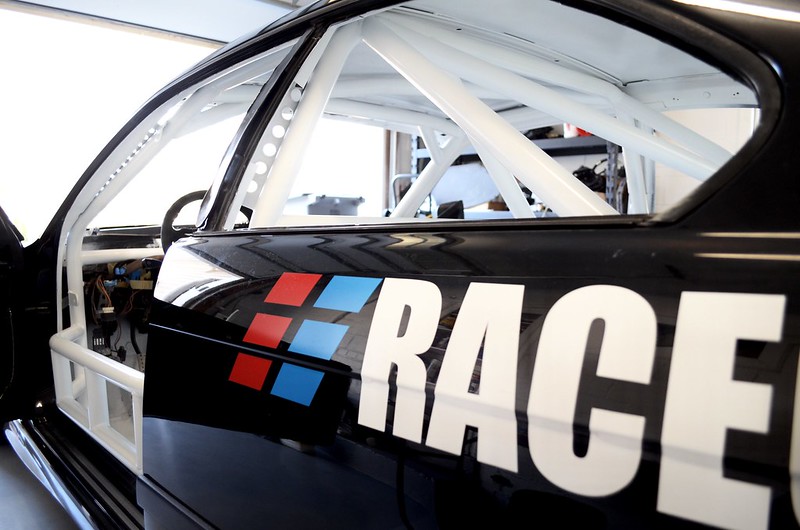
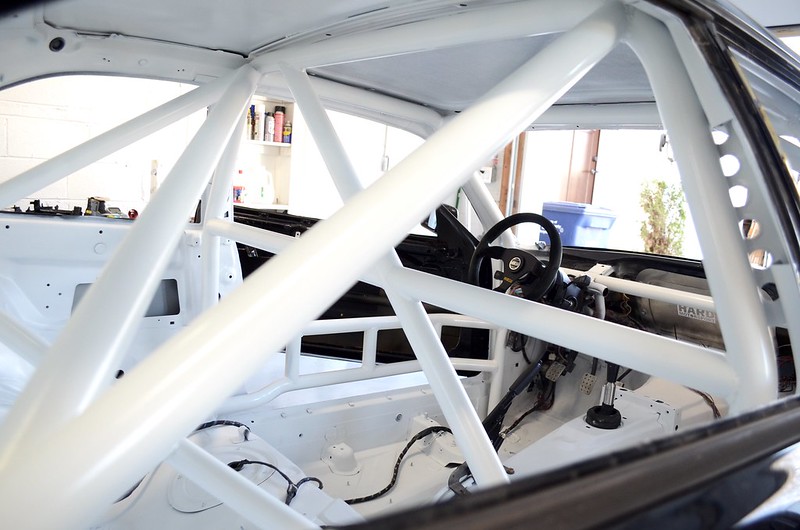
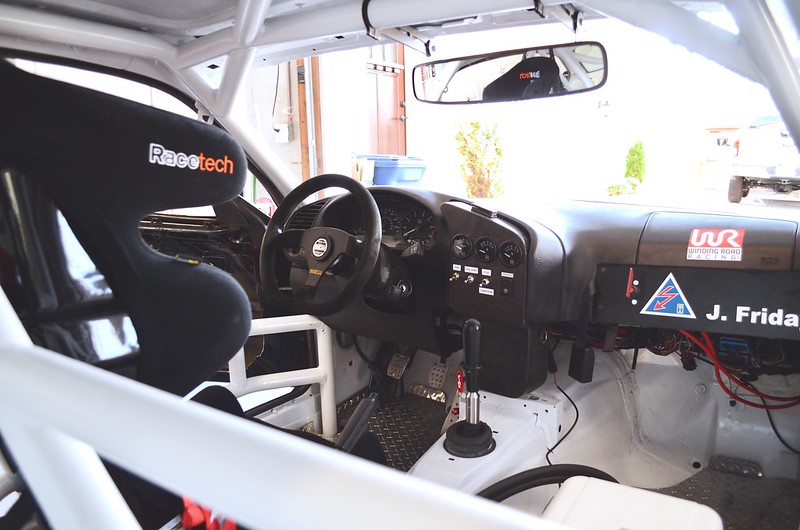
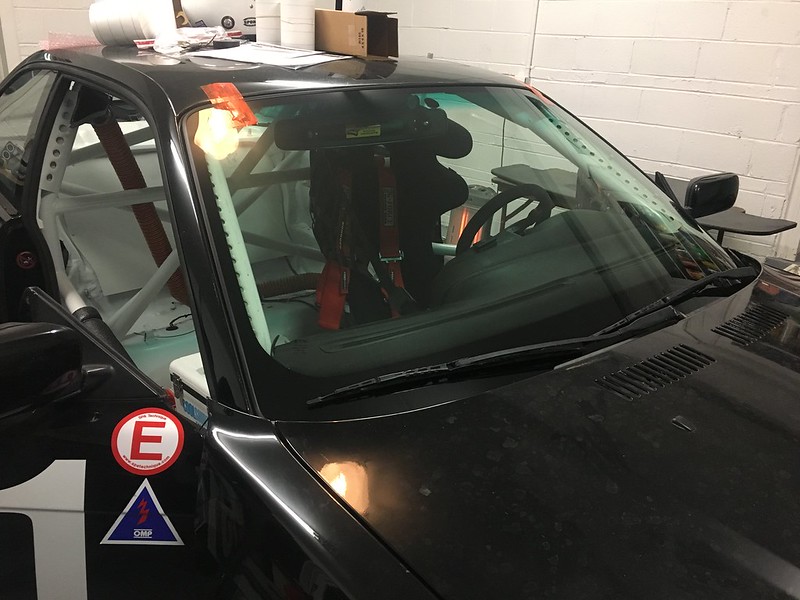
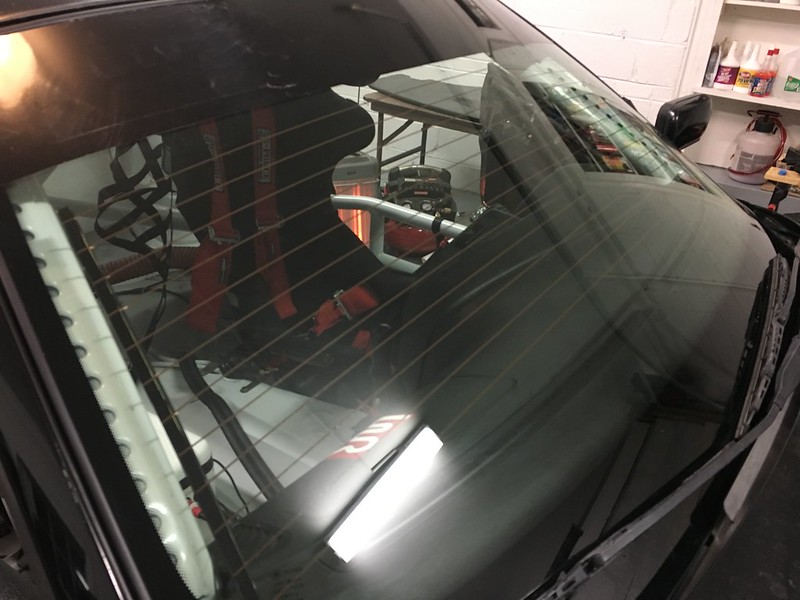
Been very busy the past couple weeks getting the cage all painted and the interior all put back together.
Primer
All painted
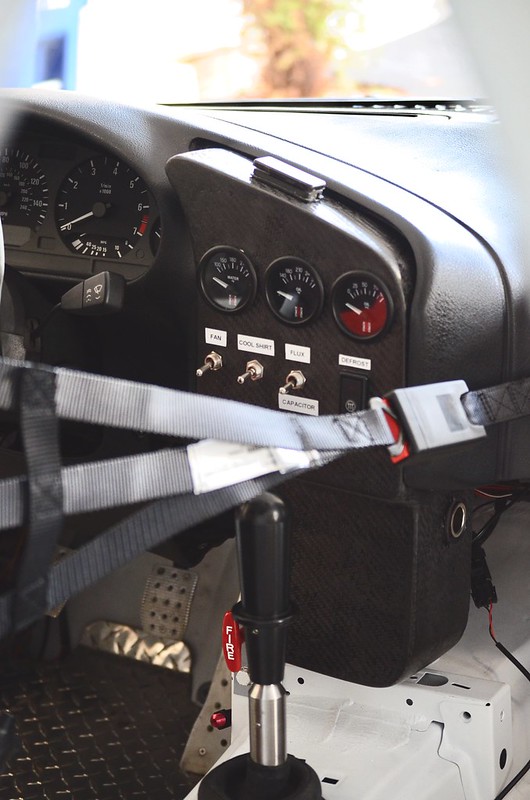
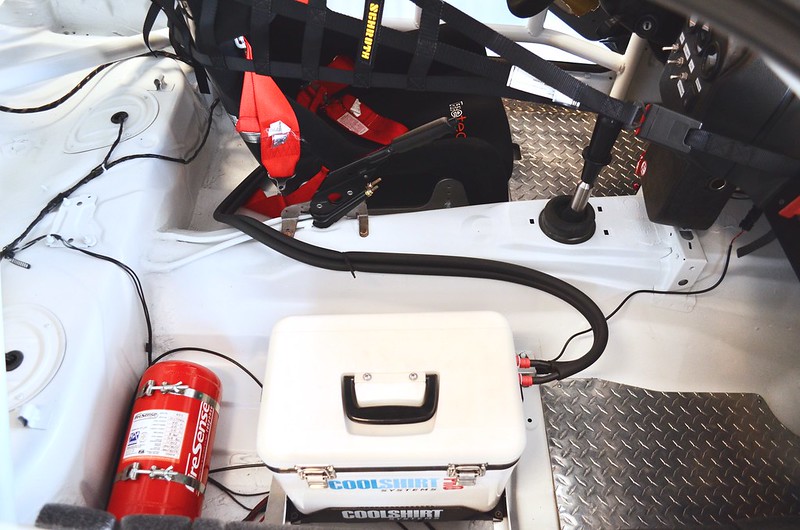
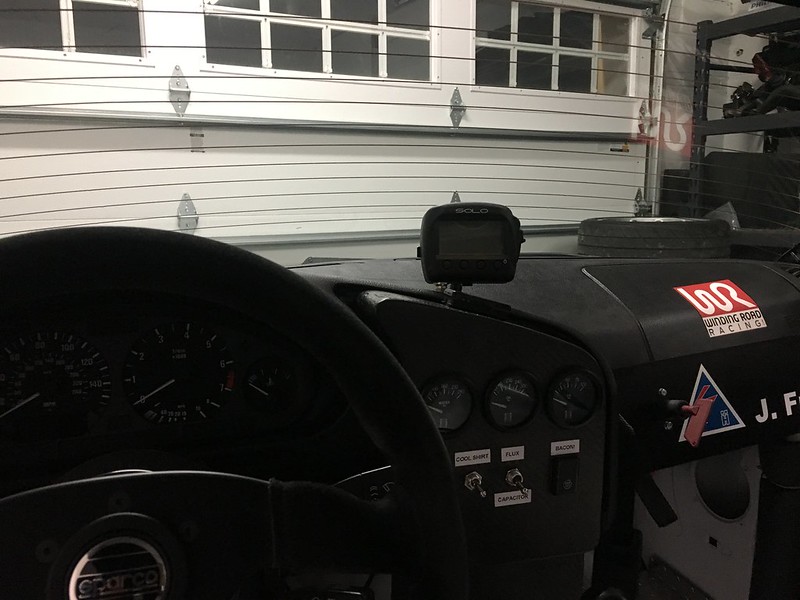
Got everything back in there. Gauges all wired up, switches in, fire extinquisher mounted, hoses/nozzles placed, and cool shirt system in.
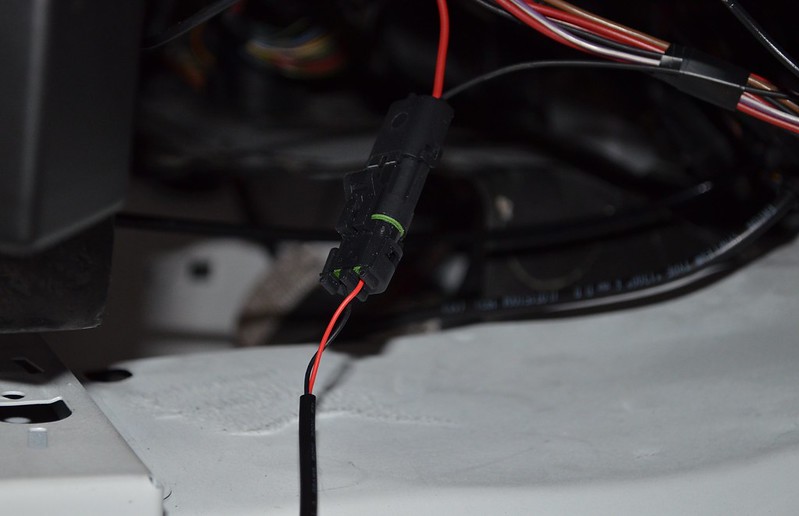
Got a weather pack connector for the cool shirt so I can easily disconnect the system and throw a seat in there for taking people out.
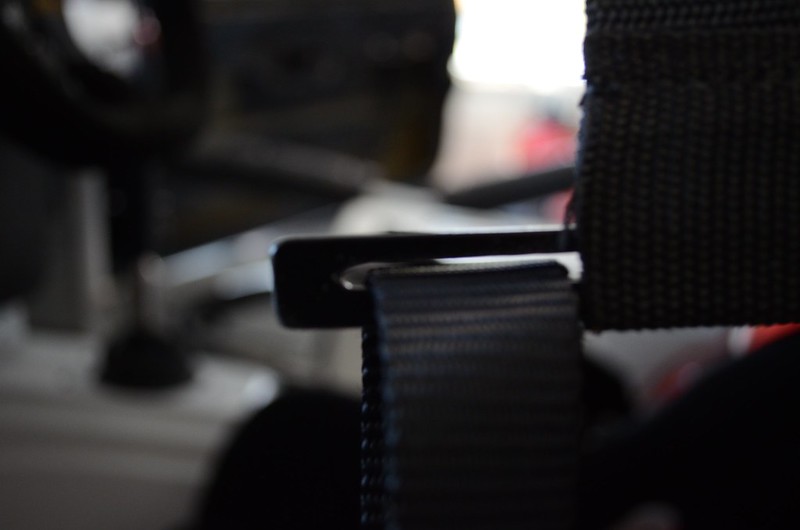
For securing the window net at the bottom, I got some aluminum and cut a slot in it to use the extra length that I cut off of the interior net so that I had a non stretchable, SFI rated way of attaching the net. Still waiting on a couple strap buckles to secure it.
Mounted up the longacre rearview mirror
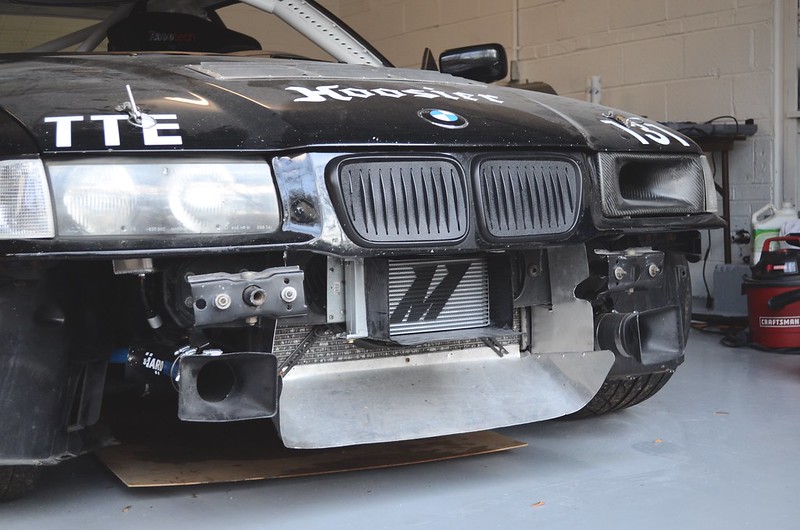
Oil cooler baffle
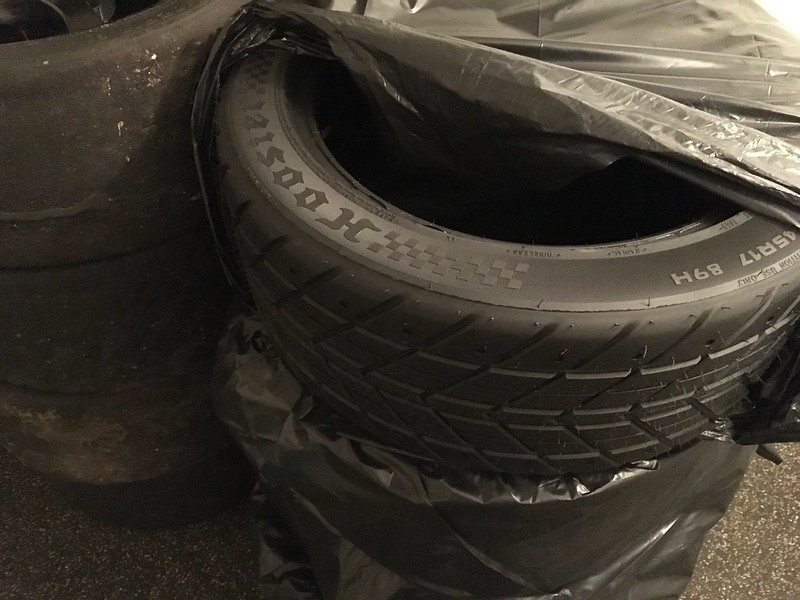
Picked up some brand new 245 Hoosier H2o's for crazy cheap from a fellow member.
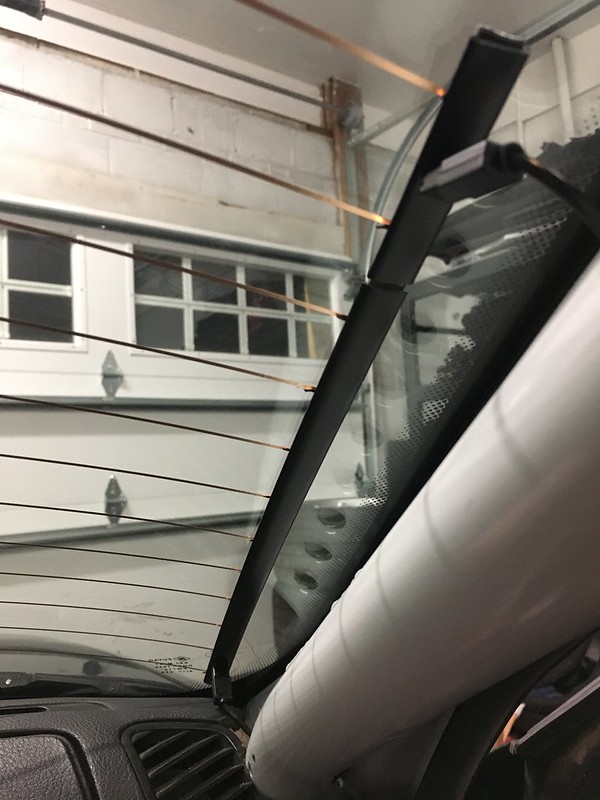
Still have to fab up a dead pedal and finish up installing the front window defroster once I get the windshield reinstalled on Wednesday. Also have some SFI bar padding and a naca duct for the seat back air vent on the way.
After that, the only things I really have left are fluids (trans, diff, motor, brakes, coolant) and aero and the car should be track ready. Wing should be here by the end of the week.
Member
Nicely done!!
Member
I might have missed it so I apologize, what seat back brace is that?
Expenses in F1 have gone down since the 1960s because teams don't need an extra pit crew to help the driver carry around his balls when he is not in the car.
RaceComm
It's the racetech RTB2005B Alloy bracket with the RTB2005C clamps http://racetech-usa.com/shop/bracket...05B-back-mount
https://www.youtube.com/watch?v=TtG3Z4pVOKY
Member
Thanks!
Expenses in F1 have gone down since the 1960s because teams don't need an extra pit crew to help the driver carry around his balls when he is not in the car.
Member
Looks great; we have similar interior setups. I have the same AFFF setup; where did you mount your nozzles?
RaceComm
Thanks!
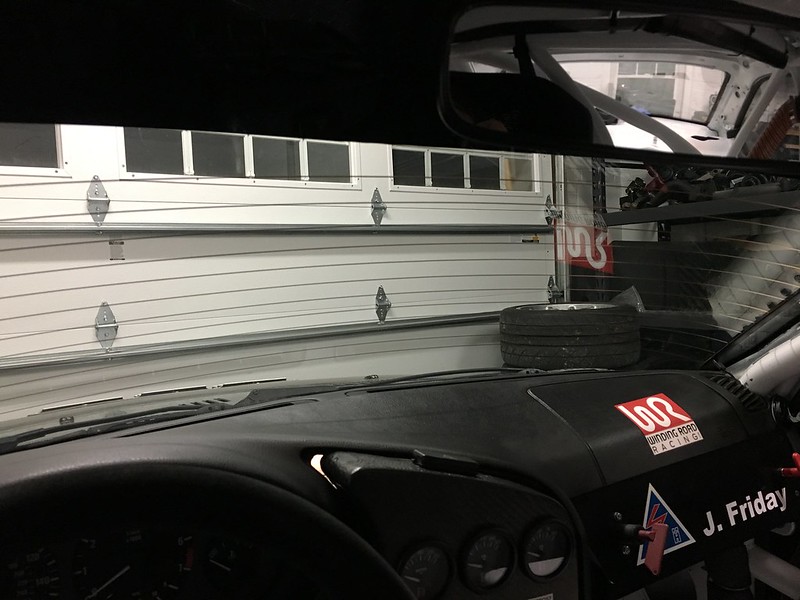
I mounted 2 next to the headers, 1 over the engine/fuel rail, and 2 in the interior with one next to my knee and the other in the dash next to the speedo dimmer switch. You can see interior nozzles poking their red heads out in one of the drivers side interior pics.
Update
Got the window and seat back air duct in tonight
RaceComm
So I ordered a Brooks Motorsport wing last Sunday and got an automatic email saying that my order was received is being processed, but haven't heard anything from them since. I tried calling them 3 times, left a voicemail, and emailed them to see if it has been processed, but no answer, no response. Pretty frustrating considering that those things cost a crap ton.
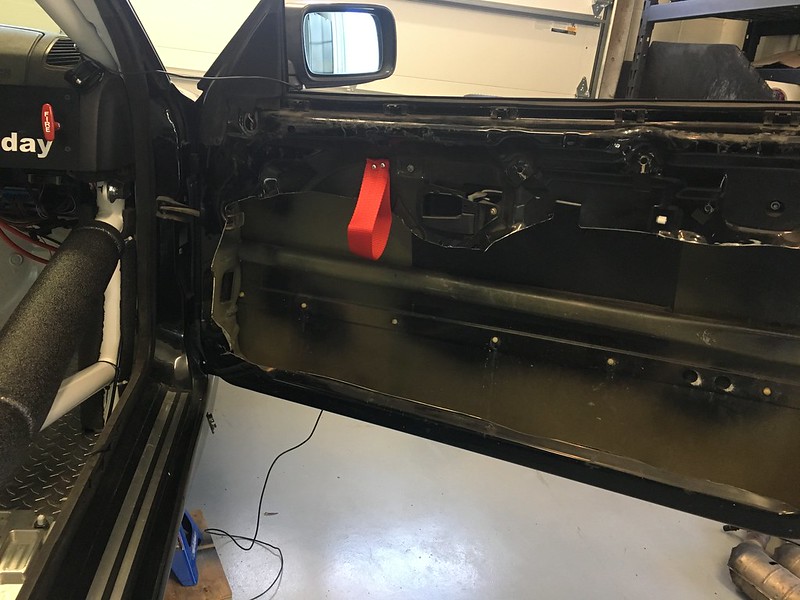
Anyway, finished up getting the defroster in today. Also put the MKAH door pulls in. Now it's on to aero and maintenance.
Member
Looks great. Would you mind sharing a bit of info on your defroster?
RaceComm
Sure! It's the defroster kit that bimmerworld sells. I forget what the brand is called, but it's pretty easy to install (has very detailed instructions) and functions just like your rear window defroster. The hardest part is getting the grid to lay out smooth and straight. Other than that, it has a on/off button, junction box, and 20amp fuse that are all really straight forward to wire up. Seems like a great, simple, and relatively cheap solution for those of us who have deleted out heater core (although not as cheap and simple as a squeegee on a stick).
Here's the link to the kit: http://www.bimmerworld.com/BimmerWor...oster-Kit.html
Member
Excellent, sorry I didn't know that BimmerWold sold a kit! Thanks for the info.
Kicking myself for removing the entire heater core assembly without a second thought, but without side windows I didn't think that defrost would be much of an issue.
Ambitious But Rubbish
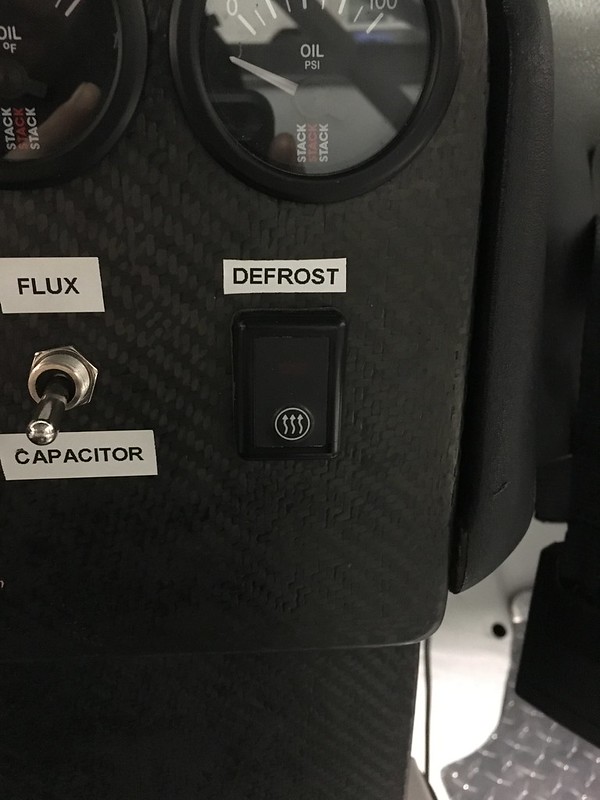
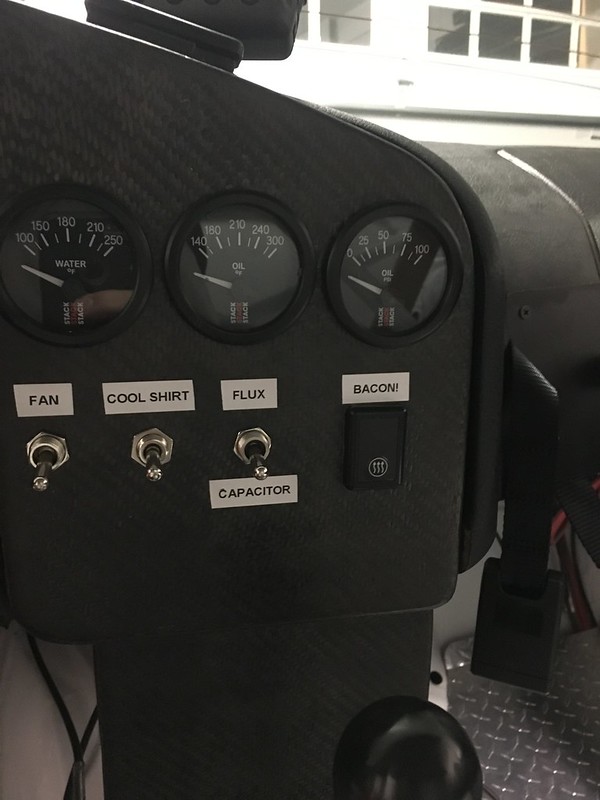
You should really re-label the Defroster button "Bacon Generator" given the icon.
2011 F-150 FX4 | 1997 BMW M3 #404 GTS2 | 2006 BMW M3 Convertible
Out Motorsports
RaceComm
Fixed...
Mounted up the AIM Solo
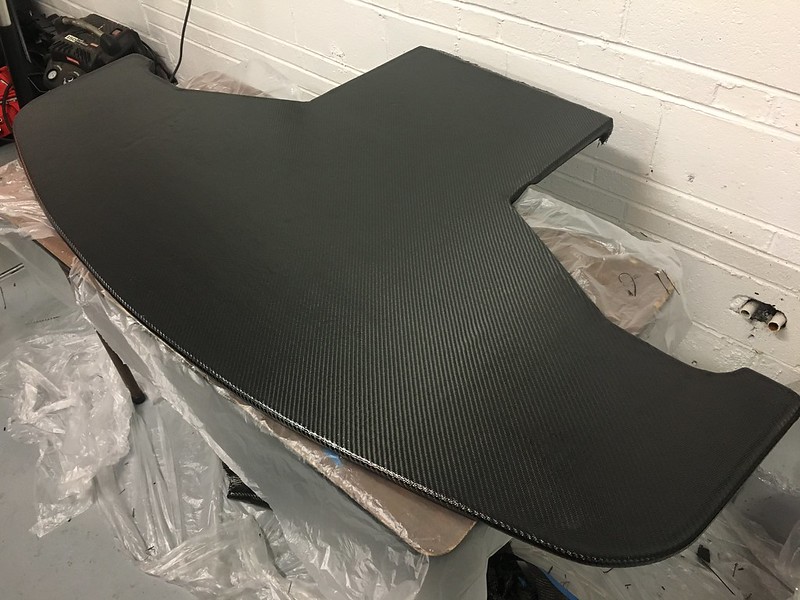
And got the bottom half of the splitter all wrapped up in its blanket.
Now its off to Nashville in the morning for a long weekend of bachelor party shenanigans and then a mad dash to get the car ready in time for VIR. Also Brooks finally got back to me and it looks like I might have less than 24hrs to install the spoiler IF it gets here in time. *Cues anxiety*
Member
Sorry if I missed it earlier, what does the flux capacitor switch do?
Member
By far the best contribution to the bimmerforums community.
Member
How thick is that splitter? 1/2" Looks dope!
1996 328i (m52B28US) OBD1 euro ZF 5spd. 3.23LSD conversion / Chem. PnP Head/ DINAN stg.2 CHIP/ VAC race valves/ S52 cams/ A/C delete/ fan delete/ Washer Fluid resv delete/ ARP head studs/ Cometic 140MLS / VAC Solid Engine/trans Mounts/ CAI / 2.5"Borla race exahaust/ NGK R spark plugs, M50 Mani, S50 Oil Res, Riot Racing HFTB, SAMCO Hoses, JBR FW, X-Brace, Mtech Front Bumper, RE RSMs, stoptech SS lines, Bilstein sports, H&R Race Springs, S52 Reinforcement plates, Kosei K1 w/ bridgestone RE960as, Brembo/stoptech slotted rotors, M3 Trailing arms, M3 Calipers, M3 Axles, ACS strut brace, weight reduction.
http://mbuild.blogspot.com/
RaceComm
On corners that I can maintain a relatively constant 88mph, I flip the switch to the flux capacitor which draws power from the plutonium powered nuclear reactor in the trunk and propels me a few seconds into the future to get past competitors that are better than me. As a consequence I leave some pretty cool looking flaming skid marks, but I can't use it too often because it takes at least half the life off the tires.
agreed. Defroster just didn't feel right on there.
Yup, 1/2in. Thanks man
Last edited by Jfriday11; 03-11-2017 at 10:40 AM.
RaceComm
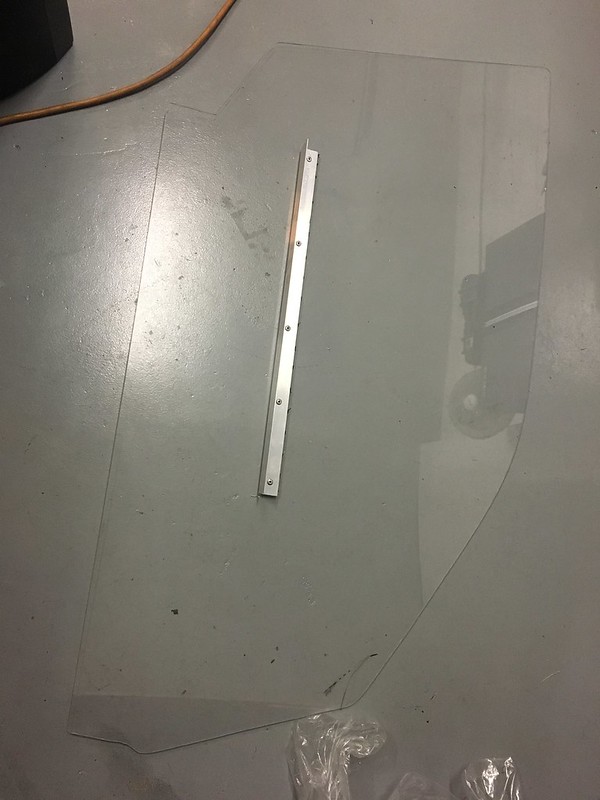
While I wait for it to warm up a bit to finish the splitter, I made some plexiglass windows for when I transport the car.
RaceComm
The week before the first event was crazy so I wasn't able to update, but I got my splitter all finished up, changed out all the fluids, flushed the brakes, mounted up the rain tires, gave the dirty old thang a bath, and set out on my way to VIR.
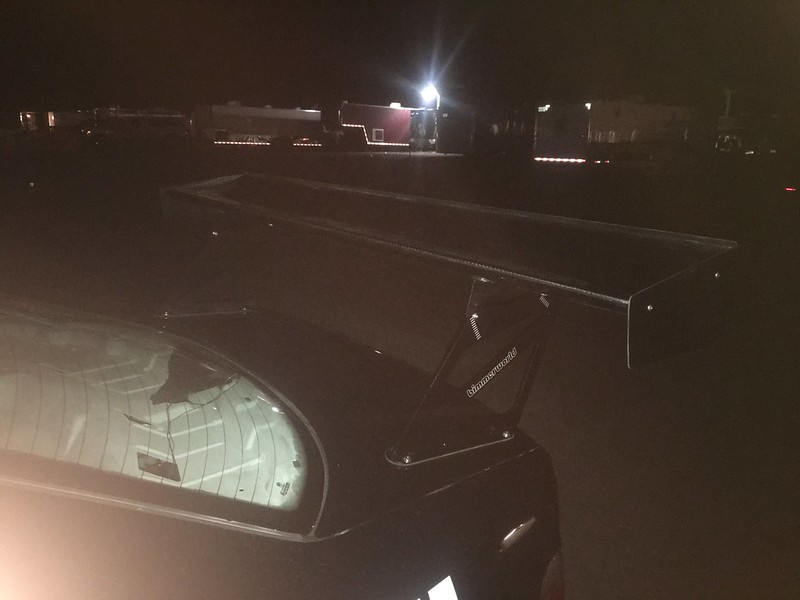
It seems like I'm always in search of some sort of part going down to VIR for the season opener. Last year it was a MAF sensor and this year it was a spoiler. Brooks motorsport ended up not being able to get me the wing in time for the event so I gave Bimmerworld a call Friday morning and they got everything setup for me to pick up their spoiler on the way down there so I could install it at the track. Big shout out to John from bimmerworld for setting everything up and having the wing ready to go for me when I got down there :thumsbup
Onto the pictures...
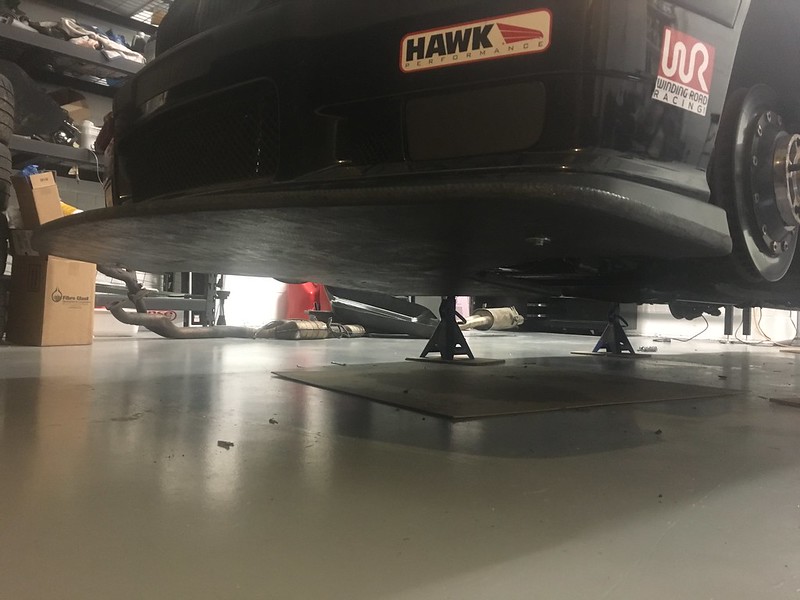
For the splitter I cut out two indents in the top and epoxied in nuts with some hardware bonding epoxy so that the airflow under the center of the splitter would be as smooth as possible. Came out to be super strong. Didn't have time to clear coat and sand it, but I should be able to get around to it before next event.
I also had to cut off the rear portion of the splitter because the indent that I made for the sway bar to fit in didn't perfectly line up and was forcing the front of the splitter to go up at a weird angle. I'll get it right for V2.
And here's the Bimmerworld V2 Medium Wing right after we mounted up. Got it on just before nightfall
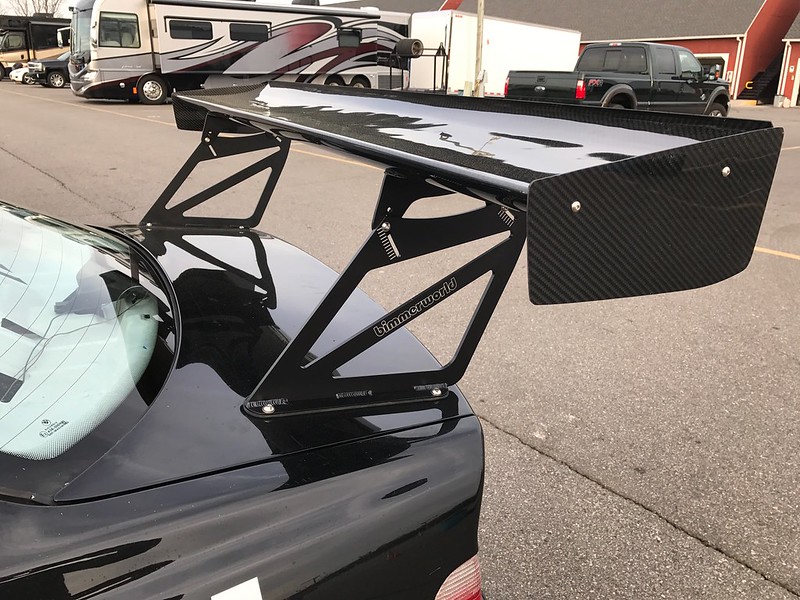
And in the daylight.
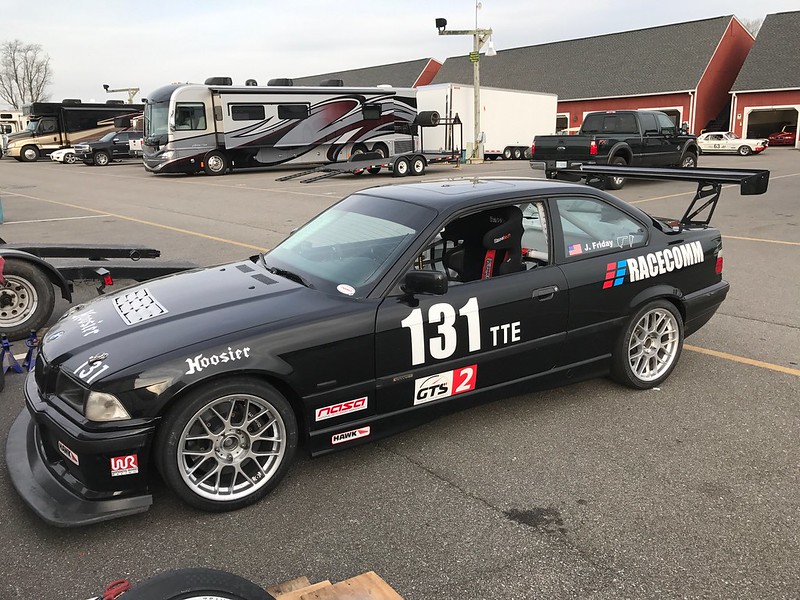
And the car all ready to go...
Between the new aero, weight savings, and exhaust setup, I was able to better my previous best time by over 3 seconds on old tires with over 12 heat cycles; although I don't feel at all like I was exploiting the max potential of the car. The aero is going to take a lot more getting used to. The car is more stable and grippy everywhere, but especially fast corners. Next time around I'm going to be super optimistic and shoot for another 3 seconds.
The only ill effect I was dealing with was understeer in right hand corners. I felt like since the passenger side has a lot less weight now, the car was pushing more than usual through right handers. I was also getting really far up on two wheels for what felt like a couple seconds when using the curbing through Oak Tree so I had to modify that line quite a bit. No more epic two wheelin picsI'm hoping that corner balancing the car will help with this, but I'm currently trying to brainstorm other viable options without adding too much weight.
Here's a video from my lap. I love the sound of the new exhaust.
RaceComm
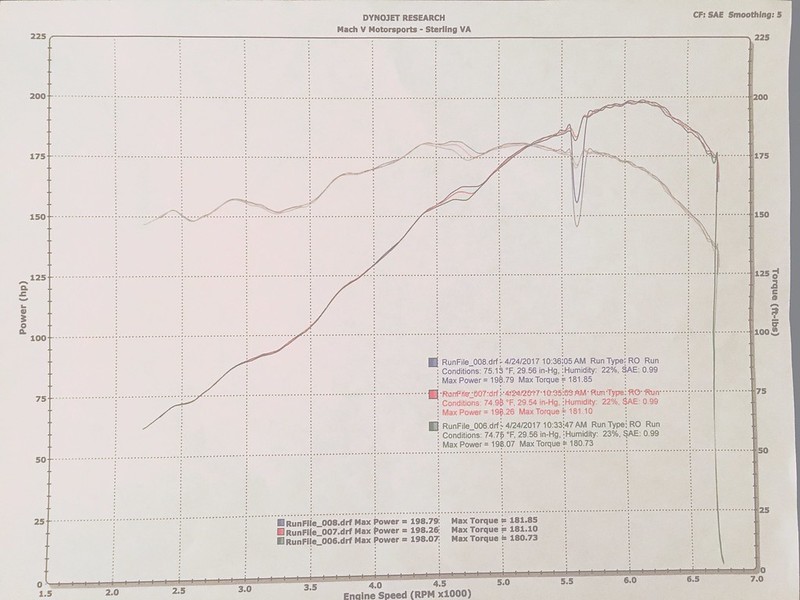
I think my Vanos is ded and my car is a heavy pig. Min weight can be 2767lbs, I'm at 2900. Hmmmm...
Ambitious But Rubbish
Hey, your power curve looks as shitty as mine did! Even has the giant drop in power at nearly the same RPM. You will get a weird minimum weight number from the GTS2 calculator because of that power curve. I think it told me my min weight could be like 2800, but looking at everyone else who runs the same-ish HP as me (214), I need to really be up near 3k, so that's where I've kept the car for now. I need to get it re-dynoed and then resubmit my paperwork.
I did the quick-and-easy Dr. Vanos replacement. Ends up being $249 and about an hour of work to swap the entire unit. If you want to take yours apart and replace the seals all yourself, you can do it for like $50 or so. My car feels so much better now - power delivery is consistent and it idles a bit more smoothly.
2011 F-150 FX4 | 1997 BMW M3 #404 GTS2 | 2006 BMW M3 Convertible
Out Motorsports
RaceComm
Sounds like were in very similar situations in many regards. I'll probably end up going the Dr. Vanos route as well. Did you need any special tools to install it? I'm trying to locate some s52 cams to do while I'm in there, but messing around with all that stuff without the proper tools kinda sketches me out.
Member
Buy the cam lock tool, keeps your car and cams at tdc when you take off the timing chain. Also grab a Bentley manual if you don't already have one they have a good write up on how to change it. It's relatively simple once you start looking at it.
Member
^ pretty sure he's talking about removing/replacing the cams.
It's not bad really, just need a little common sense and patience. There is some good videos on YouTube showing the process.
 Posting Permissions


 Reply With Quote
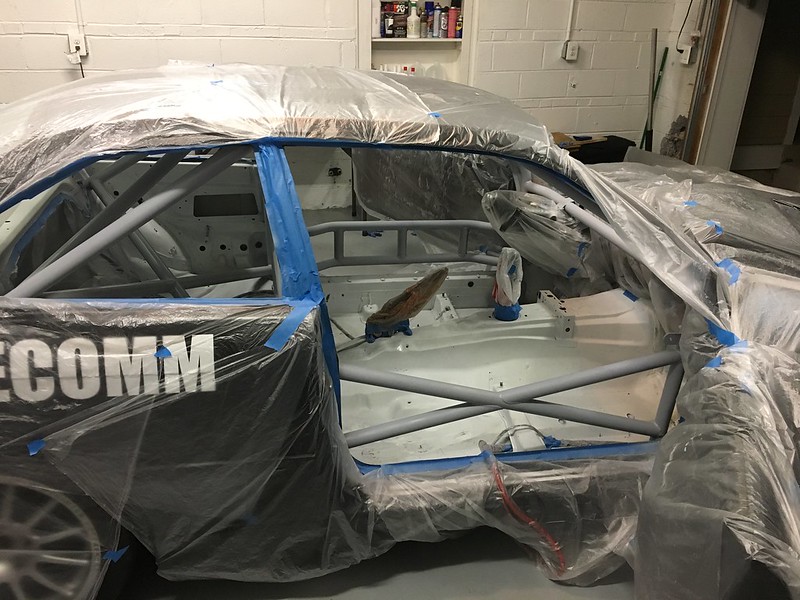


Bookmarks