
 Journeyman Somnambulist
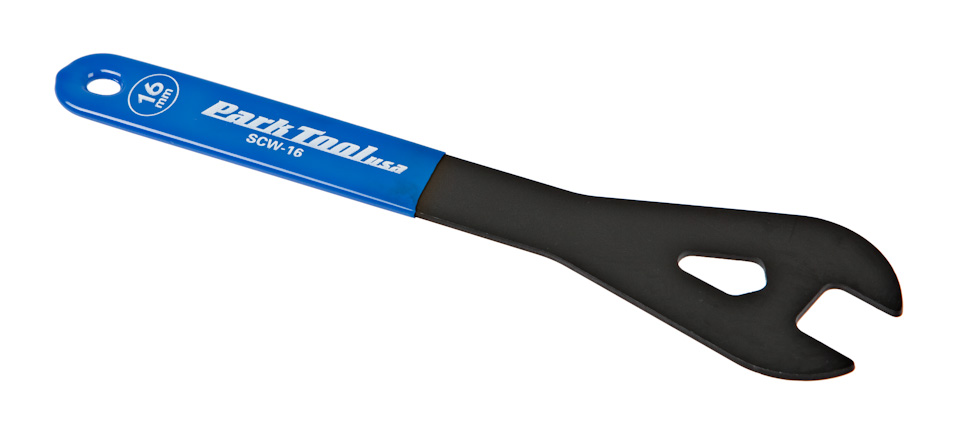
I'm sure this is Auto Shop 101 for some of you, so I appreciate your patience. I'm trying to replace the sway bar end links on my 2003 504iT. I have already completed the front links. It was easy to loosen and tighten the nuts on the ball joint studs using a 16mm cone wrench to hold the flats at the base of the stud and keep it from turning.
For the rear links, there is no room to insert the cone wrench at the base of the stud due to the way the mount is constructed.
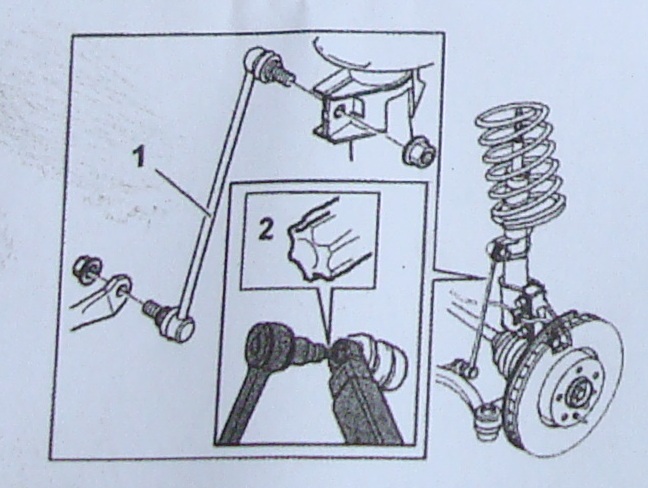
The instructions in the end link box show that there should be a hole for a star bit in the other end of the stud #2 in the diagram), under the plastic cap.
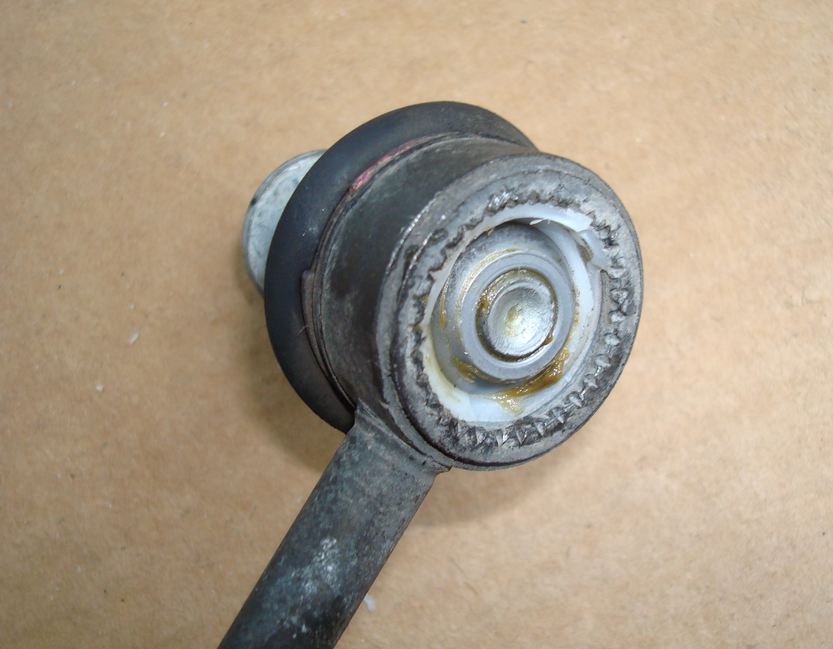
But in order to get the cap off, it has to be destroyed, which exposes the ball to dirt, etc. which doesn't make any sense. I broke the cap off the old front link, an original BMW part, and it does not have the star bit hole. Nor does the stud have a squared-off end to grab and hold.
So how do you hold the stud and remove the nut?
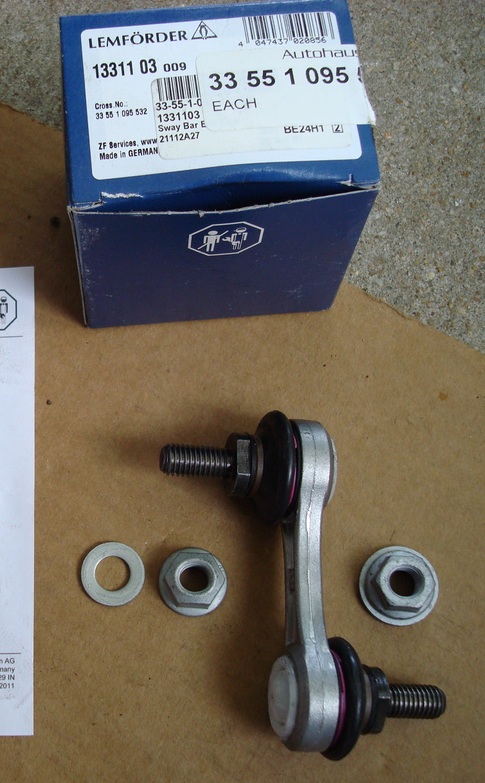
Finally, the link kit has two different nuts: one with an attached washer and one with a regular washer. Which one gets used on which end, and why the difference? I got Meyle brand links for the front and they had the same assortment of nuts (yum!).
Thanks,
2014 i3 BEV, 2016 X5 xDrive40e
Myrtle Beach SC
Coupeless Racer
Looks to me like the torx bit fits into the threaded end, not under the cap you had to destroy. But I haven't actually looked into doing this job myself so I could be totally off base ...
I like the unicorns.
'99 Z3 Coupe - Jet Black/Black (1-of-114)
'99 M Coupe - Estoril Blue/Black (1-of-82)
'03 540iT - Sterling Gray/Black (1-of-24)
'16 Z4 sDrive35i - Estoril Blue/Walnut (1-of-8)
Swagon
OEM have the torx on the threaded side. Aftermarket generally either have a allen/hex opening. IIRC, on your old car, I was able to fit a regular wrench on the collar that you tried to fit the cone wrench on. I believe I had to turn the nut first to get the collar turned to a better angle to fit the standard wrench. I know I was able to knock it out really quick with no issues and no special tools though.
Member
same here, no special tools neededOriginally Posted by RVAE34

Journeyman Somnambulist
Thanks. You're right, the diagram on the paper shows it on the threaded end. But I just checked again and none of the links, front OEM BMW, front Meyle, rear OEM BMW or rear Lemfoerder, has a Torx or hex on the threaded end. They're all just flat, butt ends.
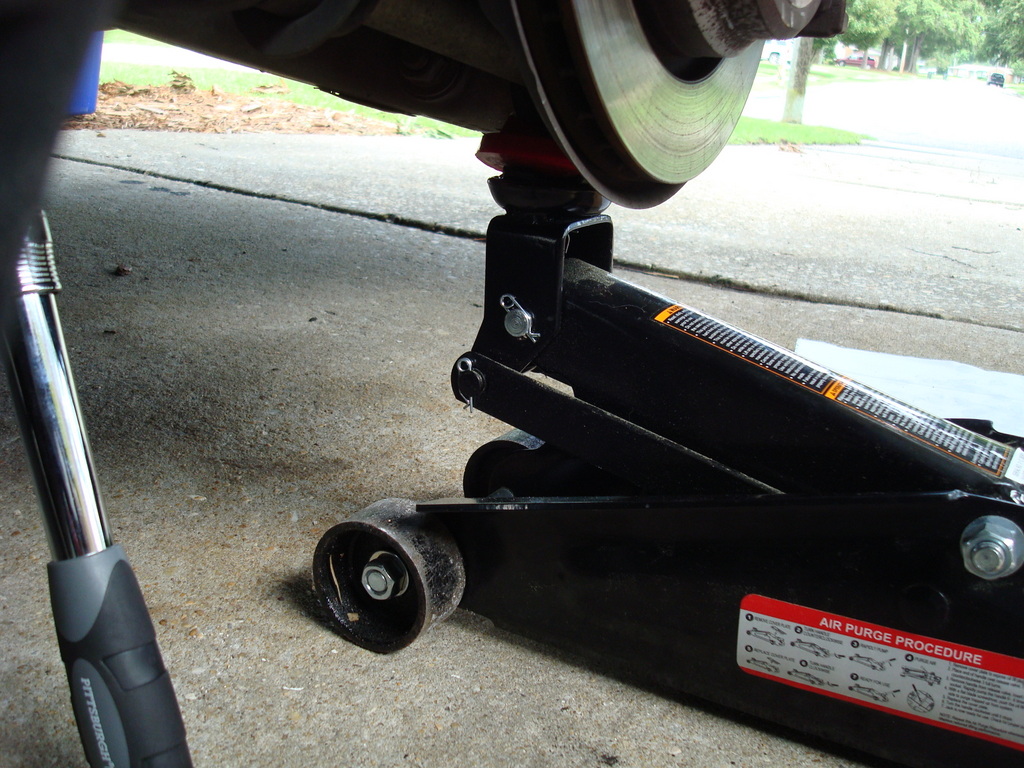
The bracket on the frame is U-shaped and there's no room for any wrench to grab the collar. (See 2nd photo above with the arrow).
I'll try today and maybe I can wedge a screwdriver or chisel next to the collar if needed. I didn't actually attempt it yesterday because I didn't want to end up with the link half on/half off and get stuck.
Thanks,
2014 i3 BEV, 2016 X5 xDrive40e
Myrtle Beach SC
Swagon
If you can get an impact in there, try that too. Even with an extension. Often an impact can get the nut off fast enough to not require a tool on the other side. But I know for sure I was able to get a wrench on the other side enough to hold it. Even if you have to wedge it on over part of the rubber boot.
Journeyman Somnambulist
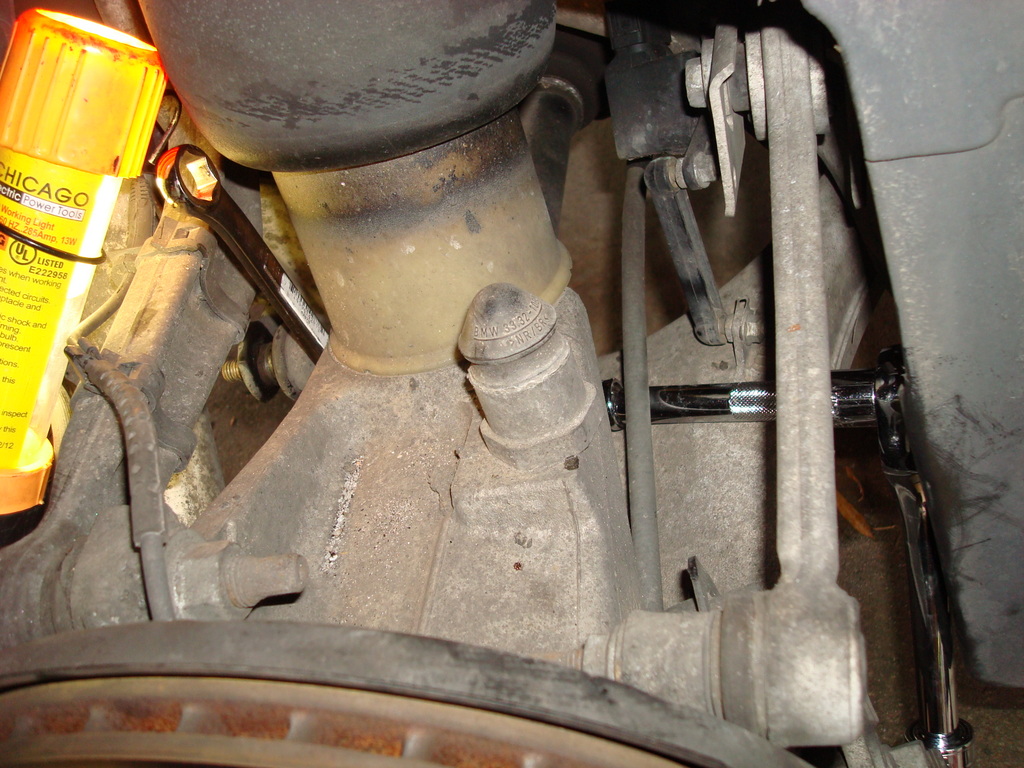
Thanks for the assistance - I was able to replace the end links over the weekend. As it turned out, the secret was to raise the wheel carrier a few inches with a floor jack.
Raising the wheel carrier loosens the link enough that there is room for a 16mm wrench over the collar.
It also opens a path over the top of the swing arm for a ratchet with a couple of extensions. (This is the other wheel; now front is to the right).
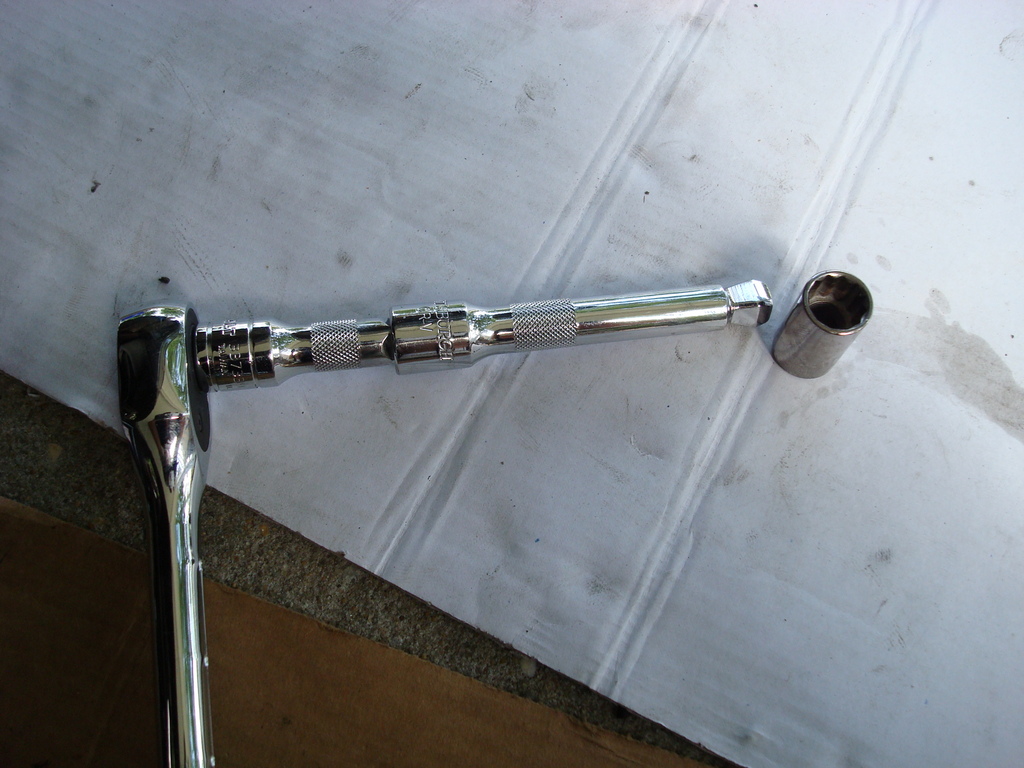
I used a Pittsburgh "wobble" extension from Harbor Freight which lets the socket sit properly on the nut.
Another tip for me: I was able to get a jack stand under the rear jack point by raising the car at the front jack point until the front wheel was about 4" off the ground. I placed the jack stand under the rear jack point, then lowered the car, which pivoted over the jack stand and raised the rear wheel so I could take it off. Then I used the floor jack to raise the wheel carrier a few inches, compressing the suspension.
I wasn't happy with my hands and fingers in and around the suspension with only a floor jack keeping it in place, but I couldn't see any other way to get the access and I just worked quickly and carefully.
Most everyone already knows all of this. I'm learning and maybe it will help another beginner.
Thanks and regards,
2014 i3 BEV, 2016 X5 xDrive40e
Myrtle Beach SC
Member
Thanks
I had to unbolt the Left Rear shock to get enough clearance to take off the top bolt because I could not get enough leverage with a combination wrench. Right Rear was tight but fine. Impact and extensions and swivel did the trick on the bottom along with jacking up the suspension
Member
Guys it is not that difficult
Use/buy a few wobble extensions, and lock down the stud with a thin 16MM open end wrench and unscrew the bottom bolt. YOu do have to remove the rear wheels, and unbolt the top bolt to the bar but this is at most a 30 min job.i can do it in less time in the driveway with just jack stands and some hand tools.
Last edited by StephenVA; 10-17-2018 at 09:46 PM.
Current Garage Highlights
2003 525iT TiSilver
2002 M5 TiSilver
1998 528i KASCHMIRBEIGE METALLIC (301) (Goldie)
Former Garage Highlights
2005 X5 4.8is
2004 325iTs (2x)
1973 Pantera L
1971 Dodge Dart Swinger "Lite Package"
1970 Dodge Challenger T/A 340 Six Pack Alpine White
1970 Dodge Challenger T/A 340 Six Pack GoManGo Green
1969 Road Runner 383
1968 Barracuda Formula S 340 Sea Foam Green
 Old BMW's FTW
My biggest tip for doing any E39 touring suspension work is to deflate the air struts... that makes it very easy to move the rear suspension around to access the various nuts and bolts. Otherwise you end up having to do silly stuff to get access.
1995 525i 5-speed - Thread
Member
I've just finished a rear suspension job and my biggest advice is to get 18mm and 16mm ratchet ring spanners. It will make the job much easier.
 Posting Permissions


 Reply With Quote


Bookmarks